Jagged Alliance 3


Beginners Guide for Jagged Alliance 3 giving tipps and hints in the following categories: Starting out Stats Combat Inventory Saving Space Loot, Healing Money Late Game (Spoilers) This guide was originaly just a translated version of the Gamestar.de Guide (german gaming news site) https://www.gamestar.de/artikel/jagged-alliance-3-einsteiger-guide,3397544.html Special thanks to: Martin Deppe, Damocles66, Sundance Starting Out - Which mercs should I chose? Even though it's tempting to go straight for tough guys like Ivan or Scope, they are incredibly expensive and can only be financially sustainable later on. In the beginning, it's better to start small and check the Recruits and Veterans tabs on the in-game laptop, as you can find good and more affordable employees there. Some of them may not be available initially - their availability is redistributed with each new game start. Take your time when choosing your first mercenaries because often you'll spend the whole game with them. Pay attention not only to their attributes (see below) but also to the many different active and passive skills of the mercenaries. Initially, hire only five people. On the A.I.M. Website you can find a link to another page called "I.M.P. Web" to do the legendary psych test. This will allow you to create your own mercenary who will fill the sixth slot in your starting squad and does not requre a salary! Alternatively you can also wait and after a couple days you receive an Email to the Psych Test. But there is no reason to not do it from the very beginning. Just like in the predecessor game Jagged Alliance 2, you will receive an em Based on the four possible multiple-choice answers per question, you can already see the tactical direction your free fighter tends to, such as melee combat or heavy weapons. This way, you can fill any skill gaps in your already hired five-person team or simply reflect your own character. After all, Jagged Alliance 3 also involves a lot of role-playing! Important: Pay attention to the money burn-rate. It indicated what you have to pay on your mercs each day. Stats - Which mercenary attributes are truly important? Accuracy Accuracy is the most important attribute when choosing your starting team. You should have at least two mercenaries with a value of over 80 in this attribute. For example, the skilled marksman "Buns" is a good choice, recognizable by the crosshair symbol, and she also has some snappy remarks. Her skill "Negotiator" helps save money and time when recruiting militias. She can also serve as a backup medic. Medicine It's all about the mix: Don't just focus on accuracy! You definitely need a good medic (cross symbol) like MD or the agile Fox. Additionally, a second mercenary should have a medicine value above 50 in case your main medic goes down. Explosives Mines are already buried in the first sectors, so get yourself an explosives expert (bomb symbol). For example, Barry is affordable and even provides you with two thrown charges every seven days. Technical Skills Technical experts (gear symbol) repair and modify equipment and can hack well-discovered devices. Be sure to have at least one of them on your team. Steroid, who looks like the big brother of Duke Nukem, is recommended here because he also brings strength. You'll need strength, for example, when breaking doors and chests or throwing grenades. Leadership is especially important later on for quickly recruiting militias, but it's not as urgent at the beginning as having experts in medicine, explosives, and technology. Combat - General Tips How to Position? When entering an enemy sector, after positioning your team (not too close together!), select the entire team and press the "H" key. This puts the squad in stealth mode, giving you more time to react if an enemy is right near your starting position. However, don't forget to exit stealth mode for each mercenary when it's no longer needed, as it slows down their movement. Always ensure that your team members are not left standing freely at the end of a round, as enemy AI will ruthlessly take advantage of it. For example, if you are firing while standing, save two action points to go prone afterward. Crouching behind cover is also acceptable and costs only one action point. Always defuse mines in the prone position, as it reduces the damage in case one detonates. Kneeling also provides some protection, but standing will result in the full blast. It should be evident that no team members should be holding hands with you while defusing, to avoid accidents. Tip: You can also detonate discovered mines by shooting at them. For example, if an enemy is standing next to it because they didn't read our tips. If a squad needs to be positioned close together (in tight spaces like corridors, bunker doors, alleys), have the front mercenaries go prone, the ones behind them kneel, and the fighters at the back stand. This way, you can avoid friendly fire when shooting. Where to Shoot? Aim deliberately and pay attention to the cues: The small weapon range bar with the crosshair indicates whether your current weapon is suitable for the distance. Also, listen to what your shooter says before pulling the trigger. Warning symbols, such as a wall or armor icon, indicate that the body part is behind cover or armored. In such cases, choose a different body part or another target. For penetrating weapons and types of ammunition, the symbols will be crossed out in red, indicating a viable shot. Be cautious with light blue head symbols, as they mean a team member is in the line of fire and can suffer friendly fire. When facing close combat attackers, aim for their legs, and for snipers, aim for their arms. For heavily injured enemies ("near death"), a hit to the upper body (the easiest target) often suffices to eliminate them. Extra tip: When leveling up, distribute advantages to your mercenaries. "Trick Shot" is a good choice when aiming because it can knock down opponents with a leg shot. It's better to kill one enemy than to injure three: Even injured AI fighters can still cause surprising amounts of damage! Cars can catch fire and explode several rounds later. The same goes for diesel generators – but it's easy to overlook the small fire if it's on the far side. Which Commands? The new commands, such as running and shooting (firing three bursts at an opponent while running, requiring about nine shots in the magazine!) and mobile shot (for pistols/revolvers, running to the target position and shooting at a nearby enemy), are also great for getting out of danger zones and dealing damage. However, remember to reserve two action points for going prone, as mentioned above! The Overwatch command displays how many times a mercenary can fire with that command. However, this display can be easily overlooked. It appears as a small indicator at the curved end of the shooting sector. With machine guns (stationary or mobile models with bipods), the number of passive bursts is particularly high, so take advantage of that! You shouldn't immediately treat lightly wounded mercenaries, as the medic always kneels next to the patients and becomes an easy target. Additionally, first aid kits and medical kits are scarce, and mercenaries slowly heal on their own after battles (we'll cover this in more detail shortly). It's a different story when a mercenary goes down: Quickly get a medic there to stabilize them because the displayed chance of death increases with each round. Also, don't rely on the fact that a mercenary always collapses as a warning sign – a severe hit can kill them directly! Connecting mercenaries always kneel next to the wounded and use up medication. It's better to let minor injuries heal on their own after the battle. Inventory - Sections Explained Your inventory is organized a bit differently than before. Essentially, there are four sections: Hands Each mercenary has a slot for each hand and two slots for swapping. For example, you can carry a pistol in each hand and a rifle in the swapping slots (which will be shouldered). Or you can have two uzis in your hands and a Colt and a grenade in the swapping slots. All weapons are also visible on the character model. Swapping between the two sets of slots costs one action point in combat. Backpacks Each mercenary has their own backpack. The more strength a mercenary has, the more slots the backpack provides. For example, the powerhouse Steroid has eleven slots, while Mouse only has four. Items have no weight, but long guns and some submachine guns take up two slots. Retrieving an item from the backpack during combat costs a hefty three action points. Team Supplies The team supplies in the middle of the inventory screen serve as the mobile collective inventory of your team. It has 20 slots, but it can only contain consumables such as ammunition, medications, and repair components—not weapons or armor. For example, if you find ammunition on an enemy corpse, you can right-click it in the inventory and select to place it directly in the team supplies (or assign it to a specific mercenary). Alternatively, you can press "T," and all looted consumables will immediately go into the team supplies—this is the quickest way to stash multiple boxes of ammunition with different calibers, for example. Sector Stash The fourth and most notable inventory section is the sector stash. Each sector has its own stationary stash with 16 slots. It is not a specific location in the sector, such as a crate or chest, but rather a fictitious space in the inventory where any item can be placed. To access the stash, right-click on the desired sector on the satellite map and select the stash (or press "H"). If a squad is present there, the sector stash will automatically be displayed in the middle of your inventory. Tip: On the satellite map, you can display the number of items in each of your sector stashes by pressing the small crate button in the lower-right corner ("Items and Stashes"). Attention: If you lose control of a sector, you can no longer access the sector stash. However, if you recapture it, the stash and its contents will be restored (at least in our experience, nothing was ever missing). Items in sector stashes do not deteriorate. Useful: When hovering the cursor over a weapon in the inventory, the accuracy values are automatically displayed on the left side of your mercenary portraits. This also works for other items like grenades (accuracy) or medications (medical skills). Additionally, the appropriate ammunition lights up when hovering over a weapon, and vice versa. Saving Space in the Inventory Since you acquire more loot early on compared to Jagged Alliance 2, inventory space quickly becomes limited, especially in the backpacks of weaker mercenaries. Therefore, scrap unnecessary weapons like the many Browning revolvers you find at the beginning—starting with the ones in the worst condition. You don't need to unload them beforehand because the ammunition will automatically go into the team supplies. Scrapping not only frees up space but also provides components for repairs and weapon modifications. The number of components obtained is shown beforehand. The condition of the scrapped weapon doesn't matter; a Browning revolver always yields six components, regardless of whether it's falling apart or at 100%. Be careful with scraping to much of essential items like crowbars and lockpicks tho. You might find many in the beginning hours but they are quite rare later on. Attention: The assault rifles AK-47 and AK-74, as well as the MG RPK-74, not only have similar names but also look similar in the inventory with their curved magazines. So be careful before scrapping them. You often find the AK-47 early on, so you can safely scrap any extras. Besides, each rifle frees up two slots. Stacking: Items like grenades, steel pipes (for weapon modifications), lockpicks, or throwing knives can be stacked up to ten. It's better to distribute all the grenades to two explosives specialists, and one skilled mercenary carrying all the lockpicks is sufficient. You only need one crowbar in the squad. Selling: Haha, that's not possible—just like in the previous game, nobody buys your weapons or other equipment. At least we haven't found anyone. If you do find a buyer, please write it in the comments. You can sell diamonds and valuables directly from the inventory by right-clicking on them. Additionally, a vendor in Fleatown (H9) will buy components from you; in our case, it was $500 for 30 parts. Loot - Collecting Stuff Faster Thoroughly search sectors when there are no (more) enemies present. Almost everywhere, you can find herbs (for medications), components, or even money. Observant mercenaries can spot such objects from a greater distance. Pressing the Alt key allows you to quickly locate previously discovered loot spots, so you can send a mercenary with a crowbar later, for example. Attention: Some containers are booby-trapped, which can explode or deliver an electric shock, for instance. Only send one mercenary to open them, not the entire group tightly clustered together. You don't have to individually search each enemy corpse after battles: The loot will be directly placed in the sector stash in the inventory. Healing - Care for your Wounded You have several options to get your injured mercenaries back in top shape: - During combat, you can use the "Heal" command (which consumes medicine) to treat wounded mercenaries and restore 90% of their hit points. Please refer to our combat tips above for more information. - Injuries will gradually heal over time on their own after battles. This process doesn't require any money or medicine, but it takes a long time. - With the "Treat Injuries" operation, two mercenaries can treat up to three injured individuals each. The higher their medical skill, the faster the healing process. However, this method consumes medicine. A mercenary can also self-treat, but it is less efficient. - If your squad is in a city, it is recommended to give the wounded mercenaries the "Rest and Relaxation" operation. This operation costs a few dollars per injured mercenary but heals them faster than natural healing. Cheers! - In sectors with a hospital (such as D8 and H12), any number of mercenaries can quickly recover. However, this option comes with a high cost. Money - How to get rich Your starting capital is quickly spent. You can see your account balance and the current daily change on the right below the strategic map, and more details are available when you hover over it. In Jagged Alliance 3, you have several sources of income and ways to save money. Diamonds Diamond mines are your biggest regular source of income. Grab the H7 mine as soon as you can leave the starting island. You can see the potential yield of a mine in advance by hovering the mouse over the diamond symbol on the strategic map (you can display buildings using the corresponding button at the bottom right). Also, liberate the nearby cities to increase their loyalty – the higher the loyalty, the more the mine will generate daily. Always secure mines with militias, as the enemy is eager to reclaim them. Mercenaries with the "Negotiator" skill, such as Buns, significantly reduce costs when recruiting militias. Intercept Transports Your enemies occasionally transport diamonds from their mines to port cities. You can see these groups as moving diamond symbols on the satellite map, and their troop strength is conveniently displayed as well. When intercepting such a transport, you can often calculate the battle automatically. Typically, a group carries a diamond crate that can be sold directly from the inventory (right-click) for $12,000. Long-Term Contracts If you plan to keep mercenaries for an extended period, you should set the contract duration as long as possible. This way, the daily cost is significantly lower. For example, Explosive Specialist Fidel costs $6,000 for three days (equivalent to $2,000 per day) but $21,000 for 14 days (only $1,500 per day). If possible, try to align contract expiration dates for multiple mercenaries. This allows you to extend all of them at once instead of frequently switching to the chat because a contract is ending. Saving the Gold Status Fee You can unlock the Gold status on the mercenary website for $20,000 to access elite mercenaries. However, the membership is also available for free later on – in our case, it happened in June 2001, but we suspect the timing may vary depending on your game progress. !!!SPOILERS!!! - Some Tips for the later game Again: Spoiler Alert! - In the diamond mine in sector H7, there are several archaeological treasures that you can sell directly from your inventory. You will also need the money: The mine slowly runs dry over time, yields less and less profit, and eventually becomes completely depleted. Get a second mine (such as the one in A2 in the northwest) at the latest when you receive the message about dwindling yields! -In the refugee camp E9, a shaman offers his healing powers for a small fee. However, only temporarily... -Some battles are particularly intense, such as Biff's rescue in E11, where multiple waves of enemies attack you, including mortar fire. Shortly afterwards, you will be summoned to the refugee camp (E9), where things also get intense. Prepare well for both battles, with fit mercenaries and fully equipped weapons!


No story spoilers or choose options, purely for mechanic obsessive people, how you are able to increase each stat. Some of options have fail chance, and some do only one gain per map ( "oncePerMapVisit" - so retreat and come back should help? - good luck traveling out and back for every mine in minefield :D ) Sources are lua files from game Data.hpk:Data.hpk > SectorOperation.lua Data.hpk > StatGainingPrerequisite.lua And for merc stat mechanics (storage, AP):Lua.hpk > Lua/ClassDefs/ClassDef-Zulu.generated.luaLua.hpk > Lua/Mercenary.lua Merc (even IMP) is starting with random XP at start between 0-600 for IMP, for AIM merc it depends on their level. When and how exactly point is added, ... I tried to follow from Stat increases("SetPrerequisiteState") to "RollForStatGaining" where "roll = InteractionRand(100, "StatGaining")" and I found several Cooldowns - some related to campaign time so related to last skill increase and some related to Map ... Adding Stat Point You only gain 5 statGainingPoints per level, when you advanced 20% toward the next level, 40%, 60%, 80% then when you reach a new level. Level-10 mercs can still gain statGainingPoints ... 引用自 MouToN:source: function RollForStatGaining(unit, stat, failChance) in Lua.hpk > Lua/Mercenary.lua Each time you get a stat increase by field experience, you get a random cooldown between 1 and 2.5 days (only for this specific stat). The triggers described in this guide are called "StatGainingPrerequisite". In order to gain an actual point in a stat, you first need to store "statGainingPoints" through XP (I have not analyzed this yet, but i suspect that this is where wisdom is valuable). These "statGainingPoints" are shared between all stats and are consumed by successful stat gain (-1 for any stat increase through "field experience"). If your merc's pool of "statGainingPoints" is at least 1, if the cooldown is over, and if your merc's current stat is between 1 and 99, then for each "StatGainingPrerequisite" met, you roll a first dice between 1 and 100 for the fail chance of the prerequisite (if not mentioned in the guide, this is guaranteed). Then you roll another dice between 1 and 100. If this second roll is greater or equal to [merc's current stat - 30] (ie. 100% chance for a 1..31 stat, 99% for a 32 stat, etc., until 32% for a 99 stat), this stat will get increased, a new random cooldown will be set, and a point will be deduced from this merc's "statGainingPoints". You only gain 5 statGainingPoints per level, when you advanced 20% toward the next level, 40%, 60%, 80% then when you reach a new level. Level-10 mercs can still gain statGainingPoints when they get 2000 XP past the level-10 milestone, then when they get 4100 XP (2000+2100) past level-10, then 6300 XP (4100 + 2200), then 8600 XP (6300+2300) so basically they get their n-th points after 2000*n + 100*n*(n-1)/2 XP. Health: "Accumulated 80 HP of damage." "Recovered from a wound" ( Fail to gain 10% ) Agility "Moved a distance of at least 7 voxels after they were attacked in the previous turn" ( once per map visit) "Opened a combat while Hidden." "Accumulated 20 AP of movement in combat (including free move)" Dexterity: "Killed with an aimed shot (at least one aim)" ( Fail to gain 75% ) "Killed with an aimed melee attack (at least one aim)" ( Fail to gain 50% ) "Successful stealth kill" ( Fail to gain 25% ) "Killed with a throwing knife" Strength: "Killed with a melee crit" "Accumulated 50 inflicted damage to enemies with melee weapons." "Killed 2 enemies in melee within the same combat." Wisdom "Discovered hidden herbs/parts"( once per map visit ) "Discovered a trap (e.g. mine)" ( once per map visit ) Leadership: "Spent at least 12 hours to train mercs (activity)" "Spent at least 12 hours to train militia (activity)" Marksmanship: "Accumulated 110 inflicted damage to enemies with firearms" "Kill an enemy with precise attack against him at <=30% hit chance." Mechanical: "Finished a mechanical activity in the satellite view lasting 24+ hours" "Disarmed a mechanical trap" ( once per map visit ) "Upgraded a weapon." Explosives: "Hit 2+ enemies with a single grenade/heavy weapon shot" ( Fail to gain 10% ) "Successfully craft explosives" "Disarmed an explosive trap" ( once per map visit ) Medical: "Finished a Doctor activity in the satellite view lasting 24+ hours" "Accumulated 25 health healed with Bandage." "Revived a downed teammate." Bandage - skill during active battle Sector Operations: Treat Wounds: Medical >30Repair Items: Mechanical >20Craft Ammo & Explosives: Explosives >50 Storage size: Minimal size for merc storage is 4. Any futher slot to gain is (Strength - 30)/5. So your 5th slot is at 55 ... and every 5 STR after AP amount: Number of AP from agility(not counting any other stats as SLOWED/REST WELL and others like perks ): From lua file: 3 + (agi/10) + (lvl/3) Minimum garanted: 3 Agility score: 1/10 ( rounded down ) Level of merc: 1/3 ( rounded down ) Example: Merc: lvl 4 with 88 agi 3 + 8 ( from agi ) + 1 ( from level ) = 12 AP Max point ( without R&R and Taking cover and maybe some perk: 3 + 10 ( max agi is 100 ) + 3 ( max lvl is 10/3 rounded down is 3 ) = 16 Sector travel time: This was fun to decode :D squadModifier = 100 - (125 - max_leadership) sector_travel_time = sector_travel_time - sector_travel_time * squadModifier / 100 Examples: Leadership 30 : 5% saving of travel time Leadership 50 : 25% savings Leadership 75 : 50% savings Leadership 100 : 75% savings Enemy HPs: Very strong >= 90 Strong >= 75 Healthy >= 60 Below levels, if it is their Max HP = Uninjured else Weak >= 45 Wounded >= 25 Severely Wounded >= 10 Almost dead > 0 Dead = 0 Names of Magazines: I will not provide locations as this is mechanic and info dump guide. Health: "An Apple a Day" Agility: "Parkour!" Dexterity: "Sleight of Hand" Strength: "Flex 'em!" Wisdom: "Grilled Bears' Survival Guide" Leadership: "Puntastic Dad Jokes" Marksmanship: "Long Distance Relations" Mechanical: "Nuts and Bolts Magazine" Explosives: "The Red Wire" Medical: "National Paramedic" Show XP and Level ( mod by audaki_ra ): While hovering over a merc, shows current Level, total XP and total XP required for next level. https://steamcommunity.com/sharedfiles/filedetails/?id=3011957956


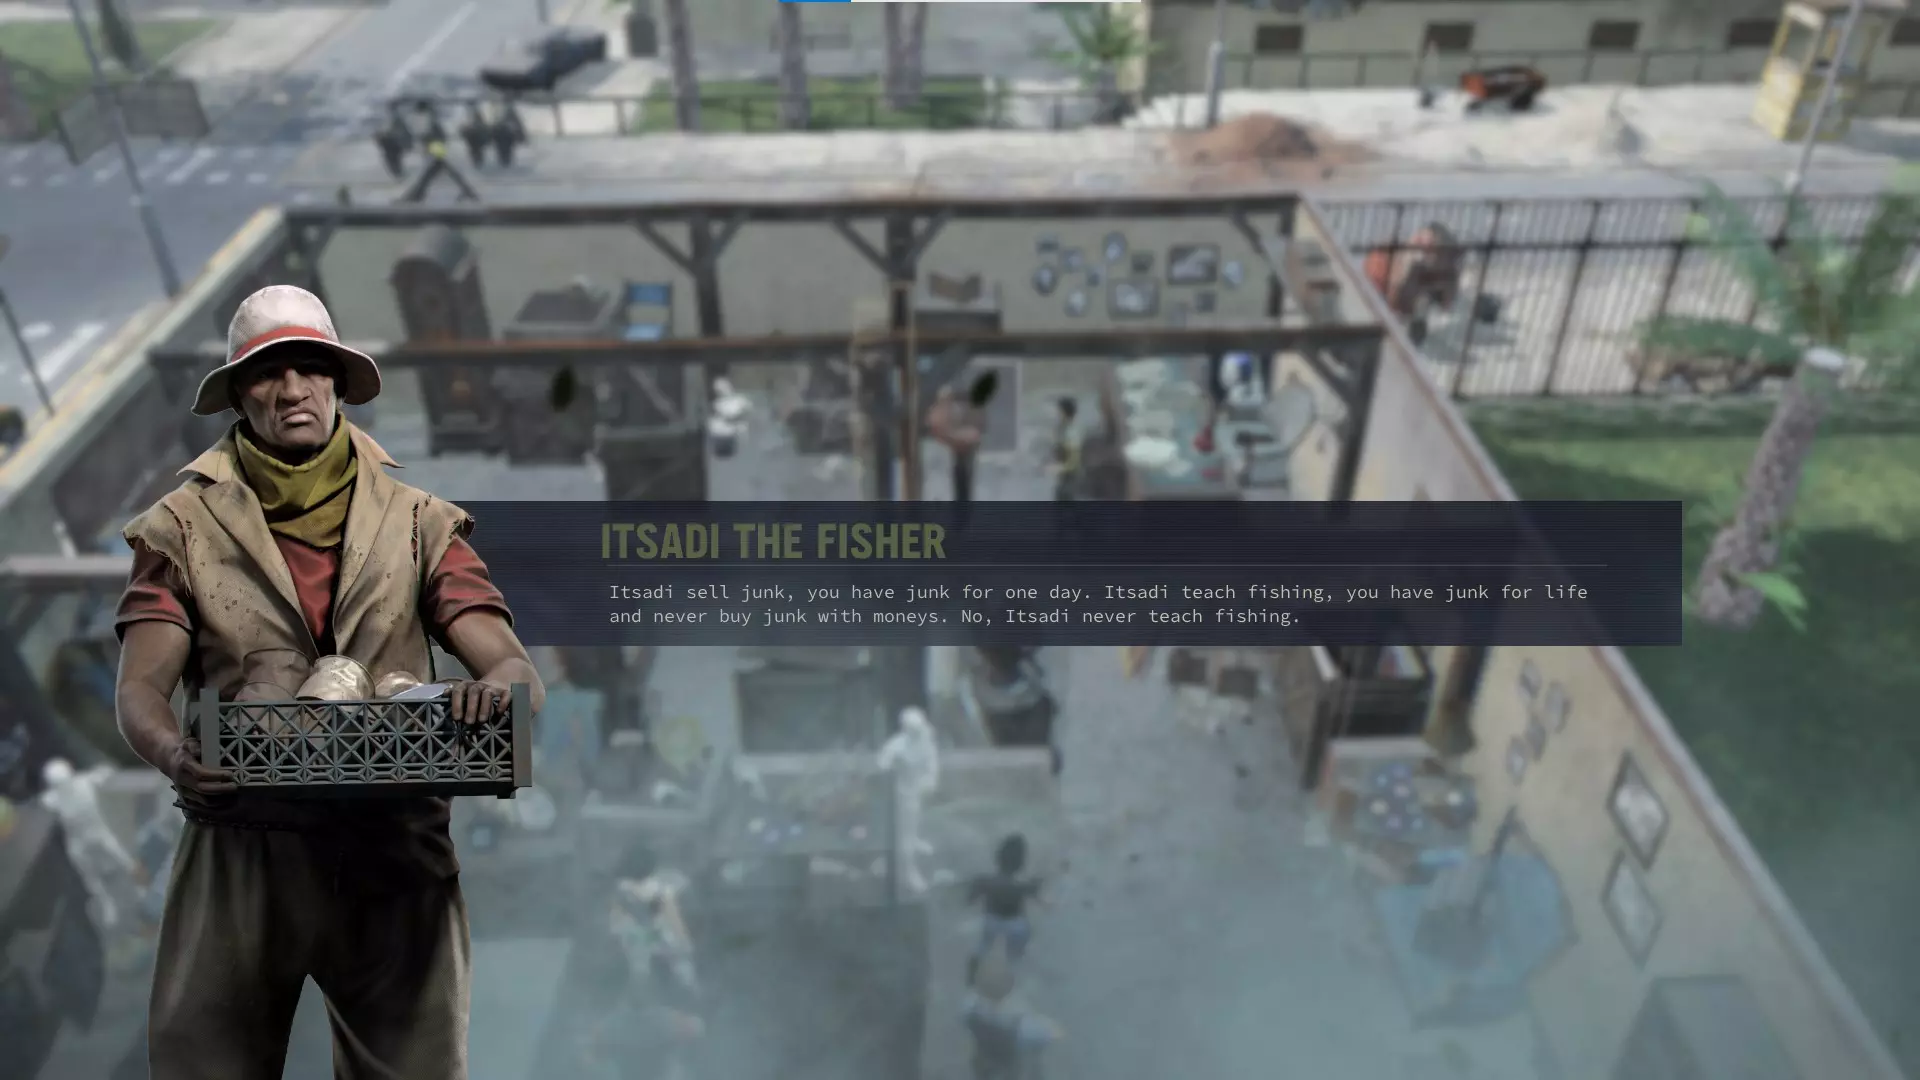

The who's who in Jagged Alliance 3 voices Mercs Barry - Andrew James Spooner Biff - Vincenzo Nicoli Blood - Oberon Adjepong Buns - Penelope Rawlins Dr. Q - David Cui Cui Fauda - Serena Manteghi Fidel - Joseph Balderrama Flay - Alexander Devrient Fox - Dev Joshi Grizzly - Gary Littman Grunty - Weston Heflin Gus - Bruce Barker Hitman - Derek Ridell Ice Williams - Kevin D Thelwell Igor - Nicholas Corda Ivan - Sergey Chikhachev Kalyna - Amanda Philipson Larry - Ian Bouillion Len - Damon Alums Livewire - Zehra Jane Naqvi Magic - Chris McCloy MD - James Alexander Meltdown - Penelope Rawlins Mouse - Rachel Stasiak Nails - Derek Hagen Omryn - Sergey Chikhachev Raider - Jason Yudoff Raven - Alicia Ambrose Reaper - Stephen Fu Red - David Lane ♥♥♥♥♥ Scope - Alicia Ambrose Scully - Ben Crowe Shadow - Andres Williams Sidney - Ben Crowe Smiley - Federico Louhau Spike - Joseph Balderrama Steroid - Ben Crowe Tex - David Cui Cui Thor - Ciaran Saward Vicki - Esther Niles Wolf - Nicholas Corda Named NPCs Abraham - Alexander Devrient Antoine - Tashinga Bepete Baronne des Ordures - Harriet Kershaw Bastien - Alexander Devrient The Beast - Pamela Jikiemi Billy Boy - Tashinga Bepete Bonecrusher - Lindon Alexander Boss Blaubert - Tom Moutchi Bounce - Kojo Kamara Butcher - Ali Zayn Captain Pierrot - Abraham Amkpe Caroline - Penelope Rawlins Chimurenga - Abraham Amkpe Claudette - Michelle Asante Col. Faucheux - Maxim Reston Corazon Santiago - Díana Bermudez Deedee Boombastic - Nneka Okoye Dirty Henri - Alexander Devrient Doc Robert - Bruce Barker Doorknob - Tom Moutchi Dr. Kronenberg - Alicia Ambrose Dr. L’Enfer - Toby Bradford Elliot (you idiot!) - Derek Hagen Emma LaFontaine - Michelle Asante Father Tooker - Abraham Amkpe Fra Baggz - Ali Zayn Frédéric Le Furet - Kaspar Mairowitz Gouvernour Le Pingouin - Ciaran Saward Granny Cohani - Harriet Kershaw Greasy Basil - Joseph Quartson Haunted Mansion Butler - Tom Moutchi Headshot Hue - Kojo Kamara Heinrich - Ciaran Saward Herman - Kevin D Thelwell Hog Lady - Pamela Jikiemi Hyena Gilbert - David Lane Pus/ey Itsadi the Fisher - Joseph Quartson Jackhammer - Gogo Lomo David Justine - Pamela Jikiemi Karen Gosling - Harriet Kershaw King Chicken - Oberon Adjepong Lalee Leewaylender - Kaspar Mairowitz Lami the Witch - Nneka Okoye Luc - Tom Moutchi Lucky Veinard - Gogo Lomo David Luigi - Andres Williams Lurch - Heath Martin Ma Baggz - Pamela Jikiemi The Major - Joseph Balderrama Maman - Alisha Bailey Manny - Ali Zayn Mario - Damon Alums Martha - Alisha Bailey Mike Ditch - Vincenzo Nicoli Mole - Ali Zayn Mollie - Michelle Asante Monday the Drunk - Tashinga Bepete Monsieur Fournier - Joseph Quartson Mr. Gattz - Joseph Balderrama Mrs. Le Pingouin - Harriet Kershaw Pangloom - Lindon Alexander Pepe - Maxim Reston Petta - Andi Gibson Pierre - Nathan Musoki President LaFontaine - Lindon Alexander Sangoma the Shaman - Joseph Quartson Serge - Lindon Alexander Siegfried - Ciaran Saward Slave Master Graaf - Tashinga Bepete Tim Turtledove - Federico Louhau Travis - Derek Ridell Uncle Baggz - Gogo Lomo David Wanda - Dionne Audain Wlad the Tinkerer - Jason Yudoff Xavier - Joseph Quartson Other NPCs Adonis Soldier voices - Joseph Balderrama Army Soldier voices - Oberon Adjepong Civilian Male voices - Lindon Alexander Coffee Bean voices - Dionne Audain Coffee Bean voices - Pamela Jikiemi Female Civilian voices - Alisha Bailey Female Civilian voices - Michelle Asante Female Civilian voices - Nneka Okoye Female I.M.P. Character - Díana Bermudez Female Soldier voices - Michelle Asante Legion voices - Ali Zayn Male Civilian voices - Ali Zayn Male Civilian voices - Kojo Kamara Male I.M.P. character - Stephen Fu Male Soldier voices - Ali Zayn Male Soldier voices - Gogo Lomo David Male Soldier voices - Kevin D Thelwell Male Soldier voices - Tashinga Bepete Male Thug voices - Abraham Amkpe Male Thug voices - Nathan Musoki Male Thug voices - Oberon Adjepong MERC Survivors - Joseph Balderrama Night club referee - Kaspar Mairowitz Rebel Soldier voices - Tom Moutchi Thug Soldier voices - Nathan Musoki
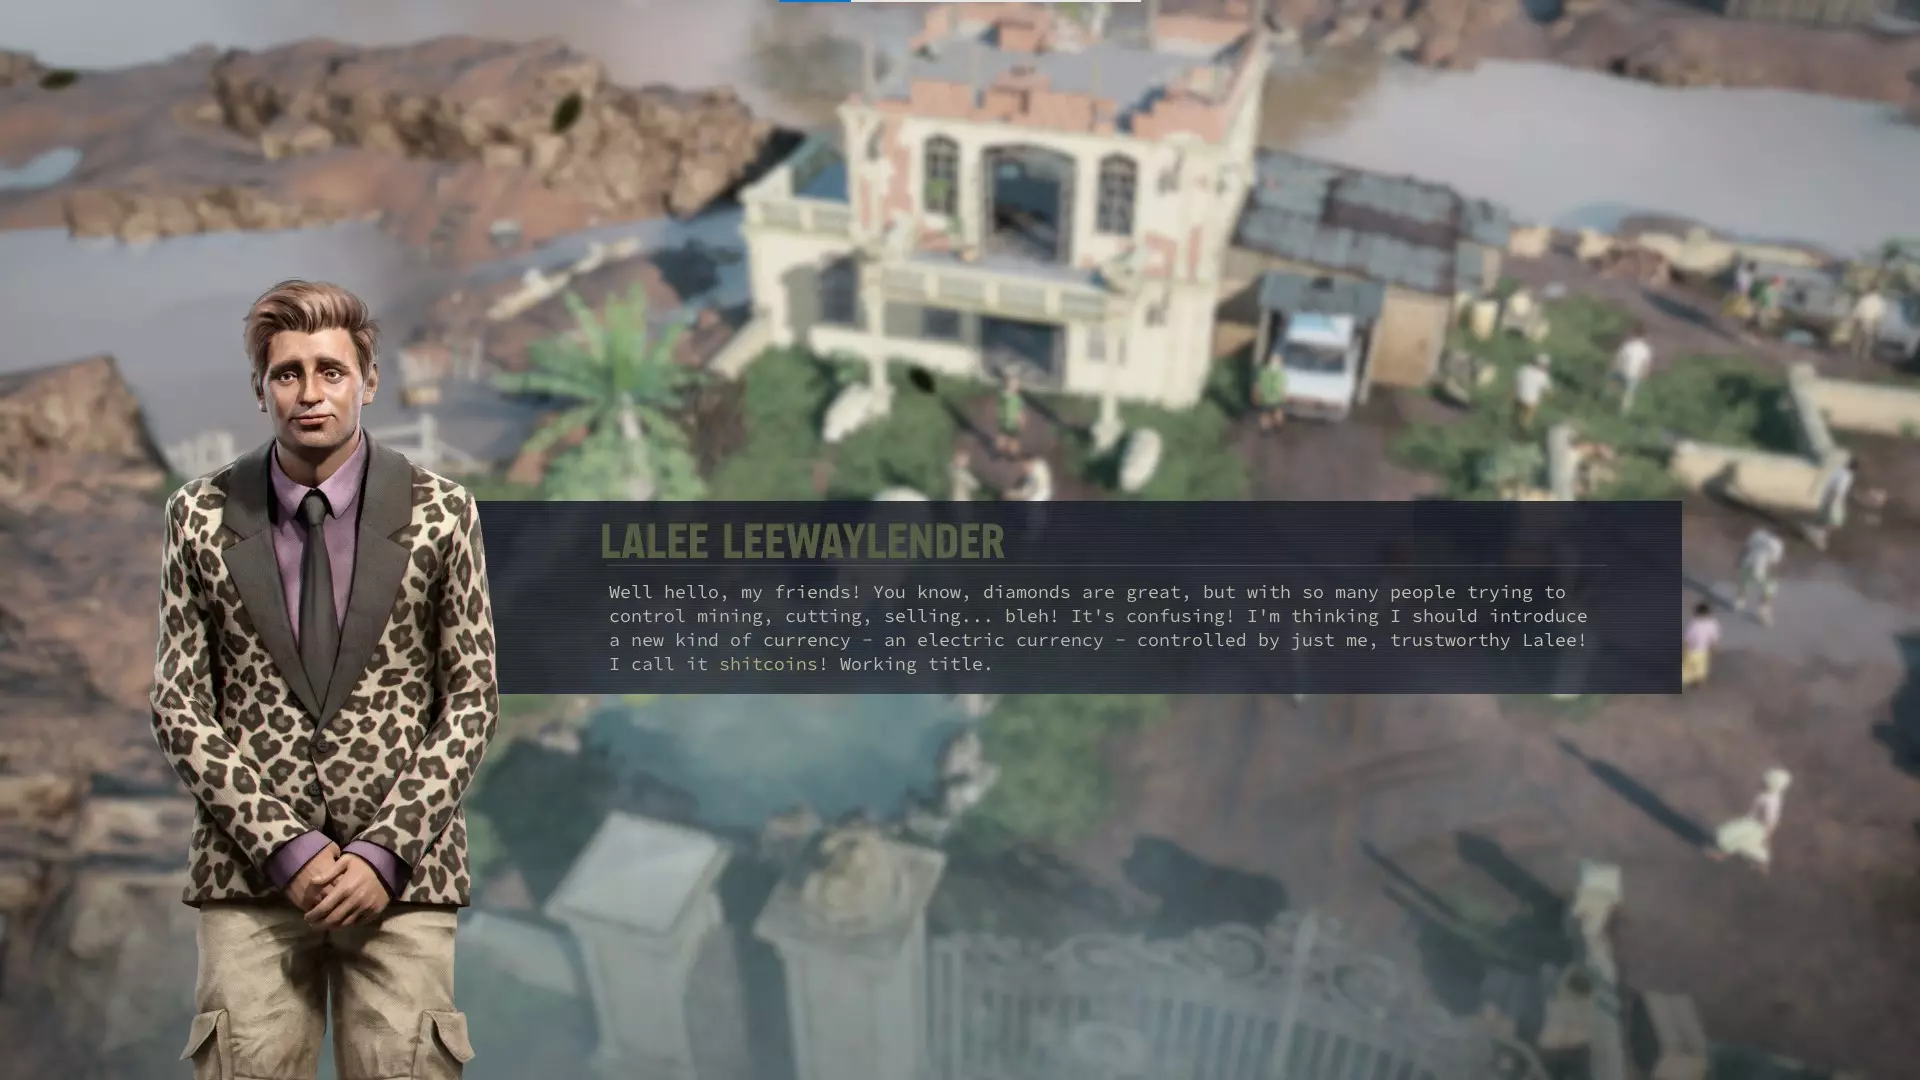

Listing of all things you can buy and sell in the Jagged Alliance 3 Desert and savanna region B2 - Savanna coast 1 Modified M-14 - 2500 $ Has mods: Recoil booster, Bipod, Quick Prism scope, Default mag B13 - Landsbach 3 Combat stims - 1500 $ C5 - Poachers camp 1 Modified Dragunov rifle - 2000 $ Has mods: Heavy stock, Thermal scope, Compensator 1 Ancient Bronze mask - 1 bag of Grand Chien franks 30 units of 7.62 mm WP AP ammo - 1000 $ C7 - Fosse Noire (Communist mine) 30 units of .50 frag ammo - 500 $ D6 - Pantagruel outskirts 20 Meds - 1000 $ 3 Toxic gas grenades - 1000 $ H8 - Fleatown La Boue 1 Magazine - 1000 $ H9 - Fleatown Flea Market 3 Molotov - 800 $ 1 Med Kit - 1000 $ 1 Modified AUTO-5 - 3000 $ Has mods: Short barrel, Full choke 60 units of 7.62 mm WP HP ammo - 300 $ 1 Magazine - 1000 $ 1 Modified MP5K - 2500 $ Has mods: UV dot, Short barrel, Vertical grip, Compensator 1 Modified GLOCK-18 - 1500 $ Has mods: Advanced reflex sight, Flashlight 5 Combat Knives - 1000 $ SELL 30 parts - 500 $ receive Great Forest, Jungle and Wetlands region H12 - Sanatorium SELL 50 meds - 2000 $ receive L8 - Port Cacao City 1 Magazine - 1 Money bag 1 Red Curly Wig (quest item) - 1 Money bag Few Field resources (random gas grenades or other grenades, for example, smoke grenades*) - 1 Money bag Special parts (pipe, lens or chip, random order) - 1 Money bag Detonator parts (time detonator, remote, proximity detonators, remote detonators, in random order) - 1 Money bag K9 - Port Cacao Docks 1 Modified FN-FAL - 2500 $ Has mods: Quick Prism scope, Heavy stock 3 HE Grenades - 1000 $ 1 Modified RPK-74 - 3000 $ Has mods: Recoil booster, Default handguard, Expanded mag 1 Heavy Armor - 1000 $ * - I bought 4 times, received gas, mustard gas, tear gas grenades and smoke grenades. What is sold at 5th and later times, don't know) North Eastern region D17 - Ille Morat 3 Gunpowder - 300 $ Wlad the Tinkerer - crafter (can upgrade an AK-47 to an AK-74) and trader - accepts parts and can craft: Plasma Crowbar (repairable crowbar) - 20 parts (can be received once) Composite machete - 10 parts, knife (can be received once) AK-47 - 40 parts (can be received infinite times) South Eastern region/Farmlands I18 - Wassergrab Mining Area 1 Weave padding - 750 $ L20 - Farmland 1 Sharpened machete - 1500 $ 20 Meds - 1000 $ 3 Molotov - 800 $ Sold weapons modifications descriptions M-14 Recoil booster - Burst, Long burst, and Full Auto fire more shots. Cost 15 parts. Bipod - Large Accuracy bonus when prone. Cost 60 parts. Quick Prism scope - If your first action is an attack, it counts as being Aimed 3 times. Cost 1 lens, 35 parts. Default mag - No changes. Cost free by default. Dragunov Heavy stock - Moderate Accuracy bonus for attacks with 3+ Aim levels. Cost 30 parts. Thermal scope: No Cover Accuracy penalties when at 3+ Aim levels Illuminates enemies when at 3+ Aim levels No Grazing hits when at 3+ Aim levels No line of sight Accuracy penalties when at 3+ Aim levels. Cost 1 chip, 50 parts.Compensator - Moderate Accuracy bonus for subsequent attacks against the same target. Cost 25 parts. Modified AUTO-5 Short barrel: Wider attack cone Decreased Reliability Reduced Range Decreased AP cost when attacking. Cost 1 steel pipe, 20 parts.Full choke: Narrower attack cone Increased range. Cost 20 parts. Modified MP5K UV dot - 1 Aim level added automatically to each attack. Cost 1 chip, 10 parts. Short barrel: Reduced range Decreased Reliability Decreased AP cost when attacking. Cost free by default.Vertical grip - The Accuracy bonus for the first Aim level is doubled. Cost free by default. Compensator - Moderate Accuracy bonus for subsequent attacks against the same target. Cost 25 parts. Modified GLOCK-18 Advanced reflex sight: Increased Accuracy bonus from Aiming Wider Overwatch cone Moderate Accuracy bonus for Interrupt attacks. Cost 1 chip, 35 parts.Flashlight - Illuminates enemies and the wielder. Cost 10 parts. Modified FN-FAL Quick Prism scope - If your first action is an attack, it counts as being Aimed 3 times. Cost 1 lens, 35 parts. Heavy stock - Moderate Accuracy bonus for attacks with 3+ Aim levels. Cost 30 parts. Modified RPK-74 Recoil booster - Burst, Long burst, and Full Auto fire more shots. Cost 15 parts. Default handguard - No changes. Cost free by default. Expanded mag: Increased AP cost when reloading Increased clip size. (+30 ammo) Cost 15 parts. Lalee Leewaylender's loot boxes Save first 10 of tiny diamonds you find for Fleatown NPC Lalee Leewaylender. He can sell a loot box for 1 diamond. 10 at all. From them you can get various random magazines, some ammo, assorted set of various grenades, random weapon up to rare late game pieces as HK21, AKSU-74 etc. dose of metaviron (guaranteed drop), 2 tiny diamonds (also seems guaranteed drop) and several useless things like dead cat, alive cat. Also 1 more diamond that is left from action with loot boxes can be used for him to give quest to find necklace in one of 12 chairs. Quest phrase is somewhat like "how to get rich in town".

Guide for 100% Achievements in JA3 Story how I got 100%. My tips and tricks for hardest achievements + some general tips for the game. Mistakes I did and how I got away with them. Some tips for builds and mercs. Introduction I decided to create that guide after spending around 60h in the game (officialy 100h but tbh I kept the game running without playing for couple of nights which pumped out number of hours) and after getting 100% completion during that time. I wanted to share my experience from that great game, give you some tips and tricks how to get all achievements and make the game even more exciting to everyone. Spoiler alert: This guide contain spoilers aroung storyline, quests, mercs and other elements of the game. Please proceed only if you are fine with that! Summary As I wrote in the Introduction I spent around 60h in the game to get 100% completion but I was not entirely commited to get achievements only so that I can fully enjoy that great game. Obviously getting 100% completion can be done faster (and I will try to provide some guides on that as well). In order to have 100% completion it took me 3 full playthroughs + one ~15% playthrough + one old save usage to clean one achivement. I did following runs: 1st full playthrough: "To get familiar with the game, enjoy and explore the game" Difficulty: Commando (middle) Forgiving mode: No Achievements: 41/50 Comments: I focused on some quest related achievements + I hired dedicated merc to get "Natural Sprinter" Achievement and took advantage of situations to get some other achievements. Details in secion dedicated to that playthrough. Old save usage from 1st playthrough to clean missing "Diesel Power" (Solved the Diesel problem.) Achievement Achievements: 42/50 Comments: Obviously that could be done within first playthrough but for some reason achievement did not pop up to me even though I did finish that quest. Later on it turned out that specific ending has to be chosen in that quest in order to be granted achievement. Details is specific section. 15% playthrough to get "Psycho" (Chose a Psycho dialogue option 5 times) and "Say my name" (Did three morally bad things.) Achievements Difficulty: First Blood (lowest) Forgiving mode: Yes Achievements: 44/50 Comments: I started a new campaign to quickly wrap up those two achievements after I missed them in 1st playthrough as I didint have "Psycho perk" character early enough in the game and I missed some choices early game for "Say my name" achievement. Obviously could be done within 1st playthrough. 2nd full playthrough: "Lone wolf + Time is money achievements " Difficulty: First Blood (lowest) Forgiving mode: Yes Achievements: 49/50 Comments: I focused to make it in shortest possible time to get "Time is money" achievement (Finished the campaign before 1 MAY, 2001.) using only one merc (IVAN!) for "Lone Wolf" (Finished the campaign while having no more than one hired merc at the same time.). In that Playthrough I also did: "Pacifist" (Finished the campaign without killing any civilian.) - for some reason I didnt notice in 1st playthrouigh that I killed a civilian "Bullet proof" (Finished the campaign without a single merc dying or getting downed.) - for some reason I didnt notice in 1st playthrouigh that I got downed - maybe in autoresolve fight? Dynamic Duo (Finished the campaign while having no more than two hired mercs at the same time.) - completing Lone wolf automatically grant also this Achievement. 3rd full playthrough: "Ironman" Difficulty: Mission Impossible (highest) Forgiving mode: No Dead is Dead: Yes To The Bitter End: Yes Lethal Weapons: Yes Forgiving Mode: No Achievements: 50/50 Comments: Playthrough dedicated for "Ironman" Achievement (Finished the game on the highest difficulty settings: “Mission Impossible”, “Dead is Dead”, “To The Bitter End”, “Lethal Weapons” and no “Forgiving Mode”) General tips and trick for Jagged Alliance 3 Please find several information about the game, its mechanics that I find usefull on different stages of the game. Some of them are critically important to make it possible to finish some more difficult achievements like: "Lone Wolf", "Ironman" or "Time is Money". Game storyline has in fact 3 phases. Its important to understand them especially for "Ironman" Playthrough. Tutorial - Ernie island on the begining - you can stay there as long as you want without being bothered - but watch your cash ;) - was important for my "Ironman" playthrough. 1st half where Legion is your main enemy - its time to acumulate cash that will be used in second half (was especially important for my Ironman playthrough) 2nd half where Army is you main enemy and you loses majority of mines and cities. You are leaving Tutorial when you take 1st Outpost in H4. You are triggering 2nd phase of the game by eighter: Entering Refuge camp after the "incident" - be carefull you cannot retreat from entering there and fight is quite though! But can be skipped by... Getting close to Eagle nest sector (A20). Entering any sector closer than 3 sectors from A20 will trigger second phase. There are three main storyline battles which are more difficult than others: A20 Major battle - tough one especially in Lone Wolf playthrough K16 Colonel battle - tough one especially in Lone Wolf playthrough H4 Final battle - relatively easy especially that there seems to be some bug that most of enemies do not leave final room whatever is happening. There are some fights that can be skipped but are more difficult than others (I would suggest ot avoid them in Ironman and Lone Wolf playthroughs): A8 Biff rescue E8 Refugee camp after "incident" H8 Smiley quest Barry if very good merc! Relatively cheap, great explosives expertise and incredible special: he generates 2 very powerfull grenades every week. They saved me several times on my Ironman playthrough when things went bad or I made a mistake. He was essential for that Playthrough success. Merc friendship factor - some mercs like other mercs, some hates particular ones. This factor affects not only ability to hire particular mercs but also their morale therefore AP point in tactical fights. E.g. Wolf likes Fox and Fox likes Wolf. If you have thoise two mercs in one squad both have +1 AP. You can find detailed desription of that factor here: https://commonsensegamer.com/jagged-alliance-3-merc-relationships-and-affinities-full-guide/ or https://steamcommunity.com/sharedfiles/filedetails/?id=3006312456 Thing that I did not know (or just didn`t notice) before I started my Ironman playthrough: Silent one-shot kills can be done not only in real time part of tactical game but also in turn based part of them. You can always go into hidden mode and if enemy doest see you you can kill them silently with one shot. It was very important for my Ironman playthrough as silently killing enemies can turn off turn based part and therefore you are free to have fresh ironman save when turn based fight will be triggered again. This mean you dont have to repeat whole sector if things goes bad. Some loots in sectors are generated when you first enter the tactical map of a sector. E.g. G11 has a fridge where Winchester rifle (one of the best sniper rifle) can be generated. You can save scamm it by: 1. making autosave when you arrive in the sector. 2. Entering the sector. 3. Check loot. 4. Quick load if you didint get what you wanted. 5. Repeat. Doing that was important for my Lone Wolf achievement run. It was relatively easy for me to complete everything using following weapons (I know there are better but some of those better are very rare): Winchester - one of the best Sniper rifle in the game (of course when modded). Proper mods and perks on merc almost guarantee you two kills each turn. Dragunov - its nice as it uses different ammo (not NATO) which reduces problems with that ammo on 1st half of the story. Gewer - silenced version of that was used til the end by half of my squad on Ironman playthorugh. Its your main rifle for first 30% of the game especially on Lone wolf and Ironman playthrough. Barry grenades - very powerfull greades for free (2 each week). Stick grenades - long distance, relatively big damage. RPK 74 - nice automatic rifle especialy to deal with Hyenas - I used it twice on my Lone wolf playthroughs. Shotguns - was essential for Lone Wolf playthrough. With Perks like: Breach and Clear and Frogleaping are really OP. You can kill enemy with one shot using 3 AP. Move for free to next one, kill, move kill. With Ivan you can get for each kill 3 AP which makes it... kills for free without using AP! 1st full playthrough: "To get familiar with the game, enjoy and explore the game" (part 1) In first playthrough for fun I did 41 Achievements: New Kid On The Block Created an I.M.P. merc. - nothing to write about. Its alwas good to have merc for on time fee of 7000 USD. Suggestions for Ironman run: I created merc with 0 in mechnical, explosived and medical. Maximum 85 in everything but Markmanship. 40 there but its easily trainable using "Train merc" operation and/or by just shooting. Different Ways To Die Killed an enemy with 5 different weapon types. - self explanable. Possible weapons: Handgun Shotgun SMG Assault Rifle Sniper Rifle Grenade Molotov Gas Grenade Melee Weapon Machine Gun Grenade Launcher Mortal Missile Launcher (RPG-7) Bullseye Killed 25 enemies with a headshot. - it comes as you play. Field Training Defended a sector with the help of militia without autoresolve. - you can do it even in tutorial on Ernie H2 sector. Just train some militia there and defend first couter attack from enemy by entering Tactical map fight. Hot Diamonds Ambushed a diamond shipment and got the case. - just intercept "suitcase" enemy unit. Grab the diamonds and got Achiv. Breaking The Wall Killed an enemy with a shot through an obstacle. Shot enemy through an obstacle - some walls cannot be penetrated but light obstacles can - e.g. some iron fences. Sniper rifle can do the job. Silent and Deadly Killed 7 enemies in one sector without triggering combat. Stay hidden in sneak mode (H). Shoot separated enemies (that are not in line o sight of other ones) in the head using sniper rifle or use good character to kill using knife in close combat. As long as you dont trigger a combat they count. Not every sector make it possible as is some of them there are no 7 separated enemies. Some suggestion: Mfumu's Mine Overwatchmen Made 10 overwatch shots in one turn. It can be done on multiple occasions. All you need is bigger number of enemies stacked together (5 should be more than enough). Put all you mercs (5-6 should be there) on overwatch towards enemies and "End turn" each time enemy will move you merc will do Overwatch attack. If only you dont kill enemies to fast they should manage to do 10 overwatch shots. I did it on one of the outposts where at some point "reinforcments are sent". The one with fake major vel "Eliot". Born Killer Killed 5 enemies in one turn with a single merc. - there are multiple easy ways to get this one. e.g.: good grenade on pack of Hyenas (Barry grenade is extremely good. Nive number of hyenas can be found close to each other in C20 sector. Ivan with shotgun and Breach and Clear and Frogleaping perks. Sabotage Reduced all defense shields of an Outpost. - Each outpost has "red shields: visible on Satelite map. By speaking with NPCs around or by doing "Recon" operation on Satelite map you can reveal what you need to do to soften the defence there. Usually its some quests, cleaning some sectors nearby or so. When you do all of them for one Outpost achiv will pop. If you clean Ernie Island during Tutorial properly this outpost may already give you achiv. All Your Base Are Belong To Us Controlled 5 sectors with an Outpost. - just take over all 5 outposts within one playthough. Be aware to train some militia as they may be taken over in the meantime. Also be carefull not to trigger 2nd phase of storyline as you will have more to do to make that achievement. Flawless Victory Conquered an Outpost without losing HP. this one is much easier if you soften the defence in outpost. Then use silent kills as much as possible. With a little quick saving and loading, sooner or later you will get it. Tactician Controlled at least 50 sectors. You will get it without even trying unless you rush the game (e.g. my Lone Wolf + Time is Money run). Living Legend Hired a Legendary merc. - sooner or later you will be able to hire legendary merc. if you dont need any use quicksave - hire - quickload method just to get achiv. Gritty Dozen Have at least 12 hired mercs. - wait til you have enough money. Quicksave. Hire enough cheap mercs. Quickload. Winner, Winner, Chicken Dinner Chicken murderer. When you find a chicken just kill it using manual attack. e.g. Sector L18. Unlockdown Found a cure for the Red Rabies. Thats a long quest related achivement. I took advantage of following guide for it: https://steamcommunity.com/sharedfiles/filedetails/?id=3007360203 Liberator Earned at least 75 Loyalty in 5 towns. - just train militia in each city, do quests, be nice and you will get it. Friendly Fire Hurt your own merc with the bullet that killed an enemy. whenever you have low hp enemy (or full hp Hyena) put a merc in front of that enemy and shoot enemy with other merc (while targeting there should be blue icon indicating there is your ally on shooting line). if only your bullet hit your merc and kill enemy achiv is granted. Prizefighter Defeated all fighters in the Night Club. you need to win fist battle with each fighter in Night club in sector B13. Please note that fights are only carried out during the night and if you want to enter the club you need to visit B12 first and talk with Sigfrid (Diesel Power questline). Ready, Woody! Hired Gus. - normally you cannot hire Gus as he is retired. But if you hire either Len or Scully then he will agree to join you. Two Birds One Stone Killed two enemies with a single shot. You have to do it using gun. Cannot be done using greanes or explosives. Easier to do it on Hyenas. Sniper rifle + 2 hyenas standing one behind another. And voila. Just A Flesh Wound Taken 300 damage in a single turn without any merc dying or getting downed. Not that easy to get in regular play but there is an easy way to cheese it. Hire 12 mercs (e.g. for other achiv) go with both squads into battle. Start battle having all 12 mercs together. Start throwing greades on them. Eventually you will get 300 damage and no deaths. Lethal Weapons Killed 10 enemies in a single turn. There are multiple ways to do it: You can do it easily in C20 with hyenas and MGL - 3 shots (4AP each) will kill 3 packs easily. You can do it with solo Ivan with shotgun and Breach and Clear and Frogleaping percs. Final battle is also good opportunity but not that easy as previous two. Blood Rain Dealt 1000 damage to enemies in one turn. This one is a little bit tricky as you need to have really big number of enemies to make 1k damage in one turn. I personally did it in Refugee camp after the "incident". I`m pretty sure that last chamber of final fight is also a good place to try. Some suggestions: explosives (Barry`s grenades!), Ivan with shotgun and Breach and Clear and Frogleaping perks. Other mercs with same perks. Or just a brute force way: 2 squads (12 mercs). Saw It Coming... Story related - visit Refugee camp after incident. Gather some evidences and achievement pop. A Long Shot Killed an enemy at extreme range. Easy way to do it is to use Rocket launcher. Still it has to be over 40 quares distance to get the achievement. So usually severa tries required. 1st full playthrough: "To get familiar with the game, enjoy and explore the game" (part 2) Twelve Chairs Found Madam Lecoq's diamond necklace. There is a quest to examine 12 chairs in different places in the JA3 World. In order to get the mission in the first place, you will need to talk to Lalee Leewaylender in Fleatown (H9) and ask him for information. He will agree to provide it in exchange for one Tiny Diamond per piece of info. To start the necklace mission, ask him how to get rich and he will offer you a deal. Chairs can be found here: Flag Hill (I1) Fleatown (H9) Rimville (I9) Diamond Red (A2) Camp Grand Prix (D10) Pantagruel (D8) Camp Savane (F7) Camp La Barriere (G10) Fosse Noire Mine (C7U) Jungle River Bank (G11) Sanatorium (H12) Drachenberg Mine (B12) A Fistful Of Diamonds Controlled all sectors with mines. - You need to take control over all mines. Please note that at least one mide require to go through questline (B12 mine). X Marks the Spot Found Lucky Veinard's secret treasures. Quest related. You need to find at least 3 treasure before the chicken appear in K18. Basic treasure locations: H7 E14 C3 J11 After finding 3 of those go to K18 to finish quest. Truest Detective Caught the Teddy Bear killer. Quest related. You need to kill the killer. he can be on one of those sectors: K17, K18 or K19 Green Diamond Obtained the Green Diamond. The easiest way to get achiv is to Save game. Go to A8 to "Rescue" Biff. Kill him "manually" before enemies come. Loot Diamond. Reload save. ;) Rehab Helped Larry overcome his addiction. Larry can be found is sector: F7. In order to get the achiv you need to (in any order): Take over hospital in H12 (both on the ground as well as underground map) Give metaviron to Larry in F7 (metaviron can be found in H12, but also looted as rare drop or received from loot bought from Lalee Leewaylender in Fleatown (H9) for tiny diamonds. Recruit Larry Take him to H12 and do Operation "Cure addiction" on him Love Cats Made Maman and Chimurenga get together. Quest related. In order to make Chimurenga get with Maman you need to do the quests for him, defeat him and posess 100 loyalty with his city. Modding Expert Installed 7 mods on a single weapon. Straightforward achievement but for some reason I did not receive the achiv after modding first 3 weapons like that. Achievement popped for me after... I removed one of the mods from one of the weapons... Martial Artiste Conquered an Outpost without using firearms. Similarly to previous one this achievement did not pop up for me on first try. So it seems it might be bugged sometimes unless... throwing knife is counted as "using firearms ;) " On second try where I used only knifes to stab it was ok. Natural Sprinter Moved a merc 35 tiles away in a single turn. A lot of peope are suggesting to use Ivan due to his +3 AP after kill. I tried and failed. However it might be beneficial to try this with MGL and C20 sector where where are 3 Hyenas packs close to each other. Taking out them will cost 12 AP (3x4AP) and might get up to 33 AP back... so having 14 AP at start or a turn should be enough. I personally did it different way. My guide on that achiv can be found here: https://truesteamachievements.com/a2564882/natural-sprinter-achievement#oSolutions There is obviously yet another way: Ivan + Shotgun + Breach and Clear and Frogleaping perks or even other merc with same perks. Ivan would probably be easier as he might get another +3AP for each kill. True Crit Made 10 critical hits in one turn. Some suggestion: machinegun with critical chance ammo (Hollow points) + burst attack. 2-4 attacks and achiv should be on your list. In order to make it in one turn probably its good to have two such mercs/guns/ammo. Apocalypse Later Hired the Major. MISSABLE This one is tricky as it requires to make proper decisions through full playthrough. (part below is taken from Siris guide available here: https://steamcommunity.com/sharedfiles/filedetails/?id=3008044784) You need high reputation (75) to recruit the Major. Reputation gains: Time penalty: -5 or -10 (Defeat the major within 1 or 2 months) Take down outpost: 5/outpost (max 35) Kill Graaf: 10 Kill Bastien: 5 Recruit Pierre: 25 (or Kill Pierre: 10) Kill/Jail Elliot: 5 Complete right hand man: 5 Kill DrKronenberg: 5 Kill Chimurenga: 5 Kill Jackhammer: 10 Kill/Recruit Beast: 5 Kill/Recruit Flay: 5 Kill Colonel: 10 Defeat Corazon: 20 You were a merc like us, Spike: 5 (Hire Len/Gus/Ivan) Your Legion could have performed better: 10 (Leadership >= 70) Proven Innocent Gathered enough evidence to clear your name. MISSABLE Similarly to one above you need to meet some criteria to get that one. Again explanation taken from Siris guide (bold ones are the one I did on my playthrough): You need to find more than 4 evidences to get this achievement. There are 6 evidences in the game: The Hermit (Rescue Ghost) Rescue Biff Refugee camp incident Major (You need to have 50 reputation to gain evidence from the Major and select correct conversation with him to get the evidence) The evidence for correspondence between Corazon and Colonel (Fort Brigand) The truth from Corazon (Ernie Fort) 10 Out Of 10 Have a Level 10 merc. Straight forward. On my 1st playtrough withj 6 mercs my highest merc was 8 lvl before final battle so I travelled across the map a little and autoresolve some battles to hit lvl 9+. On final battle I got lvl 10. During my Lone Wolf run my only merc hit 10 without any issues before final battle. Old save usage from 1st playthrough to clean missing "Diesel Power" (Solved the Diesel problem.) Achievement After my first playthrough I was missing some achievements I thought I will get. Like the one for not killing any civilian or not getting downed. There was also one quest related achievement that I tried to get but for some reason it did not pop up to me. I thought its bugged therefore I left it for later. It was Diesel Power achievement. After finishing the campaing I get back to it as I had save just before it. I quickly found out that a certain outcome has to be chosen for achievement to pop up. But to have everything in one place: Talk to Siegfried in B12 to start the Quest. You can go to Mole in B13 and give him 5000$ or fight Bonecrusher (which is needed for another achievement). You can fight him during a night in Night Club. Recover Diesel Get at least 6 out of 11 cliues: Siegfried’s notes on his table B12 Fuel tank near the mine B12 Miner diary in miner’s barrack B12 Nightclub laptop on second floor B13 Hack control in left watchtower near Landsbach dock B13 Van near Travis Use medical merc to talk with Sieg’s guard B12 Talk to male village near fighting pit in Nightclub B13 Sneak and hear Legion talk about Diesel Fuel tank in D10 Lelee in Fleatown After finding required evidence, go back to Siegfried. And here was a tricky part to get achievement. You need to conversate with him in such a way that you will have to fight both Sigfrieds guards as well as Bounce people. After killing all you can get achiv. Its hardest way to finish that quest as you need to fight quite a number of enemies. 15% playthrough to get "Psycho" (Chose a Psycho dialogue option 5 times) and "Say my name" (Did three morally bad things.) Achi There are two achievement for which I decided to do a new short, not full run: Psycho Chose a Psycho dialogue option 5 times. You need to have a merc with Psycho perk. I took Meltdown for that run. There are following options to use Psycho dialogue option (in order of appereance). I did the one in Bold as they were relatively easy and fast to get and I combined them with Say my name achievement. Bastien I1: Why not just shoot you Herman I3: Get out of here (Legion retreat) (+XP) Hyena C5: You should be afraid of us Flay B4 or C6: Why not hunt the Legion instead? Bastien E9: We’re here to check on you Lalee H9: What is the meaning of life? (+2 tiny diamond) Gran Granny K9: ♥♥♥♥ you! (+5 loyalty) Bounce B13: The good old "break and enter" Beast: No, we enjoy killing just like you do Tim D8: Open the clinic NOW (Must destroy rebels) King F19: Yes, this is an inspection or Yes. Back to your shack, maggot Colonel K16: ♥♥♥♥ you! Corazon H4: You are not talking your way out of this Say My Name Did three morally bad things. There are only 4 actions considered as "bad" things in the game: Hire Graaf as a mine foreman Kill Lurch and take his shotgun (If coffee bean's members see your actions, they will attack you) Meet Bastien in Refugee Camp and make him give you money Completed Right Hand Mand and side with Boss Blaubert What I did was to: go immediately to E9 Refugee camp to talk with Bastien (I combined it with one Psycho dialogue). go to A2 Red diamond mine to Hire Graff go to Port Cacao Docks,to kill Lurch and take Shotgun 2nd full playthrough: "Lone wolf + Time is money achievements" On my 2nd full run I decided to combine "Lone wolf" with "Time is money" achievement which might sound crazy but honestly it didin`t change much. Still you are very much limited by the money as you dont have time to claim more than 1 (maybe 2) mines on the way. So probably if you are trying to get Time is Money achievement alone you shouldn`t count on more than 3 mercs including IMP. Honestly speaking I was following combined guides described here (but on easiest difficulty): https://www.reddit.com/r/JaggedAlliance/comments/158n19z/i_did_it_solo_time_is_money_on_hardest_difficulty/ https://www.reddit.com/r/JaggedAlliance/comments/15c2mgg/mission_impossible_lone_wolf_time_is_money/ I have followed following route: I1 -> I2 (Gewehr) -> H2 -> H4 -> J8 -> H8 -> G10 (RPK) -> G11 (Winchester) -> F13 -> D17 -> D18 -> C20 -> A20 -> C20 -> D18 -> H16 -> K16 -> K9 -> H2 -> H4 Merc: Ivan with Breach and Clear and Frogleaping perks for shotgun + Silenced sniper rifle. I was using whenever I can knife kills to save ammo. Especially NATO ammo for Gewehr was quite short til midgame. I had to create it once. I had to rest around 3 times across the run. Problems to be solved across the run: With Ivan as merc - no possibility to repair items. Save scamm required on G11 entry to get Winchester rifle. Save scamm on modding weapons (a lot of failures due to low mechanical skill) required quickloading. Inventory space. You have to focus to carry only necessary items as one merc inventory is very small space. Thoughest battle: K16 Colonel Enemies with rocket launchers (RPG) The only things that changed for me during the run: I got lucky and got some extra Gewehr rifle from enemy loot so I didnt have to worry abot main issue duing such run: lack of Ivan mechanical skills - so no possiblity to repair items. I finished whole campaign on 23rd April. I finished A20 battle on 16th April. I used in fact only modded: Winchester, Gewehr G98, Shotgun + RPK once or twice on Hyenas. During that run I also did following achievements almost automatically: Pacifist Finished the campaign without killing any civilian. Bullet Proof Finished the campaign without a single merc dying or getting downed. Dynamic Duo Finished the campaign while having no more than two hired mercs at the same time. 3rd full playthrough: "Ironman" "Ironman" achievement sounds difficult but in reality I managed to do it on first attempt. However you need to realize that there are some mistakes that can lock you behind single "Save slot" without possibility to get back and if you dont get away with that you have to start over again. In that description of my Playthrough I will try to point out places where such mistakes can occur (or where I did fail) and what to focus on. SQUAD Before I started I had following plan for my final Squad: IMP Merc - I have created merc with 0 in explosives, mechanical, medicine, 85 in everything but Markmanship which was 40 at the beginning (bumped up to 65+ before leaving tutorial island). Tactical perks for close meele combat: Hand to hand + Martial Arts - honestly it was very handy during Tutorial but I almost didn`t use it later in the game so worth reconsidering. Barry - taken for explosives expertise and his great unique perk that creates two strong grenades every ingame week - those grenades saved me 2-3 times during hard moments of the run. Cheap merc. Plus he has relatively good Markmanship, Dexterity and Agility. Wolf - taken because I always like him :) and due to his mechanical skills and bond with Fox which gives both +1 AP. + relatively cheap and good Markmanship, Dexterity and Agility. Fox - taken as main squad medic and due to bond with Wolf which gives both +1 AP + relatively cheap and good Markmanship, Dexterity and Agility. Igor - taken due to his bond with Ivan, relatively cheap and good Markmanship, Dexterity and Agility. Ivan - because he is OP. However finally I did not hire Ivan because he was not available for hiring for whole run... so I took Shadow instead. Ironman Playthrough I started only with IMP merc. Cleaning first 3 sectors using knife, silent kills and hand to hand perk (ending Turn with merc standing close to living enemy triggering overwatch knife attack). This saved me some money and gave him all experience. Then I hired Barry (so that he can start generating his grenades early on playthrough) and Kalyna. I trained my IMP merc and Barry markmanship stat using Kalyna. I think I hired her for like 2 x 2 weeks as you need to watch your money during early game. In the meantime Barry created like 6-8 grenades which get usefull soon. I cleaned all sectors/quests in the initial Island before going to H4 outpost. Before entering H4 Kalyna contract ended and I hired Wolf and Fox. Such approach reduced outpost defence, got me tons of experience, additional Barrys grenades and quite a lot medicaments which are generally issue later on. I also got from underground sector three Gewehr G98 rifles which kinda make the game a breeze. Of course make silencers for each one. I had to use some grenades to clean enemies within "Herman quest" in sector I3. H4 Outpost battle was relatively easy with all those Gewehr rifles. Sneaking through minefield (Barry can act as Saper) going up killing silently guys at the back of Outpost and triggering turn based combat by silently killing guy with Rocket launcher. My squad was waiting for enemies on the stairs close to Rocketman. I used additional Barrys grenades to deal with Pierre and his bodyguard. My next objective was to take ASAP some mines so that finally I will generate money instead of spending them. At this moment I was so short of money that I had to prolong some contracts only for a week instead of 14 days. At the begining you want to take 3 mines ASAP to make enough money to pay your mercs, hire additional ones and pay for militia training etc. (Finally I took five out of seven mines (A2, B12, C7, D18, I18) as they dont require going through any additional questlines). In each mine I trained militia. I also took over as many outposts as possible to reduce number of attacks on mines and therefore make it possibile to acumulate money. During that time I made first mistake triggering Smiley quest fight in sector H8 while having not the best squad gahtered inside the church. They overwhelmed me and I had to restart fight several times. Finally I took them off using combination of Barrys granades, shotguns and Gewehr shots but it was harder than I expected. At this stage (while having two mines) I hired MD merc with teacher trait to use him as militia trainer. A little bit later when money allowed I hired Igor. I played with such 5 merc squad til I got to D17 sector and was ready to go for A20 battle. When I control the map (mines and outposts) I placed my MD in G10 outpost. He was staying there training militia and constantly repealling enemies attacks on that sector (there are only two sectors that are attacked if you control all outposts G10 and D17) My main Squad was staing for quite long time in sector D17. Staying there longer allowed me to: Acumulate enough money before going to A20 battle so that I can affort my full squad til end of game without taking back all mines from Army. This is IMPORTANT NOTE: do not trigger second phase of a game without having enough money. I spent aroud 100k USD between going to A20 and finishing the game but to be on safe side I stayed in D17 til I have 300k USD. Acumulate enough money to hire last merc - I tool legendary Shadow. Got tons of experience from Autoresolved attacks (just dont use weapons as you might get out of ammo). When I had around 300k USD I actually make a second mistake. I wanted to move my MD merc to another sector and I didn`t realize that his way was through Refugee camp. When he entered that sector I coudnt retret, I had to enter it got killed and second phase of game was triggered. After triggering next phase I was forced to move to A20 battle with my squad. Of course I did in through the same path as for Lone wolf achiv so: C20, sneak to underground grotto, elevator to B20 -> A20 A20 battle was not that hard as I thought. I killed around 4-5 enemies silently using sniper rifles. Then I triggered turn based battle while all my mercs were stacked together at the bottom of the mountain with president. All enemies were coming, combination of grenades, shotgun and sniper rifles did a trick. Next point was to get to K16. I strongly suggest to go the same way back to D17: A20 -> B20 -> C20 -> D18 -> D17. Them go to H16 and take underground tunnel to K16. Its important as it will let you get inside the building and close to Colonel. Go upstairs silently and kill Colonel. Clean up enemies coming. It will take some time.Dont hurry not to get overwhelmed. Go to K9. Take a boat to H2. Clean H2, H3. Goto H4. Here I made third mistake that was almost fatal... while on the ground I went with Barry only to clean minefield. All other mercs stayed above minefield. And someone spotted Barry triggering combat. That was very unfortunate. I put barry under the ladder so that enemies co H4 underground was a easy as pie. General hints for Ironman run Keep your eye on money - you wont be able to reload previous save Keep all your mercs together just in case you accidentaly trigger combat and update the "Save" Have always some grenades/explosives to "save the day" in case things go messy. Whenever you can keep your mercs close to extraction zone - you can always Retreat Be caruful with triggering second phase of story - its kinda "point of no return" Take perks/weapon mods that allow you to make more attacks (less AP, first fully precise shot, etc) or more damage. Be carefull with Hyenas whey have tons of AP and hits hard. In the same time they are weak so kill them first.

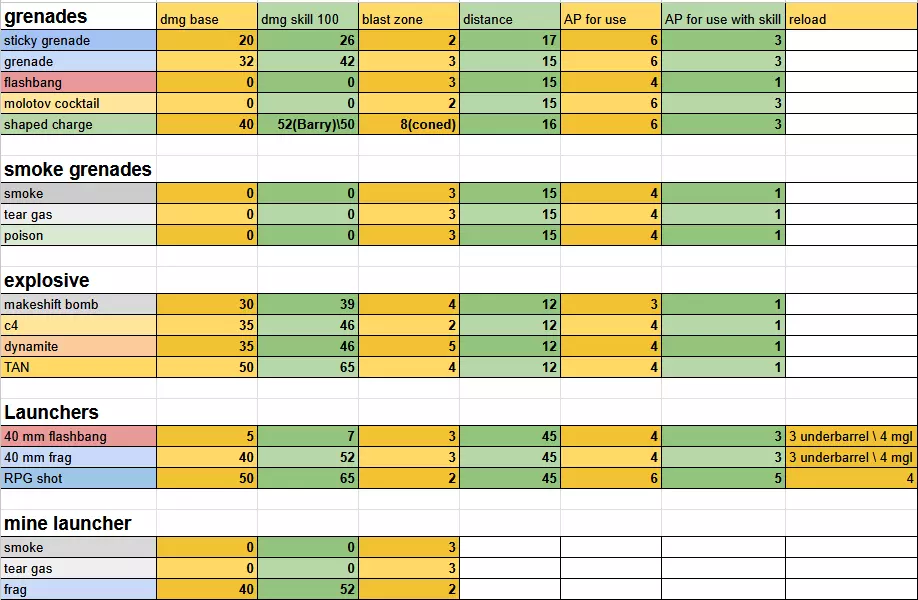


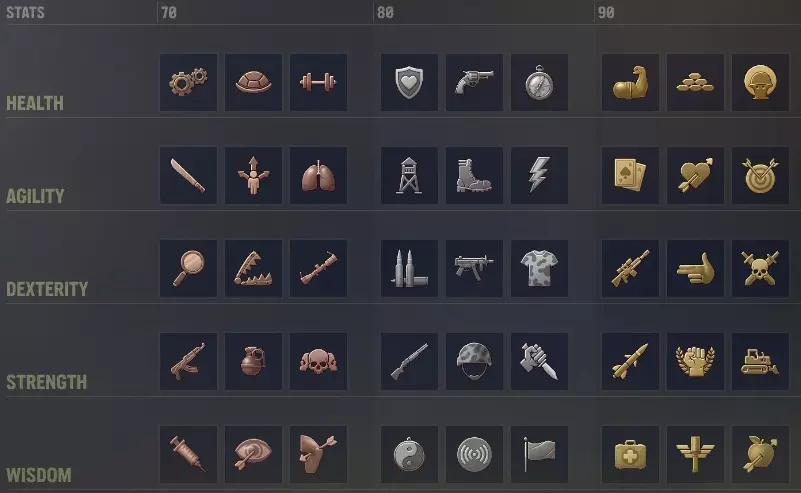


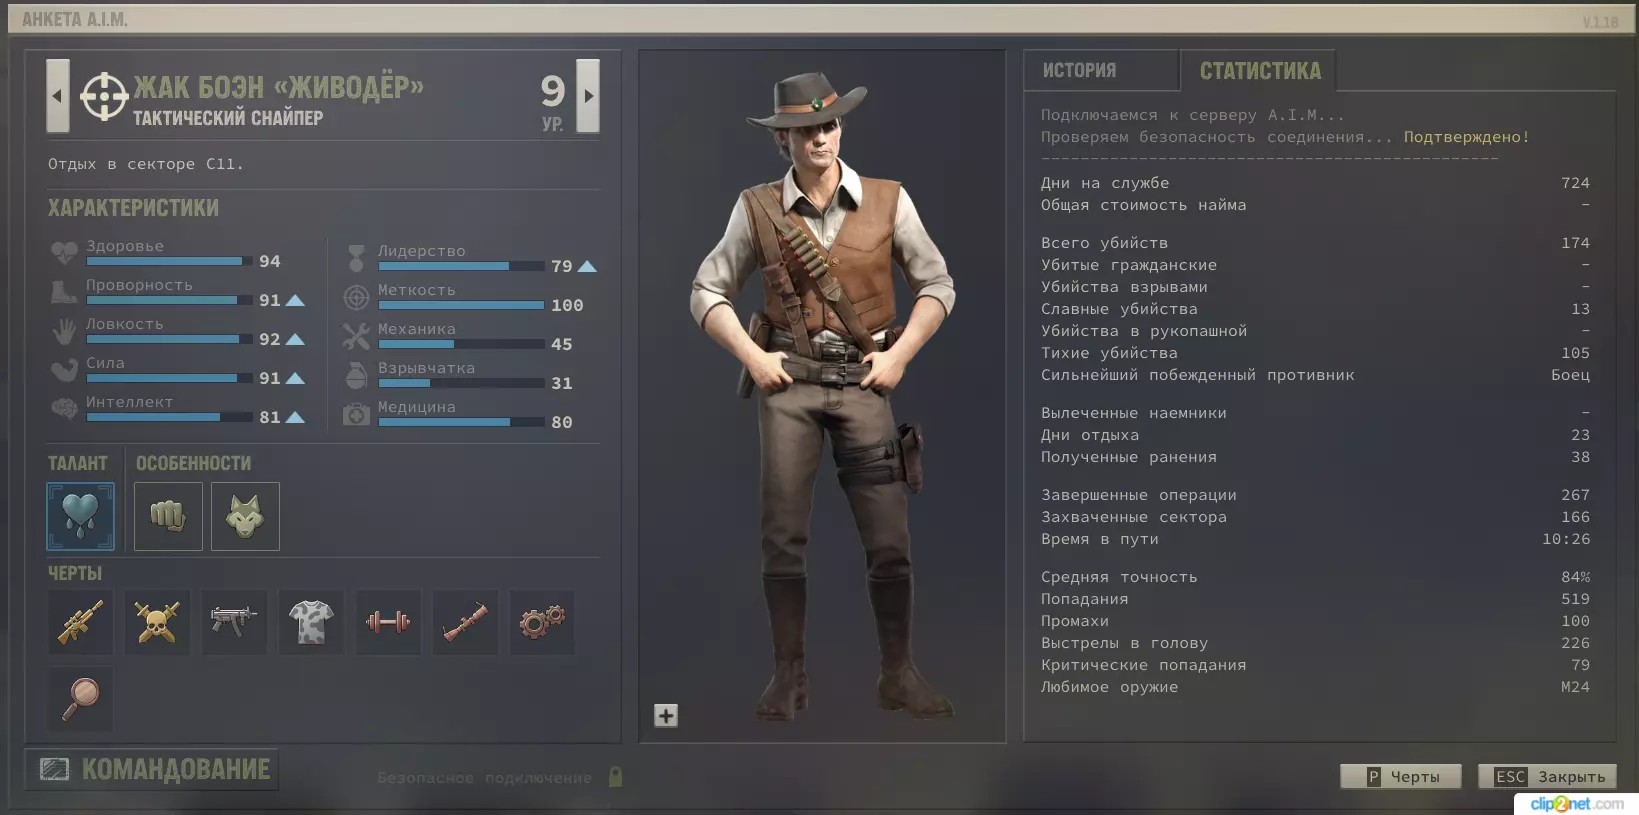

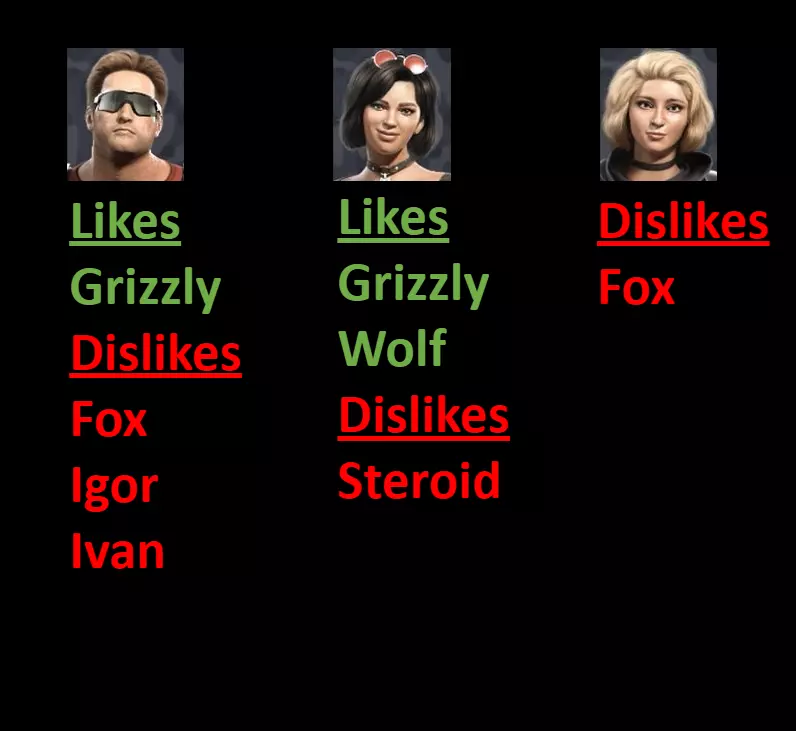

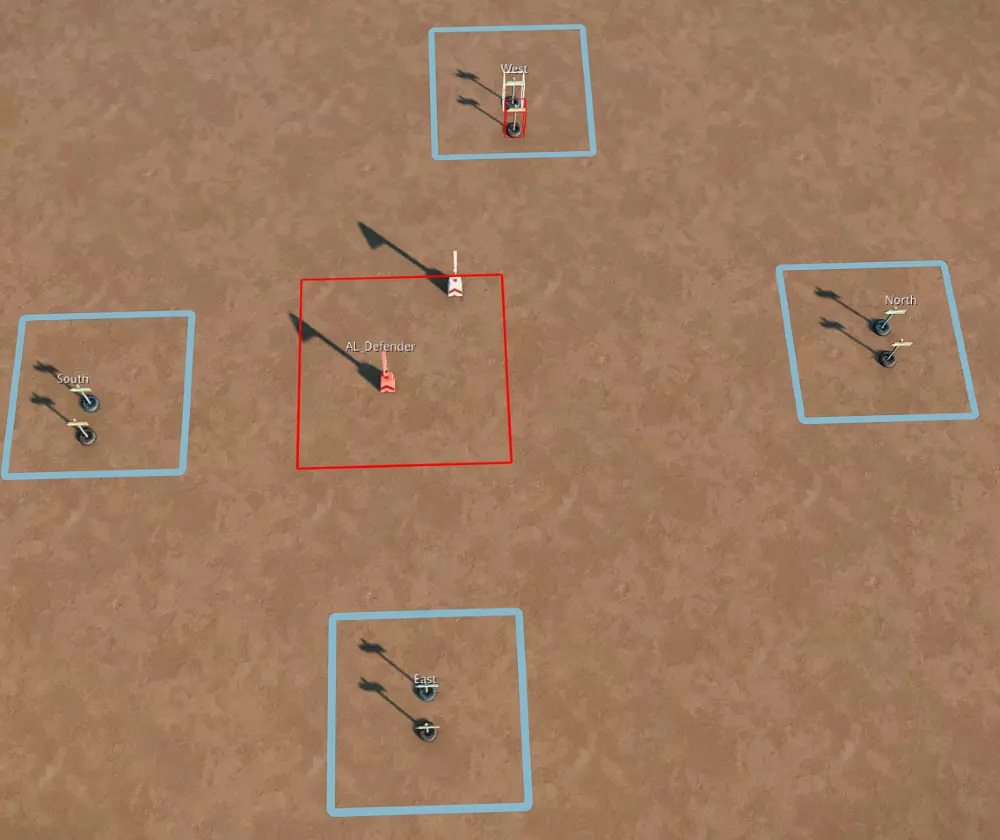
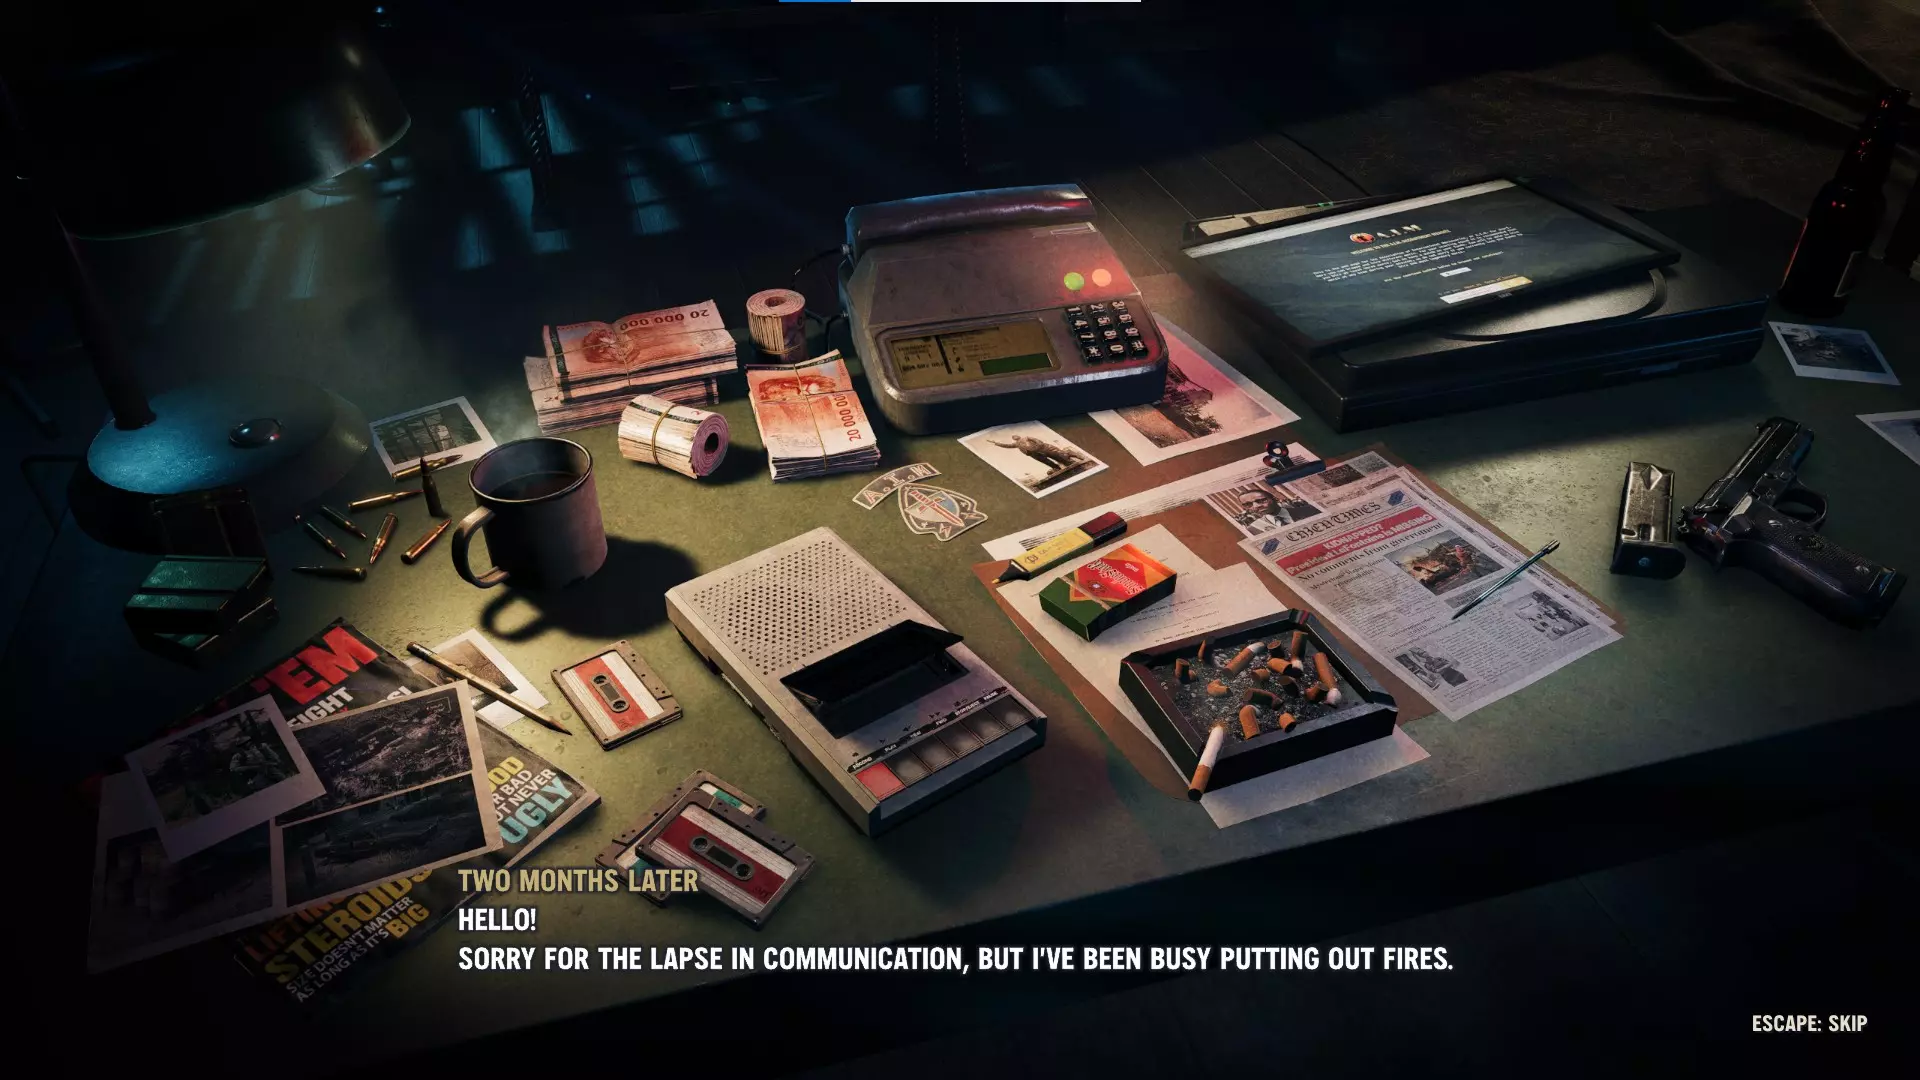
Генерация главного героя, лучшие наемники и оптимальные перки, плюсы и минусы оружия, как быстро прокачать характеристики. Вступление Проще всего играть через стелс, даже днем. Пока наемник в стелсе - его хуже видно, то есть вражеские снайперы представляют меньшую угрозу. При этом выстрел из стелса имеет шанс сразу убить врага, даже если наносит минимум вреда. Спрятаться можно в любом месте, даже в чистом поле, одним нажатием клавиши; главное - чтобы никто из врагов в этот момент не видел наемника. Поэтому, если кнопка стелса недоступна - надо отвести бойца на несколько шагов назад или спрятать за стеной, и спрятать уже там. AI на огонь из стелса отвечает по двум основным алгоритмам. Снайперы - продолжают прятаться на своих позициях, все остальные - прут вперед и пытаются найти стрелков. Поэтому свои позиции хорошо прикрыть пулеметчиком. В идеале - положить его так, чтобы он не был виден вражеским снайперам (закрыт стеной или камнями), но набегающие враги попадали бы под огонь до того, как спалят наших стрелков. Еще один действенный вариант - стрелять по засвету. Посылаем вперед самого хорошего стелсера, который сам не будет стрелять - только помечать врагов, а остальная команда будет стрелять по координатам. Это снизит эффективность огня, но повысит выживаемость отряда. Характеристики и как их качать Здоровье - хитпоинты. Проворность (agility) - отвечает за количество экшен-поинтов и эффективность стелса. Ловкость (dexterity) - дает бонусы к меткости, лечению, починке предметов и обезвреживанию мин. Сила - увеличивает объем инвентаря и урон в ближнем бою. Интеллект - увеличивает скорость обучения (для учеников). Лидерство - увеличивает скорость обучения (для учителей). Меткость - точность при стрельбе из огнестрельного оружия. Механика - починка предметов, модификация оружия, взлом замков, обезвреживание ловушек (электрошок, сигнализация). Саперное дело - обезвреживание мин-ловушек, создание предметов (гранаты, патроны). Влияет на наносимый взрычаткой урон. Медицина - лечение ран. В квестах эти параметры иногда чекаются. Например, квест с расследованием убийства в секторе L18 требует 80+ медицины, чтобы правильно установить причину смерти. Еще в диалогах проверяется наличие у героев перков "переговорщик", "тертый калач" (scoundrel) и "психопат". Иногда они позволяют сэкономить, иногда - получить дополнительную награду, а иногда без них вообще нельзя завершить квест. Поэтому в активной партии должен быть как минимум один "переговорщик", один "калач" и один "психопат". Если их будет больше одного - игра рандомно выбирает, кто именно из них будет говорить с неписем. Результат в любом случае одинаковый. ВАЖНО: если непись не открывает отдальное окно диалога, т.е. его фразы выводятся над ним на тактической карте - с ним нужно говорить конкретно тем наемником, который обладает необходимым перком. Качаются навыки тремя способами: 1. практика. Если наемника ранят - качается его здоровье. Лечат - у медика качается "медицина". Он кого-то бьет в ближнем бою - качается сила. Ну и так далее. Сложней всего качать интеллект. Он повышается, когда наемник находит на локации лечебные травы, но за всю игру он так вырастет на пару-тройку пунктов. Обнаружение (и обезвреживание) ловушек приносит гораздо больше, поэтому саперы будут самыми мудрыми в команде. 2. Журналы. Они сразу дают +1 к определенной характеристике. Для каждой характеристики есть свой тематический журнал. Найти их можно в сундуках на локациях, их дают в награду за квесты, плюс их можно купить во Флитауне. В секторах H8 и H9 есть лотки, где за $1000 раз в сутки можно купить рандомный журнал. 3. Обучение, т.е. когда один наемник учит другого. Обучать можно чему угодно, кроме интеллекта. Скорость обучения зависит от трех факторов: 1) лидерство учителя, 2) интеллект обучаемого, 3) разница в характеристике между ними. Если у учителя есть базовый перк "обучение" - процесс пойдет быстрее. ВАЖНО: от количества обучаемых скорость обучения не зависит! Поэтому учить лучше всю банду сразу. Какое оружие выбрать Снайперки - лучшая категория оружия в игре. Дальнобойное, точное (с максимальным прицеливанием даже наемник с плохой меткостью (60) имеет хорошие шансы попасть в голову). Мощное - хедшот как правило убивает наповал, и броня не спасает (а если спасает - нужно посадить партийного сапера сделать пару ящиков бронебойных патронов). И главное - на винтовки можно накрутить глушитель. Партия, вооруженная винтовками с глушителем, может зачистить всю карту, вообще ни разу не подняв шухер. Базовые Gewehr 98 в большом количестве будут падать с самого начала игры. В секторе H3 есть целая яма с ними, правда, в плохом состоянии - придется посадить партийного механика за ремонт. На смену Геверам придут Драгуновы - их можно в неограниченном количестве покупать в секторе C5 в лагере браконьеров (2000 за штуку, обновление магазина в полночь. Сюда же можно приносить "сумки с франками" - их тут меняют на древние маски. Маски можно продавать или отдать в музей Порт-Какао (L8). Драгуновы можно поменять на Winchester 1894, но это по вкусу - дистанция у "Винчестеров" ниже. Еще есть M24, но они тормозят наемников (лишают "свободного перемещения" в начале раунда), так что тоже выбор на любителя. Однозначный апгрейд - это PSG1, но они попадаются лишь ближе к финалу. Автоматы - мусор. Высокая стоимость стрельбы, низкий урон, плохая кучность. Дробовики - тоже по большей части мусор. Исключения два: 1) если нужно встать в овервотч и отстреливать набегающих гиен. 2) Враги стоят кучкой и хочется навесить на них дебафф Supressed. Хотя в таких случаях проще закидать их гранатами или разложить пулемет. Пулеметы отличаются высокой скоростью стрельбы, хорошей кучностью и читерской механикой: если боец лег и разложил пулемет - у него автоматически есть overwatch на конус перед собой. То есть если враг двинется или попробует выстрелить - в него немедленно прилетит длинная очередь. Причем триггернуть этот овервотч можно хоть десять раз за раунд. В итоге если враги лежат кучкой - можно подбежать пулеметчиком, лечь перед ними и во время своего хода враги сами убьются о наш пулемет. Недостатка у пулеметов три: 1) большой расход боеприпасов 2) они тяжелые и потому замедляют наемника 3) небольшой урон в пересчете на пулю. Базовый MG42 - довольно плохая пушка и скорее всего разочарует. Но прежде чем списывать эту категорию оружия со счетов - дождитесь HK21, полностью его модифицируйте и вручите Вики Уотерс. Это просто ураган. Халявный HK21 можно забрать в B13 - он лежит в ящике посреди улицы (пара штук мне попадались раньше, но я напрочь забыл, где). Ножи. Самое мощное оружие для ближней и средней дистанции, но требует соответствующей подготовки: высокой силы (чтобы больно бить), ловкости (чтобы попадать) и проворности (чтобы добегать). Штурмовик с ножом постоянно использует "свободное перемещение": вначале чтобы добежать до врага, потом - чтобы бегать от противника к противнику. Поэтому он не может носить тяжелое оружие (пулемет или М24; "Драгунов" можно) или пользоваться тяжелой броней. Так что ему часто придется танковать хитпоинтами. Поэтому штурмовику нужно высокое базовое здоровье и перки, дающие "Силу воли" (Grit): "полный контакт" и "авангард". Поскольку он все равно будет получать ранения, хорошо зайдет "ярость", дающая +10% урона за каждую рану. Честно говоря, я своего ножевика даже не лечу - буфер "силы воли" его хорошо прикрывает, а раны лишь усиливают эффективность. Из общих перков еще важны "наскок-отход" (бесплатное перемещение после ножевой атаки), "серия убийств" (повышение урона при переключении целей) и "сосредоточение" (лишние ОД не бывают лишними). Еще важна "внезапная атака" - многие вражеские штурмовики имеют перк "ответный огонь", когда в ответ на полученный урон они стреляют (и попадают). "Внезапная атака" этот вражеский перк нейтрализует. Также очень хорошо, если у ножевика будет перк "Рукопашный бой" - по сути это постоянный ножевой овервотч на соседние клетки. В общем, ножевик требует целевой подготовки, зато такой боец может вырезать двух-четырех солдат каждый ход. Для ножевика идеальное оружие - это базовый нож. Его можно заточить при помощи специального точильного камня, который попадается крайне редко - мне за всю игру встретилось лишь две штуки. Один - в шахтах C7, и еще один - в городке F13. Гранатомет, РПГ, миномет - штуки довольно слабые, потому что радиус поражения небольшой, и даже прямое попадание не всегда убивает врага. Зато при помощи РПГ очень удобно ломать стены, что позволяет обойти некоторые крепко запертые двери. Сбор команды - основная шестерка Главный герой - ножевик, снайпер, "переговорщик". Перки: рукопашный бой, обучение. Статы: здоровье, проворность, ловкость, сила, интеллект, меткость - по 85, лидерство - 35, остальное - поровну. В напарники берем: Фаза (Livewire) - "тертый калач", механик, медик, потенциально снайпер. Ее уникальный перк подсвечивает ВСЕХ врагов на карте, если у команды есть разведданные на этот сектор. Также у нее есть устройство, которое позволяет находить и хакать объекты на уровнях, получая разведданные или деньги, так что она по сути сама за себя платит. Также она имеет высокую мудрость, поэтому будет быстро качаться и сразу может идти в нижнюю ветку общих перков: "отвлекающий выстрел", "предупреждающий выстрел", "пример бойцам" и "шок и трепет". Это позволит прокачать команде мораль (что дает больше ОД на ход). Либо ее можно прокачать в снайперы/стелсеры: "снайпер", "засада", "ответный огонь", "меткий стрелок". Барри Ангер - подрывник и снайпер. Сам по себе генерирует самые мощные гранаты в игре, больше ничем (кроме низкой зарплаты) не примечателен, но на раннем этапе очень полезен. Лиска (Fox) - "тертый калач", медик, снайпер и стелсер. Ее уникальный перк позволяет при атаке из стелса сделать дополнительный выстрел до того, как враги что-то поймут. Т.е. она в одиночку может снять сразу двоих часовых, что позволит сломать существенную часть энкаунтеров. Байкер Гвоздь (Nails) - "психопат", сапер, механик, милишник, снайпер. У него приятный уникальный перк, увеличивающий урон после первого убийства, и он уже взял несколько перков для ближнего боя. Ему остается прокачать проворность, чтобы взять "наскок-отход", и потом "полный контакт". Он не будет настолько же хорош, как ГГ, но в целом составит хорошую компанию. Вики Уотерс - механик, пулеметчик, снайпер. Ее уникальная черта - если она стреляет из оружия, которое полностью модифицировано (в каждом слоте стоит кастомная деталь), то каждая пуля наносит +7 урона, что делает ее идеальным пулеметчиком. Также она в пассивном режиме чинит надетое снаряжение, поэтому когда гуляешь по карте или тренируешь ополчение - нужно дать ей чужую экипировку, чтобы она ее бесплатно подлатала. Еще у Вики уникальная отмычка, которую можно ремонтировать. Поскольку закрытых дверей и сундуков много, она пригодится. Если уволить Барри, можно взять себе Мышь (Mouse) - ее уникальная абилка позволяет ей игнорировать вражеский overwatch, что делает из нее идеального штурмовика для тех редких случаев, когда враг ведет себя умно и кемперит вход в помещение вместо того, чтобы ломиться наружу. Поскольку это происходит редко - я все же выношу ее в опциональные герои. Краткий ход компании Создаем героя, нанимаем Фазу и Барри на две недели. Отбиваем I2, H2, H3. Находим три Gewehr, возвращаемся в Эрни. Нанимаем Лиску на две недели. ГГ и Барри тренируют ополчение, Фаза чинит снайперки, накручивает на них глушители и оптические прицелы (линзы можно найти в H3). Приходит рейд Легиона. Убиваем, дожидаемся прилета Лиски, отбиваем H4. На обратном пути заходим в I3 по квесту (спасти муженька). Возвращаемся в Эрни. Тренируем ополчение, чиним снаряжение, глядим на тающий счет. Найденные сумки с алмазами НЕ ОБНАЛИЧИВАЕМ - они пригодятся позже. ГГ может читать журналы, если они по его профилю (меткость, ловкость, проворность, здоровье, интеллект) Остальные журналы пока коллекционируем Делаем рейд на B2, забираем шахту А2. А2 надо брать ночью и по стелсу, потому что если пошуметь - то бандиты начнут убивать шахтеров, уменьшая наши будущие доходы. Тренируем ополчение, чиним предметы, нанимаем Гвоздя (Nails) с прибытием в B2 Захватываем F5 как перевалочный пункт, потом освобождаем Флитаун (H7-H9). Не пытайтесь найти Смайли в H8 - у команды сейчас не хватит лидерства, чтобы все закончилось хорошо. В Н9 меняем алмазы на лутбоксы, пока не получим дозу "Метавирона". С ней идем в F7, отбиваем форт и даем Ларри дозу "Метавирона". Нанимаем Вики Уотерс, и, если хватает денег - Рона "Рейдер" Хиггенса. Если денег не хватает - отбиваем Порт Какао. Если вы хотите поменять Барри на Мышь или кого-нибудь еще - сейчас самое время, потому что дальше команда будет по сути сформирована. Итак, веселой гурьбой садимся и едем в G10. Это важная перевалочная база, через которую идут почти все атаки Легиона, поэтому здесь можно сидеть долго без вреда для кампании в целом. Что мы и будем делать, потому что начинается время тренировок. Вначале Рон должен обучить всех присутствующих (включая Ларри) лидерству. Чем больше - тем лучше, но 60 хватит для большинства квестов. После этого роль учителя переходит к ГГ: он учит остальных меткости, силе, проворности (особенно Нейлза) и всему остальному, что необходимо и что он сам уже прокачал. Рон и Ларри при этом не присутствуют - это персонажи поддержки, их роль - бегать по карте и тренировать ополчение там, где его выбили. Если хотите оптимизировать процесс - можно оставить Рона и Ларри в G10 и окрестностях, а основную банду двинуть в Пантагрюэль, а потом - в лагерь браконьеров С5, чтобы в перерывах между тренировками купить всем Драгуновых. В любом случае, в этой фазе игры вы совершенно спокойно можете позволить себе долгие тренировки, а по окончании у вас будет команда натуральных терминаторов. Правда, их зарплаты тоже вырастут, но с учетом количества работающих шахт, ничего криминального в этом нет. А когда шахты начнут иссякать - у вас уже будет гигантская денежная подушка, которой хватит до конца игры. Плюс в шаговой доступности есть еще несколько шахт: захватываем Шале-де-ля-Пе, оттуда по воде до D17 и I18. Плюс можно снести форты на E16, F19 и H24, практически остановив прессинг Легиона. После этого уже можно спокойно изучать карту и делать побочку (ну, или по-быстрому завершить игру). Правда, не стоит слишком развиваться на восток до того, как вы спасете Биффа в A8. Дело в том, что это триггерит мощный прессинг со стороны врага: отдельная армия двинется на каждый ваш захваченный объект. Перехватить их все не получится, и ополчение на автопилоте тоже не справится, поэтому готовьтесь к тому, что завоеванное придется отбивать по второму кругу. Но после первоначального раша прессинг со стороны врага ослабеет почти до нуля. Завершение Если гайд был полезен - подписывайтесь на мой канал, https://www.youtube.com/@NimRed . Там регулярно выходят свежие обзоры и гайды.