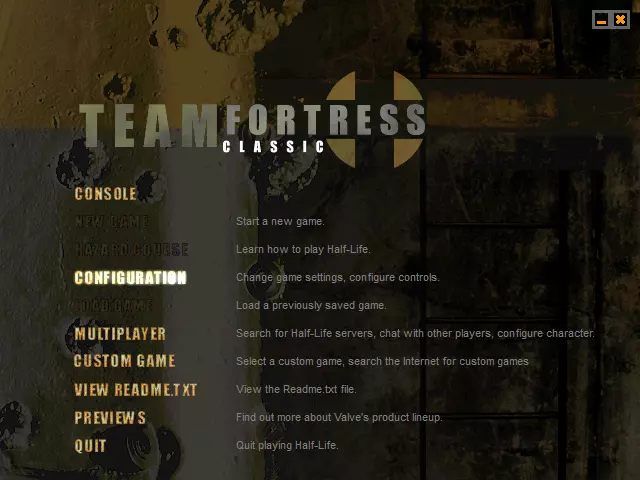
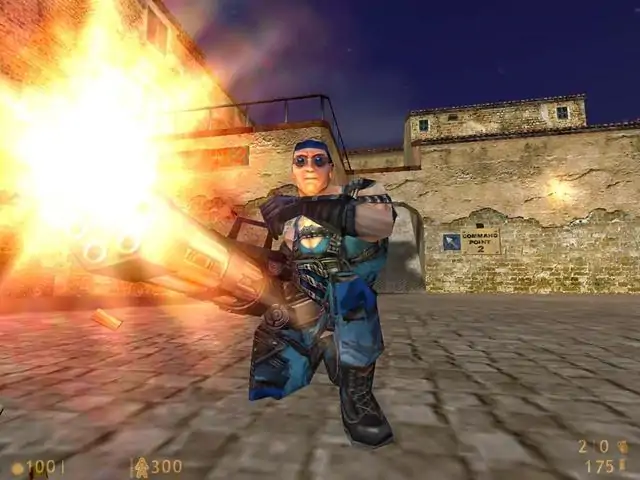
Team Fortress Classic


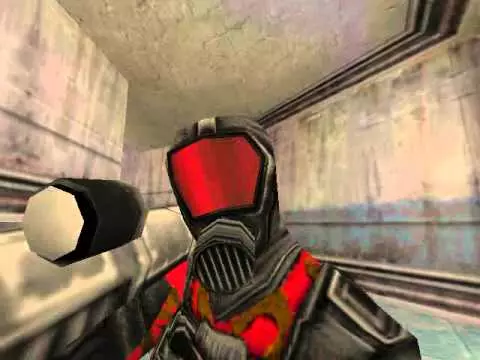
This is a guide I wrote back in 2002. It likely has some errors and other odd stuff. I hung on to this for whenever I got nostalgic of the TFC days and my time in the Radioactive Zombie Posse. I don't see why i should hoard it. Enjoy. Part 1 GUIDE TO THE ENGINEER " The enemy group attacked him, a soldier, a medic, and a pyro. They sneered as they started firing, thinking he was an easy kill. The Engineer took cover and calmly primed his EMP, and threw it at them. They're eyes widened in perfect synchronization and soon after showered the engineer's body along with their blood and gibs." Welcome to the world of an engineer. Before I'll even try to tell you anything about how to rock the servers, you need to know what you're working with, so here are the engineer's basic stats: Speed: Medium Max Health: 80 Max Armor: 50 units of medium armor Weapons: Spanner: This is what you use to build/upgrade/repair sentry guns and repair a teamates armor. Or you can use it to humiliate someone by bashing their brains out. In combat this is your last resort weapon, hope to god you dont have to resort to using this. Damage is patheic. Railgun: Pistol that fires electromagneticly propelled yada yada yada. The projectile does low damage and is slow, however its the only gun that is laser accurate other than the sniper/auto rifle and it can knock back a foe a couple of feet. Even a HWguy. Use this gun when you want to weaken slower classes coming at your base when they are out of range of your shotgun, this gun is also a good sentry killer. This gun can also be lethal to any class in certain situations, like on a narrow platform over a pit or an area near a pit, such as the underground in rock2 (knockback, remember?). Nothing is more satisfing than knocking an enemy off a platform and laugh as you watch them fall to their death. The knockback can be usefull in other situations as well. Damage is low. Double-Barrel Shotgun: Your bread and butter weapon. This gun has a good punch and a decent effective range. You'll want to be using this most of the time as it can drop any medium class with 2 or 3 good close-range blasts. If you use this gun at long range, you wont be able to even kill a scout before a sniper nails you. Use at close range for best damage. Damage is Pathetic to high, depending on range. Grenades: Frag: General purpose frag grenade. Use these against anyone except a pyro, demoman, soldier, or HWguy. If you can't get a good shot at a sentry gun toss two of these and watch the Sg go boom. These grenades can gib you with a single blast so watch where you toss them so they won't bounce back and surprise you. Damage is very high. EMP grenade: This is what makes an engineer so deadly. This little bastard can drop an entire enemy squad in a heartbeat. To master the use of this nade will take a while, but once you do, you will be hell incarnate. The way an EMP works is not too complicated, when someone gets hit with an EMP blast, the server evaluates how much ammo/cells/rockets/pipes etc etc and adds it up. Then it does the damage to the person that got hit by it. This is why scouts can walk though EMP blasts and a pyro will explode in a mushroom cloud. The server also adds the damage to everyone inside the radius of the blast. That means that the entire group can be made of scouts, but if theres a pyro in the group, its gib city. Knowing this, you should ONLY use these nades on heavy classes or classes that carry a lot of explosive ammo, which would be pyros, demomen, HWguys, and soldiers. If a group is coming at you, toss one of these at one of those classes and savor the moment your tripple/quadrupple EMP kill shows up in the top right. Damage is low to insta-gib depending on class and how much ammo he's carrying, and who or what he is near. Sentry gun: Your Engineer's pride and joy. This is an automatic turret that fires on the enemy. SGs have 3 levels. At level one, is has a basic machine gun that can take down light classes but not much else. At level 2, it has a minigun that can quickly kill any class. At level 3, it has 2 miniguns and a rocket launcher, give a whole new meaning to overkill. A sentry gun requires 130 metal to build/upgrade a SG. Damage is medium for level 1, extreme for level 2, incredible for level 3. Dispenser: Meant to be used as a resupply away from base, but nobody ever really uses/needs it. So engineers have made up more usefull things to do with this, which I will tell you about later in this guide. It costs 100 metal to build a dispenser. Sentry gun tactics And you thought that all you had to do was to just plop it down somewhere and leave it. There is a lot more to it than that. You have to pick a good sentry spot or your sentry wont be as efficent as it could be, its also will be able to be destroyed/evaded more easily. The first thing you must know about picking sentry gun spots is that it has to be as spam-proof as possible, that is that it has to be hard for enemies to destroy it by spamming it with grenades. An elevated platform or stacked boxes are good examples, the SG is somewhat safe from spam because the grenade will rather bounce harmlessly away or fall off. A high platform or a cliff is perfect. A good SG spot must also have clear fields of fire, so enemies can't jump between cover to get a better shot at your sentry. Ok, now that that you found a heavenly SG spot, you should know that it is still easily destroyed. If an enemy knows where it is then you'll have a hell of a time keepin your SG(and yourself) in one piece. So how does one get around this problem? Build it in a different spot, and I dont mean everytime it gets destroyed. Det your sentry and rebuild it every time it kills a few people. This will keep the enemy guessing where your SG is. Lets say that im in a game of 2fort and I built a SG, Mr. Medic comes running in and gets blasted by the sentry. Just leaving it there is stupid because Mr.Medic now knows that an SG is there and will just nade it when he comes back. So, before Mr. Medic comes back, I quickly det my SG and rebuild it in another spot, preferably around a corner. You dont have to rush to get it to level 3, at level 2 it can drop any class other than a HW guy like cake. Now Mr. Medic comes back and spams the hell out of the spot that your sentry used to be in and gets dissapointed when he dosent see a SG kill in his top right, so he continues to the flag and gets blasted by the new SG right around the corner. You dont have to det the SG every time it kills someone(but is never a bad idea), in large games, I wait untill it kills around 3 or 4 people, in smaller games, no more than 2. Dispenser Tactics So many things to do with this little gem. I'll start with the most usefull aspect of a dispenser, a giant pipebomb. A dispenser, fully stocked, has the gibbing power of a detpack. I love to put this at the top of the elevator shaft in 2fort to catch conc-jumping medics. To be able to use this feature, you have to bind a key to det your dispenser. The console command to bind a key to det your dispenser is "bind X detdispenser" excluding quotes. X is the button that you want to use to det your dispenser. Now that you can det it, lets put it to use. When you first build a dispenser, it cant kill a scout when you det it. You have to wait for around 2-3 minuites before it can gib a HW guy. Why? Your dispenser has to fill itself with a ton of ammo before it can do any real damage. You can speed the process by grabbing ammo from the resupply and whacking your dispenser with your spanner a few times. Now that your dispenser is full, all you have to do is lure an enemy near it or you can build it in an area with a lot of traffic, like the ramp room. Another good use is a perimeter alarm. When an enemy touches your dispenser, it will say across the top of your screen: "Enemies are using your dispsener!" This means that an enemy has passed your dispenser or is hanging around it. if you put this at the bottom of the water spiral in 2fort, then you have a great way of knowing if the enemy is coming from the water. Also, spies cant fool dispensers. If a teammate is touching your dispenser and it tells you that enemies Part 2 enemies are using your dispenser, its not a teammate. You know what to do from there. There are many other things you can do with the dispenser, use your imagination and you can do some very useful(or humorous) things with it. EMP Tactics What engineers lack in armor and health, they make up for by having the most powerful grenade in TFC. To be able to use every ounce of that power, you need to know how to use it, when to use it, and where to use it. Most engineers just use the EMP when they see a group of enemies or a heavy like a pyro, HW, etc. What engineers forget about the EMP is that the blast can go through walls, floors, and ceilings. For example, in 2fort, we have some uber-elite sniper thats kicking the crap out of the offense. Go underwater and get under their battlements and listen for rifle fire, then throw an EMP at the ceiling in the direction you heard the rifle shot. Mmmmmm.... Sniper gibs.... *drools*. An enemy sentry gun on the second floor giving your team hell? Simply dealt with. Throw EMPs at the 1st floor ceiling and the SG will go boom. Just keep in mind, just because the enemy youre fighting just went out of sight, does not mean thats he's safe from your EMP. Be creative! I made enough people say "WTF?! HOW DID YOU KILL ME!?" As you already know, the more ammo an enemy carries, the more effective an EMP will be to him. However, an EMP will even det any ammo bags around the area of the explosion, adding even more damage. Its also a good safeguard if you have to use an EMP on a light class, as the explosion will be good enough to kill or severly injure the enemy. Dont throw more than 2 or 3 bags because there is a limit on how many bags can lie around from an engineer. The first 2 bags give the most power to the explosion, after the 3rd bag it dosent help the explosion much at all. Throw a bag or two in a high traffic area or an area you know the enemy will pass through. When an enemy comes near the bag, throw an EMP at it and watch his guts spray the wall. Enviormental Awareness No, this is not about hugging trees. Some people are completely seperated from whats going on around them. To be a good engineer(or any class for that matter), you must know what is happening around you at all times. This can mean the difference between owning and being owned. Unfortunately, this is not something that can be just "taught" to you. Its something that you develop overtime by playing and learning. I'll try to get you started anyway. The first thing you should know is the map you are playing in. If you like playing 2fort, make a dummy server and study every nook and cranny in that map. Count how long it takes for every class to get from point A to point B in that level. For example: It takes around X seconds for a medic to go from the bottom of the basement ramp to the 2nd floor. Knowing things like this will improve your game tremedously. Listen for footsteps if the server has them enabled, be ready to throw nades at an area you hear footsteps from. If the server has footsteps disabled, listen for noises like bags bein picked up, jumping, shooting, and things like that(all of this helps when detting your dispenser on someone). Fighting Strength-wise, you are nothing more than a slower scout with better weapons. To get to the top of the scoreboard, and stay there, you must be sneaky. You can do a ton of damage, but all you have is 80 health and 50 armor, so you cant take much damage. You would be wise to fight using flanking maneuvers, where the enemy is focused on the main defenses so you can bring the power of your EMP to bear. Fighting a SCOUT: Scouts will run most of the time, just throw a grenade where you think he wants to go and blast him with your shotgun. If the scout is crazy enough to fight you, dont underestimate him, his single barrel shotgun can kill you quickly if he has a good aim. Try to bring the fight into a small area. That way the scout wont have as much room to move and can be easily killed with your double barrel shotgun. Fighting a SNIPER: If you are so bored on defense that you want to do a little offense you must be careful of snipers. The faster way would be to use the regular way to the enemy base. If you see a sniper at long range, start shooting at him with your railgun while closing the distance, switching to shotgun when you get closer. When you get close to him, throw a frag at his nest. If the fight is on level ground, be careful of his autorifle, he WILL kill you if you get sloppy. Try to stay behind cover and pop out when he least expects it, and never come out of cover the same way you came in. He'll have a charged sniper dot ready for you, more skilled ones will throw a grenade at you. If you cant find another way out, run out and hope he misses, then blow his brains out with the shotgun. Fighting a SOLDIER: These guys are the hardest to fight as they are somewhat mobile and all it takes to kill you is a single rocket. Stay as far away as you can and throw EMPs at him along with shotgun fire. If they do get close to you, throw EMPs, shoot him with your shotgun, and jump around like you never jumped before. Try to stay unpredictable, if a soldier can predict you then you're already dead. Also, try to be at an elevated position, I seem to have an easier time that way. If you're about to die, give him a good ol' EMP hug( prime an EMP and get very close to him without letting go of the EMP). You'll die, but he will rather die with you, or be severely injured. Making him easy pickings for the rest of the players on defense. Fighting a DEMOMAN: They're not that dangerous because you can quickly kill them with a well placed EMP and a shotgun blast or two, but be careful of his pipebombs because they will kill you if not severely injure you. If he's skilled, he'll launch a pipe in your face and blow it. Fight him as you would fight a soldier. Fighting a MEDIC: These guys are a royal pain in the a--. They're fast, can hit hard, and to top it off they can infect you and run off. Keep as much distance from the medic as you can while trying to slow him down. I prefer to fight medics in an area just outside of my SG's coverage area. Even if he's good, he has to blow your SG to continue the fight. When he's trying to get the Xhairs of his nailgun on your sg, nade him. dont use EMP's on medics because most of them discard, making your EMP's useless. Fighting a HWGUY: These guys are very easy to kill if you know what you are doing. They're very slow and they are practicaly imobile when they are firing their AC. All you have to do is take cover from the AC fire and toss an EMP at him, a well placed EMP will weaken him tremedously. making him a prime target for a follow up frag nade. Also, dont be afraid of him. GET IN HIS FACE. Circle-strafe while using your shotgun. You might die the first few times you try this, but soon enough you will be slapping HW's back to the respawn. It also makes you look elite when people see you have the balls to fight a HW like that and win ;) Fighting a PYRO: Very easy to kill. When an EMP lands at a pyro's feet, the first thing to come to his mind is: "♥♥♥♥". A single EMP will gib a pyro, but dont let them get close or they'll burn you back to the respawn. Also, when you are about to put that EMP down his throat, make sure you are VERY FAR AWAY when it goes off. I killed myself countless times because I was too close to the pyro when the EMP went off. Fighting a SPY: These guys must be killed the second you see them. They can disguise and fool your SG so he can nade it. Some less experianced spys will just run at you waving his knife. Smarter spy's will use their shotgun and nades. Fight them like you fight a medic. Fighting an ENGINEER: If an engineer does show up in your base, show him how unwelcome he is by tossing a frag down his throat. A well placed frag nade will gib him in a flash. Part 3 General Advice - Have a decent computer with a nice video card. Its hard to play any game with a crappy FPS. - Play with an ultra high sensitivity. You need to be able to react as fast as you would in real life. It also helps to keep your crosshairs on faster classes. - Make a dummy server so you can practice maneuvers, throwing grenades, and other things. - A good defensive engineer will never leave his base unless the offense really needs the manpower. - Maintain you fellow engineers sentry guns. Even if they are getting all the kills. - Always be well stocked with grenades. EMPs are what make you a feared class instead of a weak mechanic. - If someones talking trash to you, dont talk back. You'll only get yourself frustrated. Instead, let your guns do the talking. - If the enemy manages to get your flag out of your base. Let them have it. Its now worth trying to defend it as its much harder. Instead, use that time on rebuilding your defenses. I hope this guide will help any aspiring engineers. Keep on fraggin! Spade -TPF-


安装FoxBot以在游戏中添加机器人。 下载并安装FoxBot 从apg-clan.org下载Foxbot。 撰写本指南时,最新版本为0.791。 可在apg-clan.org查看新版本。 解压文件,得到名为addons的文件夹。 将addons放入游戏文件夹。 游戏文件夹名为tfc,位于Half Life文件夹内。 可进入Steam库,在游戏列表中右键点击游戏标题,选择属性,然后点击本地文件,再按浏览本地文件按钮,即可到达Half Life文件夹。 如果在TFC文件夹中已安装AMX MOD和Metamod,会询问是否覆盖重复文件,请确认。设置 安装完成后,即可开始试玩游戏并创建房间。若安装在专用服务器上,此操作同样适用。 建议使用Notepad程序来查看文件,以便获得良好的显示效果。 如果使用记事本,所有内容会挤在一行,导致难以理解。 机器人的行为可通过以下文件进行配置(无需修改所有文件): foxbot.cfg(适用于所有地图的通用设置) default.cfg(当地图没有专属.cfg文件时使用的配置) foxbot_chat.cfg(机器人在聊天中的发言,若已启用聊天功能) foxbot_commanders.cfg(可向机器人下达命令的用户) foxbot_names.cfg(机器人可使用的名称) 在configs文件夹中包含各张地图的配置文件。如果某张地图没有专属的.cfg文件,则会采用default.cfg中的配置。 scripts文件夹包含用于编写部分事件程序的文件(懂行的用户可以创建新文件)。 机器人不显示? 检查addons/metamod/plugins.ini文件中是否包含以下代码行: win32 addons foxbot foxbot_mm.dll linux addons/foxbot/foxbot_mm.so 如果没有,请添加这些代码。 其他游戏的机器人?


以下是我在其他《军团要塞经典版》攻略中很少见到的一些实用或奇特内容汇总。 有趣的控制台指令 你是否在玩《军团要塞经典版》时曾想:“天啊,要是这游戏能有更多血腥效果就好了。” 那么,在控制台输入“cl_gibcount 999”,你就能获得想要的所有血腥效果!此指令同样适用于其他GoldSrc引擎游戏,甚至可能适用于Source引擎游戏!它还能用于绕过血腥内容限制,但别说是我说的。 另一个简单指令是“fov #”。将#替换为数字,效果立竿见影!默认值为0,但你可以改成各种数值。我个人很喜欢-1。记住,这可能会带来不公平优势,但我相信你不会滥用。 最后,还有经典的“bind”指令。玩过《军团要塞2》的玩家肯定都懂我在说什么。其他的我就不多说了。 如何玩狙击手。没错,就是这样。 好吧,我专门为狙击手做一个章节,因为除了间谍,它可能是这个游戏里最难上手的职业了。是的,我就是这么说的。特别是狙击步枪本身就很特别。大多数新手玩家都不明白,如果你想成为一名有用的玩家,就需要按住鼠标1来蓄力射击。这其实很简单,但不知为何就是没人能搞明白。


这份指南将教你如何玩侦察兵 侦察兵指南 《军团要塞》中的侦察兵与《军团要塞2》中的有很大不同。在《军团要塞》中,用侦察兵进行战斗几乎没有用处,因为侦察兵在该作中仅用于夺取旗帜。 一种策略是向难以预测的方向移动。例如:左、左、右、后、右、右。 另一种策略是持续跳跃(兔子跳)。ESCLAN服务器有一个设置,按住空格键即可自动跳跃。 最后一种策略是震荡 grenade 跳:按住G键直到 grenade 即将爆炸,然后跳跃。 grenade 的冲击力会将你推得很远。
RedFox开发的FoxBot。视频预览
Main guide To make a FoXBot waypoints, I've downloaded the FoXBot v0.791 Linux builds and added this into my [/common/half-life/tfc] folder and made sure my [liblist.gam] loaded in [gamedll_linux] line. I then load TFC Linux client on Steam and used [Create Server] to make a listenserver online from my PC. Now in order to control the bots and menus on making waypoints, I made a empty file as a .cfg file named as fwp.cfg that contain this text: // Waypoint Key Binder For FoXBot .. -=Last Modified 8-02-2006=- // These are the keyz that will be bound .. bind "=" "waypoint on" bind "-" "waypoint off" bind "INS" "waypoint add" bind "DEL" "waypoint delete" bind "s" "waypoint save" bind "m" "waypoint menu" bind "i" "waypoint info" bind "l" "waypoint load" bind "[" "autowaypoint on" bind "]" "autowaypoint off" bind "PGUP" "pathwaypoint on" bind "PGDN" "pathwaypoint off" bind "/" "pathwaypoint create1" bind " " "pathwaypoint create2" bind "HOME" "pathwaypoint remove1" bind "END" "pathwaypoint remove2" bind "F11" "bot_debug on" bind "F12" "bot_debug off" bind "F3" "pathwaypoint_connect on" bind "F4" "pathwaypoint_connect off" bind "F5" "locate_waypoint on" bind "F6" "locate_waypoint off" bind "F7" "Pathrun_oneway" bind "F8" "Pathrun_twoway" bind "F9" "Waypoint_author YOURNAMEHERE" bind "F10" "exec config1.cfg" // This section prints the info out into the console .. // So that you can PGUP & PGDN to see each keyz function .. clear echo "=-....-=Waypoint Keyz Loaded For FoXBot=-....-=" echo "" echo "= waypoint on --> Turns On Waypoints." echo "- waypoint off --> Turns Off Waypoints." echo "INS waypoint add --> Adds a waypoint at the current player location." echo "DEL waypoint delete --> Deletes the waypoint nearest to the player." echo "s waypoint save --> Saves the current waypoint list to a file." echo "m waypoint menu --> Displays a menu for setting tags on a waypoint." echo "i waypoint info --> Shows information about the current waypoint." echo "l waypoint load --> Loads the waypoint list from a waypoint file." echo "[ autowaypoint on --> Turns on autowaypoint setting." echo "] autowaypoint off --> Turns off autowaypoint setting." echo "PGUP pathwaypoint on --> Turns on the pathwaypoint setting." echo "PGDN pathwaypoint off --> Turns off the pathwaypoint setting." echo "/ pathwaypoint create1 --> Sets the first waypoint in a manual path." echo " pathwaypoint create2 --> Sets the second waypoint in a manual path." echo "HOME pathwaypoint remove1 --> Sets the first waypoint in removing a path." echo "END pathwaypoint remove2 --> Sets the second waypoint in removing a path." echo "F11 bot_debug on --> Bot tells you current location of it's problem." echo "F12 bot_debug off --> Turns Debug Off." echo "F3 pathwaypoint_connect on --> Turns on automatic path connection to a waypoint." echo "F4 pathwaypoint_connect off --> Turns off automatic path connection to a waypoint." echo "F5 locate_waypoint on --> Turns waypoint location on." echo "F6 locate_waypoint off --> Turns waypoint location off." echo "N/A locate_waypoint <number> --> Best use spectator mode for this." echo "F7 Path run 1 way ==> Connects waypoints in direction you run 1 way" echo "F8 Path run both ways ==> Connets both ways when running" echo "F9 Waypoint Author ==> Add's your name to waypoint file" echo "F10 Restore config ==> Done waypointing, restore original config.cfg" In order to use this config you need to press [~] key and type "exec fwp.cfg", but be warned as this may erase your binds like for "say_team [%H|%A] Flag Dropped!" After you exec the fwp.cfg, make sure that waypoint is ON! For rats this map is quite basic and quite easy to make as you don't need to insert flag locations, goals and various tags, but for this map the best thing to insert is the normal waypoints by using [autowaypoint ON] and using waypoint menu to plot the Actions for Sniper vantage points in the shadows and near the dark passageways and behind props, but nowhere near to a place for snipers to be over-exposed. Under this image is the Sniper Action post and where the armour/battery can be traced for bots. http://steamcommunity.com/sharedfiles/filedetails/?id=230903021 In order to insert the Sniper Action spot, you need to use [waypoint menu], but it has to be where you are on the vertical light located directly, in order for the menu to work. http://steamcommunity.com/sharedfiles/filedetails/?id=230902974 Once you got the GUI menu loaded up, press [4] then [3] where it says "Sniper" and the crossbow sound will occur - hey presto! http://steamcommunity.com/sharedfiles/filedetails/?id=230902999 Optimize your waypoints An important part of your waypointing is optimizing your waypoints. This is basically running through your level and deleting unneeded waypoints and fixing paths that aren't quite right. Heres some things to look for when optimizing. Make sure paths don't cut through corners or try to connect to higher unreachable places. Make sure there are paths to and from the flags and flag goal locations that travel both ways. Make sure your sniper waypoints face the right direction. Make sure you have health, ammo, and armor waypoints set where needed. Also check their team specific tags if needed. AND DON'T FORGOT TO SAVE IT BY USING "waypoint save" PLEASE OR YOU WILL LOSE YOUR WAYPOINTS!!! https://apg-clan.org/showthread.php?32093-Tutorial-on-how-to-create-waypoints-for-TFC-s-FoXBots