Guild Wars 2


《激战2》社区网站、指南及工具索引 官方网站 激战2官网 激战2论坛 激战2维基 激战2 Steam页面 激战2支持中心 社区综合网站 激战2 Reddit社区 激战2 Discord社区 Hardstuck Metabattle GuildJen Mukluk Labs AyinMaiden ProjektDyad 新手指南 激战2官网 - 新手指南 Hardstuck - 创建你的第一个角色 GuildJen - 最佳职业——如何选择? 激战2维基 - 常见问题《激战2》新手欢迎指南 《激战2》维基新手引导 《激战2》综合指南(未更新至巨龙绝境版本)技巧与窍门 《激战2》非详尽的“隐藏”便利性功能/技巧列表 新手玩家提示视频 背包管理指南 战斗信息图表 《激战2》新手 solo 及团队玩法机制指南图表 《激战2》新手游戏机制指南图表 常见缩写与术语 《激战2》术语总表 《激战2》维基 - 缩写 优化性能与帧率 提升《激战2》性能及修复问题指南 性能优化设置我刚到80级,现在该做什么? 激战2维基 - 你想给角色配装(作者:Tanetris) Reddit激战2板块 - 如何“变得更强”:休闲玩家指南(作者:Vex和Pathos)《激战2》相关攻略资源整理 Build网站: - SnowCrows(团队副本/ Strike) - Hardstuck(全游戏模式) - Metabattle(全游戏模式) - GuildJen(全游戏模式) 副本/Strike/团队副本: - 团队内容组织工具:Hardstuck - 团队组建工具 - 10人PVE队伍配置速查表(信息图由u/PrideAndEnvy制作) 碎层(5人): - Hardstuck - 碎层攻略 - GuildJen - 迷雾碎层完全指南 - Discretize - 碎层攻略 Strike(10人): - Hardstuck - Strike任务攻略 - GuildJen - Strike任务攻略《激战2》相关指南与工具 团队副本(10人) 雪鸦攻略组 - 团队副本指南 Hardstuck - 团队副本指南 Phoenix Uprising - 团队副本指南 Raid & Strike CM PoV视频(由u/StepW发布)- 团队副本训练计划【RTI】 世界之战/玩家对战 GW2Mists - 世界之战指南与配装 GODSofPvP - 玩家对战指南与配装 OCX/SEA世界之战公会/服务器(由u/Radianshot发布) 实用网站、工具和应用 GW2 Efficiency - 账号助手 GW2 Inventory Cleanup - 背包整理工具 GW2BLTC - 交易站追踪器 GW2 Lunchbox - 各类API工具、物品价格计算由于内容包含多个外部链接,根据规则需删除所有外部链接,因此最终输出内容为空。最后更新时间:2023年2月7日 1. 重组新玩家指南部分并添加链接 2. 新增优化性能和帧率部分 3. 为“我已80级,接下来做什么?”添加链接 4. 新增配装网站部分 5. 重组新碎层/突袭/团队副本部分并添加链接 6. 为实用网站、工具和应用程序添加链接 7. 新增热门模组和插件部分


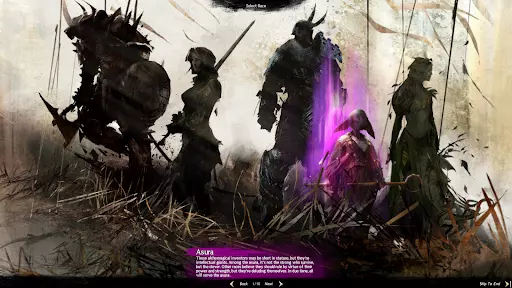
Hey everyone! So, I've finally decided to put together a newbie guide for Guild Wars 2 on Steam. I've been playing GW2 for a while now, and I've learned a few things along the way. I wanted to share my experiences and insights to help new players avoid some of the early confusion and get straight to the fun parts. This isn't a polished, professional guide; it's my personal take, written from the perspective of someone who's been there, made the mistakes, and learned from them. Let's dive in! Chapter 1: Free-to-Play Fun and Beyond: A Taste of Tyria Guild Wars 2 offers a generous free-to-play experience. You can level a character to 80, explore a significant portion of the core game world, and experiment with most professions. Think of it as a massive, extended demo. You'll get a true feel for the combat, exploration, and overall game mechanics. The limitations for free accounts mainly involve chat restrictions (limited channels and character-specific restrictions) and access to the bustling main city of Lion's Arch, which is gated until you reach level 35. This restriction encourages exploration of other areas and helps ease new players into the game's scale. If you fall in love (and I bet you will!), the expansions unlock even more content, including new professions, elite specializations (think advanced classes), maps, storylines, and challenging endgame content. Note: Buying a Guild Wars 2 expansion unlocks additional account features, but be aware that there's a verification process. After purchasing an expansion, your account will undergo a verification process by ArenaNet that can take up to five days. During this time, some account features might be temporarily limited. This is a standard security measure to ensure the legitimacy of your purchase and protect your account. Once verification is complete, you'll have full access to all the content and features the expansion provides. For a more detailed explanation of ArenaNet's account verification process and potential delays, please refer to the Guild Wars 2 Wiki Page[wiki.guildwars2.com] Chapter 2: Picking Your Path: Race and Profession: Finding Your Playstyle Character creation in Guild Wars 2 begins with choosing a race. Each race boasts unique traits, appearances, and starting areas, significantly impacting your early game experience and overall aesthetic. Consider these factors when making your choice: - Humans: A balanced race, well-suited for various playstyles. They start in the human-centric region of Kryta. - Norn: Powerful and resilient, Norn excel in strength-based builds. Their starting area, the Shiverpeaks, reflects their hardy nature. - Charrs: Fierce and technologically advanced, Charr are adept at both melee and ranged combat. Ashen Valley, their starting area, showcases their industrial prowess. - Asura: Intelligent and inventive, Asura are masters of technology and magic. Their starting area, Rata Sum, is a marvel of technological innovation. - Sylvari: Mysterious and nature-bound, Sylvari possess a unique connection to the plant world. Their starting area, the tangled forests of the Grove, reflects their mystical origins. However, your profession choice is far more significant. Each profession boasts a unique playstyle, with different strengths and weaknesses. Some excel in close-quarters combat, others dominate from a distance, and some focus on support roles, buffing allies or debuffing enemies. There's no single "best" profession; it's all about finding the one that suits your preferences. Here's a more detailed rundown (with my personal, slightly biased, opinions!): - Warrior: The quintessential damage dealer and tank. If you enjoy being in the heart of the action, soaking up damage while dishing it out, the Warrior is your pick. They're versatile, capable of both sustained damage and powerful burst attacks. Great for beginners due to their straightforward nature. - Guardian: A powerful support and damage dealer, often considered beginner-friendly. Guardians excel at protecting allies with powerful defensive abilities and providing crucial buffs. They can also deal significant damage, making them a well-rounded choice. - Ranger: Unique in their combination of ranged combat and a pet companion. The pet provides additional damage and support, making the Ranger a versatile choice for various situations. They're fun to play and offer a good balance of offense and defense. - Thief: Masters of stealth, precision strikes, and quick getaways. If you enjoy outplaying enemies with cunning tactics and quick reflexes, the Thief is for you. They require more skill and precise timing than other professions. - Engineer: A highly technical profession that utilizes gadgets and turrets for ranged and support roles. Engineers are unique and fun, requiring strategic placement of turrets and skillful use of various gadgets. They're less straightforward than other professions but offer rewarding gameplay. - Necromancer: Commands minions and wields dark magic. Necromancers are more complex to master, requiring an understanding of minion management and the strategic use of conditions (negative effects on enemies). They're powerful but demand more strategic thinking. - Elementalist: Manipulates the elements for devastating attacks. Elementalists have a high skill ceiling, requiring precise timing and skill rotations to maximize their damage potential. They're incredibly powerful in skilled hands. - Mesmer: Masters of illusion and control. Mesmers confuse and control enemies using illusions, creating openings for damage and disrupting enemy attacks. Their playstyle is unique and requires a good understanding of enemy behavior. - Revenant (Expansion required): Channels the power of legendary figures, offering a diverse range of abilities and playstyles. Revenants are powerful and versatile, offering a wide range of options depending on the legend you choose. Chapter 3: Mastering the Interface: Optimizing Your Experience The game's interface can seem overwhelming initially, but it becomes intuitive with practice. Take your time exploring the different menus, customizing your keybindings, and adjusting your graphics settings. I strongly recommend turning off reflections; it's a significant performance boost, especially in densely populated areas or during large-scale events. Consider lowering other graphical settings during these events as well to maintain a smooth framerate. Efficiently navigate the game with these interface tips: - Keybindings: Customize keybindings for comfortable and efficient control. Experiment with different layouts. - UI Customization: Adjust UI size, position, and elements for optimal visibility and screen real estate. - Graphics Settings: Balance visual quality and performance. Lowering settings like reflections can significantly improve frame rates, especially during large events. - Minimap/Map: Use the minimap and full map for navigation and awareness. Learn to interpret icons. - Character Panel: Regularly check health, conditions, and buffs for informed decision-making. - Inventory Management: Organize your inventory and utilize bank/shared slots for efficient item storage. Chapter 4: Skills and Action Bars: Your Arsenal Your action bars are your primary tools in combat. You'll have slots for weapon skills (determined by your equipped weapons), healing skills, utility skills (tactical abilities), and your powerful elite skill (a high-impact ability with a long cooldown). Experiment with different skill combinations to find what best suits your playstyle and the situation. Don't be afraid to adjust your build as you level and encounter new challenges. The beauty of Guild Wars 2 is its flexibility. Effectively manage your action bars for optimal combat performance: - Weapon Skills: Skills are determined by equipped weapons. Experiment with different weapons to find your preferred playstyle. - Utility Skills: Choose skills that complement your weapons and provide support, control, or utility (e.g., crowd control, healing). - Healing Skills: Select effective and easy-to-use healing skills based on your profession and build. - Elite Skill: A powerful ability with a long cooldown; use strategically for high impact. Chapter 5: Gear Up: Understanding Itemization and Progression Don't stress excessively about gear in the early stages. Focus on enjoying the gameplay and learning the mechanics. As you progress, you'll naturally acquire better equipment. Remember, item stats aren't randomly rolled; each item has a predefined set of stats based on its rarity and level. Focus on finding gear appropriate for your level and gradually upgrading as you level. Here's a breakdown of the gear tiers you'll encounter in Guild Wars 2: - Basic Gear (Levels 1-10): This is the gear you'll start with. It's readily available and serves as a foundation for your early adventures. - Fine Gear (Levels 11-20): A slight upgrade from basic gear, fine gear provides a noticeable boost in stats. - Masterwork Gear (Levels 21-30): Masterwork gear offers a more substantial increase in stats compared to fine gear. - Rare Gear (Levels 31-40): Rare gear is a significant upgrade, providing even better stats and sometimes additional bonuses. - Uncommon Gear (Levels 41-50): Uncommon gear is a step up from rare gear, offering even higher stats and potential bonuses. - Exotic Gear (Level 80): Exotic gear is the first step towards powerful endgame gear. It offers a significant upgrade from the gear you acquire through leveling. Exotic gear can be crafted, purchased from merchants, or obtained as rewards from specific events. It's a good stepping stone to Ascended and Legendary gear. - Ascended Gear (Level 80): Ascended gear is a major leap in power and requires significant effort to obtain. It's crafted using rare materials and often involves completing challenging achievements or events. Ascended gear is the pinnacle of crafted gear in Guild Wars 2, offering significant stat bonuses and unique abilities. - Legendary Gear (Level 80): Legendary gear is the ultimate goal for many players. It's incredibly powerful, offering unique aesthetics, abilities, and story-driven acquisition. Legendary weapons and armor are often crafted through a long and complex process, requiring a dedicated effort and often involving gathering specific items and completing unique achievements. Legendary gear isn't just about power; it's a testament to dedication and a symbol of achievement in the game. Chapter 6: Stats and Their Impact: A Deeper Dive While earlier chapters provided a simplified overview, let's delve deeper into the core stats: - Power: Directly increases your damage output. Essential for dealing damage. - Precision: Increases your chance to land critical hits, significantly boosting your damage potential. - Toughness: Reduces the damage you take from enemies. Crucial for survivability. - Vitality: Increases your maximum health pool, allowing you to withstand more damage before falling. - Condition Damage: Increases the damage you inflict with conditions (status effects like burning, bleeding, etc.). - Condition Duration: Increases the duration of conditions you apply to enemies. - Healing Power: Increases the effectiveness of your healing abilities. - Ferocity: Increases the damage dealt by critical hits. These are the fundamental stats, and their relative importance varies depending on your profession, build, and playstyle. Chapter 7: Boons and Conditions: Mastering the Battlefield – A Deeper Dive Boons and conditions are the lifeblood of combat in Guild Wars 2. They're not just simple buffs and debuffs; they're intricate systems that significantly impact combat flow and strategy. Boons: These are beneficial effects applied to players, enhancing their capabilities. Examples include: - Might: Increases damage dealt. - Quickness: Increases attack speed and movement speed. - Protection: Reduces incoming damage. - Regeneration: Gradually restores health over time. - Swiftness: Increases movement speed. - Alacrity: Reduces the recharge time of skills. - Fury: Increases critical hit chance. - Resolution: Reduces condition damage. - Resistance: Nullifies non-damaging conditions. Boons stack, meaning multiple instances of the same boon will increase its effectiveness up to a certain cap. Understanding which boons are most valuable for your profession and build is crucial. Conditions: These are detrimental effects applied to enemies, hindering their abilities and dealing damage over time. Examples include: - Burning: Deals damage over time. - Bleeding: Deals damage over time. - Poison: Deals damage over time and reduces healing effectiveness. - Chilled: Reduces movement speed. - Weakened: Reduces damage dealt. - Vulnerable: Increases damage taken. - Torment: Deals damage over time and inflicts additional conditions. - Blind: Reduces accuracy. - Fear: Forces the enemy to flee. Conditions also stack, increasing their effectiveness up to a certain cap. Different conditions interact in various ways, and some combinations can be devastatingly effective. Learning which conditions are most effective against specific enemies and how to apply them efficiently is a key skill to master. Mastering boons and conditions is not just about applying them; it's about understanding their interactions, durations, and how they affect both your character and your enemies. Chapter 8: Equipment, Buffs & Agony Resistance: Arming Yourself for Adventure Mastering equipment is key to success. Here's a breakdown: Core Equipment: - Weapons: Primary offensive tools; choose based on playstyle and combat situation. - Armor: Provides defense and attribute bonuses - Backpack: Provides attribute bonuses Accessories: - Rings & Amulet: Provide attribute bonuses and sometimes additional effects. - Relics: are powerful items that provide significant temporary buffs or utility effects during combat. Specialized Equipment: - Underwater Gear: Essential for underwater exploration and combat; enhances underwater movement. Enhancements: - Runes: Slotted into armor for additional attribute bonuses and effects. - Sigils: Slotted into weapons for additional effects like increased damage or conditions. - Infusions: Slotted into all ascended and legendary equipment; the primary source of Agony Resistance, and provide other attribute bonuses. - Enrichment: is a type of upgrade component that goes into enrichment slots, which can only be found on ascended and legendary amulets. Agony Resistance: is the attribute that mitigates the amount of damage taken from the Agony mechanic found exclusively in the Fractals of the Mists. Consumables & Buffs: - Food & Utility Items: Provide temporary buffs like increased damage, healing, or condition removal. Effects vary widely. Strategic use significantly impacts combat effectiveness. - Guild Buffs: Guilds can provide powerful buffs to members, enhancing attributes or granting other benefits. - Banner Buffs: Guild Banners placed in the world grants characters various bonuses upon interaction with it. - Consumables with Buff Effects: Many consumables offer temporary buffs, ranging from simple health regeneration to powerful combat enhancements. These are often crucial for challenging encounters. Other Equippable Items: - Gliders: a unique type of equipment that allows characters to descend from one point to another. - Mounts: are creatures used to enhance travel through the world of Tyria and certain parts of The Mists. - Jade Bots: provide utility and support functions, enhancing gameplay in various ways. - Gathering Tools: Specialized tools for harvesting resources like lumber, ore, and herbs. - Glyphs: are upgrade components that can be applied to gathering tools to provide bonus effects when gathering. Optimize your equipment, including Agony Resistance and strategic use of consumables and buffs, to match your playstyle and the challenges you face. Regularly update your gear as you progress. Chapter 9: Elite Specializations: Level Up Your Gameplay! At level 80, unlock powerful Elite Specializations for your profession! Each specialization offers new skills and traits, unique playstyles, and changes your profession's strengths and weaknesses. - Warrior: Berserker (focuses on rage and damage), Spellbreaker (control and disruption), Bladesworn (swordplay and precision). - Guardian: Dragonhunter (powerful ranged attacks and conditions), Firebrand (close-range fire magic and support), Willbender (evasive maneuvers and control). - Engineer: Scrapper (mechanical combat and utility), Holosmith (powerful energy blasts and mobility), Mechanist (powerful mechanical constructs and abilities). - Ranger: Druid (nature magic and healing), Soulbeast (combining pet abilities with your own), Untamed (powerful pet-focused abilities and hammer skills). - Thief: Daredevil (high mobility and acrobatic attacks), Deadeye (ranged damage and precision), Specter (summoning spectral allies). - Elementalist: Tempest (powerful storm magic and mobility), Weaver (combining fire and earth magic), Catalyst (powerful support and control). - Mesmer: Chronomancer (powerful time-bending abilities), Virtuoso (combining illusions and swordplay), Mirage (illusion magic and deception). - Necromancer: Reaper (powerful death magic and life stealing), Scourge (powerful conditions and control), Harbinger (powerful burst damage and condition application). - Revenant: Herald (powerful support and healing), Renegade (powerful burst damage and control), Vindicator (powerful support and control). Experiment to find the perfect fit for your playstyle! The Guild Wars 2 wiki has details on each. Chapter 10: Building Your Build: Optimizing Your Potential – Recommended Resources "Builds" in Guild Wars 2 refer to the specific combination of skills, traits, and equipment you choose for your character. As a new player, don't feel overwhelmed by the complexity. Start by experimenting and finding what you enjoy. Once you've got a feel for your preferred profession and playstyle, you can start optimizing. For build inspiration and guidance, I highly recommend checking out Metabattle[metabattle.com] and Snowcrows[snowcrows.com]. They provide well-explained and up-to-date builds for all professions and specializations. Their site is incredibly helpful for beginners, and you can easily tweak their suggested builds to suit your preferences and available equipment. Remember, these builds are starting points; feel free to adjust them based on your experience and playstyle. Chapter 11: Combat: Fight Smart, Win Big! Guild Wars 2 combat is all about using your skills effectively. Here's how to get better: - Know Your Skills: Learn what each skill does and how to use them together. - Good Positioning: Stay out of harm's way, but get close enough to attack. Use the environment to your advantage. - Crowd Control: Interrupt enemies' attacks with special skills. - Boons and Conditions: Boons help you, conditions hurt you. Learn to use and remove them. - Teamwork: In groups, work together! Communicate and coordinate your attacks. - Practice: The more you play, the better you'll get. Experiment with different skills and strategies. Underwater Combat: Underwater, things are slower and visibility is lower. Some skills work differently underwater. Practice fighting underwater to get used to it. By mastering these basics and practicing regularly, you'll become a more effective fighter in Guild Wars 2! Chapter 12: Exploring Tyria: Unveiling the World Guild Wars 2 is a visually stunning game, and exploration is a core component of the experience. The map is your invaluable companion. Familiarize yourself with the various icons: - Waypoints: Fast travel points, crucial for efficient movement across the vast world. - Hearts: These represent dynamic events and objectives within a region. Completing them rewards experience and often valuable items. - Vistas: Offer breathtaking panoramic views and often require some exploration and light platforming to reach. - Hero Challenges: These provide hero points, used to unlock new skills and specializations for your character. - Points of Interest: Minor objectives that provide small amounts of experience. Don't rush through the main storyline. Take your time to explore the diverse environments, discover hidden areas, and engage with the world's rich lore. Chapter 13: Crafting: Make Your Own Gear! Want to create your own weapons, armor, and more? Guild Wars 2 has a robust crafting system! Here's a look at the different disciplines: Choose Your Craft: Specialize in one or more of these crafting disciplines: - Armorsmith: Creates sturdy armor for heavy hitters. Needs lots of metal. - Weaponsmith: Forges powerful weapons. Requires metal and other resources. - Jeweler: Makes rings, amulets, and earrings that boost stats. Uses gems and metals. - Leatherworker: Crafts light and flexible leather armor. Needs leather and other materials. - Tailor: Creates cloth armor, perfect for mages and support classes. Uses cloth and other resources. - Chef: Makes food and drinks that give temporary boosts. Uses food ingredients. - Artificer: Creates trinkets and other useful items. Requires various resources. Gather Resources: Find materials like wood, ore, leather, and cloth throughout the world by harvesting nodes. Learn Recipes: Discover how to make items by exploring, completing tasks, or buying recipes from merchants. Advanced Crafting: Make super-powerful items and even legendary weapons (it takes a long time and significant resources!). Craft Away! Use crafting stations in towns to make items. The more you craft, the better you get, unlocking more advanced recipes and improving your efficiency. Chapter 14: Masteries: Horizontal Progression Guild Wars 2 Masteries are account-wide unlocks providing long-term progression and new abilities. They're categorized into: - Core Masteries: Fundamental improvements available early on. - Specialization Masteries: Powerful abilities tied to Elite Specializations. - Region-Specific Masteries: Unique movement and access to areas unlocked through exploration. - Other Masteries: Unlocks like increased inventory space or faster crafting. Masteries are unlocked through: - Exploration: Discovering new areas and completing vistas. - Achievements: Completing mastery-related achievements. - World Events: Participating in and completing world events. - Story Progression: Advancing through story instances and personal story chapters. Masteries offer benefits such as: - Enhanced Movement: Faster travel and access to previously inaccessible areas. - Improved Crafting: Increased speed and efficiency, plus new crafting options. - Combat Advantages: Powerful new skills or improvements to existing ones. - Utility Enhancements: Increased inventory space and resource access. Strategically prioritize masteries based on your playstyle and goals. Regularly check your in-game mastery panel to track progress and plan your next unlocks. Masteries significantly enhance your Guild Wars 2 experience! Chapter 12: PvE Content: Exploring the World of Tyria Guild Wars 2 offers tons of PvE (Player vs. Environment) content! Here's a simple overview: - Story Missions: Follow the main story; easy to moderate difficulty. Good for new players. - Exploration: Explore the world! Find hidden areas, secrets, and get rewards. - Dungeons: Challenging instanced areas for small groups (5 players). Good loot! - Fractals of the Mists: Instanced areas with scaling difficulty. Great for experienced players. - Raids: The hardest PvE content! Requires teamwork and skill. Best rewards. - Strikes: Challenging instanced areas for small groups. Good for groups who want a challenge. - World Bosses: Giant bosses that appear at set times. Fight with other players. - Meta Events: Large-scale events that need lots of players to complete. - Jumping Puzzles: Test your skill and agility in these challenging obstacle courses! Rewards await those who succeed. - Adventures: They generally involve time or survival constraints, rewarding practiced movement and planned strategies, offer unique challenges often involving exploration and puzzle-solving. - Festival Events: Seasonal events with unique activities, rewards, and a festive atmosphere! - Bounties: Hunt down specific targets for rewards and experience. - Dynamic Events: Spontaneous events that pop up across the open world, offering varied challenges and rewards. Chapter 13: Player vs. Player: Conquer the Battlefield Guild Wars 2 offers exciting player-versus-player (PvP) experiences in three main modes: Structured PvP (sPvP), World vs. World (WvW), and unranked PvP. Let's explore each: Structured PvP (sPvP): This is your classic arena-style combat. You'll join a team and compete against others in various game modes. A great place to hone your skills and test different builds and strategies. Importantly, your gear is neutralized in sPvP, meaning everyone starts on a level playing field. Winning matches earns you valuable PvP-specific gear and rewards. There are also ranked ladders for those seeking a serious competitive challenge. World vs. World (WvW): This is large-scale warfare on a massive scale! Three teams representing different servers battle for control of a sprawling map. You'll fight alongside your server's players to capture keeps, control objectives, and dominate the battlefield. In WvW, your gear does matter, so equipping yourself with powerful and appropriate items is crucial for success. WvW is a dynamic and ever-changing experience, requiring teamwork, strategy, and adaptability. Rewards include unique WvW armor, weapons, and other valuable items. Unranked PvP: This is a more casual mode, perfect for practicing your skills and experimenting with different builds without the pressure of ranked play. It's a great way to learn the ropes before jumping into the more competitive sPvP modes. Gear is neutralized in this mode as well. Chapter 14: Achievements: Show Off Your Skills! Guild Wars 2 achievements reward you for exploring, fighting, crafting, and completing various challenges. They offer: - Experience points - Titles - Unlocks - Unique items - Mastery Points Achievements cover many areas: exploration, combat, crafting, story, WvW, fractals, raids, and guilds. Track your progress in the in-game achievement panel and earn rewards while exploring everything Guild Wars 2 has to offer! Chapter 15: The Gem Store and Trading Post – Fueling Your Adventures Guild Wars 2 offers two primary ways to acquire items outside of traditional gameplay: the Gem Store and the Trading Post. Let's explore each: Gem Store: is where you can purchase cosmetic items, convenience features, and character boosts using Gems. Gems are a premium currency purchased with real money. Items available in the Gem Store often include: - Skins: Change the appearance of your weapons and armor. - Gliders: Stylish ways to traverse the world. - Finishers: Special animations played after defeating an enemy. - Boosters: Temporary boosts to experience gain, crafting speed, or other aspects of gameplay. - Inventory Slots: Expand your character's inventory space. - Character Slots: Create additional characters. The Gem Store offers a way to customize your appearance and enhance your gameplay experience with convenience features, but it's entirely optional. All core gameplay remains accessible without spending any real money. Trading Post: is Guild Wars 2's player-driven auction house. Here, players can buy and sell items using in-game gold. You can find a wide variety of items on the Trading Post, including: - Materials: Resources used for crafting. - Gear: Weapons, armor, and accessories. - Consumables: Food, potions, and other temporary boosts. - Rare Items: Unique and valuable items dropped from enemies or found through exploration. The Trading Post is a crucial part of the Guild Wars 2 economy. You can earn gold by selling items you've crafted, gathered, or looted, and use that gold to purchase items you need. It's a great way to acquire specific items you might not find through regular gameplay. Understanding both the Gem Store and the Trading Post will help you maximize your Guild Wars 2 experience, whether you prefer to customize your appearance with cosmetic items or focus on building wealth through the in-game economy. Chapter 16: Inventory, Loot, and Materials Management: Don't Be a Packrat! Let's face it: managing your inventory, loot, and materials in GW2 can feel overwhelming. But with a little organization, you can transform from a chaotic packrat into a master of your digital possessions. Understanding Your Storage: - Backpack: Your immediate access inventory. Keep this streamlined with only essential items for your current activities. - Bank: Your primary long-term storage. This is where you'll store most of your gear, materials, and less frequently used items. Invest in bank slots as you progress! - Shared Inventory: If you play multiple characters, this is a lifesaver for sharing materials and items between them. Loot Management Strategies: - Regular Purging: Make a habit of regularly reviewing your inventory and bank. Sell, salvage, or delete anything you don't need. Don't hoard useless items! - Salvaging: The salvaging system is your friend. Salvage unwanted gear and weapons to obtain valuable crafting materials. - The "Deposit All Materials" Button: This little gem automatically deposits all crafting materials into your bank, freeing up valuable backpack space. Use it religiously! - Categorization: Organize your bank using folders and stacks. Group similar items together (e.g., weapons, armor, crafting materials, consumables). This will make finding what you need much easier. Consider color-coding your folders for extra visual organization. Material Management: - Identify Your Needs: Determine which crafting materials you need based on your goals (e.g., upgrading gear, crafting specific items). - Track Your Progress: Keep an eye on your material stockpiles. Know what you have and what you need to acquire. - Prioritize: Focus on gathering materials relevant to your current goals. Don't waste time collecting materials you don't need. - Utilize the Trading Post: The Trading Post is a great resource for buying and selling materials. You can often find materials cheaper or sell excess materials for profit. Beyond the Basics: - Guild Storage: If you're in a guild, take advantage of the guild's storage to share materials and resources with your guildmates. - Account-Wide Storage: Certain items are stored account-wide, meaning you can access them from any character on your account. This can be particularly helpful for materials and certain types of equipment. By implementing these strategies, you'll transform from a disorganized packrat into a highly efficient loot and material manager, ready to conquer Tyria! Chapter 17: The Lingo: Navigating the Acronyms – Common Abbreviations Guild Wars 2 players frequently use abbreviations to communicate efficiently. Here are a few common acronyms you'll likely encounter: - DPS: Damage Per Second (measures damage output) - HPS: Healing Per Second (measures healing output) - Condi: Condition (detrimental effect on enemies) - Boon: Beneficial effect on players - AoE: Area of Effect (skills that affect multiple targets) - PvP: Player versus Player (player-vs-player combat) - WvW: World versus World (large-scale player-vs-player combat) - sPvP: Structured Player versus Player (smaller-scale organized PvP) - GW2: Guild Wars 2 (the game itself) - CM: Challenge Mode (difficult versions of story instances) - Fractals: Instanced dungeons with increasing difficulty levels. - Raids: High-level group content requiring coordination and skill. - LFG: Looking For Group This is just a small sample; you'll encounter many more as you play. Don't be afraid to ask for clarification if you're unsure about an abbreviation. Chapter 18: Expansions and DLC: Which Ones Should You Get? Guild Wars 2 has several expansions and DLCs that significantly expand the game's content. Here's a breakdown to help you decide which ones are right for you, including information on mounts and gliding: - Heart of Thorns: This expansion takes you to the Maguuma Jungle, a dense and dangerous environment with unique challenges and rewards. Explore the verdant canopy, navigate treacherous swamps, and uncover the secrets hidden within the ancient jungle. New specializations for existing professions add significant depth and variety to gameplay, allowing you to customize your character further. Challenging dungeons and raids are introduced, testing your skills and teamwork. You unlock gliding here! If you enjoy challenging dungeons, raids, and a dense, atmospheric environment, Heart of Thorns is a great choice. - Path of Fire: This expansion introduces the Crystal Desert, a vast new region with unique environments like the scorching sands of the Desolation and the lush oasis of Elon Riverlands. You'll master mounts like the springer, jackal, griffon, raptor, and skimmer, drastically changing how you explore the world. The Revenant profession joins the fight, wielding the power of legendary figures. The level cap increases, opening up new challenges and rewards. If you enjoy exploring diverse environments, mastering new movement mechanics, and engaging in challenging combat, Path of Fire is a must-have. - End of Dragons: This expansion transports you to Cantha, a land steeped in history and culture. Explore the vibrant cities of Kaineng and Seitung, discover ancient ruins, and uncover the secrets of this mysterious land. You'll master the powerful Engineer profession, utilizing gadgets and technology in unique ways. Stunning new environments, challenging new gameplay mechanics like the siege turtle and jade bot, and a captivating storyline await. You gain access to the jade bot, skiff, fishing and siege turtle mount here. If you enjoy exploring new cultures, engaging in intricate storylines, and mastering new gameplay mechanics, End of Dragons is a must-have. - Secrets of the Obscure: This expansion introduces a series of mysterious locations, from the treacherous peaks of the Skywatch Archipelago to the enigmatic realm of Nayos and the hidden depths of Inner Nayos. Master new skills and strategies as you explore ancient ruins, uncover forgotten lore, and face formidable foes. Earn the majestic Skyscale mount, master the art of gliding once again, and forge a magnificent new set of legendary armor—a testament to your skill and dedication. Prepare for an adventure filled with discovery and unparalleled rewards! - Janthir Wilds: This expansion introduces a new region and, most importantly, the highly anticipated Player Housing system. Build and customize your own home, personalize it with furniture and decorations, and create a unique space to call your own. New story content and challenges are also included, expanding the game's narrative and providing new adventures to experience. You will unlock the warclaw mount here. If you enjoy personalizing your gaming experience and creating a unique space, Janthir Wilds is a great choice. - Living World Seasons: These episodic updates add new storylines, maps, and challenges, enriching the overall experience. They are generally considered worthwhile, especially if you enjoy the story and lore of GW2. Consider buying these in bundles for better value. The Skyscale, Roller Beetle mount is unlocked through completing achievements in Living World Seasons. Some Living World seasons also introduce new mounts or improve gliding capabilities. My Recommendation: If you're completely new to the game and unsure where to start, I'd recommend focusing on the core game first. Once you've reached level 80 and experienced a good chunk of the base game content, you can start considering the expansions. Many players consider Path of Fire to be a good starting point for expansions due to its introduction of mounts, which significantly improve exploration and movement. However, unlocking gliding in Heart of Thorns is also a significant gameplay improvement. Ultimately, the best expansions for you will depend on your preferences and playstyle. Consider what aspects of the game you enjoy most (exploration, combat, story, etc.) and choose the expansions that best align with those preferences. Reading reviews and watching gameplay videos can also help you make an informed decision. Chapter 19: Beyond Combat: Exploration, Activities, Housing and Customization Guild Wars 2 offers much beyond combat. Exploration & Activities: - Fishing: Catch fish using various rods and lures; some used in crafting or achievements. - Skiffs: Small boats for navigating rivers and lakes, accessing otherwise unreachable areas. Player Housing & Customization: - Home Instance: An instanced area within a character's home city based on the character's race, which evolves as they progress through the world. - Homestead: An account-wide personal housing instance located in Hearth's Glow, with structures and land for the player to decorate and cultivate, exclusive to Guild Wars 2: Janthir Wilds - Chairs: Decorative items for sitting and relaxing. - Miniatures: collectible toy versions of creatures, heroes, and villains from Tyria that follow you through the world.. - Novelties: Decorative items adding whimsy and humor. - Tonics: Temporary buffs or cosmetic changes. - Musical Instruments: Playable instruments for entertainment and ambiance. - Toys: Interactive items for amusement. - Held Items: Items your character can hold for cosmetic effect. - Fashion & Dyes: Customize your character's appearance with various outfits and dyes. Optimize your home instance, collect miniatures, explore fishing spots, utilize skiffs, and experiment with tonics, musical instruments, toys, held items, fashion, and dyes. Enjoy the game's non-combat features! Chapter 20: More GW2 Tips and Tricks Beyond the basics, here are some extra tips I've picked up that might make your GW2 journey smoother: - Embrace the Events: Dynamic Events are a core part of the GW2 experience. Participating in these events provides valuable experience, loot, and a sense of community. Don't just run past them; jump in and help out! You'll often find yourself working alongside other players to overcome challenges. - Utilize Waypoints Strategically: Waypoints are your fast-travel network. Unlocking and utilizing them effectively can save you a lot of time and effort. Don't be afraid to travel to a waypoint, even if it seems a bit out of the way; it might save you a long trek later. - Don't Neglect Your Daily Achievements: Daily achievements offer valuable rewards, including experience, gold, and crafting materials. Make it a habit to check your daily achievements and complete them whenever possible. They're a great way to supplement your progress. - Explore the Trading Post: The Trading Post is Guild Wars 2's in-game auction house. You can buy and sell items here, making it a great way to earn gold and acquire the items you need. Take some time to explore and familiarize yourself with the system. - Join a Guild: Guilds provide a sense of community and offer various benefits, such as guild halls with useful features and opportunities for group play. Finding a guild that suits your playstyle can significantly enhance your GW2 experience. - Experiment with Different Professions and Builds: Guild Wars 2 offers a wide array of professions and builds. Don't be afraid to experiment and try different things to find what suits your preferences. You might discover a hidden favorite! - Level Up Faster with the "Character Achievement Guide": While focusing on gear upgrades, remember that the "Character Achievement Guide" offers a significant boost to your overall progression. The experience rewards from these achievements contribute to faster leveling, allowing you to access higher-level gear and content more quickly. - Don't Forget the Wizard's Vault!: The Wizard's Vault is a streamlined rewards system introduced in Secrets of the Obscure. Don't neglect this valuable resource! Regularly check the Vault to claim rewards like skins, Gem Store items, gold, legendary crafting materials, and more. It's a great way to supplement your progress and acquire valuable items. Remember that you can customize your Wizard's Vault objectives to focus on PvE, PvP, or WvW. This allows you to maximize your rewards based on your preferred playstyle. - Harvest Resources in Your Home Instance: Regularly harvesting these resources can significantly aid your progress, especially when you need specific materials for crafting or upgrades. - Master the Looking for Group (LFG) Tool: This tool is essential for finding groups for dungeons, fractals, raids, and other activities. Use specific search criteria (difficulty, role, etc.), communicate clearly with potential groups, and be patient. Consider joining guilds or using Discord servers for additional group-finding options. - Ask for Help!: Don't hesitate to ask for help in-game. Many players are willing to assist newcomers or those struggling with specific content. Use the in-game chat or guild channels to ask questions. - Take Breaks: Guild Wars 2 can be quite immersive. Take breaks to avoid burnout. Stepping away from the game for a while can help you return refreshed and ready to continue your adventure. This isn't an exhaustive list, but these tips should help you get a better grasp of the game beyond the fundamentals. Remember, the best way to learn is by playing and exploring! This guide is my first attempt at creating something like this, so I hope it's helpful! I'm always learning, and I'm open to feedback. Let me know if you have any questions or suggestions! Happy adventuring in Tyria!


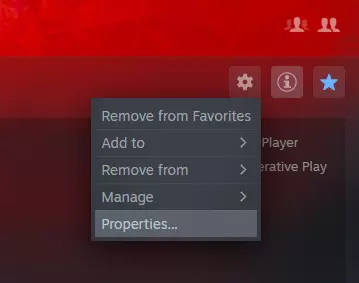
Full-feature control scheme for action camera mode and standard Xbox controller (or something similar). Includes necessary in-game bindings, suggested settings, general play overview, and detailed button mapping. Introduction This guide has instructions and necessary game settings for a versatile Steam Input configuration to play Guild Wars 2 with an Xbox 360 controller (or similar shapes that can reuse the config). Steam Input stuff has no home and you can't properly document a configuration, so we end up here. New versions will come with updates detailed here and a post in the linked forum thread, which is your only way to track changes. Please share this configuration by linking this guide, and not the configuration directly. To set it up:Either install the game through Steam or add the normal GW2 launcher to your Steam library as a non-Steam game Load the configuration with one of the Steam Input links below (don't forget to turn on your controller while doing this) Set the necessary options and keybindings in the game (see 'In-Game Settings' section)And that's it. Whenever you start your GW2 from Steam with your controller on, you'll have full controller play (if you forget to turn on the controller, switch back to Steam and open and close the controller configuration for the game, then Steam should have things straight). I also use a mouse/trackball for quicker inventory and menu handling, but the config does have its own full-featured mousing support. In-game mappings are chosen to make the least changes to the default configuration, so you can still play on keyboard and mouse without too much disruption. (Paste config links into your browser and they will open in Steam--these can't be proper links because Steam refuses to recognize their own config links in their formatting markup.) This version of the configuration automatically engages the racing mode when activating the beetle mount: steam://controllerconfig/1284210/3650649595 (Steam install) steam://controllerconfig/2306085804/3650652406 (non-Steam install) (v7-race 2026-01-20) This version of the configuration includes the racing mode as a manually activatable option, but stays in normal controls when activating the beetle mount: steam://controllerconfig/1284210/3650651430 (Steam install) steam://controllerconfig/2306085804/3650653166 (non-Steam install) (v7-norace 2026-01-20) Play Overview This config plays surprisingly well considering all the things it needs to do, but it still takes some time and effort to get a handle on it. Be patient and don't try to do or remember everything at once. It looks daunting, but there's lots of hours of play and refinement behind it. Let your hands learn the connections, and you'll be off in no time. First, it will help to make a couple preparatory mental adjustments. You'll want to think of the four face buttons and Start together as a button group (A, X, B, Y, Start), and do likewise for the four D-Pad directions and Back (Up, Left, Right, Down, Back). These five-button groups will make things a lot more intuitive. We have two main shift-key sets: one focused on more immediate combat keys (Right Trigger), the other on utility keys (Left Trigger), and you'll be using both of those and the unshifted layout simultaneously, so everything that helps the mental mapping take hold is important. Whenever you start the game, when you first get in character, you will need to press Back+LB to toggle the action camera on. You won't need to do this again within a session, because any time a dialog, panel, or menu comes up, the game automatically switches to showing a cursor instead of the action camera. Once you close whatever it is, it will be back in action camera for you. Note: There's a Steam bug that can leave the configuration in a broken state. If you ever find buttons not acting like you expect, you should be able to press and hold Start then also Back, to reset the config to a correct state. If that doesn't work, the Steam client may be broken entirely (or have just crashed) and you should just restart it and the game. That's very rare, but it can happen. Without any modifiers held, basics:Move with the left stick and aim/turn with the right stick (holding LT or RT won't change this, of course) Jump with A, Interact with X, Dodge with B Heal with LB Highlight enemies and interactables by holding RS-Click or RB (game default changed to highlight everything all the time, so you can turn that off to reduce clutter and pop names when you want to see them, or leave names up and forget this mapping) Tap Back for Escape, which closes open windows/dialogs or brings up the system menu if nothing is open Hold Dpad-Down to dismount or get off a chair With RT held, attacks:Face buttons and Start are your weapon skills (1-5) LB swaps between your two equipped weapon sets Dpad and Back are your profession skills (F1-F5) With LT held, utilities:Face buttons and Start are your utility slots (7-9), special action (-), and elite skill (0) Dpad and Back are your mounts (these all need to be unlocked through play, and require expansions)Remember the Special Action! It doesn't come up that often, but when it does you will need it. That's part of why it's between 9 and Elite, to help keep the spot in mind when suddenly searching for it :) With Back held, mousing:mouse with either stick mouse click with triggers and RB: RT is primary click, LT is secondary click, and RB is alt-primary, for setting map waypoints LB toggles the action camera (note that any panel, dialog, or other such active UI element will switch the game to mouse cursor from action cam while it is open) With Start held, UI panels:Map on Dpad Up Hero/Character panel on Dpad Left Inventory on Dpad Right Contacts/LFG on LB PvP on X (also useful for trying out fully unlocked versions of a class without leveling, or for travel through Lion's Arch to avoid waypoint fees) You can also hold Start and then also hold one or both triggers for various secondary and novelty commands, such as your homestead door, rift scan, and some preset emotes and chat insertions (eg Start->LT->Dpad-Up,Up to dance, or Start->LT->hold B to type "thank you", which is nice after a revive :). Detailed Button Mapping All states: hold Start then also Back to reset controller configuration state when Steam bugs out and buttons are performing the wrong actions (very important) Main layout -- Unshifted LS: Movement LS-Click: If holding forward, activates auto-run until you move backward, otherwise toggles walking RS: Camera/Aim RS-Click: Highlight enemies/interactables (hold longer for more names) Back: Tap for Escape; hold to shift for mouse set Start: (shift for menus/panels set) LT: (shift for utility set) RT: (shift for attack set) LB: Heal (6) RB: Highlight enemies/interactables (hold longer for more names) A: Jump / Swim Up X: Interact B: Dodge Y: Mount Ability 2 / Swim Down Dpad-Left/Right: Target previous/next enemy Dpad-Up: Call target; hold to lock autotarget Dpad-Down: Take target; hold to dismount or get off a chair Attack layout -- Hold Right Trigger LB: Swap weapons RB: (unused) A, X, B, Y, Start: 1,2,3,4,5 Dpad-Up, -Left, -Right, -Down, and Back: F1,F2,F3,F4,F5 Utility layout -- Hold Left Trigger LB: Skiff; double-tap for fishing RB: Stow/draw weapons A, X, B: 7,8,9 Y: Special action (depends on context, not always available) Start: Elite skill (0) Dpad and Back for Mounts: RIGHTUPDOWNLEFTBACKPRESS Raptor Springer Skimmer Warclaw GriffonHOLD Beetle Skyscale Turtle Jackal n/a Mouse layout -- Hold Back LT: Right click RT: Left click LB: Toggle action camera (you'll need to do this at session start) RB: Alt + left-click (in map, set navigation marker at cursor) A: Left click X: Interact B: Ctrl+right-click Y: Ctrl+left-click (in map, paste waypoint at cursor into chat and send) Start: Escape Dpad Up/Down: Mouse scroll-wheel up/down (camera zoom, map zoom) Dpad Left/Right: Page Up/Down (change map layers) Menu layout -- Hold Start RS-horizontal: Adjust map zoom RS-vertical: Change map layer LB: Contacts/Looking for Group panel; hold for Mail panel; double-tap for Ranger Pet panel RB: WvW panel A: (unused) B: Chat panel; hold for logout dialog (F12) X: PvP panel Y: Guild panel; hold for Party dialog (note: this UI does not work with action cam and captures keypresses, so you need Escape to close it) Dpad-Up: Map Dpad-Left: Hero panel Dpad-Right: Inventory panel Dpad-Down: Trading post panel; hold for Wizard's Vault panel ---Below here are extra things you don't strictly need but are handy or fun--- Controls layout -- Hold Start, then hold RT A,X,B: Build templates 1,2,3 Y: Swap between equipment templates 1 and 2 with Y (you may need to press it a couple times, to get the game in sync with its toggle) LB: double-tap to switch controller to racing mode RB: Hold to scan for rifts; double-tap to place temporary Jade Bot waypoint Dpad-up: "Tonic" novelty; hold for Conjured Doorway (homestead) Dpad-left: "Toy" novelty; hold for "Musical instrument" novelty Dpad-right: "Held item" novelty; hold for Fishing Dpad-down: "Chair" novelty; hold for X/dismount (re-pressing Chair does not exit it) Social layout -- Hold Start, then hold LT LB: (unused) RB: hold to Toggle mentor mode (if unlocked). Double-tap-hold to cycle chat channels on each following hold. A,B,X,Y: Two-step quick-chat with Y=Up, X=Left, B=Right, A=Down: UP LEFT RIGHT DOWN just press and hold yes sorry thank you no press, then again and hold marker blue red green press UP, then push split cut build press LEFT, then sustain cc boons carry press RIGHT, then chase coming stack defend press DOWN, then repair run gather hold Dpad: two-step quick-emote: UP LEFT RIGHT DOWN just press and hold agree shrug ponder disagree press, then again and hold cheer wave thank sleep press UP, then dance salute bow kneel press LEFT, then laugh beckon talk sad press RIGHT, then surprise crossarm point threaten press DOWN, then cry cower upset sit (hold on threaten for hiss) UI Mousing layout -- Hold Start, then hold both LT and RT (pending, but you can try B to right-click reward boxes, make sure you have a cursor first :) Racing layout -- Double-tap LB from Control layout, or use beetle auto-switch config LS: Camera (Mouse) (use to steer) LS-Click: Hold to toggle autorun (R) RS: Movement (WASD) RS-Click: Show names LT: Drift (C) RT: Forward movement (W) LB: Endurance refresh (7); hold for heal (6) RB: Tap for boost, double-tap for left mouse click, hold for interact (F) A: Jump/boost/trick (Space) B: Drift (C) X: Boost (V) Y: Endurance refresh (7); hold for stealth (9) Dpad-Up: Map (using Start or Back will clear race mode) Dpad-Left: Attack dismount (1); hold to wing-dismount (8) Dpad-Right: Beetle; hold for Raptor (useful for quick remounting) Dpad-Down: Dismount; hold to wing-dismount (8) Dpad-Down and Dpad-Left both return to normal control mode, as does Back. If you are using the automatic race mode switch on beetle mount, there is an interim control change until you let go of Dpad-Right to smooth the transition when mounting while moving. In-Game Settings RECOMMENDED GENERAL OPTIONSAoE Loot on Interact: checked Use "Show Ally Names" Key Bind: checked Ground Targeting: Fast with Range Indicator Double-Tap to Evade: UNCHECKED -- checked will kill you Lock Ground Target at Maximum Skill Range: checked Move Inventory Compact Option: checked REQUIRED CONTROL BINDINGS MovementWalk: Shift-R Swim down: CTargetingPrevious enemy: Ctrl-Tab Next ally: . (period) Lock autotarget: Ctrl-Shift-. (period)User InterfacePvP panel: Shift-P Mail dialog: Shift-OCameraToggle action cam: Ctrl-' (single quote)Mounts (must unlock each to see the option)Raptor: Shift-X Springer: Ctrl-Z Skimmer: Ctrl-x Jackal: Shift-C Beetle: Shift-Ctrl-X Griffon: Shift-Ctrl-Z Warclaw: Shift-Z Skyscale: Shift-Ctrl-C -- If you prefer Skyscale as your immediately-accessible aerial mount, bind it to Shift-Ctrl-Z and griffon to Shift-Ctrl-C. Siege turtle: Ctrl-CMastery SkillsStart Fishing: Alt-NUMPAD_6 Summon Skiff: Alt-NUMPAD_7 -- Skiff enthusiasts, especially those without turtles, may wish to bind skiff to Ctrl-C and turtle to Alt-NUMPAD_7 Set Jade Bot Waypoint: Alt-NUMPAD_. (decimal) Scan for Rift: Alt-NUMPAD_0 Conjured Doorway: alt-NUMPAD_ReturnMiscellaneousShow enemy names: ' (single quote) Show ally names: ; (semicolon) Stow/draw weapon: Ctrl-` (backtick) Activate Chair: Alt-NUMPAD_1 Activate Musical Instrument: Alt-NUMPAD_2 Activate Held Item: Alt-NUMPAD_3 Activate Toy: Alt-NUMPAD_4 Activate Tonic: Alt-NUMPAD_5TemplatesBuild Template 1: Ctrl-NUMPAD_1 Build Template 2: Ctrl-NUMPAD_2 Build Template 3: Ctrl-NUMPAD_3 Equipment Template 1: NUMPAD_/ (divide) Equipment Template 2: NUMPAD_* (multiply) Issues and Bugs Steam Input has problems and Valve really doesn't care about them (seriously-- one key bug I reported with a very nice test case just had them change the documentation to redefine the broken and obviously undesirable behavior as "intended"), which is a darn shame considering the vision and potential it shows. Unfortunately, some things just can't really be avoided and this is a complex configuration, so problems do come up. The biggest problem is getting stuck in a shifted mapping. This has long been a thorn in the side, so the config offers a reset mechanism by pressing Start and Back together (you must press Start before Back). You can also usually press whatever would have triggered the layer that's stuck, and it will clear on subsequent leaving, but the Start->Back chord doesn't require figuring out what got stuck. If this comes up, you're probably in combat, so be aware. Sadly, between the Steam bugs and painful lack of even the most rudimentary debugging for configurations, the more one tries to protect the config from weird situations, the more complicated certain buggy interactions become and the harder noticing and restoring a sensible state gets. More common but less problematic, due to the misguided way Steam Input handles layout changes and buttons, if you hold a button as you release a shift or switch to a new layout, Steam will interpret that as pressing the button again in the new layout. Often this just comes through as a jump because you still had A down as you let the trigger go, and jumping is one of the few actions you can do during an ability animation. Both triggers use "hair trigger" mode, so they count as off the moment you start releasing them, and as pressed the moment you start pressing them again. This makes the layout shifting nice and responsive, but the down side is making it easier to linger on a button as the layout changes. After rebuilding the config to use only "more reliable" action sets instead of the much more versatile layers, layer sticking has been less problematic, but there are some inexplicable random bugs, such as LT won't work the first time you use it after leaving Race mode. Weird, but more manageable than the various layer sticking problems that Valve never fixes. Version and Updates Update thread: http://steamcommunity.com/app/353370/discussions/0/2149847423916655685 Steam Input has zero facilities for versioning or updates (or documentation or testing or debugging...), so updates will be posted to this thread. You can subscribe to it and receive notices when there's a new version to install.
关于Steam与ArenaNet账号的常见问题 简介 以下是《激战2》的Steam与ArenaNet账号相关常见问题。 术语说明 首先说明一下术语: * Steam-GW2:指通过Steam创建的《激战2》账号。 * ArenaNet-GW2/ANet-GW2:指通过激战2官网(guildwars2.com)创建的《激战2》账号。 * Steam《激战2》安装文件夹:指Steam安装《激战2》的文件夹。 * ArenaNet或ANet《激战2》安装文件夹:指非Steam方式安装《激战2》的文件夹。 明确以上术语后,我们开始解答问题。 常见问题 Q-01:能否将我的ArenaNet-GW2账号与Steam账号关联? A-01:不能。截至本文发布时,ArenaNet不提供账号关联功能。Q-02:我能否通过Steam使用我的ArenaNet-GW2账号? A-02:可以。 Q-03:如何通过Steam登录我的ArenaNet-GW2账号? A-03:在Steam中的《激战2》启动器设置中添加:-provider:Portal Q-04:我能否在Steam购买《激战2》DLC并用于我的ArenaNet-GW2账号? A-04:不能。你在Steam上为《激战2》购买的任何物品都将与你的Steam账号关联。 Q-05:这是否意味着我仍需在Steam之外购买资料片? A-05:是的。你可以通过激战2官方网站,或当地官方授权的游戏零售店进行购买。 Q-06:我是否必须通过Steam重新下载游戏? A-06:不需要。快速指南: 找到Steam商店中的《激战2》 安装《激战2》 当右下角出现带有“开始游戏”按钮的《激战2》客户端后,让其下载几兆字节,然后关闭客户端。 同时关闭Steam客户端 找到你的ArenaNet《激战2》安装文件夹 复制gw2.dat文件 找到Steam版《激战2》安装文件夹 粘贴gw2.dat文件 启动Steam 启动Steam版《激战2》 问07:Steam版和ArenaNet版《激战2》是否在不同服务器? 答07:否,它们使用相同的服务器。 问08:你如何确定你的答案正确? 答08:因为这是我的设置。我使用我的ArenaNet《激战2》账号(自测试版开始)通过官方Steam版《激战2》(不是“添加非Steam游戏”选项)进行游戏。我复制了我的gw2.将ArenaNet《激战2》安装文件夹中的dat文件放入Steam《激战2》文件夹。是的,这样是有效的。已在Windows 10和Linux(Pop!_OS 22.04 LTS)系统中测试。结束。游戏中见!~ ♾️ 스노 (雪亮 Yuki) (YourOnlyOne.4937)


i'll explain you most useful things to know if you wish to begin the game The basics to get started What to buy to start the game? having at least one extension gets you out of F2P account limitation and IS a big multiplayer game feeling upgrade. for those with a serious budget, when it's on sale taking the 49,99 pack with the 3 first extensions + Living worlds episodes is the best value for money discount you can get. For a almost all in one premium start i'd take this pack + secret of the obscure, and in game i would purchase Infinite Teleport to a friend quality of life item and Mistlock Sanctuary Pass Key in the Shop. Second thing you need to know is .... How will i know if im going to enjoy the class im going to play in 50 hours of grind. To do so, create a character of the class of your choice and join the edge of the mist World versus World zone (its on the top menu of the game), you will be able to try out a fully leveled character for no time investment (all skills etc...). NEXT things to know. In guild wars 2 you do have basic housing, with the vanilla game you can add the Crystal quartz node to your personnal instance as the first thing you buy to exploit this personnal mining area (worth 1 gold/day). Some nodes to buy to add to your home instance cost laurel currency, for all laurel nodes you do need a total of 90 laurels (25 25 25 15 for krait obelysk), so you may wanna focus on saving your laurels and get some completing weeklies missions. Mind that you can get Ascended accessories amulet and rings from the Laurel Vendor, for a full set you need 180 Laurels, so you might prioritize this before nodes, also, try if you play alot even if it's not necessary the first thing to take in the Wizard Vault Daily/weekly completion board, the 150 laurels every semester for 1500 wizard vault currency, take them untill you fully geared with the ascended you can get from it, and untill you have all your nodes, then you can stop purchasing them. GETTING cheap Exotic gear (called exos) the best way to find cheapest exotic gear with specific lvl 80 stats is the honor badge seller in World versus World. you just need to play WvW a bit then you will have access to a active income of honor badges. you will save 100's of golds if you play several characters. take note that doing this method is a money saver only for specific traits of weapon and armor, like viper or Celestial which are expensive from PVE side. Also there are celestial weapons which are particulary cheap from PVE side, like Greatsword, Shortbow or mace. You can also buy Arms of the people box for around 3,8 gold for a Celestial weapon of your choice since the last extension. As Celestial builds are the king of soloing pve hard content, and are also the most expensive most of time, i would strongly recommand purchasing Celestial exotic gear from WvW vendor in prio, or Viper, just check which are real expensive on trading post, but for Berserker most of time there are 40 silver option from trading post PVE that will cost less than the WvW part purchase itself. World versus world is a main feature of endgame content, i'd even say if you don't enjoy it after 10-12 hours of WvW, i would quit guild wars 2 if i were you, because its like not liking 25% of the cake in the end of a long bake. Best things to invest your real money in. Except extensions there is also a utility type of features you can unlock for real money or ingame currency converter system (that will ask you to play alot to convert to the median currency , equivalent to real cash gems). the best things i would invest in in order are : - S tier - - infinite teleport to a friend (10 minutes cooldown) - mistlock sanctuary (infinite) pass key (not always available in shop, just wait for it). - The rest (highly optionnal)- - if you like being able to play all classes, character slots (it also works as storage, and you know... we are in Storage Wars 2). - the three cash shop unbreakable recyclers (copper fed for blue, the purple rune one for green, and the silver one for gold equipment and exotic gear recycling). - material storage bank expansion (makes your mats storage increase by +250 every time you pay once, paying once makes it increase from 250/250 to 500/500, then 750/750 , etc...) - Bank tabs storage expansions - a set of Unbreakable harvesting tools with 3 glyphs chests, in which you pick 3x glyph of volatility. - once you have chose a main character, eventually 1 bag inventory slot. -having 5 shared inventory slots for infinite teleport to friend, the three recyclers and your mistlock sanctuary pass key is a big upgrade compared to base game (but is not absolutely necessary). there is also living world chapters which are not properly extension but they are equivalent to it, so you might want to get them in the end, it unlocks features, maps , etc. there are several other utilities you can easily overwrite for exemple world boss portal device becomes really limited interest with a whole map discovered character and this : https://wiki.guildwars2.com/wiki/Event_timers Class choice. 1) if you like World vs World and plan being a commander in your 5 base character slots pick up at least : - a Mesmer - a Guardian 2) If you like to roam and be a solo star in pvp and roaming pick up at least : - a Rogue (best pvp mobility) (deadeye is also incredible PVE DPS) - a Ranger (soulbeast/untamed elite spec, soulbeast is king of 1v1) 3) If you want pet hunting minigame inside the game pick up at least : - a Ranger 4) If you like arena? well look what top players play in meta comps videos. 5) If you like easy PVE mode pick at least : - an engineer with mechanist elite spec (easiest class). - or a revenant for the vindicator elite spec (almost easiest class). - A mesmer for a Staff/staff Mirage build 6) if you like solo fight hard achievements completion pick up at least : a) at least 1 elite spec S tier - a Mesmer | - a Revenant | - an Engineer | b)at least 1 elite spec S/A tier - a necromancer | - a Ranger | - an elementalist | - a rogue | - a guardian | 6) everything is indicative /! everything is reliable classwise (or almost, depending on updates) /! and strongly depend on which extensions you got, for this kind of information i strongly recommand you to search for content creators doing tier lists, like Syrma or Lord Hizen. 7) if you want the unique ability to help other with puzzles and obstacles and teleport them you'll need to have a mesmer. If you got only HOT/POF extension and only one lvl 80 character boost, i strongly recommand you use it for a thief , a necromancer or a mesmer, or if you want to use it on the hardest class to level up then use it on an elementalist. with only Heart of Thorns and Path of Fire, the two S tier elite specs are Reaper Necromancer, then Deadeye (Thief) . A tier is Mirage (mesmer), Berserker (warrior), and Scourge (necromancer). The class that will ask you to change the less gear for best result with a lvl 80 booster is the thief, you will only need to change the Relic for a absolute S tier build. The necromancer is also a good pick, weapons are good for both scourge and reaper, and the two hander celestial sword on trading post the cheapest is at less than 1 gold. for fulling your 5 character slots with only the 2 first extensions, making a mesmer a guardian a thief and a necromancer, and keeping the last slot for key farming, or make the one of your choice, is what i do recommand, if you got several other extensions, almost all classes gets a A/S tier PVE build for soloing content, as i said check content creators. The world wide vast field of web ressources ! FOR BUILD RESSOURCES. https://metabattle.com/wiki/MetaBattle_Wiki My go-to for browsing builds. https://hardstuck.gg/ Second place I look for builds https://snowcrows.com/ Try-hard raid builds. https://guildjen.com/builds/ More experimental builds FOR CRAFTING RESSOURCES. https://gw2efficiency.com/ https://gw2crafts.net/ https://www.gw2profits.com/ THE REST Most of these resources pull live data from the game through APIs. To some of these resources you can add your own personal API from: https://account.arena.net/applications. https://wiki.guildwars2.com/ OFFICIAL ARENANET WIKI CRAZY GOOD FOR MOST QUERIES. Part of my daily routine from official wiki: https://wiki.guildwars2.com/wiki/Faction_Provisioner https://wiki.guildwars2.com/wiki/Pact_Supply_Network_Agent https://blishhud.com/ UI Overlay. I use it for in-game access for timetable, event notifications, trading post watcher, radial mount wheel, and then the big one called pathing where you can download map overlays that show achievement locations etc. https://gw2efficiency.com/ Account overview, crafting calculator, material storage listing price etc. https://fast.farming-community.eu/ Daily farming checklist, alt parking, currency/item conversions (with live data), guides to set up the most profitable farming builds etc. https://www.gw2lunchbox.com/ Material promotion cheat sheet. https://www.gw2craftgold.com/ Easy money, can do more advanced stuff but I haven’t gotten to that yet. https://www.gw2profits.com/ Crafting suggestions based on inventory. https://gw2crafts.net/ Crafting discipline levelling guides. https://www.gw2bltc.com/en/ Trading post overview. https://guildjen.com/ Guides! https://gw2timer.com/ Timer overview, inventory cleanup tool etc. This has kinda been replaced by blish hud. Getting cash shop items for free (up to 52 black lion chest free key / year) If you wish to optimize which cash shop items you can get for free. you must reserve an empty slot on your account, where there will be a character to recreate and raised to lvl 10 and the end on the first lvl 10 mission quest line (every week you can do it , reset on monday). The best race and specs is to take a human commoner (raised by common folks) to go fast. Once you'll be advanced into the game playing world versus world and stuff you'll get that many tome of knowledges / week that you'll can easily afford throwing 8 on your alt to lvl him up lvl 10 instantly. the chain quests takes 15 minutes max. So basicaly for 15 active minutes / week you got a maximum of 52 Black lion chest keys / year . which is equivalent of 4300 gems ( 45 euros ) . Once you have finished the lvl 10 questline and earned your black lion key, transfer it to your bank, and then delete and recreate the character. What to do when you start (with a lvl 80 booster)? Okay so now you chose your class, you boosted it, you out of the test zone. Your character is ready. What to do? first i'd strongly recommand doing the Path of fire First mission, you will unlock raptor. then, once in the path of fire zone, get all the hero points of the first zone, and all the mastery points you can get (don't mind asking for help to get some you couldn't get that early, people can teleport you with mesmer portal, or you can jump on a turtle mount, etc...) the goal is to unlock the Canyon Jump Mastery and grab all mastery points and hero points of the first zone, then move to the second one, desert highlands. Once there, go to the Bunny mount village, and do the heart (only available if you unlocked canyon jump raptor mastery) and purchase the bunny mount. Okay so for now we are done with Path of fire. now, switch the story line, and do the first heart of Thorns mission, once done, you'll have to earn a bit of experience in first Heart of thorn map to unlock the first Glider mastery. Once done do the second mission. okay so now you should aim on getting your gliding skill to the use of updrafts (the second one), and then you should unlock itzel/nuloch/exhalted first masteries, then gliding 3. After this you have different options, if you want to get access to a gear vendor, get the itzel second mastery, or if you want to upgrade the fastest your glider, go directly to gliding 5th mastery. During this quite long process, you can also go sometimes to path of fire maps, to unlock the High vault third mastery of the bunny, it's a huge jump that will help you alot (in fact i would do it in parallel of doing the HoT masteries, just switch maps). to optimize your experience gain and participation to META events, use this : https://wiki.guildwars2.com/wiki/Event_timers when you got the 3rd mastery of the bunny and of the raptor, i would strongly recommand move to the third path of fire map, and unlock quickly the Skimmer mount, once done (it takes 10 minutes), just level up the masteries untill you reach the 3rd one (Ride the Wind). Okay so this is the end of the tutorial, if you get at least Glider 3 itzel/exalted/nuloch 1 Raptor/bunny 3 and Skimmer 3 you good with 85% of content. You should after that aim on doing your Vanilla story to lvl 80 to unlock masteries points and level up Vanilla masteries, first thing to aim in vanilla mastery is Pact Commander line at least to Supply line Management, i would recommand going all the way to Advanced Logistics for auto looting monsters everywhere in the game which is a game changer. Then you got two options, if you a fractal abuser get some Fractal masteries, if your goal is being a crafter and trying as soon as possible to have a Legendary set, unlock legendary crafting masteries (mind that for fully craft a legendary you need the last masterie of Legendary crafting, so i would start with this first, especialy if your a talented player, i would say you really may need only the 2 first masteries of the Fractal Attunement Line. Wizard Vault (milking it) There is a Daily/weekly quest board on the guild wars menu When you complete daily or weekly missions, you receive currency. if you complete the right amount of each you got a huge bonus reward. First thing i would do as a new player is instantly you get out of the test zone you go to wizard vault menu, and on top left you got a little wheel for parameters, here click, and set your missions preferences to PVE only. mind that for weeklies you'll have to wait the next monday for your mission list to permanently being modified to PVE only missions, that's why i would start on a Sunday Night! Don't forget to change the settings twice for both daily and weekly missions, they operate separately! This will be much easier and fast to complete all the missions this way. okay so now you have access to a large variety of rewards, from sellable expensive Mystic coins, to cheap bag of gold, to ascended gear, Laurels, cash Shop salvaging kits and upgrade extractors. There are things to absolutely avoid in this "shop" - essence of gold (this apply only on money dropped from mobs , which is absolutely marginal) - essence of luck - transmutation charges ( you can get alot quick from WvW) - vision crystals - black lion mastery coffers - essence of luck - the large T5 crafting bags (worthing 40 currency) - the obsidian shards, they are way overpriced all the other things are valuable, and you should prioritize the order you want to get them depending on your preferences and volume of hour played ( for a high volume of hour player unlocking everything won't be a problem if you play during the whole semester.). take in consideration the expensive gold bags costing 35 currency each only once you have milked absolutely all the rest, and you got more wizard vault currency than the one you can store.