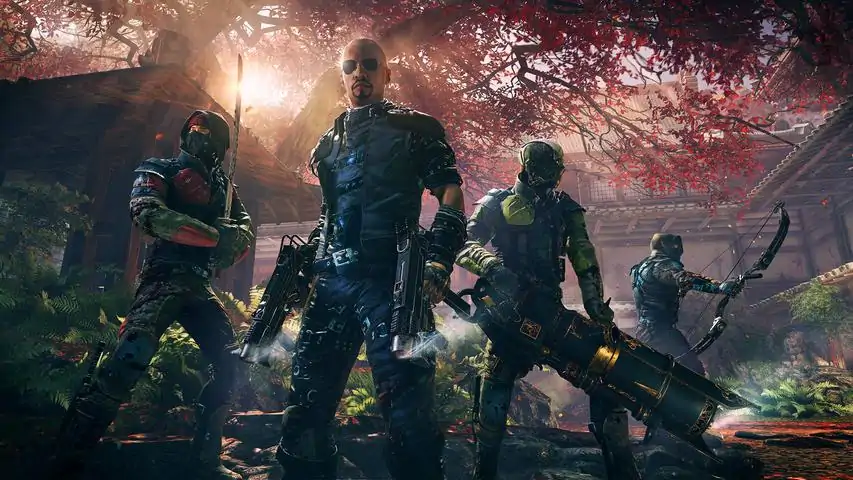
影子武士2


For new players and as a reference. For this guide all stories are called missions. The guide is for missions flow and the order in which to complete them though you can choose any order for some of the side missions if you wish, plus some tips. If you try to skip side missions you will be warned you are under-levelled and do you wish to continue with the main mission. Any weapon not listed in this guide like the Smith and Wesson pistol are world drops. Tips Suggest you purchase the One Trick Pony grenade launcher as soon as you can afford it from Larry’s store. You can basically shoot the enemy head on (aim waist high) without taking damage from the grenade launcher. Ammo try to stock up after completing a mission in the same area at one of the shrines, it will save you money buying ammo. Do free roam as you can get good items doing this, also to level up and get more skill points. Good area for this is the Cookery. Your best friend is the dash and health packs/regen. Do apply upgrades to your weapons/shields etcetera with the gems regularly and take off the gems when you decide to use a different weapon as you may be able to apply them to another weapon. Some of the weapons dropped by Bosses become available early in Larry’s store, an example is The Last Kiss Goodbye rocket launcher, so be careful in what you buy as you could be wasting money. Rocket Launchers, when a mob is charging at you, aim at the ground just in front of them for spectacular results, as one would say dodge that. Some bosses will dodge them if you shoot directly at them, so watch out for that if you do not have auto aim. If you cannot find a boss while on a mission, return after completing the mission and track it down with a couple of exceptions listed below. The amount of orbs you obtain from certain bosses depends on the difficulty you select, number of orbs are 3/5/7/27. Missions page 1 Main Missions All In a Day’s Hard Work There are 3 secrets that you can pick up here, one by following the stream into a cave at the back of the area where your car is, another is after you go down the wooden ramp and have to double jump the second stream, just past the jump is a cave on your left. The last is your first major fight behind the altar accessed by the water in a cave. Reward Hauer shotgun plus 1 skill point. Main Missions My Hero Boss Lieutenant Akimbo drops the Deck-ARD pistol, Reward for completing Blade of Ziabatsu, Skill vanish and 2 skill points. Calamity your Home Base. Weapon the Warrrsaw, skill Serene Mind and amulet Forbidden Fruit in the Wang Cave. Hot Blooded Boss is The Sharpest Spike drops the Yumi Bow, skill Bullet Pouch, Reward for completing Ripper blade weapon, skill Chi Blast and 2 skill points. Missions page 2 Side Missions Chi-ters Boss is Vicious Sentinel drops new Skill Firestarter, Reward for completing skill Grip of darkness and 1 skill point. Ninja’d Scrolls part 1 Boss is Frozen Widow drops new skill Sub zero, Reward for completing Devolt nail gun and 1 skill point. Ninja’d Scrolls part 2 Boss is The Guard drops new skill Killer instinct, Reward for completing skill Chi Slash and 1 skill point. Ninja’d Scrolls part 3 Boss is Unit-64 drops the Weapon Emperors Touch and the skill Thunderbolt, Reward for completing skill Energy Pouch and 2 skill points. The Cookery Boss is The Chef drops Talons arms melee weapon and skill Intoxication, Reward for completing The Duke grenade launcher, Skill Arcane Mastery and 1 skill point. Missions page 3 Main Missions Industrial Espionage There is a Secret in Kamiko’s bedroom to the right in the corner near the window. Boss is Transistor ZL-260 drops the Monson rocket launcher, skill Explosive Pouch, Rewards for completion are Automatic Grenade Launcher Genocider or Automatic Shotgun Hammershot and 2 skill points Seepage Problem If you wish to farm, do it before commencing this mission if you want to level up a bit and for more skill points, also the mission Hot blooded will be greyed out and you cannot access it. Mission boss is an Elite belly who drops the Sword of Oni, Boss is the Gatekeeper who drops a key, Reward for completion, skill Like The Wind and 2 skill points. Big trouble in Calamity The first part where you fight your way back to Calamity is closed after completing it, look for secrets here carefully there are 4 of them all except one are in/near water. Boss is ST-RC1 drops Fujin rocket launcher. From the library King Skeletor heavy machine gun also a secret. Main mission Boss is Corrupted Kamiko, the One Trick Pony does wonders here, reward for completing, skill Elemental Shield and 2 skill points. Missions page 4 Side Missions Monster tea party Boss is Alpha R-X111 drops The Beast melee weapon, and 1 skill point Demonic trafficking Boss is Gun Fury drops the skill Auto Reload, Reward for completing Stapler nail gun, skill Second Chance and 1 skill point. Flirty fishing part 1 Boss is The Old Fart drops the Shogun pump action shotgun and the skill One With Nature, Reward for completion Triad revolver and 1 skill point. Flirty fishing part 2 Boss is the Shady Rascal drops the skill Elemental Focus, Reward for completion is TRIPLE- 6 machine gun or The Last Kiss Goodbye rocket launcher and 1 skill point. Flirty fishing part 3 Boss is The Queen of Dolls drops the Sawblade, Reward for completion is Feuerfaust Gauntlet and 2 skill points. Wang in a Box and New Bounty Brd The mission is accessed from the Snow Globe in the Wang Cave. There are 4 bosses and 2 surprise rewards. Bounty Brd in Wang cave there are 10 missions. Missions page 5 Main Mission Ancestral Ties If you wish to farm, do it before commencing this mission if you want to level up a bit and for more skill points. Boss is Apprentice of Mamushi drops Crimswords, Reward for completion is the Springchester gauss rifle, skill Elemental Knockout and 2 skill points. Body Shaking A good weapon to use for the bosses is the Springchester. Boss is Magmator of Devil Mountain, drops the Overseer assault rifle. Main Boss Devouring Kamiko drops Destroyer of Realms rocket launcher, Reward for completion 2 skill points. All in the Family Note: Go to where the oyabun is but do not enter, turnaround and find the boss first as this section is closed after completing mission. Boss is Lord Destroyer drops the Sheng-Long grenade launcher, Reward for completing Cerberus sawed off shotgun or Lumberjacks Caress chainsaw, whichever you do not choose will be the reward in Stop the Ooze side mission and 2 skill points. Also more missions on bounty board avail. Stop the Ooze Boss is the Toxicator drops Wyrm’s Breath grenade launcher, skill Overheal, Reward for completing Cerberus sawed off shotgun or Lumberjacks Caress chainsaw and 2 skill points. Missions page 6 Side Missions Heisenberg part 1 Boss is the Highest Priest, Reward for completing Eternal Infinator SMG, amulet Hand of Re-Incarnation and 1 skill point. Heisenberg part 2 Boss is Colonel Fasthand drops the Perferator assault rifle. Reward for completing Shredders or the Purgatator pump action shotgun and 1 skill point. Heisenberg part 3 Boss is the Lord of War drops Agent of Chaos gattling gun. Reward for completing Gidorah melee weapon or Jigoku pistol and 2 skill points. One More Thing Boss is Captain Lo-Gan who does not drop anything, Reward for completing ZI-ROB1N Bow and 1 skill point. Stop the Propaganda Boss is Eradicator drops Plasmoid assault rifle, Reward for completing Amulet Heavy Metal and 1 skill point. Missions Final page Main Missions Corporate Shill If you wish to farm, do it before commencing this mission if you want to level up a bit and for more skill points. Boss is TL-Devourer who drops Raijin assault rifle, Reward for completing 2 skill points. Violent Take Over Boss is Resistor ZL-260 drops the Zweihander machine gun. Mission Boss is Zilla Mechcanoid, use non elemental weapons as these work best. Reward for completing Arm of Orochi melee weapon and 2 skill points. The Battle of the Gates Ancient Goddess Ameonna. This is fairly hard fight, use your dash all the time and you can shoot it with anything, or use a sword, the only thing on hard or above is you will have to use fury to finish off the boss especially when the boss digs their abdomen into the ground and starts to send unlimited waves of fireballs. Reward is the sword Ryuken and 2 skill points. Hope this guide assists you, unfortunately no pictures as there are other good guides with pictures if you need to look at them in respect to weapons, and I am lazy as this took long enough to compile. May you Slash/shoot and loot and enjoy the action in this game. Any other suggestions in regards to tips I will be happy to take on board. Bounty Board Missions There are a total of 14 New Missions, 2 new weapons and 4 new skills. Missions listed below: 1. Plague of the Bunny Lords 1 x skill point 2. 50 Shades of Shade 1 x skill point 3. Power Supply 1 x skill point 4. Faceless Foe 1 x skill point 5. Returning some Video Tapes 1 x skill point, skill Deathcheater 6. The Traitors Among Us 1 x skill point, skill Sword Master 7. Toxic Avengers 1 x skill point, Power Gauntlet Medusa Ray 8. Infernal Affairs 1 x skill point, skill Revenge 9. Missing in Action 1 x Skill point 10. Attack of the Drones 1 x Skill point 11. Danger Zone on Mt Akuma 1 x Skill point and Skill Shared Pain. 12. Attack on Yakuza Mansion 1 x skill point. 13. Merciless Captain 1 x Skill point, Gattling Gun EX-GF01. 14. The Butcher of Onishima 1 x Skill point. Playthrough's and other You can do do 4 playthroughs with the one character if you start on easy mode, then a further 7 on the insanity levels. Once you have completed a couple of playthroughs you can drop back to a lower level if your after the achievement for money and by farming for it. Note you can start on any difficulty, suggest you skip easy and start on normal if your not confident with FPS games. There is not much difference between the the 2 difficulty levels. After you have completed a playthrough by defeating the end boss and you have 100% completion, select new game and the character you want, normally the one you have just completed, this will take you to the next difficulty with all your weapons and gems you have collected. This makes it a lot easier than starting from scratch. On the second playthrough and other playthroughs the bounty board missions become available again with orbs and skill points as rewards after completing the mission Hot Blooded, also the same for the story and side missions instead of the weapons etc, assuming you already have them. If you do not have them all, they will also be available plus the orbs. The bounty board missions will be given to you in stages, it is up to you when you want to do them. Gems - Do not let them pile up in your inventory, every few missions put them in junk if you do not want them and mass sell them at one of the stores. For achievements the hardest to get are the secrets and collecting 10,000 orbs. There are guides in the forum also on youtube if you are after the secrets. Collecting the orbs is just plain out grinding until you get them. I use the guide myself as its easy to miss a boss, especially if you don't have a good memory on where the bosses are and rewards given.

这与其说是一篇指南,不如说是我分享一些能让游戏变得更有趣的创意的方式。 如果你有任何很棒的想法,欢迎告诉我,我会添加新的部分并制作视频来呈现。祝好。 忍者流派 每击16.8k伤害
Important: To calculate average dmg per hit, divide DPS by Rate. Explaination: DPS displayed already factor in Crit. chance and Crit. dmg and also rate of attack. Rate of attack is irrelevant since invisibility is broken once an attack is made and the spell have to be cast again immediately.... Thats if you want to be invis all the time like a Ninja. So basically we want to know how much each attack does on average. Sword start to 3:30 Chainsaw 3:30 to 8:30 Gauss Rifle 8:30 to 14:20 Rocket Launcher 14:20 to end Invis Melee Dmg Bonus: 2.9x Fully Charged Sting Dmg: ~5x I'm going to assume every attack is a fully charged sting attack for melee weapons. Ghidorah Average Dmg: 2985 or 8657 (for invis) Saw Blade Average Dmg: 5794 or 16803 (for invis) Springchester Average Dmg: 3785 Destroyer of Realms Average Dmg: 7514 While Saw Blade dmg is high for melee attack, you need to stand still for the full chainsaw animation to finish to deal full dmg. This is always dangerous for insanity 4 difficulty. Tanker Build 95% Dmg resistance Boss fight with Devouring Kamiko: You basically never have to worry about dying.. Not even at insanity 4 difficulty. Player Dmg Resist (PDR): +87% Weapon (WDR): +30% After Heal (AHR): +30% Capped at about 90-95%. Not sure how the cap works but its probably either: 1) A simple cap at 95% 2) Damaged received = (1 - PDR) * (1 - WDR) * (1 - AHR) So, for my example when my dmg resistance is at its highest I receive dmg = (1 - 87%) * (1-30%) * (1-30%) = 6.37% So I was receiving about 6.37% of the original dmg amt. 239% Movement Speed Build Boss fight with Zilla Mechanoid: Player Movespeed: +47% Invis Movespeed: +92% Total Movespeed Bonus: +139% This build is good for boss fights for dodging their attacks or for rushing through a stage or a mission very quickly. Its not very effective when fighting mobs since their attacks are everywhere and too unpredictable. High DPS Build... 5.6k DPS Note about sting: To maixmise damage, you wouldn't want to use sting since it gives a 5x dmg multiplier but has to be charged for 3 secs. So its the same as modifying the weapon's Rate to 1.67 which is lower than most weapon anyway. Sting is efficient only when used with invis Ninja build since that gives an additional 2x dmg multiplier. Wrist Blade start to 5:40 Chainsaw 5:40 to 9:00 Gauss Rifle 9:00 to 13:05 Rocket Launcher 13:05 to end Player Crit Chance: +30% Player Bonus Dmg: +348% Shadow Fury Dmg Bonus: 3.02x Ghidorah DPS: 1194 Ghidorah DMG: 118.2 Ghidorah Crit Chance: +47% Ghidorah Crit Dmg: +174% During Shadow Fury DPS: 3606 Lumberjack's Caress DPS: 1444.8 Lumberjack's Caress DMG: 212.8 Lumberjack's Caress Crit Chance: +37% Lumberjack's Caress Crit Dmg: +174% During Shadow Fury DPS: 4363 Springchester DPS: 1059.8 Springchester DMG: 836.1 Springchester Crit Chance: +37% Springchester Crit Dmg: +174% During Shadow Fury DPS: 3200 Destoryer of Realms DPS: 1878.6 Destoryer of Realms DMG: 1659.9 Destoryer of Realms Crit Chance: +37% Destoryer of Realms Crit Dmg: +174% During Shadow Fury DPS: 5673 Note that the correct DPS data for both ranged weapons are at timestamp 9:32 I edited it in since I forgot to use the "Marksman Soul" amulet while playing. Chainsaw dmg is higher but requires player to stand still and wait for animation to finish for it to deal full dmg. This can be dangerous at insanity 4 difficulty. Mage Build The key point of this build is that even when Superior units are Power Immune, you can have a 100% chance to hit them with your spells. At insanity 4 difficulty, just standing next to a mob with elemental buff can kill you, due to "Aura Damage". Also, you have no time to go invisible and you actually don't need to... Most of the time.. So get yourself some dmg resistance. Use upgrades focused on the specific power you will want to use all the time. 1 powerful spell is better than 2 spells. I recommend Grip of Darkness since there's an achievement related to it. Oh and you should get Serene Mind maxed. The 4 chi per second helps alot. Chi mastery however not so much. I maxed Chi mastery but its not essential. Endless Fury You will need Jigoku for this one. 1st weapon upgrade: Pick the one that helps you gain fury when fighting a SINGLE Boss/Mob. If you're fighting a crowd, speed was never an issue to begin with. You want to spend as little "time per shot" as possible. Including reload time in the equation: Time spent per shot: 1 / Rate + Reloadtime / Clipsize So, you want the above equation to give you a low number. Any upgrade that affects 2 of the above 3 factors above are always worth considering. By the time you get Jigoku, you should have at least one or two such upgrades. Unless if you're unlucky. Do check shop after every mission there's probably one selling. Explosive Ammo upgrade multiplies your fury gain when hitting a crowd. Do note that you should aim at their feet.. That way even if you missed the explosion will still hit them. If you miss but aimed at their bodies you literally hit nothing. Dual Wield literally doubles your fury gain. Its important. Important to consider if you want "Furious Heart". +30% fury means filling up the meter is even faster. However, -30% affects the passive 4 chi per second from maxed Serene Mind. So you can't spam spells all that much anymore. Lastly, pick upgrades for Shadow Fury in the Power slots section. Duration is the key since you replenish the meter not the time. Longer duration means each point of fury in the meter is now worth more time. This doesn't improve your fury gain but does make very fury point worth more Shadow Fury time.

Wonder what all those things listed under health bars do? What is this Guide? All enemies in Shadow Warrior 2 spawn with a pseudo-random selection of traits that are listed under their health bar when "All Information" or "Basic Information" is selected in the HUD section of the game's settings. This guide explains what they do. Auras Some traits can be auras. An aura will apply the trait in question to all nearby enemies, who will have the trait listed under their health bar as a non-aura. Only the aura-giver will have "Aura" after the trait's name. Classification Traits These traits are only visible when using the "All Information" HUD setting. They just indicate the 'type' or 'species' of the enemy. As far as I know, there are no actual mechanics related to different enemy types. Animal Human Cybernetic Demon Boss Size Traits Some weapon mods increase or decrease a weapon's damage to Small, Large, Superior and/or Elite enemies. Small is not explicitly listed under an enemy's health bar, it just means the mod affects enemies that aren't Large, Superior or Elite. Large Physically bigger, more health, faster movement, more melee range and more damage. Chi-Blast must be upgraded to rank 3 and Grip of Darkness to rank 4 to effect Large enemies. Superior and Elite enemies can also have the Large trait. Superior Physically bigger, more health, faster movement, more melee range and more damage than Large Always Powers Immune, but the Arcane Mastery skill and Dominator amulet give rank 3 Chi-Blast and rank 4 Grip of Darkness a chance to affect Superior enemies. Elite Physically bigger, more health, faster movement, more melee range and more damage than Superior enemies. Always Powers Immune. Non-Elemental Traits Non-Aura:Powers Immune Grip of Darkness and Chi-Blast won't work on this enemy. Vanish still works.Guarded When damaged to 50% health, this enemy will become immune to all damage and spawn minions which must be killed to lift the invulnerability.Aura or Non-Aura: Mighty Does more damage. Tough Has more health. Swift Faster movement speed, faster attack speed, faster recovery time, more aggressive. Hardened Immune to elemental effects like damage over time, stun, and slow. Possibly reduces the chance you'll proc a critical hit. Vital Constantly regenerates health. Elemental Traits All sources of damage (melee, projectiles, explosions, damage over time...) have an elemental component (Fire, Ice, Toxic or Electric) and a Physical component. The type and percent elemental damage a particular weapon does is visible below its DPS statistic. Most weapons start 0% elemental (100% Physical) and can become as much as 100% elemental (0% Physical) by attaching mods. For example, if an enemy is Fire Immune and you use a weapon that does 25% Fire damage, only the Physical portion (75%) of its listed damage will harm that enemy. Note all damage over time effects are always 100% elemental. Non-Aura: Fire / Ice / Toxic / Electric Vulnerable Receives more damage from Fire / Ice / Toxic / Electric weapons. Note Physical Vulnerable does not exist. Fire / Ice / Toxic / Electric / Physical Resist Receives less damage from Fire / Ice / Toxic / Electric / Physical weapons. Resistances are stronger on harder difficulties Fire / Ice / Toxic / Electric / Physical Immune Cannot be harmed by Fire / Ice / Toxic / Electric / Physical weapons.Aura or Non-Aura: Burning You have a chance to receive Fire damage over time when hit by this enemy. Higher difficulties increase the chance this elemental effect occurs. Always accompanied by Ice Vulnerable and either Fire Resist or Fire Immune. Freezing You have a chance to have your movement significantly slowed when hit by this enemy. Higher difficulties increase the chance this elemental effect occurs. Always accompanied by Fire Vulnerable and either Ice Resist or Ice Immune. Poisonous You have a chance to receive Toxic damage over time when hit by this enemy. Higher difficulties increase the chance this elemental effect occurs. Always accompanied by Electric Vulnerable and either Toxic Resist or Toxic Immune. Stormy You have a chance to receive Electric damage over time and have your movement slightly slowed when hit by this enemy. Higher difficulties increase the chance this elemental effect occurs. Always accompanied by Toxic Vulnerable and either Electric Resist or Electric Immune. Tips I find the most dangerous enemies are those who are Swift and Mighty. Especially Swift Aura and Mighty Aura. There's nothing worse than being stun-locked by one Swift, Freezing enemy and then clobbered by a Swift, Mighty enemy. You'll never find an enemy that is immune to all damage types, but on the harder difficulties you will find enemies immune to all but one. You should keep at least one DPS-focused weapon of each damage type on hand, and keep some reserve ammo in them. .

《影子武士2》"The Way of Masamune"成就刷取攻略 前言: 在《影子武士2》中有一个不太友好的成就,至少对我来说是这样。这个成就就是"The Way of Masamune",它的难点在于需要收集10000个【正宗之球】。这些球体的掉落量极少,主要来自精英怪、Boss,完成主线和支线任务以及通过试炼也能获得。球体的掉落数量直接取决于游戏难度。收集10000个球体需要相当长的时间,尤其是如果从头开始新游戏+或在试炼中获取它们的话。本指南将介绍如何加快整个过程,并通过正当途径获得这个棘手的成就,无需作弊,也无需使用Steam Achievement Manager。再次强调,这只是加快进度,并非瞬间完成。 操作步骤和流程:我们将通过击杀精英怪物来获取球体。首先在自由模式中进入海森堡3的任务,也可以选择其他地点,关键是要刷出敌人在我们附近刷新的随机情况。为此,我们需要通过地图反复传送至该地点,当刷出所需结果后就不要再使用地图,击杀怪物后退出到菜单并重新加载。即使重新加载后,怪物也可能在不同位置刷新,但地点和我们的出生点将保持不变。当我们记住精英怪的刷新位置后,就寻找一个离所有敌人刷新点最近的存档点,之后不再进行存档,接下来所有操作都通过返回菜单来完成。在视频中我找到了这样一个存档点,怪物的刷新位置只会在左侧和右侧,不会出现在其他地方。现在说到击杀,我们要拿最强的武器,要有100%的周期性伤害。我用的是带石头的电锯,有100%的电击伤害,你们可能用的是别的,但关键是要有攻击后的周期性伤害。将精英怪物的生命值攻击到接近一半,但要在它进入无敌阶段并召唤3个帮手之前,立即进入隐身状态。这样敌人会失去我们的视野,也就不会召唤帮手了(此方法对所有精英怪物都有效)。一旦无敌状态结束,就可以击杀敌人。拾取球体后,返回菜单并重新加载游戏。就像我之前说的,我们要这样反复尝试直到成功。【球体的数量取决于难度】,但这并不意味着即使实力足够,也要立刻选择“不可能7”难度。这完全取决于你的角色和武器强化情况。难度或许已经解锁,但如果【宝石】无法让你快速安全地消灭敌人,再加上难度提升后敌人会对不同元素产生抗性,战斗就会拖长,你也会因此失败。比在较低难度下玩几次所花费的时间更多。
后记。


A complete (I think) list of console commands for Shadow Warrior 2. Intro and what to do. This is a list of console commands for Shadow Warrior 2. Got this from GameRanx and am just posting it here for ease of use. There are a lot, and few have been tested; USE THEM AT YOUR OWN RISK. To access the console, press left control (Ctrl) and the Tilde key (~ the key above Tab and to the left of 1 on a QWERTY keyboard) together. Type your console command (such as d_slowmo), then enter a boolean value (1 to turn on, 0 to turn off) and press enter. Example: d_slowmo 1 Useful commands The commands will be listed first, the effects are listed in parentheses after; do not type what's in the parentheses. (List is currently empty.) a_ a_atlas_enabled a_constraints_enabled a_curve_default_size a_dangles a_dangles_enabled a_events_log a_hud_loading_image_ a_hud_loading_image_arena_1_0_d a_ik_enabled a_lods a_lods_size_treshold a_parent_skeleton_mapping a_show_attachments a_show_blendtree_events a_show_envelopes a_show_lods a_show_lookat a_show_penetrations a_show_ragdolls a_show_skeletons a_tpose a_trajectory_correction ai_ AI_ACTIVITY AI_Die ai_displacement_debug AI_FinishGoal ai_info ai_lod AI_POSE ai_ranges AI_Set_Interrupteble ai_set_on_ground AI_SetInterruptable ai_show_debug_awareness ai_show_debug_awareness_state ai_show_sensor ai_tickets d_ d_ai_squadinfo d_animated_systems_disable d_animatix d_animatix_min_screen_size d_ansel d_auto_start_level d_auto_start_level_wait_for_video d_auto_start_menu d_auto_start_menu_after_intro d_autoaim (gives auto-aim) d_budgets d_budgets_history d_can_skip_cutscenes_first_time d_can_skip_dynamic_cutscenes d_collect_ai_logs d_debug_dialogs d_decals d_disable_chapters d_disable_main_menu d_disable_resource_precache d_disable_roll_when_immortal d_disable_script_cache d_disable_spawnpoints d_dlcs_enabled d_draw_decalmap d_draw_entity_map d_draw_menu_level d_draw_tbn d_enable_alienfx d_enable_cheats_menu (appears to be "readonly") d_enable_level_select (enables level select; not sure how to access it) d_encounter d_enemies_name d_enemies_quest d_enemies_xp d_force_enable_heroic d_force_renderer_objects_reload d_frame_delay d_gen_graph_using_jobs d_gen_imposter d_gen_jumplinks_bulk_recheck_consistency d_gen_jumplinks_using_jobs d_gen_mopp_mt d_gen_navmesh1_using_jobs d_gen_navmesh2_using_jobs d_gen_navmesh_during_warmup d_gen_navmeshIO_using_jobs d_generate_navi_after_editor d_load_outdated_navmeshes d_loading d_loc_force_condition d_minimap_path d_missing_res d_mp_respawn_on_death_position d_nav_mode d_occupied d_optimize_navmesh_graph_using_jobs d_physics d_physics_collisions d_physics_collisions_freq d_physics_collisions_pin d_remote_manager_autoconnect d_res_load d_reset_steam d_save_navi d_save_quest_progress d_script_profile d_scripts_load_only_used_templates d_show_ai d_show_asset_info d_show_encounters_errors d_show_enemies_darkpower d_show_explosions_range d_show_hints d_show_hitmaterials d_show_layers_WIP d_show_plane d_show_sp_ai_state d_show_spgroupinfo d_skip_all_cutscenes d_spawnpoints_xp d_toggle_prisec_weapon d_tris_count_placeables d_tris_shadows_count_placeables d_ui d_ui_forms d_upgrade_price d_usable d_video_player d_visual_debug d_watch_channels d_watch_savefile d_watch_values e_ e_animations_dir_last e_animations_last e_animatix_atlas_last e_animatix_last e_animatix_texture_last e_block_connector_color e_block_connector_height e_block_edge_color e_block_edge_height e_block_info_color e_camera_crawl_speed e_camera_move_speed e_camera_pitch_mult e_camera_sprint_speed e_camera_yaw_mult e_confirm_readOnly e_connector_edge_color e_connector_edge_height e_curve_editor_snap e_disable_objects_in_game e_drag_scalling e_external_max_script_ide e_gizmo_text_color e_grid e_grid_color e_grid_current e_hide_close_button e_hide_ro_in_object e_instance_debug_log e_instance_generic_dir_last e_instance_properties_flat e_instance_rhm_dir_last e_instance_texture_dir_last e_keep_area_modifier e_level_editor_fast_close e_material_auto_save e_material_import_last e_material_last e_material_texture_last e_max_scripts e_object_last e_opaque_triggers e_outline_border e_outline_highlight_color e_outline_selection_color e_p4_always_checkout e_p4_checkinFooter e_p4_client e_p4_enable e_p4_enable_log e_p4_multicheckout e_p4_password e_p4_port e_p4_user e_persistent_item_color e_preview_actor_dir_last e_preview_window e_properties_rhm_dir_last e_properties_texture_dir_last e_redefined_item_color e_rotate_angle e_scene_bkg_color e_search_last e_selection_color e_selection_trigger_faces e_show_ambush_triggers e_show_animpaths e_show_audiovolumes e_show_background_plane e_show_blockers e_show_boxes e_show_children_helpers e_show_env_maps e_show_flyer_zones e_show_fog_volumes e_show_gizmo_origin e_show_hooks e_show_items_range e_show_occluders e_show_spawn_radius e_show_triggers e_show_volume_ambients e_show_volume_decals e_show_volume_lighting_channels e_simulation_extra_radius e_snap_position e_snap_rotation e_snap_scale e_snap_scale_on_start e_template_ai_last e_template_base_last e_template_create_dir_last e_template_create_meshdir_last e_template_filter_last e_template_fx_last e_template_last e_template_view_favorites e_template_view_list_mode_1 e_terrain_brush_flatness e_terrain_cursor_alpha e_terrain_cut_radius e_terrain_delta_delta e_terrain_delta_radius e_terrain_delta_strength e_terrain_fixed_height e_terrain_fixed_radius e_terrain_fixed_strength e_terrain_move_radius e_terrain_move_strength e_terrain_paint_att e_terrain_paint_radius e_terrain_paint_strength e_terrain_ramp_width e_terrain_show_tile_border e_terrain_smooth_extent e_terrain_smooth_radius e_terrain_smooth_strength e_thumbnail_bkg_color e_thumbnail_empty_color e_tracker_color e_tracker_depth_test e_tracker_focus_color e_trails_rotate_height e_trails_rotate_radius e_trails_rotate_speed e_undo_restores_camera e_visibility_range e_window_animations e_window_animpath_editor e_window_create_instance e_window_curve_2d e_window_curve_color e_window_file_chooser e_window_level e_window_material_editor e_window_object e_window_preview e_window_quick_look e_window_sequencer_editor e_window_template e_window_tools e_window_tools2 e_window_tools2_minimized e_window_visibility_tags e_window_watch_values g_ g_agent_force_damping g_agent_force_multiplier g_artbook_end_id g_artbook_start_id g_autodelete_meshes_limit g_autodelete_meshes_min_time g_autodelete_parts_time g_autodelete_skinned_meshes_max_onlevel g_autopause_enabled g_autopause_time g_binary_profile g_binary_saves g_color_objective_completed_description g_color_objective_completed_title g_color_objective_description g_color_objective_failed_description g_color_objective_failed_title g_color_objective_title g_combo_max_time_between g_combo_max_time_hold g_containers_auto_collect g_cutscene_skip_delay g_damage_player_own_multiplier g_damage_to_enemies_multiplier g_damage_to_player_multiplier g_demo_combat_enabled g_demo_damage_to_enemies_multiplier g_demo_damage_to_enemies_multiplier_from_clients g_demo_damage_to_player_multiplier g_demo_mode g_difficulty g_difficulty_player_count g_difficulty_player_count_mp g_enable_arrow g_enable_blood g_enable_checkpoints g_enable_electricity g_enable_hints g_enable_lightnings g_enable_rain g_enable_subtitles g_explosions_glow_strength_mod g_explosions_glow_threshold_mod g_fall_never_kills g_force_to_enemies_multiplier g_hud_inertia_damping g_hud_inertia_range g_infinite_ammo (appears to be "readonly") g_katana_cut_animation_speed g_katana_mouse_direction g_katana_mouse_direction_window g_katana_slowdownanim_whenhit_amount g_katana_slowdownanim_whenhit_time g_level_tags g_local_user_name g_max_save_slots g_mods_active g_mods_enabled g_mods_order g_outline_bbox_expand g_player_acceleration g_player_aircontrol g_player_backward_ratio g_player_bouncefix g_player_inair_force_multiplier g_player_independent_reload g_player_inertia_damping g_player_inertia_range g_player_jumping_control_direction g_player_maxpitch g_player_move_actions_freq g_player_onground_force_multiplier g_player_onground_friction g_player_rotation_when_zooming g_player_speed g_player_speed_whenjump g_player_sword g_player_t_inertia_damping g_player_t_inertia_max_velocity_x g_player_t_inertia_max_velocity_y g_player_t_inertia_max_velocity_z g_player_t_inertia_speed g_player_time_between_dialogs g_prevent_using_same_blocks g_radar_shows_all g_remains_quality g_save_AI_data g_savegame_slot g_second_chance_revive g_splitting g_splitting_attachment_field_threshold g_splitting_attachment_step g_splitting_edge_blend g_splitting_editor_isolate_split g_splitting_emissive_amplitude g_splitting_emissive_deceleration g_splitting_emissive_power g_splitting_flip g_splitting_flip_epsilon g_splitting_invalid_mesh_maximum_size g_splitting_minimum_size g_splitting_recalculate_hole_masks g_splitting_remove_edges g_splitting_remove_edges_intersection_test g_splitting_remove_edges_threshold g_splitting_remove_edges_uv_threshold g_splitting_reskin g_splitting_tess g_splitting_tess_threshold_0 g_splitting_tess_threshold_1 g_splitting_tess_threshold_2 g_text_default_time_long_word g_text_default_time_min g_text_default_time_short_word g_text_default_time_short_word_max_length g_ui_show_controls g_weapon_autochange_ammoout n_ n_always_allow_clients n_conn_delay n_conn_speed n_connect n_debug_say n_debug_send_reliable n_debug_send_unreliable n_disconnect n_friendly_fire n_get_games n_grey_area n_imbad_clients n_kick n_map n_network_stats n_party_radius n_player_mp_color n_player_mp_model n_ragdoll_interpolate n_request_games n_server_accessibility n_show_ragdoll n_stop_server p_ p_accepted p_add_batch_max_size p_character_push_limiter p_debug_memory p_debug_ragdoll p_debug_world_snapshot p_enable_dead_body_collision p_impact_enabled p_impact_force_multiplier p_impact_show p_merging_enabled p_min_angular_damping p_min_linear_damping p_particles p_particles_warmup_fps p_penetrations_enabled p_progress p_ragdoll_ease_action p_show_broadphase_messages p_show_info p_show_jumplinks p_show_player_info p_show_transforms p_show_water_simulation p_slipping p_slipping_counter_tolerance p_slow_mo (enables slow motion effect on dead bodies) p_surface_velocity_enabled p_toolkit p_toolkit_dragging_force_multiplier p_vdb_enabled p_vdb_port p_water_simulation_enabled p_wind_multiplier pp_ pp_adaptation_enable pp_adaptation_instant pp_bloom_enable pp_ca_enable pp_ca_force_val pp_dof_enable pp_dof_max_size pp_enable pp_grain_enable pp_heat_d pp_lens_dirt_enable pp_lens_flare_enable pp_motion_blur_camera_cut_threshold pp_motion_blur_enable pp_motion_blur_max_size pp_motion_blur_scale pp_motion_blur_translation_scale pp_radial_blur_enable pp_screen_blur_enable pp_ssr_blur pp_ssr_blur_sigma pp_ssr_blur_sigma2 pp_ssr_blur_sigma3 pp_ssr_debug pp_ssr_enabled pp_ssr_gloss_fade pp_ssr_gloss_limit pp_ssr_gloss_threshold pp_ssr_max_angle pp_ssr_strength pp_ssr_temporal_blend r_ r_afr_sync_enabled r_animatix_debug_bg_color r_animatix_debug_safe_region r_animatix_force_res r_animatix_pp_enable r_animatix_pp_min_distance r_animatix_text_partial_clear r_anisotropy r_ao_direct_lighting r_async_io_file_sleep r_auto_res_reload r_console_perf_aniso_treshold r_console_perf_mip_clamp_region r_console_perf_z_clamp_region r_csm_cascade0_depth_bias_clamp r_csm_cascade0_depth_bias_offset r_csm_cascade0_depth_bias_scale r_csm_cascade1_depth_bias_clamp r_csm_cascade1_depth_bias_offset r_csm_cascade1_depth_bias_scale r_csm_cascade2_depth_bias_clamp r_csm_cascade2_depth_bias_offset r_csm_cascade2_depth_bias_scale r_csm_cascade_split_0 r_csm_cascade_split_1 r_csm_cascade_split_2 r_csm_shadow_dist_mult r_csm_z_far_offset r_csm_z_near_cull_offset r_csm_z_near_offset r_debug_adaptation r_debug_break_on_error r_debug_deferred_tri_light r_debug_disable_rt_sync r_debug_gbuffer_opaque_frag_num r_debug_hdr_display_checker r_debug_hdr_display_disable r_debug_max_index_num r_debug_min_index_num r_debug_shader_time r_debug_terrain_LOD r_debug_view r_debug_view_billboards r_debug_view_mesh_mode r_debug_view_weather_shadow_map r_debug_view_wind_chunks r_decal_depth_offset r_decal_weapon_depth_offset r_decals_skinned_max_depth r_default_depth_bias_clamp r_default_depth_bias_offset r_default_depth_bias_scale r_depth_bounds r_dissolve_border_color r_dissolve_border_color_intensity r_dissolve_border_size r_dissolve_time r_draw_ambient r_draw_ambient_box r_draw_ambient_convex r_draw_ambient_ellipsoid r_draw_ambient_local r_draw_animatix r_draw_animatix_debug_bg r_draw_cables r_draw_decals r_draw_decals_foliage r_draw_decals_skinned r_draw_dyn_meshes r_draw_editor_coloring_overlay r_draw_flare_occlusion r_draw_flares r_draw_foliage r_draw_forward_opaques r_draw_hud r_draw_hud_console r_draw_hud_refraction r_draw_imposters r_draw_lens_flares r_draw_lights r_draw_lights_angle_tube r_draw_lights_directional r_draw_lights_directional_projector r_draw_lights_local r_draw_lights_particle r_draw_lights_point r_draw_lights_spot r_draw_lights_trilight r_draw_lights_tube r_draw_mesh_particles r_draw_meshes r_draw_meshes_translucent r_draw_opaques r_draw_opaques_alphatest r_draw_outlines r_draw_overlay r_draw_particles r_draw_rain_splashes r_draw_shadow_capsules r_draw_skinned_meshes r_draw_skybox r_draw_terrain r_draw_translucents r_draw_translucents_gun r_draw_translucents_gun2 r_draw_tri_lights r_draw_volume_ao r_draw_volume_decal r_draw_volume_lighting_channels r_draw_volumetric_flares r_draw_water r_draw_weapon r_draw_weather r_draw_weather_decals r_dummy_mem_usage r_dump_area_params r_dump_buffers r_dump_render_lists r_env_map_blend_in_time r_env_map_debug_alpha r_env_map_debug_forward_capture_names r_env_map_debug_names r_env_map_debug_save_to_file r_env_map_debug_spheres r_env_map_enable_generation r_env_map_gen_dist r_env_map_gen_wait_dist r_env_map_shadow_range r_env_map_unstream_offset r_event_query_sync r_farZ r_fog r_fog_local_lights r_fog_quality r_fog_volumes r_fog_volumes_afr_temporal_threshold_angle r_foliage_cascade_num r_foliage_dissolve_distance r_foliage_dissolve_distance_imposters r_foliage_dissolve_distance_z r_foliage_gather_extend r_foliage_imposters r_foliage_instance_culling r_foliage_lock r_foliage_quality r_foliage_range_max_0 r_foliage_range_max_1 r_foliage_range_multiplier r_foliage_show_boxes r_foliage_show_modifiers r_foliage_show_stats r_foliage_use_cbuffer r_foliage_use_tiles r_fov r_fullscreen r_fullscreen_aspect r_fullscreen_modes r_fullscreen_monitor r_fullscreen_refreshes r_gamma r_gbuffer_clear_emissive_stencil r_gbuffer_toskvig r_hdr_display r_hdr_display_paper_white r_hit_proxy_scissor r_hit_proxy_test r_hud_blur r_inventory_ambient_intensity r_inventory_back_light_intensity r_inventory_back_light_pitch r_inventory_back_light_yaw r_inventory_key_light_intensity r_inventory_key_light_pitch r_inventory_key_light_yaw r_keep_vanish r_lens_flares_blur_strength r_lighting_channels_debug_alpha r_lights_cam_intersection_force r_local_shadow_atlas_cutscene_updates_per_frame r_local_shadow_atlas_debug r_local_shadow_atlas_game_updates_per_frame r_local_shadow_atlas_prioritize_moving_lights r_local_shadow_atlas_time_in_cache r_lod_blend r_lod_dist_mult_camera r_lod_dist_mult_env_map_gen r_lod_dist_mult_shadow_cascade r_lod_dist_mult_shadow_local r_lod_dist_mult_weather_shadows r_lod_foliage r_lod_force r_lod_quality r_lod_screen_area_skinned_decal r_material_mod_acid_emissive_max r_material_mod_acid_emissive_speed r_material_mod_electricity_emissive_max r_material_mod_electricity_emissive_speed r_material_mod_fire_emissive_max r_material_mod_fire_emissive_speed r_material_mod_ice_emissive_max r_material_mod_ice_emissive_speed r_material_transmitance_foliage r_material_transmitance_thinwall r_max_prims r_menu_fov r_merge_skinned_mesh_dips r_merge_static_mesh_dips r_min_prims r_mip_cap r_mip_lod_bias r_nearZ r_nv_multi_res_flatten r_nv_multi_res_preset r_outline_color_1 r_outline_color_2 r_outline_color_3 r_outline_intensity_1 r_outline_intensity_2 r_outline_intensity_3 r_outline_occluded_multiplier r_outline_occluded_separation r_outline_thickness r_outline_thickness_vanish r_outlines_blur r_outlines_blur_offset r_outlines_blur_scale r_outlines_blur_speed r_particle_global_spawn_multiplier r_particle_quality r_rage_enemy_grad_range r_rage_enemy_grad_scale r_rage_enemy_grad_speed r_rain_enable r_rain_lock r_refraction r_refraction_force_fs_copy r_refraction_hud r_resolution_scale r_safe_region r_safe_region 0 r_safe_region 1 r_scanner_color r_scanner_enabled r_scanner_local_falloff r_scanner_local_speed r_scanner_refraction r_scanner_width r_shader_debug_w r_shader_debug_x r_shader_debug_y r_shader_debug_z r_shader_list_load r_shader_list_save r_shader_make_default_cache r_shader_save_asm r_shadows r_shadows_directional r_shadows_local r_shadows_local_depth_bias_clamp r_shadows_local_depth_bias_offset r_shadows_local_depth_bias_scale r_shadows_local_force_res r_shadows_point r_shadows_quality r_shadows_res_scale r_shadows_spot r_show_agent_paths r_show_agent_personal_space r_show_agent_vel r_show_basis r_show_blockers r_show_box r_show_box_animatix r_show_box_animatix_chunks r_show_box_decal r_show_box_env_map r_show_box_flare r_show_box_global_env_map r_show_box_light r_show_box_light_shadow r_show_box_lightning r_show_box_mesh_skinned r_show_box_mesh_static r_show_box_particle r_show_box_terrain r_show_box_translucent r_show_box_volume_decal r_show_camera_pos r_show_editor_dangles r_show_env_maps r_show_flares r_show_flyer_zones r_show_fog_volumes r_show_fps r_show_grid r_show_hole_capsules r_show_hole_collision r_show_lights r_show_lights_particle r_show_lights_shadow r_show_lights_shadow_point r_show_lights_shadow_spot r_show_lod r_show_lod_info r_show_name r_show_name_light r_show_name_particle r_show_particles r_show_particles_overdraw r_show_particles_spawn_area r_show_safe_frame r_show_shadow_capsules r_show_shadow_casters r_show_shadow_casters_local r_show_sim_particles r_show_splits r_show_splits_color_scale r_show_subchunks r_show_system_stats r_show_triggers r_show_volume_ambients r_show_volume_decals r_show_volume_lighting_channels r_sleep_on_idle r_sort r_sort_mode r_ssao r_ssao_blur_depth_diff_mult r_ssao_constant_bias r_ssao_distance_scale_bias r_ssao_max_radius r_subsurface_scattering r_subsurface_scattering_scale r_temporal_aa r_terrain_lod_bias r_test_a r_test_b r_test_c r_test_d r_test_e r_tex_streaming_debug r_tex_streaming_enable r_tex_streaming_force_pool_size r_tex_streaming_in_range r_tex_streaming_time_in_cache r_texture_quality r_tripple_buffering r_vanish_ambient_high r_vanish_ambient_low r_vanish_blend_time r_vanish_enemy_grad_range r_vanish_enemy_grad_scale r_vanish_enemy_grad_speed r_vanish_heat_offset r_vanish_heat_scale r_vanish_heat_speed r_vanish_outline_ally r_vanish_outline_collectable r_vanish_outline_enemy r_vanish_outline_player r_vanish_outline_quest r_vanish_player_grad_range r_vanish_player_grad_sc s_ s_allow_attack_as_use s_ansel_move_dist_max s_ansel_rotational_speed s_ansel_translational_speed s_console_height_ratio s_console_instant s_credits_speed s_damage_indicator_scale s_debug_break s_debug_send_crash_report s_debug_sys_window s_demo s_disable_loading_thread s_enable_ansel s_enable_video s_fast_menu s_filesystem_cache s_fly_mode s_force_baking_textures_ps4 s_force_baking_textures_xboxone s_fow_range s_hud_crosshair s_hud_crosshair_custom s_hud_crosshair_custom_alpha s_hud_crosshair_custom_color s_hud_crosshair_custom_outline s_hud_crosshair_custom_scale s_hud_damage_messages s_hud_enemy_info s_hud_exp_bonus_messages s_hud_opacity s_hud_scale s_hud_visible s_info_multiplayer_bata s_language s_language_default s_language_external s_language_from_steam s_language_ignore_user s_language_sentence_split_anywhere s_load_streaming_lock s_loading_force_video s_loading_hints_pool s_loading_show_bg s_loading_show_hints s_logs_enabled s_logs_mask_console s_map_big_icons_scale s_map_small_icons_scale s_map_trigger_blend_time s_map_view s_map_view_all s_map_view_debug s_map_view_encounters s_map_view_filter_chests s_map_view_filter_items s_map_view_filter_monsters s_map_view_filter_npc s_map_view_filter_other s_map_view_filter_players s_map_view_scale s_map_view_scale_big s_minimap_alpha_big s_minimap_alpha_small s_minimap_bcg_alpha_big s_minimap_bcg_alpha_small s_minimap_path s_minimap_path_density_big s_minimap_path_density_small s_minimap_path_icon_scale s_minimap_path_max_length s_minimap_path_min_length s_minimap_path_regenerate_dist s_minimap_quest_range s_minimap_z_arrow_blend s_minimap_z_arrow_dist s_minimap_z_dist_blend s_minimap_z_dist_max s_mouse_default_cursor s_mouse_invert s_mouse_lock s_mouse_raw_input s_mouse_sensitivity s_mouse_smooth s_null_sound s_pad_autoaim s_pad_autoaim_distance s_pad_autoaim_radius s_pad_autoaim_speed s_pad_autoaim_stickness s_pad_autoaim_zoomin_time s_pad_hold_delay s_pad_layout_buttons s_pad_layout_sticks s_pad_layout_triggers s_pad_log_delta s_pad_look_curve s_pad_look_invert s_pad_look_sensitivity_x s_pad_look_sensitivity_y s_pad_look_speed_x s_pad_look_speed_y s_pad_move_state_threshold_accept s_pad_move_state_threshold_ignore s_pad_swap_triggers_buttons s_pad_trigger_fire_threshold s_pad_trigger_zoom_delay s_pad_vibration s_pad_weapon_circle_dpad s_pad_weapon_circle_left_stick s_pad_weapon_circle_right_stick s_player_indicator_visible s_profilers_history_size s_profilers_summarize_calls s_profilers_summarize_counters s_recorder_enable s_recorder_freq s_safe_region_ratio s_screenshot_mode s_scripts_compiled_file s_scripts_compiled_use s_scripts_watchhog_enabled s_scripts_watchhog_timeout s_show_hud_hints s_show_quest_goals s_simulate_particles s_skip_logo s_sound_cutscenevolume s_sound_decodebuffer s_sound_dopplerratio s_sound_duck_inhead_kamiko s_sound_forcemono s_sound_forcestereo s_sound_musicvolume s_sound_optimizememory s_sound_sfxvolume s_sound_stats s_sound_streambuffer s_sound_volume s_sound_VOvolume s_supress_ignored_errors s_time_multiplier s_track_quest_items s_unholster_attack_dash_distance s_unholster_attack_detect_distance s_use_network_cache s_Use_PS4_controller_for_VO v_ v_activate_occluder v_active_view v_cascades v_cbuffer_grid_node v_cbuffer_grid_object v_cbuffer_min_quad_size v_cbuffer_mip v_cbuffer_mode v_cbuffer_rast v_cbuffer_show v_grid_check_boxes v_grid_sanity_check v_lock v_only_always_visible v_show_boxes v_show_boxes_mode v_show_cascade v_show_cascade_grid v_show_events v_show_frustum v_show_grid v_show_occluders v_show_tiles v_tiles v_zcull v_zcull_node_print v_zcull_treshold w_ w_editor_enable w_editor_height w_editor_pos_x w_editor_pos_y w_editor_width w_game_enable w_game_height w_game_pos_x w_game_pos_y w_game_width Outro and how you can help That's them. Again, I haven't tested most of these, so USE THEM AT YOUR OWN RISK. If you want to help out though, if you test the commands and figure out what they do, leave it in a comment and I'll add it to the guide.


如果游戏在创建会话或尝试加入其他玩家时出现错误,这里有解决方法! 修复网络问题 1. 下载压缩包。 2. 将压缩包中的【GalaxyPeer64】文件放入游戏文件夹。 3. 路径 -> 【你的磁盘: SteamLibrary steamapps common Shadow Warrior 2】 4. 享受多人游戏吧!
Welcome, grasshopper! You're about to embark on a journey through Shadow Warrior 2, a glorious cocktail of sword-slashing, gun-blasting, demon-slaying mayhem sprinkled with one-liners that’d make even Deadpool jealous. Strap on your katana, polish your guns, and prepare to laugh your way through chaos. Here's everything you need to know, and then some, to dominate Lo Wang’s world with style, flair, and a heaping side of absurdity. Step 1: Become One with Lo Wang’s Sarcasm First, let’s address the elephant demon in the room: Lo Wang is not your typical hero. He’s a wise-cracking, pop-culture-spewing whirlwind of sass. If you're not ready to embrace his terrible (yet amazing) jokes, you’re doing this wrong. Start every session by practicing your best cheesy one-liners in the mirror. For example: "Who wants some Wang?!" "The sword is mightier than the... everything else." "If at first you don’t succeed, reload and try again!" Say them out loud. Feel the Wang. You are now ready. Step 2: Know Thy Arsenal (Or: The Bigger the Gun, the Bigger the Boom) In Shadow Warrior 2, your arsenal is as varied as it is ridiculous. You’ve got katanas, rocket launchers, chainsaws, and guns that look like they were designed by a toddler hopped up on energy drinks. Here’s the rundown: 1. Katanas and Swords: These are your bread and butter. Get up close, slice everything into sushi, and leave behind a trail of diced enemies. Pro tip: Aim for the head—it’s more satisfying. 2. Guns: From pistols to miniguns, the rule is simple: bigger is better. If it shoots, explodes, or turns demons into goo, it’s a keeper. 3. Weapons with Weird Mods: Shadow Warrior 2 allows you to customize weapons with gems, making them shoot fire, ice, lightning, or just make a sound that annoys your enemies to death. Experiment! 4. Chainsaw: For those intimate, "let's get to know each other better" moments. Remember, dual-wielding is a thing. Why settle for one gun when you can have two? Step 3: Slay with Style Demons in Shadow Warrior 2 are like piñatas filled with gore and loot. But don’t just kill them—style matters. Here’s how: 1. Use the Environment: Barrels explode, ledges are high, and spikes are sharp. Be creative! Kill your enemies and redecorate at the same time. 2. Combos are King: Combine swordplay with gunfire for maximum destruction. Decapitate a demon, shoot it mid-air, then blow up its buddies. Bonus points for slow-mo flair. 3. Elemental Madness: Mix and match elemental weapons to exploit weaknesses. If a demon is on fire, why not freeze it next? Call it a hot and cold special. Step 4: Loot Like a Hoarder Every enemy you kill is a loot dispenser. Grab everything! Sure, 90% of it is junk, but who cares? That one rare mod that makes your shotgun shoot fireballs is worth the cluttered inventory. Sell the junk, upgrade your gear, and repeat. Pro Tip: Organizing your loot is for losers. Just scroll through your inventory like a maniac until you find what you need. Step 5: Upgrade Like a Mad Scientist The upgrade system in Shadow Warrior 2 is like building a Frankenstein’s monster out of shiny trinkets. Here’s how to master it: 1. Weapon Mods: Stick gems into your weapons like a kid gluing macaroni onto art. 2. Skills: Invest points in important things like healing and stabbing harder. Or, just max out the skill that makes you insult demons. 3. Experimentation: If you’re not turning your shotgun into a freeze ray, are you even playing the game? Step 6: Co-op Chaos Why kill demons alone when you can bring friends along? Co-op mode lets you and three buddies wreak havoc together. Just remember: Friendly fire isn’t a thing, so shoot your friends for fun. Lo Wang is still the funniest. Accept it. If someone hogs the loot, challenge them to a sword duel (or sabotage them with exploding barrels). Step 7: Side Quests = Extra Wang Side quests are where the real fun happens. They’re full of absurd plots, weird characters, and more opportunities for Lo Wang to make jokes. Do them all, if only to hear the dialogue. Step 8: Boss Battles = Chaos The bosses in Shadow Warrior 2 are enormous, grotesque, and absolutely bonkers. Here’s how to win: 1. Stay Mobile: Stand still, and you’ll die faster than Lo Wang’s jokes land. 2. Switch Weapons Constantly: When in doubt, rocket launchers solve everything. 3. Use Chi Abilities: Healing and magic attacks are your lifeline. Step 9: Embrace the Absurdity Shadow Warrior 2 isn’t just a game—it’s a comedy show with blood splatters. Stop taking things seriously. Laugh at the ridiculousness, enjoy the over-the-top action, and remember: You’re here to have fun. Step 10: Become the Ultimate Wang By now, you should be a demon-slaying, loot-hoarding, joke-spewing master. Keep slicing, dicing, and laughing your way through hordes of enemies. And remember: When life gives you demons, give them hell. With a katana. And a bazooka. Now go forth, mighty Wang. The world of Shadow Warrior 2 awaits!

最高難易度No pain no gain の攻略に必要なハクスラ部分の知識です。 有用なもののみガイドに乗せています。 -----Enemy Information----- 敵のヘルスバーの下に表示される情報の解説 (Electric,Toxic,Fire,Ice) Velunerable属性が弱点となる。 多くの場合、炎をまとった敵は氷が、氷をまとった敵は炎が弱点、毒をまとった敵は雷が、雷をまとった敵は毒が弱点となる。 (Electric,Toxic,Fire,Ice,Physical) Resist属性に耐性がついている。 基本的にまとっている属性が防御耐性となっている。PhysicalはInfoを読むしか判別不可? (Electric,Toxic,Fire,Ice,Physical) Immune属性が無効化される。 基本的にまとった属性が無効化されている。 Stormy敵が雷を纏いToxic Velunerable、Electric Resist or Immuneが付く。 触れるとダメージと状態異常になる。雷の状態異常はスロー効果とダメージ。 Poisonous敵が毒を纏いElectric Velunerable、Toxic Resist or Immuneが付く。 触れるとダメージと状態異常になる。 毒の状態異常はダメージ Freezing敵が氷を纏いFire Velunerable、Ice Resist or Immuneが付く。 触れるとダメージと状態異常になる。氷の状態異常はスロー効果大。 Burning敵が炎を纏いIce Velunerable、Fire Resist or Immuneが付く。 触れるとダメージと状態異常になる。炎の状態異常はダメージ ~Auraオーラは周りの敵にも効果が発動する。Mightyオーラなら周りの敵も攻撃力が上昇する。 Mighty敵の攻撃力が上昇する。まとっている属性のダメージが洒落じゃなくなる。 Tough敵のHPが上昇する Swift敵の移動速度が上昇する。 Hardenedプレイヤーの与える属性状態異常の確率、クリティカルヒット率が減少する。 Vital敵のHPが自動回復する。 GuardedBOSSエネミーに付く。HP50%になった際に発動し、無敵+雑魚を召喚する。 召喚された雑魚を倒すまで周囲にシールドがはられ、ダメージは通らない。 Vanishでスキップ可能。 Powers ImmunePowerスキルが無効化される。 格付け Large Superior Elite LargeはEliteやSuperiorも持つことがある。Elite Large ○○ Superior Large ○○等。 EliteにはVanish以外のPowerスキルは無効。 リストの下に行くほど体力、攻撃力が多い 種族 Animal Human Cybernetic Demon Boss ゲームプレイに大きな影響なし -----Skills----- Life Life Mastery最大HPの上昇。 HP+10 HP+20 HP+30 HP+40 HP+50 そのまま。ポイントも少ないので余ってたら振っていい。 Overheal+Call for Medic+Touch of Healerメディキットと回復石像が最大HPを超えて回復する+ 敵からのメディキットのドロップ率上昇+ メディキットの回復量上昇(最大60) の3点セット 3つあってはじめてまともに効果を発揮するためどうしても後回しになるが、あれば大分安定する。 Second ChanceHPが0になった際に数秒間発動し、敵を倒すと復活する。 効果時間5秒、発動時のダメージ+50% 効果時間8秒 発動時のダメージ+100% 敵を倒した際のHP回復+最大ライフの20% 発動時のダメージ+500% とりあえず1SP振ってアクティブにしておくといい。 発動中は移動不可、感度・攻撃速度低下。 発動時のダメージボーナスが大きいため簡単に生き返れるが、死亡時に敵に囲まれているため離脱の仕方は考えておいたほうが良い。 AmuletのHand of the Reincarnationでクールダウンが60秒へる。常時ダメージ500%発動が可能なためゲームがぶっ壊れる。 Warrior Shadow FuryUnstoppable Killing Machineになる。 初期開放。ダメージボーナス50%、ダメージレジスト25%、ライフ・チドレイン2%、 ダメージレジスト+50% ダメージボーナス+50% 近接攻撃でフォーススラッシュが発動、フォーススラッシュへのダメージ変換率100% 効果時間+67% 数字見ただけでもおかしいぶっ壊れスキル。発動頻度も高め。Level4で近接の通常攻撃でフォーススラッシュがでるようになり、密着での火力が2倍+貫通分になる。手に入れたら最優先でSPを割くべきスキル。 Like the Wind移動速度上昇 移動速度+4% 移動速度+8% 移動速度+12% 移動速度+16% 移動速度+25% 10spも使うためLevel5まで上げる必要はないが、移動速度アップの恩恵は大きい。 Sting右クリ+Wで突き攻撃 初期開放 ダメージ+10% レンジ+50% ダメージ+20% ダメージ+30% とりあえずLevel3まで上げておくと良い。すばやく視点を振ると全方位に攻撃可能なため、酔を覚悟で使えばVortexの上位互換となるか(?。 Vortex右クリ+AorDで回転斬り 初期開放 レンジ+20% ダメージ+20% レンジ+50% ダメージ+50% 視点がぐねぐね動くのを除けば、全方位に攻撃できる優秀なスキル。 Force Slash右クリ+Sで敵を貫通する衝撃波を飛ばす 技の解除 フォーススラッシュの大きさ+15% フォーススラッシュの大きさ+30% フォーススラッシュの速さ+50% フォーススラッシュの射程+30% 最強の近接スキル。密着で当てると斬撃と衝撃波で2hitする。ダメージアップはないのでLevel1の開放のみでいいかも。 Killer InstinctHPが低いときにダメージボーナスを得る HP20%以下で発動、発動時のダメージ+20% HP30%以下で発動 発動時のダメージ+50% 発動するとBerserkと表示される。Second Chanceスキル時にも発動するので火力がえらいことになる。 Auto-Reload装備中の武器が自動的にリロードされる。 リロードまでの時間100秒 リロードまでの時間80秒 リロードまでの時間60秒 リロードまでの時間20秒 遠距離武器中心ビルドならあると便利。近接ビルドでもShadow Fury中に遠距離武器をタレット化して敵のヘイト集め→集敵が捗る。 Dark WandererShadow Furyの発動に必要なFury量が減少する。 SF発動に必要なFury-10% SF発動に必要なFury-25% SF発動に必要なFury-50% Shadow Furyの発動機会が倍になる。RyukenやBoner、JigokuでFury回復すれば問題なし。 Backstabber背後からの近接攻撃にダメージボーナスを得る ダメージ+10% ダメージ+25% ダメージ+50% ダメージ+100% 敵の動きを止める、背後を取るのは簡単なので、実質的に常時火力+100%の恩恵を得られる。 Power Healing Flame35chi消費して詠唱2秒で25HP回復する。 初期開放 ヒール量+10% ヒール量+25% 詠唱時間-25% 長押しでchiのあるかぎり回復し続ける。序盤の貴重な回復リソース。ではあるがSPを振るのはちょっと勿体無いか。 Vanish隠れ身の術。詠唱時間2秒で効果時間8秒、近接ダメージ+50%、50chiコスト 初期開放 コスト-25%(40) 効果時間+25%(10秒) 近接ダメージボーナス+50%(100%) 本作最強のPowerスキル。ウサギや一部ボス以外の全ての敵にステルス効果がある。たった4SPで近接ダメージボーナスが2倍になるすぐれもの。 Guardedをスキップしたり、非即着(ロケットランチャー等)のヒット時に発動することでバニッシュを解除せず一方的にハメたり、小ネタも多い。 Chi-Blast敵を転倒させる、前方7m、20chiコスト SuperiorとEliteには効果がない 初期開放 レンジ+25% Largeエネミーにも効果が発動する 範囲が全方位になる コストが低く発動が早い、爆発物を吹き飛ばせるので序盤に活躍する。 Grip of Darkness敵を串刺しにして動きを止める。前方6m、30chiコスト、3秒継続 SuperiorとEliteエネミーには効果がない 初期開放 範囲が全方位になる 拘束時間+40% Largeエネミーにも発動する 串刺し中はHS判定がズレてる敵が多い。拘束時間が長いのでChi-Blastよりはこちらが中心になるか。 Arcane MasteryChi-BlastとGrip of DarknessがSuperiorエネミーにも有効になるチャンスを得る ただしGrip of Darknessのレベルが4以上、Chi-Blastのレベルが3以上必要 Superorエネミーに発動する確率+10% Superorエネミーに発動する確率+25% Superorエネミーに発動する確率+50% Eliteの登場頻度は少なく、殆どの敵にChi-BlastとGrip of Darknessが発動できるようになる。DominatorのAmuletと組み合わせで100%発動に。 Chi MasteryChiの最大値が上昇する chiの最大値+10 chiの最大値+20 chiの最大値+30 chiの最大値+40 chiの最大値+50 Serene Mindが最大レベルなら優先度は低いが振っておいて損はない。 Serene MindChiが自動回復する chiの最大値の50%までリジェネ、秒間0.5Chi回復 chiの最大値75%までリジェネ chiドレイン+1% 秒間1chi回復 chiの最大値までリジェネ、秒間4chi回復 最大レベルでPowerスキルを連続して使用できるようになる。Powerはどれも強力なので最優先でSPを割り振るべき。Chiドレイン1%も美味しい。 Elemental Fire Starter火属性アップグレードのプロパティーを強化 火の状態異常のダメージ+10% 火の状態異常のダメージ+20% 火の状態異常の時間+15% 火の状態異常の時間+30% 武器につける火属性ジェムの強化。火属性の状態異常はDOTダメージ。状態異常のダメージは意外と高めなので馬鹿にはできない。 Sub-Zero氷属性アップグレードのプロパティー強化 チルエフェクト+10% チルエフェクト+20% チルエフェクトの時間+25% フリーズのチャンス+15% チルはスロー効果、フリーズは動きが完全に止まる。 Thunderbolt雷属性アップグレードのプロパティー強化 雷状態異常の効果+10% 雷状態異常の効果+20% 雷状態異常の効果+30% 雷状態異常のダメージ+15% 雷の状態異常は麻痺とDOTダメージ。 Intoxication毒属性アップグレードのプロパティー強化。 毒状態異常の効果+10% 毒状態異常の効果+20% 死体の爆発ダメージ+20% 死体の爆発ダメージ+50% 毒の状態異常はDOTダメージと毒状態のときに倒した敵が爆発する。 Elemental Knockout敵の属性耐性が低下する。 敵の属性耐性-5% 敵の属性耐性-10% 敵の属性耐性-20% 敵の属性耐性-30% 敵の属性耐性-40% Immuneには効果なし。属性ダメージが上昇し属性ゲーが加速する。 Elemental Focus物理ダメージの属性ダメージへの変換を強化。 ダメージ変換率+5% ダメージ変換率+10% ダメージ変換率+20% 物理耐性はあっても物理弱点の敵はいないので、ダメージの属性変換は重要。 Elemental Shield自分が受ける属性状態異常への耐性を強化する。 属性エフェクトの軽減-10% 属性エフェクトの軽減-20% 属性エフェクトの軽減-30% 属性エフェクトの軽減-50% 属性エフェクトの軽減-100% 最大レベルで状態異常を受けなくなる(ダメージは受ける)。属性をまとった敵は近づくだけでダメージ+状態異常(氷と雷はスローなので厄介)なので防御面で非常に安定するようになる。 Shared Pain状態異常が近くの敵に拡散する 属性エフェクトダメージ拡散+10% 属性エフェクトダメージ拡散+25% 属性エフェクトダメージ拡散+50% 属性エフェクトダメージ拡散+100% 属性状態異常のダメージが敵から敵へと広がっていく。体力の低い敵はこれだけで倒せたりする。 Resource Ammo Collector弾薬の取得量が増加する。 取得量+10% 取得量+20% 取得量+30% 取得量+40% 取得量+100% 遠距離中心ビルドならとっておきたい。JigokuのためにLevel4まではとっておくと便利。 Karma Harvester取得経験値が増える カルマ+5% カルマ+10% カルマ+15% 長い目で見れば大きい。 Bullets PouschLight Bulletsの所持量が増加する。 バレットライト、ミディアムの最大所持量+10% バレットライト、ミディアムの最大所持量+20% バレットライト、ミディアムの最大所持量+30% バレットライト、ミディアムの最大所持量+50% 対象はハンドガンやサブマシンガン、アサルトライフルなど。遠距離中心でやる場合序盤で使う武器があるので強化しておきたい。終盤でもJigokuに使用する。 Projectiles PouchProjectilesの所持量が増加する。 プロジェクタイルの最大所持量+10% プロジェクタイルの最大所持量+20% プロジェクタイルの最大所持量+30% プロジェクタイルの最大所持量+50% プロジェクタイルには強武器が多いため割り振っておくといい。前半は弓、後半はガスライフルが強い。 Energy PouchEnergy,Plasmaの最大所持量が増加する エナジー、プラズマの最大所持量+10% エナジー、プラズマの最大所持量+20% エナジー、プラズマの最大所持量+30% エナジー、プラズマの最大所持量+50% 通常攻撃でフォーススラッシュを飛ばせる近接武器や、終盤に手に入る強武器の弾薬。近接、遠距離武器問わず振っておいて損はない。 -----Upgrades----- Wepon Upgrades Critical chanceクリティカル率。クリティカルはデフォルトでもダメージ+100%。強い。 Critical bonusクリティカルダメージのダメージボーナス。強い。 Damage Fire rate Clip reload time Ammo clip size increased Ammo save chance弾薬を消費しないで撃てる確率。最大50%。 発動すればロケットランチャーなどの一発打ち切りの武器を連射できる。 Life drain Fire Modes Turret武器のタレット化 ダメージ タレット稼働時間 リロード時間 ミス拡散率 置くだけで自動で状態異常をばらまけるため、ガトリング系のタレットは強力。 Multishot1度の発射で複数発発射する。 発射弾数 ミスレート 発射レート 燃費は悪いが瞬間的な火力は上がる。 Charge shot遠距離武器で溜め攻撃ができるようになる 最大ダメージ 最大ダメージ範囲 ミスレート ロード時間 どうしても遠距離武器縛りをしたい場合vanishと合わせてどうぞ。 Dual Wield武器2丁持ち リロードタイム ミスレート ダメージ jigoku用。高レベル品はミスレートが+になるので非常に使いやすい。 ハンドガン、サブマシンガン、アサルトライフルにつけられる。 Ammo upgrades Piercing Ammo貫通するようになる ダメージ 貫通率 タレットにつけて状態異常をばらまく用。メインで使うにはgem枠が勿体無い。 Explosive Ammo弾が爆発するようになる。 ダメージ範囲 爆発のダメージ ダメージ 遠距離武器のバランスブレイカー。 爆発範囲は5でロケットランチャー程度。爆発ダメージ上昇はクリティカル無しでも安定して火力を出せるほどの上昇量。範囲も火力も申し分なくなる。ハンドガン、弓、ガスライフルで猛威をふるう。 Flaking Ammo弾が分裂する 分裂数 ダメージ ミスレート 消費弾数はそのまま、弾が分裂されて発射され、ダメージは分割される。GEM一つの分裂数は最大3。発射数が増えることをどう使うかがポイント。 Elemental upgrades Damage as electricity Extra damage as electricity 本命 雷属性の追加ダメージ (他属性でも同様のため省略) Damage converted to electricity 属性弱点を突くゲームなので必要 (他属性でも同様のため省略) Electrocute effect vulnerability 雷属性の状態異常強化 Electrocute effect damage 雷属性の状態異常ダメージ強化 Electrocute effect duration 状態異常の持続時間 Damage as toxicToxic corpse explosion damage 死体爆発のダメージ上昇 Toxic effect vulnerability Toxic effect duration Damage as ice Chilling effect Chilling effect duration Chance to freeze Damage as fire Burn effect damage Burn effect duration Armor upgrades Critical chance Critical bonus Damage melee Light,Heavy firearms damage Damage resist武器につけるのは勿体無いためArmorでつけるのが無難 Life drainこちらも武器につけるのは勿体無いのでArmorで。近接武器ならば休む間もなく攻撃を続けられるためDamage resistよりもこちらのほうが相性が良い。 Items drop chanceアイテムドロップ率。有用なジェムが手に入る率が増えるため、Money foundをつけるよりいらないジェムを売ったほうが美味しい。 Karma gained経験値が増える ファーム用 Amulets Marksman Soul 遠距離武器の火力+30% 全スキルのchi消費コスト+50%DominatorなしでChi-Blast,Grip of darknessは使い物にならないのでほとんどデメリットはない。 Coop時だったり、Life・Chiドレインをつけてぶっぱなす用。 Forbidden Fruit 武器についている特殊効果25%武器についている特殊効果が25%強化される。序盤に手に入り、効果も悪くないが25%は若干低い。他の有用なAmuletが出るまでの繋ぎとしては優秀。 Healer Star ヒーリングウェブのコスト-100% メディキットからの回復-100%メディキットからHP回復しなくなるが、Healing Flameが使いたい放題になる。 Powes Upgradesに良いものがあれば悪くはない。 ダメージレジストが少ないときの Kamiko用 Ninja Touch 近接ダメージ+30% 遠距離武器ダメージ-20%近距離武器のダメージが上昇する。序盤で手に入る上に効果も大きく、ずっと使える。 Furious Heart Fury gain +30% Chi gain -30%Furyが入手量が30%増えるのは大きい。ChiはChiドレインでいくらでもカバーできる。 Hand of the Reincarnation セカンドチャンスのクールダウン-60秒Lifeのセカンドチャンスが無限にできるようになる。火力500%でファームできる。 調子に乗りすぎて最後の1体の範囲攻撃とかで死なないように。 Dominator Chi-BlastとGrip of DarknessのSuperiorエネミーへの発動チャンス50%Arcane Masteryと併用すれば100%発動に。 Power upgrades Chi drainPower upgrades枠でつけれるのは便利。 Heal amountスキルで割り振るよりこちらのほうがずっと回復量が増える。 Healing wave cast time詠唱中の回復速度が上がる。 Resist damage after healing回復後ダメージレジストを得る。減少量は大きめ。 Impaled enemies received damageGrip of darknessで拘束した敵へのダメージが上がる。強い。 Pushed enemies damageChi-blastで転倒している敵へダメージが上がる。 Shadow Fury durationShadow Furyの時間が増える。強すぎ。 Vanish melee damage bounusVanishの近接ダメージが更に増える。やりすぎ。 Multiplayer upgrades Direct damage to co-op player as heal味方に攻撃すると回復する。Lifeドレインをつけれないうちはこっち。 Resist aura味方のダメージを軽減するオーラ レジストオーラの範囲 味方のレジスト Damage bonus aura ダメージオーラの範囲 味方のダメージこれとLifeドレインつけとけば良いと思う。 -----Wepons----- おすすめ武器を紹介 近接武器 クリティカルチャンス+クリティカルダメージ+属性ジェムの構成がおすすめ Nobitsura Ka-geクリティカルを出すだけでダメージレジスト50%のすぐれもの。入手時期も中盤かつ条件もクエストをクリアするだけで簡単。 Ryukenつけられるジェムのグレードがレア以下に限定されているが、スペシャルアタック(Sting,Vortex,ForceSlash)でキルすると10%の確率でFuryが100%溜まる。 Shadow Fury中は通常攻撃でForceslashがでるため非常に相性が良い。 Fist of Gozu近接武器では最もダメージが高い(レートは低いが)。1撃重視のためVanishと相性が良い。 また立ち止まっている間は通常攻撃の火力が25%増すのでShadow Furyとも相性が良い。 Plasma CuttersForce slashを飛ばせるショートブレード、多段ヒットするので属性をばらまくのに有用。 Warrrsaw!Lumberjack’s Caressチェーンソー。ヒットストップが大きいため1体1では強いが。スペシャルアタックが使えないためいまいち。 対ウサギで活躍する。 遠距離武器 Devolver Anaconda序盤に手に入る遠距離武器の中でも強め。 Dual Wield + Explosive ammo + Explosive ammo が強力。 Jigoku1hitすると1%Furyが回復する。 Dual Wield + Explosive ammoで1トリガー4hit+爆発分。どんどんFuryが溜まるぶっ壊れ。 Ammo save chanceをつけて連射しまくれ。 Boner敵を倒すと確率でFuryが50%回復する。Ryukenまでの繋ぎ。 ちなみにショットガンは範囲攻撃なので当て方を工夫するとダメージ効率が上がる。 FujinWyrm’s Breathグレネードランチャーは自爆ダメージがないためVanishハメで密着して使える。 he Last Kiss Goodbye Destroyer of Realmsロケラン、自爆ダメージがかなりおおきいもののVanishハメは猛威。 Yumi Bullseye & Bartonガスライフルが手に入るまでの単発高火力の武器。 Flaking ammo + explosive ammo + explosive ammo が強力 Judgement of EnraSpringchesterRaijin最強遠距離武器のガスライフル。Judgement of Enraは後者2つまでの繋ぎなもののクリティカルダメージ60%がデフォルトでついている。 Flaking ammo + explosive ammo + explosive ammo が非常に強力。 弓と違いAmmosave Chanceが発動すれば連発できるためEmbed Gemで大化けする。 再装填はリロード判定ではなくFireRate判定なため、リロード系やクリップサイズのデメリットが無視できるのも大きい。 -----えんどこんてんつ----- No pain no gain 、insanity7までいって更に上を目指す人へ。 Craft3つのGEMを合成してランダムなGEMを1つ作成する。 3つGEMレベルが高いほど、高レベルのジェムが完成しやすい。 Insanity7で入手できるジェムレベルはボスを倒して150前後のものなので、150程度のいらないものを集めてクラフトするのが効率がよい。 お金がかかりまくるので、低レベルジェムはどんどん売っていい。 Purify GemGEMについてるデメリット効果を取り除く。貴重なOrb of masamuneをこれで使うのは多少勿体無いか。 近接武器であれば遠距離武器系のデメリットは全て無関係なのでそこまで必要ではないかも。 Embed Gem武器に4つ目のGEMをつける。取り外しは不可能。Wepons upgradesとElemental upgreadesのみ。 とりあえずでつけるほどOrb of masamuneのコストは低くないので慎重に。 これが一番効果大きい。 Infuse WeaponOrb of masamuneを使用して武器を強化する。ダメージ、レート、リロード速度等。 最初のうちは要求量が少ないものの、だんだんとおかしい要求量になる。低いところだけ強化してあとは無視が無難。 ふぁーむ Orb of Masamunesのファーム、ボスはドロップするジェムのレベルも高く、Furyを確定でドロップするのでその後Shadow furyで雑魚狩りしてファームをするのが基本の流れ。
【正宗之球】100%掉落的首领位于【自由领域】 疯狂难度7下全首领共57个 【根除者】位于【阻止宣传】 【至高祭司】位于【海森堡 - 第一部分】 【战争领主】位于【海森堡 - 第三部分】 【TL吞噬者】位于【企业托】,掉落率约50% 【毒刺者】位于【阻止黏液】 【老家伙】位于【调情钓鱼 - 第一部分】

这是《影子武士2》的用户界面及其他文本的日语化文件。 由于尚未完成,请勿对质量抱有过高期待,只能说聊胜于无。 文件会随着翻译的推进随时更新(最新:2023/11/25)。 据uzura2026表示,剩余的日语化工作也已完成!可从评论栏进行确认(2025/09/09)。 【注意】 作者对于因使用本日语化文件而造成的任何损害概不负责。 因此请自行承担使用风险。 【日语化补丁导入步骤】 【导入步骤】 1.从以下网站下载ZIP文件。2.解压ZIP文件后,按照readme文件的步骤进行数据应用,将语言设置中的中文翻译文本替换为英语。 3.启动游戏,在语言设置中选择中文时,确认游戏内文本是否已替换为英语。若已替换,先关闭游戏。 4.下载并解压我制作的日语化ZIP文件,将_import.bin文件夹覆盖到原文件夹。 5.将pc_arch_script.bin拖拽到_import_bin.bat上。6.启动游戏,若已显示为日语则安装完成。