换一换
换一换 


还记得我吗?没错,我回来了。多亏了评论区的建议,这次我带来了更好的攻略。我觉得与其大幅改写旧攻略,不如直接出一个新的。 剧透警告 和我上一篇攻略一样,本攻略默认你已完全了解: - 凯茜的模组(KM)的基本内容 - KM中所有3个可解锁物品 - KM中所有16张可解锁卡牌 - KM中所有8个可解锁初始套牌 - KM中所有15个可解锁挑战 《邪恶冥刻》及其凯茜的模组最好在一无所知的情况下体验。如果你还没解锁这里提到的所有内容,那么本攻略可能不适合你。等你积累更多经验后再回来吧。别担心,我很有耐心。 1.5 DX版导言 欢迎回到我的全新升级版“ weathering the storm”攻略。你可能会问,为什么要做一个新的攻略呢?说实话,评论区里大家给予的大量支持让我意识到,我的攻略不只是需要修改……而是需要重写。 和上一版攻略相比,没什么太大变化,除了一大堆重要内容。而且我发现自己以前有点啰嗦,所以这次我会尽量写得简洁一些。至于最后能不能做到,那就是另一回事了。 另外,这个成就的达成需要极其离谱的随机数生成(RNG)。想要达成完美条件(笑)需要不断刷,不能掉以轻心。除非你像有些评论者那样运气爆棚,第二次尝试就成功了……所以,先提醒一下,你可能要在这上面花不少时间。 最后一点——【你需要激活15个骷髅头才能获得SKULL STORM】。如果你还没集齐15个挑战等级,先去获取下一个挑战等级再回来。 铺垫性的介绍就到此为止,如果你现在自己剧透了,那责任自负。我们开始吧。 序章 - 挑战 【Skull Storm】是一个隐藏成就,需要在启用所有挑战的情况下完成一局KM游戏。这意味着: - 无鱼钩:你不会初始携带鱼钩物品。 - 更小的背包:你的背包只能容纳2件物品,而非3件。 - 无幸运草:你不能重roll卡牌选择。 - 昂贵的皮毛:猎人的皮毛售价更高。 - 首领图腾:首领战中也会有图腾在场。 - 失衡天平:所有战斗开始时,你的天平侧初始带有1点伤害。 - 全图腾战斗:每场战斗都是图腾战斗。 - 无首领稀有卡:首领只会奖励普通卡牌,而非稀有卡牌。 - 难度提升。所有战斗中出现更多更强的生物。 难度更高:所有战斗中出现更多更强的生物。 单烛模式:你只有1条生命。 烦人的初始牌组:初始牌组中的卡牌也拥有【烦人的】印记。 松鼠鱼:你的松鼠拥有【水生】印记。 灰熊首领:前3场首领战中会出现灰熊。 最终首领:莱西不再是最终首领。用力,嘿咻。 显然,这里最关键的就是这个。
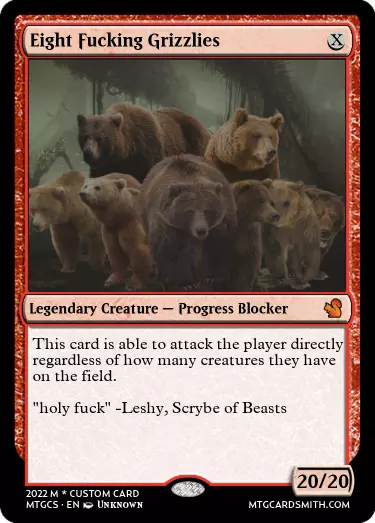
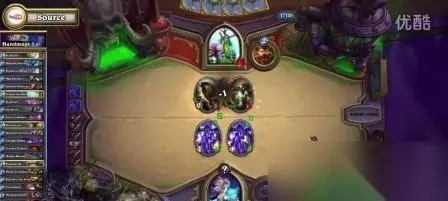
每个首领的第二阶段都被替换成了八只该死的强力跳跃灰熊。围绕这些灰熊制定策略是击败【骷髅风暴】的关键,因为如果你毫无准备地进入战斗,你会被打得很惨。让我们来讨论一些通用的卡组策略,看看能学到什么。 策略一:螳螂之神或失败
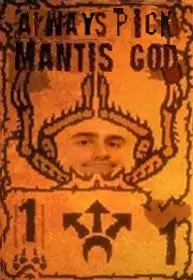
当然,我会把我的“螳螂神”放在攻略的最前面。 螳螂神的三叉戟攻击正是你所需要的,它能造成极高的伤害,让你每次都能在第一回合获胜。在营火处吃掉你的“环虫”,然后想办法处理掉另一个。全力强化螳螂神。至少,它需要2点攻击力才能在三个空 lane 秒杀 Leshy……但显然攻击力越高越好。如果可以的话,目标是7点攻击力(也就是三个双倍力量火焰),这样无论你在哪个战斗中抽到它都能获胜。 最麻烦的部分是抽到螳螂神,对吧?这正是我重写这份攻略的主要原因:你总是能抽到一只消耗1点或更少血液的生物。如果螳螂神是你唯一消耗1点血液的生物,那你就稳了,每次都能抽到它。始终通过在被迫向牌组添加卡牌时选择高费用生物来保持这种状态。 注意!如果你必须向牌组添加卡牌,绝对不要选择有骨头费用的卡牌。莱西会将骨头卡牌视为血液费用为0……这意味着你可能会抽到骨头生物,而不是你的螳螂之神。呃。 编辑:感谢评论,我发现这并不完全正确。你可能会抽到骨头卡牌,但只有当你能够在第一回合用初始手牌或资源(例如骨头恩赐,可能还有骨头银行物品?需要测试)打出它时才会发生。不过,如果可以的话,还是值得避免使用骨头卡牌,以防出现刚好抽不到关键卡牌的情况。 使用这个策略,螳螂之神会带你一直打到熊那里,之后就需要依靠物品来突破了……除非是7点力量且带有双重打击的情况,这种情况下能直接获胜。我曾经是“不死机枪”的拥护者,但说实话,“双重打击机枪”在原始伤害输出方面更胜一筹。只是在对抗捕兽夹时要注意你的站位。 策略2 - 不是蜜蜂

第二种可能更可行的策略是【不死蜂巢】,顾名思义就是让蜜蜂无法被消灭。这里的主要问题是如何通过常规的图腾战斗,但考虑到你每秒能召唤出大量蜜蜂,只要能抽到关键牌,我认为这不成问题。 抽牌规则与【螳螂之神】相同——如果【不死蜂巢】是你牌组中唯一的1血卡牌,你就总能抽到它(前提是你没有0血或骨牌费用的卡牌)。【不死蜂巢】的一个问题是它相当被动,需要几个回合才能让蜜蜂引擎运转起来,而不像【螳螂之神】那样能实现一回合秒杀。 至于灰熊,蜜蜂引擎能很好地应对它们。蜜蜂无法杀死灰熊,但它们不需要这么做;只需用蜜蜂阻挡灰熊来拖延时间,当饥饿状态生效时,你的蜜蜂就会飞过它们并造成直接伤害。轻松获胜,但需要一点时间。 策略3 - 牺牲壁虎
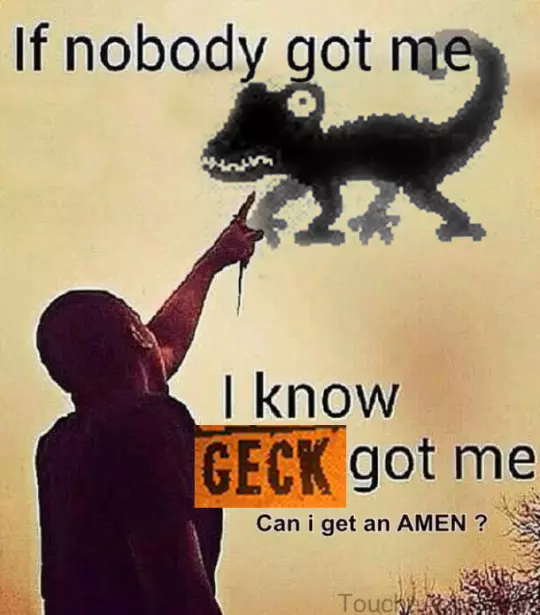
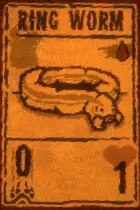
This strategy relies on gambling. Lots and lots of gambling for that perfect start-of-run setup. Unkillable Geck with Ant Spawner. Grab Cockroach for Unkillable, and make your totem Reptile: Ant Spawner. Similar to Bees strat, this one lets you fill your board with infinite mobs - and this time, they actually do damage! Topdeck Geck using the same rules outlined above, play to draw ant, sac to play ant, repeat until your board is full of 4/2 ants and let loose. You can OTKO so long as you've got two free lanes and three ants. On paper, this strategy is highly effective, but it all comes down to getting the perfect storm of taking Geck deck, getting Cockroach and transferring Unkillable onto Geck, trashing your tadpole and rabbit, and getting a Reptile: Ant Spawner totem, all at once. If you're gunning for this strategy, best of luck, it'll take time to reset for it. ITEMS TO GRAB You start your run with a Squirrel in a Bottle, as well as a set of Pliers. Use them ASAP, so you have backup plans against the incoming Wall Of Bears in case something goes horribly awry. Magickal Bleach. Erase the Mighty Leap sigil from the Grizzlies, and allow fliers to damage Leshy directly. No fliers? Pack a Harpy's Leg Fan alongside it. Skinning Knife. Destroy a Grizzly, if you've got a creature with enough power to kill on that lane. Scissors do the same thing, except less cool. Wiseclock. If your leftmost lane is empty, you can use this to both empty Leshy's leftmost lane and get a Grizzly on your side. Just... make sure that you can deal enough damage before the second bear comes out. These items are the best IMO, anything else should be used so you can get new ones. Unkillable Pack Rat is handy for getting new items on the board. Don't put Pack Rat on a 0- or 1-cost, since that'll mess up your topdeck strats. REWIND (exploit) So this is probably considered cheese, and definitely considered an exploit, and absolutely outside of the intended play experience. So... don't use this exploit if you don't want to. That being said - let's learn how to rewind in Inscryption. Inscryption periodically saves at certain events, completing an Event (any space on the board) and losing a creature to a Flame being the big two we're worrying about. Your RNG from these saves is LOCKED. You can reload a thousand times, and every roll is gonna turn out the same way. What does this mean? It means we can, by pressing Escape and using Return To Menu, effectively erase our mistakes and craft the perfect run. This rewinds to the last save state - the end of the previous Event - and allows us to make a different choice altogether. Our main situations we apply the reset button are as follows: Losing a battle, or making a mistake that would render a battle unwinnable. With only one candle, there are no Ls that you can take. Try to get through a battle using as few items as possible, but if there's truly no other way, it's better to gamble on if you'll get an item back than to have a certain loss. Successful double flame. When there are still survivors around the campfire, you ALWAYS want to double Flame a disposable card, with the Ringworm being a prime example. If it passes and gets that +2 Power or +4 Health, reload and apply that bonus to Mantis God, or whatever your topdeck creature is. If it fails, the Ringworm is eaten and all other Flames are free. THE GAME SAVES WHEN A CREATURE IS EATEN, so you can't put Mantis God on the Flame and reload if it fails. TERRAFORMING (exploit) Depends on if manipulation of map RNG counts as cheating to you. Definitely counts as an exploit, but it's moreso bending RNG in your favor as opposed to having to grind out that many more games to get a halfway decent map. I say it's fair game, but you do you. Normally, your RNG is locked in the moment the game saves, giving you the exact same choices and the exact same card draws on every event. The exception to this is when you first load in the map. The game saves after the stage is chosen but before the map is generated, meaning you can reload to get a different map, and with it, different events. Astute readers will note that the last section saves once you complete an event. Yes, this means you can walk up to the trader and reload if you get bad card choices. This is also significantly faster than losing a battle on purpose to reload your cards, because you don't have to go through the trouble of selecting every skull and relaunching and all that mess. MISC ADVICE Avoid taking low-cost cards whenever possible. Fail Cave Trials where you can, and take the highest Blood cost creature if you succeed. The "Random Card of X Cost" event is great, because you're guaranteed either a Two-Blood or a Three-Blood in the set. Bees deck wants as slim a deck as possible to starve asap. Trapper is... fine. That extra pelt is a ♥♥♥♥♥ to deal with, due to it being 0 Cost and thus ruining your topdeck (presumably? haven't tested), but at least you can pick up a Skinning Knife. Destroy unnecessary cards. The Execution and Sacrifice events are great for this. Execute your extra Annoying Ringworm or that useless Opossum. Eliminate any 0- or 1-cost cards that aren't your planned topdeck. Slime Wizard Best Wizard. Want to see me topdeck 7/5 Mantis God? Want to see me do it again? Dupe your planned topdeck so you've got a backup plan should something go amiss. Of course, this can backfire if your sigils get messed up... so weigh your options carefully if you're heavily relying on a specific sigil. OUTRODUCTION Seeing the Skull Storm achievement rise from 0.4% to 1.0% (as of 10/27/2022) makes me pretty happy. Glad to be of service! Honestly, the amount of support I got from everyone on my original WEATHERING THE STORM guide was insane. Thank you, everyone, who commented leaving additional advice - on that guide and this one! also the awards and likes help fuel my ego so thanks bunches <3 Best of luck, may your DSMGs be topdecked!