换一换
换一换 


### 大满贯高效队伍精简指南 大满贯指使用同一队伍在无死亡情况下通关全部5幕。本文将介绍队伍配置、策略及高效使用指南。 #### 简介 经过多次尝试不同队伍配置后,我找到了以下这套队伍配置及策略,成功达成了Grand Slam成就。能完成大满贯的队伍配置有很多,且都各有优势,但仅仅讨论配置往往会忽略其背后的精妙策略。因此,本指南不仅会介绍队伍配置,还会提供在这款随机元素较多的游戏中使其发挥作用的战术规划。我并非说这是最强的配置,但可以肯定它是一套切实有效的强力配置。
注意 Steam 上有许多其他指南,其中特别值得一提的是 Novel Guide,里面包含了大量关于游戏玩法、策略、组合、注意事项等信息。我强烈推荐这些指南来全面了解游戏,相比之下,本指南假设你已经对游戏有大致了解,因此会直接切入主题。 组合 我们专注于持续伤害! 瘟疫医生(炼金术士) 位置 4(后排)
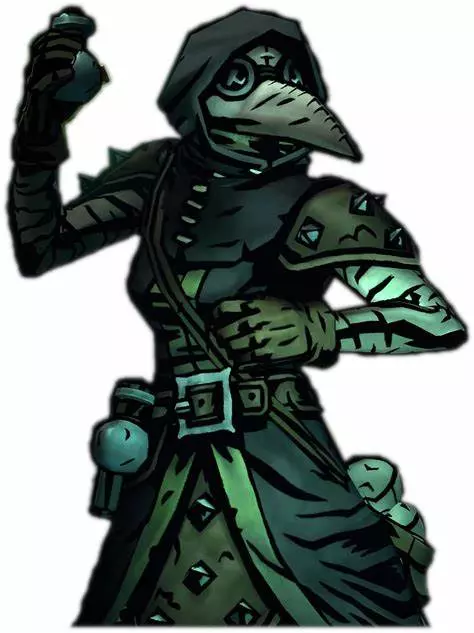
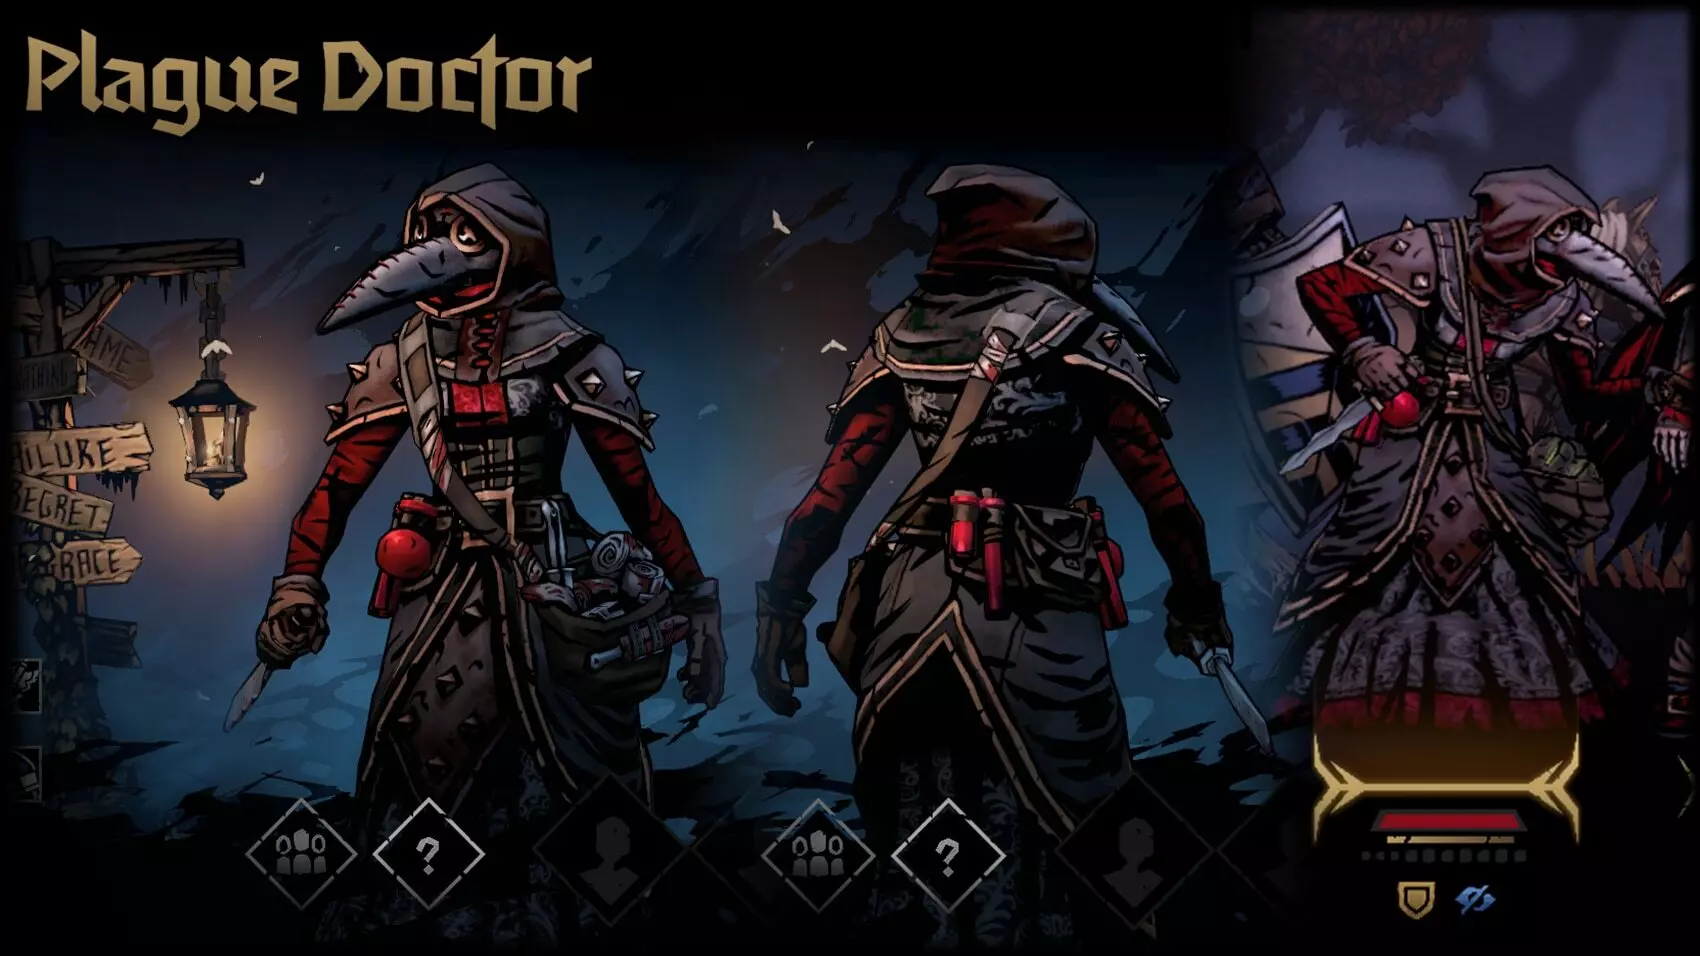
炼金术士模式下的瘟疫医生,主要职责是施加枯萎持续伤害。次要职责是在必要时进行治疗。 技能: - 毒性爆发 - 瘟疫手雷 - 战地医疗 - 无差别科学 - 镁弹 备注: 瘟疫医生是一个非常强力的角色,经常出现在许多强势组合中,这是有原因的。主要是因为她能将强大的持续伤害与治疗能力相结合,这正是我们在此处使用她的目的。 我们的主要目标是施加持续伤害。治疗非常少见,通常只用于将队友从濒死状态拉回,或者移除会导致他们濒死的有害持续效果。 为什么带两个治疗技能?为了节奏(参见节奏策略)。两个治疗技能中的一个通常能提供更多治疗量(或者像战地医疗那样移除持续伤害效果)。我们两者都有,所以你可以根据目标选择更强的那个。反正你基本不需要治疗,而且我们总是希望瘟疫医生(PD)施加疫病,这样就不会丢失节奏,所以用技能消耗一回合也确实没有更好的选择了。 镁光(Magnesium)是一个移除闪避的范围攻击技能,偶尔也能用来清理尸体。很少使用。 炼金术士能提供疫病穿透,让你的疫病效果总能生效。 runaway(纵火者)放在3号位。
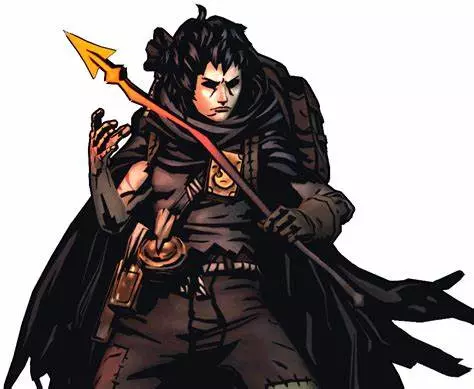
纵火犯模式下的逃亡者会为队伍增加更多持续伤害(我们完全支持!)。此外,还会添加少量治疗和少量致盲效果,有时会很有用。 技能 萤火虫 烧灼 可控灼烧 烟幕 龙蝇或遁走(由玩家选择) 备注 选择纵火犯模式是为了获得燃烧穿透,确保燃烧效果能稳定生效。 逃亡者的主要任务是寻找目标施加持续伤害。次要任务是使用烧灼进行辅助治疗或使用烟幕。 龙蝇或遁走纯粹是为了提供一点“帮助”来调整位置。这个队伍通常最害怕敌方位移(在策略部分讨论),而这两个技能有时可以节省一回合。仅此而已。 关于烧灼的特别说明:烧灼是一个非常强大的治疗技能。但它仅在有人流血时才生效。谢天谢地,总有人在流血,因为流血效果在这款游戏里简直泛滥成灾(见策略部分)。【灼烧】技能在这方面表现出色。 苦修者(无生命形态) 2号位

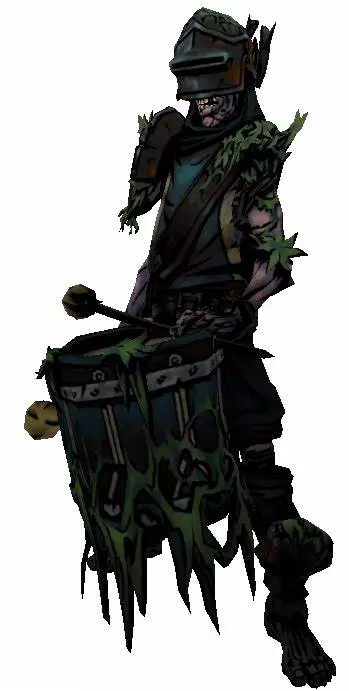
苦修者(Flag)的职责就是使用【再来,再来!】。其他所有技能都是额外增益,而这些增益主要以持续伤害(DoT)的形式体现。毕竟,我们就是专注于这些持续伤害! 技能 【再来,再来!】 【惩罚】 【脓毒】 【酸雨】 【不死】 说明 苦修者的主要作用是通过使用【再来,再来!】迫使敌人攻击他。由于这个技能的治疗效果非常强大,它实际上能起到抵消敌人回合的作用。这比诸如铁卫的普通嘲讽/格挡要有效得多。 【酸雨】也有助于攻击后排,效果类似瘟疫手榴弹。但要注意,它的效果没那么好,因为苦修者没有出色的枯萎穿透能力。 【惩罚】的存在是为了让你能够攻击1-3号位,造成少量伤害并叠加持续伤害。此外,由于【无生命】状态的存在,有时这个技能的伤害会相当可观! ### 不死者 作为第三名队友,不死者拥有治疗能力,能在紧急情况下维持队友生命值或使其脱离濒死状态。 ### 脓毒症 该技能可治疗【旗帜】,并且在这套组合中能造成极高伤害。虽然主要是为了娱乐效果,但在快速终结 Boss 战斗时确实有一定作用。 ### 狂战士(地狱少女) 位置:1号
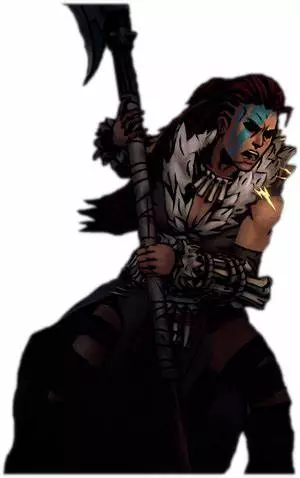
狂战士的加入带来了更多持续伤害效果。(说真的,我们就是专注于此。)流血效果、“钢铁天鹅”的夹击,当然,她也是我们缓解压力的来源。 技能 钢铁天鹅 若其流血 血流不止 呼啸终结 喧闹狂欢 说明 坦白说,这是“非主流”玩法的狂战士。要注意我们没有任何方法移除“喘不过气”标记。但我们并不在意,因为我们的任务就是施加流血效果。不过,狂战士在“喘不过气”标记叠加起来之前,能在战斗初期造成可观伤害,这一点还是不错的。 “喧闹狂欢”对我们来说很重要,因为它能为队伍恢复压力、为自身恢复生命并恢复自身压力。关于压力管理的策略,我们会另外讨论。 “钢铁天鹅”有时在战斗刚开始时,或者在你开始叠加“喘不过气”标记之前对付后排敌人时非常有用。【哀嚎终结】的奇怪之处在于它并非用于输出伤害,而是用于将自身位移至2号位以维持节奏。当1号位没有适合使用【血流不止】的目标时,我们会使用这个技能。它能造成一定伤害,将我们移至2号位,并为使用【血债血偿】做好准备。 给新手玩家(前期游戏准备) 给新手玩家 《暗黑地牢2》是一款类rogue游戏,这意味着它的单次游玩流程较短,设计初衷是让你进行无数次游玩(通常会失败),同时通过收集到的蜡烛逐步积累力量,直到足够强大以通关。游戏通过大量随机元素确保每次游玩体验都有所不同,从而让这个游戏循环变得有趣。由于游戏初期无法直接使用这套组合,你需要先进行一些准备工作:外出探索、刷【圣坛】和【蜡烛】,直到解锁所有必要的技能和职业专精,让这套组合发挥出真正的实力。 【蜡烛使用】 你需要逐步将这4名角色升级到接近满级。这样做是因为升级过程中他们的抗性会小幅提升。例如,对于【地狱女武神】的【狂战士】专精,不要中途停止,应该继续升级。 此外,和所有组合一样,这套组合会随着你获得更强的【饰品】、【驿站马车物品】、特定【宠物】以及一些【战斗道具】而变得越来越强。因此,你需要解锁这些内容。你还有很多farm工作要做!好好利用这段时间享受游戏吧。解锁所有角色,完成十字军任务,尝试各种队伍组合思路等。 队伍组合需要【蜡烛】 记住这一点:理论上,没有任何队伍组合特别依赖特定饰品,但所有队伍组合的整体强度都会随着解锁内容以非常微妙的方式提升。通常这种提升非常细微,你可能会发现,同一个队伍组合在5次 runs 前表现平平,现在却突然变得更好了,这是因为你获得了一些之前没有的强力饰品。这类因素非常重要。你玩游戏的时间越长,解锁的内容越多,就越会忘记没有这些解锁内容时的游戏体验。请记住这一点。大多数提供游戏建议的人早已忘记了在没有解锁任何饰品或战斗物品的情况下进行游戏是什么感觉。所以,尽情享受游戏吧。逐步解锁你的蜡烛,当你准备好时,就是大满贯时刻了。 快速概念 在深入了解如何使用这套组合之前,了解一些快速概念会很有帮助,这些概念通常有助于玩《暗黑地牢2》,无论使用什么组合或游戏风格。再次建议,如果你想详细分析《暗黑地牢2》的所有内容,可以阅读Steam上的“Novel Guide”。这里的概念以简短形式呈现,但在该指南中有更详细的介绍。 节奏
节奏的概念简而言之就是,当轮到你的队伍成员行动时,他们通常在执行你想要的操作以推进战斗,而不是被迫对敌人的行动做出反应。节奏就是那种战斗进展顺利、一切按计划进行且没有浪费行动的感觉。当你不得不做出反应,执行那些无法推进战斗的操作时(比如被迫重新站位,从而浪费了本可以用来消灭敌人的回合;或者被迫治疗某个角色,因为他们可能会死亡或压力过大),你的节奏就会被打乱。一个好的队伍组合应该感觉流畅,几乎没有浪费的行动。 这套组合拥有极高的节奏。唯一会影响这一点的是洗牌机制,这部分将在策略部分讨论。 伤害计划 这指的是你的队伍打算如何通过造成伤害来推进战斗并结束战斗。这与节奏以及下一个概念——威胁评估/目标选择密切相关。 这套队伍的伤害输出远高于平均水平。虽然不是完全离谱,但确实非常高。在这里,你不需要太复杂的实际伤害计划。计划很简单:对所有目标施加持续伤害然后获胜。你拥有所需的全部手段,可以在不损失节奏的情况下以极高的伤害击中所有目标。就这样。 威胁评估/目标选择 再次强调,本指南假设你已经玩过这款游戏。你已经见过大多数敌人,与它们战斗过,知道哪些敌人有威胁,哪些敌人很烦人,哪些敌人会造成压力等等。你知道该击杀哪些目标,并且意识到大约85-90%的情况下,规则是先击杀后排的敌人,再处理前排的敌人,但也有一些明显的例外情况。 这套组合能以高节奏轻松应对任何难度等级。这一点已经得到验证。 生存/减伤 作为一个玩了足够久游戏的人,你会意识到在战斗中维持队伍的生存非常重要,尤其是围绕【压力值】方面。同时,治疗和减伤也很关键,而其中最重要的可能是能够清除叠加的【持续伤害】效果,如果你不这么做,这些效果可能会造成毁灭性的打击。 减伤通常来自坦克角色。在我看来,游戏中最好的坦克是【旗手】,这也是他出现在这里的原因(稍后会详细说明原因)。【战士】同样很强,但在一个关键原因上不如【旗手】(稍后讨论)。续航能力来源于承受伤害后的治疗能力(这也是为什么【旗手】在核心机制上优于【持盾兵】的原因)。这通常由治疗者来实现。在这套阵容中,【瘟疫医生】和【逃亡者】都拥有治疗技能。【地狱少女】具备自我治疗能力以及团队压力缓解技能。【旗手】能够自我治疗。此外,【瘟疫医生】和【逃亡者】还可以移除持续伤害效果(后续会详细说明)。实际上,队伍中的每个成员都具备续航能力。这一点对这套阵容至关重要。 主动战斗 你的优先选择应该是在地图上主动参与战斗。这样做的原因是为了在特定区域内获取最大化的【精通点数】。【怪物巢穴】不仅能提供精通点数,还能提供其他非常有用的任务物品。务必完成【巢穴】战斗。 后期当你拥有大量金钱且不知如何使用时,可以考虑使用【囤积者】。持续伤害的真正终极力量 如果你没注意到,这套组合就是围绕着持续伤害(DoT)构建的。这里专门讨论持续伤害是因为,要理解这套组合为何如此强大,你需要明白为什么《暗黑地牢2》中的持续伤害可以说是最佳伤害类型,即便不是最佳,也至少与其他任何伤害方案不相上下。
DoT's Allow You To Ignore Tokens. Enough said. No really, this is so important and such an enormous advantage in this game, it needs to be spoken about. Here's the thing. Many enemies and bosses rely on token manipulation to wreck your day. Tokens, for the record, are the Block, Vulnerable, Strength, Crit, etc. tokens. You know, the ones that make you (or the enemy) take 50% or 75% less damage, or 50% more damage, etc. See, DoT's don't care about Block tokens, or having to setup Combo tokens, or having to manipulate Vulnerable tokens. You get the damage, it's already strong, and poof, you get to ignore half the game mechanics.... just... like... that. The only tokens you now have to care about are Blind, Taunt, and Dodge. Blind because it makes you miss your DoT's. Taunt because you want ever so many more Taunt tokens on Flag. Dodge because they can dodge your DoT's. That being said, you know what else is cool about DoT's? Once an enemy has "enough" DoT on them to basically wipe them out in a turn or two, who cares if they suddenly acquire Stealth, or Dodge, or Blind someone? Even these tokens are less of a problem with an all DoT based damage plan. DoT's Increase Tempo Enemy already going to die on his turn anyways? Cool! Switch targets now. See how much tempo you get from that? You can already start in on the next guy before the first guy is dead. No more wasted turns having to knock off that last death shield or ping off those last 5 HP... especially after the guy just dropped a Dodge+ token on himself with that last 5 HP. Ouch city for tempo. You, like the Honey Badger, no longer care. DoT's Do Comical Damage W/O Setups Because They Stack Hilarious, my Hellion just Howling End for 50 Damage! So Sweet! All I had to do was set up a strength, put vulnerable on him with another character, up my Crit %, and look how awesome that was! So... much... tempo... lost. DoT's will hit for 50 damage (yes seriously) just by stacking them up with normal actions. Plainly put, do the math yourself. Runaway shlocks someone with Firefly for let's say 4 damage and slaps a 6 damage DoT that will last for 3 turns. Total damage output of that move then is actually 22 DMG! With NO SETUP. Yes, yes, "but that's over 3 turns." No sir. Because I will hit them again with another Firefly and then AGAIN with another in those 3 turns if need be. And look at the insane damage pouring out over those same 3 turns versus all the setup for doing straight damage necessary to pull those numbers. The damage output of Plague Grenade is bonkers since it hits 2 targets. DoT's Wreck Bosses Because bosses generally take multiple turns in a single round, that causes the DoT's to trigger at a faster than normal rate. Thus, now you are hitting like a truck (see above) and don't even have the investment penalty to do it. Since almost all bosses are DPS race, this puts a DoT damage plan into an even better position! DoT's wreck bosses. No setup required. No combo tokens. No bull. Just straight wreck. Drop the mic. Comp General Strategy Section This section covers the general strategy of how to use this comp. High Damage Ends Fights Fast This comp pours out damage in the form of DoT's. Fights are FAST. DoT them up till they are going to die soon and switch targets before they do. Keep this up till it is all wrecked. For bosses, just pour on the DoTs like you pour on the ranch dressing, and when the boss starts taking 30, 40, even 50 damage every time it activates, wave bye bye and get ready to collect the sweet loot. You generally want to be flinging out those DoTs with PD, Runaway, and Hellion. Flag is the only person who will skip turns of DoT'ing but only so he can use More, MORE! every time it comes off cool down. But, this fight is going long. My stress is getting high. Someone is really hurt! Should I stop to heal? Probably not! DoT them instead. Heal when the enemy is dead... or better... Sustain When Everything is Basically Already Over 1 enemy left who already has enough DoT's to kill him in 1-2 turns? His damage output is low, Flag will tank him. Cycle a turn or 2 and heal yourself up for the next fight. Drop a Raucous to remove some stress. Sip tea and watch the last dude melt. Know Thy Bosses Special section on each boss will be below. But know the bosses. Come with the right plan and equipment, and you will destroy them all with this comp. Even Leviathan goes down like a house of cards... not that you will ever fight him... but I digress. You Don't Need to Over DoT Suppose you got an enemy in the back rank. He's got 8 damage on him already for the next 3 turns and 9 HP. Now, you might be tempted to smack him with a Plague Grenade because lets end him now. Many times, that IS the right choice. Many times it isn't. Depends on the enemy and Flag's More, MORE! state. Do you really care if that enemy gets one more turn? Do you care so much you are willing to waste tempo by not using Noxious on something in the front rank to ultimately end the entire fight 1 entire round faster? Think about it. If it DoTs, it is Good. Trinket selection gets real easy in this comp. Does it give extra DoT potential? Yes, please! Does it give resistance to Bleed, give Flag more taunt, remove DoT's from your own team member, or otherwise just "sounds good till I can get something better". OK take it. Doesn't do any of that? Trash heap. You will be constantly choosing either The Sprawl, The Foetor, or The Tangle. Why? Because you want the Trinks that commonly drop for Blight and Burn in those regions. But Runaway sucks at fighting the Sprawl boss? Pfft... that boss is the ultimate in weak sauce of all the bosses. You could literally skip Runaway's turn in that fight and still wreck that boss with this comp. Every time. (See below). Pet Choice Take just enough candles to unlock the Food Rabbit. That's all you ever need. If you do just enough candles to unlock him, he will always be available (#4 on the pet grid.) Why the Food Rabbit? Because of the Speed Boost. You are going to, if you can find them, load up your wagon with Food Gear. Each time, you get +1 Speed. Speed is the great destroyer when it comes to DoT based comps. Why? Because you get to go before the enemy, simple as that. This gives you a round to load them with DoT's before they act and puts you 1 turn ahead of them on the damage train. Also, STACK FOOD in your inventory. Flap Jack maker is great. Food stack stagecoach item is also great. Every 4 food, is more HP for you. More HP means less having to worry about stopping to heal someone, which means more DoT's, better Tempo. Food Rabbit 4tW. Don't ever look back. Stress Management and Reputation You may have noticed, this is the rare Grand Slam comp that doesn't include Man at Arms or Jester (or both). Right you are, and you are probably thinking, BUT STRESS? WHAT TO DO ABOUT STRESS? Believe it or not, you don't need a Stress Healer in this game at all once you understand some core components (listed below). However, we pack one anyway in Hellion with Raucous. Raucous will keep Hellion at low stress, but also removes 1 stress from all party members. Remember, the sweet stress spot is 3-4, preferably nobody over 3. Reputation - Always buy reputation upping items in the inns and use them. You want reputation to be as high as you can get it at all times. This not only gives you sometimes incredibly good bonuses for a run, but it also acts as a natural stress reducer during and between fights as your team helps each other. Laudunum - Buy. It. All. Equip it. Use it all the time. Stress problem (and Horror problem) largely solved just by this alone. Choosing Paths - OK, it took me forever to notice this. When you are choosing which way to go on the stage coach, a symbol appears above each party member portrait at the bottom of the screen. That symbol is telling you which way that party member wants to go. If you pick the way they want to go, they typically lose 1 stress. Prioritize Stress Dealers - Kill the stuff that causes stress damage first, and profit. You follow that list and make sure you heal your stress in the inn, and that'll be that. You don't NEED a dedicated stress healer in this game. Finally, let's note that when you are on the last fight of an area, it's OK if your stress gets high because you are about to hit an inn where you can easily lower it. Most reputation building items also reduce stress. Being Shuffled The weakness of this comp, if there really is one, would be, being shuffled. The reason for this is that depending on the shuffle, it can destroy your tempo and force a few wasted actions getting back into the right position. This is because the comp lacks tempo effective skills to reposition itself like a dance comp would or similar. In reality, there just isn't that much shuffling in the game, and when there is, the odds of being shuffled into the "worst possible position" are low. Even if you do end up there, it's still manageable with just clever repositioning. Let's discuss. First, Flag and Hellion can swap positions and be just as effective in most cases. Meaning Position 1 and Position 2 can swap and cause no tempo loss. PD and Runaway can also swap positions w/o tempo or loss in effectiveness. So, already, there some configurations of shuffling which have no effect at all. Secondly, we take one skill on Runaway such as Dragon Fly to allow a tempo effective movement to help get Flag back into position should Flag be knocked into the way back. One can make an effective argument on this comp that Hellion could take one of her 2 move forward skills such as Toe to Toe instead of Howling End to also create a tempo effective re-order. The thing is, I just don't experience shuffling happening enough in such a bad way to warrant it over what Howling End is good for in this comp already (see Hellion). Ultimately, if Flag gets moved to the back or PD to the front you are going to lose an action or two having to use the standard move to get them back into position. Not the end of the world, and it does happen. Finally, I do throw Inn Items that give Move Resists to Flag and PD if I get them randomly. I typically don't buy them over say Reputation gainers, but you could if it really bothers you that much. Mastery More, MORE! always first. I usually then pick Plague Grenade. After that, I upgrade all the damage abilities. Firefly, Bleed Out, if It Bleeds, Noxious etc. Lastly, we start targeting utility. If you follow the general advice about fighting all the time, you will end up with more mastery in most runs than you have abilities to use it on. Plague Doctor
你是来上持续伤害的,不是来治疗的 你应该把瘟疫医生当作稳定的持续伤害来源。通常先用瘟疫手榴弹攻击后排,直到他们叠满状态准备死亡,然后切换到剧毒爆发。你的任务就是尽可能高效地叠加那美妙的疫病层数。 你配备了两个治疗技能“以防万一”。旗帜手身上的持续伤害叠太多了?对他使用战地医疗。逃亡者刚被 Boss 的流弹击中,处于濒死状态,而其他人又没有治疗技能?好吧,那就用不分敌我的科学。 饰品 任何能提供任何形式持续伤害加成的饰品。不管是疫病、燃烧还是流血伤害。提供固定数值加成的饰品是最佳选择,百分比几率加成的次之。有史以来最棒的物品,就是那个能提供3层枯萎、3层燃烧或3层流血效果的饰品。 为什么呢?因为瘟疫手雷能攻击多个敌人,这就是原因。这使得瘟疫手雷成为游戏中最好的持续伤害施加技能,因为你还有枯萎穿透。如果你能突然用它叠加更多的持续伤害,天哪,这简直是游戏规则的改变者。毒性技能也不是吃素的,当你突然能施加更多持续伤害时,效果会变得非常夸张。 如果你找不到这样的饰品,那么就选择一些实用的东西,比如减少队伍压力、增加压力抗性、增加生命值。任何听起来不错的东西都可以,直到你能找到增加持续伤害的饰品来替换它。 镁雨 在装备了持续伤害装备后,效果会更好。不过,它的主要用途是作为一种范围攻击来清除闪避标记,这种情况并不常见。例如,假设你正在与野兽战斗,遇到了4只蜘蛛,每只都有2个闪避标记。唉,【镁雨】在这种情况下就很有用。它也有助于清除道路战斗中烦人的路障。 逃亡者
有人需要持续伤害吗? 就像瘟疫医生一样,逃犯也擅长施加持续伤害效果。灵活使用“萤火虫”技能,并在适当时机搭配“控制灼烧”(详见下文)。 前排问题 在这套组合中,逃犯无法攻击前排。这有时会有点烦人,可能会打乱节奏。不过这不成问题。分散你的持续伤害:让逃犯开始对2号位叠加伤害,同时瘟疫医生和地狱火攻击1号位。是的,敌人可能会因此多行动一回合,但实际上这两个位置的敌人差不多会同时死亡。 除此之外,可以使用“ cauterize”,或者在万不得已时,与瘟疫医生交换位置来跳过回合。或者用“烟雾弹”来娱乐一下。通常,当前排开始造成麻烦时,战斗其实已经接近尾声了。所以,这其实不算什么大问题。 烧灼术——女孩最好的朋友 我知道你在想什么。烧灼术只有在有人流血时才会生效。没错,而且它还是一个无需消耗的强效治疗技能。 但我们来认真说说流血效果。流血绝对是游戏中敌人最常用的持续伤害效果,简直无处不在。几乎每场战斗都有造成流血的敌人。即便是在腐溃街道,敌人还是会流血,哈哈。这游戏就是很喜欢流血机制。烧灼术的实用性(因为它的治疗效果太强了)会比瘟疫医生的战地急救和滥疗术高得多。相信我。 精准灼烧 精准灼烧对付 bosses 效果非常好。优先使用它。它们不会切换位置,而且随着时间推移,这个效果会疯狂叠加。我对付 Boss 时总是先用【灼烧控制】。 另外,遇到带有闪避标记的敌人怎么办?用【灼烧控制】代替【萤火虫】攻击他们,这样就能确保某种持续伤害效果会附着在他们身上。这比打空要好。 饰品 任何能增加持续伤害的饰品都可以!尤其是增加灼烧伤害的。不过,那些真正优秀的持续伤害饰品要给瘟疫医生。但到了游戏后期,你还是希望瘟疫医生和 runaway 都能装备上增加持续伤害的饰品。在各种叠加效果下,伤害会变得高得离谱。 除此之外,在获得持续伤害相关的饰品之前,任何听起来有用的功能性饰品(比如压力抗性、生命值加成……真的什么都可以)都能用。特别要提一下那个能移除所有持续伤害效果并在生效时提供生命回复的饰品(来自奇尔格)。对于 runaway来说这非常好用,因为她在纵火者模式下总是让自己处于燃烧状态。 关于生命值和速度的最后说明: runaway和PD的生命值都较低,这就是我们选择食物兔子的原因。要知道,如果运气好,吃到大量的薄煎饼和食物堆叠,runaway很容易达到50点生命值,PD也能达到40点左右,非常可观。 苦修者
旗帜坦克!旗帜持续伤害!旗帜坦克!旗帜持续伤害! 旗帜玩法指南 1. 点击【更多,更多!】 2. 使用【惩罚】或【酸雨】对目标施加持续伤害 3. 返回步骤1 【脓毒症】 【脓毒症】的存在是因为当【持续伤害】对 Boss 造成大量伤害时,它有时能造成惊人的伤害。它可以以毁灭性的伤害量让 Boss 战提前1-2回合结束。 它还可以为旗帜提供双倍治疗(通过【脓毒症】,然后在同一回合触发【更多,更多!】的效果) 为什么旗帜是游戏中最强的坦克? 因为【更多,更多!】 关键在于,升级后的【更多,更多!】能恢复大量生命值,几乎可以完全抵消旗帜受到的任何伤害。完全抵消意味着,攻击旗帜的敌人等于浪费了行动机会。 这一点是【持盾兵】或【麻风病人】所不具备的。这两种方式通过将伤害降低到可处理的程度来【减轻】伤害,以便后续治疗。而“More, MORE!”则是直接治疗伤害,从而【消除】伤害。毫无疑问,这比减轻伤害更好。 “More, MORE!”还会进行嘲讽,确保敌人会攻击旗手,通常不会攻击其他人。 【捏合治疗】 别忘了,旗手可以像瘟疫医生和逃亡者一样进行捏合治疗。在紧急情况下,第三人称可用于濒死状态下的治疗。 【饰品】 【流血抗性】和【压力抗性】非常出色。流血抗性是因为流血效果非常普遍。压力抗性的重要性不言而喻。除此之外,他的职业专属饰品能提供疫病伤害,这很不错。任何有助于生存、增加治疗量或减少伤害的饰品都很好。 【地狱女战士】
The Odd Duck Hellion is the odd duck in this comp. In fact, so odd that if you wanted to replace someone in this comp, it would probably be her. But Hellion brings a lot to this comp that is not at first obvious. Let's discuss Hellion. Winded Tokens You will note that Hellion in this comp does not have a skill to remove Winded, yet has multiple skills that cause it. That's right! Half her skill bar in this comp is going to wind you with no way to remove it. What gives? Because this Team, is all about the DoT. Did I mention that? So, we don't CARE if Hellion does -100% damage... because her DoT still goes through. So, you ignore the tired token altogether. Early Fight vs. Late Fight Very early in the fight, look at the enemy you are facing. Got someone in the back row you need to absolutely curb stomp quick? Now's the time to use Iron Swan, before you have racked up winded tokens. Same goes for Howling End. See, here's the thing, early in the fight you use the damage abilities IF YOU NEED THEM.. and it's rare you do. Most common fight is you dive right into Bleed Out on the first position to start stacking DOT. In the late fight, well, all you are doing is Bleed Out, Raucous and If It Bleeds. That's it. Who cares if winded. Why is Howling End Here? Howling End is on EVERY Hellion Build, but in this comp, it's not here for the typical reason. See, normally Howling End is used as part of a setup mechanic to whack someone for 50 damage and lolz. It's true, it's good for that. In this comp, however, we are all about the DoT. So what gives? Howling End is simply used in this comp to increase tempo for swapping positions with Flag. Why? Because Position #1 is already DoT'ed to hell and back (or is a corpse already), and you need to slide Hellion Back 1 so you can target Position 2-3 with If It Bleeds. Might as well whack something for a little damage too while you are at it? Am I right? Stress Healer Use Raucous to heal stress on party members to keep them below 5. You will especially use this towards the end of fights when the enemy is already going to die due to DoTs, and stacking more DoTs is just wasteful. Might as well Stress Heal a little. Do not underestimate the long term benefit of this simple stress heal when combined with liberal Laudunum use. Know Thy Bosses Knowing how to deal with each Boss is important for a Grand Slam run for any comp, and it is true of this one as well. No comp I have experienced in the game yet is so incredibly OP that it can just ignore boss mechanics writ large and still win. So, here's the Boss Breakdown. First, Always Fight Trophy Bosses Always go for the Lair. Even when you are weak at the start of the run. There isn't a boss you can't kill flat, with no upgrades or trinkets, with this comp. Second, Almost All Bosses in DD2 Are DPS Races A DPS Race means the boss will win overtime if you don't kill them fast enough. Luckily, this team excels at DPS, and therefore, is more than aptly equipped to handle all the bosses. This is pointed out to keep you in the right mind frame. Don't worry if the stress is building or the damage is stacking up on you, just keep DoT'ing. This isn't always true. You do have to use some judgement, but for the most part, it's the right answer to just keep attacking. Sleeping General (Tangle) This boss is trivial with this team. His major mechanic is you need to be able to hit the back row to remove vines from your team. The goal is to hit the back object twice per round and no more while otherwise doing damage to the boss. - Runaway -> Controlled Burn.-> Fire Fly on general every turn. - PD - > First round, Noxious on boss, 2nd and all subsequent rounds, Plague Grenade to hit back row + general. - Flag -> Punish on first round, then Acid Rain to hit back row and boss with DoT. - Hellion -> Bleed Out. Repeat till dead. This boss drops excellent trophies for this comp. The no shuffle trophy is great, but all of them are pretty useful. Librarian (Sprawl) Easiest boss in Game for this comp. - Runaway - Pings Firefly for trivial damage and otherwise smokescreen when available. - PD - Plague Grenade every turn while he's in the back, Noxious when he gets to the front. - Flag - Cycle More, MORE! with Acid Rain at first, then Punish. - Hellion - Iron Swan at first. Then drop back one pos to If It Bleeds while he's in the middle. Step back up for Bleed Out if somehow he gets to the front. (He never does though... dead before that.) Worst case scenario is he hits you with a bad shuffle. It's still no big deal. Because this boss activates multiple times a turn, the DoT's crush it. Trophies and Trinkets from this both are typically very good for this comp. Baby (Foetor) This is just a straight DPS race. Step on the gas HARD and do not let up till it's dead. DoTs kill it quick because of its multiple actions per turn. - Everybody throws whatever DoT they can at it where applicable. - You will be forced to eat meat with Hellion and/or Flag sometimes. Oh well. Just kill the boss. Don't target the meat. - Runaway + Dragon Fly (because typically higher speed than PD) will keep PD and Runaway from moving forward. Trinkets and Trophies are typically good for comp. Leviathan (Shroud) Don't bother. Although Trophies can be really good, you don't have much need for Bleed trinkets. In theory, could help Hellion, but truth is, I never pick Shroud over the other options for this comp. It's not that don't bother with Leviathan so much as it is don't bother with the Shroud. Collector Load down DoT's on first turn. Continue Plague Grenade + Firefly till dead. This is an easy fight. Death Another DPS race. Dump DoT's till dead. Try to manage stress if you have Laudunum or need sustain. Knight Just a regular fight for this comp. Focus the Boss not the minions because of his AoEs. Act 1 For this comp, typically order is Ranged -> Melee -> Heals -> Stress heal. Kill in that order. If you don't know this boss, it's 4 enemies, one of which randomly each turn has an ability to disable all skills of a specific type. In truth, you will kill multiples of these at a time due to DoTs, like Plague Grenade or Hellion battering the front position with Bleed Out. Items to Take: Anything that causes more DoT damage. Any heals. Act 2 Straight DPS race. Pedal to the metal DoTing the boss. Forget the lungs. Mostly forget the breath mechanic. Hammer him. - Runaway - Controlled Burn -> Firefly on boss every turn. - Plague Doctor - Noxious blast on boss every turn. - Hellion - Drop back with Howling End and If It Bleeds on Boss every turn. - Flag - Rotate More, MORE! and a DoT on boss. Items to Take - DoT combat items to stack on the boss. A heal kit on someone is also helpful in case you get very unlucky getting smacked by a Crit Breath or something. Act 3 Do your best to manage the tokens put on you in Part 1 hopefully getting the majority onto Flag. After that, straight DPS race, again. Start DoT'ing and don't look back. - Runaway - Controlled Burn -> Firefly on boss every turn. - Plague Doctor - Noxious blast on boss every turn. - Hellion - Bleed Out every turn. - Flag - More, MORE! and DoT rotation. Items to Take - Healing items. If someone gets smacked into Death's Door you can throw a healing item at them to get them back on their feet without losing Tempo. Act 4 More DPS races. Who would have thought? To easily defeat this boss you need some prep work. Throughout the run, you MUST collect Bleed Resistance trinkets and items. You want if you can for 3 team members to have item to increase Bleed Resist for 3 turns and one with a Heal Item. In addition, stockpile Inn Items that give bleed resist to be used on the Mountain. Also, food that grants +Bleed resist stock piled for the Mountain. Scoring the +66% or +33% Bleed Resist trinkets is even better. Flag first, then Hellion, etc. If your bleed resist is already going to be 90+, don't over stack it unnecessarily. Help someone else out first. - Phase 1: This phase is the most dangerous to you if not played properly. Kill this thing. All DoTs all the time. The reason why dangerous is he can shuffle front pos to back and hits very hard. - Phase 2: If you have enough bleed resists, this is easy. DoT him to death and sustain as you need. Flag will do the work here of taking care of damage. - Phase 3: Same as phase 2 is you have enough bleed resists. Just DoT away and sustain as needed. Act 5 Arguably the easiest act boss, lol? Maybe not easier than Act 1. There's nothing to really say here in terms of strategy. If you can get some extra Blight Pen for PD before the fight, that's helpful for Phase 1 of the fight.Otherwise, this is just a long, normal-ish fight. Sustain as you need with normal rotation and DoT it down. For the final phase, it is recommended NOT to select Hellion to fight against. The reason is because your Hellion will be winded and no way to fix that. Everyone else is fair game. Flag is the harder of the 3 to defeat because you really want Flag to be sustaining for you with More, MORE!, not fighting himself. Truth be told, this comp does SO MUCH DAMAGE you can easily skip 2 of the clones to fight. It's no problem for you to do 400 damage during this fight. I haven't tried it, but I actually think you could do the full 1000 damage, but it's the sustain that's the problem because your own clones do hurt.