换一换
换一换 


大家好!经过一年的构思,我终于要分享我的发现和心得了。我相信本指南的内容会让那些已经通关游戏,但想深入了解Flux及其装备的玩家感兴趣。你将看到的内容包括:流派对比、测试、理论分析,以及我制作的一个能让一切变得更简单的表格! 简而言之:选择电系! 简介 在本指南中,我将为你展示如何最大限度地提升Flux的伤害和整体战斗效率。我还会分享一些旅途中实用的小技巧,相信很多人都会觉得有帮助!如果你准备尝试硬核模式,建议不要遵循本指南,因为在那种模式下,你不会想成为一个玻璃大炮。首先,游戏分为两种类型。一种是你可以随心所欲地玩,但最终会因为糟糕的平衡(以及其他因素)而感到沮丧,导致只有少数甚至一种“正确”的玩法才能通关。而《崩溃大陆》则属于另一种,任何玩法都可行! 因此,为弗拉克斯搭配装备的方式有数百种,无论你采用哪种方式,敌人都会被消灭——或者说被分解!但我又想,到底能有多快呢?我们实际能造成多少伤害呢? 让我们一探究竟!

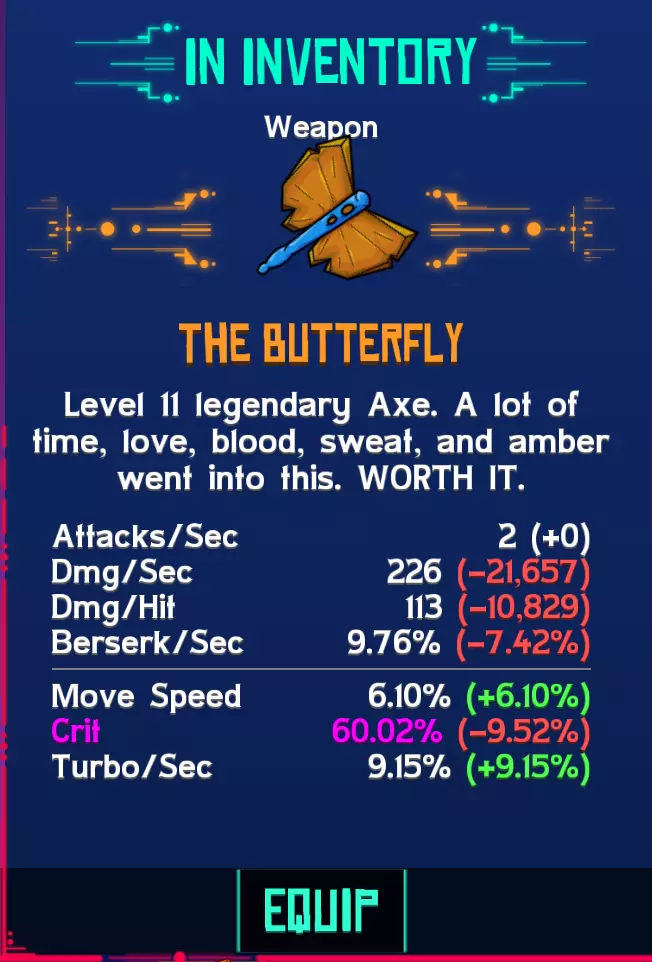
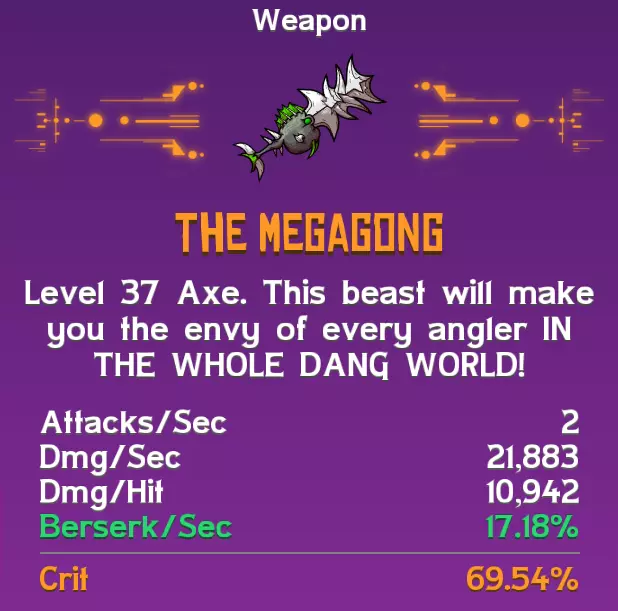
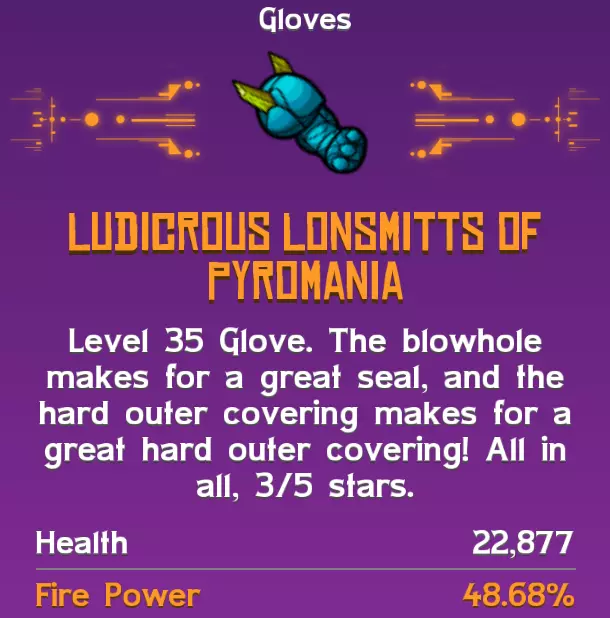
Keep in mind that everything written here is based on my own tests, experiences and observations and may be different from yours. So don't treat this as a "Play like this or don't play at all" but rather use it as inspiration when creating your own builds! The Spreadsheet After visiting the wiki I found a google spreadsheet that listed the stats as well as how they change depending on item quality and the amount of stacks the stat has. The sheet wasn't up to date so I figured I'd do some upgrades. The sheet can be found here: Crashlands Stat Calculator[docs.google.com]. Before we continue, feel free to make your own copy so that you can use the sheet properly. I will refer to this sheet on multiple occasions throughout this guide so having it available is adviced. The only things that requires manual input is the two drop-down menus found at the following cells: B3 & B4. Make sure to check the comments I've made for some of the cells (the small black triangle in the top right corner inside the cells). The Main WindowShows the % amount of each of the stats (depending on what qualities are chosen in the drop-downs). The Blue WindowShows the highest possible stats should you stack up from all sources. Keep in mind that some of the stats (Crit & Elemental On Hit) are capped at 100% for obvious reasons, while you can get more (the %'s of your gear added together) the in-game character sheet will not show more than 100%, nor will you notice any difference going above. ModifiersFor anyone interested, these are the modifiers used for the stats. Do note that Berserk/Sec & Stun/Sec has got its own modifier, most likely after the COMBOVER update. Because of this, I'd advice not going further than Rare/Blue quality (3 stacks). The bottom right window (of the 4 modifier windows) shows the increase of each modifier compared to the previous quality. As you can see, you'll get a smaller increase each time the stat goes up in quality, starting at an increase of 88% of the (white) base value. More stat related information will be found under the 'Min-Max: Part 1 - Stats & Gearing' section. [Trinkets, Gadgets & Devices] + [Pets]On the second tab I've listed all the useable items as well as the pets in the game. I've left out my personal inputs since it's already covered in this guide and figured a non-biased, neutral informational approach is better taken in the sheet. You'll see stats such as Cooldown, Effect decriptions (+ Elemental damage type should the item have this) as well as Attack Range. 1 tile equals to one square of floor. All measurements was done in the game using preplaced floor tiles prior to attacking. The distances between Flux and the enemy on a horizontal plane was then used. As far as Pets goes, I just listed the stats as seen in-game, as well as the Symbiosis (the stats Flux gets) bonuses. At the top of the Pet section (Summary) you'll find some numbers if you're curious. I wouldn't base the chioce on these numbers alone however, since there's a lot of other factors to account for as well (also covered in the Stats and Pet sections in this guide) but it's a nice reference nontheless. Rock, Paper, Scissors? ...or rather Sword, Axe, Hammer? One of the exciting things to come with the Combover patch is the new weapon system. At least I found it exciting before trying it but after some testing, it kind of didn't any difference for me personally in terms of preference, Axes > All. Per level tier of gear, the differences between the 3 weapons are the following; Sword: 4 Attacks/Sec - Bleed Axe: 2 Attacks/Sec - Berserk Hammer: 1 Attacks/Sec - StunAPS: Attack/Sec. The DPS of the 3 weapons are exactly the same (within the same level range), however the attack speed and the Damage/Hit differs. I found this to matter mostly in the start of the game, when your primary damage comes from the weapon hits. The first thing that hit me was that I'd need to get 4 hits with the Sword before I'd be on par with the Hammer. At first glance one would think it'd be the same (1 second) but that's not really the case, since the first hammer hit happens as the first sword hit happens, but then the sword keeps hitting 3 more times until the Hammer would hit a second time (as the Sword hits the 5th time). And since enemies have a tendency to react (violently) I found the Hammer > Sword. However, I wasn't happy here. Because there was definately some dead time where I could've gotten another hit in, but instead I'd had to wait a full 0.75 Sec before the next hit. In comes the Axe. The perfect balance between the other two. After some comparing, I found the Attack Speed of the Axe to be more favorable than of the Hammer or the Sword. But there's more to it, because the weapons also have some unique stats; Bleed, Berserk and Stun. First of all, I find Bleed to be very lackluster in this game. It just sits there and ticks for kinda low'ish damage, not very impressive at all. Stuns definately opens up for some more uptime of attacks but then we are back to the slow attack speed, while you could perhaps get 1 more attack in, you'd still not benefit as greatly in the long run. Not to mention bosses being immune to stuns and the inability to reliably depend on it in the hour of need. Once again, I found the Berserking of the Axe to be the winner, both from a utility point of view as well as a Damage one. The only exception to this rule was when I crafted THE BLOOD ROOT, which is a Hammer. Unlike other Hammers, this one also come with Berserk/Sec. Bosses being immune to stun make it less attractive of a stat so it's kinda just a waste (and a loss, in lack of Berserk or Bleed) on normal Hammers. So the Stun was removed completely on the ROOT (more on this later). Another thing to keep in mind is the COMBO! system and how the 3 Weapon type Procs synergises with that. No worries, it's all covered in the Min-Max: Part 2. Min-Max: Part 1.0 - Stats & Gearing (1/2) Stats - What's useful and what's not? Before we get started, I'd like to clear out some things; White items have 2 stats. Green items have 3 stats. Blue items ALSO have 3 stats. Pink items have 4 stats. Orange items have 5 stats. Unique Orange items have 7 stats.In the game, there are 7 Unique Legendary items. These are (in order of obtaining them); HYDRABLADE WOODSHANKERS (Gloves), GIANTBONE HELM (Helm), THE BUTTERFLY (Axe), THE BLOOD ROOT (Hammer), DEMONIC BOOTS (Legs), THE MEGAGONG (Axe) & JUICEJOCKEY VACUHELM (Helm). Aside from that, other (crafted) items can also be upgraded to Legendary (Orange) quality but they will only have 5 stats, not 7. As for upgrading, I'd suggest making all crafted (non unique legendary) weapons, Legendary. Armor to Epic but not more (the 35 Armor is Legendary when crafted, it still only has 5 stats though). Wouldn't want to run out of Juice Crystals. In Crashlands, there's a total of 22 Stats you can aquire on gear (plus 7 additional stats found as Pet Bonuses (Symbiosis). First of all, we'll go through all the stats so we know what's good and which ones that are more or less useless and won't really help with what we want to achieve. Reminder: we're playing on Ludicrous difficulty. All the stats Berserk/Sec (Axe) - This stat has great synergy with many of the Gadgets/Devices (next section). Bleed/Sec (Sword) - Lackluster as a stat itself but has some synergy with Gadgets/Devices. Stun/Sec (Hammer) - Same as above, also bosses are immune to it. Toughness - Only "ok" in the very beginning of the game, before you get the JUICEFORGE / Elemental damage items. Can save you from a instant KO, maybe. Ice Resist - Same as Toughness except it only applies to certain mobs, so in other words, kinda useless. Poison Resist - See above. Fire Resist - See above. Electric Resist - See above. HP Regen - Probably the most useless stat of them all. Not because it's bad per se but because you get so little of it. With the best gear in the game you're looking at 2.85% HP/Sec. And that stat budget is better spent elsewhere. Vampire/Sec - Okay'ish for healing but it does nothing if you're full HP. And that's usually the case on Ludicrous mode, that or you're dead. Move Speed - I like this. Try to get 5%+ early on. As a rule of thumb, I kept myself above 10% (with the MERCURIAL BATSHOES) while playing through the game. This lets you avoid most if not all enemy attacks while adding a little bit leeway for slow reactions. Turbo/Sec - I'm personally not a fan of this. It's not realiable enough to be able to use as a hit & run for utility when running longer distances and while you could get a proc while fighting, to get the most of it you'd want to run somewhere, which may be just the opposite of what you want to do since you're >fighting< something. In terms of combat, it could of course let you avoid enemy attacks but you can do that just as fine without it, and when you're going in for a hit, you're standing still... Crit (5% Base) - One of the best stats in the game. Flux has a base crit of 5%. My first proper crit weapon was a lucky roll on THE BUTTERFLY, with a 60.02%, meaning I had a total of 65.02% Crit at the time. The number of Crit has changed a bit as I went on with my journey, usually placing myself just below 50% (to make room for 3 stacks of Berserk/Sec). You can reach (over) 100% in endgame. Shock - Pre-JUICEFORGE, these stats are decent if they align with your +Elemental Powers. You won't have too much total chance however, usually below 10% but can't be too picky before we get the ability to reroll the stats. Poison - See above. Burn - See above. Freeze - See above. Fire Power - Now things are getting interesting. These are the stats you'll want to stack on your armor once you get hold of the JUICEFORGE. Ice Power - See above. Poison Power - See above. Electric Power - See above. Dmg Reflect - A very interesting, and useless stat, for Ludicrous that is. If you were to stack this to the highest possible, you'd end up with a total of 1093.34% Damage Reflect. You'd also die trying to soak up all the damage. Could work post endgame though when you've got the best armor. Hm, I wonder how the final boss would be with this. Either way, not what we are going to cover here. Could be worth/hilarious to explore for the lowest difficulty. The Min-MaxNow that I've gone through what use each of the stats have, it's time to pick out the good stuff and go through these. Most of the numbers will be assuming the JUICEFORGE is available, since we can't be as precise before that point. Berserk/Sec (Axe)Since I favor Axes in this game, this stat comes naturally. I'd suggest not going above Blue (3 stacks) quality of this, since the modifier scales very poorly after. Green: 17.18% Blue: 22.25% (Pink: 24.99%)As you can see, going from Green to Blue gives an extra 5.07% but the next step (Blue -> Pink) only gives 2.74% (and after that it's below 1%). Not to mention that each stack of Berserking also takes away a stack of Crit, which we'll be looking at next. CritThis will give us a lot of damage. Early game you can't do a lot about it, although if you abuse the Save exploit / get lucky, you can get a nice roll on THE BUTTERFLY. Mine looked like this;
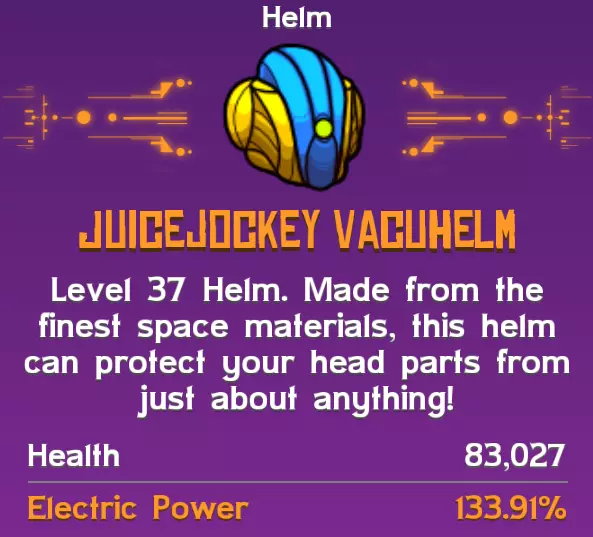
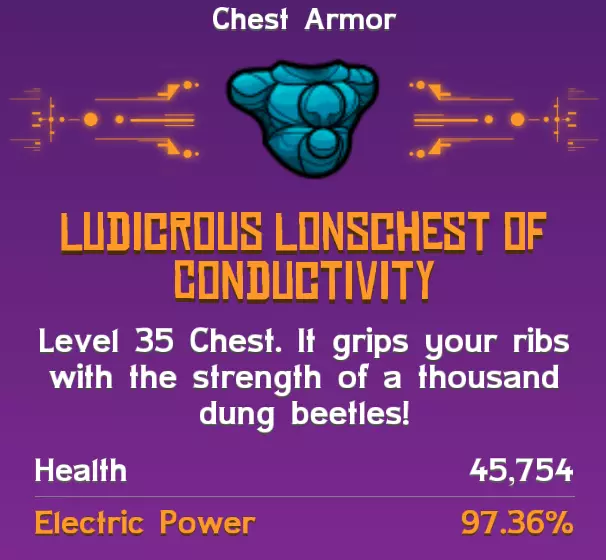
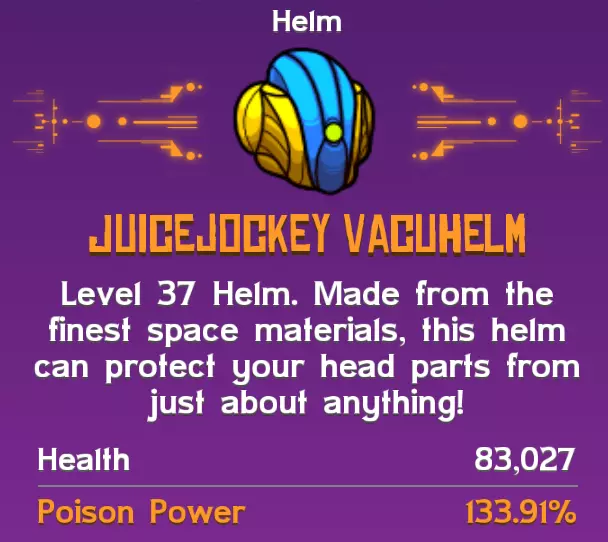
As the game progressed (post BUTTERFLY), I found myself aiming for Green Crit on my weapons (non Unique BUT upgraded Legendaries). This means I'd have 34.40% on the Weapon, another 5% from the Flux' default Crit putting me on 49.40% after we add the SAFETY GOGGLES (10%). This means you can still have the Blue Berserking on the weapon (3+2=5). Around the time you get to replace the BUTTERFLY (w/ Level 15 Axe(SPINE)), you'll also have the JUICEFORGE. With this you should upgrade the newly made Axe to Legendary quality and get Blue Berserk and Green Crit on the weapon. As you're nearing the end of the Bawg, you'll be able to craft THE BLOOD ROOT. Despite being a Hammer, it will also come with Berserking. For this I suggest that you aim for Blue Berserk (22.25%) and Pink Crit (60.02%). As for endgame and THE MEGAGONG, there's 2 approaches I'd suggest. The True Min-Max Approach; Green Berserk (17.18%) & Orange Crit (69.54%) ELIXIR OF PRECISION (+3% Crit) ELIXIR OF THE SPOOD BEAST (+5% Run Speed) ELIXIR OF TEMPORARY INSANITY (+3% Berserk/Sec)This will give you a total of: 87.54% Crit, 12% Move Speed & 20.18% Berserk. The Crit can be further increased to 92.54% if you take a SATGAT Pet with you, although I think it's not really needed since you'll be just above 100% when Berserking kicks in (15% Crit Chance from the WEAKNESS DETECTOR Trinket). The More Laidback Approach; Orange Crit (76.86%) & White Run Speed (6.10%)Yes, we will skip out on the Berserk. Even without this Activator you will still deal a lot of damage while not having to care for consumables, Gadget/Device synergy and optimzed gameplay / timing etc. The Crit will make you crit more or less on every hit, since we have to add 5% and 10% to the 76.86%, resulting in 91.86%. Then add the SATGAT Pet on top of that and we're looking at 96.86%. The Move Speed will give us 13.10% when used with the MERCURIAL BATSHOES. Speaking of Move Speed, mov(e)ing on (tehehe). Min-Max: Part 1.0 - Stats & Gearing (2/2) Move SpeedI noticed quite early on that the default movement speed won't do. For example trying to outrun the bigger TARTIL bombs would often result in a death if I were to run straight through them. As with many other stats, we can't be too picky before we get access to the JUICEFORGE. While in the Savanna, I'd suggest getting around 5%, that tiny boost will make a difference. For later, I opted for just above 10%. With the JUICEFORGE is available, this was solved in two ways, [[b]JUICEFORGE[/b] -> Pre-MEGAGONG] & [Endgame ([b]MEGAGONG[/b])]. I'd also point out, before we continue, that I did use the GIANTBONE HELM all the way until the end, where it was replaced by the VACUHELM. With that out of the way, we now have 7 stats to work with on the helmet. I went for Blue Move Speed (5.64%) and Pink Elemental (Electric) Power (98.04%). The highest possible Elemental Power on the Unique Legendary helmets are 133.91%, this means a loss of 35.87%. While it may seem like a bad trade, there's not really a better way of doing it without losing something else, since this is a give-or-take situation. The helm gives the highest amount of stats among the Armors, meaning we'd loose more trying to achieve the same on a different armor piece, the chest for example, boasting the second highest amount of stats, would result in a loss of ~60% Elemental Power rather than 35%. And Gloves and Legs isn't even an option since they top out at 3% and 4%, respectively, at Pink Move Speed, meaning there can't be any Elemental Power at all on these. Of course, upgrading the Chest to Orange quality would be another idea, however, we are still looking at a loss of ~50% Power, not to mention having to spend all those Juice Crystals every time a new chest is crafted. Once you get the MEGAGONG however, things changes a bit. If you get the weapon ASAP, you'll still be having the GIANTBONE HELM, although it wouldn't make a difference should you have the VACUHELM (% wise). Once you get the GONG, you have 2 routes to take. Quoting myself from the Crit topic just above this one (do still read that though, since I've removed all unrelated information here to make things more simple/relevant to Move Speed); The True Min-Max Approach; Green Berserk (17.18%) & Orange Crit (69.54%) ELIXIR OF THE SPOOD BEAST (+5% Run Speed) The More Laidback Approach; Orange Crit (76.86%) & White Run Speed (6.10%) The stats shown above are for the MEGAGONG. For the Helmets (whichever of the two you have, go full Elemental Power now (133.91%). Crafting and using the Potions at this point should not be a big issue, since you'll most likely have more than enough materials laying around to make a nice batch. This accompanied by the BATSHOES, you'll be looking at 12% or 13.10% Move Speed, depending on which approach you went with. Elemental PowerGenerally speaking, whichever Power you choose to go for, there's no difference here, although I do suggest Electric. Aside from the helmet which was covered above, just go all in on Elemental Power. Just from gear alone you'll be getting 271.91% E-Power once you get the JUICEFORGE. This assumes that you use a Unique Legendary Helm with Pink E-Power (& Blue Move Speed) and the rest of the 3 Armor pieces being Pink quality as well, with Pink (all in) E-Power. Then adding Trinkets and possibly a Pet to this, you'll go above 300%. I rememeber hitting enemies for ~10k damage by the later stages of the Bawg, numbers I've seen others have done in late Tundra, for comparison. As far as Endgame goes, you'll be able to go above 400%!
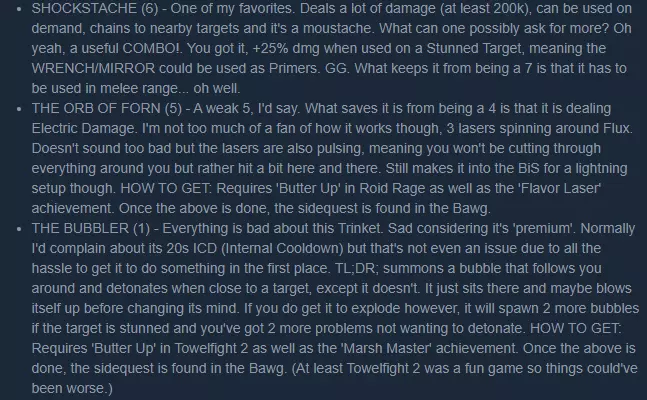
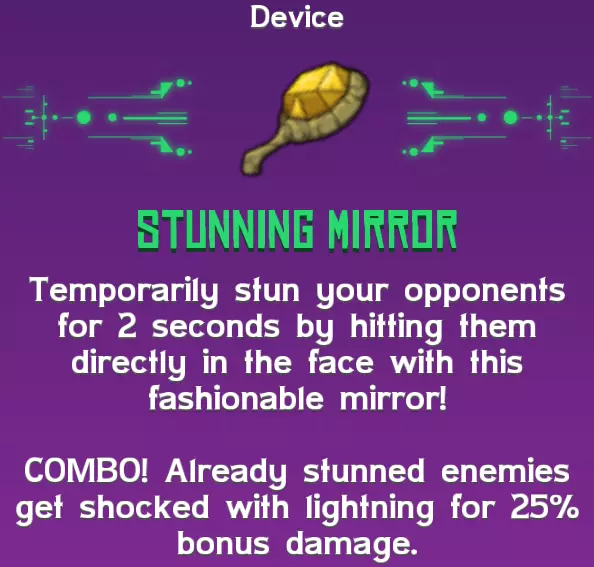
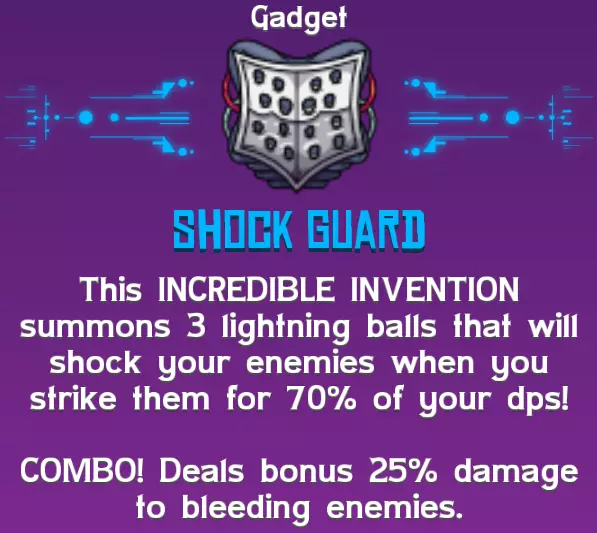
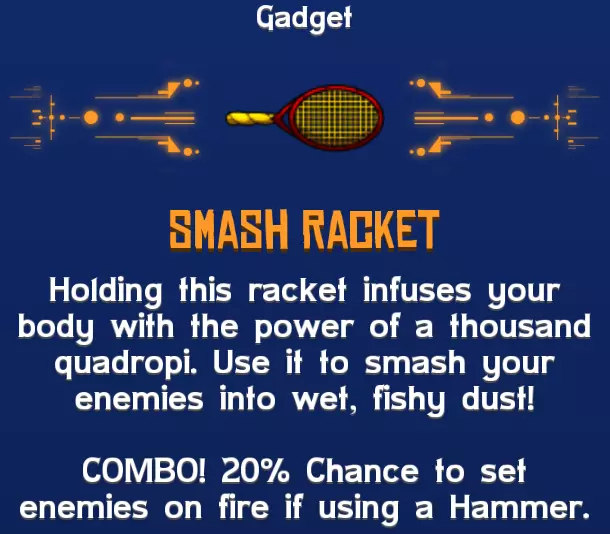
Min-Max: Part 2.0 - Trinkets, Devices & Gadgets (Intro) In this segment I will go through each of the items, rank them according to my experience with them and then I'll go through how they synergise with each other as well as their COMBO!s. The RankingHere we'll go through every and each of the items. To make things simple, each item will be written with it's name, followed by a number inside a parentheses showing a number - that number is my ranking, going from 1-6, followed by a description based on personal experience and testing. 1 - Very bad. Don't bother using it unless you have nothing else to put in the slot for the time being. 2 - Bad, the equal to what "Very Good" is to "Amazing". It's basically useless but not as bad as the items with a score of 1. 3 - Decent, neither Good or Bad. Will most likely be used for awhile but will be replaced as soon as possible. 4 - Good, this item will be part of your journey for a longer time but will be replaced as you progress through the game. 5 - Very good, part of the endgame BiS but it's not AS good as a rank 6 item. 6 - Amazing, part of the endgame BiS (Best in Slot). COMBO!s & Stat SynergiesOne thing I look at when reviewing and testing all the trinkets is first of all how their effect is applied. Is it a single-target hit that requires melee range or is it a huge AoE that can be fired from afar? Then it's of course the damage element as well as the damage itself, the cooldown and of course, the overall synergy when everything is taken into account and last but not least, the COMBO!. Something I noticed while playing is that focusing on a specfic element is definately the way to go, since you can reach over 400% Elemental Power, making the hits devastating. It also helps filtering out what we can/should use and what to avoid. So if you go for Electric, you'll want to focus on Electric items only, same for Fire and so on. You're also limited to 8 Gadgets/Devices and 8 Trinkets by design, so you couldn't even use it all even if you wanted to, so in that aspect it makes a lot more sense to go for a specific damage element dealing (as I am now) 50-550k per hit(!) rather than below 10k with a bunch of different stuff. As for COMBO!s, the biggest impacts are from the 3 weapon specific stats; Berserk, Bleed & Stun. Sadly, the COMBOVER patch didn't change much for me personally. Previous to the patch on the first playthrough I was still an Axe user (Crit was specific to Axes back then, instead of Berserk), although for the better, since I could now stick to using Axes throughout the whole playthrough (THE BLOOD ROOT was an exception, being a Unique Legendary, having 7 stats instead of 5. AND it also comes with Berserk/Sec, win win). When talking about COMBO!s I will sometimes mention Primers & Activators. The way COMBO!s work is that they need a condition to be true in order for them to work. For example, the target is Bleeding or Flux is Berserking. This can either be through Bleed, Berserk or Stunning the target or it could also be using an item prior, such as the SPACE WRENCH for the STUNNING MIRRORs COMBO!. When using the two words (Activator/Primer), I think of an Activator as the effect needed (Bleed/Stun/Berserking) while a Primer would be an item that can achieve a desired effect, such as the WRENCH in the example below, being a Primer. Min-Max: Part 2.1 - Trinkets, Devices & Gadgets (Savanna) SPACE WRENCH (5) - Believe it or not, at first glance it may not look like much, it's after all the first Device Flux will obtain in the game, nor does it have any flashy effects except for a Stun. A Stun that can be used from a Range of 4 tiles away from the target. What makes this item so good is actually not the Device itself but a different Device. This Device acts as a Primer for a COMBO! used by the STUNNING MIRROR (see 2 entries down). BACONBAND (2) - The only reason I don't give this a 1 is because it's obtained early enough to actually be used for a little while (replace ASAP). While HP regen sounds nice on paper, 0.25% isn't a lot and certainly won't save you playing on Ludicrous, where you'll most likely get one shot anyways. For out of combat healing I'd advice you just use a Potion (see Tips & Tricks section) or take a nap in that bed you're always carrying with you (again, Tips & Tricks). STUNNING MIRROR (5) - One of the highest damaging Devices in the game, if used in succesion with the SPACE WRENCH. Sadly, bosses can't be stunned in this game, else I'd give this a solid 6. Just like the WRENCH, this item also stuns the target but can only be used in melee range. However, what makes it so interesting is the COMBO! it has, namely, shocking the target with Electric Damage that will completely destroy anything in late game, once you get to stack up on that Electric Power (I'm running 380%-400% since I got the JUICEFORGE). DBOT (6) - While it doesn't deal damage by itself, it gives you a nice window of invincibility best spent at attacking your target while not giving a Flux about anything around you. Can also save your life in tricky situations. It also has a COMBO! linked to Berserking but I'd suggest not trying to account for that since Berserking is RNG and you're better off using the DBOT at your own command (rather than being dependant on something that may or may not happen, thus, misaligning you from the current situation). It's also Frost damage which isn't too exciting to begin with, unless you're of course stacking Ice Power for some reason. SAFETY GOGS (6) - First of all, this can be farmed from GLIDOPUS enemies. I'd suggest doing so before heading into the Bawg since it can be missed. I've been having mine on since I got it, one of the best items in the game for sure. Sadly, the COMBO! requires a Sword to activate but that extra 4% won't make a huge difference. For example, I got 60% Crit on my BUTTERFLY, meaning I had 75% Crit with this Trinket. And once the weapon was replaced in the Bawg I was close to getting the JUICEFORGE anyways, meaning we can secure a solid Crit chance for the rest of the game. GLORB (1) - While it atleast does something in the offensive department, it's just half as good as the next item, which is also bad. Simply becuase Poison... BEAKLER (2) - Bad but not as bad as the one above. BLO-PIPE (2) - I guess it's helpful early game when you don't have anything else but I was not sad when I got to replace it due to lack of space on the action bar. Again, Poison damage is very lackluster. JAR OF JOOM (2) - While it'd normally score higher, being part of the "Poison BiS" set, "Poison" & "BiS" shouldn't be anywhere near eachother, let alone in the same sentence. Only reason I gave it a 2 is that I used it for a little bit accompanied by the PIPE early game but never looked back once I replaced it. DAVY LAMP (2) - Not very impressive this one. First of all, any type of Resistances or Toughness is quite useless due to the difficulty setting (except for the very start of the game where you lack any Element Dmg Devices anyways + you can't really be too picky due to RNG). While the Burn proc may come in handy at the time the Trinket is obtained (rocking Fire damage at this point of the progress), it's sadly dependant on 2 Activators. First of all, the target has to be stunned, which is possibly RNG if using a Hammer or at least situation based (the cooldown of the WRENCH is available). The second being that you'll need to land a hit on the target during the duration of the stun, while possibly avoiding stuff and if you do, it's a 1/5 chance it will even happen. And that WRENCH Stun is better used with the MIRROR... GROUNDER (1) - Same as above except there's not even a COMBO! on it. NASTY LURE (6) - While this Trinket doesn't give any benefit in combat, it sure makes fishing a lot nicer, or rather, the result of fishing. Best combined with a FISHING Shrine buff. BURNY LIDFLIPPER (4) - Not part of the endgame BiS (Electric) but very useful for the first half of the game, where I suggest going Fire. Sadly no Combo on it but its 20% Fire Power will be the main source of extra oomph for the next item on this list (this is prior to being able to reroll stats using the JUICEFORGE so you're most likely not too spoiled with Fire Power this early on). FLAMETHROWER (4) - A very welcome item when you obtain it. Still one of the items to carry the Fire Build but not nearly as impressive as the Electric toys we get later on. SHOCKPROD (5) - 10% Shock Chance may not seem amazing at first glance and it isn't. But thanks to the Set Swap ability, we can use 8 Trinkets and there isn't really any better alternatives. Mostly it's noncombat affecting stuff and other Elemental Power stuff to choose from. It's certainly one of the weaker if not the weakest Trinket among the 8. Should possibly be a 4 or something but since I worded the 5 as being part of the endgame BiS, well this item is. Also, with the ~400% Electric Power it DOES hurt when it procs (just did a 53k Crit on a Glaser (50% Electric Resist)) as I am writing this. The GLASER disappeared!). MERCURIAL BATSHOES (6) - Run Speed, good stuff. Helps you get to that +10% Run Speed. As I suggest for this stat, 5% in the start of the game, over 10% (with this item) from the point where you get it. Also, if you're using an Axe (they are the best!!1) you get another 2% from the COMBO! FINGARANG (3) - Okay when you get it in absence of other items but quickly replaced later in the Bawg. Cannot cause COMBO! proc from its own Bleed, only other sources. If you position yourself correctly you can get another hit on the same enemy with this when it's on it's way back. SMASH RACKET (5) - While this item isn't part of the end-game BiS normally, it comes into play during bosses, where the WRENCH & MIRROR isn't much of use. For normal use, I think I replaced mine in the end of the Tundra, once I ran out of slots to keep it and while it could be replaced as early as end of Bawg (swapped with the CHRONO SHIFTER), it certainly was of great help since getting it in the Savanna. HOW TO GET: Requires 'Butter Up' in Quadropus Rampage as well as the 'Tack Jones' achievement. Once the above is done, the sidequest is found in the Savanna. Min-Max: Part 2.2 - Trinkets, Devices & Gadgets (Bawg) HEATING PAD (1) - Another useless Resistance item, again without a COMBO!. LIFE ENFORCER (2) - Sounds good on paper but if you read carefully, it only restores half of your MISSING hp, so it's not actually a 50% heal, which would've made it a bit better at least. But in its current state you'd kinda want to wait until you're as low as possible before using it to get the most out of it. Also, for incombat healing, a potion would be more effective. For out of combat, there are better ways (see Tips & Tricks). The COMBO! is kinda lackluster as well, being RNG and all, plus the Ludicrous one-shot argument used above. THE CHRONO SHIFTER (5) - It's not bad for normal play and it has its use on bosses for example, where you'd not want to bring your WRENCH/MIRROR combo anyways. But for all other places I just found other Devices/Gadgets giving me better results over all. To quote myself from the Spreadsheet; "When Time Warp is active in the game, time is slowed down by 50%. This affects both durations AND cooldowns. So if you activate something lasting for 3 seconds, it now lasts 6 seconds, but it's cooldown is also slowed down for the duration of the Warp. Best used together with DBOT for extended invurnability." RETINA MOUNTED SPICE INJECTOR (5) - Been using it since I got it. While it doesn't act as a weapon itself, it gives us the ability to use our other weapons sooner. As if that's not enough, it's COMBO! also reduces our cooldowns further each time we Crit. Best used with items with a longer cooldown, such as the DBOT. JUICE CONDUIT (5) - Again, been using since I got it (~mid Bawg). 20% Electric Damage, yes thank you. TERRIFYING FETISH (5) - A very nice item indeed. The (manual) Turbo Speed is always useful, whether its for getting around Woanope or incombat utility. What keeps it from being a 6 is the Primer not being reliable enough, namely Berserking. We won't really have more than 22.25% Berserk chance at any point in the game due to the poor modifier scaling beyond this point, and while 1/5 isn't bad, it's not good enough to make this item always proc lightning... but when it does I estimated it to be around 200% weapon dps (it doesn't say in the tooltip) so it sure packs a punch. I'd say, don't hesitate to use it if needed but if you don't need it, try to save it until you do Berserk and then watch stuff around you get deleted. SHOCK GUARD (5) - What this does is basically the same as Shock Chance but at a 100% Chance for the next 3 hits. Details on how to optimize its use will be covered in a different chapter here in the guide. Sadly the COMBO! denies this Gadget a 6 but its another one of those I've used since getting it. For the sake of argument, it could be best used with a Sword, partly due to the COMBO! (25% Dmg v Bleeding) but also for getting the 3 hits out asap. Sadly, the cooldown remains at 15s and no matter how slow we hit, we will spend all 3 charges before the cooldown is off anyways so it won't really matter in the long run. SHIVLY (2) - Didn't really use it at all during my playthrough. Only when trying the Ice Build, which wasn't as bad as I thought but not nearly as good as I had hoped for. PEDOMETER (5) - One of the weaker BiS items, somewhere back there with the SHOCKPROD. But since it's a Trinket, the other options isn't too exciting either. One contender would be the RAVE TUBE but I'd prefer something more reliable than a 5% on hit chance. NEMATOBLASTER (3) - If we forget this is an Ice Damage item for a second, it packs quite a punch when Ice Power is stacked. Another thing I liked here is the COMBO! Activator working nicely using the WRENCH or the MIRROR as Primers. But a truly good item is one that doesn't require another to work fully. Not that it matters much taking those actionbar slots since there's only 2 Ice items in the game anyways. Never used in the actual playthrough. CHEMWAND (3) - If you're playing fire (which you shouldn't at this point, else hf with Blastcrabs), it sure makes the cut as a Fire version of the SHOCKPROD. Unless you opt for Bombs instead, then the BOMBCATCHER is a clear winner. FREEZY HANDPOKER (2) - Another item I never used. Would be an obvious choice if you're going for an Ice build. MINI DIRIGIBLE (3) - A nice item when getting around. I personally just put down floors if I need to cross a river (always carrying 50+), I'm too lazy to swap this in and out and not good enough to take up a Gadget/Device slot. SWAPSCOPE (1) - Would give it a 0 if I could. Just too messy to be used effectively and will most likely get Flux killed in the process. WEAKNESS DETECTOR (6) - Alright, back to the damage department! 25% Crit Damage, hardly gets better. This combined with the already +50% Crit Chance (since the Juiceforge) makes this item very effective. The COMBO! gives another 15% Crit Chance when Berserking. BLOODBALL (1) - Yeah.. no (If Vampire/Sec worked like Lifesteal in other games, adding a proc ontop of the melee hit I would consider giving this a 2 but here it simply adds to your health from the damage dealt. And we've already talked about this. Would probably still be a 1 to be honest.) RAVE TUBE (3) - A worse PEDOMETER. RNG based, at 5%. Chance doubles against Bleeding targets (which they shouldn't be). PLAGUE INJECTOR (1) - Clearly does more damage than the BLO-PIPE but it'd be like shooting yourself in the foot to start using it so late in the game. Built for completion purposes only. OPTIMIZED GAMEPAD (3) - Nice for farming I guess, never used it but I think a 3 is a fair score. WEALTHY STATUE (4) - Pretty awesome for farming. Sadly, it should have a 3 or 2, if obtaining the schematic is included in ranking (it isn't). During my 2 playthroughs of the game, I didn't get this item before leaving the Bawg meaning it's obtained very late, too late infact, to have gotten much use of it. It's a random drop from harvesting Spurs and it can take awhile to get. Unless you use the Save Exploit mentioned in the end of the post together with a Spur farm, it's probably more hassle than it's worth trying to farm this instead of just moving on. If you're lucky however, I congratulate you and think you should definately use it for the Tundra, as some of the resources there can be pretty scarce (Larva/Bunnion). CLAWBOX (2) - No. Should be 1 but still does more than the final item on the list here. IDOL OF PLAGOO (2) - Oh, here's a good one. Just kidding, it's just no. Eww. Given a 2 just to differentiate between the other Poison Power item giving 20% (this one gives 30%).-- It appears I ran out of writing space here so I had to get creative by adding a picture for the last 3 entries. Maybe I could've gotten away with it without telling? Not like it looks weird or anything ^^.
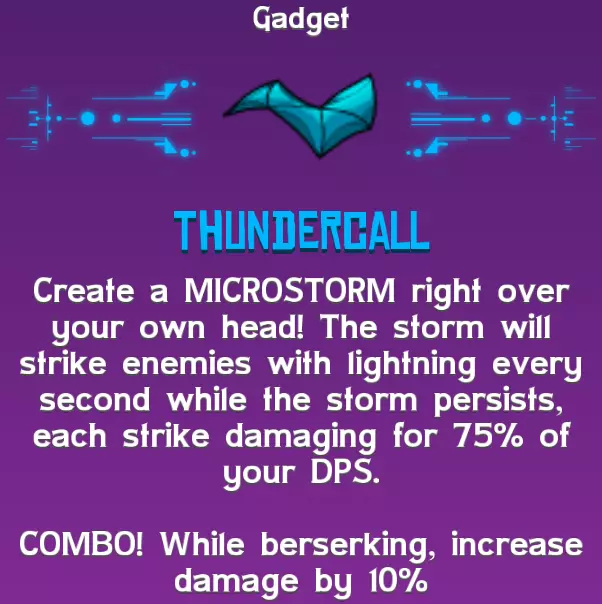
Min-Max: Part 2.3 - Trinkets, Devices & Gadgets (Tundra) THE HEFT (1) - Too low chance to be used alone, and Hammers aren't prefered weapons anyways. Would be using the BLOODROOT at this point but there are better options anyways. Also useless vs bosses. ELECTRO FUZZ-KNUCKLES (6) - A better JUICE CONDUIT (use both). 30% Electric Power. MOTIVATOR (1) - 15% Run Speed when below 30% Health, no thanks, I'd rather have full health. Combat is too fast paced to make use of it, as you'd most likely; 1) Die 2) Heal up above 30% - shortly after going below 30. LASER LEASH (2) - It may be dealing Electric damage which I like but it's too much of a hassle to use properly. Draws a laser between Flux and her pet, doing not super impressive damage to anything caught between. The problem I found is that I'd spend too much time trying to position myself in relation to the pet than actually playing properly. These adjustments could also end badly. COMBO! uses Bleed as its Activator, so another minus there (if we were to even consider using Swords & Bleeds, we'd not be going for Electric damage). BOMBCATCHER (4) - An absolute must if you're going the bomb route. Wouldn't personally use this nor any bombs since it'd get annoying after awhile having to craft new ones all the time. Perhaps the first effect of this item should've been 100% and only the no-cooldown chance would be at 25%? Would've made bombs worthwhile. SLOWBALL MACHINE (3) - The second of the two Ice damage items in the game. Trading damage for range (compared to the NEMATOBLASTER), it goes well together with the WRENCH as a Primer to get that extra 25% damage through its COMBO!. EFFICIENCY ENGINE (4) - Quite nice for farming, I didn't get mine until post endgame though so as with the WEALTHY FIGURE, should be a 3 or 2 if time of obtaining it is accounted for. Also, our harvesting tools are pretty powerful by now so only a few resources take multiple hits. This item should've been obtained in the Savanna instead. That way you'd be trading a damage Trinket for a Harvesting one, giving an interesting choice. Now it's kinda whatever. EVERFIRE LAMPBOX (3) - A solid item if you're fire but going fire at this point is a pretty bad idea with all those BLASTCRABs around and their 100% Fire immunity. The mats are not the easiest either, I didn't even have one until post endgame for testing the Fire build. SPACETIME FOLDER (2) - It lets you teleport to anywhere on the screen by poking 10s cooldown. Not something I'd use very often, except for when I'd be trying to reach the end of the map maybe. It's also most likely one of the last items you'll craft. A cool idea (Description/Implementation and Usage) but not very useful. +1 for awesome effect when using it. SEARCHLIGHT (4) - I didn't use it personally because I choose to spend my Trinket slots elsewhere but not a bad item if you're going the Pet route. The reason I didn't care too much is that by now, my damage is so high the pet doesn't really matter. Pets are doing ~40k damage (Crits) at this point where I'm doing 6 digits on most of my attacks, it just seems sort of pointless. MEGAGONG LURE (6) - Let's you fish the best weapon in the game. COLDY SPINPOPPER (2) - Same as with the EVERFIRE LAMPBOX. Didn't have one made until I tested the build for this guide. And just like Fire > Frost, 3 > 2. BIG RED (4) - Surely deals some damage but a large portion of its damage budget is in DoT (damage over time) damage. Still better than the FLAMETHOWER in terms of power though but not very useful with BLASTCRABs and Electric Damage in the game. It did come in handy on the E.M.G. boss though (Immune to Electric & Stun). CLEAVEBAT (2) - Another harvesting item. Not as good as the others though. Range appears to be around 3 tiles. While not terrible, the biggest issue here is finding resources of the same type close enough to eachother. CLARM (4) - I'm just going to go ahead and quote myself from the SEARCHLIGHT entry. "I didn't use it personally because I choose to spend my Trinket slots elsewhere but not a bad item if you're going the Pet route. The reason I didn't care too much is that by now, my damage is so high the pet doesn't really matter. Pets are doing ~40k damage (Crits) at this point where I'm doing 6 digits on most of my attacks, it just seems sort of pointless." THUNDERCALL (6) - Summons a big cloud around Flux zapping enemies caught inside (one target / hit per second). Also makes the screen go a bit darker, quite nice for the eyes. It's nice to combine with the ORB OF FORN for maximum clusterFlux. (COMBO!: +10% Dmg while Berserking.) Min-Max: Part 3.0 - Consumables, Enemies & Pets In this part, we'll be looking at the Consumables (Potions) and the Pets the game throws at us. ...starting with Consumables As much as I would like to list all the Potions and give my opinion on them, there's honestly not much to say here. I feel like going out of your way to craft them is too much hassle honestly, except for the endgame if you really want to Min-Max, but early on I feel it'd just take more time than it's worth to farm for a big enough batch to last through the game. Looking at my current (game completed) session, I've been stranded on Woanope for just over 1 day. For the sake of keeping things simple, if we were to use a potion all the time for this period, that'd be 1,440 minutes. Each potion last 20 minutes which means we'd need 72 Potions of each kind (that'd be worth using). I think I'll pass on that. For those interested though, I'll just write the names (and effects) of the Potions that ARE interesting (sorted by Workstation). HEARTH ELIXIR OF PRECISION (3% Crit) ELIXIR OF THE SPOOD BEAST (5% Move Speed) CAULDRON ELIXIR OF BULGING BICEPS (5% Damage) PRESSURE COOKER ELIXIR OF TEMPORARY INSANITY (3% Berserk/Sec) Honorable Mentions ANGER OMELET (15% Pet Damage) (HEARTH) BLEGHMAR TREAT (15% Pet Crit) (CAULDRON) SPONGY PODCAKE (Berserking for your Pet (3min)) (CAULDRON) I don't really think the rest of the Potions are worth it, taking the gain:material ratio into consideration (Stun,Burn,Shock, etc). It's 2-3% for each and while you could of course stack it with other On Hit items to get around 18% (Pet + Trinket), it's not where the majority of the damage comes from anyways. Enemies & PetsMoving on! Next up is pets. Let's start by looking at the overview of all the Enemies, to get a general idea of the effectiveness of our Elemental Damage (do note that we won't decided solely based on this information but it's nice to get out of the way).
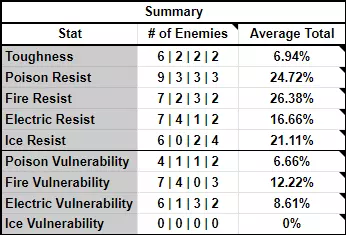
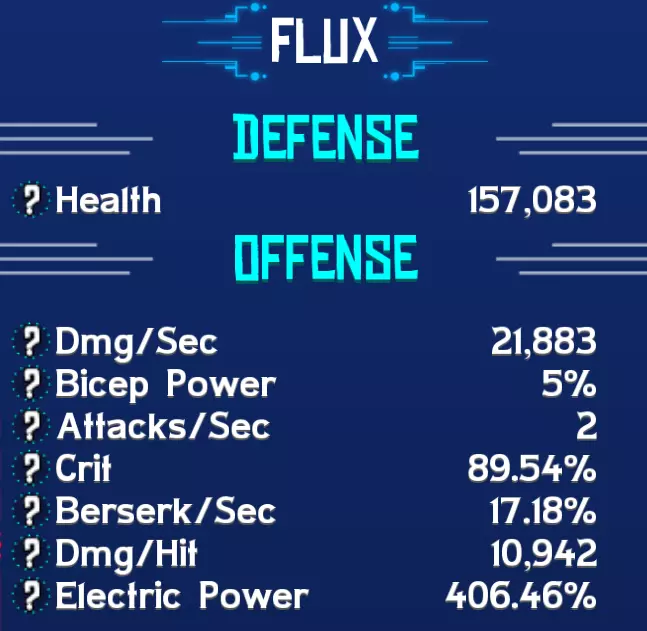
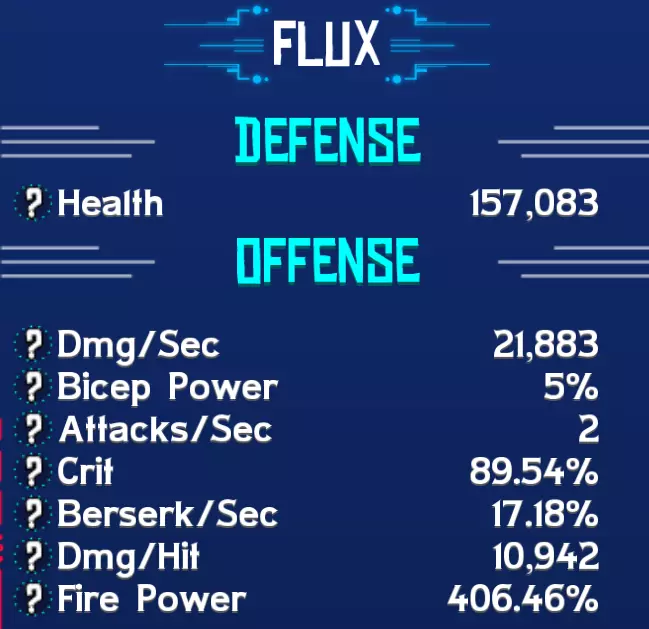
So while we're not going to go on this entierly, it's still interesting to see that Electric Resist is present favoring Savanna, where only 1 and 2 enemies has this in the Bawg and Tundra. As for Fire, 4 enemies has Electric Vulnerability in the Savanna and overall, Electric Vulnerability is held by 3 and 2 enemies in Bawg / Tundra (vs 1 & 2, 0 & 3 and 0 & 0). Now, I won't bore you with too much numbers since its easy to get carried away at this point. Some key factors to make note of however is that in regards to resistances, once your Elemental Power (and means to deliver the Elemental damage through Devices & Gadgets), the resistances will not matter too much except for a few. For example, at endgame, the GULANTI has a 80% Electric Resist, but with ~400% Electric Damage they still die pretty quickly. On the other hand, THROAKs are immune to Freezing Damage, just like BLASTCRABs being immune to Fire. These two are the only ones with a 100% Reistance though. The "# of Enemies" shows how many of the enemies per biome (and overall) has at least some resistance. The first number looks at all 19 enemies, while the 2nd, 3rd and 4th number shows each Biome (Savanna, Bawg & Tundra, respectively). On the other hand of the spectrum there's Elemental Vulnerability. By mouseovering the notes I made for the "Average Total" column, you can see specifically per biome. Poison is pretty even between the 3 Biomes although it ramps up in Tundra. No enemy are weak to Fire in the Bawg but the rates are pretty high in the Tundra (keep in mind of the BLASTCRABs being immune though). Electric, just like Poison is very even but when it comes for Ice Damage, no enemy has a weakness to this. While I will showcase the capabilities of pets later, I believe most of the damage comes from Flux herself and I see pets more like a stat boost in terms of its synergy rather than something that kills stuff - once you start getting enough toys to do some serious damage, which is around mid-Bawg. Early game, Pets are great help, especially on Ludicrous when it can definately take some time killing stuff. In the start, you'll obviously not have a lot to choose from, and there's not a whole lot of Gadgets/Devices to sync with and finally, Elemental damage stacking isn't a thing yet either so here I'd say focus on the pets attacking capabilities. Personally, my progression looked like; 1) WOMPIT (first pet) (also adviced Vs. the Baconqueen, it soaks the projectiles pretty well) 2) GLUTTERFLY (as soon as I got one) 3) TARTIL (solid damage and we're getting the FLAMETHROWER around this point too) 4) VOMMA (Awesome carpet bombing capabilities) 5a) SATGAT (When you're around 400% Electric Damage, another 20% won't make a huge difference, so having that 5% Crit is definately something to consider. If we are going to be picky here, we WILL reach above 100% (while Berserking) meaning some of the crit is wasted, but outside of Berserking, the window of no crits is certainly lower. This is for endgame though, closing the crit window. 5% Crit won't make too much of a difference when you're sitting at around 50% mid game. 5b) ZUG (If you feel the Crit isn't what you want or perhaps you just loathe the SATGAT, this is another option. So 20% Electric Damage + 5% Shock Chance Vs. 5% Crit. (Math Below)) The earlier you swich to this pet the bigger difference the 20% Electric Power will do, since your over all Electric Power will be lower.) 5c) WAT (Apart from the options above, the WAT is an alternative for Move Speed but I'd rather solve that differently (see previous chapter). It's hard to argue that you can have too much speed though, and you'd still deal more than enough damage at this point but then again, 3% Move Speed isn't very impressive. As I wrote above, I use the pets for the bonuses they provide Flux with but if you'd want to look at the pets attack patterns and such, a user named KatherineOfSky made a very nice guide covering just that (and a lot of other stuff too), find it HERE. For other Elemental Builds, the ZUG equivalences is; Poison: GLUTTERFLY Fire: TARTIL or BLASTCRAB (basically 10% Fire Resist vs 10% Toughness (I'd say Toughness)) Ice: None. Before considering choosing a Elemental Power Pet over the SATGAT though, see Part 4! Min-Max: Part 4.0 - Crit Pet vs Elemental Damage Pet? SATGAT Vs. ZUG Alright, math time (skip to the bottom of this chapter if you hate math). Just before we get started, this will not be 100% accurate due to the many factors (enemy vulnerabilities/resistances, all the different Gadgets/Devices etc) but we'll get a rough estimate anyways. To make things simple, we'll use what I consider to be the BiS setup (Electric), using the Min-Max approach discussed earlier. We will also use a "100% of your DPS" Gadget as an example. This should leave us with the following stats; 21,883 Weapon DPS (MEGAGONG) 87.54% Crit (w/o SATGAT) 406.46% Electric Power (w/o ZUG) A wild Shirk appears! Device hits! Dealing 100% of your DPS (21,883) as Lightning. The following happens... 21,883*4.0646=~88,945 (damage)(That would be without either the SATGAT or the ZUG.) Starting with the SATGAT, at 87.54% Crit (not using the Pet), the non-Crit chance is 12.46%. Since we're so close to the cap (100%), we'll do this the other way around. Using a Chance Calculator[dskjal.com], we can see that it's just below 50% (48.59%) probability that we will see a non-Crit over 5 hits. With 92.54% Crit Chance, the non-Crit chance would be only 7.46%. That by the way, is a ~33% non-Crit Chance decrease. So with these new numbers, we are looking at a probability of 32.13% to see a non-Crit during these 5 hits, or for comparison, we'd be able to hit 9 times and have the same probability of a non-Crit if we were not using the SATGAT. While I'd like to wrap it up here, there's one more factor we need to consider:Berserking. We will be going with 20.18% Berserk/Sec, since that's what we will have with the Weapon Berserk in accordence to the adviced stat rolls combined with the potion. We will not be able to consider the whole 15% of the COMBO! from the WEAKNESS DETECTOR since in both examples, we will hit above 100% Crit Chance. What we will consider is the Berserk chance (20.18%) and use that to get the number(s) we are looking for. 12.46*0.2018=~2.51 & 7.46*0.2018=~1.51In other words, with 87.54% Crit, the average Crit gain while Berserking is 2.51% and 1.51% for 92.54% (The Trinket does less the higher Crit chance we reach). So, still working from the backend of the spectrum, we will need to subtract these numbers with the first numbers we used, 12.46% becomes 9.95% and 5.95%. The new probabilities are entered into the calculator and we have the following Conclusions; 51.98% probability to see a non-Crit over 7 hits and 11-12 hits if we are to use the SATGAT Pet! Now, if we have the ZUG follow us, we get another 20% Electric Damage. Using the same method as above, we'll get ~93,322 damage. An increase of 4,377 damage. After some actual tests ingame however, these numbers were different, at 110,000 damage (without ZUG). This wouldn't make a huge difference however, since the compared damage is just below 1k more. If we are now to apply the near 100% Crit Chance to this, the numbers are now ~doubled(?) (according to tests, Crit damage seems to be around 2x). In other words, 8,754-11,000 more damage per hit (that deals 100% Weapon DPS as lightning). ConclusionComparing the two pets (SATGAT & ZUG), you now stand before a choice. SATGATIf you're using the SATGAT, you'll be able to do 4-5 more hits than if you were using the ZUG, before you will see a non-Crit, at a 50% probability. ZUGIf you instead opt for the ZUG, you can expect to deal 8,754-11,000 more damage per (Electric) hit. That's with a Device that deals 100% Weapon DPS, ignoring Vulnerabilities / Resistances. "But...you didn't say what's best Lulleh. :(" Well, it's very even! If we compare the two, if you do 11 hits with each of the setups, the 12th hit will decide what did the most damage (whether its a Crit or not). However, at 12 hits with the lower Crit Chance of the two examples above, the probability of the 12th hit being a non-Crit is 71.57%! So the probabilities favor the SATGAT. That's the mathematical conclusion anyways. The TL;DR conclusion is: if you just hate the idea of a non-Crit, go SATGAT. I'm personally on team SATGAT. (And no, I will not calculate if it'd be better to use the WAT for Move Speed or drop 1 level of Crit on the weapon to get another 6.10% Move Speed, because then I'd have to factor in how long distance would have to be travelled from the point of this being relevant until you're done with the game, how angry you will get of seeing a non-Crit and check how many times that'd happen during the decreased travel time... just no!) Min-Max: Part 5.0 - Gameplay Optimization and Tryharding (Basics) Now, this part will be covering "the little things" that made a difference for me while playing. I don't expect or suggest that you just copy everything written here since many of this things come down to personal preferences so instead use it as an inspiration for creating a style that works for you! KeybindsBefore this turns into a mobile vs PC discussion, I'd like to add that I started playing Crashlands on my phone and was hooked instantly. One of the best games (and without any competition, THE BEST game in the genre) for mobile phones. For some reason however, I decided to buy the game for Steam and I haven't touched the game on my phone since. This is mostly due to the Mouse > Finger movement as well as individual keybinds. I never had any issues on the phone but getting the improved accuracy of the mouse when moving around combined with keybinds that makes Set Swapping a whole lot easier, it plays like a Diablo style game kinda. And I can just see myself fatfingering the Gadgets while tryharding putting Set Swapping into play while on the phone, resulting in many deaths. I also prefer the Small View Width which isn't available if my phone screen is set to high resolution. For those of you that DO play on the PC, here's my setup of keys (once again, don't copy, find your own!).
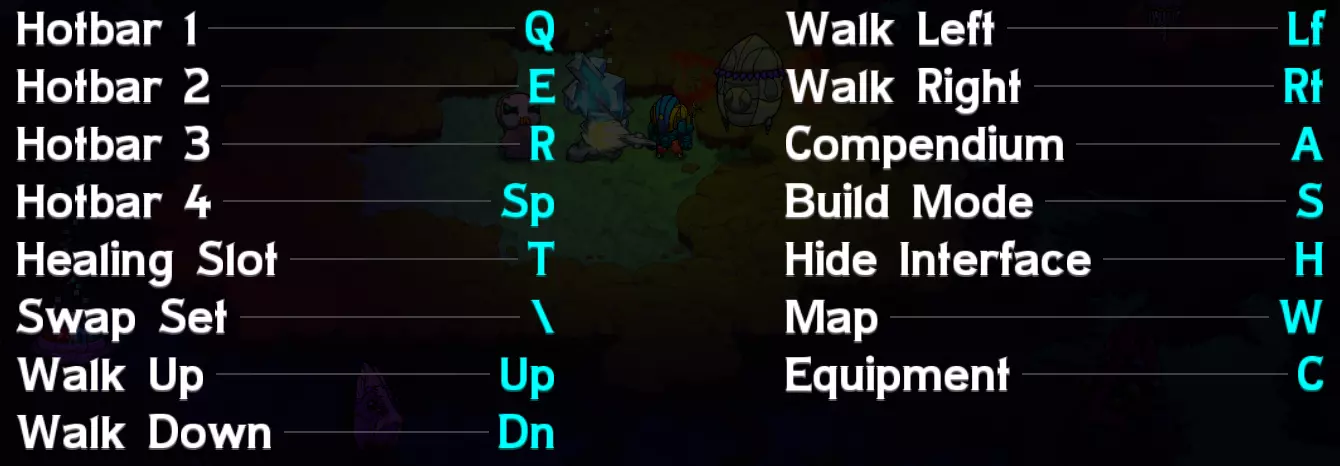
关于移动,我只用鼠标。我尝试过使用键盘以及PS3手柄,但都不如鼠标光标精准。我觉得区别在于,用鼠标是直接告诉Flux要去哪里,而用键盘或手柄则像是在推着她移动,这让移动感觉有点……奇怪?不过这只是我个人的看法。 至于按键设置,4个 gadgets/Devices 槽位绑定在Q、E、R和空格键上,这是我玩《暗黑破坏神》和《火炬之光》时的按键习惯。治疗技能绑定在T键,这也是我在很多其他游戏里常用的设置。我把切换套装的按键设为CapsLock(我已经禁用了CapsLock的实际功能,所以加了引号),这也是我在游戏中切换武器的常用键位。然后我考虑利用默认的WASD手位。我感觉自己使用地图的频率比建造模式高,所以把地图绑定到了“W”键,建造模式则绑定到“s”键(手指从默认位置向下移动)。“A”键分配给图鉴最合理,因为我切换套装时本来就在那边操作。至于“D”键,没有分配任何功能,有点可惜。我觉得它本该分配给装备栏的,但装备栏对我来说一直是“C”键(角色)——直到我玩《魔兽世界》时键位不够用,不得不把“H”键也用上了,不过那就是另一回事了!我从不使用隐藏界面功能,所以就把它留在“h”键上了…… 接下来是基地布局。我敢肯定,很多人会说:“喂,别教我怎么建房子!而且你的基地看起来糟透了!” 我无法反驳这一点,你们自己看看吧。
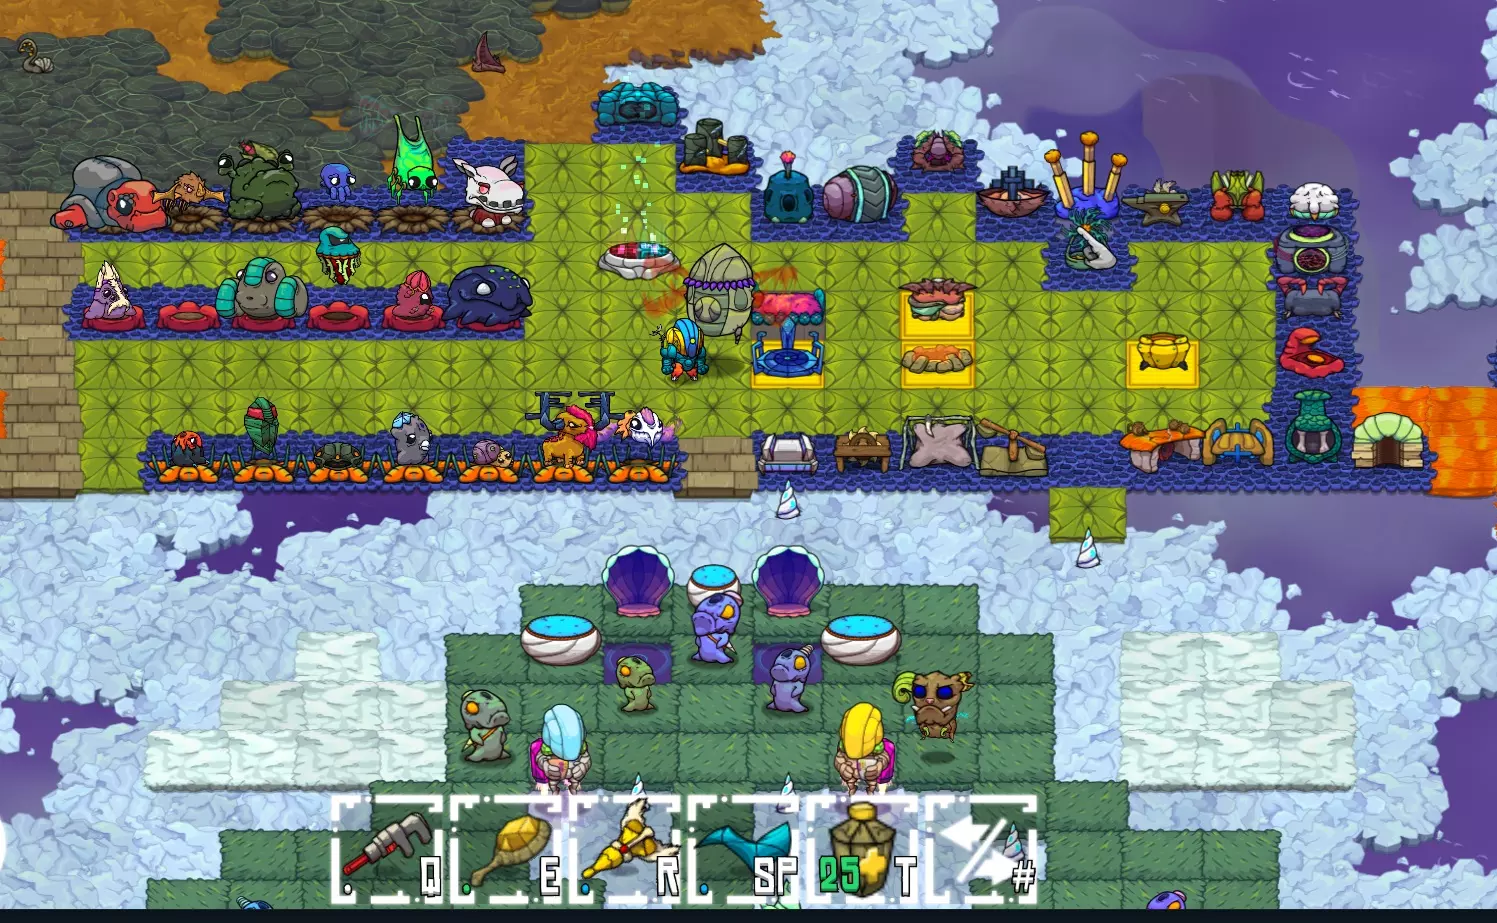
人们常说,“金窝银窝不如自己的狗窝”。所以照搬我的设计没什么意义,也拿不到什么建筑奖项(我甚至可能被赶出去)。不过,如果我们忽略材料的选择,就能看到这里的效率水平。我(已经尽力)想要实现的是最高效的设计,能让我放置所有工作站和宠物,同时考虑到我使用不同物品的频率,让各区域之间的移动距离最短。 从底部的【BS SSSS SS5】开始,所有热带草原工作站都在最下面一排,有3个出口可以通往庭院的不同区域。接下来是呈倒L形的鲍格工作站,最后,为了区分鲍格苔原,我将碎料篮向下放置了一格,这样就能在它正上方挤出空间放置一个集袋泵。之所以没有将泥浆处理器与其他工作站排成一列,是为了将它与其他工作站区分开,因为它并非“标准”的工作站(指用于制作装备等的工作站)。这也为基地额外提供了一个出口!然后是精炼厂和铸造厂。如果把它们留在原地,在基地内传送时会出现问题,所以我必须腾出一些空间。还有,没错,我有时会遇到不速之客,比如激光虫或闪避怪,因此在整个区域周围建造围墙是合理的。我刚刚才发现,我一直把 tundra 敌人算作6个,而不是7个,这意味着平均总百分比有点偏差,因为统计的是18个敌人,而不是19个……好吧,太糟糕了!不会再这样做了!现在已经更正了! 最小-最大:第5.1部分 - 游戏玩法优化和极致挑战(高级) 优化套装切换 现在事情变得非常有趣。这基本上分为两部分讨论。首先,我们在每套装备中放入哪些物品,才能使它们之间以最佳方式协同作用?其次,一旦选择了物品,我们如何充分利用套装切换功能? 从物品及其协同作用开始; 借助套装切换功能,我们可以即时使用8个饰品(被动)和8个装置/小工具(主动)。为此,我制作了两套配合得非常好的装备。我将以我的电系构筑为例,但会在第6部分【构筑对比】下列出其他(推荐的)组合。 ~组合1:伤害~

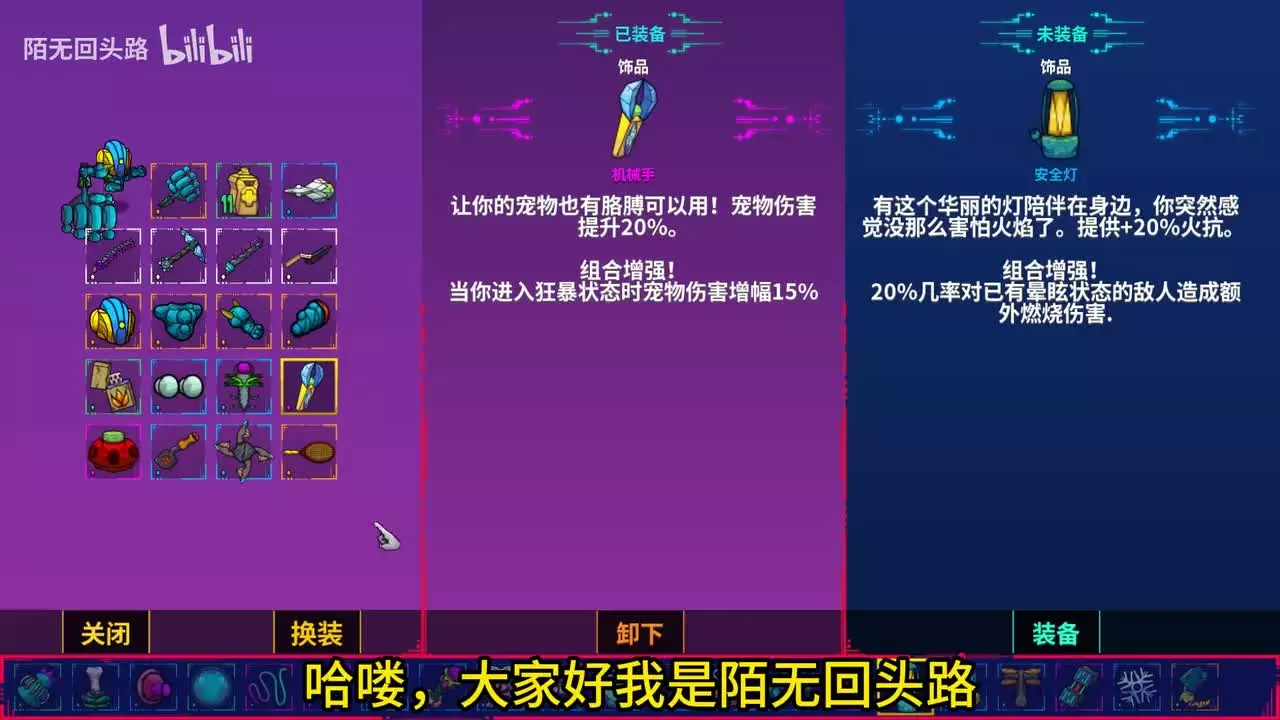
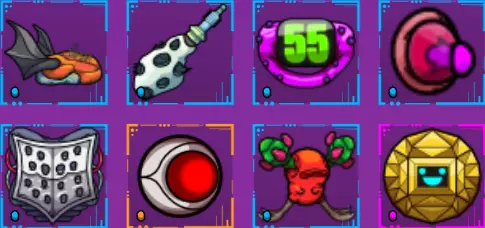
这就是奇迹发生的地方。这套饰品的选择只考虑了一个因素:伤害。 【安全护目镜】(+10%暴击率) 【弱点探测器】(+25%暴击伤害,狂暴状态下额外+15%暴击率) 【电子绒毛指节套】(+30%电力伤害) 【能量导管】(+20%电力伤害) 关于这些饰品无需多言。在这套组合中,你的暴击率将达到最高,因此装备【弱点探测器】最为合理。然后,为了进一步放大伤害,+50%的电力伤害效果不言而喻。理论上,你可以用【蝙蝠鞋】替换【能量导管】,以少量伤害换取额外速度。虽然【涡轮】(+50%移动速度)会随着移动速度的提升而获得更好的效果,但你通常会在使用【 fetish】后立即切换到这套组合。关于装备/ gadgets,我选择了一些强力装备: 空间扳手(SPACE WRENCH)(这是下面那件装备的启动器) 眩晕镜像(STUNNING MIRROR)(只能与上述装备连续使用,它会造成大量闪电伤害(我写这段时刚打出411k的暴击)) 电击胡须(SHOCKSTACHE)(这个build的核心装备,我之所以这么喜欢它,是因为它不需要启动器,自身就能造成大量伤害,还能连锁攻击附近的敌人(约4格范围)。可以与眩晕镜像(如果镜像在冷却中,也可以用扳手,它们的冷却时间不同)连续使用以获得25%的额外伤害,不过大多数非boss敌人单独吃一个镜像就活不下去了) 雷电召唤(THUNDERCALL)(另一件非常强力的装备。它的伤害不如另外两个高,但一旦激活,你就可以不用管它去做别的事情了,因为接下来5秒内它会一直以风暴的形式围绕着【Flux】存在。 ~套装2:辅助/实用~
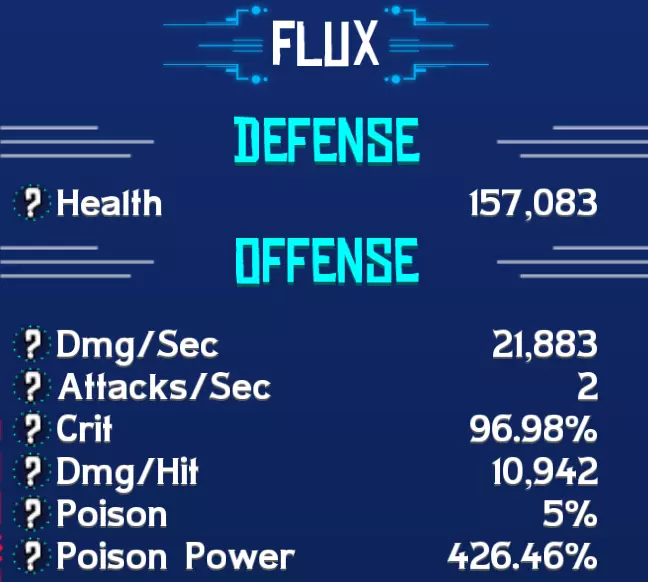
This set is focused more on utility as well as support for the first set. Starting with trinkets; MERCURIAL BATSHOES (+7% Move Speed) (Can be swapped with JUICE CONDUIT from Set 1, (see above)) SHOCKPROD (+10% Shock Chance (+20% while Berserking)) PEDOMETER (Turbo Speed for 10 Sec every 50 steps) RETINA MOUNTED SPICE INJECTOR (-15% Cooldown for all items (Crits reduces cooldowns by 0.50 Sec)In this set, Flux will be Quicker, thanks to the SHOES. You will also have a chance to Shock your target, while one could argue this would better be suited for the other Set, these Shock hits doesn't do a lot of damage in comparison to the other stuff, so mixing it up doesn't make sense. It's more of a 8th item in lack of anything better. This is also why I am more biased towards the SATGAT over the ZUG, as the extra 5% Shock Chance could be a reason to keep the ZUG but since we will spend about 50/50 time in each sets, that 5% alone doesn't matter much. The PEDOMETER is a reliable extra speed boost since Crashlands is a lot about travelling so it definately helps. There are other, similar items but I never found them to be very reliable but rather RNG dependant. Overall, the cooldowns of our Devices/Gadgets on this Set is actually longer than the ones in Set 1, so keeping the INJECTOR here makes more sense. as for Devices/Gadgets; SHOCK GUARD (This one is basically a 3-hit guaranteed Shock Chance. The best part is that you just turn it on and forget about it and it of course works while you're in Set 1 as well. Sadly the COMBO! has Bleed as its Activator, and not Berserking) THE ORB OF FORN (Apart from the fact that Lasers = awesome, this item was a bit disappointing, due to how it works. Considering the damage isn't amazing (not be to confused with bad), the way it works makes it a bit of a hassle. 3 Lasers spinning around Flux but they also pulse (turn off/on), meaning that they might miss some enemies if you're unlucky so see this item more like a bonus item kinda. Better to have it than not have it) TERRIFYING FETISH (Very nice for utility, giving you a little speed boost. If you're Berserking, it will also do a lightning nova, similar damage to that of the STUNNING MIRROR. It seems though that it cannot Crit, still pretty decent damage. But partly because of that, don't wait for Berserking in order to use this. If you need to use this, to get to a safe place while fighting something dangerous, don't hesitate to use it. It's not worth dying for some extra damage) DBOT (Been using this since I got it back in the Savanna and never looked back. 7 Sec invincibility opens a lot of possiblities, letting you go full Rambo on whatever is trying to eat you. So use it offensively! For example when spending the SHOCK GUARD stacks etc. The COMBO! is similar to the one of the FETISH just above, also triggered by Berserking. Although it's Ice Damage so don't even bother, just forget it's there and use it as there was no COMBO! in the first place)Now that we've gone through what to use, there is one final tip (also written out in the second last section). First of all, the SHOCK GUARD should always be active at 3 stacks unless it's got a cooldown. Always. Other than that you should utilize the way Set Swap works, taking advantage of its cast time to minimize it's cooldown. So if you're in combat, Set Swap has a 5 Sec cooldown. It also has a 1 Sec animation before you actually swap. During this animation you can use any item however, so it's adviced to use that to your advantage. It would look like something like this; Use Shock Guard -> Forn -> Fetish -> Set Swap -> DBOT (While Set Swap is being Cast), you'll now be in Set 1 with the DBOT going off in the very last moment before the swap took place and now you can go Rambo with the other stuff. This way, you used the Set Swap ~1 second earlier than you'd do if you were to use the DBOT first, and you can swap back into Set 2 once all the Set 1 items are on cooldown! While all this happens, you'll be in melee range spending all the SHOCK GUARD stacks with your Invincibility! Min-Max: Part 6.0 - Build Testing (Electric) Now it's time to see the potential of each Elemental Build. As I've stated before, stacking one Element is the way to go here in terms of damage (and that's why we are here after all). Starting with Electric; Weapon & Armor THE MEGAGONG
无法识别或无法翻译,已删除。
无法识别或无法翻译,已删除。
无法识别或无法翻译,已删除。
恶魔之靴

统计数据
饰品、小工具与设备 第一套
第二套
视频片段 优点:游戏内最高伤害。 拥有多种不同的装置/小工具可供使用。 装置之间具有良好的组合协同效果。 来自小工具/装置的范围伤害会随能量流动。 虽然敌人的电抗性可能会带来问题(见缺点中的电磁脉冲和格拉泽),但一旦进入终局游戏,这就不再是问题。即使是拥有80%抗性的古兰特人也能轻松消灭(见视频)。 缺点:在早期 tundra 区域对抗格拉泽(50%电抗性)时会有些吃力。 对电磁脉冲 Boss 无效(免疫电伤害)。 所使用的两个小工具提供/依赖眩晕效果——Boss 对眩晕免疫。(改用粉碎球拍和时间转换器) 我认为,在四种流派中,电系是“最难”玩的流派。倒不是说这游戏本身难度很高或要求很苛刻,而是如果你想充分发挥Build的潜力,需要留意很多冷却时间之类的东西。 觉得游戏太简单了?^^(我通关时,HEWGO 3不到25秒就被击败了,甚至可能更快)。 极限优化:第6.1部分 - Build测试(火焰) 来看看火焰能有什么表现! 武器与护甲:THE MEGAGONG

无法识别或无法翻译,已删除。

无法识别
无法识别或无法翻译,已删除。
恶魔之靴

统计数据
饰品、小工具与装备: 第一套配置的饰品部分没有太多变化,只是将电力改为了火力。在装备/小工具方面,游戏中只有两件纯火系物品,即【火焰喷射器】和【大红】。【火焰喷射器】以狂暴状态作为启动条件,因此我们保持其武器属性与电力流派相同。【大红】有一个连击效果,依赖目标处于流血状态,由于缺乏其他火系物品,【指虎】成为解决该问题的合适方案,需在使用【大红】前使用。注意,如以下视频片段所示,【指虎】可以造成两次攻击。在没有其他选择的情况下,第一槽位使用了【粉碎球拍】。 第一套配置
第二套

对于套装2,我保留了FETISH和DBOT。前两个装备换成了时间转换器(CHRONO SHIFTER)和迷你飞艇(MINI DIRIGIBLE)。饰品方面只做了一处改动,将电击棒(SHOCKPROD)换成了火焰版本的化学法杖(CHEMWAND)。就像视频中展示的那样,我也尝试了使用炸弹,效果非常棒!在使用炸弹时,我用炸弹捕捉器(BOMBCATCHER)替代了化学法杖。使用的炸弹是大家伙(THE BIG ONE)和鞭炮(FIRECRACKERs)。注意,由于火焰强度的叠加,鞭炮的伤害超过了大家伙。 优点:在游戏初期(草原场景)表现良好。我个人在巴格区域中期获得电击护具(SHOCK GUARD)后,就切换到了电系流派。 对古兰特(GULANTI)效果显著。古兰特具有70%的火焰易伤,如果你使用火焰流派,它们会非常难受。缺点:首次进入巴格区域时存在一些问题。作为我们遇到的第一个敌人,沃玛拥有75%的火焰抗性,这会让火焰伤害大幅受限。幸运的是,我们可以使用乔利啃咬将它们炸掉。 来自 gadgets/Devices 的范围伤害是固定的,不会移动。 除了沃玛有高抗性外,爆炸蟹对火焰完全免疫。此外,还有3种其他敌人至少有50%的火焰抗性。 游戏中只有2个火焰系 Devices。其中一个的连击激活器带有流血效果,整体来说不太理想,因为巨 Gong 是游戏中最好的武器,所以我们会错失那额外25%的伤害。 总体而言,物品之间的协同作用感觉很笨拙,玩起来有些奇怪。 极致优化:第6部分。2 - 构建测试(毒素) 接下来是毒素! 武器与护甲【THE MEGAGONG】

无法识别
无法识别或无法翻译,已删除。
无法识别或无法翻译,已删除。
恶魔之靴

除了将元素能量改为毒素外,这里唯一的区别就是武器。没有任何小工具/装置使用狂怒作为启动技能,所以我将所有属性都转换为暴击。 属性
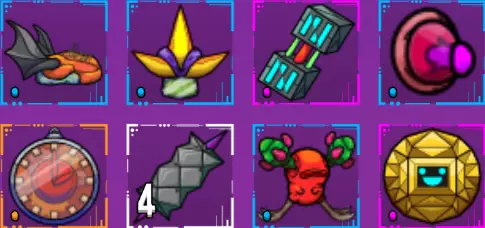
饰品、小工具与装置 再次说明,饰品已根据正确元素进行调整,这包括【普拉古偶像】(IDOL OF PLAGOO)和【祖姆罐】(JAR OF JOOM)。 至于小工具/装置,我四处搜寻后只找到了2个:【布洛吹管】(BLO-PIPE)和【瘟疫注射器】(PLAGUE INJECTOR)。这会很有趣。^^ 更糟的是,这两个【组合技】都以流血效果作为触发条件,而且装备【巨 Gong】(MEGAGONG)后,所有伤害都基于武器DPS,使用剑反而会适得其反。【指节环】(FINGERANG)再次派上用场,而在没有更好选择的情况下,【粉碎球拍】(SMASH RACKET)将是我们最后的选择。 组合1

第二套
对于套装2,我选择了BEAKLER(近战元素触发几率),DBOT和CHRONO SHIFTER沿用了火焰流派的配置,FETISH也一样。说实话,我真不知道该怎么改进这个流派,但我觉得带些炸弹总没坏处。 视频片段 优点?好像没有。我实在想不出任何优点。实际测试后发现它比我预期的要差很多。大家可以对比这四个流派的视频,自行判断。 哦,有一点:它增加了一个有趣的挑战,即仅使用毒素伤害通关。不过如果我非要玩一个输出很低的流派,我宁愿选择纯移动速度流。至少这样移动起来还能快点! 两个毒素系装备都将流血伤害用作其连击激活条件!乍一看,我觉得这会很糟糕,部分原因是【MEGAGONG】不能有流血属性,而且就算没有【MEGAGONG】,剑类武器也挺一般的(参见第二章的武器类型对比)。但【FINGERANG】却成了这些武器的绝佳启动装备。可惜的是,与其他选择相比,中毒和流血的伤害都没什么用。(这就像是一个优点变成了缺点) 缺点: - 游戏中伤害最低的武器类型。 - 和火焰属性一样,游戏中只有2种中毒属性的装置,但不同的是,这些装置的伤害甚至更低(和火焰相比)。 - 中毒作为一种伤害来源,本应进行完全不同的调整。每层中毒伤害(即使来自同一来源)都应作为独立层数存在,并且会刷新目标身上已有的中毒层数。这种叠加机制可能会非常有趣,比如某个可怜的敌人身上叠了10层中毒,看着它逐渐被毒倒。中毒伤害或许也应该更高一些,因为即使在400%伤害倍率下,它的表现似乎也不太理想。最后,需要更精心设计的连击系统和物品协同效果,以及更多中毒系物品。 极限配装:第6.3部分 - 流派测试(冰系) ……最后是冰系。 武器与护甲:巨 Gong
无法识别或无法翻译,已删除。

无法识别或无法翻译,已删除。

无法翻译的内容已删除

恶魔之靴

除了护甲上的【冰之力】外,这里没有其他区别。属性
饰品、小工具与装置 再次,饰品已更改为冰系能力;【冰爽旋转陀螺】和【冰冻手刺】。 与上一元素类似,本次发现了2个小工具:【雪球制造机】和【线虫爆破枪】。好处是两者均以眩晕为激活条件,所以是时候让【扳手】和【镜子】重新派上用场了! 组合1
第二套
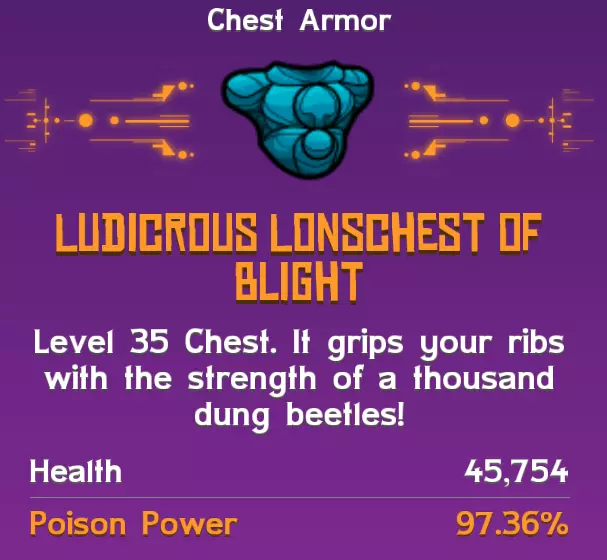
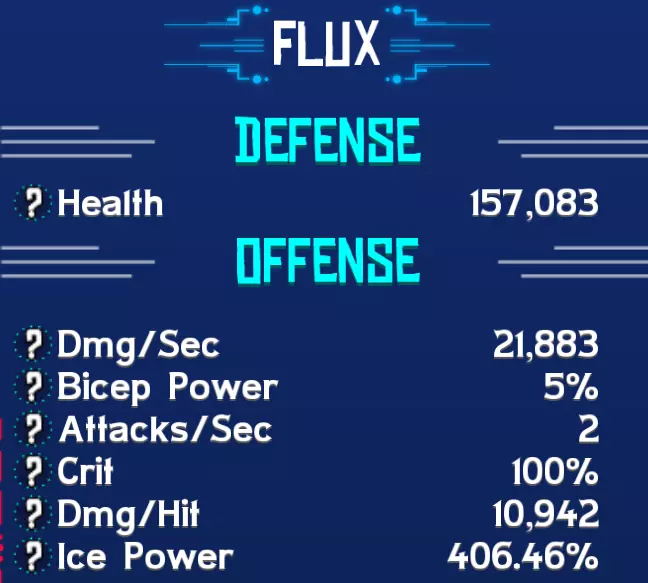
No difference for Set 2 other than the Elemental on Hit item, SHIVLY for Ice. Video Footage Pro's Not as bad as I thought it would be prior to testing. Surely packed a decent punch. The most Convenient / easy build to play with. While there was (again) only two Ice based Devices, I found two very suitable Primers for these. The WRENCH has the same range (4 tiles) as the SLOWBALL MACHINE and both the MIRROR and the NEMATOBLASTER are melee range. Not a lot of stuff to keep track of while still reaching it's full potential. Con's Not much of AoE capabilities to speak of. About the same damage as Fire except Fire works on multiple targets. As far as enemy resistances goes, THROAK are completely immune. GLASER and GULANTI sits on 80% Resist and GALLUM on 50%. No enemy in the game has Ice Vulnerability. Min-Max: Part 7.0 - The Verdict & Gearing Roadmap ConclusionIf you've been reading everything up until now (or at least the 4 previous chapters), I suppose you already know the answer. Electric wins by a huge margin.Mostly due to the insane (direct) damage output and partly due to versatility in terms of items and COMBO! (Activator/Primer) synergy. While it's a bit more to keep track of (cooldowns) than other builds, the first two points makes up for it tenfold. It's not even fair compared to the other builds. Utilizes both Sets so you'll find yourself swapping back and forth quite a lot. My second favourite is Ice......but I'd say Fire is better. Ice just felt very laidback and chill (pun not intended) to play with. Great synergy between the two Primers and the two Ice damage Devices. Not a lot of cooldowns to keep track of, at all. Not including Utilities I kept on Set 2, this works just as fine with only 1 set. Fire - Equal to Ice in damage but with AoE capabilities.This game is much about clearing a bunch of enemies as fast as possible and not so much about single target damage. This is why I'd say Fire has an edge on Ice. It felt kinda clunky to play with however and not as enjoyable as Ice and nowhere near Electric in terms of overall damage. I'd say both Ice and Fire are about half the damage as Electric. Speed Build > Poison Build.I was very surprised when trying out the Poison build. The damage was just... nowhere to be found. If you haven't watched the video footage of the builds, feel free to do so and see for yourself. The build made me feel like I had just crashed on the planet and I'm trying to kill my first WOMPIT, except worse because I'm fully decked in the finest gear Woanope has to offer. If it was between using this or [not any of the builds above], I'd just go for full Move Speed or even Toughness / Resistances and use Physical Gadgets such as the SMASH RACKET and maybe even Bleeds. It can't get much worse than this. Like I said in the Poison test chapter, Poison should not only do more damage but also make individual stack each time (no matter the (duplicate) source) its applied, making for some interesting ramp-up resulting in melting the targets. It's barely tickling them now. While at it, I'd also change Bleeds to do what Freeze currently does - more damage taken from all sources, and lasting longer too. As for Freeze, a % based chance to shatter the target could be nice. Ah well, shouldn't complain too much. Electric is so much fun as it is and the game is amazing nontheless. Just stay away from Poison. :) Gearing RoadmapI figured I'd include a rough roadmap of upgrades and such here. As a rule of thumb, armor and weapons has been upgraded as soon as a new workstation is available. Once I got the unique legendary GIANTBONE HELM I didn't replace it until the very end, since it holds 7 stats rather than 5 that upgraded (Juiceforged) legendaries have. The legendary gloves from the beginning of the game (HYDRABLADE WOODSHANKERS) was replaced once I could craft new gloves that were 3 workstations away from the SHANKERS if that makes sense. As far as weapons goes, I'd suggest always making Axes with the exception of the unique legendary hammer, THE BLOODROOT. Legendary weapons follow the same logic, 2-3 workstations ahead. Due to their higher stat budget. In terms of quality upgrades once the JUICEFORGE is available, I made all weapons Legendary quality for more damage, armor however was kept at Epic, to save JUICE CRYSTALS. It'd be annoying to run out and I always kept myself above 100 until the end. As far as Trinkets and Gadgets goes, one can't be too picky in the very start of the game. But notable items are the SPACE WRENCH, STUNNING MIRROR, FLAMETHROWER, DBOT, SAFETY GOGS, MERCURIAL BATSHOES and I also found use for the FINGARANG (in lack of anything better at the time). I focused on Fire Power up until I got the SHOCK GUARD semi-early in the Bawg, where I then rerolled to Electric Power and kept that until I finished the game. As far as bosses goes, personally the ones I found most challenging was (in order); E.M.G., THE BACONWEED FAIRY & BLOCKSTOCK. The E.M.G. is immune to Electric damage and there's a lot of movement in the fight, so it takes awhile. I didn't bother rerolling all my stats so I just put on a bunch of random stuff and went with it. The BACONWEED FAIRY has a lot of fast moving stuff and meeting the boss so early in the game made it not only take long time to kill due to lack of items but also having to dodge those fast moving projectiles. Pre-buffing with a SPEED and FLY Shrine is adviced. Also, using the WOMPIT to soak the projectiles is a good idea. BLOCKSTOCK isn't very hard mechanically, just takes awhile for the same reason as above, being the first boss and all. Min-Max: Part 8.0 - The BiS (Best in Slot) Some of you may want to skip to this part so here it is! The 'Zeus' Lightning BuildHere I'll list all the items that made it into my final loadout. Weapons & Armor THE MEGAGONG
无法识别或无法翻译,已删除。
无法识别或无法翻译,已删除。
无法识别或无法翻译,已删除。
恶魔之靴
饰品 安全护目镜

弱点探测器

电光拳套(ELECTRO FUZZ-KNUCKLES)

无法识别或无法翻译,直接删除。

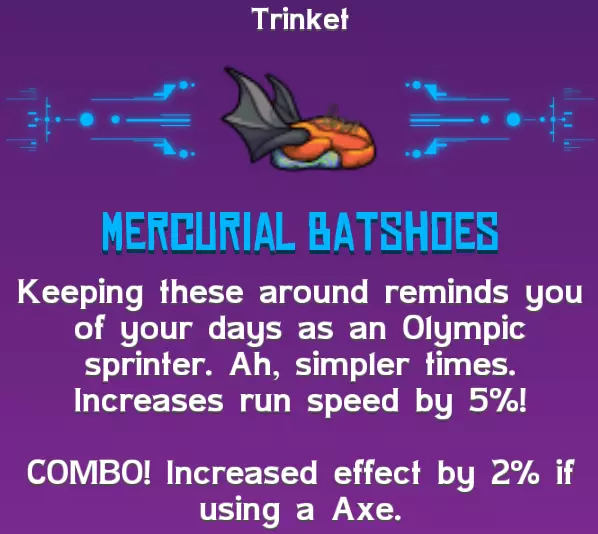
水银战靴(MERCURIAL BATSHOES)
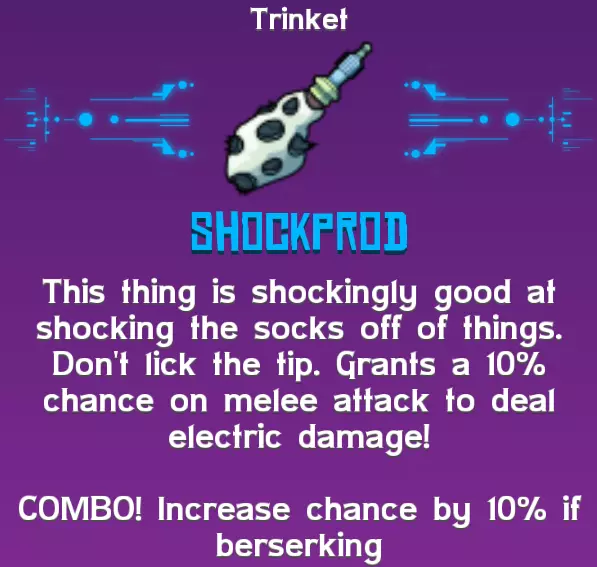
SHOCKPROD
计步器

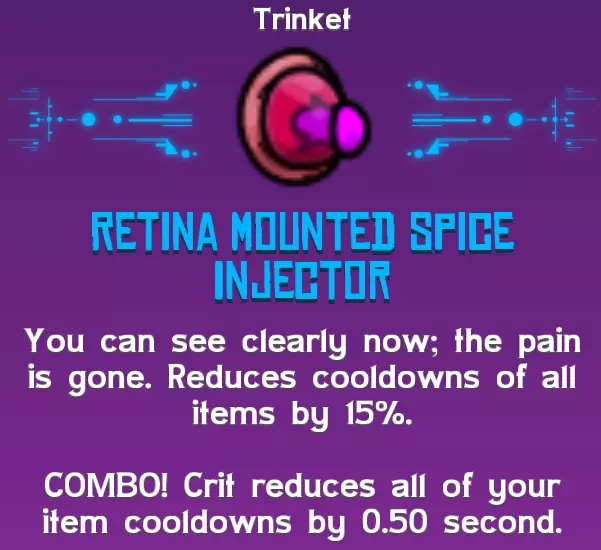
视网膜植入式香料注射器
小工具与设备 太空扳手

震撼镜像
无法翻译,已删除。

雷霆召唤
防电盾(SHOCKGUARD)
无法识别或无法翻译,已删除。

令人恐惧的恋物癖

无法识别内容,已删除。

Bosses are immune to Stun, replace SPACE WRENCH & STUNNING MIRROR with; SMASH RACKET
时空穿梭者(THE CHRONO SHIFTER)

技巧与窍门:那些我希望在开始前就知道的事 建议选择一个你会经常访问(并返回)的地点作为基地,且该地点附近应有资源,例如水源或预先放置的土壤。虽然你当然可以拥有不同的基地,但我在到达新生物群系时会移动所有物品,这样能节省大量材料。这是我放置基地的位置; 热带草原:BAARNAPOL(我一到达那里,就一直保留着陆点直到那时)

巴格:萨凡纳搬运者(在我完成巴格后,我将家乡位置移到了TOOCHOOCHOOINAX)

冻原:中央守卫队

标记!制作它们,使用它们!从游戏开始能够制作标记起,我就总会随身携带至少20个标记。有了这些标记,我会标记出所有的增益神龛、果汁水晶簇、 buff 神龛以及其他值得注意的东西。为了让事情简单些,我会建立某种系统。增益效果会命名为【飞行】【生命值】【时间】【速度】【收获】和【钓鱼】。我用红十字标记未来的渔场(任何足够大、能容纳多个3x3鱼群的水域),用蓝色水滴标记果汁水晶簇。
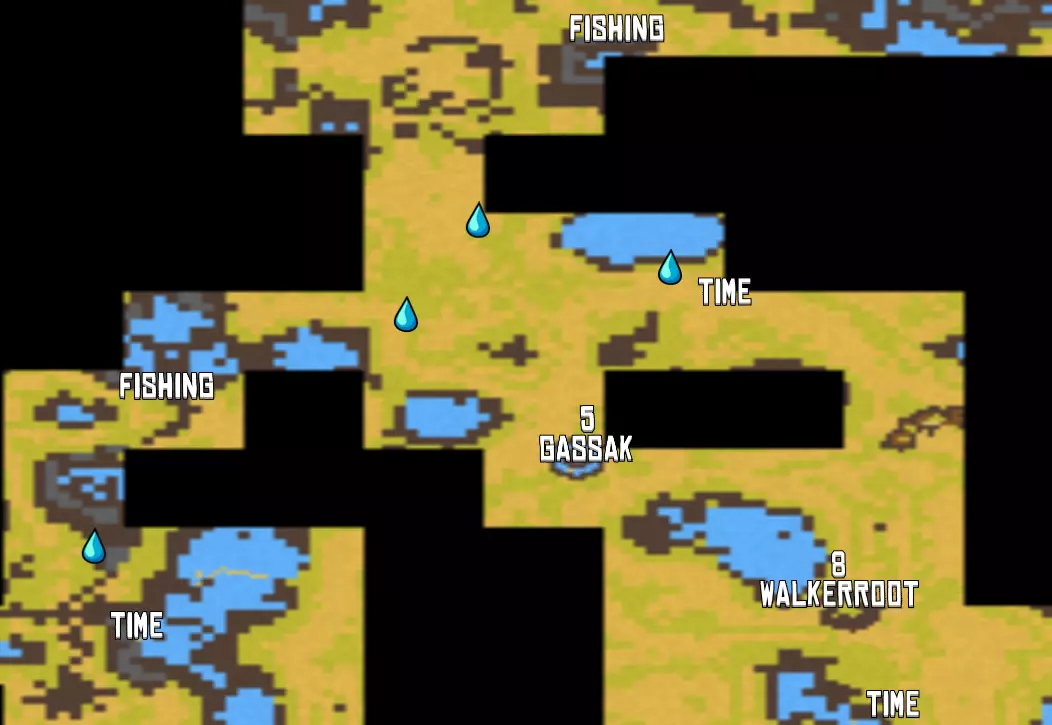
This way I'd know right away when I needed something without having to go look for it. Always carry an extra bed. Sometimes you're out on the field and need to change the time of the day, heal up to full, maybe you're being chased by angry Throaks or simply want to take a nap. Either way, this should save you a teleport back to homebase. This bed would act as a sleeping bag, meaning you just place it on a floor tile, sleep and pick it up and go on. During boss battles, there are usually (% based) times where the fight stops and the boss starts taunting Flux through dialog. You can utilize this time to wait for your cooldowns (Gadgets/Devices). Buff timers (Berserking, Fly etc) DO NOT tick during this time. Swap Set and Post-Using an Item. The Swap Set feature has a 1 sec cast time and a 5 sec cooldown (if used in combat). To utilize this to the fullest, you can opt to first press the Set Swap, then while the animation/cast is in progress, you can activate an item. This means you'll get out of the 5 sec cooldown faster (since you used the Set Swap BEFORE the Item (and not the other way around) and you'll also have more uptime of your item using the other Set (where you may have stacked up on a lot of +Elemental Power / Crit items, for example. Time-Warp and how it works! Apart from slowing down time (duh), it's interesting to look into how this actually affects the gameplay, more specifically, our items. It mostly works in our favor but it has some small downsides too. Perhaps you've noticed how when you activate a Time-Warp (RED) shrine and it says "Time warp! (10 sec)" but it feels a lot longer? That's because it is! Thanks to the Time warp itself, the buff duration in real time is actually 20 sec. Meaning that if used together with other effects, you'll get double the time on those too. One example is using THE CHRONO SHIFTER together with the DBOT. However, while this is a good thing (combined with the fact all enemies are slowed down too), this also affects your cooldowns, increasing the time it takes for them to finish. So keep that in mind. Only use low level healing potions for out of combat healing! Playing on Ludicrous, taking a hit more often than not results in death. But there are those times where you may just survive the hit (or after you come back to life following a KO), you'll find yourself low on HP. The way the game works, similar to other games (WoW is one example), is that it takes in account of your % of HP, so if you were to swap out gear, changing your actual HP from 50/100 to 500/1,000, you'd remain at 50% HP. Unless you're on 100% HP. So, what you can do is to unequip all your gear, leaving you at 50 HP. Use the cheapest healing potion you can find, wait til you're full, then put back your gear and voila! You're back on 100% @ 150,000 HP for the price of a lowly MILD HP POTION. Or just use the bed you always carry with you. Utilize the generic sowing grounds to save some materials reducing the amount you'll need. As you play, you'll come across places where the game has already placed a few sowing grounds, meaning you can just add your own to this. There are 3 good spots for this, one in each of the Biomes. Savanna: BAARNAPOL (North-East) Bawg: TOOCHOOCHOOINAX (North-East) Tundra: CENTRAL POD GUARD (South-East) Save (pick up using the Buildmode) all Fatfish for later. More specifically, when it's time to go for the Megagong. While it may not make a huge difference (unless you're really lucky), utilizing the Exploit in the next section can save you some time. Should you take that route, I'd suggest that you break them open in either the Savanna or the Bawg, preferably the one where you got the least mats in order to make a fish farm. This means you'll get your GONG from the Fatfish, and then making a Fish Farm in the Tundra + whichever Biome you DID NOT break the Fatfish in. The reason you'll want a Fish Farm in the Tundra no matter what is that you'll first need to get the Bonkagong and then the actual Megagong. So having the fishing cluster ready is adviced. Aim for 5% Run Speed early game, 10% for mid-late. Personal preference here but I noticed a big difference in the start having none to actually having a minor boost, when trying to dodge stuff, especially the larger Tartils could be problematic. Details will be / has been covered in the theorycrafting part earlier in the guide. The HYDRABLADE WOODSHANKER Legendary Gloves CAN NOT have any of the +Elemental Power stats. Too bad since they are the only Unique Legendary Gloves in the game. In other words we're missing out on 8.71% Elemental Power! The JUICEJOCKY VACUHELM sidequest require the two following things to be true (I'm adding this since there was no information regarding the second requirement when I tried looking for it). 1) "Quest Line unlocked by Flop rocket Perk upgrade the ship to it's maximum (including the buttered up upgrades, meaning that you have to pay 2.99$ to get this helmet). In terms of how many time you have to spend to get it it's comparable to the megagong." https://crashlands.gamepedia.com/Juicejockey_VacuHelm 2) The second requirement however, is progressing to the last story quest in Crashlands, To SPACE!. When you have this quest in your quest log, Brad will offer you the side quest. Each of the Biomes have unique Home locations, meaning that you can have 3 different homes set. It's not a major thing but it saves some time when you teleport between the Biomes - when you arrive you can just hit the Teleport to Home button instead of zooming in and/or choosing the specific teleporter (which you may frequently visit). This is more trivia / "for your information" than very useful buut, a step is counted at the start of the step, not at the end. Only affects the PEDOMETER but still an interesting useless find. Naughty Stuff (Exploits)! Disclaimer: I do not advice or suggest cheating and I'd never consider sharing this should this affect online play in any form. I don't suggest that anyone does this, I simply show you how it is done. For me, it helped me test a lot of stuff more efficiently which lead me to bring you this guide. Also, the game is single player so what ever is done here will not affect anyone but yourself. If you're against any exploits and/or cheats, be it clever use of game mechanics or otherwise, stop reading here. ============================================================================ ...for the rest of you, let's take the red pill! :) I'm sure someone else must have found this too but I didn't see anyone explain it properly, nor list the benefits of doing these things. There's two things we'll be going through here. Abusing the Save System (should work with Cloud or Local alike). The second one is real life Time Traveling (only tried on phone). Abusing the Save System The benefit of this is the following; When crafting gear you can ensure that you get an Epic quality item without having to make 10 of each item. Same logic applies to crafting Legendaries, make sure you get the good stat rolls! When rerolling stats in the JUICEFORGE (only spend minimum amount of JUICE CRYSTALS instead of depleting your supply and still ending up with bad stats). When harvesting resources trying to get a specific item or schematic, you'd make a few 3x3, 4x4 or 5x5 spots. Same as above but for Fish Farms or Fatfish clusters. A backup when fighting a (very) tough enemy. So, now that we know what we can gain from this, how do we do it? 1) First, depending on we want to do, you'll want to be on a stage (screen) where you're just about to do what will be undone. So, for example. Have your item crafted and ready to be picked up. Stand next to the JUICEFORGE ready to reroll or have a harvest cluster of Fish Farm (WITH THE LURE + FISH BUFF ACTIVE) ready to be bombed (if you don't have any harvest bombs, picking a Harvest Shrine works fine too!). 2) Save the game (or Sync to Cloud) if you're using the Cloud feature. Then do whatever you're gonna do. Did you get your stuff? Awesome. If not: Alt+F4 or just close the App and start it again and you'll be back to where you saved. Do keep in mind the game does auto save from time to time. I am unsure of the exact interval but it'd say it's a minute or so. Well enough time to fool around whether it's breaking a bunch of resources or rerolling the gear a few times. This can also be used when fighting a very tough enemy. You can save while fighting (the save screen pauses the game) and if you die, you can come back to find the enemy nearby with (more or less) the health it had when you saved, rather than dying and having to run back only to find the enemy is fully healed or not even there... Real Life Time Travelling to respawn resource nodes I've only tried (and succeeded) doing this on my phone in my previous playthrough, prior to the Combover patch but I believe it'd be no difference now. That being said, I haven't tried it on the PC so I don't know the exact steps but I'm sure it'd be easy enough to figure out if anyone would like to do it. I haven't done it or had any need for it on my latest playthrough but I figured I'd mention it nontheless. First of all, turn off the Cloud Saving and use a Local save (make sure not to screw anything up here or overwrite your saves!). Then put your phone in airplane mode and go farm whatever you need to farm. Close the game (I can't remember if this was even needed, possibly not). Next, go to your phone settings and choose to set the time manually, for the sake of ease, just choose the next day and get back into the game and bam, all the resources have respawned. Repeat.