换一换
换一换 


这是一份详尽的100%成就指南,包含从0到100%的逐步流程。如果你正在寻找特定的成就或收集品,可以使用Ctrl+F并在搜索栏中输入相关内容以获取更直接的帮助。 我会为我的所有指南提供支持和调试帮助。如果你有任何问题、遇到困难或发现指南中的错误,请随时留言,我会尽快回复你。祝你游戏愉快! 简介:
成就分类:(50个) 剧情相关:(14个) 易错过:(1个) 收集品:(4个) vigor(活力):(8个) 击杀:(18个) 其他:(5个) 如果以1999难度进行游戏,所有成就都可以在单次通关中解锁。如果觉得太难,你可以在任意难度下使用本指南,之后再专门进行一次1999难度的二周目(游戏剧情本身很精彩,你可能本来就会想这么做)。《生化奇兵:无限》中无法手动存档,但死亡时可以使用银鹰币复活。如果没有足够的钱支付复活费用,你会被送回主菜单,需要重新加载最近的检查点。不过检查点很常见,所以不用太担心。在开始新游戏前,我们可以先解锁1999难度。向下滚动到序章1的顶部,就能找到解锁方法。 在1999难度下进行游戏时,还有一个成就需要在不购买任何【美元纸币自动售货机】物品的情况下通关游戏。这些自动售货机出售生命值包、盐和弹药等普通物品。这会大幅增加难度,但并非不可能。尽可能搜刮所有物品,这很有帮助,因为我们要寻找收集品,所以会走遍哥伦比亚的每一寸土地。我们仍然可以使用【民兵军械库】(武器升级)和【万军之主!万有之主!活力!】(活力升级)自动售货机,只是不能使用美元纸币自动售货机。《生化奇兵:无限》中有大量与不同武器和 vigor 相关的“敌人击杀”成就,我称之为“击杀成就”。在我们游玩过程中要记住这些成就。我会说明自己解锁某些击杀成就的时间和地点,但如果你不想使用我当前的武器配置,不必受此限制。基本上,要始终携带尚未解锁成就的武器,至少带一把;在 1999 难度下,你只能使用有弹药的武器。需要注意的是,击杀数会在存档间累积。你可以反复加载同一个检查点或章节,刷特定武器的击杀数。游戏中有不少可收集品,我会列出所有收集品的位置,并直接引导你找到它们。 《生化奇兵:无限》有3个DLC,前两个是“海葬”章节。每个章节包含10个成就,并且都有着精彩的故事。这两个章节和前两部《生化奇兵》一样,敌人会无限刷出,所以你不必担心为了解锁“杀戮”类成就而没有敌人可杀。对于第一章,成就获取相当直接。而第二章,我们需要在“1998难度”下通关。该难度会禁用所有致命攻击手段,我们必须严格地将敌人击晕。不过这对我们有利,因为所有成就实际上都与非致命手段相关。《生化奇兵:无限》的“云端激战”DLC很可能是你无法达成该游戏100%完成度的原因。它的成就中有十分之九其实并不算太难,真正让人头疼的是“蓝带冠军”成就。“云端激战”包含4个竞技场,每个竞技场有15波敌人。每一波都设有蓝带挑战,需要以特定方式完成该波才能获得蓝带。这些挑战难度不一,从简单到变态都有。也就是说,我们要解锁60个小型成就。不过别被我劝退,这仍然是可以完成的,我会尽力指导你完成每个挑战。 如果你感兴趣,这里有一份整理好的所有成就及隐藏成就列表。这是我如何得出成就分类的方法,也是我开始100%完成游戏旅程前创建的第一个参考资料。 【指南包含重大剧透】 序列1:爱罪人 1. 第1-3章 2. 武器重点:天钩处决、舷侧炮手枪、附身机械 3. 注入:0/25 4. 望远镜:1/11 5. 活动电影放映机:3/26 6. 录音筒:5/80 7. 成就:2/80

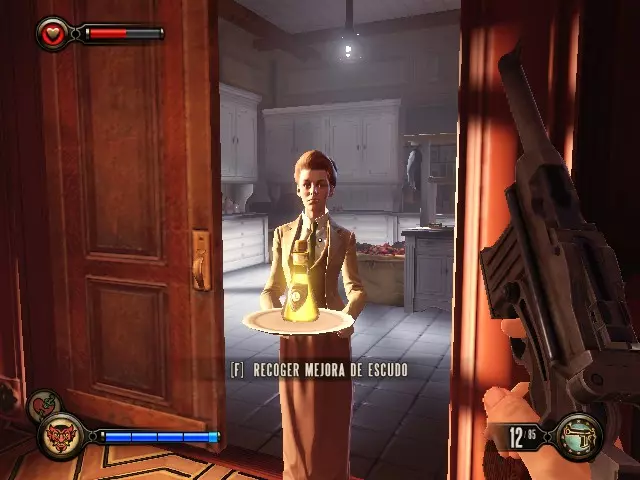
成就#1 - Should Auld Acquaintance:解锁1999模式。 此成就可在任意难度下首次完成游戏后解锁。若想立即游玩该难度并在一次通关中完成所有成就,有一个简单的解决方法。 在《生化奇兵:无限》主菜单中,使用手柄或键盘按顺序按下以下按键:上、上、下、下、左、右、左、右、B键或Esc键、A键或Enter键。 若正确按顺序触发,将弹出窗口提示新游戏时1999模式已可用。关闭弹窗后成就将解锁。 关于1999难度的一些注意事项: 1.可以复活,但每次复活需花费100银鹰。请节约金钱。1. 如果资源不足,我们将被送回主菜单。 2. 敌人的精准度更高,造成的伤害更大,并且在我们重生时会满血复活。 3. 我们的生命值更低,护盾充能所需时间更长。 4. 银币和弹药掉落更少见;尽可能拾取所有物品。 5. 如有可能,尝试对自动售货机使用占据 vigor 以获取额外现金。 第一章 - 灯塔:

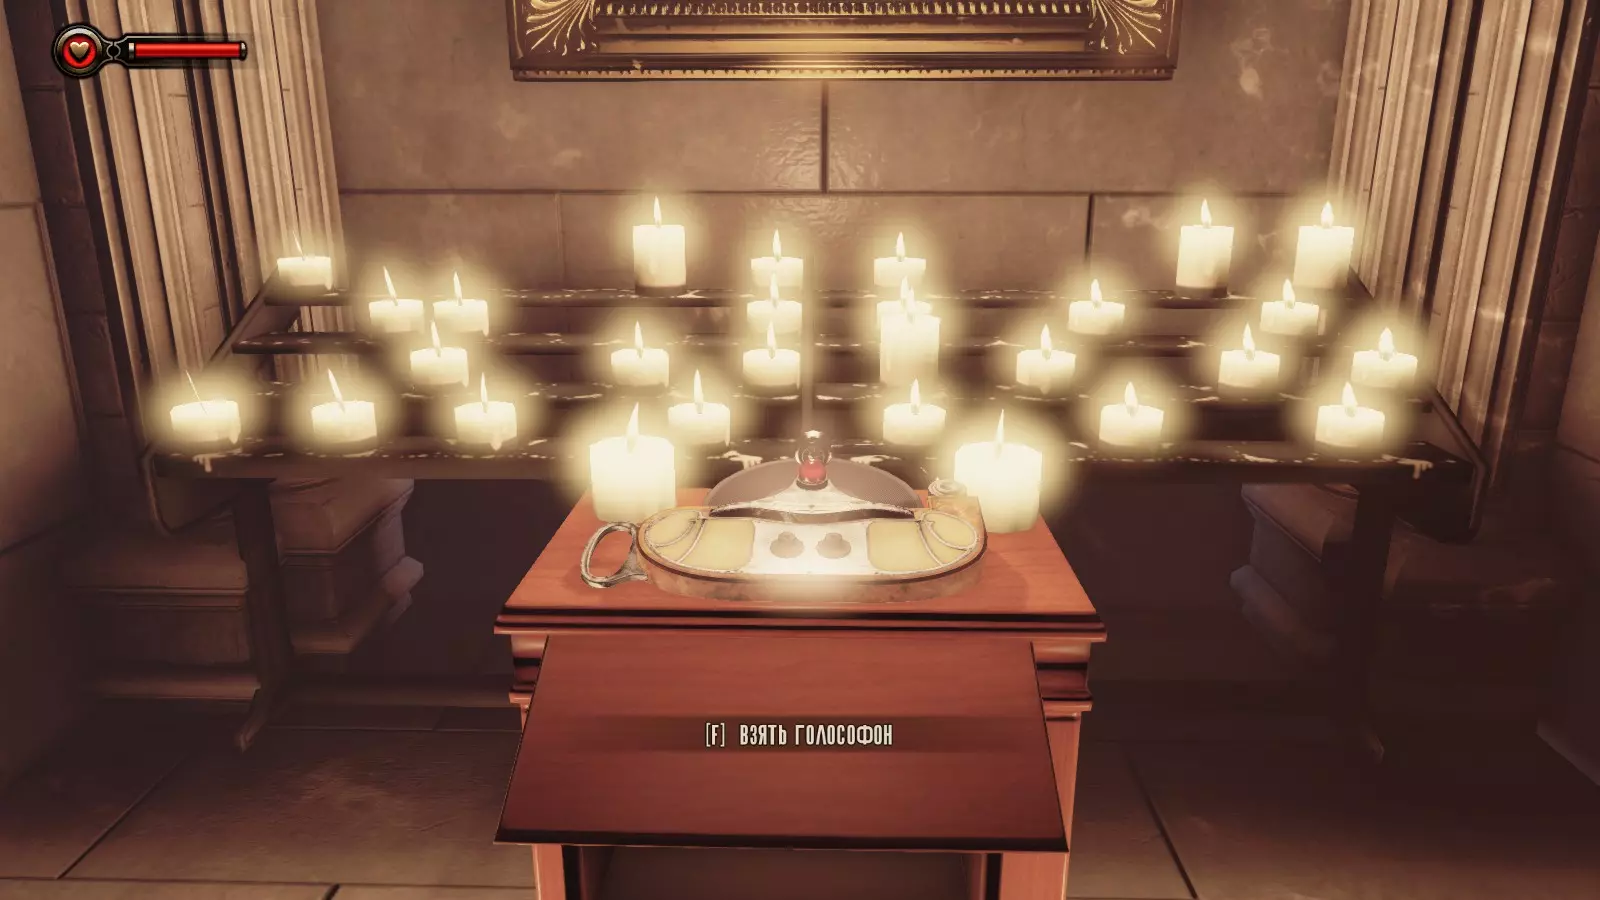
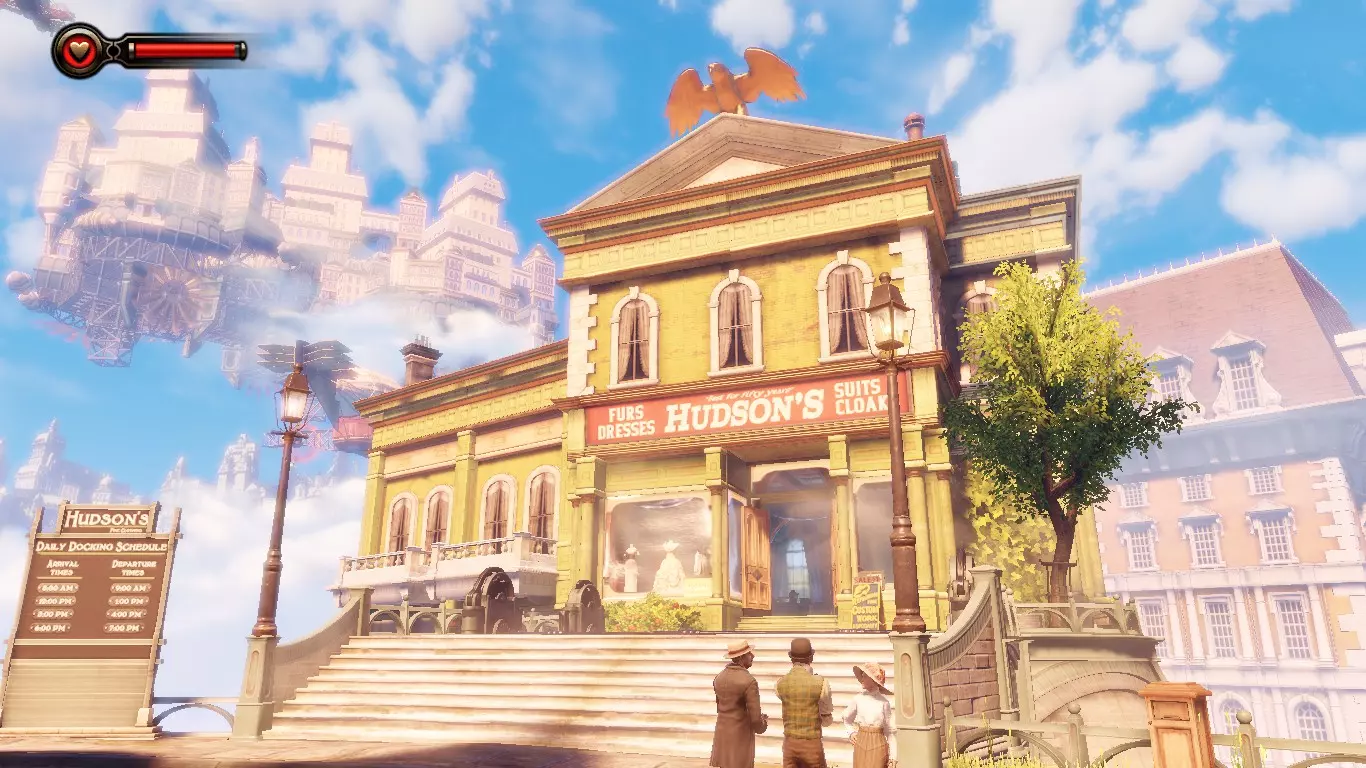
Achievement #2 – Written In the Clouds: Completed Lighthouse. Story Related. This will unlock after the Prologue & Booker is sent up to Columbia; the Achievement will unlock at the end of the Chapter. Hallelujah. Chapter 2 – Welcome Center: Voxophone #1 – Love the Sinner: Exit the pod after arriving at the beginning of the Chapter & make your way down the flooded stairs. From the large statue of Comstock, go into the side room on your left. Take a right from the stained-glass picture of Lady Comstock up to a small candle lit alcove to find our first Voxophone on a lectern. Kinetoscope #1: Open the doors into Columbia & approach another large statue of Comstock in the center ahead of you. Take a right from the statue & enter the shop Hudson’s. We can find our first Kinetoscope to the left of the front counter underneath a “Quality” sign. Voxophone #2 – Undeserving: While still in Hudson’s, head around the front counter & we can find a Voxophone beside a Safe. Kinetoscope #2: Carry on through Columbia & wait for the floating parade to pass through. When the way is clear, head across the bridge & go up the stairs. At the top of the stairs straight ahead will be a large poster board about The False Shepard that is to the right of a grocery store. A Kinetoscope will be right below this poster. Voxophone #3 – Everyman, All At Once: From the Kinetoscope, take the stairs on your left up & walk towards the greenhouse beside Chas. A. White Home & Garden Supply. We can find a Voxophone on a table under an umbrella to the right of the greenhouse. Telescope #1: Follow the stairs along & eventually we will be handed a telegram by a postal boy. After Dewitt stops reading the card, head over to your left & we can find a Telescope aimed at Monument Island. Kinetoscope #3: Head up the stairs to the fair entrance. We can find a Kinetoscope at the top of the stairs directly across from the shouting Vigor Salesman & his show. I highly recommend completing the Bucking Bronco game as well as the 1st & 2nd prize requirements for the two shooting games in the fair for some extra Silver Eagles. Remember, if playing on 1999 Difficulty, do not buy anything from a Dollar Bill vending machine! You can check their Inventory if you select them buy accident, just be sure not to purchase anything. Vigor #1 – Possession: We can collect our first Vigor to the left of the ticket collector at the gate we need to progress through. A woman will be handing them out. Voxophone #4 – For I Am Lonely, Too: Use Possession on the ticket collector & leave the fair. Carry on down the street past the two policemen speaking about the Sky-Hook. Down the stairs from them on the right will be a statue that changes from Robert Lutece to Rosalind Lutece. Head to the base of the statue & you can find a Voxophone here on a bench. Chapter 3 – Raffle Square: Voxophone #5 – Solution to Your Problems: Enter the 1912 Raffle & receive the lucky #77 ball. Very disappointing when you can’t hit Jeremiah Fink with your prize… (Censored by Steam) will hit the fan & we will find ourselves in combat. Fight through the streets until you come across a Veni! Vedi! Vigor! vending machine. Look to the right of the vending machine to see two large cages for… Vox Populi; there will be a Voxophone in between the two cages. Focus on getting Execution kills with the Sky-Hook; whenever you see Gun or Rocket Automatons, Possess them to get kills that way as well. There are lots of Health tucked around, but chances are you will probably die at least once during our first stretch of fighting. 1999 is very difficult at the beginning, but as we upgrade our Weapons & Vigors it does get easier. Especially when we get Shields. Vigor #2 – Devil’s Kiss: This Vigor can be collected after defeating the Fireman near the end of the Chapter. The quickest way to kill him is to walk backwards shooting him in the head as fast as you can. He will drop this Vigor upon his death. Sequence 2: A New Hunt 1. Chapter 4-5 2. Weapon Focus: Sky-Hook Executions, Sky-Line Strikes, Broadsider Pistol, Possessed Machines, Founder Machinegun 3. Infusions: 4/25 4. Telescopes: 3/11 5. Kinetoscopes: 8/26 6. Voxophones: 12/80 7. Achievements: 6/80 ----------------------------------------------------------------------------------------------------- Chapter 4 – Comstock Center Rooftops: Kinetoscope #4: When the Chapter begins, we will see three Kinetoscopes (Kinetoscope #4, #5, & #6) in front of us. Be sure to view them all. Kinetoscope #5: Found in the beginning of Chapter 4 – Comstock Center Rooftops. Kinetoscope #6: Found in the beginning of Chapter 4 – Comstock Center Rooftops.

成就#3 - Dress For Success:在所有四个装备槽位中各装备一件装备。 共有四个可装备装备的槽位:帽子、胸部、裤子和靴子。如果你拥有【哥伦比亚精英】DLC,收集并装备每种类型的装备各一件后即可解锁该成就;如果没有该DLC,你将在游戏后期解锁此成就。 除了装备外,我们还可以收集额外的5个【注入物】,它们能极大提升我们的生存能力。这将帮助我们开启【Infused With Greatness】成就,目前进度为已找到6/25个注入物。我建议至少将其中4/5的注入物用于你的护盾。对于没有该DLC的玩家,我会提供所有25个基础游戏注入物的位置。注入升级#1:我们的第一个注入将由罗莎琳德·卢特斯在蓝带酒吧交给我们,这个无法错过。 录音#6 - 半个犹太人:从卢特斯处获得注入后进入蓝带酒吧厨房,在左手边能立即找到一个录音。 录音#7 - 奥蒂斯的灵活手指:离开蓝带酒吧,跳过货运钩子,一路战斗穿过下一个屋顶。接下来要跳下的屋顶是兰斯当住宅,上面有三角形玻璃窗。打破一扇窗户进入下方卧室,走下第一段楼梯,在楼梯平台进入儿童房,床左边的架子上可以找到一个录音。记住如何到达这个房间,当我们找到【上锁箱子的钥匙】后会回到这里。 【录音器8 - 新的狩猎】:现在跳到远处的建筑并进入。一路战斗到另一边然后出去。在外面,从你右侧的楼梯下去,靠近下方草地上的舞台。我们可以在一个熊标本下方的桌子上找到一个录音器。

成就#4 - A Real Pistol:使用阔边左轮手枪击杀25名敌人。这很可能是你第一个完成所有击杀要求的武器,应该能在游戏早期解锁。如果可以的话,尽量不要使用那些你已经解锁了击杀相关成就的武器。 活动电影放映机#7:从这里的舞台出发,向右走上楼梯,在一个帆布集市帐篷后面可以找到一台活动电影放映机。 语音日记#9 - 解放者的礼物:现在前往渡鸦兄弟会大楼。在里面你会看到一座约翰·威尔克斯·布斯的雕像。从雕像向左走进入酒吧区域,在吧台上可以找到一本语音日记。 语音日记#10 - 解放者的谎言:在搜刮完下层后,从雕像处上楼。进入下一个区域并击败所有狂热者。在中央长椅的其中一个座位上可以找到另一台录音器。 【灌注升级2】:从录音器位置抬头看向乌鸦进行布道的房间讲台,在祭坛顶部可以找到一个灌注。 灌注旁边还能找到兰斯当宅邸内上锁箱子的钥匙。 【灌注升级3】:拿到箱子钥匙后,通过货运钩索一路返回兰斯当宅邸。进入儿童卧室并打开箱子,里面有一个灌注。 【录音器11 - 圣母的象征】:返回渡鸦兄弟会,乘坐电梯下到下层。进入放映室,前往左侧的侧室。在这个房间的右侧,后方的一张桌子上可以找到一个录音器。回到放映室,墙边会有一个单独的书架。将其推开,我们就能找到第一个装备(如果你没有哥伦比亚精英DLC的话),那是一条裤子。

成就 #5 - Industrial Accident:使用天空吊钩处决击杀20名敌人。 这很可能是你下一个需要完成击杀的武器。对付近战敌人时,用天空吊钩解决他们总是不错的选择。此外,你可以先用远程武器削减敌人的生命值,然后用天空吊钩处决来终结他们。 活力 #3 - 群鸦杀:我们可以在兄弟会地下室击败乌鸦后收集这个活力。根据你击杀他的方式/地点,这个活力可能不太容易找到。他死后确实会掉落它,四处搜寻直到找到它。它应该离他不远。 击败乌鸦和他的手下后,上楼,我们可以在一台坏掉的理发机旁边找到一个帽子装备。望远镜#2:当你离开渡鸦兄弟会大楼时,向左看。人行道旁的飞艇上会有一架望远镜。 第五章 - 纪念碑岛入口: 活动电影放映机#8:在章节开始进入贡多拉车站时,向右看。墙边会有一台活动电影放映机。 在此处花费50美元购买占据辅助 vigor 升级。我们需要它来完成后续成就。 vigor 组合#1 - 占据+恶魔之吻:为了解锁成就,我们需要对敌人使用全部8种不同的 vigor 组合。拥有占据辅助 vigor 升级后,我们现在可以占据人类。对敌人使用占据,然后紧接着使用恶魔之吻进行攻击,完成我们的第一个组合。望远镜3:离开贡多拉站并跳上天空缆车系统。当你滑行时,下方会有一个平台,上面有一些敌人。跳到平台上,我们可以在栏杆旁找到一架望远镜。 在游戏流程中,记得用天空缆车突袭(从天空缆车上跃下进行近战攻击)击杀敌人,以及在天空缆车上时用爆头击杀敌人。 灌注升级4:从望远镜处,进入你右侧敌人出来的房间。我们可以在里面的一张桌子上找到一个灌注。 录音器12 - 另一个时代的方舟:乘坐天空缆车向上,直到被一个货运箱挡住去路。下马并使用天空缆车控制杆移动货运箱。从控制杆处出发,进入你左侧的房间。在一个侧室的桌子上可以找到一台语音记录仪,位置和我们上次找到灌输物的地方类似。 当你离开天空线并在终点降落到坚实地面后,使用货运钩登上标有“禁止入内!”的酒店二楼。在卧室里,查看床右侧梳妆台后面,能找到一件靴子装备。 活力组合2——群鸦风暴+恶魔之吻:这可以作为我们的下一个活力组合。先用群鸦风暴向敌人发射乌鸦,然后用恶魔之吻轰炸他们,即可完成该组合。

Achievement #6 – Welcome to Monument Island: Reached Monument Island. Story Related. Enter Monument Island to end the Chapter after we fail at commandeering an Airship. The Achievement will unlock as soon as the Chapter ends. Sequence 3: Born In the River 1. Chapter 6-8 2. Weapon Focus: Sky-Line Kills, Sky-Line Strikes, Possessed Machines, Founder Machinegun, Founder Shotgun, Founder Carbine 3. Infusions: 7/25 4. Telescopes: 4/11 5. Kinetoscopes: 12/26 6. Voxophones: 24/80 7. Achievements: 6/80 ----------------------------------------------------------------------------------------------------- Chapter 6 – Monument Tower: Voxophone #13 – Tiger By the Tail: Enter the Monument at the beginning of the Chapter. From the statue of the angel inside, look to your left to see some lockers. There will be a Voxophone in one that was left open. Voxophone #14 – To: R. Thompson Re: Fuses: After the room with the large Siphon machine, you will enter a hall with three rooms branching off it. Take the first room off your left & pass through a metal door. Inside you will find an experimenting room; the Voxophone will be on the counter to your right. Voxophone #15 – A Reward Deferred: Enter the next main room down the hall & there will be a large electrical generator going haywire. We can find a Voxophone straight ahead of us on a desk when we enter. Infusion Upgrade #5: Where we found the Voxophone, look behind the desk it was on top of. We can find an Infusion hidden on the floor behind it. Voxophone #16 – The Source of Her Power: Take the elevator up & you will enter a Specimen Observation room. Follow the corridors along until you reach the fourth observation room, the Library. Here, Elizabeth will be looking out the large window in a room full of books. We can find a Voxophone to the right of the observation lever in a wheeled chair. Chapter 7 – Battleship Bay: Voxophone #17 – Born In the River: When you wake up on the beach, turn around & look back towards the resort. At the back of the beach near the resort building, will be a small red & white striped hut on wheels. Approach it & we can find a Voxophone underneath it. Kinetoscope #9: Enter the way-building off the beach. We can find a Kinetoscope around the corner against the right wall. Voxophone #18 – Heaven: Regroup with Elizabeth & enter Battleship Bay. Carry on after selecting the Choker for Elizabeth to wear & enter the Dimwit & Duke Arcade. To get inside, Elizabeth will pick the Lock. Head through the back rooms of the Arcade until you come across a Dollar Bill vending machine. From here, head straight down the hall past it & into the next room. We can find a Voxophone in a laundry basket in the right corner of the room. Voxophone #19 – A Dog’s Loyalty: Enter the main game floor of the Arcade & head around to the far end across from where you came in to find some “washrooms for the phobic”. We can find a Voxophone in the men’s restroom on a table near the sinks. Kinetoscope #10: Exit the restroom & go left down the hall to find a Kinetoscope against the windowed wall. There are three other Kinetoscopes in the Arcade, but they are repeats of ones we have found previously. Feel free to access them just in case, but if you have been following along with the guide, we will be alright. Voxophone #20 – Take Her Alive: Continue through the Chapter & try ordering tickets for the Airship. After the Tickets Please Guy… gives you a hand, head up the stairs & enter the room off your right. Inside we can find a Voxophone on top of a police desk in front of us. Infusion Upgrade #6: Head down the hall & take a left around the corner to enter the room where Tickets Please Guy was standing. We can find an Infusion on a desk behind where he stood. Voxophone #21 – The Golden Path to Heaven: Before leaving the Gondola Station outside, carry on down the hall & take some stairs down into a side area. We can find a Voxophone underneath the stairs at the bottom beside a table. Telescope #4: Give Elizabeth a hand with the lever & ride the gondola up to Soldier’s Field. When you arrive, take the stairs up to the top landing. Directly across from the entrance to Soldier’s Field, there will be a Telescope looking back towards Battleship Bay. Chapter 8 – Soldier’s Field: Kinetoscope #11: Head down the stairs in Soldier’s Field then make your way over to the rooms on the right side of the area. We can find a Kinetoscope behind the miniature Soldier’s Field display. Infusion Upgrade #7: Now make your way over to the other end of the area, the left side. Get Elizabeth to pick a Locked Door & head inside. We can find an Infusion on one of the desks against the windowed wall. Voxophone #22 – A Place In the World: From the Infusion, carry on into the security room. To the right of the desk in here we can find a large open safe with a Voxophone sticking out of it. Kinetoscope #12: Exit the Soldier’s Field information building & enter Soldier’s Field proper outside. After stepping off the walkway look to our left; there will be a Kinetoscope in between us & an Ice Cream shop on a small pier. Voxophone #23 – I Am His Mirror: Enter the Dimwit & Duke Ice Cream Shoppe now & we can find a Voxophone on one of the tables inside in the center of the room. If you are to set off the enemies in the area the Ice Cream Shoppe is the best place to do so since we have four walls around us. If there are no more enemies, we can loot indiscriminately while also racking up some more Weapon kills. Your call, we will be attacked if we don’t a little ways further in anyways… Voxophone #24 – Viewing the Infinite: Before leaving Soldier’s Field proper, head inside a Founders Book store. We can find a Voxophone up some stairs on a small ledge overlooking the front counter. Sequence 4: A True Soldier 1. Chapter 8.5-11 2. Weapon Focus: Sky-Line Kills, Sky-Line Strikes, Possessed Machines, Founder Shotgun, Founder Sniper Rifle, Crank Gun, Tear Machines 3. Infusions: 10/25 4. Telescopes: 4/11 5. Kinetoscopes: 17/26 6. Voxophones: 32/80 7. Achievements: 8/80 ----------------------------------------------------------------------------------------------------- Chapter 8.5 – Soldier’s Field: Voxophone #25 – Never Seen the Face: Take the elevator down to the Hall of Heroes. Head down the stairs & get Elizabeth to pick the Locked Door on the left side of the room. We can find a Voxophone on one of the desks near the back of the room. Watch out for the Automaton!

Achievement #7 – Coins In the Cushion: Looted 200 containers. Contrary to what the name of the Achievement might imply, all we have to do is loot an Item from a container for it to count towards the Achievement. It can be ammo, food, Salts, or Silver Eagles. If you are diligent with what you have been looting thus far, this Achievement will most likely unlock for you at some point during this Chapter. Vigor #4 – Bucking Bronco: Leave this entrance lobby to the Hall of Heroes & we can find a crate full of Bucking Bronco directly ahead of us. The Skeet Shoot Achievement requires us to kill five enemies while they are airborne. Bucking Bronco can make this Achievement much easier early on. While killing an enemy while they are floating from the Vigor won't count, shooting them as soon as the effect wears off will. If you have a Founder Shotgun, launch an enemy in the air & be ready to blast them as soon as Bucking Bronco wears off. It may take a few tries to get your timing down. Vigor Combo #3 – Bucking Bronco + Devil’s Kiss: Exit the lobby & we will end up outside to be attacked by some soldiers. Launch an enemy into the air with Bucking Bronco then blast him with Devil’s Kiss for the combo. Kinetoscope #13: Fight off all the soldiers, then make your way into the building on the right with “Tickets” lit above its front. We can find a Kinetoscope in the left area of the lower floor in a waiting room. If you have some extra Silver Eagles, it could be worth purchasing some Weapon Upgrades at the nearby Minuteman’s Armory. Voxophone #26 – A True Soldier: Make your way upstairs now & left around the balcony. We can find a Voxophone on the floor next to a Sniper Rifle resting against the railing. Code Book: Return downstairs in the Tickets building & walk up to the cannon in the center of the room. In the barrel of the cannon, we can find a Code Book stuffed inside it. Voxophone #27 – Vox Contraband Inventory: Head across the street now to the Fellow Traveller pub. Inside the kitchen, we can see a Voxophone pinned to a cupboard immediately ahead of us upon entering. Voxophone #28 – Their Sun Is Setting: With the Code Book, go to the back right corner of the pub & we can find two bathrooms, the first having a Cypher written on its walls. Walk over to the other bathroom & “tip the hat to the Vox”. Enter the secret room downstairs to find a Voxophone on a table in the center of the room. Infusion Upgrade #8: This Infusion can also be found in the secret basement of the Fellow Traveller pub. It will be on a table against the right wall. Voxophone #29 – A Final Stand: Clear the Sky-Line & ride it up to the Hall of Heroes Plaza. We are about to enter a large battle; this is a good location to farm some kills if you feel the need to. Reload a Checkpoint or two. Before or after you engage the enemies, look down the stairs from where we first dropped off the Sky-Line. There will be a parked gondola at the bottom of the stairs here. Head inside the passenger room looking back towards Columbia & we can find a Voxophone on a fold out chair inside. Kinetoscope #14: Head up the stairs to the entrance to the Hall of Heroes. Before entering, go to the right corner from the doors to find a Kinetoscope against the far wall. Chapter 9 – Hall of Heroes: Voxophone #30 – Comrades of Necessity: In the Hall of Heroes, you will come to a crossroads in the first hall. Take the left hall towards the Minuteman’s Armory vending machine & enter through the doors to the right at the end of the hall. The Voxophone will be on a desk off your left when you enter the room. Infusion Upgrade #9: Enter the room with the statue of Comstock following the crossroad & we will have to fight off some of Slate’s soldiers. Enter the room to the right of the Comstock statue where Slate’s men come out of. At the back of the room, we can find an Infusion on a table in the right corner. Chapter 10 – Inside the Hall of Heroes: Voxophone #31 – Unconditional: After you pass through the Memorial to the First Lady & you discover why Elizabeth was locked in her tower; you will need her to pick a Locked Door. In the next room will be the part of the exhibit where Daisy Fitzroy is. To the right of Daisy’s statue will be a side room where we can find a Voxophone beneath a portrait of Lady Comstock on a chair. Kinetoscope #15: Enter the Courtyard after the Tear tutorial & fight through Slate’s men. Carry on up the stairs & enter the next room where there will be some vending machines & two Kinetoscopes on either side of the doorway ahead. This Kinetoscope is to the left of the doorway. Kinetoscope #16: In the same room as Kinetoscope #15 after the Courtyard. It is the Kinetoscope to the right of the doorway carrying onwards. Kinetoscope #17: Enter the Giftshop now from the last room & we can find a Kinetoscope directly ahead of us. Chapter 11 – Hall of Heroes Gift Shop: In the Giftshop we will be attacked by a Motorized Patriot who will drop the Crank Gun. Until we unlock the Seasoned to Taste Achievement, it is a good idea always grabbing the Crank Guns for our kills. It is one of the rarer Weapon types. Voxophone #32 – A Soldier’s Death: Exit the Giftshop back into the Courtyard & we will have to fight off a few waves of Slate’s men. Afterwards, doors to the left & right of the Courtyard’s lower floor will be unlocked. Enter the room off the left & we can find a Voxophone on a worktable next to some broken vending machines. Infusion Upgrade #10: From the Voxophone in this room, we can find this Infusion hidden inside the nearby toolbox. Jump onto the worktable we found the Voxophone on & look inside the toolbox to grab the Infusion. It can be hard to see.

成就#8 - Raising the Bar:将一项属性(生命值、护盾或盐分)升级至最高等级。 在将10个灌注点投入生命值、护盾或盐分中的任意一项后,我们就能最快解锁此成就。如果拥有“哥伦比亚的精英”DLC,可能会更早解锁该成就。无论如何,通过收集游戏中全部25个灌注点,我们将能填满2.8个槽位。这会随着游戏进程自然达成。如果游玩的是1999难度,建议优先将护盾升级至满级。 序列5:谎言的种子 1. 第12-17章 2. 武器重点:天空线击杀、天空线突袭、附身机械、撕裂机械、创始人霰弹枪、创始人狙击步枪、转轮机枪 3. 灌注点:13/25 4. 望远镜:5/11 5. 活动电影放映机:18/26 6.录音器:37/80 7. 成就:15/80 ----------------------------------------------------------------------------------------------------- 第12章 - 返回英雄广场大厅: 活力#5 - 电涌骑手:重新进入第一夫人纪念馆,会看到斯莱特躺在地上。放过或杀死他,然后喝下电涌骑手。

成就#9 - Shock Tactics:获取电涌骑师。 剧情相关。当我们在英雄大厅从斯莱特处收集到电涌骑师 vigor 后,将解锁此成就。 Vigor 组合技#4 - 支配 + 电涌骑师:现在我们拥有了电涌骑师,就可以完成另外 2 个 Vigor 组合技。先用支配击中敌人,然后用电涌骑师攻击他们。

成就#10 - Hazard Pay:利用环境危险杀死10个敌人。 这是一个需要刻意去完成的成就。当你看到浮油或水洼时,试着引诱敌人进入其中,然后相应地使用【恶魔之吻】或【电击骑手】。我们只需要用这种方式杀死10个敌人,最好尽快完成这个成就。 活力组合#5 - 乌鸦谋杀+电击骑手:这是我们现在可以获得的另一个活力组合。对敌人使用【乌鸦谋杀】,然后用【电击骑手】攻击他们。

成就#11 – Bolt From the Blue:在乘坐天空缆车时用爆头击杀5名敌人。 这是另一个与击杀相关的隐藏成就,建议找机会专门完成。如果你有创始人卡宾枪或狙击步枪,这个成就会非常容易达成。当你在天空缆车上时,放慢速度,尝试在下车前完成一些爆头击杀。我们只需要5个。 录音带#33 – Calling You Out:现在乘坐电梯回到士兵广场。这个区域已经重置,所以再次搜刮这里获取一些额外的银鹰是个好主意。 使用电涌伏特,前往士兵广场酒店。从面向贡多拉的一侧,使用货运钩到达酒店二楼。在这里用冲击骑手为门禁供电,然后进入新解锁的房间。我们可以在隔壁房间一张沾满血迹的床上找到一台声谱仪。

成就#12 - Street Sweeper:使用创始人中国扫帚霰弹枪或 vox 加热器击杀50名敌人。 这大概是我完成创始人霰弹枪击杀数的时候。最后几章是完成这个成就的好阶段,但实际上,只要你用尚未解锁成就的武器击杀敌人,任何武器的击杀都是有效的。不要局限于我选择的武器。 在通往第一夫人飞艇电梯的楼梯下方,可以找到一台活动电影放映机。不过这台我们之前已经收集过了。 【注魔升级#11】:登上第一夫人的飞艇后,先不要拉动导航操纵杆。相反,看向你的右侧,拿起角落里桌子上一些盐旁边的注入物。

成就#13 - First Class Ticket:登上“第一夫人号”。 剧情相关成就。当我们抵达“第一夫人号”飞艇并使用导航控制台离开哥伦比亚后解锁。与控制台互动并完成章节后,该成就将解锁。 第13章 - 芬克顿码头: 录音带#34 - 上帝的蓝图:当你在芬克顿码头重新控制布克时,进入你左侧的建筑。在建筑内左侧的两张桌子之间可以找到一盘录音带。

成就#14 – Seasoned to Taste:使用胡椒磨旋转机枪击杀30名敌人。 旋转机枪是机械爱国者专属掉落的迷你机枪。只要有机会,就装备它。游戏中会有很多收集旋转机枪的机会,但仅限于遇到机械爱国者时,或偶尔从泪之缝中获取。 第14章 – 乞丐码头: 录音#35 – 我服役的耻辱:当我们追逐伊丽莎白穿过乞丐码头时,最终会进入哥伦比亚当局警察局,那里有两名士兵抓住了她。在警察局内,前往房间的左后方,在角落的桌子上可以找到一个录音。 第15章 – 富兰克林港码头:

成就#15 - On A Clear Day:使用鹰眼狙击步枪击杀30名敌人。 我大概就是在这个时候解锁了这个成就。这是一把在天空线上使用的好武器,因为它能在保持精准度的同时快速击杀敌人。游戏中随处都能找到狙击步枪。 【灌注升级#12】:当你离开警察局并下落到新区域去救伊丽莎白时,我们会切换章节。击败所有敌人后,从下层上楼,进入警察局的牢房。我们可以在牢房栏杆后面够到一个灌注。 如果你有钱的话,把“恶魔之吻” vigor升到满级可能是个好主意,因为这有助于我们达成“全副武装”成就中vigor全满级的要求。【活力】或【占有】应该是升级成本最低的【 vigor】。 第16章 – 工人入职中心: 望远镜 #5:最终,伊丽莎白会从【巨型手怪】手中救你出来,你们在新工人入职中心外重新会合。站在入职中心外时,看向左侧的贡多拉旁,就能找到望远镜。 第17章 – 芬克镇中心: 活动电影放映机 #18:进入入职大楼后,向左转进入有【Veni! Vedi! Vigor!】贩卖机的房间。在房间左侧墙上可以找到活动电影放映机。 录音带 #36 – 一件普通商品:进入入职中心的招生办公室,绕过前台柜台进入里间。在里间的办公桌上可以找到录音带。【注入升级13】:感应大楼的里屋对面有一间员工专用办公室,但它是锁着的。使用5个开锁器让伊丽莎白打开门锁。注入装置就在里面右侧的第一张桌子上。 要继续前进,我们可以从任意一个楼梯下到感应大楼的地下室。每条路都会被一扇锁着的门挡住,伊丽莎白可用发夹打开这些门。记得把两扇门都打开,这会为【The Roguish Type】成就增加一点进度。 【录音带37 - 谎言的种子】:进入感应大楼的地下室,底层会有两个侧室。一个看起来是大型行政室,对面的小办公室里有通往前方的电梯,录音带就在那里。进入小办公室,查看墙边一个打开的储物柜。里面会有一台录音器。 序列6:我们需要一位牧羊人 1. 第19-21章 2. 武器专注:天空线击杀、天空线突袭、手炮、创始者卡宾枪、连发炮 3. 灌注:15/25 4. 望远镜:5/11 5. 活动电影放映机:21/26 6. 录音器:42/80 7. 成就:18/80 ---------------------------------------------------------------------------------------------------- 第18章 – 狂热广场: 录音器#38 – 无形之色:乘坐电梯进入狂热广场。与芬克的助手交谈后,进入广场,右转下楼梯。沿着枪械店右侧的街道前行,经过棚户区入口。在热忱广场最右侧角落,经过我们上方的一排货运集装箱后,在后方角落靠近一些木材的锯台旁会有一个语音日记。 进入枪械商店前,看向入口左侧上方,会有两个货运挂钩挂在芬克制造公司的招牌上。使用货运挂钩可以到达枪械商店的屋顶。在枪械商店招牌下方会有一个装备箱。如果没有哥伦比亚精英DLC,这里就是解锁Dress For Success成就的地方。 语音日记#39 – 我们需要一位牧羊人:进入枪械商店,你可以在前台柜台上找到这个语音日记。

成就#16 - Heartbreaker:仅射击修理工的心脏将其击杀。 这是一个非常困难的成就,尤其是在1999难度下。当我们与林夫人交谈并离开枪械店后,会遭到一名修理工的袭击。使用手枪、卡宾枪或狙击步枪最容易达成此成就。慢慢来,精准瞄准射击;如果击中心脏以外的任何部位,你将不得不重新加载存档。虽然理论上在任何与修理工战斗的场合都能解锁此成就,但这是尝试获取该成就的最佳机会,因为此时修理工独自处于一个宽敞的区域。装备工匠复仇装备也非常有用,它能使我们对工匠造成额外50%的伤害;我们应该在第4章的蓝带餐厅就拾取它。 Maka91Productions制作的视频攻略对于弄清楚如何最好地完成这个成就非常有帮助。尝试完全按照视频操作以确保成功。当工匠在视频中指定的悬挑处向你跳来时,直接跑过冒烟的金色圆柱体并跳下边缘。这应该能将工匠困在这里。如果无法触发这个 glitch,这里仍然是完成成就的最佳地点,尽管任务会困难得多。你基本上需要在狂热广场周围绕圈,在安全的时候进行心脏射击。第19章 - 欢乐时光俱乐部: 活动电影放映机#19:进入欢乐时光俱乐部并走上楼梯。我们可以在楼梯顶部的民兵军械库旁边找到一台活动电影放映机。 在下一个房间,我们将受到一波又一波敌人的攻击。如果你需要刷武器击杀数,这里是个非常不错的地方。

成就#17 - More For Your Money:将3个敌人诱入同一个活力陷阱5次。 在“欢乐时光俱乐部”的敌人波次开始前,迅速冲到舞台中央的幕布附近并放置一个活力陷阱。波次开始时会有大量敌人冲出来,这是完成该成就的绝佳时机。【恶魔之吻】和【电涌骑手】是效果最好的陷阱。不知为何,我的电涌骑手陷阱无法被记录,所以不得不使用恶魔之吻才能计入成就进度。 用陷阱触发第一波敌人后,重新加载 checkpoint 并重复此方法四次,即可解锁成就。如果速度够快,甚至可能在单次游戏中完成全部5次。活动电影放映机#20:击败欢乐时光俱乐部内的所有敌人波次后,如果你不在下层,就前往下层。在舞台对面的远端有一条走廊,尽头是一台“来!见!活力!”自动售货机,旁边就是活动电影放映机。 注入升级#14:离开这条走廊,向右看会发现一台美元钞票自动售货机。售货机右侧有一扇门,进入后是一个酒吧。注入升级可在酒吧柜台上找到。 录音器#40 - 改变我的曲调:现在穿过舞台进入化妆间。我们可以在其中一张化妆台上找到录音器。 密码本:下楼进入欢乐时光俱乐部下方的监狱。打开上锁的门后,你将进入“处理室”。密码本位于熔炉右侧一个带有陈琳标识的板条箱顶部。 这本密码本用于我们在下一章返回狂热广场时找到的密码机。 留声机#41——他的残酷设计:穿过放映室进入牢房区。进入后,你可以在右侧的凳子上立即找到这个留声机。

成就#18 – Loose Cannon:使用碎颅者手炮击杀25名敌人。 这是一个相当简单的杀戮成就。我们会在上一章接触到手炮,并且有很多机会立即解锁这个成就。除了创始者猎兵步枪外,这是我在游戏中最喜欢的武器。 活动电影放映机#21:当我们进入哥伦比亚的平行世界时,返回欢乐时光俱乐部。这台活动电影放映机的位置与#19相同,但这次是在民兵军械库的对面。 第二十章 – 狂热广场(第二次访问): 注入升级#15:离开欢乐时光俱乐部,消灭外面所有敌人。当敌人被消灭后,前往广场的另一端,那里有一匹复活节机械马拖着一个芬克顿精炼厂的油罐。从机械马处出发,沿着墙壁向左走,直到你来到外面,此时天空在你的右侧。在这里的外面,你的左侧会有一扇上锁的门。进入建筑并靠近房间后部的大时钟。 使用我们在欢乐时光俱乐部找到的密码本,将损坏的时钟设置为午夜,以解锁 vox 的秘密藏匿处。灌注物可以在藏匿处的时钟后面找到。 录音 #42——更真实的忠诚:我们可以在使用密码本找到的 vox 秘密藏匿处中,在灌注物的旁边找到这个录音。 第二十一章——枪匠商店: 本章没有可收集物品或成就。序列7:煽风点火 1. 第22-24章 2. 武器重点:天空线击杀、天空线打击、附身机器、撕裂机器、创始人卡宾枪、连发枪、创始人火箭筒 3. 灌注:18/25 4. 望远镜:6/11 5. 活动电影放映机:22/26 6. 语音日记:49/80 7. 成就:23/80 ----------------------------------------------------------------------------------------------------- 第22章 – 棚户区: 灌注升级 #16:乘坐电梯下到棚户区。走出电梯,在街道尽头左转。在这个死胡同里,你可以看到杂货商后面的板条箱顶部有一个灌注。 当我们去拿灌注时,暴徒会攻击我们,所以要注意这一点。

成就#19 - Lost Weekend:在醉酒状态下击杀5名敌人。 从这里左转下楼梯,进入“守夜人”酒吧。进入时,酒吧里会有六个人。其中一名男性没有敌意,另外五名则被视为敌人。进入后,你的左侧会有一张桌子,上面放着三杯啤酒和一瓶葡萄酒。喝足够的酒让自己进入醉酒状态,然后尽快开火击杀酒吧里的所有人。我们需要的是累计在醉酒状态下完成5次击杀,而非在同一次醉酒期间完成。可以分次饮用房间里的酒。如果你的醉酒状态消失而敌人还没杀完,就迅速再喝一些酒,然后继续击杀。 如果失误了,希望你只剩下一两个击杀数没完成。在后续的游戏流程中请记住这一点,确保在另一个合适的放纵时刻完成最后的击杀。你也可以通过重新加载章节,在酒馆里击杀相同的敌人来轻松获得一些击杀数。不过,如果你确实重新加载了章节,请务必重新收集之前获取的任何收集品。

成就#20 - Here Little Piggy:使用创始人猪排枪或 vox 冰雹火击杀30个敌人。 我很早就解锁了这个成就,因为我在完成“失落周末”成就时使用了排枪。这是比较烦人的“杀戮”成就之一,因为排枪和冰雹火都不是什么好枪。热情广场是用排枪刷击杀数的好章节。我们之后会有很多机会,它们在游戏后期是相当常见的枪。 录音#43 - 煽风点火:在守灵人酒吧内,下到地窖。我们可以在房间中央一个桶架左侧的桌子上找到一个录音。 钥匙:从录音处转身,你的右边会有一面帆布墙。帆布墙正前方的桶顶上有一把钥匙。我们在接下来的章节中找到某个收藏品时会用到这把钥匙。 望远镜#6:继续穿过棚户区,经过那些正在撬坏自动售货机的人,然后沿街向下走。走上楼梯,经过那些被关在栅栏里的人。在下一组通往新区域的楼梯顶部,抬头看向左侧,可以看到一个货运挂钩。跳上去,然后在其下方的平台上下来。沿着栏杆向外望向公牛之家的方向,我们可以找到一架望远镜。 录音带#44 - 被困:要进入公牛之家,我们必须清除外围防御。摧毁防御后,先不要进入公牛之家。而是乘坐天际线,从公牛之家右侧的建筑后面向上到达。在最顶部的后方,地板上的血泊中会有一个捕熊夹。我们可以在捕熊夹对面、椅子旁的地面上找到一个【录音带】。

成就#21 - David & Goliath:击杀20个【重量级敌人】。 【重量级敌人】是难度较高的敌人类型,包括:机械爱国者、消防员、乌鸦和工匠。正常游玩流程中会自然解锁此成就。 第23章 - 公牛之家扣押场: 活动电影放映机#22:进入公牛之家并通过安检 checkpoint。进入下一个房间前,走进右侧的侧室。在两张桌子之间可以找到活动电影放映机。 录音带#45 - 已终止:进入下一个房间并击败里面所有敌人。在一楼,前往房间的左角落。楼梯下方通往二楼的位置有一个审讯室。进入房间,我们可以在前方的桌子下方找到一个留声机。 强化升级17:现在前往二楼,在楼梯顶部进入左手边的第一个房间。使用5个开锁器打开上锁的门,我们可以在齿轮旁边的桌子上找到一个强化道具。 留声机46:保持在二楼,前往左手边的下一个房间。在这个侧办公室里,我们可以在一个上锁箱子右侧的桌子上找到一个留声机。 强化升级18:如果你在上一章拿到了箱子钥匙,就能打开这个上锁的箱子。箱子里有另一个强化道具。

成就#22 - Armed Revolt:协助枪械师。 剧情相关。打开公牛之家扣押场地下室的裂隙,并将 vox 的枪支归还到枪械店。打开裂隙即可解锁该成就。 录音#47 - 引火物:打开裂隙后,上楼直到到达公牛之家一楼的下一层。当经过扣押场大门时,你可以在正前方的办公桌(位于通往一楼的两组楼梯之间)上找到一个录音。 第24章 - 公牛场:

成就#23 - Aerial Assassin:使用天际线突袭击杀20名敌人。 这是另一个需要耐心完成的杀戮类成就,在正常游玩过程中可能无法自然解锁。到了这个阶段,才开始专注于天际线击杀相关的成就可能有些晚了。只要有机会,就跳上货运钩或天际线,然后使用天际线突袭击杀敌人。 如果你拥有【哥伦比亚的精英】DLC,【鹰击装备】对解锁此成就非常有用。 重要的是要记住,即使你已经通关游戏,也可以通过章节选择回到之前的章节,重新游玩某些段落来刷取剩余的杀戮类成就。所以如果你觉得进度落后了,也不必过于紧张。击杀友方的 vox 士兵也会计入我们的 Slay Achievements;不知为何,它们会被算作敌人击杀……所以在合适的时候一定要利用这一点。它们是很容易击杀的目标。 录音 #48 - 永恒海岸:返回棚户区,再次前往夜班酒吧。在酒吧外面,我们会发现一些 vox 士兵在一个死去的技工前摆姿势拍照。录音就在死去的技工正前方。 录音 #49 - 死亡抽签:现在进入夜班酒吧,我们可以在吧台柜台上找到一个新的录音。 序列 8:所有债务已还清 1. 第 25-28 章 2. 武器重点:天空线击杀、附身机器、撕裂机器、创始人卡宾枪/vox 爆裂枪、创始人火箭筒、创始人机枪/vox repeater注入物:19/25 4. 望远镜:8/11 5. 活动电影放映机:22/26 6. 语音留声机:52/80 7. 成就:31/80 ----------------------------------------------------------------------------------------------------- 第25章 – 芬克镇中心: 活力【Charge】:从棚户区的电梯出来后,进入正前方的保安室。栅栏区域会被破坏,我们现在可以从支架上获取活力【Charge】。 活力组合技6 – 【Bucking Bronco】+【Charge】:装备这两种活力,然后用【Bucking Bronco】将敌人抛向空中。当他们在空中时,用【Charge】进行冲撞即可完成组合技。 活力组合技7 – 【Devil’s Kiss】+【Charge】:这个组合技简直是过度杀伤。使用【恶魔之吻】点燃敌人,然后在敌人仍处于燃烧状态时用【冲锋】技能冲撞他们。

成就#24 - Strange Bedfellows:使用通过裂隙召唤的盟友消灭20个敌人。 这个成就的击杀计数可能有些棘手,尤其是在1999难度下。当你确定可以召唤裂隙盟友时,如果可以的话,先稍微削弱附近敌人的血量,这样盟友更容易将其消灭。裂隙盟友可以是机动爱国者、蚊子机器人,或是机枪/火箭自动机兵。 第26章 - 前往工厂:

成就#25 - 意志战胜物质:使用被附身的机械击杀20个敌人。 此成就与“奇怪的盟友”成就类似,区别在于机械需要是敌对且预先存在的。当你遇到敌对机械时,附身它们,削弱其他敌人,以便你的机械能更轻松地击杀它们。 第38章开始的最终战斗是后期反复加载以获取这两个成就的好地方。 录音器#50 - 所有债务已还清:再次进入狂热广场并消灭该区域所有敌人。进入枪械店,在店内左侧墙壁的架子上可以找到这个录音器。 第27章 - 工厂庭院:

成就#26 – Tear ‘em A New One:开启30个裂隙。 这个成就很可能会在你游玩过程中自然解锁。只需开启任意30个不同的裂隙即可计入成就进度。重复开启已打开过的裂隙不会再次计数。这些裂隙可以是生命值、枪支、盐、盟友、掩体、货运钩以及许多其他资源。 望远镜#7:消灭所有敌人并摧毁飞艇以进入工厂。走上楼梯,但先不要进入工厂。从工厂门口转身,跳上两扇门之间的小平台,就能找到一个指向你上来方向的望远镜。 第28章 – 工厂:

成就#27 – Kitted Out:将一把武器和一种 vigor 完全升级。 这是我们能最快解锁该成就的方法。穿过工厂,乘坐电梯到下一层。消灭敌人后,进入所在区域左侧的房间。房间内会有一台“Veni! Vedi! Vigor!”贩卖机和一台“Minuteman’s Armory”贩卖机。最廉价的可升至满级的 vigor 是【恶魔之吻】或【附身】,而最廉价的可升至满级的武器绝对是【宽边手枪】。 购买所有必要的升级后,退出贩卖机时成就就会解锁。从现在开始,我们可以囤积【银鹰】以备用命,或者将它们花在你喜欢的武器上进行升级。记住,要解锁Grand Largesse成就,我们需要在自动售货机上累计花费10,000美元。我们会在后续章节中专门刷这个成就。 录音带#51 - 孩子需要保护者:离开有自动售货机的房间,前往该区域的出口。在出口门旁边的最右侧角落,经过暗流 vigor 后,我们可以在一块黑板下方的桌子上找到这盘录音带。 Vigor #7 - 暗流:当我们离开电梯带我们到达的房间时,这个Vigor就在我们的必经之路上。 我们需要用这个Vigor将20个敌人从哥伦比亚轰下致死,以解锁Bon Voyage成就。vigor连招8——电涌骑手+暗流涌动:最后一个vigor连招,先用电涌骑手攻击任意敌人,再用暗流涌动vigor将其击飞。

成就 #28 – Combination Shock:完成全部8种 vigor 组合技。 现在我们拥有了 undertow vigor,就具备了完成全部8种 vigor 组合技所需的所有 vigor。如果你完成了上一个 vigor 组合技但成就并未解锁,请查看简介中列出的成就清单,获取你需要的全部 vigor 组合技列表。依次尝试所有组合技,直到找到你遗漏的那一个。完成最后一个 vigor 组合技后,该成就将会立即解锁。

成就#29 - Skeet Shoot:在敌人坠落时击杀5个敌人。 使用浪潮涌动和电涌 vigor 可以轻松解锁此成就。在遭遇黛西·菲茨罗伊后,我们会受到多波敌人的攻击。当较弱的士兵敌人出现时,先将他们的生命值削减至大约一半,然后用电涌攻击他们,紧接着立即使用浪潮涌动。如果他们的生命值足够低,电涌会在他们被浪潮涌动掀飞坠落的过程中将其击杀。 电涌/浪潮涌动是解锁此成就最简单的方法;在正常游戏过程中尝试击杀空中敌人非常困难。

成就30 - 猛烈对抗:使用 vigor 或在敌人受到 vigor 效果影响时击杀75名敌人。 这个成就可能会在你玩游戏的过程中自然解锁。Vigor 是这款游戏中相当重要的部分,尤其是在1999模式下。任何通过 Vigor 造成的击杀都计入该成就,包括被附身的机械单位所造成的击杀。 由于工厂区域的战斗中有大量敌人,而且适合完成一些与 Vigor 相关的成就,所以你可能会像我一样在这里解锁该成就。我们还有游戏7/10的内容未体验,因此还有很多机会完成它。望远镜#8:在对抗菲茨罗伊时击退敌人波次的过程中或之后,前往该区域与我们进入位置相反的另一端。经过特斯拉线圈裂隙的最深处,我们可以在远处栏杆旁找到一架望远镜,望向一栋燃烧的建筑,上面悬挂着红色的 vox 旗帜。 录音器#52 - 道歉:战斗结束后,将伊丽莎白托进通风口,并阻止黛西·菲茨罗伊。当伊丽莎白打开房间时,接下来我们有三条不同的路可以走。暂时不要直走。 首先,进入你右侧的房间,在芬克旁边的地板上可以找到一个录音器。 灌注升级#19:从这个侧房出发,穿过大厅到对面的另一个房间,我们可以在靠近窗户的桌子上找到一个灌注。

成就#31 – Working Class Hero:完成工厂。 与剧情相关。在对抗黛西·菲茨罗伊后,登上“第一夫人号”飞艇并设定前往纽约的航线即可解锁该成就。 序列9:无法救赎 1. 第29-31章 2. 武器重点:天空线击杀、创始人卡宾枪/ vox爆裂枪、创始人火箭筒、创始人机枪/ vox连发枪 3. 灌注:22/25 4. 望远镜:9/11 5. 活动电影放映机:23/26 6. 录音器:60/80 7. 成就:36/80 ----------------------------------------------------------------------------------------------------- 第29章 – 商业区 灌注升级#20:章节开始时,推开钢琴,前往街道尽头的繁荣港大楼。让伊丽莎白用发夹撬开前门,然后用3个开锁器打开你左手边内侧的上锁大门。穿过大门后,向右沿着走廊走,在尽头的浴缸里可以找到一个【注入物】。

成就#32 - 卓越注入:在单局游戏中收集全部25个注入升级。 如果你拥有哥伦比亚精英DLC,此成就会提前解锁,因为我们之前在第4章的蓝带区域已收集了5个额外注入。 如果你没有该DLC,不用担心,我会包含剩余5个注入的位置。收集25个注入后此成就将解锁。 第30章 - 繁荣港口: 望远镜#9:走出繁荣港口建筑外,我们会看到左右两个供贡多拉乘客下船的平台。在右侧平台上可以找到一个望向恩波里亚的望远镜。 注意两个平台之间会有载有敌人的贡多拉抵达。留声机#53 - 向康姆斯托克进发:登上贡多拉并乘坐它前往中央车站。上楼并进入票务室。击退敌人,然后沿着大厅继续前进,经过自动售货机。在大厅左侧,我们可以找到一台留声机,它靠在一个箱子上,旁边窗户上用血迹写着“创始人将流血”。 活动电影放映机#23:从留声机处进入下一个票务室,用3个开锁器打开通往“咸牡蛎”的锁着的门。前往里面的洗手间,在男洗手间和女洗手间的门之间可以找到一台活动电影放映机。 留声机#54 - 墙那边的低语:当你进入中央车站主厅时,击退大量的 vox 成员。当他们全部被击败后,在面对大型康斯托克雕像的下层,进入该区域左下角的办公室。进入办公室内的侧室,在一堆报纸上可以找到一台语音日记。

成就#33 – The Roguish Type:使用伊丽莎白打开30把锁。 如果你一直认真开启遇到的所有可解锁物品,这很可能是你最早解锁的成就之一。游戏中有很多机会,随着你的游玩进程,这个成就会自然解锁。记得搜刮所有东西! 留声机#55 – A Window:上楼并打开通往中央车站外的上锁大门。前方会有一座桥,桥上有一名敌方狙击手。在桥的下方,向左走并打开通往创始人书店的上锁门。在前台右侧靠墙的位置,我们可以在一个大毛绒熊旁边的柜台上找到留声机。 留声机#56 – Sally:现在前往创始人书店的地下室楼层。地下室中央是一个休息区;我们可以在右侧沙发旁的小桌子上找到录音器。 小心埋伏…… 【灌注升级 #21】:听完录音器后,我们将能进入一个秘密房间。一路返回中央车站,回到“咸牡蛎”酒吧。跳过前台柜台,收银机下方会有一个按钮。按下按钮,你左侧会打开一个侧室。在中央柜台上,【归乡信使】 vigor 旁边可以找到一个灌注。 【vigor #8 - 归乡信使】:这个vigor位于“咸牡蛎”酒吧的秘密房间内,就在灌注旁边。这是游戏中的最后一种 vigor,用它攻击下一个遇到的敌人即可解锁Well Rounded成就。这种vigor对我们在第32章对抗的 boss 非常有用!录音带#57——合二为一:这盘录音带也可以在“咸牡蛎”的密室中找到,它位于左侧角落的金属浴缸里。

成就#34 – Well Rounded:对敌人使用全部8种 vigor( vigor 为游戏内专有名词,指 vigor 能力)。离开咸牡蛎的秘密房间后,我们会遭到一些 vox( vox 为游戏内敌对势力名称)的伏击。只需对其中一个使用“以彼之道还施彼身”,并且如果你至少使用过其他所有 vigor,该成就就会解锁。章节31 – 市中心恩波里亚。

成就#35 – Bon Voyage:将20名敌人击落到哥伦比亚之外。 当我们乘坐电梯下行时,会进入一场大型战斗。这是刷取该成就的理想区域。耗尽所有盐分并死亡几次以重置场景,使用暗流技能尽可能多地将 vox 敌人击落。当盐分耗尽时,重新加载检查点并重复此过程,直到解锁成就。 录音#58 – 悬浮之城:击败章节开始处的所有敌人。敌人全部消灭后,登上天空线,到达爱国者骄傲糖果店和创始人书店上方的悬挑处。用3个开锁器打开锁着的门,在前方的一些箱子中间可以找到录音。密码本:回到下方区域,寻找通往市场区的上锁大门。撬开锁后上楼进入哈德森商店。下楼后走到角落处那个看起来很干净的水槽旁,在水槽左侧的架子上可以找到一本密码本。 灌注升级 #22:离开哈德森商店,继续穿过市场区,直到看到威尔逊兄弟公司 bottling works。用3个开锁器撬开上锁的门进入店内,立即向左转,在入口左侧的壁龛里可以找到一个灌注。 录音器 #59 – 无可救药:返回本章开头战斗过的大区域,前往和谐巷的入口。打开上锁的大门,穿过乞丐巷。离开乞丐巷后,会遭到一些 vox 狙击手的袭击。消灭他们,然后穿过桥梁。过桥后,右手边有一家开着的商店。进入商店并下楼到地下室。在两个 vox 成员曾坐过的位置后面,酒架下方可以找到一个 voxophone。 voxophone #60 - 我皮肤的真实颜色:继续穿过和谐巷,直到进入恩波里亚市中心。在一个桥下有自动售货机的区域,击退 vox 和创始人势力。走上桥左侧的楼梯,使用 3 个开锁器打开一扇锁着的门,门后是一家窗户挂着红色窗帘的商店。我们可以在收银台附近的前台柜台上的一些肖像画顶部找到一个【语音记录仪】。

成就#36 - 烟火大师:使用“风暴骑兵”火箭筒击杀20名敌人。 考虑到火箭筒的实用性,这个杀戮成就是比较容易达成的。如果你经常使用火箭筒,很可能在本章就能解锁该成就。在最终章节中我们会大量使用火箭筒,所以即便现在没解锁,到那时也肯定能完成。 序列10:神明的想象 1. 章节31.5-32 2. 武器重点:空中索道击杀、创始者卡宾枪/ vox连发枪、创始者机枪/ vox repeater 3. 灌注:24/25 4. 望远镜:10/11 5. 活动电影放映机:23/26 6. 录音器(voxophones):69/80 7. 成就:39/80 ----------------------------------------------------------------------------------------------------- 章节31。5 - 恩波里亚市中心: 录音日记#61 - 笔友:继续穿过恩波里亚市中心,直到你来到康斯托克宅邸外。在康斯托克夫人雕像底座的台阶上,我们可以找到一个录音日记,旁边还有她的肖像画和一些点燃的蜡烛。 在前往纪念花园之前,让伊丽莎白在康斯托克宅邸的大门上扫描她的指纹。 望远镜#10:现在穿过纪念花园,我们可以在正前方找到一个望远镜,俯瞰着康斯托克宅邸。 录音日记#62 - 凭空出现:在进入纪念花园之前,沿着狭窄的通道继续前行,那里有水泄漏和电力。我们的左边会有一座漂浮的建筑。等待它下降到较低位置,然后跳进去。在一架破损的钢琴顶部可以找到一个【录音带】。 第32章 - 纪念花园: 前往面见康斯托克夫人时,要准备好迎接游戏中最艰难的 boss 战——【塞壬】。遗憾的是,这场战斗分为三个阶段,第一阶段发生在墓地。最佳的坚守位置是她陵墓右侧的一座小建筑内,在那里我们可以通过【空间裂隙】获取一些【医疗包】。她会无限复活她的盟友,你仍需击杀这些盟友以获得喘息空间,但要尽可能频繁地向 boss 射击。在1999难度下,无论如何都不要死亡。死亡会使她满血复活,而我们将不得不在弹药和医疗包更少的情况下重新开始战斗。【返还信使】 vigor 能有效节省弹药并保护自己,同时对她造成可观伤害。

成就#37 - 热情回报:使用创始人三R机枪或 vox 连发枪击杀150名敌人。 除了“大游戏猎人”成就外,这个“杀戮”成就很可能是你解锁耗时最长的。纪念花园中被女妖复活的僵尸是刷这两个成就击杀数的好方法。游戏中还有很多内容可以让你逐步完成这些成就。 录音#63 - 论基因的熵:跟随女妖的脚印走出墓地,向右经过我们找到录音#62的悬浮商店。进入市场区,击退卢特斯实验室外的 vox 成员。用发夹打开实验室的锁着的门并进入。前往下层左侧角落,你会看到一台闪烁的机器,机器上有一个时空裂缝。前往这台机器右侧的侧室,在里面的医疗桌上可以找到一台录音器。 录音器#64 – 科学之子:激活卢特斯实验室里的时空裂缝,在它完成投影后会掉落一台录音器。记得捡起来。 能力强化#23:在卢特斯实验室上楼,来到闪烁机器上方的卧室。在房间角落的桌子上,机器顶部对面可以找到一个能力强化装置。 录音器#65 – 关于“死亡”的理论:从能力强化装置望向大床的方向。在床和梳妆台之间的地板上可以找到一台录音器。【注入升级 #24】:现在,回到初始区域的先知银行,击败银行外的 vox 敌人。乘坐电梯下楼,消灭银行中央大厅的所有敌人。全部击败后,前往前方台阶顶部的巨大保险库门。在保险库门处左转,沿着走廊走到尽头的房间,墙上写着“囤积者”。由于我们很久以前就找到了密码本,现在可以打开 vox 的秘密藏匿点。在打字机上输入 VOX 即可打开藏匿点,里面的保险箱顶部有一个注入。 注意,必须在击败康斯托克夫人之前搜刮这个房间,否则该区域将永久封锁,导致无法收集这个注入以及旁边的 vox 录音!留声机#66 - 上帝的想象:这台留声机同样可以在先知银行内的 vox 藏匿点找到。它位于保险箱左侧的桌子上,保险箱顶部放有灌注物。 尽可能多地收集并保存银鹰。在银行内完成操作后,我们将快速完成【Grand Largesse】成就,而拥有至少1000美元能让这个过程快得多。 留声机#67 - 不复存在:进入那个有我们要找的眼泪的房间,眼泪在三尊雕像前面。打开眼泪之前,走到我们左边的房间。沿着房间走过楼梯,我们可以在后面的角落附近找到一个保险箱。保险箱的另一边藏着一台留声机。【语音日记68 - 破碎的圆环】:立即关闭银行中的裂隙,会掉落一个语音日记。别忘了捡起来! 现在我们将进入塞壬 boss 战的第二阶段。最佳的坚守位置是下层两侧的小办公室。尽可能专注于 boss;她会无限复活她的爪牙。【反弹】 vigor 对她特别有效!

成就#38 - Grand Largesse:在哥伦比亚的自动售货机上花费10,000美元。 击败塞壬后,乘坐电梯离开先知银行,游戏会创建一个新的检查点。理想情况下,你至少要有1000美元或更多。离开银行后向右转,前往 minuteman's armory 和位于和谐巷入口附近的 Veni! Vedi! Vigor! 自动售货机。在这些自动售货机上尽可能多地花费银鹰,然后重新加载检查点。重复此过程,直到解锁该成就。记住,在此过程中不要在 Dollar Bill 购买物品!这会使 Scavenger Hunt 成就失效。 录音#69 - 顾客迟到了:准备好后,沿着和谐巷前往恩波里亚市中心。上楼,撬开坎宁安工作室的锁着的门。关闭最后的裂隙,裂隙右侧的桌子上会出现一台语音记录仪。记得收集它!

成就#39 - Blood In the Streets:完成恩波里亚。 剧情相关。在康斯托克宅邸外最终击败塞壬。如果你前两次击败了她,第三次不会更难。使用【返还 sender】!击败她后,进入康斯托克宅邸即可解锁该成就。 序列11:扼杀于摇篮 1. 第33-37章 2. 武器重点:天空线击杀、创始人卡宾枪/ vox 爆裂枪 3. 灌注:25/25 4. 望远镜:11/11 5. 活动电影放映机:26/26 6. 语音记录器:77/80 7.成就:42/80 第33章 - 康斯托克宅邸: 录音带#70 - 束缚:进入康斯托克宅邸并穿过建筑,直到抵达有病人和寂静男孩的房间。击败敌人(支配术在此类战斗中很有用),然后查看房间中央的电梯。使用对讲机后,电梯会到达。乘坐电梯上楼前,查看电梯内的地板即可找到录音带。 第34章 - 中庭: 活动电影放映机#24:乘坐电梯上楼,在标有“她的深情拥抱”的下一个房间向左绕过拐角。尽可能避开寂静男孩。在大厅塌陷区域附近的柱子旁,我们可以找到一台活动电影放映机。 录音带#71 - 选择的价值:现在前往标有“我们长眠之处”的房间。进入该房间后,向左走进标有“我们哭泣之地”的房间。在一个敞开的棺材内,铁栏炉前可以找到一台录音带。 活动电影放映机#25:穿过康斯托克宅邸,直到进入室外区域,上方有两个自动机枪塔。走上楼梯,在下一个房间向左进入标有“我们工作之所”的区域。进入后,沿着大厅直走就能找到一台活动电影放映机。 录音带#72 - 债务:从活动电影放映机处进入摆满人体模型面具的房间。继续前进,进入有寂静男孩的房间,从他身边经过,走到一根巨大的方形柱子后面。在这个房间的后方,柱子后面的桌子上可以找到一台语音记录仪。 活动电影放映机#26:前往“我们学习的地方”区域,穿过一扇大破窗,朝着典狱长办公室的方向前进。从指向典狱长办公室的第二个指示牌处,转而看向你的右侧。在右侧走廊的尽头可以找到这台活动电影放映机。 这是游戏中的最后一台活动电影放映机,我们只需再找到一台望远镜就能解锁Sightseer成就。 语音记录仪#73 - 最后的机会:前往下一个房间下层的远端,经过楼梯后向右转。在这个房间的右后方角落,靠在投影仪旁可以找到一台语音记录仪。留声机74 - 扼杀于摇篮:现在上楼前往典狱长办公室,我们可以在安全门控制台左侧的滚轮椅上找到一台留声机。尽量不要跳跃… 第35章 - 典狱长办公室: 留声机75 - 终结:使用安全门控制台后,返回电梯下楼前往康斯托克宅邸大厅。启动电梯前,我们可以在电梯内的地板上找到另一台留声机。确保在离开本章前获取它! 第36章 - 手术室:

成就#40 - Big Game Hunter:使用创始人猎兵卡宾枪或 vox 爆能枪击杀100名敌人。 这是除了天轨击杀外,我们需要获取的最后一个击杀类成就。接下来的几个章节战斗非常密集,无论你还缺少哪些击杀类成就,都应该能在这些章节中获得所需的全部击杀数。

成就#41 - Higher Learning:完成康斯托克宅邸。 剧情相关。穿过时空裂隙并关闭两个虹吸发电机。在我们从那些穿白大褂的【已被Steam屏蔽】手中救出伊丽莎白后,该成就将解锁。 录音#76 - 巴甫洛夫的铃铛:救出伊丽莎白后,返回楼梯,前往通往发电机操纵杆的门道处。在两个门道之间,会有一扇锁着的门。让伊丽莎白用3个开锁器打开它,我们就会进入康斯托克所在的观察室。不要将这扇门与我们离开本章节时经过的上锁大门混淆。我们可以在这个房间的一张桌子上找到一个录音,它旁边还有一个灌注器。【灌注升级25】:游戏中的最后一个灌注可在本章的上锁观察室中找到,留声机也在那里。 如果没有【哥伦比亚的精华】DLC,你将在此处解锁【Infused With Greatness】成就。 第37章 - 先知之手: 【留声机77 - 最后通牒】:走出电梯进入图书馆并前往室外。一路战斗穿过第一个大厅,来到尽头那栋门上挂着哥伦比亚旗帜的上锁建筑。要打开它,你必须先消灭该区域的所有敌人。敌人清除后,返回建筑并使用3个开锁器打开门。进入后,向左拐进房间,正前方的一叠文件上可以找到留声机。望远镜#11:在登上蓝色飞艇追击先知之手前,看向飞艇停靠处的左侧。最后一个望远镜就在这里的栏杆处。

成就#42 - Sightseer:使用游戏中所有11个望远镜和26个活动电影放映机。 如果你一直按照指南操作,在查看完最后一个望远镜后就会解锁这个成就。 现在乘坐飞艇登上先知之手。利用接下来的三章专注于完成你剩余的杀戮类成就。 序列12:罪恶之镜 1. 第38-41章 2. 武器重点:空中索道击杀 3. 录音带:80/80 4. 成就:50/80 ---------------------------------------------------------------------------------------------------- 第38章 - 机库甲板:

成就#43 - On the Fly:乘坐天空缆车时击杀30名敌人。 登上先知之手,前往远端并清理天空缆车。利用天空缆车在一层甲板和二层甲板之间往返,获取所需的剩余击杀数。如果需要,可以重新加载最后一个检查点来刷取。 录音#78 - What's Done Is Done:清理先知之手的二层甲板。站在启动面板处清理二层甲板的天空缆车后,转身走下身后的楼梯。楼梯底部会有一扇带锁的门,旁边有工程标志。用1个开锁器打开门,就能看到房间后方有一个无头的机械爱国者。进入爱国者雕像后方的房间,在隔壁房间的黑板下方,桌子上可以找到一台录音器。 第三十九章 - 工程甲板: 录音器#79 - 先知将死:现在乘坐天空缆车前往顶层甲板,进入第三层甲板内部。一路战斗穿过下一个房间,再乘坐下一个天空缆车前往康斯托克的船舱。与康斯托克对峙后,前往他所在房间的上层,那里有彩色玻璃窗。在登上返回彩色玻璃窗的最后一段楼梯前,你面前应该有一扇门。进入门内,在床上可以找到一台录音器。 如果你先上了另一组楼梯,请按相反顺序收集这些录音器。留声机#80 - 罪孽之镜:这台留声机位于你所在房间的对面,在通往这个平台的另一组楼梯顶端。最后一台留声机可以在康斯托克的办公桌桌面上找到。

成就 #44 – Eavesdropper:收集全部80个录音器。如果你一直按照指南进行,在第39章拾取最后一个录音器后就会解锁该成就。第40章 – 指挥甲板:

成就#45 - The Bird or The Cage:完成“先知之手”。 剧情相关。在“先知之手”顶部保卫虹吸装置,并派遣鸣禽摧毁纪念碑岛的雕像。 第41章 - 门之海:

成就#46 – Tin Soldier:在简单难度或更高难度下完成游戏。 剧情相关成就。继续体验剩余的故事直至精彩结局,并完成《生化奇兵:无限》即可解锁该成就。这绝对是我有史以来最喜欢的射击游戏之一!

成就#47 - 目睹巨象:在普通难度或更高难度下完成游戏。 剧情相关。完成【生化奇兵:无限】即可解锁该成就。

成就#48 - 铁面平克顿:在困难难度或更高难度下完成游戏。 剧情相关。完成《生化奇兵:无限》即可解锁该成就。

成就#49 - Auld Lang Style:在1999模式难度下完成游戏。 与剧情相关。继续游玩剩余剧情直至结束并完成《生化奇兵:无限》即可解锁该成就。在1999难度下通关游戏还将同时解锁其他难度对应的成就。

成就#50 - 寻宝猎人:在1999模式下完成游戏,期间不使用美元纸币自动售货机购买任何物品。 如果你在1999难度下成功达成该成就的条件,它将在游戏结束时与其他成就一同解锁。 完成度62% 序列13:海葬 - 第一章 1. 第1-3章 2. 摧毁炮塔:0/10 3. 音频日记:4/17 4. 成就:51/80 ----------------------------------------------------------------------------------------------------- DLC - 成就分类:(10) 剧情相关:(3) 收集品:(1) 质粒:(2) 击杀:(3) 杂项:(1) 该DLC没有与难度相关的成就;我绝对推荐在中等或更低难度下游玩。这个DLC实际上有点挑战性,让敌人死得更快会让解锁很多成就变得更容易。 有一些特定的敌人击杀成就与【Old Man Winter Plasmid】和【Range Finder Gun】相关。我们至少需要350美元来解锁其中一个的两项升级以获得成就。如果条件允许,购买全部四项升级会让这些成就变得更容易,但这需要存下一大笔钱。此外,我们需要收集DLC中所有17个音频日记并摧毁所有10个炮塔。开锁器对于寻找音频日记尤为重要,所以尽可能在所有地方搜刮以找到它们。 第一章 – 德维特调查: 本章没有成就或收集品。第二章 – 市集街: 音频日记 #1 – 行善积德:与伊丽莎白一同穿过极乐城,直到你能看到窗外有一个大老爹正在进行维修工作。在这个区域的右侧,有一栋名为907的公寓楼。进入公寓楼,我们可以在前台后面的架子下方找到一本音频日记。 音频日记 #2 – 观察记录 #33:乘坐电梯上楼,向左走上楼梯,然后再上第二段楼梯,到达 Vosges 之家服装店。店内楼梯顶部有两个试衣间。第一个试衣间里有一张书桌,第二个试衣间的桌子上放着我们要找的音频日记。 音频日记 #3 – 工作邀请:前往市集街的另一边,科恩剧院所在的位置。不过,先不要进入剧院,而是前往黄金法则珠宝店。商店入口右侧有一个敞开的门道,我们可以进去。在里面的右侧是一间维修室,里面有一扇带键盘的锁着的门。门的密码是2076。在后面的桌子上可以找到一份音频日志。 音频日志#4——【被Steam屏蔽】的人们:离开维修室,进入右侧的区域,来到“被注视的时钟”。进入餐厅,然后前往厨房。在本章的最后一份音频日志位于烤箱后面,旁边的柜台上。

Achievement #51 – Down In the Briney: Took a Bathysphere ride in Burial At Sea – Episode 1. Story Related. After we go & see Sander Cohen, he will assist in locating Sally. The Achievement will unlock after he shocks us with the plot & sends us on our way… Chapter 3 – Arrived At Fontaine’s Station: There are no Achievements or Collectibles associated with this Chapter. Sequence 14: Still Just A Biscuit 1. Chapter 4 2. Turrets Destroyed: 6/10 3. Audio Diaries: 12/17 4. Achievements: 55/80 ----------------------------------------------------------------------------------------------------- Chapter 4 – The Pavilion – First Floor: Turret #1: Exit the elevator up to the next floor & head inside the area labelled Stairs to Floor 2. Pick the Locked Door & enter Menswear. From here, take the stairs up on your left & we can find a Turret inside the Dressing rooms area. Refrain from using Possession on Turrets, we have to be the ones to kill them! If a Splicer kills it instead, it will not count towards the Achievement. Kills are cumulative however, so you can technically reload Checkpoints & re-kill the same Turrets. We can find 1 Lockpick on a counter to the left of the Turret. Audio Diary #5 – Left Behind: From the Turret, there is a red vent area across from us on this floor. Crawl into it, & we can find an Audio Diary inside a Hop Up Cola crate near a Splicer. 1 Lockpick can also be found across from the Audio Diary on a Circus of Values box. Audio Diary #6 – The Old Bear: With the Lockpicks we found, return downstairs & pick the Locked Door to The Daily Bread with 1 Lockpick. Inside, we can find an Audio Diary underneath the bar counter off our right. Turret #2: Head downstairs in The Daily Bread & we can find a Turret here being set up by three Splicers. We can find 1 Lockpick in an open toolbox to the right of the Turret. Carry on out of Menswear & we will have to use the Air-Grabber to reach a Freight Hook to progress. Before doing so, look to the counter with the flickering spotlight above it. 1 Lockpick can be found on here. Turret #3: Use the Freight Hook & take the stairs up past Workman’s Wear. From here, head inside Haberdashery off our right. We can find a Turret around the corner from the front counter. Audio Diary #7 – Critics: Dispatch the Turret in Haberdashery, then look inside the third dressing room from your right. The Audio Diary will be on floor in front of a chair inside. Turret #4: Cycle the Airlock in the Home Delivery Elevator & we will enter the Pavilion – Second Floor. Follow this floor along & head inside Ladieswear at the opposite end from where we entered. Inside, head up the stairs on our left & we can find a Turret at the end of the hall around the corner. From the Turret, enter the side room to your right & we can find 1 Lockpick on top of the Checkout counter. Turret #5: Take the stairs up to the top floor in Ladieswear now & enter the Shoes Department. At the back will be a Locked Door with a Keypad. We can find a body with 1 Lockpick beside it in front of this door. Now, use the code 0928 on the Keypad to open the door. The Turret will be inside & around the corner to the left. Another 1 Lockpick can be found on the same counter as the Quick-Handed Gear as well. Audio Diary #8 – Insufficient Postage: Still in the Shoe Department, carry on through this locked area into the next room. We can find an Audio Diary on top of a desk in the center of the room. Audio Diary #9 – Message In A Bottle: Head back down to the first floor of Ladieswear. Before we exit, head into the Jewelry Department first. In the back left corner of the Department will be a Locked Door. Pick the Locked Door with 3 Lockpicks, & we can find an Audio Diary straight ahead on a desk. From this desk, turn around & look to your left. We can find 1 Lockpick on a counter beside a Ring. Audio Diary #10 – False Advertising: Return back to The Pavilion – Second Floor & use the Sky-Line to get up to the Third Floor. Enter Fontaine Plasmids & defeat the Splicers inside. On the lower floor, we can find a Safe that needs 3 Lockpicks to open. We will find an Audio Diary inside it along with an Infusion. Audio Diary #11 – A Gift From Fontaine: Collect the Shock Jockey & leave Fontaine’s Plasmids. Now, we head into Jack Frost’s Village. Go up the stairs inside & use Shock Jockey to unlock the souvenir shop. We can find the Audio Diary on a tipped over desk in front of us. Cycle the Airlock & make your way over to the Skate Rental shop. We can find 1 Lockpick in the back room to the left of the Huntsman Carbine.

成就#52 - Snowball Effect:使用同一个冬日老人陷阱冻结2名敌人。 这个成就相当容易完成。收集到冬日老人陷阱后,当我们离开杰克·弗罗斯特的村庄时,右侧会有一大群 splicer( splicer 是游戏内特定敌人类型,此处保留原词)发动攻击。一旦发现他们,在这群敌人前方放置一个冬日老人陷阱,它应该能冻结至少2名或更多敌人。

成就#53 – Fully Equipped:在【生化奇兵: Burial at Sea - 第一章】中,为“寒冬老人”或“雷达范围”购买任意两项升级。 如果你有钱的话,现在就是购买两项升级的好时机。要将“寒冬老人”升至满级需要350美元。你可以在基因银行购买质粒升级,在【展馆 - 三楼】可以找到一个基因银行。 或者,将“测距仪”升至满级也需要350美元。其升级可以在弹药土匪处购买,在【Pret-A-Porter】内可以找到一个弹药土匪。 现在我们可以随意花钱了。

成就#54 – Break the Ice:使用【冬季老人】质粒冻结5名敌人后将其击碎。 现在我们拥有了【冬季老人】质粒,请一路返回【展馆 - 一层】。沿途使用【冬季老人】质粒冻结遇到的5名敌人,冻结后使用【空气抓取器】进行近战攻击将其击碎。记得在【自动贩卖机】补充【伊芙】。 炮塔#6:在一层,向左走过水桥,前往电车方向,转而进入【Pret-A-Porter】。使用【冬季老人】制造冰桥通过,前方凹室中可以找到一个炮塔。 音频日记#12 – Ghost In The Machine:前往【Pret-A-Porter】的最深处,那里有两个更衣室。其中一个包含【注入物】,另一个则有【语音日志】和【霰弹枪】。

成就#55 - Going Places:在《生化奇兵: Burial at Sea - 第一章》中乘坐电车。 剧情相关。在亭站搭建冰桥,乘坐深海球形舱前往家居用品区即可解锁该成就。 序列15:常量与变量 1. 第5章 2. 已摧毁炮塔:10/10 3. 录音日志:17/17 4. 成就:60/80 ----------------------------------------------------------------------------------------------------- 第5章 - 家居用品区: 录音日志#13 - 未来烤箱:走出深海球形舱,上楼。我们的左边会有两个展品。在被锁链锁住的人脚边亮着白光的“白燕麦”展示台上可以找到1个开锁器。剩余的开锁器可以从冰霜 splicer(原词)身上收集,但除了这最后一个开锁器外,它们不再用于任何收集品或进度推进。 现在,让我们前往电子设备区。下楼后,我们可以在一个被砸坏的电梯里找到一份音频日记。 音频日记14 - 吻:在电子设备区的左上侧是小酒馆。进入后下楼,我们可以在前台收银机旁边找到这份音频日记。 我们还可以在这里收集到雷达范围。键盘的密码是3958。如果资金允许,在弹药班迪托(原词)处购买加速器模块武器升级,以增加其伤害。这将使获取它的两个击杀成就变得容易得多。音频日志15 - 观察17:循环气闸至设备区并进入下一个区域。正前方会有一个客服 kiosk。我们可以在里屋的一张桌子上找到一份音频日志,它位于小妹妹通风口的左侧。这里还有一个需要3个开锁器才能打开的保险箱,里面没有音频日志。

成就#56 – Cook & Serve:在《生化奇兵: Burial at Sea - 第一章》中使用雷达范围使5个敌人爆炸。 要让 splicer( splicer)爆炸,你需要用雷达范围对他们进行充分辐射。持续辐射直到他们爆炸,不过这会消耗你的弹药。记得经常储备雷达范围的弹药。好在弹药贩卖机或自动售货机处只需8美元就能买到300发。 炮塔#7:前往客服台右侧的玩具区方向;我们可以在一个大型泰迪熊模型后面找到一个炮塔。 录音日记#16 – A Little Help:从最后一个炮塔处,进入右侧的门,来到婚纱店。我们需要1个开锁器才能打开门。在商店内,我们可以在前台柜台下方的架子上找到一份音频日记。 炮塔8:现在前往客服台左侧,那里会有一家书店。进入书店并上到二楼。在这里,我们可以在一个需要关闭的小妹妹通风口左侧找到一个炮塔。

成就#57 - Chain Reaction:在【海葬 - 第一章】中,使用雷达范围技能,通过爆炸的敌人对15个敌人造成伤害。 这个成就可能会自然解锁,也可能不会。如果你引爆一个 splicer( splicer 是游戏中的一种敌人),且其附近有其他敌人,爆炸会对这些敌人造成伤害,并且很可能将他们杀死。当然,这只有在周围有多个 splicer 时才有效。如果你在收集了接下来的音频日记后还需要更多击杀数,只需在本章的所有主要房间之间来回跑动,就会有更多 splicer 生成。这个成就不会错过,你不需要重新加载检查点来获取它。 炮塔#9:从书店的下层门出去,进入下一个区域。让伊丽莎白用发夹打开陈列室的门,你就会进入电器区。在伊丽莎白的帮助下击退 splicer( splicer)并打开后方的门。 伊丽莎白打开门后,向左转,走下一座水桥下方的楼梯。在楼梯底部可以找到火箭炮塔。 音频日记 #17 – 观察 #22:返回楼梯,使用“寒冬老人”制造冰桥到对岸。过桥后,进入右侧的房间,在里面的桌子上可以找到最后的音频日记。

成就#58 - Audio Enthusiast:收集《生化奇兵: Burial At Sea - 第一章》中全部17份音频日记。 如果按照本指南操作,在收集第五章的最后一份音频日记后,你将解锁该成就。 炮塔#10:收集这份音频日记后,返回本章开始处附近的客户服务亭。当我们离开书店时,可以在婚纱店入口附近发现一个由一群 splicer( splicer)正在架设的最终炮塔。

成就#59 – Confirmed Luddite:在《生化奇兵: Burial at Sea - 第一章》中摧毁10个炮塔。 这个DLC中实际上有11个炮塔,我肯定是漏掉了一个。不管怎样,如果你找到了指南中提到的其他炮塔,那么在摧毁最后一个后,该成就应该就会解锁。遗憾的是,被 splicer( splicer)摧毁的被附身炮塔,以及被雷达范围爆炸的splicer杀死的炮塔,都不会计入该成就。 如果你已经通关了这个DLC但仍未解锁该成就,不要担心。通关这个DLC后,只需加载第四章,快速跑图并再次摧毁一些炮塔即可。重新摧毁之前已经摧毁过的炮塔仍然会计入成就;它是跨所有存档累积的。

成就#60 - 海葬:完成海葬 - 第一章。 剧情相关。在你调高恒温器并启动DLC的结束部分之前,确保你已解锁所有成就(除了“坚定的卢德分子”成就)。利用本章中无限刷出的 splicer( splicer)来帮助你完成击杀类成就,然后再完成DLC。 准备好后,升高温度并与 boss( boss)战斗。准备好迎接《禁闭岛2.0》;就在你以为他们不会再这样对我们的时候。在我们的思绪被震撼后不久,成就就会解锁…… 75%完成 序列16:海葬 - 第二章 1. 第1-2章 2. 音频日记:12/16 3. 语音日记:0/9 4.成就:64/80 DLC - 成就分类:(10个) 故事相关:(4个) 收集品:(2个) 质粒:(2个) 击杀:(2个) 要在一次游玩中解锁该DLC的所有成就,我们需要在1998难度下进行游戏。此时我们所有的致命武器都会被移除,只能将敌人击晕。这其实并不太难,而且所有与质粒和击杀相关的成就都与非致命行为相关联。 第一章 - 时间口袋咖啡馆: 本章没有成就或收集品。 第二章 - 玩具部: 音频日记#1 - 自由放任:DLC开始后,乘坐服务电梯离开玩具部,下到瑞恩狮子学院。离开学院,向左前往丘比特之箭。在商店的左后方角落,我们可以在员工专用锁门左侧的柜台上找到第一个音频日志。 音频日志#2 - 蓝裙:打开员工专用锁门,在后方一个穿着康斯托克夫人旧裙的人体模型旁可以找到另一个音频日志。 离开该区域前,务必拾取偷窥汤姆质粒。我们需要在隐形状态下用空气抓取器击倒15个 splicer( splicer)。 注意1:抬起电梯门并乘电梯上到下一层。进入豪华潜水球,走下底层的楼梯。跟随房间中央偏左的旋转显示屏,我们可以看到左侧有一组未标记的门,通往信息室。进入信息室后,在后面的桌子上,保险箱旁边可以找到一张笔记。 之后我们需要再找到3张笔记,才能在DLC后期解锁一个包含音频日记的秘密藏匿处。 笔记2:离开信息室,穿过下层区域,前往一个上方挂着“来自你的朋友阿特拉斯的药品”横幅的房间。进入该区域后,立即向左拐进房间,在里面的桌子上可以找到另一张笔记。

成就#61 - Dead Drop:在三个不同场合,从货运吊钩上无声落下后击晕敌人。 随着你游玩DLC,这个成就可能会自然解锁。当你看到货运吊钩附近有 splicer( splicer)时,跳上吊钩,然后在落地前按住蹲伏键,从splicer身后落下。落地后大约四秒内将其击晕,即可计入该成就进度。 音频日记#3 - Pennies on the Dollar:前往深海潜水钟豪华版的顶层,通过维修室的通风口进入银鳍号。关闭里面的炮塔,收集另一个噪音发生器,现在我们还需要再收集三个,以解锁Making Some Noise成就。 循环使用气闸,进入有卢特斯装置的主餐厅区域。穿过门进入厨房,我们可以在一扇锁着的门附近的桌子上找到一份音频日志。 音频日志#4 - 印记障碍:现在前往银鳍号上层,我们可以在绘图板下方的桌子左上角找到一份音频日志。 音频日志#5 - 阿特拉斯的人:回到豪华潜水球,进入试驾区。在里面,穿过右侧的员工专用门,走到前面的 kiosk 后面。一份音频日志会在后面的桌子上。 音频日志#6 - 冬日老人:由于我们先去了银鳍号,现在可以进入试驾区楼下的阿特拉斯藏身处。走下下一段楼梯,在我们下来的楼层下方左转。我们可以在角落里的桌子上找到一份音频日志。音频日记#7 - 适用于所有场合:在这个房间的中央,我们可以在圆形作战桌(上面放着一张《生化奇兵》所有地点的地图)上找到另一本音频日记。 音频日记#8 - 监狱情报。调度#8:在获取“寒冬老人”质粒之前,进入你左侧的员工房间,我们可以在一名“公司人员”手中找到一本音频日记…… 笔记3:从最后一本音频日记的位置开始,继续沿着这些房间向右走,我们可以在一个小壁龛里亮着灯的桌子上找到一份笔记。 音频日记#9 - 小混混:离开试驾区,穿过房间前往维修区。乘坐电梯下楼,经过两个复古的深海潜水球。在有黄貂鱼的房间里,下到一楼。下层左侧会有一个更衣室;我们可以在靠墙的其中一个洗手池里找到一份语音日志。 语音日志#10 - 建造不可能之物!:离开更衣室,沿着下层向左走。会有一扇需要3个开锁器才能撬开的上锁的门。在这个房间里,正前方的架子上就有一份语音日志。

成就#62 – Making Some Noise:通过撬锁获得5个发声器。 部分撬锁小游戏中,当指针悬停在蓝色圆柱体上时,按下提示键即可收集发声器。获取该成就的机会肯定不止5次,只需消耗撬锁工具。哨塔是收集发声器的便捷途径。 笔记4:从这个房间的录音日志继续,在通往楼上楼梯的门口前进入侧室。我们可以在这个小房间的桌子上找到最后一份笔记。

成就#63 - Never Saw It Coming:在隐形状态下,使用窥视汤姆(Peeping Tom)以近战攻击击倒15名敌人。 如果在1998难度下进行游戏,此成就会在游玩过程中自然解锁。避免使用十字弩,专注于利用窥视汤姆(Peeping Tom)潜行消灭 splicer( splicer)。 音频日记#11 - So Long, Suckers!:在服务湾中央有三个潜水球,其中一个是黄貂鱼号。使用货运钩跳到黄貂鱼号入口对面的平台上。在这个蓝色潜水球内的座位上可以找到一本音频日记。

成就#64 - Twofer:使用同一发毒气弩箭击倒2名或更多敌人。 从维修区乘坐电梯返回,出电梯后就能拾取到毒气弩箭。从这里潜行到前台附近,会有三名 splicer( splicer)相互靠近。只需向其中一人发射毒气飞镖,他们就都会被击倒,从而解锁该成就。 录音日记#12 - C'est La Vie:离开维修区,上楼前往蝠鲼休息室。进入后,走上长长的楼梯到达主区域。在我们前方吧台的左侧,一具尸体旁边可以找到一本录音日记。 序列17:王牌 1. 章节2.5-6 2. 录音日记:16/16 3. 语音日记:9/9 4.成就:70/80 第2.5章 - 玩具部: 音频日志#13 - 阿特拉斯的供给:现在前往休息室主区域下楼。在我们下楼的楼梯对面,穿过被水淹没的区域,会有一扇上锁的门。使用2个开锁器打开它,我们可以在前方的碗碟架上找到一本音频日志。 音频日志#14 - 你这个蠢货:离开这个房间,前往主区域后部的楼梯上楼。沿着顶层走,经过私人房间内的炮塔,我们会来到一个有3个酒瓶的死胡同。在酒瓶处,如果你找到了全部4份笔记,将它们翻转使标签面朝自己,就能打开方丹的服装室。在室内的桌子上可以找到一份音频日记。

成就#65 – Up & Running:在【海葬 - 第二章】的苏崇实验室修复机器。 剧情相关。现在返回银鳍号,收集三个组件后修复卢特斯装置。进入时空裂隙完成章节即可解锁该成就。 第三章 - 哥伦比亚: 录音带#1 - 仁慈的品质:当我们抵达哥伦比亚时,收集量子粒子并进入第一夫人的主房间。我们可以在左侧的桌子上找到【铁壁】 vigor。 进入通风口,穿过芬克办公室后从通风口出去。通风口出口右侧有一扇滑动玻璃门。穿过玻璃门,然后进入左侧的房间。我们可以在里面的工作台上找到一个录音带。录音器#2 - 牺牲:跳上天空线并沿着它们向上,前往你左侧的大型蓝色飞艇。下到机翼上,然后进入飞艇内部。在飞船后部靠近一些大型画作的箱子上可以找到一个录音器。必须现在就获取它,因为随着我们深入哥伦比亚,飞艇将会离开! 录音器#3 - 住手:返回下方区域,穿过通往杰里迈亚·芬克办公室的大型双开门。下一个录音器就在我们前方室内的一张桌子上。 录音器#4 - 拉撒路计划:穿过这里左侧的门,进入杰里迈亚·芬克的私人住所。进入卧室,我们可以在壁炉前的地面上找到一个录音器。录音带#5 - 先知无利可图:收集时钟钥匙并返回之前的房间。使用时钟钥匙打开休闲室。我们可以在房间中央的小桌子上找到一盘录音带。 录音带#6 - 必要的预防措施:乘坐电梯下到芬克实验室,前往有纯金芬克雕像的房间。沿着右侧的走道前进,进入遇到的第一个房间。我们可以在一块写有失败的活力宣传方案的黑板前找到一盘录音带。 录音带#7 - 更大的利益:现在前往该区域的一楼,进入雕像正面右侧的房间。我们可以在这个房间中央的柜台上,一些ADAM蛞蝓旁边找到一盘录音带。留声机8 - 幼稚的恐惧:前往该区域的二楼,我们可以找到外科病房 - 工匠病房,它就在我们之前所在位置的正上方。进入病房,穿过患者病房,前往零件库存室。暂时不要进入患者病房里的通风口。 在零件库存室,向右转,我们可以在房间中央的桌子上找到一台留声机。 留声机9 - 残羹剩饭:通过患者病房的通风口逃离,进入新区域。从外面登上 vox 飞艇,然后使用货运钩进入观察与工程区。继续前进并收集头发样本,用杠杆打开安全门。回到我们之前带着自动机登上 vox 飞艇的那个房间。在机械守卫面朝方向的左侧,安全门现在已经打开。进入房间后,我们可以在一张面朝玻璃观察窗的桌子上找到一个录音器。

成就#66 – 我的头发:在《生化奇兵: Burial at Sea - 第二章》中交付头发样本。 剧情相关。收集到头发样本后,返回第一夫人处,苏崇会让你穿过时空裂隙,解锁该成就。 第四章 – 返回销魂城:

成就#67 - Glutton For Punishment:在《生化奇兵: Burial at Sea - 第二章》中使用铁壁 vigor 收集20发或更多弹药。 章节开始时,储备好伊芙并装备铁壁 vigor。我们会获得一个检查点,60秒后莱恩的手下会进入房间。只需消耗伊芙,用铁壁吸收敌人的子弹,尽可能补充伊芙,然后重新加载检查点直到解锁成就。尝试前清空所有飞镖!我们需要使用铁壁收集弹药,而不仅仅是生命值,否则将不计入成就!在等待敌人进入时,熟悉房间内所有伊芙的位置,有3个伊芙以及一包香烟。这个过程有点繁琐,但你在正常游玩DLC时可能无法自然解锁该成就。 这可能需要重新加载2-3次检查点。在开始时对霍迪尼 splicer 使用 tranquilizer dart,接下来会出现两个铅头 splicer。在这种情况下,两个敌人比一个更好。当你用 Ironsides 收集到20支 dart 后,成就将会解锁。 消灭苏崇实验室里的莱恩手下,然后前往方丹的办公室。前往蝠鲼休息室,上到我们之前找到方丹服装室的上层区域。这里现在会有私人电梯,进入电梯并乘坐它前往方丹的办公室。使用量子粒子升起方丹百货公司的屋顶。第五章 - 房间: 本章没有成就或可收集物品。 第六章 - 进入苏崇的免费诊所: 音频日记#15 - 产品召回:与阿特拉斯会面后,我们会被送到阿耳忒弥斯套房的某个地方。穿过狂喜论坛报的报摊,进入苏崇的实验室。一进入实验室,就能看到天花板上挂着两套大老爹的防护服。从进入实验室的位置向右看,在其中一个打开的储物柜里可以找到一本音频日记。 音频日记#16 - 精神控制测试:帮助修复大老爹并将其移开,以便继续前进。当我们进入右侧的大厅时,在前方尽头的右侧可以看到一扇通往认知转换室的门。进入里面,我们可以在桌子上找到最后的音频日志。

成就#68 - The Whole Story:在《生化奇兵: Burial at Sea - 第二章》中收集全部16份音频日记和9份录音器。如果你一直按照指南进行,收集最后一份音频日记后应该就能解锁该成就。

成就#69 – Paid In Full:完成海葬第二章。 剧情相关。将制胜法宝交给阿特拉斯并完成DLC。 插入《生化奇兵 重制版》*

成就#70 - 盗贼的喜悦:在1998模式下完成海葬第二章。 与剧情相关。如果在1998难度下进行游戏,完成游戏后也会解锁此成就。 完成度87% 序列18:云端冲突 1. 竞技场:OPS狂热、公爵与傻瓜剧院、渡鸦穹顶 2. 蓝带挑战:0/60 3. 武器击杀:14/14 4. 活力连击:8/8 5. 活力击杀:7/7 6. 成就:77/80 ---------------------------------------------------------------------------------------------------- DLC - 成就分类:(10) 竞技场:(5) 收集品:(1) 活力:(2) 击杀:(2) 不得不说,这个DLC很肝,而且并不完全有趣。共有4个竞技场,每个竞技场有15波敌人。每一波都有一个相关的蓝带挑战,总共有60个挑战需要完成。注意,如果你在没有复活的情况下死亡,选择【放弃排名并继续】!这样做,我们可以保留当前竞技场中已完成的所有蓝带挑战,并从同一波继续。我们不需要任何成就的排行榜排名。 这些挑战非常繁琐。在DLC的初始流程中完成你能完成的挑战,然后专注于解锁特定的挑战。这需要很多很多次的运行。真是太棒了。 首先,击败所有4个竞技场,并专注于购买所有武器和活力升级。把画廊物品留到最后。在竞技场中购买的任何武器或活力升级都将保持解锁状态!优先专注于解锁所有这些升级,这会让我们的游戏过程轻松很多!收集到的注入物和装备也会保留。我建议先将注入物用于盾牌,其次是盐,最后才是生命值。我们总共只能使用25个注入物。 OPS Zeal:

成就#71 – Friendly Skies:在The OPS Zeal中击败全部15波敌人。 这很可能是你解锁的该DLC的第一个成就。利用第一个竞技场完成所有14种武器的击杀。我们可以从军械库装备除了Crank Gun之外的所有武器。你需要击杀一个Motorized Patriot来收集该武器。如果你死亡,确保选择“放弃排名并继续”选项,这样你就能保留进度。 花费1700美元解锁其他三个竞技场,一并完成这部分内容。 Duke & Dimwit Theater:

成就#72 - Sergeant-At-Arms:在《生化奇兵:无限》中,使用全部14种武器和全部7种 vigor(不包括“野马奔腾”)各完成一次击杀。 这绝对是所有成就中最简单的一个。最困难的部分是确保你确实使用vigor击杀了敌人。“群鸦盛宴”和“电疗术”在这方面表现很差。对于“冲锋”,要确保是冲锋攻击杀死敌人,而不是坠落伤害。 有关武器和vigor的完整列表,请查看简介部分的成就清单。

成就#73 – Duke Or Dimwit?: 在Duke Or Dimwit剧院击败全部15波敌人。 我发现这个竞技场比前一个简单很多。继续专注于用武器和活力击杀敌人,同时努力完成活力连击。在第15波,你需要摧毁大型Vox齐柏林飞艇的引擎,然后跳出飞艇回到哥伦比亚或空中以完成该波。 Raven's Dome:

成就#74 - The Ol’ One-Two:在《生化奇兵:无限》中,使用全部8种不同的 vigor 连击对敌人造成最后一击。 vigor 连击: 1. 野马奔腾+充能 2. 野马奔腾+恶魔之吻 3. 恶魔之吻+充能 4. 群鸦风暴+恶魔之吻 5. 群鸦风暴+电击骑手 6. 电击骑手+暗流 7. 占据+恶魔之吻 8. 占据+电击骑手 连击所涉及的其中一种 vigor 必须杀死敌人。对于与暗流或充能相关的连击,敌人因坠落伤害死亡将不计入,必须通过 vigor 效果杀死敌人。很难判断哪些连击实际杀死了敌人。如果需要,请不断循环列表,用它们获取多次击杀。关于两个涉及【附身】的连击,你必须先附身一个敌人,然后让该敌人在着火或触电状态下杀死另一个敌人。这两个连击绝对是最难达成的。【高射炮】敌人是最佳选择,因为它们生命值高且造成的伤害大。附身一个高射炮敌人,然后让其着火或触电,这样它们有望在自身死亡前杀死另一个敌人。

成就#75 - Rope-A-Dope:在《生化奇兵:无限》中,用浪潮牵引将敌人打下城市,然后救起他,再把他打下去一次。 这个成就并不像听起来那么荒谬。敌人只需要改变高度,不一定非要被打下哥伦比亚城的露天区域。所以,如果你把敌人从一个平台打到更低的平台,或者打到倾斜屋顶的下方,都算成功。关键在于,敌人必须因此死亡,这就是为什么最后把他们打下哥伦比亚城通常是最简单的方法。先把他们打到低处,再把他们拉回你身边,然后再次把他们推下去。如果最后一次投掷让他们掉得足够远,他们就应该会死。我最终在乌鸦穹顶的一栋小楼屋顶上完成了这个操作,在倾斜的屋顶上推拉一名士兵,然后把他们扔到我下方的地面上。为了更好地了解该怎么做,可以参考GameInfirmary制作的视频。他们在《The OPS Zeal》中就做过类似操作,但无论在何处,原理都是相同的。

成就#76 - Missile Defense System:在《CitC》中,通过击落空中的火箭弹,利用其溅射伤害消灭敌人。 这个成就是个十足的麻烦。可以在任何有火箭筒士兵的波次中完成。最简便的方法是使用射速较快且可缩放瞄准的武器,比如创始人 Huntsman Carbine 或机枪。除一名火箭筒士兵外,消灭所有敌人,然后与他保持适当距离,以便在失误时能躲避火箭弹。你需要将准星对准他的火箭筒炮口,理想情况下,射击时不应伤害到士兵,避免意外将其击杀。如果瞄准正确,你可以在不杀死士兵的情况下,通过弹幕射击击落火箭弹。先把他的生命值削减一部分,这样爆炸就能杀死他了。 你也可以选择杀死站在火箭筒士兵旁边的其他敌人,不一定非得是他本人死亡。我发现直接让他死亡是最简单的,这样你只需要对付一个敌人,而不是两个。这需要大量的反复尝试。当我们进行竞技场游戏时,请记住这一点和【Rope-A-Dope】;在我们刷蓝带的时候,会有很多机会在游戏过程中完成这个成就……除非这是你最后需要完成的成就,否则我不建议专门去刷它;在游戏过程中你可能会意外解锁它。

成就#77 – Rooftop Ruffian:在渡鸦穹顶击败全部15波敌人。 这个竞技场相当直接,我还是觉得OPS狂热比这个更难。不过我确定升级武器和 vigor 肯定对此有影响。只剩最后一个竞技场了! 序列19:OPS狂热 - 第一部分 1. 竞技场:恩波里亚拱廊,OPS狂热 2. 蓝带挑战:6/60 3. 画廊物品:0/35 4. 成就:78/80 ----------------------------------------------------------------------------------------------------- 恩波里亚拱廊:

Achievement #78 – Hand of the Prophet: Defeated all 15 Waves in Emporia Arcade. This Arena can be tricky at times as it incorporates all the challenging enemy combinations from the other Arenas. By the end of all 4 Arenas I had every Upgrade purchased for my Vigors & Weapons except for the Vox Hail Fire, Vox Heater, & Founder Volley Gun… because they suck. In all the Waves, I was able to complete 5/60 Blue Ribbon Challenges without paying attention to them, so that was nice… only 55 left. Now for the absolute worst part of Bioshock – Infinite, grinding out these tedious Blue Ribbon Challenges. Ideally, you were able to buy the majority if not all of the Vigor & Weapon Upgrades. This is going to make our struggles infinitely easier. With all 4 Arenas previously beaten, we now have access to every Gear as well which will be very useful. Once you have purchased all the Upgrades you want, we can begin chipping away at all the Gallery Items. Chances are, we are going to run out of things to buy & be swimming in Silver Eagles by the end of this DLC… You will probably max out your wallet 20 times over. My favourite Weapons to use are fully upgraded Carbines & Hand Cannons. For Gears I like Hat – Rising Bloodlust, Chest – Bullet Boon, Pants – Head Master, & Boots – Death From Above. Be warned that if some of your Gears deal damage that it may void certain Blue Ribbon Challenges. Be mindful of the Challenge you are about to do & the Gears you have equipped. If you fail a Challenge, do not hit restart Checkpoint! Checkpoints are made back in the Columbia Archaeological Society Lobby & will undo any Blue Ribbons you have unlocked! Just carry on & complete the Wave with “Forfeit Ranking”. You will fail the current Waves Ribbon, but you will still be able to keep the Ribbons you have collected previously. If you purchase a Revive, this will not fail your Challenge when you die. If you have the spare Silver Eagles, always have a Revive purchased as a second life/attempt for the Blue Ribbon. When you use your Revive in game, you can turn around from where you exited & purchased another Revive on the spot! Be warned, we can only purchase a maximum of 4 Revives per Arena run! When you are specifically hunting for certain Blue Ribbons, play up to that Wave, & if you fail & have not collected any other Ribbons you needed prior that is when you can reload the Checkpoint. There is no sense playing through the entire Arena if you do not have to. The OPS Zeal: Wave #1 – Soldiers (5): Defeat the Wave using Sky-Line Strikes only. This Ribbon is not too difficult. Just glide around on the Sky-Lines & pick off the Soldiers one by one with Sky-Line Strikes. Wave #2 – Soldiers (6): Defeat the Wave while only taking Shield damage. Choose a far ranged & a close ranged Weapon for this. Hideout where we spawn & pick off the enemies from a distance. Watch for those who Sky-Line up to you & dispatch them quickly. Do not let them break your Shields. Wave #3 – Soldiers (5): Defeat the Wave using only the Sky-Hook attacks & Shotgun. Once again, we will focus on using our Sky-Line Strikes, this time however we are able to supplement our kills using the Shotgun. It’s honestly easiest running around the map gunning them all down with the Shotgun if it is fully upgraded… Wave #4 – Soldiers & Volley Gunners (6): Defeat the Wave using only Machine Guns or the Crank Gun. We can use the Machine Gun or Vox Repeater; the Crank Gun can be pulled in through a Tear. The Volley Gunners are our biggest threat. The Soldiers can be mowed down easily enough with Machine Guns, but the Volley Gunners can pose a threat. They do not wear helmets on this Wave, so try taking them out with Headshots if you can aim it. This is where all those Weapon Upgrades really start paying off… Wave #5 – Handyman (1): Defeat the Wave using only the Pistol & Hand Cannon. Equip both the Pistol & the Hand Cannon. Since it is only one Handyman, bait him up & down off the Sky-Line so he tries electrifying it. When he does, just unload bullets into his heart. Rinse & repeat until he is down. Wave #6 – Soldiers & RPG Soldiers (6): Defeat the Wave without picking up Weapons or looting corpses. This Wave is very easy, though it is sad we cannot loot the Silver Eagles from the corpses. Be sure you pick Weapons with a good ammo supply though. We can also use Vigors, so go wild! Be mindful of the RPG Soldier, be very cheap when taking him out like stun locking him with Shock Jockey or blasting him off the map with Undertow. Sequence 20: The OPS Zeal - Part II 1. Arena: The OPS Zeal 2. Blue Ribbon Challenges: 15/60 3. Gallery Items: 35/35 4. Achievements: 79/80 ----------------------------------------------------------------------------------------------------- The OPS Zeal: Wave #7 – Soldiers, Snipers, & Zealots (6): Defeat all enemies using only zoomable Weapons while they are zoomed. Theoretically, any Weapon can zoom but it is better to use Weapons you are comfortable with shooting down the sights of. The Carbine, Hand Cannon, or Sniper Rifle are good choices for this. Try using the Sniper Rifle & killing the Zealot as soon as the Wave begins if you can manage it. Wave #8 – Zealots & Volley Gunners (4): Defeat all enemies using only Tears, Possession Traps, & Return to Sender Traps. The best way to do this is cycling between the Tesla Coil & the two Automaton Tears. You can use Return to Sender to catch shells or bullets, but you cannot kill anyone with them! I am unsure why but using the Return to Sender Traps is not actually allowed. Unless I am using them wrong… Wave #9 – Soldiers & Handyman (6): Defeat all enemies without ever hitting anyone in the head or the heart. This is pretty open ended. I would abuse using Vigors to dispatch the Soldiers & use Devil’s Kiss plus the RPG to kill the Handyman with back shots. Ironically, you need to focus your aim to not hit the vital points. This Ribbon is hard for the wrong reasons. The Sky-Hook can also be handy for taking out the Soldiers as well. Wave #10 – Soldiers & Siren (5): Defeat the Siren before she performs a resurrection. You need to go berserk on the Siren at the beginning of the Wave. The Siren will be going to a pile of bodies directly underneath where you spawn. Drop down & intercept her. Spamming Devil’s Kiss & using guns like the Hand Cannon, RPG, Volley Gun, or Carbine are good. Use fully upgraded Weapons & Vigors of course. As soon as you run out of ammo for one gun, switch to the other one. Waste no time. Wave #11 – Soldiers (4): Defeat the Wave without using Sky-Lines or Hook-points. The Wave just says Soldiers, but there is actually a Motorized Patriot & Fireman here as well. Stun lock the Patriot & Fireman with Shock Jockey & kill them quickly. Prioritize the Patriot first since we can shoot him in the back for extra damage. You will need to be mobile & get into cover on foot. Do not let yourself get cornered by the Fireman. Wave #12 – Zealots & Firemen (4): Defeat the wave within 1:15. My favourite combo of the Carbine & Hand Cannon work best for this one. Stun lock the enemies with Shock Jockey & keep shooting them all in the head until they drop. Just using Undertow & blasting them off the map also works well too; there are only 4 enemies that we have to fuss over. Wave #13 – Firemen & Handyman (3): Defeat the Wave using only Weapons fired from a Sky-Line or Sky-Line Strikes. Focus on the Firemen first, riding around on the Sky-Line & dropping off whenever the Handyman electrifies it before jumping back on the Line. After the Firemen are dead, it is just back to business with the Handyman dropping on & off the Line when necessary. Remember, fire not a single shot while you are off the Sky-Line! Vigors are off the table as well. All Weapons must be fired off the Sky-Line! Wave #14 – Soldiers & Zealots (5): Defeat the Wave using only Shock Jockey & Headshots. Sniper Rifles, Carbines, or Hand Cannons work best for this Ribbon. Whenever you approach an enemy or they approach you, stun them with Shock Jockey & point blank Headshot them. If you have a Sniper Rifle, you can open with it at the beginning of the Wave. Be careful though, if you miss & hit them anywhere else you will fail the Ribbon. I actually had to replay this entire Arena 3 times for this one Ribbon… Go slow & be patient. Try having your targeting reticle barely touching above their head. It is better to be off & completely miss, than being off & hitting a different part of their body. Wave #15 – Patriot & Handyman (3): Defeat each enemy with a different Vigor type (until you have used all Vigor types). Whittle down the Handymen with Weapons then finish one off with Devil’s Kiss, Shock Jockey, Charge, or Murder of Crows. You can also Possess the Patriot & get him to kill one of the Handymen as well. Using Return to Sender against the Patriot is also a good strategy. Basically, the finishing blow to each of these enemies needs to be from a different Vigor type. It cannot be the same Vigor. This is a very difficult Wave. In all, this took me 4 runs throughs of the Arena to get all 15 Blue Ribbons (not counting my first run in Sequence 16).

Achievement #79 – Museum Curator: In CitC, unlocked all 35 Gallery Items. There are 35 Items we have to purchase for this Achievement. We will need to save $24,400 Silver Eagles, which sounds like a lot… until you realize how many times we have to play through these Arenas. After my initial run through the 4 Arenas & getting all 15 Blue Ribbons on The OPS Zeal, I had enough Silver Eagles for every single Vigor & Weapon Upgrade as well as enough for the Gallery Items. The Items we need to purchase are: 1 Kinetoscope for $100 5 Kinetoscopes for $2000 4 Phonographs for $1000 12 Concept Arts for $250 6 Models for $300 4 Models for $500 2 Models for $1000 1 Center Model for $1500 The Achievement will unlock after you purchase the final Item. What do we do with all these Silver Eagles now Cynic, you ask? Nothing. Absolutely nothing. I mean, you can buy a 4 Revives every Arena run if you want? Might as well… Can I buy Blue Ribbons… please? Sequence 21: Duke & Dimwit Theater 1. Arena: Duke & Dimwit Theater 2. Blue Ribbon Challenges: 30/60 3. Achievements: 79/80 ----------------------------------------------------------------------------------------------------- Duke & Dimwit Theater: Wave #1 – Soldiers & RPG Soldiers (7): Defeat all enemies with the Shotgun. If you are like me & don’t casually carry around a Shotgun, we can find the Shotgun Tear directly to our right when we spawn in. Collect it, then take everyone down. Headshots obviously will do the most damage. Remember this location in case you need to come back for ammo. The Mosquito does not actually count as an “enemy” we have to kill for some reason; you can complete the Wave without destroying it. Wave #2 – Soldiers, Patriots, Firemen, & Zealots (9): Defeat two enemies with a Possessed Patriot. This Wave can be a bit tricky. We want to weaken the human enemies before Possessing your Patriot so that they are easier to kill. Its best to take out the Zealots & Firemen first then try juggling the Soldiers & Patriot. You will want a lot of Salts so you can spam Possess on your Patriot. The Patriot’s melee attacks kill enemies a lot faster than their Crank Gun… if they even shoot it, which they don’t. You can use Undertow to pull Soldiers closer, but this all hemorrhages Salt. Wave #3 – Firemen (6): Force 3 Firemen to self-destruct while airborne from Bucking Bronco or Undertow. Having a high damaging Weapon like the Hand Cannon, Sniper Rifle, or Shotgun work best for this. With a maxed out Bucking Bronco, weaken the Firemen a little then launch them into the air & just unload your Weapons into them. There are 6 Firemen total, so you have some room for error. It is best to stay on the roof you spawn on, but head back a little so you can get some cover from their fireballs. Wave #4 – Soldiers & Volley Gunners (11): Damage 5 enemies with Vigor Traps. This one is pretty easy. Shock Jockey Traps are the best since they are easy to lay down & have quite a large radius. They just have to be damaged, not killed which definitely makes our lives a lot easier. Wave #5 – Soldiers & Snipers (6): Complete the Wave in under 0:45. Long to mid range Weapons work best for this like a Sniper Rifle or Carbine. There are two Snipers on the far roof, take them down first. The Soldiers will then all try getting up to your position. Just pick them all off as quickly as you can. Try to avoid chasing them around if you can help it. Staying put where you spawn is best. Wave #6 – Handyman (1): Defeat the Handyman while he's electrocuting a Sky-Line. This one is pretty standard. Do the ol’ mount & dismounting of the Sky-Line to bait the Handyman then fill his heart with lead as soon as he grabs the Skyline. Be careful when using Devil’s Kiss so that he does not burn to death accidentally if drops off the Sky-Line before you can finish him off. He has to die while holding the Sky-Line, that does not mean we cannot weaken him prior to him grabbing it. Wave #7 – Solders, RPG Soldiers, & Patriots (11): Defeat 5 enemies with Undertow. This one is not too difficult as well. Just blast the enemies off their Airships with Undertow. It definitely helps having a maxed out Undertow for this. We have a Tear containing Salts on our Airship so just go ham with it. Wave #8 – Soldiers &Volley Gunners (6): Defeat 2 enemies with a Possessed Rocket Turret. This Ribbon is completely luck based. A Rocket Airship will arrive & drop off Vox; you have to Possess the Rocket Cannon off the Airship & get it to kill enemies. Its accuracy is awful. You must have it Possessed for the kills to count. Quite often it may kill enemies accidentally with its splash damage, but if it is not Possessed at the time, these kills will not count. There are only 6 enemies, so we have a small window for error. This video guide by VidGamiacUnlocked is really helpful in showing us just how to swing this Blue Ribbon. You will definitely want a Revive purchased… https://youtu.be/Gt5U4LjeUhc Wave #9 – Soldiers, Zealots, & Patriots (8): Defeat every enemy with a different Weapon or Vigor. Enemies can be damaged with anything but must be each finished off with a different Weapon or Vigor. Enemies drop different Weapons as well like the Crank Gun or Machine Guns. If you can manage it, damage the Zealot then finish him off with your Sky-Hook. I used: Sky-Hook, Hand Cannon, Carbine, Crank Gun, Machine Gun, Devil’s Kiss, Undertow, & Charge. Wave #10 – Soldiers & Volley Gunners (8): Complete the Wave using only Charge, Return to Sender, & Shotguns. Bring in the Founder Shotgun & Vox Heater. Use Return to Sender to catch bullets or shells & absorb some more ammo. Be wary of the Volley Gunners as their splash damage will fail the Challenge for us if they hit their allies. Because of this, focus on trying to take them out first as fast as you can. Wave #11 – Soldiers & Patriots (8): Defeat the Patriot with a Possessed enemy. This Ribbon is tricky as well. Wear down the Patriot then stun him with Shock Jockey. Begin Possessing as many Soldiers as you are allowed around him & they should kill him. This can become muddled if the Possessed Soldiers chase down enemy Soldiers instead. Keep the Patriot stunned & kill the un-Possessed Soldiers yourself if they become a nuisance. Wave #12 – Soldiers & Snipers (8): Defeat all enemies with Vigor Traps. For this Wave we can complete it very simply if we have a fully upgraded Murder of Crows & Devil's Kiss equipped as an emergency back up if an enemy gets too close. When the Wave begins, leap onto the first airship then place down two Murder of Crows Traps. Lure some enemies into it, & the Crows will do their job from here. The range on Murder of Crows is insane, & enemies from a few airships over can get caught in your Traps. Shout out to VidGamiac again for the original strategy! Wave #13 – Soldiers & Volley Gunners (7): Defeat 5 enemies with a single Devil's Kiss blast. This is a very hard Ribbon. It pretty much can only be done with the Devil’s Kiss Trap. As soon as the Wave begins, use Charge to launch yourself up onto the circular roof with all the enemies & lay down a Devil’s Kiss Trap. To assist this, equip the Storm Gear for easier effect chaining. Using the Storm Gear makes this a lot easier! There are only 7 enemies, so we have a tiny margin for error. Be sure to have a Revive purchased just in case. If you are having issues with this strategy, try removing the Storm Gear & equipping something else instead. Players have reported that it actually messes up Ribbons somehow, not entirely sure if that is actually true or not, but worth a try if you are struggling. Lastly, if you are unable to get up to the circular roof, than an alternate strategy for this Challenge is to spawn in an Oil Puddle using a nearby Tear, hold down Undertow to move Soldiers onto the Oil Puddle (doing this twice to grab at least 5 of them), while always spamming Bucking Bronco on them so they do not run away. After you have at least five Soldiers in the Oil Puddle, ignite them with a Devil's Kiss Trap. Wave #14 – Soldiers & Handyman (5): Defeat the Handyman with a Tesla Coil. Start off by killing all the Soldiers. Whittle down the Handyman’s health then lure him over to the Tesla Coil. This does not do a lot of damage, so you have to dance around it until the Handyman is killed. There are two Tesla Coils we can use, the one in the open is easiest for us to “dance” around. Wave #15 – Soldiers & RPG Soldiers (12): Complete the Wave in under 1:30. An important distinction for this Wave is that all we actually have to do is destroy the engines inside the furthest Airship. Kill as many of the enemies as you can, but if it proves too tedious for the time limit, just bull rush your way to the final Airship; Charge can be useful! Sequence 22: Raven's Dome - Part I 1. Arena: Raven’s Dome 2. Blue Ribbon Challenges: 40/60 3. Achievements: 79/80 ----------------------------------------------------------------------------------------------------- Raven’s Dome: A huge disclaimer for attempting any Blue Ribbon Challenges that require “Defeat all enemies with…” on this Arena: the pathfinding for enemies is horrendous. Quite often, an enemy will miss their jump when dismounting Airships & just… jump off the map. If they die this way during these Challenges, it will void the Challenge & there is nothing you can do about it. It is very luck based when they decide to make the jump or not. Be patient, it isn’t guaranteed they will do this… just very probable. Quite often as well, enemies will be killed by Friendly Fire from RPG Soldier rockets which will also void these Challenges. Stick with it, we are halfway there! This is the most challenging of the 4 Arenas for the wrong reasons… Wave #1 – Soldiers (6): Defeat all enemies with the Sky-Hook melee. Defeat the enemies with either Sky-Line Strikes, Sky-Hook Executions, or just basic melee attacks. You can use Return to Sender for defense, but do not kill anyone with it accidentally. Gears like Coat of Harms, Brittle-Skinned, & Vampire’s Embrace can be useful. Wave #2 – Soldiers (7): Defeat all enemies with the Pistol. By Pistol, they exclusively mean the Broadsider Pistol, not the Hand Cannon. If your Pistol is fully upgraded this should not pose too much of a challenge. Wave #3 – Soldiers & Volley Gunners (7): Defeat all enemies using only the Undertow Vigor. Stay near ledges in cover for this one & let them come to you. After the Soldiers are taken care, you can begin systematically hunting down the stragglers & blasting them off the map. You will probably have to restock on Salts during this Wave. Wave #4 – Soldiers, RPG Soldiers, Zealots (7): Defeat all enemies with Vigor Traps. This is an annoying Challenge. I always like using Devil’s Kiss Traps for these kinds of Challenges. You can use Shock Jockey Traps to contain enemies, but Devil’s Kiss is the most fatal way to take care of them. Stay away from ledges! I failed this twice because I accidentally blasted an enemy off the map. Equipping the Storm Gear can be really helpful for this one. I am pretty sure the Trap itself has to kill them outright; I ended up failing due to any enemy “Dying Over Time” which probably was caused by the Devil’s Kiss’ after effect. Wave #5 – Soldiers & Handyman (4): Defeat the Handyman before any other enemy. Bring out your good guns & lure the Handyman away from the Soldiers so you can just focus on killing him. Easier said than done of course. Just pay attention to your surroundings so that a Soldier does not catch a stray bullet & pray to God no decides to commit suicide! Note that if a Handyman throws an enemy Soldier at you while they are still alive, it will fail the Challenge on you... talk about bad luck. Wave #6 – Soldiers & Patriots (7): Defeat 5 enemies via Friendly Fire. This Challenge can be annoying as well. With a maxed out Possession; Possess every single Soldier you can so that they kill each other. In this case, it is better leaving the Patriot un-Possessed. They are more effective as enemies killing our Possessed guys then the other way around. Enemies committing suicide by shooting themselves when the Possession ends also counts as Friendly Fire. Wave #7 – Soldiers, Snipers, Volley Gunners, & Zealots (6): Defeat the Volley Gunner & the Zealot before damaging any Snipers. You all remember your elementary school math lessons? Order of Operations? Now its finally time to put it to use. First: lure the Zealot away from everyone & take care of him. Second: locate the 2 Volley Gunners & take them out with a long ranged Weapon or your preferred method. Third: Take out the 2 Snipers any way you would like. Randomly, there is 1 Soldier just hanging around who does not quite fit into this Challenge. The Soldier can be killed at any point during the Wave & will not void the Challenge. Damaging any of the Snipers before the Zealot & Volley Gunners are dead will void the Challenge. Wave #8 – Soldiers & RPG Soldiers (7): Defeat all enemies with Turrets or Environmental Hazards. Now this Challenge is the new hardest Challenge we have faced thus far. If an enemy dies any other way then is mentioned, FAIL. Pay very close attention to the RPG Soldiers. If any gets killed by a stray rocket, FAIL. Take it slow, & really pay attention to enemy placement. Take them out one by one & use the lack of a time limit to our advantage. The best way to do this is to cycle between the Gun Automaton & the Tesla Coil on the garden building. Run circles around the garden building luring the enemies in & out of the coil. Use the Sky-Line to circle around the back of the building, then run around back to where you were. This Challenge definitely takes some time to do right. The biggest thing is not letting the RPG Soldiers kill anyone. They also have the most health & killing them with the Tesla Coil really takes some time. But when they are the only enemy left it is just a game of attrition at that point. Be sure to have a Revive purchased for this one. Drago notes that you can use Undertow to knock enemies off of Columbia so that they fall to their death (which is an Environmental Hazard kill). You cannot use the pull ability of Undertow however as that will fail the Challenge. You also have to be careful that the Undertow itself does not kill the enemy & they specifically die from falling off of Columbia. Wave #9 – Soldiers, RPG Soldiers, & Firemen (6): Defeat all enemies in 60 seconds using Vigors only. This Challenge can be a pain as well. Speed is of the essence. The quickest way to accomplish this is with Undertow’s second ability. Yank the enemies off their Airships as fast as possible & launch them off the map. Salt conservation is key. I had a real issue with this Challenge & needed the help of VidGamiacUnlocked’s video guide for this one. It took me 3 runs to get this one. Practicing using the Undertow grab before the Wave comes up is handy so you can get proficient in using it. https://youtu.be/_1vDgwSL0bQ Wave# 10 – Soldiers, RPG Soldiers, & Firemen (8): Take no damage for 30 seconds. This is probably the easiest Challenge in the DLC. Simply crouch behind a wall & stay in cover where we spawn for 30 seconds. If you are somehow spotted, try holding out with Return to Sender as best you can, but you really shouldn’t be seen if you hide right away. Sequence 23: Raven's Dome - Part II 1. Arena: Raven’s Dome, Emporia Arcade 2. Blue Ribbon Challenges: 50/60 3. Achievements: 79/80 ----------------------------------------------------------------------------------------------------- Raven’s Dome: Wave #11 – Soldiers, RPG Soldiers, Volley Gunners, & Firemen (6): Defeat all enemies with the Shotgun. This Challenge can be tricky, ammo conservation is key. When possible always try getting Headshots for the most bang for your buck. The Head Master Gear is very useful for that. We can find a Shotgun Tear on the building below us down the stairs where the enemies gather. It is at the far end underneath that overhang where we can find some Medical Kits. Don’t let the RPG Soldier or the Fireman’s suicide explosion kill anyone by accident. Wave #12 – Soldiers & Firemen (8): Defeat the Wave without picking up Weapons or looting corpses. Just like in The OPS Zeal, just bring in Weapons you are proficient with & do not loot any of the corpses by accident. Abuse Vigors. You CAN accept ammo from Elizabeth if she tosses it to you, this does not count as picking up a new Weapon or looting. Wave #13 – Snipers & Patriots (4): Defeat all enemies while they are distracted with a Booker Decoy Tear. Another annoying Challenge. There are two Decoy Tears on this map. We can only kill enemies while they are distracted/shooting at the Decoys. This is not so bad in theory, just do not kill anyone who is not focused on a Decoy. The Snipers are easy this way since it is obvious when they are distracted. The 2 Patriots are a different problem. It is very easy losing track of your Decoy while shooting the Patriots & having it disappear without you noticing. I recommend whittling the Patriots health down to a low amount before finishing them off with the Decoy. You cannot use the same Tear twice in a row. To reset a Decoy Tear, just use a different Tear. Wave #14 – Soldiers & RPG Soldiers (8): Defeat each enemy with the same Weapon type it wields. This is a real who’s who of Weapons. Bring in a Machine Gun & Shotgun for the Soldiers & take them out first with the appropriate Weapon. On the garden building we can find an RPG Tear near where a Tesla Coil Tear is. Stay as far away from the RPG Soldiers as possible! I failed this twice because one of them killed a Soldier with Friendly Fire. Definitely buy a Revive for this one. Wave #15 – Firemen & Handyman (3): Defeat each enemy with a different Weapon. This Challenge is not bad at all. Bring in two of your best Weapons & perform the killing blow on the Handyman with one. Use the other for a Fireman. We can then use Undertow, Charge, or Return to Sender to take out the final Fireman; Undertow being the easiest. Friendly Fire also counts, for me, the Handyman just lobbed one of the Firemen at me & it did not void the Challenge. Neato. This Arena is definitely the hardest thus far; it took me 5 runs of the Arena to get all the Ribbons. I found Waves #8, #9 & #13 the hardest. Emporia Arcade: Wave #1 – Soldiers & Patriots (14): Defeat an enemy affected by Bucking Bronco with a Possessed Motorized Patriot. This Challenge sucks right off the bat. It is best to kill the Patriot that is on the bridge then Possess the second Patriot at the far end of the map. Kill the first Patriot then around 2-4 Soldiers. The far Patriot will then get reinforced by another 5 or so Soldiers from an Airship. Get close & use Bucking Bronco to levitate the enemies & then Possess the Patriot. We need the Patriot to melee the levitated enemies; he will never fire a shot with his Crank Gun. Since we are relying on the melee the enemies have to be right beside the Patriot for this to work. MJanek |CD-A| came up with this strategy: On the right side of the map, near the shop's wall, there is Tear with a Motorized Patriot. You can bring him in, & his kills will count towards the Ribbon after levitating enemies with Bucking Bronco. If have not tested this myself, but if it works it would be much easier as Tear Motorized Patriots will actually fire their Crank Guns. This will take a lot of the irritation out of this Ribbon Wave #2 – Soldiers & RPG Soldiers (8): Defeat two enemies who are riding Sky-Lines with Traps. Another very difficult Challenge. For this one, we need to snipe two enemies off of the Sky-Line with Devil’s Kiss Traps. The best method I found was to place Traps where the Sky-Line has a solid surface above it. There are two locations for this: underneath the far bridge & the ceiling of the highest building in the map that the Sky-Lines lead up to. When the Wave begins, jump on the Sky-Line & ride it under the second bridge. Lay down two Traps here, then ride the Sky-Line up to the balcony of the building. You will probably only have time to lay one Trap up here. Rinse & repeat. Keep on doing circuits around the map replacing your Traps in these locations until the Blue Ribbon unlocks. You will definitely want some Revives for this one. Here is a good video I found using this exact strategy by Espen in case you are having issues figuring where exactly I am talking about. https://youtu.be/X3NNPh6jijg Since this is so early on in the Arena, it could be best saving this for a different run so that we do not burn through all our Revives on Wave #2. Wave #3 – Soldiers & Volley Gunners (11): Defeat Wave with hazards or support brought in through Tears. Oh yes, they had to bring back this Challenge. Back to using Tesla Coils & Tear Ally’s to take down our enemies. On this Challenge, it turns out that Possessed enemies count as Tear Ally’s. Feel free to Possess strong enemies to help thin out the herd a bit. This definitely decreases the Challenges difficulty by a lot. Wave #4 – Soldiers & RPG Soldiers (8): Defeat the Wave using a different Weapon or Vigor on every enemy. I never minded these Challenges. Bring in two good Weapons for this, but do not bring in a Hand Cannon, Shotgun, Machine Gun, or an RPG. We can loot these off of enemies to use against them. As for Vigors we’ve got Devil’s Kiss, Return to Sender, Charge, & Undertow. Be sure to keep track of who you have already killed what with. They can be damaged with anything, just kill them with a different Weapon. Wave #5 – Handymen (2): Defeat both Handymen while they are electrocuting a Sky-Line. Similar to a Wave we had to do in The OPS Zeal Arena but this time there are 2 of them. Great. Weaken the Handymen then bait them onto the Sky-Line. I had the most luck getting them to grab the line up on the balcony of the highest building. This can be a real pain, & just surviving can be a challenge in itself. Be sure to purchase a Revive for this Wave. Be careful using Devil’s Kiss in case they die after they let go of the Sky-Line. Try getting those Heart Shots in! Sequence 24: Cursed Ribbon Arcade 1. Arena: Emporia Arcade 2. Blue Ribbon Challenges: 60/60 3. Achievements: 80/80 ----------------------------------------------------------------------------------------------------- Emporia Arcade: Wave #6 – Soldiers & Snipers (7): Defeat all enemies using only the Shotgun. Back to only using our Shotgun. Use the Freight Hooks to get across to the other side, ideally undetected if possible. Clear out the lower level first & anyone who drops down to intercept you. The Snipers are the biggest threat. Take out those that get up close to you & then attempt to blindside the Snipers. Use Return to Sender to deflect some shots, just do not kill anyone with it. Wave #7 – Soldiers & Firemen (8): Defeat 2 enemies with the Fireman’s suicide attack. Welcome to the new hardest Challenge in the DLC. The best thing to do is wait for all the enemies to drop off the Airship at the far end; stand to the left of the bridge at the top of the stairs. Then, as they start charging up the stairs towards you, begin stunning them all with Shock Jockey. Get them all bunched together, ideally all 8 of them, & simultaneously begin slowly whittling down the two Firemen’s health. Once they are both at 0 health, stop using Shock Jockey & let them explode. Between the two of them, they should at least kill one Soldier each. The kills do not have to be from the same Fireman… I don’t think. Wave #8 – Soldiers, RPG Soldiers, Patriots (7): Defeat the Wave with in 1:20. We have a decent time window for this one, so it is not too bad. You can use the Undertow grapple strategy we used back in the Raven’s Dome to clear out a bunch of the enemies. Then for the Patriot just spam Shock Jockey & shoot it in the gears. Wave #9 – Soldiers, RPG Soldiers, & Siren (6): Defeat the Siren before destroying the Zeppelin. This is another Challenge that is not too bad, you would probably end up doing this anyways even if it was not a Challenge. Fight your way up to the Vox Zeppelin then spam a high damage gun along with Devil’s Kiss to annihilate the Siren as fast as possible. Return to Sender can be very useful as well if she has already summoned minions. Once she is defeated, take out the Zeppelin & finish the Wave as normal. Wave #10 – Soldiers (15): Defeat all enemies using only the Sniper Rifle. Theoretically an easy Challenge, but we cannot even use Shock Jockey for crowd control which can make it tricky. Always stay on the move & do not get yourself cornered by the baton wielding Soldiers. Conserve your ammo as best you can & make every shot count. Do not shoot wildly. The Rising Bloodlust Gear is great for getting extra damage. By two consecutive kills you should be able to one shot Soldiers with body shots. Wave #11 – Handymen (2): Defeat all enemies while they are distracted with a Booker Decoy Tear. Great, my other least favorite Challenge. Whittle down the Handymen down as best you can then bring in the Decoy Tear. If you thought timing the Decoy kill was hard with a Patriot, it is ten times harder with a Handyman. The Hand Cannon, Sniper Rifle, or RPG are good guns to use for this. Weaken the 2 Handymen by baiting them with the Sky-Line until they have low health. Then, we do circuits around the map. There are 2 Decoys, 1 on each bridge. Just keep sprinting around the map, when you get to a Decoy set it up & wait for a Handyman to get close. When they do & you know their next jump is going to be on top of the Decoy, hit them with Murder of Crows to temporarily stun them. Then using an RPG, just blast the hell out of them. The Handymen can one shot Decoys, so this is exceptionally hard. You will definitely want a Revive or two for this Challenge. This is a very difficult Wave & you should try saving this for a later run through of the Arena. Try saving all your Revives & Medical Kits on the map to use for this one exclusively. Wave #12 – Soldiers, Zealots, & Patriots (9): Defeat all Soldiers & Zealots with Bucking Bronco; followed by Charge. This is another Order of Operations Challenge. First: lure in the Zealots & complete the Combo against them. Then, take out the Patriots from afar. When the Patriots are done, move over to the building & complete the Combo against the Soldiers. If you need more Salts, use the Freight Hook Tear to return to the other side or equip the Blood to Salt Gear. Taking out the Patriots first also works. Wave #13 – Soldiers (15): Defeat each enemy with the same Weapon type it wields. Yet another repeat of a bad Challenge. Fortunately, there are no RPG Soldiers on this one. The enemy loadouts are Machine Guns, Shotguns, Pistols, & Hand Cannons. Equip the Pistol & any of these four Weapons, though I think most enemies use the Shotgun or Machine Gun. To make a hard Challenge worse, the enemies are dropped right at our feet & we have very little time to react. We can find a Machine Gun, Shotgun, & Hand Cannon on the first Airship that arrives. As it turns out, using Undertow to knock enemies off of the map will not actually void the Challenge for this Wave. This Wave is a total cluster (Censored by Steam) trying to juggle your Weapons, so now you are at least able to supplement some kills with Undertow. Huge shout out to Drago & Ungläubiger Gläubiger for bringing this strategy to my attention/confirming it for me! I used the help of VidGamiacUnlocked again for this one... though I wish I knew about the alternate strategy using Undertow before trying to grind this Challenge out the "conventional way". https://youtu.be/aGpNBmqj-0w Wave #14 – Handyman (1): Defeat the Handyman with a Motorized Patriot Tear. After the last few Challenges, this Challenge isn’t actually too bad. Weaken the Handyman to low health then simply summon the Patriot through the Tear to finish him off. The Tear Patriots are actually, you know, useful compared to Possessed Patriots. Wave #15 – Siren (1): Knock 4 corpses off of Columbia before the Siren can resurrect them. When the Wave begins, some Airships will arrive carrying bodies that they will dump onto the map. As soon as the bodies land, quickly run up & knock them off the map with Undertow before the Siren can resurrect them. This Challenge is not very hard at all. Sometimes it will even glitch out & unlock without you even doing anything. I am pretty sure the Airships mess up & miss where they dump the bodies when this happens. Oh well, sucks to suck, Siren.

成就#80 - Blue Ribbon Champ:在【云端之争】中,完成所有蓝带挑战。 该成就会在你完成最后一个蓝带挑战后立即解锁。毫无疑问,这是《生化奇兵:无限》中最难且最繁琐的成就。 总结: 除了【云端之争】,我真的非常喜欢《生化奇兵:无限》的一切。本体游戏的剧情以及两个【海葬】DLC都非常精彩,使其成为我玩过的最佳射击游戏之一。如果你成功达成了100%完成度,干得漂亮,你真是个传奇,拥有钢铁般的意志。
100% 完成