
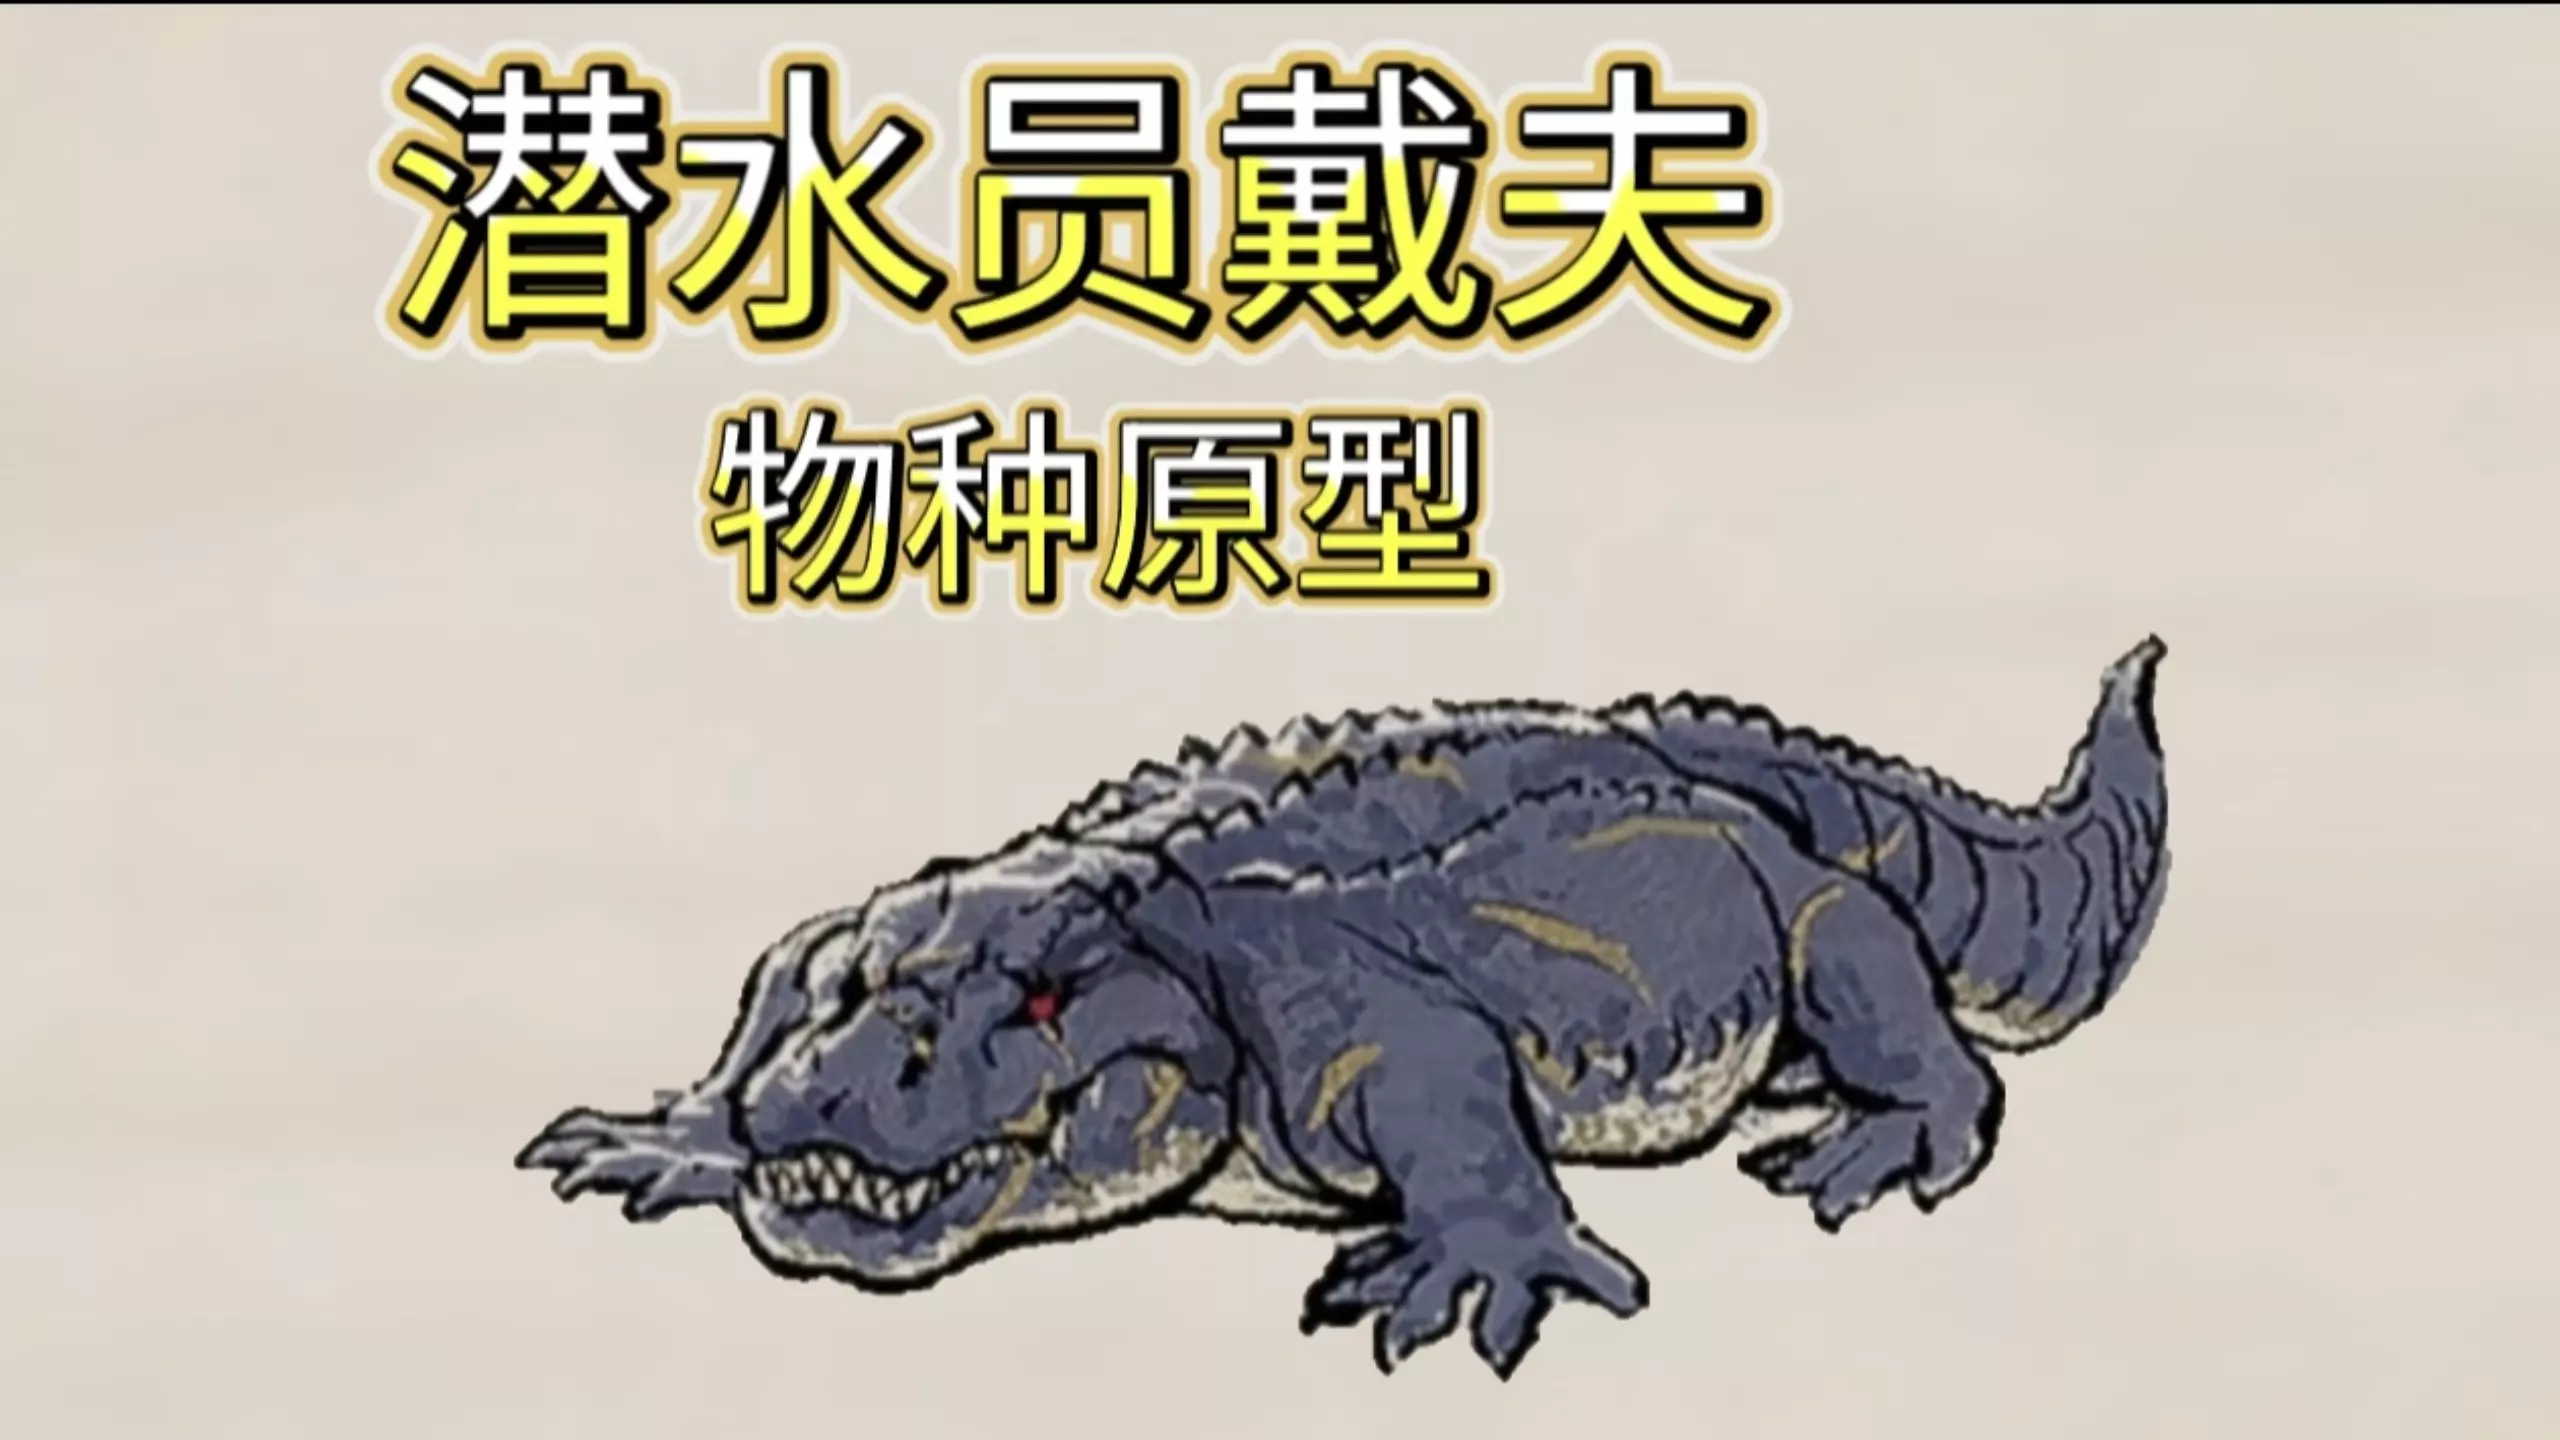
潜水员戴夫 DAVE THE DIVER
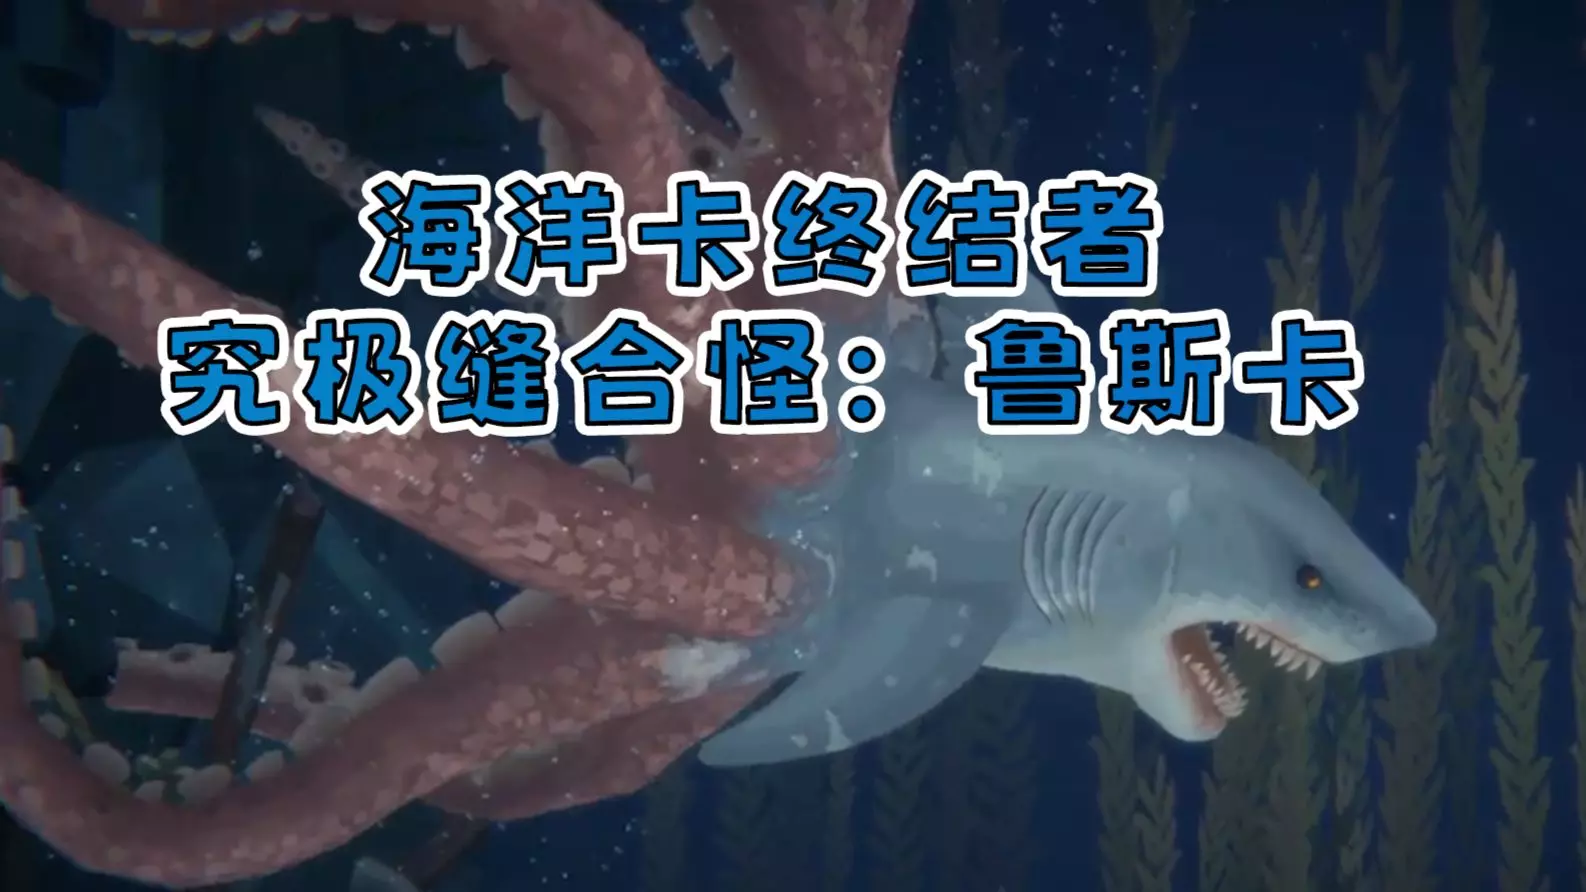


最佳鱼类养殖策略 简介 养殖策略是在每个养殖场选择尽可能少的鱼类种类,以确保培育出优质鱼类,并将这些鱼类用于单位黄金价值(gpi)较高且使用较少养殖/调味食材的食谱中。这将有助于确保你能够跟上这些物品的种植/配送进度。鱼类及对应食谱如下: 蓝洞浅水区 *马林鱼(马林鱼豆瓣酱烤,2109 gpi) 蓝洞中层水域 *大梭鱼(大梭鱼开胃小菜,1179 gpi) 旗鱼(旗鱼海藻煮,1768 gpi) 夜间区域 *白虾(洪堡鱿鱼墨汁意面,1554 gpi) *洪堡鱿鱼(洪堡鱿鱼墨汁意面,1554 gpi) 蓝洞深水区 *蓝斑瞻星鱼(糖醋瞻星鱼,2164 gpi) 冰川通道 小飞象章鱼(小飞象章鱼烧,2331 gpi) 鹈鹕鳗(鹈鹕鳗果冻,2484 gpi) 冰川区域 南极章鱼(南极章鱼薄片,1747 gpi) 独角鲸(独角鲸味噌汤,2220 gpi) 热液喷口 瓦普塔虾(调味瓦普塔虾,1222 gpi) 皮卡亚虫(皮卡亚虫拉面,1726 gpi) 特别提及 番茄蛋汤3374 gpi 设置:你需要尽快让这些鱼繁殖,因为将它们养到最大需要数百份肉,而每条鱼只能产出5-7份肉。为此,你要让养殖场保持约80%的满员状态,所以当收获鱼会使数量低于这个比例时,就不要进行收获。但同样要记得,在你捕鱼后的第二天早上检查,移除任何不属于这里的新鱼,以避免它们繁殖。 零潜水策略: 如果你只想经营餐厅,不想进行潜水,就需要避免使用任何海草的食谱。这是因为海草种子需要贝币,而你需要潜水获取物品卖给杜瓦,以维持海草的种植。如果是这样,就只使用标有*的鱼。总结
目前找到的游戏皮肤及物品奖励代码如下: 代码 船只皮肤代码: - SEABLUEFOREVER - 解锁:船只皮肤【海蓝】 - 5656DRAGON - 解锁:船只皮肤【Coro Dragon】 - 30BDAY - 解锁:船只皮肤【30周年纪念】 - AEGISTHEDIVER - 解锁:船只皮肤【NIKKE】 其他物品代码: - EASTEREGG - 解锁:装饰【风向标】 - GREATKINGLONG - 解锁:装饰【King Long Statue】 - SEAPEOPLE - 解锁:装饰【Sea People Tablet】 - 4TWRS - 解锁:装饰【Manbo Air Poster】 - YOUTOOZDAVE - 解锁:装饰【Youtooz Dave】 - MUSHROOMER - 解锁:钥匙扣【彩虹帽】 - MAIAANDDAVE - 解锁:钥匙扣【Ukele】- DAVEANNIVERSARY - 解锁:迷你游戏【Evil Factory Demo Mini Game】 - HAPPYHOLIDAYS - 解锁:钥匙扣【红鼻子小飞象】 - PINKBEANTHEDIVER - 解锁:钥匙扣【粉豆】 - JIMBOISWILD - 解锁:钥匙扣【Jimbo】


潜水员戴夫赚大钱以及全成就达成方案 各种成就及赚钱说明(没有图) 早点开始养殖,多抓点容易捕获的海天使和海马养,前期这些寿司比较赚钱。 后期最赚钱的就是小黄瓜料理,小黄瓜是在食品节解锁种子,我都是直接从商店买黄瓜,把小黄瓜料理强化到满,一个小黄瓜料理能卖1400,净赚1200,每晚入6W不再是梦,流着良心的泪水当一个赚差价的黑心商人。 今天发现更新了,限定每日农场购买量最大3个,其实也还好,那就种地呗,中国人还怕种地? 剧情任务得到的boss身上的肉做的料理都早点卖了,这是早期的第一桶金。 需要用到泰坦板机鱼和稻米的五彩缤纷寿司菜谱在早期就能拿到,升级高了一样是每个1000多块,想致富必须早点开启养殖,把不重要不值钱的鱼卖掉,只养几个关键鱼,大量繁殖强化料理。 农场开到最大,全种黄瓜,左边稻田是稻米,右边是黄瓜,两样交替着卖,一样日入4W金以上。 餐厅两个帮厨级别可以不升太高,但是大堂服务员还是尽量先把一个升满,因为级别越高,跑的越快,大堂里我留下的两个服务员一个能力是倒酒倒茶、擦桌子,另一个是磨芥末、倒鸡尾酒,我就站旁边监督他俩疯狂干活,其他不满足要求的服务员都发配去各地买调味料,这样每天晚上轻松极了。 枪支个人喜欢死亡步枪,30%概率一枪毙命(BOSS除外),做成之后基本可以抛弃鱼叉,享受火力压制的极致快乐,做任务极其顺滑。 GYAO种类和幼年各项状态有关。 图谱里最难找的那个海马是红宝石海马,要去冰河最底下左边的红宝石矿,砸开红宝石矿之后30%概率刷出一只红宝石海马,多去几次碰碰运气。 成就说明如下: 1、大海的枪手 完成了枪支教程 剧情任务完成 2、更好的装备 第一次进行了装备升级 剧情任务完成 3、班乔寿司回来了! 修理了被毁的寿司店 剧情任务完成 4、网红 在COOKSTA上达到了铜牌级别 COOKSTA程序上有相应说明,每级都有不同数量食客点赞,还要强化料理等 5、愤怒的鲨鱼 第一次捕获了鲨鱼 只要下海就能完成 6、味道达人 强化了5次料理 走流程即可 7、屏住呼吸戴夫 第一次游戏结束后获救 第一次下海不要吸氧,直接憋死在海里可达成,不影响后续 8、料理研究家 研究了5中新料理 走流程即可 9、海豚的朋友 完成了海豚的请求 剧情任务完成 10、废铁收藏家 捡到了100个道具 下海时捡捡捡,前中期就很容易达成 11、深海的潜水员 第一次进入到深海了 剧情任务完成 12、干练的店 第一次购买了装修 随便买个什么都行,很容易 13、近战的男子汉 用近战武器捕获了20条鱼 浅海有一群小鱼主动攻击人,等它们游过来的时候直接抡匕首就行,很容易 14、海底文明 第一次发现了海底村子 剧情任务完成 15、狙击手戴夫 用狙击步枪抓到了10条鱼 字面意思 16、蓝洞捕食者 抓到了300条鱼 字面意思 17、水中饺子 米玛的餐馆开张了 剧情任务完成 18、阴暗寒冷的地方 发现了冰河通道 剧情任务完成 19、摄影师 在拍照点拍了10次照 随着任务可完成,如果想早点完成,可以不好好对焦乱拍几次也作数 20、茂盛的海藻 古莫的农场开张了 剧情任务完成 21、班乔寿司常客 在COOKSTA升为了铂金级 方法同前,建议升虾这类好抓的容易繁育的 22、武器工匠 强化了枪支3次 字面意思,如果材料不够的话,建议先升级死亡步枪,亲测在绝对的火力面前,一切鲨鱼都是纸老虎 23、吃粮者 吃了口粮 剧情任务完成,去海豚工厂偷东西的时候在最上面一层有物品,非常明显,点了吃掉就跳成就 24、阿嚏 第一次进入了冰河区域 剧情任务完成 25、虚弱的铁匠 杜瓦的铁匠铺开张了 剧情任务完成 26、莫莫的秘密 更了解莫莫了 每天白天喂一次猫,连喂三到五天就有剧情任务可以完成 27、我的水稻棒棒哒 把稻田扩大到最大了 字面意思 28、匠人之火 研究了30个新料理 字面意思,很容易达成 29、经理 班乔寿司开了分店 剧情任务完成 30、祥和的蓝洞 观看了游戏结尾字幕 耐着性子看完就行 31、农耕专家 在小菜园安设了喷水器 把浇水壶升级到最大就有喷水器了 32、我的菜地棒棒哒 把菜地扩大到最大了 字面意思 33、生物猎人 抓到了所有的BOSS 剧情任务完成 34、武器收藏家 收集了所有设计图 总共有8个武器,分别是老式水下步枪、三旋枪、红色狙击枪、小型网枪、消音飞镖、粘弹枪、榴弹发射器、寒冰枪。每到新的地图翻开武器箱子记得先把新武器拿到手里,就会有提示,随着任务很容易达成。 35、鲛人族历史学家 拍下了所有冰河通道的鲛人族壁画 剧情任务完成后,需要再次回到冰河通道重新走一遍,会有一张在剧情中漏掉的壁画,提示非常明显,拍完后不会立即跳成就,需要出水之后和博士进行对话才能跳成就,感谢好友2539008810提示。 36、COOKSTA网红 在COOKSTA升为了钻石级 还是尽量用冰河的虾强化料理,攒够了点赞数量,非常容易 37、领导力 把员工培训到了20级 建议花400块钱招聘,然后大概1000多块钱雇最好的服务员,然后先把一个服务员升级到20级,基本上晚上经营店铺就不忙了 38、雷神 用雷神之锤抓到了鱼 雷神之锤就在冰河区域左上方的冰窟附近,走失的海豚任务附近,不难找,很明显能看到一把武器插在一个冰堆里,拉出来之后随机选取附近的受害鱼锤死一个就达成了 感谢thanatol74提示,雷神大锤在地图右边可能也会刷新,总之闲逛的时候肯定能发现 39、铁匠铺支持者 向铁匠铺出售了200件物品 字面意思 40、猫奴 给猫咪喂了20次饲料 白天回到寿司店喂猫,用普通猫粮需要喂20次,如果用高级猫粮的话,喂不到10次就能达成成就 41、开发者杀手 摧毁了所有开发者 看片尾字幕的时候有射击小游戏,可以把开发者的名字挨个打碎,手快点一次就能通关,不成功也没关系,后续小游戏会上架手机,可以反复玩,感谢好友2539008810提示。(作弊方法,拿手机拍下来,按顺时针方向看着打) 42、奇怪的鱼群 捕获了5只鱼怪 随每周任务完成,很容易,记得参考提示,选取合适属性的武器进行击杀,比方说寒冰鱼怕火枪,有的鱼直接提示可以被麻痹,还有的需要用紫外灯照一下 43、GYAO大师 养了5只GYAO成体 只要5只成体即可,哪怕是重复的也能达成成就,到点喂饭治病冲厕所就行,晚上可以不关灯也没事,很容易。

Welcome to the ultimate guide for maximizing profits and efficiency in Dave the Diver! This guide is fully updated to cover the latest version of the game, including new recipes, updated profitability metrics, and ingredient locations. Use this as a reference to craft an optimized menu, helping you serve the best dishes with minimal ingredients and achieve top profits for your sushi restaurant! 🥇 Top Dishes: Profitability & Ingredient Efficiency In Dave the Diver, different dishes can be considered “best” based on key profitability metrics: MetricDescriptionPrice per ServingHighest earnings for each serving of a dishTotal Earnings per DishTotal revenue if all servings sell outPrice per IngredientRevenue generated per ingredient, showing ingredient efficiencyEase of AvailabilityDifficulty level of sourcing the dish’s ingredients 🍛 Best Dishes by Profit and Efficiency These dishes require only a few ingredients but offer high profits, making them ideal choices for an efficient kitchen. Each dish is updated with the latest profitability data and ingredient requirements. DishDescriptionCurrent Price per ServingSea Toad and Cucumber Gunkan SushiA simple yet high-profit sushi made with easily obtainable ingredients.$1,470Seagrapes Special SushiExotic and flavorful sushi with minimal ingredient requirements.$1,460Skewered CucumberA low-cost, popular dish that is highly profitable.$1,450Stellate Puffer Special SushiFlavorful sushi made with pufferfish, in high demand.$1,480Tropical Fish Sushi SetA varied, high-profit sushi set with easy preparation.$1,460Roasted CapelinA beloved roasted seafood dish, now with easier-to-obtain ingredients.$1,480Crimson Fish RollA colorful sushi roll that’s simple to make and highly appealing.$1,460Dumbo TakoyakiA rich-flavored, in-demand dish using easily sourced octopus.$1,520Special Fried Shrimp SushiA dish with great returns, using accessible shrimp.$1,510Deep Fish TempuraQuick to prepare and highly profitable seafood tempura.$1,500Dried StingrayA rare but high-profit dish with exotic appeal.$1,520Three-Colored Squid RoastA vibrant roasted dish with a new, improved recipe.$1,530Spicy Tuna RollA classic sushi roll that is both popular and easy to prepare.$1,470Octopus SaladA refreshing, high-profit salad made with octopus and simple ingredients.$1,490Grilled EelTender eel grilled to perfection, offering great profit margins.$1,550Shrimp Tempura RollA crowd-pleasing sushi roll with crispy shrimp and excellent returns.$1,500Gingered Crab SushiDelicate crab meat combined with fresh ginger, delivering both flavor and profit.$1,480Seared Salmon BitesA quick-to-make, delicious appetizer with high demand and great margins.$1,510Miso Grilled FishSimple, savory fish dish with a miso glaze that’s loved by patrons.$1,470Sushi Rice BowlAffordable and easy-to-make rice bowl, popular for its simplicity.$1,440 🔹 Single-Ingredient Dishes for Quick Profit These single-ingredient dishes are quick to prepare, requiring only one main ingredient. They are perfect for a low-effort, high-return kitchen setup, especially with the latest updates to ingredient values. DishDescriptionPrice per ServingTrio of Yellowfin Tuna SushiA simple sushi dish using Yellowfin Tuna, now with an increased value.$1,450Trio of Bluefin Tuna SushiPremium sushi made with Bluefin Tuna, offering high value.$1,520Most Shark-Based SushiA variety of shark-based sushi options, now with enhanced profitability.$1,600Single-Ingredient Seared TunaFreshly seared tuna served simply, maximizing profit from the premium fish.$1,490Simple Shrimp SushiA straightforward shrimp sushi dish that’s both quick to prepare and profitable.$1,470Grilled Eel FilletA single grilled eel fillet, offering excellent returns with minimal effort.$1,550Single Crab Leg SushiA sushi dish using a single crab leg, offering a high-value option for minimal ingredients.$1,530Smoked Salmon SashimiDelicately smoked salmon served as sashimi, perfect for high-profit simplicity.$1,490Miso Marinated FishA simple dish with fish marinated in miso, offering both flavor and profit.$1,470Steamed ClamsSteamed clams, an easy-to-prepare, high-value dish with a quick cook time.$1,460 💰 Best Dishes by Specific Profit Metrics Below, dishes are categorized by specific metrics for easier planning. These are updated to reflect the latest ingredient rebalancing and profitability changes in the game. Best Dishes by Price per ServingThese dishes provide the highest profit per individual serving, with the best dishes exceeding $1,500 per serving. DishPrice per ServingBoiled Sailfish and Seaweed$1,572Great Barracuda Canape$1,572Seasoned Waptia Fieldensis$1,572Dumbo Takoyaki$1,554Humboldt Ink Pasta$1,554Pikaia Ramen$1,554Rice with Great Spider Crab Meat$1,517Arctic Cod Risotto$1,509Lobster Tail Tempura$1,520Grilled Bluefin Tuna$1,580 Top Dishes by Price per IngredientThese dishes make over $2,200 per ingredient used, making them the most ingredient-efficient choices. DishPrice per IngredientGreat Spider Crab Curry$4,440Tomato Egg Soup$3,374Pelican Eel Jelly$2,484Fried Rice with Galapagos Red Crab$2,373Grilled Eel with Habanero$2,358Dumbo Takoyaki$2,331Narwhal Miso Soup$2,220Ice Fish Curry$2,220Latok Omelet$2,220Miso Grilled Fish$2,310Steamed Giant Clams$2,300 Best Dishes by Total Earnings per DishThese dishes earn over $15,000 when all servings sell out, optimized for total revenue. DishTotal Earnings per DishNarwhal Miso Soup$17,760Three-Colored Squid Roast$17,760Fried Tomato and Snailfish$16,872Humboldt Ink Pasta$15,540Pikaia Ramen$15,540Special Fried Shrimp Sushi$16,000Roasted Capelin$15,660Grilled Lobster Tails$16,200 🌊 Updated Ingredient Farming Guide To consistently craft the best dishes, you'll need to source the right ingredients. Here's the latest guide to farming both sea and land-based ingredients, ensuring you have everything you need for your sushi restaurant. Ocean Farming IngredientsThe ocean provides many essential ingredients for sushi and special dishes. Here's where to farm the most valuable ocean ingredients: IngredientSourceSailfishDeep Ocean (New update provides better spawn rates)Dumbo OctopusTropical Zones, Easy to FarmSpider CrabDeep Sea Fishing, Reliable Spawn LocationsSnub-Nosed Spiny EelOcean Floor, Special Fishing ZonesHaddockCoastal Waters, Available Year-RoundIce FishPolar Zones, Recently Buffed Spawn RatesNarwhalTropical Ocean, Rare but High-ValueLongspine PorcupineRocky Shores, Rare CatchStarry PufferDeep Waters, Exclusive Catch Tip: Ocean farming is more efficient when using advanced fishing tools. Be sure to upgrade your gear for faster harvests and better ingredient quality. Additionally, check for special oceanic events that may boost spawn rates of rare ingredients like Narwhal or Starry Puffer. Land Farming IngredientsLand farming has become more integral with the addition of new crops and ingredients. Here's what you need to grow on land: Land FarmSourceWheatFarmable in Southern RegionsHabaneroSpicy Soil Farms, Year-RoundCherry TomatoSeasonal Farm, Planting RequiredCarrotAvailable in the Vegetable PatchEggFarmable from chickens, rebalanced for easier accessGrade A EggPremium farm, more expensive to acquire Tip: For the best yields, consider upgrading your farm tools to speed up crop growth. You may also want to focus on high-value crops like Grade A Eggs, which can be used in several profitable dishes. Seaweed FarmSeaweed is essential for many recipes. Here’s where to farm the best seaweed varieties: SeaweedSourceSouthern Bull KelpCommon in shallow areas, excellent for multiple dishesKajimeDeep Sea Kelp, Requires specialized tools to harvestBuckBeanCommon seaweed in shallow water zonesBladderwrackSpecial Seaweed for High-Value Dishes, Requires Fishing Tackle Tip: Seaweed farming can be significantly more efficient with the right tools. Upgrading your fishing tackle will allow you to access rare seaweed like Bladderwrack, which is crucial for high-value dishes. Additionally, keep an eye out for any special seasonal events that boost seaweed yield. 🌶️ Spices and Special Ingredients Some dishes require specialized spices and ingredients that are available through the market or specific farming. Be sure to stock up on these key items to craft advanced recipes and maximize your restaurant's potential. SpiceSource Soy SauceMarket or Spice Shop, Essential for Sushi Dishes MayonnaiseMarket or Spice Shop, Used in Various Fusion Dishes Curry BlockMarket or Spice Shop, Key for Curry-Based Recipes Olive OilMarket or Spice Shop, Commonly Used for Grilled Dishes MisoMarket or Spice Shop, Vital for Soups and Stews HabaneroLand Farming, Available Year-Round in Spicy Soil Farms WasabiMarket or Specialized Farms, Essential for Sushi Dishes Chili FlakesMarket or Spice Shop, Used in Spicy Dishes Tip for Managing Special Ingredients: Some special ingredients like Soy Sauce, Mayonnaise, and Miso are essential for a wide range of recipes. It’s a good idea to keep a well-stocked supply of these items in your restaurant inventory. Purchasing in bulk from the market will save time, and occasionally you can get discounts during special events. Farming Special Spices: While some spices are available only through the market, others, like Habanero, can be farmed at your own land plot. Ensure you are regularly planting high-demand crops, as they can be used in many profitable dishes. Habaneros, for example, are commonly used in spicy recipes and high-value meals, so having a steady supply on hand can greatly increase your profitability. Using Spices for High-Value Dishes: Soy Sauce and Wasabi are integral to sushi-based recipes. These are indispensable for any restaurant aiming to make premium sushi dishes like Yellowfin Tuna or Bluefin Tuna sushi. Curry Block is perfect for crafting hearty curry dishes like Great Spider Crab Curry, which is both profitable and popular. Olive Oil and Miso are great for grilled or soup-based dishes that require a more refined flavor profile. 🍣Conclusion🍣 Thank you for reading! This guide is here to help you optimize your earnings and efficiency in Dave the Diver. Whether you’re fishing in the deep sea or managing your farm, each step is designed to increase your profits while keeping your workflow streamlined. Leave your comments below or suggest new strategies to make this guide even better! Happy Diving and Dining! 🍣🍤 引用自 Deelt:If you found this guide helpful, please give it a like or an award! Thanks for reading, and I’ll see you at the dive site!


Offers detailed explanation as well as quick summary, (hopefully) contains everything you need to know… Intro My fellow divers, good morning, good afternoon, good evening, and good night. Thanks for reading the intro. Smart choice. Before you read any further, please be advised that the guide contains minor spoilers of a feature that is unlocked during late game. If you aren't comfortable with any spoiler, you can still read this section to get some general ideas. For early game, my hiring recommendations are: Kitchen: James, Raul, Yone, Yusuke, Charlie, Maki, Tohoku Dining Area: El Nino, Drae, Billy, Raptor, Kyoko, Cohh, Mitchell, Itsuki Dispatch: Masayoshi, Davina, Liu, Yusuke, Pai, Carolina*The underlined ones are must-haves, but the others are also decent. Each of your staff members has two skills, unlocked at level 3 and level 7, respectively. Also, here's a brief overview of what each stat does: Cooking: decreases the time needed to prepare a dish Serving: increases movement speed, but does not affect cleaning or drink serving Procure: increases the number of items obtained when dispatched Appeal: increases the chance of getting random bonus items when dispatched, but does not affect the amount of tips Hence ends the spoiler-free part. If you want to skip the details and just need the summary, navigate to the TL;DR section. For a list of all staff members and their skills, refer to the last question in the Q&A section. Kitchen For the kitchen, Raul, James, Charlie, Yusuke and Yone are the ideal candidates, because they have the best skills and decent cooking stats. Maki has been available early game and is also an okay cook, but Maki’s skillset isn't as great. If you can't get any of the above, Tohoku is also a viable choice. Don't sweat if these folks didn't show up in your applicant list, since the kitchen is quite chill and basically couldn't go wrong. Anyone with high enough cooking stat will suffice. Skills (actual order may differ): Maki: Cooking++, Cooking+ Yusuke: Cooking+, Ingredient Prep Expert (5% chance of making an additional plate) Charlie: Ingredient Prep Expert (5%), Cooking+ Yone: Ingredient Prep Expert (5%), Cooking++ James: Ingredient Prep Master (10%), Cooking+ Raul: Master Drink Maker, Ingredient Prep Master (10%) Tohoku: Cooking+, Cooking++ What's worth mentioning about Raul is that with the Master Drink Maker skill, you get an extra 10g income for all drinks sold (including cocktails). These extra gold can come in handy during early game, so consider the hiring if you are fine with Raul's slightly lower but still good enough cooking stat. Dining Area For the dining area, we have two options: do you want a fully automatic team, or are you fine with refilling wasabi a few times each night? If you want a hands-free setup: Main Sushi Bar: El Nino, Raptor Branch: Drae (manager, best at level 14+), Billy, Itsuki/Kyoko/MitchellThe downside with this setup is that you might lose 1-5 customers when it gets busy, but everything runs automatically (how cool is that?). If you ever want to help out, focus on cleaning dirty tables to keep customers. This setup is recommended for most of you and should work great most of the time. If you are fine with some wasabi grinding, consider this setup: Main Sushi Bar: El Nino, Drae Branch: Kyoko (level 18+) or Raul (level 20) as manager, Billy, RaptorHere you always get all of the customers served, with only a very slim chance of missing one or two. All you need to do is stand by the wasabi machine and grind wasabi when it gets low. Consider switching to this setup after you hit Diamond Cooksta ranking, which should most likely happen after the main story ends. Skills (actual order may differ): El Nino: Cleaning Master, Drink Serving Master (cocktails not included) Raptor: Cocktail Serving, Wasabi Refill Drae: Cocktail Serving, Cleaning Billy: Cleaning Master, Tip Master (always get tips) Itsuki: Appeal+, Drink Serving Kyoko: Tip Master, Drink Serving Mitchell: Serving+, Drink Serving Raul: Master Drink Maker, Ingredient Prep Master (10% chance of making an additional plate) If the average level of your staff falls below 14 when the branch* is unlocked, I would suggest using setup #1, at least for the time being. Then remember to prioritize Drae’s training so Drae reaches level 14 ASAP (without leaving the other staff members underleveled, of course). When Drae is at level 10, your branch will hit rank 9 and it will be able to use all ingredients; once Drae is level 14, popularity of the branch will reach 5 stars**. *If you have zero idea what the branch is about, refer to the Q&A section. **Refer to the next section if you are curious about the details of your branch’s rank and popularity. As of the current version of the game (1.0.0), how much money we are making depends almost exclusively on the number of dishes being served; cooking is never the problem. Therefore, I would really suggest hiring and placing servers as suggested above to maximize profits. Just be patient with recruiting and slowly work your way until you have the desired crew. Or, at least hire El Nino, Drae, Billy and Raptor whenever possible, because they are simply good. You would probably need to send out multiple hiring ads to get the desired crew, but it is worth the effort. Manager Mechanics Explained I added this section because the branch manager is somehow a special role, so some explanation might be helpful; feel free to skip to the next section if you don't want too much detail. A few things are worth mentioning about the manager: First, the manager works as an omnipotent server; they can do everything like cleaning, drink serving, wasabi grinding, etc with or without corresponding skills. They do, however, tend to prioritize those work they have the skills with. I guess that’s how the role is programmed to be. Also, the manager's stats and level determine the rank and the popularity of your branch: The rank of your branch is a number that ranges from 1 to 9, where 9 is the highest. This rank is determined solely by the manager's cooking stat; for the branch to hit rank 9, the manager needs to have 450+ cooking. The rank of your branch in turn determines the maximum rank of ingredients that can be sent to the branch. For example, if your branch has a rank of 7, then you won't be able to send any ingredient of rank 8 or higher to the branch, thus limiting menu variety. On the other hand, the popularity of your branch is represented by stars. The popularity level ranges from 1 star to 5 stars, and as popularity rises, the number of customers attracted to your branch also increases. The maximum number of customers for a branch with 3-star, 4-star and 5-star popularity seems to be 26, 34 and 45, respectively. Though we still need more data to back this up, it seems that each additional star increases the number of customers by roughly 33% (26*133%=34; 34*133%=45). Your current Cooksta ranking doesn't seem to affect the number of customers at the branch. At this point, how exactly the popularity level is determined is still unknown. What we do know for sure, however, is that the popularity of the branch is also dependent on the manager. Therefore, a well-trained manager is essential for the branch to hit rank 9 and to have 5-star popularity; this is why we prioritize the manager's training over the others'. If you are using setup #1, Drae needs to be at least level 14 to meet the requirements. If you are using setup #2, you will need to train Kyoko to level 18 and Raul to level 20. During early game, it's obviously a better idea to pick Drae as the manager. When at the branch, you can check out the current rank and the popularity level under the staff tab. The ranks of ingredients are displayed under the ingredients tab. Dispatch I honestly think many of you already knew who the ideal foragers are. When it comes to dispatch (forage), only two stats of your foragers ever matter: Procure determines the maximum number of items you will get, and appeal determines the chance of getting random bonus items. Here, procure is the main focus, because having high procure means having a steady supply of items. On the other hand, the chance of getting bonuses, which is determined by the appeal stat, is quite random, so don't expect much from it. Additionally, it would be nice if the forager also has specialized skills. When we put these conditions together, the answer is quite obvious. Masayoshi and Davina, right? Not much surprise here. They both have 800+ dispatch stat which guarantees a successful dispatch, and specialized skills that increase the number of acquired items (I think the skill only gives you one additional item, but I still have to check). If the having specialized skills condition is dropped, Yusuke, Pai, Carolina and Liu, all with 700+ dispatch stat at level 20, can be considered decent foragers. Itsuki can also be added to the list because of the 600+ dispatch. Plus, Itsuki is a ninja. What else can you ask for? Due to the gradual transition in the stats, Itsuki is better off being a server during early game, and a forager in the late game. Skills (actual order may differ): Davina: Dispatch Master (acquire more items), Appeal+ Masayoshi: Dispatch Master, Ingredient Prep Master (10% chance of making an additional plate) Yusuke: Cooking+, Ingredient Prep Expert (5%) Pai: Serving+, Cooking+ Carolina: Tip Master (always get tips), Wasabi Refill Liu: Serving+, Cleaning Itsuki: Appeal+, Drink Serving TL;DR Some of you may not feel like reading paragraphs, so I’ll add a summary section here, for your convenience. For the kitchen, pick four from the following: Raul, James, Charlie, Yusuke, Yone, Maki, Tohoku. For the dispatch team, whoever with high procure will do the job. My recommendations are: Masayoshi, Davina, Yusuke, Pai, Carolina, Liu and Itsuki. For the dining area, if your staff members are under level 14, put El Nino and Raptor at the main sushi bar; Drae (manager), Billy and Itsuki/Kyoko/Mitchell should be at the branch. With this setup, everything should be running automatically. If it's late game already and your staff members are well-trained, consider switching to this setup to improve profits: El Nino and Drae at the main sushi bar; send Kyoko/Raul (manager), Billy and Raptor to the branch. You are responsible for wasabi refilling. It's fine if you don't have everyone listed above, just slowly work your way until you have the desired crew. When it comes to training, a general rule of thumb is manager > servers > cooks. You might also find the following Q&A section helpful, as it could answer some of your potential questions; if it doesn’t, please let me know in the comments. Q&A Q: What on earth is this branch thing? A: Think of the branch as the secondary sushi bar that you own. It will be unlocked after the Bancho’s Ordeal? Pasta Contest! VIP mission is completed. The branch works basically the same way as your main sushi bar does. You send five of your staff members to work there; two in the kitchen and three in the dining area. The extra person working in the dining area is the manager you selected; they will take care of the business in your place. Remember to send ingredients to the branch so they have the materials to make sushi, or your customers will be starving. :( So you chose to read the guide knowing there will be spoilers. Brave. I commend you. Q: Is any staff member missable? A: No. All of the staff members are available from start to finish, and they can dismissed and rehired at any time. However, staff you dismissed won't keep their levels and will be reset to level 1. In previous version of the game, Maki will be gone forever if dismissed, but that's no longer the case. If you did fire Maki before, either out of curiosity or because you have a heart of steel, she should now come back to the team automatically without you hiring. Maki is cute. Be nice to Maki. Q: I see a lightbulb above my staff members' heads. What does that mean? A: It means they have a big plan. It means they will learn something new the next time you train them. At level 3 and level 7, they will learn new skills. At level 5/10/15, they will learn new recipes. Note that everyone learns a new recipe at level 15. However, the recipes at level 5 and 10 aren’t guaranteed. Q: Should I max out my staff members to level 20? A: It depends, but usually level 15 is enough. Having a higher level certainly means having better stat, but it would also mean more grinding. In most cases, 15 is the ideal level. At this level, your employees' hidden recipes will be unlocked, and your staff members will have high stat, and the cost of training is acceptable (it costs 53,600g from level 1 to 15, and 274,000g from 15 to 20). Again, if you are using setup #2 for the dining area, Kyoko needs to be level 18+ and Raul needs to be at level 20 so your branch hits rank 9 and has 5-star popularity. Q: How are daily wages calculated? A: Daily Wage = Base Wage + (Current Level - 1) * [Wage Increase per Level]. The formula applies to all staff members. For example, Yone's base wage is 60g, and the wage increases by 39g for each additional level, so at level 20 Yone's daily wage will be 60+(20-1)*39 = 801g. Employees idling in the waiting room are also considered hired, so you still need to pay them. Staff Hiring Base Incr. Staff Hiring Base Incr. Billy 562 40 26 Carolina 410 20 13 Charlie 123 20 13 Cohh 1079 40 26 Davina 143 25 16.25 Drae 297 48 31.2 El Nino 2327 60 39 Itsuki 4 45 29.25 James 707 40 26 Jandi 302 20 13 Kyoko 0(142) 14 9.1 Liu 125 14 9.1 Maki 0 0 0 Masayoshi 551 38 24.7 Mitchell 258 28 18.2 Pai 467 20 13 Raptor 1150 55 35.75 Raul 991 30 19.5 Tohoku 1307 40 26 Yone 1464 60 39 Yusuke 267 28 18.2 Note that Wage Increase per Level is always 65% of the Base Wage, scaled up from 50%. Q: What is the cost of training staff members? A: The cost varies by the level of your staff. Please consult the following table. Again, it costs 53,600g from level 1 to 15, and 274,000g from 15 to 20. Level Cost Level Cost Level Cost Level Cost 1-2 150 2-3 215 3-4 308 4-5 442 5-6 635 6-7 911 7-8 1307 8-9 1875 9-10 2690 10-11 3859 11-12 5537 12-13 7943 13-14 11395 14-15 16348 15-16 23452 16-17 33644 17-18 48264 18-19 69239 19-20 99328 Q: I want to know about the details of my staff members' wages/maxed stats/recipes. A: Please refer to the staff section of this guide. I think the section on wages is slightly outdated, so you might want to refer to the above tables for relevant information. https://steamcommunity.com/sharedfiles/filedetails/?id=2998778318 Outro & Credits This is my first time writing a guide, so your feedback of any kind is highly welcomed. I'll be more than happy if the guide has helped in even the slightest way. Also, if some part of the guide is outdated and no longer applies (especially after a patch), please don’t hesitate to let me know! I’ll update the guide accordingly if I can, and I’ll make sure to give you the credit. Let’s make this guide great together! The guide is based loosely on a thread on a Chinese online forum called 贴吧 (tieba); the original title is 记录一些自己摸索的和从别人那边总结的杂七杂八的游戏窍门 (Recording some random gaming tricks I figured out myself and the others summarized), and the OP is 恶之笛 (Ocarina of Evil). To be precise, the settings of the dining area, what each stat does, and how the branch rank works, were the OP's idea. Because most of you probably won't read Chinese, I'll just leave the link to the thread out. I then did some testing myself and added needed explanations as well as my own understanding of the game to make this guide. When writing, I also referred to several other guides: Full staff guide written by @dubesor, and Dave the Diver Reference Guide by @a small rabbit. Also, my special thanks to @Poison Trail, @{Wutang}RZA, @FREAKZ, @someonesneaky, @𝐁ᴀsᴛᴀʀᴅ, @SayakiArt, @Null and @dubesor for their valuable feedback and insights. Thank you for reading. I am glad we shared this short while together, across time and space. Again, good morning, good afternoon, good evening, and good night.


