


XCOM: Enemy Unknown
 Steam Deck
 家庭共享
家庭共享 云存档
云存档 支持手柄
支持手柄

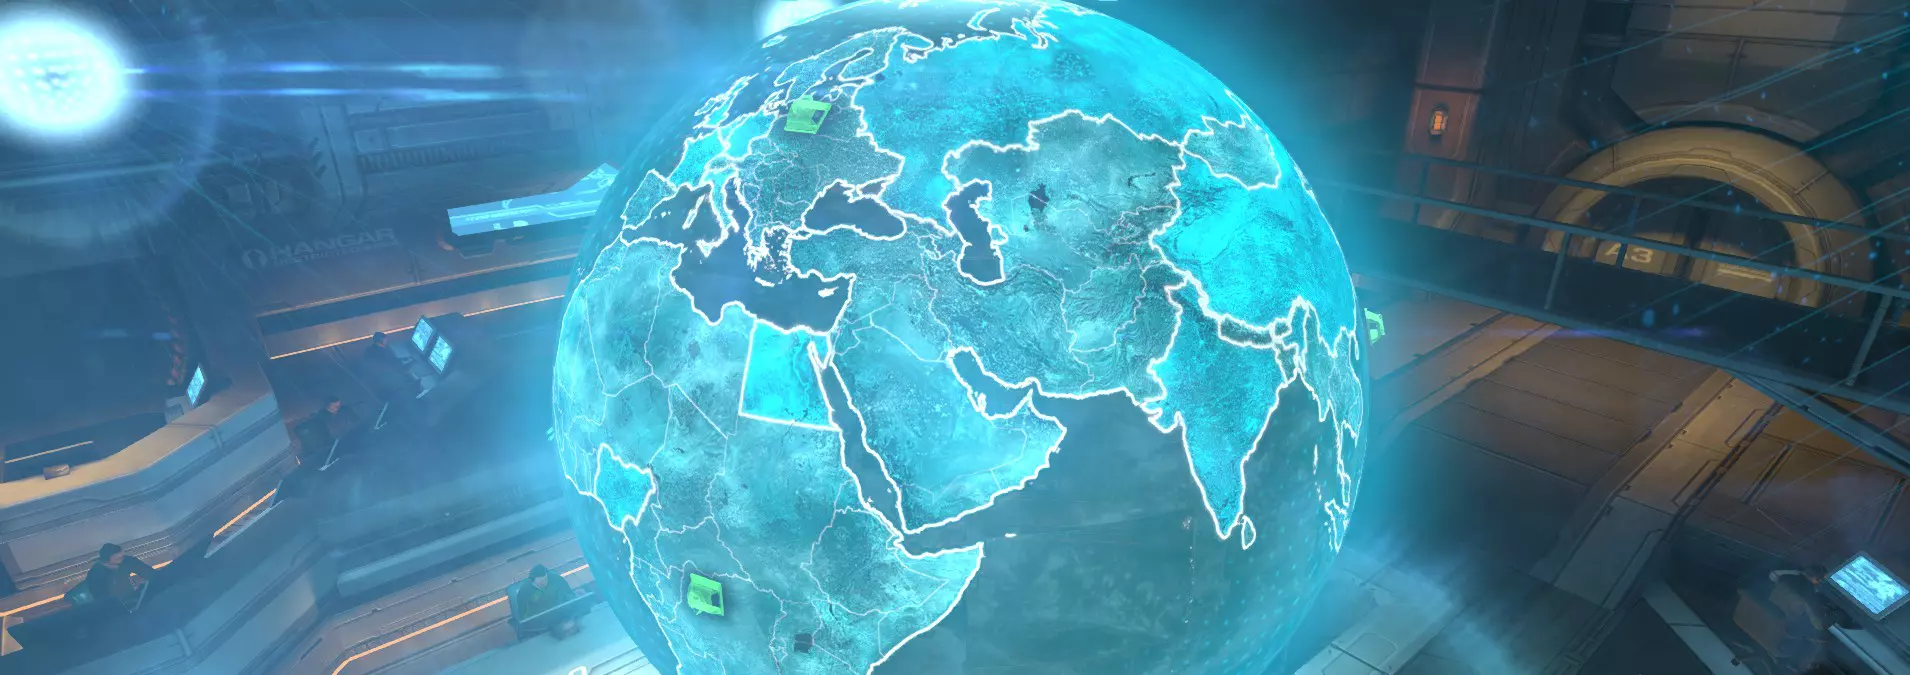
XCOM: Enemy Unknown will place you in control of a secret paramilitary organization called XCOM. As the XCOM commander, you will defend against a terrifying global alien invasion by managing resources, advancing technologies, and overseeing combat strategies and individual unit tactics. The original XCOM is widely regarded as one of the best games ever made and has now been re-imagined by the strategy experts at Firaxis Games. XCOM: Enemy Unknown will expand on that legacy with an entirely new invasion story, enemies and technologies to fight aliens and defend Earth. You will control the fate of the human race through researching alien technologies, creating and managing a fully operational base, planning combat missions and controlling soldier movement in
游戏圈
共33条帖子

LV.
2026-02-20 16:00:18 · 发布在 「XCOM: Enemy Unknown」
《幽浮:未知敌人》最受欢迎的指南之一。这是一份面向新手指挥官和经验丰富指挥官的全面战斗与基地管理指南。本指南详细介绍了技能树路径、外星能力、交战规则、灵能能力、职业角色、彩蛋等诸多内容。起源如果你是《幽浮》系列的新手,建议你准备些饮品,观看朱利安·戈洛普在GDC Vault上的经典游戏回顾《幽浮》。他会非常详细地讲解你需要了解的一切。不过,如果你从未见过原版游戏,在观看回顾之前应该先看这个游戏流程视频。
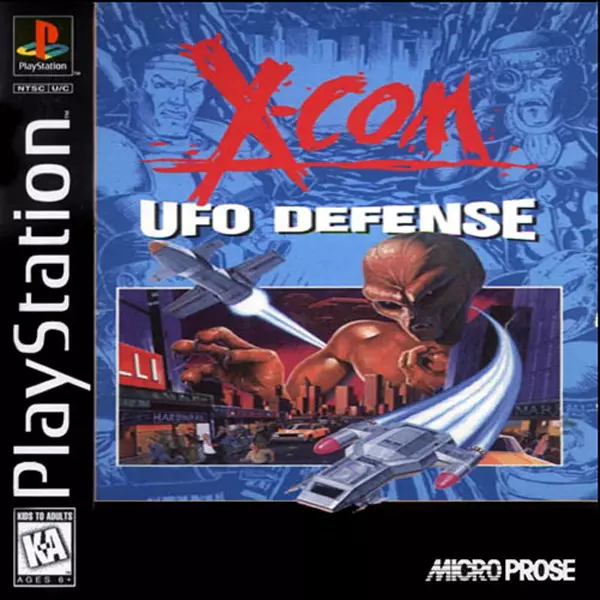
1995年PlayStation平台的《幽浮:未知敌人》移植版。
前言
最优策略【′äp·tə·məl ′strad·ə·jē】(数学)
矩阵博弈中两名玩家采用的混合策略之一,此时每个玩家调整策略以最小化对手可能造成的最大损失。欢迎来到外星作战部队计划,指挥官。地球的防御现在掌握在你手中。
欢迎你,指挥官。我建议你启用一些第二波选项进行游戏,特别是:隐藏潜力、新经济和天赋异禀。这些选项能增加游戏的多样性,让游戏更有趣,同时也更简单。其中天赋异禀能让你挑选属性最高的士兵,从而获得最大的性价比。我还认为你应该启用铁人模式,尤其是如果你已经在非铁人模式下通关过游戏。为了让失去士兵时更加令人心碎,我建议你花些时间自定义你的 squad-members 并给他们取昵称。祝你玩得愉快!我也不妨提前为任何拼写错误和/或语法错误道歉;英语不是我的母语。你也可以在评论区告诉我我错得有多离谱。我猜想有些人可能会不同意我的观点,因为我只在经典难度下启用铁人模式完成了游戏。这意味着我不能保证所有这些信息在不可能难度下都适用,但如果你是那些人之一(也就是那1%的玩家),那么你可能需要去别处看看。
这款游戏显然是为主机设计的(例如你不能设置路标,这就是为什么电脑会计算A点和B点之间的最短距离),这就是为什么我推荐用手柄来玩。如果你想玩一款竞技性战术回合制策略游戏,我推荐《冰封触点》,这款游戏在鼠标和键盘操作下体验更佳。如果你对本指南中未涵盖的特定内容有疑问,可以查阅XCOM Wiki。
虽然这与本指南的主题无关,但如果你想禁用开场动画、关闭多人语音聊天或进行类似设置,可以前往PCGamingWiki。最后,如果你想观看《幽浮:未知敌人》的攻略视频,我推荐Beaglerush的攻略,他的视频兼具娱乐性和信息量,堪称两全其美。XCOM总部
欧洲(4)- 使你的工坊和实验室造价减半,每个工坊和实验室可节省65货币单位。该区域包含4个国家,这意味着如果从这里开始,你可以在绑架任务中牺牲3个国家,而其他大陆仍可被拯救。推荐给那些早期建造大量工坊和实验室的玩家。
南美洲(2)- 提供即时审讯和尸检,每项可节省3到5天的研究时间。不推荐作为起始大陆,如果可以,建议通过卫星获取该区域(只需2颗卫星)。
北美洲(3)- 将拦截机价格从40货币单位降至20货币单位,维护费用从20货币单位降至10货币单位。此加成带来的节省相当显著,且随着时间推移会增加。非洲(3)- 提升XCOM每月总收入30%。该加成在游戏早期和后期都非常强大,尤其是当你用卫星覆盖了大量国家时。游戏初期,此加成能使你获得210货币而非165货币。它可以作为一个不错的初始大陆选择,因为能在游戏早期带来更多资金。推荐作为全面性良好的大陆加成。
亚洲(4)- 降低铸造厂和军官训练学校所有项目的成本50%。在游戏早期能提升你的步兵能力,但后期效果减弱。而且这种成本节省的收益在游戏中出现得较晚,因此不推荐选择。有一个优点是,它包含4个议会成员国,所以即使失去所有这些成员国,你仍然能保留该加成。我们亲爱的母亲。
“发现敌人。”
晋升准备:在你的小队成员晋升为上校之前,确保至少带上一名从第一次任务就跟随你的士兵,因为你需要提升他的等级以解锁军官训练学校。最重要的升级是小队规模、湿活训练、钢铁意志,如果你主力士兵受伤,或许快速恢复也很重要。无论如何,你可能还需要挑选属性最高的士兵并使用他们。面无表情的杀手们。
我个人喜欢根据小队成员的职业进行颜色编码。支援兵用白色,狙击手用红色,重机枪手用绿色,突击兵用黄色。我知道不同职业的士兵有不同的装甲装饰,但在战场上,这种颜色编码能帮我更好地记住他们各自的职责。色彩搭配的艺术非常重要,(含糊不清的嘟囔)。
初始设置:当你尚未与任何敌人交战时,你是安全的。当你与外星人交战时,你会看到他们的过场动画。这意味着在未与敌人交战时,你可以自由移动,但要记住,当你遇到敌人时,你需要掩护。最安全(也是最佳)的接敌方式是让所有小队成员都处于完全掩护或至少半掩护状态,然后每次让一名队员缓慢前进。如果你想非常谨慎,可以确保在移动到未知区域时,所有队员都拥有完整的行动点数(AP:每回合开始时每人有两点)。如果你这样操作,当遭遇敌人时,小队中除了向前移动的队员只有1点行动点(AP)外,其他所有队员都会有2点行动点。不要鲁莽行事。你可能会问,为什么在缓慢推进时要使用【守望】技能,这是因为有时外星人会进入你的【视野范围】(即屏幕上的有色区域),当这种情况发生时,你就有机会重创那些该死的外星人。开启抖动视角。
如果你的攻击效果拔群,就能消灭靠近小队的外星人,但可能会有一两个外星人在首轮存活下来并撤退。当它们撤退时,你的士兵会发出提示,你还能看到这些家伙尖叫着求救。这意味着你需要清点外星人的数量并考虑自己的策略。你可以用战锤模型、硬币等任何东西来辅助计数,但一定要数清楚外星人的数量。如果战斗结束后不清理战场,可能会有瘦人在外面搜寻你,它们会悄悄靠近并发动袭击。
关于小队的站位,一般经验是突击兵在前,重装机兵其次,支援兵随后,狙击手在最后。突击兵需要靠近敌人,以便他们能进行【移动射击】,并且可以轻松侧翼包抄敌人,同时避免己方小队成员被侧翼夹击。重型兵需要对敌人方向有清晰的视野,在任务中你会看到敌人所在的方向(屏幕上的声波符号会指示这一点),以确保重型兵在需要时可以掏出大型火箭筒,把那些外星人送上天。支援兵适合位于中间位置,这样他们可以投掷烟雾弹,必要时也能进行几次射击。最后但同样重要的是,狙击手要待在后方,因为他们需要远离敌人射程,从而避开危险。然而,这可能非常难以做到——尤其是在游戏初期——因为你必须依赖地形,而地形并不总是配合。
“确认击杀!”
消灭敌人:在敌人四处逃窜并找到掩护后(他们总是这样做),首先要做的是确定谁对你的小队构成最大威胁。在进行此操作时,你必须考虑敌人类型、与小队成员的距离(例如,如果一个外星人靠近你的一名小队成员,该外星人可能会对你进行侧袭)以及他们武器的射程(例如,如果你的三名小队成员处于敌人的视线范围内,而你让其中两名蹲下隐蔽,那么外星人会攻击掩护最少的那名成员)。他们甚至没能体验到自己的第一个过场动画。
攻击顺序
准备攻击时,首先要做的是探索你的选项,也就是切换你的小队成员,看看你有哪些可用的选择。其次,你应该考虑谁需要经验值(EXP)、捕获的可能性、谁是最安全的(如果不安全就需要移动他们)以及你的备选计划是什么。你会有一个最优计划(即计划A),它能通过不使用爆炸物来获得最多金钱,给需要的人经验值,并将失去资深士兵的风险降到最低。当然,计划A只有在完美的世界里,或者应该说在完美的风暴中才会奏效。但正如任何指挥官都会告诉你的那样,事情并不总是按计划进行,世界也并非完美。这就是为什么你需要一个B计划。作为指挥官,你的首要任务是让部队安然无恙地回家,当有生命受到威胁时,你必须不惜一切代价确保生存。如果其他方法都失败了,可以使用爆炸物摧毁掩护,破坏车辆使其在下一回合爆炸(如果你看到车辆上有火焰,它们会在下一回合爆炸),迫使敌人移动从而触发守望反应射击,或者用一枚精准的火箭弹将所有外星人炸飞。顺便说一下,获得经验值有两种方式:a)消灭外星人;b)完成任务存活。这就是为什么如果你想让新兵获得经验值又不想费心照顾他或她,带上一名新兵是个好主意。【外星活动】向骰子之神祈祷吧,希望你已经将士兵在战场上承担的风险降到最低,这样就不会有人牺牲。如果有人受伤甚至牺牲,也不必担心,这是一款关于风险管理的游戏,而非消除风险。我的意思是,你会失去士兵,他们也会受伤,但你必须继续前进,因为地球不会自己拯救自己。
“不要莽撞冲刺,而是稍作喘息。”游戏没有时间限制,除了拆弹任务实际上有时间限制。在消灭那些卑鄙的外星人后,一定要重新装弹,并等待你的技能冷却完毕。只要你不移动小队指挥官,你的小队就应该是安全的,除非一群重型悬浮兵冲进你的视线范围,干扰你的重新装弹小队。巡逻单位可不友好。
捕获(活体)外星人
使用电弧投掷器并将被击晕的外星人安置在异形收容室中,将为你提供研究点数。例如,捕获一个 Sectoid( sectoid )将使所有光束武器的研究速度翻倍(参见研究部分)。但要注意,使用电弧投掷器时会让你的士兵陷入极大危险,因为它的射程非常有限。射程由一个带有小闪电符号的圆圈表示,当你在 HUD(平视显示器)上选择投掷器时可以看到这个圆圈。我建议你要小心,并尽可能多地使用电弧喷射器,但要记住,如果它失效了,要有备用计划。Contempt in its purest form.
My most successful tactic is to back the alien into a corner, meaning you have one soldier suppress the alien and the rest of the squad Overwatch -behind cover of course- and try to be fairly spread out if the aliens has grenades. I can't guarantee this but, most of the time the alien simply does nothing at all or scream for help.
Rules of Engagement*
*Rules always have exceptions. That's what makes them rules.
Before deploying:
Always bring with you at least one Arc Thrower, one Medikit and one of each class.
If you are going to do a very hard mission like the early Council missions, Terror mission or story mission remember to always bring your A-Team and your a-game.On the battlefield:
Always have a backup plan, a.k.a. Plan B.
Always check what your options are for eliminating your enemies.
Identify the greatest threat and put that enemy on the top of your kill list.
Aliens will always attack the member of the squad that has the weakest Defense, so if you leave a guy standing out in the open it won't help to Hunker Down with the rest of your squad.
Remember to always position your Sniper on the high ground and your Heavy with a clear LOS in the direction that the aliens are coming from. This is why when we advance we always give our Heavy and our Sniper good positions and full-cover. Assault has Run & Gun and has to get dirty some time, i.e. get close to the enemy. Support can move into cover and shoot in one turn, unlike Sniper who needs 2 APs to shoot and Heavy who could have to shoot two times in a row or use a rocket. In practice this means that Support and Assault stand out in the open when no aliens have been engaged.
Explosives are Plan B, unless you want to use them to remove cover from the aliens, so try to avoid killing enemies with them. If you kill enemies with explosives you don't get any weapon fragments or any other item for that matter, except for Chryssalids ; those bastards don't drop anything so you can blow them to smithereens. You should also praise the lord that grenades never miss; they will be your lord and savior.
If you realize during a turn that you can't kill all of the aliens try to minimize the risk of your squad getting wounded or killed by: moving into full-cover (or out of the aliens' LOS), drop some purple smoke or Hunker Down. For your information, smoke makes everyone in the smoke cloud harder to hit, even aliens.
Be very cautious when flanking, you don't want to have to fight anymore enemies at a time then you have to. The safest way to flank is to either: flank close to the enemy (i.e. within your squad's LOS) or flank with your back against the edge of the map or some building.
Spread out your squad to avoid area of effect attacks, like Poison Spit. This can obviously be skipped if you are encountering enemies that don't have such capabilities.
If given the opportunity, try to use your Arc Thrower as much as possible, but remember always have a backup plan. You don't want to take a Plasma Rifle shot to face when standing out in the open.
There's no use for excessive force, in practice that means that when the extra damage is not needed to kill an enemy use your pistol instead. That way you save ammo for targets that need to taste high caliber rounds.
Make sure to keep track of the number of aliens you have engaged. Commanders do this so his or her squad doesn't get surprised by an enemy that they engaged earlier.
Listen closely for cues on what you are up against and pay attention to what direction the aliens are coming from, as to not get surprised or even worse flanked.
Make sure to reload, wait for your abilities to go off cool-down and carefully contemplate if you should patch up your squad-members, or save it for disaster relief after the next engagement. Things to note about the enemy A.I.:
If the enemy didn't dash, shoot or do anything else that requires 2 APs assume that they are on Overwatch, even if you didn't directly see them Overwatch.
Overwatch will most of the time just make sure the aliens don't move. The A.I. is smart enough not to give you a free reaction shot.
Hunker Down is literally a life-saver. The only thing Hunker Down won't protect against is flanking. I know it makes it so that aliens can't crit but you also lose the Defense bonus from cover if flanked and that is the primary bonus of Hunker Down.
Base Management
C.R.E.A.M.Your number one priority should be to get enough money (or whatever bloody currency this § is) to cover the Earth in satellites. If you play your cards right you could need 16 satellites, but it's more likely that you will lose a few countries along the way. So make sure that you build enough Uplinks, Nexuses and satellites. You may want to visit the Gray Market and sell things that you don't need because then you can invest in more satellites, which in the end will give you much more money, much earlier. Be careful though and make sure that you have enough materials to keep your scientists busy; you don't want to ever stop researching. You can also get a lot of money by delivering on the requests of Council members, most of time it's worth it and if you don't need it you should definitely sell it, or if you can spare the materials to create the things Council members want and then sell it. The last way to get money is to select missions with cash rewards. You can also save a lot of money by only having enough equipment for one squad. It's a pain to remove all of the equipment when switching squad-members, but if you want to save money you might want to consider it. My last tip is to start using your Arc Thrower immediately, because then you will get aliens weapons for free, instead of having to manufacturing them. You don't need to research Alien Grenade, but all of the other alien weapons you need to research before you can use them.
Research with (German) efficiency [/url]I would put off the main story research projects* (they are indicated by PRIORITY) and make sure that I get some armor, weapons and some usable items for your Interceptors. If at all possible you want to skip all of the Laser Weapons (note that this is very hard to do when playing on Impossible) and instead upgrade all of the other things like armor, weapons, Interceptors weapons and usable Interceptor items. If you hang tight you will eventually encounter a Muton and if don't blow it sky-high you can research Plasma Weapons by stunning him with your Arc Thrower. Getting an early interrogation is something you should try to accomplish.
*The one expection being Xeno-Biology and Arc Thrower, of course.值得收藏,因为你会经常用到。
选择研究项目时,务必研究最佳版本。例如,若要在激光步枪和等离子步枪之间选择,显然应选等离子步枪。武器的优劣有一个简单的颜色标识规律,从最致命到最不致命依次为:橙色(如合金加农炮)、绿色(如轻型等离子步枪)、红色(如激光步枪)以及普通的棕色(如突击步枪)。我喜欢这个IzPad。
铸造厂
简单来说:升级所有你经常使用的物品,例如医疗包、电弧发射器等。
建筑
记住要持续挖掘并建造升降机,确保所有具有相邻加成的建筑能够相互相邻放置。我建议你留出额外一列,用于放置剧情推进所需的建筑。此外,质量胜于数量,也就是说,如果可以建造热力发电机和电力发电机,在可能的情况下优先选择热力发电机。记得要持续建造发电机,这样你的蚂蚁农场才能有稳定的建造资源供应。
不要恐慌。如果某个国家的恐慌等级达到5级,他们就有可能在月底退出。让国家退出理事会的另一种方式是在该国的恐怖任务中失败。这就是恐怖任务非常重要的原因。而导致恐怖任务失败的情况只有两种:要么中止任务,要么小队成员全部阵亡。
非常重要的一点是,要等到月底的前一天再发射卫星,并且提前制造好卫星。别像我一样犯傻,一个个地制造它们,其实你可以一次订购任意数量,花费的时间和制造一个是一样的。换句话说,无论订单里包含多少卫星,完成一个订单都需要十天时间。优秀的指挥官都会这么做,因为你不知道这个月会发生什么。理想情况下,我们不想在议会成员恐慌等级达到五级时才发射卫星去“拯救”他们;相反,我们希望获得最好的大陆加成。不过也别太天真,你不是完美的,可能无法拯救所有人。当你遇到注定失败的情况时,要懂得识别。盲目追求所有大陆只会让你获得糟糕的加成,最终使你成为一名更差的指挥官。目标提取是议会任务中的一种任务类型,其他任务类型包括:目标护送、资产回收和炸弹处理。
降低国家或地区恐慌值的方法有四种:
1. 成功完成坠机点任务可使该任务所在国家的恐慌值降低2点。
2. 部分议会任务将降低恐慌值作为成功完成任务的奖励,这种恐慌值降低效果会影响整个地区(例如欧洲),通常可降低1点恐慌值。
3. 在某个国家发射卫星可使该国的恐慌值降低2点(如果是议会成员要求的,则可能降低更多)。这也是我们要等到每月最后一天才发射卫星的另一个原因。4. 完成【游戏中期剧透】异形基地突袭剧情任务会使全球恐慌度降低2点,并且只要你拥有骷髅钥匙,就可以随时执行该任务。因此,我建议各位指挥官在没有其他降低恐慌度的方法时再执行此任务。它基本上就像是一张【让所有人都不会退出议会】的王牌,当你需要专注于其他事务而无法每月发射卫星时,可以使用它。
5. 成功完成恐怖任务会使该地区所有议会成员国的恐慌度降低2点。世界广播网,真的吗?
这意味着最佳策略是尽可能阻止更多国家脱离,并尽快让那些卫星投入运行,这意味着【外星导航计算机】(更多信息见研究树)是重中之重。你还需要工程师(游戏早期到中期,你需要从任务奖励中获取这些)、拦截机、卫星上行链路和发电机,以便在游戏早期让卫星投入运行。记住,始终用拦截机保护你的卫星,否则你就得让讨厌的外星人逃脱你的怒火,然后外星飞船会击落你非常宝贵的卫星。
职业分类
重型角色
重型士兵是陷入困境时的备选方案。重型武器专家会对集群敌人进行猛烈攻击,并在其他方法都行不通时保证所有人的存活。重型士兵也是对抗机械敌人的最佳人选,例如无人机、 Sectopods 和 Cyberdiscs。
技能树
弹幕射击 vs 全息瞄准
为了+10瞄准值并不值得,不如选择额外一次射击机会。给你的狙击手买一个S.C.O.P.E.(瞄准镜)会更好。
破片火箭 vs 压制
破片火箭非常适合清除掩体和重创敌人,在游戏后期遇到更强的外星人时会很有用。话虽如此,压制也是一个不错的技能,所以你可能需要两名重型士兵,一名携带压制,另一名携带破片火箭。你可以通过压制被监视的敌人来阻止其进行反击射击。如果没有压制技能可用,且你知道敌人已激活监视状态,可以通过冲刺来降低其命中率。这就是为什么我们每次任务都记得至少携带一名压制者。
热能弹药与快速反应:我认为快速反应的适用场景非常有限,而且由于反击射击会受到瞄准惩罚,这个技能很难带来实际收益。
掷弹兵与危险区域:抛开《壮志凌云》的梗不谈;理想情况下,你不会想使用手榴弹,因为手榴弹的伤害衰减非常快。【危险区域】要好用得多,它能压制敌人集群,或者消灭更多敌人。
火箭筒手对比混乱模式
混乱模式在游戏后期,当你拥有所有高级科技时会好得多。这样你不用发射两枚火箭,一枚就能造成更高伤害。我认为选择混乱模式是显而易见的。
支援角色
支援角色正如其名。他或她会防止灾难发生,并在情况危急时为你提供治疗。情况彻底失控的典型例子。
疾跑者 vs 掩护火力
疾跑者显然是最佳选择,因为它能让士兵移动更远距离,然后投掷烟雾弹或手榴弹(如果有深口袋支援技能,还能携带医疗包和手榴弹)。考虑到守望反击射击时的瞄准惩罚,掩护火力的实用性不高,且非常依赖特定情境。
战地医疗兵 vs 烟雾与镜像
我可不信一个叫“烟雾与镜像”的技能[罐头笑声]。总之,根据我的战术,我会选择战地医疗兵,这样我只需要一名支援兵跟随,就能带上更多输出单位,比如突击兵、重装机兵或狙击手。
复活 vs 步枪压制
理想情况下,你可以用步枪压制来阻止一次潜在的击杀,而且你会希望你的重装机兵随时准备好消灭外星人。浓烟 vs 战斗药物
这是一个艰难的选择,但我推荐浓烟,因为它用途更广,而灵能敌人相当罕见。
救世主 vs 哨兵
同样,这是一个艰难的选择。我会选择救世主,以打造专注于完美治疗的支援角色。
突击角色
突击队员会冲锋并绕到敌人侧翼造成巨额伤害。高回报伴随着高风险。当你需要在一回合内消灭一个危险敌人时,他们非常合适。
技能树
战术感知 vs 侵略性
你很少会看到4个敌人(从而获得+20防御),而且如果你按照本指南的玩法,这种情况不会发生。因此,基于这种玩法,侵略性在紧急情况下更有用。尤其是在游戏后期,一回合消灭敌人是最理想的玩法,此时【侵略】技能非常适合潜行接近并正面攻击 Sectopod。
【闪电反射】与【贴身近战】对比:
毫无疑问,你肯定会遇到使用守望攻击的敌人,这是非常常见的攻击方式。而且幽灵甲能完全抵消【贴身近战】的效果。
【压制】与【速射】对比:
我很难理解【压制】的用途。它对我来说太随机了,而【速射】的高额伤害实在太香,让人无法拒绝。
【近战专家】与【来者不拒】对比:
游戏初期,除非进行侧翼包抄(这可能会引来更多敌人),否则很难造成暴击,因此【来者不拒】在初期效果较弱。到了后期,几点伤害无关紧要,所以该技能也变得毫无意义。这就是我选择【近战专家】的原因。
坚韧 vs 杀手本能
当外星人运气好时,坚韧在紧急情况下非常有用。当你需要冲锋并消灭像【 Sectopod( Sectopod)】这样的强大敌人时,杀手本能也非常出色。这是一个艰难的选择,个人而言我会选坚韧。
狙击手Role
The Sniper will stay in the back and deal massive damage, without putting his or hers on the line, high reward with very low risk.
Skill tree
Snap Shot vs Squadsight
No question about it, Squadsight it's.
Gunslinger vs Damm Good Ground
Damm Good Ground is good, but only on open maps, and it's a bit of a pain in the ass to set up. If you're looking for a good early game perk I would go with Gunslinger, because then you can do an amazing amount of damage really early.
Disabling Shot vs Battle Scanner
Like I said earlier Flush and Disabling Shot are situational and I find them not so useful most of the time. With Battle Scanner -if you use it right- you can detect enemies from a distance without engaging them. With Squadsight you can snipe these enemies while they are unaware because the Battle Scanner acts an ally, it will literally warn you if you try to blow up your battle-scanner.
For your information Disabling Shot makes it so that dangerous enemies like Muton Elites and Sectopods can't fire their main weapon, which buys you time to kill them. That's worth considering when making this choice.
Executioner vs Opportunist
+10 Aim is not that much and I find it that there are very few times then my Sniper shoots at enemies that have below 50% health. Opportunist is amazing combined with Squadsight and Archangel Armor.
In The Zone vs Double Tap
With all of the aforesaid skills and Archangel armor Double Tap is a must. This will turn your Sniper into a no-scoping long-range killing machine. In The Zone is just too situational and you will Double Tap a lot because ideally you want your Sniper in the back protected by your other squad-members.
Although I don't object to In The Zone it just doesn't fit my particular playstyle and I'm sure there are some Commanders that swear by it.
Squad Tactics
SynergyAfter publishing this guide I got some well-deserved criticism and I learned something about my strategy. Ultimately it sparked this section so thank you /r/xcom for providing that feedback. And I know this may sound weird coming from the guy who made the arrogantly called "The Optimal Strategy 2.0", but hear me out first.
引用自 Wikpedia: Synergy is the interaction of multiple elements in a system to produce an effect different from or greater than the sum of their individual effects.
I would take squad synergy over my particular skill specification any day, because I wouldn't say that any particular skill in one of the skill trees is bad, except Snap ♥♥♥♥. When I try to motivate my preferences (see Class Breakdown), it comes down to my peculiar strategy and is not at all an objective assessment. The main point is that the more your squad synergizes the better. Here's an example of an alternative to my own recommendation; meet the Executioner also known as the Gunslinger who is always In The Zone. And his best friend the Shredder, who can take the HEAT and is known in his hometown of Badassery as the Grenadier a.k.a. the Rocketeer depending on whether he wants to blow alien scum mid to low high or sky ♥♥♥♥♥♥♥ high. Accompanying these two badass ♥♥♥♥♥♥♥♥♥♥♥♥♥ we have the Assault, who has an Aggression problem, with a Killer Instinct whose tagline is Bring ‘Em On.
The aforementioned group of collateral damage deniers is an alternative to my regular six man team that I described in Class Breakdown. All of classes still serve the same purpose but this time they do it a bit differently. This team, that I will call B-Team from now on, relies on a Squadsight Sniper that will wreck havoc killing everything that does not have cover. Speaking of, the main objective of our Heavy is to destroy all of the enemies’ cover, which should be simple with 1 Shredder Rocket and 2 regular rockets per battle. Finally we got an assault (or assaults) that will clean up after the Sniper, i.e. hopefully kill the ones that still are in cover or have been maimed but not killed.
My personal preferences are not very good in indoor environments or cramped maps that don't allow for good high ground for my Sniper. No tactic is perfect and mine is definitely flawed on certain maps. On other hand the B-Team shines on almost all maps and does more collateral damage, but that's the price you pay for badassery.
Making A SquadI would generally go with:
1 Support
2 Heavies
2 Assault
1 Sniper
The only rule of thumb that you need to stick to is to always bring with you at least one of each class. All of the classes have their roles and you will need them all.
Again, you can pray to the dye God that you will get one of each class and not 4 Heavies in a row. That's one of the those "That's XCOM baby"-things. Sometimes you are just unlucky early in the game and it could screw up the basis for your squad.
Squad LeaderIf you look at your HUD when on the battlefield and tab through your soldiers you will notice a star in the bottom left corner; this star indicates that this soldiers is the squad leader and if he or she dies the rest of the squad gets temporary Will debuff.【战斗护甲】
引用自【身体护甲】说明文本:如果优先研发更好的护甲,XCOM士兵们会很感激。不用担心,你的小队很快就会像【恐龙战队】一样帅气。
如果你能获取【骨骼护甲】,我建议你跳过【甲壳护甲】,因为前者要好得多。我不会为了1点生命值而放弃【钩爪】和+20防御力。这就是早期游戏的大致建议。
到了后期游戏,除了狙击手装备【大天使护甲】外,我会给所有人配备【幽灵护甲】。如果想格外谨慎,我可能会给支援兵或突击兵穿上【泰坦护甲】,但除此之外,我发现火焰抗性和毒素免疫很少派上用场。在后期,【瘦人】很容易被击杀,即使中毒,伤害也很微弱,所以问题不大,汽车爆炸等造成的火焰伤害也是如此。剧透警告:如果你尚未通关游戏。在培养天选者以摧毁最后一艘飞船时,【灵能装甲】搭配【心灵护盾】是必备的。名称 HP加成 类型 防御加成 移动加成 特殊能力
身体护甲(默认) +1 轻型护甲 - - -
甲壳护甲 +4 中型护甲 - - -
骨骼套装 +3 中型护甲 +10 3 抓钩
幽灵护甲 +6 中型护甲 20 3 幽灵【可在一回合内或发动攻击前保持隐形,隐形状态下发动攻击必定暴击】、抓钩
灵能护甲 +6 中型护甲 +10 2 意志+20
大天使护甲 +8 重型护甲 - - 飞行切换【携带6个燃料单位,若在铸造厂研究进阶飞行铸造厂项目则为12个】
泰坦护甲 +10 重型护甲 - - 免疫毒素【对毒素伤害完全抵抗】、火焰抗性装备医疗包也可达成该成就
Sectoids与有毒敌人
敌人概述:本概述将涵盖所有外星人的能力,甚至可能包含一些击杀它们的技巧。这听起来可能有些矛盾,但如果你不想阅读这份敌人指南,我建议你玩《幽浮:未知敌人》的多人模式。你必须一直扮演外星人,但多人模式还不错,非常适合了解外星人的各种能力。
(Sectarian)Sectoid:如果你跳过教程任务,这是你遇到的第一个外星人。无论如何,这些小家伙无疑会使用心灵融合,当它们这么做时,你需要记住是谁发起的,并集中攻击他。你甚至不需要直接看到它,只需利用融合体留下的紫色轨迹来定位并摧毁它。指挥官,这是关于生命体的报告。你打断了我深刻且引人深思的对话,我要杀了你。
能力名称 详情 思维融合与另一个 Sectoid 进行心灵融合,使其获得+25%暴击率和额外1点生命值。注意,如果接受心灵融合的单位已受到伤害,它将“治疗”1点生命值,而非在满血状态下获得的临时生命值。
Sectoid 指挥官
Sectoid 首次出现在教程任务中。总之,该单位很可能会使用其灵能能力,因为它的等离子手枪在游戏后期效果欠佳,因此需对此保持警惕。如果你的小队成员被心灵控制,请使用你拥有的任何禁用和压制能力。火星上的最新时尚是【游戏中期剧透】超波信标橙色。
能力名称 详情 冷却时间 高级心灵融合与另一个 Sectoid 进行心灵融合,使其获得25%暴击率加成和额外1点生命值。注意,如果接受心灵融合的单位已受到伤害,它将“治疗”1点生命值,而非在满血状态下那种临时增加的效果。-心灵冲击造成5点伤害,并在两回合内降低目标的瞄准、意志和移动力。当然,没有大脑的敌人对这类攻击免疫。1回合【心灵控制】控制目标3回合-心灵恐慌目标在本回合剩余时间及下一回合陷入恐慌状态。持续2回合。
【瘦人(难以置信)】
瘦人这种凶恶生物来自诡异的“离奇”星球。它们拥有惊人的精准度和高超的敏捷性,是极具挑战性的敌人。我至今还记得有一次,我成功让三名小队成员中毒,而我连接到电脑的手柄也震得厉害。言归正传,面对它们时要分散站位、包抄侧翼,并远离那团毒云。指挥官,这是关于该生物的报告。瘦长人为何异常纤瘦?立即获取瘦长人饮食,价格14.99美元。
能力名称 详情 毒液喷射此攻击会留下一片毒云,我认为其覆盖范围为3x3区域,持续2回合。若接触到这片毒云,会中毒并在接下来的3个回合持续受到伤害。不过,若装备了泰坦装甲或医疗包,则会对这种毒素免疫。需要注意的是,除瘦人、 Chrysalid 和机械敌人外,所有外星人都可能中毒。瘦人被击杀时,此能力会自动激活。
跳跃允许瘦人进行非人类的跳跃,使其能够翻越建筑物等。
机械敌人
赛博碟
尽量将爆头技能留到赛博碟处于开放模式时使用,并保持距离,以防赛博碟直接飞过你的某个小队成员并对其进行侧袭。如果你有热能弹药和子弹蜂群技能,确保让重炮手在赛博碟处于碟形模式时专注攻击它。赛博碟在碟形模式下,受到暴击的几率会降低60%。
技能名称 详情 冷却时间 轰炸远距离投掷一枚手榴弹。- Death Blossom释放大量黄色能量,对赛博碟3x3范围内的所有敌人造成伤害。若赛博碟在碟形模式或展开模式下被摧毁,此攻击将自动触发。3回合你知道它们来自未来,因为它们被称为赛博碟。
无人机
应与伴随的赛博碟或 Sectopod 同时或在其之前被消灭。我不喜欢惠特利。
能力名称 详情 过载它与死亡绽放类似。无人机爆炸并对附近敌人造成伤害。此攻击的范围比死亡绽放小,且杀伤力也较低。修复此技能会为机械敌人“治疗”2至4点生命值。该技能拥有中等射程,但凭借无人机的高机动性,无疑会让人十分头疼。
Sectopod( Sectopod)
所有Sectopod基本都具备Bullet Swarm能力,因为它们在不移动的情况下一回合可以射击两次。Sectopod还拥有60%的暴击减免几率。有趣的是:当你知道Sectopod已激活Cluster Bomb后,你可以将小队移动到其附近,然后等待Sectopod用Cluster Bomb炸到自己。看着这些眼睛。它们根本不在乎【视线】或你那微不足道的掩护。
技能名称:集束炸弹
详情:Sectopod会标记一片大范围区域(比毒云更大),并在下一回合发射一连串集束炸弹。这种攻击最常在Sectopod处于你的视线范围外时使用。Cannon FireSectopod会朝目标方向发射一道巨大的红色光束,若命中目标,将对目标造成伤害,同时对相邻的友军或敌军造成较低伤害。光束发射后,Sectopod会获得一次免费的【守望】机会。
Mutons
(青少年期)Muton(不具备忍者神龟的任何特征)
注意它们的【外星手雷】,并利用完全掩护。如果你的小队大部分成员处于【守望】状态,务必注意其中一只Muton会使用【血性呼唤】。Mutons的【等离子步枪】极具杀伤力,应在它们接近前直接攻击其正面。无需手下留情,摧毁它们的掩护并全力攻击。
能力名称:压制
详情:[此处内容缺失或无法识别]压制目标并降低其30点瞄准值。若目标在被压制后移动,压制者将获得一次反应射击。【威吓】穆顿通过捶胸顿足来回应,并向所有可见的敌人散播恐惧。若敌人未通过意志检定,该敌人将陷入恐慌。【Blood Call】穆顿猛捶胸膛并发出战斗咆哮,这会提升他的基因战友们的意志、瞄准和机动性。哦该死,你刚才不会是说我是大猩猩的后代吧。[捶胸]
穆顿狂战士
这种穆顿类型只能进行近战攻击,并且极为强悍,能将被暴击的几率降低20%。不过要注意,你可以通过让士兵向狂战士射击的方式,将其“引向”该士兵。利用这种方法,你可以把狂战士引到其他小队成员的攻击范围内。
技能名称 详情 恐吓穆顿通过重击胸膛回应,并向所有可见的敌人散播恐惧。若敌人未通过意志检定,则会陷入恐慌。Bloodlust狂战士受伤后会向造成伤害的目标发起冲锋。【冲撞】狂战士会直接冲破掩体向前冲锋,大杀四方。
穆顿精英
与普通穆顿并无太大差异,只是各项能力都有所增强,但没有血怒技能。更难、更强、更好且更慢。
能力名称 详情 压制压制目标并降低其30点瞄准值。若目标在被压制后移动,压制者将获得一次反应射击。炮击向远处投掷一枚手榴弹。
空中敌人
悬浮怪
它们确实名副其实,因为看起来糟透了。这些所谓的悬浮怪如果用它们的“抛掷”技能从侧面夹击你,会非常危险。为了以防万一,可以使用“守望”技能来保护你的小队,避免这种情况发生。
技能名称 详情 闪避任何试图攻击处于空中的漂浮者的单位,其瞄准值会受到20点惩罚。发射漂浮者可以升空并在一回合内降落到战场上任一处于其视野范围内的位置。显然,此技能无法在室内使用。极限改造。开个玩笑,女士们先生们。我会在这儿待上一整周。
重型漂浮者
就像穆顿精英和穆顿没什么太大区别一样,漂浮者和重型漂浮者也没什么太大不同。需要记住的唯一一点是,这些会飞的小混蛋扔手榴弹的技术一流。它们最致命的战术是摧毁你的掩护,然后把你的一名小队成员炸上天,或者飞过你的头顶,从侧面击杀你的小队成员。
技能名称 详情 闪避任何试图攻击空中漂浮者的单位会受到20点瞄准惩罚。发射重型漂浮者可以升空,并在一回合内降落到其视野范围内战场的任意位置。显然,此技能无法在室内使用。轰炸可投掷手榴弹至很远的距离。
其他敌人
异星人
首次出现于你击落的第一艘UFO飞船中。【游戏中期剧透】当你完成“袭击外星基地”任务目标后,该敌人将从游戏中消失。这是你遇到的首个持有轻型等离子步枪的敌人,这意味着这家伙的攻击力极强。除此之外,它是一种相当标准的敌人。E=mc²。
抱脸虫
始终与抱脸虫保持一臂距离,这意味着要边移动边射击。并且要注意一只抱脸虫一回合能移动的距离。你不会想让抱脸虫的数量增加,所以消灭那些四条腿的恶魔后裔是你的首要任务。我要让你怀孕。而且你会喜欢的。
能力名称 详情 跳跃允许异形虫进行非人类的跳跃,使其能够翻越建筑物等障碍。毒爪如果被【 Chryssalid(虫族)】攻击且未被杀死,你有几率中毒,类似于【 Thin Men(瘦人)】的毒素。植入体如果被 Chryssalid(外星虫族)的近战攻击杀死,受害者会被植入胚胎,并在下一回合变成僵尸。如果在3回合内没有射击僵尸的头部,这个看似无害的僵尸就会变成新的 Chryssalid,也被称为 Chryssalid Hatchling(虫族幼体)。
Ethereal(灵媒)
战场上的强大对手,需要动些脑筋才能击败。如果不利用灵媒自身的外星心灵技巧来扭转战局,你将会陷入苦战。此外,灵媒受到暴击的几率降低60%,因为它们根本不在乎你微不足道的侧翼攻击(不要尝试侧翼包抄,无法对不能掩体的外星人进行侧翼包抄)。以太族也有将射击反弹回你身上的强烈倾向,但这种“自食其果”的能力存在一个巨大漏洞。这个漏洞足以容纳一枚火箭弹,或者一颗手榴弹。指挥官,利用这个弱点来获取优势吧,尽管在行动时大喊“尝尝这个,混蛋!”紫色是一种如此超凡脱俗的颜色。
能力名称 详情 冷却时间 心灵融合与另一个 Sectoid 进行心灵融合,使其获得25%暴击率加成和额外1点生命值。注意,如果接受心灵融合的单位已受到伤害,将“治疗”1点生命值,这与该 Sectoid 满血时获得的临时生命值不同。-心灵冲击造成5点伤害,并在两回合内降低目标的瞄准、意志和机动性。当然,没有大脑的敌人对这类攻击免疫。1回合【心灵控制】获得目标3回合的控制权-裂隙这项危险的能力会释放一场大规模灵能风暴,对友军造成伤害。友军的意志力越高,受到的伤害就越少。灵能 lance(持续4回合)向敌人发射灵能 lance - 灵能汲取从友方单位吸取生命值。
灵能
测试
记得每10天对士兵进行一次测试,建议优先测试意志力高的士兵,因为他们的灵能能力成功率更高。我的大脑里充满了声音。
提升灵能等级只需造成伤害,或者选择【灵能启发】,每次使用它都能获得经验值。
灵能技能【心灵冲击】
当你想活捉外星人,或者【压制】、【步枪压制】处于冷却状态时,这是一个完美的技能。
【灵能恐慌】与【灵能启发】
就个人而言,我喜欢【灵能恐慌】,因为它能轻松捕获敌人并使其失去行动能力,但恐慌是把双刃剑。有时恐慌对你有利,有时却会因为一名小队成员陷入恐慌而搞砸一切。【灵能启发】则安全得多,而且每次使用都能获得经验值。心灵动能力场 vs 心灵控制
心灵控制可以让你在不冒风险的情况下进行侦查,或者组建一支装满手榴弹的自杀小队(效果仅持续四回合),并在被心灵控制的生物有机会破坏你闪亮的灵能护甲前将其消灭。这是一个艰难的选择,心灵动能力场拥有相当有效的作用范围。在他的语言里,他是彼得……天选之人。
彩蛋
如果你将士兵重命名为以下名字之一:
席德·梅尔(《文明》系列知名制作人)。
肯·莱文(《生化奇兵》和《系统 shock》系列知名制作人)。
乔·凯利(《死侍》和《少年骇客》知名创作者)。
奥托·赞德(《XCOM:幽浮防御》游戏实况知名主播)。
克里斯·克鲁韦(因在在线比赛中击败Firaxis的加斯·迪安杰利斯而闻名)。
你将获得一个超级士兵,其外观与所命名的人物相似;但这也会禁用你当前游玩存档的成就。
如果你在总部闲逛,可能会听到这样的对话:
某个自称斯特拉克指挥官的疯子一直在广播里谈论暗影防御组织的特工。这是对电视剧《不明飞行物》的巧妙致敬,XCOM系列的联合创作者朱利安·戈洛普曾表示,该剧是《幽浮:未知敌人》(在北美地区也被称为《X-COM:幽浮防御》)的主要灵感来源。我之所以说是联合创作者,是因为尼克·戈洛普也是《幽浮:未知敌人》的游戏设计师。说到这里,游戏中那个完成游戏所必需的【戈洛普密室】,显然是以戈洛普兄弟的名字命名的。从左至右:《幽浮:未知敌人》首席设计师杰克·所罗门与《幽浮:未知敌人》总监/游戏设计师朱利安·戈洛普。在你制造出第一把激光步枪后播放的过场动画中,出现了一个来自《幽浮:未知敌人》的 Sectoid 纸板人形。具有爬行动物特征的瘦人是对《幽浮:未知敌人》中蛇人的致敬。这些图片来自《幽浮:未知敌人》。如果你仔细查看生命形态报告,会注意到1994年的存档图像来自《幽浮:未知敌人》/《幽浮:UFO防御》。
自定义姓名列表
操作步骤:游戏有一个默认姓名列表,如果你不修改,游戏就会使用它。如果你想修改,你需要前往:
【%USERPROFILE% 我的文档 我的游戏 XCOM - Enemy Unknown XComGame Config】
并打开XComNameList。打开文本文件XComNameList,你可以根据自己的意愿添加或移除潜在的士兵姓名。
如果你想添加姓名,请按以下格式书写:
m_arr[国家缩写][M代表男性,F代表女性,显然姓氏不包含此项][名或姓]=[插入姓名]
示例:
m_arrAmFFirstNames=Elizabeth
用通俗的话说,这是一个名叫伊丽莎白的美国女性。
m_arrRsMLastNames=Petrov
用通俗的话说,这是一个姓彼得罗夫的俄罗斯男性或女性。
【临终遗言】
我想说祝你好运,指挥官,但我们都知道XCOM系列游戏完全与运气无关。记住,如果你一开始没有成功,就再试一次。我花了40多次尝试——在各种难度级别和启用第二波选项的情况下——才掌握了它。我时刻警惕。我值得信赖。³
继续游玩士兵们可能看起来非常困惑,但在拯救地球这件事上,你只能接受现状。
你知道这一天总会到来。去玩玩《幽浮:未知敌人》的原作吧。你可以以5美元或地区等值货币购买该游戏。在Steam、GamersGate和Amazon上均有销售。该游戏有三个不同的名称:X-COM: UFO Defense、X-COM: Enemy Unknown和UFO: Enemy Unknown。这是《幽浮:未知敌人》原版的完整克隆版,可免费下载,但需要未修改的《幽浮:未知敌人》版本。它也可在Haiku系统上使用,这让我觉得很棒。这是一个有点特别的游戏,所以我会让开发者来介绍一下。
引用自X@COM的常见问题:这是《幽浮》(X-COM)和 Roguelike(RL)的结合体(一款XCOMRL)。虽然它肯定不是“纯粹”的Roguelike游戏,但《幽浮》具备几个重要的Roguelike特质,比如回合制策略、半随机战场、高重玩价值、永久死亡(某种程度上)等等。
X@COM的初始目标是制作一个或多或少忠实于原作的复刻版,不过会使用简单的ASCII图形来呈现。当然,第一阶段也会进行必要的界面改进以简化游戏体验(原作存在一些明显的缺点,大多数重制版都会尝试修正这些问题)。第二阶段将在可能的情况下扩展游戏内容,但不会影响平衡或游戏玩法,而是更多地扩展幽浮的广度(例如,更多的战斗环境)。最终的第三阶段将添加许多可选设置和可能性,为游戏带来更大的深度。我必须承认,这款游戏是我的个人最爱。《幽浮:未知敌人》可以说是一款重制版或重新构想的作品,它加入了非常详细的空战、物品栏等元素。游戏扩展了原作中的现有机制,例如多个基地等。它看起来确实很有前景,没错,它还处于 alpha 测试阶段。你可以通过 Humble Store 或 Steam 购买《幽浮:未知敌人》。如前所述,这款游戏是一款深度的基于小队的回合制策略游戏;它更类似于国际象棋而非幽浮系列,但如果你愿意接受略显陡峭的学习曲线,它仍然是一款值得一试的策略游戏。该游戏可在Steam、谷歌应用商店、iTunes(仅iPad)以及开发商网站上获取。最棒的是?它提供免费试玩版(也可通过Steam获取)。它有点像《幽浮》系列的16世纪美洲(指美洲大陆而非美国)背景版本,虽然在打磨上有所欠缺,但我建议你可以留意一下,在各大数字发行平台打折时入手。这款游戏是制作精美的免费战术回合制电子游戏。其系统设计有所不同,更侧重于多人游戏,例如采用轮流行动的机制。游戏拥有相当独特的战斗系统、一些角色扮演元素以及独立的属性系统。总体来说很不错,既然是免费游戏,不妨一试。
《幽浮:未知敌人》的模组:你会在Nexus Mods上找到数量相当多的模组。尽管Firaxis提供的模组支持不尽如人意(这么说已经很客气了),但模组数量依然令人惊讶。请按照说明操作——务必备份你的文件——这样应该就没问题,你也可以自己制作模组。这些DLC定价过高,而且和大多数DLC一样,在内容和质量上都有所欠缺。我们来逐一分析。首先是《幽浮:未知敌人》的精英士兵包,它增加了一些自定义选项,售价4.49欧元或其他地区的等值货币。在我看来,这个DLC本应包含在基础游戏中,我实在不明白为什么它甚至会成为预购奖励。能够自定义士兵是游戏的重要部分——基础游戏的自定义选项相当令人失望,因此以如此高的价格(相对于它提供的内容而言)出售似乎很不合理。我建议等待它打折,或者如果你在特定地区,或许可以关注一下GMG。《幽浮:未知敌人》精英士兵包也可在GamersGate、GameFly、GetGames和Amazon上获取。与其花5美元购买它,你不如购买《购物车人生》。《幽浮:未知敌人》的“弹弓包”DLC包含新的议会任务,这些任务带有剧情,当然还有一些新的自定义选项。我不知道你们怎么想,但议会任务无疑是游戏中最糟糕的部分。就我目前听到的——我自己还没敢玩——这DLC很糟糕。剧情无聊,而且通过提供免费科技让游戏变得更简单。它的售价为6.49欧元,这一点也没帮助。除非是折扣非常大的促销,否则我可能,只是可能,会把它推荐给我的死对头。新的“独特”角色。呃。
《幽浮:未知敌人》资料片《幽浮:内部敌人》和大多数DLC一样:如果你喜欢《幽浮:未知敌人》,你也会喜欢《幽浮:内部敌人》。更多信息请参见我即将发布的关于这个扩展包的指南。
缩写词
LOS:是“视线”(line-of-sight)的缩写。
AP(s):代表“行动点”(action point(s))。
LZ:代表“着陆区”(landing zone)。
侧翼:在战场上由黄色的XCOM图标指示。
队长:当你选中队长时,左下角会有黄色星星标识。
见鬼:当你错过那80%命中率的射击时你会说的话。
该死:当一个 Thin Man 在你的最爱队员处于完全掩护且卧倒状态时对其造成暴击,你会说的话。
去他的世界:当你的狙击手连续两次错过97%命中率的射击时,你会说的话。垃圾
当你的霰弹枪突击在近距离没能击杀敌人时,你会这么说。
灵能
是“心灵能力”的缩写。
混蛋
当 Sectopod( Sectopod )对你整个小队使用集束炸弹时,你会用乔恩·斯图尔特式的语气这么说。
我的人生/世界完了。
当你的突击队员用霰弹枪在近距离以 90% 以上的命中率进行连射却两发都打偏时,你会这么说。
引用说明
功劳必须归于应得之人。
1 找不到作者,只知道它(可能)起源于 SA 论坛。如果你知道是谁创作的,欢迎留言,我会给予其署名。
2 Rev3Games,2013-08-13
3 由 Adam Shaftoe 翻译,2013-08-13
截图是通过 Steam 覆盖层或 FRAPS 截取的。我大部分信息都是在游戏内找到的,但有时我比较懒,会去XCOM Wiki上查阅。非常感谢/r/xcom的朋友们给了我一些中肯的批评。生物报告是来自《幽浮:未知敌人》Facebook页面的宣传资料。
读者反馈
添加武器部分
添加SHIVs部分
说明烟雾弹的工作原理
讨论《幽浮:未知敌人》和《幽浮:内部敌人》的Long War Mod
工程师的俄罗斯方块小游戏
说明外星手榴弹
okum 26 jan @ 1:01pm Ta bort
“我认为你不需要研究外星手榴弹,但其他所有外星武器都需要先研究才能使用。”没错,但如果你有1颗手榴弹,你可以用它来研究,这样手榴弹就会变成无限的,所有角色都能使用,而不只是一个角色。
提供更多选项并解释“压制”和“专注”的用途。
【专注】在《幽浮:未知敌人》中对无法利用掩护的单位很有用,比如支援赛博碟和 Sectopod 的无人机。拥有此技能且弹夹满的狙击手可以在一回合内先消灭两只无人机,然后向赛博碟或 Sectopod 开火,对其造成可观伤害并同时消灭其支援无人机。因为其他方法都需要牺牲一颗手雷或重装机兵的火箭弹,而【战场专注】技能实际上可以为其他敌人节省爆炸物。
=(FGR)=Sentinel 2013年12月14日 晚上8:11
实际上,【压制】和【战场专注】技能有一些巧妙的用法。如果你让一名狙击手(尤其是拥有【机会主义】技能的狙击手)在射程内对完全掩体后的外星人进行警戒,使用【压制】技能会造成少量伤害并迫使外星人离开掩体,这会触发狙击手的警戒射击。当外星人处于无掩体状态时,不仅会失去其位置带来的防御加成,还会提高暴击几率。
关于受版权保护作品的所有权
至于使用受版权保护的图片、肖像等的合法性,我援引合理使用原则。尽管有第106条和第106A条的规定,但对受版权保护作品的合理使用,包括通过复制副本、唱片或该条规定的任何其他方式进行的使用,用于批评、评论、新闻报道、教学(包括课堂使用的多份副本)、学术或研究等目的,不构成版权侵权。我相信我符合所涉及的所有四个因素。我也绝不是律师。谢谢!

虚拟存在
2026-02-18 07:00:12 · 发布在 「XCOM: Enemy Unknown」
一份深入的《幽浮》士兵职业指南,详细介绍了所有士兵职业及其属性和能力。无论你是新玩家还是《幽浮》老手,本指南都能帮助你充分发挥小队成员的潜力!
本职业指南分为八个部分:一部分介绍新兵职业,一部分介绍每个士兵职业,一部分介绍灵能者。第七部分包含一些通用游戏技巧以及一些高级策略思路,最后一部分则提供了游戏中部分最难成就的获取技巧。
新兵
每个加入XCOM计划的士兵最初都只是一名新兵。这些缺乏经验的年轻人仅配备一把基础突击步枪和一枚破片手榴弹,若想生存下去,就必须机智且谨慎。ROOKIE STATSEasyNormalClassicImpossibleHealth6543Aim65656565Will*40404040Defense0000* Will is increased by 1-6+2 for every rank up, plus an additional 1-4+2 with the Iron Will perk
** The information in this table does not apply if the Second Wave modifier Not Created Equally is selected upon starting a new game
RECOMMENDED BACKPACK ITEMSNano-Fiber Vest[xcom.wikia.com] [Health +2] / Chitin Plating[xcom.wikia.com] [Health +4, melee damage taken reduced by 50%]
S.C.O.P.E.[xcom.wikia.com] [Aim +10]
Frag Grenade[xcom.wikia.com]
Medikit[xcom.wikia.com] [if squad lacks dedicated Support]
Making sure your rookies stay alive should always be your top priority. Even if they don't fire a single shot over the course of a mission, they will still receive experience points and ultimately climb in rank if they take part in successful missions.
To that end, it is probably best to equip your rookies with Nano-Fiber Vests. It probably won't save them from dying to a critical hit, but early on that +2 bonus to health can easily make the difference between injury and death.
If you fancy a more offensive playstyle, equipping your rookies with a S.C.O.P.E. to improve their aim is a good idea. Those Sectoids you encounter early on can be hard to hit when they are in high cover or far away.
Alternatively, giving your rookies Frag Grenades can make surviving early missions considerably easier. Rookies may have poor aim, but they can lob a grenade just fine. Use them to either destroy the aliens' cover or kill them outright. A solid tactic, but don't expect Dr. Vahlen to be happy about it:
"You may want to instruct your men to exercise restraint when using explosives. While certainly effective at killing aliens they also destroy the artifacts we're hoping to recover from their bodies. Just something to consider".
Only ever give a rookie a Medikit to hold if your squad does not have a Support soldier. Giving it to anyone else will effectively waste their valuable item slot, hurting their chances.
Assault
The aggressive Assault class is great for recon, flanking, blitz tactics and capturing aliens alive with the Arc Thrower[xcom.wikia.com]. They are not as durable as the Heavy, but their nimbleness paired with their defensive abilities keeps them alive even if they get caught in alien crossfire. Though they prefer the shotgun, an Assault soldier can also carry assault rifles into battle.
ASSAULT STATSRankHealthAimSquaddie+1+5Corporal+0+3Sergeant+1+3Lieutenant+0+3Captain+1+3Major+0+3Colonel+1+4* The information in this table does not apply if the Second Wave modifier Hidden Potential is selected upon starting a new game
ASSAULT ABILITIESRankAbilitySquaddieRun & Gun
Allows firing or Overwatch after dashing on the turn Run & Gun is activated. 2 turn cooldown.CorporalTactical Sense
Confers +5 defense per enemy in sight (max +20).
Aggression
Confers +10% critical chance per enemy in sight (max +30%).SergeantLightning Reflexes
Forces the first reaction shot against this unit each turn to miss.
Close & Personal
Confers +30% critical chance against adjacent targets. The bonus declines with distance from the target.LieutenantFlush
Fire a shot that causes enemies to run out of cover. The shot is easy to hit with, but does reduced damage.
Rapid Fire
Take two shots against a single target in quick succession. Each shot carries a -15 penalty to Aim.CaptainClose Combat Specialist
Confers a reaction shot against any enemy who closes to within 4 tiles. Does not require Overwatch.
Bring ‘Em On
Adds 1 damage on critical hits for each enemy the squad can see (up to 5).MajorExtra Conditioning
Confers bonus health based on which type of armor is equipped. Heavier armor increases the bonus.ColonelResilience
Confers immunity to critical hits.
Killer Instinct
Activating Run & Gun now also grants +50% critical damage for the rest of the turn.
Squaddie: Run & Gun - every Assault promoted from rookie status acquires the Run & Gun ability, and it is awesome. Being able to fire (even Rapid Fire!) after dashing really helps when trying to flank an enemy, and it's also great for closing the distance on enemies that are hard to reach otherwise.
Corporal: Tactical Sense - Although Aggression is nice, Assaults generally have plenty of crit chance as it is, especially when flanking or attacking from stealth with Ghost Armor[xcom.wikia.com]. Also, to reach Aggression's full potential the Assault has to be within line of sight of three aliens, which can be very dangerous indeed.
Being front-line fighters, Assaults need all the extra defense they can get, especially on higher difficulties where aliens receive bonuses to Aim. This makes Tactical Sense a much better choice. Be advised that Tactical Sense has no effect against melee enemies such as Chryssalids.
Sergeant: Lightning Reflexes - Lightning Reflexes is hands-down the best ability here. With it you can force an enemy in Overwatch to waste its reaction shot on you without taking any damage. This in turn allows cornered squadmates to retreat to safety. The importance of Lightning Reflexes' many possible applications cannot be overstated.
Close & Personal is a solid choice for a second, more damage-oriented Assault, especially if you did not take Aggression at corporal rank.
Lieutenant: Rapid Fire - Rapid Fire is great in tandem with Run & Gun; run straight up to the enemy and blast them in the face twice at point-blank range. The damage potential is huge, and at short distances the -15 penalty to Aim is negligible.
By itself, Flush does terrible damage compared to Rapid Fire. It has some situational uses, such as forcing a well-fortified enemy out of cover while the rest of your squad is on Overwatch, but chances are good said alien will just take cover somewhere else straight away.
Captain: Close Combat Specialist - Close Combat Specialist will save your hide on terror missions, when you are surrounded by Chryssalids and Muton Berserkers. You can even trick Berserkers into charging you by shooting them from a distance; if they close to within 4 tiles you get a shot at them for free. Vital.
Bring 'Em On is a solid choice for the more offensive Assault, especially if you went with Close & Personal at sergeant rank. The enemies don't even have to be in the Assault's direct line of sight for the damage bonus to work, making this a potentially powerful offensive ability.
Major: Extra Conditioning - all Assaults that attain major rank gain Extra Conditioning. Have your Assault wear either Archangel[xcom.wikia.com] or Titan Armor[xcom.wikia.com] for the full +4 bonus to Health. Ghost Armor will give you +2 Health with this ability.
Colonel: Resilience - no matter how careful you are, at some point your Assault is going to get shot. At higher difficulties, chances an alien will score a crit against you increase dramatically. Resilience makes the Assault immune to critical hits, even when flanked. Take this ability and never look back.
However, if you went with Close & Personal and Bring 'Em On before, you have to take Killer Instinct here. If you use Run & Gun to dash right up to the enemy and then Rapid Fire at point-blank range, this deadly combination of abilities pretty much guarantees two critical hits at 150% damage, plus 1 damage for each enemy your squad can see. That's about 15-25 damage per shot with an Alloy Cannon[xcom.wikia.com]. Boom.
RECOMMENDED BACKPACK ITEMSNano-Fiber Vest[xcom.wikia.com] [Health +2] / Chitin Plating[xcom.wikia.com] [Health +4, melee damage taken reduced by 50%]
Arc Thrower[xcom.wikia.com]
Combat Stims[xcom.wikia.com] [Will +40, Mobility +3, 50% damage reduction and crit immunity for 2 turns]
Assault troops usually fight in the vanguard, exposing them to enemy fire. Good defense is a necessity and because of this, equipping your Assault with either a Nano-Fiber Vest or Chitin Plating is a must. Chitin Plating is an absolute no-brainer on terror missions and will help you deal with those pesky Chryssalids. Of course, you will have to kill one before you can make any.
The Assault's close proximity to the enemy makes them ideal candidates for carrying the Arc Thrower into battle. Be advised that the Arc Thrower isn't considered a weapon and therefore cannot be used with the Run & Gun ability. Soften enemies up from a distance and rush in with the Assault to take them in for 'questioning'.
Combat Stims are another great choice for Assaults to carry, especially for those that prefer offensive abilities. Note that using it ends the Assault's turn.
Heavy
The Heavy is a hulking powerhouse, capable of dealing massive amounts of damage to synthetic enemies.. and pretty much everything else around them. Armed with a light machine gun and a rocket launcher, these bad boys carve a path through obstacles like no other.HEAVY STATSRankHealthAimSquaddie+1+2Corporal+0+1Sergeant+1+1Lieutenant+0+1Captain+1+1Major+0+2Colonel+1+2* The information in this table does not apply if the Second Wave modifier Hidden Potential is selected upon starting a new game
HEAVY ABILITIESRankAbilitySquaddieFire Rocket
Fire a rocket using an equipped launcher. This ability can not be used after moving, nor more than once per mission.CorporalBullet Swarm
Firing the primary weapon as the first action no longer ends the turn.
Holo-Targeting
Shooting at or suppressing enemies also confers a +10 Aim to any allies’ attacks on those enemies.SergeantShredder Rocket
Fire a rocket that causes all enemies hit to take +33% damage from all sources for the next 4 turns. The rocket’s blast is weaker than a standard rocket’s.
Suppression
Can fire a special shot that grants reaction fire at a single target. The target also suffers a -30 Aim penalty.LieutenantHEAT Ammo
+100% to damage against robotic enemies.
Rapid Reaction
Confers a second reaction shot, if on Overwatch and the first reaction shot is a hit.CaptainGrenadier
Allows to carry 2 grenades in a single inventory slot.
Danger Zone
Increases hit area of rockets and suppression by 2 tiles.MajorWill to Survive
Reduces all normal damage taken by 2 if in cover and not flanked.ColonelRocketeer
Allows 1 additional standard rocket to be fired per battle.
Mayhem
Confers additional damage based on weapon tech level to Suppression and all area-effect abilities.
Squaddie: Fire Rocket - The Heavy's signature weapon is the rocket launcher. Use it to dispose of cover, exposing the enemy, or to blow up explosive objects such as cars. Everything caught in the blast will die, including your squadmates. Make sure you have a medic standing by.
Corporal: Bullet Swarm - This ability allows you to fire your weapon and then move, shoot again, go into Overwatch or reload. Needless to say, Bullet Swarm is a versatile ability that's easily more useful than its counterpart Holo-Targeting.
Sergeant: Shredder Rocket - Every once in a while, especially on terror missions, you are going to get swarmed. Whether facing a zerg rush of Chryssalids or a small army of Mutons, Shredder Rocket is your ticket out of a sticky situation. Use it to soften up the masses and then clean up with a grenade. The Shredder Rocket also doubles nicely as a terraforming tool.
Suppression is not a terrible ability, but it consumes ammo both when you activate it and if the Heavy takes a reaction shot. This could mean you start your next turn with an empty gun, and that's a pretty afwul situation to find yourself in.
Lieutenant: HEAT Ammo - This ability DOUBLES all damage you deal to synthetic enemies; that includes Cyberdiscs and Sectopods. With HEAT Ammo your Heavy will one-shot Cyberdiscs every time, and if you took Bullet Swarm your Heavy can single-handedly topple a Sectopod in one turn as well. HEAT Ammo isn't just good, it's vital.
Rapid Reaction is terrible because it relies on the first reaction shot to hit. Heavies have terrible Aim and on top of that, there's an Aim penalty on reaction shots. Even if by some miracle the first shot connects, your special second shot can and very likely will miss, making this a godawful ability.
Captain: Danger Zone - This ability is pretty great, but it's also a double-edged sword. Being able to catch more enemies in one rocket's blast radius is awesome, but the increased damage radius also means it's easier to hit your own guys with it. It also makes it a bit trickier to blow up cover without killing the aliens cowering behind it; the raw damage potential more than makes up for these little drawbacks, however.
Don't take Grenadier. You will need a S.C.O.P.E. on your Heavy to compensate for his terrible Aim and on top of that, if you take Shredder Rocket and Rocketeer you will have a total of 3 rockets available on every mission. Use any more explosives than that and you will find yourself wanting for salvage before long.
Major: Will to Survive - If you position your Heavy with care, this ability will really help him survive. With this, chances are good the Heavy won't get hit for more than his armor can shrug off, meaning no more visits to the infirmary!
Colonel: Rocketeer - This is a tricky one. The extra damage on rockets from Mayhem is nice if you don't use more than one or two of them per mission, but if you didn't take Suppression (and I recommend that you don't) the usefulness of this ability is seriously hampered.
Rocketeer gives you one extra standard rocket per mission. Point for point, that is more bang for your buck than the damage bonus from Mayhem, making Rocketeer a solid choice, especially in combination with HEAT Ammo (yes, it applies to rockets too!) and Danger Zone.
RECOMMENDED BACKPACK ITEMSS.C.O.P.E.[xcom.wikia.com] [Aim +10]
Combat Stims[xcom.wikia.com] [Will +40, Mobility +3, 50% damage reduction and crit immunity for 2 turns]
Heavies are terrible shots. Early on, when you have to make do with one rocket and your LMG, you will want to make every shot count. The +10 Aim bonus of a S.C.O.P.E. is a godsend for inexperienced Heavies.
Later on, when your Heavy has attained colonel rank, trading that S.C.O.P.E. for a Stim Pack allows for some interesting tactics. Your Heavy, already a pretty durable unit, can soak up damage like a sponge with the Stim Pack's 50% damage reduction and crit immunity.
On top of that, the +3 Mobility bonus allows the Heavy to run farther, enabling him to get in close and shoot the enemy from point-blank range, negating the need for that S.C.O.P.E. altogether. And the best part? With Bullet Swarm you can fire AND use the Stim Pack all in one turn!
Sniper
Snipers are the most terrifying addition to any XCOM squad. They can kill without being seen, or disable enemy weapons from a distance. Scaling buildings or taking to the skies in Archangel Armor to find that perfect vantage point, they oversee the entire mission area. Your whole squad will rest easy knowing that their Sniper is up there somewhere, looking out for them.SNIPER STATSRankHealthAimSquaddie+0+10Corporal+1+3Sergeant+0+3Lieutenant+1+3Captain+0+4Major+1+7Colonel+0+10* The information in this table does not apply if the Second Wave modifier Hidden Potential is selected upon starting a new game
SNIPER ABILITIESRankAbilitySquaddieHeadshot
Fire a shot with +30% critical chance and extra damage on critical hits based on the tech level of the sniper rifle. 2 turn cooldown.CorporalSnap Shot
Removes the sniper rifle’s restriction on firing and Overwatch after moving. Any shots taken suffer a -20 Aim penalty.
Squad Sight
Allows firing at targets in any ally’s sight radius.SergeantGunslinger
Confers 2 bonus damage with pistols.
Damn Good Ground
+10 Aim and +10 Defense against enemies at lower elevation in addition to the usual elevation bonuses.LieutenantDisabling Shot
Allows the Sniper to fire a shot that causes the target’s main weapon to malfunction. The target may use Reload to fix the weapon. The shot cannot inflict a critical hit. 2 turn cooldown. -10 Aim penalty.
Battle Scanner
Scanning device, when thrown creates a new source of vision for 2 turns. Can only be used 2 times per battle.CaptainExecutioner
+10% Aim against targets with less than 50% Health.
Opportunist
Eliminates the Aim penalty on reaction shots, and allows reaction shots to cause critical hits.MajorLow Profile
Makes partial cover count as full.ColonelIn The Zone
Killing a flanked or uncovered target with the sniper rifle does not cost an action.
Double Tap
Allows both actions to be used for Standard Shot, Headshot, or Disable Shot, provided no moves were made. 1 turn cooldown.
Squaddie: Headshot - The Sniper's signature ability is also one of its best. Once every three turns you can fire a shot with a 30% increased crit chance and extra damage based on weapon tech. It's pretty much a guaranteed crit if you flank an alien or catch one out in the open with it. It pairs really well with Double Tap and Ghost Armor[xcom.wikia.com] for landing two massive crits in a row.
Corporal: Squad Sight - Squad Sight defines the Sniper class. With it your Sniper can fire on any alien your squad can see, provided there are no obstacles in the line of fire. Without it, you have to waste valuable time setting your Sniper up on a good vantage point. Squad Sight means your Sniper spends less time running and more time killing aliens. Essential. Paired with Archangel Armor[xcom.wikia.com] this ability is godlike.
Snap Shot, although not without its uses, really is more trouble than it's worth. Using it properly means flanking aliens with your Sniper and that means getting in dangerously close, exposing yourself. Being able to fire the Sniper rifle after moving is nice, but Snap Shot does hurt the Sniper's impeccable accuracy.
Sergeant: Gunslinger - This ability is a godsend in confined spaces, and early on when the Sniper is still lacking some of his best abilities. With Gunslinger your Sniper will do surprisingly decent damage using a Laser[xcom.wikia.com] or Plasma Pistol[xcom.wikia.com], and it works just fine with Double Tap for those times when one shot just isn't enough.
Damn Good Ground is a nice ability in its own right, but Snipers have great Aim to begin with, especially on higher ground. The Defense bonus is nothing to write home about, either, and if you play your Sniper right he should not be exposed to enemy fire to begin with.
Lieutenant: Disabling Shot - On higher difficulties, sometimes you just know you won't be able to kill that last alien on this turn. Disabling its weapon is a pretty good alternative at that point. Disabling Shot allows you to waste the alien's turn by making it reload to fix its gun. It's also great for 'prepping' targets you want to stun with the Arc Thrower, minimising the risk of getting your soldiers killed should the stun fail.
If your Sniper took Snap Shot earlier, you might like Battle Scanner. It's great for peaking around corners without exposing yourself, but it has limited uses and does not work as well for Snipers that like to keep their distance. It will work with Squad Sight, which is nice.
Captain: Opportunist - Taking reaction shots that can crit without suffering an Aim penalty? If that sounds overpowered to you it's because it is overpowered. Opportunity turns your squad's line of sight into a murder zone. Any alien careless enough to step within range is going to get its head blown off. It works beautifully with pistols too, even over long distances. The Executioner ability does not even begin to compare to this.
Major: Low Profile - This ability means you can set your Sniper up anywhere you like. It lets you save obstacles that provide full cover for squad members who really need it, and makes ledges, balconies, rooftops and lorry trailers that much more attractive as vantage points.
Colonel: Double Tap - This is it; the hardest choice your Sniper will ever have to make: In The Zone or Double Tap?
In The Zone is excellent for those whide open spaces where you are going up against Cyberdiscs, Floaters, Drones, Chryssalids, Zombies or Berserkers, pretty much any enemy that does not take cover. As long as you can kill them with one shot and the shot connects, you can keep firing until you've emptied your rifle. It's hugely powerful, but very situational.
On the other hand, Double Tap lets you fire twice every other turn. There's a little less potential damage here, but it is much more reliable and less dependent on the situation. Double Tap works just fine with all special shots and if you use it with Ghost Armor and Headshot, you can score two huge crits in a row. More than enough to kill a Sectopod, or even the Uber Ethereal, in one turn.
If you went with Snap Shot earlier, pick In The Zone here. If not, I would strongly recommend taking Double Tap. Actually, I would always recommend it. It's both powerful and reliable and that makes it really hard to beat.
RECOMMENDED BACKPACK ITEMSS.C.O.P.E.[xcom.wikia.com] [Aim +10]
The S.C.O.P.E. is probably the only item your Sniper will ever need. Early on, it's vital to compensate for the Aim penalty on reaction fire, and it negates the Aim penalty on Disabling Shot completely. It will also help you make the most of In The Zone and Double Tap, making the S.C.O.P.E. the obvious choice.
Support
Sometimes things can get ugly; soldiers start taking hits and go down, or panic in the face of overwhelming odds. The Support is there to patch them up, strengthen their resolve and help them get back into the fight. These strong-willed warriors have good aim and run like the wind, providing covering fire for their squad or going the distance to flank enemies.
SUPPORT STATSRankHealthAimSquaddie+1+5Corporal+0+3Sergeant+1+3Lieutenant+0+3Captain+1+3Major+0+3Colonel+1+5* The information in this table does not apply if the Second Wave modifier Hidden Potential is selected upon starting a new game
SUPPORT ABILITIESRankAbilitySquaddieSmoke Grenade
Deploy a smoke grenade once per mission. The smoke confers +20 defense to all units, not just allies, and lasts during the enemy turn.CorporalSprinter
Allows the support to move 3 additional tiles.
Covering Fire
Allows reaction shot to trigger on enemy attacks, not just movement.SergeantField Medic
Allows medikits to be used 3 times per battle instead of once.
Smoke and Mirrors
Allows 1 additional use of Smoke Grenade each mission.LieutenantRevive
Allows Medikits to revive critically wounded Soldiers at 33% of maximum health instead of just stabilizing them.
Rifle Suppression
Fires a barrage that pins down a target, granting reaction fire against it and imposing a 30 penalty to aim.CaptainDense Smoke
Smoke Grenades have increased area of effect and further increase units’ Defense by 20.
Combat Drugs
Smoke Grenades now contain powerful stimulants that grant +20 Will and +10% Critical Chance for all units in the cloud.MajorDeep Pockets
Confers an additional item slot in inventory.ColonelSavior
Medikits restore 4 more health per use.
Sentinel
Allows two reaction shots during Overwatch, instead of only one.
Squaddie: Smoke Grenade - Smoke Grenades are essential for those times when you need a soldier to get in position where there is no full cover to benefit from. It's a great ability, but you only have one per mission, so make it count.
Corporal: Sprinter - +3 to Mobility may not sound like much on paper, but it makes a huge difference. You could use it to flank an enemy that is pinned down, close in on an enemy to stun him with the Arc Thrower or leg it to stabilise a friendly that was shot down across the battlefield. Sprinter is a subtle, but powerful ability.
Covering Fire is not bad, especially on higher difficulties, but it has one major flaw: your Support will only take a reaction shot after the enemy has fired, meaning it could well be too late already. It pairs well with Sentinel later on, but it's not nearly as versatile as Sprinter.
Sergeant: Field Medic - Getting 3 uses out of your Medikit per mission instead of just 1 makes this an absolutely essential ability. Watching a wounded soldier bleed out because you used your one Medikit on a paper cut is rough; don't put yourself in that position.
You could argue that having 2 Smoke Grenades per mission would allow you to prevent those wounds in the first place, but relying that heavily on Smoke Grenades is risky, especially on higher difficulty levels where the aliens receive bonuses to Aim.
Lieutenant: Revive - No medic can do without Revive. It's essential, especially in those Ironman games where every veteran soldier is worth his weight in gold. Not only can you prevent them from dying, you can actually put them straight back into the fight. Awesome.
Rifle Suppression uses up a lot of ammo and unless you took Covering Fire earlier, you are probably not going to get much use out of it. A suppressed alien knows better than to move when under fire, and at higher difficulty levels chances are good they will still hit you, even at a -30 penalty to Aim.
Captain: Dense Smoke - This is a pretty tough choice, but Dense Smoke is the slightly better choice here because the area of effect on it is bigger than that of Combat Drugs, and because +20 Defense is generally better than +20 Will and a +10% crit chance, which is negligible. Defense works against all enemies, whereas Will only really helps you against psionic abilities.
That said, Combat Drugs is not without its uses and having a second Support with this ability could be a great idea. You could use it to empower your gifted soldiers or keep soldiers with a low base Will stat from panicking in the face of terrible danger.
Major: Deep Pockets - It may be a passive ability, but Deep Pockets is a-ma-zing. You could carry both a Medikit and an Arc Thrower, or Chitin Plating and a Mind Shield, or any other combination of offensive, defensive and utlity items. Deep Pockets is a defining ability for the Support and it makes them the most versatile class by far.
Colonel: Savior - Again, this is a very tough choice because both abilities are pretty great. Savior is fantastic because it doubles the effectiveness of your Medikits. If you completed the Improved Medikit project in the Foundy, this bumps your Medikits up to +10 Health per use. Awesome.
Sentinel is great too, as it allows you to fire from Overwatch twice. Unlike the Heavy's Rapid Reaction ability, the first shot does not even have to be a hit for it to work. Sentinel is great when you're trying to lure enemies into a murder zone, but it has one major flaw: the second shot will never trigger on enemies that you run into for the first time.
RECOMMENDED BACKPACK ITEMSMedikit[xcom.wikia.com]
Arc Thrower[xcom.wikia.com]
Every Support should carry a Medikit. Supports are the best at healing squad members and their Deep Pockets ability allows them to carry another, more directly beneficial item as well. Also, the Medikit grants immunity to poison, which is excellent when fighting Thin Men.
The Arc Thrower is another great item choice for Supports, especially if you took the Sprinter ability. Supports can run long distances, making it easy for them to get into stun range. Should the stun fail, you could use your Assault to run in and clean up so nobody gets hurt.
Later, when capturing aliens alive is no longer a priority or even completely unnecessary, you could replace the Arc Thrower with any item you want. Chitin Plating is great for defense, especially on terror missions. Mind Shield will help your Support overcome psionic attacks. Combat Stims could improve their own psionic powers, etc. Take your pick, they are all solid choices.
Psionic
After building the Psionic Labs, you can test your soldiers for 'the Gift'. All classes can become Psionics and they will get a special purple class icon to convey that they are gifted. Psionics can get inside the minds of their enemies, causing them to panic and fire on their allies. The most powerful Psionics can even deflect bullets with their mind, or make an alien do their bidding.
Note that Psionic soldiers can only gain ranks and access new abilities by actively using their powers. Use psi powers often and well to unlock new, even stronger powers more quickly.灵能能力
等级 能力
新手
心灵冲击
使目标失去现实感,造成瞄准、意志和移动力惩罚,基础伤害5点。机械单位免疫。持续2回合。冷却1回合。
专家
灵能鼓舞
移除3格内所有友军的心灵冲击和恐慌状态,并在2回合内增强他们的意志+30。冷却4回合。
心灵恐慌
若目标意志被压制,使其在下一回合陷入恐慌。机械敌人免疫。冷却2回合。
特工
心灵动能场
创建一个持续到敌方回合的固定心灵动能场。该场扭曲并偏转 incoming 攻击,为场内友军和敌人提供+40防御力。冷却4回合。心灵控制
非常困难的灵能技巧,若成功,可控制目标3回合。机械敌人免疫。5回合冷却时间。
灵能者:心灵冲击 - 每个有天赋的士兵初始都拥有此能力。心灵冲击是一项出色的能力,因为它不受距离或掩护影响,是对抗处于完全掩护状态敌人的理想选择。其对瞄准和机动性的惩罚使其成为压制的绝佳替代,而意志惩罚则使敌人更容易陷入恐慌或被心灵控制。
专家:灵能激励 - 此能力在对抗 Sectoid Commander 和 Ethereal 等敌人时能发挥最大作用。增强小队对精神攻击的防御至关重要,提升他们的意志以防止恐慌也同样重要。你甚至可以用它来强化其他灵能士兵的能力,提高他们成功施展心灵控制的几率。
心灵恐慌是个还不错的技能,但恐慌本身作为战斗策略太不可靠了。根本无法预测恐慌的敌人会做什么:他可能会害怕地逃跑,攻击自己的盟友,或者变得狂暴并再次向你开火。使用心灵恐慌就像掷骰子,我不建议使用它。
特工:心灵动能力场——这可能是安全但无聊的选择,但别搞错了;心灵动能力场非常强大。它能在已有的防御加成基础上再增加40点防御,而且作用范围很大。这个技能能在异形入侵结束前多次拯救你的小队,使其免受 Sectopods 和 Muton Elites 的威胁。但要记住,敌人也能从中受益,所以请明智使用。
心灵控制是一种极其强大的能力,确实能扭转战局。通过合适的装备、物品和能力组合,你甚至可以用它来控制一个 Ethereal,成功的话将获得成就。这确实非常酷,但它也有缺点。与心灵动能场不同,它可能会失败,一旦失败,接下来五回合内你将无法再次使用。在激烈的交火中,五回合就像永恒一样漫长。
如果你的队伍中有不止一名有天赋的士兵,让其中一名学习心灵动能场,另一名学习心灵控制。两名灵能士兵协同作战对异星人而言意味着灾难。RECOMMENDED BACKPACK ITEMSMind Shield[xcom.wikia.com] [Will +30]
Combat Stims[xcom.wikia.com] [Will +40, Mobility +3, 50% damage reduction and crit immunity for 2 turns]
Chitin Plating[xcom.wikia.com] [Health +4, melee damage taken reduced by 50%]
The Mind Shield's description can be deceptive. It's intended purpose is to shield the wearer from offensive psi attacks, but it can also be used to power the user's own Psionic abilities. Use it together with Psi Armor[xcom.wikia.com] to have a real shot at mind controlling those darn Ethereals. You will have to kill one before you can build it, though.
Going with Combat Stims is good if you can't build the Mind Shield yet. The +40 bonus to Will is excellent and the damage reduction certainly does not hurt either. You can use this to empower your Mind Control ability, but remember that it takes up a turn to use it. Don't leave your soldier exposed while the stimulants take effect.
Of course, you could argue that a Psionic has plenty of mental defenses as it is, especially if wearing Psi Armor. You could therefore decide to bolster his physical defense, and that's where Chitin Plating comes in handy. +4 to Health is nice, especially considering Psi Armor is medium-class and only provides +6 to Health, rather than Titan Armor[xcom.wikia.com]'s +10 Health bonus.
A NOTE ON PSI ARMOR
After clearing the Overseer Crash Site[xcom.wikia.com], XCOM's second essential story mission, you will have the opportunity to research Psi Armor[xcom.wikia.com]. I strongly recommend developing it at the earliest possible convenience. Psi Armor grants a +20 bonus to Will, making it that much more likely your Psionic powers will work succesfully.
Tips, Tricks & Tactics
In this section you will find some tips that all tie in directly to your squad members and their abilities in some way. I will try to keep adding to this section over time, and I will see about adding some images or videos here and there to visually represent more complex ideas.
SQUAD SET-UPThere are four different classes in XCOM: Enemy Unknown, and there's a total of six spots on your team. All classes have their merits, and as such the core of your team should simply look like this:
1 Assault
1 Heavy
2 Support
1 Sniper
I strongly recommend taking 2 Supports on your team wherever you go. They aren't the strongest fighters, but they are accurate and their versatility makes them an excellent addition to your team. Ideally, you will want one of them to focus on healing abilities, and let the other one take perks like Combat Drugs and Sentinel.
For terror missions and abduction missions, consider taking a second Assault. They are the best in close-quarters combat and any enemy stupid enough to run into striking range will be torn apart by their Close Combat Specialist ability. Assaults are the perfect counter against Chryssalids and Berserkers, and with Ghost Armor they make excellent spotters for your Sniper, too.
For council missions and UFO crash/landing sites, consider taking a second Sniper. Give them both Squad Sight and maybe a suit of Archangel Armor, and use the rest of your team as spotters. Snipers can deal a stupid amount of damage from afar and if one of them specialises in Double Tap and the other one takes In The Zone, they can lay waste to an entire army of aliens between the two of them.
COMBAT TACTICS#1 rule: always have a backup plan! Soldiers can and will miss shots despite great odds at the absolute worst of times, and you will want to make sure they don't get caught with their pants down. Think about a move before you make it, and think about what could go wrong beforehand.
Never dash. Seriously, just don't do it. You could argue that dashing is safe unless you are already engaged in a fight, but it's a bad habit regardless. Always move all of your soldiers once before committing to a second action with any of them.
Make a habit of moving your Assault(s) first. If any aliens are on Overwatch beyond your line of sight, you have a good chance of wasting their reaction shot with the Assault's Lightning Reflexes.
Always move your Sniper last. Should your squad stumble upon some aliens, taking an 'active' shot before the end of your turn is always more efficient than reaction fire from Overwatch, especially so if your Sniper knows In The Zone or Double Tap.
Don't charge into unrevealed territory when you are already in a fight. Chances are more uninvited guest will crash your party, and that is going to make life really hard for you on higher difficulties.
Check all your soldiers before firing a single shot. If your Sniper can hit only one alien and your Assault can hit three, make sure you don't have your Assault kill that one alien your Sniper could have killed instead.
Take a turn to reload ALL guns after a firefight. If you don't, your soldiers could be out of ammo halfway through the next firefight, just when they're up against a Sectopod and a small army of Mutons.
Similarly, never patch up soldiers in the middle of a fight. Doing so would likely expose your medic, risking more injuries or even death. It's better to pull injured soldiers away from a firefight and keep them away until the threat is dealt with.建议根据士兵职业进行颜色编码,以便在战场上更容易区分他们。
不要分散火力。受伤的外星人依然能轻易杀死你。
如果外星人躲在完全掩体内畏缩不前,就用手榴弹或火箭筒炸毁掩体。如果无法做到,那就直接用爆炸物炸他们。
穆顿和赛博碟如果有机会,会对你使用这种战术,所以面对它们时,不要让士兵过于聚集。
汽车、卡车和UFO能量源是很好的爆炸物。如果有两个或更多外星人在它们周围,抓住机会用一枚精准的爆炸物将它们全部炸成碎片。
新兵用步枪射击时,就算外星人坐在他们肩上也打不中。不过,他们是很棒的掷弹兵。新手只需一次击杀就能升级,所以那枚手榴弹应该就够用了。
别忘了使用【卧倒】技能!如果你需要靠近外星人以便在下一回合包抄或击晕他们,通过在掩体后卧倒可以将受伤风险降到最低。卧倒能使你的掩体加成翻倍,并获得暴击免疫,这本身就能带来天壤之别。
即使处于完全掩体内,你仍然可能会被击中。士兵要想真正安全,就需要完全脱离敌人的视线。
使用你的手枪!它们非常适合削弱你想要击晕和捕获的敌人,而拥有【枪手】技能的狙击手可以用手枪一击杀死很多敌人。手枪也不消耗弹药,对付较弱的外星人时效率很高。请密切留意士兵说出类似“你听到什么动静了吗?”这类话时周围的声响。学会识别外星人发出的声音,能为你提供即将面对何种敌人以及威胁来源方向的重要线索。
给你速度最快的士兵装备幽灵护甲,让他潜行侦察前方。这样你就能让狙击手从尽可能远的“天行者”登陆点开始逐个消灭外星人。
在恐怖任务中,要在不使士兵面临巨大风险的前提下尽可能保持进攻姿态。任务完成得越好,事后获得的恐慌值降低效果就越明显。
成就Ain't No Cavalry Comin'
让一名士兵在完整游戏的每一个任务中存活下来。
你可以在任意难度下完成这个成就。在简单难度下很轻松,但我在普通难度下用三名士兵也能顺利完成。只需要让初始四人小队中的一名士兵参与整个游戏流程中的每一个任务。如果你好好照顾你的狙击手,让他远离危险,这个成就应该不难获得。
注意,如果你依赖的士兵住院了,只要他在下一个任务开始前回到现役,你仍然可以完成这个成就。泽维尔
控制一个以太族单位。仅限单人模式。
这是一个较难的成就。你的灵能士兵必须拥有极高的意志力属性才有可能做到,即便如此,也需要大量增益效果才能有不错的成功几率。灵能护甲是绝对必需的,心灵护盾也是如此。如果可能的话,让另一名灵能士兵对你使用灵能激励,或者使用带有战斗药物的烟雾弹。在尝试心灵控制前叠加尽可能多的意志力增益,以最大化成功几率。
注意,对以太族造成物理伤害不会像眩晕那样提高成功率,但用心灵冲击对其造成精神伤害则可以。不过,以太族极难被心灵冲击命中,所以尝试其他方法可能更有价值。孤狼
在经典或不可能难度下,仅用一名士兵清理一个UFO坠毁点。
有两种方法可以达成这个成就。第一种也是最好的方法是在你接到的第一个UFO任务中只派遣你的重装机兵。这样一来,他将独自面对4个 Sectoid( sectoid)和1个 Outsider(outsider),这应该会给你相当大的成功机会。遇到紧急情况时,不要犹豫使用手榴弹或火箭筒。如果可能的话,尽量把火箭筒留到对付Outsider时使用,这样几乎可以保证一击必杀。
如果你在游戏早期没能达成这个成就,在游戏后期仍然可以尝试。派遣一名拥有心灵控制能力的精英士兵(最好是重装机兵),并使用该能力为自己创造盟友。精英 Muton 是心灵控制的最佳目标,因为它们容易被控制,并且能对其同伴造成可怕的伤害。它们会成为你心甘情愿的肉盾,让你可以在远处进行清理。在心灵控制效果消失前,让被控制的外星人用外星手榴弹自杀,然后转移到下一个目标。如此反复操作即可。
最后想说的话
亲爱的读者,感谢你抽出时间阅读本指南。我是《幽浮:未知敌人》的忠实粉丝,这款游戏是我第一次如此投入,以至于想要撰写攻略、帮助他人,并与世界分享我那些辉煌胜利和令人心碎的失败故事。
我非常感谢 Firaxis 团队对这款绝对经典游戏的精彩重制。它们让我得以体验到一个系列游戏的伟大之处,而在初代游戏推出时,我年纪太小还无法欣赏。我从未好好玩过《幽浮:未知敌人》,而且很可能以后也不会,但多亏了《幽浮:未知敌人》,我现在终于明白了那款游戏为何如此特别。
祝你好运,指挥官。Rensje 下线。
下载233乐园APP
专心推荐好游戏
纠纷处理及不良内容举报电话:
4006600910 (工作时间: 9:00-12:30,14:00-18:00)
北京市朝阳区启阳路4号院2号楼15层1803室
本公司产品适合10周岁以上玩家使用 未成年人家长监护