


Empyrion - Galactic Survival
 Steam Deck
 家庭共享
家庭共享 创意工坊
创意工坊 可用手柄
可用手柄

精选 DLCWorkshop透过帝国霸业工作坊取得蓝图,来丰富你的游戏体验:浏览大量社群创作的战舰与基地,试试新奇又不常见的设计 - 或是上传你自己的设计!关于游戏帝国霸业-银河生存是一款3D开放沙盒太空生存游戏。这里,你可以建造强力的战舰;探索雄伟的宇宙空间站和多种多样的星球原住民聚集地;征服和开拓不同类型的行星并探索游戏的奥秘!在这个充满隐藏危险的宇宙中,与敌对人类、外星人、异形生物战斗并生存下来。你可以开启一段独狼的生活,也可以拉着好友一起建立派系。与其他派系结盟或者宣战,甚至独霸整个星系。本游戏独特地结合了太空模拟、建筑工艺、生存游戏和射击游戏等的不同游戏元素,这里,你可以无限可能的打造你天马行空的太空梦想。太空和行星探索:绝对的自由的探索在等着你:比如在两个行星间翘曲跳跃;或者直接飞上行星的卫星;在一个陌生行星地表降落然后徒步旅行看看风景。你可以探索各种不同的神秘外星种族,或是感受奇异的外星动植物。这是一个充满挑战的沙盒游戏,无数生动的行星等你到来!完整的星系系统和开放世界:游戏会按照预先的设置生成一个完整的星系,包括恒星和数个行星及行星上各种有趣的建筑。并且每个行星都会有其特点(可以设定不同的行星类型、重力、大气环境、卫星数量、地表覆盖、地势和湖海、动植物、气候、天气以及资源)。建筑和建造:你可以自行建造你想象中的大型宇宙母舰,小型战舰,宇宙空间站和各种奇形怪状的行星基地。——也可以去Steam创意工坊下载一个蓝图,修修改改成你的自定义建筑或飞船。生存模式:从你的逃生舱出来,把能带的东西都带上,然后就想办法在一个完全陌生的环境里生存下去吧。食物和氧气会不足,各种资源更是稀缺,没有多少子弹,外星动植物和行星的鬼天气会想方设法弄死你,即使你侥幸不死也很难在一些奇怪的角落里躲开那些潜伏已久的“刺客们”的最后一击。与在地球上不同,在一个陌生的星球上生存哪怕只有一天,你也必须绞尽脑汁准备完全。创造模式:就是一个让你梦想成真的地方,无所顾忌的建造吧,没有饥渴、资源和敌人的烦恼。有信心的话请加入我们的社区,往Steam创意工坊里上载你的“伟大杰作”吧。单人游戏和多人游戏 你可以选择独狼的生活,也可以拉着朋友们建立派系:与你的朋友组队,或者同其他派系结盟,或者直接干爆他们,随你所愿。你可以在一个PVE区域里建造一个温馨舒适的宫殿居住;或者到PVP区域去打劫别人的财富;甚至可以让你们的派系独霸所有PVP区域!此外,创意工坊里还有不少好玩的剧情等着你下载呢。野生动物和敌人:不要被星球上那些乖乖的小兔小鸟迷惑,大多数的野生动物都只想着一件事:扭断你的脖子。当然,那些主动攻击的外星无人机、外星人士兵、和建筑守卫们想的不太一样:就是一看见你就把你轰成渣!所以,你要武装你自己,拿好手里的各种武器或者安装个远程炮台之类,把那些残忍和隐蔽的敌人先轰趴下。采矿和资源收集: 生存模式下要想建造点什么东西,你首先得收集和挖掘资源。找到矿床直接挖或者掏空那些富含稀有资源的小行星,当然,你也可以掠夺和搜刮你路过的那些外星人建筑,如果你本事够的话。包罗万象的工艺配方: 学习如果精炼资源以及制造零件,在你的基地里制造各种道具,或者在你移动时也可以这么做。用一系列不同的设备、武器和各种小物件装备、装饰你的飞船或者建筑,只要你愿意。打猎,种植和食物系统:种菜收菜,种水果收水果,然后再去打猎弄点肉,这样,你的美味大餐就准备好了。一些植物能直接填饱肚子,一些植物是药用的,甚至一些植物可以直接当做急救包。升级和科技技能树: 几乎做任何事情——都会给你涨经验升级!升级之后获得的升级点可以解锁科技技能树里新的配件、设备和武器。改变地形:每个行星的地形都可以随意改变。你可以完全重新定义一个星球的地形,并在上面设定你创造的各种建筑。你可以打个洞,或打穿一个深深的隧道再建家。帝国霸业绝对是一款完完全全的沙盒游戏。
游戏圈
共49条帖子

虚拟存在
2026-02-16 04:00:17 · 发布在 「Empyrion - Galactic Survival」
本指南将帮助初次游玩9+版本的新玩家。它以行动为导向,而非罗列信息。这些行动会构成小型任务,所有任务共同形成一个初始计划,与游戏的教程任务并行。该计划能确保你获得最大的生存几率,直到你能够独立且安全地行动。你还将在需要时逐步学习游戏的大部分“操作方法”、提示与技巧、界面和交互方式,而非一开始就灌输所有内容。按照此计划操作后,你将拥有一个具备所有基本要素的基地,包括一个在你外出时用于防御的自动炮塔,以及一艘前往星球的小型气垫船。之后,你就可以开始自己的计划,从一名幸存者逐步成长为宇宙中的超级势力!进入逃生舱
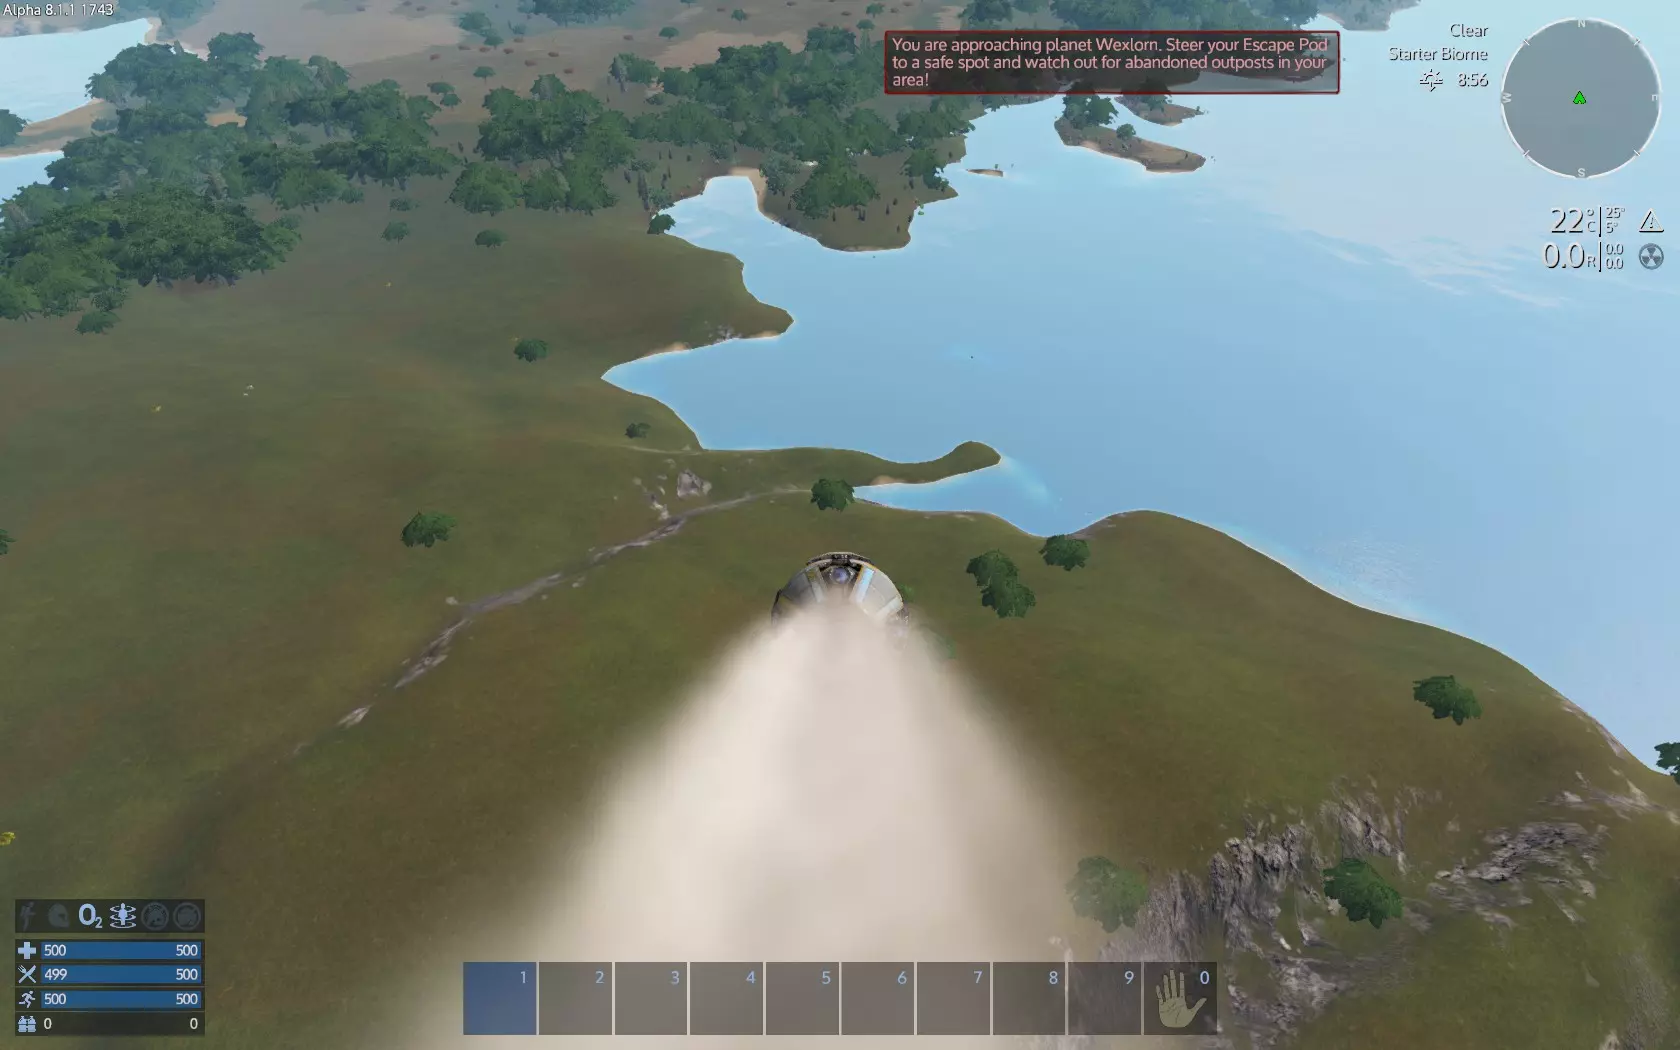
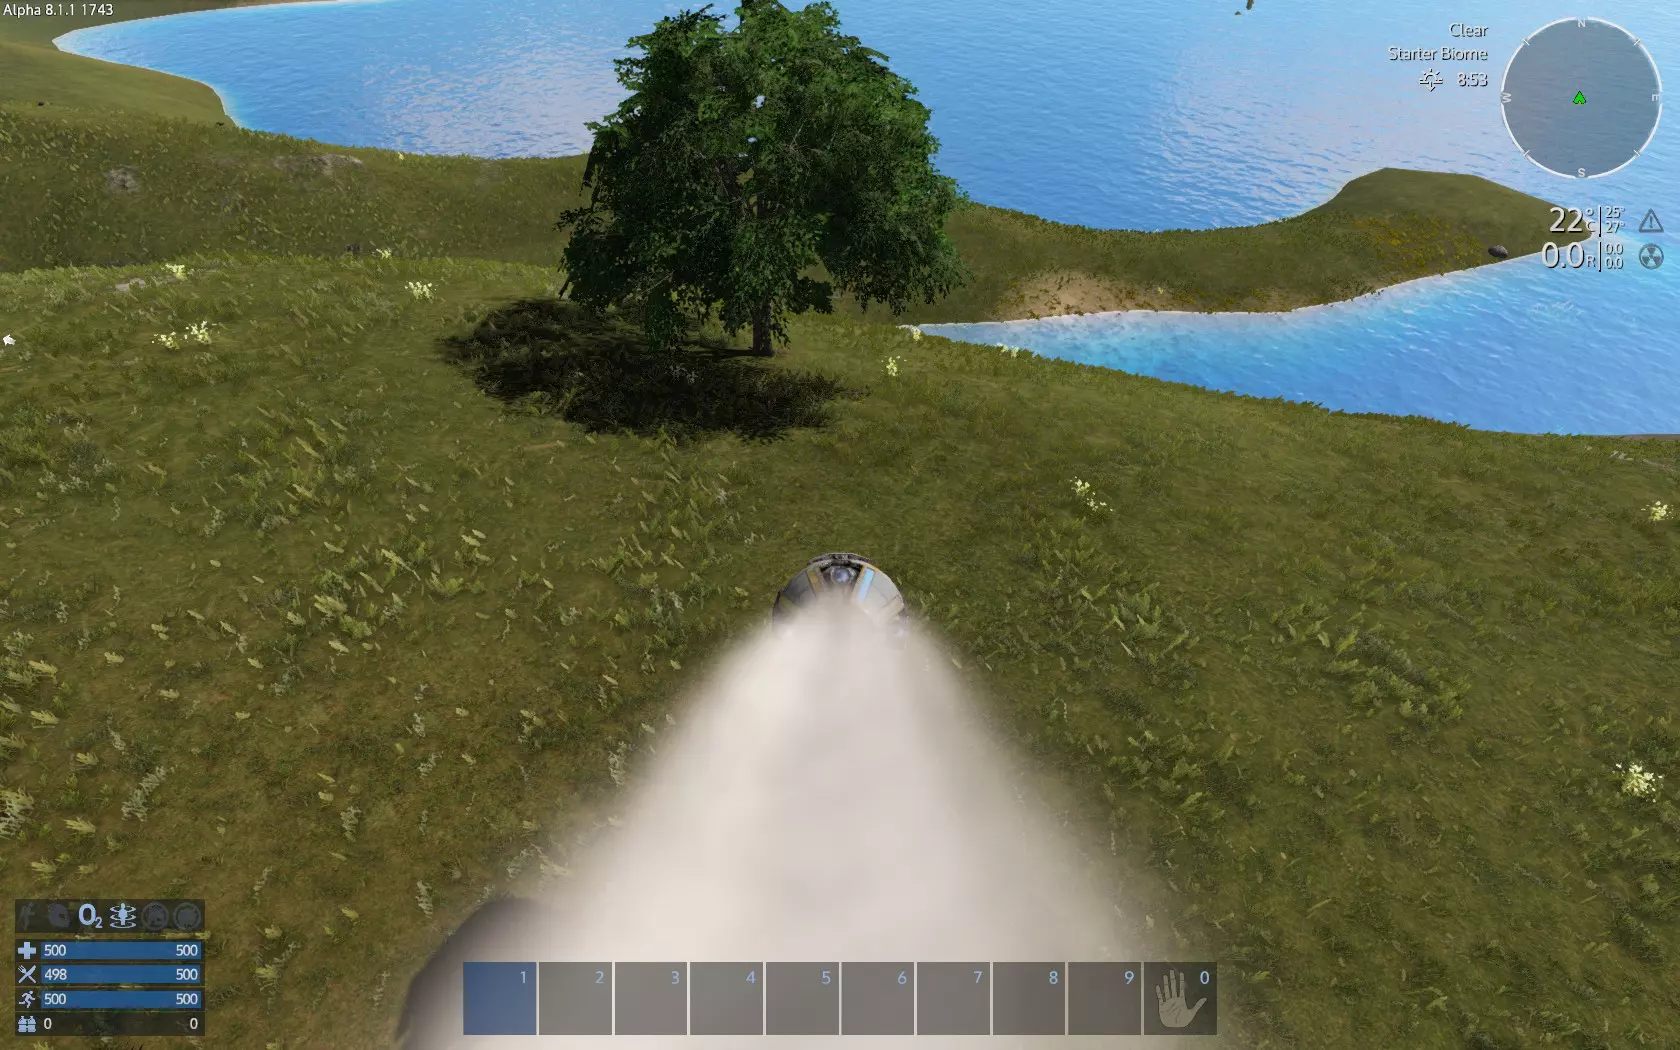
游戏开始时,你会身处一个安全的逃生舱内,该逃生舱会坠落到默认场景的星球上,或者你在开始新游戏时选择的任何星球。本指南将聚焦于默认场景,其中自定义星球拥有固定的可呼吸大气星球开局。自定义场景则可以是任何设定。本指南以可呼吸大气星球为例,同时也适用于非可呼吸大气星球,前提是这些自定义场景能提供一些小型氧气罐以及氧气生产手段。如果你选择了默认场景,那就没有问题,本指南完全适用。与非可呼吸大气星球相比,可呼吸大气星球的区别在于,由于星球本身有氧气,你可以将氧气相关项目延后,暂时不需要考虑氧气问题。其他所有操作说明均相同。作为一名新玩家,我强烈建议你在尝试任何自定义内容之前先体验默认剧本,以了解游戏玩法。开始游戏后,等待逃生舱着陆。在逃生舱内时,你可以使用【环顾四周键】(默认左Alt键)来环顾四周。这允许你在不改变方向的情况下用鼠标查看,尤其在之后驾驶载具时,想要在不改变载具方向的情况下环顾四周会非常有用。你也可以在下落时使用WASD键来操控逃生舱。
等待逃生舱落到地面。然后你发现自己就在逃生舱外面并弹出包含有用信息的消息此消息还会开启教程/故事任务,这非常有用。选择【出发!】即可开始任务。
如果错过对话或点击了跳过,想要激活任务,请按F1(默认键)打开个人数字助理(PDA),选择【故事】选项卡,找到【鲁滨逊协议】,然后点击【激活故事】。然后你会再次打开对话窗口,点击“出发吧!”
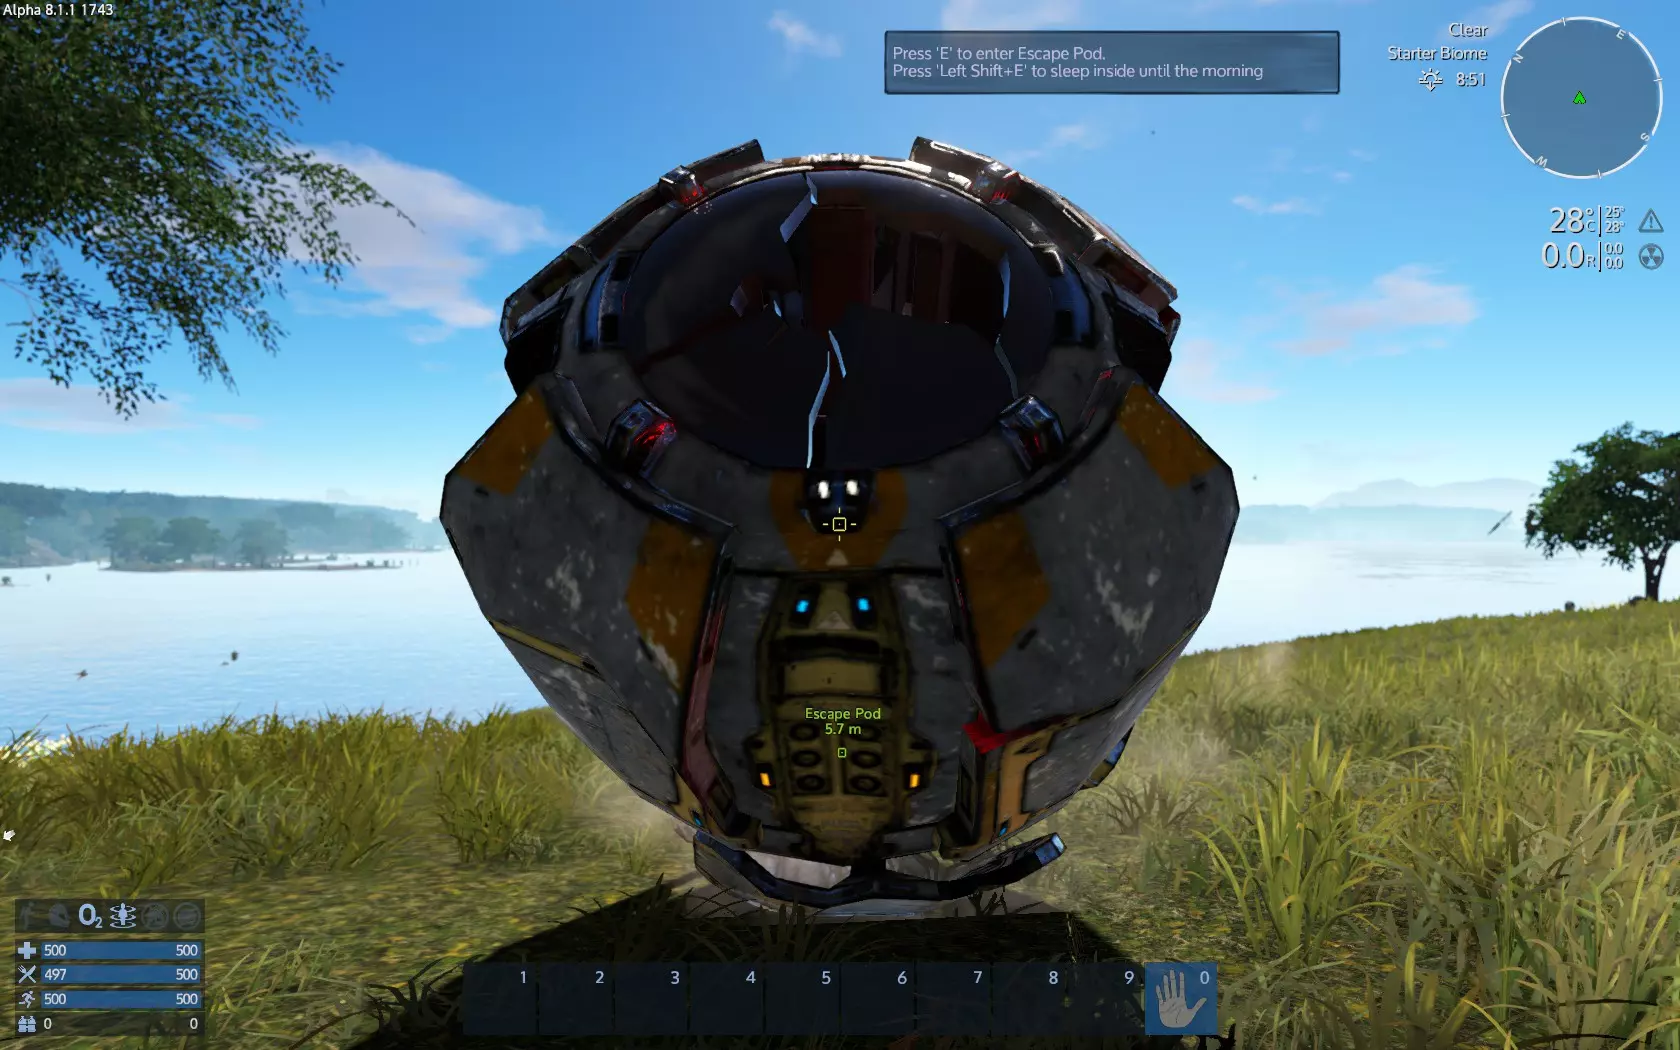
你的第一个任务是检查【舱体】的库存,屏幕右侧雷达下方会一直显示你当前的任务。面对舱体时,按下打开/使用键(默认F键)可访问舱体的物品栏。
会弹出提示:按F键进入舱体(即访问舱体物品栏),按Shift+F键可在夜间睡觉。夜间温度通常会下降,你可以待在舱体内过夜以避免冻伤。如果你远离舱体,也可以使用帐篷睡觉,不过目前该功能可用。
按下F键将打开舱体物品栏。里面没什么东西,只有一瓶净化水。你的物品栏在左侧,舱体物品栏在右侧( loot储物箱时也是如此)。在窗口的右上角区域,比关闭窗口的“X”按钮稍低且偏左的位置,有一个带左箭头的按钮,类似<--。左键(LC/LMB)可将舱体物品栏中的所有物品移至你的物品栏。然后左键点击右上角的【X】按钮或按【Esc】键关闭窗口。可通过拖放(左键点击并拖动,再左键点击)将水移到你的物品栏,或点击舱体物品栏右上角的右箭头来全部取出。在进行其他操作之前,你需要先了解自己的HUD界面,并将一些物品添加到快捷物品栏中以便使用。
屏幕右下角有一组状态条,状态条上方有一些指示器。这些状态条从上到下依次是生命值、饱食度、耐力和氧气值。
状态条上方的指示器从左到右依次为:喷气背包、头盔、可呼吸氧气环境、重力、附近的基地以及附近的(用于建造的)资源。
屏幕底部中央是你的工具栏槽位,对应1-9数字键。
屏幕右上角是雷达。雷达左侧可以看到天气、生物群系以及距离夜晚/黎明的剩余时间。雷达下方显示温度、辐射值和你当前的任务。按下跳跃/向上键(默认空格键),尝试爬上逃生舱,以便更好地初步观察周围区域,并获得一定的高度,从而避开野生动物(在默认场景的该区域不会有攻击性野生动物)。留意周围是否有攻击性野生动物,它们会主动向你靠近。如果没有,其他生物都是中立的,不会打扰你。但请注意,如果你攻击它们,它们会变得具有攻击性。
按物品栏键(默认I键)打开你的物品栏。用鼠标左键从物品栏中拿起生存工具,并将其放置在屏幕左侧的快速访问横栏中(默认热键为1-0,也可通过鼠标滚轮切换选择)。接下来放置手电筒。你还需要将另外几样物品放入快捷栏槽位,分别是能量棒和生存帐篷。如果你前往的是无法呼吸的星球,那么小型氧气瓶(如果有的话)也需要带上。为避免误触使用物品,建议你将那些误触也无关紧要的物品(如手电筒、生存工具,后期还有武器)放在顶部槽位(左侧的1、2、3、4槽),而数量较少且较为珍贵的物品(如药品、氧气和食物)则放在底部槽位(右侧的6、7、8、9槽)。中间的空闲槽位之后将用于放置大量临时快捷物品。
以下是整理前后的物品栏和槽位状态对比:你的下一个任务是找到信号源,但在前往那里的途中,我们还需要完成更多事情。
从一个无法呼吸的星球开始时,氧气是你额外的需求,而且实际上比任何事情都更紧急。本节将说明你需要做些什么来生存。
要了解这个问题,氧气的消耗速度比食物快得多,你有5个小氧气瓶,可以完全恢复你的氧气条。所以你总共有2条氧气条,初始的一条和小氧气瓶补充的一条。这只会给你一些时间来制作额外的小氧气瓶。如果你不把这作为首要任务,你很可能会因缺氧而死亡。在困难难度下尤其如此。当氧气消耗设置为“快速”(困难难度)时,你最多有大约12小时的时间,之后所有氧气都会耗尽并导致死亡。本节内容针对困难难度——选择中等或简单难度会为你争取更多时间。因此,如果你能在困难难度下完成,那么在任何难度下都能做到。
在这种条件和难度下生存的关键在于,明白一旦紧急着陆,在能够自行生产氧气瓶之前,你的时间极其有限。而且你必须生产出比消耗的氧气更多的氧气瓶。
首先,让我们看看你需要做什么/制作什么:
1. 达到3级以解锁便携式建造器
2. 制作2台应急发电机,最好是3台
3. 制作1台便携式建造器
4. 为应急发电机制作生物燃料
5.拥有2台应急发电机(EG)后,时间将对你有利而非不利,不过氧气生存的问题已经解决,你有时间再制作一台应急发电机,然后寻找木材(用于生物燃料)和食物。
6. 额外的应急发电机可以提高小型氧气的产量,从而扩大你的探索范围。之后你可以制造水发电机和氧气站,例如安装在气垫船上以实现移动自主。
困难的部分在于步骤5之前。让我们看看具体该怎么做:
在逃生舱坠落时,首先要做的是查看地图。降落在靠近水源的地方至关重要。沙漠类型的星球上温度非常高,水可以帮助你降温。高温会首先消耗你的耐力,使你无法快速钻探矿石或砍伐树木。一直待在阳光下,你最终会在氧气耗尽前死亡。当你紧急迫降后,从逃生舱中拾取净化水。这可能会为你提供额外的氧气,在等待稍后第一个小型氧气瓶生成时挽救你的生命。
现在有一件重要的事:移动时,【沿途拾取所有物品】,即使你暂时用不到或不知道它是什么。拾取是升到3级以解锁便携式建造器的唯一途径。钻探矿石不会获得经验值,砍树获得的经验值很少,还会更快消耗宝贵的氧气,探索获得的经验值也很慢,而且你不能远离海岸线。
同样非常重要的是:【不要奔跑】。使用喷气背包来加快移动速度。轻按2-3次,落地,再轻按。这样可以节省氧气——这是你最缺乏的东西。
现在,如果你不在海岸线附近,就前往那里。如果你已经在海岸线附近,就沿着海岸线移动。不要远离海岸线。移动时,务必拾取路径上或路径附近的所有物品,并留意寻找矿石。你需要铁、铜和硅。使用你的生存工具,将其设置为岩石钻头模式,然后开采你找到的矿石。不要开采普通岩石,这是浪费时间。
当你拥有1个铁矿石和3个铜矿石时,使用生存建造器开始制作你的第一个应急发电机。制作需要一些时间,所以最好在搜索资源的同时进行制作。
如果你看到树木,用生存工具的防御模式砍树。你大约需要3-4根原木。
不要忘记,在寻找矿石和树木时,要搜刮所有物品。
如果你感觉太热或出现中暑症状,跳进海里。你很快就会凉快下来,然后可以再次外出。
当你获得接下来的3个铜和1个铁时,制作你的第二个应急发电机。
最后,当你达到3级时,解锁便携建造器并进行制作。你需要3个铁、2个硅和1个铜。
不要浪费时间大量开采单一类型的矿石,例如铁或铜。木材也是如此。3根原木就足够了,5个铁、7个铜和2个硅也一样。你只需要1-2棵树和每种矿石各1个矿床。
当便携建造器准备好后,将其放置在地面上,放入原木(如果想节省时间,也可以放入纤维),至少制作2个生物燃料(或按住Shift键点击制作10个)。将应急发电机安装在旁边。如果你的氧气所剩不多(50-100),最好待在原地,不要走动,以尽可能减少氧气消耗。制作完成后,将第一个生物燃料放入第一个应急发电机,第二个放入另一个。让应急发电机并行工作很重要。后续的生物燃料也按同样的方式分配。待在附近,直到你的氧气条充满,并且随身携带1个小型氧气瓶。尽快制作第3个应急发电机。应急发电机每完成两次倒计时,会先制作1个小型氧气瓶,然后制作1份净化水,所以你每两次倒计时能获得1个氧气瓶。
有时你可能找不到某种矿石。你能做的就是尽可能尝试在不同地形中寻找。查看上面的图片——我在平原沙漠找到了铁,在相对肥沃的沙漠找到了铜。不过这对于矿石分布来说并非100%确定。
有时你可能会降落在地图上甚至看不到水的地方。有时可能因为高温根本无法生存——便携式加热冷却器也需要3级才能解锁。随机生成的地形并不保证一定适合生存。不过,这种策略能让你在开局时获得充足氧气的可能性很大。
有几点重要事项你需要了解:
让我们快速查看一下当前的界面和物品,了解一些可能救命的信息。
到目前为止,我们乘坐逃生舱着陆,搜刮了逃生舱,并将一些物品设置为快速使用快捷键。
我们也看到了界面显示,但还不知道如何利用它来生存。
打开你的背包。在右侧,属性旁边点击【生存建造器】。
浏览物品,找到【浆果汁】。弹出信息显示:腐烂时间50,生命值90,所需材料2个浆果。这意味着当你收集到2个浆果时,就可以制作浆果汁来恢复90点生命值。【腐烂】表示,除非存放在冰箱内(你目前没有冰箱),否则物品将在X游戏小时后变成【变质食物】(这也是需要的)。能量条也是如此,需要2份植物蛋白,可恢复80点饱食度。So you now know how to restore food and health bars. When you have the required items in your inventory the item in the constructor will no longer have red background and it will be available like the Survival Tool which requires nothing to build. Click the survival tool into the constructor to craft one to see how it works. When finished it will be placed at output slots. You do not need to wait, close inventory to move on, the survival tool will be crafted meanwhile.
Now on the HUD:
You total have 500 health and 500 food, food bar should be somewhat lesser now. Food bar always depletes.
Stamina is used for running and replenishes over time. Better use running when you really need to.
Oxugen is 0 because you have no suit and you do not need it yet because you are on a breathable planet. Leter on you produce O2 from water with certain devices and you will have O2 either from base/vessel ventilators or your suit O2 and use O2 stations or carry O2 bottles to replenish.
The indicators above are, from left to right, Jetpack, Helmet, breathable O2 atmoshpere and gravity. The O2 and gravity should be on because of the planet. Later on those are either non existent and you get O2 from your armor suit and move from your armor suit thrusters or exist from a base or spaceship having ventilators and gravity generator devices. The two left indicate a base or resource nearby that block you from build close, not needed for now.
Bellow are extra info, you do not need to read right now if you do not like, but feel free to do if you want. You can go on and without and come back later here.
More info on tooltips:
Description: General info helpful to know where to use it
Different item types have different stats. While most devices have energy In for example a generator has Energy out. A consumable plant may have Health - 100, Stamina 500, meanning it damages health by 100 and restores 500 stamina. Weapons have stats like damage, range, ammo and the like. Devices have stats like HP, Placeable, energy In or Out, Mass, Size.
More info for health:
Your health should be full at this point. Injuries will deplete health and you can restore your health using varius items. Health can be damaged from combat, falling a lot of height or as a last resort when starving, freezing, cannot breathe, getting very hot or got radiated (environmental conditions). Can be restored with medicine, food, or medic devices at bases and ships. For now you have no enemies at this level, no special environmental conditions and no hazardous environment disasters, so just make sure you will not fall from too high. Also make sure you protect yourself from freezing at night by sleeping. You can check temperature below your radar. When starting getting cold you will also got notified as 'Too Cold' at down right of the screen and see the afliction at your stats (inventory, stats tab next to survival constructor tab).
More info for food:
Food is a constant need. Water is not. If you run or drill stones for example you need more food. Check your bar level and your food resources at regular times. Eating food restores the bar. The food bar indicates how hungry you are. Fulls means not hungry, empty means starving - dying from hunger. If the bar empties you don't die instantly but you loose health gradually. However it is pointless to 'heal', when you food bar depletes you need to eat. That is what energy bars do at your quickslots, make sure if you get starving you have a workaround at your pocket. If you don't place into quickslot at least make sure you always have some food in your inventory. Later you run here and there and do multiple tasks you might find yourself starving because you miss to check the food bar. It is relatively easy to obtain food so you probably won't have to starve unless you forget to check the bar and forget to collect food or your food had perished. Later on you craft emergency rations that do not have perish time. For food there is one rule, you better have and do not need it yet, than need it and do not have it. Carefull with perish time, when you stack items perish time goes average. Place 1 energy bar with 50 perish time on top of 10 other having 1 perish time your fresh bar will join the others and now 11 bars will have 2 perish time!
THIS IS VALID ONLY IF YOU HAVE AMROR FROM THE SCENARIO: Press the Jetpack key (default J) to toggle your jetpack on. The jetpack state and energy is at your HUD, lower left of your screen. The energy recharges very fast. The jetpack indicator will now work as vertical bar. Press U to toggle helmet on and off. When off, you cannot use suit's O2 and night vision.
More info on O2:
The oxygen is your suit oxygen supply, when wearing a armor suit. Like food, if it depletes then you gradually loose health until you die. If it is depleted healing will not help you, you need to refill it with oxygen. You can refill your suit oxygen using small O2 bottles. Later on you will use a device on your bases called O2 Station. When away of O2 station you only have small O2 bottles. Your oxygen supplies are deadly more limited than food. A single small O2 bottle fills only a very small portion of your suit oxygen supply. All 5 bottles will fill half your meter. So instead of take care you hunger 4 times with 4 emergency rations, with 5 small O2 bottles you only fill your meter 50%.
More info on stamina:
Stamina is used when you run. You run by pressing Run key (default Left Shift). It regenerates slowly when you walk and much more faster if you stand still. You do not have any consumables to restore stamina now but there are some items you may harvest and others you will craft that restore stamina. However when your stamina is depleted you cannot run but you don't die of this.
More info on Jetpack, Gravity and Helmet:
Jetpack is the On/Off indicator for your jetpack. The bar represents the jetpack's energy that replenishes very fast. Please remember that when the jetpack is on you cannot run so it is good to turn it off while on the planet and opened it when you need a high jump, then turn it off again. The jetpack is mostly used (On) when been in space where there is no gravity, so you can move around.
The gravity indicator is of no much use at the moment.
The helmet indicator is important. It is On/Off toggle and shows if you wear your helmet or not. The key Helmet (default H) toggles the helmet. If you take of your helmet however you cannot breathe unless been on a breathable atmosphere or inside a vessel cokpit. Without helmet you cannot also use night vision googles.
The way to the signal
The mission to go to the signal open a yellow waypoint visible into the game and on the radar. It is named 'Wreckage'. We certainly need to get there. It says 1.09 km which means it is 1090 meters away. We need to walk 1km to get there.
On our way we may also visit small wreckages unless close to our way:这个小型残骸值得一探究竟,因为它就在我们的路线附近。记住,如果夜晚降临,就用帐篷睡觉。在旅途中,我们会在周围搜寻可收集物,主要是重要的食物和矿石。
这是一个植物纤维可收集物。按下F键即可将其收入背包。这是另一个可收集物品,植物蛋白。植物纤维并不是必须大量收集的资源,因为可以用木材大量制作。不过植物蛋白是制作食物的必需材料,尤其是用生存建造器制作能量棒时会用到,这部分我们稍后再处理。
现在按1键或将鼠标滚轮滚动到1号槽位,选择你的生存工具。
选中后,点击鼠标右键。这个工具共有3个功能选项:
防御模式,可作为(非常弱的)武器使用,也可用于砍树。岩石钻,用于开采岩石和矿石。打捞,用于建筑和船只,将其逐件回收为材料。矿石是游戏中最有价值的资源,因为除了食物和药品外,几乎所有物品的制作都需要用到矿石。目前,如果没有手持钻机,我们只能开采矿石岩石。所以要注意留意它们的位置。靠近处于凿岩机模式的生存工具,按住鼠标左键进行钻孔屏幕右下角会显示岩石的种类信息(石头、铁矿、铜矿、硅矿)以及其钻孔生命值。完成钻孔后,注意收集矿石。不同矿石具有不同颜色。铜矿石呈红色,铁矿石呈蓝色,硅矿石呈白至银色。继续前进,我们找到了残骸。这个残骸被埋起来了。小型残骸通常有一个货柜可以搜刮,但这个在地下,所以我们不得不放弃搜刮。这些残骸的战利品是随机的。如果你愿意,可以使用生存工具【打捞装置】来打捞一个方块(就像钻石头一样),看看它是什么以及能获得什么。是时候开始制作了。打开物品栏,然后选择生存建造选项卡。之前需要点击制作的生存工具现在应该已经在产出物品栏里了。拿上它吧。反正这是免费物品——把它扔到你背包的垃圾槽里。
如果你收集了至少1份植物蛋白,现在应该就能制作能量棒了。查看一下你有多少份植物蛋白,然后点击制作——2份植物蛋白可以制作1个能量棒。比如,如果你有6份植物蛋白,就点击3次来制作3个能量棒。你的制作指令会排队进行——3个能量棒会依次制作完成。储物柜中还有一些物品,分别是便携式加热/冷却器和便携式建造器。这些物品需要你掌握相应的科技才能制作。退出物品栏,打开科技树(默认按键F3),在那里你可以找到所有可解锁和制作的科技。
你需要进入【杂项】标签页并找到这些科技。目前在我的截图中,我等级为2级,拥有10个解锁点数。这些科技各需要5点解锁点数和3级等级,所以我还需要再升1级才能解锁并制作它们。这里还有应急发电机可用,但在此处不需要(在非 breathable 星球开局时需要)在《帝国霸业:银河生存》中,你所做的任何事都能获得经验值和等级提升,比如探索、掠夺、制作、建造、战斗等。
这对于平衡你的进度至关重要——不要花太多时间在远处钻探矿石,也不要一直采集植物获取食物,否则你会不断升级,却无法应对新的威胁。你需要继续前进并取得进展。
靠近任何你认为可收集的物品,查看工具提示。例如,这个物品就能收集到某些东西。查看物品栏,我们可以看到物品提供的内容。例如【天然甜味剂】这类物品,本身就是非常有用的治疗道具,无需像浆果那样通过制作才能使用。此外,物品的【有效对抗】属性意味着,如果你患上了该物品能治疗的疾病,使用它就能治愈你。
重要的是要检查所有你拾取的物品、可能制作的物品、所有可用配方,以及所有物品的说明文本,以了解每个物品的用途。其中一种物品可以治疗毒咬伤,另一种可以治疗眩晕。请注意,负值会产生负面效果——【食物值-100】意味着会变得更饿!继续行走和探索,你会发现其他有用的地点,比如这个铁矿床。矿脉中含有大量矿石。但你需要在那里放置一台 drill(钻井机),因为生存工具只能开采地表岩石。对于某些矿石,例如 promethium(钷),你还需要扫描仪。
按 M 键打开地图。在地图上可以查看你目前已发现的所有内容。除了现有的标记外,你可以右键点击地图上的任意位置来设置自定义标记。最终你会到达目标地点,一处较大的残骸。在那里你会找到一个储物柜。像开局时搜刮逃生舱那样收集战利品。你还会收到任务更新消息。游戏到这里会提示你通过查看便携建造器的配方来制作更高级的物品。
将便携建造器和摩托车放在你的物品栏中。选择便携建造器并指向地面,左键点击进行部署——你可以随时(按Shift+F)将其收起,所以可以在任意位置部署。所有建造器的工作方式相同。它们都拥有配方、获取材料、具备建造队列,并在完成后将产物放置在输出口。不同之处在于配方和建造速度。更高级的建造器拥有更先进的可用配方,且建造速度更快。查看建造器界面,左侧是模板,中间是输入、输出和建造队列,右侧是你的物品栏。
准备使用手持钻机进行钻探。
现在我们已经移动了一段距离,拥有了便携式建造器和食物,但接下来该做什么呢?
你现在所在的这片残骸将作为你的临时“基地”。
接下来我们需要制作一些武器、一个基地和一艘气垫船。然而,要完成所有这些,我们需要资源,比目前从地表石头中收集到的要多得多。
实际上,我们需要钻探4个矿床,分别是铁、铜、硅和钷矿石各一个。
这将需要一些时间,所以我们需要确保至少在每个矿床之间补充食物供应。我过去常常把便携建造器留在残骸处,既把它当作储物箱,也用来制作那些耗时较长的物品,这样我就可以去钻孔了。你还需要一把武器,哪怕是一把手枪也行。打开建造器,进入武器和工具分类,找到手枪的制作配方。看起来可以建造,但我们还需要检查弹药。任何武器的弹药都可以在武器工具提示中找到。手枪子弹似乎需要一种叫做硝化纤维素的东西,而我们没有。
模板标签旁边有一个文本过滤器。点击那里并输入“nitro”,就能显示缺失的物品。这是一种用于制作其他物品的中间材料。最终物品可能需要多种中间材料层层叠加制作。显然,此类物品需要植物纤维,而植物纤维本身也是一种中间材料。你可能已经拥有植物纤维,也可以通过配方获取。使用筛选和搜索功能可以发现,植物纤维需要原木。
前往最近的树木处,使用处于防御模式的生存工具砍树。这可能需要一些时间。砍树完成后,原木会自动进入你的 inventory(背包),无需像采集矿石那样手动收集。
现在返回,将原木放入建造器的输入端。此时子弹应该就可以制作了(除非你还缺少其他材料)。如果无法制作,请检查还缺少哪些材料。重要提示:
物品至少可通过以下一种方式获取:
- 在建造机或食品加工机上制作(如船体块、披萨)
- 在特殊设备上生产(如小型氧气瓶、水壶)
- 从死亡生物和外星敌人身上掠夺(如生肉、外星零件)
- 从星球地面植物中采集(如植物蛋白、浆果)
- 从你建造并种植的人工地面植物中采集(如玉米、番茄)
- 从地面岩石上钻探(如铁矿石、碎石)
- 从矿床或地面钻探(如铁矿石、碎石)
- 如果你使用生存工具或多功能工具对由该物品制成的东西进行回收,可将其回收到你的 inventory 中(所有组件都会被回收,例如回收一个船体模块将获得2个金属板。
可从容器、外星生物或中立生物处 loot。(重型装甲、生存建造器)
当你将原木放入建造器输入端后子弹变得可用,这意味着建造器会自动制作所有所需的中间物品(植物纤维,然后是硝化纤维素),以制作最终产品——子弹。由于物品的最小制作数量并不总是1,产品制作完成后所有多余的中间物品将存入你的建造器输入存储。
如果你不信任手枪,可以试试霰弹枪。不过你需要先解锁它。解锁武器的同时也会解锁该武器的弹药。但请确保你已先解锁便携式加热器/冷却器和便携式建造器。如果你的等级或点数不足,请去开采矿石直到满足条件。现在你可以使用摩托车移动了。选择摩托车并在地面上左键点击即可。放置后,可照常骑行使用。那你就可以开始了。现在来说说钻头。和制作手枪子弹的方法一样,你需要进入建造界面,你可能会缺少制作钻头所需的硅。所以你需要去寻找一些硅。不过在此之前,你可以检查一下钻机的弹药。你需要大量的钻机弹药来开采矿脉,所以在寻找资源的同时进行制作是明智的做法。实际上,如果你在做其他事情时需要进行制作,那么让制作持续进行总是个好习惯。否则,你会发现自己需要更多时间来完成任务。
所以在外出寻找硅之前,先制作一些生物燃料。如果你还没检查过便携建造器的组件筛选栏,可以去看一下,你会发现可以用碎石制作硅矿石。问题在于,获取一块硅矿石需要大量碎石。显然,直接开采硅矿脉要快得多。不过,如果你找不到硅矿脉,或者只差一块矿石,那么用碎石来获取就是理想的替代方案。
记住,查看建造器配方、你拾取的物品以及阅读工具提示是必须的,这样才能了解物品的用途、每次所需的资源以及你能制作的东西。
所以在你去开采之前,需要制作以下物品:
1. 一把武器和至少5次装填的弹药。这是必要的,因为通过探索和开采你会获得等级,而野生动物掠食者(例如蜘蛛)会攻击你。
2. 一个便携式加热器/冷却器和一个便携式建造器随身携带。加热器/冷却器将保护你免受舒适区外温度的影响(具体范围取决于你的套装,可通过【物品栏->状态->护甲属性】查看)。便携建造器能帮助你制作生存建造器无法制作的物品,并且在你的“基地”时还能提供第二条制作队列(例如:第一个建造器大量制作生物燃料,第二个建造器则用来制作钻头)。
你需要钻头和名为生物燃料的钻头弹药才能实际开采矿床。工具和武器一样需要弹药。生存工具是初始基础物品,因此无需弹药。
由于我一边玩一边写这份指南,所以我会收集材料并将它们加入制作队列。我还将生存建造器用于另一个队列:例外的是,有些物品只能在生存建造器中制作,例如便携式加热器/冷却器和建造器本身。至少在当前版本是这样。
记得合理安排制作顺序,在进行其他操作时同时下达制作指令,这样就不必稍后等待。在外出收集/钻探资源前,甚至在晚上睡觉前,先想好自己需要什么。你的便携式建造器会很乐意在你睡觉、收集食物或钻探时帮你制作例如20份生物燃料。
进食时,优先食用保质期较短的食物。例如,烤串的变质速度比能量棒快得多。现在不用担心变质的食物了。已经变质的就任它去吧。把它当成一种资源——你以后会需要的。在这个阶段,你没有冰箱,食物变质是很自然的结果。
我的物品已经准备好了,我从建造机的输出口拿起它们,准备去钻井了。建造机的输出栏是临时存储区——一旦从中取出物品,就无法再放回。不过建造机的输入栏可以用作储物空间。如果需要,你可以制作额外的便携式建造机。它们不仅能用于制作多种物品,还能当作储物箱使用。准备钻探,我们现在可以开始钻探了。矿床就在我们前方。当距离较远时,HUD上的标记会消失,所以我会标记我的临时基地以确保能返回。右键点击残骸,然后在对话框中点击确定。如果你愿意,可以更改图标——我选择了主页图标。这样一来,你的基地就能在星球上的任何位置被HUD显示出来。部署载具并靠近矿藏。你的HUD会显示矿石类型、大小、剩余矿石量和距离信息。矿石 deposit 总是位于地下。
如果遗漏了某种 deposit 类型,你需要进行探索。骑上你的摩托车继续探索,直到找到 deposit。要确认 deposit 是否存在以及数量多少,请查看你的地图。在右侧,行星信息下方列出了资源。资源种类丰富,你需要每种各找到一个。注意不要靠近任何敌方基地500米以内。制作一个探测器并随身携带,这将帮助你进一步探测矿石 deposits 并避开外星基地。
要小心,那里可能有掠食者(具有攻击性的野生动物)并会攻击你。在钻探前确保清理该区域的掠食者。如果你受伤了,检查一下生命值并进行恢复。如果你得了某种疾病(截图右下角显示我得了皮肤灼伤),进入物品栏-状态,将鼠标悬停在那里的疾病上,它会显示你需要什么药物来治疗。
有时天然成分可以治疗疾病。阅读工具提示很重要。
如果你没有治疗疾病所需的物品,查看建造器中的配方,找到制作所需的材料。试着多制作一些,而不仅仅是一个。这样你就能建立自己的药品储备,以便应对各种疾病。
不要让疾病拖延。一旦生病就要立即治疗。有些疾病可能会自行消失,而有些则可能会恶化并导致你死亡。
如果你有一些药品,但又得了需要新药的疾病,就制作新药。随着时间推移,你总会随身携带或在附近备有一整套药品。
目前要小心,因为你正徒步前行,没有护甲,只有一把带些许弹药的武器。
只需尝试清理矿脉附近的区域即可。
在解决掉掠食者后,前往矿脉处,部署钻机并装填(默认键R)。就像生存工具一样,钻头也有模式,分别是地面钻头和岩石钻头。右键点击会显示:选择地面钻机即可准备就绪。按住鼠标左键并指向前下方开始钻探。钻探一段时间后,检查你的工作成果。关于如何钻孔,没有简单的解释方法——这完全是一个边做边学的过程。你只需注意,完成钻孔后要有办法出来,所以垂直向下钻洞不是个好主意。
靠近矿石时,你会通过颜色发现它,矿石的颜色总是与石头不同。另外,请确保你返回的道路是畅通的。Once you find the first spot of ore, you can drill it all. Ore deposit is like a gigantic egg below the ground. However keep in mind that you need a way to go up at all times!
While drilling, ore will be deposit to your inventory automatically. You do not need to collect it, just keep drilling. Together with ore, you will also get crashed stone - it is a valuable resource as well. Keep it. Most bases need it for concrete, it is their basic resource.
The first drill project.
You now have a base and a small hover vessel. You are good to go drilling and get some resources. Before you go, make sure that:
Your base has the fuel tank full and the power is on. Open the control panel and check the autonomy. Make sure you do that while the large constructor does not craft something at the moment. The constructor uses a fair amount of fuel for crafting an item so if you craft few stuff you get wrong indication. Wait for the constructor to finish and then check base power autonomy. Make sure you will return before fuel runs out. Later on you will build large fuel tanks and get much greater autonomy. If you dfinatetly need more autonomy now, craft a second fuel tank, install it and fill it with fuel. This will double autonomy.
Your base ammo box has ammunition for the cannon turret. Remember, the cannon turret uses different ammunition than your pistol and your assult rifle. If you don't remember check the recipe or enter the turret to find out. If you haven't already, now is the time to craft ammo for the cannon turret and place it into the ammo box.
Check the O2 generator, add some fuel if needed and collect O2 bottles.
Make sure your hover has fuel into fuel tank, O2 bottles into O2 tank and extra at cargo box and food into the fridge. Add anything else you see fit. A second weapon with some ammo, few meds, 5 small O2 bottles and an emergency ration would be smart because if you die on foot and respawn near your hover you can equip and reclaim your inventory from your death location. When you respawn from death you have nothing at all at inventory and slots and all bars are at 50%.
Also make sure you have ammo for the hover turret. However place that ammo at the simple cargo box. It will be a waste to shoot dozens of aggresive creatures on the way that you never loot, don't get epxerience (you don't get epxerience from turret kills or damage) and use lots of precious ammo.
Unlock and craft the Remove and Repair tool with a relative charge. This tool has 2 great functions. First it repairs any building block or device that is not entirely destroyed, with RMB, charge free. Secondy, it recycles. If you press LMB close to a building block or device, yours or ALIEN(!), after some shoots (depends on the target) the target is destroyed but you get ALL crafting required for crafting at your inventory! So basically, if you missplace something you recycle it, place the components back to the constructor,craft it again and install it properly. Later on you may want to recycle certain important components from alien bases you will conquer. For now you mostly need it to repair your hover.
Finally make sure you have enough charges for your drill tool. One charge per different ore is great as it provides about more than 200 ores, which means 400+ ingots. The working light tool will also help you, you have one. Without it and without the flashlight either it would be difficult to drill at night.
Open you map and select your first deposit to drill. Go there. If you get attacked by drones stop the hover, get out and kill drones on foot. Loot the drones, back to hover and continue.
When you get at the deposit, power off the hover, get out and check around for aggresive creatures. Kill all you find. Then fill the ammo box with the turret ammo from the cargo box. Enter the hover, turn power on and get out. The turret will reload - if not enter the turret and reload it yourself then get out. If the turret targets and starts firing, there must be an aggresive creature into vicinity. Enter the turret to understant where it targets. Then enter the hover and turn power off. Get out and run towards the turret target area. Find the aggresive creature and kill it. Go back and turn power off. If the turret targets and fires again, repeat.
When you are done with aggresive creatures, drill as close to the deposit as possible. Avoid to drill vertically, drill as much horizontally as you can. Drill in a way that the ground gradually goes deep so you can always use the jetpak to jump out of the hole - you will eventually create a hole. The longer the drill the wider and deeper the hole. Also make sure you drill to the horizontal sides first to broaden the hole as much as possible before make it deper. Drill with LMB is better i think but you may experiment. Don't forget to loot the ores when you drill. Best practice is to drill for few seconds, collect ores, repeat. Ores if left on the ground they dissapear after few minutes.
Make sure your hover is as close as possible:当你听到悬浮载具的炮塔开火时,就下车查看。不要让悬浮载具独自作战。处理威胁并修复你的悬浮载具。设备损坏可以在控制面板上轻松查看。例如,那里显示“驾驶舱75%”,意味着你的驾驶舱已损坏75%。对于建筑模块,你需要目视检查载具周围。你可以右键点击进行修复——修复不消耗任何资源,所以当你的指针移到受损建筑模块上时,你会听到修复的声音。停留在该模块旁,直到声音停止。你初始的悬浮载具,我称之为悬浮侦察机,非常轻。如果任何一个关键部件(核心、驾驶舱、发电机、燃料箱、RCS推进器)被摧毁,你将无法驾驶它返回基地。不过,如果你遇到驾驶舱被摧毁的情况(例如可能是由于驾驶舱尺寸问题),最佳做法是使用拆卸修理工具回收核心,将你的物品从悬浮载具上取下并返回基地。在基地,你需要用现有的材料制作一个新核心,然后制作一个新驾驶舱来替换被摧毁的那个。当你这样做时,你的悬浮载具残骸是绝对安全的,因为外星人会通过核心来发现并攻击基地、悬浮载具以及所有船只。没有核心意味着不存在任何目标。
基地和船只制作:
钻探4种矿床(铁、铜、硅和钷)后,你就拥有了建造基地和悬浮载具(气垫船)所需的全部材料。之后,你将可以建造小型船只,再之后是大型船只。我强烈建议先建造一艘悬浮载具(HV),用它四处移动一番,然后再建造基地。这能帮助你找到一个合适的基地位置,要远离敌方基地,并且建在开阔地带,这样基地的加农炮塔就能轻松消灭敌方无人机。
一旦你的基地建成,敌方无人机很快就会发动攻击。不过,如果你有悬浮载具,就能拥有不错的防御能力,至少能撑到你制造出加农炮弹药并装填到基地加农炮为止。这是因为只有基地的大型建造器才能制造基地加农炮塔所需的30毫米子弹。
建造基地/载具的方法有两种:
1. 使用蓝图工厂:
使用蓝图工厂(默认按键F6)来选择一个蓝图。点击工厂以获取工厂蓝图,并从你的库存中向中央底部的箱子提供所需资源。你放入那里的资源无法取回,它们会一直留在那里直到被使用。提供资源并点击开始生产。当所有资源都已放置且你达到蓝图所需的等级时,即可开始生产。准备就绪后,你可以立即将其生成到游戏中。打开蓝图工厂。选择它,准备好的物品在列表左上角,然后点击右下角的生成按钮。而你就在这里:2. Craft it into your game:
This is very difficult and complicated. Please see sections 'Craft ingame' down on this guide.
Where do i find blueprints?
1. The game has some ingame blueprints you can use.
3. You can craft your own blueprint starting a new game of type 'Creative'. This game type gives you all resources, you cannot die and be able to build anything you like, thus the mode name creative. When finish your creation save it as blueprint (you do not need to publish it) and it will be accesible into your blueprint library, together with the ingame blueprints.
2. The game's workshop has thousands of blueprints you can use, created by other users and shared for free. Browse them and subsribe to those you want. When subscribe, they will become available to your blueprint library together with ingame and your blueprints.
Steam workshop:
https://steamcommunity.com/app/383120/workshop/
You can also ckeck my blueprints if you like:
https://steamcommunity.com/profiles/76561198034543949/myworkshopfiles/?appid=383120
I also have a special collection for starter blueprints here:
https://steamcommunity.com/sharedfiles/filedetails/?id=1448034927
Few things you need to know:
Bases (BA) do not move. They may have solar panels thus been energy sufficient. They have the strongest weapon turrets available. They can be build on ground and on space. When build on ground they are subject to structural integrity. Structural integrity can be checked using build menu (default T), debug, check structural integrity. Bases may have the best utilities available to install on. Bases only compared to capital vessels, but they are build faster (lesser level) and they can repair capital vessels (capital vessels cannot repair themselves) as well as hovercrafts and small vessels. Bases only have turret weapons. Turret weapons automatically fire enemies and player may also control them directly if choose to.
Hovercrafts (HV) move only on planets hovering above ground. They have many roles according to their design, from combat tanks to utility or scavenging or multiple roles. You can move around inside them, attack wildlife or aliens (aliens according to HV strenght and role) and may have a variety of usefull devices like constructors, fridges, storage boxes, O2 stations, interior protected O2 ventilated space, armor lockers, health and spawn stations and more. A proper hovercraft will allow you to move on as a nomad at this phase, explore the planet and collect resources. Hovercrafts have both turret and fixed weapons. Fixed weapons fire manually at ship's croshair.
Small vessels (SV) are flying planet and space ships. They have most of a HV utilities you can install on them except towers. SVs only have fixed weapons. SV can fly to the moon of a planet. If equipied with SV warpdrive can also travel to a nearby planet as soon as is lesser than 15AU. SV only get up to hardened steel armor.
Capital vessels (CV) are large spaceships. They have all a base may have except solar panels. Capital vessels are capable of carry any SV and HV on them, as long as the HV/SV have docking pads. They can also repair SV/HV on them. Capital vessels may go on planets but certain weapons do not function there.
Starting with a scavenging hovercraft
As i reccomend, you better craft a HV before your first base.
The hover vessel is a vessel type construction. While bases are fixed on a planet, vessels move around. The Hover Vessel (HV) hovers up to 3 meters above the ground. It travels up to 40 meters per second. It is safer than motorbike because wild creatures cannot attack you as the hover will avoid rocks and similar obstacles. On it you can install cargo boxes, a fridge(s) and an O2 station (!!!), making it a small mobile base, short of. That is, you fuel your hover, turn power on, add some food into the fridge, add O2 bottles to its O2 tank, some more into the cargo box with any other supplies you see fit and you are good to go. If you run out of oxygen, you return to your hover and use the O2 station. In cockpit you use hover's O2 anyway. If you are hungry you open the fridge and suit yourself. As simply as that, while moving around. On top of that, the hover may get a medic station and a cannon turret exactly like your base does! Except a large constructor (hover's mobile constructor has certain recipe limitations), the hover has all essentials your starting base has!
But most importantly:
The HV will not attract enemy drones and will help you learn how you manage vessels and bases.
There are thousands of HVs you can find. For learning purposes i will continue with a vessel i design and use which is simple, cheap, easy to use and effective at scavenging around.
Get the ship from here:
https://steamcommunity.com/sharedfiles/filedetails/?id=1336300609
Subscribe and you are ready to craft it into your game using the blueprint factory.
After crafting it, it is time to use it. Aproach the ship and press P for control panel.这里有很多信息。
共有4个标签页:主标签页、设备、信号逻辑、统计。
停留在主标签页或前往主标签页。
右下角显示燃料。所有基地/载具都需要燃料,这就是为什么要开采钷矿。用于制作燃料包(钷)。如果还没有制作,请现在制作一些。使用这些燃料包为载具填充燃料。使用管理界面通过拖放方式添加燃料,或使用全部填充来自动填满所有燃料。在管理界面中还可以提取燃料。输入数值并点击<<按钮。燃料有数值,燃料包(钷)的最小值为30。填充和提取燃料均以30为单位,不能少于30。因此,例如,如果载具的燃料箱有25的空余量,则无法填充;如果剩余25燃料,则无法提取。
左上角信息旁边有常规选项,这些是开关:
电源,总电源开关,默认按键Y。关闭所有电源。
氧气,用于氧气覆盖区域的通风设备。
灯光,用于所有灯光(默认按键L)
信号,用于所有信号
炮塔,用于所有炮塔
推进器,用于所有推进器。
有时你需要让飞船部分通电。驾驶这艘飞船时,你需要冰箱始终开启以防止食物变质,同时炮塔也要开启以保护你免受捕食者和无人机的攻击。因此使用总电源不是一个好选择。相反,我会关闭推进器、悬停功能和灯光来节省燃料。
进入设备选项卡。找到炮塔。在那里,你可以通过勾选相应的复选框来定义炮塔的攻击目标。例如,如果你取消勾选曲速引擎、发电机和推进器,迷你炮就会专注攻击炮塔和固定武器。
现在找到悬浮引擎组。如果没有组,使用顶部的自动分组按钮。点击悬浮引擎组后,确保其左侧已选择快捷键【hover】。这能让主标签页上的自定义【悬浮】开关控制该类别的所有设备开关。通过这种方式,你可以创建自己的开关。比如在【悬浮】下方输入【Fridges】,然后进入设备界面,找到冰箱类别并选择你刚输入的快捷键。现在你就有了专门控制冰箱的开关。
在设备界面,使用上下按钮可以展开或折叠所有组。如果设备受损,列表中会显示剩余的损坏百分比。只要有任何损坏,你可以在主选项卡的右下方查看100%生命值的位置。
自定义和信号是基地/船只可能有的自定义开关。这些是自定义的,所以你需要弄清楚它们的工作方式。一个常见的信号开关是生态推进器,尤其是在大型主力舰上。这会禁用一些推进器以节省燃料。信号比自定义更复杂。
继续之前,制作15发转轮机枪的弹药。
让我们看看船只设备:在那里你可以使用建造器、冰箱、氧气站、收获箱、弹药箱和货箱。此外,在船只后部还有2个额外的货箱以及护甲储物柜。At the front you can use the harvester module while piloting to chop trees. Wood will go to harvest box.
When reach level 7 you can craft and add a Medic Station for your HV. You need to do that using a large constructor from a base.
To repair your vessel, you need to craft a multi tool. If you have not craft already, craft one now. When available, choose repair mode to repair damaged parts of your HV.
Totally destroyed parts cannot be repaired. this will be available later with BA/CV repair bay T2.
If your vessels got heavilly damaged you need to build a new one.
Remember, this is a scavenger ship, it cannot attack alien enemy bases!
When you are happy scavenging around, build a small base. Your Hv will protect you until power up, craft and deploy 30mm ammo. Just make sure the blueprint has at least 1 cannon turret.
A better look on Constructors
Constructors
All constructors work in a very similar way.
Turn on the constructor (if off) by LC the switch on right top of the window.
The players inventory at the left, input, output and queues at the middle and recipes at the right side.
The players inventory is there to transfer items to input and get items from output.
The input is where the constructor gets the items needed to craft.
The output is where the constructor puts ready items.
The queues are 2, the upper is your queue (if you craft different items one after another) and the lower is auto queue the constructor uses for various intermediate items.
The recipes are the available items to craft, displaying information about what is needed, time to craft and so on.
You can use the filters to filter recipes.
You can also use text filter if you know the name of what you need to craft.
When use text filter make sure you also check all objects and search all categories because text filter works together with categories filters.
If you cannot find a recipe, the constructor is unable to craft.
If the recipe has a lock, you need to unlock before craft from the Tech menu.
If a recipe is red you miss something to craft it. If it is normally colored you can craft at least 1 item.
The template filters are category filters right (food, medicine, weapons...) and object filters left (all, bases,hovercrafts...). The object filters have a color dot. Recipes have at least one dot and may have up to four. This indicates where the crafted item can be installed - one dot means one type e.g. Base only while all 4 dots means the device can be installed anywhere, bases and all vessel types. No dots means no installation, that recipe should either be a usable or consumable item like weapon and ammo or component to craft installable items.
It is a good practice to place resource materials into the constructor to identify craftable recipes, easily craft various items and free your own inventory from occupied slots. To quickly move items from your inventory to the constructor without drag and drop, shift+LC to items you want to transfer.
Constructor input can be used as storage until actual storage becomes available.
A constructor will use an intermediate item if available instead of crafting it from lower intermediates or row materials.
Survival Constructor is always with you and needs no energy. With a good amount of iron, copper and silicon ore in your inventory you have a fair chance to survive without anything else.
The Portable Constructor is very cheap, can be crafted by the Survival Constructor, can be placed on terrain and also needs no energy to work.
Mobile constructors of hover and small vessels have a lot of recipes but not as many as large constructor.
Large constructor has most recipes available.
Finally, the advanced constructor has all recipes available.
You are on your own now
At this point you have a small base that can protect itself while you are absent, a small hover that allows you to move fast to the planet surface to drill, kill creatures or harvest plans and assuming that you drill one charge per different ore deposit you have lot of resources for doing more things.
The difficult part of surviving is behind you. You are now relatively safe, autonomous and with a fair amount of resources. But the difference between the moment you get out of the pod and now is obvious, i think. If you have not done what you did so far, maybe you would be dead by now. You are still stranded on a planet with alien inhabitans however.
What will you do now is and should be up to you. You already know so far all you need to know to explore the game further.
I will only list some final hints and tips here that is good to know. I will not give detailed explanations because i will need a page for each hint, but if you follow the hints you will realise the why behind the hint.
When you are attacking aliens either on a vessel or on foot make sure your inventory is as empty as possible. If you die and not been able to recover your inventory, your items maybe be lost. A couple of favourite weapons, their ammo at reasonable quantities and few consumables to get you going is the perfect loadout.
When you design a vessel to attack aliens at POIs you are not sure of their defensive capabilities you better design a small light vessel than a large heavy one. In case you lost the vessel you had saved yourself crafting and building hours as well as resource gathering hours. You will become better and learn from your mistakes and defeats at a lower time cost. This also applies when exploring uknown areas for first time.
Also make sure your attacking vessel does not carry tons of important stuff. Make sure you carry only the essentials for your mission. If your vessel cargo box(es) are destroyed, your stuff will be likely lost. You can deal with loosing few O2 bottles, some food and meds and few miscellaneous supplies but loosing 1000 ore will cost you.
If a container is destroyed, its inventory is tranferred at a temporary box nearby and disappear after a certain time. This is valid for all containers from cargo boxes to your inventory drop container after death. Believe me, try to collect all your stuff from a destroyed vessel under enemy fire and within your limited inventory is not the best plan. To recover something however do not use area damaging weapons nearby because you may destroy your stuff yourself.
Avoid storing important resources and stuff in one place like 'this is my iron storage with 50000 iron inside' or 'all resources and components are in my advanced constructor'. Spread to at least 2 storage locations. Make whatever disaster recovery plan you like as long as you think in advance that even when something goes wrong your losses will be as few as possible.
When you design a vessel do not stay on visuals. Design it with a purpose, a role. Define what the ship will do and what properties it will have to accomplish its role. Base and vessel design is one of the most amazing parts of the game, and the limitations of what you can do are really few. You will be surpised of what you can build if you think out of the box. Do not limit yourself to 'standards'. You won't get any ISO :) A base may have a 'secret' area, a vessel may have doubled its primary devices etc.
Organize to reduce micromanagement and time wasting. Using lots of tanks for example will allow you to refuel at longer intervals. Installing your devices properly will save you from unnecessary walks. Having all your tanks in one place will allow you to organize your REST space effectively as check and refill them can be done from control panel. It is easier to harvest 100 plants installed in one straight area than 25 installed at 5 different areas. On the other hand, certain devices help if spreaded. A central cargo box area is not as practical as spreaded cargo boxes exactly where you need them. A cargo box near your tanks will allow you to pick fuel from your reserves to refuel instantly. Food Proccesor and Frdges near your plants are another example.
Make sure your bases and vessels are secure when you are not present. If you need to leave for a very long time and you do not need the base or vessel to be powered, recycle the core and put a new one when you return.
Space is safer than planets. A base in space somewhere far from anything is the best place to store your most valuables, later on.
NPC Factions and reputation
Newly added, the game includes 3 NPC factions and therefore 3 reputation standings for you, one for each faction. Those Factions are Zirax, Talon and Polaris. The standings are from worst to best: Hostile, Unfriendly, Neutral, Friendly and Honored. By default you start with unfriendly with Zirax and neutral with Talon and Polaris. You can see all realated information at Functions tab (the 4th tab) or by pressing the default key F4.
In Functions tab you see NPC, Human and Neutral sub tabs. The NPC subtab has the info for NPC Factions. There you can see the 3 Factions and you reputation standing at the right pane. Hovering your mouse over any of them the left pane will display a list of info about how you gain or lose reputation.
While not clearly understood from the beginning, your reputation greatly affects your game as defines enemies and friends. It also limits your actions into any territory marked as faction territory based on your standing. Finally allows trading services and even discounts. For example, unfriendly or worst reputation will cause factions to shoot at you or on the other hand friendly reputation will allow you to mine ore into the faction territory and honored will even allow you to spawn vessels and bases into their territory without loosing any reputation!
So a key factor is to maintain a neutral or better reputation at least with the factions you do not want to attack (yet). Better than neutral is needed for action you need to do. If for example you need to mine promethium into Talon territory, you need to get friendly reputation. If not you will lose reputation gradually and Neutral may change to unfriendly. If this happens, the Talon will attack you.
When starting a game you need to be very careful about what you do within a faction territory. Whenever you enter such a territory, a HUD information pops up with the faction you enter and your current standing. Also when you perform action the change reputation up or down other pop ups spawn where the XP and item gathering info also pops up. It is very easy to lose standing - travel or stay within the territory with any vessel is enough for Zirax and Talon to lose reputation from when been Neutral or below. For Polaris this is not valid - Polaris tolerate traveling for Neutral. In general there are some things in common but other are different among the functions for when you gain or lose reputation. All those can be found at the left pane of Factions tab as mentioned above.
When you start your worst standing is with Zirax. This however can be change. Think about it because Zirax has the strongest military presence and their drones guard POIs even outside their territory. They will shoot you on sight unless you gain Neutral reputation standing. Once you get Neutral you actually have a ceasefire with Zirax and all their drones, vessels and bases become irrelevant to you. To gain reputation with Zirax is easier than Talon and Polaris assuming that you do not attack Zirax which gives the fastest boost for Talon and Polaris reputation. If you read the texts at the left pane you see that killing predators or prey or chopping wood into their territory adds reputation. All you have to do is go close to one of their borders, enter their territory on foot and start killing prey and predators. While you remain unfriendly you need to be careful for Zirax foot patrols. Avoid them at all costs. Keep killing predators and prey until you get neutral standing. When neutral you no longer need to look out for foot patrols as they will not fire at you. You can freely travel on foot and keep killing to get even further at friendly and honored standings.
Polaris on the other hand only gives positive standing reputation for killing predators, killing prey is useless. Talon is even more strict, they give positive reputation for predators but negative for prey, so killing prey into Talon territory will slow progress down.
Be aware, for using a vessel into Zirax and Talon you need friendly or better standing. Also make sure you shoot when 200% sure you hit what you think you will hit. Never use explosive weapons, shoot rapidly and/or when Faction troops are nearby and NEVER-EVER use automatic turrets even if you have disable NPC factions as targets. If you accidentally hit a faction member you drop to neutral (even when been honored) and if you kill a member you drop to unfriendly standing. An automatic tower may shoot a patrol soldier if it happens to go between your turret and the prey/predator the turret currently shoots. I had injured a Zirax troop this way dropping from friendly(almost honored)to neutral and had to start over.
Getting and keeping a neutral standing with all factions will ensure that no faction will shoot you on sight. Getting and keeping higher than neutral standings will allow you to perform actions within faction territory without worsen your standing, and get services like trading even with discounts.
In general it is recommended to get at least neutral standing even for some time at start. However for game immersion reasons you may not wish to get neutral or better with e.g. the Zirax. In any case always make sure you do not lose (or gain?!) reputation without intent to with the factions according to your play style.
Mass and volume setting
A relative late addition, mass and volume setting activates two properties for nearly all items in game, mass and volume. This setting can be found at difficulties tab when starting or loading a game.
Before this setting or having it off, the only restriction was the number of inventory slots and the number of max same items able to stack in one slot. Pretty much quite a usual and standard inventory system to many games. That give some 'volume limit' faint idea. Still it was possible to loot most of an entire base, including the concrete blocks into your backpack. This cannot be done when use mass and volume setting on.
When activated, this setting primarily affects 2 things:
Firstly, in order to put any item into any inventory there must be enough inventory volume available (free) to accommodate the item's volume.
Secondly and for any vessel, the summary of any cargo mass (including docked vessels total mass and player inventory total mass) is added on top of the vessel mass creating that vessel total mass. An unloaded (cargo-free) vessel mass (the net mass) can be seen at statistics. When loaded statistics display the total mass that is now the sum of net mass plus any cargo mass. This total mass is counted for vessel movement. This is very important because the same vessel that could operate normally at mass and volume setting off may not be able to move at all at mass and volume setting on.
Certain types of containers like the portable constructor and certain game features like the blueprint factory are not bound to mass and volume settings (up to 9.7.1). There can be lot of debate here about balance between immersion and simplicity of a game however all this goes to each player immersion theme and i believe is totally subjective.
The Emergency (O2) Generator and Water Generator
The importance of this section depends if the starting planet is breathable or not. This section is especially useful at NON BREATHABLE starting planets.
This section is to make sure you have oxygen supply. You will learn how we will build the Emergency (O2) Generator and the Water Generator and see how it works.
First open your survival constructor and build the emergency Generator:完成后将装置放入腰带并安装在地面上和往常一样,你可以通过Shift+F键将其关闭。
正常访问后会看到三个部分:能源物品、输出物品和状态。【能源物品】是放置能量包的地方,【输出物品】是存放已生产物品以便获取的地方,【状态】则会显示相关信息,例如关闭(无能源来源)、能源质量20%以及正在生产小型氧气瓶。能源质量会影响氧气的生产速度,但在所有行星表面,这一速度都是相同的。小型氧气瓶就是当前正在生产的物品。按住左键从物品栏中拖动燃料包以启动发电机。燃料状态后有重要信息。运行时间是指在能量耗尽前的实际工作小时数。下一个产物是指下一个小型氧气瓶何时准备好输出。这样你就能获得小型氧气瓶,它们可以放在腰带上,为你的护甲补充氧气条。如果氧气瓶的产量不够,你需要制作额外的应急发电机,以便在相同时间内生产更多的小型氧气瓶。当你消耗氧气瓶的速度快于生产速度时,你就会明白这一点。
该装置每生产2个小型氧气瓶,还会产出1个净化水物品。
最后,你需要钷矿石来制作燃料包,没有燃料包,发电机就无法工作,你也会因此缺氧。
注意:如果你只放入1个燃料包到能源物品栏中,它会几乎立即消失。不用担心,你没有丢失它。发电机只是用它来启动工作。如果你放入第二个燃料包,它会一直留在那里,直到第一个燃料包被完全消耗掉。这就是为什么会有这么多插槽的原因,多放置一些插槽,发电机就能在不需要你过多手动操作的情况下运行很长时间。不过,有一种更高效的获取氧气进行补充的方法。你需要一个水生成器,以及一个来自基地或气垫船的氧气站。你可以通过便携式建造器来制作水生成器。查看可放置物品的属性,显示为T,即地形。简单来说,你需要将其放置在地面上。特别是水生成器,需要放置在水中才能运行。你不能将其放置在地面地形上,否则放置标记会显示为红色。在水上时,它会变成蓝色,这样你就能放置它了使用水生成器的方法与应急发电机基本相同。不同之处在于,它会生成水壶道具。该道具可用于制作氧气瓶,其氧气含量是小氧气瓶的4倍。但请注意,制作氧气瓶需要铁板,而铁板可由铁矿石炼制而成。
和应急发电机一样,你可以使用多台水生成器来加快水壶的生产速度。
有了氧气瓶,你可以为基地或气垫船的氧气罐充气;通过氧气站,你还能为所有护甲的氧气条补充氧气。
你需要时不时检查应急发电机和/或水生成器,收取它们的产出道具并补充能量包。
如果需要将它们从地面移开,需先取出剩余的能量包和产出道具,然后再将其收起。如果你不想浪费现有的燃料包,就让它们用完。
在游戏中建造气垫船!
建造基地或载具最简单的方法是通过蓝图工厂。游戏内有蓝图,在创意工坊中可以找到数千个由玩家制作和分享的蓝图,你也可以在创意游戏模式中创建自己的蓝图。
不过,如果你想在游戏中建造基地和载具(我猜是为了沉浸感),这里有一个简短的入门指南。我们来建造一艘小型气垫载具。
要建造气垫载具,你需要一个气垫起始块(建造基地需要基地起始块,小型载具需要小型载具起始块,大型载具需要大型载具起始块)。去查看你缺少什么,了解制作要求并制作气垫起始块。
你还需要一定数量的钢块。数量取决于尺寸。对于小型的来说,20个就足够了。
重要提示:确保你制作的所有物品(可能是在基地大型建造器中制作的)【适用于悬浮载具】!要建造基础悬浮载具,你需要以下设备(A=需便于使用,B=需朝向特定方向,C=至少1个需便于使用):
1. 驾驶舱(A)
2. 发电机
3. 燃料箱(C)
4. RCS推进器
5. 主推进器(B)
6. 方向推进器(向后)(B)
可选设备:
- 2个方向推进器(左和右),用于更轻松的导航(B)
- 氧气站,用于补充氧气(A)
- 氧气罐,为氧气站供能(C)
- 货箱,用于储存物资(A)
- 冰箱,用于保存食物(A)
- 迷你炮炮塔,提供额外火力对抗必然会遇到的无人机,并在你钻探时提醒悬浮载具位置有敌人(A)
- 小型弹药箱,用于炮塔武器(A)
- 至少1个聚光灯(B),安装在前方,用于夜间照明,也可照亮钻探地点你要正确停放并进行钻探!
你可以跳过可选任务,但我强烈建议不要这样做。
如果你找不到配方,查看科技树和悬停标签。你可能需要先解锁它。
你还需要一把多功能工具来回收放置错误的物品。
设备会根据需要相互连接。燃料箱会为发电机供能,氧气罐会为氧气站供能,依此类推。但有两点需要注意:
第一,确保需要你操作的设备,比如添加燃料的燃料箱,放置的位置要能让你相对容易地用指针操作它们。我在上面的列表中将这些设备标记为【A】。
第二,某些设备需要朝向特定方向才能正常工作。例如,主推进器需要“朝向”后方,才能真正推动飞船前进。这些装置在上述列表中标记为【B】。以下是小型“经济型”悬浮载具的外观示例:Appendix A by brianmi
By brianmi http://steamcommunity.com/profiles/76561197978155502
1. carry and chug water continuously to be able to run without stamina depletion. Also, learn to run, then bounce at low elevation in the air as far as you can on the jetpack with running OFF to maximize your travel distance before stamina runs out. You'll use this RUN / BOUNCE / RUN / BOUNCE also to "float" over all the deep crevices also.
2. whenever caught out on the open by a drone, drill straight down to get below the surface where it can't get you, then fire at it when it flies overhead.
3. You CAN play "HARD" pod contents in single player to where you don't even have any minerals to build anything, and on the airless OMICRON: a, on the way down in your pod, immediately bring up the MAP for a quick peek and then steer towards the largest group of minerals below you. Spot a large body of water also for seaweed to recharge your drill. Keep in mind that IRON, MAGNESIUM, and then PROMETHIUM are all you care about at first. Why? Promethium will let you start the air processor EVERY time you dig, as you won't worry about wasting the run time when you pick it up, even if you just get a single bottle. IRON / MAGNESIUM obviously for ammo.
With air and ammo, you can definitely get the rest over time. Use about a half of a drill charge on each mineral, although more on Iron and Magnesium and less on Promethium as a little goes a long way early in the game and you want to save daylight. Creatures don't spawn the first day, so you want to get as many different mineral types before the first sunset while you're free to roam, other than staying out of range of drones. After you land, if any of the "big 3" minerals needed above are to the EAST of you, make sure to head there soon to get them. The trick is after you get what is nearby, you want to be heading WEST the entire rest of Day One. That way you stretch the daylight, and cover the maximum amount of ground before nightfall.
Try to avoid drones, but for sure if your last mineral you need to complete the set of 5, -OR- it's nearing nightfall and the last of the "big 3" is protected by a drone, then you want to go for it and worst case charge in and drill down right where the final needed mineral is even if you can't take out the drones. You alternatively need seaweed also if you are having bad luck with the mix of minerals you've run across as you head WEST during the day. With it, you can drill down and horizontal enough so that wandering night creatures likely won't find you to survive a night out in the open, or, their AI doesn't take them to the entrance to your cave to be able to get you, so you can make a run for it in the AM.
4. Building your base underground gives you essentially a base you never have to defend, I like to start it ideally at the boundary of something like an Iron, Magnesium or Promethium deposit. Just make it big enough to drop the base starter and get a constructor powered up, then you can add some lighting and expand out the base to get all the rest in place. I then start harvesting water, and with all the stone from digging your cave, you can make plenty of cement to build a hangar above ground poking an elevator shaft through straight up to take you to it.
5. When you build your first SV make it flat enough on top so that you can exit while hovering somewhere and fire away. This works great on alien bases, after you take out the defences just blow a hole in the side at the appropriate story in the building and you can hover just outside and stand on your ship to finish off what's there. Then hop inside the building, grab the loot from storage containers and jump back in your hovering ship. Also fun to hunt the new packs of animals this way since they can't get to you in the air. Great fun.
6. Speaking of taking alien buildings, crack them open with an explosive charge, then pistol away the appropriate metal to let you stand and always fight from one level above the aliens and fire at them from above. Just keep an eye on the scanner for a drone if your ship is hovering outside!
7. If you aren't lucky enough to find a rock giant to kill to get the Neodymium you need for the level 2 drill, as soon as you have a ship just fly to the moon (Omicron) and nab some and fly back. It's pretty easy to avoid the drones until you find some and a little goes a long way so just get in and get out.
虚拟存在
2026-02-15 16:00:24 · 发布在 「Empyrion - Galactic Survival」
部分命令难以理解或存在其他使用方式。本指南将介绍控制台命令及其多种用途。命令具有安全等级,共分为4级:游戏管理员(单人游戏中的你)、管理员、版主、玩家(多人游戏中的你)。这些等级被称为角色,其中玩家角色等级最低。在单人游戏中,你是游戏管理员(GM)。
玩家命令
本指南适用于所有使用内置服务器且希望快速上手的玩家。“托管”服务器会对列出的这些命令进行增删。除游戏内控制台外,托管服务器还会提供网页控制台或远程登录连接凭证。所有玩家角色均可使用玩家指令。
点击反引号`键(大多数键盘的左上角)。
你还可以使用3种可选尺寸之一调整控制台大小。
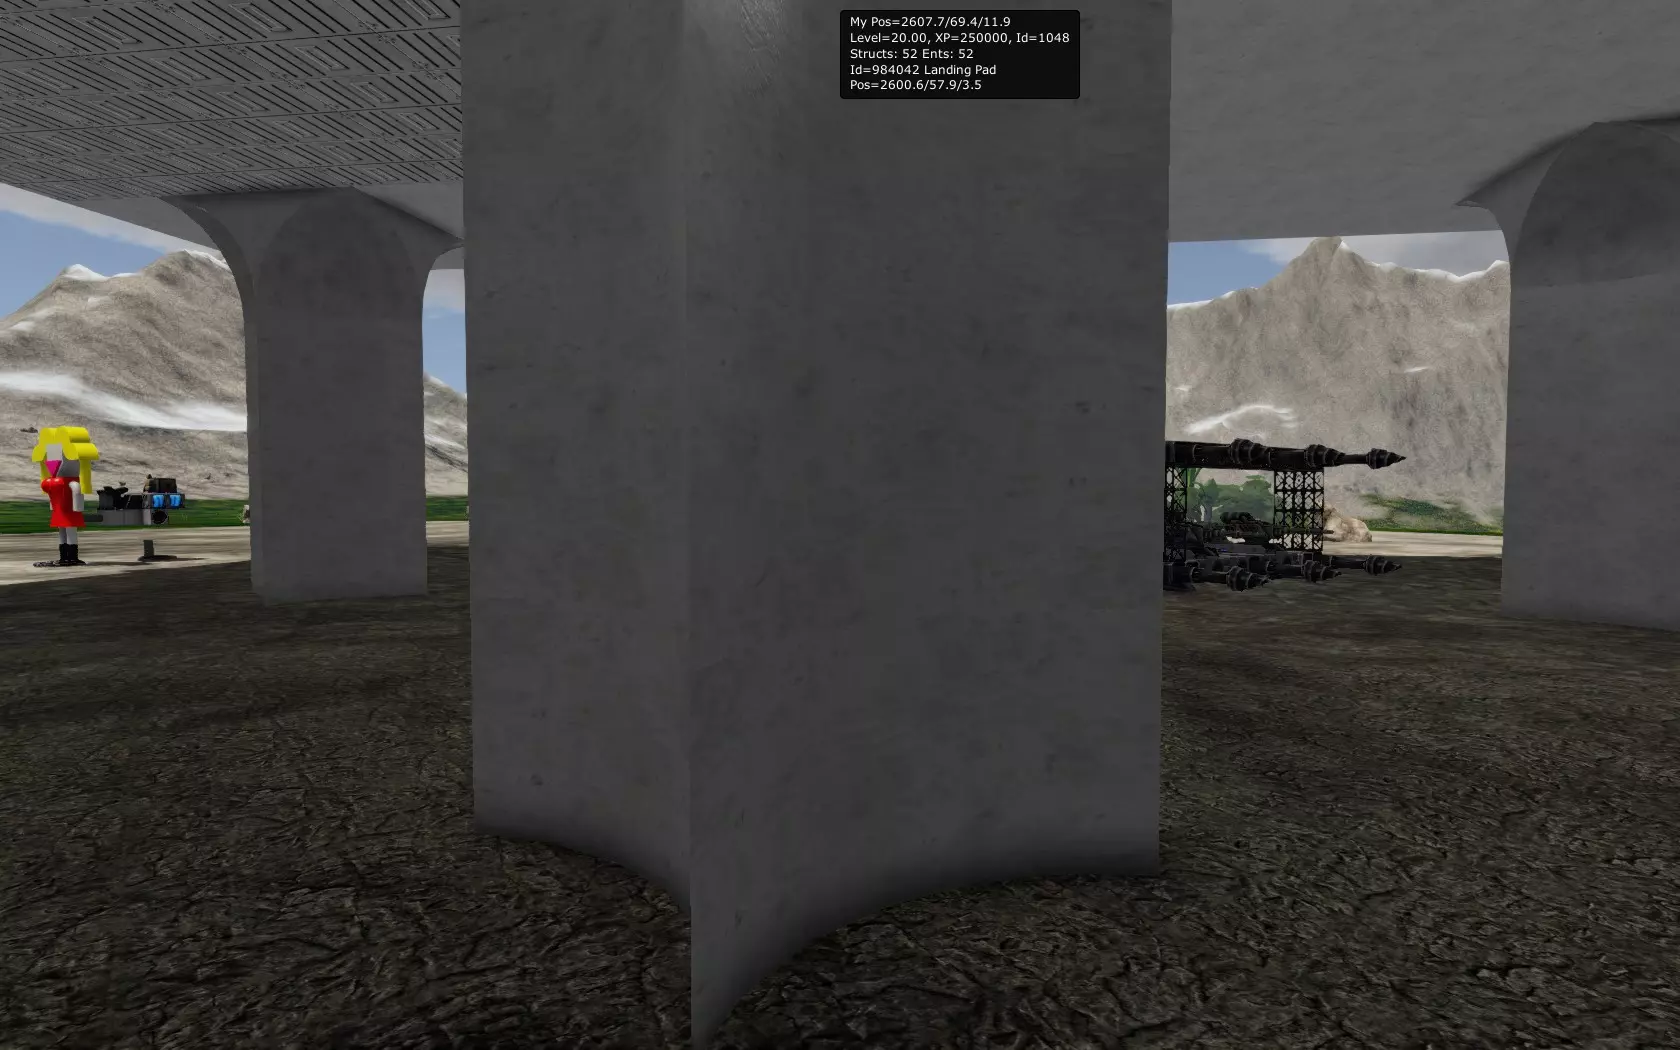
di(调试信息的缩写)打开控制台并输入di,然后按回车键。在玩家屏幕顶部弹出一个小窗口,其中列出以下信息:
- 你的坐标
- 你的等级、经验值和玩家ID
- 游戏区域内的结构数量和实体数量
(结构包括:飞船、基地、兴趣点、小行星、陨石)
(实体包括:结构 + 玩家)
如果你正面对一个实体且距离足够近,还会显示:
- 该实体的ID和名称
- 该实体的坐标
此命令有助于查询你自己的坐标或你想要操作的实体ID。
再次运行该命令即可关闭窗口。许多命令都可以通过再次输入或按上箭头并按回车键的方式来切换开启或关闭状态。detach 玩家卡在地形中
detach 此命令可在摩托车或飞船因碰撞导致角色卡入地形时将你移出地形。该命令已被引入,但一段时间后不再需要。
difficulties 显示当前难度等级和条件
从 DiffEscapepodcontent 到 DiffOxygenConsumption,这些参数数量不少,它们是游戏的初始条件或服务器上的场景条件。这些参数会显示诸如氧气消耗速度是否比正常情况更快等信息。
Origins 列出所有起源
origins
0: 中立
1: 人类
起源与种族不同。
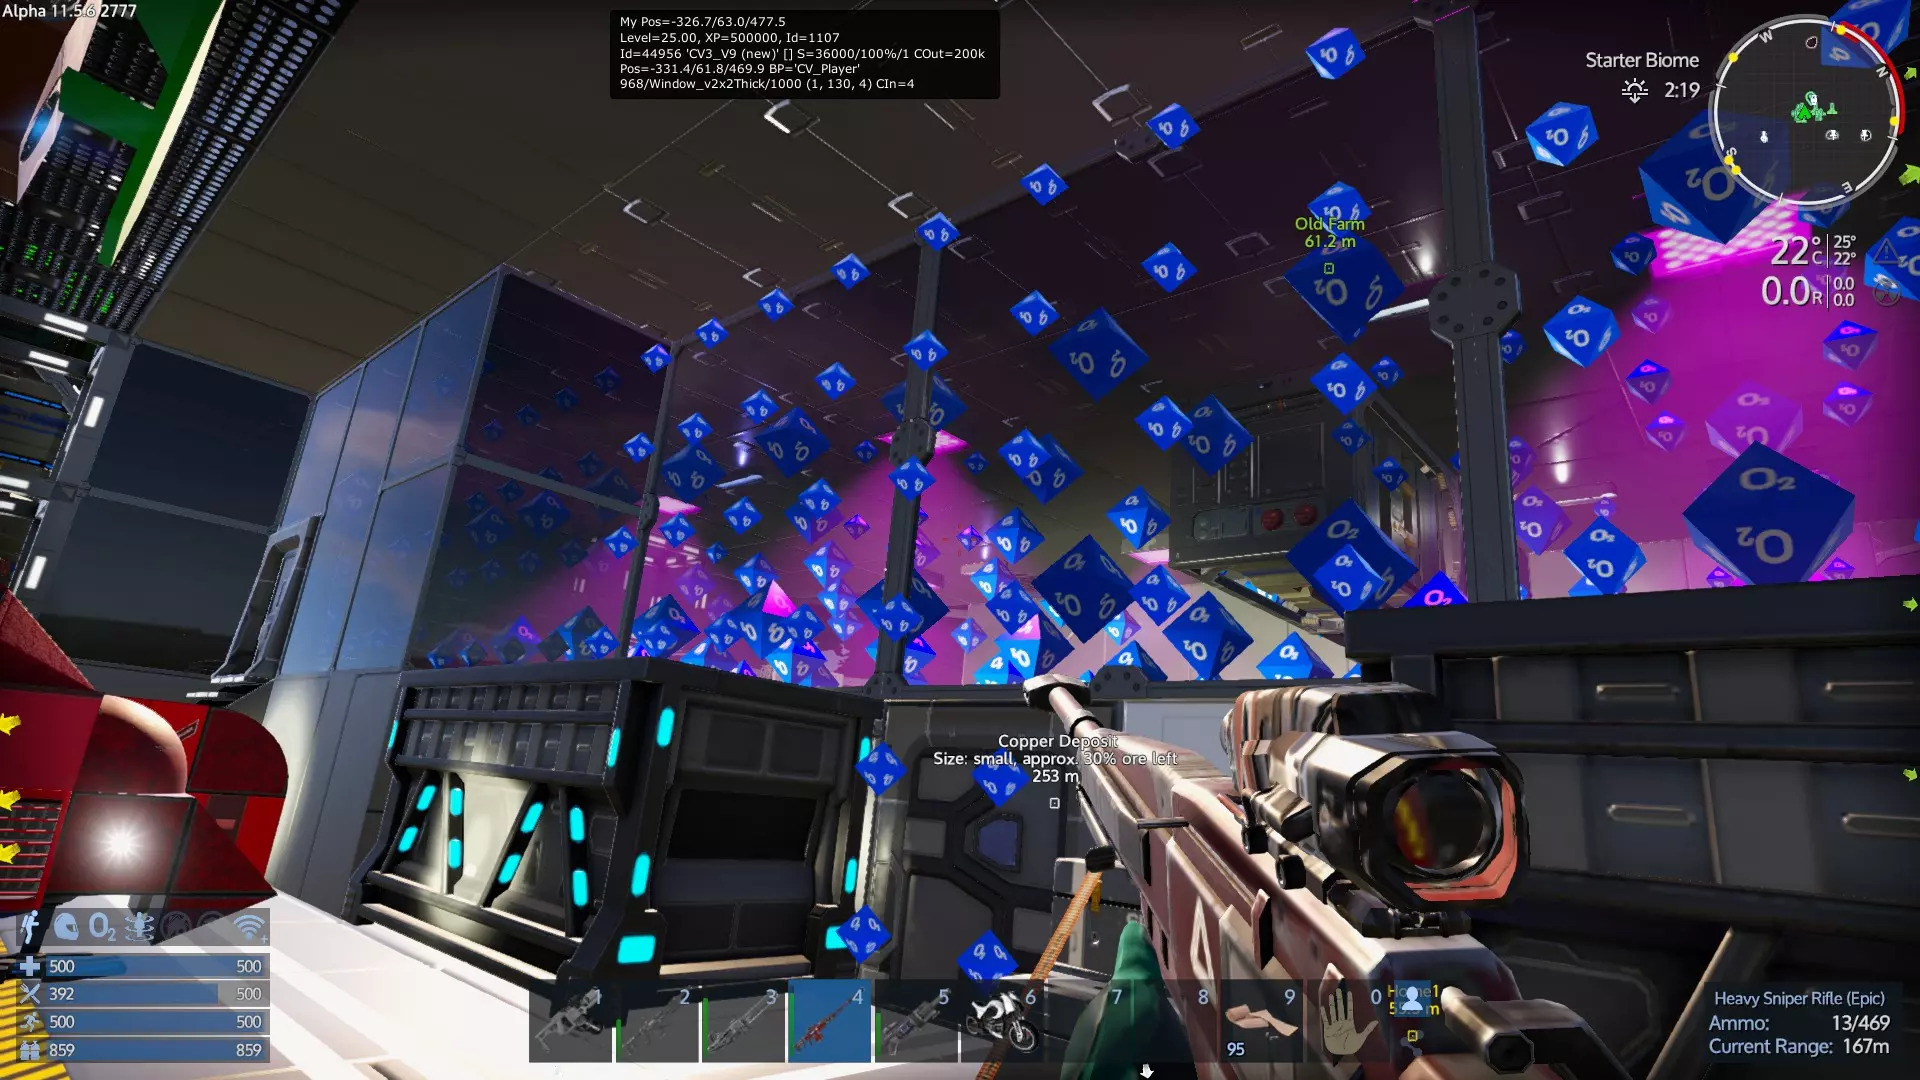
oxygen显示飞船或基地中所有正在获取氧气的方块
oxygen 44956 将44956替换为实体ID
更简单的方法是通过调试菜单“n”并点击“Debug”选项卡。
显示服务器的游戏时间,这与HUD右上角显示的本地世界时间无关。如果你是管理员或在单人游戏中,可以设置服务器时间,但在多人游戏中时间会跳回原来的状态。
time 4000 星球表面和服务器上的时间在各处都是相同的。0到22000之间的任何数值都是有效的服务器时间。这在尝试截图时特别有用,也可用于快速推进时间,以便在夜间在帐篷中睡觉。lpf(加载游戏区域):加载游戏区域列表中的游戏区域,缩写为lpf。管理员角色可以指定游戏区域名称作为参数,强制加载该区域,具体请查看服务器的游戏区域加载限制。这将导致另一个游戏区域被卸载。(服务器可配置为允许同时加载多个游戏区域。)
initadmin(多人模式,若未设置管理员):如果服务器从未设置过管理员,使用此命令后你将成为管理员。默认情况下,启动服务器的人已具备管理员权限。
clear:清屏
clear:清屏
游戏管理员(创造模式)Commands are secured, using 4 levels Gamemaster (like an admin), Admin, Moderator and of course Player. In a single player game, all commands are always available to you. In a MP game, these levels are called roles, the player role is the lowest. In single player, you are a game master or GM. The person starting a local server "ingame" is the Admin and GM by default. The Admin commands and role control the server. Moderator is only relevant in multiplayer, an Admin might add you as a moderator. When you join a multiplayer server, you join as a "Player", and have pretty much only the above group of commands available to you. Some commands have a long version of the command, this guide will mostly use the short version for simplicity.
GodmodegmMakes you invulnerable and allows you to fly.
Hold Shift and you go fast
Hold Ctrl and you go FastER
Hold Ctrl and Shift to go FastEST
You can fly thru anything and even transition from planet to space and back.
In a Creative game, press G to toggle godmode on and off.
You can now use ctrl and shift for vertical movement
Godmode Invisible gm ivWorks Just like godmode but you are invulnerable and invisible and can access all structures as if they were your own. Constructors, cargo boxes, the control panel, light switches, power... It's all available to you. You can even deconstruct anything that doesn't have an Admin core or an Alien Admin Core.
Pressing G Sometimes gets bugged out for the toggle.
To turn it off you must use Godmode Off
Sectorto teleport from one planet to another you have to use Sector to move to the destination's Orbit first.
Usage:
Sector 'Akua Orbit'note: this command is Caps or case sensitive and requires single quotes if the name is more than one word.
it Is possible to use just the first word in certain circumstances like
Sector Akua
Teleportcan be used multiple ways
Teleport toggles you (and ship) to be able to right click on the map to teleport to where you right clicked (a little buggy at times)
Teleport [coordinates]... teleports you (and ship) to those coordinates.
Usage:
Teleport -451 124 475spaces between the X, Y and Z coordinates are mandatory and Commas are optional.
Teleport [playfield]teleports you (and ship) to the connected playfield if it is in the same "Sector"
Usage:
Teleport Akuateleports you to Akua if you are in either Akua Orbit or on Akua Moon. Use the sector command to change sectors
Teleport [ship]teleports you to that ship, the ship name will need to be unique, it usually will have a (1) suffix if it's not unique.
Teleport [player]Will teleport the GM or moderator to the player location - be aware you want to type GM INV first, to prevent the player seeing a mirror image and for them to get a fright because you teleport right in top of the player.
Mapmaplets you see everything that shows on the map (structures, Drones, Asteroids, Freighters, etc)
must use Map Hide , or just 'map' to turn this off.
SetpositionYou can move Anything with an ID with this command
Including Structures, Ships, asteroids, POIs, meteorites... even Motorcycles. But not players!
Usage:
setposition [id] x,y,zIt has a nudge mode, use expression-math like to change the x/y/z location relative to a value. To nudge 5 meters
setposition [id] 2249+5,111,915 and if the +5 is not far enough
setposition [id] 2249+6,111,915 and then mayby nudge the item up a meter by going
setposition [id] 2249+6,111+1,915
examples:
setposition 1048 y+100setposition 1048 -2249,111,915
note: Coordinates are with NO spaces AND requires commas
Setrotationsetrotation[id] x,y,zrotates the specified entity (ships and buildings). I believe this does not work on players.
Note: this command does not work correctly in multiplayer, the entity looks rotated for the person that used the command only and will revert on server restart.
Findlets you look up Coordinates and ID of any Entity (players, Ships, Asteroids, etc)
doesn't require the whole name
example:
find Xangodisplays
Found 'Xango2000' at (2602.5, 68.8, 4.1): id=1048
Found 'Xango's Tank' at (2638.5, 67.8, -0.3): id=65018
Note: only looks up entities on the current playfield
Entsentslists all entities on the current playfield包括它们的坐标、ID、全名、派系ID#以及许多我尚未确认的其他信息。
以p=开头的部分是坐标。
Itemmenu:启用H键打开创造模式物品菜单,就像在创造模式中一样。在生存模式中使用此功能会被视为作弊。im是其缩写形式,同样,在控制台中输入两次即可简单切换开关状态。
Blueprints:
Finishbp:立即完成工厂中已有的蓝图。说实话,我已经不再使用这个指令了。Spawnanyblueprint用起来要容易得多。
选择一个蓝图,点击“送至工厂”,然后打开控制台并输入Finishbp,你的蓝图将在2秒后准备好生成。或者,你可以设置时间,输入Finishbp 60,将蓝图设置为在60秒后准备好生成。Spawnanyblueprintsbp是我最喜欢的生成蓝图指令。这个指令是开关式的,开启后工厂就会像在创意模式中一样运作。选择一个蓝图并点击“生成”,重复此操作即可在你周围生成大量可直接使用的建筑和飞船。修复蓝图居中问题
确保你拥有飞船的蓝图,按F2键可查看其名称。
prefabinfo 蓝图名称 -clearpivot
如果蓝图名称包含空格,请使用:
prefabinfo '蓝图名称' -clearpivot
在控制台输入di,获取有问题的飞船ID,摧毁已生成的建筑,然后从蓝图重新生成一个新副本,问题应该会得到解决。
list命令本身无任何作用,必须跟在子命令后使用
用法:
list perm(列出所有GM+角色人员,按组显示及其Steam ID)
list bans(列出被封禁玩家及其自动解封时间)封禁玩家ban <玩家名称/ID>
解封unban <玩家名称/ID>列出玩家封禁情况
阵营faction该指令有多个子命令,以下仅介绍我已知的用法。
阵营列表faction list列出所有阵营、阵营缩写、阵营ID、当前在线玩家数量、总玩家数量以及tick(tick是什么?)。部分命令需使用阵营缩写而非阵营名称。
阵营列表 [阵营]faction list [faction]列出指定阵营的所有成员及其阵营角色
注意:需要用单引号括起完整的阵营名称,且该命令在遇到某些标点符号时可能无法正常使用。
阵营实体Faction Entity允许你更改实体的阵营...阵营实体 Ply 104435会将实体104435设置为玩家阵营(公开)
阵营实体 Adm 104435会使该实体成为管理员阵营的一部分(不需要/消耗任何燃料或氧气)
阵营加入 [阵营] [玩家ID] 可将玩家加入指定阵营(我忘记是否需要缩写或完整阵营名称)
管理员give:允许为自己或其他玩家添加信用点,也可以给予修改状态的食物/生命值/耐力/体温/辐射值。
give food 50:增加的食物量大约相当于一个猪肉馅饼。
示例:give credit 100
添加经验值:level x+ 1000:向玩家的经验条添加1000经验值直至升级,即使玩家已达到25级,仍可继续添加经验值。
set level Level = 20:将自己的等级设置为20级,在多人游戏中无法为其他玩家执行此操作。最高等级为25级,这是硬编码的上限。
itemmenu 创造物品菜单:切换创造菜单,可选择物品放入自己的 inventory,按【h】键如常打开菜单。
itemmenu
debugmenu 调试菜单或者简称为dm,它能让你拥有传送的用户界面,并且可以生成……物品。天气晴朗时,可能会突然下起冰雹,或者辐射雾可能会毁掉你的庄稼。
格式:weather <效果> [fade]
fade为可选参数,true/false,用于设置天气变化是否渐变,默认为立即变化。
weather next 可查看下一个天气效果
weather off 可关闭天气
天气效果列表:
晴朗
刮风
多云
乌云
中云
雾
中雨
大雨
强酸雨
风暴
小雪
中雪
大雪
寒潮
热浪
冰雹
绿色辐射雾
紫色辐射雾
火焰雨
陨石火焰雨
摧毁指令用法:
Destroy [结构ID]
对玩家无效
示例:
Destroy 4488115
你可以摧毁船只、基地、摩托车……任何带有ID的物体,但玩家除外。绅士们
按游戏区域列出所有阵营实体
绅士们 <阵营名称>
或
绅士们 <阵营缩写>
管理员管理员命令用于控制服务器和玩家。
setadmin
如果你启动了自己的多人服务器,此命令会使你成为管理员。如果已设置管理员,则此命令无效。有时可能需要通过配置文件进行设置才能成为管理员。
setrole
允许你更改其他玩家的角色,包括游戏管理员、版主、管理员或玩家。不适用于派系角色。使用SteamID或玩家名称。示例:setrole xango2000 Admin
全局选项
设置全局选项。
gopt set EnableCPUPoints false
禁用CPU点数计算。此设置在开始游戏条件中控制。许多设置(包括游戏难度设置)都可以通过此命令控制。Telnet
如果服务器开启了telnet端口,你可以使用telnet客户端作为控制台——该端口会由服务器所有者设置角色和密码。remoteex 是一个 telnet 命令,是“Remote Execute”的缩写,允许你在其他玩家的游戏中执行命令。
这个控制台命令对于制作 API 模组非常方便。
使用示例:Eleon.Modding.Game_Request(CmdId.Request_ConsoleCommand, (ushort)某个唯一数字, new PString(此处填写 remoteex 字符串));
remoteex cl=1003 'sector Akua'
remoteex cl=1003 'marker name=IronAsteroid pos=511,224,-5700 w expire=55'
注意:使用的是 Empyrion 玩家 ID#(不是 SteamID,也不是 ClientID……他们已经做了更改)。
也可用于执行游戏区域命令……我知道我曾经这样用过一次,但忘记具体操作了。
示例:remoteex pf=x '此处填写命令内容'
其中 x = 游戏区域进程 ID……你可以在游戏区域启动时通过 telnet 找到,或者在 API 中使用……某个我目前记不起来的请求。
被收录在以下游戏单
下载233乐园APP
专心推荐好游戏
纠纷处理及不良内容举报电话:
4006600910 (工作时间: 9:00-12:30,14:00-18:00)
北京市朝阳区启阳路4号院2号楼15层1803室
本公司产品适合10周岁以上玩家使用 未成年人家长监护