


黑暗之魂:重置版
 Steam Deck
 家庭共享
家庭共享 支持手柄
支持手柄


有一天,燃起了第一团火。 重新体验话题性、代表性十足的经典游戏。 经过画质提升,将以惊艳的60fps形式呈现,做好重返罗德兰的准备吧。 黑暗灵魂 Remastered包含游戏本体,以及DLC《Artorias of the Abyss》。 游戏特色: - 黑暗与深沉的世界观 - 每一次结束都是一个新开始 - 游戏丰富性与各种可能性 - 体验学习、克服、获得成就感的连锁效应 - 可多人联机游玩(人数最多可至6人)
游戏圈
共637条帖子

杀死女巫
2026-02-18 13:00:20 · 发布在 「DARK SOULS™: REMASTERED」
Achievements not remastered.
Disclaimer
Can I use my Prepare to Die edition save in the remastered edition?No, the game will attempt to load your sl2 save, but determine that your save data is corrupted.
Changes Now uses Dark Souls III multiplayer system with passwords.
Multiplayer player count increased from 4 to 6.
Going up Ash Lake is a pain in 60fps. Clipping issues.
Can use multiple of the same item at once now. This includes offering items to covenants.
New bonfire near Vamos. Can be warped to.
Phantoms now have a limited number of estus when summoned instead of the host healing phantoms.
Covenants can be swapped at bonfire.
https://steamcommunity.com/sharedfiles/filedetails/?id=1085600991
Missable
By following the walkthrough of this guide, you will encounter these checkpoints which act as missable checkpoints for various items. The list is in order of the guide. This list only considers the singleplayer game.
TaskLocationTaskDefeat the Gaping DragonThe DepthsCut his tailDefeat Ornstein & SmoughAnor LondoThis is for NG+, if you already have Smough's Hammer/Soul, then kill Smough first. Vice versa for Ornstein.Placing the LordvesselFirelink AltarDefeat Four Kings for Darkwraith Covenant, see end of New Londo Ruins for detailsDefeat Crossbreed PriscillaPainted World of AriamisCut her tailDefeat Bed of ChaosLost IzalithHave Quelana spawn in Blighttown Swamp with +10 Pyromancy FlameDefeat Seath the ScalelessThe Duke's ArchiveFree Big Hat Logan from the Duke's Archive PrisonDefeat Seath the ScalelessThe Duke's ArchiveCut his tailSave Rhea of ThorolundTomb of the GiantsIf you save her after the guide takes you passed Seath, then you won't have to worry about missing her.Dealing with PatchesTomb of the GiantsForgive him or kill him and make sure to get the Crescent Axe (purchase if you forgive)Defeat Gravelord NitoTomb of the GiantsKill the invading phantom NPC Paladin Leeroy in the Tomb of Giants for Sanctus and GrantDefeat Gravelord NitoTomb of the GiantsGravelord Servant Covenant and its miraclesKilling GwynevereAnor LondoSilver Knight WeaponsKilling GwyndolinAnor LondoDarkmoon Covenant and its miracleDefeat Gwyn, Lord of CinderKiln of the First FlameAnything you wanted to do in the current playthrough
Using this Guide
The focus of this guide is achievements. This will not run through every possible item in the game, even loot spot, every item drop. For the most part, the instructions will take you from the previous point to the next point of interest skipping everything along the way.
Note: Bonfires will be labeled with their names AND their description. This is due to the fact that the player will not be able to see the names of the bonfire until they obtain a certain item. Also due to the nature of the game (no warping until late game), I will also cover the areas the player must traverse in between areas up until the ability to warp is obtained.
Things you need to 100% Dark Souls Can be done on multiple characters.
Shards, Large Shards, Large Chunks, and Slabs of all colors
All Sorceries
All Miracles
All Pyromancies
All Unique Weapons
2.5 Playthroughs Solo
2 Playthroughs Co-op
DLC content is NOT required for any collection achievement.
Why is Co-op only 2 playthroughs?For 100%, you need all Unique Weapons and the Soul of Great Wolf Sif is required 3 times. In solo, you would need to defeat Sif in NG, NG+, and NG++. Then in NG++, make it to the Giant Blacksmith in Anor Londo and forge the third Sif weapon. (Greatsword of Artorias, Greatsword of Artorias (Cursed), and Greatshield of Artorias)
In Co-op, if you and your friends are sharing weapons, you can drop weapons to each other. Since Boss Souls are not shared between games, By the end of your second playthrough, you would have a combined 4 Soul of Great Wolf Sif easily getting the three requirement.
Side Note: Gwyn's Soul actually forces you into NG++ regardless as you cannot get his Soul and stay in the current playthrough. If you're doing in coop, it's okay for both players to make the Great Lord Greatsword after the first playthrough and then do the Miracle after the second playthrough (unless you're in faith build). Then you would only have to make it to the Sunlight Altar in NG++.
Walkthrough - Introduction
Character Setup While the Master Key is probably the best starting item, I will not be writing the guide to force players to pick that Master Key in terms of routes, so that will be up to you.
Note: Master Key is by far the best item to pick, but this can be purchased for 5,000 souls fairly early into the game.
Undead Asylum After the opening cutscene, loot the Dungeon Cell Key and free yourself. Go down the hall turn to your left for your first bonfire. Quick note: The weapon you pick up here is required much later on in the game. Make sure you keep the Straight Sword Hilt.
Bonfire: Undead Asylum 1 | Courtyard点燃火焰 - 点燃营火
进入你面前的门。你将面对第一个 Boss。现在,如果你此时用你的直剑剑柄击败他,你将获得【骑士的荣耀】成就所需的武器【恶魔大锤】。对于新手来说,这很难做到,除非玩家选择【黑火焰壶】作为他们的初始物品,或者在【二周目】(NG+)中完成这个任务,或者用【布袋】与【鸦人老婆婆】交易。
否则,直接跑向你左边的大门。
营火:【不死院2】|【 asylum demon 】之后
继续前进。这里的物品将成为你职业的初始装备的一部分。一直走,直到到达一个岔路口,向右转,然后你会看到一些楼梯。当你上楼梯时,一个【活尸】会等着把一个巨大的球推到你身上,引诱他这么做。球会击碎你所在位置的墙壁,进入洞里。你会看到那个帮你逃出牢房的骑士。和他对话可以获得一把钥匙和元素瓶。元素瓶
获得元素瓶。
走上楼梯并打开大门。沿着单行道前进,穿过雾门。
boss战: asylum demon | 下落时使用轻攻击会施展造成巨额伤害的下落攻击。除此之外,要习惯学习翻滚和耐力管理。
战斗结束后,打开大门。这里提前提醒一下,右侧的小山丘上有一个小鸟巢。里面是鸦人史妮弗,可以和你交换各种物品。这部分内容我会在单独的章节中介绍。
前往山顶以完成该区域。抵达罗德兰
到达罗德兰。
传火祭祀场 欢迎来到你的枢纽。传火祭祀场是整个游戏的基地,所以一定要熟悉它。
篝火:传火祭祀场 | 没错。
在《黑暗之魂》中,你可以营火添火,这会增加你在该篝火休息时获得的元素瓶数量。默认情况下,有防火女在场的篝火初始会提供10个元素瓶,其他篝火则初始提供5个元素瓶。
从篝火出发,你可以走右边通往废墟楼梯的路。这条路会带你找到索拉尔(身材魁梧的家伙)。如果你一直缠着他,他最终会让你加入白教誓约,并解锁成就【Reach Lordran】。(骑士和牧师默认属于这个誓约)契约:白教
发现白教契约。
从那里开始,在这里收集你需要的物品。前往水道桥,继续前往不死教区。
攻略 - 不死聚落/教区及黑森林庭院
不死聚落
离开水道桥后,你将抵达不死聚落。沿着线性路径前进,很快就能到达第一个营火。
营火:不死聚落 | 遭遇飞龙后,穿过一座木桥即可到达
现在,在营火前方(从营火位置看)左侧有一条小路,那里有两名持矛不死人。从他们身后的楼梯下去,出门后可以找到男性不死商人。
他出售大部分用于制作 boss 武器的初期装备。之后在下层不死聚落需要用到【居民钥匙】。这里有一名黑骑士,作为关于黑骑士武器的提示。
现在从篝火处继续前进,沿着小路走。当你开始上楼梯时,会有敌人朝你滚木桶。继续登上那座塔,雾门之后就是一场 boss 战。
Boss:牛头恶魔。当你进入塔墙区域进行 boss 战时,身后有一个梯子,你可以用它对牛头恶魔施展下落攻击。不过牛头恶魔会跳上平台,所以要小心。它有几率掉落恶魔巨斧,但这个武器很容易买到。
战斗结束后,下楼并向左走。你会找到亚斯特拉的索拉尔。与他交谈可获得用于联机合作的白标记蜡石。
走上桥,龙肯定会向你喷火。你的主要目标是到达右侧的中途位置并走下楼梯。一直往下走,直到看到之前的篝火,踢下连接捷径的梯子。引诱龙喷火,然后趁机冲过去会更安全。
从这里回到桥上。明显的目标是贪食龙。对它的尾巴造成足够伤害后,玩家将获得 Drake Sword 加入武器收集,同时它也是前期非常强力的武器。你可以用短弓射击龙的尾巴直到其断裂。
你可以稍后再杀死这条龙。你也可以利用它在桥上喷火来刷魂。
现在你有两个选择:完全避开龙,或者从它下方跑过去。确保你拥有弓箭(无需特定属性要求)。射击古龙使它跳下。然后直接从它下方跑进大门。
篝火:阳光祭坛
不死教区拉动拉杆可永久升起大门。
转而向右前往破碎雕像处,可加入誓约【太阳战士】。需要25点信仰值,每以白灵形态击败一个 Boss,信仰值要求降低5点。太阳战士誓约
发现太阳战士誓约。
大门后方的塔顶端有一名黑骑士。梯子可通向下方的一些老鼠,这些老鼠所在的区域通过桥下方与不死聚落营火相连。老鼠可用于刷取人性。
在接下来的区域,有一个游魂会跑到大门后面并关上它(就是你面前的那扇门,不是你刚打开的那扇)。向右下楼。在这个房间里,你会找到神秘钥匙。
沿着这条线性路径继续前进,直到到达一个岔路口,前方有一座木桥,左侧有一条石路。直走然后右转(远离教堂方向)。沿着这条路走就能找到营火。篝火:不死教区 | 位于亚斯特拉的安德烈上方,连接着塞恩古城和黑森林。
现在返回教堂。教堂内有一名贝雷妮卡骑士(不会刷新),棺材上有一个防火女之魂。防火女之魂用于强化元素瓶(最高+7)。与任意防火女对话即可进行强化(传火祭祀场的笼子里就有一位)。
你上方会有一名咒术师(同样不会刷新)。咒术师的唯一重要之处在于他会掉落武器收集所需的【咒术师的三叉戟】(稀有)。
在此之前,通往咒术师的楼梯下方有一对电梯,连接着不死教堂和传火祭祀场。这也是重返北方不死院的必要条件。
现在,如果你经过咒术师并左转。在这里你会看到一个可破坏的门。顶部有一个牢房,里面关着卡利姆的 Lautrec 骑士。你可以用神秘钥匙释放他,万能钥匙在这里也能用。你需要释放他,这样他会给你一个阳光勋章,之后还会给你一个与誓约奖励相关的复仇之证。
剧透:无论如何,Lautrec 都会自行离开,但剧透的重点是隐藏这样一个事实——当两口钟都被敲响或玩家在每个钟的位置都收集到防火女之魂后,他会杀死传火祭祀场的防火女 Anastacia。之后你可以在复仇时复活她,同时获得复仇之证。在此期间,传火祭祀场将无法使用。如果你不想这样,只需现在杀了他,或者在传火祭祀场的石像鬼战斗后把他踢下悬崖。
一旦你放他出来,就可以在屋顶面对这个区域的 boss。在你遇到咒术师的地方,走右边的路就能找到一些梯子。太阳骑士索拉尔和 Lautrec 都可以在这里召唤。石像鬼的尾巴可以被切断以获得武器,这对【骑士的荣耀】成就不是必需的。
Boss:钟楼石像鬼 | 有两只石像鬼,第二只会在一段时间后出现。第一只拥有满血,第二只出场时只有一半生命值,但具有喷火能力。
战斗结束后,爬上梯子,到外面再爬另一个梯子。拉动顶部的拉杆敲响钟声。Ring the Bell (Undead Church)
Ring Bell of Awakening at Undead Church.
On the way down, you will find Oswald of Carim who serves as both a merchant, but also the Pardoner of sins in Dark Souls. This proves extremely useful when the player starts swapping covenants or aggro NPCs.
Now, before we move on, head to the front of the church. To your right is a corpse holding a Halberd. Halberds cannot be purchased and thus are rare. Keep that in mind. Then at the bottom of the stairs is a corpse containing the Basement Key. If the gate is closed, feel free to open it.
Head to the Undead Parish bonfire now. From there, head downstairs passed Andre of Astora and you'll find a Titanite Demon. You can ignore it for now.
Darkroot Garden Now, this area is fairly straightforward. At the first fork, right takes you to Darkroot Basin (ignoring for now). So continue straight until the path turns right. Then you'll get a giant stone door.
This stone door can be opened with the Crest of Artorias which can be purchased from Andre of Astora for 20,000 Souls. But the latter half of the Darkroot Garden will be done later. To the left of the doorway is an illusory wall.
Bonfire: Crest Gate Bonfire
Now, take the other path towards the fog gate. The only thing to note here is that the Stone Knights here will drop both the Stone Greatsword and the Stone Greatshield required for the weapon collection.
Go to the end and go up the stairs for the boss.
Boss: Moonlight Butterfly | If you're not ranged, this fight might be a bit long waiting for the Moonlight Butterfly to land. So have fun rolling.
The soul is required twice for boss weapons: Moonlight Butterfly Horn & Crystal Ring Shield
After the fight, go up the long flight of stairs. You'll see a corpse loot. Loot it three times, the second being the Divine Ember.
Divine Ember can be given to Andre in order to ascend +5 weapons into Divine.
Return to the Undead Parish bridge where the Hellkite Dragon is.
Undead Parish Once here, go to the beginning of the bridge and you should be able to open the door using the Basement Key found in front of the church.
Walkthrough - Lower Undead Burg & The Depths
Lower Undead Burg Once in, go down. At the bottom, take the right stairs up and open the door to unlock the shortcut back to the Undead Burg bonfire.
Now make sure to buy the Residence Key now from the Male Undead Merchant nearby.
Return back down and then go all the way down.
At the bottom of the stairs, go right towards the torch wielding enemies. To your left you will spot various doors that can be opened with the Residence Key. One of them contains Griggs of Vinheim, a sorcery merchant. Free him. He'll move to Firelink Shrine.
Now from here, simply make your way to the worst boss ever.
Boss: Capra Demon & Dogs | The dogs and the size of this room makes the boss ridiculously annoying. Run up the stairs and take out both dogs. Then enjoy an easy 1v1 against the Capra Demon.
You'll get the Key to the Depths from the boss fight giving you access to the Depths.
Now, go to the beginning of the room and go downstairs. You'll find two passages here. Take the stairs up.
Once you're at the top, enter the aqueduct. To your right is the Female Undead Merchant. Go left, and unlock the shortcut to Firelink Shrine.
Return to the fork where you went upstairs and open the door to the Depths.
The Depths Progress in the area. You'll face off with a butcher. After the butcher is a chest containing the Large Ember.
Side Note: Behind the butcher's table are several boxes that you can break to reveal a hole in the wall which will drop you above the giant rat. You will find the Spider Shield on a corpse here.
After that, you'll go through some water. Once you get out, you'll face another butcher. The butcher will be sitting over a doorway. That doorway will have Laurentius of the Great Swamp, a pyromancy merchant. He'll move to Firelink Shrine. Roll into his barrel to free him.
In the next area, be wary of the ceiling.
After you make your way to the end of the long sewer path filled with slimes, you'll reach a door. The Master Key can open this door immediately to reveal a bonfire.
Bonfire: The Depths | The only bonfire here
From there, go downstairs. You'll see a giant rat behind a metal fence. You can actually deal a lot of damage, or even kill, the rat if you have a very long weapon. Between hits, if you go up the ladder, the rat will start to approach the gate again.
Else, continue on your way above. Left at the fork, and down the stairs. You should see a corpse near the gate in front of you. It's the Sewer Chamber Key which opens the room to the previous bonfire should you not have the Master Key. Go ahead and open it if you haven't and return here.
Now, go into the doorway under the stairs. At the fork, ignore the right path and go straight. Follow that path to a fog gate.
You'll encounter your second channeler of the game, also non-respawning. It is highly recommended that you kill him as he can buff the boss as well as attack you during the boss fight. Head right into the doorway.
Take the first right, then the first left. The rat in front of you is just baiting you into the hole in the ground. At the end of this longer path, take a right and you'll end up int he room where the Giant Rat is. Kill it if you want, otherwise, slide down the ramp in front of you making sure to use the left/right side to avoid the giant hole while sliding.
At the bottom. go immediately to your right for a staircase. Go to the top and open the door to unlock the shortcut back to the bonfire.
Back to where we were, behind the gate before the door is a merchant. Otherwise, head to the doorway to the right just before him and proceed to the boss.
Boss: Gaping Dragon | First off, cut the tail off for the Dragon King Greataxe. Then, simply just have the boss lay down a bunch and then get a bunch of hits in. Rinse repeat. Do not underestimate the size of the boss, he covers a lot of ground.
After the fight, you'll get the Blighttown Keys. Return to the merchant NPC and open the locked doors near him.
Walkthrough - Blighttown
Now available in 60fps
Upper Blighttown First make your way down all the ladders. Heads up, equip some poison healing and use a shield. If you do have the Master Key, you can retrieve the Spider Shield from the Valley of Drakes.
Once at the bottom, make your way straight until you reach a fork with two paths going slightly down. Take the left path.
They both lead to the same spot, but the right wobbles. Now, follow the linear path here and down the ladder. Cross the beam and there will be a torch which is the top of the ladder. Take the ladder.
From here, head left straight to the bonfire on the support of the bridge.
Bonfire: Blighttown Catwalk
Continue on your path and take the ladder to the right. You'll then want to take the ladder in front of you to go to the giant spider in the well.
Pyromancy: Power Within | Just in front of the Cragspider
From here, you can make your way all the way down to the swamp.
Lower Blighttown To the right of the swamp entrance, you'll find a sewer.
Bonfire: Blighttown Swamp
Pyromancy: Poison Mist | From the bonfire, go forward to the other side of the swamp. The pyromancy is on a corpse tucked into the corner on the right.
From the bonfire, go right and you should encounter some more scaffolding. This time, this will take you to a waterwheel elevator lift. Take it up. Take one ladder up.
Sorcery: Remedy | From the first ladder, proceed along the linear path including the very narrow branch path to the other side to find this spell.
Fire Keeper Soul | From the first ladder, climb up one more ladder. This will lead you to another sewer segment loaded with several toxin dart enemies and fire dogs. The soul is located on the lower section behind a sewer grate guarded by two dogs
Where you encountered the first toxin dart enemy, there is a ladder here going up. It may be difficult to see. Climb it to the top.
Key to New Londo Ruins | In a chest next to the last ladder
This key will let you unlock the shortcut between Blighttown/Valley of the Drakes/New Londo Ruins which connects back to Firelink Shrine.
The rest of the loot here isn't required, but you may get them as you wish. If you are having trouble with the boss here, you may pick up the set of items two towers the opposite direction from the boss from the Poison Mist Pyromancy.
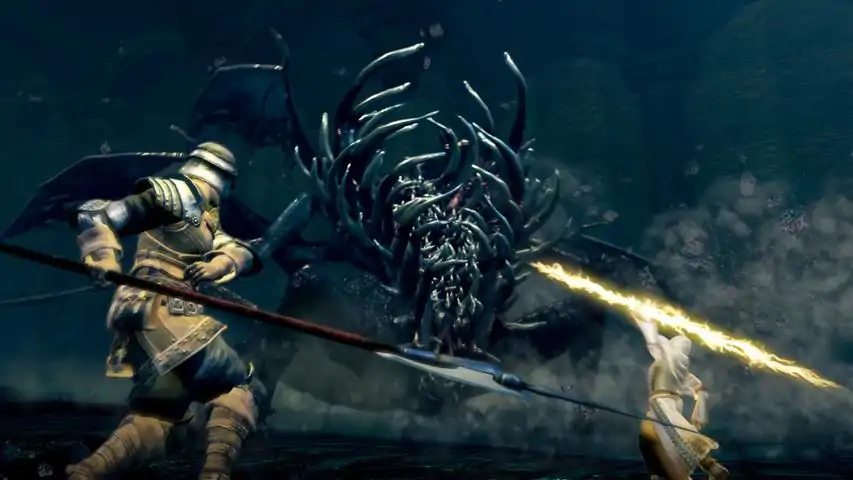
Boss: Chaos Witch Quelaag | Overall a simple boss as most of her attacks are heavily telegraphed. Her sword swipes cannot reach point blank so you're able to attack her while hugging her as she swings. She spits lava onto the ground that lingers for a period of time. The horizontal lava spit takes longer giving you time to get some hits in. Then the only move you actually have to be worried about is when both Quelaag and the Spider somewhat kneel telegraphing her explosive attack that deals massive damage and may one shot you. Other than that, manage her position away from her lava pools and you're set.
After the fight, ring the bell.【敲响钟声(克拉格的住所)】
在克拉格的住所敲响苏醒之钟。
现在,下楼。你应该会看到一个通往熔岩区域的门口或破墙。不要理会这个门口,在门口的右侧应该有一面平整的墙壁,翻滚撞向墙壁以显现幻影墙壁。
与蛋人对话,让他移开。
篝火:混沌的女儿
现在,同样与墙上那个无法说话的蜘蛛对话。最终你会获得加入誓约的提示。誓约:混沌的仆人
发现混沌的仆人誓约。
攻略 - 病村连接区域
从病村可以进入多个非必需区域,这些区域包含完成成就所需的重要物品。你可以稍后再回来探索这些区域。
【龙谷】
此区域可从新隆多遗迹(需新隆多遗迹钥匙)、病村或黑根盆地进入。
你会注意到有一条龙在睡觉。小心地走向它。现在你可以获取同一侧的两个战利品之一,但你需要两个都拿到。
【骑士的荣耀:亚斯特拉直剑】
靠近它爪子的那个可以安全拾取。需要注意的是,这把剑带有神圣属性,在后期的地下墓地会很有帮助。骑士的荣耀:龙纹盾 | 靠近他头部的物品无法安全拾取。你可以冒险拾取该物品,也可以用毒箭杀死他,或者直接将其击杀。他会使用大量毒素。对于黑暗之魂老手而言,红泪石戒指位于另一侧的塔顶,就在通往新隆多遗迹的巨大紧闭城门旁边。大空洞注意事项:这里需要大量移动,所以如果你想在完成亚诺尔隆德后再来探索,也是可以的。从病村沼泽出发,朝着远离克拉格的方向,你会找到一个像斜坡一样的大树枝。沿着那条路向上走,会看到一具尸体。在尸体的左侧,翻滚撞向墙壁可以发现一面幻影墙。然后你会找到另一个宝箱,翻滚到宝箱后面会发现另一堵幻影墙。
前往大沼地。
篝火:大沼地
警告:这里有大量的 Basilisk(石化蜥蜴),所以要避免被诅咒。如果需要的话,带上解咒石。
虽然这里没有必须获取的物品,但你会发现大量的楔形石碎片和结晶蜥蜴,这将使之后强化装备变得容易得多。
一路来到树干底部。
灰湖
进入灰湖并沿着树干向下走后,你应该会看到右侧的篝火。
篝火:灰湖
现在,你首先注意到的可能是这里的九头蛇。如果你想要灵魂的话可以与它战斗。这里还可以拾取一些龙鳞。
在湖的中途,你应该会看到左侧有一棵巨树。爬上树根斜坡。向上爬一小段后,要留意你所走路径下方的一个空心树干(这是在垂直树干的外部)。
奇迹:【大魔法屏障】| 如果你跳进空心树干,会找到一具尸体,上面有这个法术。
沿着湖泊一直走到尽头。
篝火:【石之巨龙】
首先,与巨龙对话以触发加入誓约的选项。Covenant: Path of the Dragon
Discover Path of the Dragon covenant.
Knight's Honor: Dragon Greatsword | Now cut off his tail for this weapon. He won't aggro.
You're done here!
Walkthrough - Sen's Fortress
With both bells rang, Sen's Fortress will be open now.
Sen's Fortress I hope you like platformers!
Siegmeyer of Catarina was sitting outside of here if you talked to him. If you didn't, he will relocate inside regardless. His quest remains active, and you will need his quest for a miracle.
Be wary of pressure plates and misplaced enemies. This is also your first place that you will encounter a mimic. I'll mention it now, the way to determine if a chest is a mimic is by looking at the chain on the right side of the chest. If the chain is pointing TOWARDS you as you look at the chest from the front, that's a mimic. Regular chest chain will curl to the right up and up.
Enter the fortress, follow the linear path. Now, once you make it passed the first two catwalks with swinging blades, you'll be in a room with a chest. The NEXT room will be a catwalk with an enemy. This room is a point of interest as you will need to return here with the Cage Key. If you have the Master Key, that will do at this point too; however, we will still want the Cage Key.
Continue to the next area which is a ramp that contains a boulder rolling on it. Let the boulder kill the first enemy, then once a boulder passes, run up the ramp and to the left to the fog gate. You can get the item at the top in the chest if you want. Go through the fog gate.
In this next room, you'll get an ambushing enemy as well as another path to the boulder.
With the boulder here, you CAN actually run up and make it to the room untouched, but its a very narrow margin.
Instead, once a boulder passes, run up the ramp halfway then drop off onto a wooden platform with a caster enemy. Go towards the doorway.
Sorcery: Hush | On the corpse in this room
Go out the other direction and go up the ramp. You will now be located at the boulder mechanism and can direct it any path you want.
Sidequest: Siegmeyer of Catarina | Make sure it's not pointing outside where you first encountered the boulder, and head out that way using the boulder path. If you drop off to your left, you should find Siegmeyer sitting on the ledge. Exhaust his dialogue.
Return to the boulder mechanism.
Return down the ramp that you just ascended from (right after Hush) and go left. You will see an elevator in here. Before getting on the elevator, MAKE SURE it goes up before getting on, then get on as it's going back down.
Item of Interest: Lightning Spear | Mimic in this room
Now, walk out of the room and you will see that the boulders will slot down into the hole here. Once the hole fills up, the next boulder will smash the wall open.
Item of Interest: Covetous Gold Serpent Ring | If you're brave, run in and get the item. Otherwise, return to the mechanism and turn it clockwise then retrieve the item safely.
Once that's done, return to the boulder mechanism.
Siegward Questline: You can walk out to the FIRST path that you encountered the boulder. Drop off to the left for a Shotel. Then drop off again to find Siegward sitting on the ledge. Talk to him and exhaust his dialogue.
Return to the boulder mechanism and head into the hallway. Follow the linear path until you reach the fog gate.
Once you're through the fog gate, you'll be on the roof. First off, go upstairs, twice and then you'll see a broken wall off to your right. This ledge will let you drop down to a bonfire.
Bonfire: Sen's Fortress
Item of Interest: Flame Stoneplate Ring | On the roof, at the lower end in a chest guarded by Balder Knights.
Make your way up four sets of stairs, then follow the wide catwalk. Take the right (left is a jump that we'll do later). You'll get another fork, left takes you to a balder knight, go right. In this room, you'll need the cage key to unlock the shortcut. Go upstairs some more and onto the catwalk where a crossbow hollow is shooting at you. Get by him to the final area.
The fog gate leads to the boss, ignore this for now.
Go upstairs and kill the giant. He's the giant throwing fire everywhere and he DOES throw fire into the boss arena.
Key Item: Cage Key | The first fork on the large catwalk, you can jump across if you jump on the left side. Make the jump, then in the tower go all the way down and find the Cage Key at the end.
With the Cage Key, you can unlock the cage shortcut just before the boss. Make sure to go in it so that the shortcut is activated.
Sidequest: Big Hat Logan | Head back to the boulder mechanism and send just one boulder down the straight path then rotate it. Head down the path, and the wall will be broken here. Unlock both cages here, you'll free Big Hat Logan for his questline as he moves to Firelink Shrine.
Quest Note: You will need 15 INT before Logan teaches you at this time. You can wait later for him to lower his requirements completely.
Now, when you're ready, just head up to the boss fight.
Boss Fight: Iron Golem | He's big, but his attacks are fairly telegraphed. You can hug his feet for most of the fight, except when he goes for his grab attack. Besides that and falling off, should be an easy but long fight.
After the fight, examine the ring.
Walkthrough - Anor Londo
Anor Londo抵达亚诺尔隆德
到达亚诺尔隆德。
从这里往下走楼梯。暂时可以无视巨人,直接前往室外。在中央区域,向左走可以找到一处营火。
三个宝箱中有一个是宝箱怪,另外两个装有强化材料。
营火:亚诺尔隆德 | 这是一处有防火女的营火。
从这里乘坐电梯下去。你会遇到一只石像鬼。如果你在教堂没有砍掉石像鬼的尾巴,在这里还有一次机会获得石像鬼尾斧。
现在,向左走并爬上屋顶,前往左侧的建筑。这里有些狭窄,请注意。
进入下一栋建筑后,从窗户进去,会遭到绘画守护者的攻击。爬上梯子并穿过它。这里需要注意的是,你需要攻击吊灯的链条,使悬挂在上面的物品掉落。
穿过区域,进入雾门。
你会到达电梯处。推动拉杆来移动电梯。你可能会在这里吸引到第二个石像鬼的仇恨,它的尾巴不会掉落任何物品。
下楼,进入你刚才所在的建筑,但要到一楼。
【法术:强力魔法武器】| 吊灯处
【骑士的荣耀:黑铁大盾】| 后左角落
补充说明:这幅画是另一个区域,除非我们拥有【怪异玩偶】(不死院),否则无法到达。
回到电梯处,走上楼梯。现在前往主入口,然后向右走。你需要解决几个恶魔,然后是两个非常烦人的巨弓骑士。击败右侧的骑士后,从边缘跳下至阳台。
篝火:亚诺尔隆德住所 | 跳下后,在左侧房间内。索拉尔也在这里。
前往中间的螺旋楼梯并向上走。这里的楼梯只能到达2层:1楼和3楼。同一螺旋结构上的另一段楼梯则通往2楼和屋顶。到达3楼后,注意两个敞开的箱子都是宝箱怪。走向弓箭手,进入左侧房间,这会通往屋顶。
在屋顶时,暂时无视弓箭手,进入另一座塔。
支线任务:卡塔利纳的希夫梅尔 | 如果你一直在推进这个任务线,希夫梅尔会出现在窗边。杀死里面的三名骑士,然后与他对话,他会给你一枚戒指。
之后你就能打开这里的门了。回到屋顶,现在走弓箭手身后的楼梯。你现在会来到二楼。左边的门里有一个游荡的恶魔,你可以杀掉它。或者走向右边的门,打开底部通往一楼的门。
【骑士的荣耀:龙齿和哈维尔大盾】进入你面前的门道,翻滚进壁炉以显现一面幻影墙。底部会有几个箱子,唯一不成对的箱子是一个宝箱怪。
回到二楼,上楼进入主门厅。上楼并走向玻璃窗。
【骑士的荣耀:屠龙弓】从破碎的玻璃窗多次向下跳。解决这里的恶魔后,你可以打开大门,解锁电梯和巨人铁匠之间的捷径。
巨人铁匠【重要NPC,他可以锻造Boss武器】。
准备就绪后,标志性的Boss战就会开始。
Boss:翁斯坦与斯摩【这场战斗的关键在于,每个周目只能获得一个Boss灵魂。如果你先杀死翁斯坦,只能获得斯摩的灵魂;如果先杀死斯摩,则只能获得翁斯坦的灵魂。这对于获取他们两人的武器非常重要,所以要记住你获得的是哪一个】。
篝火:公主寝室【位于Boss战后的顶层】。
与葛温艾薇雅对话。前方有宝箱。无论如何,不要攻击她。获取王器誓约:公主的守护
发现公主的守护誓约。
警告:如果严格按照本指南操作,不要将王器放置在传火祭祀场,这会导致后续一个誓约错过。详见新隆多遗迹的誓约:暗黑之手。
传火祭祀场支线任务:卡塔利纳的希夫梅尔 | 他就在营火旁边。与他对话。
奇迹:强力灵魂巨枪 | 如上
流程 - 黑森林庭院及传火祭祀场周边
黑森林庭院有两种进入方式,一是从黑森林盆地通过九头蛇,二是向亚斯特拉的安德烈购买阿尔特留斯纹章,价格20000魂。推荐后者,因为这里可以轻松刷魂。
如果从黑森林盆地进入,沿着直线道路向上走,然后右转面对所有人类类型的敌人。进入建筑后,你可以与森林猎人的阿尔维娜交谈。阿尔维娜是窗边的那只猫。触发誓约。誓约:森林猎人
发现森林猎人誓约。
从这里前往下一个区域。你要寻找一群守护着湖中宝箱的蘑菇,宝箱里有【魔法余烬】。
前往有巨大发光门的悬崖。
Boss战:巨狼希夫 | 他的攻击相当基础,但必须能够翻滚躲避他的攻击。Art of Abysswalking
Acquire the Art of Abysswalking.
The Covenant of Artorias ring will allow you to progress to the boss in New Londo Ruins.
Side Note: There's another ring behind the grave.
Firelink Shrine Whatever you do, don't talk to the giant snake in the pool. Especially do not put down the Lordvessel for him.
If Lautrec was still alive when you rang the second bell, then this bonfire here should be disabled (although it can be warped to, but not warped from). If you move downstairs under the bonfire, you should see a gate where Anastasia was, and some items. Her Dingy set and a Black Eye Orb should be dropped.
Take the Black Eye Orb.
Anor Londo Warp to the Chamber of the Princess bonfire, then head outside of Ornstein & Smough's boss room. The Black Eye Orb should give you a message, so use it to invade Lautrec.
Once you defeat him, you should get Anastasia's soul back, so you can return it to her where you picked up the orb.
If you're really having trouble killing him, you can shoot him from afar with poison arrows, he won't aggro.
Firelink Shrine From the bonfire, head towards the elevator that lead you to the Undead Church in Undead Parish. When the elevator goes up, you want to drop off onto the roof. Once there, follow the land to the right then you should see an arch support to the left. From the cliff, just run towards it and roll so you'll land on it. From here, climb up to the top to the bird nest. Imitate the bird egg and you'll be taken to Undead Asylum
Undead Asylum Revisited Boss Fight: Stray Demon
If you go to the arena where you fought the Asylum Demon, you'll fall through the ground and face off against the Stray Demon.
Knight's Honor: Crest Shield | Return to where you got your Estus Flask and you should find a knight hollowed (Oscar). Kill him for the shield.
Key Item: Peculiar Doll | Return to the very first spawn point of the game in the cell.
Walkthrough - The Catacombs and Tomb of the Giants Bonfire
The Catacombs I recommend having someone with a divine weapon for this section as skeletons here can revive unless necromancers are killed. Necromancers DO NOT respawn.
Another note here is that Blacksmith Vamos is located here where you will be doing all your upgrades regarding Chaos and Fire given that you have the respective embers given to him. This guide will unlock all the bonfires here so that returning to this point will become easier.
From Firelink Shrine, run towards the graveyard and you should find some stairs leading to the catacombs.
Once inside, if you have a divine weapon or spells then you can fight freely. Otherwise, just run through.
Run into the area, down the spiral stairs, and into the next area. Climb down the ladder, and enter the door to the left. The next area has a hole in the wall to the left, go through there to find a Necromancer and the first Bonfire.
Bonfire: The Catacombs
First warning here: the statues are traps with spikes. Be wary. Second warning here: Walkways need to be activated before you can walk on them. So avoid rolling onto platforms below until you know you've unlocked them.
Walk outside, the first necromancer is to your right. Either run to him, or kill him from range.
Head through the very linear path. When you return outside, head to the right where you'll find several flying skulls and skeletons. Run through all of these and hit the switch at the end to rotate the bridge. The next necromancer is at the end of the bridge. You can kill him before hand.
Proceed to the next area. Here, make your way to the very bottom through all the skeletons to find your next necromancer and the next switch.
Now from here, if you drop down the spiral staircase some more you'll meet Blacksmith Vamos who will open up a path at the bottom. By this point, you are actually in the next area. So don't go here yet, just remember it's here.
Head back up and you should see a small narrow pathway leading outside to a dead end and a drop off to the right. Before going outside, there's a narrow path to the left that will also lead you outside. Take this path.
Head to the end of the path, climb up the ladder and use the switch. The wall next to the bottom of the ladder is an illusory wall and takes you to the bonfire.
Bonfire: Illusory Wall in the Catacombs
With that, head across the newly rotated bridge and into the next area. You can kick the skeletons off the ledge here outside, but you'll need to go into the broken wall room with several skeletons here. Drop off, go straight into the room.
Key Item: Darkmoon Seance Ring | You will find a giant skeleton. The ring is in the tomb behind him.
From the giant skeleton, there's a broken wall to his right. Go in. Follow this very narrow pathway to find the necromancer here.
Miracle: Tranquil Walk of Peace | From the necromancer, go upstairs and you'll find the spell
In this room, you can walk over one of the graves that will give out and put you back near the beginning. Progress to the next bridge. Make your way to the outside path where you can drop off, you will need to drop off here. The closest path is right before the previous bonfire. Once here, drop off to the right and you'll find a Great Scythe and a hole in the tomb. (You need to walk over it to reveal it). This will drop you to the next area. Go into the doorway and you'll find a prowling demon. Kill it or don't, but make sure to loot the Eyes of Death (3x) behind him.
To his left, you should see an open coffin, get inside that coffin and wait until you are transported.契约:墓王仆人
发现墓王仆人契约。
骑士的荣耀:墓王剑 | 加入契约
在成就方面,你确实需要加入这个契约,如果你有朋友的话可以快速完成。一旦该区域的领主(巨人墓地 Boss)死亡,这个契约就会无法使用。
使用小棺材传送回地下墓地,从那里直接走进下一个区域并向下爬。如果你踩过这里的地面,中央部分会塌陷。一路向下走到最底部。
这个区域有几个风车骷髅,它们极其危险,所以要小心地消灭它们。一旦你穿过风车骷髅的挑战,就会遇到 Boss。
Boss:风车 | 我认为这是一个 Boss。Rite of Kindling
Acquire the Rite of Kindling.
There really isn't a bonfire after this boss, so I'll guide you to the next bonfire in the following area.
Tomb of Giants This area does not allow for summons.
The only good source of light is either the Skull Lantern (Left hand) or the Cast Light miracle.
Guiding you will be extremely difficult in the dark, but we'll see what we can do with the prism stones.
Head to the first prism stone.
Head to the second prism stone to the left.
The third prism stone is to your right, head there. You will be descending slowly on a large coffin used as a bridge.
You will soon encounter a large skeleton to your left. The fourth prism stone is behind him.
At the 4th prism stone, you will be sliding down TWICE. First slide takes you to the fifth prism stone, then the next slide you won't see much as there are no more stones to follow.
Now at the bottom, you will go to your RIGHT. You will encounter two large skeletons. You can hug the right wall if you want safety.
Soon, you will see another light ahead and an NPC. Do not go near the prism stone here. It's a trap. Instead, go to the left of that and you should find a ladder.
Follow the path to the bonfire.
Bonfire: Tomb of the Giants | Yes, you can teleport here.
Important Note: If you're exploring on your own, I will put a warning here now. The prism stone above that I said to avoid that triggers an event. You get kicked down to an area with Rhea of Thorolund and you must save her from some enemies. If you happen to save her (which you WILL need to do, but I like to delay it). When you save her and talk to her after, she will relocate to Undead Parish Church where you fought the Bell Gargoyles. From this point, she will sell miracles for a period of time. That period ends if you kill a combination of two bosses from the following list: Gaping Dragon, Bell Gargoyles, Sif, Nito, Quelaag, the Bed of Chaos, Iron Golem, O&S, Four Kings and Seath. Bosses killed prior to saving her do not count.
The 3 exclusive miracles she sells are: Magic Barrier, Wrath of the Gods, and Great Heal.
Walkthrough - New Londo Ruins
New Londo Ruins Go under Firelink Shrine via the elevator to New Londo Ruins. You cannot summon here until you lower the water in the area (opening the gate to Valley of Drakes). Also, make sure you have the New Londo Ruin keys from Blighttown or the Master Key as well as the Covenant of Artorias ring.
The ghosts here cannot be harmed by regular weapons. You can only attack them using cursed weapons, or by using Transient Curse items. I'll leave it up to you to either kill them all or run passed them.
Once down the elevator, head towards the docks. Just before the wooden planks, there is a pot containing a 2x Transient Curse.
Go across the bridges until you get to the first wall.
Key Item: Fire Keeper Soul | To the right across the catwalk from the first wall. You have to walk through the narrow set of arches.
Transient Curse x2 | To the right of the base of the stairs in a pot behind the wall.
Go up the stairs, and across the catwalk. To the left are two paths. The first is an elevator you can access as a shortcut later when you've unlocked it. The second one is a stairs leading to your next spot. Go down the stairs.
Once out, immediately take the path to your right. Follow this path and watch for a doorway on the right. Take it and go up.
Just go across this walk-way towards the church.
Once you're at the entrance to the church, go in, take the door to your right. Then you'll have two choices, take the left path to the main room of the church. Go into the fire place and climb the ladder to the roof.
On the roof, you'll find Ingward. As we've already collected the Lordvessel, he will give you the Key to the Seal. This key will let us open the gates and lower the water.
Sorcery: Resist Curse | Purchase from Ingward for 5,000 Souls
Climb back down the ladder, and go out the first door. Take the right door then go right and downstairs and take the door to the left.
Once out, follow the linear path. Take the right at the fork and up the stairs. At the top of the stairs, run straight into the tower. (Don't climb the second set of stairs).
Once in, go down stairs and stay on the left and you'll find a gated door, open it with your newly obtained key and rotate the lever inside.
With that, the water will be drained and the door to Valley of Drakes will be opened. Now you can summon phantoms as well as take giant shortcuts.
Taking the elevator here will take you to the very bottom of New Londo Ruins. once you exit the elevator, go straight and up the ramp between the walls. Take this linear path until you reach a church-like building with several Darkwraiths (black enemies with black glowing shields) and a Mass of Souls (giant blob enemy).
Behind the Mass of Souls, take the left path and activate the shortcut elevator. Back to the same area, take the right path now up the stairs.
Key Item: Very Large Ember | Once up the stairs, follow the linear path until it takes you upstairs and to a chest. The item is in the chest.
Now back to the Mass of Souls once more, go out the other door into a pool of water. Climb out of it and go across to your left and up the stairs to another building containing Darkwraiths and Mass of Souls. Exit out the left side and the fog gate will be right in of you. Enter the fog gate.
This spiral staircase will lead to the boss; however, make sure you have the Covenant of Artorias ring equipped as you will die without it when falling into the Abyss at the bottom. You CANNOT swap the ring out after dropping down during the fight. You will die instantly.
Boss Fight: The Four Kings | They deal a good bit of magic damage, but most of it is pretty tolerable. The only attack that's truly dangerous is when one hugs itself and starts glowing with magic. This is a large blast which may kill you one hit. The strategy here is to deal enough damage where you kill a king before a second one appears. The rest is up to your DPS and ability to dodge. When a king dies, you can actually still hit him while he's in the dying animation to deal more damage to the boss health pool (hence Three Kings nomenclature).击败四王
击败灵魂继承者四王。
战斗结束后,由于我们尚未放置王器,你会在篝火附近找到卡斯。请仔细阅读这部分内容。接下来将说明如何加入暗灵誓约并同时保留弗林特的服务。
在篝火处休息以获得传送点。确保你拥有返乡骨片,或消耗你的灵魂以便在需要时使用黑暗印记。
与卡斯交谈,他会要求你为他放置王器,并将你传送到传火祭祀场。传送后,使用传送道具:返乡骨片、返乡奇迹、黑暗印记等。
你将回到深渊篝火处。与卡斯交谈并加入誓约。Covenant: Darkwraith
Discover Darkwraith covenant.
Knight's Honor: Dark Hand
Now, you can place the Lordvessel using either Kaathe or Frampt. It's highly recommended that you place it for Frampt for his exchange services. Frampt is the serpent in the pool of Firelink Shrine.
Firelink Shrine Head to the pool, and talk to Frampt. If he's asleep, just hit him to wake him up.
Talk to him until he moves you to Firelink Altar, then place the Lordvessel.
With the Lordvessel placed, all golden fog gates will be removed giving you access to the latter half of Tomb of the Giants, Duke's Archive through Anor Londo, and the latter half of Demon Ruins.
Walkthrough - Painted World of Ariamis
Painted World of Ariamis Make sure you have the Peculiar Doll key item from Undead Asylum Revisited. Also warning here: If you aggro the boss in the Painted World of Ariamis, you cannot leave until you defeat it. You cannot warp out.
Make your way to Anor Londo, then in the giant room with the chandelier outside the castle, go downstairs and go up to the giant painting and interact with it.
Upon arriving, follow the linear path.
Bonfire: Painted World of Ariamis | Note: This is the only bonfire in the area.
Proceed and go to your right. Go up the stairs. Warning now: The pus-like enemies inflict toxin upon death if you're within the splash radius.
Once up the stairs, you can go left or go up the stairs to the right. Take the stairs. Go across the bridge where you'll find several more pus enemies. Continue straight and exit the building and head right to a circular building.
Take the stairs to the left and you'll be faced with a dragon. It mainly inflicts poison, but you should be able to take it out.
Knight's Honor: Bloodshield | On the bridge where you fought the dragon
After the dragon, head back to the circular tower. At the top is a Red Sign Soapstone if you want otherwise head to the bottom and open the doorway to the courtyard.
Ahead is an enemy known as the Phalanx, go across the courtyard and open the gate that unlocks the shortcut to the bonfire. I will describe each area FROM the bonfire gate.
Pyromancy: Acid Surge | From the gate, go to the right. Hug the right until you're near the cliff and you'll find the pyromancy behind a wall
From the gate, go left and up the stairs. At the top of the stairs, go straight and go down the ladder inside. This next area is filled with pinwheels.
Straight in front of you is the handle that opens the gate to the boss area.
From the switch, the wall to the left in the corner is an illusory wall. Break it and go straight all the way to the dead end. Take the left and right at the fork.
Pyromancy: Fire Surge | Kill the enemy here.
Return back down to the fork and go left. Now, at the right turn, don't turn, roll into the wall in front of you to reveal an illusory wall.
Key Item: Annex Key | Take the left at the fork to find this
Now back at the bonfire gate once more, go straight to the phalanx and enter the building to the right. Using the Annex Key, open the door and climb up the stairs here. Exit the building.
Knight's Honor: Velka's Rapier | Once outside, break the wooden wall to the right to find this
Key Item: Dark Ember | Once outside, go straight and down the stairs passed several pus enemies to find this on a petrified blacksmith
Miracle: Vow of Silence | Once outside, take the left at the fork and go up the stairs. The miracle is on the corpse at the very top
Head to the bottom floor of the circular tower and the other door should be opened now. Make your way to the boss.
Knight's Honor: Priscilla's Dagger | Cut her tail
Boss Fight: Crossbreed Priscilla | Upon attacking her, she aggros and goes invisible, staggering her will make her visible again. If you have no methods to stagger her, then simply watch the snow for her footprints to locate her.Defeat Crossbreed Priscilla
Defeat Crossbreed Priscilla, the Lifehunter
You may exit.
Walkthrough - Demon Ruins & Lost Izalith
Blighttown Before we head to Demon Ruins, if you've followed Siegmeyer's quest he will now be in Blighttown. Make sure you have 3 SPARE purple moss clumps (non-blossomed). From the Daughter of Chaos bonfire, go backwards into Blighttown and stay on the right side. Once you go get to the area with the large slugs, you'll find Siegmeyer. Talk to him and give him 3 Purple Moss Clumps.
Demon Ruins Warp to the Daughter of Chaos bonfire.
Go outside to Demon Ruins.
Bonfire: Infestation Bonfire
Wound one of the egg enemies here so that they attack you until your character starts scratching their head. Once you start scratching, head back to Eingyi at the Daughter of Chaos bonfire and talk to him. He will offer to sell you Toxic Mist (exclusive) for 25,000 Souls. You only need to do this once per playthrough, the offer to buy will always remain afterwards.
Roll off to the right of the bonfire and head across the bridge.
Boss Fight: Ceaseless Discharge | I'll say this now, if you run to the end of this area and loot the equipment before attacking the boss, he will aggro onto you and if you ignore him and run back to the fog gate, he will get stuck and will grab onto the ledge. Attack his hand to kill him.
After the boss fight, the lava levels will rescind.
Key Item: Chaos Flame Ember | In the first area, it's located in the lava at the very end behind 7 Taurus Demons.
Head right near the beginning of the big area, you'll find a Capra demon guarding the route where you want to go.
Follow the linear path and once you get to the bottom, you can drop down to the right.
Bonfire: Second Bonfire
Go down the steps.
Key Item: Large Flame Ember | At the bottom of the steps, you'll want to take the left path to a chest containing this.
From the bottom of the steps, go straight up through the fog gate.
Boss: Demon Firesage | Similar to the Stray Demon you fought in Undead Asylum except fire attributed.
After the boss, the left stairs up will take you to an elevator that connects back to the Daughter of Chaos bonfire.
Eventually, take the stairs down to your next bonfire.
Bonfire: Bonfire between Bosses
Boss: Centipede Demon | If you go to the area to the right of the boss entrance crossing the lava twice, you will find a good area to fight the boss (where there's 2x Green shards).
Exit the boss area to the left of the entrance.
Lost Izalith Warning: Before completing the boss here, make sure you have a Pyromancy Flame +10 and have met up with Quelana of Izalith in Blighttown. (Encountering another player with a Pyromancy Flame +10 or higher is also an alternative provided it's in The Depths, Blighttown, Demon Ruins, or Lost Izalith)
Bonfire: Lost Izalith Entrance | Solaire is here.
The Centipede Demon drops the Orange Charred Ring. Make sure you have it equipped before venturing into the lava.
Head straight into the lava, climb the branch there. Follow it til it forks, taking the left. At the end of this branch, go right to the next set of branches.
At the end of that branch, go straight to the first tower. The left wall of the tower is illusory. Go around the tower to the right. Going up the branch above the second tower is an item, but you want to go to the base of it and break the illusory wall which is also on the left.
Bonfire: Lost Izalith
From the bonfire, go straight to the branches ahead and climb then to the second half of Lost Izalith.
Follow the linear path until you climb the stairs with a giant Chaos Eater.
Take the first branch down at the top of the stairs.
If you run towards the item in the cave, the floor will give out. Hug the left side so you stay up top.
Sidequest: Siegmeyer of Catarina | If you've followed his quest to this point, he will be here near the top. Kill off three Chaos Eaters from ranged, then talk to him until he says he'll join you in battle. Once you jump in, he joins you. Kill the fourth and final chaos eater with Siegmeyer's health above 50% to clear this stage.
Key Item: Red Titanite Slab | Looking at the exit down here, take the left and left. You'll find a dead end on your next right. It's in the chest
From the chest, go out go left, right, go to the end and go left. Climb the stairs then take the branch to the top.
Once back up top, continue on your route.
Go straight to the end and encounter another Chaos Eater
Pyromancy: Chaos Fire Whip | In the chest behind the chaos eater
See warning beginning of Lost Izalith before entering fog gate.
Boss: Bed of Chaos | This is a scripted boss fight. Bed of Chaos has three parts, two roots and the actual boss. The two roots are located inside the orange spheres to the left and right. The more you break, the more holes there are in the ground. The right one is harder to break, so you should go for that one first, then the left. After that, go to the middle and the floor will break making you roll onto the branch. Go up and kill the Bed of Chaos.Defeat Bed of Chaos
Defeat the Soul Lord Bed of Chaos.
Walkthrough - The Duke's Archive & Crystal Cave
The Duke's Archive Warp to the Anor Londo bonfire, go out and take the left passed two iron boars.
Bonfire: Entrance to the Duke's Archive
Head inside and up the main stairs, go to the right and head to the end of the floor to the right. The chest is a mimic containing the Crystal Knight Shield (this is helpful for the Crystal Weapon achievement if you don't fancy a crystal weapon and want to limit the number of items you use).
Go to the other end and take the elevator up.
If you're carrying a hefty number of souls, I would equip the Ring of Sacrifice here.
Fake Boss Fight: Seath the Fake | You cannot kill him here, just die.
PRISON STAGE
Bonfire: Archive Prison Tower
After dying, you'll wake up at the bonfire.
Key Item: Archive Tower Cell Key | Attack the serpent at the gate to get the key.
Key Item: Archive Tower Extra Key | From the bonfire cell, go down to the 4th door. Open this one
Head to the very bottom dispatching all of the octopus enemies.
Miracle: Soothing Sunlight | Dropped by the non-hostile octopus enemy near Big Hat Logan
Miracle: Bountiful Sunlight | Dropped by the non-hostile octopus enemy near Big Hat Logan
Outside the cell is a ladder, climb the ladder.
Key Item: Archive Tower Giant Door Key | In the chest up here
With the key, climb to the very top of the tower and open the door.
EXIT PRISON STAGE
Follow the linear path until you return to the Duke's Archive. This is the south side.
Once here, take the left and go through the hallway. Take the stairways from the current floor to the upper floor and use the switch midway. Go up and you'll be on the floor above on the same side.
Cross back through the hallway here and you'll notice the stairs on this south side has also rotated. You can simply drop down to the stairs and go up it to the Channeler.
Sorcery: Strong Magic Shield | After dropping down in the previous instruction, the chest is at the top to the right.
Return to the staircase and rotate it. Then go down the stairs and you can access a room with an archer and a ladder.
Climb down the ladder, pull the lever. Run out to the foyer and turn left for the bonfire.
Bonfire: The Duke's Archive
Return to the lever and go into the library and loot all the chests. The far right chest is a mimic.
Key Item: Crystal Ember | Chest to the right behind a bookshelf
Key Item: Archive Tower Giant Cell Key | Chest before the lever on the left inside the library
The previous key is used in the bottom room
Pull the switch to lower the ramp, go down and outside. Under the ramp is a chest with 20 prism stones which may help.
Sidequest: Siegmeyer of Catarina | This is actually Sieglinde but the quest is tied to Siegmeyer. Kill the gold golem to free Sieglinde. Talk to her and answer 'Yes'. She will relocate to Firelink Shrine now.
Go down the slope to enter Crystal Cave
Crystal Cave Follow the slopes until you see a crystal butterfly. They respawn, so unless you're farming them ignore them. Go passed it and at the end you should see several floating messages to the left.
Crystal Cave has invisible paths. If you see the crystals dropping, you can see them colliding with the floor. If you're online, you will also find several orange messages. Those will show you the safe routes. Shooting arrows, or dropping prism stones will also land on the invisible flooring.
Go straight along the path to the next crystal slope. Kill this golem, he does not respawn.
Once on this path go straight and you should see a drop off with more messages. Drop down.
Three crystal lizards behind you.
Key Item: Blue Titanite Slab | On the path with the crystal lizards, you can keep going up turn right then immediately left after four-five steps. Go parallel to the first path after the crystal lizard until you line up with the lower ledge and go straight that way. You can save this for later.
From the spot you dropped off, go left a bit and cross the invisible path. Take the right path to an area with several clams.
Boss Notes: Having the cursebite ring is quite helpful from Oswald at the Undead Church.
Knight's Honor: Moonlight Greatsword | Cut the boss tail, you MUST hit the very tip of it to count for tail damage.
Boss: Seath the Scaleless | If you break the crystal on the far end, Seath will be stunned for a bit giving you bits of damage. Most of Seaths attack are tail slaps or his curse breath.击败无鳞的希斯
击败无鳞的希斯,灵魂的继承者。
公爵书库关键道具:大块魔法余烬,位于首次遭遇希斯的地方。希斯必须死亡后才会出现。
巨人墓地攻略
巨人墓地警告:如果想在本次周目获得墓王法术,请在击败该区域 Boss 前获取。如果计划等到下周目,请确保不要上交任何死者之眼。
传送到巨人墓地营火。爬上梯子。
支线任务:索拉尔的雷亚。你应该会看到一个楔形石和帕奇。如果你走向楔形石,帕奇会把你踢进坑里。在那里你会找到雷亚、文斯和尼科。杀死文斯和尼科。奇迹:回复 | 在从文斯和尼科手中救出莉雅后,将她的对话全部听完,再与她交谈。
关键物品:骷髅灯笼 | 位于这个深坑中,左手装备时,格挡动作会举起灯笼照亮道路。非必需,但很有帮助。
支线任务提示:查看莉雅的任务线
从篝火出发,向上并向右走。你会找到一个梯子。
关键物品:大块神圣余烬 | 爬下梯子,在最尽头处。
从之前的梯子处,沿着狭窄的路径向左走。爬上梯子进入一个建筑,然后直走并爬上左侧的两个梯子。
契约物品:死神之眼(x3) | 在梯子附近的 ledge 上。
再次从篝火出发。你可以与帕奇对话,若选择原谅他,他会迁移至传火祭祀场,在那里你可以购买3个额外的死者之眼。从篝火出发,向上走并径直经过帕奇。你会遇到一只狗形骷髅。当遇到第二只狗形骷髅时,左转进入一个向下的斜坡。调整你的视角看向斜坡下方。【成就:Knight's Honor】:石像鬼盾牌 | 选择唯一的右侧路径,盾牌就在路的尽头。再次回到斜坡处,左转至边缘,从边缘左侧跳下。直走会到达另一个边缘。你的右侧有一个斜坡,左侧有一条小路,选择左侧的小路。【篝火:第二个篝火】| 你也可以在此处开始召唤。此区域需要保持人类形态。从篝火出发,前往有斜坡的区域,你可以翻滚或跳上壁架,获取上方的戒指。
贴着墙壁,落到小平台上。转身,再次向下跳。你会看到一个梯子,爬上去。
沿着这条狭窄的路径走,进入右侧入口后,圣骑士里罗伊会入侵。击败他,但要确保他不会掉下去,你需要拾取他的掉落物。
骑士的荣耀:圣杖 | 由圣骑士里罗伊掉落
骑士的荣耀:格兰特 | 由圣骑士里罗伊掉落
进入洞穴。注意:池中的小骷髅会无限刷新。
关键物品:白 Titanite 石板 | 在洞穴另一侧的顶部,左侧有一个可以跳下的地方,在那里可以找到这块石板。Boss战:墓王尼特。他弱火,但最佳策略是紧贴他。如果你一直贴身,他往往会使用范围攻击,这会杀死范围内所有骷髅,让你在战斗时无需担心骷髅的干扰。击败墓王尼特
击败灵魂之王墓王尼特。
攻略 - 黑暗亚诺尔隆德
获取黑暗亚诺尔隆德
有两种方法可以获取黑暗亚诺尔隆德。
装备在地下墓地找到的暗月司祭戒指。
杀死葛温艾薇雅
警告:杀死葛温艾薇雅将使你无法刷银骑士来获取武器以完成【Knight's Honor】。
如果你杀死葛温艾薇雅,葛温德林将变为敌对状态,需要在 Oswald 处赎罪才能加入暗月骑士团。这也会使亚诺尔隆德的防火女永久敌对,从而完全失去篝火。
否则,拿到戒指后可以完全忽略这一步。
黑暗亚诺尔隆德
前往亚诺尔隆德开始处的巨型旋转楼梯电梯。爬到最底部。
篝火:暗月篝火
前往这里的雾门,但不要进入。进入雾门会使葛温德林变为敌对状态(显然,这是一场 boss 战)。与地毯互动,会出现加入誓约的提示。暗月之剑誓约
发现暗月之剑誓约。
现在你需要收集总共10个复仇的证明,并将其献给葛温德林,之后才能继续。现在击杀 Boss 将导致你必须等到下周目才能获得相关奇迹。
本指南介绍如何通过在亚诺尔隆德入侵 Lautrec 来获取必定掉落的复仇的证明。
另一个可以通过在不死院与鸦人 Snuggly 交易蕾雅任务线中的吊坠获得。
其余的可以通过誓约入侵或在绘画世界亚米达拉刷恶魔乌鸦获得。
注意:与葛温德林战斗会使亚诺尔隆德的防火女变为敌对状态。Boss:暗日葛温德林。葛温德林拥有大量远程攻击,并且会持续向后传送(走廊并非无限长,所以他最终会耗尽空间)。必要时可利用左右两侧的柱子进行掩护。击败暗日葛温德林
击败暗月之神——暗日葛温德林。
奇迹:阳光之剑 | 击败 Boss 后在宝箱中获得
攻略 - 初始之火的火炉
传火祭祀场 前往传火祭祀场,献上四个王魂:四王、混沌的温床、无鳞的希斯以及墓王尼特。
之后门会打开,即可进入初始之火的火炉。
初始之火的火炉 警告:击败最终 Boss 会进入二周目,请先完成所有清理工作。
该区域非常直接,有各种类型的黑骑士。
Boss:薪王们的化身 | 对他进行弹反。
结局 《黑暗之魂》有两个结局,每个结局对应一个成就。为方便攻略,此处只列出一个,另一个将在二周目说明。你可以选择自己的结局,然后在二周目选择另一个结局。击败 Boss 后,点燃篝火。【传火】
达成【To Link the Fire】结局。
攻略 - 清理法术
此处所有与誓约相关的条目均默认你完全没有升级过誓约。
法术
Vinheim的Griggs
向Vinheim的Griggs购买【坠落控制】:1500灵魂
Oolacile的Dusk
确保你处于肉身状态。前往Darkroot Basin,你会在那里遇到一只九头蛇。本攻略之前避开了这里,所以如果你之前自己探索过,它可能已经被击杀了。进入左侧的洞穴,里面应该有一个金色结晶傀儡。击败它,Oolacile的Dusk就会被解救出来。
现在,重新加载游戏,或在篝火处休息后返回。在九头蛇湖泊右侧的岩石附近应该会有一个召唤印记。你可以召唤Oolacile的Dusk。购买她的所有法术:18,000 灵魂
大帽子罗根
在击败无鳞的希斯后,大帽子罗根会离开囚笼前往图书馆,之后离开公爵书库。
购买他的所有法术:183,000 灵魂
之后,耗尽他的对话。在篝火处休息,然后返回首次与希斯战斗的地方(无敌希斯)。
杀死大帽子罗根
他会掉落白龙吐息,这是最后的法术。智慧的贤者
获取所有法术。
关键物品:大型魔法余烬 | 在房间的宝箱内。
咒术
大沼的罗根
在底层救回罗根后,在传火祭祀场与他会面。
购买铁身躯和迅速恢复:4000灵魂
伊札里斯的克拉娜
你应该已经解锁克拉娜。如果没有,必须在二周目完成。
前往克拉娜处
咒术:火焰风暴 | 击败混沌的温床后与克拉娜交谈
购买她所有的咒术:84300灵魂
Eingyi
前往混沌的女儿营火旁的Eingyi处,如果你还没购买剧毒雾,花费25000灵魂购买。只有当你之前在头部感染蛋状态下与他交谈过,他才会出售该咒术。混沌的仆人
获得30个人性
在克拉格的住所加入混沌的仆人誓约
咒术:混沌大火球 | 加入混沌的仆人
向克拉格的妹妹献上30个人性
咒术:混沌风暴 | 混沌的仆人2级(上述步骤之后)【火焰法师的羁绊】
获取所有咒术。
【奇迹】
若尚未拥有所有墓王奇迹,需在二周目(NG+)完成。
若尚未从暗月之剑誓约获得暗月 Blade,需在二周目(NG+)完成。
【索拉尔的侍女】
应已购买:神之怒、魔法屏障、寻求指引、大恢复、强力法术、返回、大恢复片段及恢复。按照本指南操作,应能在游戏后期找到索拉尔的侍女。
【卡利姆的奥斯瓦尔德】
在钟楼石像鬼附近向卡利姆的奥斯瓦尔德购买因果报应,花费40000灵魂。
【加入太阳战士誓约】
奇迹:雷枪 | 加入
献上10个太阳徽章
太阳徽章可通过召唤金色灵体完成 boss 战或作为金色灵体帮助他人获得。索拉尔是有效的(获取途径)。在亚诺尔隆德篝火对面的城堡里,宝箱必定会掉落三枚阳光勋章。
除此之外,你可以在恶魔遗迹与失落伊札里斯之间的捷径处刷混沌虫(需要混沌仆人等级达到2级及以上)。
奇迹:阳光之枪 | 上述方法
献上葛温的灵魂 | 必须达到誓约1级
奇迹:阳光长枪 | 上述方法Prayer of a Maiden
Acquire all miracles.
Walkthrough - Clean Up Knight's Honor
This will only cover boss weapons and weapon drops. Guaranteed weapon finds were already covered in the walkthrough. List is in order it appears in the inventory.
Knight's Honor - Drops Silver Knight Straight Sword: Farm the Sword wielding Silver Knights in Anor Londo. Does not spawn in Dark Anor Londo.
Black Knight Sword: Farm the Sword wielding Black Knight in Kiln of the First Flame
Stone Greatsword: Farm the Stone Giants in Darkroot Garden
Black Knight Greatsword: Farm the Greatsword wielding Black Knight in Kiln of the First Flame
Crescent Axe: Purchase/Kill via Patches
Black Knight Greataxe: Farm the Greataxe wielding Black Knight in Kiln of the First Flame
Channeler's Trident: Farm Channelers in the Duke's Archive (Rare drop)
Demon's Spear: Farm Demons in Anor Londo or Purchase from Shiva of the East in Blighttown
Silver Knight Spear: Farm the Spearwielding Silver Knights in Anor Londo. Does not spawn in Dark Anor Londo.
Black Knight Halberd: Farm the Halberd wielding Black Knight in Kiln of the First Flame
Giant's Halberd: Farm the Giants in Anor Londo or Purchase from Giant Blacksmith
Silver Knight Shield: Farm any Silver Knight in Anor Londo. Does not spawn in Dark Anor Londo.
Black Knight Shield: Farm any Black Knight in Kiln of the First Flame
Stone Greatshield: Farm Stone Giants in Darkroot Garden
Knight's Honor - Boss Weapons You only get one soul per playthrough. If multiple weapons are listed, then you need multiple playthroughs for them. If you're cooping with friends, you can drop trade them to lower playthrough amount.
To upgrade to boss souls, you'll need a required weapon type upgraded to +10 (via Andre) for that weapon.
Soul of Sif: Cursed Greatsword of Artorias (It's black) | Any Sword
Soul of Sif: True Greatsword of Artorias (It's white) | Broken Straight Sword or Straight Sword Hilt
Soul of Sif: Greatshield of Artorias | Shield
Soul of Quelaag: Quelaag's Fury Sword | Curved Sword
Soul of Quelaag: Chaos Blade | Katana
Core of an Iron Golem: Golem Axe | Axe
Core of an Iron Golem: Dragon Bone Fist | Claw or Caestus
Soul of Smough: Smough's Hammer | Hammer
Soul of the Moonlight Butterfly: Moonlight Butterfly Horn | Spear
Soul of the Moonlight Butterfly: Crystal Ring Shield | Shield
Soul of Ornstein: Dragonslayer Spear | Spear
Soul of Priscilla: Lifehunt Scythe | Scythe, Halberd, or Whip
Soul of Gwyndolin: Darkmoon Bow | Bow
Soul of Gwyndolin: Tin Darkmoon Catalyst | Catalyst (+0)
Soul of Gwyn: Great Lord Greatsword | Sword
Due to Sif, a solo run would require 2.5 playthroughs, the minimum run requirement.
For weapon upgrades, see the respective area for it.
Walkthrough - NG+
Note: DLC is NOT required and will not be covered here. I do recommend it though. It can be accessed where you saved Dusk in Darkroot Garden.
Make sure you purchase the Master Key from Domhnall under the Aqueduct in Firelink Shrine. It'll shorten the next runs.
Stock up on any items that you think you may want as all merchants will be reset. You can kindle bonfires if you'd like. Their kindled state will be carried over.
Once you're ready to move to NG+, interact with the main bonfire at Firelink Shrine. I will only list the required areas that you must go to.
Things that don't carry over:
Blacksmith Embers
NPC Questlines
Sins
Keys
If you need specific items, covenants or questlines, make sure you keep track of that yourself. Those will not be covered here.
Undead Asylum If you defeat the Asylum Demon before you get the weapons, he will drop a Demon Great Hammer.
Firelink Shrine The usual.
Undead Burg Boss: Taurus Demon
Undead Parish Boss: Bell Gargoyle
Ring the bell.
Darkroot Garden Boss: Moonlight Butterfly
You need a second soul for Knight's Honor.
Boss: Sif, the Great Grey Wolf
Access Sif either through Darkroot Basin or using the Crest of Artorias
Blighttown Skip the Depths using the Master Key
Boss: Chaos Witch Quelaag
You need a second soul for Knight's Honor.
Ring the bell to open Sen's Fortress.
Sen's Fortress Boss: Iron Golem
You need a second soul for Knight's Honor.
Anor Londo Boss: Ornstein and Smough
You need a second soul for Knight's Honor.
If you have Smough's soul, then make sure you kill Smough FIRST.
If you have Ornstein's soul, then make sure you kill Ornstein FIRST.
Firelink Shrine Place the Lordvessel
Undead Asylum Boss: Stray Demon
If you don't need Titanite Slabs, ignore this.
Demon Ruins Boss: Ceaseless Discharge
Boss: Centipede Demon
New Londo Ruins Boss: Four Kings
The Duke's Archive & Crystal Cave Blue Titanite Slab here.
Boss: Seath the Scaleless
The Catacombs Boss: Pinwheel
Tomb of the Giants White Titanite Slab here.
Boss: Gravelord Nito
Lost Izalith Red Titanite Slab here.
Boss: Bed of Chaos
Dark Anor Londo Boss: Dark Moon Gwyndolin
Kiln of the First Flame Boss: Gwyn, Lord of Cinder
Make sure to pick the opposite ending to what you picked in your first playthrough.黑暗领主
达成【黑暗领主】结局。
清理:在二周目查看武器清理情况。可在巨人铁匠处打造所需的任何武器。
攻略 - 三周目
准备好进入三周目后,即可开始。
北方不死院:若在获得武器前击败 asylum demon,它会掉落恶魔大锤。
传火祭祀场:常规流程。
不死镇 Boss:牛头恶魔
不死教区 Boss:钟楼石像鬼
敲响钟声。我们需要前往巨人铁匠处。
黑森林庭院 Boss:巨狼希夫
获取【骑士的荣耀】需要第三个灵魂。
可通过黑森林盆地或使用亚尔特留斯徽章进入希夫区域。
病村:使用 master key 跳过底层
Boss:混沌魔女奎拉格
敲响钟声以开启塞恩古城。塞恩古城 Boss:钢铁巨偶
亚诺尔隆德巨人铁匠:如果你已完成所有步骤,这应该是单人游玩时的最后一步。制作最终的希夫武器。获得所有稀有武器The Dark Soul
All achievements completed. Congratulations!
Sidequest: Big Hat Logan
Sen's Fortress Located in a cage in Sen's Fortress behind a wall that can be broken with a large boulder. It's the wall with a serpent leaning on it near the start.
You need either the Master Key (starting item for Thief, gift item, or purchase from Domhnall of Zena in Firelink after ringing both bells) or the Cage Key found in Sen's Fortress in a tower accessed from the roof.
Rotate the boulder contraption and point it towards the leaning serpent wall.
Unlock Big Hat logan's cage. Exhaust his dialogue
Firelink Shrine Whenever he moves over here possibly related to your time in Anor Londo, he will begin selling some of his spells, but you need 15 Intelligence.
You do NOT need to buy anything from him now.
The Duke's Archive After placing the Lordvessel, he will appear in the prison cell at the bottom with several Pisacas. The key to this cell is located in the library before you exit The Duke's Archive.
Once you defeat Seath, he will exit the cell himself regardless if you free him from the cell. You should open the cell as there lies a Firekeeper Soul.
Purchase all of his spells. Exhaust his dialogue.
He relocates to the first boss arena where you fought Seath. Defeat him for his sorcery, White Dragon Breath.
Sidequest: Rhea of Thorolund
Firelink Shrine Appears in Firelink Shrine next to Petrus upon defeating Capra Demon.
Talking to Petrus here will move them to Tomb of the Giants.
Tomb of the Giants In the ditch that Patches kick you down, you'll find Rhea as well as her bodyguards. The latter of whom are hollowed.
Defeat Vince and Nico.
Talk to Rhea and she will give you the Replenishment miracle.
Undead Church Here she will sell all of her miracles.
After saving her, if you defeat any two of the following bosses FROM THIS POINT, she will die: Gaping Dragon, Bell Gargoyles, Crossbreed Priscilla, Sif - the Great Grey Wolf, Gravelord Nito, Chaos Witch Quelaag, Bed of Chaos, Iron Golem, Ornstein and Smough, Four Kings, and Seath the Scaleless.
Note: Petrus is the one who kills her, so if you kill Petrus, you will make Rhea hostile. But you can absolve your sins with Oswald.
Any of the bosses who are already dead will not count towards this.
The Duke's Archive Purchasing all of her miracles prior to her death condition in Undead Church will have her hollowed and trapped in the Duke's Archive prison.
Sidequest: Siegmeyer and Sieglinde of Catarina
Sen's Fortress Originally found outside the Sen's Fortress gates. Will move automatically once you open them.
After the gates are opened, you'll find him sitting on the ledge to the right of the first boulder path. Talk to him here and exhaust his dialogue.
Anor Londo Found in a window room accessed from the roof of Anor Londo. Talk to him here and exhaust his dialogue.
Next, kill the three silver knights in the adjacent room. Go back him and exhaust his dialogue.
He will give you a Tiny Being's Ring, then relocates.
Firelink Shrine He moves to the central bonfire, and talk to him. Respond with "Yes" for the Emit Force miracle.
Note: this is as far as you NEED to go. If you keep going, you'll get a Titanite Slab.
Exhaust his dialogue: this will trigger Sieglinde's questline.
Blighttown You will find him in the swamp near the Ash Lake branch to the right.
He will ask for 3x Purple Moss Clumps. Say yes, and you'll give him 3 clumps.
You will receive his Pierce Shield in exchange.
The Duke's Archive In the open area between the Duke's Archive and the Crystal Cave, a golden golem will now appear in the middle. Defeat this to save Sieglinde.
Exhaust her dialogue.
Firelink Shrine At the main bonfire, exhaust Sieglinde's dialogue.
Lost Izalith Located in the pit with the broken floor you can fall down to.
In order to continue this questline, you need the following conditions: All four chaos eaters cannot be killed before jumping down with Siegmeyer, Siegmeyer MUST have at least half his health when the last Chaos Eater is killed.
So to do this EASILY.
Defeat 3 Chaos Eaters in the middle with range. You can damage the fourth one.
Exhaust his dialogue, then jump in and defeat the fourth chaos eater. Siegmeyer will jump down with you.
Exhaust his dialogue.
Firelink Shrine If you pass the condition of saving Siegmeyer in Lost Izalith, talk to Sieglinde once more at the bonfire.
Exhaust her dialogue.
Ash Lake You will find both located at the first bonfire here.
You will be rewarded with a Titanite Slab.
Covenants
Covenants are similar to factions in several games and Dark Souls provides several types of factions. Below will list every faction, their requirements, how to join them, and any related information.
The most important note here is: If you leave a covenant, the amount of points you've accumulated in that covenant will be halved. (i.e. if you gave 20 humanity to a covenant, leaving it will make it seem as if you only gave it 10).誓约:白教之路
发现白教誓约。
标签:易错过 | 初始 | 合作
易错过条件:彼特鲁斯和雷亚死亡/敌对。在巨人墓地拯救雷亚后,彼特鲁斯会永久敌对。
位置:无 | 传火祭祀场 | 不死教区
加入条件:与彼特鲁斯或雷亚对话 | 骑士/ cleric职业自动加入
无等级誓约:公主的守护
发现公主的守护誓约。
标签:易错过 | 合作
易错过条件:葛温艾薇雅被杀死。
位置:亚诺尔隆德
加入条件:击败翁斯坦与斯摩后与葛温艾薇雅对话
无等级誓约:暗月之剑
发现暗月之剑誓约。
标签:易错过 | PvP | 区域防御
易错过条件:【Boss】葛温德林被击杀。
位置:暗月亚诺尔隆德
加入条件:在葛温德林的雾门前与其对话。
等级 条件 奖励
0 加入 蓝眼宝珠 | 暗月之剑誓约戒指
1 10个复仇之证 暗月之剑 | 暗月护符
2 额外20个复仇之证 无
3 额外50个复仇之证 无太阳战士誓约
发现太阳战士誓约。
标签:合作
位置:太阳祭坛 | 不死教区大桥(飞龙下方)
加入条件:25点信仰 - (以白灵形态击败的 Boss 数量 ×5)
等级条件奖励
0级:加入即可获得雷枪
1级:10个太阳徽章,奖励大雷枪 | 献上葛温的灵魂可获得阳光枪
2级:30个太阳徽章,无奖励
2级:80个太阳徽章,无奖励誓约:森林猎人
发现森林猎人誓约。
标签:玩家对战 | 领地防御
位置:黑森林庭院
加入条件:与阿尔特留斯对话并选择“是”。如果选错,可以找奥斯瓦尔德赎罪。
等级 条件 奖励
0 加入 猫之誓约戒指
0 击杀1名入侵者 女神的祝福
0 击杀3名入侵者 浓雾戒指
1 击杀10名入侵者 无
2 击杀30名入侵者 无
3 击杀80名入侵者 无契约:暗灵
发现暗灵契约。
标签:可错过 | 玩家对战
可错过条件:在与卡斯对话前,将王器交给弗林特
位置:深渊【新隆多遗迹】
加入条件:与卡斯对话
等级条件奖励
0 加入 暗之手
1 献上10个人性 红眼宝珠
2 献上30个人性 暗剑 | 暗一套装
3 献上80个人性 无契约:古龙之道
发现古龙之道契约。
标签:玩家对战
位置:灰烬湖
加入条件:与石之古龙对话
等级条件奖励
0 加入 龙瞳 | 龙头石
1 献上10块龙鳞 无
2 献上30块龙鳞 龙体石
3 献上80块龙鳞契约:墓王仆人
发现墓王仆人契约。
标签:易错过 | PvP
易错过条件:【Boss】墓王尼特被击杀
位置:地下墓地
加入条件:持有至少一个死者之眼并与尼特的石棺互动
等级 条件 奖励
0 加入 墓王剑 | 墓王剑舞
1 献上10个死者之眼 墓王大剑舞
2 献上30个死者之眼 无
3 献上80个死者之眼 无Covenant: Chaos Servant
Discover Chaos Servant covenant.
Tags: Missable | PvE
Missable Condition: Quelaag's Sister is killed.
Location: Quelaag's Domain
Join Condition: Talk to Quelaag's Sister
RankConditionReward0JoinGreat Chaos Fireball110 Humanity OfferedNone230 Humanity OfferedChaos Storm380 Humanity OfferedNone
Knight's Honor - Guidelines
This is by far the hardest achievement of the game whether it's unconfirmed lists of weapons, or RNG itself. This will help mediate some of the issues.
All weapons MUST be on a single character.
Weapons CAN be dropped from other players (in +0 form).
You should NOT use weapons required for Knight's Honor to ascend weapons to their Boss equivalent UNLESS you have another. (i.e. using a Bloodshield to create the Greatshield of Artorias)
If the achievement does not register and you're certain that you've got everything, try dropping weapons and picking them back up or putting them into the bottomless box and taking them out.
Weapons gained through glitches do not count.
Knight's Honor - Sorted by Categories
Boss Soul WeaponsBoss weapons can be obtained by upgrading a weapon similar of the same nature to max, then ascending it to the boss variant using the soul of that boss. Example: The Chaos Blade is a katana built from the Soul of Quelaag; therefore, the player will need a +10 Katana (Washingpole, Iaito, or Uchigatana) and the Soul of Quelaag to create the Chaos Blade.
Weapons are listed in order of bosses that you encounter in the walkthrough.
NameBoss SoulWeapon TypeMoonlight Butterfly HornMoonlight Butterfly (Darkroot Garden)Spears/Rapiers -
Spear sold by Male Undead MerchantCrystal Ring ShieldMoonlight Butterfly (Darkroot Garden)Shields - Buckler sold by Male Undead MerchantGreatsword of Artorias (Cursed)Great Grey Wolf Sif (Darkroot Garden)Swords/Daggers/Greatsword - Dagger sold by Male Undead MerchantTrue Greatsword of ArtoriasGreat Grey Wolf Sif (Darkroot Garden)Broken Straight Sword/Straight Sword Hilt - Dropped by the Undead/Starting WeaponGreatshield of ArtoriasGreat Grey Wolf Sif (Darkroot Garden)Shields - Buckler sold by Male Undead Merchant Chaos BladeChaos Witch Quelaag (Blighttown)Katanas - Sold by Shiva of the EastQuelaag's Fury SwordChaos Witch Queelag (Blighttown)Curved Sword - Scimitar sold by Male Undead MerchantGolem's AxeIron Golem (Sen's Fortress)Axes - Hand Axe sold by Male Undead MerchantDragon Bone FistIron Golem (Sen's Fortress)Caestus/Claw - Caestus sold by Andre of AstoraSmough's HammerSmough (Anor Londo)Hammer - Club sold by Male Undead MerchantDragonslayer SpearOrnstein (Anor Londo)Spears/Rapiers - Spear sold by Male Undead MerchantLifehunt ScytheCrossbreed Priscilla (Painting World of Ariamis)Halberds/Scythes/Whips - Halberd can be found in front of the churchDarkmoon BowDark Sun Gwyndolin (Dark Anor Londo)Bow - Short Bow sold by Male Undead MerchantTin Darkmoon CatalystDark Sun Gwyndolin (Dark Anor Londo)Catalyst - Sorcerer's Catalyst sold by Rickert of VinheimGreat Lord GreatswordGwyn (Kiln of the First Flame)Swords/Daggers/Greatsword - Dagger sold by Male Undead Merchant
Weapon DropsOrdered by how they would appear in forced sort of inventory.
NameDropped ByLocationSilver Knight Straight SwordSilver Knight (Sword Wielding)Anor LondoBlack Knight SwordBlack KnightsKiln of the First FlameStone GreatswordStone KnightsDarkroot GardenBlack Knight GreatswordBlack Knights (Greatsword Wielding)Kiln of the First FlameCrescent AxePatchesPurchased at Firelink Shrine (Or Kill Patches)Black Knight GreataxeBlack Knights (Axe Wielding)Kiln of the First FlameGrantPaladin Leeroy (Red Phantom)Tomb of GiantsChanneler's TridentChannelersDuke's ArchiveDemon's SpearShiva of the East (Forest Hunter)BlighttownSilver Knight SpearSilver Knight (Spear Wielding)Anor LondoGiant's HalberdGiant BlacksmithAnor LondoBlack Knight HalberdBlack Knights (Halberd Wielding)Kiln of the First FlameSanctusPaladin Leeroy (Red Phantom)Tomb of GiantsCrest ShieldOscar (Hollowed)Undead Asylum (Revisited)Silver Knight ShieldSilver KnightAnor LondoBlack Knight ShieldBlack KnightsKiln of the First FlameStone GreatshieldStone KnightsDarkroot Garden
Guaranteed LootWhether it's corpse loot, chest, or given automatically. It's listed here.
WeaponLocationDescriptionAstora's Straight SwordValley of DrakesNext to Undead DragonGravelord SwordTomb of the Giants (The Catacombs)Join the Gravelord Servants covenantVelka's RapierPainted World of AriamisIn the annexDragon ToothAnor LondoAfter the second bonfire behind a fireplaceDark HandNew Londo RuinsGiven upon joining the Darkwraith CovenantDragonslayer GreatbowAnor LondoCorpse loot above Giant Blacksmith outside a windowEffigy ShieldTomb of GiantsAfter final bonfire (pre-boss)BloodshieldPainted World of AriamisOn the bridge behind the Undead DragonDragon Crest ShieldValley of DrakesNext to Undead DragonBlack Iron GreatshieldAnor LondoJust left of the painting to Painted World of AriamisHavel's GreatshieldAnor LondoAfter the second bonfire behind a fireplace
TailsList of weapons that are obtained by cutting off the tail of an enemy (boss).
WeaponBossLocationNotePriscilla's DaggerCrossbreed PriscillaPainted World of AriamisIf Priscilla is invisible, simply use fire to dispel her invisibilityDrake SwordHellkite DragonUndead ParishYou can safely shoot arrows at his tail until it falls offMoonlight GreatswordSeath the ScalelessCrystal CaveBreaking the crystal will stun himDragon GreatswordDragon LordAsh LakeAttacking only his tail will not cause him to be hostile to youDragon King GreataxeGaping DragonThe DepthsN/A
Knight's Honor - Sorted by Inventory Order
This is the order in which weapons will appear in your inventory so you can check which ones you have in order. You can select a weapon in your inventory, and select Reset Order and this is the order that will return.
WeaponTypeLocationPriscilla's DaggerDaggerCut off Priscilla's Tail (Painted World of Ariamis)Silver Knight Straight SwordStraight SwordDropped by Silver Knights with Swords (Anor Londo)Astora's Straight SwordStraight SwordCorpse loot in Valley of Drakes next to Undead DragonDrake SwordStraight SwordCut off Hellkite Dragon tail in Undead ParishBlack Knight SwordStraight SwordDropped by Black Knights with Swords (Kiln of the First Flame)Stone GreatswordGreatswordSold by Shiva of the East (Forest Hunter) or dropped by Stone Giants (Darkroot Garden)Greatsword of Artorias (Cursed - It's Black)GreatswordAscend sword/dagger with Soul of Sif (Darkroot Garden)Greatsword of Artorias (True - It's White)GreatswordAscend broken sword with Soul of Sif (Darkroot Garden)Great Lord GreatswordGreatswordAscend sword/dagger with Soul of Gwyn (Kiln of the First Flame - Soul given in NG+)Moonlight GreatswordGreatswordCut off Seath the Scaleless' tail (Crystal Cave)Black Knight GreatswordUltra GreatswordDropped by Black Knights with Greatswords (Kiln of the First Flame)Dragon GreatswordUltra GreatswordCut off Ancient Dragon's tail in Ash Lake (He will not turn hostile if you ONLY hit the tail)Quelaag's FuryswordCurved SwordAscend Curved Sword with Soul of Quelaag (Blighttown)Gravelord SwordTomb of the Giants (The Catacombs)Join the Gravelord Servants covenantChaos BladeKatanaAscend Katana with Soul of QuelaagVelka's RapierThrusting SwordCorpse loot in the annex before the boss (Painted World of Ariamis)Crescent AxeAxeSold/Dropped by PatchesGolem AxeAxeAscend axe with Core of an Iron GolemBlack Knight GreataxeGreataxeDropped by Black Knights with Greataxes (Kiln of the First Flame)Dragon King GreataxeGreataxeCut the tail of the Gaping Dragon (The Depths)GrantGreat HammerDropped by NPC Invader Paladin Leeroy (Tomb of Giants)Dragon ToothGreat HammerChest behind a fireplace after the final bonfire of Anor LondoSmough's HammerGreat HammerAscend a hammer with Soul of Smough (Anor Londo)Channeler's TridentSpearRare drop by Channelers (Duke's Archive)Demon's SpearSpearDropped by White Gargoyles (Anor Londo) | Also sold by Shiva of the East (Blighttown)Silver Knight SpearSpearDropped by Silver Knights with Spears (Anor Londo)Moonlight Butterfly HornSpearAscend a spear/rapier with Soul of the Moonlight Butterly (Darkroot Garden)Dragonslayer SpearSpearAscend a spear/rapier with Soul of OrnsteinGiant's HalberdHalberdSold by Giant Blacksmith (Anor Londo)Black Knight HalberdHalberdDropped by Black Knights with Halberds (Kiln of the First Flame)Lifehunt ScytheHalberdAscend halberd/scythe/whip with Soul of Priscilla (Painted World of Ariamis)Dragon Bone FistFistAscend cestus/claw with Core of an Iron GolemDark HandFistJoin the Darkwraith Covenant or Rare drop from Darkwraiths (New Londo Ruins)Dragonslayer GreatbowGreatbowCorpse Loot above Giant Blacksmith outside a window (Anor Londo)Darkmoon BowBowAscend bow with Soul of GwyndolinTin Darkmoon CatalystCatalystAscend a catalyst with Soul of GwyndolinEffigy ShieldShieldCorpse Loot above the second bonfire at the end of a long path (Tomb of Giants)Crystal Ring ShieldShieldAscend a shield with the Soul of the Moonlight Butterfly (Darkroot Garden)SanctusShieldDropped by NPC Invader Paladin Leeroy (Tomb of Giants)BloodshieldShieldCorpse loot after the Undead Dragon on the bridge (Painted World of Ariamis)Crest ShieldShieldDropped by Hollowed Oscar during revisit (Undead Asylum)Dragon Crest ShieldShieldCorpse Loot next to Undead Dragon (Valley of Drakes)Silver Knight ShieldShieldDropped by Silver Knights (Anor Londo)Black Knight ShieldShieldDropped by Black Knights (Kiln of the First Flame)Black Iron GreatshieldGreatshieldJust left of the entrance to the Painted World of Ariamis (Anor Londo)Stone GreatshieldGreatshieldDropped by Stone Knights (Darkroot Garden)Havel's GreatshieldGreatshieldChest behind a fireplace after the final bonfire of Anor LondoGreatshield of ArtoriasGreatshieldAscend a shield with Soul of Sif (Darkroot Garden)
Miracles - Prayer of a Maiden
Must be on the same character.
MiracleLocationMerchant PriceForceReah of Thorolund1,000Emit ForceFirelink ShrineAfter defeating Ornstein & Smough, return to Firelink Shrine and talk to Siegmeyer of Catarina for the miracleWrath of the GodsReah of Thorolund10,000HealReah of Thorolund1,000Great Heal ExcerptReah of Thorolund2,000Great HealRhea of Thorolund10,000Soothing SunlightDuke's ArchiveGuaranteed drop from Pisaca (octopus) in the prisno tower ReplenishmentTomb of GiantsRescue Rhea from Patches' trapBountiful SunlightDuke's ArchiveGuaranteed drop from Pisaca (octopus) in the prison tower Lightning SpearWarrior of SunlightJoinGreat Lightning SpearWarrior of SunilghtRank 1 (10x Sunlight Medals)Sunlight SpearWarrior of SunlightRank 1 & Offer Soul of GwynHomewardRhea of Thorolund1,000Magic BarrierRhea of Thorolund6,000Great Magic BarrierAsh LakeInside one of the tree trunksSeek GuidanceRhea of Thorolund500Karmic JusticeOswald of Carim40,000Darkmoon BladeDarkmoonRank 1 (10x Soul of Reprisals)Tranquil Walk of PeaceThe CatacombsNear the illusory wall bonfire, follow the path and up the ladderVow of SilencePainted World of AriamisIn the annex before the bridge to the Undead DragonGravelord Sword DanceGravelordJoinGravelord Greatsword DanceGravelordRank 1 (10x Eye of Death)Sunlight BladeDark Anor LondoJust after defeating Gwyndolin
Rhea of Thorolund - Firelink Shrine: After you defeat the Capra Demon, she will show up near the elevator in Firelink Shrine. If you talk to Petrus while the group is here, they will go to the Tomb of Giants. This also occurs when defeating Pinwheel in The Catacombs. Once in the Tomb of Giants, find Patches and fall prey to his tricks. In the pit, you will find Rhea and some hollowed buddies. Kill off the hollowed enemies to save Rhea. She will give you the Replenishment Miracle. From here, she moves to the Undead Parish Church where you looted the Fire Keeper Soul. The Berenike Knight must be killed before she spawns here.
Now the complicated part is that once she moves to the Undead Parish, if you kill any two of the following bosses, she will die and move to the Duke's Archive.
Bosses: Bell Gargoyles, Gaping Dragon, Great Wolf Sif, Chaos Witch Quelaag, Bed of Chaos, Iron Golem, Priscilla, Ornstein & Smough, Seath the Scaleless, Four Kings, or Gravelord Nito.
Note: This does not count if these bosses were dead prior to her moving there, only after she moves there.
To save her, buy all of her miracles, or kill Petrus before killing two additional bosses listed above.
Pyromancies - Bond of a Pyromancer
Must be on the same character.
PyromancyLocationMerchant PriceFireballLaurentius of the Great Swamp800Fire OrbLaurentius of the Great Swamp8000Great FireballQuelana of Izalith20,000Flash SweatLaurentius of the Great Swamp2,000CombustionLaurentius of the Great Swamp500Great CombustionQuelana of Izalith5,000Fire WhipQuelana of Izalith10,000Chaos Fire WhipLost IzalithIn a chest before the Bed of Chaos (continue straight)Fire SurgePainted World of AriamisFrom the start, go forward into the gate and at the first courtyard, turn left and climb the well ladder down. Navigate to the path with the stairs and kill the bloat. (Left Left Left Right)Acid SurgePainted World of AriamisFrom the start, go forward into the gate and at the first courtyard, turn to your right to the cliffs. Follow the cliffs to the right and it'll be behind a wall.FirestormQuelana of Izalith30,000Chaos StormChaos ServantRank 2Fire TempestQuelana of IzalithAfter defeating Bed of Chaos, talk to her.Great Chaos FireballChaos ServantJoinPower WithinBlighttownUnderneath the giant bug at the top of BlighttownIron FleshLaurentius of the Great Swamp2,000Poison MistBlighttownFrom the swamp bonfire, run straight. You'll encounter a corner of the tower, it's behind this corner. Or see Toxic MistToxic MistEingyi25,000Undead RapportQuelana of Izalith10,000
Laurentius of the Great Swamp - The Depths: Once you face the first butcher, you should find a room filled with barrels. Laurentius is stuck in one of the barrels. Pro-tip: Roll, don't attack.
Quelana of Izalith - Blighttown: Be in Blighttown with a +10 Pyromancy Flame BEFORE defeating Bed of Chaos. The flame can be carried by the host, a phantom, or an invader. She spawns between the waterwheel and the shore to the boss.
Eingyi - Quelaag's Domain: After the Chaos Witch Quelaag bossfight, you can ring the bell and go downstairs and break one of the spider egg walls revealing Eingy and Quelaag's Sister. In order for Eingyi to sell pyromancies, you must have an egg-head. Become infected in Demon Ruins and return to Eingyi (only required once).
Sorceries - Wisdom of a Sage
Must be on the same character.
SorceryLocationMerchant PriceSoul ArrowBlacksmith Rickert of Vinheim2,000Great Soul ArrowGriggs of Vinheim6,000Heavy Soul ArrowBlacksmith Rickert of Vinheim4,000Great Heavy Soul ArrowGriggs of Vinheim8,000Homing SoulmassBig Hat Logan/Griggs of Vinheim20,000HushSen's FortressJust before you reach the doorway of the boulder contraption, drop off to your left onto a wooden scaffolding. Go into the doorway and follow this linear path to the item.Cast LightDusk of Oolacile1,000Soul SpearBig Hat Logan/Griggs of Vinheim40,000Crystal Soul SpearBig Hat Logan50,000Crystal Magic WeaponBig Hat Logan20,000Homing Crystal SoulmassBig Hat Logan30,000RemedyBlighttownGo up the water wheel, then follow the linear path to find the Crimson Set as well as this sorcery.Resist CurseIngward, the Guardian of the Seal5,000RepairDusk of Oolacile10,000Hidden BodyDusk of Oolacile2,000ChameleonDusk of Oolacile3,000Hidden WeaponDusk of Oolacile2,000Magic ShieldGriggs of Vinheim3,000Strong Magic ShieldDuke's ArchiveIn a chest directly above the entrance of Duke's Archive (Top Floor).Magic WeaponGriggs of Vinheim3,000Great Magic WeaponAnor LondoIn the catwalk above the painting to the Painting World of Ariamis, you can cut a chandelier to drop the spell.Aural DecoyGriggs of Vinheim1,000White Dragon BreathBig Hat LoganSee below.Fall ControlGriggs of Vinheim1,500
Griggs of Vinheim - Lower Undead Burg: You will either need the Residence Key (sold by Male Undead Merchant in Undead Burg). From there, head to the Lower Undead Burg. Go down the stairs and turn right. Griggs is in the second room on the right.
Note: On spells that are listed for both Griggs and Logan, you'll need Logan to leave for the Duke's Archive.
Dusk of Oolacile - Darkroot Basin: After you defeat the Hydra, reload your game. A gold crystal golem will spawn in its place. Kill it and Dusk will be freed. After this, you can summon her on the shore near a boulder. Also, do not use any spells with a lingering effect on the golem (i.e. mists attacks, lasting fireballs). Dusk spawns right on the golem.
Ingward, the Guardian of the Seal - New Londo Ruins: On top of a building in upper New Londo Ruins. The roof can be accessed by a ladder inside the fireplace.
Big Hat Logan - Sen's Fortress: After obtaining the Cage Key (at the top of Sen's Fortress in bottom of the isolated tower where you have to jump a gap), turn the boulder mechanism so it follows a path to break a wall. Now, the part you want to go to with the wall is the just before the boulder paths where you're at the final set of swinging blades. To your right, you should see a serpent next to a wall. After you break that wall (with the boulder, or by baiting the serpent's attack into the wall), you'll find Big Hat Logan in a cage to the right. He will then sell you spells at Firelink Shrine.
Logan will move once you enter the Duke's Archive. After you encounter Seath the Scaleless in Duke's Archive (in his invincible form), make sure to die to him so you wake up in a cell. Big Hat Logan will be here with you in this tower at the bottom. You'll need to get the Archive Tower Giant Cell Key in the Duke's Archive at the end just before the Crystal Golem Garden. He will then relocate to the area where you exit the Duke's Archive until you buy all his spells.
After you buy all of his spells, he goes crazy. He will become hollowed and move to where you first fought Seath in the Duke's Archive. Kill him here for White Dragon Breath sorcery. A chest will spawn in his previous location with his catalyst and the rest of his armor.
Weapon Upgrades - Achievement List
You do not personally have to upgrade the weapons. Having a maxed out weapon in the specific element will trigger the achievement, so picking them up will trigger it.最强武器
通过标准强化获得最佳武器。
将武器沿常规路线强化至+15。水晶武器
通过水晶强化获得最佳武器。
将武器沿水晶强化路线升级至+5。闪电武器
通过闪电强化获得最佳武器。
将武器沿闪电强化路线升级至+5。原始武器
通过原始强化获得最佳武器。
将武器沿原始强化路线升级至+5。魔法武器
通过魔法强化获得最佳武器。
将武器沿魔法强化路线升级至+10。魔法武器
通过魔法强化获得最佳武器。
将武器通过魔法强化路径升级至+5。神圣武器
通过神圣强化获得最佳武器。
将一把武器通过神圣强化路径升级至+10。隐秘武器
通过隐秘强化获得最佳武器。
将武器沿隐秘路线升级至+5。火焰武器
通过火焰强化获得最佳武器。
将火焰路径的武器强化至+10。混沌武器
通过混沌强化获得最佳武器。
将武器通过混沌路线强化至+5。
武器强化 - 路线武器强化 - 余烬列表
安德烈(亚斯特拉)
位置:不死教区篝火
余烬|位置|作用
大型余烬|底层|将普通路径+5强化至+6,或转换为粗制路径
非常大的余烬|新隆德遗迹|将普通路径+10强化至+11
神圣余烬|黑森林庭院|将普通路径+5转换为神圣路径
大型神圣余烬|巨人墓地|将神圣路径+5强化至+6
黑暗余烬|亚米达拉的绘画世界|将神圣路径+5转换为咒术路径
里卡特( Vinheim)
位置:新隆德遗迹
余烬|位置|作用
魔力余烬|黑森林庭院|将魔法路径+5转换为 enchanted 路径
大型魔法余烬|公爵书库|将魔法路径+5强化至+6
巨人铁匠
位置:亚诺尔隆德 | 黑暗亚诺尔隆德
余烬|位置|作用
结晶余烬|公爵书库|将普通路径+10转换为结晶路径
瓦莫斯
位置:地下墓地余烬位置功能
混沌火焰余烬
恶魔遗迹
修改火焰路径 +5 至混沌路径
大型火焰余烬
恶魔遗迹
修改火焰路径 +5 至 +6
武器强化 - 强化材料列表
强化材料 - 商人出售与掉落
楔形石碎片 - 安德烈出售 | 巨人铁匠出售 | 瓦莫斯出售
大块楔形石碎片 - 巨人铁匠出售 | 病村水蛭掉落
绿楔形石碎片 - 巨人铁匠出售 | 病村水蛭 5个掉落
楔形石原盘 100% 掉落率
楔形石原盘 - 初始之火的火炉中的黑骑士(剑)掉落
白色楔形石原盘 - 初始之火的火炉中的黑骑士(巨斧)掉落
蓝色楔形石原盘 - 初始之火的火炉中的黑骑士(戟)掉落
红色楔形石原盘 - 初始之火的火炉中的黑骑士(巨剑)掉落初始火焰楔形石圆盘 - 由新隆多遗迹的暗灵稀有掉落
白色楔形石圆盘 - 由巨人墓地的风车骷髅稀有掉落
蓝色楔形石圆盘 - 由结晶洞穴的结晶蝴蝶稀有掉落
红色楔形石圆盘 - 由失落伊札里斯的混沌吞噬者稀有掉落
升级材料 - 固定获取的圆盘
楔形石圆盘 - 击杀离群恶魔
楔形石圆盘 - 完成希夫梅尔/希夫琳德的支线任务
楔形石圆盘 - 【DLC】在黑龙喀拉弥特 boss 区域的瀑布后面的宝箱
蓝色楔形石圆盘 - 结晶洞穴的尸体拾取
蓝色楔形石圆盘 - 【DLC】王室森林的宝箱
红色楔形石圆盘 - 失落伊札里斯的宝箱
红色楔形石圆盘 - 用未强化(+0)的混沌咒术之火与小狼希夫交换
白色楔形石圆盘 - 巨人墓地中尼特 boss 前的尸体拾取
白色楔形石圆盘 - 【DLC】尸体深渊裂隙中的战利品 其他内容 其他指南


LV.
2026-02-19 19:00:12 · 发布在 「DARK SOULS™: REMASTERED」
这是一份详尽的100%成就指南,包含从0到100%的逐步流程。如果你正在寻找特定的成就或收集品,可以使用Ctrl+F在搜索栏中输入相关内容以获取更直接的帮助。
我会为我的所有指南提供支持和调试帮助。如果你有任何问题、遇到困难或发现指南中的错误,请随时留言,我会尽快回复你。祝你游戏愉快!
简介:Achievement Breakdown: (41)
Story Related: (16)
Covenants: (9)
Collectibles: (4)
Upgrades: (10)
Slay: (2)
To achieve 100% in Dark Souls we will have to complete two full playthroughs & a half playthrough of the game all on the same character (NG++). Certain Rare Weapons can only be made using multiple copies of the same Boss Soul, which we only get one of per playthrough. There are no missable Achievements in the game per say, however a lot of the Items or Covenants are tied to completing specific events at a specific time. If you miss a Covenant or Item during one of the playthroughs, be sure to remember it for the next one.
While Class & play style do not matter (build your Character however you like), we DO in fact need at least 10 Intelligence (then later 15 Intelligence) to speak to two Merchants that sell Sorceries we will need, so be sure to keep that in mind. As well, we need to have 25 Faith to be able to join the Warrior of Sunlight Covenant. 15 Intelligence & 25 Faith… good thing we have to go through so many playthroughs of the game. Focus on getting the 15 Intelligence first, then the 25 Faith. Note that if you play Online, being Summoned into another Player’s World & successfully defeating a Boss with them will reduce this Faith requirement by 5. If you have 10 Faith, you only need to defeat three Bosses in jolly cooperation to join the Warriors of Sunlight.
For certain Rare Weapons, Covenant Items, & Titanite; we will need to do A LOT of farming. Increasing your Item Discovery will greatly improve your odds of receiving the Items you are hoping for. The Covetous Gold Serpent Ring or the Symbol of Avarice are two Items we can equip to increase Item Discovery. Note that they do not stack in Dark Souls 1! The only other thing we can do to increase Item Discovery is having “Soft” Humanity in our possession. We have a base of 100 Item Discovery; the Gold Serpent Ring & Symbol of Avarice will individually increase it by 200. Then having “Soft” Humanity will increase Item Discovery by an odd metric. At 10 “Soft” Humanity (when its benefits plateau) we get an increase of 110 Item Discovery. Having one of the two Items equipped, plus 10 “Soft” Humanity will net us a max of 410 Item Discovery. Keep this in mind as we play. Being Human or Hollow does not alter Item Discovery.
Certain Spells can be bought from Merchants at our leisure so long as they remain alive. I usually farm Souls & buy them once they become available, but there is no reason why you have to. You can wait until the end of the game when we reach the best farming Areas for the fastest way to obtain them if you wish.
Unfortunately, some Rare Weapons & Spells are tied to Ranking Up in certain Covenants. We must offer specific Items to Rank Up in Covenants, typically, these are received by completing Online Summoning events associated with the Covenant. Alternatively, these Items can all be farmed off enemies Offline, but this can be a very time-consuming process. If you are Online inclined, this process may be a lot faster for you. Keep in mind though that Online play is Level dependant; you will have more success if your Character Level is low rather than being ludicrously high. If you are not Online inclined, do not worry, neither am I. I will explain how to accomplish both when it becomes relevant.
There is a great DLC for Darks Souls, but it does not influence any of the Achievements. Even with the addition of Dark Souls: Remastered, the DLC still does not contribute to Achievements. This means we do not need any of the Sorceries, Miracles, Pyromancies, or Rare Weapons to get their respective Achievements in the Base Game. While I will not cover it in the guide, I highly recommend playing through the DLC as it is absolutely amazing!
This is an Open World game; you may earn some Achievements/Items sooner or later in the guide then I did depending on how you approach Areas. Just be mindful if venturing ahead of Boss fights as completing these usually progresses NPC Questlines & could void them if you are not careful.
Unfortunately, this is not a 100% completion guide, only a 100% Achievements guide. There are a lot of Weapons, Armor, or Questlines that this guide does not cover if it is not specifically tied to an Achievement. While this we do explore the majority of the game, there are still many secrets left uncovered.
For those interested, here is an organized list of all the Achievements/Secret Achievements. This is how I derive my Achievement Breakdowns & the first reference I create before I begin my 100% journeys. The Checklist also includes details on Weapon Reinforcement, Boss Weapon Acensions, & Titanite Farming.
https://steamcommunity.com/sharedfiles/filedetails/?id=2672560105
*Guide contains major spoilers.
Sequence 1: Prepare to Die
1. NG – Northern Undead Asylum, Firelink Shrine, Undead Burg
2. Pyromancies: 0/19
3. Sorceries: 0/24
4. Miracles: 0/23
5. Rare Weapons: 0/50
6. Achievements: 4/41
-----------------------------------------------------------------------------------------------------
Create your Character however you like; your starting Class gives you minor bonuses but is ultimately irrelevant. It basically will just give you a plus or minus edge in early game. Note that we will eventually need to chip away at getting our Intelligence to 15 & our Faith to 25 over the course of the game so keep that in mind. The Wanderer & Pyromancer Classes are the best in my opinion having the best stat allocations while being the lowest Level.
As for the starting Gift, it is up to you. The Master Key is by far the most useful/game breaking early on. For natural progression & those who do not take it, I will not choose the Master Key (we can purchase it later on in game). If you do choose the Master Key, you will be able to access Areas sooner then I have listed in the guide. Which is fine, just keep in mind as some things might become out of order for you. I like choosing the Old Witch’s Ring for reasons of Lore…
Hoard all the Titanite & Boss Souls you come across throughout our first playthrough. We will focus on all of the Weapon Reinforcement Achievements as well as crafting all of the Boss Weapons (except Sif’s third Weapon) in NG+. Since Embers do not carry over into NG+, I will only be leaving their locations in those Sequences. If you want to Upgrade specific Weapons early, & need an Embers location, quickly skim down past Sequence 25: NG+ to find them. All Embers can be found at anytime & cannot be missed or voided if you progress too far.
Northern Undead Asylum 1-6:成就#1 - Enkindle:点燃营火火焰。
剧情相关。穿过不死院,我们会在一座教堂外的小院里找到第一个营火,教堂的门是关着的。点燃营火即可解锁该成就。成就#2 - 元素瓶:获得元素瓶。
剧情相关。在我们与 asylum demon( asylum 恶魔)遭遇后,继续穿过不死院,前往庭院上方的上层区域。穿过雾门后,可以看到碎石后面有一名亚斯特拉骑士。走上拐角处的楼梯,会有一个铁球滚落下来,撞碎你身后的墙壁。
穿过墙壁上的洞口,与骑士对话,听取游戏第一个故事篇章的剧情。他说完后,会将他可靠的元素瓶交给我们,解锁该成就。
击败 asylum demon( asylum 恶魔),走出废墟。前往小丘,薇尔卡的乌鸦会载着我们离开,开始我们的朝圣之旅……
传火祭祀场 1-6:成就#3 – Reach Lordran:抵达罗德兰。
剧情相关。当乌鸦将你带离病院后,会直接把你丢在传火祭祀场。当你重新控制角色时,该成就就会解锁。
游戏初期有很多地方可以探索(尤其是拥有 master key(万能钥匙)的情况下),比如地下墓地或新隆多遗迹。为了简洁起见,我会在这些区域变得相关时再进行介绍。但如果你不是第一次游玩《黑暗之魂》,完全可以自由开始探索。
灰心战士坐在传火祭祀场篝火的对面。他与任何成就都无关,只会对我们的旅程发表嘲讽性的评论。NPC - 索拉尔的彼特鲁斯#1:从营火处上楼梯,进入上方的废墟。穿过右侧第二个拱门,就能找到NPC索拉尔的彼特鲁斯。彼特鲁斯是主要的奇迹商人;为了达成【Prayer of a Maiden】成就,我们最终需要收集他出售的全部5个奇迹。
需要注意的是,游戏后期我们可以从另一位奇迹商人那里买到他出售的所有奇迹。彼特鲁斯的奇迹售价极高,要多花数千灵魂。除非你急需他出售的特定奇迹,比如治疗或返乡,否则建议暂时不要购买。Achievement #4 – Covenant Way of White: Discover Way of White Covenant.
Speak with Petrous & exhaust all of his dialogue. After he gives us the Copper Coin, speak with him again & he will offer to let us join the Way of White Covenant. You do not technically have to join the Covenant, only get to the screen where we have to say “Yes” or No” to join. Getting to this screen will unlock the Achievement.
If you started out as the Cleric Class, you will already be in this Covenant. You still need to discover it from Petrous to unlock the Achievement, however.
That is all we can do for now in Firelink Shrine. I would recommend exploring around the Firelink ruins as there are many secret Items to be found. Dropping down the elevator shaft above where Petrous is will lead you to some Chests… Be very careful in the graveyard!
Undead Berg 1-10: When you are tired of being killed by Skeletons, return to the Firelink Bonfire & this time head up the cliffside path up towards the aqueduct above to enter Undead Burg.
Undead Burg Bonfire: Progress through Undead Berg until we see the Hellkite Dragon land down momentarily in front of us. Fight off some Hollow Warriors & head up some stairs where a Hollow Soldier with a Crossbow is. From here, turn around & there will be a wooden plank bridge that will lead us to the Undead Burg Bonfire. This Area will mark our first farming location.
Sequence 2: Minotaurs & Dragons
1. NG – Undead Berg
2. Pyromancies: 0/19
3. Sorceries: 0/24
4. Miracles: 0/23
5. Rare Weapons: 1/50
6. Achievements: 4/41
-----------------------------------------------------------------------------------------------------
Undead Berg 1-10:
NPC – Male Undead Merchant: From the Bonfire, return to the lower square where the Hellkite landed & head across a bridge towards two Spearmen Hollow Soldiers. Roll through some boxes & head downstairs into a small room. From here, head outside onto a balcony where we can find the Merchant sitting beside his wares.
This Merchant sells some incredibly useful Items for us to purchase, these are the: Bottomless Box, Repairbox, Residence Key, Arrows or Bolts, & some new Weapons & Armor. The essential things you need are the Repairbox & Residence Key (even if you have the Master Key, we will still need this Key later on). “Nee hee hee hee hee…”
Key – Residence Key: Purchased from the Male Undead Merchant for 1000 Souls.
As we farm away for Souls for new equipment or Levels, you may notice a small number increasing beside your Health Bar (or it will just be at 00). This is called “Soft” Humanity & it is a currency that is very important in Dark Souls. We need “Soft” Humanity to return us to Human, Kindle Bonfires to increase our Estus Flask uses, & it even increases our Item Discovery. There is a rare chance that you can obtain “Soft” Humanity just by killing enemies, but this only occurs if the Area Boss is still alive. Kill the Area Boss, & we will stop being able to receive “Soft” Humanity & will only be able to obtain it through it by consuming a Humanity Item.
This is another good thing to try to farm for in Areas before killing the Area Boss due to how useful “Soft” Humanity is. Be careful though as it functions like our Souls do; if we die, our “Soft” Humanity will be dropped on our Bloodstain.
Black Knight Encounter #1: Close to the stairs leading up into a tower at the far end of Undead Berg, there will be a set of stairs leading down into a darkened passageway. At the end of the passage will be a Black Knight. This a non-respawnable Mini-Boss who has a rare chance of dropping a Black Knight Sword &/or a Black Knight Shield. These are both Rare Weapons we need for the Knight’s Honor Achievement. If they do not drop, do not worry, there is a respawnable Black Knight near the end of the game we can farm.
When you are done farming in the Berg, head up into the tower & through the Fog Gate to defeat the Taurus Demon. (We can find a hidden Titanite Lizard in some barrels just across from the Fog Gate in the tower).
NPC – Solaire of Astora #1: After defeating the Taurus Demon, enter the next tower & head down some stairs out onto a large bridge. Before going across the bridge, head right instead, down some stairs & we can see a knight staring directly into the sun. This is Solaire. Speak with him, & he will give us the White Soapstone Item.
This will allow us to participate in Online. While Online play can make advancing in certain Covenants quicker, it is not necessary for our 100%. Just user preference.
If you are Human, anytime you see Solaire’s Summon Sign in front of a Boss Room, Summon him. He will reward us with a rare Sunlight Medal which we need to accumulate 10 of for a Covenant. This will reduce the amount we have to farm for later on…
Rare Weapon #1 – Drake Sword: When we go to walk across the bridge, we will be assaulted by the Hellkite Dragon who will take up residence across the bridge. After he lands, quickly run to the center of the bridge & duck right, down some stairs. Here, we can find a passage under the bridge as well as a Ladder Shortcut we can kick down to the Undead Burg Bonfire.
From the Bonfire, return to the Male Undead Merchant & purchase the Short Bow for 1000 Souls & at least 50 Standard Arrows for 500 Souls (100 is a good amount to be safe). You will need at least 7 Strength & 12 Dexterity to use the Short Bow.
Return to that room underneath the bridge now & begin making your way along the underside. Along the right side under the bridge, you can see the tail of the Hellkite dangling off the wall a ways ahead of you. Equip your Short Bow, & begin shooting it in the tail. It takes a bit of practice to hone your eye in. After his tail gets hit, the Hellkite will fly up & land on the bridge above you. It cannot hit us, & will eventually fly back to its resting position… where we will shoot its tail again & again until we literally shoot its tail off & we get this Weapon. With a Dexterity of 15, it took me 16 Standard Arrows to cut the tail off (not counting missed shots).
If you are quick, you can get in an extra shot on its tail while it has landed on the bridge above us. If you are having issues figuring this out, here is a video guide by GameFront that will show you the gist of what to do.
https://youtu.be/Ek0sSVi8JqU
Though difficult, it is possible to sprint past Hellkite & get inside the gatehouse it guards. Inside, is the Sunlight Altar Bonfire which gives us an easier time exploring this next Area. Otherwise, we have to use the Undead Berg Bonfire which is a longer ways to travel. An easy way to get into the gatehouse is to shoot the Hellkite from the center portion of the bridge where the stairs leading down are. It will fly up & land on the bridge to fight us. As soon as it launches up, sprint as fast as you can for the gatehouse entrance; its easier than you think. Rest at the Bonfire to reset Hellkite. Hellkite will then fly off but is only gone for a few Bonfire rests; he does come back to roost on top of the guardhouse when you least want him too…
Regardless of what you do, head up the ladder from underneath the bridge, or pull the gatehouse Lever Shortcut & we will enter the Undead Parish.
Sequence 3: Knight Lautrec
1. NG – Undead Parish, Firelink Shrine
2. Pyromancies: 0/19
3. Sorceries: 0/24
4. Miracles: 0/23
5. Rare Weapons: 1/50
6. Achievements: 4/41
-----------------------------------------------------------------------------------------------------
Undead Parish 5-15:
Black Knight Encounter #2: From outside the gatehouse, will be stairs leading up where a Hollow Soldier is. To your right will be a tower with stairs leading up; its basement is where you would come up from underneath the bridge. Follow the stairs up, & we will see a Greatsword Black Knight. If you’re lucky, we have the chance of obtaining the Rare Weapons the Black Knight Greatsword or the Black Knight Shield. If you do not get them, don’t worry; we can farm Black Knights near the end of the game.
Key – Mystery Key: After defeating the Fang Boar Mini-Boss, head down the stairs into a dingy basement full of Hollows. Go up some stairs onto a floor with some benches & a rust ladder leading up. To the left of the ladder, are some stairs leading to a small landing where we can find a Corpse with this Key on it.
We will want this Key to free an NPC later on…
Key – Basement Key: Navigate your way through the Undead Parish until you are at the front entrance of a large church (not the side entrance). From the front entrance, turn around & walk down some stairs until you are on the other side of the gate where the Fang Boar used to guard. Behind the gate will be a Corpse holding this Key; this will lead us into lower Undead Berg & eventually to the Depths…
NPC – Andre of Astora #1: Before entering the church itself, leave the front entrance & navigate around the side of the church where three Hollow Soldiers will be. From the side church entrance, turn around to see a bridge leading off towards some distant ruins. Follow the rings of a beating hammer, down the stairs to find the Undead Parish Bonfire.
Head down the stairs from the Bonfire, & we will find a bare-chested blacksmith called Andre of Astora who sells many useful Items. Most notably are the Weapon Smithbox, Armor Smithbox, & the Crest of Artorias. The Smithboxes are very convenient to own; the Crest of Artorias will also make farming for Souls extremely convenient. The Smithboxes I would get as you can afford them; the Crest of Artorias we can collect later.
NPC – Siegmeyer of Catarina #1: If you are explorative, you may find a strange onion knight sitting outside of the closed gates of what will be Sen’s Fortress. This Siegmeyer, we will need to complete his Questline to obtain a rare Titanite Slab for our Weapon Reinforcements.
Useful Item – Firekeeper Soul: Inside the Undead Parish church, we can find a Firekeeper Soul on a Corpse upon an altar at the back guarded by a Tower Knight. There are no Achievements related to these however they are extremely helpful to find. We can bring these Souls to Anastacia of Astora below the Firelink Shrine Bonfire & she will Upgrade our Estus Flask so that it heals more Health.
We can reinforce our Estus Flask 7 times & it will carry over into subsequent playthroughs.
Channeler Encounter #1: In the Undead Parrish church, we can encounter a non-respawnable Channeler on its second floor. Channelers have a 1% chance to drop the Channeler’s Trident which is a Rare Weapon.
We can farm Channelers in the Duke’s Archives later on…
The Fog Gate up the rusty ladders close to the Channeler will take us to the Area Boss for Undead Parrish. For now, let’s leave it be so that we can still get some “Soft” Humanity from the enemies here. We have a few errands to run…
NPC – Lautrec of Carim #1: From the second floor where we fought the Channeler, head up the next set of stairs around the church to the third floor, it is guarded by a Balder Knight. Walk around the third floor until you are above where the church front entrance is. Here, we can see two wooden doors set into the stone walls; one is cracked & we can see light through it. Strike the broken door to destroy it & head up the following stairs to reach a cell with a golden knight inside it.
Speak with the knight, Lautrec, & free him from his cell with the Mystery Key. While Lautrec does have a Questline, it has no associated Achievements. What we want from him, is the Ring of Favour & Protection we get from killing him. Lautrec is a challenging foe, but the benefits of the Ring outweigh the difficulties. You can complete Lautrec’s Questline in NG+ if you want his Armor Set. For now, let him go, & we an find him later at Firelink Shrine.
Firelink Shrine:
NPC – Lautrec of Carim #2: Return to the Undead Parish church first floor & we can find an Elevator Shortcut that will lead us back down to Firelink Shrine. With Lautrec free from his cell, we can now find him sitting across from where Firekeeper Anastacia is. Speak with him, & he will give us a free Sunlight Medal as a reward which is a very important Covenant Item we will need for later... With that received, we can now take out Lautrec for his Ring. Either fight him fairly or repeatedly kick him off of the nearby ledge to kill him. If he dies by falling, immediately quit & reload your game & go back to where we found him sitting to find his loot. Be careful if you kill him this way as there is the potential for the his loot to get caught in an unreachable location below us if you are unlucky...
The Return to the Northern Undead Asylum: Head back to the elevator that leads to Undead Parish & pay attention as it goes up. Look behind us as it ascends & we can see the wall will give way to open air near the bottom of the shaft, where there will be a floor we can drop off onto out towards the ruins. Do so, & skirt your way onto a grassy cliff edge to your right. From here, leap across the gap towards the Firelink ruins onto the furthest stone archway to the right. This can be a challenging jump.
Optional Key – Undead Asylum F2 West Key: Walk along the arch in through an open window, & we will be inside a broken tower above the Firelink ruins. Follow some stairs up, & we can see a Corpse on top of the stone roof top where Petrous is below that holds the Key. Leap off the stairs onto the roof & loot the Corpse; this will let us collect a very useful Ring in the Undead Asylum.
Return to the stairs & continue up them until you come across the Crow of Velka’s nest. Approach the nest, & “Curl up like a ball”. Wait like this for a minute or so, & the Crow will take us back from whence we came.
Sequence 4: The Bell of Awakening
1. NG – Northern Undead Asylum, Undead Parish
2. Pyromancies: 0/19
3. Sorceries: 0/24
4. Miracles: 0/23
5. Rare Weapons: 3/50
6. Achievements: 5/41
-----------------------------------------------------------------------------------------------------
Northern Undead Asylum:When we return to the Asylum, we will notice things are a little different, & new enemies will have appeared. Stepping into the center of the Boss Room we fought the Undead Asylum in will drop us into a lower chamber where the optional Stray Demon Boss is. This is a very difficult Boss & should be left until later in the game; it has no associated Achievements though does drop a Titanite Slab which we will eventually come back here to collect…
Rare Weapon #2 – Crest Shield: From the Undead Asylum Bonfire, head up the stairs to where we found the Knight of Astora in Sequence 1. When we go to enter his room, he will come charging out; he has gone Hollow. Defeat him, & he will drop this Shield for us to pick up as a reward.
Useful Item – Rusted Iron Ring: Head up the stairs from where the iron ball rolls down into the wall & carry on past where we drop down into the Asylum Demon’s Boss Room. In the next room over will be two Hollow Soldiers & a locked door. Use the Undead Asylum F2 West Key to unlock the door & proceed into the small side room. We can find this Ring on a Corpse hanging from on top of some broken stairs.
Black Knight Encounter #3-4: Backtrack through the Asylum, & we can find two Sword Black Knights here as well. One will be in the corridor where we collected our Class Weapons, & the other will be standing in front of where our old cell is. Both have a rare chance of dropping the Black Knight Sword & the Black Knight Shield.
Key – Peculiar Doll: We can find this Doll on a Corpse inside our old cell. This Item is important to access a secret Area later on in the game…
That is all that there is here in the Undead Asylum. Save Stray Demon for when you are stronger, & return to Firelink Shrine.
Undead Parrish:When you are ready, return to the Undead Parrish church & make your way up into the rafters using the rusty ladders. If you are Human, you can summon Solaire of Astora or Knight Lautrec of Carim (if you kept him alive).
Summoning Solaire of Astora for the Boss fight will reward us with a Sunlight Medal; a Covenant Item we need to accumulate 10 of for the Prayer of a Maiden Achievement.
Rare Weapon #3 – Gargoyle Tail Axe: Pass through the Fog Gate at the top of the Undead Parish church & walk onto the roof to trigger the Bell Gargoyle boss fight. As soon as it appears, make a point of going for its tail & focus all of your attacks on it. After enough hits are landed on it, the tail will bust off & we will receive this Rare Weapon.
There is a slim chance this Rare Weapon will drop after defeating the Bell Gargoyle, even if its tail is uncut. Since it is not guaranteed, make a point of cutting it off. We do fight two non-respawning Bell Gargoyle later on in a different Area, but since we can “reset” this Boss by dying, it is ideal trying to get the Tail Axe here. Though we will have to fight this Bell Gargoyle Boss every single playthrough…
The Gargoyle’s Halberd & the Gargoyle’s Shield do not count towards the Knight’s Honor Achievement.Achievement #5 – Ring the Bell (Undead Church): Ring Bell of Awakening at Undead Church.
Story Related. After defeating the Bell Gargoyle, make your way up to the Bell Tower at the top of the Undead Parish church. Pull the Lever to ring the Bell of Awakening & unlock the Achievement.
NPC – Oswald of Carim #1: When we ring the Bell of Awakening, climb down the ladder to the bottom of the Bell Tower & we will find a strange man in black here. This is Oswald, another NPC with a very distinct laugh… He sells Miracle #3 – Karmic Justice for a whopping 40,000 Souls. While you could grind Souls for it, it is unadvisable right now. Just remember his location, & do not kill him. We will return here later on when we have better farming locations.
Oswald also sells Purging Stones for 3000 Souls a piece. Though expensive, these are extremely useful Items to have on your person as they will absorb Curse from you. Curse, if you die by it, will permanently halve your Health until you can get it removed by Oswald or by consuming a Purging Stone. One of the upcoming Areas, The Depths, has enemies that can Curse us so it is best to be prepared.
Sequence 5: Shadows of Oolacile
1. NG – Darkroot Garden
2. Pyromancies: 0/19
3. Sorceries: 0/24
4. Miracles: 0/23
5. Boss Souls: 1/16
6. Rare Weapons: 5/50
7. Achievements: 6/41
-----------------------------------------------------------------------------------------------------
Darkroot Garden 10-20: Head to the Undead Parish Bonfire, & follow the stairs down into the basement of the ruins. Here will be a large Titanite Demon; these statues have a chance to drop the Titanite Catch Pole, but it is not required for the Knight’s Honor Achievement. Slay the Titanite Demon & step outside the ruins to enter fabled Darkroot Garden.
Darkroot Garden Bonfire: Make your way through Darkroot Garden & you will reach a junction when we come across a pool of water. Take the pathway along the cliffs to the left, & follow the trail along until it ends at a sealed gateway. This is what we need the Crest of Artorias to open. To the left of the gateway, will be a stone wall that has a doorframe filled in by bricks. Strike the doorframe to reveal an illusionary wall & the Darkroot Garden Bonfire.
Rare Weapon #4 – Stone Greatshield: From the Darkroot Garden Bonfire, return to the sealed gateway & this time head to its immediate right to see a side path leading down further into the forest. Pass through a Fog Gate & we will enter a small grove that will have five Great Stone Knights in it.
They have a 2% chance to drop the Stone Greatshield as well as the Stone Greatsword. We need both for the Knights Honor Achievement. Grind out these two Rare Weapons or remember their location for late when you have more Item Discovery or “Soft” Humanity.
Rare Weapon #5 – Stone Greatsword: Dropped by Great Stone Knights in Darkroot Garden. This Weapon can also be purchased from the NPC Shiva of the East when we meet him in Blighttown for 15,000 Souls if we are a member of the Forest Hunter Covenant.
If you look to the right of where we entered this grove, there will be a strange tree set into the cliff wall. Look closely & you will see that it moves. Kill the tree, & it will reveal a secret passage that will take us to some loot & an additional Great Stone Knight to add to our farming run.
Key – Crest of Artorias: Farming the 20,000 Souls off the Great Stone Knights is a good way to kill two birds with one stone. We will need this Key to progress further into Darkroot Garden.
Boss Soul #1 – Soul of the Moonlight Butterfly: After you are done farming, for one reason or another, carry on to the back of the grove & enter the small ruins at the far-right side. Take the stairs up & we will reach the Fog Gate for the Moonlight Butterfly Boss. Out last its magical bombardments & wait for it to land on the bridge when you can get your strikes in. We will receive this Boss Soul from it when it is defeated; do not consume this Soul!
If you are Human, we can find a Summon Sign for the NPC, Witch Beatrice, underneath the stairs leading up to the Fog Gate; she will destroy the boss… She is very handy to Summon & can almost solo the fight. If we do Summon her here, we can Summon her later on for the Four Kings Boss (who is the most difficult Boss in the Base Game in my opinion) & will make the battle a bit easier.
Key – Watchtower Basement Key: When the Moonlight Butterfly is defeated, carry on across the bridge into the tower at the far side. Head up the stairs & we can see a petrified blacksmith. Pillage his Corpse for the Watchtower Basement Key & the Divine Ember. Don’t ask me why he looks identical to Andre of Astora…
We can use this key in Darkroot Basin to acquire a very useful Ring.
Farming the Forest Hunters: With the Crest of Artorias, place it into the sealed gateway to unlock it, opening up the second half of Darkroot Garden. Shortly after entering this Area, we will be accosted by members of the Forest Hunter Covenant. There are a set four NPCs that will respawn with another three NPCs that do not, making seven in total we have to fight off. These NPCs are an amazing way to farm for Souls if you want Level ups, Petrous’s Miracles, or other Weapons/Armor. Joining the Forest Hunter Covenant will make them neutral, & they will not be hostile to us anymore.
If you are playing Online, this Area is extremely challenging as other Players can Invade your world here. It is recommended you switch to Offline play.
There is an easy way to bait the Forest Hunters off of the cliff where we enter this Area making farming them very easy. This video guide by Silent Gonzalez will show you how if you do not already know of this strategy.
https://youtu.be/Cp6IKCG1U8UAchievement #6 – Covenant Forest Hunter: Discover Forest Hunter Covenant.
When you are tired of fighting these Forest Hunters, make your way through the forest close to the cliff edge to your left & there will be some ruins at the far side. Enter into the first building & you can see a bridge leading out to the third half of Darkroot Garden. Before crossing the bridge, look up to your left to see the monstrous grey cat Alvina. Speak with her & she will ask us if we want to join the Forest Hunters. Say “Yes” & we will receive the Joining Screen, unlocking the Achievement.
That is all we need in Darkroot Garden. In this third area across the bridge from Alvina we can find the Stone Knight Set, three Great Feline Mini-Bosses as well as a bridge leading to a large closed set of doors. That door takes us to the Area Boss of Darkroot Garden. Do not enter through the door! We will save that old wolf for much later in the game…
Sequence 6: Dragonslayer
1. NG – Darkroot Basin, Valley of Drakes
2. Pyromancies: 0/19
3. Sorceries: 5/24
4. Miracles: 0/23
5. Boss Souls: 1/16
6. Rare Weapons: 7/50
7. Achievements: 6/41
-----------------------------------------------------------------------------------------------------
Darkroot Basin: 20-30From the Undead Parish Bonfire, make your way back into Darkroot Garden & when you reach the junction at the pool of water, take the right pathway this time. As we walk down the cliff switchbacks, we can find a pesky Titanite Lizard along the way.
Black Knight Encounter #5: When we reach the bottom of the switchbacks we can go left over towards the lake, or right, backwards along the cliff edge. Follow the cliff edge backwards & there will be another set of switchbacks taking us lower down the basin. Immediately as we start down the switchbacks, we will be ambushed by a Halberd Black Knight. It has a 20% chance to drop its Black Knight Halberd & a 5% chance to drop its Black Knight Shield. Like all Black Knights, we can farm them at the end of the game.
Darkroot Basin Bonfire: We can find the Darkroot Basin Bonfire just behind where the Black Knight was, inside the cliff wall. Ignore the elevator at the back for now.
The Hydra: We must now defeat the hulking 7-headed Hydra in the Darkroot Basin. Quickly dispatch the Crystal Golems & get into the water so that it starts using melee attacks. The Rusted Iron Ring found in the Northern Undead Asylum with the F2 West Key can be very useful for this fight.
Bait the Hydra to use melee attacks & systematically lop its heads off to slay it. Once it is defeated, return to the Darkroot Basin Bonfire to reset the Area. The hardest part is just being able to reach the Hydra in the first place… The head on the far right can be difficult to sever; if all other heads are gone, switch to a ranged Weapon & try shooting it off. Even if it still has health left, if all heads are severed, the Hydra will instantly die.
Useful Item – Havel’s Ring: Note that if you have the Watchtower Basement Key, you can unlock the tower door in the top right corner close to the lake. Here will be an extremely challenging NPC who will reward you with the game breaking Havel’s Ring.
NPC – Dusk of Oolacile #1: After resetting the Area once the Hydra is slain, make your way into the lake & begin following the shallow edges left around it through the water. In the back-left corner of the lake, there will be a hidden tunnel leading into the cliff wall. At the very end of the tunnel, we can see a Golden Crystal Golem. Having the Rusted Iron Ring for this fight is very handy. The Golem will only appear if you have rested at a Bonfire or quit the game & reloaded to reset the Area after killing the Hydra.
Defeat the Golem, & the Princess Dusk of Oolacile will stand in its place. Speak with her & she will ask if we want her assistance by purchasing Sorceries; say “Yes”! Not only will saying no void us from purchasing her Sorceries on this playthrough but it will also lock us out of the DLC. After agreeing to her help, Dusk will vanish.
While Dusk is part of the Artorias of the Abyss DLC, she is still in the Base Game making her Sorceries she sells count towards the Wisdom of a Sage Achievement.
NPC – Dusk of Oolacile #2: If you agreed to Dusk’s assistance, make your way back to the far end of the lake. Close to where the Corpse with the Knight’s Set is; we can find Dusk’s obscured Summon Sign in the water. The Summon Sign is to the left of the Corpse & the only tree close to the water. We do not need to reset the Area or be Human for it to appear. Click the Summon Sign, & Dusk will appear allowing us to purchase her 5 Sorceries.
Sorcery #1 – Cast Light: Purchased from Dusk of Oolacile for 1000 Souls.
Sorcery #2 – Hidden Weapon: Purchased from Dusk of Oolacile for 2000 Souls.
Sorcery #3 – Hidden Body: Purchased from Dusk of Oolacile for 2000 Souls.
Sorcery #4 – Chameleon: Purchased from Dusk of Oolacile for 3000 Souls.
Sorcery #5 – Repair: Purchased from Dusk of Oolacile for 10,000 Souls.
Though you do not need to purchase all her Sorceries straight away, we DO need to collect them before we obtain the Lordvessel near the middle of the game. Once we do, Dusk will disappear into the DLC & her Sorceries will then become for sale by the NPC Elizabeth who is inside the DLC as well. This means you have to enter the DLC to collect the final Sorceries she sells; it is best buying them before then if you plan on skipping the DLC.
Valley of Drakes 50-60: Return to the Darkroot Basin Bonfire & make your way to the elevator at the back of the cave. Follow it down & we will enter the Valley of Drakes. This is a high Level Area; I don’t recommend trying to fight the Drakes. Run past them where you can as you are probably no where near being even Level 40. Before entering this Area, be sure you have 100+ Arrows with you!
Rare Weapon #6 – Dragon Crest Shield: Run along the cliff ledge to the left & dodge the two Drakes on the way. As you skirt up to a plateau, you will see the top half of a large Undead Dragon. This is a Mini-Boss. There are three Corpses with loot near the Dragon; one near its left hand & two encircled by its right hand & face.
The Undead Dragon will awaken if we make a move on the two it encircles, not the one in its left hand. Unfortunately, both Rare Weapons are on the Corpses it encircles. There are two ways we can go about this: we can run in & try scooping up the Weapons & run, or we can awaken it & kill it using a ranged Weapon if you have the Arrows for it. It will probably take you around 100+ Standard Arrows to kill it, depending on your current Bow & Dexterity. Be warned that the Undead Dragon will stay awake after it is woken up until it is slain.
The Dragon Crest Shield will be on the Corpse that was close to the Undead Dragons right hand.
Rare Weapon #7 – Astora's Straight Sword: The Astora’s Straight Sword can be found on the other Corpse that is close to the Undead Dragon’s head.
That is all we can do here, while there is a secret entrance to Blighttown at the back of the Valley of Drakes… we do not want to go there right now. Use a Homeward Bone or walk out of here back to the Bonfire.
Sequence 7: Vereor Nox
1 NG – Lower Undead Berg, Firelink Shrine
2. Pyromancies: 0/19
3. Sorceries: 5/24
4. Miracles: 0/23
5. Boss Souls: 1/16
6. Rare Weapons: 7/50
7. Achievements: 6/41
-----------------------------------------------------------------------------------------------------
Lower Undead Burg: 25-30To access the Lower Undead Berg, we need to have collected the Basement Key from outside the Undead Parrish church steps on the other side of the Fang Boar’s gate. With the Key, go to the far end of the Hellkite’s bridge where Solaire is located. Directly across from the stairs we come down from where the Taurus Demon was, there will be a locked door. Open the door & slide down the rusty ladder to enter Lower Undead Berg. We can find a Door Shortcut back to upper Undead Berg immediately to our right up some stairs.
NPC – Griggs of Vinheim #1: If you have not already purchased it, buy the Residence Key from the Male Undead Merchant for 1000 Souls. Even if you have the Master Key, we need the Residence Key for this upcoming door. Fight off the Undead Attack Dogs at the bottom of the stairs & turn right, down the street. Walk along the building walls to our left & we will approach a locked door where a man will call out to us to unlock it. Use the Residence Key & we will find a young sorcerer standing beside some barrels. This is Griggs of Vinheim.
Exhaust his dialogue & he will relocate to Firelink Shrine. He will sell us important Sorceries there, but we need to have at least 10 Intelligence before he does.
Be careful looting the Corpse in the barrel to his right; do not accidentally attack Griggs!
Key – Key to Depths: The Area Boss for the Lower Undead Berg is the vicious Capra Demon. Focus on baiting its Undead Attack Dogs away & kill them first before trying to fend off this monster. It is overall not that challenging of an enemy; however, the dogs & the tight quarters really amplify the difficulty. He hits very hard & will take out most of your stamina if you block his blows.
We do not get a Boss Soul from the Capra Demon, but we do get the Key to Depths which will let us access the next Area.
NPC – Female Undead Merchant #1: Before we enter the Depths, there are some important preparations we need to make. We will be facing environments & enemies that can Poison, Toxic, & Curse us. We can purchase the majority of the Items we need from the Female Undead Merchant who we can find in the Aqueduct Shortcut just across from the entrance to the Depths.
For Poison, we need a good supply of Purple Moss Clumps. These can be purchased for 500 Souls from the Female Undead Merchant or farmed from the Ent enemies in Darkroot Garden. Poison is going to be the main debility we will endure; consider having around 10-20 Purple Moss Clumps.
For Toxic, we need Blooming Purple Moss Clumps. These can purchased from the Female Undead Merchant for 1000 Souls or farmed as a 5% rare drop from Ents. There is only one annoying enemy type that can inflict Toxic on us. They do not respawn when killed, but there enough of them down here that it is a real pain. Consider having at least 5-10 Blooming Purple Moss Clumps.
Lastly, we have Curse which we need those Purging Stones for. While we can purchase Purging Stones from the Female Undead Merchant, she charges 6000 Souls a piece for them. Instead, if you do not have any, travel up to the top of the Undead Parish church to see Oswald of Carim who will only charge us 3000 Souls a piece. You will want at least 2-3 Purging Stones.
At the moment, farming the Forest Hunters in Darkroot Garden is our best source of Souls. Just make sure you leave the Covenant before attacking the NPCs if you ever want to rejoin them later on…
Firelink Shrine:
NPC – Reah of Thorolund #1: (Skippable encounter) With the Aqueduct Shortcut unlocked, quickly run back to Firelink Shrine. When you head over to where Petrous usually stands, you will notice two other Clerics along with a maiden on her knees praying. These are the companions Petrous has been waiting for. Eventually Reah will become our primary Merchant for purchasing Miracles.
They will soon venture off into the Catacombs below Firelink Shrine & disappear where Reah’s Questline will begin.
We can also see that Griggs of Vinheim has relocated to Firelink Shrine; for now, do not worry about buying his Sorceries but make a point of trying to get to 10 Intelligence as we progress.
With all our preparations made, we will now proceed into the Depths. Be warned, we will be traveling very far underground & will not be returning to the surface for a while. Make sure you have wrapped up any unfinished business you still have to do beforehand.
Sequence 8: The Defiled Valley
1. NG – Depths, Blighttown
2. Pyromancies: 1/19
3. Sorceries: 5/24
4. Miracles: 0/23
5. Boss Souls: 1/16
6. Rare Weapons: 7/50
7. Achievements: 6/41
-----------------------------------------------------------------------------------------------------
Depths 30-35:
NPC – Laurentius of the Great Swamp #1: Make your way down into the Depths & we will enter a grungy food kitchen. Down in its lower level we can find an Undead Butcher massacring a slab of meat. Defeat the Butcher, & we can find the Large Ember inside a Chest to the left of its cutting table.
Carry on through the flooded first floor of the food kitchen & up into the proceeding corridor. We will be ambushed by a second Undead Butcher here. Close to where we were ambushed, there will be some stairs leading up into a storage room. In the far-right corner, we can find a Pyromancer who is trapped in a barrel. Free him by rolling into the barrel, not by swinging your Weapon into it. This is Laurentius of the Great Swamp, one of our main Pyromancy Merchants.
Exhaust his dialogue, & Laurentius will relocate to Firelink Shrine.
Key – Sewer Chamber Key: Carry on down the hallway into the Depths & we will eventually come to a large corridor full of Slimes that ends with a locked door. Behind this door is the Depths Bonfire. If you have the Master Key, you can open this up & gain access to the Bonfire straight away. If not, then you will need to find the Key.
Keep heading down the corridors past the large caged area with the Giant Rat & into the next corridor. Follow the hall to the left & down some stairs where we will be on the other side of the caged area where we can see a Corpse. Fight off the Rats & loot the Corpse through the cage bars to collect this Key.
Useful Item – Spider Shield: Return back up to the food kitchen a drop through the garbage chute behind where the Butcher was to end up above the caged area with the Giant Rat. Walk around to the other side of the walls & we can see a Corpse hanging off the ledge at the far end holding this Shield.
The Spider Shield is extremely useful for the next Area we will enter. It can nullify the Toxic effect of a certain enemies blow darts by blocking them.
Channeler Encounter #2: We have another shot of looting the Channeler’s Trident here in the Depths inside the sewer maze.
From the Sewer Chamber Key side, enter the maze & head straight, then right to find the Fog Gate leading to the Channeler.
Alternatively, from inside the Giant Rat’s cage, enter the maze & turn left, then right, & left again to find the Channeler.
To leave the sewer maze, look for the water drain that does not have water flowing into it; it will just be a square black hole close to a Corpse. Be careful, there are Basilisks at the bottom of this drain. These are the enemies that can inflict Curse upon us if we are caught in their Cursing Gas. Be cautious & be very sure you have Purging Stones just in case!
NPC – Domhnall of Zena #1: After the Basilisk corridors, we will enter a large flooded junction-room. Here, will be a large locked gate, the NPC Merchant Domhnall of Zena, & a Shortcut back to the Depths Bonfire. If you speak to Domhnall & exhaust his one line of dialogue, he will relocate to underneath the aqueduct near Firelink Shrine where the Ring of Sacrifice was after defeating the Gaping Dragon Boss in the Depths.
Domhnall is not needed for any Achievements, however he does sell Boss Armor Sets after they are defeated making him a really cool Merchant. He also sells the Master Key for 5000 Souls once he relocates.
Rare Weapon #8 – Dragon King Greataxe: When you are ready, proceed down the staircases & prepare to fight the Area Boss. If you are Human, we can find the Summon Signs of Solaire of Astora & Knight Lautrec (if you kept him alive). Always make a point of trying to Summon Solaire when he is available as we will receive a Sunlight Medal as a reward for defeating bosses with him.
We need to cut the tail off of the fearsome Gaping Dragon Boss to receive the Dragon King Greataxe. This is not too difficult due to how large the dragon is; stay behind it & keep striking the tail. Focus on the tail cut first so that you do not miss this Weapon. You need to attack the far end of the tail for it to break off; attacking the tail closer to the body count as body shots.
The Gaping Dragon does not give us a Boss Soul.
Key – Blighttown Key: After defeating the Gaping Dragon, we will receive this Key that will give us access to the putrid Blighttown.
Take the Blighttown Key to the closed doors beside Domhnall in the junction-room & enter Blighttown.
Blighttown 35-40: Blighttown is an extremely difficult Area; this is where all of our Purples Mosses are going to come in handy. If you have the Spider Shield, definitely equip it. It will negate all Poison & Toxic attacks if we block them. The Blow Dart Snipers can instantly make us Toxic if they strike us with one of their darts if we cannot dodge or block them with the Spider Shield.
Pyromancy #1 – Power Within: When you eventually reach the Blighttown Bonfire, make your way along the bridge ahead & we will be attacked by two Flaming Attack Dogs. The bridge will then give way to scaffolding & we can see a monstrous Parasitic Wall Hugger. The Pyromancy we need is just underneath it. To get behind it, we need to climb down the ladder off our right, then down a second ladder to a landing on the scaffolding. We can then take a ramp down to continue on, or climb up a different ladder nearby up to where a Blow Dart Sniper is.
Climb up that ladder & carry on across a rickety bridge inside of the stone walls to our right. Follow the scaffolding inside past an Infested Ghoul, down a ladder, & we will be in behind the Parasitic Wall Hugger. It cannot attack us back here; cut it down. Drop down to the platform below where it was & we can loot a Corpse hanging off of the ledge that holds this Pyromancy.
Blighttown Swamp Bonfire: Continue on down through Blighttown, through the Fog Gate, & down the ladders until you reach the swamp. At the bottom platforms, drop into the poisonous swamp & make your way along the cliff wall to the right; the Rusted Iron Ring is very useful down here. After a short walk, there will be an open drainage pipe to our right where we can enter to find the Blighttown Swamp Bonfire.
Sequence 9: Daughters of Chaos
1. NG – Blighttown
2. Pyromancies: 3/19
3. Sorceries: 6/24
4. Miracles: 0/23
5. Boss Souls: 2/16
6. Rare Weapons: 7/50
7. Achievements: 8/41
-----------------------------------------------------------------------------------------------------
Blighttown:
Pyromancy #2 – Poison Mist: From the Blighttown Swamp Bonfire, look out straight ahead into the swamp & you can see two Giant Mosquitos hovering over the water near some grass. Look past these Mosquitos & you can see a large stone bridge support at the very back of the swamp. Make your way into the swamp towards the bridge support & walk around its left side. Head around the corner, & we can see a Corpse pressed against the wall holding this Pyromancy as well as the Tattered Cloth Set.
This Pyromancy can also be purchased from the Merchant Eingyi for 10,000 Souls.
We are able to head left or right (from the Bonfire), through the Blighttown Swamp. Left will take us towards an Archtree that is actually a mini-dungeon called The Great Hollow. There are things we need to collect down there & an Achievement; however, we will be saving it for our return trip to Blighttown after we have unlocked the ability to Warp between Bonfires. This saves us having to hike all the way back up The Great Hollow to escape it; it is very grueling journey you will not want to do. If you are not convinced, feel free to explore it early, there is nothing voidable down there, so you won’t mess anything up.
Sorcery #6 – Remedy: Follow the swamp around to the right from the Bonfire, sticking close to the wall. A short way over, there will be a wooden ramp & ladder leading up to a turning wheel. Climb up the ladder & step off the ledge above onto one of the platforms attached to the turning wheel; step off at the top. Climb up another ladder & walk left, past a different ladder carrying on up. Head along this floor until we have to cross some roots off our right to get over the gap to the far side. Watch out for Blow Dart Snipers!
Carry on along the right side here & walk past a ladder, carrying on down the scaffolding to the right. At a dead end, we can see a Corpse leaning against the wall beside a Chest. Loot the Chest to collect this Sorcery.
Useful Item – Firekeeper Soul: Backtrack across the roots over to that ladder we walked past when we first got up to this location. Climb up the ladder & walk to the right of yet another ladder leading up (this goes to the Valley of Drakes & the New Londo Ruins Shortcut Key). Fight off a group of Blow Dart Snipers in a stone drainage system off our right. Climb down a ladder it the drainage systems lower level & deal with the Flaming Attack Dogs; we can find the Firekeeper Soul on a Corpse tucked behind a barred drain down a path to our right.
Boss Soul #2 – Soul of Quelaag: It is now time for the Area Boss fight. We can find the entrance to Quelaag’s Domain at the far-right end of the Blighttown Swamp; opposite side as The Great Hollow. If you are Human, when you walk towards Quelaag’s Domain, close to the turning wheel elevator, we will be Invaded by Maneater Mildred. If you defeat her, & are Human still, we can actually find her Summon Sign just outside Quelaag’s Fog Gate. She is worth Summoning for the fight. Defeat Quelaag to acquire her Soul; as always, do not consume this as we need it for Weapon Ascensions!成就#7 - Ring the Bell(克拉格的领域):在克拉格的领域敲响苏醒之铃。
剧情相关。击败克拉格后,穿过她的 Boss 房间并上楼,找到最后的苏醒之铃。拉动拉杆敲响铃铛,解锁该成就……以及塞恩古城。Achievement #8 – Covenant Chaos Servant: Discover Chaos Servant Covenant.
We are not quite finished down here yet. With the Bell rung, carry on further into the Bell Tower, down the next set of stairs to the basement floor. In the basement will be a strange circular dais & a hole in the wall leading out into the Demon Ruins. When facing the hole in the wall, follow the room around to your right & there will be a wall that isn’t fully covered by Blightpus. Strike the wall & it will disappear, revealing a secret area.
Enter this room & there will be an Egg Carrier that will talk to us named Eingyi. He will ask if we are a new Servant; tell him “Yes” to be allowed to speak with The Fair Lady. The Fair Lady is mute & cannot speak; ask her to “Enter Covenant” & we will receive the Joining Screen, unlocking the Achievement.
If you chose the Old Witch’s Ring as a Starting Gift, we can actually speak with The Fair Lady… & it is very depressing; especially if you have played Dark Souls 3.
Pyromancy #3 – Great Chaos Fireball: We will receive this powerful Pyromancy as a Joining Gift as a Rank 0 Chaos Servant from The Fair Lady.
We eventually need to reach Rank 2 in the Chaos Servants to acquire another Pyromancy. To do this, we will need to offer 30 Humanity which is no small task. Keep this in mind as we play, & hoard as many Humanity & Twin Humanities as you can.
Sequence 10: The Primordial Serpant
1. NG – Blighttown, Firelink Shrine
2. Pyromancies: 6/19
3. Sorceries: 8/24
4. Miracles: 0/23
5. Boss Souls: 2/16
6. Rare Weapons: 7/50
7. Achievements: 8/41
-----------------------------------------------------------------------------------------------------
Blighttown:
NPC – Eingyi of the Great Swamp #1: Now that we are a member of the Chaos Servants, Eingyi is now a Merchant for us. His Pyromancies however, are not available to us yet. We must first do something very disturbing… we need to become infected with the horrendous Blightpus
To do this, leave the Daughter of Chaos Bonfire & make your way out into the Demon Ruins, remove your Helmet, & engage one of the Egg Carriers. We can either attack (without killing) one of the neutral ones near the Bonfire or walk a little ways down the hill to find hostile ones. These enemies have a grab attack that will implant a parasite in your face; we need the Egg Carriers intact, the Parasites that come out of them will just kill you. Once you have received the Egg Carrier’s grab attack animation, reset the Area by resting at a Bonfire. The process of infection takes around 5 minutes. As the minutes go by, your Character will begin scratching at the back of their head. After 5 minutes have passed, the Blightpus will take over… & we will be Egg Head.
Return to Eingyi as an Egg Head to speak with him & he will be very happy. If you never farmed one in the Darkroot Garden, he will give us an Egg of Vermifuge to counteract the Blightpus. Before we do, we can purchase the Pyromancies that he has for sale. Note that we only need to become infected with the Blightpus once for him to sell us Pyromancies; if you cannot purchase what we need, we can return to him later at anytime once we have saved up the Souls.
Pyromancy #4 – Toxic Mist: Purchased from Eingyi while we have contracted the Blightpus for 25,000 Souls.
This is the only Pyromancy we need from him as we already collected Poison Mist in the Blighttown Swamp.
Eingyi also sells Egg of Vermifuge for 1000 Souls each & can also Reinforce our Pyromancy Flame as long as we speak to him while in the Chaos Servant Covenant. This makes him a good backup in case something happened to Laurentius...
Firelink Shrine:Make the long trek out of Blighttown & back to Firelink Shrine. If you take the wheel elevator, & climb up all the ladders, we can collect the Key to New Londo Ruins & head through the Valley of Drakes back to Firelink Shrine. There is a locked door we can unlock into the New Londo Ruins where we can find an elevator that will take us all the way up to Firelink Shrine.
NPC – Kingseeker Frampt #1: When we return to Firelink Shrine, we can find a... monstrosity that has appeared in the Firelink ruins. Speak with him & respond “Yes” so that we may hear our next quest to fulfil.
Frampt will also “buy Items” from us; he eats them, but we get Souls in return. This is a handy way to get rid of any of your excess Items or Weapon/Armor doubles. Don’t sell any important Souls or Titanite!
NPC – Laurentius of the Great Swamp #2: If you rescued him from the Undead Butcher’s food kitchen in the Depths, Laurentius will relocate to Firelink Shrine after we kill Quelaag. We can find him outside the Firelink ruins above where the Crestfallen Warrior is. Speak with him, & he will ask if we want to learn Pyromancy from him. Be sure to reply “No” when he asks if we find Pyromancy unsavory.
He will grant us a Pyromancy Flame as well; do not sell this or Discard it! We need a Pyromancy Flame to unlock a different Pyromancy Merchant later on in the game…
Depending on how many times you talk to him, he will ask us about the Chaos Pyromancy we have collected from the Chaos Servant Covenant; tell him “No”. If we tell him where they are, he will leave Firelink Shrine & go Hollow down in Blighttown; there is no benefit to this as he does not drop anything but a few Souls upon death. It will also mean we will be unable to use him to Modify our Pyromancy Flame needed for our next Pyromancy Merchant; we do have Eingyi as an alternative, but Laurentius is a bit more convenient.
Pyromancy #5 – Iron Flesh: Purchased from Laurentius for 2000 Souls.
Pyromancy #6 – Flash Sweat: Purchase from Laurentius for 2000 Souls.
There are only two Pyromancies that have to be purchased from Laurentius, the other three can be purchased later on by our final Pyromancy Merchant. It is best to save those until then as we need to purchase all of her Pyromancies anyways to progress her Questline.
NPC – Griggs of Vinheim #2: While at Firelink Shrine, we can also go & speak with Griggs if you rescued him from the Lower Undead Burg. To purchase Sorceries from him, we need 10 Intelligence. If you have the required Intelligence, reply “Yes” to his proposal & he will now be a Merchant for us.
Note that while he does sell a lot of Sorceries, we only need two from him specifically. The other Sorceries are sold by a different Sorcery Merchant, Big Hat Logan, later on. We need to purchase all of Big Hat Logan’s Sorceries to progress his Questline; we do not need to purchase all of Griggs’.
Sorcery #7 – Aural Decoy: Purchased from Griggs of Vinheim for 1000 Souls.
Sorcery #8 – Fall Control: Purchased from Griggs of Vinheim for 1500 Souls.
If you are not a part of the Covenant, we can farm the Forest Hunter NPCs in Darkroot Garden for the necessary Souls. I do recommend getting these Pyromancies & Sorceries out of the way as we will only have more things to have to purchase & farm for later on in the game.
Useful Item – Master Key: If you do not already have/purchased this Key, make your way up the path from the Firelink Shrine Bonfire over to where the first set of Hollow Warriors is. Over where the lone Hollow Soldier Swordsman is will be the lower ledge of the aqueduct above. Leap over onto the ledge & skirt your way along to the far side where we can find Domhnall of Zena if we spoke with him in the Depths.
We can purchase the Master Key from him from him for 5000 Souls. While none of our Keys carry over into NG+ with us, the Master Key will! This will save us a lot of unnecessary searching in NG+ & will speed our playthrough up significantly.
Sequence 11: Where Good Men Hollow
1. NG – Sen’s Fortress
2. Reinforcement Weapons: 1/6
3. Pyromancies: 6/19
4. Sorceries: 9/24
5. Miracles: 0/23
6. Boss Souls: 3/16
7. Rare Weapons: 7/50
8. Achievements: 8/41
-----------------------------------------------------------------------------------------------------
Sen’s Fortress 40-55: When you are ready, make your way to the Undead Parish Bonfire & walk across the bridge into Sen’s Fortress. Sen’s Fortress will be the first brick wall/slap in the face you will really notice; the difficulty spikes sharply in this Area. You will want good Armor & an even better Weapon that is dealing at least 200 damage (which basically translates to 50ish damage when you’re actually hitting the enemies because of their damage reduction).
NPC – Siegmeyer of Catarina #2: As we progress through Sen’s Fortress, we will come to a chute that has massive stone boulders rolling down them (it will knock down a Manserpent when we first encounter it). Quickly run down the chute to the right, then round the corner left to find a narrow walkway with two Manserpent Soldiers & Siegmeyer. Speak with him, & he will explain to us… that he is stuck.
Sorcery #9 – Hush: Pass through the Fog Gate & head down the corridor until we hit the next boulder chute. When the boulder passes, quickly sprint up the stairs to our right then drop off the side to the left about halfway up to land on a wooden platform with a Manserpent Mage on it.
Take out the Manserpent & head through the passage leading underneath the stairs we ran up to drop here. Walk up some stairs, over an iron grate, & we can see a Corpse lying on the ground that has the Black Sorcerer Set & this Sorcery.
This Sorcery can also be collected from Griggs… if you kill him.
Useful Item – Covetous Golden Serpent Ring: After collecting Hush, back track to where we fought the Manserpent Mage on the wooden platform & drop down onto the stairs. Quickly sprint your way down to the bottom & get in cover from the boulders. Two things can happen when you get here: the first is there is a hole in the wall leading straight ahead or second, there is just a wall with a hole in the floor in front of it instead. If the wall is still intact, hide around the corner & wait for the hole in the floor to slowly fill up with boulders. After three boulders have filled the hole, the fourth will come smashing through the wall ahead. If boulders are no longer coming down the stairs to breach the wall, use a Homeward Bone (or die) to return to a Bonfire to reset the Area.
We can find this extremely useful farming Ring on a Corpse hanging off the railing to our right through the smashed wall.
Reinforcement Weapon #1 – Lightning Spear: Return back to the bottom of the boulder chute from the breached wall & enter through the passage off our right. Immediately you will see a Chest ahead of you; but be warned, do not open the Chest as this is our first Mimic encounter! Slay the Mimic & it will drop the Lightning Spear.
Using the Lightning Spear makes getting the Lightning Weapon Achievement much faster as this Weapon is already imbued with Lightning, savings us Titanite we have to farm. Do not sell this Weapon!
NPC – Big Hat Logan #1: If you happened to either purchase the Master Key or choose it as a Starting Gift, we can bypass a bit of backtracking in Sen's Fortress. At the boulder mechanism, adjust the Lever so that the boulders shoot down the pathway where that one Manserpent Soldier was sleeping against the wall. Look for the health bar appearing to show that the boulder has struck the Manserpent, & turn the Lever to fire the boulders a different way.
Head down the stairs now towards that Manserpent & you will see the wall behind him has been smashed apart. Three cages down the walkway off your right we can find a Sorcerer… with a big hat. Use the Master Key to set him free & he will relocate to Firelink Shrine; if you do not have the Master Key, we will need to locate & use the Cage Key which we can find shortly.
This is the NPC we need at least 15 Intelligence to buy Sorceries from…
Sen’s Fortress Bonfire: Carry on through Sen’s Fortress past the boulder mechanism until you walk through a Fog Gate into the second half of the Fortress outside. We can find the Sen’s Fortress Bonfire up two sets of stairs to our left then to our right, through a hole in the railing where a Giant starts lobbing explosive clay balls at us.
NPC – Crestfallen Merchant #1: Return back to where we were & continue up the stairs of the Fortress until we reach a long stone walkway. In the center of the walkway will be a T-junction; right leads further into the Fortress while left appears broken. Leap across the broken gap & enter the tower on the other side. Inside on the top floor we can find the Crestfallen Merchant. While not that important right now, he is a big alternative when it comes to farming for Titanite as he sells Green Titanite Shards.
Key – Cage Key: From the Crestfallen Merchant, head down the stairs of the tower to the bottom floor where we can find a Manserpent Mage. Slay it & it will drop the Cage Key.
NPC – Big Hat Logan #1.5: With the Cage Key (unless you had the Master Key) back track to the boulder mechanism room, use it to destroy the lower wall, & free Big Hat Logan so he relocates to Firelink Shrine.
Boss Soul #3 – Core of An Iron Core Golem: That is all we need to do here in Sen’s Fortress. Make your way to the top of the Fortress & prepare to fight the Area Boss. If you are Human, walk into the tower across the walkway to the Fog Gate’s right & we can find the Summon Sign of Iron Tarkus. He has been known to solo this Boss he is that good.
If you can get the Golem near a ledge & stagger it, it also has a chance of completely falling off the map.
After the Iron Golem is defeated, examine the ring of light in the center of the Boss Room to carry on. Once again, we will be leaving the surface Area for a little while; but don’t worry, we get the Bonfire Warp ability in this next Area.
Sequence 12: The City of Gods
1. NG – Anor Londo
2. Reinforcement Weapons: 3/6
3. Pyromancies: 6/19
4. Sorceries: 10/24
5. Miracles: 0/23
6. Boss Souls: 3/16
7. Rare Weapons: 11/50
8. Achievements: 9/41
-----------------------------------------------------------------------------------------------------
Anor Londo 55-65:Achievement #9 – Reach Anor Londo: Arrive in Anor Londo.
Story Related. This Achievement will unlock as soon as we regain control of our Character after the Batwing Demon’s rudely drop us in Anor Londo.
Anor Londo Bonfire: Make your way down the stairs & past the first Sentinel out into the large courtyard. From here, head left, down some stairs into a small room with the Anor Londo Bonfire & where the Lady of the Darkling is. She is tied to the Blades of the Darkmoon Covenant but is not really relevant… unless you betray them. She is in fact a Fire Keeper however & will drop a Soul if killed; save this for after we betray the Covenant though.
Reinforcement Weapon #2 – Crystal Halberd: Exit the Bonfire room, & head left out of the courtyard into another room with two Sentinels. There are two Chests in the room as well; our Weapon is in the Chest on the right, but be careful as it is another Mimic!
Using the Crystal Halberd makes getting the Crystal Weapon Achievement much faster as this Weapon is already imbued with Crystal, savings us Titanite we have to farm. Do not sell this Weapon!
Bell Gargoyle Encounter #1: If you accidentally missed the Rare Weapon the Bell Gargoyle’s Tail-Axe when we fought it in Undead Parish, then you are in luck. Take the circular elevator down into the lower area & we will be ambushed by a Bell Gargoyle as a Mini-Boss. We have another attempt at trying to get it tail-cut; this Gargoyle does not respawn when killed.
The Cathedral Chandelier: To progress onwards, we are going to have to do some platforming. Turn around & face the stairs that lead up to the elevator we came down. From here, drop off the ledge to our right & begin walking up the shingled archway up to a balcony of an adjacent cathedral. Inside, fight off some Painting Guardians & make your way over the rafters of the cathedral to the center where we can find a chain holding up a chandelier. Strike the chain, & the chandelier will fall to the ground below where we can find it later on…
Bell Gargoyle Encounter #2: Pass through the Fog Gate at the far end of the cathedral rafters & we will be able to access a Lever activated elevator. Approach the elevator & pull the Lever to drop the elevator down a floor. We can find another Bell Gargoyle on the far side of where we fought the last one.
Darkmoon Tomb Bonfire: Push the elevator Lever one more time to drop it to its lowest point. Follow the stairs down to the very bottom & we can find the Darkmoon Tomb Bonfire. We need this Bonfire lit so we can Warp back here later on.
Sorcery #10 – Great Magic Weapon: Head back up the elevator steps & now enter the lower floor of the cathedral. If you cut the chandelier chain in the rafters, we can loot this Sorcery off a Corpse near where it hit the floor.
Rare Weapon #9 – Black Iron Greatshield: In the very far left corner of the cathedral we can find a Corpse guarded by Painted Guardians. This Shield will be on it as well as the very useful Black Iron Set.
Entrance to the Painted World: Here at the back of the cathedral you will notice a large Painting. Stay away from it for now! Since we have the Peculiar Doll already, we will get transported & trapped in the secret area the Painted World of Ariamis if we examine the Painting. To exit, we will have to kill the Area Boss who is nice to keep alive while we farm for Covenant Items there so we can also get “Soft” Humanity at the same time. For now, just leave the Painting be.
Palace Bonfire: When you are ready, carry on up the palace steps & make your way through the most difficult section of the game: the Dragonslayer Silver Knight walkway. While a good Shield may be handy, you are better off going light & fast; dodging the Dragonslayer Arrows as they come. When you get up to where the Silver Knights are, quickly strafe left & dispatch the first knight in cover from the second knight. Riposting is very handy if you can pull it off. With the first knight dead, very carefully run along the roof towards the second knight.
NPC – Solaire of Astora #2: With both Dragonslayer Silver Knights dispatched, pass through the Fog Gate & enter the palace’s east wing. We can find Solaire resting at the Palace Bonfire in the first room off our left when we enter. Exhaust his dialogue, & we will be able to Summon him for the Area Boss for Anor Londo.
Covenant Item – Sunlight Medal x3: We can find 3 Sunlight Medals in a Chest over in the room directly across from where the Bonfire is here; it is guarded by a Spear Silver Knight.
Looting this Chest again in NG+ means we only need to get 4 extra Sunlight Medals from Solaire or by farming.
Reinforcement Weapon #3 – Occult Club: Carry on past the stairs in the center of this floor over to the far end where another two doors will be. Open the door on the left side & enter a small storage room. Approach the stone fireplace & strike its back wall to reveal a secret staircase going down into a dark basement. In the far top left corner from where we enter, we can find 5 Chests; 4 will be in clusters of two while 1 will be off on its own. This more isolated Chest is a Mimic. Defeat the Mimic & we can receive this Reinforcement Weapon.
Using the Occult Club makes getting the Occult Weapon Achievement much faster as this Weapon is already imbued with Occult, savings us Titanite we have to farm. Do not sell this Weapon!
Rare Weapon #10 – Dragon Tooth: From the Mimic Chest with the Occult Club, work your way along the wall of Chests & this Weapon will be in the first Chest.
Rare Weapon #11 – Havel's Greatshield: This Shield can be found in the next Chest right beside the Chest containing the Dragon Tooth.
NPC – Siegmeyer of Catarina #3: As we progress through the palace, we will eventually climb up to its rooftop where we can see a Sword Silver Knight off our left & a Dragonslayer Silver Knight straight ahead of us. Go towards the Silver Knight off our left & head down the stairs it was guarding. At the bottom, we can see Siegmeyer standing near a window; he has been repelled by three Silver Knights in the next room.
Enter the room & lure the Silver Knights away one by one to dispatch them safely. When they are defeated, return to Siegmeyer & he will reward us with the Tiny Being’s Ring. This encounter is not skippable & is required to progress his Questline.
Sequence 13: The Lordvessel
1. NG – Anor Londo, Firelink Shrine
2. Reinforcement Weapons: 3/6
3. Pyromancies: 6/19
4. Sorceries: 10/24
5. Miracles: 1/23
6. Boss Souls: 4/16
7. Rare Weapons: 16/50
8. Achievements: 11/41
-----------------------------------------------------------------------------------------------------
Anor Londo:
Rare Weapon #12 – Dragonslayer Greatbow: When you eventually enter the massive front entrance to the palace there will be steps leading down towards Royal Sentinels (& the front Gates Shortcut) & steps leading up to an observation balcony. Quickly go & open the front Gates Shortcut & then make your way back up to the top of the observation balcony. From the balcony, look along the back wall with the stained-glass windows to see that one has been broken. Crawl through the broken window & carefully make your way down the outside of the palace entrance. Around the corner, drop off over a spined iron railing where we can find a Corpse holding this Bow hanging off of the ledge we drop onto.
NPC – Giant Blacksmith #1: From where we drop down off the ledge after collecting the Dragonslayer Greatbow, we can hear the sounds of hammering. Get past the Bat Wing Demons & enter a nearby tower where we can find the Giant Blacksmith.
Not only does he sell extremely useful Titanite, but this is also the Blacksmith we will be bringing our Boss Souls to when we are ready to craft our associated Rare Weapons in NG+.
Rare Weapon #13 – Giant's Halberd: Before we go to fight the Area Boss, there are a few Rare Weapons we can farm. These can be farmed at anytime, however this is a convenient way for us to also get some more Souls/Levels in as the Area Boss here… is very difficult to say the least.
We can get the Giant’s Halberd from Sentinels or the Royal Sentinels in the palace entrance; for both it is a 2% drop rate. We do not need the Giant’s Shield. For expedience, it is good to farm the 6 Sentinels that are up near the Anor Londo Bonfire at the beginning of the Area.
It can also be purchased from the Giant Blacksmith for 5000 Souls.
Rare Weapon #14 – Silver Knight Shield: The next set of Rare Weapons are dropped by the Silver Knights. Fortunately, there are many that are easily accessed near the Palace Bonfire.
All Silver Knights have a 1% chance to drop the Silver Knight Shield.
Rare Weapon #15 – Silver Knight Straight Sword: Sword Silver Knights have a 2% chance to drop their Silver Knight Straight Swords.
Rare Weapon #16 – Silver Knight Spear: Spear Silver Knights have a 2% chance to drop their Silver Knight Spears.
Boss Soul #4 – Soul of Orenstein/Soul of Smough: When you are ready, go through the Fog Gate in the palace entrance & prepare to fight the Area Boss…es. This pair is extremely defeat; Summoning Solaire is a good idea, but you may want to figure out their moves beforehand, so you do not burn through all of your Humanity. Solaire’s Summon Sign can be found on the stair landing just below where the Dragonslayer Silver Knight is in the palace entrance. It is unlikely he can be kept alive during the battle; but he still helps a lot being able to distract one of the two Bosses.
Depending on which of the two Bosses you kill first, the other will get super charged & you will have to defeat them a second time. After defeating the super charged version of either Orenstein or Smough, you will receive their associated Boss Soul. Which ever Boss you kill on this playthrough, we will receive the Boss Soul of the other Boss in NG+; fortunately, there is only one Rare Weapon per Boss we need their Boss Souls for.
In my opinion, super charged Smough is much harder than super charged Orenstein. I would make a point of defeating super charged Smough this playthrough & save Orenstein for on NG+. On NG+, the enemies & Bosses will receive a large increase to health & damage making super charged Smough insanely difficult.成就 #10 – Lordvessel:获得王器。
剧情相关。击败翁斯坦与斯摩后,乘坐电梯上楼并点燃公主寝室篝火。从那里,走上楼梯进入葛温艾薇雅的寝宫,她会将王器赠予我们。
王器是游戏中的关键物品,允许我们在特定篝火之间传送。Achievement #11 – Covenant Princess's Guard: Discover Princess's Guard Covenant.
After Gwynevere has given us the Lordvessel, speak with her again & we will have the option if joining her personal Covenant. The Achievement will unlock at the Covenant Joining Screen.
Warning! There is a secret twist to Gwynevere that completely alters the Anor Londo Area if you attack. Do not do this, do not attack her; it is all bad man! If you attack her, Gwynevere will disappear & with her, the Sun. The Darkmoon will take the sky in its place & Anor Londo will become dark. Silver Knights will de-spawn locking us out of their Weapons if we do not have them & Bonfires will become disabled making Anor Londo a dead zone. If you are curious, wait until the very end of the game before we go to fight the final Boss. Losing Gwynevere overall makes things way way more inconvenient & could ultimately kill your playthrough.
Firelink Shrine:
NPC – Siegmeyer of Catarina #4: Warp back to Firelink Shrine, & if you helped him in Anor Londo, we can find him standing near the Bonfire. When he asks if we were the ones that opened Sen’s Fortress, tell him “yes” & he will reward us with a Miracle. Speak with Siegmeyer again, & he will tell us he will be going on an adventure "down below" where he can later be found in Blighttown. Be sure you exhaust Siegmeyer's dialogue so he leaves for Blighttown!
This is technically the only Achievement related thing we need from Siegmeyer; however, his Questline ends with a Titanite Slab which are very hard to come by. I will keep including the points in his Questline so that we can snag one.
Miracle #1 – Emit Force: We will receive this Miracle from Siegmeyer when we meet him at Firelink Shrine after helping him in Anor Londo.
NPC – Kingseeker Frampt #2: With the Lordvessel, return to Frampt in the Firelink ruins. He may be asleep; strike him once to wake him up… don’t go overboard. He will then “transport” us down to the Firelink Altar deep below the shrine.
Place the Lordvessel on the pedestal & it will activate, unlocking access to 4 new Areas where the next arc of the game takes place.
Warning! Be sure to purchase the 5 Sorceries from Dusk of Oolacile before placing the Lordvessel on the pedestal in the Firelink Altar. If you do, her Summon Sign in Darkroot Basin will disappear & we will have to enter the DLC to purchase them. We won’t be able to get into the DLC until we collect a certain Item in the Duke’s Archives Area…
Sequence 14: Undeath Begets Death
1. NG – Firelink Shrine, The Catacombs
2. Reinforcement Weapons: 3/6
3. Pyromancies: 6/19
4. Sorceries: 18/24
5. Miracles: 5/23
6. Boss Souls: 4/16
7. Rare Weapons: 17/50
8. Achievements: 12/41
-----------------------------------------------------------------------------------------------------
Firelink Shrine:Before we continue on, we have some housekeeping to do so we don’t get bogged down in farming later on. The four Forest Hunter NPCs in Darkroot Garden are our best method for farming Souls at the moment netting us 7000 Souls a run. As well, if you have any duplicate Weapons or Armor or any random Items you never use, Feed them to Frampt for some good Souls.
NPC – Big Hat Logan #2: If you rescued him from Sen’s Fortress, we can find Big Hat Logan sitting near Griggs at Firelink Shrine. If you managed to get 15 Intelligence, we can now purchase Sorceries from him. We need to purchase all 8 Sorceries he sells to progress his Questline regardless if you already have that Sorcery or not.
Sorcery #11 – Soul Arrow: Purchased from Big Hat Logan for 1000 Souls. Also the starting Sorcery if you chose the Sorcerer Class.
Sorcery #12 – Heavy Soul Arrow: Purchased from Big Hat Logan for 2000 Souls.
Sorcery #13 – Magic Weapon: Purchased from Big Hat Logan for 3000 Souls.
Sorcery #14 – Magic Shield: Purchased from Big Hat Logan for 3000 Souls.
Sorcery #15 – Great Soul Arrow: Purchased from Big Hat Logan for 6000 Souls.
Sorcery #16 – Great Heavy Soul Arrow: Purchased from Big Hat Logan for 8000 Souls.
Sorcery #17 – Homing Soulmass: Purchased from Big Hat Logan for 20,000 Souls.
Sorcery #18 – Soul Spear: Purchased from Big Hat Logan for 40,000 Souls.
With all his Sorceries purchased, Big Hat Logan’s Questline is progressed. We need to have this stage completed when we go to the newly unlocked Duke’s Archives Area. It is possible Logan will leave for The Duke’s Archives before you have purchased what you need; getting him to leave is the event we need. We can purchase the remainder of his Sorceries from him in The Duke’s Archives. Do not buy any of his Sorceries from Griggs or else you will have to buy them twice!
Miracle #2 – Homeward: Purchased from Petrous of Thorolund for 8000 Souls.
While more expensive if bought from Petrous, the Homeward Miracle is exceptionally useful for farming & makes runs that take you far from a Bonfire much quicker. It is definitely worth buying early but only if you have the Faith to use it.
If you do not need Homeward, it can be purchased later on from Reah of Thorolund for a mere 1000 Souls. It is worth buying early, but only if you will use it…
Undead Parish:
Miracle #3 – Karmic Justice: Purchased from Oswald of Carim up in the Undead Parish Bell Tower for 40,000 Souls.
The Catacombs: 40-50When your farming is complete (or you get tired), return to Firelink Shrine & make your way into the graveyard behind the Firelink ruins. Follow the pathway down & take the uneven stone steps left, down along the cliffside to enter The Catacombs.
You will shortly realize that the Skeletons here…respawn. To permanently defeat them you need to locate the Undead Necromancer linked to them & slay them, so the Skeletons stop respawning. An alternative method if you are a Faith build is to Imbue a Weapon with a Divine Blessing which will severe the Skeletons connection to the Undead Mages & kill them right off the bat. The Astora Straight Sword counts as a Divine Weapon.
Catacomb Falls Bonfire: As you navigate your way through The Catacombs, you will have to push in two Levers to turn spiked bridges over to make them accessible. When you approach the second Lever, you will need to climb an iron ladder inset into the wall. At the bottom of this ladder to the left, there is a trap statue that will eject spikes at you when approached. Strike the wall right beside this statue & it will reveal a secret cave where we can find the Catacomb Falls Bonfire.
Covenant Item – Darkmoon Séance Ring: Cross the bridge from the second Bonfire, & we will enter another room with a spiral staircase leading down. At the bottom of the stairs, we can see a Message in front of a crumbing brick wall reading “Treasure”. Strike the wall & drop down into a room full of Skeletons.
Walk up the stairs from the Skeleton room & a Giant Skeleton will burst through the ceiling & drop down at us. Defeat it, & we can find this Ring in an open sarcophagus at the back of the room.
This is the Ring we need to be able to access the Blades of the Darkmoon Covenant & the optional Boss Dark Sun Gwyndolin in Anor Londo…
Miracle #4 – Tranquil Walk of Peace: Carry on through a broken wall near where the Giant Skeleton dropped down from up the dirt slope. From where the Undead Necromancer is, we can find another Message in front of a ladder reading “Up”. Follow the ladder up & we can find this Corpse at the top around a corner past a statue trap.
Covenant Item – Eyes of Death x3: Return back to where we entered the “Treasure” section & make your way outside around the ledge where more Skeletons & exploding Wisps are waiting for us. Afterwards we will enter a large crypt; make your way to the very far end of the crypt & we can find a hidden Titanite Demon.
We can find 3 Eyes of Death on a Corpse behind where the Titanite Demon is.成就#12 - Covenant Gravelord Servant:发现墓王尼特的契约。收集到死之眼后,从尸体处转身,面向来时的方向。沿着右侧墙壁前进,经过五个石棺后,可以找到一个从墙壁中突出且打开的石棺。如果你的物品栏中有死之眼(现在我们已经有了),“躺进棺材”并等待30秒。之后会被友好的骷髅传送,带到巨人墓地……实际上是墓王尼特的 boss 房间。但不要惊慌,他正在沉睡。走出石棺,绕过拐角,就能找到沉睡的墓王。靠近他巨大的石棺并进行祈祷;选择【加入誓约】以打开誓约加入界面,解锁成就。
稀有武器#17 - 墓王剑:加入墓王仆人誓约,我们将获得这把稀有武器作为0级奖励。
奇迹#5 - 墓王剑舞:加入墓王仆人誓约时,我们也将获得这个奇迹作为0级奖励。
我们最终需要收集10个死者之眼,以达到墓王仆人的1级 rank,从而获得该誓约的最后一个奇迹。
序列15:三具尸体,一座坟墓
1. 新游戏 - 地下墓地,绘画世界亚米达拉
2. 强化武器:3/6
3. 咒术:8/19
4. 魔法:18/24
5. 奇迹:5/23
6. boss 灵魂:4/16
7. 稀有武器:17/50
8.成就:14/41
地下墓穴:
黑骑士遭遇战#6:返回有泰坦ite恶魔的墓穴房间,穿过墙上的洞口,顺着梯子下到中央有石棺的小房间。在石棺两侧可以找到两块不稳定的地砖;从其中一块掉落,会落到一个有巨斧黑骑士的小房间里。
我们当然需要黑骑士巨斧作为稀有武器;之后可以在初始之火的火炉刷取。
地下墓穴篝火:返回地下墓穴瀑布篝火,前往我们用拉杆翻转的第二座桥右侧的建筑。在这个结构中,我们可以找到一个螺旋楼梯,它通向一个看似无底的深坑。仔细观察的话,能隐约看到下方一个平台上有一具尸体。小心地从楼梯上直接朝着尸体冲刺或翻滚,我们就能落到那个平台上。成功着陆后,沿着一系列其他平台向下走,然后通过天花板上的一个洞跳下去,这时会触发一段过场动画。我们不仅会解锁地下墓地的可传送营火,还会解锁铁匠瓦莫斯。在这次流程中他没什么太大用处,但要记住怎么到这里,因为他是在二周目能为我们的武器附加火焰和混沌属性的铁匠。成就#13 - 营火的注火仪式:获得营火的注火仪式。
剧情相关。当你完成地下墓地后,前往洞穴最底部有所有车轮骷髅的地方,进入雾门与墓王尼特战斗。他不是一个非常具有挑战性的 Boss,尤其是在之前已经击败了翁斯坦与斯摩之后。
击败他后,我们将获得营火的注火仪式,现在可以将营火注火四次,将我们的元素瓶最大使用次数增加到20。
在墓王尼特 Boss 房间的顶部,是通往巨人墓地的漆黑入口。从原路返回并离开地下墓地;我们稍后会回来完整探索这个区域……
亚诺尔隆德:Achievement #14 – Covenant Blade of the Darkmoon: Discover Blade of the Darkmoon Covenant.
Now that we have the Darkmoon Séance Ring, Warp to the Darkmoon Tomb Bonfire & equip the Ring. Approach the statue of Gwyn near the Bonfire & it will vanish revealing a staircase leading down. At the bottom of the steps, Dark Sun Gwyndolin will call out us through a Fog Gate & ask us to kneel. Stand in between the four candles on the floor & do just that. The Achievement will unlock upon receiving the Joining Screen after Gwyndolin’s speech.
Be sure to join the Covenant as we will be needing to reach Rank 1 in it for a Miracle. Do not enter the Fog Gate! Entering the Fog Gate will initiate the Dark Sun Gwyndolin Boss fight & will void the Darkmoon Covenant for us, locking us out of a Miracle. We will reach Rank 1 in the Covenant first before we do this…
Painted World of Ariamis 55-60: If you have the Peculiar Doll that we found in our return trip to the Northern Undead Asylum, then make your way all the way upstairs into the large cathedral with all the Painting Guardians. Approach the Painting at the back of the cathedral & “Examine” it to enter the Painted World.
Warning! We will be trapped in the Painted World until we slay the Area Boss; if you have any unfinished business, do so before we leave. You will want a decent supply of Blooming Purple Moss as well as we will be facing enemies that can make us Toxic irritatingly fast; the Spider Shield won’t save us this time. You will also want a good supply of Arrows to fight another Undead Dragon like we found in Valley of Drakes.
Painted World Bonfire Shortcut: Make your way through the Painted World for a while until we come across a large broken tower in the center of the Area. To the tower’s left will be stairs leading down to a bridge that ends at a slumbering Undead Dragon. Ignore the dragon for now & follow the tower around left all the way down the stairs to the very bottom of the tower. Pass through the Fog Gate & sprint past the disturbing Phalanxes to the far side of the courtyard where we can push open some doors & see the Painted World Bonfire on the other side.
This Shortcut will be critical for our farming for the Blades of the Darkmoon Covenant & for Soul farming later on.
Pyromancy #7 – Acid Surge: With the Shortcut opened, turn around from the gates & head right, over onto a snowy outcrop full of impaled Hollows. Follow the outcrop right, past the trees, & around a small stone wall near the cliff edge where we can find a Corpse holding this Pyromancy.
Key – Annex Key: Return to the courtyard & head straight across from the snowy outcrop & left around the corner in the courtyard to see a well with a ladder inside it. Climb down the ladder & approach the first corner where a Wheel Skeleton will come barreling past us off our right. If you dodge it, it will wheel past down the passage, left, & break through an illusionary wall. If it does not, head left & strike the wall at the end yourself. From here, follow the passage down, take a left, & follow it straight to the end to find this Key on a Corpse.
Pyromancy #8 – Fire Surge: From the Corpse with the Annex Key, turn right, down the passage behind us, through another illusionary wall, & turn right again. Follow the passage along & we can find a Wheel Skeleton guarding a set of stairs going up. At the top of the stairs we can find an Engorged Zombie… just standing there. It will not attack us, which will not stop US from attacking IT.
Slay the Zombie & loot its corpse to collect this Pyromancy.
Tower Doors Shortcut: Backtrack to where our first crossroad in the passage is near where we came down the ladder & pass through another illusionary wall to enter a large cistern full of Wheel Skeletons. In its center will be a wheel we can spin to unlock the iron gates to the bridge that leads to the Area Boss; but we won’t be going over there for a bit.
Sequence 16: Descendants of Cinder
1. NG – Painted World of Ariamis, Anor Londo
2. Reinforcement Weapons: 3/6
3. Pyromancies: 8/19
4. Sorceries: 18/24
5. Miracles: 8/23
6. Boss Souls: 6/16
7. Rare Weapons: 20/50
8. Achievements: 16/41
-----------------------------------------------------------------------------------------------------
Painted World of Ariamis:
Rare Weapon #18 – Velka's Rapier: With the Annex Key, return to the large courtyard where the Phalanxes are & head over to the building to the right of where they gather. Climb up a small set of stairs to a door we can unlock with the Key. Up another set of stairs & we will have three different paths to take (straight ahead having an Engorged Zombie charging us). Look to your right & there will be a broken wooden door; break it down & follow a bridge across to a Corpse holding this Weapon.
Miracle #6 – Vow of Silence: From Velka’s Rapier, head back across the bridge & carry on straight then left up some stairs where another Engorged Zombie is standing. At the top of the stairs, we will be attacked by Crow Demon, with another standing up on landing. Lure down the second Crow Demon & kill it then make your way up to where it was to find a Corpse with this Miracle. Be careful as two more Crow Demons will come down to attack us once we grab the Miracle.
Make a note of this location, we will be farming these 4 Crow Demons for their Souvenir’s of Reprisal for the Blades of the Darkmoon Covenant… if you are playing Offline that is.
Rare Weapon #19 – Bloodshield: Remember that Undead Dragon we found near the beginning of this Area? Return to the Dragon & shoot it to death or very carefully use melee. When it is defeated, we can see two Corpses lying on the bridge it was resting on; the Rare Weapon is on the second Corpse in the back.
Souvenir of Reprisal Farming: We now have a few choices to make: the first being whether or not you farm now or later. If we farm now, we can get “Soft” Humanity from Hollows or the Crow Demons which can be handy for multiple reasons. If we farm later, we miss that opportunity, but it is not essential. If you farm later, remember this spot in the guide & come back to it when you are ready.
If you are farming, we will be doing runs up to where we found the Vow of Silence Miracle killing the 4 Crow Demons up there. Crow Demons have a 6% chance to drop Souvenirs of Reprisal which isn’t terrible compared to other enemies we will farm later. We only need 10 Souvenirs. If you have the Homeward Miracle, it will make farming much faster as you can branch out to the other Crow Demon locations.
Slaying all 13 Phalanxes in the courtyard as part of your farming run, though adding a little extra time, can net you a seriously hefty amount of Souls. At 500 Souls a piece, you will get an extra 6500 Souls a run; these can give you a jump on your Levels & can help you work towards the 15 Intelligence or 25 Faith we need.
If you play Online, then as a Blade of the Darkmoon we can Invade a Sinful Player using the Blue Orb or if you are wearing the Darkmoon Blade Covenant Ring. Using both will double your Invasion chance. When you Invade a Sinful Player, kill them, & we will receive a Souvenir of Reprisal as a reward; you only need to win 10 Invasions. If you are proficient in PvP, then this is a much quicker route.
Rare Weapon #20 – Priscilla's Dagger: When you are finished farming for Souvenirs of Reprisal (or postponing it until later), make your down the large bridge at the far end of the Painted World & pass through the Fog Gate to the Area Boss. Priscilla’s Dagger is a Tail-Cut Weapon, & as you will figure out… she has a tiny (Censored by Steam) tail! Fortunately, when we enter the Boss Room, Priscilla is not initially hostile until provoked. This gives us a clean shot or two at her tail. While we can leave without killing her… we need that Rare Weapon, her Soul, & the Achievement for killing her. Sorry ma’am.
When she turns hostile, she will turn invisible; while she is invisible, we need to stagger her out of it, this usually takes 3-4 strikes depending on damage dealt. This is a battle of patience & her own longevity. It is very “easy” to kill her before you can manage to get the Tail-Cut. If her health is too low, & you have not got the Tail-Cut, die or use a Homeward Bone to try again. If your current Weapon is not suited for this, such as an Ultra-Greatsword, consider returning to the Bonfire & grabbing a Straight Sword or Dagger. Once we have the Rare Weapon, all bets are off & we can defeat her however we like.
If she dies before you get the Tail-Cut, you will have to attempt this on NG+!成就#15 - 击败半龙普利希拉:击败猎命者半龙普利希拉。成功击败她后将解锁该成就。
Boss魂#5 - 普利希拉的灵魂:与大多数Boss不同,普利希拉的灵魂只能用来锻造一件稀有武器。
若要离开画中世界,需前往Boss房间后方的小走道,走向边缘即可触发离开的过场动画。注意,你会被弹出画作,回到亚诺尔隆德大教堂,那里的绘画守护者已重新刷新并等待着你!
亚诺尔隆德:当你通过刷乌鸦恶魔或作为暗月之剑参与在线PvP获得10个复仇的证明后,返回暗月之墓营火。奇迹#7 - 暗月之剑:持有10个复仇之证,在葛温德林的雾门前跪下并将其献上……他……她……这有点复杂。当我们在暗月之剑契约中达到1级时,会获得这个奇迹作为奖励,同时还会获得暗月护符。这就是我们从该契约中需要的全部;2级和3级只会增强暗月之剑的威力,虽然这会使其变得异常强大,但并非必需。Achievement #16 – Defeat the Dark Sun Gwyndolin: Defeat Dark Sun Gwyndolin, the Darkmoon God.
When we are finished with the Blades of the Darkmoon Covenant & have acquired the Darkmoon Blade Miracle, it is now time for our betrayal. Prepare yourself & enter the Fog Gate. Stay on your toes & weave between the hallway pillars to get close to Gwyndolin. The Achievement will unlock after we defeat him.
Note that by defeating Gwyndolin, the Anor Londo Bonfire will become permanently disabled for this playthrough; if this is a Bonfire you like using, you can save facing Gwyndolin until you are ready to lose it. You can even save him to the very end of the playthrough before we beat the game in the Kiln of the First Flame if you wanted...
Boss Souls #6 – Soul of Gwyndolin: We will need to collect Dark Sun Gwyndolin’s Souls once again in NG+ for two copies…
Miracle #8 – Sunlight Blade: With Gwyndolin defeated, make your way to the far end of the Boss Room where Gwyn, Lord of Cinder’s tomb lies. This Miracle can be found in a Chest right in front of the massive tomb.
Sequence 17: Seath the Treacherous
1. NG – Anor Londo, The Duke’s Archives
2. Reinforcement Weapons: 4/6
3. Pyromancies: 8/19
4. Sorceries: 19/24
5. Miracles: 10/23
6. Boss Souls: 6/16
7. Rare Weapons: 20/50
8. Achievements: 16/41
-----------------------------------------------------------------------------------------------------
Anor Londo:
Useful Item – Firekeeper Soul: With Dark Sun Gwyndolin dead, & the Covenant betrayed, Warp to the Anor Londo Bonfire. When we arrive, the Lady of the Darkling will become hostile & attack us. Watch out for her Ripostes! Defeat her, & we will receive her Firekeeper Soul.
Upon her death, the Anor Londo Bonfire will become inactive & we will not be able to rest at it. We can still Warp here though.
The Duke’s Archives 60-65: From the Anor Londo Bonfire, head left in the large outer courtyard into the building with the Sentinels. From there, go outside & up the hill to reach the entrance to The Duke’s Archives.
DLC – Broken Pendant: From the Archive Entrance Bonfire, take the elevator up & carefully fend off the Undead Crystal Soldiers. In the right corner near the entrance to the next room, we can find a Crystal Golem. When we defeat it, we will receive the Broken Pendant.
If you take this Pendant to where we fought the Golden Crystal Golem in Darkroot Basin behind where the Hydra used to be, we can enter the Artorias of the Abyss DLC. Since there are no Achievements associated to the DLC, it will not be covered in this guide. I highly recommend you complete it though, Artorias is my ultimate man crush & one of the coolest bosses in Dark Souls history. It is best to save the DLC until just before we fight the Area Boss of Darkroot Garden…
Channeler Encounter #3: In the massive library from the Crystal Golem, we can find a Channeler. Unlike other Channelers, this one actually respawns making it one of the three in The Duke’s Archives we can farm for the Channeler’s Trident. The other Channelers here are more ideal however.
Seath the Scaleless: The lead up to Seath is probably the hardest part of Duke’s Archives honestly. After you get past the gauntlet of Undead Crystal Soldiers & that Channeler, take the elevator up to Seath’s study. Before you do, make sure you equip a Ring of Sacrifice if you have one handy or at the very least spend all your Souls/ditch all your Soft Humanity into Kindling Bonfires! Seath is a big fat phony & is invincible in his study. It is part of the story that he kills us here, & we will not be able to retrieve our Bloodstain along with the Souls & “Soft” Humanity it carries!
Key – Archive Tower Cell Key: After Seath kills us, we will awaken in a prison cell deep within The Duke’s Archives. Attack the Manserpent Soldier outside our cell & loot his Corpse to collect the Key to get us out of here!
Miracle #9 – Soothing Sunlight: Exit your cell & make your way down to the base of the tower fighting off the poor Pisacas as you go. In one of the cells on our way down we can find the Archive Prison Extra Key, though it is non-essential.
At the bottom of the tower, enter the room where the Pisacas came out of (or are in if you died & the music was not reinitiated by the Manserpents). In the back left corner of the room, we can find two Pisacas who are not hostile. Kill the one closest to the wall to collect this Miracle.
Miracle #10 – Bountiful Sunlight: Kill the non-hostile Pisaca that is further away from the wall than the first to collect this Miracle.
The Pisacas are actually a great enemy to farm the Humanity Item off of due to how many of them are here. They have a 4% chance to drop it.
NPC – Big Hat Logan #3: If you purchased the majority of his Sorceries back at Firelink Shrine, in the same room we found the Pisacas, we can find none other than Big Hat Logan. He is locked in a rather large cell & none of our Keys will open it. Remember this location as we will have to return here when we locate the Key.
If you did not have the 15 Intelligence at the time of this, still remember this location, when Logan finally leaves Firelink Shrine this is where he will end up whether Seath the Scaleless is alive or dead by that point.
Key – Archive Tower Giant Door Key: At the base of the tower, climb up the iron ladder up to where the music box is. At the top, we will have to fight off two Man Serpent Soldiers & a Manserpent Mage all at the same time. At the back of this floor, we can find the Key out of this Tower in a Chest.
Channeler Encounter #4-5: After opening the doors with the Archive Tower Giant Door Key, make your way up the stairs into the second massive library. We can find a Channeler immediately to our left when we enter with another on the floor above us. These Channelers also will respawn & will be who we farm for the Channeler’s Trident.
Sorcery #19 – Strong Magic Shield: In the large library with the two Channelers, this Sorcery can be found on the upper level where the second Channeler is firing Soul Arrows at us. Walk left into the upper level of first library & rotate the stairwell so we can get up into the adjacent upper floor. From here, walk back into the second library & drop down onto the other rotating stairwell where we can ward off the second Channeler. Before we chase him down, carry on to the right on his top floor & we can find this Sorcery in a Chest.
The Duke’s Archives Bonfire: We can find this Bonfire at the very bottom of the second library. Navigate your way down through the irritating Undead Crystal Soldiers & we can find this Bonfire on an outside balcony.
This is a Bonfire that we can Warp to.
Shortcut to the Crystal Caves: From The Duke’s Archives Bonfire, make your way back up the stairs to the rotating stairwell in the second library. Turn the stairs so that we are able to access the third floor of the second library. On the third floor, enter into a room that has ladder leading down off our right & an Undead Crystal Archer straight ahead of us on a ledge. Climb down the ladder & pull the Lever at the bottom to move a bookshelf allowing us quick access here from the Bonfire.
Key – Archive Tower Giant Cell Key: In this new wing of the second library, we just opened up, we can go left or right. Enter the room on the right (room on the left has a Chest with a Blue Titanite Chunk in it) & we can find 4 Chests & another Lever. We can find this Key in the last Chest in the back left corner of the room.
This will open Big Hat Logan’s cell door.
Reinforcement Weapon #4 – Enchanted Falchion: Across from the Chest we found the Key in, we can find a Mimic. Defeat the Mimic & we can collect this Reinforcement Weapon.
Using the Enchanted Falchion makes getting the Enchanted Weapon Achievement much faster as this Weapon is already imbued with Enchantment, savings us Titanite we have to farm. Do not sell this Weapon!
Sequence 18: The Death of Sorcery
1. NG – The Duke’s Archives, Blighttown, Crystal Caves
2. Reinforcement Weapons: 4/6
3. Pyromancies: 8/19
4. Sorceries: 23/24
5. Miracles: 10/23
6. Boss Souls: 6/16
7. Rare Weapons: 22/50
8. Achievements: 17/41
-----------------------------------------------------------------------------------------------------
The Dukes Archives:
NPC – Big Hat Logan #4: Now that we have the Archive Tower Giant Key, navigate your way back to the tower full of Pisacas & free Big Hat Logan from his cell. The entrance back to the tower is on the third floor of the second library across from where we entered the side wing. Free Logan & exhaust his dialogue.
Useful Item – Firekeeper Soul: We can find a Firekeeper Soul on the Corpse at the back of Big Hat Logan’s cell.
NPC – Big Hat Logan #5: After Logan has been freed, rest at The Duke’s Archives Bonfire & head into the side wing we opened up previously. Enter the dark room on the left & we can find Big Hat Logan sitting in the back near a Chest.
Logan will now have 3 new Sorceries for us to purchase; we must completely buy out his Inventory to progress his Questline.
Sorcery #20 – Crystal Magic Weapon: Purchased from Big Hat Logan after he has moved to The Duke's Archives for 20,000 Souls.
Sorcery #21 – Homing Crystal Soulmass: Purchased from Big Hat Logan after he has moved to The Duke's Archives for 30,000 Souls.
Sorcery #22 – Crystal Soul Spear: Purchased from Big Hat Logan after he has moved to The Duke's Archives for 50,000 Souls.
Logan’s new Crystal Sorceries are very expensive. First, farm the Channelers here in the Archives to get the Channelers Trident. Then you can either farm the Crystal Golems outside the Crystal Caves for Blue Titanite Chunks (not a good Soul return) or just farm the Phalanxes back in the Painted World of Ariamis.
Rare Weapon #21 – Channeler's Trident: The Channeler’s Trident is dropped, of course, by the Channelers. If you were really lucky, you may have already got this Weapon earlier. If not, farm the two Channelers in the upper level of The Duke’s Archives in the second library… over & over again. The Trident only has a 1% drop chance making it one of the most irritating Rare Weapons to get.
Blighttown:NPC – Siegmeyer of Catarina #5: Before we continue on towards the Crystal Caves, we need to go speak with Siegmeyer down in Blighttown to spawn an important NPC to his Questline. Warp from the Duke's Archives to the Daughter's of Chaos Bonfire & make your way over to teh Blighttown Swamp Bonfire.
From the Blighttown Swamp Bonfire, make your way left through the swamp towards the large Arch Tree at the opposite end from Quelaag’s Domain. Head to the right of the tree & we can see a familiar onion standing on a small bank near a stone bridge support against the walls. Speak with him, & he reveals he has run out of Purple Moss Clump. Hand him 4 pieces of the Moss & he will give us his Pierce Shield, but more importantly, his Questline will be progressed.
The Duke's Archives:NPC – Sieglinde of Catarina #1: When you are finished with Siegmeyer, return The Duke’s Archives, pull the Lever in the second library’s side wing & pass through the Fog Gate to enter the Crystal Forest. Head down the Ladder into the forest below & we can now find another jailing Golden Crystal Golem in the center of the forest. Defeat it, & an onion knight will appear… but it is not the onion we know.
Speak with Sieglinde & tell her that we have seen her father to progress her Questline.
Before we carry on into the Crystal Caves, be sure you have ample supply of Prism Stones. The majority of the walkways in this Area… are completely invisible & unless you know where they are, you will be going in blind. We can buy Prism Stones for 10 Souls a piece from the Female Undead Merchant.
Crystal Cave 65-70: The Crystal Caves is one of the worst Areas in Dark Souls due to the invisible walkways. Trying to explain how to navigate through it is borderline impossible without a video, so here is a quick rundown by 100% Guides that will get us all the Items we need, mainly the Blue Titanite Slab. If you look carefully, you can see crystal dust falling & landing on the invisible walkways which essential for navigation. Take your time; unless you use a Prism Stone or are certain a crystal dust speck has fallen on solid ground ahead of you, don’t progress further.
https://youtu.be/UAU2KceMxYY
Blue Titanite Slab #1: After we fight the first Golden Crystal Golem in the Caves, drop down onto an invisible walkway with a Message on it. Immediately spin around & we can see 3 Crystal Lizards in a small cave behind us. At the backside of this cave, we can see large gap & a Corpse across from it on an outstretched crystal. Either with the Prism Stones or the falling crystal dust, carefully navigate your way over to the Corpse (straight, right, then slightly diagonal to the left) & we can loot our first Blue Titanite Slab. This took me around 15 tries to get right… playing Online can help as some Players may leave Messages for us to see.
We will need to come back here in NG+ so we have 2/2 Slabs for the Magic & Enchanted Reinforcement Achievements.
Rare Weapon #22 – Moonlight Greatsword: With the Blue Titanite Slab collected, navigate to Seath the Scaless’s Boss Room & prepare to fight. When the battle begins, sprint to the very back of the cave & destroy the Primordial Crystal which removes Seath’s invincibility. The Moonlight Greatsword is another Tail-Cut Weapon.
With the Crystal gone, you need to constantly get behind Seath & strike the tip of his rear most tail. You need to attack it closer to the end, otherwise your attacks will only count as body shots. Due to Seath’s size, it can be very tricky getting around him after his attacks before he resets again. Don’t be greedy with your strikes, if Seath goes in for his Cursed Crystal Breath attack you need to get away! Be sure to bring some Purging Stones into the battle with you as Seath also can deal Curse to us if we are not careful.
If you kill Seath before getting the Moonlight Greatsword, you will have to try again on NG+!Achievement #17 – Defeat Seath the Scaleless: Defeat Seath the Scaleless, inheritors of souls.
Story Related. Seath is the first of four Lords we will need to defeat; we will unlock this Achievement upon his death.
He does not have a Boss Soul but instead drops a Bequeathed Lord Soul Shard.
The Duke’s Archives:
NPC – Big Hat Logan #6: Warp back to The Duke’s Archives Bonfire after defeating Seath & speak with Big Hat Logan. If you have purchased all of his Sorceries, Big Hat will not remember us at all & seems very confused. We can still buy his Sorceries if you have not already, do so, & speak with him afterwards to get this new dialogue.
Warp to a different Bonfire then back to The Duke’s Archives Bonfire to reset. Now make your way up the set of stairs on the first floor of the second library, head left onto the second floor then take a right to enter the second floor of the first library (if that makes sense). From here, take the elevator up back to the study where we fought Seath for the first time. In the center of the study, we can find Logan… in nothing but a loincloth & his hat of course. He has gone Hollow. Put him to rest & we will finish his Questline. Be careful, this man is the definition of a glass cannon on so many levels…
Sorcery #23 – White Dragon Breath: This powerful Sorcery is dropped by Big Hat Logan at the end of his Questline once he has gone Hollow in The Duke’s Archives.
Sequence 19: Arch Trees
1. NG – Firelink Shrine, Northern Undead Asylum, Blighttown, The Great Hollow
2. Reinforcement Weapons: 4/6
3. Pyromancies: 16/19
4. Sorceries: 23/24
5. Miracles: 10/23
6. Boss Souls: 6/16
7. Rare Weapons: 22/50
8. Achievements: 17/41
-----------------------------------------------------------------------------------------------------
Firelink Shrine:
NPC – Sieglinde of Catarina #2: After freeing her from the Crystal Forests, return to Firelink Shrine & we can find Sieglinde standing near the Bonfire. Speak with her & when she asks if we have seen her father, tell her “Yes”. With that, she will leave Firelink Shrine to continue her search; answering “No” will end her Questline here & void us the Titanite Slab.
NPC – Laurentius of the Great Swamp #3: Before we carry on tracking down our next Lord Soul, we need Laurentius’s help first. If he has not already, he will ask us about the Chaos Pyromancies we have collected from the Chaos Servant Covenant.
Tell Laurentius “No” & bring him a Pyromancy Flame & Modify it to +10; this will cost a total of 53,500 Souls to get to +10. He can Modify it further, but +10 is the minimum we need to spawn the Merchant. Farm the Phalanxes if you need the Souls.
Alternatively, if Laurentius already left, head down to see Eingyi at the Daughter of Chaos Bonfire; you will need to enter into the Chaos Servant Covenant for this service.
Northern Undead Asylum:
Titanite Slab #1: Before we carry on, we might as well also slay the Stray Demon in the Northern Undead Asylum. Navigate back to the Asylum Demon’s Boss Room & walk into the center of the room to fall through the floor where the Stray Demon will be waiting.
The Stray Demon does not have a Boss Soul but instead drops a Titanite Slab upon its death. We need 3 regular Titanite Slabs total to complete all the Weapon Reinforcement Achievements. We will get one more for completing Siegmeyer’s Questline, & our third from killing the Stray Demon again in NG+. There is an enemy we can farm for Slabs, but it is a very low drop rate. Try your best to hold onto 3 Slabs for the least amount of grief later on…
Blighttown:
NPC – Quelana of Izalith #1: With a Pyromancy Flame of +10 or higher, return to Blighttown. From the top of Quelaag’s Domain staring out into the Blighttown Swamps we can see two large stone columns ahead of us a ways into the swamp. Head over to the column to our left & we can find a woman garbed in black sitting on a small beach. This is Quelana, our final Pyromancy Merchant. She will only appear if we have a +10 Pyromancy Flame or have Summoned an Online Player into our world who has one.
When she asks if we are interested in her Pyromancies, of course say “Yes”.
Pyromancy #9 – Combustion: Purchased from Quelana of Izalith for 500 Souls. It can also be purchased from the Laurentius back at Firelink Shrine.
Pyromancy #10 – Fireball: Purchased from Quelana of Izalith for 800 Souls. If you chose the Pyromancer as your Starting Class, you will already have this Pyromancy. It can also be purchased from the Laurentius back at Firelink Shrine.
Pyromancy #11 – Great Combustion: Purchased from Quelana of Izalith for 5000 Souls.
Pyromancy #12 – Fire Orb: Purchased from Quelana of Izalith for 8000 Souls. It can also be purchased from the Laurentius back at Firelink Shrine.
Pyromancy #13 – Undead Rapport: Purchased from Quelana of Izalith for 10,000 Souls.
Pyromancy #14 – Fire Whip: Purchased from Quelana of Izalith for 10,000 Souls.
Pyromancy #15 – Great Fireball: Purchased from Quelana of Izalith for 20,000 Souls.
Pyromancy #16 – Firestorm: Purchased from Quelana of Izalith for 30,000 Souls.
To progress Quelana’s Questline, we need to purchase all of her Pyromancies; this may include Pyromancies previously purchased from Laurentius. Farm the Phalanxes for any Souls you need.
NPC – Quelana of Izalith #2: After all of Quelana’s Pyromancies are purchased, reload the Area & return to her. Speak with her, & she will request that we slay her mother… the Bed of Chaos. We were already going to do that… but now we can net ourselves another Pyromancy.
Alternatively, we can receive that Pyromancy just from killing her. It won’t save us killing the Bed of Chaos so there is not much point in doing this. Be sure you have all the Pyromancies we need from her first if you choose this option.
The Great Hollow 35-40:Make your way up the root ramp up into the Arch Tree in the Blighttown Swamp & we can find a Corpse holding the Plank Shield. From the Corpse, approach the left wall inside the trunk & strike it to reveal a secret chamber with a Chest. Walk around the Chest, & strike the wall behind it now to reveal yet another secret room. Navigate down the passage & we will eventually come to The Great Hollow Bonfire.
The Great Hollow… is awful; probably the worst Area in the game baring maybe the Crystal Cave. There are no Weapons or Spells we need here for Achievements although there are more than a few Titanite Lizards & Corpses with Titanite on them if you are brave enough to collect them. What we need most, is simply getting to the bottom of the tree so we can just get to the next Area afterwards. Be sure you are carrying Purging Stones with you in case you are Cursed by the Basilisks here! On that note, the Basilisks are a great way of obtaining Eyes of Death for the Gravelord Servant Covenant; make a point of killing them if you can.
Sequence 20: Everlasting Dragons
1. NG – Ash Lake, Demon Ruins
2. Reinforcement Weapons: 4/6
3. Pyromancies: 16/19
4. Sorceries: 23/24
5. Miracles: 11/23
6. Boss Souls: 6/16
7. Rare Weapons: 24/50
8. Achievements: 18/41
-----------------------------------------------------------------------------------------------------
Ash Lake 40-50:
Ash Lake Bonfire: After we pass through the Fog Gate at the bottom of The Great Hollow, we will enter Ash Lake; we can find the Ash Lake Bonfire on the beach to the right of the half pipe trunk we exit.
The Black Hydra: In the waters of Ash Lake, we can find the Black Hydra Mini-Boss. Though not needed for any Weapons, this Hydra will harass us as we make our way through the Area. It can be avoided, but we may as well kill it for some extra Souls.
Miracle #11 – Great Magic Barrier: Make your way along the massive beach in Ash Lake until the beach goes underneath an Arch Tree in the distance. Make your way around this tree & turn left to walk up a twisted root just before the beach becomes a windy pathway. Right before we encounter a Basilisk on this root, look over the edge to your right & you can see a massive hollow branch we can drop into. Do so, & head up inside the tree where we can find this Miracle on a Corpse on top of some large mushrooms.Achievement #18 – Covenant Path of the Dragon: Discover Path of the Dragon Covenant.
Return outside the Arch Tree & continue down the windy beach path onwards. The path will end with the Stone Dragon Bonfire & a massive Everlasting Dragon. Fortunately for us, it is an ally. Approach the Stone Dragon & pray to it; enter the Covenant to see the Joining Screen where we will unlock the Achievement. There are no Weapons or Spells we need from this Covenant.
Rare Weapon #23 – Dragon Greatsword: While we do not need anything more from the Covenant, we are not in fact finished with the Stone Dragon itself. Walk around behind the Dragon & we can see his massive tail dangling down… we need to chop it off for this Rare Weapon. Do not worry, this does nothing to the Dragon & he will not go hostile… what a stand-up dude.
That is all for this Area now, thanks to the Lordvessel, we can Warp out of here without having to backtrack our way through The Great Hollow.
Demon Ruins 65-70: With our side business settled, Warp to the Daughter of Chaos Bonfire & exit the Bell Tower into the Demon Ruins.
Ceaseless Discharge: From the Demon Ruins Bonfire, make your way down the hill & turn right along a narrow path halfway down. Walk along a narrow stone bridge over to the far side of the molten river, & pass through the Fog Gate. When we pass through the Fog Gate, no health bar or boss music kicks in… but the Fog Gate does not disappear either. When we round the corner, we can spot the grotesque Son of Chaos. He will not attack until provoked, so take this time to scan the Boss Room.
Ceaseless Discharge fulfils his name by blasting us with very powerful fire attacks; you will want good Fire Defense for this fight. Dodge his attacks left or right as best you can & strike his appendages to deal damage to him. When you are ready, loot the Corpse on the stone altar at the back of the Boss Room.
He does not drop a Boss Soul however his death will cool some of the molten lava below opening up the next half of the Demon Ruins.
Capra Garrison Bonfire: With the lava somewhat cleared, make your way across the charred ground to the right over towards a Capra Demon. After it is dispatched, carry on down the path & round the corner to see… many Capra Demons. As you slowly inch your way down the path towards them, look off the cliff edge to your right to see a Corpse on a lower down not far below you. Quickly drop down to it, & we can find this Bonfire hidden underneath where the Capras are. Be careful as a Burrowing Rockworm guards this Bonfire!
Rare Weapon #24 – Demon's Catalyst: When you are ready for yet another Boss fight, pass through the Fog Gate below the Capra Garrison Bonfire & we will face the Demon Firesage. It is almost identical to the Stray Demon except instead of Magic Damage it will do Fire Damage. Upon its death it will drop this Catalyst; though be sure you walk over & pick it up. Once again, this Boss does not have a Boss Soul either.
Some sources claim that this Weapon is not in fact needed for the Knight's Honor Achievement; most do however so it is safest collecting it.
Saving Solaire of Astora: Make your way up the stairs past the Firesage’s Boss Room & we can find an Elevator Shortcut that will take you up to the Daughter of Chaos Bonfire. Rest at the Bonfire, & equip your Pyromancy Flame & the Poison Mist Pyromancy. Head back down the elevator & backtrack your way near the entrance of the Boss Room. Just outside the room to your left, will be a hole in the wall with roots leading down to a secret room.
This root will lead you to four Chaos Bugs & a strange door we cannot open. The way we open this is by reaching Rank 2 in the Chaos Servant Covenant. Doing this will allow us to kill the Sunlight Maggot early & in turn save Solaire of Astora as he subsequently goes Hollow if we do not kill the Sunlight Maggot before reaching the Bed of Chaos. It is still way too early to give up 30 Humanity however, so normally, Solaire would die this playthrough… unless we cheat.
Equip your Poison Mist Pyromancy & press yourself against the center of the strange door & cast the Pyromancy (if you have 0 Attunement Slots then just equip the Darkmoon Séance Ring). When we do this, you should see a health bar slowly tick down as we have infected the Sunlight Maggot with Poison. This may take a few seconds, but eventually it will die. You will know it is the Sunlight Maggot & not a Chaos Bug because it will give you 100 Souls not 30. With this done, we have now saved Solaire which means we can Summon him for the battle with the Final Boss at the end of the game. The Sunlight Maggot does not respawn; the actual Sunlight Maggot head piece we need for the Tomb of Giants that it drops will be there when we walk around the long way…
Useful Item - Orange Charred Ring: Return to the Firesage’s Boss Room & we can find The Centipede’s Bonfire at the bottom of the stairs leading down at the back of the room. Believe it or not, that Fog Gate at the bottom of the next room leads to yet another Boss! If we are Human, we can find the Summon Sign of Knight Solaire at the bottom of the root ramp we walk down. The Centipede Demon is tough, & we will be taking a lot of Fire Damage. Consider putting on Havel’s Ring & wearing the Black Iron Armor Set.
When the Boss is defeated, we will receive this essential Ring.
Sequence 21: The Witch of Izalith
1. NG – Lost Izalith
2. Reinforcement Weapons: 4/6
3. Pyromancies: 17/19
4. Sorceries: 23/24
5. Miracles: 11/23
6. Boss Souls: 6/16
7. Rare Weapons: 25/50
8. Achievements: 19/41
-----------------------------------------------------------------------------------------------------
Lost Izalith 70-75:From the Respite Bonfire where we can find jolly Solaire, put on the Orange Charred Ring & make the arduous journey across the lava fields of Lost Izalith. You ever wonder why we only fight the upper bodies of Undead Dragons? Well, this is where their lower halves go… to hell.
Lava Field Bonfire: As we dash across the lava, we will come to a stone tower in the middle of the lava field. From here, carry on a little ways further & we will see another stone tower. Head underneath the large root to the lower level & make your way left around the tower. As we round the corner, we will duck under another root snaking underneath the over hang above us. Turn to the tower & strike the wall to our right here to reveal an illusionary wall & our Bonfire.
This Bonfire will be our major waypoint as we raid the city of Lost Izalith. To enter the city, strike out into the lava directly across from the Bonfire entrance in the tower to where a broken stone causeway is. We can then climb some roots up into the city from here.
Rare Weapon #25 – Izalith Catalyst: Navigate through the city until we come across a Daughter of Chaos… who is somehow still human though Hollowed. Slay this challenging Pyromancer & she will drop this Catalyst for us.
This is another Weapon that is speculated to not be necessary for the Knight's Honor Achievement; since most sources say it does, I would collect it anyways to be safe.
Pyromancy #17 – Chaos Fire Whip: After the Daughter of Chaos is killed, continue along past the Fog Gate (don’t go in there!) over to where another tentacley Chaos Eater is. Kill it & we can find this Pyromancy in a Chest behind where it was.
Before this next bullet in the guide, be sure you stock up on both Purple Moss Clumps & many Arrows.
NPC – Siegmeyer of Catarina #6: With the aforementioned Items collected, backtrack up past the Fog Gate & down the stairs we originally came up. From here, take a left down a large root into an area full of Stone Demons. Near the end of the area we can go right across a causeway leading to a Titanite Demon, or left into a dark tunnel that looks like a dead end.
Walk into the dark tunnel & the floor will give way, dumping us into a putrid Chaos Eater hive. Across from where we land, we can see the silhouette of an Onion Knight. Before we approach him though, we need to do something about the Chaos Eaters below us. As part of his Questline, he will aid us by jumping into the pit to kill them… except it’s highly likely he dies if he does. To help him, we need to kill all but one Chaos Eater; killing all five of them before having him help us will actual make him commit suicide because he feels so useless, so definitely leave one alive.
After we have killed 3/5 of the Chaos Eaters with our Bow, walk around the pit to speak with Siegmeyer. Equipping the Rusted Iron Ring is very helpful for the upcoming fight… Exhaust his dialogue & he will leap into the pit to repay his debt; be warned that only the first four Chaos Eaters are visible with the fifth being around the corner in another room close by that may catch you by surprise. After you are sure only one Chaos Eater is alive (but weakened), let Siegmeyer kill the final one & speak with him. After the battle he will take a nap… seemingly immune to the Poison water. Siegmeyer must survive this fight with over half health. If he does not, then when we go to speak with him, he will die during the dialogue sequence which will rob us of the Titanite Slab reward we will get in our final encounter with him.
Red Titanite Slab #1: Down in the stagnant waters of the Chaos Eater hive, head down the only path available to us then turn left at the T-junction. Skirt around a square pit & then take another left down the corridor. As we head down it, we can see a short passage off our right that ends in a Chest. This Chest contains a Red Titanite Slab; remember this location as we will be returning here in NG+ for 2/2 Red Titanite Slabs for the Fire & Chaos Weapon Reinforcements.
Useful Item – Sunlight Maggot: Either use a Homeward Bone or navigate your way out manually up the roots out of the Chaos Eater hive back to where we are. Once we are back at the top, head out across a bridge across from where the hive is located & either dodge past or kill the Titanite Demon. This is the hardest Titanite Demon in the game.
However, you get past it, carry on down the stairs at the far side & we can find more Chaos Bugs… & Solaire. If you followed the steps to save him, we can find Solaire just sitting on the ground; sane, with the Sunlight Maggot head piece on the ground a little ways behind him. Speak with him, & though he sounds a bit forlorn, this is what we do to make him a Summon for the Final Boss.
If you did not save Solaire or correctly do it, Solaire will be insane & he will have the Sunlight Maggot on his head. You will have to kill Solaire to get the head piece. The Sunlight Maggot is what will allow us to safely explore the Tomb of Giants.Achievement #19 – Defeat Bed of Chaos: Defeat the Soul Lord Bed of Chaos.
Story Related. When all is done in Lost Izalith, pass through the Fog Gate & prepare for one of the strangest Boss battles in the Dark Souls series. To kill the Bed of Chaos we have to destroy both Nodes on either side of the Boss Room. Getting to these is such a pain as you will find out; trying to snipe them with a Bow can be a much easier strategy. When these are destroyed, we now have to charge straight at the Bed of Chaos & she will destroy the floor in front of herself. This in itself is usually certain death; she will destroy the floor & we have to somehow land on some roots below. This is the most infuriating part of the fight. After some trial & error (or a video guide) line up your fall to land on the roots below & quickly follow them to the remnants of the Witch of Izalith herself. One strike is all it will take to kill her.
Note that between our deaths, make a habit of killing the two Chaos Eaters on either side of the Bed of Chaos’s Fog Gate with the Covetous Gold Serpent Ring equipped as they have a 10% chance of dropping a Red Titanite Chunk & a 0.3% chance of actually dropping a Red Titanite Slab!
Sequence 22: Pride Before A Fall
1. NG – Blighttown, Firelink Shrine, Ash Lake, Tomb of Giants, The Catacombs
2. Reinforcement Weapons: 4/6
3. Pyromancies: 18/19
4. Sorceries: 23/24
5. Miracles: 13/23
6. Boss Souls: 6/16
7. Rare Weapons: 25/50
8. Achievements: 19/41
-----------------------------------------------------------------------------------------------------
Blighttown:
NPC – Quelana of Izalith #3: After we have defeated the Bed of Chaos, return to Quelana & we can complete her Questline to receive her final Pyromancy.
Pyromancy #18 – Fire Tempest: Obtained after defeating the Bed of Chaos & completing Quelana’s Questline. Can also be obtained just by outright killing her; be sure you have purchased all her Pyromancies first if you do this…
Firelink Shrine:
NPC – Sieglinde of Catarina #3: Warp back to Firelink Shrine, & if we helped Siegmeyer down in Lost Izalith, we can once again find Sieglinde near the Bonfire. Speak with her, & she will tell us that her father has gone on his final journey & thank us for the part we played…
Ash Lake:
NPC – Sieglinde of Catarina #4: After meeting Sieglinde at Firelink Shrine, Warp to the Stone Dragon Bonfire in Ash Lake. Make your way to the very far end of the beach to where the Ash Lake Bonfire is, & if you followed Siegmeyer’s Questline in Lost Izalith, you will find Sieglinde standing over her father’s corpse. He had gone Hollow after finally achieving success… & she came to put him to sleep forever.
Titanite Slab #2: Speak with Sieglinde as she stands over her father’s corpse in Ash Lake & we will be rewarded with a Titanite Slab for completing their Questlines.
We only need to kill the Stray Demon in NG+ to have 3/3 Titanite Slabs for the Weapon Reinforcement Achievements. Any extra Slabs we may get past 3 are yours to use as you choose.
Tomb of Giants 70-75:With the Sunlight Maggot from Lost Izalith, it is now safe for us to traverse the Tomb of Giants. Warp to the Catacombs Bonfire (or Firelink Shrine) & navigate to the top of Pinwheel’s Boss Room to enter the Tomb of Giants.
Tomb of Giants Bonfire: From the top of Pinwheel’s Boss Room, slowly make your way through the darkness with the help of the Sunlight Maggot, Cast Light, or the Undead Lantern. Follow the Prism Stones set by Reah & her Clerics through the Area & down the sarcophagus slides until we are plopped directly in front of an NPC. Ignore him for now, & walk to the cliff edge to the left of where we drop off the slide & we can find a ladder going down to a lower landing. This will take us to the Warp-able Tomb of Giants Bonfire.
Covenant Item – Eyes of Death x3: From the Bonfire, climb up the nearby ladder (still ignoring the NPC) & follow a pathway under the sarcophagus we slid down. Keep following path left up the cliff past a square crypt roof & fight off a Giant Skeleton Swordsman & Archer. Climb up a ladder & fight off two more Giant Skeleton Swordsmen in a small stone room. Climb up two iron inset ladders & drop off the top onto the other side of the room where we can loot a Corpse holding three Eyes of Death.
NPC – Patches the Hyena #1: Approach the strange NPC in Tomb of Giants & speak with them. Answer his question however you like though it is best if you say you are not a Cleric & approach the Prism Stone on the ledge to his right where we will receive a helpful nudge.
NPC – Reah of Thorolund #2: After regaining control of our Character, begin following the wall along past three Corpses to the right. We can find Reah kneeling on the ground just past the first pillar of the pit. Speak with her… & she is in big trouble. Locate her now Hollowed escorts a little ways further in this pit & slay them. Return to Reah & she will thank us with a Miracle; she will later flee the Tomb of Giants & we can find her in Undead Parish…
Miracle #12 – Replenishment: We will receive this Miracle from Reah as a reward from saving her in the Tomb of Giants.
NPC – Patches the Hyena #2: Navigate your way out of the trap pit back to Patches & he will be rather surprised. While we can kill him, he becomes a Merchant in Firelink Shrine if we do not. When he asks to be “jolly undead outcasts” just say “Yes”. If you said you were a Cleric before however, tell him “No” or he will become hostile & attack us.
He has a Rare Weapon we need for the Knights Honor Achievement; you can kill him & he will drop it, or we leave him alive & can buy it from him amongst other Items in Firelink Shrine. The Weapon is all we really need from Patches; he will head to Firelink Shrine after we defeat Nito.
The Catacombs:
Eye of Death Farming: Now that we collected those 3 Eyes of Death in the Tomb of Giants, we should now have at least 6 Eyes of Death. Before we carry on in Tomb of Giants, let us quickly complete the Gravelord Servant Covenant & get to Rank 1. Killing Gravelord Nito will disable the Covenant, voiding us of its final Miracle until NG+.
There are a few ways we can collect the last 4 Eyes of Death if you still need some. The fastest way is to farm Basilisks. Basilisks have a 6% chance to drop them & can be found in the Depths or The Great Hollow. The Great Hollow, though an awful Area, has the most Basilisks.
Lastly is PvP. If you are a member of the Gravelord Servants you can consume an Eye of Death to Invade another Player’s World. Upon slaying the Host, you will receive an 2 Eyes of Death in return. This is risky though is if you lose, you just lost an Eye of Death.
Miracle #13 – Gravelord Greatsword Dance: With 10 Eyes of Death, return to the Titanite Demon’s crypt in the Catacombs & hop into that sarcophagus to be transported to Nito’s Boss Room. Offer the Eyes of Death & we will receive this Miracle completing this Covenant.
Ranks 2 & 3 only increase the strength of this Miracle.
Sequence 23: First of the Dead
1. NG – Tomb of Giants, Undead Parish, Firelink Shrine
2. Reinforcement Weapons: 4/6
3. Pyromancies: 18/19
4. Sorceries: 23/24
5. Miracles: 20/23
6. Boss Souls: 6/16
7. Rare Weapons: 29/50
8. Achievements: 20/41
-----------------------------------------------------------------------------------------------------
Tomb of Giants:
Black Knight Encounter #7: Return to Tomb of Giants & carry on past where Patches is. After the first horrible Skeleton Beast, pass through the Fog Gate & we will be shortly ambushed by a Halberd Black Knight.
Rare Weapon #26 – Effigy Shield: Defeat the Black Knight & begin following this new area down to the left underneath the floor into a small cave. As soon as we enter the cave, take the exit to our right & follow a narrow path along the cliffs over to an isolated Corpse holding this Shield.
Barrow Bonfire: Drop down to the next level of the small cave & fight off the Giant Skeleton Swordsman & Skeleton Beast that await us. Turn around & walk underneath the floor we dropped down from & go straight to the cliff edge on the other side. Follow another narrow path to the left of the cliff edge & we can find a Bonfire tucked away in an alcove.
Useful Item – Covetous Silver Serpent Ring: Return back to the top of this room where there is that Giant Skeleton Archer. It will have a Corpse near it that holds a Soul of a Brave Warrior. From where the Corpse is, take a run & leap off the ledge directly ahead of the Corpse & we will land on a slightly narrow ledge below. Follow this ledge along to collect this Ring off a Corpse. Be warned as we will be ambushed by many Bone Towers (a good source of White Titanite Chunks). This Ring will be essential for Soul farming, especially in NG+.
Rare Weapon #27 – Grant: Return to the Barrow Bonfire & Reverse Hollowing to gain your Human form. The next two Weapons we need are drops from an Invading Phantom that only appears if Nito is still alive. You may want to familiarize yourself with the way to the Phantom beforehand as there are more then a few Skeleton Beasts along the way.
Kill or run past the 3 Skeleton Beasts to the right, down a winding path to a ladder leading further down. At the bottom of the ladder we can find a long pathway along the cliffs with an unsettling view of the Ash Lake Area. If we are Human, walk along the pathway, past a tunnel into the cliff wall, & we will be promptly Invaded by the Red Phantom Paladin Leeroy. Fight defensively & Backstab him whenever he tries using the Heal Miracle. He will drop Grant upon his death.
Do not let Leeroy roll or fall off the edge of the area or we will not be able to collect his Weapons! Try luring him further up the pathway or into the cave close to where he spawns.
Rare Weapon #28 – Sanctus: Along with Grant, Red Phantom Paladin Leeroy will also drop his Shield, Sanctus, when killed.
White Titanite Slab #1: Enter through the tunnel into the cliff wall now & navigate to the chamber just outside of Nito’s Boss Room; this Chamber will be full of Pinwheel Servants. Fight your way through the Pinwheels & strange Skeleton Babies until you reach the ramp just before Nito’s Fog Gate. At the foot of the ramp leading up, there will be a small tunnel off our right. Drop into it & follow it to the dead end where we can find this Slab on a Corpse.
We will need to return here in NG+ to get the 2/2 White Titanite Slabs we need.Achievement #20 – Defeat Gravelord Nito: Defeat the Soul Lord Gravelord Nito.
Story Related. When you are ready, & have achieved Rank 1 in the Gravelord Servant Covenant, enter the Fog Gate & prepare for battle. Unless you have a Divine Weapon or use the Astora Straight Sword or Grant, the Skeletons Nito has for minions will keep respawning. This isn’t damning, just makes it a harder fight; fortunately, by this point they are easy to kill quickly.
Regardless if you can or cannot permanently kill the Skeletons, stay near the beginning of the Boss Room; at the far back are three Giant Skeletons Swordsmen that will make things very very difficult for you. Defeat Nito to unlock the Achievement.
Firelink Shrine:
Rare Weapon #29 – Crescent Axe: With Nito dead, return to Firelink Shrine & make your way to the Firelink ruins where Kingseeker Frampt is. From here, start making your way towards the graveyard & we can find Patches crouching just outside the ruins. Not only does he sell… the gear of dead Clerics, but he will also sell his Crescent Axe for 10,000 Souls.
If you can’t be bothered to buy it, & need nothing from his shop, then you can kill him instead & he will drop the Weapon for us.
Undead Parrish:
NPC – Reah of Thorolund #3: With Reah saved from the Tomb of Giants, make your way to the Undead Parish church up the elevator from Firelink Shrine. Reah can be found kneeling in front of the altar with the dead Firekeeper on it. Speak with her, & we will be able to purchase a bunch of Miracles from her (the Covenant we can join is just The Way of White). Reah sells all of the same Miracles as Petrus but at a drastically reduced price.
Miracle #14 – Seek Guidance: Purchased from Reah of Thorolund for 500 Souls. Alternatively sold by Petrus of Thorolund for 2000 Souls.
Miracle #15 – Heal: Purchased from Reah of Thorolund for 1000 Souls. This is also the starting Miracle if you chose the Cleric Class. Alternatively sold by Petrus of Thorolund for 4000 Souls.
Miracle #16 – Force: Purchased from Reah of Thorolund for 1000 Souls. Alternatively sold by Petrus of Thorolund for 4000 Souls.
Miracle #17 – Great Heal Excerpt: Purchased from Reah of Thorolund for 2000 Souls. Alternatively sold by Petrus of Thorolund for 10,000 Souls.
Miracle #18 – Magic Barrier: Purchased from Reah of Thorolund for 6000 Souls.
Miracle #19 – Great Heal: Purchased from Reah of Thorolund for 10,000 Souls.
Miracle #20 – Wrath of the Gods: Purchased from Reah of Thorolund for 10,000 Souls.
(Miracle #2 – Homeward:) Purchased from Reah of Thorolund for 1000 Souls. Alternatively sold by Petrus of Thorolund for 8000 Souls.
This is listed as Miracle #2 due to being purchased prior in the guide for farming. If you never bought it from Petrus, be sure to buy it now from Reah.
Firelink Shrine:
NPC – Petrus of Thorolund #2: If you do not have the Souls to purchase all of the Miracles you need from Reah, immediately go to Petrus in Firelink Shrine… & kill him. If we do not, Petrus will take it upon himself & kill Reah after we defeat any upcoming Boss. If he does, we will be voided of Reah’s Miracles until NG+; if you got the hints from Lautrec or Oswald… then you already know Petrus is a bad man.
Sequence 24: The Legend of Artorias
1. NG – Artorias of the Abyss DLC, Darkroot Garden, New Londo Ruins
2. Reinforcement Weapons: 4/6
3. Pyromancies: 18/19
4. Sorceries: 24/24
5. Miracles: 20/23
6. Boss Souls: 7/16
7. Rare Weapons: 29/50
8. Achievements: 24/41
-----------------------------------------------------------------------------------------------------
Artorias of the Abyss DLC:The Artorias of the Abyss DLC is not needed for any Achievements, however if we beat it, it will impact the opening cinematic for the upcoming Area Boss of Darkroot Garden. To access it, if you have the Broken Pendant from the Crystal Golem in the beginning of The Duke’s Archives then make your way to the back of Darkroot Basin. Walk into the cave where we fought the Golden Crystal Golem & saved Dusk of Oolacile & there will be a black portal that will take us into the DLC. It is a very challenging DLC, but I highly recommend playing through it for extra Souls, Titanite, Weapons, Armor, & Lore!
AoA DLC - Royal Wood:
Blue Titanite Slab: If you do enter the DLC, we can collect three Titanite Slabs throughout it that will assist us in our Weapon Reinforcement Achievements & reduce farming. After defeating the initial Sanctuary Garden Boss & we enter the Royal Wood shortly after, head up the first slope across the bridge. Make your way into the center of this forest just up ahead & we can find a Chest in a murky pool guarded by Stone Guardians (it is the same Chest we originally found the Enchanting Ember in). This Chest, will contain a Blue Titanite Slab.
Titanite Slab: This Titanite Slab will be found in a Chest hidden behind the waterfall found within Black Dragon Kalameet's boss room. You can enter this boss room early or after you have shot down Kalameet (entering in early may mean certain death). Before entering Artorias's boss room in the large coliseum, we can find a short pathway close to the elevators that will lead us down to a small creek. Follow the creek down past all the Wild Dogs to find Kalameet's Fog Gate.
AoA DLC - Chasm of the Abyss:
White Titanite Slab: Near the end of the DLC when we are right above the final boss's Fog Gate, we can find a White Titanite Slab on a Corpse just to the left before we begin walking down the slope to the boss room.
For reasons unknown, there is no Red Titanite Slab to be found in the DLC...
Darkroot Garden:成就 #21 – Art of Abysswalking:习得深渊漫步技艺。
剧情相关。无论是否完成【深渊的阿尔特留斯】DLC,传送到不死教区营火,然后前往黑森林庭院。穿过桥梁进入庭院的第三部分,经过森林猎人阿尔维娜所在位置,一直走到尽头的巨大门前。进入 boss 房间……准备好哭泣吧。
击败希夫会获得阿尔特留斯的契约,这是进入深渊与四王战斗所必需的戒指。
Boss 灵魂 #7 – 希夫的灵魂:在黑森林庭院击败希夫以获取其灵魂。与《黑暗之魂》中的大多数 Boss 不同,我们实际上需要三份希夫的 Boss 灵魂。这需要我们在二周目杀死他,以及三周目唯一必须击杀的 Boss(除了前往亚诺尔隆德途中的那些 Boss)。
新隆德遗迹 70-80级:装备阿尔特留斯契约,传送回传火祭祀场,从篝火处经过防火女安娜塔西亚往下走。乘坐电梯下去,我们就会进入新隆德。这里的幽灵和女妖只有在你处于诅咒状态时才能被伤害。或者,你可以使用【短暂诅咒】道具,它会暂时诅咒你且没有任何负面效果,效果持续5分钟。我们可以在新隆德找到【短暂诅咒】,有5%的概率从幽灵身上掉落,或者由不死镇女商人以4000灵魂出售。在通往废墟的水上木栈道前,你可以立即找到两个。
如果你运气非常好,幽灵可能会掉落锯齿幽灵短剑,这是一把带有永久诅咒附魔的匕首。
【有用物品 - 防火女的灵魂】:穿过木栈道,我们将进入新隆多遗迹。消灭迎接我们的两个幽灵,然后前往第一个区域的最右侧,那里有一个敞开的门口,里面曾是一条长长的石隧道。走到尽头,穿过另一个敞开的门口,小心地沿着狭窄的石桥走到水面上,朝着一具尸体走去。快到桥的尽头时,我们会遭到三个幽灵的伏击,所以要小心!防火女的灵魂就在尽头的尸体上。NPC - 英格瓦 #1:穿过新隆多,通过一道雾门,最终进入一座如同迷宫般的大型教堂。在教堂内,径直穿过一道门,然后左转进入一个宽敞的房间,地板上散落着骨头,远端有一名女妖。击杀女妖和幽灵后,爬上房间后方壁炉内的铁梯。到达教堂屋顶后,可以找到一名身着绯红色长袍的魔法师英格瓦。与他对话,由于我们持有王器,他会给予我们【封印钥匙】,用于排空新隆多的积水。
法术 #24 - 抗咒:再次与英格瓦对话并进入他的商店。除了以1000灵魂的价格出售【短暂诅咒】外,他还以5000灵魂的价格出售此法术。成就#22 - Wisdom of a Sage:获取全部24个法术。
如果一直按照本指南操作,在向内环购买最后一个法术后,我们就会解锁这个成就。
如果成就未解锁,请查阅本指南引言部分的【黑暗之魂:重制版】成就清单,看看还缺少哪些法术。我们可以在二周目收集它们……
【排水新隆多】:进入电梯房,使用封印钥匙打开通往水闸拉杆的门。拉动拉杆排水,这样我们就能进入新隆多的下层区域。
现在我们可以使用黑森林盆地篝火,通过飞龙谷的捷径前往新隆多;每次经过时直接冲刺跑过飞龙即可。成就#23 - Defeat the Four Kings:击败四王,灵魂的继承者。
剧情相关。四王可以说是《黑暗之魂》中最难的 Boss。进入他们所在的深渊时,我们需要装备【阿尔特留斯的契约】,否则会从“地面”掉落。穿过雾门,走下楼梯,在楼梯底部跳入深渊。这不是一场技巧之战,而是一场比谁更快造成伤害的战斗。装备上你能挥舞的最强武器和你能舒适穿着的最厚重盔甲……然后正面硬拼。你离王越近就越安全,因为这会限制他们能使用的攻击以及你受到的伤害。如果你在黑森林庭院的月光蝶 boss 战中召唤过她,并且处于人类状态,那么我们可以召唤魔女贝阿特丽斯来参与四王的战斗。我们可以在四王雾门所在通道的右侧找到她的召唤印记,该位置靠近一个藏在角落的暗灵。如果你确实召唤了她,那么在穿过雾门后,必须立即杀死漂浮在深渊上方的幽灵。贝阿特丽斯没有被诅咒,所以她会站在那里攻击幽灵,除非我们杀死幽灵,否则她永远不会和我们一起进入深渊。贝阿特丽斯在一周目是个巨大的帮助!
步骤25:传火
1.新游戏 - 初始之火的火炉,传火祭祀场,病村
2. 强化武器:4/6
3. 咒术:19/19
4. 奇迹:20/23
5. boss 灵魂:8/16
6. 稀有武器:34/50
7. 成就:25/41
-----------------------------------------------------------------------------------------------------
初始之火的火炉 80-90级:当我们拥有全部四个王魂后,返回王下的监视者弗拉姆特和传火祭祀场,将它们燃烧。随着王魂在祭坛中被点燃,初始之火的火炉大门将会打开,我们就能进入游戏的最终区域。不要穿过该区域尽头的雾门,否则会触发最终 boss 战!在完成新游戏(NG)之前,我们需要做几件事:
稀有武器30 - 黑骑士盾:初始火炉的五个黑骑士会刷新,是刷取所有黑骑士装备的最佳地点。如果还没有这些装备,花时间刷取你仍需要的武器。任何黑骑士都有5%的几率掉落黑骑士盾。
稀有武器31 - 黑骑士剑:任何持剑黑骑士都有20%的几率掉落黑骑士剑。初始火炉有两个持剑黑骑士可供刷取。
稀有武器32 - 黑骑士大剑:任何持大剑黑骑士都有20%的几率掉落黑骑士大剑。初始火炉有一个持大剑黑骑士可供刷取。稀有武器#33 - 黑骑士戟:黑骑士戟有20%的概率从任何持戟黑骑士处掉落。在初始之火的火炉可以刷到一个持戟黑骑士。
稀有武器#34 - 黑骑士巨斧:黑骑士巨斧有20%的概率从任何持巨斧黑骑士处掉落。在初始之火的火炉可以刷到一个持巨斧黑骑士。
传火祭祀场:
添火篝火:在完成最后的任务时,如果你有多余的人性,不妨考虑给一些篝火添火。建议将可以用主祭瓮传送的篝火以及其他你想添火的篝火至少添火至15次。在二周目,我们会失去主祭瓮和添火仪式,因此提前做好准备能让你在下周目更轻松。病村:
咒术19 - 混沌风暴:我们一周目的最后一项任务是从混沌的仆人誓约处收集游戏中的最后一个咒术。我们需要将誓约等级提升至+2,这需要向费莲诺尔女王献上30个“软”人性。目前,我们对人性的需求不大,在二周目还会获得更多。趁着我们拥有注火秘法,去任意地点注火并吸收剩余的人性吧。达到+2等级后,我们就能获得这个咒术。
如果需要更多人性,在公爵书库刷 Pisacas 是最快的方法。进入二周目时,储备一定数量的人性道具以便召唤NPC协助 boss 战仍然是个好主意。在二周目(NG+)中, Boss 的强度会大幅提升,我们肯定需要所有能获得的帮助!成就#24 - 咒术师的羁绊:收集全部19个咒术。
如果一直按照本指南操作,在从混沌仆人誓约处收集到最后一个咒术后,我们就会解锁这个成就。
如果成就未解锁,请查阅本指南开头的【黑暗之魂:重制版】成就清单,看看还缺少哪些咒术。我们可以在二周目收集它们。
实用物品 - 防火女的灵魂:现在我们已经完成了混沌仆人誓约的相关内容,可以从【白蜘蛛女】处获得最后一个防火女的灵魂。击倒她即可收集;注意这会禁用该区域的营火。准备迎接挑战吧……
初始之火的火炉:
Boss灵魂#8——葛温的灵魂:当你完成所有武器的收集与刷取后,前往初始之火的火炉尽头的雾门,准备最终之战。如果你在失落伊札里斯救过他,就能在通往雾门的螺旋楼梯顶部找到太阳战士索拉尔的召唤印记。
击败薪王以收集他的灵魂。我们只需要葛温的灵魂来制作一把稀有武器,但之后还需要用它来获取太阳战士誓约的最终奇迹。加上希夫的第三个灵魂,这就是我们必须进入二周目的唯一原因。Achievement #25 – To Link the Fire: Reach "To Link the Fire" Ending.
Story Related. After defeating Gwyn, approach the Bonfire in the center of the Kiln & Link it to complete NG & unlock the Achievement.
Alternatively, you can walk out of the Boss Room & unlock the Dark Lord Achievement which we will be getting on our NG+ playthrough.
60% Complete
Sequence 26: NG+
1. NG+ – Undead Parish, Darkroot Garden, Northern Undead Asylum, Depths, Blighttown
2. Embers: 3/10
3. Reinforcement Weapons: 4/6
4. Miracles: 20/23
5. Boss Souls: 10/16
6. Rare Weapons: 34/50
7. Achievements: 25/41
-----------------------------------------------------------------------------------------------------
When NG+ begins, carry on as you would; I recommend re-beating everything 100% again if nothing else than for more Levels & Titanite drops. We need to collect the next batch of Boss Souls, final Reinforcement Weapons, as well as locating all 10 Embers we need for Reinforcement. Once we beat up to the Kiln of the First Flame, we will be farming for Titanite & unlocking all of the Weapon Reinforcement Achievements as well as collecting all but the last Rare Weapon (Sif’s final Boss Weapon). If you missed any Rare Weapons or Spells in NG, make sure you collect them in NG+.
As well, we need to make a point of getting 25 Faith if you have not already done so. We will be covering the Warriors of Sunlight Covenant in NG++ but we need the 25 Faith to join them. We are using NG+ as our grinding playthrough so we can complete NG++ as fast as possible. You also want to make a point of collecting 10 Sunlight Medals as well; Summon Solaire whenever you can help it. He can be Summoned for the Bell Gargoyles, Gaping Dragon, Orenstein & Smough, Centipede Demon, & Gwyn Boss fights.
Note that if you play Online, being Summoned into another Player’s World & successfully defeating a Boss with them will reduce this requirement by 5. If you have a Faith of 10, you only need to defeat three Bosses in jolly cooperation to be able to join the Covenant.
Undead Parish:
Key – Basement Key: After defeating the Taurus Demon, navigate your way through to the Undead Parish until you are at the front entrance of the large church (not the side entrance) that is past the Fang Boar. From the front entrance, turn around & walk down some stairs until you are on the other side of the gate where the Fang Boar guards. Behind the gate will be a Corpse holding this Key; this will lead us into lower Undead Berg & eventually to the Depths…
Useful Item – Ring of Favour & Protection #2: While you may already have the Ring of Favour & Protection collected & equipped, it can be useful owning a second copy. During our NG+ Four Kings fight I highly recommend freeing up one of your Ring Slots, which if you have this Ring equipped, will break it. This way with our second copy, you can re-equip the Ring after the Boss Fight is over with.
Either kill Lautrec in his cell or progress his Questline to Anor Londo & kill him there; either way will reward us with the Ring. You will need to collect the Mystery Key from the room full of Hollows close to the Fang Boar in Undead Parish to free him.
Darkroot Garden:
Boss Soul #9 – Soul of the Moonlight Butterfly: When you reach Darkroot Garden, make your way through the Area to the Moonlight Butterfly Boss Room.
Summon Witch Beatrice if you want her help again for the Four Kings later on; unfortunately for us, we will be fighting them waaaay earlier in this playthrough, as I will explain why later… I highly recommend having her for that fight.
Slay the Moonlight Butterfly for its second Boss Soul.
Ember #1 – Divine Ember: When the Moonlight Butterfly is defeated, carry on across the bridge into the tower at the far side. Head up the stairs & we can see a petrified blacksmith. Pillage his Corpse for the Watchtower Basement Key & the Divine Ember.
We can take this Ember to Andre & he will be able to imbue Divine Weapons for us.
Key – Crest of Artorias: Farm the 20,000 Souls needed for the Crest of Artorias so we can access the second & third sections of Darkroot Garden.
Ember #2 – Enchanted Ember: Using the Crest of Artorias, make your way across the bridge past Alvina of the Forest Hunters into the third section of Darkroot Garden. At the bottom of the stairs on the other side, leave the ruins & make your way into the middle of this new forest, slightly off your right. Here there will be a pool of water with a Chest containing this Ember in it. Be careful though, there are two Large Mushroom-Men guarding it. They punch VERY hard. Its easiest luring them away & stealing the Ember.
We can take this Ember to Rickert of Vinheim in the New Londo Ruins to imbue Enchanted Weapons for us.
Northern Undead Asylum:
Titanite Slab #3: If you are still needing the third Titanite Slab, return to the Undead Asylum & take out the Stray Demon for one as a reward.
If you still need more you can re-complete Siegmeyer’s Questline again or farm them off Darkwraith Knights once we reach the end of the playthrough.
Key – Peculiar Doll: We will need to enter the Painted World of Ariamis once again to collect an Ember we need. Make a pit stop at your old cell in the Asylum to pick up the Doll to allow us passage inside the Painting.
Depths:
Ember #3 – Large Ember: Make your way down into the Lower Undead Burg using the Basement Key & go slay the Capra Demon Boss. Enter into the Depths & head inside the grungy food kitchen. Down in its lower level we can find the Undead Butcher still going ham on a slab of meat. Defeat the Butcher, & we can find this Ember inside a Chest to the left of its cutting table.
We can take this Ember to Andre in the Undead Parish to advance Standard Weapon Reinforcement to +10 for us.
Blighttown:
Boss Soul #10 – Soul of Quelaag: There are two ways we can get to Quelaag, the natural way down through the Depths/Blighttown, or we can take the back entrance to Blighttown Swamp through the Valley of Drakes. I recommend going the Valley of Drakes route, but only if you are confident with your pathfinding/survivability. Are only Bonfire on this route is at the very bottom in the Blighttown Swamp, so if you die you have to re-navigate the whole way from the Darkroot Basin Bonfire through Valley of Drakes again. If you don’t want to risk it, just take the longer/“safer” route through the Depths.
Slay Quelaag to receive her second Boss Soul.
Sequence 27: The Chosen Undead
1. NG+ – Firelink Shrine, Sen’s Fortress, Anor Londo, Painted World of Ariamis, Darkroot Garden, New Londo Ruins
2. Embers: 5/10
3. Reinforcement Weapons: 5/6
4. Miracles: 20/23
5. Boss Souls: 14/16
6. Rare Weapons: 34/50
7. Achievements: 25/41
-----------------------------------------------------------------------------------------------------
Firelink Shrine:
NPC – Kingseeker Frampt #1: After ringing both Bells of Awakening, we can find Kingseeker Frampt in his usually spot in the Firelink Shrine ruins. Frampt is essential in this playthrough… essential to avoid! Before obtaining the Lord Vessel, we are able to speak with Frampt & sell him Items. Once we obtain the Lord Vessel, we cannot speak to him or we will be taken down to the Firelink Altar.
Before going to Sen’s Fortress, you may want to consider blasting through The Catacombs & taking out Pinwheel to obtain the Rite of Kindling first.
Sen’s Fortress:
Boss Soul #11 – Core of An Iron Core Golem: Slog your way through Sen’s Fortress & get to the Iron Golem. Summon good ol’ Iron Tarkus for the battle if you need him.
Slay the Iron Golem to receive its second Boss Soul.
Anor Londo:
Boss Souls #12 – Soul of Gwyndolin: If you never sold the Darkmoon Séance Ring, head to the Darkmoon Tomb Bonfire & pass through the Gwyn statue to get to Gwyndolin’s Fog Gate. Since we already dealt with the Blades of the Darkmoon Covenant, pass through the Fog Gate & take out Gwyndolin right off the bat.
Slay him to receive his second Boss Soul.
Covenant Item – Sunlight Medal x3: Navigate all the way through Anor Londo until you reach the Palace Bonfire, past the gauntlet of Dragonslayer Silver Knights. From the Bonfire, we can find 3 Sunlight Medals in a Chest over in the room directly across from where the Bonfire is here.
Reinforcement Weapon #5 – Occult Club: From the Bonfire, enter the room at the far end past the spiral stair case, through the door to the left. Strike the wall at the back of the fireplace to enter the secret room below. Take out the Mimic to receive our second copy of the Occult Club.
We need this second copy to simplify getting the Divine Weapon Reinforcement Achievements.
Boss Soul #13 – Soul of Orenstein/Soul of Smough: In the massive palace entrance, reach the Fog Gate for this deadly duo. Summoning Solaire can be useful for distractions but you’ll notice his survivability is greatly reduced.
Be sure you kill the Boss whose Soul you already have first so that the super charged Boss you fight will give you your needed Soul. If you have Smough’s Boss Soul, kill him first so we will get Orenstein’s Boss Soul after the fight or vice versa. Double check to make sure your killing the right Boss last!
The Lordvessel: Speak with Gwynevere, & we will be awarded with the Lordvessel. Now that it is in our possession, we cannot speak with King Seeker Frampt at all or we will void the Darkwraith Covenant on this playthrough!
If for some reason you accidentally do speak with him & are transported down to the Firelink Altar; do not place the Lordvessel on the Altar & just use a Homeward Bone or die to escape. I cannot guarantee that this still won’t void the Covenant, but in theory, so long as the Lordvessel is not placed on the Altar it should be alright. But even with extensive research online, I cannot confirm this!
Painted World of Ariamis:
Ember #4 – Dark Ember: While we do not need a second copy of Priscilla’s Boss Soul, we do need to re-enter the Painted World of Ariamis to collect an Ember unfortunately. Navigate to the courtyard well & locate the Annex Key down inside it. Use it to unlock the door, which is also found in the courtyard, & make your way up to the top of the stairs. From here, head straight down a corridor towards an Engorged Zombie. Follow it along to find two more down on a small patio where we can find another petrified blacksmith. Loot it to collect this Ember; be careful, two Crow Demons will ambush us when we grab it!
We can take this Ember to Andre in the Undead Parish to imbue Occult Weapons for us.
If you already got Priscilla’s Dagger from her Tail-Cut, feel free to leave her alive & take her up on her offer to exit the Painted World peacefully. Walk on past & take the leap out of the Painting… unless of course, you want more Souls.
Darkroot Garden:Now for the divergent part of our playthrough, because we cannot speak to Frampt to place the Lordvessel to unlock the next arc of the game we are forced to fight the Four Kings early. This is the latest point in the playthrough we can delay this fight as all other Areas are locked until we place the Lordvessel on the Firelink Altar. The Darkwraith Covenant leader will be the new recipient of the Lordvessel but he will only appear in the Four Kings Boss Room… after they are defeated.
Boss Soul #14 – Soul of Sif: Head to the massive doors at the far end of Darkroot Garden & dispatch man’s best friend to receive Sif’s second Boss Soul & the Covenant of Artorias.
New Londo Ruins:
NPC – Ingward #1: Make your way through New Londo as you would & speak with Ingward to receive the Key to the Seal.
Ember #5 – Very Large Ember: Drain the water to access the lower levels of New Londo & make your way to the first stone structure with three Darkwraith Knights & a Mass of Souls in it. To the far-right side of the room we can find stairs leading up to the second floor. Follow the second floor along to another set of stairs going up to the third floor where we can find this Ember in a Chest.
We can take this Ember to Andre in the Undead Parish to advance Standard Weapon Reinforcement to +15 for us.
Sequence 28: The Darkwraiths
1. NG+ – New Londo Ruins, The Abyss, The Duke’s Archives, Crystal Cave, Tomb of Giants
2. Embers: 8/10
3. Reinforcement Weapons: 6/6
4. Miracles: 20/23
5. Boss Souls: 14/16
6. Rare Weapons: 35/50
7. Achievements: 26/41
-----------------------------------------------------------------------------------------------------
New Londo Ruins:
The Four Kings: If you thought they were hard in NG they are even more difficult in NG+, especially since we are just barely halfway through this playthrough. If you used her in the Moonlight Butterfly Boss fight, we can once again use Witch Beatrice though. She is less effective but I found she was still essential for getting through this. It took me MANY tries to succeed & a lot of Humanity…
This is definitely the hardest moment of our 100%; many of the Four King’s moves will be able to one shot us. Knowing we have a second copy of the Ring of Favour & Protection, I took the original Ring off in place of Havel’s Ring to don more heavy/magic resistant Armor. As a Faith build, I also took advantage of Sunlight Blade; with Beatrice’s help I was able to eventually take the Four Kings down…
For strategies for NG+ & just fighting the Four Kings in general, here is the info guide by Fxtralife.
https://darksouls.wiki.fextralife.com/Four+Kings
The Abyss:
NPC – Darkstalker Kaathe #1: If you never spoke to Kingseeker Frampt at all after receiving the Lordvessel then after defeating the Four Kings we can now find a new Primordial Serpant, Darkstalker Kaathe near The Abyss Bonfire.
Speak with Kaathe, & when he asks us to usher in a new Age of Dark as the Fourth Lord, answer “Yes”. If you say “No” on purpose or by accident, then he will become frustrated & leave the game forever, voiding the Achievement for this playthrough! Do not screw up our hard work; you DO NOT want to have to attempt Four Kings early on NG++!
If you said “Yes”, then we will be transported to the Firelink Altar in the presence of Darkstalker Kaathe. Place the Lordvessel on the Altar to unlock the location of the remaining Lord Souls & speak with Kaathe afterwards to be taken back to The Abyss.Achievement #26 – Covenant Darkwraith: Discover Darkwraith Covenant.
This is an extremely missable Achievement that requires a lot of set up (which we have done if you have been following along). After we have placed the Lordvessel in the Firelink Altar with Darkstalker Kaathe, speak with him again after returning to The Abyss. We will now have a new dialogue option of joining the Darkwraith Covenant; the Achievement will unlock on the Joining Screen.
Rare Weapon #35 – Dark Hand: Join the Darkwraith Covenant & we can receive this Rare Weapon as a Rank 0 bonus. It also has a 1% chance to drop from Darkwraith Knights in the Lower New Londo Ruins.
That is all we need from this Covenant, however if you can somehow cobble together 30 Humanity, you can reach Rank 2 in the Covenant & acquire the super cool Darkwraith Armor Set & Darksword. Afterall this hard work getting to the Covenant, might as well?... good thing I wasted around 15 Humanity trying to defeat the Four Kings…
With the Darkwraith Covenant taken care of, the rest of this playthrough is pretty linear until we get to The Kiln of the First Flame.
The Dukes Archives:
Reinforcement Weapon #6 – Enchanted Falchion: Blast through The Duke’s Archives, die to Seath in his study, & get to The Duke’s Archives Bonfire in the second library. From The Duke’s Archives Bonfire, make your way back up the stairs to the rotating stairwell in the second library. Turn the stairs so that we are able to access the third floor of the second library. Climb down into the side room & open the Lever Shortcut back to the Bonfire. From here, enter into the room full of Chests & another Lever that opens the way down to the Crystal Forest. The Reinforcement Weapon will be inside the Mimic on the right side of the room.
This is the second copy of this Weapon we need to simplify getting the Magic Reinforcement Achievement.
Ember #6 – Crystal Ember: In the same room where we found the Enchanted Falchion, look behind the bookshelves on the right side of this room to find this Ember inside a Chest.
We can take this Ember to the Giant Blacksmith in Anor Londo to imbue Crystal Weapons for us.
Crystal Cave:
Blue Titanite Slab #2: Enter the Crystal Caves & after we fight the first Golden Crystal Golem in the Caves, drop down onto an invisible walkway with a Message on it. Immediately spin around & we can see 3 Crystal Lizards in a small cave behind us. At the backside of this cave, we can see large gap & a Corpse across from it on an outstretched crystal. Either with the Prism Stones or the falling crystal dust, carefully navigate your way over to the Corpse & we can loot our first Blue Titanite Slab. If you look carefully, you can see crystal dust falling & landing on the invisible walkways which essential for navigation.
I once again referenced the video guide by 100% Guides to get to the Slab; I still ended up dying around 5 times in the process. Fortunately, this is the last Blue Titanite Slab we need.
https://youtu.be/UAU2KceMxYY
The Duke’s Archives:
Ember #7 – Large Magic Ember: After defeating Seath the Scaleless, Warp to The Duke’s Archives Bonfire & navigate back to his study in the first section of The Duke’s Archives. In the study, we can find this Ember in a Chest in the center of the room.
We can take this Ember to Rickert of Vinheim in the New Londo Ruins to advance Magic Weapon Reinforcement to +10 for us.
Tomb of Giants:
Ember #8 – Large Divine Ember: First off, navigate the darkness & reach the Tomb of Giants Bonfire that is close to Patches the Hyena. From the Bonfire climb up the ladder & take a right along a narrow path until we reach a large stone crypt roof. We can enter this crypt by climbing down a short ladder into a small square opening.
Inside the crypt, will unfortunately be… six Giant Skeleton Swordsmen. We must try our best to lure them away one at a time though we have to fight the first two to three at once since though aggro immediately. If you have a good Bow, definitely consider trying to whittle them down to give yourself an easier time. With the Skeletons dead, we can now loot this Ember off of a petrified blacksmith.
We can take this Ember to Andre in the Undead Parish to advance Divine Weapon Reinforcement to +10 for us.
White Titanite Slab #2: Make your way through Tomb of Giants until you are just outside Nito’s Fog Gate. At the foot of the ramp leading up to the Fog Gate, there will be a small tunnel off our right. Drop into it & follow it to the dead end where we can find the Slab on a Corpse. This is the final White Titanite Slab we need to collect.
Move on to defeat Nito.
Sequence 29: Beginning of the End
1. NG+ – Demon Ruins, Lost Izalith, Kiln of the First Flame, Undead Parish
2. Embers: 10/10
3. Miracles: 20/23
4. Boss Souls: 14/16
5. Rare Weapons: 35/50
6. Achievements: 30/41
-----------------------------------------------------------------------------------------------------
Demon Ruins:
Ember #9 – Large Flame Ember: Dispatch Ceaseless Discharge & make your way to the Capra Garrison Bonfire outside of the Demon Firesage’s Fog Gate. From the Bonfire, head down the stairs towards the Fog Gate & take a left along a path that will take your through two Taurus Demons. Dispatch the Demons & we will enter a long corridor with a Chest at the end of it that will contain this Ember. As we proceed towards the Chest, four Burrowing Rockworms will come out of the ceiling. We can sprint past them & get to the Chest, but it is difficult getting out of here without using a Homeward Bone… or dying in our on-foot escape.
We can take this Ember to Blacksmith Vamos in The Catacombs to advance Fire Weapon Reinforcement to +10 for us.
Useful Item – Orange Charred Ring: Carry on to slay the Centipede Demon once again to receive this very helpful Ring. We need this Ring to comfortably collect our final Ember of the game.
You may also want to use the Poison Mist/Pyromancy Flame exploit to kill the Sunlight Maggot through the wall once again to save Solaire of Astora for the Gwyn Boss fight as well. Just make sure you track him down on the other side in Lost Izalith to Summon him later.
Ember #10 – Chaos Flame Ember: Now that we have the Orange Charred Ring, take the Elevator Shortcut back up the Daughter of Chaos Bonfire & head back out into the first large room of the Demon Ruins. Walk all the way down to the bottom of the hill & look out across the wastes to see a throng of Taurus Demons… waiting. Lure them away one by one to dispatch them & head to the far end of the wastes where they were guarding. In the middle of a lava pool we can see a floating Corpse; equip the Orange Charred Ring & walk over to loot it, collecting our final Ember.
We can take this Ember to Blacksmith Vamos in The Catacombs to imbue Chaos Weapons for us.
Lost Izalith:
Red Titanite Slab #2: Our last important Item of note down here will be our Red Titanite Slab. Navigate your way close to the Bed of Chaos’s Boss Room, whether or not you or following Siegmeyer’s Questline, drop down into the Chaos Eater hive. Down in the stagnant waters after defeating the Chaos Eaters, head down the only path available to us then turn left at the T-junction. Skirt around the square pit & then take another left down the corridor. As we head down it, we can see a short passage off our right that ends in a Chest. This is the final Red Titanite Slab that we need for Reinforcements.
Carry on to defeat the Bed of Chaos.
Kiln of the First Flame:As of this point, there are no more Weapons, Souls, Spells, or Embers that we need to collect for NG+. Complete all the way up to the Kiln of the First Flame but do not enter into Gwyn’s Boss Room yet & beat the playthrough. If you have not already done so, be sure to fully loot around the Areas to collect any remaining Titanite found in Chests or on Corpses; we will need every piece for what’s to come.
The meat & potatoes of NG+ has just arrived… lucky us.
Undead Parish:It is now time for the long grind of Weapon Reinforcements & Boss Weapon Ascensions. For a reference sheet of where the best farming locations are for all Titanite, check out my Achievement Checklist: Dark Souls – Remastered in the Introduction at the top of this guide. If you have been following along up until now, we should already have all the Slabs we need; it will only be Shards, Chunks, & of course Souls we will have to farm for.
NPC – Andre of Astora #1: Take the Large Ember, Very Large Ember, Dark Ember, Divine Ember, & Large Divine Ember to Blacksmith Andre in Undead Parish to start our first four Weapon Reinforcements.
The Titanite totals for all of Andre’s Reinforcements differ depending on if you have two copies of the Occult Club.
With the Occult Clubs, we will need: Titanite Shards x18, Large Titanite Shards x19, Titanite Chunks x8, Titanite Slabs x1, White Titanite Chunks x14, & White Titanite Slabs x2.
Without the Occult Clubs we will need an additional: Titanite Shards x18, & Green Titanite Shards x20.成就 #27 – Strongest Weapon:通过标准强化获得最强武器。
选择任意标准武器并将其强化至+15。
标准武器 0 – +5:楔形石碎片 x9
(大块余烬 + 标准升级)
标准武器 +5 – +10:楔形石大碎片 x9
(特大块余烬 + 标准升级)
标准武器 +10 – +14:楔形石圆盘 x8
标准武器 +14 – +15:楔形石原盘 x1成就 #28 – Raw Weapon:通过粗制强化获得最强武器。选择任意标准武器并将其制作成+5粗制武器。标准武器0–+5:楔形石碎片x9(大型余烬+粗制质变)。粗制武器0–+5:楔形石大碎片x10成就 #29 – Occult Weapon:通过秘法强化获得最强武器。
将两把秘法棍棒中的任意一把强化至+5,或把任意标准武器升级/强化为+5秘法武器。若已有秘法棍棒,可跳过前三个步骤直接进行秘法武器强化。
标准武器 0–+5:楔形石碎片 x9
(神圣余烬+神圣升级)
神圣武器 +0–+5:绿楔形石碎片 x10
(黑暗余烬+秘法升级)
秘法武器 +0–+4:白楔形石楔形石块 x7
秘法武器 +4–+5:白楔形石圆盘 x1成就#30 - Divine Weapon:通过神圣强化获得最佳武器。
将我们的第二把 occult club 改造为+5神圣棍棒并强化至+10,或取任意标准武器进行升级/强化使其成为+10神圣武器。如果改造occult club,可跳过前四步直至神圣武器+5。
标准武器0-+5:楔形石碎片x9
(神圣余烬+神圣升级)
神圣武器0-+5:绿楔形石碎片x10
(大块神圣余烬+神圣升级)
神圣武器+5-+9:白楔形石楔形石块x7
神圣武器+9-+10:白楔形石圆盘x1
序列30:武器强化
1. 周目+ - 亚诺尔隆德、新亚诺尔隆德、地下墓地
2. 奇迹:20/23
3. boss 灵魂:14/16
4. 稀有武器:35/50
5.成就:36/41
亚诺尔隆德:
NPC - 巨人铁匠 #1:从公主寝室篝火出发,前往巨人铁匠处并交给他楔形石原盘。
巨人铁匠强化所需的泰坦ite总量会因是否拥有雷电矛和结晶钺的复制品而有所不同。
若拥有雷电矛/结晶钺,我们只需:泰坦ite楔形石x18和泰坦ite圆盘x2。
若没有雷电矛/结晶钺,则还需额外准备:泰坦ite碎片x18和大块泰坦ite碎片x18,以便先从亚斯特拉的安德烈处制作两把+10标准武器,再将其升级为雷电武器和结晶武器。成就#31 - Lightning Weapon:通过雷电强化获得最佳武器。
获取雷电矛并强化至+5,或选择任意标准武器进行升级/强化,使其成为+5雷电武器。若已拥有雷电矛,可跳过前四步,直接进行雷电武器相关操作。
标准武器0-+5:楔形石碎片x9(阿斯特拉的安德烈+大块余烬+标准升级)
标准武器+5-+10:楔形石大碎片x9(+10标准武器+雷电升级)
雷电武器+0-+4:楔形石圆盘x9
雷电武器+4-+5:楔形石原盘x1成就#32 - Crystal Weapon:通过结晶强化获得最佳武器。
获取结晶戟并将其强化至+5,或获取任意标准武器并将其升级/强化为+5结晶武器。若已拥有结晶戟,可跳过前四步直接进行结晶武器相关操作。
标准武器0-+5:楔形石碎片x9(阿斯特拉的安德烈+大块余烬+标准升级)
标准武器+5-+10:楔形石大碎片x9(结晶余烬+结晶升级)
结晶武器+0-+4:楔形石圆盘x9
结晶武器+4-+5:楔形石原盘x1
新隆多遗迹:
NPC - Vinheim的里克特#1:从传火祭祀场乘坐电梯下至新隆多遗迹。在电梯底部,出去进入广阔的开放区域,然后前往最右侧的悬崖边。从这里可以看到一些楼梯向下通往一个牢房,里面有一名法师,他就是里卡特。与他对话,并将魔法余烬和大块魔法余烬交给他。
里卡特强化所需的楔形石总量会因你是否拥有两把魔法弯刀而有所不同。
拥有魔法弯刀的情况下,我们需要:楔形石碎片x18、楔形石大碎片x19、楔形石 chunk x8、蓝色楔形石 chunk x14以及蓝色楔形石原盘x2。
没有魔法弯刀的情况下,我们还需要额外的:楔形石碎片x18和绿色楔形石碎片x20。成就#33 – 魔法武器:通过魔法强化获得最佳武器。
获取魔法弯刀并强化至+5,或选择任意标准武器进行升级/强化,使其成为+5魔法武器。若已拥有魔法弯刀,可跳过前四步,直接进行魔法武器相关操作。
标准武器0–+5:楔形石碎片x9
(魔法升级)
魔法武器+0–+5:绿楔形石碎片x10
(魔法余烬+魔法升级)
魔法武器+0–+4:蓝楔形石大碎片x10
魔法武器+4–+5:蓝楔形石圆盘x1成就#34 – 魔法武器:通过魔法强化获得最佳武器。将我们的第二把附魔弯刀强化为+5魔法弯刀,并进一步强化至+10;或者将任意标准武器升级/强化为+10魔法武器。如果已改造附魔弯刀,可跳过前四步,直接从魔法武器+5开始。标准武器0-+5:楔形石碎片x9
(魔法强化路线)
魔法武器+0-+5:绿楔形石碎片x10
(大块魔法余烬+魔法强化路线)
魔法武器+5-+9:蓝楔形石楔形石块x10
魔法武器+9-+10:蓝楔形石圆盘x1
地下墓地:
NPC-铁匠瓦莫斯#1:为避免重复描述复杂位置,可参考流程15顶部“三具尸体,一座坟墓”附近的地下墓地营火描述,了解如何到达铁匠瓦莫斯处。与瓦莫斯对话,并给他混沌余烬和大块火焰余烬。
最后这两种武器强化是最麻烦的,因为游戏中没有对应的武器类型实例。这意味着我们需要完全从头制作这两种武器。我们需要:楔形石碎片x18、楔形石绿碎片x22、楔形石红 chunk x14、楔形石红 slab x2。成就 #35 – Fire Weapon:通过火焰强化获得最佳武器。选择任意标准武器并将其强化/升级为+10火焰武器。标准武器0–+5:楔形石碎片x9(火焰升级);火焰武器+0–+5:绿楔形石碎片x11(大块火焰余烬+火焰升级);火焰武器+5–+9:红楔形石大碎片x7;火焰武器+9–+10:红楔形石圆盘x1Achievement #36 – Chaos Weapon: Acquire best weapon through Chaos Reinforcement.
Choose any Standard Weapon & Reinforce/Ascend it into a +5 Chaos Weapon.
Standard Weapon 0 – +5: Titanite Shards x9
(Fire Ascension)
Fire Weapon +0 – +5: Green Titanite Shards x11
(Chaos Flame Ember + Chaos Ascension)
Chaos Weapon +0 – +4: Red Titanite Chunks x7
Chaos Weapon +4 – +5: Red Titanite Slab x1
With that, we are finally done the grueling Weapon Reinforcement smithing & farming… & onto Boss Weapon Ascension. This is easier to do but no less tedious.
Sequence 31: The Age of Man
1. NG+ – Anor Londo, Kiln of the First Flame
2. Miracles: 20/23
3. Boss Souls: 15/16
4. Rare Weapons: 49/50
5. Achievements: 37/41
-----------------------------------------------------------------------------------------------------
Anor Londo:
NPC – Giant Blacksmith #2: The Giant Blacksmith will Ascend any applicable +10 Standard Weapon with its corresponding Boss Soul to create the Boss Weapon. There are 15 Boss Weapons we need to create but we can only make 14/15 as we will need to collect a third copy of Sif’s Boss Soul on NG++.
To create 15 +10 Standard Weapons, we need a massive total of: Titanite Shards x126 & Large Titanite Shards x126. It is actually faster farming Souls & buying the Shards you need as opposed to farming them one by one. Both are best purchased from the Giant Blacksmith. 126 Titanite Shards at 800 Souls a piece will require 100,800 Souls. 126 Large Titanite Shards at 3800 Souls a piece will require 478,800 Souls. This makes a cumulative total of 579,600 Souls! This is a disgusting amount of Souls which is why we saved this for NG+.
The best way to farm Souls is from the Phalanxes in the Painted World of Ariamis. If you have the Covetous Silver Serpent Ring & were lucky enough to get the Symbol of Avarice (a rare drop from killing Mimics) we can increase or Soul Drop by 44%. On NG+, we can net 18,720 Souls a run from killing the Phalanxes. With how easy they are to defeat & short of a run it is, this won’t be AS tedious as we first thought.
Alternatively, you can also farm the two Royal Sentinels found in the Anor Londo Cathedral outside Orenstein & Smough's boss room (& the two Sentinels outside the Cathedral as well if you wanted) for a much higher Souls yield (by an extra 6000 Souls per run). The yield is better, but the enemy is trickier to kill for some builds with a longer distance to run to; I found killing the Phalanxes provided a better yield in the long run with how quickly you can complete a run.
Note that we need Andre of Astora to Ascend our Weapons with the Large Ember to get them to +10; the Giant Blacksmith cannot do this.
Rare Weapon #36 – Moonlight Butterfly Horn:
Materials: Titanite Shards x9, Large Titanite Shards x9, Soul of the Moonlight Butterfly x1
Best Compatible +10 Rapiers: Mail Breaker, Rapier, Estoc
Best Compatible +10 Spears: Spear, Winged Spear, Pike
Rare Weapon #37 – Crystal Ring Shield:
Materials: Titanite Shards x9, Large Titanite Shards x9, Soul of the Moonlight Butterfly x1
Best Compatible +10 Shields: Plank Shield, Small Leather Shield, Large Leather Shield, Target Shield, Buckler, Cracked Round Shield, Red & White Shield, Warrior’s Round Shield, Heater Shield, Hollow Soldier Shield, Balder Shield, Spider Shield, etc.
Rare Weapon #38 – Quelaag's Furysword:
Materials: Titanite Shards x9, Large Titanite Shards x9, Soul of Quelaag x1
Best Compatible +10 Curved Swords: Scimitar, Falchion, Shotel, Painting Guardian Sword
Rare Weapon #39 – Chaos Blade:
Materials: Titanite Shards x9, Large Titanite Shards x9, Soul of Quelaag x1
Best Compatible +10 Katanas: Iaito, Washing Pole, Uchigatana
Rare Weapon #40 – Golem Axe:
Materials: Titanite Shards x9, Large Titanite Shards x9, Core of an Iron Golem x1
Best Compatible +10 Axe: Hand Axe, Battle Axe, Great Axe
Rare Weapon #41 – Dragonbone Fist:
Materials: Titanite Shards x9, Large Titanite Shards x9, Core of an Iron Golem x1
Best Compatible +10 Gauntlet: Caestus
Rare Weapon #42 – Smough's Hammer:
Materials: Titanite Shards x9, Large Titanite Shards x9, Soul of Smough x1
Best Compatible +10 Hammers: Club, Mace, Morning Star, War Pickaxe, Reinforced Club, Great Club, Large Club
Rare Weapon #43 – Dragonslayer Spear:
Materials: Titanite Shards x9, Large Titanite Shards x9, Soul of Orenstein x1
Best Compatible +10 Rapiers: Mail Breaker, Rapier, Estoc
Best Compatible +10 Spears: Spear, Winged Spear, Pike
Rare Weapon #44 – Lifehunt Scythe:
Materials: Titanite Shards x9, Large Titanite Shards x9, Soul of Priscilla x1
Best Compatible +10 Scythe: Scythe, Great Scythe
Best Compatible +10 Halberd: Halberd, Lucerne
Rare Weapon #45 – Tin Darkmoon Catalyst:
Materials: (No Titanite required), Soul of Gwyndolin x1,
Best Compatible Catalysts: Sorcerer’s Catalyst, Oolicile Ivory Catalyst, Tin Banishment Catalyst
Rare Weapon #46 – Darkmoon Bow:
Materials: Titanite Shards x9, Large Titanite Shards x9, Soul of Gwyndolin x1
Best Compatible +10 Bows: Short Bow, Composite Bow, Longbow
Rare Weapon #47 – Greatshield of Artorias:
Materials: Titanite Shards x9, Large Titanite Shards x9, Soul of Sif x1
Best Compatible +10 Shields: Plank Shield, Small Leather Shield, Large Leather Shield, Target Shield, Buckler, Cracked Round Shield, Red & White Shield, Warrior’s Round Shield, Heater Shield, Hollow Soldier Shield, Balder Shield, Spider Shield, etc.
Rare Weapon #48 – Greatsword of Artorias (True):
Materials: Titanite Shards x9, Large Titanite Shards x9, Soul of Sif x1
Only Compatible +10 Swords: Broken Straight Sword, Straight Sword Hilt
Rare Weapon #49 – Great Lord Greatsword:
Materials: Titanite Shards x9, Large Titanite Shards x9, Soul of Gwyn x1
Best Compatible +10 Swords: Dagger, Bandit’s Knife, Short Sword, Longsword, Broad Sword, Balder Side Sword, Bastard Sword, Zweihander
If you were a keener & got to the Warrior’s of Sunlight Covenant ahead of time, you may have already given the Soul of Gwyn to the Sunlight Altar for the Sunlight Spear Miracle & will not be able to smith the Great Lord Greatsword. This is fine as we need to go to the Giant Blacksmith again anyways for Sif’s third Boss Weapon on NG++.
After we have built all the necessary Weapons, make an extra +10 Standard Weapon (or two if you didn’t get Gwyn’s Boss Weapon) out of a Dagger, Bandit’s Knife, Short Sword, Longsword, Broad Sword, Balder Side Sword, Bastard Sword, or Zweihander. This way on NG++ all we need to do is grab our third Soul of Sif & take it to the Giant Blacksmith for an immediate Ascension without having to waste time farming again.
As of this point, we should only need the Greatsword of Artorias (Cursed) for the Knight’s Honor Achievement. Consult my Achievement Checklist: Dark Souls – Remastered in the Introduction of this guide to see which Rare Weapons you are still missing.
Kiln of the First Flame:Before we beat NG+ & wrap up our playthrough, make sure you have acquired 25 Faith; if need be, farm the Phalanxes for the extra Souls. While you can count on collecting Souls in NG++ as we do need to get all the way to Anor Londo, this is risky if you cannot get enough & may add on extra time. This is of course you have not been playing Online & killed Bosses cooperatively in other Player’s Worlds.
Boss Soul #15 – Soul of Gwyn: Defeat Gwyn for the second time to collect his Boss Soul. We need this either for his Boss Weapon or for our final Miracle from the Warrior’s of Sunlight Covenant.成就#37 - Dark Lord:达成“黑暗之王”结局。
剧情相关。击败葛温后,不要在营火处传火。而是转身……走出 boss 房间以触发黑暗之王结局并迎来下一个黑暗时代。
90%完成度
阶段32:二周目+
1. 一周目+ - 北方不死院至亚诺尔隆德
2. 奇迹:23/23
3. boss 灵魂:14/16
4. 稀有武器:50/50
5. 成就:41/41
----------------------------------------------------------------------------------------------------
这将是一次“简短”的游戏流程。一旦我们解决了太阳战士并击败希夫,我们就会速通前往亚诺尔隆德的巨人铁匠处。
不死教区:成就#38 - 太阳骑士誓约:发现太阳骑士誓约。
击败牛头恶魔后,我们会到达古龙桥。古龙守卫的门房内可以找到太阳祭坛营火以及祭坛本身。走到桥中间,从掩体后射击古龙,使其飞起并落在桥上。一旦它飞起来且不会喷火,就尽快 sprint 到营火处,这样它就会消失。从营火出发,向右走出阳台,我们就能找到太阳祭坛;索拉尔本人可能就站在那里。当你的信仰达到25点,或通过联机游玩降低了需求后,就能与祭坛互动并进入誓约加入界面,解锁成就。
奇迹21——雷枪:加入誓约时,作为加入奖励可获得该奇迹。
奇迹22——巨雷枪:使用辛苦获得的10个太阳徽章,将太阳战士誓约提升至1级,即可获得该奇迹。
太阳徽章刷取:如果仍缺少太阳徽章,在二周目(NG++)中还有一些顺路就能收集到的。
在不死教区解救罗特雷克并在传火祭祀场与他会面,可获得1个太阳徽章。与索拉尔一同击败钟楼石像鬼和贪食龙 Boss 可获得 1 枚太阳徽章。(还有其他战斗,但这些战斗中很难让索拉尔存活下来。)
召唤太阳战士或被太阳战士召唤并一同击败 Boss,可获得 1 枚太阳徽章。
最后,可以在亚诺尔隆德宫殿内第一个篝火对面的宝箱中拾取 3 枚太阳徽章。
最后,还有一个完全不推荐的方法,如果你已经用尽所有选项,可以前往失落伊札里斯刷混沌虫。它们有 3% 的几率掉落太阳徽章。关于掉率以及为了获取它们而进行的糟糕跑图;这是获取最后几个勋章的糟糕方式……
奇迹#23 - 阳光之枪:当太阳战士誓约达到1级后,我们现在可以选择向阳光祭坛献上葛温的灵魂。这样做,我们将获得最后的奇迹。成就#39 - 少女的祈祷:收集全部23个奇迹。
如果一直按照本指南操作,在获得阳光之枪后就能解锁该成就。
若成就未解锁,请查阅本指南开头的【黑暗之魂:重制版】成就清单,确认缺少哪些奇迹。务必在二周目+中获取它们。
关键物品 - 阿尔特留斯纹章:找到【亚斯特拉的安德烈】,第三次花费20000灵魂购买阿尔特留斯纹章。
黑森林庭院:
Boss魂#16 - 希夫的灵魂:使用阿尔特留斯纹章穿过黑森林庭院,第三次也是最后一次击败希夫,收集我们100%完成度所需的最后一个Boss魂。如果你在二周目(NG+)中做好了规划,应该已经拥有一把+10的剑类武器(不是直剑剑柄或断裂直剑),用于升级最终Boss武器。如果还没有,在前往亚诺尔隆德之前,你需要尽快准备。我们可以从底层区域的不死屠夫身后的宝箱中获得大块余烬。一定要提前做好这件事;如果毫无准备就前往亚诺尔隆德,在击败翁斯坦与斯摩之前,你将无法顺利离开。在三周目(NG++)中,若非必要,我们不想这样做。
亚诺尔隆德:
NPC - 巨人铁匠#1:快速通关苏醒之钟、塞恩古城和亚诺尔隆德,前往巨人铁匠处。我们不需要击败翁斯坦与斯摩;只需冲过宫殿,前往铁匠所在的塔楼即可。稀有武器 #50 - 亚尔特留斯的大剑(诅咒):
材料:楔形石碎片 x9,楔形石大碎片 x9,希夫的灵魂 x1
最适配+10的剑类武器:匕首、山贼短刀、短剑、长剑、宽剑、巴德尔侧剑、 bastard sword、双手巨剑成就#40 – Knight’s Honor:获取全部50把稀有武器。
如果你一直按照本指南操作,在我们用希夫的灵魂锻造出最后一把 Boss 武器后,就会解锁该成就。
关于哪些武器属于稀有武器,有很多不同的【骑士的荣耀清单】。大多数清单内容相同,都包含我列出的全部50把武器。唯一不同的是黑暗之魂维基,该网站声称我们实际上不需要石像鬼尾斧、伊札里斯触媒或恶魔触媒。成就#41 - The Dark Soul:完成全部41个成就。恭喜!
剧情相关。当我们解锁Knight’s Honor成就后,会同时解锁此成就。正如成就描述所言,恭喜你达成了目标!
总结:
《黑暗之魂》是我一直以来最喜欢的游戏。《黑暗之魂3》更加宏大,也可以说更出色……但这是我第一次接触黑暗之魂系列,怀旧感令人难以置信。可惜的是,这也是黑暗之魂系列中最难达成100%完成度的一作,因为需要大量刷取物品。我花了大约60小时达成100%,但具体时间会因刷取楔形石的数量和掉落运气而有很大差异。如果本指南帮助你达成了100%完成度,可以在评论区告诉我。这能让我了解自己的工作是否正确。


下载233乐园APP
专心推荐好游戏
纠纷处理及不良内容举报电话:
4006600910 (工作时间: 9:00-12:30,14:00-18:00)
北京市朝阳区启阳路4号院2号楼15层1803室
本公司产品适合10周岁以上玩家使用 未成年人家长监护