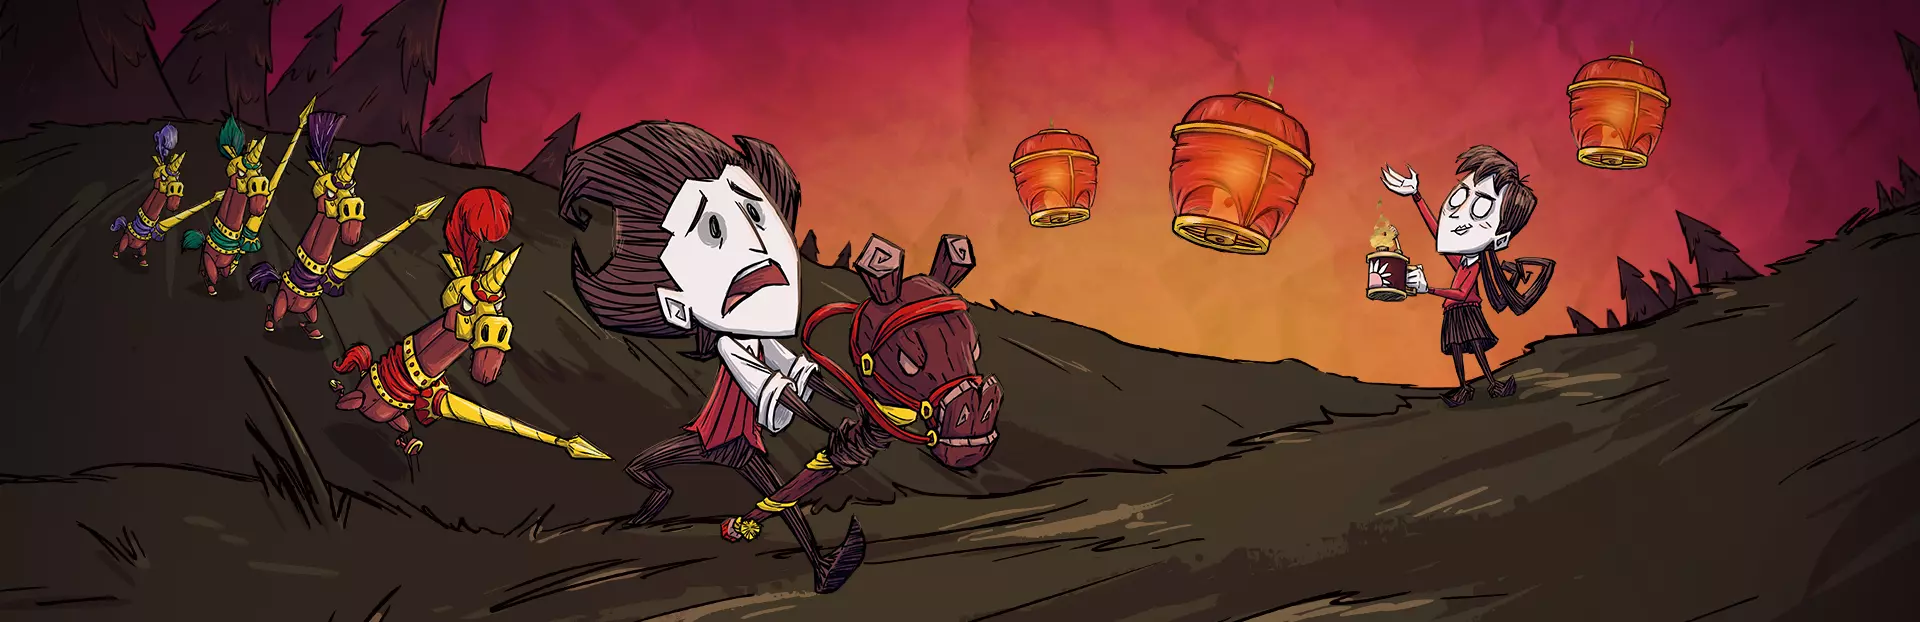
换一换
换一换 


本指南包含一系列可追踪的目标,最终将完成洞穴和月岛任务线,首先你需要建立一个能常年运转且能抵御各种季节的生存基地,同时击败途中的大多数 Boss 以及所有“主要”Boss。 这份指南最初是为我和我的朋友们制作的,这样我们就有最终目标和明确的最终任务,不会因为只是生存和建造基地而漫无目的地游荡,最终感到无聊。指南中还包含 3 个我最近才知道的小技巧。 开始前 在阅读任务列表之前请注意: 这份任务列表尚处于第一阶段(你可以称之为 1.0 版本),我刚刚完成编写,它可以作为一份完整但不繁琐的攻略。此外,其行文风格非常随意,没有深入解释。 另外,感谢您的浏览,希望它能帮到您。薇克巴顿重做版本 - 已标注日期。 文中没有深入探讨那些广为流传的技巧和策略,默认您已了解游戏玩法,并且阅读过一些优秀指南,看过诸如“你不知道的饥荒冷知识”之类的视频,但也不会将您视为生存专家或经验丰富的玩家。同时,它也尽量避免包含带有剧情描述的“剧透”内容,不会完全透露未来步骤中会发生的事情。不过,它仍然旨在让你在进行游戏时逐步阅读,因为它会有针对性地为你提供所有必要的最佳信息,帮助你在当下和未来都不会浪费时间。感谢 有趣的小知识以及如何使用任务列表 提示 如果你在短时间内对蜻蜓造成足够伤害,她会被击晕并掉落一片鳞片 你可以通过按住F键攻击并在命中生效时切换装备(如头盔)来进行快速攻击 如果你附近有萤火虫,在出现文字提示时进出其光照范围,就能度过夜晚 参考视频已损坏 此外,在你浏览列表时还有更多技巧,比如通过制作但不放置结构来预先建造,你应该尽可能充分运用所学知识

游戏初期和任务列表的内容有些繁杂,这是因为你需要考虑的事情很多。随着你推进任务目标,一切会变得更有条理和简单明了。游戏初期的大部分内容是基于“良好开端”的主观建议,你应该从容行事,按照自己的意愿或当时的世界状况来行动。 要查看任务列表,请阅读“创建世界后”(默认以秋季为起始季节),了解你当前所处的季节,尤其是在第一个秋季,你应该阅读“必要时才启用”部分。洞穴和月球任务线将更加简单直接,前提是你在“创建世界后”部分花费了必要的时间完成所有先前步骤、所有季节内容,以及“必要时可选”部分中在到达相关阶段时所需的一些内容。 创建世界后 希望你没有在世界设置中禁用任何重要内容 在按照清单操作时才发现这一点会感觉很愚蠢 如果你在设置中移除了某些内容,或者通过模组进行了类似操作,你可以查看一下被移除的内容是否具有任何至关重要的意义,例如独特掉落物或其他非常重要的东西

(本指南的这部分看起来很像那些速通计时工具的分隔符) 选择角色 出生点(主要死亡原因) 收集资源(至少一整堆草、树枝、木头),石头和燧石不需要优先堆满一整堆 获取食物,直到达到20个任意类型的可用食物,例如20个浆果,或10个浆果和10个胡萝卜等。
预建营火的方法是建造它但不放置(右键点击任意位置),此时营火会呈蓝色,可随时放置。建议始终携带一支充满燃料的火把。


建造第一个科学机器,制作背包、木甲、篝火、长矛和铲子。建造炼金引擎后,你可以用锤子敲掉科学机器来回收资源。 找一个合适的地点建立基地,放置篝火并开始收集资源,直到能够建造炼金引擎(最好将炼金引擎放在远离篝火的位置,详见下一步)。
将你的炼金引擎放置在篝火的光圈范围内,但要留出足够空间在其周围摆放储物容器以最大化效率。至少建造一个32格储物空间(4个普通箱子),然后根据需要扩展。收集更多种类的资源,例如从黑森林(有蜘蛛和大量树木的区域,你也可以击杀树精)的树木获取活木。通过击杀生物/敌人或利用环境(如机械棋子掉落齿轮、蜘蛛掉落丝绸等)来收集掉落物。
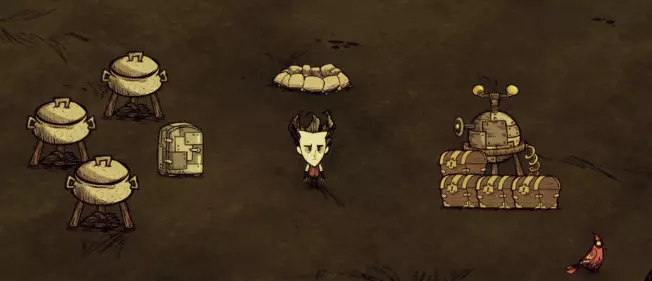
收集资源后,优先建造一个冰箱来存放食物。建造时遵循与炼金引擎和储物箱相同的逻辑,这次将冰箱放在中间,周围尽可能靠近地摆放烹饪锅以最大化效率(这样摆放的话,打开冰箱时可以直接往烹饪锅里放东西,距离最近。炼金引擎也是同样的逻辑。)
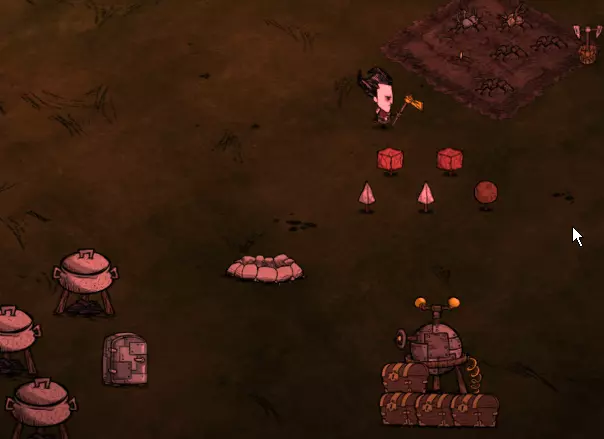


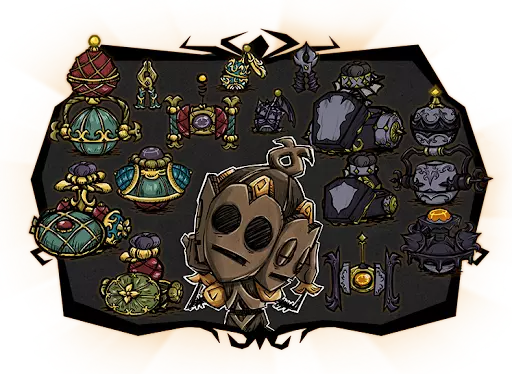
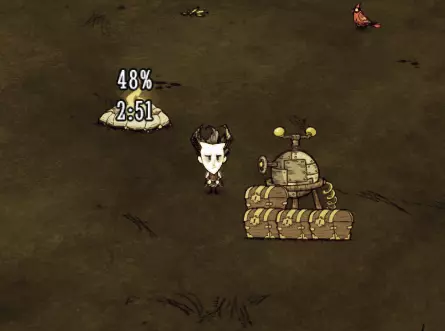
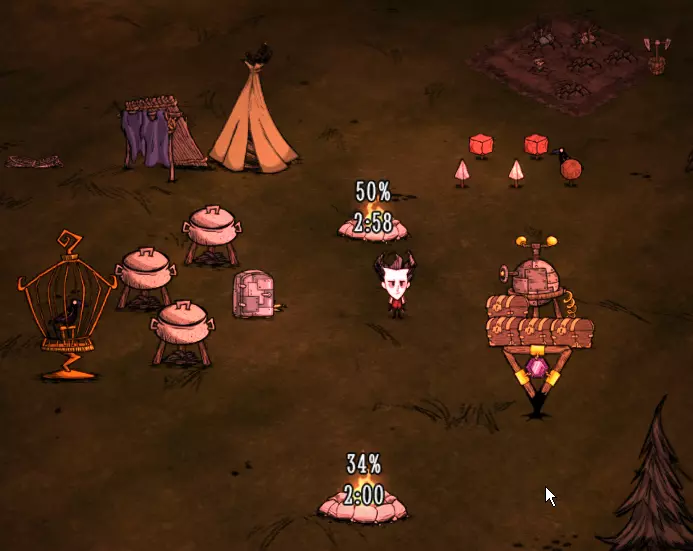
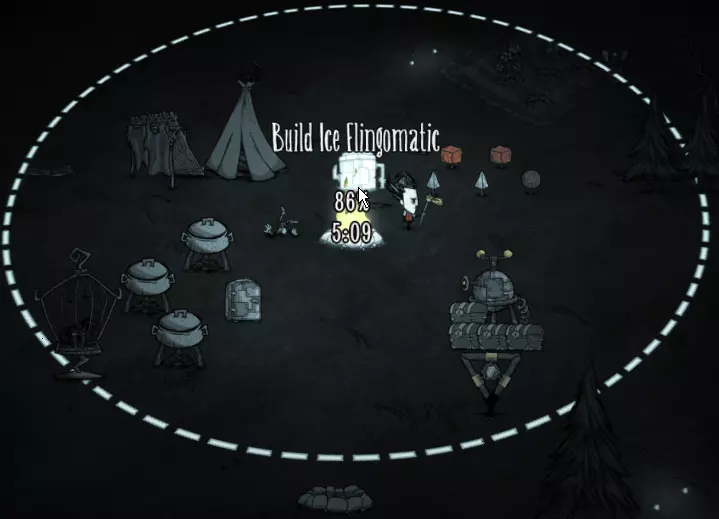
建议通过收集大理石并制作大理石豆来建立大理石农场,同时建造园艺掘地机和锄头来种植作物。使用虫洞探索遥远的地方,并绘制地图标记它们的目的地(可以使用模组或放置路标)。使用铲子将因距离基地过远而难以获取的资源(包括浆果丛、树枝、草等)挖走并种植在基地附近,如果树木稀缺,也应种植树木。用专门的冰火魔杖保护你的所有农场、树木、树枝和草,防止它们被烧毁。搭建一个帐篷和一个午休棚屋,这样你就能恢复生命值和理智值,而无需使用特定用途的食物(比如波兰饺子和熟绿蘑菇)。建造一个科学机器,然后你可以通过战斗发疯,或者更推荐的是挖掘坟墓获取宝石,击杀(硬扛)主教来获取宝石是个不错的选择。建造一个暗影操纵者,然后用锤子敲掉科学机器,现在你可以在游戏早期制作非常强大的魔法物品了。制作一个捕鸟陷阱和鸟笼,把鸟放进笼子里,给它肉(最好是怪物肉)来获取鸡蛋。本指南中的基地看起来如下图所示,但通常它应该更大更宽,这样灭火器在紧急模式下就不会波及营火。这仅用于说明你在基地需要拥有的设施。建造一个比这更好的东西吧,当你开启洞穴任务线时,你会需要它的。
基础设置完成。“创建世界后”阶段已勾选完成。干得不错。 以下为非必需步骤,可在需要时再进行 (这些设置将贯穿所有季节,但你可以在第一个秋季处理其中几项): 找到眼骨。(它可能会出现在道路、沼泽或池塘附近。)

将切斯特转变为雪切斯特或影切斯特(分别用一颗蓝宝石或一份噩梦燃料填满所有格子)。只有在满月时才能转变为影切斯特。雪切斯特可当作冰箱使用,还能保鲜其中的活体动物;影切斯特则额外增加3个格子,但物品会更快腐烂。 你应该始终考虑为拥有专属物品的角色制作其特有装备,比如薇格弗德的长矛和头盔、旺达的时钟、薇克巴顿的书籍等等。


不用火焰摧毁一个三级蜘蛛巢,并将获得的蜘蛛卵囊放置在海象营地前,这样在冬季更容易击杀海象。 猎杀与玩家数量相同的考拉象,获取它们的肉和象鼻,用于制作冬季所需的微风背心。 考虑制作一个缝纫包,这样你的服装类物品(尤其是那些难以制作的)就不会损坏。 通过喂草来驯服野牛,使用铃铛,然后制作马鞍就能骑乘它(如果你不知道如何操作,可能不应该直接查看相关内容,因为其中包含洞穴的剧透,但这在洞穴任务线中有详细说明)。 用剪刀给野牛剪毛。 在基地建造一个智囊团,这样你就能制作船套件和海洋相关物品。找到猪村,用小饰品和猪王交换金子;找到沼泽,用锤子敲掉猪头杆获取猪皮,以便制作护甲和雨伞。在猪村附近找到格洛姆雕像,在满月时获取格洛姆之花,同时拿走旁边的排箫。找一些曼德拉草,这样之后遇到棘手情况时可以制作排箫。在危险地带随身携带一个,它或许能救你一命。 如果时间充裕,你可以进入洞穴(要注意每晚洞口会生成6只蝙蝠)获取灯泡,这样就能拥有一个有燃料的灯笼,而非火把,这要实用得多(它唯一的不足是攻击时不会点燃敌人或建筑)。 如果你的第一个秋天被延长了,要在基地外击杀熊獾,以免它抢夺你的食物并摧毁基地(这很难做到)。 建议找到可靠的获取怪物肉的方法(这样你就能获得无限鸡蛋,且每餐都有1块怪物肉作为饲料)。你可以通过使用前面提到的蛛卵囊,将其放置在能杀死蜘蛛但不会吃掉其掉落肉的东西附近(不要将其放在猎犬、猪人以及其他会吃地上肉类的生物附近,也不要给蜘蛛留下时间和机会去吃这些肉)。 遗憾的是我没有相关视频,但你可以通过蜘蛛与触手、蜘蛛与高鸟等组合来实现,还有其他一些方法。去探索吧!(或者去别的地方查一下) 你也可以摧毁一些蜂巢来获取蜂巢块,蜂巢块可用于制作蜂箱(6个蜂箱就很不错),这样你就能获得无限的蜂蜜了。蜂箱不要离你的基地太近,因为你不会希望蜜蜂飞进你的基地。另外,要用冰火魔杖保护好蜂箱以及附近的花朵。你需要用网捕捉蜜蜂并将其放入蜂箱,同时也要用网捕捉一些蝴蝶,将它们放在蜜蜂附近的地面上以种植花朵[每个蜂箱至少需要6朵附近的花才能产出最低量的蜂蜜][花朵越多=蜂蜜产出越快],并且你还应该考虑制作一顶养蜂帽,在收获蜂蜜时使用,以避免受到严重的意外伤害[收获时蜜蜂会变得具有攻击性]。洞穴内的蜂箱(很奇怪)需要自然洞穴光线,这样蜜蜂才会离开蜂箱去产蜜。大概就是这样。

季节 基础设置已完成(?), 但你可能需要考虑为季节变化做好准备,以便能全年生存。 季节图片取自https://steamcommunity.com/sharedfiles/filedetails/?id=375794293 上述提到的指南几乎解释了所有游戏机制,但内容有些过时。
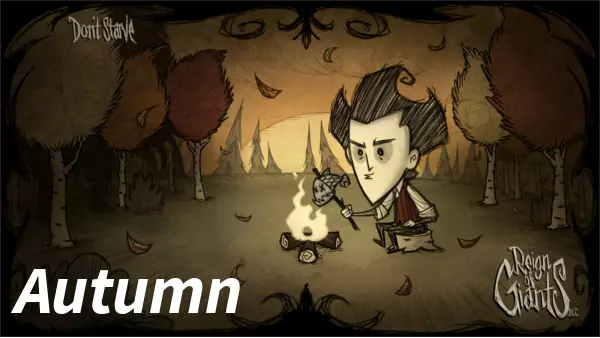
秋季通常是个相当不错的季节,和其他季节相比,你可以利用这段时间探索洞穴、海洋,挑战首领,收集资源,做那些平时需要特定季节性装备才能做的事情。因为不需要携带保温石、眼球伞之类的物品,能减轻你的个人储物压力。 注意接下来几年的猎犬袭击。 小心熊獾,要把它引到远离基地的地方战斗。即便是2人以上使用普通装备(木甲、长矛、冰火法杖、吹箭、排箫),这场战斗也会很艰难。 检查好下一个季节的准备工作是否就绪,以及距离下一个季节还有多少时间。

冬天对毫无准备的人来说会非常严酷,利用秋天收集资源、建造基地,并在冰箱中储存足够的食物以提前度过冬天。 不要挨饿,也不要远离你的安全区,因为如果没有携带合适的生存物品就外出或遭遇死亡,你可能会陷入非常糟糕的境地。 冬天的第一天你需要两块保温石,之后你应该去猎杀一只冬象,这样就能制作一件羽绒背心了(需要1个冬象鼻、8个丝绸和2个牛毛)。(提供配方是为了让你提前准备,以便在拿到箱子后能立即制作)制作完成后,只需要一个保温石即可。你应该猎杀海象获取它的精神值帽子(tam o' shanter)和海象牙(用来制作步行手杖)。准备好击杀独眼巨鹿,这并不难,只需确保之后有精神值恢复手段,或者有信心在击杀它后应对噩梦生物。将它引到远离基地的地方击杀,无人靠近时它会消失(你可以利用它缓慢的移动和攻击,作为一种安全的方法来破坏树木和建筑以获取资源)。击杀后用它的眼球制作眼球伞,这样就能为春季的降雨做好准备。你应该尽可能多地开采冰块(冰块生成于岩石生物群系,企鹅筑巢时也会生成4个冰矿)。(当你走近水边时会发生)可以用这些冰在烹饪锅中制作食谱,冰可以作为辅料,比如(怪物肉、浆果、冰、冰 = 肉丸)。将雪球发射机建在远离篝火但能保护存储区、农场和建筑的地方(因此你应该把它建在离篝火相当远的地方)。安全且明智地度过冬天剩下的时光,停下来思考一下你应该做什么,或许在寒冷的夜晚反思一下生活或和朋友聊聊天也会有帮助。说到雪球发射机,记住你可以开关它,要是它扑灭了你的壁炉,或者你不想浪费燃料并承担风险,你可以让它覆盖整个基地——如果你的基地像图片里这样小的话。
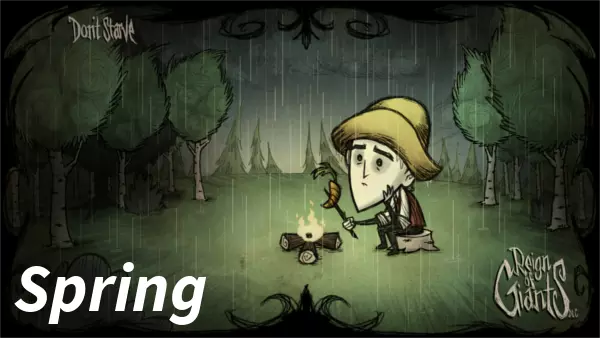
你可能会进入春季,其主要特征是:始终在下雨。你可能会被闪电击中并受到伤害,你的建筑也一样,还会着火。淋湿会导致你死亡,原因可能是冻伤、理智值下降、无法使用武器和工具,或者背包里的食物更快变质。如果你已经有了眼球伞,那就没问题了。如果没有的话,你应该考虑制作一把雨伞,或者使用帐篷来保持自身干燥。 春天是获取大量食物的好时机,尤其是在农场。 要小心青蛙雨,如果你攻击一只青蛙,很可能会被它们淹没,最终死亡。 击杀麋鹿/鹅虽然有风险但很值得,你可以获得它的肉和羽毛,用来制作天气痛苦(一种远程武器,对洞穴最终 Boss 非常有效)或奢华风扇(夏季生存用的散热工具)。 在春雨中,你可以搜寻可疑的土堆,有可能找到带电的伏特山羊。不过,击杀常见的绿洲沙漠中生成的山羊也非常有用,因为伏特山羊角可用于制作天气痛苦和晨星,这两种都是各自领域中非常强大的武器。如果你还没有硝石,就去从普通岩石中获取,这样你就能为基地制作一个吸热火坑了。另外,提前制作好吸热火堆以便随时放置。如果条件允许,扩大你的背包容量并收集更多物资。到目前为止,如果你的基地还没有受损、烧毁或被摧毁,那已经是相当了不起的成就了。
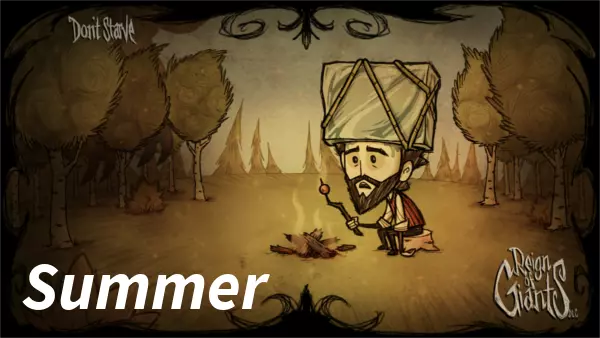
Summer goes hard. You and your friends better be prepared, as the solutions are usually found in other seasons. If you don't have the means to reduce temperature, find the quickest method of the below, and then continue following the list as normal: Use what is at your disposal to regulate your temperature, eat ice, rest at siesta lean-to, stand near endothermic campfire, use summer clothing (same logic as winter), make two thermal stones and put them in the fridge, or snow chester, or insulated pack. The thermal stone works inside the backpack and insulated pack alike Staying near the desert with pools of lava (Dragonfly desert) should be avoided. In the second day of summer Antlion will spawn and the oasis desert is going to have a sandstorm. Sandstorm disappears with rain. If screen is shaking, don't stand near important structures, as they will break with a crater appearing in your feet. (You can avoid avoid this by giving trinkets to Antlion, but this being worth it is situational, but even so, isn't great) After dealing with heat issues and being able to explore, call your friends, prepare a fish rod or two for everyone, two to three days of food that isn't going to spoil before this time period if you dont want to eat fish, then go to the oasis (if you don't know where is it, it's the desert that has cactus and no pools of lava, yes you will need to cross the sandstorm until you reach it). Don't fight Antlion if you find him on the way. The oasis only has water in summer. Fish in it until you unpack a crumbled package containing the Desert Google blueprints. Go back and craft them. Now you will be immune to sandstorms and moonstorms if wearing this. To kill Antlion, two extra armor pieces and 100 health worth of healing, and two spears, or one dark sword, and a whiteish very cold stone to give him to start the fight so he starts frozen may be more than sufficient, as he will make a small arena around him where you will need to dodge sand spikes coming out of the ground but isn't much more complicated than that. CAVES questline part 1 YEAR-ROUND SURVIVAL SETUP COMPLETE, but there's ruthless caves, and more stuff you need to do on the surface. (it needs to be noted that this part especially assumes the worse is going to happen, and also assumes inexperienced exploring and also fighting, in some degree.) (also needs to be noted that the next steps from here and now on will be very complicated having many enviromental hazards, very hard bossfights, meticulous and some obligatory steps, time-demanding, and a major world reseting endeavor [as you're expected to die multiple times trying to complete it without prior experience]) Go into the cave near your base (if there is one) and collect lightbulbs to prototype a lantern, that should always be carried. Bunnyman will attack you if you have any meat or egg related food in your inventory, but not if it is a hambat or if inside a Chester/Woby/Hutch. Consider that when you're inside a cave events still happen, seasonal bosses may wait you at the exit, and depth worms will attack you as if they were hounds in the surface, Antlion "remote attacks" cause boulders to fall in your position. The big tentacles are wormholes. Upon attacking them, more normal tentacles will spawn around the big tentacle. If the big one dies, so does the other ones (respawns) You need to explore until you either find a lunar biome or a orange-y tile biome with lots of cave lichen, being the wild biome, that is a indicator of the entrance to the ruins. Near this biome you need to be very careful not to be near the splumonkeys as they will rob you of everything they can, and upon approaching the orange walls, be careful not to be in the biome as the grey tile with fissures turns redder, as this indicates the monkeys are going to turn into shadowmonkeys and follow you to attack as long as the red period is going. You need to harvest the orange walls with a hammer, taking rapidly the dropped thulecite as to not be robbed, and taking care to kill the slurpers (purple tongued black fur balls) which will equip into your head, making your head equipment drop in the ground, which may cause it to be robbed by the monkeys. Going further into the ruins biomes is dangerous, being advisable to turn back and return better prepared, with logsuits/nightarmor, a bee queen crown/sanity restoring methods, a eye mask/shield of terror or football helmets, lantern, a stack of not easily perishable food, a great deal of healing measured by how confident you are (it is a good idea to use the bundling wraps from Bee Queen) and also be mindful if going in a non-autumn season of what is needed to survive the temperatures and weather. Harsh biomes ahead. Harvest the newly found ancient statues as you will need the gems and nightmare fuel they give for crafting. Killing the Dragonfly or Spazmatism is also good methods. If you're confident, have space, and want to make your time's and trip's worth, have with you the following to craft all you want to have in this moment in just one trip: (2 thulecite, 3 nightmare fuel, 1 green gem to make a construction amulet, is interesting to craft first as it halves the material cost of the next crafting recipes), 20 thulecite, 27 nightmare fuel, 3 yellow gem, 2 orange gem, 2 green gem, 1 walking cane, 7 living log, 1 luxury axe, 1 opulent pickaxe. (These values don't consider the cost of the construction amulet neither its recipe cost halving it would have if equipped while crafting these items) (also, individual) You are looking for a Broken Ancient Pseudoscience Station, and may repair it with 6 thulecite. After repairing it, craft the items. They will NOT be available for crafting anywhere, always requiring you to come back to the station. You should probably go back now, if you didn't do it before (impressive or stupid, maybe both) If you want to kill a boss now you could go after an Toadstool cap to fight Toadstool. It can yield interesting rewards, you having the axes and patience to kill it. Reorganize, and get ready to go even further to find the Labyrinth. Beware of the spiders, and trapped chests (it is still worth to check them), then be well prepared to fight the Ancient Guardian of the labyrinth, grab the spoils, don't leave the Ancient Key behind as it is obligatory for progressing. CAVES questline part 2 If you haven't already, now is the time to tame a beefalo. If you don't know how to do it, here is a snippet from the wiki page: Obtain a Saddle. Bond the Beefalo with Beefalo Bell if available. Feed it 10 Twigs, then saddle and ride the Beefalo. Riding accumulates Domestication. When you get kicked off, right click it to hop back on. If it doesn't let you, feed it 5 more Twigs, and try again. If feeding 5 Light Bulbs, Petals, or Foliage, must be fed every 160 seconds; if feeding 5 Twigs, every 210 seconds. Brush the Beefalo daily. Leave the it at a Salt Lick and feed until it farts. The Beefalo also gains Domestication when fed. Beware, as overfeeding contributes to Pudgy. You can then tend to other matters, such as farming Twigs and Cut Grass. If you are riding the Beefalo to train, you can feed less and refer to step 4. Hitch the Beefalo at a Grooming Station to avoid it wandering around and fighting other mobs. Once domesticated, leave the Beefalo by a Salt Lick. Occasional riding should refill the Domestication. The beefalo is needed so you can use it to find the three marble sculptures setpiece, and then find the respective 3 different suspicious marble, loading them onto the beefalo and assembling all 3 marble sculptures. Leave them as they are for now, as you're going to need some preparing. Using 4-5 thulecite crowns, mobility and healing and a strong weapon will prove almost fundamental for succeeding in the latter: waiting for new moon (no moon in sky) and breaking a marble sculpture when all three are repaired, spawning the shadow pieces trio and starting the bossfight (tanking is probably going to be necessary). You may kill them in any order, being common to kill them in this order: first Knight, then Bishop, Rook last. If you fail and die, you may return to the statues and pick their respective sketches so you can retry the fight by creating all 3 equivalent statues in a Potter's Wheel (Marble and cut stone only.) with the new moon rule still applying to start the fight by breaking them. On success, a Shadow Atrium will drop. Recover, prepare, and go to the caves to mine for fossils which can be found in Stalagmites (10%) and Spilagmites (100%), being 8 fossils the total needed. Explore the ruins, until you find a big tentacle that leads into a black tiled, labyrinth like, obelisk full, isolated piece of biome called the Atrium. By normal means, it can only be entered via big tentacle wormhole or lazy explorer. You can't progress in the Atrium with sanity above 15% as the obelisks won't let you pass, unless you're using a Nightmare Amulet or Lazy Explorer, be mindful of the very deadly consequences of being there while having no way/items to control your sanity. Prepare one last time, and bring your best equipment (questionable, as you may want to test the waters first so you don't lose as much on dying and then can be better prepared), being obligatory to bring 8 fossils, shadow atrium, ancient key, hammer, and a way to pass the obelisks to reach the Gateway Room. Best equipment, sanity control and healing possible is advised (also wiki page gud) unless you know you don't really need it (really betting on the power of friendship in this one). Using the fossils, assemble the skeleton in the correct manner, which can be found out when the fifth fossil is placed, with the horizontal bull-like skeleton being the right way to assemble it (you can recover 100% of fossil using the hammer, being able to quickly rearrange the skeleton to the correct form). When all 8 fossils are placed and the correct skeleton is near the Ancient Gateway, inside the Gateway Room, check all the stuff you have, and recall you're now going to fight the final boss of the ruins, and arguably the reason you followed through all the steps until now, to win this fight. Don't let him eat the Woven Shadows and heal, good fight. Take a rose home, if you will. Familiarize yourself with your new items, reorganize, then go on throughout the surface searching for moon rocks and the Moon Stone (the one in the dense evergreen forest with suspicious moonrock and moonrubble nearby), which you need to repair using a few moon rocks. Also search for the round Suspicious Boulder and store the Celestial Orb. Prepare some walls around the Moon Stone as it will make the job easier and then put the Star Caller staff in it (it doesn't matter if the staff is damaged) in the dawn just before the full moon night (the same day). When night comes, defend the beam of light for 1 minute (it might be impossible to do or possible to do multiple staves as it depends on the night lasting more than one minute [winter is your best bet]). Use the deconstruction staff atleast once in the newly formed Moon Caller's Staff to get its Iridescent Gem as it's obligatory for the future objectives, following moon caller staves can be used as normal without any kind of other purpose. SAY PAL, YOU LOOK SO GOOD. Is this how it ends? MOON questline Well, look at that, you survived. One down, one to go. Now you should be pretty confident in your ability to survive, but overconfidence is a slow and insidious killer. 120 seconds is a long time to think what has gone wrong that made you (and your friends) die together during any of the next steps. Continuing, You might have found the Lunar Grotto biome while exploring the caves, this biome being the one with the white shards and lunar theme. In this biome you will need to find the Ancient Archive biome, bring with you the Iridescent Gem you got from using the deconstruction staff on the Moon Caller's Staff, 1 moon rock, also bring the usual good equipment, as you might be used to by now. You will need to explore the Ancient Archive until you find the Archive Switch setpiece, which consists of three pedestals, with two of them having a iridescent gem, all you have to do is place yours in the empty slot. Take a distilled knowledge from a yellow and a blue Fountain of Knowledge (the red one is used to make amberosia with 3 filler, give to dust moths to grind thulecite) and bring them to the center of the Archive Orchesthina (the ritual shaped disc with orange circles), dropping the distilled knowledge in the center. The puzzle is completely randomly generated and its solved by trial and error. Learn the Astral Detector blueprint, and craft it. (1 thulecite, 1 moon rock) Go to the surface, and start using it by placing it, following the beams of light. After 10 uses, you can reutilize it by gathering 100% the ingredients back by hammering the astral detector down. This process works much like the suspicious marble line, and following the beams of light will bring you to the lunar island, usually accessible via boat or wormhole. If you haven't before, now you're going to to explore the seas on a boat, be mindful that it is very easy to get yourself in a bad situation while in a boat, considering that most of the time the boat integrity essentially serves as your current health, being that it reaches 0 you lose your boat and gets a heavy setback. Take great care when approaching ocean setpieces especially when unknown, and being non-stop exploring in a boat can also take its toll on killing you long-term. Once you find the lunar island, search for a place with 3 close lunar fissures (maybe as near as the three chess sculptures setpiece), as assembling all parts in nearby fissures is obligatory, being 6 (3 in the first, 3 in the second, 1 piece last structure) pieces in total to be found that build up to 3 structures. The astral detector will dig up 2 of those pieces (Celestial Sanctum Icon and Ward), pointing then for sunken celestial altar pieces (probably is a good idea to take a look around the lunar island to find the three inviting formations so you can just mine them and skip using a Pinchin' Winch to grab them from the underwater salvageable which can be more complicated). If you're going after the underwater salvageables for the celestial pieces intead of mining them, follow the next steps: The astral detector will point to the Crab King after all other parts are collected, find him only so you can discover his position (he will be inert and appear as a big rocky castle-like ocean structure), but there's no obligatory reason to interact with him yet as you don't have what is needed to progress in killing him. If you haven't found yet, search for the Hermit Island, a small lunar island with a a house, bee boxes and drying racks (if you want to be prepared and save time you can already be bringing the following, albeit bear in mind its very risky to lose all you brought in your boat if it sinks: 10 cookie cutter shells [by killing ocean cookie cutters around salt formations], 12 Boards, 10 Marbles, 12 Ropes, 5 Moon Rocks, 10 Cactus Flowers, 1 Empty Bottle, 1 Cut Stone, 1 Flower Salad [or the ingredients and a crock pot], 10 Butterflies, 8 Berry Bushes, 8 Fertilizer, 6 Meat items or kelp, 1 Rain or snow protection item [in the correct season] [dst wiki]) You need to do Crabby Hermit some favors, which only give progress the first time they're done, with the first one giving you access to the bottle exchange tab when near her, which can be used to trade a empty bottle for the Pinchin' Winch you're going to need later, and also perhaps now if you want to take the Underwater Salvageables. After upgrading her home 3 times and planting 10 butterflies (creating flowers), planting and fertilizing (8 berry bushes), giving her a flower salad, giving her a insulation dress (winter clothing piece) if snowing, giving Pretty Parasol/Umbrella/Eyebrella if raining, drying food items in all drying racks on the island (6 total), removing all underwater salvageables around her island, killing a meat bulb (it can't be one planted by a player, the meatbulb will spawn in the island at the beginning of spring if not spawned already), you can also give her a heavy Fallounder/Bloomfin Tuna/Scorching Sunfish/Ice Bream/Ocean Fish which can be identified as heavy by weighing with a Pocket Scale. Doing 10 different tasks (each level of the house counts as 1 different task) will culminate in a 10 level friendship with the Hermit, that reveals her name a bit before she gives you Pearl's Pearl. Now you have what you need to progress by fighting with Crab King, but some things need to be addressed first. Crab King proves very difficult and its fight revolves around keeping yourself in a boat long enough to kill him before he destroys your boat and you sink. You probably won't need any armor, instead relying on boat kits and boat patches. You need Pearl's Pearl and 8 gems (using all purple ones may be expensive but usually plays very easier if you have spare boat kits. This fight is specially recommended with friends, as you should not let him heal himself. You may want to use a Weather Pain when he tries to heal himself by putting rocks in his body, so you can cancel it). Failing it the first time is common, but good preparation and following a coordinate strategy will win the battle first try. After defeating Crab King, use a Pinchin' Winch to grab the last piece of the three structures and assemble all three together in nearby fissures, as previously mentioned. (5 tiles max distance) Have a nice surprise. Preferrably using the desert goggles, enter the new storms and find Wagstaff. You can now also use the Astroggles. Mine the charged glassy rocks (they will lose their charge in 12 minutes becoming useless), and also bring a bug net to catch the moongleams in the storms. Use the bundling wrap from killing Bee Queen so you can preserve 30 Infused Moon Shards without them spoiling. It's almost obligatory. Complete its task by initially following him until he stops, then giving him his tools (each different design has a unique permanent name you can memorize) and defending him from the Misshapen Birds and Moonblind Crows. He will rewards you 1 Restrained Static. In total, you will need 6 Restrained Static, 15 Moongleams, 30 Infused Moon Shards, 2 Electrical Doodad, 1 Celestial Orb (If you haven't found a round Suspicious Boulder to get the Celestial Orb, you can find them to mine in rocky biomes with meteor showers. It's RNG dependant, but not very rare. It has 100% chance of spawning if not available before day 60, in the next meteor shower.) The third and last stage of the building is the key to (immediatly) start the last bossfight of this tracklist, and arguably the hardest. Separate one Restrained Static, 20 Infused Moon Shards, and the Celestial Orb in your inventory, as they are needed to complete the third stage and start the bossfight. Also bring a light source and keep it in your inventory. Gloomer's goop good too. Do your best to prepare, there is no more need to enter in equipment details as you are now very experienced. All advice is especially to not lose your world now. Now it's Just dust. And the Void. And Them. Checkmate Thank you for reading/following through. If you used the tasklist as i think it would be used, you've probably had some kind of journey inside the game with this list reaching the end. Comment or leave a suggestion if you will. I'm going to read it. THE END.