换一换
换一换 


【通知】:此模组已更新至5.0版本。新更新为独立版本。对于希望继续使用4.0及以上版本的用户,本指南仍然有效。 本指南尽可能全面且易于理解地解析了每个派系的主力战舰。为简洁起见,本列表不包含特种舰船(如护航航母)。所有类型的战斗机也未包含在内;在此模组中,大多数舰船会根据其自身的战力和科技水平配备相应的驻军,因此即使未明确说明,它们的影响也已在本指南中有所体现。 本指南的完成耗时已久,感谢您的支持、反馈与时间。愿原力与你同在! 干杯! 术语表 本指南中使用了一些缩写,以下是简要说明: GC:即银河征服,是你所选派系的主要战役。 SK:即遭遇战模式,是供单人玩家进行的快速战斗。本指南中不会经常提及此模式,但为防万一还是说明一下。 Stats(数据):每个舰船主题下都会有该特定舰船的可视化数据摘要。该摘要会出现在图表之前,图表将以1-10的等级展示舰船的相对能力。单位能力不计入排名,因为它们会改变舰船的原始数据或为自身及其他单位提供增益。此列表将包含以下类别: 攻击:综合舰船的总伤害能力,包括离子炮等间接伤害、导弹以及适用情况下的驻军中队。 防御:综合舰船的总防御套件,包括高射炮、护盾、装甲生命值和耐久性。 射程:舰船有效射程的简化估计。部分舰船的武器在目标过近时无法开火,这一点已在排名中考虑。 多功能性:该等级计算舰船在其参与的任何战斗中的相对影响,以及其承担多种角色的能力。这完全基于游戏内的统计数据和上述等级。基于所使用的派系、舰船以及支援它的友方舰船的整体配置,可能会出现较大偏差。因此,对于这一数据应持保留态度,因为玩家对舰船的使用方式会极大地改变其多功能性。 帝国:护卫舰 简介:帝国舰船旨在进行压制和征服,擅长远程射击,并专注于指挥官的指挥以及以数量取胜。 ----------------------------------- 护卫舰 ----------------------------------- 角斗士级 别称:懦夫号
角斗士级及其先进驻军型的性能没什么太多可说的:造价低廉,部署迅速且可大规模出动,但在直接战斗方面实力平平。不过它们至少有一个优势——搭载战机。部署这类舰船比专用航母单位更划算且高效,因为它们配备了一些武器系统和中等护盾,能够在援军抵达前抵挡一段时间的攻击。 建议:远离前线;它们会被任何比自身更大的舰船摧毁。可作为支援舰使用,应对突破前线的零散敌军,或补充空间站的战机防御力量。在GC中,用更强大、用途更广的舰船替换它们,或者始终让更强大的舰船作为同伴。 基础型号 属性 等级 攻击 1 防御 2 射程 2 通用性 1 高级驻军 属性 等级 攻击 1+1 防御 2 射程 2 通用性 1 维护者与执行者【别称:BB Guns】
-“维护者”及其兄弟“执行者”在“角斗士”的不足之上进行了改进,但明显牺牲了战斗机能力。这是一项值得尝试的设计,“执行者”在必要时能勉强独立作战,但无法对抗多个敌人。 -建议:用它们来侦察和骚扰其他护卫舰,因为它们可以充当不错的肉盾,分散敌人对您更强大舰船的注意力。舰队中配备多达三艘这类舰船并不丢人,但要确保您有足够的战斗机或一艘巡洋舰作为支援。复仇者 属性 等级 攻击 3 防御 2 射程 2 通用性 3 执行者 属性 等级 攻击 3+1 防御 2+1 射程 2 通用性 3 欢呼者I-II型【别称:神风】
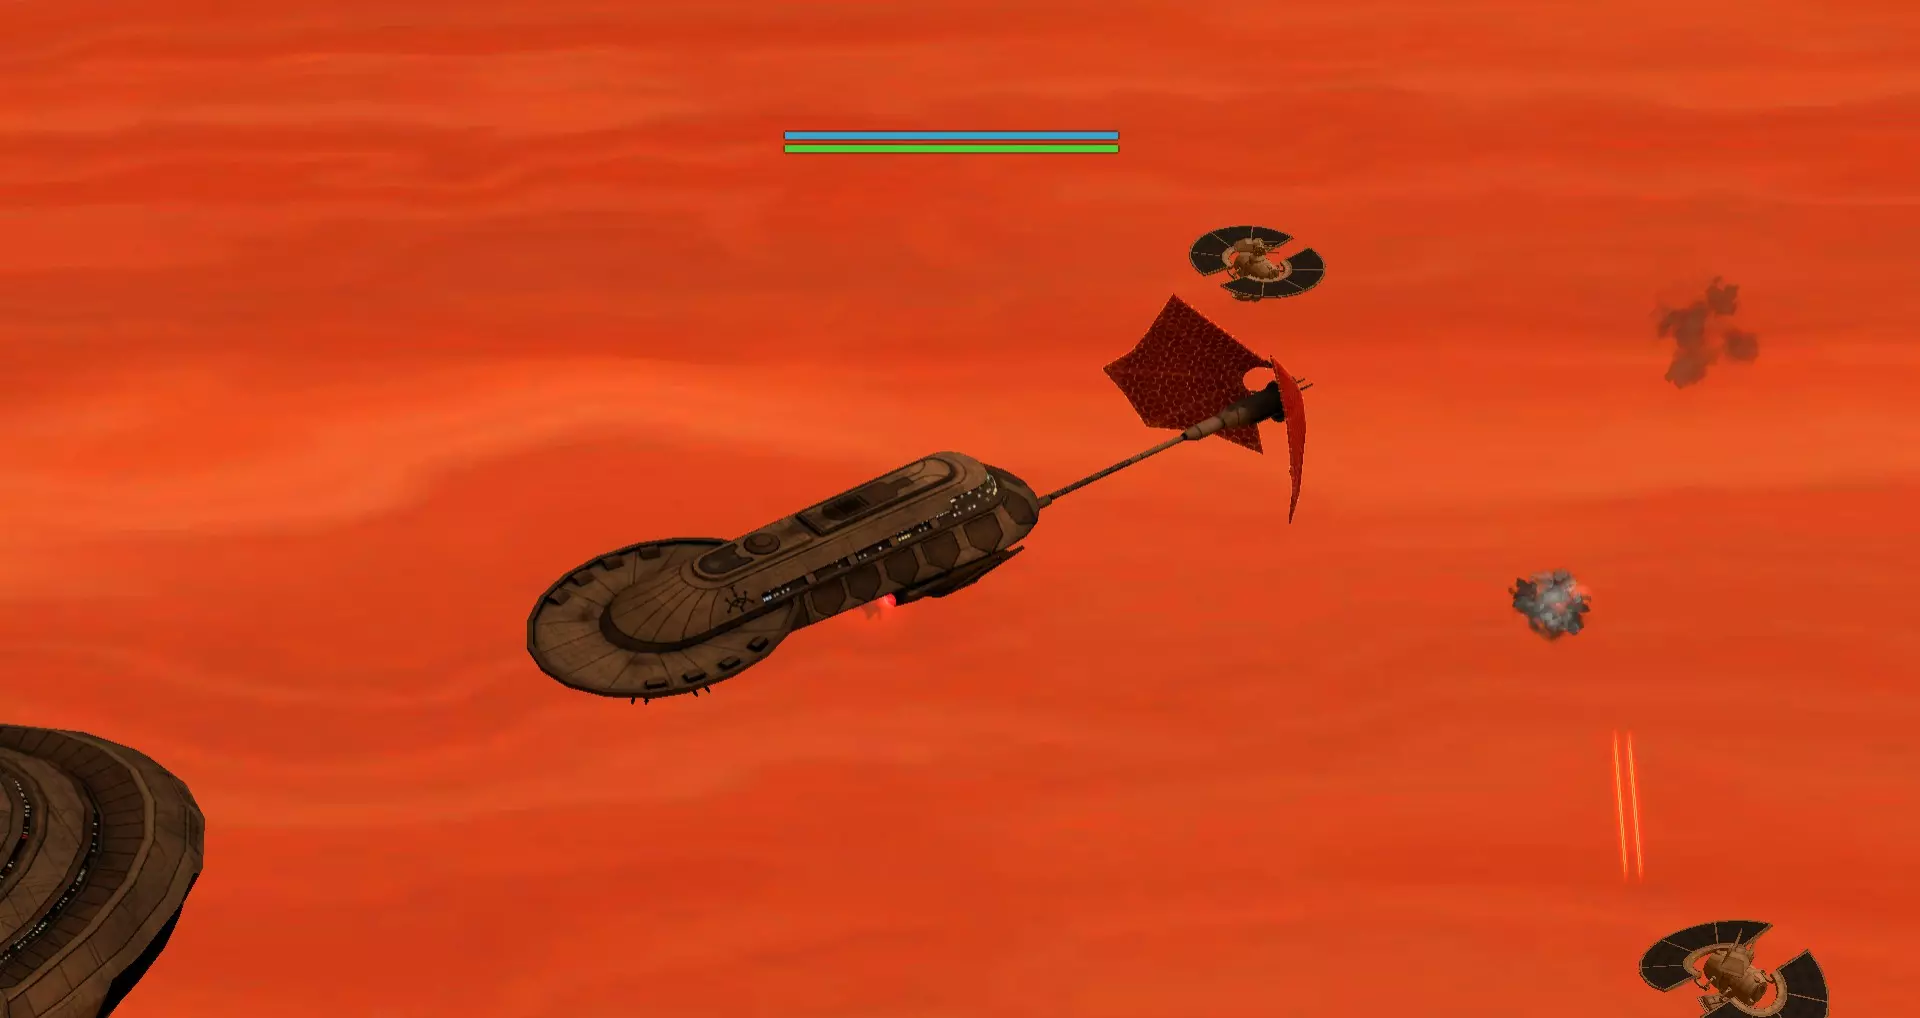
你会对这艘舰船又爱又恨,原因如下。凭借出色的速度,它们能凭借一系列令人印象深刻的攻击型武器追击逃窜的护卫舰,或作为先锋发起舰队战斗。尽管在这些方面表现出色,但你会发现它们很容易被轰炸机和战斗机击落,或者护盾被离子武器摧毁。考虑到其10000-12500的成本,你或许更愿意投资胜利级,它更便宜且用途更广。 建议:让它们率先发现并与敌方战舰交战,不要挑剔目标。这些舰船就是用来消耗的,以便让你更强的舰船进入射程完成任务。如果需要,它们对付空间站也还不错。Acclamator I 数据 等级 攻击 4 防御 3 射程 4 多功能性 4 Acclamator II 数据 等级 攻击 4+1 防御 3+1 射程 4 多功能性 4 胜利级,别称:瑞士军刀
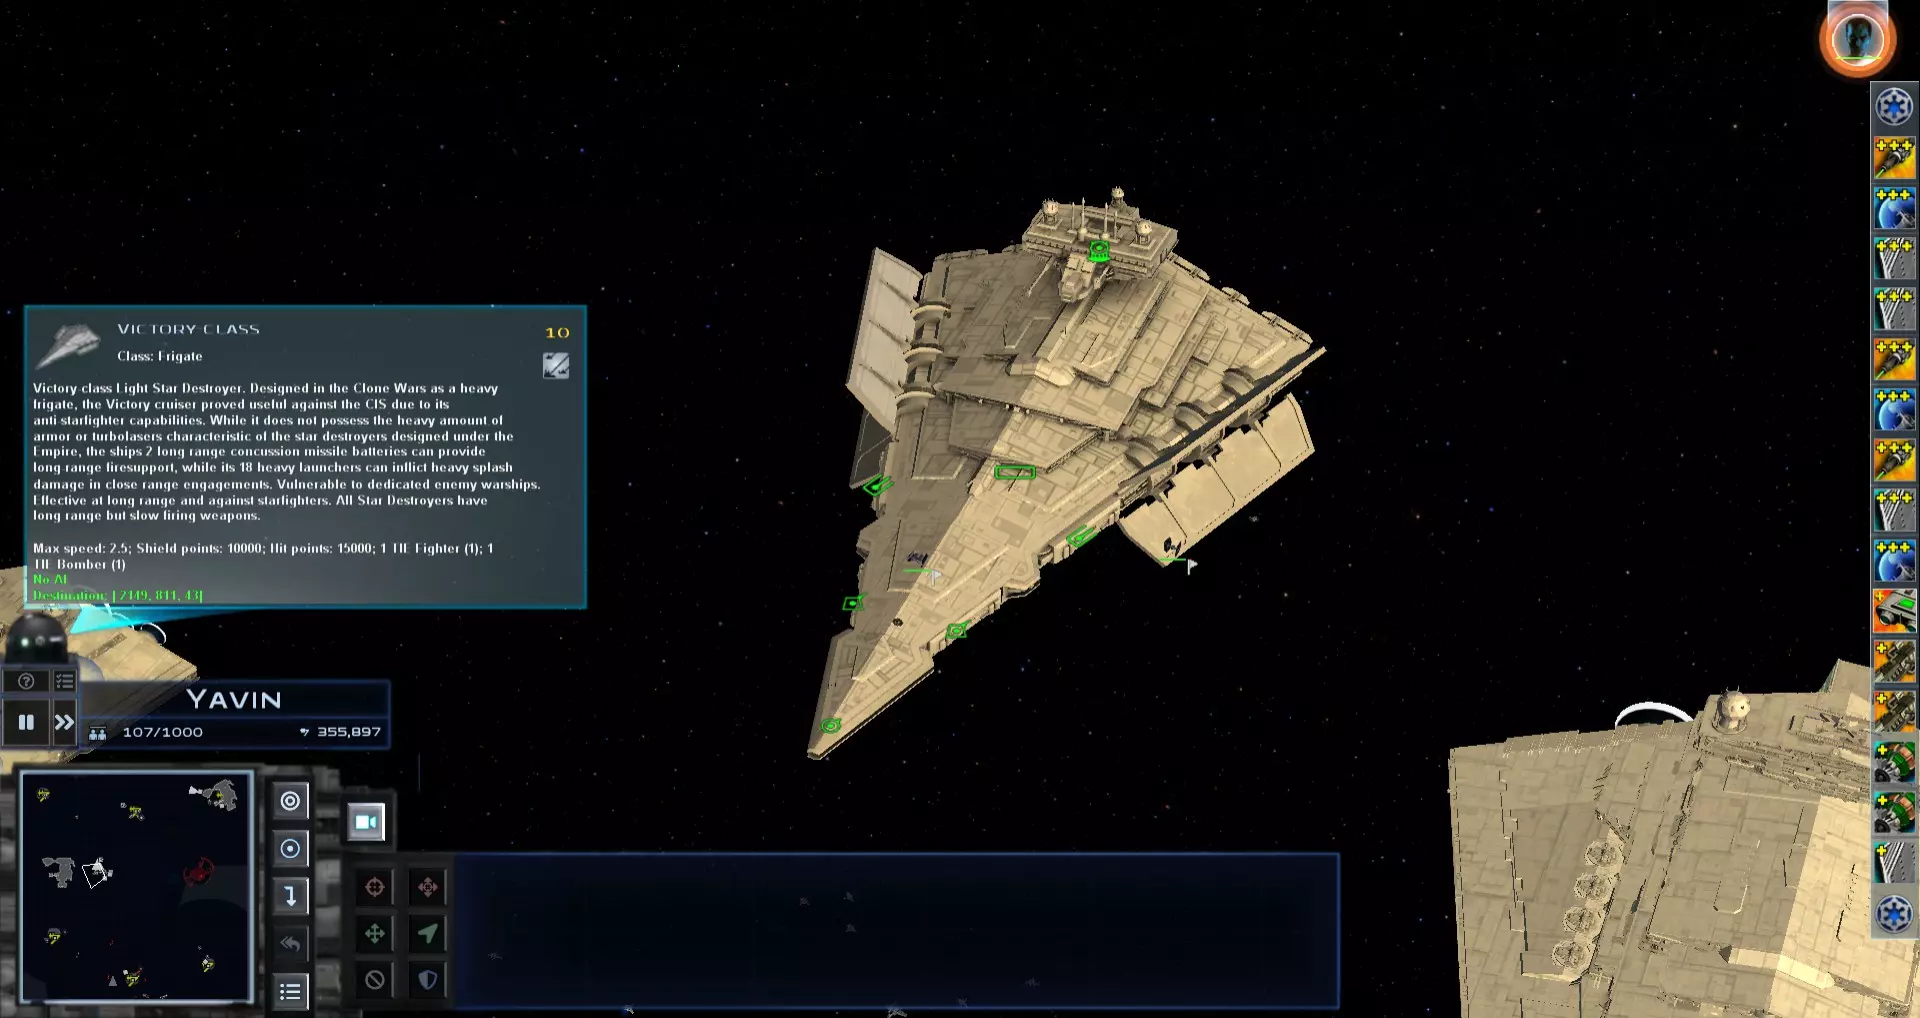
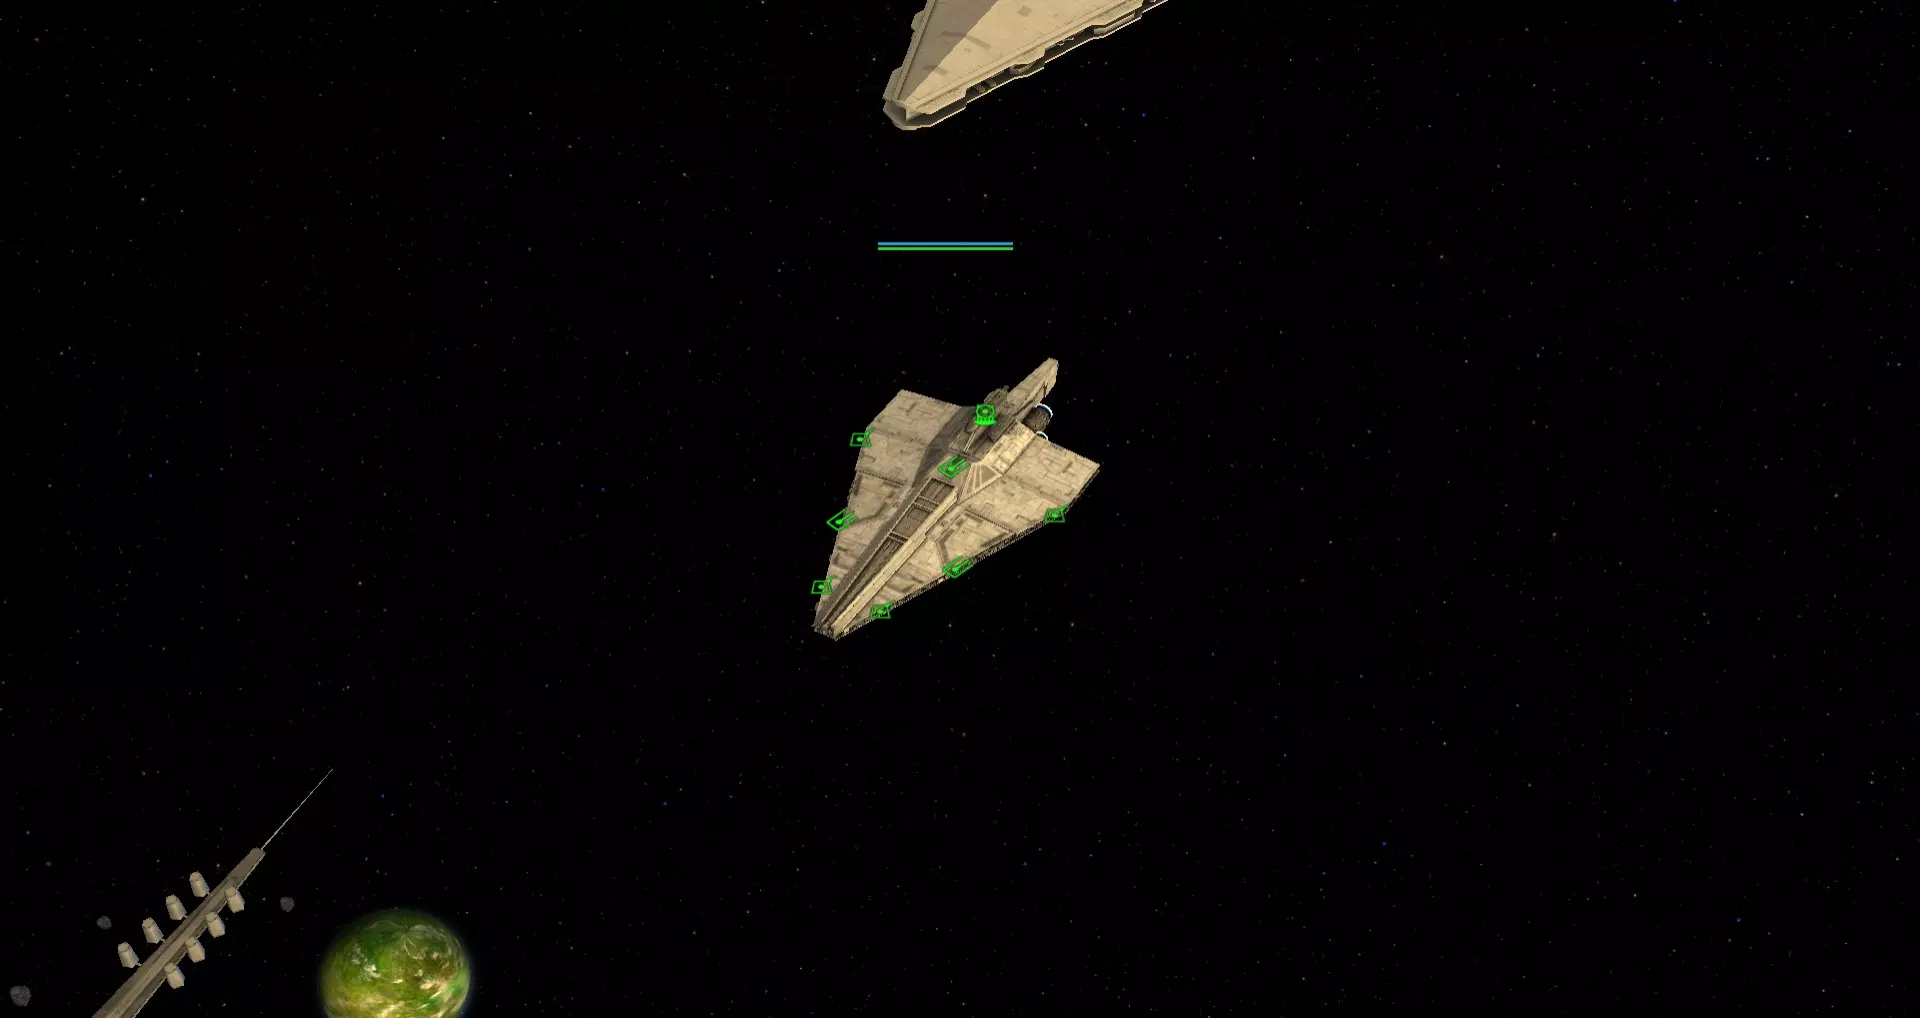
我可能对这艘船有点偏爱,但还是说说吧。反战斗机?没问题。反护卫舰?没问题。反巡洋舰?先远程打击;没问题。反主力舰?嗯,不过敌人要想赢就得付出巨大代价。在帝国舰队的所有舰艇中,胜利级护卫舰独树一帜,是能应对各种敌人的多面手,也是任何舰队中的顶级多功能舰船。它有几个明显的弱点,比如任何能反制导弹、比它快或者能在射程外攻击它的舰艇。除了少数专门的特定舰船外,符合这些条件的并不多。 建议:在银河冲突或星际王国中,我的任何舰队都至少配备一艘胜利级护卫舰。凭借在远距离攻击任何目标的能力、足以近距离对抗任何舰船的速度以及出色的护盾,有这家伙在,任何策略都能奏效。 胜利 数据 等级 攻击 5 防御 4 射程 6 多功能性 9 IEC护卫舰【别称:狙击手】
-我们都至少经历过一局有蹲点玩家的《使命召唤》对战,对吧?现在来介绍帝国阵营的同类单位,仅需5000资源(需科技等级3)。帝国的远程火力本就十分充足,而这艘护卫舰更是如虎添翼。它搭载了出色的战斗机编队,可有效防御敌方突袭;还配备了中程火炮,能对付那些侥幸逼近的护卫舰。就像游戏中的狙击手一样,一旦敌人进入最佳射程,护盾和装甲都形同虚设。 -建议:出于显而易见的原因,要与战场保持距离,且不要让派出的战斗机离得太远。虽然它对主力舰有效,但在猎杀巡洋舰和护卫舰方面表现尤为出色。我建议在攻击舰队中配备两艘,以轻松提升杀伤力。IEC护卫舰 数据 等级 攻击 8 防御 3 射程 8 通用性 5 帝国:首都舰 -------------------------------- 主力舰 --------------------------------- Procusator又名:闪电战者
在测试期间,我最近发现它是帝国舰队中射速最快的主力舰。由于帝国几乎所有比巡洋舰大的舰船射速都较慢,这使得“普罗库萨托”级成为了一种独特的舰船,尽管它很容易被替代。作为真正的歼星舰在其经典同名型号出现前的首个版本,“普罗库萨托”级是任何早期舰队的优秀核心。虽然从战术角度而言,花费13000信用点购买“帝国级歼星舰”(比“普罗库萨托”级仅多5000信用点)会更好,但如果你希望为更多不同类型的舰船节省增援上限,这艘船是一个很棒的重型打击替代选择。 推荐:将这艘船与两艘“阿卡拉玛托”级搭配使用会带来一些令人惊讶的结果。让这个编队(包括战斗机)冲向敌人的前线,然后观赏这场“烟火秀”吧。你会受到一些伤害,但相信我,“你应该看看另一边的家伙”。 Procusator 属性 等级 攻击 5 防御 4 射程 5 多功能性 4 帝国歼星舰(ISD)I-II,又名:正史(懂吗?哈哈)
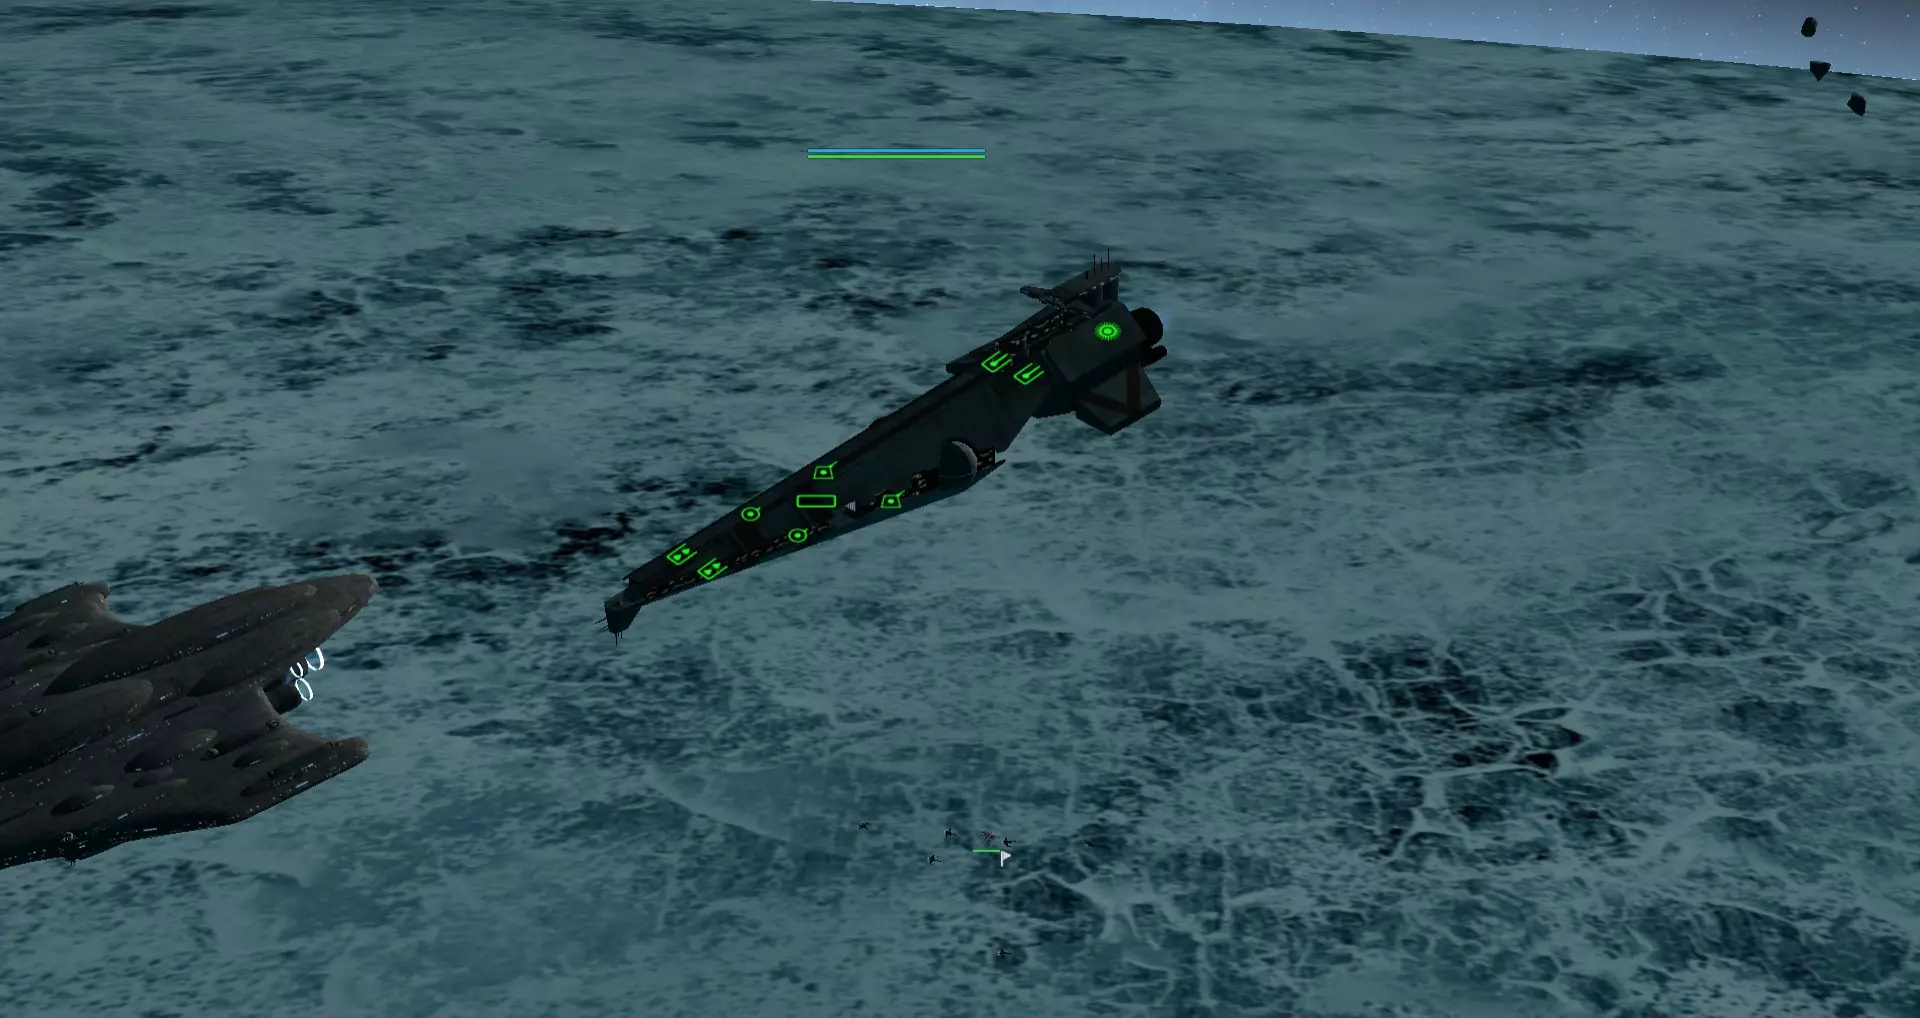
很难用言语来形容这艘经典舰船的魅力;如果没有帝国级歼星舰(ISD)的登场,《星球大战》也就失去了其标志性的一部分。正是帝国级歼星舰激发了我创作本指南的灵感,因为我发现许多玩家在理解这款模组中的战舰时遇到了困难。需要明确的是,帝国级歼星舰及其变体并非为前线作战而设计。尽管它们的造价高达18000至25000资源,它们是否会积极参与战斗?答案是肯定的。它们是否应该成为你组建舰队的核心?答案也是肯定的。那么,是否应该让它们参与近距离战斗?简而言之:不应该。但它们能否在近距离战斗中自保?简而言之:可以。 建议:让你的帝国级歼星舰主力舰远离前线的炮火风暴,保持在适当的距离。为了提供射程参考,可使用胜利级、欢呼者级或维护者级作为缓冲,以弥补帝国级歼星舰(ISD)射速慢的缺点。这不仅增加了针对其他舰船的多层防御,也提升了对战斗机的防御能力——而战斗机正是帝国级歼星舰的致命弱点。帝国级歼星舰I型(ISD I)最适合在侧舷射击角度使用,而帝国级歼星舰II型(ISD II)能够全角度开火,必要时在近距离作战中表现更出色。 帝国级歼星舰I型 数据 等级 攻击 6 防御 4 射程 7 多功能性 5 帝国级歼星舰II型 数据 等级 攻击 6+1 防御 4+1 射程 7 多功能性 5+1 忠诚级,又称:堡垒

“忠诚号”的建造成本高达50000,且建造时间漫长,它简直就是一辆坦克,旨在以一敌三,挑战任何敢于尝试的对手。其火力仅次于三级空间站和SSD,并且拥有所有主力舰中最强的护盾。尽管性能令人印象深刻,但它采用了与ISD类似的战术,且针对护盾的离子武器威力较弱,这影响了其整体效能。它在威慑方面表现出色,但实际作战能力欠佳。 建议:由于建造成本极高,且除了承受伤害外几乎别无他用,因此大规模部署这种舰船是浪费资源的。在银河征服模式中,建议在关键造船厂或咽喉要道部署一艘,并配备一定数量的小型舰船。如果可以的话,永远不要让这艘船单独行动。还要把那些讨厌的战斗机也挡在外面。 忠诚 属性 等级 攻击 7 防御 7 射程 7 多面性 5 鱼雷球【又称: siege gun】
作为5级科技的火炮舰艇,鱼雷球 siege platform 名副其实。其质子鱼雷发射器的射程是标准歼星舰的两倍以上。鱼雷球的鱼雷具有范围伤害效果,能够一次性摧毁多个武器点。它也是少数几种射程超过戈兰三号空间站鱼雷的单位之一,因此在清除防御部队后,它可以安全地摧毁敌方空间站。然而,其发射器射速极慢,且仅配备少量激光武器,几乎难以抵御任何近身的敌人。推荐:如果你在舰队中拥有多余的这些宝贵火炮,请将它们部署在主战防线后方,远距离摧毁敌人的主力舰。TSSP的火力足以摧毁大型目标,因此前线舰队应尽力阻止任何敌人(尤其是轰炸机)突破防线。 鱼雷球 属性 等级 攻击力 10 防御力 5 射程 10 通用性 3 义军:护卫舰 关于生存。在看似不可能的逆境中取得胜利。义军的舰船注重战斗机优势和多用途适应性。 ----------------------------------- 护卫舰 ----------------------------------- EF-76 尼布隆B型:标志性舰船
-除了AAF外,在整个星球大战中最知名的护卫舰或许就是它了——你知道的,就是卢克装上机械义肢的那艘。这艘舰船造价3500,在这里也扮演着类似的角色。它的战斗能力相当有限,主要为义军舰队提供纯粹的支援:修理舰船和驱散战斗机。 -建议:让它们远离前线,但要靠近你的舰队以发挥最大效率。在舰队中配备最多三艘是个不错的策略,因为在大型战斗中你很可能会损失至少一艘。 尼布隆B级护卫舰 属性 等级 攻击力 1 防御力 1 射程 1 多功能性 2 MC-30c护卫舰,又名:开拓者

蒙卡拉马里30c护卫舰有两种武器:两门鱼雷炮和它的引擎。你可能会问为什么引擎也算武器?那就试试在一群这样的护卫舰远距离对你打冷枪后追上它们吧,我敢说你做不到。说真的,如果你知道有比它更快的护卫舰,麻烦告诉我。但需要注意的是,它们的武器不像大多数导弹那样能穿透护盾,虽然不会完全失去效果,但目标的护盾越坚固,造成持续伤害所需的时间就越长。 建议:以双舰编队进行打带跑战术;对于这种舰船来说,这既简单又有效。但如果你不喜欢频繁操作这些舰船以避免它们被摧毁,同时又想确保它们能发挥作用,你可以将这种舰船与潮汐护卫舰搭配。这样潮汐护卫舰可以为其提供保护,同时削弱敌方护盾,而MC-30c则可以相对安全地进行攻击。MC-30c 护卫舰 数据 等级 攻击 4 防御 1 射程 4 多功能性 2 CEC CD-273级护卫舰和BAF-4护卫舰,又名:渡鸦(左)和猎鹰(右)
我发现这两种舰船通常扮演着完全相同的角色,只是存在一些值得注意的差异,因此将它们放在一起讨论。CEC护卫舰预算成本为7500,凭借略长于BAF-4的出色导弹射程,往往会成为你的主力突击护卫舰,不过它在装甲和护盾方面有所牺牲。BAF-4造价10000,射程较短,但在需要自卫时表现更优,并且拥有额外武器来击败对手。 建议:将这两者搭配使用虽然诱人,但并不推荐,因为它们在角色定位上完全相同。我通常将CEC用于空间站和前哨站防御,因为它具有更远的射程;而BAF则用于我的突击舰队,与吸引伤害的舰船和战斗机保护配合使用。CEC 护卫舰 属性 等级 攻击 4 防御 3 射程 5 通用性 3 BAF-4 护卫舰 属性 等级 攻击 5 防御 4 射程 4 通用性 4 浪潮,又名:箭头
-潮汐护卫舰造价约8200,在坦克和破盾这两个角色上表现极为出色。它们能在护盾失效前吸收大量伤害,同时其离子炮对敌方护盾造成极高伤害,可有效对抗任何目标。不过它并非为造成船体伤害而设计,因此需注意部署位置。 -建议:潮汐护卫舰是隐藏的制胜法宝。作为少数专门用于击破护盾的舰船之一,你需要尽可能长时间地保持它们的存在。基于此,让它们处于首轮攻击的最前线,然后撤回是个不错的主意,同时在突击舰队中至少保留两艘,因为如果不够谨慎,很可能会损失一艘。浪潮 数据 等级 攻击 3 防御 4 射程 4 多功能性 4 AAF护卫舰【别名:壁垒】
-永远不要在拥有AAF护卫舰的情况下退缩。作为你的主力坦克护卫舰,你会希望它们吸引尽可能多的注意力。这艘护卫舰造价12k,移动缓慢,拥有同级别中最高的护盾防御,但除此之外它不会有太多作为。依靠其他舰船来造成船体和护盾伤害,虽然它配备了轰炸机,但其效果高度依赖具体情况。 -建议:我发现将它们与BAF或CEC等高伤害舰船搭配使用效果最佳,以弥补其自身输出不足的问题。目前我发现,一组2艘BAF和1艘AAF来承受伤害是最佳的平衡。AAF护卫舰 数据 等级 攻击 2 防御 6 射程 3 通用性 3 叛乱军:主力舰 -------------------------------- 主力舰 --------------------------------- MC-80AAKA:调解者号
MC-80A将作为舰队防御的主力舰。由于其1v1能力较弱,你会希望它们主要用于掩护战斗机,因为其火炮对战斗机的效果远胜于对主力舰。尽管如此,其护盾防护的优势不容小觑,能够在援军到来前支撑相当长的时间。 建议:将它们分散部署在舰队中,最多3艘,以最大化其320度的 firing arc,至少有一艘部署在前线。作为出色的战斗机掩护舰,舰队中配备一艘MC-80A将有助于确保制空权(如果你尚未拥有的话),并能对小型舰艇提供可观的火力。MC-80A 数据 等级 攻击 4 防御 5 射程 4 通用性 4 解放者,又名:切齿者
我曾认真考虑是否要将这艘舰船加入指南,因为它的主要功能更接近航母,而这类舰船通常不在本指南的收录范围内。但经过长时间的内心挣扎以及对其性能的充分测试后,我认为如果将其排除在外,那就是对反叛者阵营的不公正。 解放者号或许是反叛者舰队中最能体现多用途舰船特点的范例。它能够搭载大量战斗机,还可以用离子炮击晕敌方舰船,并且能配备小型激光炮。这艘舰船最适合在战局不利时作为最后的手段,帮助你扭转局势。 建议:如前所述,解放者号首先是一艘航母,其他所有功能的效果都有所减弱。如果你发现自己即将失败,派遣至少一艘攻击型舰船护送它。这将击晕敌方舰船并削弱其护盾,同时你的护航舰船可以趁机行动。我发现自己经常用这种方法伏击之前已经交火的舰船。 解放者级 数据 等级 攻击 3 防御 3 射程 3 多功能性 4 MC 80,又名:格斗者
蒙卡拉马里80级主力舰与80A型号基本相同,主要区别在于护盾强度和武器数量的提升。它们的角色定位较为复杂,简单来说就是尽可能吸引敌方注意力。其护盾再生速度是游戏中最高的,能够承受极高的伤害,而唯一的弱点是离子炮。不要指望用这些舰船进行输出;虽然它们能造成一定伤害,但你应该让其他舰船来承担输出任务。 建议:舰队中配备不超过2艘该型舰船,占用过多指挥值并不值得。凭借其集成护盾(不可被锁定),它们是出色的坦克,应始终部署在前线吸引敌方主力舰的火力。将它们与攻击型舰船和潮汐护卫舰搭配,就能组建一支全面舰队的雏形。 MC 80 数据 等级 攻击 5 防御 7 射程 4 多功能性 5 无畏舰【别称:粉碎者】
“弹幕地狱”是这艘舰船的另一个昵称。正如其舰体结构所示,侧舷角度是它的核心作战方式,并且配备了全涡轮加农炮。简而言之,尽管缺少离子炮,但任何护卫舰及以上尺寸的目标都会被它撕碎。不过它速度较慢且护盾薄弱,因此需要保护好它。 推荐:无畏级巡洋舰应作为你的主要攻击舰之一,它拥有出色的射程,因此应保持相对距离,并从两侧侧舷角度进行攻击。它对大多数比护卫舰小的目标极为不适应(例如,对战斗机和移动的轻型护卫舰有90%的命中率缺失),所以要让这些小型目标远离它。无畏 属性 等级 攻击 8 防御 3 射程 7 多功能性 4 星云与坚毅 又名:执政官与守护者(如下)
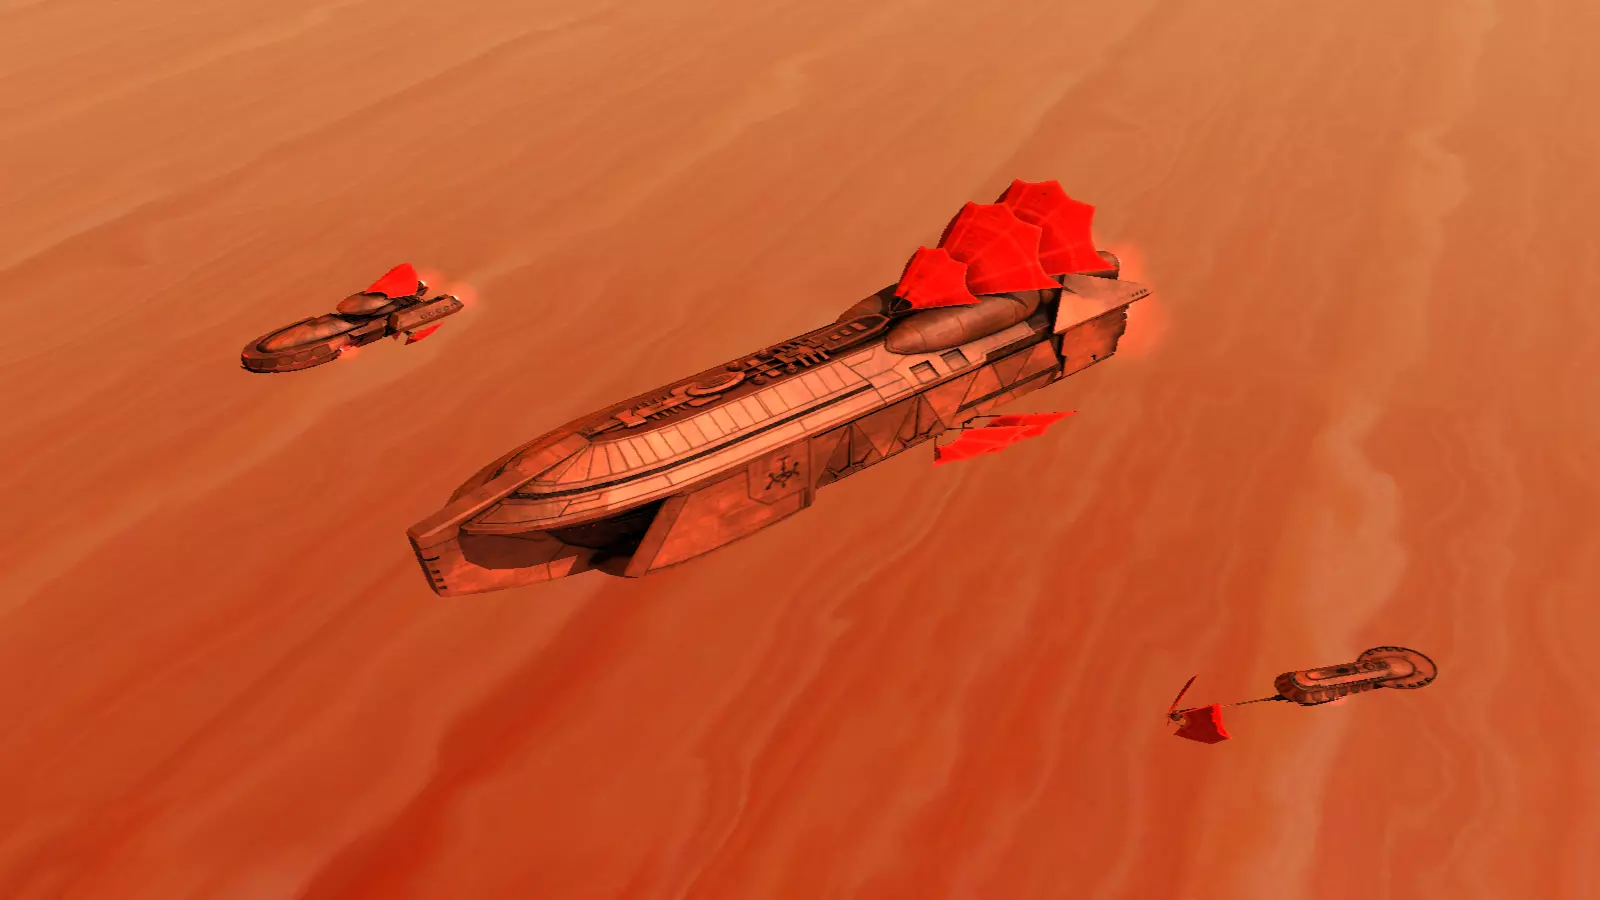
这两艘舰船如同兄弟一般相辅相成;偶尔会有分歧,但最终总能和好并共同取得成功。 星云号(执政官型)喜欢深入战场中心,挑起战斗并击败敌人。与大多数其他攻击舰相比,它的射速较慢,这一点需要注意。不过作为弥补,它配备了一门特殊的火炮,对护盾和装甲的效果同样出色。 而坚韧号(守护者型)则喜欢保持阵地,释放战斗机并偶尔发射导弹。它致力于确保制空权,因此将其当作航母来使用,它就会尽可能地支援兄弟舰船的冲锋陷阵。但它并非不堪一击,在必要时也能从危险的战斗中脱身。推荐:这些舰船搭配效果极佳。我使用的编队是让星云号以小角度位于坚毅号前方。这样做的目的是帮助保护坚毅号,坚毅号的整体射程略占优势但输出不足,但仍能对敌方舰船造成伤害。这也有助于确保所有角度都能被覆盖,因为星云号拥有近乎360度的 firing angle,而坚毅号的正后方防御较弱。星云号 属性 等级 攻击 7 防御 5 射程 5 多功能性 5(配对时为6) 坚毅号 属性 等级 攻击 7-1 防御 5 射程 5+1 多功能性 5(配对时为6) 犯罪地下世界:护卫舰 简介:三大派系,一个目标。黑日、赫特人和赞恩财团联手在银河系光照不到的地方兴风作浪。他们的舰船完全无视敌方护盾,专长于导弹武器和中距离战斗。 免责声明:有部分舰船被归类为护卫舰,但实际上更适合承担轻型护卫舰的角色。它们对舰队战斗的影响足够显著,因此将被列入【荣誉提及】标签下。 ----------------------------------- 护卫舰 ----------------------------------- 太阳帆护卫舰,又名:毒刺
-小型、灵活且略带怯懦的太阳帆船是战场上的麻烦制造者。它配备了一门质子发射器和强大的引擎,是同尺寸及更小船只的克星。它们甚至可以在撤退时使用后置倾斜涡轮激光炮进行攻击,还能部署炮塔作为进一步的攻防威慑手段。 -建议:不要害怕积极使用它们。在SK中,它们的炮塔十分坚固,成群结队时能可靠地对抗大多数敌人,这使得该舰相当具有适应性。最佳使用数量为3-5艘,以充分发挥它们的作用。 太阳帆船护卫舰 属性 等级 攻击 2 防御 2 射程 3 多功能性 3 塔拉达护卫舰,又名:游艇
-塔拉达级护卫舰是负责拦截战斗机和小型目标的主力舰只。它配备了快速导弹和性能尚可的激光炮,在本职工作上表现出色,但对抗大型目标时较为吃力。 -建议:任何舰队中最好至少配备2艘,以保持制空权并保护没有自带护卫力量的舰船。将它们部署在舰队中央,以充分发挥其宽阔的射击角度优势。 塔拉达级护卫舰 属性 等级 攻击力 2 防御力 3 射程 3 多功能性 3 标枪级护卫舰【别称:幽灵】
标枪级是一种以支援为基础的快速舰船,尽管它配备了武器。它专门用于施加减益效果、进行导弹防御以及掩护己方其他舰船免受敌方护卫舰的攻击。如果情况需要,它们也能造成可观的伤害,还能追击逃跑和受损的舰船。 建议:它们小巧流线的体型使其难以被击中;利用这一点来对抗体型较小、精度较低的护卫舰。在一场大规模战斗中,你很可能会损失一艘标枪级,因此要准备1-2艘备用。 标枪级 属性 等级 攻击 3 防御 3 射程 3 多功能性 3 达兰-坦巡洋舰,又名:鱼尾

抛开其有趣的造型不谈(为了让本指南保持适宜全年龄段),这艘船操作不便、速度缓慢但火力强大。不过,其独特造型使Darran-Tan能够充分利用其强大的重武器阵列,以恰到好处的方式击穿敌方舰船,在你需要的时候释放其威力。虽然确保它的安全应是首要任务,但它的冷却时间还算合理。(好了,我说完了) 建议:将其部署在舰队后方以获得最佳效率。它对战斗机和快速护卫舰极为敏感,但在摧毁大型舰船和前哨站方面表现出色。达兰-坦 属性 等级 攻击 5 防御 3 射程 5 多功能性 4 多尔布拉巡洋舰【别称:蝎子】
-你的主力护卫舰适用于任何舰队;无论是防御还是突击,这艘舰船都专为中距离战斗而设计。单独行动时,它平平无奇;但与其他舰船协同作战时,它便迅速展现出“多面手”的特质。与帝国的胜利级护卫舰相比,其缺点是射程较短且单独作战能力较弱,但在舰队中能完美胜任各种角色,从而弥补了这些不足。 -建议:始终将该舰与其他不同类型或角色的舰船搭配,以充分发挥其均衡且高效的多功能性。由于搭配方式多样,建议你亲自尝试找到最适合自己的组合。我个人最喜欢将其与标枪护卫舰和塔拉达护卫舰搭配,这样既能保持全面性,又能拥有速度和机动性优势。多尔布拉 属性 等级 攻击 5 防御 4 射程 4 多面性 4(单独3星) 犯罪地下世界:首都 -------------------------------- 主力舰 --------------------------------- 切兰迪翁级驱逐舰又名:贾巴宫殿
好吧,别跟我说这艘船没让你想起《绝地归来》里贾巴的 pleasure barge。不管怎样,这艘船是你任何舰队的主要旗舰。和大多数 underworld 舰船一样,它配备了导弹和几乎所有已知的武器,使其成为对抗攻击舰艇甚至战斗机的有效威慑力量(如果需要的话)。它在战斗中采取的是“样样皆通,样样不精”的策略。 建议:尽管有诸多优势,但也不要急于将它们投入前线。最好将它们部署在舰队中央,以充分利用其320度的射击角度,并应对试图攻击你关键舰船的敌方战斗机和轻型护卫舰。 切兰迪翁 数据 等级 攻击 6 防御 6 射程 5 多功能性 5 公国级战列舰,又名:幽灵号
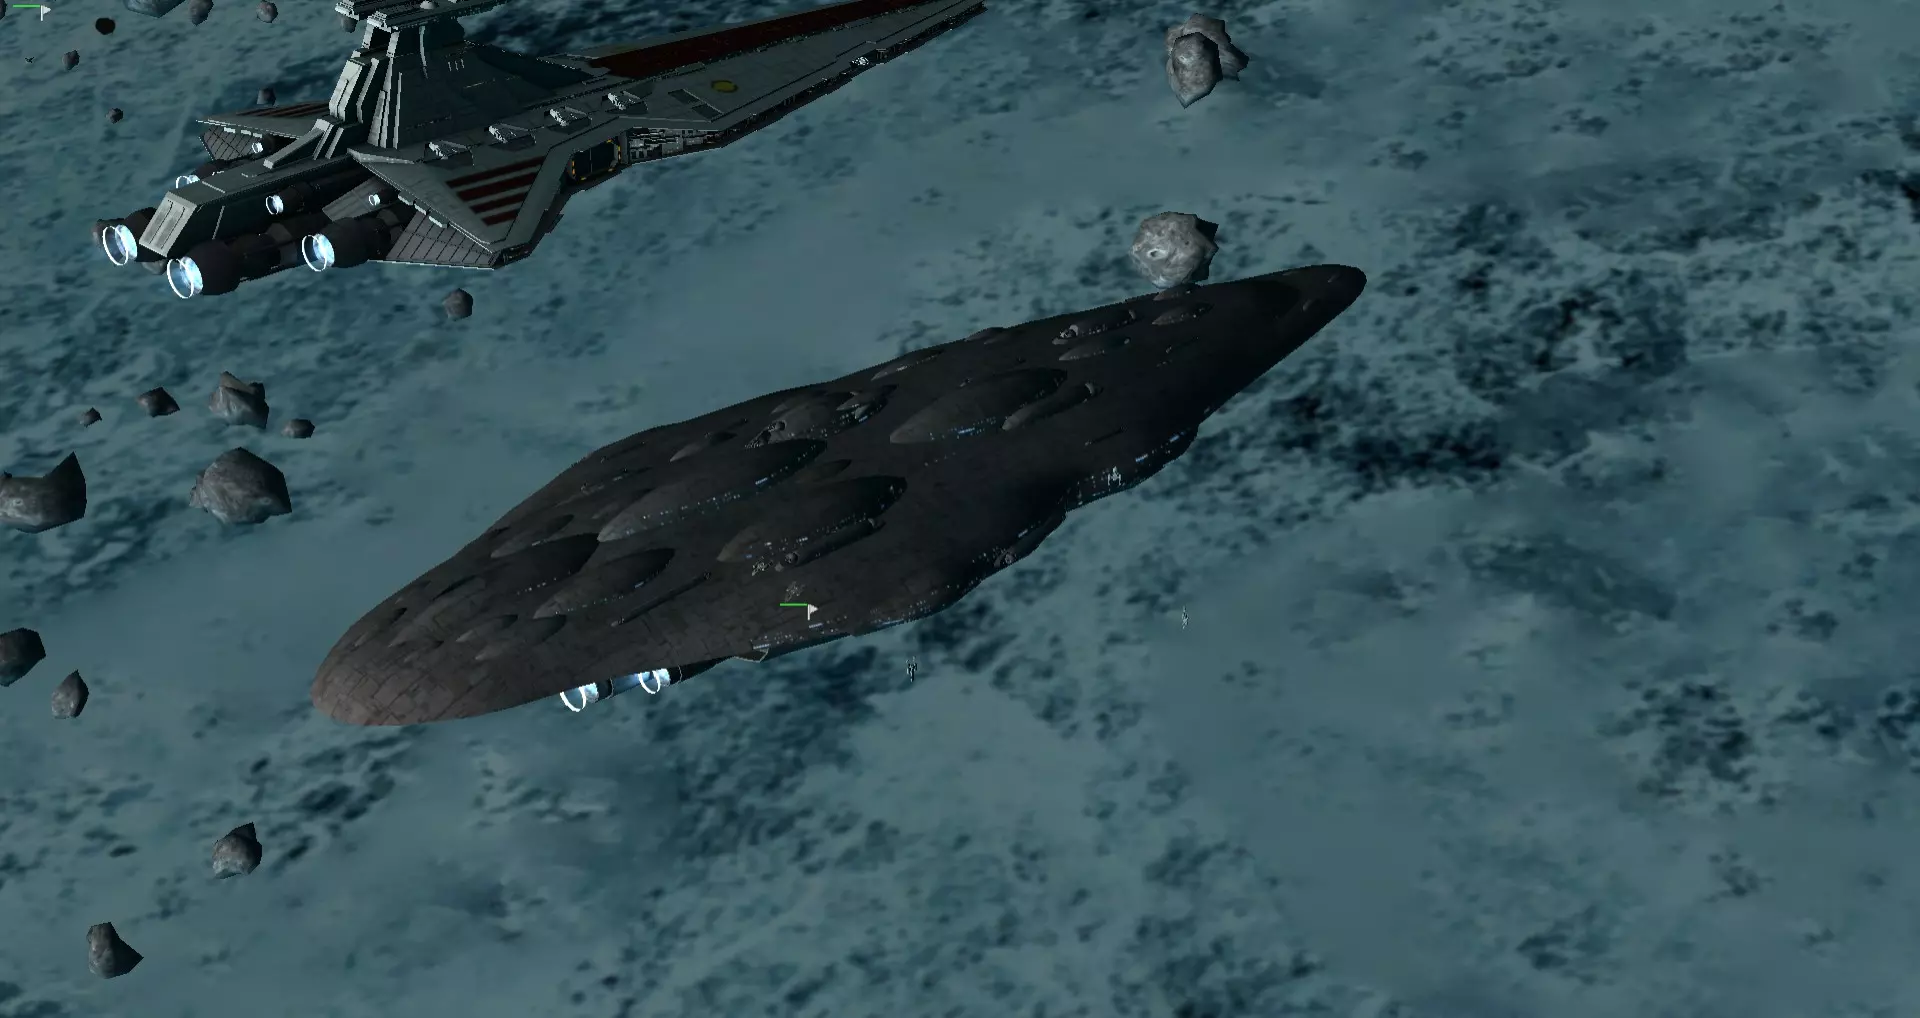
让开,ISD,城里来了新国王。这或许是我在游戏中最爱的新主力舰——公国级,是同级别中的重型武器平台。配备重型涡轮激光炮、四联涡轮激光炮和前置鱼雷发射器,除非动用SSD,否则你很难找到一艘能与之输出相匹敌的舰船。无论远近,这艘船都能大杀四方。 建议:它有一些可控的弱点,主要是明显缺乏破盾武器,而且对战斗机比较“过敏”。虽然正面朝向时难以被击中,但该舰优化了侧舷角度,为了发挥最佳火力而牺牲了正面的优势。以2艘为一组(如果有足够的舰船容量可以3艘)配合航母和几艘标枪舰提供必要保护,效果极佳。公国 属性 等级 攻击 7 防御 4 射程 7 多功能性 5 坎多西级无畏舰【别称:巨齿鲨】
如果你想要一艘比公国级更具战术灵活性的主力舰(你怎么敢这么想!开个玩笑),那么坎多西级就是你的不二之选。不过我得承认,这艘舰船在关键方面确实有所改进:更远的射程、能够穿透护盾的导弹以及不受限制的射击角度,敌人将很难将其击落。 建议:你可以选择用坎多西级替换公国级作为伤害输出舰,或者将两者搭配使用,让坎多西级充当缓冲舰。不过也不必害怕让这艘舰船冲到前线,因为它拥有战斗机机库和强大的防御能力,足以支撑下去。坎多西 属性 等级 攻击 7 防御 5 射程 8 多面性 6 萨巴oth,又名:剑齿虎
-你的主力战斗机支援舰“萨博思”将为你提供对抗战斗机的保护,赋予你战术优势。和大多数承担此类角色的舰船一样,它们并非为一对一战斗而设计,但必要时也能自保。 -建议:抵御伤害输出型舰船是该舰生存的关键。它们能很好地补充你的舰船火力,但重点应放在战斗机 screening 上。 萨博思 数据 等级 攻击 4 防御 5 射程 5 多功能性 4 凯尔达布级无畏舰,又名:石像鬼
哦,4.0版本,你都做了些什么?这艘船曾经是能与坎多西级相媲美的强大战力,但随着4.0版本更新,凯尔达贝级已被降级为支援火力角色。它绝非弱小,然而关键武器系统无法在中等距离开火,即两侧的两门巨型质量加速器。它的正前方有4门小型版本的质量加速器,但除非敌人没有护盾,否则你几乎不会注意到它们的存在。在其他所有方面,这都不是一艘你想挡在它路上的舰船。 建议:要么让它们冲到前线进行近距离伤害输出,要么用远程火力骚扰敌方前哨站和主力舰。如果需要,它们也能很好地充当坦克角色。凯尔达贝 数据 等级 攻击 6 防御 6 射程 5(7*远程 多功能性 5 AGSA级,又名:公羊
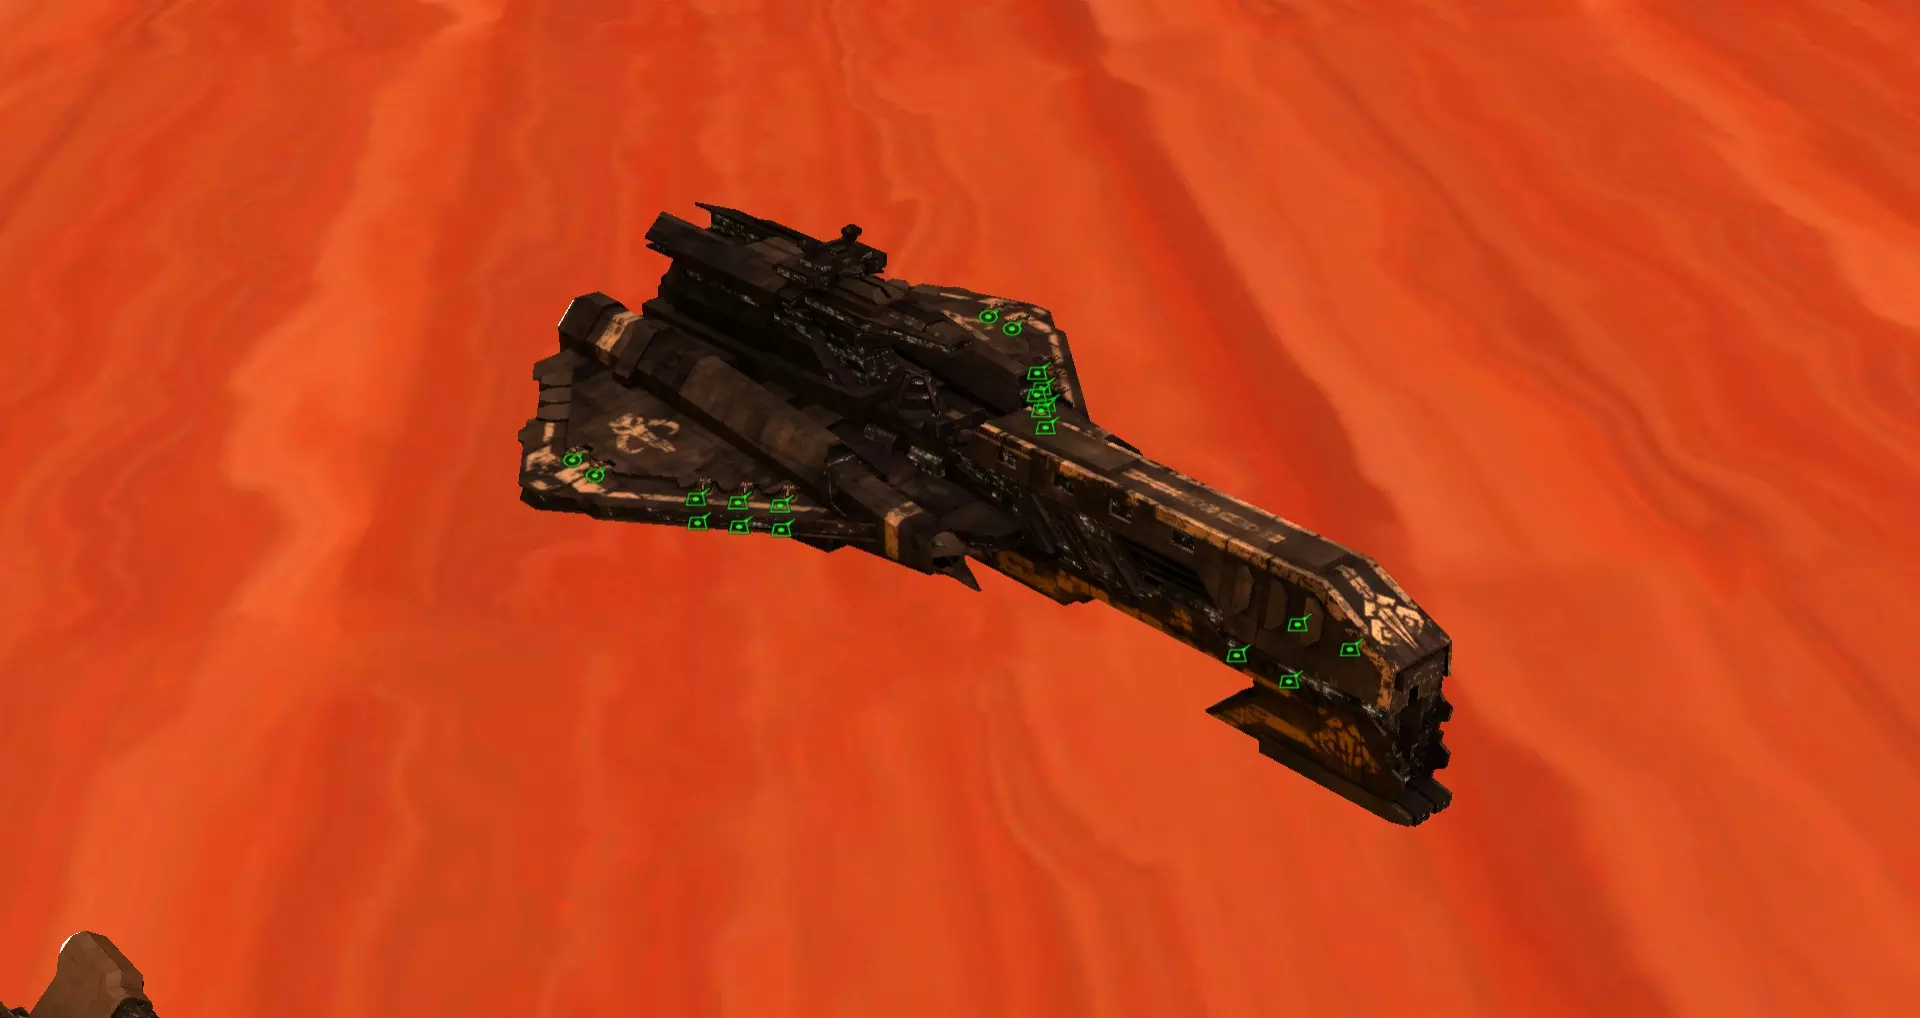
-One of the strongest seige vessel in game, you will really want its gigantic cannons to crack open any fortress system you encounter in your conquest. No longer the old glass cannon with only a handful of hardpoints, the new Aggressor is flanked by numerous turbolasers and can fend off some attackers by itself. Its axial ion and plasma cannons can quickly bring down enemy's shield and destroy even the toughest hardpoint in several shots. -Recommendations: Even with increased survivability granted by new hardpoints, AGSAs should still be protected by other vessels. While their turbolasers can destroy frigates alike, they are too inaccurate against fighters and too weak against capitals. Best to be put away from frontline and fire behind some trustworthy buffers. Aggressor Stats Rank Attack 8 Defense 4 Range 8 Versatility 3 Heroes, Captains and Admirals: Introduction Intro:Faction heroes have as much potential to turn the tide of battle as a large battlecruiser or in some cases an SSD, and while this seems like a bold statement, allow us to detail why in the next few sections. As you've likely found out, specific heroes can be upgraded and/or purchased once the prerequisite planet/tech level is achieved. As stated in the game, many of the hero bonuses stack together, however I want to detail how this is accomplished and why it's built this way. The game calculates multiples of the same bonus (10% or 0.1) individually from the base amount. For example the Victory has 10,000 shield-points so the calculation would look similar to: =(10000*0.1)+(10000*0.1) This would mean the Victory has 12,000 shield points from its standard 10,000 when both a Captain and Admiral are present. However, such an effect would not increase further if there were two or more of either. This limitation can be partially bypassed via Hero Pairing, which will be explained further in another section. The equation shown and how the game calculates the bonus is formatted this way for a far simpler reason than you'd think. Some Heroes have negative effects to stats, and as such to prevent the scale of bonuses from leaning too far on one side or the other, they are always calculated from the vessels base value first before being added and applied. To conclude, every hero, especially the upgradeable ones, requires understanding the small but noteworthy mechanics with each. It is also important to note that each upgrade, for the heroes that have it, will be considered as its own entity within the guide so as to maintain accuracy in relation to the ships that they use and their change in abilities with each upgrade. NOTE: Only heroes that provide fleet bonuses will be listed. Captains and Admirals Captains and Admirals are supplementary minor heroes, no doubt, but this limitation is also their greatest strength. As mentioned in the tool-tip description the bonuses they bring will stack with any hero not identical to another captain or admiral. The potential for complete overkill cannot be underestimated under the right conditions, allowing you to dominate with otherwise insufficient forces. Captains command an Enforcer-class Vindicator, providing 10% increased shields and 20% bonus to movement speed to all ship classes frigate and below. An Admiral commands a ISD1 and provides the same bonus but to all ship classes, effectively doubling the bonuses to corvettes and frigates. -Recommendations: Besides resource limitations there isn't a reason good enough NOT to pair these two in as many fleets as you are able. Keeping them out of harms way is essential so post them at your spawn point and keep 'em there, only engaging if absolutely needed. If you decide to employ multiples, warp them in when one of the same type is destroyed to keep the bonuses in effect. Enforcer: Captain Stats Rank Attack 3 Defense 2 (+1 *paired) Range 2 Versatility 3 ISD I: Admiral Stats Rank Attack 6 Defense 4 (+1 *paired) Range 7 Versatility 5 Imperial Heroes DISCLOSURE: Due to Steam's character limit, each hero will be discussed with their starting level and their max level only. This will still account for any whom have only 1 or 2 upgrades (original purchase and/or upgrade.) Darth VaderBlack Squadron Ship: Tie Fighter Squadron Level: 1 Upgrade Planet: Kuat --Fleet Effects-- +25% Speed to Squadrons Stacks with ALL Officer types Recommendations: Your most elite squadron at the start of the game, Black Squadron, led by the iconic Dark Lord himself, should be at the forefront of the first 1-5 of your earliest battles in nearby systems, especially if starting from a single planet. Beware; despite having massively increased health compared to similar fighters, the Black Squadron will still suffer heavy casualties against anti-fighter weaponry. The Devastator Ship: ISD 1 Level: Max Upgrade Planet: Kuat --Fleet Effects-- +33% Speed to Corvettes and above +30% Damage to Corvettes and above -30% Shield to Corvettes and above -50% Range to Corvettes and above Stacks with ALL Officer types Recommendations: At this stage, Vader makes every battle about striking first and hard with little desire to draw things out. Depending on the ships that make up your fleet, you can become a glass cannon or a fast-moving wall of firepower. Recommend you start with frigates to get an idea of his in-game effects. Baron Soontir Fel181st Imp. Fighter Wing Ship: Tie Fighter Squadron Level: 1 and Max Upgrade Planet: Coruscant --Fleet Effects-- +25% to Armor, Shields, Speed, Damage and Range to Squadrons Stacks with ALL Officer types Recommendations: The 181st appears over Coruscant once Tech 2 is acquired. Like the Black Squadron, his bonuses amplify fighters greatly, however due to when you're able to get him you may rarely use him in the long run. Personally, I've only used him in defense of outposts that I didn't want to lose but didn't have the resources to defend adequately. Reinforce him with at least 7x bombers, 12x fighters and a few corvettes and watch them tear sh*t apart. Addendum: At max level the 181st fields the Elite TIE Defender-class fighters. Admiral ScreedClone War Hero Ship: Gladiator Frigate Level: Max Upgrade Planet: NONE --Fleet Effects-- +10% Shields to Corvettes and above +20% Speed to Corvettes and above Stacks with ALL Officer types Recommendations: Your first iteration of a minor Admiral, Screed is available at the start of a new game and is quickly outclassed by heroes with higher tiered vessels. However, because he can stack with all other commanders he is still better than the minor admirals you can purchase later. Utilize Screed as a support admiral, as his ship is originally designed for this role and keep him near the galactic core, just in case you need hero support from incursions. Grand Moff TarkinHavelon Ship: Modular Taskforce Frigate Level: 1 Upgrade Planet: Kuat --Fleet Effects-- +10% Shields to Corvettes and above +20% Speed to Corvettes and above Stacks with ALL Captains Recommendations: Instead of taking up a planet's orbital build slot, the Modular Taskforce cruiser acts as mobile surveillance in GC and FOW remover and support unit in-battle. As such they are exceedingly weak to anything larger than a single patrol squadron. While he has his uses at his current level, best to upgrade him asap as MTC's are easily affordable/replaceable and the Grand Moff deserves better. Executrix Ship: ISD 1 Level: Max Upgrade Planet: Kuat --Fleet Effects-- +10% Shields to Corvettes and above +20% Speed to Corvettes and above Stacks with ALL Captains Recommendations: Boasting 5k more shield points than a standard ISD, Tarkin flexs his full military might on opposing factions. However, due to his inability to gel with other admirals I end up leaving him as the primary defender of Kuat. His assault capabilities shouldn't be underestimated, though; those extra shield points come in handy. Admiral PiettJudicator Ship: Procursator SD Level: 1 Upgrade Planet: Kuat --Fleet Effects-- +15% Damage to Frigates and above -30% Speed to Frigates and above Stacks with ALL Officer types Recommendations: Piett's effect on fleet battles is a matter of battle speed preference. His presence will cause battles to move at a turtle's pace, and while the increased damage helps, it takes a long time for ships to move into range or chase down targets. Pairing him with a Hero or Admiral that negates his debuff is strongly recommended whenever he is present. Executor Ship: SSD Level: Max Upgrade Planet: Kuat --Fleet Effects-- +15% Damage to Frigates and above -30% Speed to Frigates and above Stacks with ALL Officer types Recommendations: See 'Executor Tab' for best tactics. Grand Admiral ThrawnStalwart Ship: Victory Frigate Level: 1 Upgrade Planet: Kuat --Fleet Effects-- +20% Shields to Corvettes and Frigates +40% Speed to Corvettes and Frigates -20% Shields to Capitals and above -40% Speed to Capitals and above Stacks with ALL Officer types Recommendations: The enigmatic Grand Admiral Thrawn is fantastically represented in this mod. True to his nature in the lore, placing him in command of warships larger than a frigate and you'll find yourself punished for it. On the other hand, field smaller ships and watch them out-maneuver and overpower larger ships with ease. Admonitor Ship: ISD 2 Level: Max Upgrade Planet: Kuat --Fleet Effects-- +20% Shields to Corvettes and Frigates +40% Speed to Corvettes and Frigates -20% Shields to SSDs -40% Speed to SSDs Stacks with ALL Officer types Recommendation: Now fielding a ISD2, Thrawn's adaptability has taken a hit, however his effectiveness has not and is now much hard to take down. Suppress the temptation to field larger ships just because he has one; stick with frigates as your heavy-hitters and you'll run circles around larger fleets. Palladium HoyttCorulus Ship: ISD 2 Level: 1 and Max Upgrade Planet: Kuat --Fleet Effects-- +10% Shields to Corvettes and above +20% Speed to Corvettes and above Stacks with ALL Captains Recommendation: Following the same rules as minor admirals, unable to gel with others of the same rank, Palladium commands an ISD2 and is best used to defend or assault enemy way-stations and choke-points. Grand Admiral ZaarinPredominant Ship: ISD 1 + Vindicator (x2) Level: 1 and Max Upgrade Planet: Kuat --Fleet Effects-- +10% Shields to Corvettes and above +20% Speed to Corvettes and above Stacks with ALL Captains Recommendation: Zaarin is a bit unique as he automatically spawns two captains fielding Vindicator frigates while he commands an ISD1. Use his subordinates as fighter protection or cannon fodder; they will be replaced in the next battle so long as Zaarin lives. Lord CronalThe Singularity Ship: ISD 1 Level: 1 and Max Upgrade Planet: Kuat --Fleet Effects-- +10% Shields to Corvettes and above +20% Speed to Corvettes and above Stacks with ALL Captains Recommendation: As the only Hero-level SD capable of traveling undetected, Lord Cronal is a powerful addition to your command structure. Don't be shy in letting this sneaky bast*rd reign terror behind enemy lines; pair him with a single Titan-class Battlecruiser for that Skyrim-level 100+ stealth damage. Imperial Heroes Continued Admiral DaalaGorgon Ship: ISD 1 Level: Max Upgrade Planet: The Kessel System --Fleet Effects-- +25% Damage to Corvettes and above -40% Shield to Corvettes and above Stacks with ALL Officer types Recommendation: The elusive Admiral Daala can only be found at the Maw Installation within the Kessel Cluster. As she is quite isolated from the rest of the Empire, she represents the only significant threat to the eastern galaxy, as well as occupying a valuable stronghold. Her vessel, the Gorgon, has massively increased rate-of-fire compared to standard ISD's and is therefore extremely powerful in either attack or defense. Utilize minor admirals and captains to counter her shield debuff. Rebel Heroes Admiral AkbarHome One Ship: Home One Level: 1 and Max Upgrade Planet: The Clamari System --Fleet Effects-- +40% Speed to Bombers, Corvettes and Frigates +30% Shield to Bombers, Corvettes and Frigates +20% Shield to All units Stacks with ALL Officer types Recommendation: "I am with you." Admiral Akbar's presence on the battlefield greatly boosts the survivability of all unit classes, making him a must-have for any assault fleet. It's important to realize that he is NOT an attack ship and should only be used to eliminate enemy shields, so position him carefully for maximum effect. In addition, due to the size of his vessel he has a much larger field of view compared to similar-tiered commanders, further enhancing his defense against ambushes and strike runs. Best to let your fighters take full advantage of this. Addendum: At level 1, he fields an MC-80A and is best used to counter enemy squadrons. Leia OrganaTantive IV Ship: CEC CR-90 Corvette Level: Max Upgrade Planet: NONE --Fleet Effects-- +10% Speed to Corvettes +15% Shield to Corvettes Stacks with ALL Officer types Recommendation: The influential princess of Alderaan flexes her aggressive negotiation to inspire nearby corvettes, making her the bane of all opposing squadrons. Instinct might tell you to keep her pinned to a single planet, but I encourage you to use her more assertively. With her, attack is the best defense. Now you know why the Rebel AI spams corvettes; they are hard to deal with when she's present. Luke SkywalkerWomp-rat Marksman (lol, jk) Ship: X-Wing Level: Max Upgrade Planet: NONE --Fleet Effects-- +15% Shield, Armor and Speed to Squadrons Stacks with ALL Officer types Recommendation: Similar to his father, Vader and his Black Sqaudron, Luke should be used early and often as you expand. Because of the Rebellion's focus of fighter superiority, not having him in your fleet is the same as you unconsciously making the game harder for yourself. The first 7-10 attacks you run on planets should have him present. Rogue SquadronElite Fighter Squadron Ship: X-Wing Level: Max Upgrade Planet: NONE --Fleet Effects-- +25% Shield and Armor to Squadrons Stacks with ALL Officer types Recommendation: The Rebellion's counter to the Empire's 181st Squadron. Do to his isolated location at Hoth, he is crucial to its defense. While he doesn't equal the effectiveness of 181st, he is the only hero in this area so preserve him for as long as you can. General Jan DodonnaVictory Ship: Quasar Fire Carrier Level: Max Upgrade Planet: NONE --Fleet Effects-- +15% Shield Republic and A-Wing Squadrons +10% Speed Republic and A-Wing Squadrons Stacks with ALL Officer types Recommendation: Gen. Dodonna is a unique hero as his bonuses are far more specific, only applying to A-Wings and Republic-aligned fighters (i.e. E-wing) as well as providing minor info on enemy fleets in GC for nearby systems. This makes him highly situational as most ship garrisons at most carry A-wings as their interceptors. In order to use him effectively you will need to tailor a fleet specifically for him. Garm Bel IblisPeregrine Ship: Dreadnaught Heavy Cruiser Level: Max Upgrade Planet: NONE --Fleet Effects-- +20% Damage to Corvettes and Frigates -35% Shield to Corvettes and Frigates Stacks with ALL Officer types Recommendation: Garm adopts a more aggressive role comparable to 'risk vs reward'. His affects on frigates and corvettes will prompt you to consider carefully what types of ships you'll field with him present; being defensive will not help you. Despite commanding one of the smaller attack vessels in the Rebel fleet, do not underestimate it's hardiness and increased damage potential, capable of squaring off with most enemy frigates and win. General MadineIndependence Ship: MC80 Home One Level: Max Upgrade Planet: NONE --Fleet Effects-- +15% Damage to Capitals -10% Shield to Capitals Stacks with ALL Officer types Recommendation: Madine is the fire to Akbar's water. The Independence is modified with enhanced weapons, making it distinctly different to the OG Home One. However, be aware that this is still a Home One and therefore meant to down shields in most situations. Pairing Madine and Akbar together is still a fantastic strategy as Akbar completely negates Madine's penalty whilst gaining damage increase. Underworld Heroes NOTE:The Underworld heroes are the most divided of all heroes in the sense that their bonuses DO NOT stack with other factions; (i.e. Hutt Admiral bonuses only affect Hutt-aligned vessels, etc). Compared to the other factions, the Underworld faction isn't as comprehensive, not even able to access minor admirals. This makes sense as they are a conglomeration and not technically militarized. As a result I've lifted the restriction regarding Heroes with no bonuses. I will include Heroes that I've found to be most useful based on their abilities and total impact. In addition the current upgrades available for Heroes are not bound to any planet; simply fulfill their requirements (tech, shipyard and command base). Jabba the HuttBlood Diamond Ship: Tarrada Frigate Level: 1 and Max Upgrade Planet: UNRESTRICTED --Fleet Effects-- +15% Speed to All units (Cartel only) +15% Damage to All units (Cartel only) Stacks with ALL Commander types Recommendation: First and foremost the majority of ships you'll have access to throughout your GC campaign will be Hutt Cartel. As a result he is key to every theater of war you open and should spearhead the initial conflicts whenever you seek to expand. At this level he is best used against fighters and small frigates. Addendum: At Max level he commands a Darran-Tan cruiser as his role shifts to damage output and best used against small outposts. Tyber ZannMerciless Ship: Aggressor SD Level: 1 and Max Upgrade Planet: UNRESTRICTED --Fleet Effects-- NONE Recommendation: The self-proclaimed 'King of the Underworld', Tyber Zann's fame is rivaled only by that of Jabba. Despite not having fleet bonuses, do not underestimate his ability to turn the tide of battle with his cloak and enhanced weapon systems. He also has a passive ability to pass through asteroids unaffected; use this to launch surprise attacks on ships and outposts. Addendum: At level 1 he commands a Javelin Frigate. Seriously, upgrade him ASAP, no joke. He's useless at that level. Cpt. Jarid SykesThe Corrupted Ship: Ventator SD Level: 1 and Max Upgrade Planet: Mandalore --Fleet Effects-- +10% Shields to Capitals, Frigates, Corvettes and Fighters Stacks with ALL Commander types Recommendation: I advise waiting to upgrade Jarid till mid-game, even if you've captured Mandalore. Jarid Sykes is plenty powerful at level 1 with one of the most versatile capital ships in the game, and versatility is your greatest strength early on as the Underworld. Once you've established yourself however, don't hesitate to trade for indomitable strength. At max level he commands a Keldabe battleship, the End of Days, the perfect juggernaut for defending key systems and choke points. Because of this he is the 3rd most powerful hero you'll have. Durga Besadii TaiDarkcruiser Ship: Chelandion Level: Max Upgrade Planet: UNRESTRICTED --Fleet Effects-- +15% Speed to All units (Black Sun only) +15% Damage to All units (Black Sun only) Stacks with ALL Commander types Recommendation: Your 2nd most powerful hero (sorry Tyber), Durga commands 1/3 of all the units you'll use, that being the Black Sun. He is therefore a priority to acquire asap to make your campaign easier. Commanding a Chelandion his ship is enhanced with stolen kyber-tech; 6 forward facing beam cannons sit on its bow, giving it a substantial edge against capitals and cruisers 1v1. Best use is to have him on the opposite sides of the galaxy to Jaba, this allows an even spread of power and bonuses you have access to since they don't mix anyhow. Use him as an anti-capital and field a support fleet around that. Hero Pairing: Introduction Hero Pairing is a strategic technique you've likely been doing unknowingly and haven't consciously put much thought into. Cpt. and Adm. heroes are an easy example of this. Don't worry, there's no shame it; in fact you've already got a head start on the foundation for other pairings. In the next sections we will detail the best pairings for Heroes, both minor and major, that will optimize the best bonuses as uniformly as possible. Be aware that this will not be fleet specific (i.e. fighter fleet, capital ship fleet, etc). However, for organizational reasons they will be categorized by Damage, Defense and Speed. In addition, it will be assumed that the minor heroes Captains and Admirals are already a part of the pairing make-up. Captain vs Admiral:A critical understanding needs to be conveyed here: Cpt. and Adm. ranks are expressed literally in this mod and DO NOT occupy the same space (pun intended) when pairing exclusions are involved. For example: Grand Moff Tarkin stacks with ALL Captains, meaning in order for his bonuses to remain in full affect he must be the ONLY admiral-level Officer in that fleet; some heroes may exclude captains but stack with admirals. For Tarkin this means you can stack as many captain-level officers with him as you want. However, this also means if another admiral-level Officer occupies the same fleet and affects the same categories, the one with the highest percentage for each category will overrule the other. If they don't affect the same category, both admiral bonuses may apply but not stack. But don't be deceived. Stacking, and by extension pairing, must occur by DIFFERENT units/heroes. With the above example, you can't spam Vindicator-class Captains; the bonuses from his unit type will apply once. However, should you find a different captain-level Officer, the bonuses will add from that unit type one time, etc. This creates balance from making the game too easy during the mid-late game. It also encourages you to think carefully where you'll place your most impactful officers while deepening the game's strategy requirements without feeling tedious. Conclusion:We wish to remind our aspiring readers that the bonus percentages are NOT added by themselves. Please review the 'Hero Introduction' tab for the formula of what this would look like as this list will not contain a break-down of the total bonuses, nor will Pairings be ranked by usefulness of best-to-worst. Hero Pairing is a matter of player preference, and as such this list will only contain recommended pairs to encourage your ability to freely chose how to incorporate them. DISCLOSURE: Underworld Heroes will not be listed as their roster does not yet offer meaningful pairing opportunities. As soon as the developers expand on the Underworld more they will be promptly added, but until then....sorry. I've got to prioritize for now. Imperial Pairings NOTE: Please assume all heroes are at max level, not listed in any particular order and those that don't stack with same-rank heroes will be taken into consideration. Heroes may appear in multiple categories, others not at all due to them providing the same bonuses as another, in which case the hero with the highest tiered ship will make the list. Attack Pairs Darth Vader (+30% dmg, -30% shield, +33% speed, -50% range) 181st Imp. Fighter Wing (+25% fighter hp, dmg, shield and range) Admiral Piett (+15% dmg, -30% speed) Admiral Daala (+25% dmg, -40% shield) Defense Pairs Grand Admiral Thrawn (+20% shield, +40% speed, +30% range for frigates&corvettes) Admiral Screed (+10% shield, +20% speed) 181st Imp. Fighter Wing (+25% fighter hp, dmg, shield and range) Speed Pairs Grand Admiral Thrawn (+20% shield, +40% speed, +30% range for frigates&corvettes) Grand Admiral Zaarin (Do not purchase separate Captains; he brings his own automatically) (+10% shield, +20% speed and +10% shield, +20% speed (Captain)) 181st Imp. Fighter Wing (+25% fighter hp, dmg, shield and range) Darth Vader (+30% dmg, -30% shield, +33% speed, -50% range) Rebel Pairings Attack Pairs Garm Bel Iblis General Madine Defense Pairs Admiral Akbar Leia Organa Luke Skywalker Rogue Squadron Speed Pairs Admiral Akbar General Jan Dodonna Leia Organa Super Star Destroyers: Introduction Intro:Let's not kid ourselves; SSD's, Star Dreadnoughts and specific Battlecruisers are fleet killers capable of wiping out nearly any opposition single-handed. You know it, I know it and we all play the Empire to prove it. However, it's important to manage the pros and cons of such massive warships as this mod amplifies their weaknesses in conjunction to their power. In short, the bigger and more powerful it is the more vulnerable it is to its weaknesses. In addition, some of the largest have multiple phases of combat dependent on the amount of damage taken. Some short hand is added within this section of the guide. Here is a brief overview of them: BC: This stands for Battlecruiser. While there are a few BC's in prior categories, the ones mentioned below standout for their capability and build limits. SSD: This stands for Super Star Destroyer. Enough said. SDrN: This stands for Star Dreadnought. Had to get creative to make this one easy to read, make sense and not be an eyesore. Feedback encouraged. SSD's, SDrN's and BC's require a slightly different ranking system; lifting the 'no abilities considered' restriction and increasing the minimum and maximum ranks within 10-20: Support: This stat modifies the Defense classification to emphasize a vessels ability to defend itself when alone or with other ships. The lower this stat, the less likely a vessel can remain effective without support from other ships. NOTE: all other defensive factors are still accounted for. Maneuverability: This stat replaces Versatility as it's far more important to properly position SSD's for them to remain effective. This includes speed and turn rate. Range: The ability to target enemy positions relative to itself (aka shooting at multiple targets simultaneously) is added to the range stat, providing an important dynamic between target distance and maneuverability. Credit to Contributor: Elimm for testing all the BC's and SSD's. Battlecruisers Titan-class BattlecruiserAKA: The Phantom

泰坦级是一艘低级战列巡洋舰,其伤害并不像预期的那样高,但它提供的独特机会不容小觑。它是目前速度最快的战列巡洋舰之一,并且拥有随意隐形的能力,这让玩家能够创造自己的优势来扭转战局。 推荐:这艘舰船是少数几艘能在极少支援下有效行动的舰船之一。建议采用牺牲次要舰船来分散敌方注意力的伏击战术。让它隐形隐藏起来,先让其他部队投入战斗,然后派遣泰坦级侧翼包抄关键目标以造成巨大伤害;如此反复直至胜利,注意防范战斗机/轰炸机。泰坦级 数据 等级 攻击 12 支援 14(舰队加成后17) 射程 13 机动性 18 曼达托二型战列巡洋舰,又名:克莱莫尔
曼达托级Ⅱ型巡洋舰行动迅捷、武装精良且经济实惠,堪称降级版的执行者级超级歼星舰。与其他行动迟缓的超级歼星舰不同,该舰速度足以跟上小型舰船,使其能在护航舰的掩护下轻松转移至更有利的位置。除标准武器外,曼达托级Ⅱ型的侧舷还配备了数座导弹发射器,对各类目标均能发挥显著效果。 推荐:该舰的主要优势在于机动性强且价格低廉,但代价是 durability较低。与其与其他超级歼星舰正面交锋,不如让它率领舰队,充当攻击小型目标的先锋。其搭载的导弹既能有效清除战斗机群,也能打击侧翼敌人,但务必为其配备支援舰队。曼达托二号 数据 等级 攻击 14 支援 15 射程 14 机动性 18 歼灭者与净化者战列巡洋舰,又名:【蛇怪】(下方为净化者)
-与泰坦级战列巡洋舰几乎完全相反,歼灭者级和净化者级战列巡洋舰是专为战斗设计的战列巡洋舰。在其他舰船的充分支援下,将这类舰船部署在你的攻击或防御舰队中央,能形成一道强大的火力墙。 -建议:这类舰船速度惊人,在各种射程下表现都相当不错。充分利用这一点,出其不意地打击过于冒进的攻击者,或对脆弱的前哨站进行快速游击突袭。不过,这两种舰船都需要极近的作战距离才能充分发挥其武器阵列的威力。净化者级凭借更多的涡轮激光炮,在射程方面略占优势,但与歼灭者级相比,其有效伤害输出有所降低。歼灭者 属性 等级 攻击 14 +1 支援 16 射程 13 机动性 18 净化者 属性 等级 攻击 14 支援 15 射程 13+1 机动性 18 执政官级战列巡洋舰【别称:壁垒】
执政官级战列巡洋舰为了获得极其坚固的护盾和装甲,在火力方面做出了牺牲。作为一艘防御型舰船,它凭借多样化的武器,足以抵御各类敌方单位的攻击。执政官级的防御能力使其成为可靠的屏障,能为支援舰队承受伤害,即便在类似情况下,其生存能力也超过其他战列巡洋舰。 推荐:这艘舰船的坚韧度绝对物有所值,它会像一座堡垒般屹立在你的舰队中央。当敌人集中火力攻击这艘战列巡洋舰时,或许是其他高火力舰船趁机打击敌人的好机会。如果你愿意,尽管让执政官级冲向敌方火力,敌人很难将其摧毁。执政官 属性 等级 攻击 13 支援 17 射程 14 机动性 14 镇压者 镇压者级战列巡洋舰【别称:恶毒号(直译)】
-镇压者级战列巡洋舰是一对一战斗中的王者。尽管其常规火力相对较弱,但离子脉冲炮能使被击中的目标在后续战斗中基本丧失行动能力且毫无防御。该舰几乎无需支援舰队,若正面交战,可独自应对几乎所有类型的敌人。 -推荐:镇压者级战列巡洋舰用途广泛,凭借其能力,无论是战列巡洋舰对决还是舰队战斗,都能轻松占据优势。要想熟练使用,需仔细阅读提示信息,确保射击前瞄准精准。注意避免被从后方攻击,且该战列巡洋舰缺乏常规离子武器,因此在对抗多艘重装甲护盾舰船时较为薄弱。此外,与外观相反,离子炮的射程仅比常规武器略长,因此估算开火位置至关重要。 镇压者级战列巡洋舰 【数据】 等级 攻击:14 支援:17 射程:13 机动性:16 赞恩的镇压者级战列巡洋舰,又名:眼镜王蛇

赞恩的镇压者是冥界阵营专属的战斗巡洋舰。它拥有标准镇压者的所有副武器,并额外配备了数门高射炮,这些高射炮仅在启用其技能时激活。赞恩的镇压者最显著的变化是将离子脉冲炮替换为两座巨大的离子炮塔。这些武器能造成大量护盾伤害,并施加比原版镇压者技能更有效的眩晕效果,不过持续时间要短得多。 这艘舰船采用相位转换机制,共分为4个相位。其副武器在转换过程中不受影响,但护盾发生器在相位2可能被摧毁,离子炮塔在相位3则会变得脆弱。赞恩的镇压者的全部四个阶段都拥有相同的两项能力,使其能够激活高射炮和拦截系统。 - 建议:凭借所有新武器,赞恩的镇压者比原版更加多才多艺。离子炮塔使其能在保持舰船方向的同时快速切换目标;其反战机能力和庞大的战机驻军(每个阶段都会补充)可以保护它免受大多数战机攻击。它并不十分依赖护航舰,因此可以随意在舰队中添加你认为合适的舰船。由于离子炮塔具有不错的射速,它不像原版镇压者那样容易受到以护盾为核心的舰队的克制,但仍然容易受到侧翼攻击。赞恩的镇压者 属性 等级 攻击 16 支援 18 射程 15 机动性 15 执行者 执行者级歼星舰
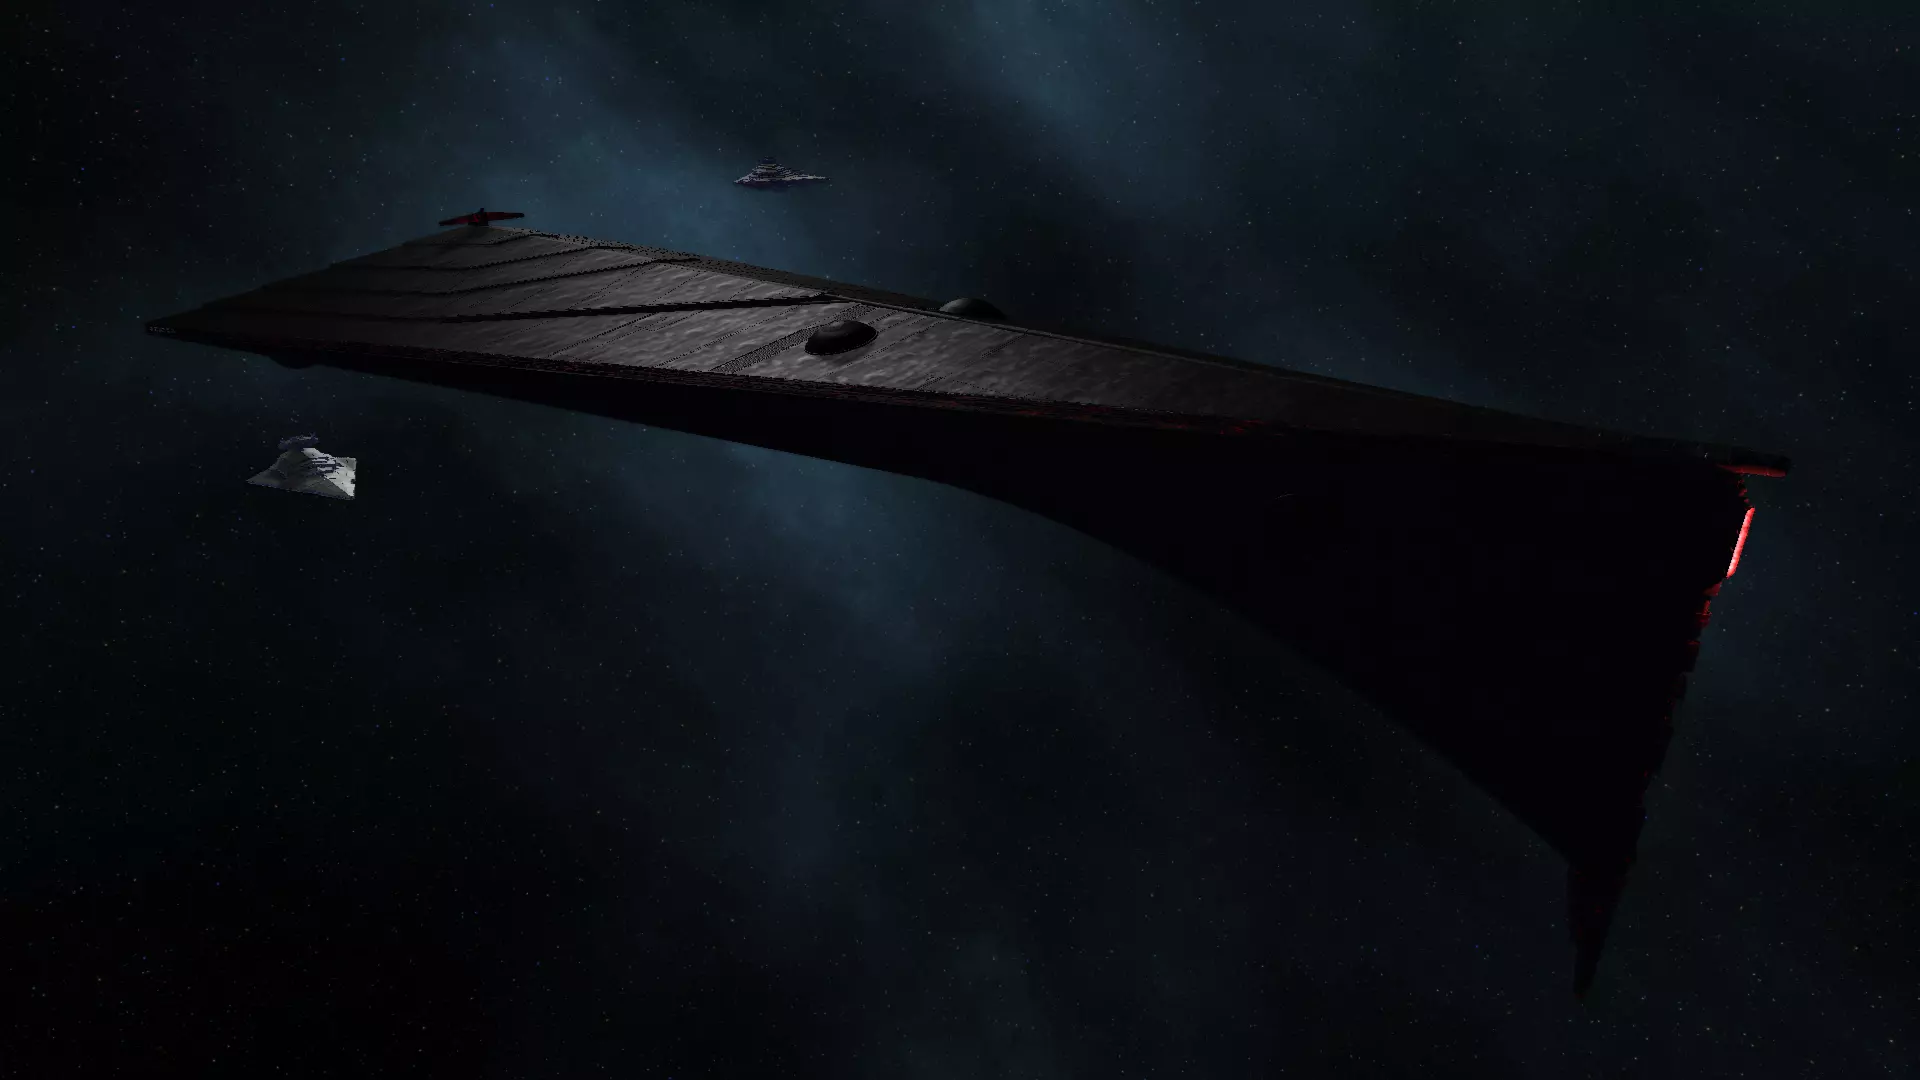
第一阶段:征服者 - 执行者号在第一阶段展现全部实力:配备数十门重型火炮和众多导弹发射器,这艘超级歼星舰能有效对抗大多数类型的舰船,尤其擅长通过集中所有重型涡轮激光炮来对付大型主力舰。 - 建议:执行者号的射程覆盖整个战场,因此可以随意攻击任何目标。但由于缺乏防空火力,执行者号难以对抗星际战斗机,因此需为此类情况准备一支支援舰队。 第二阶段:突击者 - 执行者号的护盾和主炮将失效,直至下次修复,在此阶段它依靠导弹发射器造成伤害。导弹发射器的作用与第一阶段相同,对任何隐藏在护盾后的硬点仍然致命。新的磁脉冲导弹技能可以在一段时间内显著降低敌人的火力。 -建议:利用导弹发射器打击关键目标。注意导弹不会朝船头方向发射,需要进行机动以最大化输出。理论上,磁脉冲导弹在激活期间会取代所有武器,但可以手动关闭。 第三阶段:狂怒-进入第三阶段后,执行者号开始释放其最后的怒火。所有副炮现在极其不准,但变得异常快速并提供范围伤害。它能轻松消灭战场上任何剩余的战斗机或护卫舰,并对其他任何目标造成显著伤害,但代价是耐久性较低。 -建议:盲目摧毁视野内的所有目标,星际战斗机不再是问题。剩余的钛战机群可以借此机会攻击敌人,但由于每个炮塔都很脆弱,如果敌人仍有足够的火力,这个阶段可能不会持续太久。 阶段4和5:信标-失去所有火力后,执行者号现在只是一支增援舰队的信标。一些帝国船只将出现提供支援,而执行者号则凭借其非常脆弱的剩余硬点承受伤害。是时候做出决定了:撤退或呼叫紧急增援。 -建议:要么逃跑,要么战斗,要么死亡。有了执行者号的增援,即使面对多艘主力舰也有可能赢得战斗。不过,如果出现任何差错,你可能会永久失去这艘星际无畏舰。 执行者号 数据 等级 攻击力 19 支援值 14(舰队加成后为16*) 射程 20 机动性 14 子爵号 子爵级星际防御舰
第一阶段:蒙卡拉马里之星 - 子爵号是新共和国的护盾。这艘舰船拥有极其坚固的防御,配备SDrN级武器和庞大的战斗机群。借助其速度提升能力,子爵号是所有SDrN级舰船中速度最快的。 - 建议:子爵号设计用于对抗敌方SSD,能够单独应对大多数敌人。尽管具备诸多特性,但由于其外形原因,舰船的后下方防护极其薄弱,因此在准备进行激烈战斗时,需为其选择良好的位置。 第二阶段:复仇 - 子爵号在第二阶段牺牲了防御和机动性,以换取毁灭性的伤害和战斗机蜂群。12座鱼雷发射管将成为其侧舷任何大型敌方单位的噩梦,而数量众多的星际战斗机和支援飞船几乎能压倒所有对手。 -建议:与执行者级的导弹类似,鱼雷在侧舷时拥有最佳射角,但也可以向前发射,只是效率较低。战斗机总数确实很多,但它们的出动速度比第一阶段慢,因此要等它们集结后再行动,以获得更好的效果。 第三阶段:最后喘息-子爵级在第三阶段会重新启用护盾,基本上变成一个削弱版的第一阶段。它保留了所有武器,但护盾强度降低50%,不再有战斗机,且舰船保持静止。它还拥有对友军的维修能力,但由于效率低下,不要过度依赖。建议:你可以像第一阶段那样使用它,但如果没有第二阶段的战斗机,其防空能力会降低。建议用支援舰掩护子爵号的后方,抵御敌方战斗机。 第四阶段:共和国卫士 - 子爵号在第四阶段会再次充能护盾,但这次可以牺牲护盾释放一次大规模范围脉冲。这个新能力会耗尽所有护盾并对附近所有敌人造成伤害,使子爵号在对抗敌方护卫舰和战斗机时获得巨大优势。 建议:考虑到范围脉冲的伤害不受剩余护盾量影响,你可以在护盾吸收足够伤害后再激活该能力。如果护盾已失效,则无法释放脉冲,所以不要等到最后一刻才使用。【警告】:护盾爆破技能有时会导致游戏立即关闭。建议在进入战斗前存档。 阶段5:希望——即使在最后阶段,子爵号仍能进行反击。尽管在阶段3和阶段4中所有重型涡轮激光炮和离子炮已被摧毁,但子爵号的阶段5仍保留了所有标准激光炮,对敌方舰船仍构成相当大的威胁。 【建议】:自阶段4起,舰船的人口值已降至70,因此你可能需要部署支援舰队以确保舰船存活至修复。逃生舰船仅增加 cinematic effects,可忽略不计。子爵 属性 等级 攻击 17 支援 20 射程 16 机动性 19(第一阶段后为3星) 日蚀级 日蚀级歼星舰
Phase 1: The Emperor's Throne-The completion of the Eclipse practically marks the end of the game. The fully armed and operational Eclipse can use its superlaser to wipe out almost any single target that it can fire upon, and its conventional weapons are also powerful enough to deal with anything else. The lack of anti-air weapon may be a weak point to exploit, but numerous cannons and TIE swarms can also do the trick. -Recommendation: While removing enemy capital ships with the axial superlaser, the Eclipse should also focus on enemy fighters. The Eclipse's guns are good enough to hit anything larger than bombers, so agile "fighter-bombers" will be more annoying. TIE swarms can easily get rid of standard fighters, but they are extremely weak against AoEs, so destroy every AoE units before putting swarms in combat. Phase 2: Rainstorm-Even the axial weapon and Octuple batteries are lost, the Eclipse is by no mean weak against capital ships. The Eclipse make up for the firepower it lack with two aggressive abilities, and are able to melt through any remaining enemy ship with rain of heavy turbolasers. However, the disadvantage against fighters is still presence, as there's only one new fighter swarm each phase after Phase 1. -Recommendation: Eclipse Phase 2 act like your normal battlecruiser. The first ability temporarily replace all weapons with heavy turbolasers and the second increases firing rate. Use both ability simultaneously to achieve max output, but watch out for overkill. Phase 3: Final Order-At the cost of numerous weapons, Phase 3 is the final phase Eclipse which can order the axial superlaser to fire. Comparing with previous phases, its firepower is weaker than ever, the superlaser charges much slower and may be inoperable at random moment, and it is now even weaker against starfighters due to the loss of cannons. -Recommendation: The remaining weapons on the Eclipse, along with repaired superlaser, is still enough to deal with a number of capital ships. Though even a handful of fighter may now cause large trouble, the Eclipse's population value decrease to 75 in Phase 3, allowing you to deploy more support unit. Phase 4: Reborn-With shields and about half of the weapons magically back online, a very furious Sith Lord unleash his power on enemy vessels. "Lightning Strike" act like Admiral Piett's proton beam but deal superlaser-class damage, and "Lightning Storm" create a massive storm that continuously deal damage to enemy frigates and below. Imperial ships also appear like in the final stages of the Executor, but they can benefit from the Eclipse's powerful abilities and fire support. -Recommendation: Use the abilities wisely, which seems quite obvious: remove critical hardpoints and shield with Lightning Strike and clean up smaller units with Storm. All allied units can fight majestically due to a 25% buff on everything provided by the Eclipse. You may want an anti-capital support fleet in this phase to destroy enemy capital ships that can't be affected by the storm. Phase 5: Decree-The Eclipse has lost all its weapons, but another wave of reinforcement is on the way. The good news is the abilities and buffs from Phase 4 are still there, and the ship itself is still almost as durable as a battlecruiser, so the Eclipse can still put up a fight. -Recommendation: Evaluate your enemy carefully. The Eclipse's further decreased population value is beneficial for reinforcement fleet, you can still form a formidable force along with summoned escorts. But the Empire died in arrogance, none will want the same mistake. The Eclipse Stats Rank Attack 20 Support 14 (18* with fleet) Range 19 Maneuverability 12 Single-Planet Start Strategy To make progress on 1-planet with the Empire, follow these starting steps (based on my 'Hard-mode' experience and 90 planets): 1.- Turn Coruscant into a temp. Credit world for the bonus credits and a single trooper/vehicle factory. 1.5- Build as big a fleet as fast as you can and swarm Byss, then Bilgringi. 2.- Devote Byss to full credit production. It is permanently safe from being targeted. Upgrade Bilgingi to lvl 2. DO NOT LEAVE SHIPS THERE. Treat it as an alarm to warn of approaching fleets. 3.- It's tempting to head for Brental due to proximity but DON'T. Head to Rendili and convert to credit world, then Corellia for production speed bonus. 3.2- The following steps require good timing and patience (3.2 - 3.7); Your goal is to capture the remainder of the core worlds, starting with Brental. Resources will be stretched and it might take 1-3 attempts as the AI knows Brental is a gateway to the Core. 3.4- The AI usually forgets about Alderaan for some reason so it should be an easy target, however prepare for a hard fight at Kuat. 3.5 Turn Kuat into full military production; seems obvious but there's another obscure reason for this later. 3.7- Finally, conquer Neimoidia and hold position. All gateways to the core should be covered, if Bilgringi hasn't fallen yet, and you should be strapped for credits and ships. This is the patience part. Make sure to Fully upgrade Corellia to a bastion world or your production will be cut by around 30%. 3.8- You'll be playing tug-of-war with the AI for the Northern-most planets you've captured, but your goal is to increase your tech-lvl to 2. It is global, meaning the AI will upgrade as well, but defense with be much easier once complete. 4.- You now have a critical choice; Zeltros or Loronar, (Manaan is a deathtrap; AVOID IT for now). 4.1- (Loronar Route)- This is the hard route but could net you a lot of gross income in the long run, however taking it reopens the gateway to the core and can be attacked from 3 locations. Fortify to lvl 2 then regroup. 4.3- Conquer Bespin and convert to credit world at lvl 2 and regroup for a hard push on Fondor and turn it into a fortress. 4.5- By now, Lorona is probably getting hammered (not the fun kind, actually it might be depending on your perspective), anyway, reallocate resources to field a temp. defense fleet there, then attack Mimban to relieve the pressure. Time this right and you've now re-secured the East-most core. Manaan never attacks in my experience and only acts as the AI's rally point to transfer ships from the far East to the core, and now you've cut one of those paths. 4.6- TAKE A BREAK! YOU'VE BEEN PLAYING FOR 3 HOURS STRAIGHT BY THIS POINT! But I digress. 4.7- Conquer Thyferra and Yag'Dhul and convert to worlds based on faction needs. This secures the South-most core. 5.- It is optional to take Atzerri due to the risk of a small bottleneck but might serve you as another alarm for attacking fleets. Also, lvl up tech to 3 if you haven't already. (End of Loronar Route). 5.1- (Zeltros Route)- Here is the reason you captured Kuat and militarized it. From there you can launch consecutive attacks extremely quickly from perfect safety. While doing so, lvl up tech to 3. 5.3- Devote 2/3rds of your forces to Zeltros and fortify to lvl 3, then split 2/3rds again to attack Loronar. If strong enough immediately take Mimban, then return to fortify Loronar. And at this point you should see why you should avoid Manaan early in the game; you've now boxed it in. 5.4- Feel free to release your frustrations on Manaan for an easy win. No one likes a trojan horse. 5.5- With the South and Southeast now secure, devote ships not playing tug-of-war or build a new fleet, if you have the cap for it, to assault the Hapes Cluster and convert to credit/military hybrid. 5.7- You have the option to hold position, as the East is now secure, or expand to Onderon/Dxun but you'll need to play tug-of-war for it from then on. DO NOT ATTACK Kashyyk unless your ready for a campaign Eastward. 5.9- Attacks on Bilgringi should have pretty much stopped or become rare for inexplicable reasons as the AI ignores it Mid-game and beyond, hence the benefit of taking it early after surviving initial retaliations. If you wish to open a new theater of war you have a clear gateway, but be careful not to overextend your fleets to quickly this direction; if you lose Bilgringi you'll be trapped and surrounded. 6.0 Congrats! You've made progress from 1 planet to many. From here, plan your campaign as you normally would. Each play-through is different so be prepared to repeat steps as you learn timing, fleet make-up/recovery etc. I hope this helps, and May the Force ever serve you! Honorable Mentions This section is reserved for:-Vessel's that have the capacity to make significant enough impacts on battles but not enough to warrant a spot in the main guide. -Functions or classified in a manner initially excluded within the guides' parameters (i.e. a Corvette with high Versatility potential). -Ships who's fleet functionality, when used by clever commanders, is expanded beyond its normal capabilities. -Vessels that ALL factions have access to after acquiring the correct tech level and/or planet. -Any other vessel type, function, role or usage deemed worthy of noting. NOTE: SSD's and Heroes are excluded from this section. Lancer Corvette: The Lancer-class frigate serves as a highly capable tech 3 anti-air corvette for Empire. Holding more than 10 point defense lasers on its small hull, this ship can effectively wipe most incoming starfighters and clean out incoming ordinances when operating in groups. While covering friendly capital ships being their advantage, they may not be able to follow their allies due to their slow speed. DP-20 Corvette: The DP-20 is the most critical piece in the ocean of light vessels under a Rebel commander's command. Their properties of fast-moving, small size and two concussion missile launchers make them a nightmare for almost every ship that rely on several critical hardpoint and lack good point defense ability. They may die quickly in a massive battle, but not before giving a hard punch under precise command. Interceptor IV and Interceptor V: Although they are easily overlooked corvettes, Interceptor-class can still be a powerful component in your fleet. They are cheap, fast and fragile as all corvettes do, but their missiles/torpedoes make them quite a threat for even larger targets when come in large numbers. They also hold turbolaser weaponry, which is better in combating corvettes (and above) than anti-fighters. Nebulon Hammerhead: They are just the Zann version of Nebulon-B, having identical defense stats, one more turbolaser hardpoint and a Z-95 garrison, at the cost of 500 more build cost and 1 more pop value. These changes does not influence its overall role of a small supportive unit, but its new buzz droid ability may help more in anti-air combat. Zann Hammerhead: The Zann Hammerhead is equipped with powerful mass drivers, which is basically turbo-lasers, as its description said. These mass drivers are similar to ISD's main guns, while the ship it self was poorly protected and can easily be destroyed when exposed to enemy fire. These Hammerheads should act in groups and keep away from front line to maximize their role of fire support. Marauder-class: If an Underworld or Rebellion commander want an early artillery ship, I would say this is it. The turbolasers onboard the Marauder are able to fire rapidly and have a range even longer than ISD's heavy turbolaser, but their close defenses are rather weak. As a frigate their firepower is insignificant alone, but when multiple of them concentrate fire they can easily snipe enemy from afar. Munificent Frigate: This frigate is an expression in polarity. Alone it is completely useless and you shouldn't blame yourself for going with a better option; however, a group of 5 or more can decimate even the most hardiest of capital ships. With hard-hitting, fast-firing cannons, the Munificent is an expendable glass-cannon swarm unit meant to vanguard any fleet. Be prepared to replace them often. Recusant-class Destroyer: This vessel is a great well rounder compared to other options within the CIS ships. Excellent attack via medium/heavy turbo-lasers and missiles, good defense with the inclusion of anti-missile counters and its thin construction forces attackers to expose themselves to get good hits in. As a med-to-long-range attack-support vessel, the Recusant excels at base defense first, then acting as an anti-capital and anti-frigate and pestering enemy outposts at a distance and firing at 320* angles. As a side note, there are two versions: one light and one heavy. Take your pick, each accomplishes the same task with effectiveness comparable to their tech level. Level 1 can take out most ships Frigate and below with light lasers and FLAK cannons for fighters, while level 2 is the inverse of that, Frigate and above with heavy turbo lasers and missiles bays replacing the FLAK cannons. Lucrehulk-class Capital ship: There are two versions of this ship; carrier and battleship. Honestly though, in a full scale battle both are equally effective in all the areas that you'd care about. The only one that would care which you pick is your wallet. Anyway, despite my previous statements I rarely employ these in GC. Slow, abhorrent maneuverability, and if the crescent connected completely it would literally look like a moving target. All that said makes this ship a great tank/aggro vessel capable of absorbing intense, sustained damage and allows your faster and more effective attack ships work safely. Providence Capital Ship: As a combined carrier/destroyer, positioning this vessel can become a conundrum or a nightmare. I (SoLock) play on hard mode so the latter is my life, but for you others out there here's best practices: Scan the battlefield for a good opportunity to spawn them, it will immediately launch fighters and default to carrier mode if not in range to an enemy. However, not too close that your fighters and bombers get wiped out before helping. They have a slow fire rate, just higher than Imperial ships but still less than rebels, as well as a short range, making them effective 1-v-1'ers at broadside. Isolate your target and sick this bulldog on 'em. Ambush is a great strategy to start getting the hang of them. Venator-class SD: Despite it's size, lower hard-point count and slightly weaker armor than the imperial SD, the Venator SD can surprise you with its capabilities. Torpedoes that bypass shields, light and heavy turbolasers, and a sizable hanger boasting mid-tier squadrons, this vessel is more than capable of defeating capital ships larger than itself in a fair fight. While it has its weaknesses, as previously mentioned, I would go as far as to say the Venator has the highest potential versatility for its class in the game. Manage its weakness to bombers and low armor effectively and you've got a capital ship designed for any and every scenario. Sith Dreadnought: Despite it's massive size the Sith Dreadnought has high versatility and plays extremely well with other ships. Unlike other warships of it's class, it acts like a carrier > tank > damage-dealer all in one. If deploying this vessel, change your battle tactics to a phase-like structure. Carrier: Deploy its massive fighter bays to quickly counter enemy fighters; they are weak but numerous. Tank: let it lead the first strike in phase 2 to aggro attention and use remaining fighters to weaken enemy ships. Damage: as the final phase when all your ships are engaged, have this vessel target the weakest ship/structure for quick finishes. Secutor-class SD: There are two variants to this vessel: Republic and Imperial. The Republic version is comparatively better at the time of writing with superior accuracy, fast fire-rate and a torpedo launcher at the bow. As a heavy SD it is equip with powerful turbolasers and, despite its arrowhead shape and weapon emplacements, can fire at 360* angles. Both variants function differently then other SD's this size as its main cannons will only fire at ONE target at a time, making it an excellent anti-capital/anti-frigate option. It's also a perfect tank with a preference toward enemy space stations like the Golan platforms, allowing you to take the heat off more versatile ships. References and Acknowledgements DISCLAIMER: Please keep in mind that we are not Developers; simply avid players who have spent a worryingly amount of time playing this game. We do not know coding or technical bugs, nor do we promote one faction against another or prefer one. Should you have errors, bugs, glitches or other issues, please refer to the appropriate support resources provided by the Devs. In addition, the mod for the game is in on-going development and as such the information can and will become outdated at some point. We will strive to keep the information relevant as long as possible. As a final note, the observations made for these classes are subjective to our individual play testing and we are more than happy to be corrected. Adjustments will be made according to the most updated version of the game and therefore subject to change. *NOTICE*: This mod has been updated to 5.0. The new update is standalone; link below. Remake 4.0 mod Link: https://steamcommunity.com/sharedfiles/filedetails/?id=1770851727 Remake 5.0 mod Link: https://steamcommunity.com/sharedfiles/filedetails/?id=3372762649 Discussion Forum: https://steamcommunity.com/workshop/filedetails/discussion/1770851727/5561388294347460121/