换一换
换一换 


如果你曾经想知道诊断、治疗以及其他诸多事项是如何运作的,那么你来对地方了。我们花费了大量时间和精力收集数据并理解部分游戏机制,很高兴终于能与大家分享成果。不仅如此,本指南还汇总了重要的通用技巧,以及许多关于如何经营一家盈利的医院并避免破产的建议。最后,我们还仔细研究并分析了社区中许多常见的话题,基于实验而非仅凭假设给出答案。 简介 这是我与Leamia(来自Reddit)及其他人共同进行实验后得出的结果汇总。 你可以将本指南中的数据自由用于你的网站、维基等平台。如果你发现任何问题,请在评论中告诉我。 通用技巧 - 第一部分 1) 这可能是最重要的技巧:在任何任务开始时,或者当你的全科医生办公室开始出现排队现象时,点击屏幕左下角的美元图标,进入“总览”菜单并选择“政策”选项卡。确保激活“快速治疗决策”,这能让患者在达到诊断阈值后直接接受治疗,而不会浪费时间返回全科医生办公室。请注意,这不是全局设置,你需要为每个任务单独检查政策选项卡。
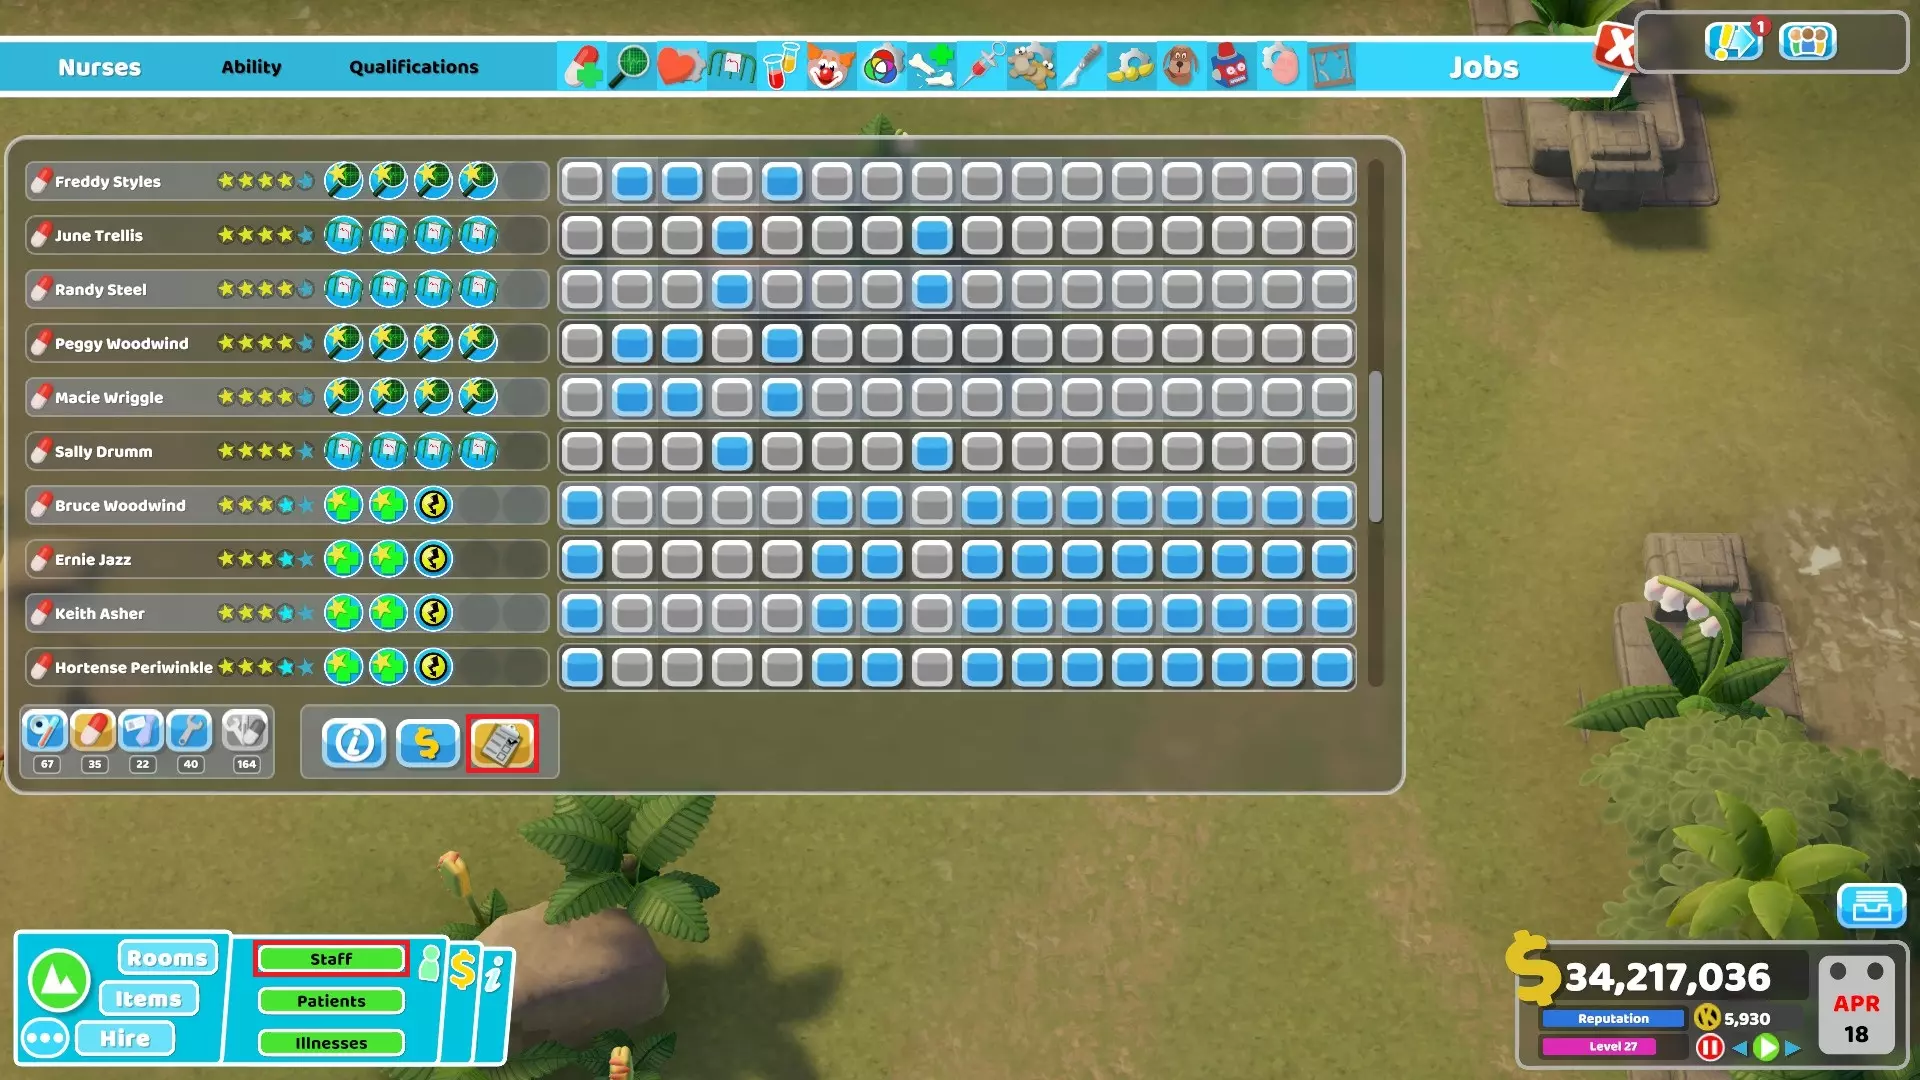
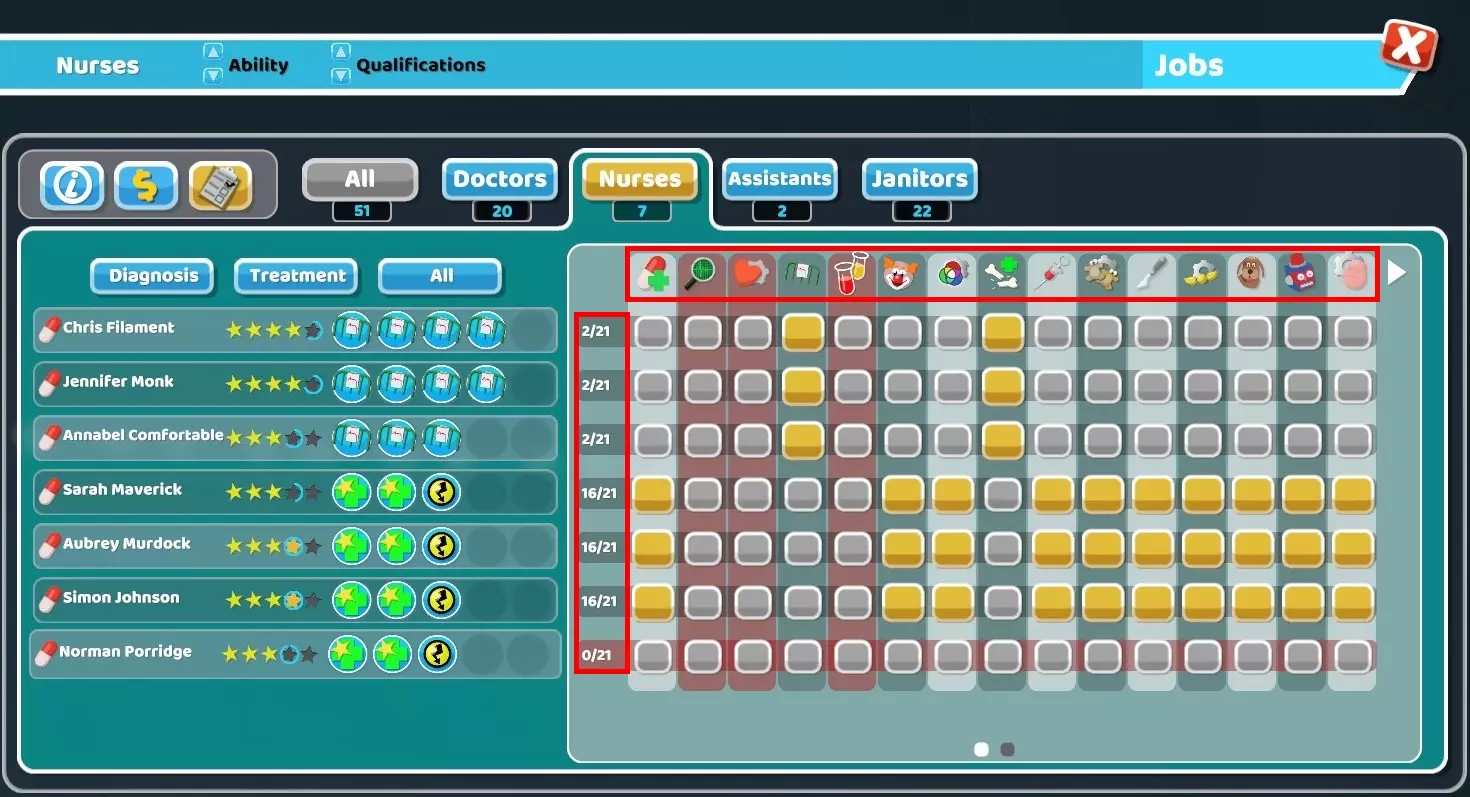
2) 经营好医院的一个原则是将全科医生诊室建在接待台附近,因为所有新患者都会先去看全科医生。诊断室应靠近全科医生诊室,因为患者看完全科医生后会接着去诊断室,之后可能会回到全科医生那里,甚至可能再去另一个诊断室等等。最后,由于治疗室是所有患者的最后一站,你可以把它们建得远一些。但这并不意味着你应该把它们建在地图的另一边。先建得近一些,当需要为更多全科医生诊室或诊断室腾出空间时再移远。如果可能的话,将治疗室建在直升机停机坪附近,以减少紧急情况下的时间损失。 3) 进入【员工】管理界面后,底部有一个名为【工作分配】的按钮。在那里,你可以取消勾选不希望员工工作的房间类型。为了提高效率,强烈建议让员工专业化,只让他们在能发挥自身技能的房间工作。例如,拥有治疗技能的员工没有理由去诊断室工作。如果治疗室的排队人数不多,让这些治疗专家在多个治疗室工作会更好,而不是每个房间都招聘一名员工,结果他们70%的时间都在等待患者,无所事事。
4) When Happiness of a medical employee is above 80%, they gain the buff called "Happy" which increases their treatment and diagnosis skill by 10% but also move speed by 10% even though it's not written in the buff description. A happy employee taking care of a patient also gives them +5% happiness. When Energy of an employee is above 80%, they gain the buff called "Energised" which increases their speed, treatment, diagnosis and research skill by 10%. They instantly lose those buffs when happiness/energy goes under 80%. A table with all buffs and debuffs given to staff when the energy and happiness are above or below a threshold can be found at the tip 28.5) When employees are training to get a skill, they slowly gain energy over time. Try to use that to your advantage and not waste that extra energy by sending them to the training room when their energy is between 20 and 60%.6) Bonuses provided by items like "+1% Training Speed" stack. With enough training boost items and/or teaching/learning trait and qualification, it's possible to have a training duration of less than 1 day: https://www.youtube.com/watch?v=hSeU_m1PtGI&feature=youtu.be However, there is no point aiming such a short time since it requires too much effort to set-up everything. Lowering the duration below 4 or 5 days requires a ton of boost items. If you have the extra money, it's still a good idea to add boosting items to reduce the training duration since missing one important employee during a long time can be bad.7) Just like the Motivation skill, Caffeine Buzz (from Coffee Maker item) only increases move speed. The buff boosts the speed to 200 which seems to be the max and makes employees run. However, it's extremely short and only lasts 20 seconds... Nothing too crazy. Note that Energy Buzz (from Energy Drinks Machine) has the same effect but lasts 30 seconds. Also it seems like employees will only drink a coffee if they are thirsty (when thirst is at least 40% depleted). And if there is an endless flow of patients they will never take the time to drink at all (they will only play the cosmetic animation making them look at the coffee machine) !8) When an employee is working, 1 energy is lost every ~6.6 seconds. The energy should take around 11 minutes to go from 100 to 0 energy. For an employee with the Stamina qualification, 1 energy is lost every ~8.9 seconds. Therefore, it takes around 14 minutes 48 sec for the energy to go from 100 to 0. By default, an employee works 134 in-game days before taking a break. With Stamina Training, an employee works 178 days before taking a break, it's 44 days more which can be very useful for surgeons for example. Note also that an employee with the Stamina qualification seems to recover energy more slowly. ~11 energy every 20 seconds against ~15 energy for others without Stamina qualification. Generally, it's not an issue since energy tends to be full before the end of the break if you didn't change the break policy.9) Plants look good and the attractiveness bonus they bring is nice. However, except for cosmetic purpose it's better to rely on other objects like posters, paintings, awards to increase attractiveness of an area. Since those items don't need watering, your janitors can focus on other more important tasks. Plants can actually have a negative attractiveness effect if your janitors don't manage to water them all quickly enough. That's also why they are less reliable.10) When you increase prices, you can see that some patients will refuse to pay. One of the most important factors affecting the chance to pay is the happiness of the patient, another factor in treatment rooms is if a cure fails or succeeds. Overall, just keep in mind that an unhappy patient will be less willing to pay higher prices. The happiness threshold defining if they will pay or not seems to depend on the illness and prices. In most cases, they will pay any price (even +100%) when their happiness is above 50% during the payment process. However, if the treatment fails they will need more happiness to be willing to pay, with +100% prices the threshold seems to be around 55-65% happiness depending on the illness. When patients pay higher prices, they lose happiness. For example, getting diagnosed in the mega scan room with prices at +100% can make the patient lose around 25% happiness. That's why I recommend not increasing prices for GP offices and even for diagnosis rooms. Patients will be more happy when entering the treatment room and be more likely to pay increased prices there where it's the most profitable.11) It's usually recommended to avoid using benches. The main reason is that they make patients take more time to enter a room when it's their turn. Without any bench, patients are all standing in line right next to the door and as long as they stay there, they will very quickly enter the room. While technically standing patients take more space in hallways than sitting patients, benches can also create some chaotic situations especially if there aren't enough for everyone. Sometimes patients seem to randomly stand-up and switch places which is annoying. However, benches have a benefit, they reduce the happiness loss over time of sitting patients (they don't seem to affect the needs or health gauges at all). I usually do not buy benches but if you intend to use them I recommend making sure there are enough for every patients, or you should probably not use them at all. Having some people standing and others using benches while queuing to enter the same room can make people have trouble moving through the hallway depending on the layout. General tips - Part 2 12) Room prestige level increases happiness over time of staff in the room. At level 1: it provides no benefit. At level 2: it provides the buff "Nice Room" => +5% happiness At level 3: it provides the buff "Good Room" => +10% happiness At level 4: it provides the buff "Amazing Room!" => +20% happiness At level 5: it provides the buff "Outstanding Room!" => +30% happiness Employees will gain happiness as long as the bonus outweighs their debuffs that negatively affect happiness (like "Underpaid", "Desperate for the Toilet", "Very Thirsty", etc...). It's very easy to keep an employee working in a level 5 room happy especially if objects increasing attractiveness are near their work station or desk. Note that prestige level doesn't affect patients in the same way, however the effect is still very powerful for patients too because it gives a happiness boost to them when they are taken care of (except for the reception room since patients are outside). At level 1: +5% happiness is instantly given to patients when taking care of them At level 2: +9% happiness is instantly given to patients when taking care of them At level 3: +14% happiness is instantly given to patients when taking care of them At level 4: +17% happiness is instantly given to patients when taking care of them At level 5: +20% happiness is instantly given to patients when taking care of them Regarding items increasing attractiveness, they can provide the buff "Attractive Environment" which can boost happiness up to 25%. Unlike room prestige this bonus also directly affects patients by giving them a boost of up to 11% happiness p/month. One of the best items to increase room prestige is definitely the Gold Star Award, it's small so you can place many on walls. It increases room prestige a lot, boosts attractiveness and doesn't need maintenance. 200 Kudosh are necessary to unlock it but is definitely worth it if your play style is more about optimizing things than making your rooms look pretty...13) There is no intrinsic benefit to build a room bigger than the minimal size (except in the case of wards to place more beds). It could even have a negative effect if a patient/doctor has to walk more to start diagnosing/curing so make sure to place the working station close to the door. That said, bigger rooms can be useful to place more Medicine Cabinets to boost diagnosis/treatment or Encyclopaedia Bookshelves II and Anatomy Models in training rooms.14) Make sure to have large corridors of 2 tiles to avoid congestion. 1 tile hallways can make patients/staff have trouble moving from one point to another, that's why they should be avoided when possible. If you have some narrow corridors, at least don't put objects on the way.15) It's possible to precisely rotate and move objects (without having it snap to the "grid") by holding left Ctrl key. You can also instantly create a copy of an item already placed in the hospital by holding the left Ctrl key before clicking on it.16) Skills of nurses working in surgery doesn't affect the cure chance, only skills of the doctor matter in this room. So either assign a level 1 nurse to work there and don't bother with promotion/training, or just set surgery as an extra assignment for any of your nurses that is not too busy already.17) When a training is in progress and you forgot or want to train additional people, just pick and drop them in the room. As long as they have an available training slot and an available trainee desk, they will do the current training too. Their training fee will be automatically paid as soon as they are dropped in the room.18) Research projects are tied to the account and not just to the hospital where they have been completed. This means that if you don't want to bother with research in all hospitals, you can complete all research projects you need in a previous hospital (Mitton University being the best hospital for that). It can be assimilated to an "exploit" since it makes the game much easier than it is when you don't have to build a research room in every hospital and recruit researchers. It's up to you how you want to play anyway.19) This is something I learned quite late but you can instantly pick-up an employee from the staff list directly with a right-click. This way, you avoid making the camera automatically move to the employee when you first left-click to select the employee before clicking on the Pick up button.20) It's not written in their descriptions but "Server" and "Super Computer" items also increase temperature around them (less than small radiators). So make sure to display the temperature overlay when using those items to avoid turning a room into an oven.21) The bonus from Items increasing training, research, diagnosis or treatment only affects the rooms they are placed in. Therefore, training "Posters" and research "Servers" are just "cosmetic" when they are not placed respectively in a training room or a research room. Moreover, they only provide boost to the training/research room they are in and not to all training/research rooms of the hospital.22) Many VIPs (mayor, journalist, movie star, etc...) will visit the hospital and are great to get reputation, money, Kudosh or research points. However, 3 of the rival CEOs sometimes coming to the hospital are "evil" and their visits are unavoidable. Jumbo McNally CEO of Jumbo Mega Corp: - he sabotages machines reducing their durability by 50%, it's not just 50% of the current durability it's a flat -50 points loss of the maintenance gauge and can instantly destroy machines (!). - he drops a ton of litter on the ground. - he talks to patients and sometimes to staff making them instantly lose 10% happiness, he can talk to other VIPs as well like movie stars but not sure it has an impact on their review of the hospital since I still got favorable reviews from them when this happened. - he can block a toilet (-100% maintenance gauge) when visiting the toilets room. Note that he only does that to normal toilets, if there are only golden toilets in the room he won't do anything. Agatha Sphere CEO of The Orb Foundation: - she brainwashes both patients and staff making them lose happiness over time very very quickly. In the case of patients, it means they are likely to rage quit before being cured. She can also brainwash other VIPs like the health minister but I am not sure it has any impact since I still got favorable reviews from them when this happened. Augustus Lavender CEO of Holistix: - he poisons plants making their maintenance gauge fall to 0 (withered plants have a negative attractiveness area of effect around them until they are watered). - he randomly vomits on the ground. Be very careful when Jumbo's CEO is in the hospital and make sure to quickly send a janitor to repair machines with low durability in rooms he is about to visit or has visited. Alternatively, you can also just pick-up the machine in the room he is in to prevent him from sabotaging it. Very often he is the main cause of machines on fire or destroyed ones when you don't pay attention. It can be frustrating and harmful to lose a fully upgraded machine because of him.23) In marketing rooms, an assistant only gains XP (between 4 and 5) when interacting with a Marketeer's Desk. So to speed up the leveling of these assistants, it's better to place a Marketeer's Desk per assistant. Items that trigger an animation like sofas or some of the boards for example should be avoided since they will make the employee lose time and not earn XP during that time. General tips - Part 3 24) Contrary to many theories, the hospital value is simply the addition of 3 elements (minus the loans): - The current amount of cash - The value of the physical assets in the hospital - The profit factor (calculated based on the net revenue of the hospital) So it's actually not "really" useful to spend money to make the hospital look better, or buy new buildings or things like that to increase the hospital value... The money you have is already taken into account in the hospital value. So the only thing to do to increase the hospital value is to make it more profitable or just wait for time to pass if it's already profitable to increase the amount of cash and thus the hospital value.25) In the job assignment screen, it's possible to tick/untick a whole line or column. To use this "hidden" functionality, you just have to right-click on the numbers on the left of the list or on the room icons at the top.
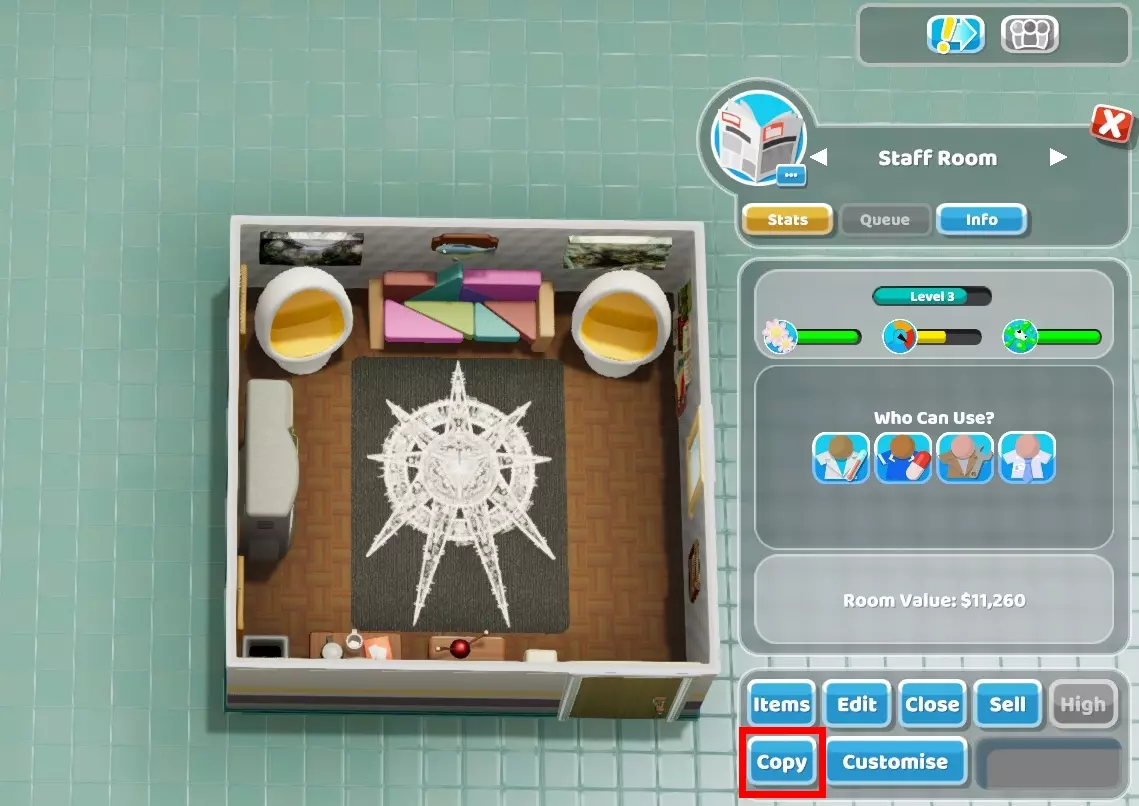
26) 工作室内的椅子(“大脑椅”除外)没有特殊加成。坐在椅子上的员工其精力、幸福感和需求值仍会以相同速度下降。这些椅子过去具有让员工在空闲时留在房间内而非离开的特殊功能,但现在已不再如此。员工是否留在房间的选项现在通过政策菜单进行管理。需要注意的是,椅子在让员工靠近其工作站方面仍然有用,但除非是在大房间内,否则由于坐下和起身动画可能会花费时间,这并不总是能带来明显差异。 27) 由于可以在政策菜单中选择让空闲员工离开房间还是留在房间,以下是一些优缺点。如果员工在闲置时离开房间: - 在房间外,他们的能量消耗速度会慢得多。 如果员工在闲置时留在房间内: - 更容易让员工在房间内保持心情愉悦(房间声望和吸引力带来的心情加成,且地面不会随机出现垃圾或呕吐物)。 - 如果房间内有糖果分配器、咖啡/巧克力机,他们会使用这些设备来满足自身需求。而在房间外闲置的员工,只有在休息时才会使用走廊里的自动售货机。 - 减少走廊内的人员流动有助于缓解交通问题。 - 当患者来到房间时,无需等待员工返回。 由此可见,员工离开房间的唯一好处就是能量消耗更慢。虽然让员工待在房间里确实有好处,但我个人更倾向于这种做法的优势。不过说到底,这通常不会造成太大影响,因为选择第一种方案的话,闲置员工大约需要两周时间才会离开房间。除了游戏初期,闲置员工应该相对少见,除非医院人员过剩。 在建造治疗室时,最好将需要护士的治疗室和需要医生的治疗室分开放置在两侧;如果空间不足,也可以放在另一栋建筑里。当指派治疗护士或医生在多个房间工作时,若这些房间距离不远,工作效率会更高。29) 缓解全科医生诊室或其他诊断室排队问题的临时解决方案是降低【治疗诊断阈值】(同时始终保持【快速治疗决策】激活)。当阈值设为50%时,大多数患者在一次全科医生就诊后就会直接接受治疗。但这会大幅降低治愈几率,因此在排队情况缓解后,别忘了将阈值调回更高水平。 30) 在招聘界面中,点击人物肖像左侧的白色十字可将该申请者从列表中彻底移除。这会重新空出一个候选槽位,经过足够时间后会有新的申请者出现。定期移除不合适的候选人以腾出空间给新人,这点很重要。虽然这看起来相当明显,但还是将其纳入提示中,因为许多玩家反馈说不知道这一点。31) 另一个许多玩家往往发现较晚的实用功能(尽管它其实并不那么隐蔽:p)是房间复制。点击一个房间时,在房间信息面板底部会有一个【复制】按钮。点击该按钮会创建一个包含该房间所有物品的副本,之后你可以将其放置在任意位置。需要注意的是,若原房间内有2级或3级机器,复制出的房间中对应的机器会变为1级。
32) Janitors can struggle a lot with all their tasks especially during missions with a lot of natural disasters. Here are some things that can be done to reduce their workload : - Remove all plants from the hospital, use other items that don't require maintenance. - Make sure to use the Big Bins, these are by far the best ones to reduce the workload of janitors. In cold environment using the incinerator from the Close Encounters DLC inside rooms can also help a little bit but I don't recommend it in hallways. - If you have spare money, use the Water Closets or the Golden Toilets instead of the normal ones. They are more durable and will therefore also reduce the workload. - Avoid buying unnecessary or far away plots, otherwise janitors will waste a lot of time just moving from a building to another. - If you have the Pebberley Island DLC and if the mission is in a hot environment, do not use Aircon Units at all. Instead rely completely on Ice Sculptures to lower the temperature since they don't require maintenance. - If you want to reduce the workload even more, you can use Drinking Fountains or Water Coolers and Sweet Dispensers (or even Carrots from Off The Grid if you want) since they don't require maintenance compared to other food/drink machines. It might be a bit overkill though, using items providing bonuses like the Luxury Snack Machines is usually better.33) Here is a table showing all buffs and debuffs given to staff members when the energy and happiness are above or below a threshold.Unhappy (happiness below 20%)Happy (happiness above 80%)Exhausted (energy below 5%)Tired (energy between 5% and 20%)Energised (energy above 80%)All employees-20% move speed+10% move speed-40% move speed -50% happiness-20% move speed -20% happiness+10% move speed +10% happinessDoctors and Nurses-10% diagnosis and treatment skill -2% happiness for patients when taking care of them+10% diagnosis and treatment skill +5% happiness for patients when taking care of them-20% diagnosis and treatment skill -5% happiness for patients when taking care them+10% diagnosis and treatment skill Doctors also get +10% research skillAssistants-20% customer service and marketing skill -2% happiness for patients when taking care of them+20% customer service and marketing skill +5% happiness for patients when taking care of them-20% customer service and marketing skill -4% happiness for patients when taking care of them+20% customer service and marketing skillJanitors-20% maintenance and upgrade skill+20% maintenance and upgrade skill-20% maintenance and upgrade skill+20% maintenance and upgrade skill Basic tips to prevent bankruptcy Here are some tips to help you get a profitable hospital. An important thing to note is that monthly expenses mostly come from wages (and loans) so it's actually not that hard to run a profitable hospital in most missions if you are careful. There is also an energy bill but there is not much you can do to reduce most of it and the amount is usually low anyway (see the "Energy cost" chapter for more info). 1) Only build rooms when necessary. There is no need to build all diagnosis rooms directly at the start of the mission. Just build one room and only build a new one when necessary (when the in-game notification telling you that a patient couldn't be diagnosed shows up). Of course, the same applies to treatment rooms, only build them if it's required to cure patients. However, if you have enough money do not hesitate to build treatment rooms when they are required since they give more money than diagnosis. 2) Do not recruit extra employees at the beginning, only recruit what's necessary to run the hospital. If there is no queue, a doctor or nurse can even take care of more than 1 treatment room. For example, I easily managed to get 3 star during the Croquembouche mission with 2 doctors taking care of 6 of the different treatment rooms and 2 nurses taking care of 5 of the other treatment rooms. It was possible because I kept the hospital at level 11 (to have less patients at once) but you get the idea, it's not necessary to have en employee per room in the case of treatments. 3) Never recruit employees with the "Expensive" trait (called "Wants more money" in the recruitment screen). Of course, avoid any other negative trait when possible but "Expensive" is one of the worst. On the contrary, one of the best trait to look for is definitely "Cheap" (called "Will work for peanuts" in the recruitment screen). 4) Never recruit overqualified applicants i.e. those with more than 2 stars since they cost way too much every month, except for example if you see a level 3 doctor with 3 General Practice skills and no negative trait. Recruited overqualified employees cost more monthly than employees who reached the same level after being recruited as juniors. 5) Never take a loan or do it only when you are confident it will help or if it's really necessary, for example to save your hospital by building a treatment room that will make it profitable. I used to always take loans when I started playing this game to quickly invest the extra money. However, it's often a bad idea since it makes the game more difficult with the extra monthly expense it brings if you are not careful. Note that the interest cost by itself is not that high, it's just that if you are in a bad situation after taking loans, it won't help to "lose" money each month. 6) Do not needlessly give pay rise to your employees just because you feel generous, even during promotions. Only increase salary when they are unhappy until they are satisfied (yellow neutral emote) but even that is optional if you are already struggling with money. Employees are fine as long as their happiness gauge doesn't go below 20%. Even if it does, making them take a break is usually enough to bring back their happiness to a higher level. 7) Emergencies are great opportunities to earn a lot of money. If possible, make sure to always accept them. It doesn't matter if your cure rate is not good enough to successfully complete the emergency mission. You will get most of the money from the emergency patients paying their treatment, not from the mission reward itself. Moreover, do not hesitate to increase price of the emergency illness to +100% as long as those VIP patients are in the hospital. Since emergency patients don't spend a lot of time in the hospital, they are usually happy which means they will very very rarely refuse to pay. It's a perfect opportunity to get even more money from emergencies. 8) Increase all treatment prices to +30% or more (do not touch GP office and diagnosis prices to avoid the happiness loss there). Don't forget to check the prices screen regularly since all new illnesses start at 0. Note that some patients won't pay when prices are too high but it should not often happen if your patients aren't too unhappy and will largely be compensated by those who pay. The only other penalty is that you will lose hospital reputation but except if it's a mission objective, it's not a big deal. Reputation mostly influences the flow of patients coming to your hospital. Having less patients is sometimes more beneficial than having endless queues anyway. It also affects the time before new candidates show up on the hire screen. Even during missions where reputation is an objective, you can still easily earn reputation with a good cure rate despite high prices, or just launch marketing campaigns to quickly earn some. 9) While it's beneficial to promote and train employees taking care of diagnosis, most treatment employees are already fully efficient at level 3 or 4 if you have upgraded machines. In that situation, promoting them all the way to level 5 is a waste because they will cost much more money for nothing. See the "Staff specialization" chapter for more info. Advanced tips to prevent bankruptcy 10) If you really struggle with the starting cash, don't buy unnecessary items in rooms until you get more cash. Don't bother with gift shops, newsagents, the café room or even benches they are all unnecessary/optional and can even have negative effect on queues. You can also save money by not building toilets, a hospital (without massive queues) can run just fine without them. Just build toilets later when you can afford them. 11) If one of the first doctors to recruit has the qualification "Radiology" or "Genetics", you should consider building respectively a Mega-Scan or a DNA Lab (if you already have them unlocked) as the first diagnosis room after the GP's office. These are the most expensive diagnosis rooms but also the most profitable by far. If you do that, you just need to be careful with other expenses early during the first few months. Diagnosing 11 patients is enough to cover the initial cost of the Mega-Scan or DNA Lab room. Diagnosing just 1 patient is enough to pay the monthly salary of the doctor working there (even a level 5 doctor). Most treatments still give more money but these expensive diagnosis rooms can help a lot early, especially when there is no other diagnosis room or if it's always busy. 12) Research can be a good way to earn money but note that it's an investment (room to buy, doctor to pay, training to do) and will take some time to truly become profitable. See the chapter "Money research project analysis" of this guide for more info. To quickly get the most out of the research system, level 3 doctors are enough. With 5 of these level 3 researchers you can complete the 20 000$ project in less than a month on average. The good thing about research is that no matter how the rest of the hospital performs, you will always get a regular income. Just make sure to instantly restart the research once it ends, otherwise it would be a waste of money to pay researchers for nothing. 13) With the feature allowing to change the diagnosis threshold for the patient to automatically be sent to treatment also comes a special way to quickly earn money which is almost an exploit. The idea is to set the diagnosis threshold at 50% and also make sure "Fast-Track Treatment Decision" is activated (in the "Policy" tab of the "Overview" menu). In this situation most of patients will only see the GP office or rarely more than 1 diagnosis room before going to their treatment room. Since patients are quickly "cured" after their arrival in the hospital, money will be earned faster too. To take advantage of that, you could also raise all prices to +100% (except for GP's office and diagnosis rooms). If your hospital is big enough with no queues at your treatment rooms, revenue can increase massively. Of course, with such a low diagnosis threshold, cure rate will probably be low so expect more ghosts and reputation loss. Keep in mind also that if the cure fails, patients will need more happiness (above 55-65% depending on the illness) to be willing to pay +100% prices. 14) This is more a special strategy than a tip but I think it's worth mentioning marketing since it can be effective. The idea is to start an illness marketing campaign to make most patients afflicted by the aimed disease come to the hospital. To take advantage of that, it's necessary to build many treatment rooms to cure that illness. The most obvious benefit is that you can attract an easy to diagnose/cure illness which means you will process patients faster and quickly earn money. Most people tend to do marketing for the Pharmacy. It's not bad because the room is cheap, nurses working there are also cheaper than doctors. The issue with Pharmacy is that it's not just taking care of a single illness but many of them including some that are quite hard to diagnose and cure. Safer options are Animal Magnetism and Lightheadedness but it's more expensive to build many of those rooms. However, note that this strategy has some downsides. Obviously, there is the initial cost to setup everything. Building the necessary rooms and recruiting people to take care of the patients can easily increase the hospital level too and bring even more patients than expected... 15) Here is a more extreme strategy if you want to save a ton of money but can be tricky to manage. The idea is to always keep the salary to the minimum of employees working in rooms like nurses and doctors (not recommended for janitors). Put the salary gauge completely to the left during promotions. It means that at level 5 the employee can have the salary of a level 1 junior. The issue is that the underpaid staff will get the "Pay Rage" debuff which gives a massive -50% happiness ! However, it's possible to somewhat compensate this by making sure the rooms where the employee is working has a prestige level of 5 (for the +30% happiness boost), it's also important for the toilets and break room to be level 5. Then make sure the attractiveness is fully green to always give the maxed "Attractive Environment" buff (+25% happiness). It's also recommended to have the attractiveness green in the whole hospital and not just in the rooms to limit happiness loss when the employee takes a break. As long as the employees take care of their needs, they should remain above 20% happiness (usually it will fluctuate around 40-50%). Giving the skill "Emotional Intelligence" (+10% happiness) to treatment staff can help. The "Positive" trait (+10% happiness) is obviously great too but I recommend this in priority for diagnosis staff since giving them an utility skill like Emotional Intelligence is not optimal. Paying a level 5 doctor around 17 000$ instead of more than 40 000$ is insane. The "Go Slow" strategy - Part 1 There are many ways to play this game but an issue many players have is to "expand" too fast and are caught in a vicious circle. In this situation, they can become overwhelmed and start losing money. The amount of patients coming to the hospital mainly depends on the hospital level. The vicious circle is that once you have queues, you build more and recruit more employees which increase the hospital level which makes more patients come to the hospital, increasing queues, etc... The goal of the slow strategy is to be patient and stop this cycle by keeping the hospital level low. What helps attain this objective is training of the diagnosis staff, machine upgrades and the use of the policy tab. I will also include other "tips" that are not directly part of the strategy but will help make the hospital profitable. Note that this should make getting 3 stars in all hospitals relatively "easy" since you will have a better control on the patients flow, recruitment, training and expenses. Obviously, this strategy isn't really useful for the wave missions since the hospital level doesn't affect the size of waves. General guidelines : - When recruiting make sure to get the employees that are as low level as possible and without any bad trait. Unless you have no choice, only train employees you intend to keep. - If you see junior applicants without bad traits, recruit them and train them. If you were forced to recruit a bad employee (very bad trait or skill set), make sure to replace them as soon as possible with a good one. - When possible, use your own employees to train others. To train employees with a skill that isn't present in the hospital yet, you can temporarily recruit someone with the desired skill to act as a trainer and then kick him/her once it's done. It will be cheaper than paying a guest trainer. -When building rooms, make sure to always increase them to prestige level 5. Gold Star Award is a great item to level up the room. In diagnosis rooms, make sure to place as many Medicine Cabinets (or other similar items) as possible if you can afford them. - To help janitors, try to have a Big Bin in all rooms and enough in hallways. Do not use plants. - Only use Luxury Drink and Luxury Snacks Machines. Do not hesitate to also place something to drink and the Sweet Dispensers in rooms. - Only buy plots once you need the extra space (or to complete a mission objective related to that). - Make sure the whole hospital is green when using the attractiveness overlay (or at least the areas where patients/employees are). Use items like the Brain Jar, Posters/Paintings, etc... If you have the cash and want to increase attractiveness in a large open area, the Horatio Statue or the Dragon Ornament are powerful. - Always keep the diagnosis rooms as close to the GP offices as possible and ideally in the same building. Early game : - First of all, make sure to activate the option "Fast-Track Treatment Decision" in the policy menu (you also can wait until queues start forming up before activating it, just make sure not to forget). - At the start of the game recruit a GP doctor and build a GP office. The GP doctors should have training priority over everyone else. As soon as they level up, train them (only give them the General Practice skills). - Consider recruiting another good doctor if you see one among the candidates to work in your first diagnosis room. Make sure to reject the bad applicants to make place for better ones. - If you see one or two good nurses, get them too. There is a high chance that the pharmacy and ward will be required early. - Unless you intend to do marketing, you shouldn't recruit more than 1 assistant. A second one can be recruited to fluidify the flow of patients but much later. An assistant with high Custom Service will process patients at the speed of light (only give them the Custom Service skills). Even if you intend to use marketing, you should wait for the hospital to be profitable first before recruiting and building the room. - Recruit a janitor with the Mechanics skills or a good junior to train him. A bit later recruit another janitor, if possible with the Ghost Capture skill to at least be capable of removing them. The janitor specialized in upgrading machines should have priority in training compared to other janitors (only give this specialist the Mechanics skills). - Build a Training room, if you have space build a big one. Cover all walls with Anatomy Posters to increase the training speed. When you have spare cash do not hesitate to add Encyclopedia Bookcases II or Anatomy Models in the room. If you need cash at any time, you can just sell some of these items to get your money back. - Build a small Staff Room and later build a new one in any new building you unlock. Note that this is entirely optional, with this strategy the benefit of having staff rooms is very limited. Not building them can help keep the hospital level low. - Build small Toilets if you want and later build new ones in any new building you unlock. As silly as it sounds, this is also optional. If you are in a hospital with small buildings, you can consider not building any Toilets room at all to save space. The attractiveness, the room prestige at level 5 and luxury drinks/snacks will easily compensate the happiness loss. However, make sure to place Hand Sanitisers in the hospital if you don't build Toilets. - From now on only build what you are asked to build... - Once a patient has been fully diagnosed, build the required treatment room. - Every time a new illness is discovered, open the Prices menu and increase its treatment price to +100%. And when you have a first patient who refuses to pay, lower the price of "Diagnosis: GP's Office" to -80%. While some patients will still refuse to pay, there should be more who pay which will compensate and heavily increase income. This is optional but it can help a lot financially. - When it's necessary to build a diagnosis room because a patient couldn't be fully diagnosed, you can build any of the diagnosis rooms (but only build one at first). X-Ray and Fluid Analysis rooms are great early and mid-game. Mega Scan is also quite good and become more interesting late game. With that said, if you see/train a doctor with the Radiology skill at the start of the mission, Mega Scan is amazing to earn money even though it's expensive to build. - When you see queues forming up because an employee is taking a break, don't recruit or build anything ! Wait and see if the queue gets processed fast enough once the employee is back. - Keep promoting and training your diagnosis staff in priority. Then the mechanics janitor and if queues are starting to form up at the reception, train the assistant. If necessary you can recruit replacements during a training and kick them after. Train the rest of the employees only when you have a good amount of cash. - Prioritize upgrading the diagnosis rooms. Upgrade treatment machines only when you have a good amount of cash (at least around 80k $). - Always check the new applicants showing up to not miss any good candidate. You can usually recruit 1 or 2 extra nurses or doctors early to train them for the next rooms you will build. - For the treatment staff (except Wards, Psy, DNA Lab), don't teach them Pharmacy Management or Injection Administration. Give them Treatment I + Treatment II + Stamina Training and that's all, never promote them to level 4. - Make sure to properly assign doctors/nurses to the good rooms. Only doctors with the GP skills should work in the GP offices, only the ones with the Diagnostics skill in diagnosis rooms, etc... Make sure the treatment staff can work in all possible treatment rooms (except Wards, Psy, DNA Lab and Surgery for doctors since their skillset is different). - Do not recruit one treatment employee per treatment room. Only recruit an extra treatment employee if the queues aren't going down during several weeks in a row. The "Go Slow" strategy - Part 2 Maintain the cap : - A temporary solution to reduce queues while waiting for an employee to level up or get trained is to lower the "Diagnosis Threshold for Treatment" in the policy tab to 50%. Don't forget to put it back to a higher level later to increase the cure rate. - When you see that the GP office has an unending queue during several weeks, it's time to build a new one and recruit/train a new GP doctor if it's not already done. The same can be done with other diagnosis rooms. - Keep in mind that since you have fresh employees, they won't be as effective as the one you already have. So until they gain some levels, queues can take time to go down but be patient. - When preparing a new diagnosis room, if possible close the room and make the janitor upgrade the machine to its max level before opening it. - In most hospitals you shouldn't need more than 4 GP offices and 6-8 diagnosis rooms. Do not build more than that and just keep training your staff and upgrading the diagnosis machines. - With 3 or 4 GP offices, you can consider recruiting an extra GP doctor who will help keep the queues under control when others take a break and train. At this point, you can also consider having an extra doctor/nurse for other diagnosis rooms if you have duplicates but again only if it's really necessary. It's still a better solution if queues can be reduced just by having an extra employee instead of building a new room. - Even though there are some exceptions for example in early missions when there aren't many different illnesses, it's rare to need more than 1 of the same treatment room. Again only build one more if it's absolutely necessary. The most problematic treatment room is usually the Surgery room because of how slow it is but having only one is still fine even if you have some queues there. - Regarding janitors it's more complicated to know when and how many are needed. During missions with natural disasters you will often need much more of them. You can use a rule like recruit 1 janitor every 3 or 4 machines you place. Personally, I just pay attention to what's going on and recruit more when I see that the ones I have are overwhelmed or if things take too much time to get cleaned/repaired. - When the hospital is doing good enough, having an extra training room can be very useful to keep everyone trained. - If you always build different diagnosis rooms you may see that at some point a diagnosis room will be much more used than the other ones. That's why instead of having 4 different diagnosis rooms, it's usually better to have 2 pairs of 2 diagnosis rooms to limit queues (for example 2 X-ray and 2 Fluid Analysis rooms). Ward is the exception since having just 1 is often fine. - Later, if you have for example a marketing room or a second training room that you don't need anymore just delete it and fire the marketing assistant if it can help lower the hospital level. With this strategy the hospital level should (almost) always be below level 16. Here is an example : 1. This is Croquembouche mission which is supposed to be one of the "busiest" hospital of the base game.
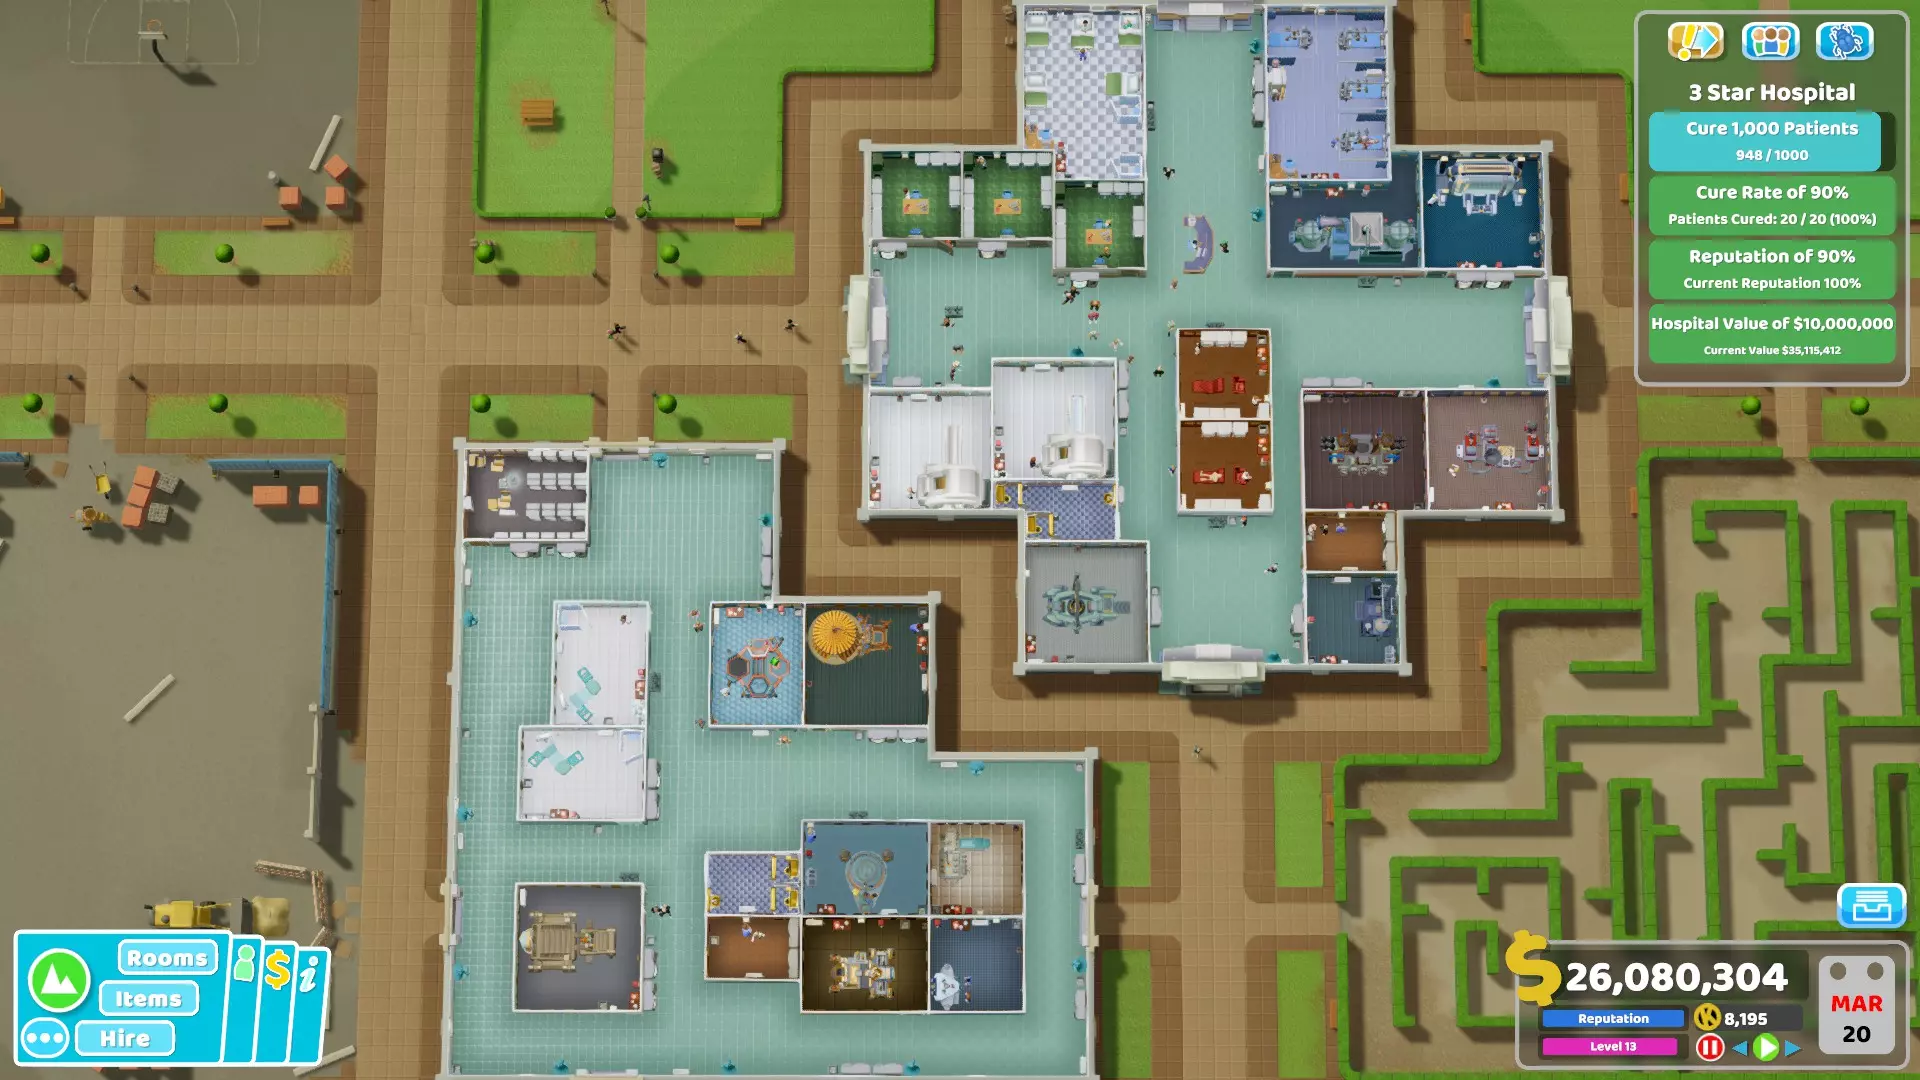
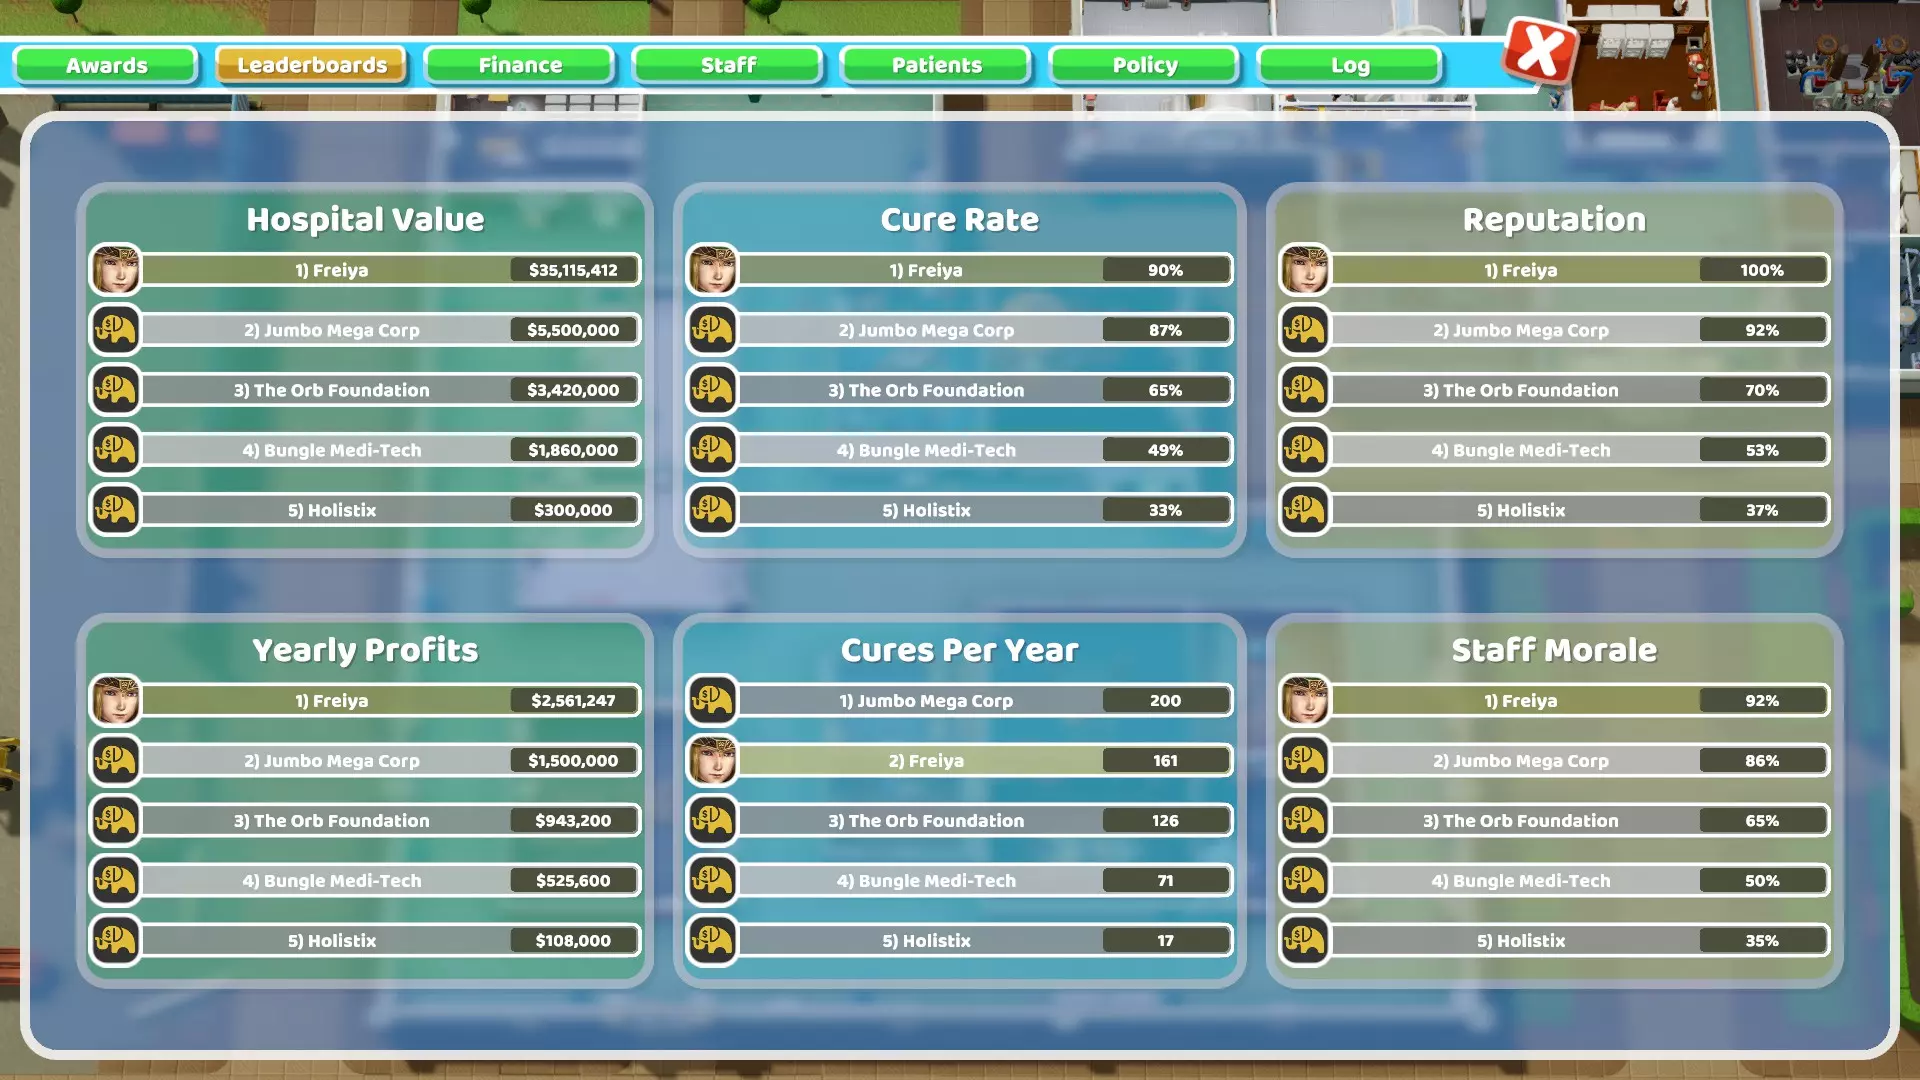
按照我的策略,这家医院只需2栋建筑就能高效运转,且仅需3间全科医生诊室。目前,这家医院已完全实现【自给自足】,不存在排队问题。医院环境整洁,患者就诊速度快,且盈利状况良好。相比之下,你可以看看一些游戏流程视频,会发现里面的医院往往规模庞大且秩序混乱。 2. 中心建筑专门用于诊断,由于空间充足,这里也设有一些治疗室:
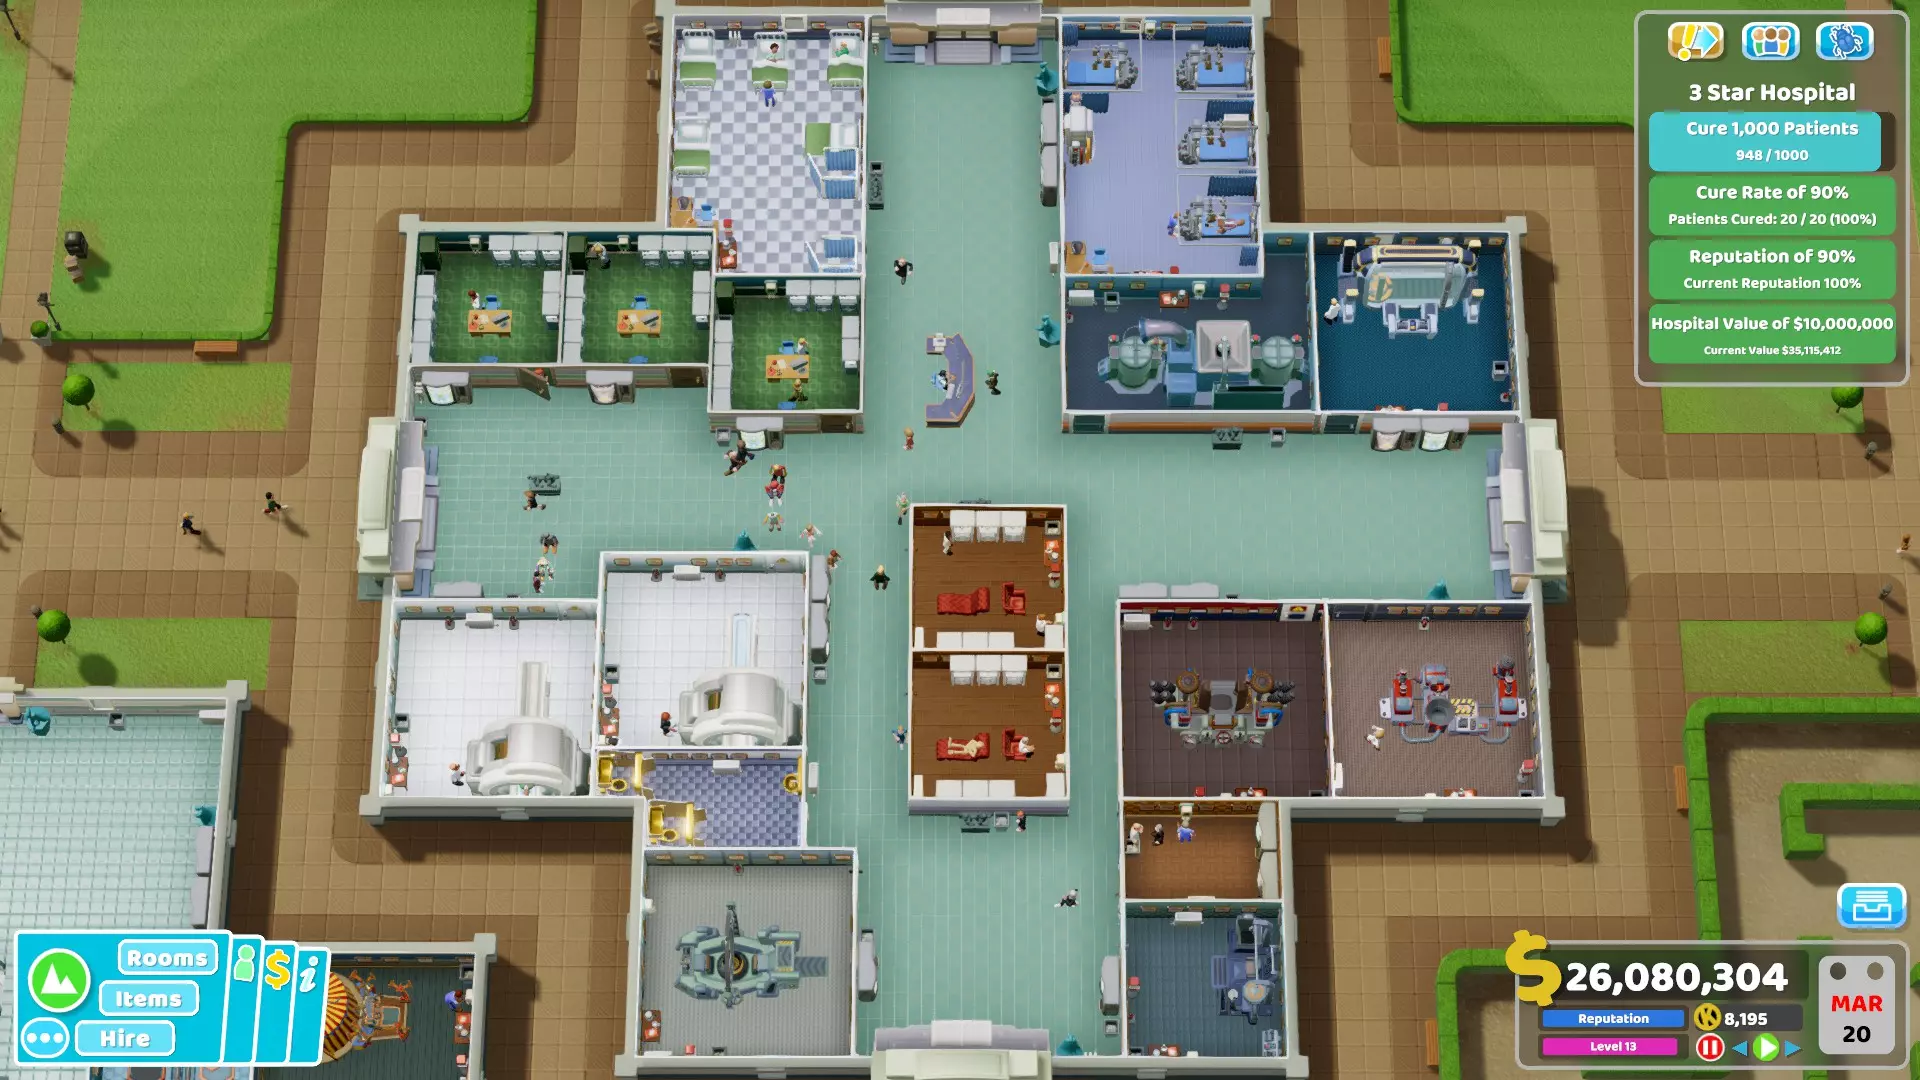
在此设置中,诊断由3间全科医生诊室、2间大型扫描室、2间精神科诊室和1间普通病房负责。除骨折病房外,该建筑内所有其他治疗室均为需要医生的诊室。3.另一栋建筑包含其余的治疗室:
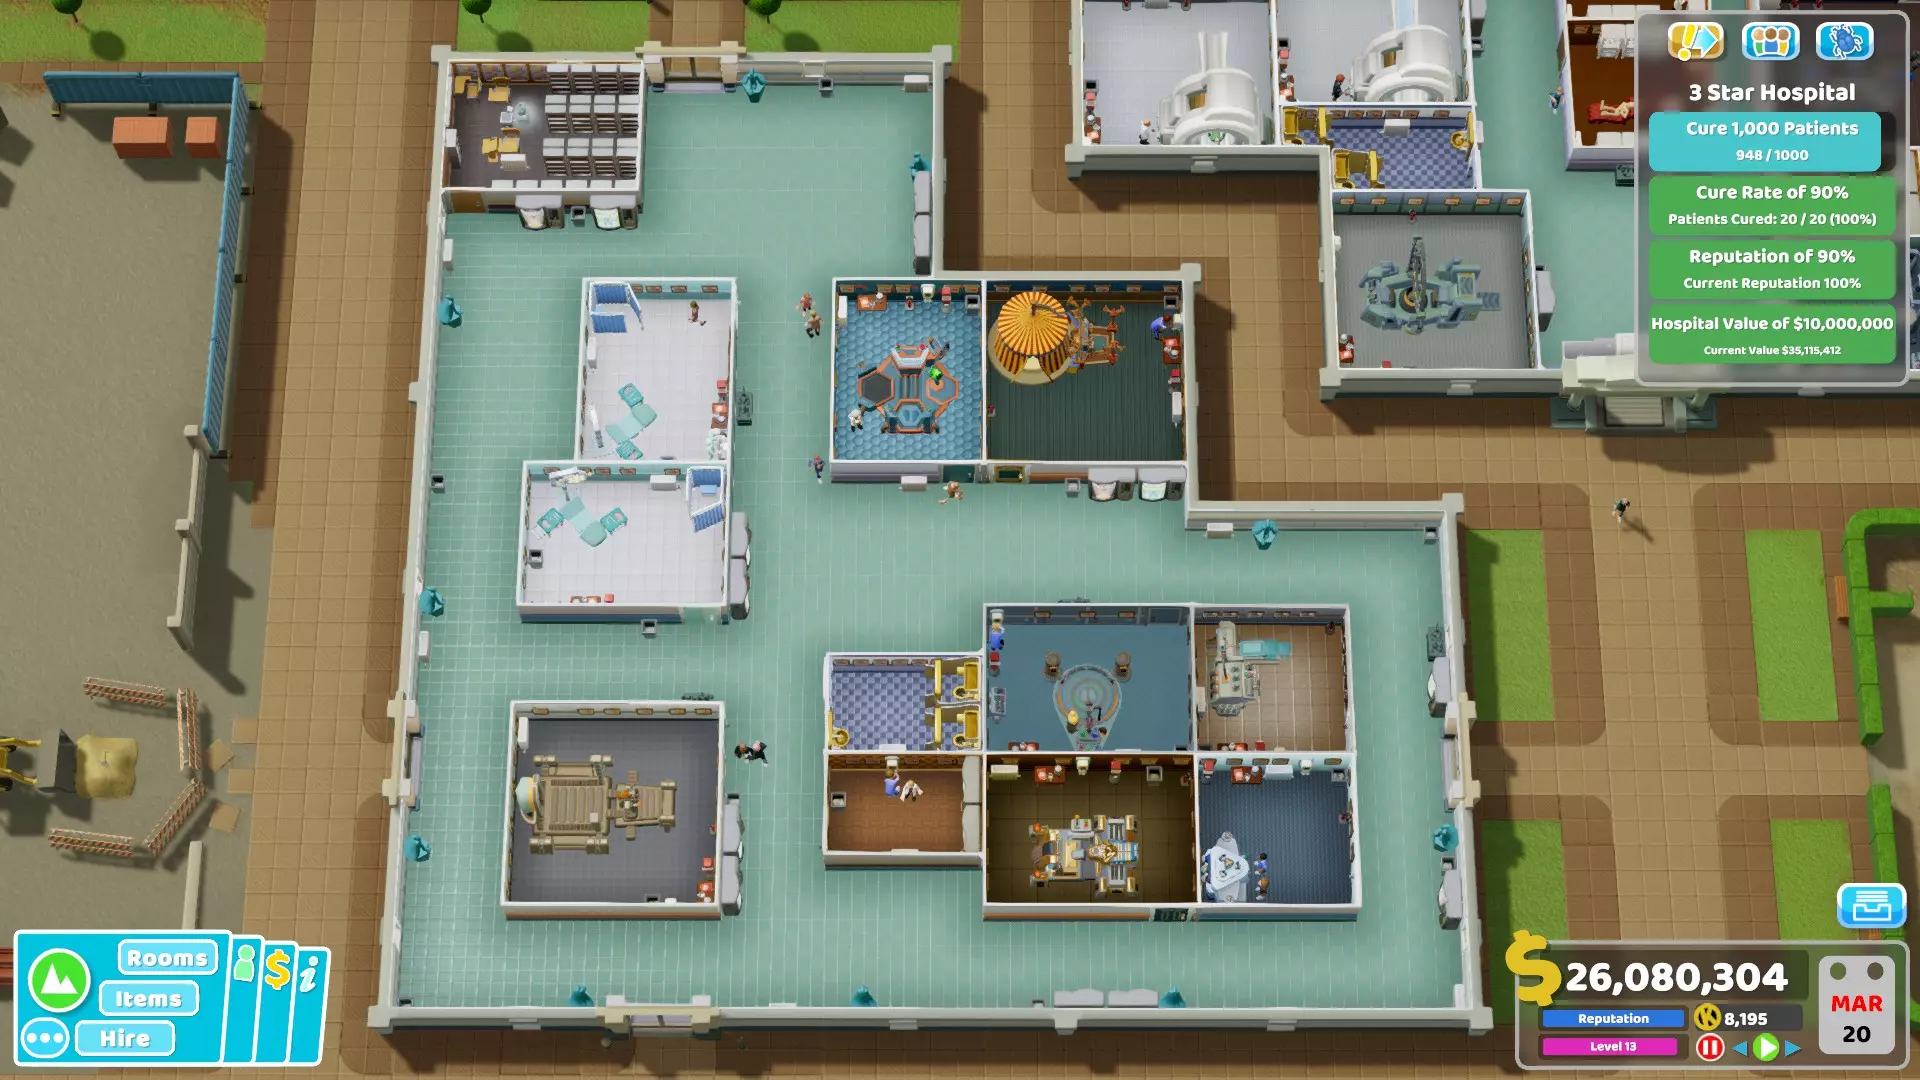
那里的DNA实验室只负责治疗患者,不进行诊断。需要注意的是,我有2间手术室,而这个治疗室是采用这种策略时唯一经常出现排队问题的治疗室,因为它的速度太慢了。不过,只设置1间DNA实验室是没问题的,而且我在大多数医院通常也只设1间。但由于它没有让我的医院升级,所以我决定再增加一间,这样就解决了排队问题。 在任务进行到某个阶段时,我曾有第二间培训室和一间营销室,但后来因为不再需要,就把它们删除了。 4. 本次任务期间我共有31名员工:
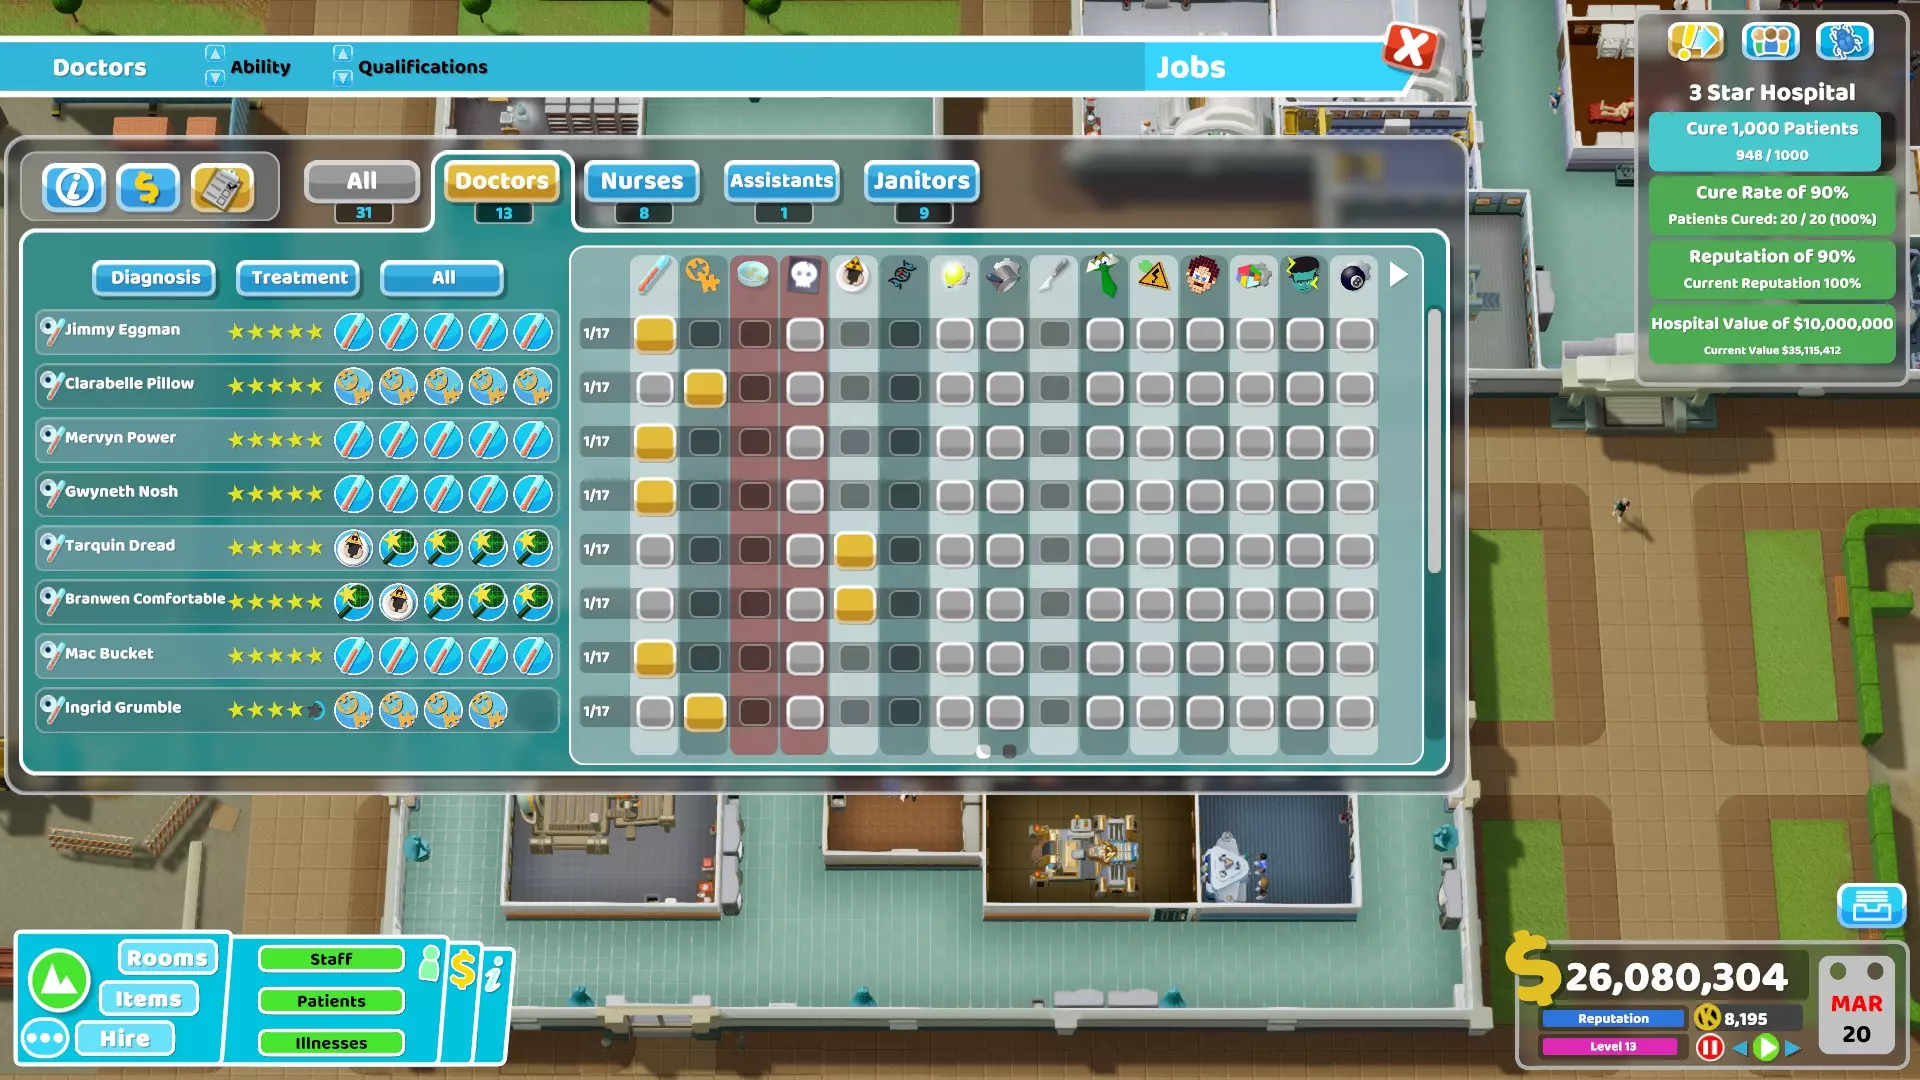
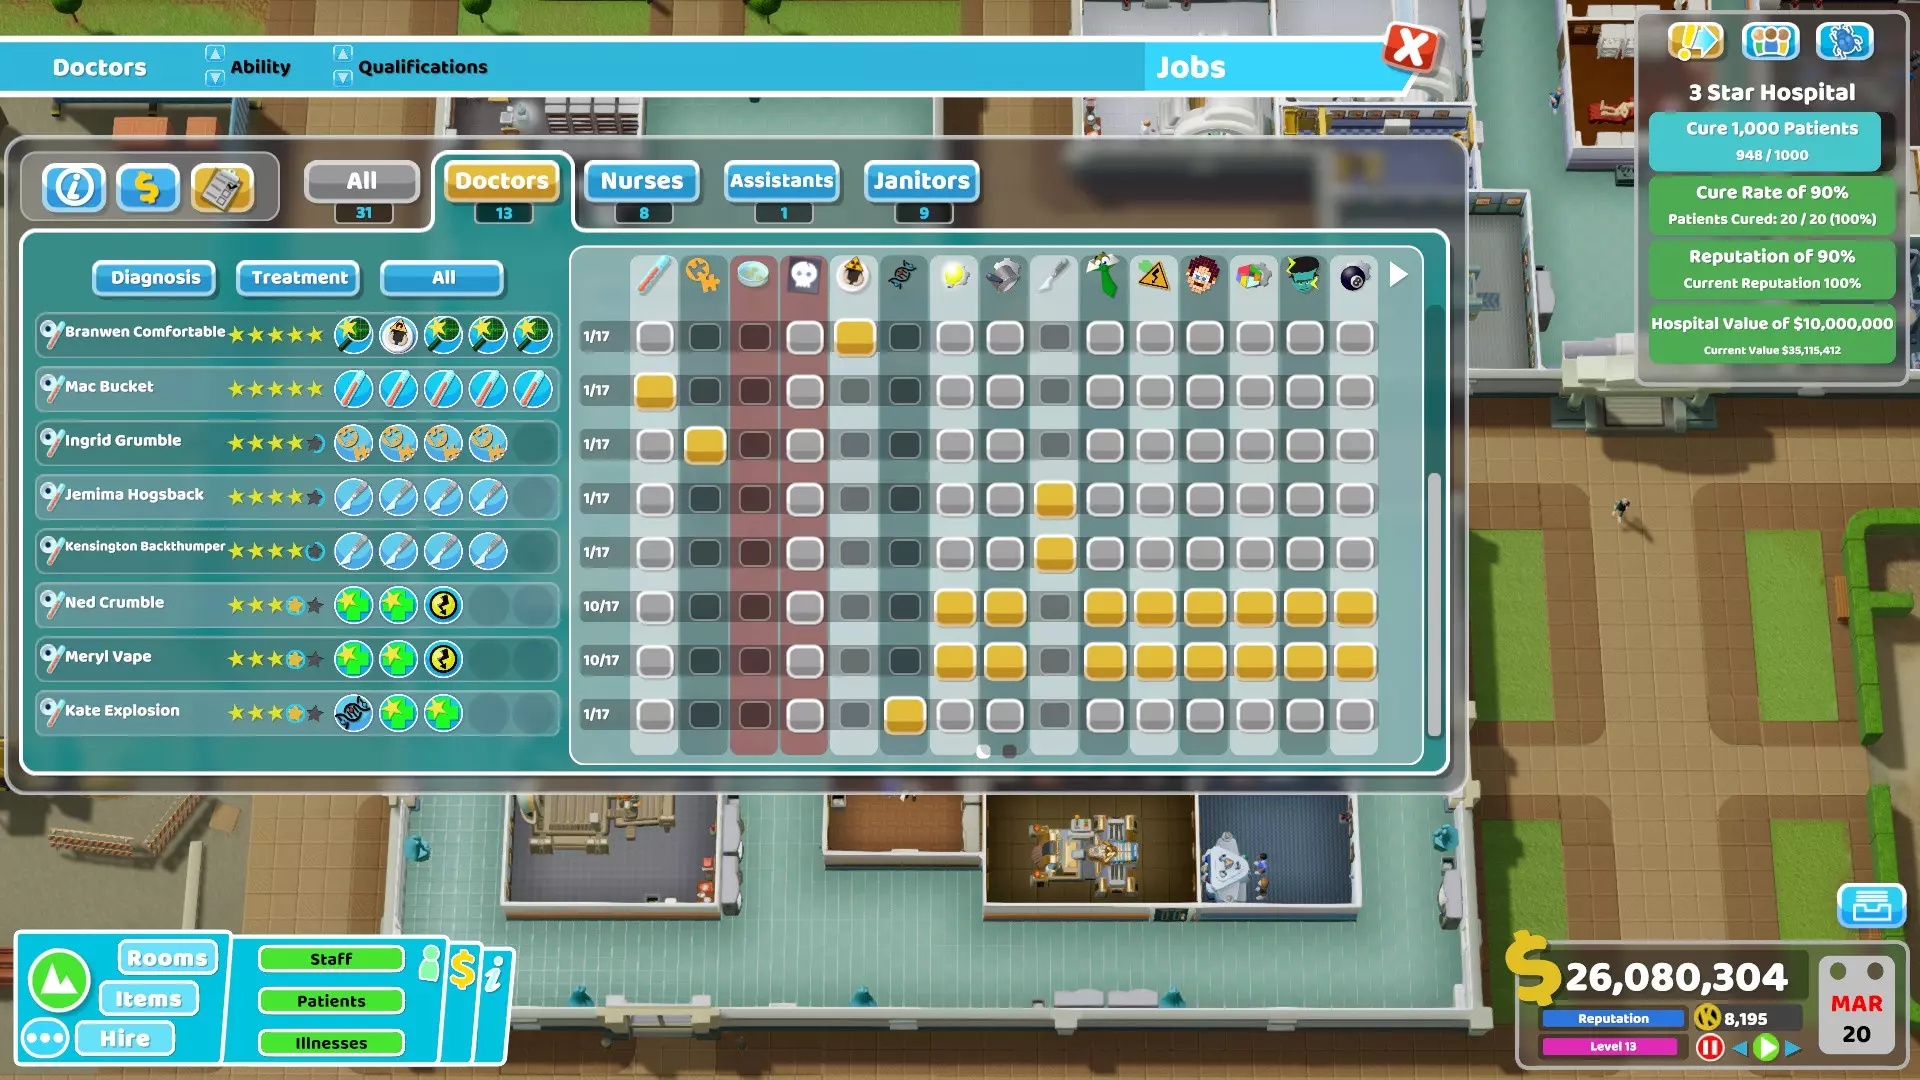
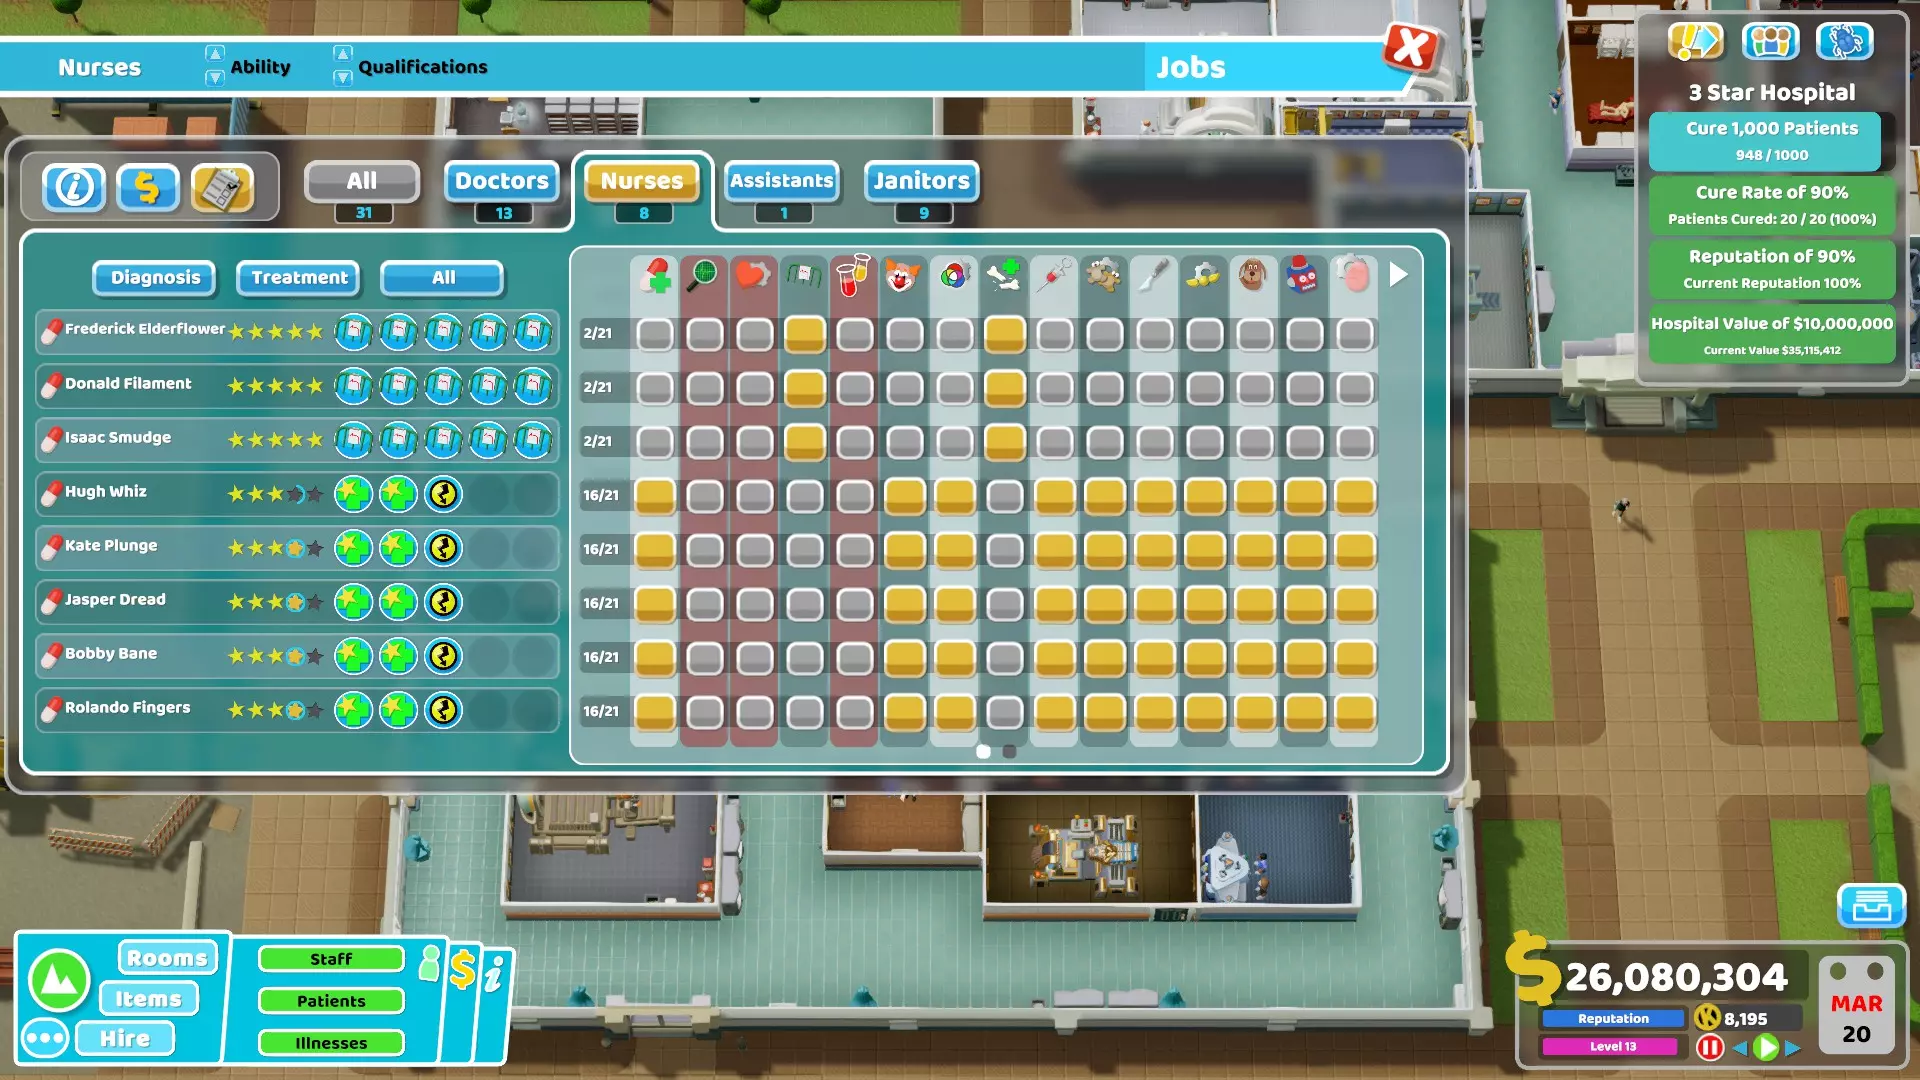
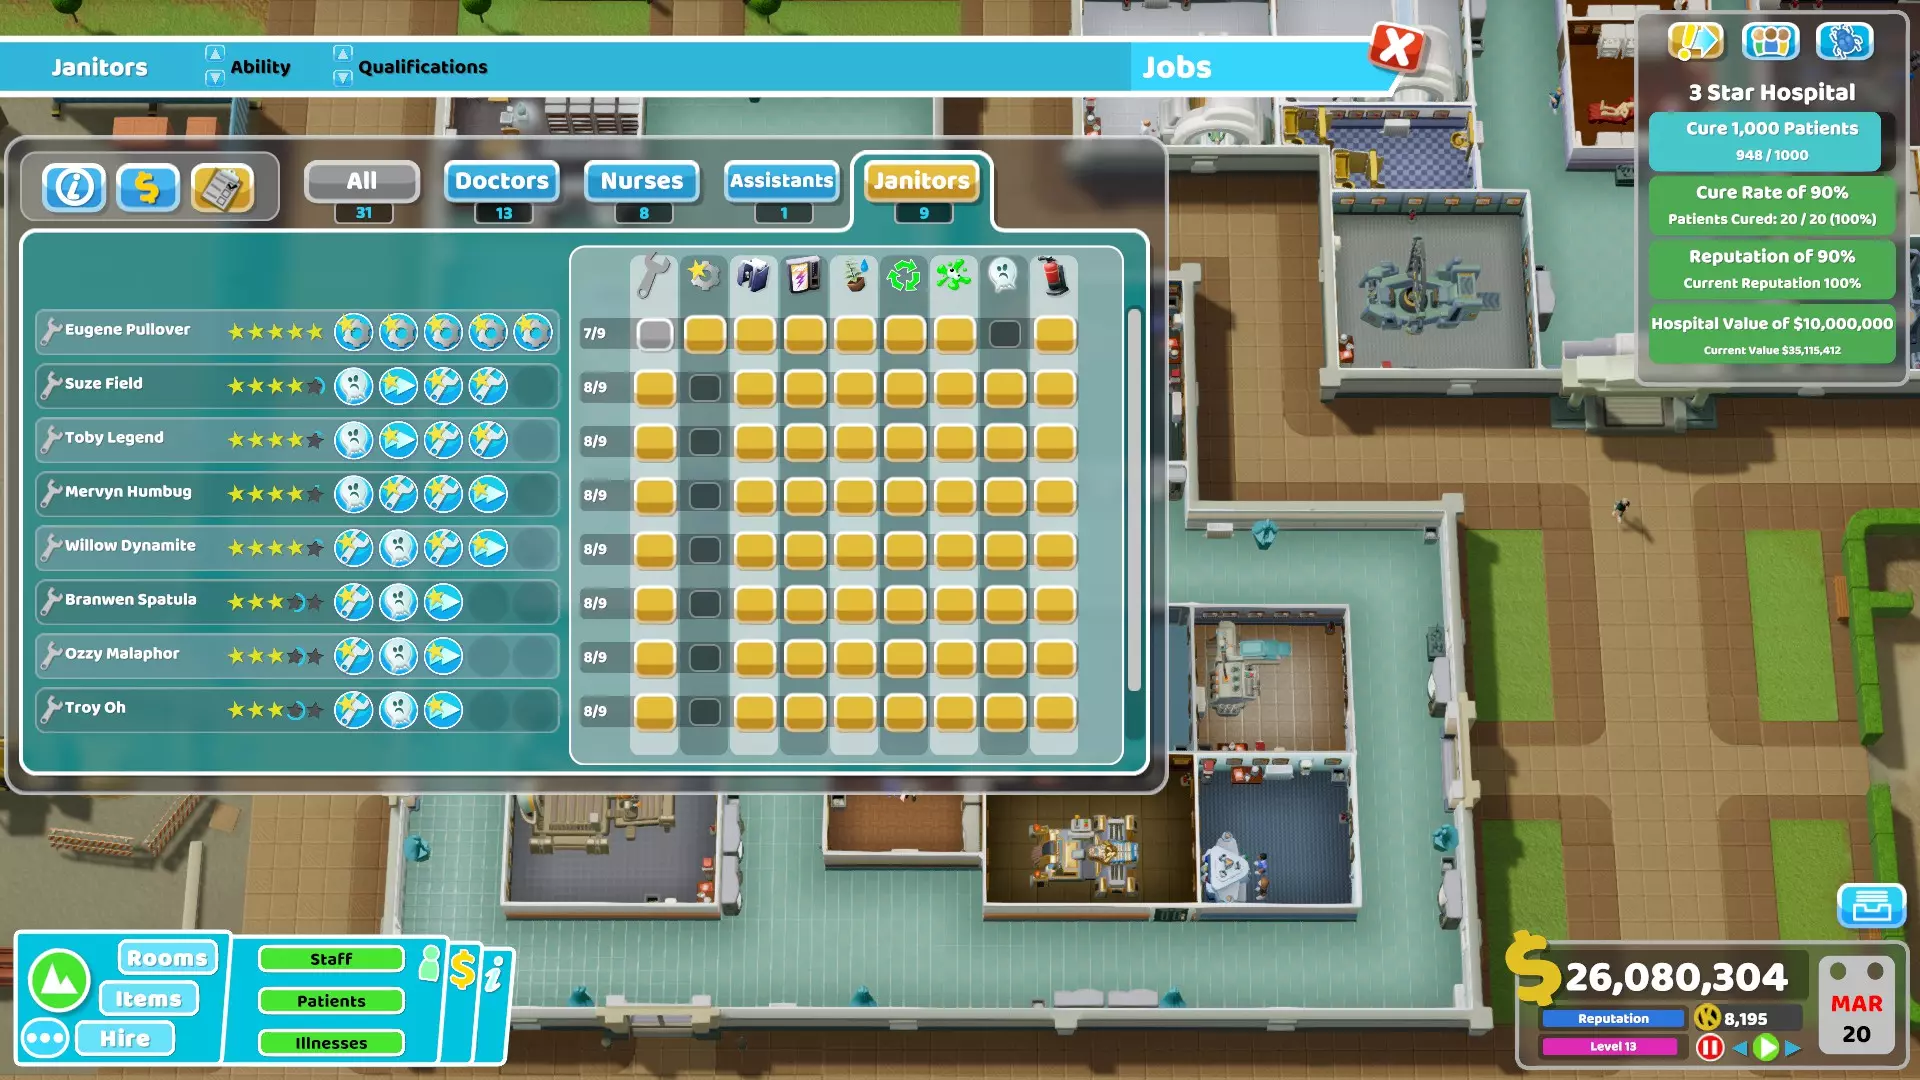
这里没什么好说的,只需确保对员工进行专业化培训,并只将他们分配到其应工作的房间。有关如何培训员工的更多信息,请参阅本指南中名为【员工专业化】的章节。 5. 一旦你理解了这个策略并知道如何运用它,游戏就会变得相当简单:
诊断速度 以下是每个诊室从患者进入到离开的平均诊断时间。这些数据是在使用最小尺寸的简单诊室设计时收集的。 普通诊断室:26秒 心脏科:31秒 病房:70至90秒(由于病房的性质以及部分患者无需更换衣物,时间差异较大) 精神科:35秒 流体分析室:34秒 X光室:22秒 M.E.G.A扫描室:33秒 DNA实验室:28秒 【无需考虑“动力”技能,它似乎不会改变任何工作速度相关的内容。如果需要,只需为清洁工学习该技能,因为移动速度对他们很有帮助。】我也查看了机器维护计量表,所有诊室的机器维护值都会因每位患者减少10%,但心脏科仅减少8%。至于普通诊断室,诊断过程中并非总会使用机器,因此有时机器完全不会损失维护值。所以理论上,这两个诊室的维护停机时间更少。 虽然诊断速度和维护情况可能很重要,但要记住,根据疾病类型的不同,某些诊室对特定疾病的诊断效果会更好或更差。这些疾病/诊室修正值对排队情况的影响可能比诊断速度/维护停机时间更大。更多信息可在【疾病与诊断修正值】章节中查看。垃圾桶之间的区别 我们很多人都想知道垃圾桶之间到底有什么区别。 价格及解锁方式: - 垃圾桶:50美元 - 大垃圾桶:100美元(使用20 Kudosh解锁) - 有毒废物垃圾桶:200美元(在Smogley获得1星评价后,使用50 Kudosh解锁) - 回收垃圾桶:50美元(通过【Off The Grid】DLC解锁) - 大象垃圾桶:120美元(通过【Retro Items Pack】DLC解锁) - 鲨鱼垃圾桶:400美元(通过【Culture Shock】DLC解锁) - 鸭子垃圾桶:350美元(通过【Speedy Recovery】DLC解锁) 垃圾桶有一个“维护”计量条,当计量条为0时,表示垃圾桶已满。因此,当NPC向垃圾桶内扔东西时,维护计量条会减少一定比例: - 垃圾桶:-6% - 大垃圾桶:-3% - 有毒废物垃圾桶:-10%(!) - 回收垃圾桶:-15%(!!)大象垃圾桶:-6% 鲨鱼垃圾桶:-5% 鸭子垃圾桶:-5% 当NPC向垃圾桶呕吐时,所有垃圾桶的维护值都会降低10%,没有区别。因此可以看出,有毒废物垃圾桶的表现并不突出,而回收垃圾桶则是最差的,因为它的填充速度比其他垃圾桶快得多…… 不过,还有其他因素需要考虑。所有垃圾桶(有毒废物垃圾桶、鲨鱼垃圾桶和鸭子垃圾桶除外)在填满时,周围会产生负面吸引力区域。维护值越低,负面吸引力区域的影响就越强。有毒废物垃圾桶、鲨鱼垃圾桶和鸭子垃圾桶的优势在于,即使装满,它们周围也不会产生任何负面吸引力区域。以下是垃圾桶装满时的吸引力表现(绿色表示良好,棕色表示不佳):
请注意,提升吸引力的物品能在一定程度上弥补不足。因此,如果你使用的垃圾桶不是【有毒废物垃圾桶】、【鲨鱼垃圾桶】或【鸭子垃圾桶】,请确保将它们放置在植物、海报或其他任何能提升吸引力的物品附近。
由于医院的卫生度默认是全绿的,所以这一点可能不太明显,但所有垃圾桶(除了有毒废物垃圾桶、鲨鱼垃圾桶和鸭子垃圾桶)都会降低周围的卫生度。与美观度类似,垃圾桶的维护量表数值越高,这种效果就会逐渐增强。
卫生值会保持微绿状态,所以单看这一项可能不算太糟,但如果地面上还有其他脏东西(比如呕吐物、垃圾等),卫生值就不会绿太久,因为脏污会“叠加”。 虽然有毒废物垃圾桶、鲨鱼垃圾桶和鸭子垃圾桶各有优势,但我认为大垃圾桶仍然是最佳选择。它需要更长时间才会装满,这能显著减少清洁工的工作量。 那《近距离接触》DLC里的焚化炉呢? 这是一种特殊的垃圾桶/散热器组合,我不建议使用,至少不要在走廊里用。 与其他垃圾桶不同,人们不能往里面呕吐。这意味着他们往往会吐在地上,这就很糟糕了……- 不知为何,人们并不总是将垃圾扔进焚化炉,反而会扔在地上。不过我怀疑这可能是某种bug,因为这种情况并非一直发生。 - 和其他散热器一样,这个物品会增加能源费用。它每月的成本是30美元,作为散热器来说还算合理,但作为垃圾桶显然就太贵了。 - 默认情况下,它会提高周围的温度,其影响半径介于小型和普通散热器之间。然而,温度的升降会取决于维护计量表的状态。当维护度非常低时,它周围大范围区域的温度会大幅上升,变得通红(过热)。这使得该物品作为散热器并不可靠。 - 请注意,尽管存在呼叫清洁工的按钮,但清洁工完全无法与焚化炉进行交互。确实,维护计量条会随时间自动增加,这意味着它“自给自足”。每次有人往里面扔垃圾,维护度就会下降10%。尽管这个垃圾桶不需要清洁工,有助于减轻他们的工作量,但呕吐物仍需清洁工处理,这一优势也就被抵消了。 如果你想要一个介于小型和普通暖气片之间的设备,在房间里用这个物品代替暖气片或许可以接受。不过,把它放在走廊外面,无论是作为暖气片还是垃圾桶,都不太可靠。 那么《时光一针》DLC中的虫洞垃圾桶呢? - 和焚化炉类似,它是一个自给自足的垃圾桶。其维护计量条会随时间自动增加,因此有助于减轻清洁工的工作量。- 当有人向【虫洞垃圾桶】内扔垃圾时,其维护值会降低10%,但与焚化炉不同的是,人们也可以在里面呕吐,这让该垃圾桶更实用。 - 即使【虫洞垃圾桶】已满,也不会对吸引力和卫生状况产生负面影响。 - 当【虫洞垃圾桶】为空时,会降低周围温度(效果略弱于小型空调机组);当它装满时,则会升高周围温度(效果略弱于小型散热器)。这种温度变化可能会使某些区域过冷或过热,这一点比较麻烦。 - 另一个缺点是它价格昂贵(700美元),且每月还要花费35美元。 【虫洞垃圾桶】虽然很棒,但不确定是否物有所值。温度问题其实不算大麻烦,但我还是更希望能随意放置垃圾桶,不用为此操心。 厕所之间的区别 很多人也想知道各种厕所之间到底有什么不同。 厕所价格: 普通厕所 = 500美元 黄金马桶 = 2000美元(在获得【免费】DLC后,使用40点 kudosh 解锁) 抽水马桶 = 2000美元(在获得【复古物品包】DLC后,使用40点 kudosh 解锁) 厕所都有一个【维护】计量条,当计量条归零时,意味着厕所堵塞,无法再使用。因此,当NPC使用马桶时,会消耗一定的维护值: 普通马桶:-10% 黄金马桶:仅-5% 抽水马桶:仅-5% 与普遍看法相反,黄金马桶和抽水马桶实际上比普通马桶有很大优势。它们更耐用,意味着清洁工不必频繁疏通,从而有时间专注于其他任务,这也能“间接”减少厕所排队现象。需要注意的是,当NPC在马桶里呕吐时,所有马桶都会损失10%的维护值,但这种情况并不常见,因为NPC更可能吐在垃圾桶里。 与普通马桶不同,放置黄金马桶或抽水马桶还会在其周围形成一个吸引力区域。这片区域的大小似乎和一种对保持环境美观非常有用的植物所在的区域相当。需要提醒的是,美观的区域会给NPC提供名为【环境美观】的增益效果,该效果能提升NPC的幸福感(或者至少能减缓幸福感随时间自然衰减的速度)。 左边那个明显是金色马桶,整体看起来就是这样的。

请注意,马桶的吸引力会随着维护值的下降而逐渐降低。对于普通马桶而言,这会产生问题,因为它们会在周围形成一个负面吸引力区域。当普通马桶的维护值降至20%或以下时,如果附近没有任何提升吸引力的设施,其负面效果会非常强烈,会使NPC获得【丑陋环境】减益(随时间降低幸福感)。 至于黄金马桶和抽水马桶,当它们的维护值降至约35%时,自身将不再提供【宜人环境】效果。即使维护值为0%,它们也不会对吸引力产生负面影响。 以下是普通马桶和黄金马桶在堵塞(维护值0%)时的吸引力表现:
金色马桶和抽水马桶的另一个优点是,它们能显著提升房间声望,从而更容易提高房间声望等级。房间声望等级似乎对使用厕所的患者完全没有影响。不过即便如此,这对员工仍然有用,因为他们在房间内时仍能从中获得幸福感提升。 最后,我发现的最后一个优点与巨无霸超级公司的首席执行官珍宝·麦克纳利有关。当这位VIP访问厕所房间时,他会使用并占用一个马桶,这会立即将其维护值降至0%,需要清洁工进行维修。但他只会破坏普通马桶,如果房间里只有金色马桶或抽水马桶,他就不会采取任何行动,只会直接离开房间。如果你负担得起(2000美元非常昂贵),我强烈推荐使用黄金马桶。它们相比普通马桶的优势非常明显。如果你使用普通马桶,确保在附近放置能提升吸引力的物品(比如可以挂在马桶后面墙上的奖杯、海报或画作)。 治疗是如何运作的? 与诊断阶段不同,患者只会前往一个治疗室,然后离开医院。除了完成任务目标外,治愈几率本身并不那么重要,因为即使治疗失败,患者仍会支付相同金额的费用。尽管要确切了解治疗机制并非易事,但令人惊讶的是,它彻底改变了优化员工培训的方式,使得大多数旧指南在这方面都已过时。
As we can see in the patient info screen, estimated chance of cure relies on 4 main factors (+ hidden ones detailed below). Note that If you are interested, you can find the formula below that calculates the cure chance. 1. Illness Difficulty: Many people don't know but this has 2 functions regarding the cure chance. Obviously, the higher the value, the more difficult it will be to get a good cure chance. However, note that it also defines the lowest cure chance value you could get for an illness. If an illness difficulty is 60%, the cure chance will "never" be lower than 40%. If the illness difficulty is 30%, the minimal cure chance will "never" be lower than 70%. I use quotes for the word never because there is an exception to that, see Diagnosis Certainty below for more info. 2. Diagnosis Certainty: Any patient with a diagnosis value above 50% can be sent to treatment, manually by clicking on the green cross under the patient info screen, or automatically depending on the diagnosis threshold defined in the policy menu. Actually, the diagnosed illness of the patient will always be the good one and the patient will always be sent to the correct room (it would have been "fun" to see a clown lose his head in the De-Lux Clinic). What diagnosis certainty does is lower the hard cap of the cure chance. If diagnosis certainty is at 60%, the cure chance can never go higher than 60% even if you have the best possible nurse/doctor with fully upgraded machine. The hard cap also lowers the minimal cure chance value we talked about while explaining illness difficulty. This means that if the illness difficulty is 30% and the diagnosis certainty is at 55%, the minimal cure chance won't be 70% anymore since the cure chance can't exceed 55%. Note that the minimal cure chance won't be 55% either, it somewhat scales depending on the diagnosis certainty so it will now be 38.5%. 3. Upgrades and Staff Skill: I talk about both upgrades and staff skill here because in the formula they are added together to form a single variable. The Upgrades factor takes into account 2 elements: - The machine level if a machine is used to cure the illness. A level 3 machine gives +50% Treatment Power. A level 2 machine gives +25% Treatment Power. A level 1 machine gives 0 Treatment Power. - Treatment boosting items like medicine cabinets or Treatment bookcases (in psy rooms) for example which increase Treatment Power just like the machine. Note that having +50% Treatment Power makes the "Upgrades" value in the patient's Info tab display 100% instead but the real value used in the formula is still 50 (I guess they just wanted to base this gauge on machine level, 100% means fully upgraded machine). Staff Skill is simply the Treatment Skill value shown in the "Stats" tab of a medical staff working in a treatment room. Basically, Treatment Skill from staff is the same thing as Treatment Power from machine/items. Very Important info for staff training ! Contrary to diagnosis, the way the game calculates the cure chance makes it useless to have a combination of Treatment Skill + Treatment Power superior to 100% ! Having more than 50% Treatment Skill for an employee working in a room with a level 3 machine (+50% Treatment Power) won't improve the cure chance. Therefore, level 3 employees with 2 Treatment qualifications are enough to have the best possible cure chance when they use level 3 machines. The same can be said for other employees like surgeons who only need 4 Surgery qualifications to get 100% Treatment Skill (or just 3 Surgery qualifications if they are both level 5 and "Happy" since gaining a level and being "Happy" give +10% Treatment Skill each). 4. Cure Cap: Even though Diagnosis Certainty lowers the hard cap of the cure chance, there is already a hard cap defined for each illness. Almost all diseases have a cure chance hard cap of 99% which means there will always be 1% chance to fail the cure. Note that there are some exceptions like Mime Crisis and Beach Wail illnesses that have a hard cap of 90% instead. 5. Cure Chance Formula CureChance = DiagnosisCertainty * (((100-IllnessDifficulty)) * (1-(StaffSkill/100+Upgrades/100) + CureCap * (StaffSkill/100+Upgrades/100)) /100) Note that this is a "simplified" version since by itself it's not enough take into account the conditional aspect of the cure cap. However, here is a treatment calculator that includes it: https://docs.google.com/spreadsheets/d/1BgDsri_PbmnuwNZP7V5ljWrYKRS5ZAf_asSjnxAbSmc/edit?usp=sharing In case you want to use/modify it, just make a copy of the spreadsheet ("File" > "Make a copy"). Change the values of the Illness Difficulty, Diagnosis Certainty, Staff Skill, Upgrades and Max Cure Chance to what you want. Update: The UI was updated in a recent patch to show an "Estimated Chance of Cure" on the patient info screen with 2 numbers for rooms having an upgraded machine instead of just one number. The number on the right is the actual cure chance of the room. The number on the left shows the cure rate without taking into account the upgrade level of the machine (but still takes into account items boosting treatment power). Don't worry too much about that, it doesn't change how the real cure rate is calculated. The final cure chance is even displayed on the patient info screen when treatment works or fails. I think this UI change was done because of the implementation of the Herb Garden room which can have both upgraded and unupgraded "machines" inside the room at the same time. After publishing how the cure chance works, I saw some people stating that because the cure cap is at 99% you only need 99% diagnosis certainty to get the max possible cure chance but this is wrong. You still need 100% diagnosis certainty to get the best cure chance otherwise you will get around 98% cure chance instead. Staff specialization - Part 1 Based on how diagnosis, treatment and other things work in the game, here is what I personally consider optimal training. Most of the missions are not that hard so you can still win by mixing the skills you want, however specialization is much more efficient. In the tables below, some rooms are grouped together since they use the same skill set. For those rooms I recommend managing job assignment to make employees work in all of those rooms and no other ones, as long as rooms aren't too far from one another. That way it's for example possible to only have 2 or 3 doctors/nurses taking care of many treatment rooms which adds a bit of flexibility, instead of having 1 employee per room. It also significantly reduces costs. For both Doctors and Nurses managing diagnosis, I don't think any skill is better than those increasing diagnosis skill, diagnosis is just too important and greatly improves the efficiency of a hospital. For treatment contrary to diagnosis, having Treatment Skill + Treatment Power superior to 100% is useless (check "How does treatment work ?" chapter for more info). For employees taking care of treatment, when they reach +100% treatment skill/power in combination with machine or boosting items, "Stamina Training" is the only utility skill that is worth learning in my opinion. For treatment rooms with a machine, there are technically 2 strategies to get the max cure chance : - Upgrade the machine to level 3 and have a level 3 employee with 2 treatment skills (I recommend "Stamina Training" for the third skill but you can teach something else if you want) - Or do not upgrade the machine at all and have a level 5 employee with 5 treatment skills The first strategy is the best in the long run because by keeping the treatment employees at level 3 forever, you will save a lot of money each month since their salary is lower than at level 5. You will also reach the max cure chance much faster because getting an employee to level 5 takes a lot of time. "Bedside Manner" for treatment can be useful to make patients' happiness go above the threshold that will make them pay higher prices. The threshold depends on the room/illness/price, but as long as patients are cured this threshold tends to be somewhere under 50% happiness. So if most patients are often above 50% happiness when paying, "Bedside Manner" matters less. It makes it hard to quantify how good this skill really is compared to cost savings from lower salaries of unpromoted staff. Note that "Bedside Manner" doesn't work on surgery nurses. "Pharmacy Management" and "Injection Administration" skills are useful early but useless in other rooms than Pharmacy/Injection and later on, so I don't use them often. Having a great cure rate is usually not that important early anyway. However, if your Pharmacy and Injection Rooms are always full of patients, you can definitely consider those skills for nurses that are only assigned there. Regarding "Stamina Training" is it worth promoting an employee and pay the extra money each month just to get this utility skill ? - By default an employee works around 134 days before taking a 20-days break. - With the "Stamina Training", the employee will work around 178 days before taking the same 20-days break. The stamina employee will work 44 more days before taking a break but it doesn't mean that the employee will work 44 more days per year. In average the stamina employee will "only" work around 13 more days per year. If you want to save money, it's probably not worth it to promote an employee just to get this utility skill. It's more efficient to just build an extra room and recruit a new employee once there is a long queue. Note however that "Stamina Training" is still worth a promotion in surgery in my opinion since getting dressed and taking care of patients takes a very long time there. In the setups below, when there are for example only 3 (or 4) skills I recommend not promoting those employees further than level 3 (or 4) since they don't really gain any benefit from that. Promoting them will just cost you more money for nothing since salary increases with level. Doctors: RoomsQualificationsGP's Office
X射线 M.E.G.A扫描
精神科负责诊断和治疗工作。
如果仅进行治疗护理:
DNA实验室:如果负责诊断和治疗
如果仅进行治疗护理:
ććŻ
4级的上述配置已经拥有最高治疗概率,但我认为为这个房间学习【耐力训练】是值得的。
豪华诊所 平底锅实验室 总部 电击诊所 解析实验室 康复室 复活室 矫正池 人格化 技术支持 危险区域 作战室 云计算 蜡像工坊 化妆间 如果它们使用完全升级的机器:
如果机器未升级:
研究效率足够高,且需要较少的微操作。
更快的研究速度和更好的长期盈利能力,适用于金钱研究
员工专业化 - 第二部分 护士: 科室资质 常规诊断 心脏科 流体分析
病房 骨折病房 若负责诊断和治疗:
如果仅进行治疗护理:
药房 小丑诊所 色彩疗法 注射室 害虫防治 外科手术 密码学 狗窝 都市神话 身份识别 密室逃脱 自行组装 蛤蟆堂 木工活 药理学 清洗池 如果它们使用完全升级的机器:
如果机器未升级:
外科护士的治疗技能没什么用,如果你想的话,直接在那里分配一名拥有【耐力训练】技能的护士就行了。
香草园:如果它们仅与升级后的花床配合使用:
如果它们与葡萄园(或未升级的花床)配合使用:
救护车 最好使用护士来驾驶救护车,因为她们比医生更便宜。 地面载具:
空中载具
如果一家小型医院只需要1名护理人员:
“客服”技能能让助理更快地处理患者。此外,他们处理患者时还有机会立即提升患者的满意度。客服技能等级越高,触发概率就越高,提升的满意度也越多(无特殊特质时最高可达+20%)。 助理: 工作资格:前台(咖啡厅+所有供应商,如果你使用它们的话)
市场营销
快速约会
许多技能对清洁工都很有用,而且人们的使用方式往往大不相同,所以我下面的配置可能并不适合你的玩法。(几乎)所有清洁工都能处理所有事务,我通常不会给他们分配特定任务。显然,由于每家医院我只安排1到2名机械师,所以只有他们负责升级机器,而不负责维修(其他人更擅长维修)。除此之外,没有理由阻止他们执行其他任务,因为游戏无论如何都会优先处理机器升级。 我觉得鬼魂相当烦人,这就是为什么几乎所有清洁工都学习【鬼魂捕捉】技能,这样任何人都能快速处理鬼魂。对于清洁工来说,更快的移动速度也非常有用,因为他们大部分时间都在行走。所以除了技工外,我喜欢给他们“激励”技能。不过,对于某些员工,你完全可以用更高的维修技能来替换抓鬼技能,尤其是当你手动管理抓鬼工作,或者当你的治愈率足够高、鬼魂出现频率降低时。如果你愿意,也可以让清洁工拥有5级维修技能。在这种情况下,没有错误的选择,因为这些技能都很有用,选择完全取决于个人偏好。 清洁工: 工作资格:技工(每家医院1或2名)
救护车机械师
其他任务
特殊情况: 如何培养“文化冲击”DLC首个任务中的特殊医生罗德里克? 教他任何治疗技能都是浪费,因为一旦他达到2级,无论技能如何,使用3级机器就能达到最高治愈几率;而达到4级时,使用1级机器就能达到最高治愈几率。 因此,我建议只教他全科技能,让他成为游戏中最优秀的全科医生,这是游戏中最重要的员工。在这种情况下,此任务期间最好不要建造任何X光室,以防止罗德里克在效率较低的房间工作。这样他就能在任何房间以最高效率工作。特性指南 - 第一部分 招募员工时,我们可以看到他们的等级、技能、薪资、招募费用,以及名为【雇佣参考】的特性列表。特性列表的最后一行始终是纯描述性文本,完全不影响游戏玩法。 其他特性可能是正面、负面,或是好坏兼具的混合特性。将鼠标悬停在特性上会显示提供额外信息的提示框。
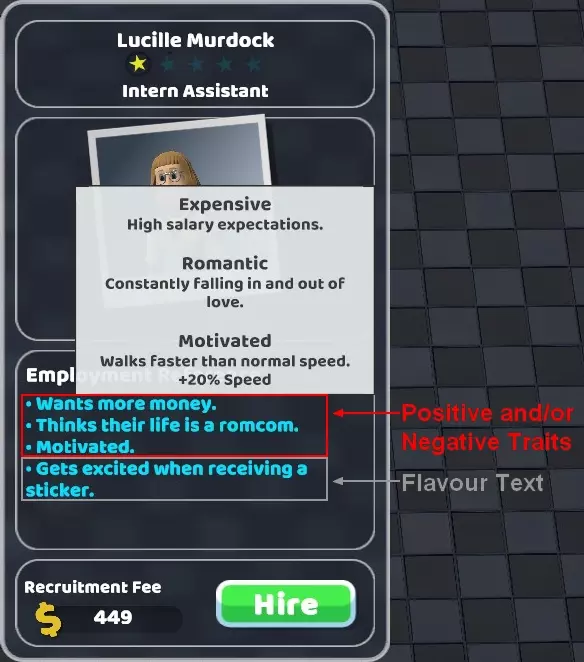
Despite the importance of traits, even 1 year and half after the game's release we don't really know the real effects of most of them. That's why I spent a lot of time experimenting and compiled below the results for each trait with some advice. Note that there are 4 types of effects: - Traits only affecting the stats of the employee having it - Traits affecting other people when talking to them during breaks. Note that these effects don't have 100% chance to activate when talking to someone. The fact that employees sometimes don't interact with others during breaks makes these traits unreliable. - Traits affecting patients when taking care of them (when diagnosing or dispatching them) - Traits affecting people around even without talking to them For the advice I provide for each trait, I will sometimes split employees in different categories: - Diagnosis staff and receptionists, since they are the ones taking care of patients many traits have a stronger impact for them. - Janitors are in their own category since they don't spend most of their time working in a room contrary to others. - Treatment staff and the rest (research doctors, marketing assistants) not taking care of patients. Since treatment is the last step for a patient it's not important that treatment employees give positive or negative buffs to them, so I will consider treatment staff as "not taking care of patients". There is an exception though if you use higher prices for treatment, instant happiness loss or boost from traits are taken into account during the payment process. This can make patients go below or above the happiness threshold that will make them refuse or willing to pay the higher price. Note that the list is in alphabetic order starting with the positive traits and with the following format: "Trait name in the employee stat screen (trait name in the recruitment screen) - game description of the trait Details about the real effects of the trait... My advice on how good or bad a trait is with more info in some cases..." POSITIVE TRAITS1. Charming (Charming) - Makes people happier when interacting with them. The employee with this trait instantly gives +10 happiness to patients when taking care of them. For diagnosis staff and receptionists: One of the best traits in the game especially if you struggle to keep patients happy. For the rest of employees: Can be useful for treatment staff if you use higher prices, otherwise not useful at all. 2. Entertainer (Class Clown) - Entertains people with their sweet dance moves. The employee with this trait instantly gives patients +100 boredom when taking care of them. The employee also instantly gives patients +80 boredom after talking and dancing for a patient during breaks. For diagnosis staff and receptionists: Good trait to keep patients from getting bored and thus lose happiness over time. For the rest of employees: Not really that useful since the effect will only work during breaks giving them time to interact with only a small amount of patients or no patient at all. 3. Cheap (Will work for peanuts) - Reduced salary expectations. Here is how much a doctor costs in average each year: Doctor level Cheap trait doctor No trait doctor Expensive trait doctor 1 15 300 $ 17 000 $ 18 700 $ 2 18 000 $ 20 000 $ 22 000 $ 3 21 600 $ 24 000 $ 26 400 $ 4 27 000 $ 30 000 $ 33 000 $ 5 36 000 $ 40 000 $ 44 000 $ For all employees: Cheap is definitely one of the best traits if not the best since one of the most important goals during each mission is to be and stay profitable. Monthly expenses mostly come from wages so this is extremely useful both early and late game. 4. Fast Learner (Has potential) - A quick learner that should develop quickly. +50% Learning Speed It makes the employee learn new qualifications via training faster. For all employees: A good trait to have since training takes quite a bit of time by default. A bit more useful for medical staff and receptionists to reduce downtime, or to avoid recruiting a temporary replacement while they are training. 5. Funny (Funny) - Makes people laugh. The employee with this trait can instantly give +40 boredom to the patients they talk to during breaks. For all employees: Not really that useful since the effect will only work during breaks giving them time to interact with only a small amount of patients, and not necessarily those who need it. 6. Green Fingers (Green Fingers) - Likes to water plants when idle. The employee with this trait will sometimes water plants when not too busy while working or during breaks. For all employees: Not an amazing trait but if you use a lot of plants, this could potentially help reduce janitors' workload. However, if the employee is always busy with patients they will only be able to water plants during breaks which means only plants outside working rooms. 7. Healer (Has magic healing hands) - Increases the health of patients. The employee with this trait instantly gives 5 health to patients when taking care of them. For diagnosis staff and receptionists: One of the best traits that will help ensure patients don't die before being cured. It's especially great for General Practice doctors since patients can sometimes see them more than once before treatment. For the rest of employees: Not useful at all. Note that it doesn't matter for treatment either. Even without this trait a patient with 0 health during a treatment can still be cured anyway. 8. Heart-Throb (The girl/boy next door) - The target of unrequited idolization. Employees with this trait can give patients or employees they talk to a buff called "Has a Crush" which increases their move speed by 15% during a short time. For all employees: Nothing great, the trait can only activate during breaks and doesn't last a long time. 9. Hygienic (Hygienic) - Likes to stay clean and hygienic. The employee with this trait passively gains hygiene over time. For diagnosis staff and receptionists: Not game changing but still a useful trait. When an employee takes care of a patient, the hygiene gauge of both of them gets "equalized". Therefore this trait will not only keep the employee clean but will also help patients stay clean. For the rest of employees: It's not that useful since hygiene is easy to deal with (sinks in toilets or hand sanitisers in staff rooms for example are more than enough). 10. Inspiring (Inspiring) - Inspires other people. The employee with this trait can instantly gain and give 5 happiness to the patients or employees they talk to during breaks. For all employees: Nothing amazing since it seems to only activate during breaks. Maybe this trait has another effect but I couldn't find any. Traits guide - Part 2 11. Motivated (Motivated) - Walks faster than normal speed. +20% Speed It's self-explanatory and increases move speed. Note that the way move speed works in this game is confusing and can be unreliable because of how move speed buffs/debuffs can "overwrite" each other. For janitors: One of the best traits for janitors since their work requires them to move a lot. For the rest of employees: Good. 12. Positive (Positive) - Happiness is higher than average. +10% Happiness The employee with this trait passively gains happiness over time. The employee can also instantly gain and give 5 happiness to patients or employees they talk to during breaks. For janitors: One of the best traits because janitors are usually more difficult to keep happy since they mostly work outside of rooms and often have to deal with things that can lower their happiness. For the rest of employees: It's easier to keep people in rooms happy because they can benefit from both happiness coming from items increasing attractiveness but also the big happiness boost coming from a high prestige room. It's still a great trait that can compensate the loss of happiness for an employee expecting a higher salary for example. 13. Romantic (Thinks their life is a romcom) - Constantly falling in and out of love. The employee with this trait can instantly gain and give the patients or employees they talk to during breaks, 30 happiness and a temporary buff called "In Love" which increases their move speed by 15% during a short time. For all employees: It's not incredible since it seems to only activate during breaks but the buff and the big happiness boost are still nice to have. 14. Teacher (A natural mentor) - Whizzes through any syllabus. +50% Teaching Speed The employee with this trait trains other employees faster. For all employees: A good trait to have on one high level person per job type to train other employees faster than the guest trainer and without the extra cost. 15. Tireless (High Energy) - Works longer before needing a break. Here is how many days employees work by default before taking a break: Lazy trait = 112 days No trait = 134 days Lazy trait + Stamina skill = 141 days Tireless trait = 168 days No trait + Stamina skill = 178 days Tireless trait + Stamina skill = 243 days ! As we can see, this trait combined with the Stamina skill is insane and allows 243 days of work before taking a break. Note that even though it's amazing, a potential downside is that the needs of the employee will be very low before the break is taken. This means the employee will probably get some "unhappiness" debuff that could be an issue if not properly managed. For janitors: Good trait but be careful, it can be counter-productive for janitors. They usually struggle with happiness and having them work longer means their happiness will dangerously drop sometimes. It's probably better to recruit tireless janitors only if they also have the "Positive" trait. It's also manageable if your hospital has green attractiveness everywhere. If you have trouble keeping tireless janitors happy enough, you could also increase their pay... but no more than +20% otherwise it's not worth it and it's probably better to get rid of them. For the rest of employees: One of the best traits to have and even if some employees have the Stamina skill as well it's easier in high prestige rooms to keep them happy contrary to janitors. Their hunger/thirst needs can also be satisfied with Sweet Dispenser and Coffee Maker for example if they are not always busy. NEGATIVE TRAITSEven though some negative traits aren't that bad or can easily be worked around, I still recommend to avoid them if possible. There is no point in keeping (or recruiting) an employee with bad traits when you can replace them with people who have good and useful traits and do the same job better in the end. 16. Argumentative (Likes to Argue) - Argues with other argumentative people. The employee with this trait talking to another character with the same trait during breaks makes both of them instantly lose 5 happiness. For all employees: Not really a big deal in my opinion since it only affects 2 characters with the argumentative trait and only during breaks. If you have only one employee with this trait it's more a neutral trait. 17. Boring (Terribly dull) - Makes people bored. The employee with this trait instantly reduces the boredom gauge of patients by 80 when taking care of them. For diagnosis staff and receptionists: Very bad trait to have especially on a receptionist or GP doctor since it means the patient will be unhappy much faster. For the rest of employees: Not a big deal since they don't take care of patients. 18. Dirty (Dirty Habits) - Makes the hospital dirty. Sometimes, the employee with this trait will not wash hands when getting out of the toilets. For all employees: Surprisingly, the trait doesn't seem to be as bad as it sounds. I am suspecting it has other less obvious effects but I couldn't find any. It's possible that it affects epidemics or VIP visits but it's not something that can easily be checked. 19. Expensive (Wants more money) - High salary expectations. Here is how much a doctor costs in average each year: Doctor level Cheap trait doctor No trait doctor Expensive trait doctor 1 15 300 $ 17 000 $ 18 700 $ 2 18 000 $ 20 000 $ 22 000 $ 3 21 600 $ 24 000 $ 26 400 $ 4 27 000 $ 30 000 $ 33 000 $ 5 36 000 $ 40 000 $ 44 000 $ For all employees: Expensive is one of the worst traits in the game and can make you struggle to be and stay profitable. Monthly expenses mostly come from wages so never recruit an employee with this trait. 20. Evil (Has a dark side) - Enjoys doing evil things. The employee with this trait instantly reduces health of patients by 5 when taking care of them. For diagnosis staff and receptionists: Obviously, one of the worst traits that you should avoid at all costs. Health for some illness decreases at a very high speed so having this trait will make it even more difficult to cure patients before they die. For the rest of employees: Not a big deal since they don't take care of patients. 21. Gross (Nausea inducing) - Makes people feel sick. The employee with this trait can make people around slightly more likely to vomit. For all employees: Note that it's not really possible to say how bad this trait really is since the sickness effect that makes people vomit is some kind of hidden stat. Still, it's bad to have this trait especially in a crowded hospital. 22. Grumpy (Grumpy) - Happiness is lower than average. -10% Happiness The employee with this trait will passively lose (more) happiness over time. For all employees: It's one of the worst traits, especially for janitors. This makes it more difficult to keep happiness above 80% to enjoy the stats boost provided by the "Happy" buff. Traits guide - Part 3 23. Hangry (Hangry) - Becomes nasty when hungry. -10% Happiness When Very Hungry (hunger gauge below 20%): - the employee with this trait gains an extra debuff called "Hangry" that lowers happiness over time. - the employee also reduces happiness of patients by 5 when taking care of them. - this can also make the employee instantly reduce happiness by 10 of patients or employees they talk to during breaks. - finally, the employee will occasionally have nasty outburst making nearby people get the "Annoyed" debuff. It lasts a very short time and seems to slightly lower happiness over time. For all employees: All these effects make it a dangerous trait to have. Fortunately, hunger is not that hard to satisfy. 24. Lazy (Tires easily) - Wants more frequent breaks. Here is how many days employees work by default before taking a break: Lazy trait = 112 days No trait = 134 days Lazy trait + Stamina skill = 141 days Tireless trait = 168 days No trait + Stamina skill = 178 days Tireless trait + Stamina skill = 243 days For all employees: One of the worst traits since you pay an employee as much as others to work less. 25. Litterer (Litterer) - Drops litter around the hospital. The employee with this trait regularly throw trash on the ground despite the presence of bins. For janitors: Not a big deal for them since they can only throw trash during their breaks. For the rest of employees: Since this forces janitors to come clean even when they are far away and needlessly increases their workload, this is not a trait you want in your hospital. 26. Nasty (Nasty) - Upsets other people. - The employee with this trait can instantly reduce happiness by 10 of patients or employees they talk to during breaks. - When happiness is between 20 and 40%, the employee reduces happiness of the patients by 2 when taking care of them. - At 20% happiness or below, the employee reduces happiness of the patients by 4 when taking care of them. - Finally, the employee will occasionally have nasty outburst making nearby people get the "Annoyed" debuff. It lasts a very short time and seems to slightly lower happiness over time. For all employees: Very bad trait to have... 27. Short Temper (Short Temper) - Becomes nasty when unhappy. - When happiness is at 40% or below, the employee with this trait can instantly reduce happiness by 10 of patients or employees they talk to during breaks. - When happiness is at 40% or below, the employee will occasionally have nasty outburst making nearby people get the "Annoyed" debuff. It lasts a very short time and seems to slightly lower happiness over time. - When happiness is between 20 and 40%, the employee reduces happiness of the patients by 5 or 10 when taking care of them (5 in GP office but 10 in reception for some reason). - At 20% happiness or below, the employee reduces happiness of the patients by 12 when taking care of them. For all employees: Just like Nasty, it's a very bad trait to have but can be manageable for staff working in rooms since its effects only activate when the employee has happiness below 40%. 28. Sleepy (Suffers from spontaneous bouts of snoozing) - Will fall asleep, at random, every now and then. The employee with this trait will sometimes fall asleep during a short time when not busy (and only during breaks for janitors). For all employees: Can be annoying but isn't that terrible since in the end what it does is mostly make employees "lose" some time during breaks. 29. Stupid (Cheese for brains) - A slow learner that will take some time to develop. -25% Learning Speed It makes the employee learn new qualification via training slower. For all employees: Not great since it makes the employees become unavailable during a longer time especially if it's someone you want to ultimately give 5 skills. However, staff slowly gets energy while training so the longer course duration means more energy when it's complete which somewhat compensates a little. 30. Toilet Rage (Gets toilet rage) - Gets angry when they need the toilet. -10% Happiness When desperate for the toilet (toilet gauge below 20%): - the employee with this trait gains an extra debuff called "Toilet Rage" that lowers happiness over time. - the employee also reduces happiness of patients by 5 when taking care of them. - the employee will occasionally have nasty outburst making nearby people get the "Annoyed" debuff. It lasts a very short time and seems to slightly lower happiness over time. For all employees: The decay speed of the toilet gauge varies a lot and is for example much faster after drinking/eating. Overall it still goes down fast so this trait is very bad. 31. Unhygienic (Unhygienic) - Doesn't wash their hands. The employee with this trait passively loses hygiene faster than others. The employee won't wash hands at all when getting out of the toilet. Since going to the toilet instantly reduces hygiene by 10 and taking care of patients can lower it even more, the gauge will eventually fall to 0. Fortunately, unhygienic employees still use hand sanitisers so make sure to have some in the staff rooms for example. For diagnosis staff and receptionists: It's not a good idea to have this trait since a low hygiene employee will "spread" it to patients they take care of. For the rest of employees: It's hard to really tell how bad it is for employees not managing patients, it probably doesn't help in case of epidemics so just avoid it anyway. 32. Unmotivated (Unmotivated) - Walks slower than normal speed. -20% Speed It's self-explanatory and decreases move speed. Note that the way move speed works in this game is confusing and can be unreliable because of how move speed buffs/debuffs can "overwrite" each other. For janitors: One of the worst traits for janitors since their work requires them to move a lot. For the rest of employees: Quite bad too even though buffs like Happy/Energised that increase move speed can compensate it. 33. Weak Bladder (Weak Bladder) - Needs the toilet more often than most. The employee with this trait has the "toilet" gauge deplete around 5 times faster than normal. This means that the happiness loss for needing the toilet will show up sooner. The happiness loss is negligible when the gauge is above 20%, however below 20% the loss over time is at -10%. For all employees: Very bad trait, especially for janitors. To conclude this traits guide, these are in my opinion the best ones: - For all employees: Cheap (Will work for peanuts), Positive, Tireless (High Energy) - For diagnosis staff and receptionists: Charming, Healer (Has magic healing hands) - For janitors (but still fine for other employees too): Motivated Staff marketing campaigns Having more than 1 marketing assistant in a room boosts the effect of marketing campaigns. It works for reputation campaigns (reputation gained faster) and also for staff campaigns (less time until next applicant shows up). Here is a video of what it looks like to have 7 marketing rooms with 5 employees launching the same doctor campaign: https://www.youtube.com/watch?v=6g8e8_i2M-A Note that "specialist" campaigns are different from the "basic" staff campaigns. If you do a "Psychiatrist Campaign", it doesn't lower the time for new applicants to arrive, instead it increases the chance for the next applicant to have the desired specialist skill (the "Psychiatry" skill in this example). However, if you have 2 marketing rooms, you can combine a basic "Doctor Campaign" and a specialist campaign to make those specialists show up more quickly. For reference, I tested a "Psychiatrist Campaign" in 4 marketing rooms at once. For the 60 doctors that showed up during the test, 13 of them were juniors (meaning they had no skill at all), all the rest sometimes had various qualifications with always at least a psychiatrist qualification. The specialist campaigns seem to only change an existing skill of the next applicant to the desired one. That's why there will still be junior staff to recruit from time to time... Since they have no skill, the special campaigns can't replace anything. This isn't necessarily a bad thing since juniors are cheaper in the long run and you can just train them however you like. Research formula and calculator A. Formula First, let's talk about how research works. Here is the formula that is used by the game to calculate the research rate : (Research Skill from all researchers) * (1 + (Research Power multiplier from all items / 100)) / 100 = Research Points per second at normal speed Let's have an example using this formula... Just as a disclaimer when I say for example "a level 4 researcher", it always means a level 4 doctor who already learned Research IV skill. 2 level 5 researchers and 1 level 4 researcher are working in my research room. There are 12 Super Computers in the room and there is also 1 Researcher's Desk that is mandatory to create the room. - Research Skill value of a level 5 researcher = 320, but to take into account the Energised buff during a full shift, let's add 2.5% to it = 322.5 - Research Skill value of a level 4 researcher = 262.5 - Research Power from the 12 Super Computers = 12 * 2 = 24 - Research Power from the mandatory Researcher's Desk = 1 Now if we apply the formula : (322.5 + 322.5 + 262.5) * (1 + 25 / 100) / 100 = ~11.34 This team generates 11.34 research points per second at normal game speed. B. Calculator With this knowledge and the fact that 1 in-game day lasts 4 seconds in normal speed we created a calculator to properly simulate research based on multiple variables: https://docs.google.com/spreadsheets/d/13u7M5PG-CyJoJXhlYVhPM_6mSPoHqWSe1WiV8kKEb90/edit?usp=sharing In case you want to use/modify it, just make a copy of the spreadsheet ("File" > "Make a copy"). I recommend to only change the cells in green since the rest of the sheet dynamically changes based on their values. C. Experience Surprisingly, a researcher seems to earn some XP only when they interact with the Research Pod (2 or 4 XP per interaction) or a Researcher's Desk (2 XP per interaction). Since Servers and Super Computers can trigger an animation that make doctors lose time, it's bad to have them in the room if you want the researchers to level up fast. Research Monitors, Science Stations, Deep Thing 1 and 2 don't trigger an animation so they are fine. Having a big room can be harmful though since the researchers can lose time moving instead of using the 2 items providing XP. Note also that 3 researchers can use the Research Pod at the same time so in a room of 5 employees leveling up it's probably a good idea to add an extra Researcher's Desk so that they can all interact with something at the same time and earn some XP. Money research project analysis
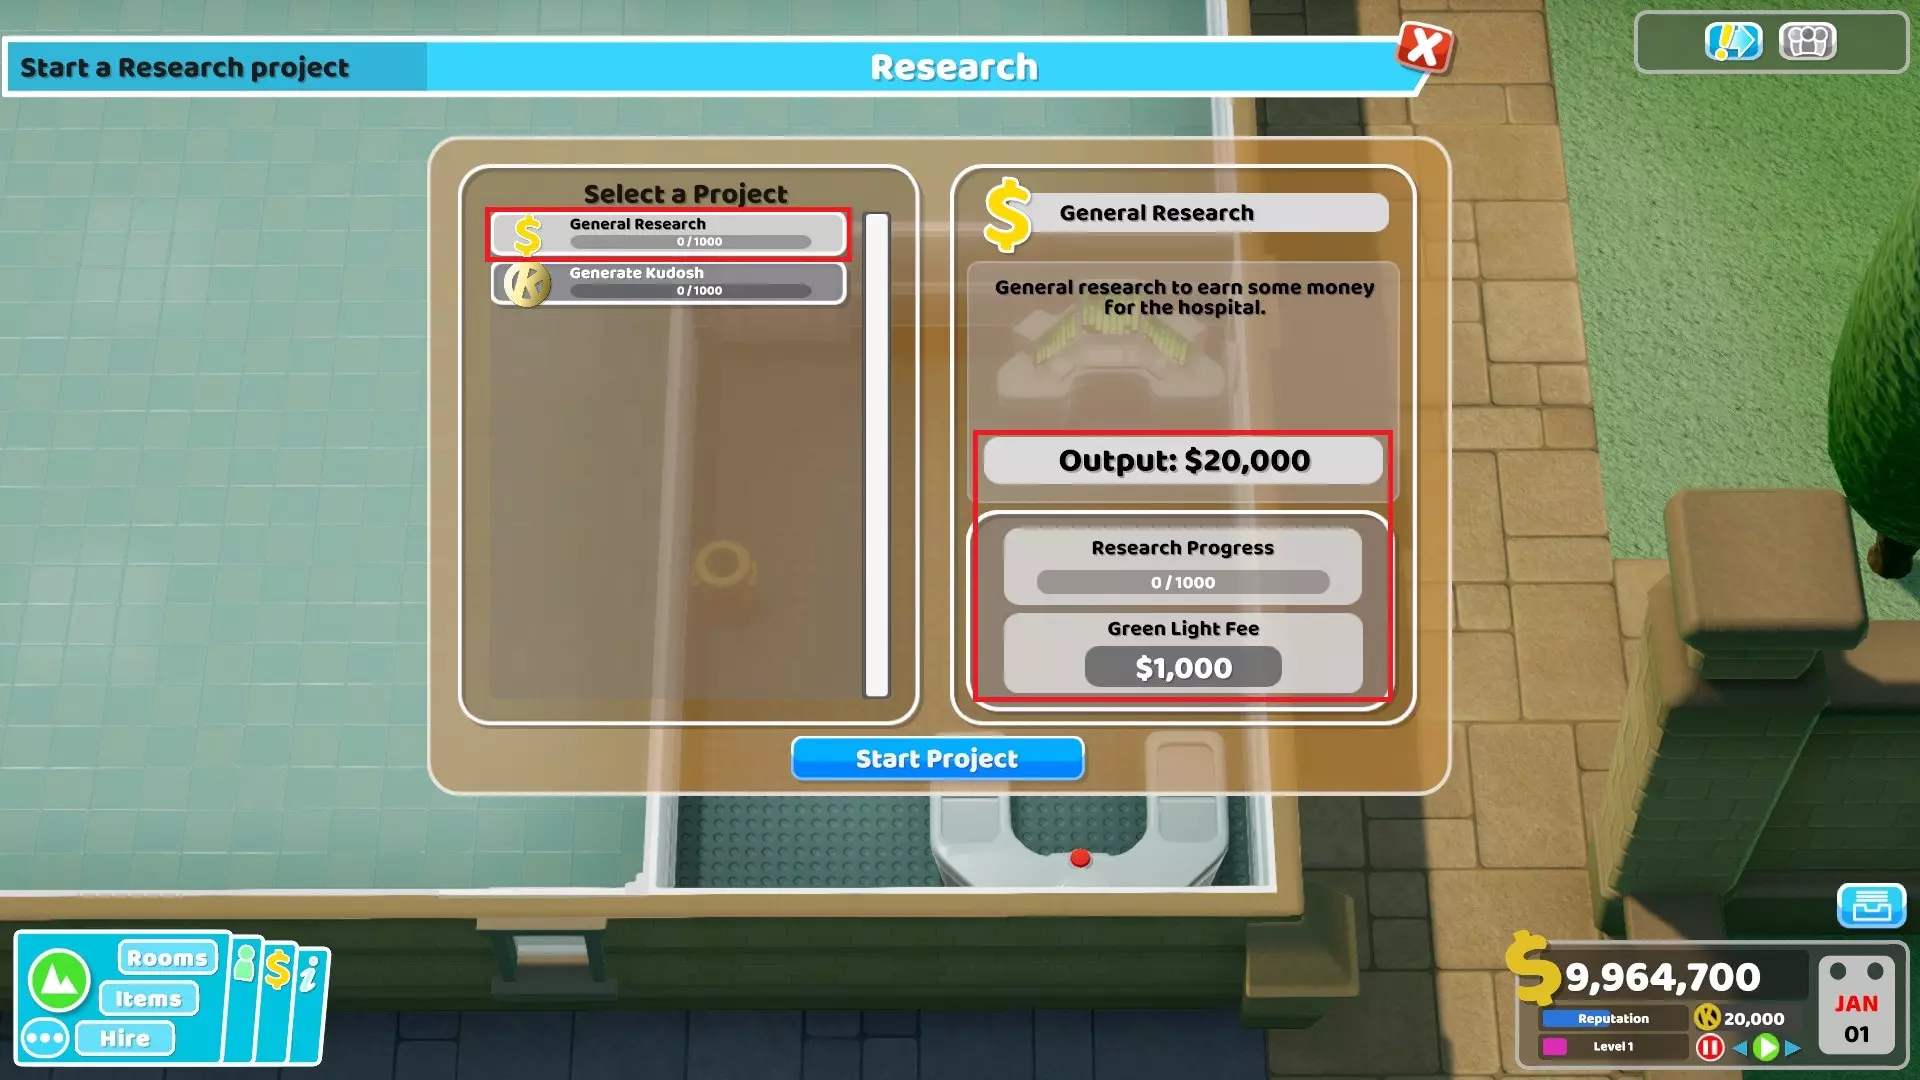
A. Is it worth it to use research to earn money ? Thanks to the calculator[docs.google.com], it's quite easy to answer this question. Yes, it can be very profitable with the proper setup. First, let's talk about items boosting the Research Powers. Note that Research Monitors, Researcher's Desk, Servers, Super Computers, Deep Thing 1 and 2 all have a monthly energy cost and can potentially make the player lose money instead of helping. Therefore, only use Research Monitors, Researcher's Desks, Super Computers or Deep Thing 1 when : - you have a solo researcher at level 4 at least - or 2 researchers at level 2 or above - or 3 researchers with at least one at level 2 - or when there are more than 3 researchers Only use Deep Thing 2 when : - you have a solo researcher at level 3 at least - or at least 2 researchers, with one at level 2 or above An important thing to note is that the Science Station (from Close Encounters DLC) doesn't have any energy cost and is very cheap, so you can use it anytime if you want even though it's quite big for just 1% Research Power. Keep in mind Servers are quite inefficient since the Research Power they provide is twice as costly per month as other boosting items. It's better to rely on other items. These boosting items can significantly reduce the time it takes for researches to complete and make research very profitable in the long term. Just use the calculator to see how much impact will have the addition of some items for your setup. Except the Science Station, these items are all very expensive though. That said, if you have spare money it's still better to place some of these objects than having money sleep for nothing. If you need money, you can still sell them anyway to get your money back. Something else to be aware of is that Servers, Super Computers, Deep Thing 1 and 2 also increase temperature around them. B. Profitability per project completion Here is how much money is gained in average after completing the "General Research" money project with 1, 2 and 5 doctors with the skill from research I to research V. Days displayed are the number of days it takes to complete the project including break days. No items are used. 1 level 1 doctor (~345 days) = 1 803$ 1 level 2 doctor (~200 days) = 7 403$ 1 level 3 doctor (~141 days) = 9 301$ 1 level 4 doctor (~109 days) = 9 737$ 1 level 5 doctor (~89 days) = 9 042$ 2 level 1 doctors (~173 days) = 2 370$ 2 level 2 doctors (~100 days) = 7 731$ 2 level 3 doctors (~71 days) = 9 532$ 2 level 4 doctors (~55 days) = 9 915$ 2 level 5 doctors (~45 days) = 9 187$ 5 level 1 doctors (~69 days) = 2 710$ 5 level 2 doctors (~40 days) = 7 928$ 5 level 3 doctors (~29 days) = 9 671$ 5 level 4 doctors (~22 days) = 10 022$ 5 level 5 doctors (~18 days) = 9 274$ As we can see researchers become much more "efficient" at level 3 or above. If you intend to make money with research, try to recruit doctors with the "Cheap" trait and reduce their expected salary during promotion. Researchers aren't really more efficient when happy contrary to medical staff, so just make sure their happiness is above 20%, otherwise it doesn't matter. C. Long term profitability As pointed out by Nspace, the above chapter only takes into account the profitability for only one research project. Here is on average how profitable each group of doctors will be in the long term. Let's take a time span of 5 years (1 825 days). 1 level 1 doctor = 9 542$ 1 level 2 doctor = 67 679$ 1 level 3 doctor = 120 835$ 1 level 4 doctor = 163 971$ 1 level 5 doctor = 187 068$ 2 level 1 doctors = 25 085$ 2 level 2 doctors = 141 358$ 2 level 3 doctors = 247 670$ 2 level 4 doctors = 333 943$ 2 level 5 doctors = 380 136$ 5 level 1 doctors = 71 712$ 5 level 2 doctors = 362 394$ 5 level 3 doctors = 628 176$ 5 level 4 doctors = 843 857$ 5 level 5 doctors = 959 339$ Since 5 level 5 doctors can research much faster, they are ultimately the most profitable research group. The issue with 5 level 5 doctors is that it will require a lot of micro management, since you will have to start a new project every 18 days or so. Obviously, make sure to instantly pause the game as soon as a project is finished to start a new one and thus avoid paying doctors and energy for nothing. In any case, don't forget that it's not cheap in terms of money/time to train these doctors so keep that in mind. D. Initial costs The initial cost of the construction of the room, the recruitment fees of the doctor(s) and the training costs mean it will take time for research to really become profitable. If we include those costs for the solo level 4 doctor we have: Research room price = 35 100$ Recruitment fee = 1 650$ Research I training = 15 000$ + 37 days of training by default Research II training = 20 000$ + 42 days of training Research III training = 25 000$ + 46 days of training Research IV training = 30 000$ + 50 days of training Salary during the 37 days of training = 1 724$ Salary during the 42 days of training = 2 302$ Salary during the 46 days of training = 3 025$ Salary during the 50 days of training = 4 110$ 35 100 + 1 650 + 15 000 + 20 000 + 25 000 + 30 000 + 1 724 + 2 302 + 3 025 + 4 110 = 137 911$ As you can see, 137 911$ is quite an investment... Let's see how many level 4 campaigns are needed to repay this investment. A campaign lasts around 109 days if we include break days. We get around 9 737$ per campaign. 137 911 / 9 737 = ~15 It takes 15 research projects to pay the investment. This means we need 5 years of research to repay the initial investment with level 4 campaigns, it's obviously more than that if we take into account early campaigns made before the doctor reaches level 4. If you have more than 1 researcher, make your own doctor train the others so you can at least reduce the costs there. Having more researchers will help to quickly repay the investment. Finally, if you play the Bigfoot DLC, it unlocks more money research projects in the campaign (doesn't seem to be available in the sandbox mode though). "Roderick's Plot Hole" is the best project to do, "Cheesier Gubbins" is the second best but it has the advantage of requiring slightly less micro-management since it takes longer to research. "Time Travel" research is also available in the campaign with "A Stitch in Time" DLC but is the worst research project. E. Conclusion Even though you can earn a lot of money with 5 researchers, it's not always worth the effort to have a research room dedicated to earn money if you already know how to make a profitable hospital. However, it can still help a lot especially if you manage to get a team of 5 cheap researchers. In the long term 5 level 5 researchers are better but just keeping them at level 3 for example is acceptable thanks to lower training costs and they will require less micro-management. As an income comparison, the base price of most treatments is between 5 000 and 12 000$. So with just 1 or 2 treated patients per month you can gain more or less the same amount of money as a money project. However, the good thing about the research room is that you can get a steady income not depending on how the rest of your hospital performs. This is especially useful in the missions with public hospitals where patients don't give money (or less money) and during the wave missions where income can suffer a lot while waiting for the next wave of patients. A disadvantage or advantage depending on the situation is that building the research room and recruiting doctors increase the hospital level. This means that it can make more patients come to the hospital which can be an issue if not ready to manage them. Energy cost Staff wages are paid at the start of each month along with the energy bill. Contrary to wages, there is not much the player can do to efficiently reduce the energy bill. Fortunately, the amount is relatively small in most cases so what you will read below is more informative than "useful". However, an important thing to note is that not only items boosting research power are very expensive, they also cost money each month. So if you do research, you should be careful since it can massively increase the energy bill if you use too many of them. There is an exception though, "science station" from the Close Encounters DLC is a research boosting item that doesn't cost any money each month and is also quite cheap, but takes much more space than supercomputers.

Here is below the energy cost per month of all items. If any of these items is in the hospital at the end of the month then it will be taken into account in the monthly energy bill: - 3$ per snacks, fruits, vegetables and drinks machine / arcade machine / arm bot / charging point / test-your-strength / vanity chamber / trampoline / gum dispenser / vaulting box - 10$ per wall monitor / pin art / accordionatron / velocipede / frozen art / - 15$ per ice sculpture - 20$ per pinball machine / energy beam - 25$ per small radiator / small aircon unit - 30$ per incinerator / wall aircon unit / shark bin - 50$ per radiator / furnace / aircon unit / mini radiator / hologram / fireplace / researcher's desk / research monitors - 75$ per large radiator - 100$ per supercomputer / server / deep thing 1 / deep thing 2 For "cosmetic" items, only the following ones seem to cost money each month: - 3$ per cryptohedron - 5$ per lamp / lava lamp / circus lights / torch - 10$ per television / retro TV / space cowboy / some keys / floppy clock / fossil / fitzpocket statue / cheesewater statue / gazplank statue / black & white / fascinator / orrery / maestropod / silver fox / pine cone / bust / armless statue / hypercube / puzzling cubes / blob fish / rocket pig / swinging balls / cat person / ex-lizard / bone lizard / mount facemore / dog portrait / ghost mirror / speaker stack / pool toy / origami / golden statuette / giant glass / shark art / jewel / grandfather clock / gretchen sign / ambulance race track / weather or not - 50$ per indoor fountain / large fountain / dolphountain / jasmine statue / love statue / golden gubbins and... ski rack for some reason For rooms, it's more complicated. There is no energy bill for rooms when they aren't used. There is an exception with the research room that costs 100$ each month by default (even when nothing is researched). For diagnosis and treatment rooms with a machine, they increase the energy bill based on the number of patients that are processed each month and the energy cost depends on the room itself. The energy bill increases by 100$ for each patient that was processed for example in the General Diagnosis and Pharmacy rooms. In other rooms like Fluid Analysis, DNA Lab, Mega Scan, etc the energy cost is higher with 250$ per processed patient. Note that I didn't check all rooms so it's possible other rooms have different costs per processed patient but it doesn't really matter since nothing can be done to change that. Rooms without a machine (GP office, Ward, Psychiatry...) that I checked don't seem to increase the energy bill at all even when processing patients. Interesting unlockable items - Part 1 I will list below the items I use the most or at least that may be worth unlocking with Kudosh in my opinion. I am only talking about items that affect gameplay significantly enough. General Items: Luxury Snacks Machine - K300 - $2 000 A snack machine that also increases happiness so it's obviously quite useful. Snack and drink machines that increase happiness are obviously the best choice if you have patients rage quitting because of happiness falling to 0. They are also probably the best too if you tend to increase treatment prices in your hospital (patients with high enough happiness won't refuse to pay high prices when cured). Fancy Food Machine from Culture Shock DLC is a much more powerful version of this item but has the downside of massively increasing thirst. Amusing Snack Machine - K500 - $2 000 (Pebberley Island DLC) A snack machine that also reduces boredom, a 2-in-1 item that can somewhat replace other items that reduce boredom of the patients making it a powerful machine. However, note that boredom isn't something employees have to worry about, so it will just be like a normal snack machine for the staff using it. Absorbent Snack Machine - K500 - $2 000 (Bigfoot DLC) A snack machine that also reduces the toilet need but increases thirst. The thirst increase is around 10% while the toilet reduction is random at either 15% or 100%. With this, it's easier to run a hospital without building any toilet or just to have patients/staff go to the toilets less frequently. Luxury Drinks Machine - K300 - $2 000 (unlocked in Tumble with 3 stars) A drink machine that also increases happiness so it's very useful. Just like the snacks version, it's usually the best to use especially if you increase medical prices. Laxative Drink Machine - K500 - $2 000 (Pebberley Island DLC) Very powerful item but with a drawback that can be bad depending on the hospital layout. It makes the patient's health increase over time while the toilet gauge decreases at a much higher speed. An issue with this machine is that your staff don't care about the health increase but will still get the toilet gauge decreasing faster if they use it. It's probably not worth it most of the time, however if you have many patients dying before treatment it's definitely an item that can help. Energy Drinks Machine - K200 - $1 000 A drink machine that also provides a temporary move speed boost. If happiness/health isn't an issue for you, it's a good drink machine. Water Cooler - K200 - $400 (Close Encounters DLC) A very cheap and small drink machine that never needs to be refilled by a janitor. It can be very useful to reduce their workload even though I prefer using other items that provide a bonus. Note that the Drinking Fountain is a very similar item that is slightly cheaper and don't require any DLC but has the downside of lowering hygiene by 4% when used which is acceptable. Sweet Dispenser - K45 - $300 Small item that can also be placed in work rooms. If a staff member is hungry and not busy (meaning no patient queuing at all), they can satisfy their hunger need thanks to this. Note also that contrary to most other food machines, it doesn't need a janitor at all. Replication Station - K200 - $2000 (A Stitch in Time DLC) Patients can use it both to drink or to eat so it can save space to only have this item. When using the machine to either drink or eat, it even has a good chance to take care of both hunger and thirst at the same time. Sometimes, it instantly decreases or increases health of patients by 5 or 10%. Its maintenance gauge is only reduced when it's used to drink. A downside of this item contrary to other drink/food machines is that disasters can reduce its maintenance gauge. Big Bin - K20 - $100 There is no reason to use the normal bin after unlocking this one and it's cheap so get it early. The toxic-waste bin (shark bin from Culture Shock DLC and Duck Bin from Speedy Recovery DLC) have some advantages regarding hygiene and attractiveness but are smaller bin. Hand Sanitiser - K150 - $200 Useful to keep everyone clean. In case you have unhygienic employees, they don't wash their hands when getting out of the toilets but they still use Hand Sanitisers. Ice Sculpture - K75 - $300 (Pebberley Island DLC) It makes the missions with hot climate much easier to manage. The issue with air con units is that they often require maintenance from janitors while the sculpture doesn't need any. Note that the Frozen Art item from Culture Shock DLC is a similar item with a stronger effect but is very expensive and can't be placed in most rooms so its overall less interesting. Gold Star Award - K200 - $300 It's the best item to increase the prestige level of a room. It allows to easily reach room prestige level 5 even in a 3 x 3 room. Brain Jar - K800 - $1 000 (Close Encounters DLC) Useful one-square item if you want to increase attractiveness of an open area (for other areas, putting decorations on walls is usually enough). It's more reliable than plants since it doesn't need maintenance. Bulging Sack - K400 - $500 I didn't try using it during a whole mission but it seems to be a very powerful item. It increases happiness by +40% when interacting with it which is extremely good... Throne - K500 - $800 (Culture Shock DLC) It's a chair that increases attractiveness around itself in an area that is quite big. But the most interesting aspect of it is that it also instantly increases happiness by 20% when a person sitting on it gets up (even after sitting just 2 seconds). I don't often use benches/chairs for patients because it tends to make them lose time, but if you do this item is amazing in hallways. The biggest downside is obviously the high price. Fire Fountain - K500 - $25 000 (Superbug item) It's a very powerful item that heats a massive area around it. Except in outside hospitals like Overgrowth, it's usually enough to heat the hallways of a whole building by itself. If you place this item in a building, you don't need to place radiators in the corridors at all to have a good temperature. As a bonus it also slightly increases attractiveness. Note that while it's expensive, this item doesn't have a monthly energy cost contrary to radiators. The main issue with this item is that it's quite big. Ice Fountain - K500 - $25 000 (Superbug item) It's exactly the same item as the Fire Fountain but instead it cools a huge area around it. Again just placing one fountain is enough to cool hallways in a whole building while also slightly increasing attractiveness. It's still very big and quite expensive but doesn't have a monthly energy cost contrary to aircon units or ice sculpture. Interesting unlockable items - Part 2 Room Items (not visible in the general list of items): Hot Chocolate Maker - K400 - $300 (Bigfoot DLC) If a staff member is thirsty and not busy (meaning no patient queuing at all), they can satisfy their need thanks to this. It also provides a happiness boost. Coffee Maker - K200 - $300 If a staff member is thirsty and not busy (meaning no patient queuing at all), they can satisfy their need thanks to this. It provides a temporary move speed boost, it's not incredible but still cool. Brain Chair - K80 - $2 500 (Superbug item) When a staff member sits on this chair, it provides them a temporary buff that increases the learning speed by 100%, move speed by 20% and diagnosis skill by 10%. It's nothing game-breaking but can still be useful. Diagnosis and some treatment rooms: Medicine Cabinet - K400 - $1 000 Good item to fill empty space of a room with something that isn't just cosmetic. Increased diagnosis and treatment power is useful and better than nothing anyway. If you have the Retro Items Pack DLC, it's unnecessary to unlock the Medicine Cabinet since it contains a similar item called Weighing Machine. In comparison, it only costs $400 and the placement shape is a square instead of a "rectangle". Surgery, both Wards and Cardiology: Wall Monitor - K125 - $500 Just like the Medicine Cabinet, it increases diagnosis and treatment power but this one can be placed on walls. So having some in rooms is nice. Toilets: Golden Toilet - K40 - $2 000 4 times more expensive than normal toilet but can be worth it once you can afford it. Take a look at the "Differences between toilets" chapter to see why it's good and how to unlock it. Training room: Anatomy Poster - K80 - $100 Cheap, small, can be placed on walls and speeds-up training. Brain Anatomy and Cubism Anatomy posters are exactly the same, use what you like. Encyclopedia Bookcase II - K800 - $4 000 (unlocked in Mitton University with 2 stars) Big boost to the training speed for a relatively small item. If you have extra money, just fill the training room with this item. If you need money, you can still sell the bookcases and get your money back so it's never wasted money. It's more expensive than the Anatomy Model but from a training bonus per used space perspective, the Bookcase II is better in most cases (make sure to hold the "Ctrl" key to put them close to each other). Illnesses and diagnosis modifiers - Part 1
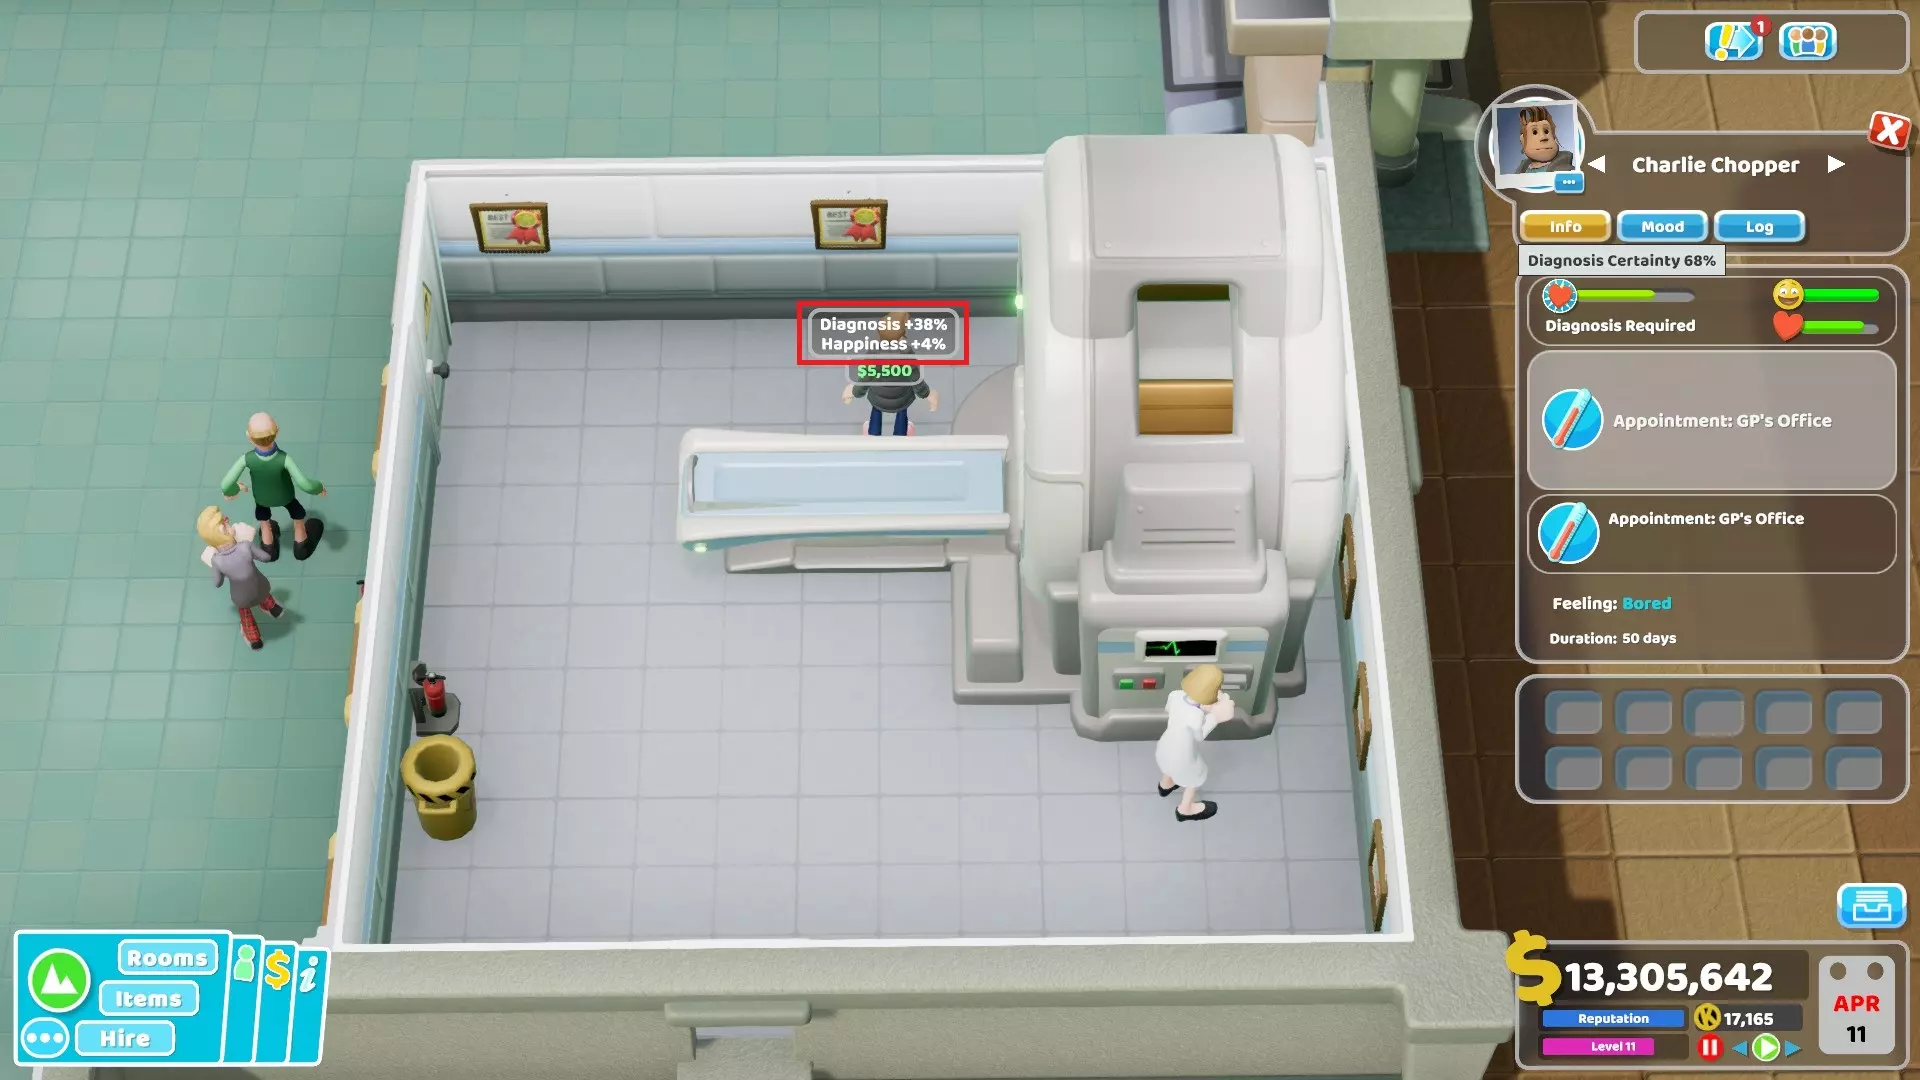
The diagnosis percentage obtained when a patient is diagnosed depends on those 3 following factors and there is no randomness involved at all in the process: - The diagnosis skill of the doctor or nurse. - The level of the machine and the bonus provided by items like medicine cabinets. Bonuses stack so many medicine cabinets can be used if you want. - The last factor is the room modifiers shown in the table below and that aren't really visible in-game, as you can expect this means that some rooms are better than other to diagnose different illnesses. With Felgard's help, data for all illnesses and more could be gathered. So here is the list of all in-game illnesses with diagnosis modifiers and also the treatment modifiers (a low percentage means it's difficult to cure). The list also includes the "revisit GP" modifier used whenever a patient visits a GP office more than once. IllnessGPGDCardioWardPsyFluidX-RayMegaDNARevisit GPTreatment8-bitten30%30%20%10%12%12%12%12%12%9.9%50%Animal Magnetism80%12%45%7%7%12%12%45%45%16%60%Bed Face85%20%20%20%5%20%20%20%20%21.25%80%Boggled Mind35%15%15%30%15%15%30%30%30%8.75%40%Bogwarts60%35%22%7%22%22%22%22%22%15%60%Broken Face50%15%25%15%15%25%15%25%15%9%50%Clamp1000%---------90%Cross Bones25%12%7%12%40%12%40%40%12%5%40%Cubism28%10%10%10%10%45%45%45%45%8.4%50%Decision Rash40%7%20%12%12%30%12%15%12%4.8%40%Denim Genes25%10%10%10%10%25%10%25%25%10%60%Emperor Complex20%12%20%12%12%12%20%20%25%10%30%Floppy Discs45%8%8%20%8%18%45%45%15%9%60%Flumps25%10%28%10%10%10%10%28%28%10%50%Freudian Lips55%15%40%15%20%15%15%15%15%11%70%Grey Anatomy50%20%20%17%7%45%17%30%17%10%60%Grout1000%---------100%Gurning Loins15%20%7%7%7%10%10%15%10%7.5%20%Heart Throb25%10%20%10%5%20%20%20%20%10%40%Humerus Injury90%20%7%20%20%20%20%20%20%22.5%80%Hurty Leg60%30%7%18%18%18%30%30%18%13.2%70%IllnessGPGDCardioWardPsyFluidX-RayMegaDNARevisit GPTreatment Illnesses and diagnosis modifiers - Part 2 IllnessGPGDCardioWardPsyFluidX-RayMegaDNARevisit GPTreatmentInflated Ego40%15%15%15%15%40%15%15%15%10%50%Jazz Hand15%10%10%30%10%10%45%45%10%11.25%30%Jest Infection60%20%20%15%35%15%35%15%35%6%60%Jumbo DNA15%10%10%10%10%25%10%40%10%9%30%Lazy Bones80%20%22%20%5%20%20%20%20%12%70%Leopard Skin25%10%10%10%10%25%25%10%25%10%40%Lightheadedness90%15%15%15%15%15%15%15%15%9%80%Litter Bug45%15%15%7%7%35%18%15%15%11.25%50%Lycanthropy30%5%41%5%20%41%5%5%5%3%30%Mime Crisis45%18%30%18%30%30%18%18%18%9%60%Misery Guts60%20%30%20%20%25%20%20%20%12%50%Mock Star90%20%20%20%20%20%20%20%20%31.5%80%Monobrow40%15%15%20%15%15%20%20%15%10%50%Mood Poisoning80%20%20%7%7%20%20%20%20%16%70%Mucky Feet35%20%20%20%20%20%25%20%25%8.75%40%Night Fever50%30%15%15%30%30%15%15%15%12.5%50%Pandemic70%17%15%15%13%15%17%17%15%7%70%Pipe Organs30%8%8%20%8%10%30%30%10%6%50%Portishead75%20%20%20%5%20%20%20%20%15%60%Potty Mouth50%20%20%35%20%35%20%20%20%5%40%Premature Mummification28%10%10%10%40%10%40%40%10%8.4%50%Pudding Blood15%5%5%5%25%15%30%5%30%7.5%30%Rock Bottom50%17%24%7%17%50%17%17%45%9%60%Shattered25%12%7%25%12%12%25%25%12%5%20%Shock Horror40%5%15%35%5%35%5%5%35%10%50%Spinal Bap45%8%25%8%8%18%18%18%15%11.25%70%Spontaneous Combustion10%15%5%25%5%5%5%30%30%5%20%Touch of Midas10%9%9%9%20%9%9%20%40%8%20%Turtle Head30%15%7%15%15%30%30%30%30%9%50%Verbal Diarrhoea100%20%20%20%20%20%20%20%20%25%75%IllnessGPGDCardioWardPsyFluidX-RayMegaDNARevisit GPTreatment Here is an example to understand how to interpret/use those data. A patient with "Emperor Complex" arrives in the hospital and visits a basic GP office. The doctor there has a diagnosis skill of 80% (stat is visible in the UI in-game). In the table above, GP has a value of 20% for this illness. 20 x 80% = 16 Patient now has been diagnosed at 16% and is sent to the General Diagnosis that has a level 3 machine (+50% diagnosis power). In the table above, the GD value for "Emperor Complex" is 12%. The nurse working there has a diagnosis skill of 150%. 12 x 150% = 18 18 x 1.5 = 27 16 + 27 = 43 Patient now has been diagnosed at 43% and is sent back to a GP office. The doctor in the office was replaced with someone much more competent and has a diagnosis skill of 165%. In the table the revisit GP value is 10%. 10 x 165% = 16.5 43 + 16.5 = 59.5 Patient now has been diagnosed at 59.5% (60% in-game) and continues his long journey in the hospital... Note that according to Mavocide: "The numbers are never rounded internally, the UI does rounding for display purposes only." This is why diagnosis values shown in game are always integers.Mavocide also provided additional info on how to take into account medical cabinets: "Item bonuses such as medicine cabinets are added to machine upgrades, so a tier 3 machine and 5 cabinets would create a single 1.55 multiplier." I purposely shown separated calculations in my example, but you can just use Mavocide's formula below to easily get the % diagnosis that will be obtained by a patient in a room: StaffDiagSkill% * RoomModifier% * RoomUpgrade% Char limit on Steam forced me to divide the table, you can find the whole one here if necessary: https://www.reddit.com/r/TwoPointHospital/comments/9husy9/full_illnesses_and_diagnosis_modifiers_finally/ Spreadsheet: https://docs.google.com/spreadsheets/d/1TK9FKIUvC_bSgLTKgYwKA1DEE7HasQWpBd7s9IkdpDs/edit Bigfoot DLC illnesses modifiers Here are diagnosis modifiers for all illnesses from the Bigfoot DLC. Something interesting is that it's the first time an illness can't be diagnosed at all in a room. Patients afflicted with Mechanical Metropolism and Reptilian Metropolism will never go to a Ward. IllnessGPGDCardioWardPsyFluidX-RayMegaDNARevisit GPTreatmentAnomalitis35%20%20%20%20%20%25%20%25%8.75%40%Aurora Snorealis15%10%10%30%10%10%45%45%10%11.25%30%Bard Flu35%15%30%15%15%15%25%30%30%8.75%40%Barking Mad80%12%45%7%7%12%12%45%45%16%60%Basic90%20%20%20%20%20%20%20%20%22.5%75%Blaggis45%8%25%8%8%18%18%18%15%11.25%70%Bloaty Dread40%15%15%15%15%40%15%15%15%10%50%Boneless Thigs60%30%7%18%18%18%30%30%18%13.2%70%Brain Freeze55%15%40%15%20%15%15%15%15%11%70%Cheese Bored45%8%8%20%8%18%45%45%15%9%60%Cold Shoulder50%20%20%35%20%35%20%20%20%5%40%Curdled Blood40%7%20%12%12%30%12%15%12%4.8%40%Dead Arm25%12%7%12%40%12%40%40%12%5%40%Displaced Glands30%8%8%20%8%10%30%30%10%6%50%Evergreen15%10%10%10%10%25%10%40%10%9%30%Eye Candy80%20%20%7%7%20%20%20%20%16%70%Face Plant60%35%22%7%22%22%22%22%22%15%60%Goobris15%20%7%7%7%10%10%15%10%7.5%20%Half Pipe25%10%10%10%10%25%10%25%25%10%60%Inverted 108050%15%25%15%15%25%15%25%15%9%50%Knightmares20%12%20%12%12%12%20%20%25%10%30%Menace Elbow90%20%7%20%20%20%20%20%20%22.5%80%Mechanical Metropolism30%15%7%-15%30%30%30%30%9%50%Monster Mishmash28%10%10%10%40%10%40%40%10%8.4%50%Paranoyance45%18%30%18%30%30%18%18%18%9%60%Rantlers45%15%15%7%7%35%18%15%15%11.25%50%Reptilian Metropolism30%15%7%-15%30%30%30%30%9%50%Shin Blintz25%10%28%10%10%10%10%28%28%10%50%Skull Chutney30%5%41%5%20%41%5%5%5%3%30%Sore Judgement40%15%15%20%15%15%20%20%15%10%50%Sweet Teeth60%20%30%20%20%25%20%20%20%12%50%Tartan Telomeres25%10%10%10%10%25%25%10%25%10%40%Thin Skinned50%17%24%7%17%50%17%17%45%9%60%Tongue Splinters75%20%20%20%5%20%20%20%20%15%60%IllnessGPGDCardioWardPsyFluidX-RayMegaDNARevisit GPTreatment You can use the "mega spreadsheet" below to interact with those modifiers. Just make a copy of the spreadsheet to be able to change the staff level and upgrades settings: https://docs.google.com/spreadsheets/d/1TK9FKIUvC_bSgLTKgYwKA1DEE7HasQWpBd7s9IkdpDs/edit?usp=sharing Pebberley Island DLC illnesses modifiers Here are diagnosis modifiers for all illnesses from the Pebberley Island DLC. It's worth noting that Budgie Struggler illness can't be diagnosed by wards at all. Two illnesses from this DLC can have a negative effect on your hospital and give more work to your janitors. Patients afflicted with Oozmosis regularly "pee" on the ground. Patients afflicted with Brain Farts can be "dangerous" since they have a chance to make people around them vomit. IllnessGPGDCardioWardPsyFluidX-RayMegaDNARevisit GPTreatmentBeach Wail45%18%30%18%30%30%18%18%18%9%60%Blank Look30%15%15%15%15%30%35%40%35%9%55%Brain Farts45%8%25%8%8%18%18%18%15%11.25%70%Buccanear15%10%10%10%10%25%10%40%10%9%30%Budgie Struggler50%20%20%-20%35%20%20%20%5%40%Camel Toe25%12%7%12%40%12%40%40%12%5%40%Cauliflower Ears40%7%20%12%12%30%12%15%12%4.8%40%Crispy Skin80%20%22%20%5%20%20%20%20%12%70%Desserted45%8%8%20%8%18%45%45%15%9%60%False Tan25%15%15%15%15%35%15%30%25%6.25%60%Fool's Mould50%17%24%7%17%50%17%17%45%9%60%Football Crazy35%15%25%30%15%15%30%30%30%8.75%40%Heat Wave60%20%30%20%20%25%20%20%20%12%50%Hermitism75%20%20%20%5%20%20%20%20%15%60%Jellied Feels15%20%7%7%7%10%10%15%10%7.5%20%Jet Leg25%10%10%10%10%25%25%10%25%10%40%Knobbly Knee50%15%25%15%15%25%15%25%15%9%50%Lemon Soul25%10%28%10%10%10%10%28%28%10%50%Limb Empathy25%12%7%25%12%12%25%25%12%5%20%Limpette60%30%7%18%18%18%30%30%18%13.2%70%Logic Problem35%20%20%20%20%20%25%20%25%8.75%40%Loose Jowels30%5%41%5%20%41%5%5%5%3%30%Nerological Imbalance20%12%35%12%12%12%20%20%20%10%30%Oozmosis80%20%20%7%7%20%20%20%20%16%70%Painapple30%8%8%20%8%10%30%30%10%6%50%Placid Reflux15%5%5%5%25%15%30%5%30%7.5%30%Sandy Crack100%20%20%20%20%20%20%20%20%25%75%Shadow Boxer15%10%45%30%10%10%40%40%10%11.25%30%Screwball28%10%10%10%40%10%40%40%10%8.4%50%Tooth Mutiny60%35%22%7%22%22%22%22%22%15%60%Trumidity40%15%15%15%15%40%15%15%15%10%50%Vested Insects40%15%15%20%15%15%20%20%15%10%50%Wanderust30%30%20%10%12%12%12%12%12%9.9%50%Wild Spore45%15%15%7%7%35%18%15%15%11.25%50%IllnessGPGDCardioWardPsyFluidX-RayMegaDNARevisit GPTreatment You can use the "mega spreadsheet" below to interact with those modifiers. Just make a copy of the spreadsheet to be able to change the staff level and upgrades settings: https://docs.google.com/spreadsheets/d/1TK9FKIUvC_bSgLTKgYwKA1DEE7HasQWpBd7s9IkdpDs/edit?usp=sharing Close Encounters DLC illnesses modifiers Here are diagnosis modifiers for all illnesses from the Close Encounters DLC. IllnessGPGDCardioWardPsyFluidX-RayMegaDNARevisit GPTreatmentAller-Gs40%7%20%12%12%30%12%15%12%4.8%40%Anty Matter10%15%5%25%5%5%5%30%30%5%20%Asterrhoids80%20%20%7%7%20%20%20%20%16%70%Astroknot45%8%25%8%8%18%18%18%15%11.25%70%Bowhine30%35%15%15%30%40%40%15%15%7.5%50%Confidentures45%18%30%18%30%30%18%18%18%9.9%60%Continuthumb60%30%7%18%18%18%30%30%18%13.2%70%Cosmoss50%17%24%7%17%50%17%17%45%9%60%Deeply Ill-Suited35%20%20%20%20%20%25%20%25%8.75%40%Extraterrestical30%8%8%20%8%10%30%30%10%6%50%Fanatick60%35%22%7%22%22%22%22%22%15%60%Flack Hole60%20%30%20%20%25%20%20%20%12%50%Flat-Packed30%15%15%15%15%30%35%40%35%9%55%Frogborne30%30%20%10%12%12%12%12%12%9.9%50%Gorm Deficiency25%10%10%10%10%25%25%10%25%10%40%Grunt25%10%10%10%10%25%10%25%25%10%60%H. G. Swells80%20%22%20%5%20%20%20%20%12%70%Hero Complex30%5%41%5%20%41%5%5%5%3%30%Highly Ill-Suited15%10%10%30%10%10%45%45%10%11.25%30%Home Sick50%20%20%35%20%35%20%20%20%5%40%Horrorscope35%15%15%30%15%15%30%30%30%8.75%40%Hyperrealty10%9%9%9%20%9%9%20%40%8%20%Isotrope15%10%10%10%10%25%10%40%10%9%30%Lack of Humanity28%10%10%10%40%10%40%40%10%8.4%50%Meteormites100%20%20%20%20%20%20%20%20%25%75%Neutrainers25%12%7%25%12%12%25%25%12%5%20%Platenary Ring25%10%20%10%5%20%20%20%20%10%40%Science Friction75%20%20%20%5%20%20%20%20%15%60%Situational Gravity45%8%8%20%8%18%45%45%15%9%60%Space Caged20%12%20%12%12%12%20%20%25%10%30%Sputneck50%15%25%15%15%25%15%25%15%9%50%Star Struck25%12%7%12%40%12%40%40%12%5%40%Telemutation25%10%28%10%10%10%10%28%28%10%50%Warped15%20%7%7%7%10%10%15%10%7.5%20%Zodiac Arrest40%15%15%20%15%15%20%20%15%10%50%IllnessGPGDCardioWardPsyFluidX-RayMegaDNARevisit GPTreatment You can use the "mega spreadsheet" below to interact with those modifiers. Just make a copy of the spreadsheet to be able to change the staff level and upgrades settings: https://docs.google.com/spreadsheets/d/1TK9FKIUvC_bSgLTKgYwKA1DEE7HasQWpBd7s9IkdpDs/edit?usp=sharing Off The Grid DLC illnesses modifiers Here are diagnosis modifiers for all illnesses from the Off The Grid DLC. Pothead illness can't be diagnosed by wards at all. IllnessGPGDCardioWardPsyFluidX-RayMegaDNARevisit GPTreatmentAvocado Hands15%10%10%10%10%25%10%40%10%9%30%Bioweasel25%10%10%10%10%25%25%10%25%10%40%Bodily Druids15%10%10%30%10%10%45%45%10%11.25%30%Burning Desire15%20%7%7%7%10%10%15%10%7.5%20%Carbon Footprint25%10%10%10%10%25%10%25%25%10%60%Chocolate Shorts35%20%20%20%20%20%25%20%25%8.75%40%Craft Ailment45%8%8%20%8%18%45%45%15%9%60%Crystal Balls45%8%25%8%8%18%18%18%15%11.25%70%Diluted Pupils30%5%41%5%20%41%5%5%5%3%30%Distrawed30%30%20%10%12%12%12%12%12%9.9%50%Eco-Worrier30%35%15%15%30%40%40%15%15%7.5%50%Flappy Hamper60%30%7%18%18%18%30%30%18%13.2%70%Foot-in-Mouth50%17%24%7%17%50%17%17%45%9%60%Glitchy Patch28%10%10%10%40%10%40%40%10%8.4%50%Green Fingers50%15%25%15%15%25%15%25%15%9%50%Harebrained20%12%20%12%12%12%20%20%25%10%30%Heavyhandedness25%10%20%10%5%20%20%20%20%10%40%Incensed25%12%7%25%12%12%25%25%12%5%20%Mage Fright25%12%7%12%40%12%40%40%12%5%40%Mulch100%20%20%20%20%20%20%20%20%25%75%Nasty Trip25%12%7%25%12%12%25%25%12%5%20%Perforated Thoughts35%15%15%30%15%15%30%30%30%8.75%40%Pesticitis60%30%7%18%18%18%30%30%18%13.2%70%Pine Dented25%12%7%12%40%12%40%40%12%5%40%Pothead40%15%15%-15%15%20%20%15%10%50%Ramshackled50%20%20%35%20%35%20%20%20%5%40%Retrogaze45%18%30%18%30%30%18%18%18%9%60%Roadstool60%35%22%7%22%22%22%22%22%15%60%Root Snoot10%15%5%25%5%5%5%30%30%5%20%Spellbound60%20%30%20%20%25%20%20%20%12%50%Sproutrage40%7%20%12%12%30%12%15%12%4.8%40%Stumblebum10%9%9%9%20%9%9%20%40%8%20%Tenderbox75%20%20%20%5%20%20%20%20%15%60%Weeping Iris80%20%20%7%7%20%20%20%20%16%70%Woodworms30%15%15%15%15%30%35%40%35%9%55%IllnessGPGDCardioWardPsyFluidX-RayMegaDNARevisit GPTreatment You can use the "mega spreadsheet" below to interact with those modifiers. Just make a copy of the spreadsheet to be able to change the staff level and upgrades settings: https://docs.google.com/spreadsheets/d/1TK9FKIUvC_bSgLTKgYwKA1DEE7HasQWpBd7s9IkdpDs/edit?usp=sharing Culture Shock DLC illnesses modifiers Here are diagnosis modifiers for all illnesses from the Culture Shock DLC. IllnessGPGDCardioWardPsyFluidX-RayMegaDNARevisit GPTreatmentArt Sick25%5%35%5%20%35%5%5%5%2.5%30%Banging Headache50%17%24%7%17%50%17%17%45%9%60%Blooper25%10%10%10%10%25%10%25%25%10%60%Blue Blood30%5%41%5%20%41%5%5%5%3%30%Broken Leg50%15%25%15%15%25%15%25%15%9%50%Canapains30%8%8%20%8%10%30%30%10%6%50%Concertoes80%20%22%20%5%20%30%20%20%12%70%Corrupt Footage25%12%7%12%40%12%40%40%12%5%40%Cross-Frayed25%10%28%10%10%10%10%28%28%10%50%Culture Shock35%15%15%30%15%15%30%30%30%8.75%40%Director's Gut60%20%30%20%20%25%20%20%20%12%50%Dramatic Paws80%20%20%7%7%20%20%20%20%16%70%Extrasensory15%10%10%10%10%25%10%40%10%9%30%Flash Back45%8%8%20%8%18%45%45%15%9%60%Fourthwall Problem20%12%20%12%12%12%20%20%25%10%30%Foxtrodden25%10%20%10%5%20%20%20%20%10%40%Guest Cist15%20%7%7%7%10%10%15%10%7.5%20%Inbagneato40%15%15%20%15%15%20%20%15%10%50%Limelit45%8%25%8%8%18%18%18%15%11.25%70%Listless10%15%5%25%5%5%5%30%30%5%20%Metrognomic25%10%10%10%10%25%25%10%25%10%40%Minty Condition75%20%20%20%5%20%20%20%20%15%60%Misdewiener60%35%22%7%22%22%22%22%22%15%60%Monopolies15%5%5%5%25%15%30%5%30%7.5%30%Motion Sickness15%10%10%30%10%10%45%45%10%11.25%30%Private Parts28%10%10%10%40%10%40%40%10%8.4%50%Protagony45%18%30%18%30%30%18%18%18%9%60%Shifting Perspective35%20%20%20%20%20%25%20%25%8.75%40%Sinewment40%7%20%12%12%30%12%15%12%4.8%40%Snot Twist100%20%20%20%20%20%20%20%20%25%75%Soiled Self30%30%20%10%12%12%12%12%12%9.9%50%Square Eyes50%20%20%35%20%35%20%20%20%5%40%Stage Hand25%12%7%25%12%12%25%25%12%5%20%Stunt Trouble30%15%15%15%15%30%35%40%35%9%55%Wardrobe Malfunction60%30%7%18%18%18%30%30%18%13.2%70%Writer's Block30%35%15%15%30%40%40%15%15%7.5%50%IllnessGPGDCardioWardPsyFluidX-RayMegaDNARevisit GPTreatment You can use the "mega spreadsheet" below to interact with those modifiers. Just make a copy of the spreadsheet to be able to change the staff level and upgrades settings: https://docs.google.com/spreadsheets/d/1TK9FKIUvC_bSgLTKgYwKA1DEE7HasQWpBd7s9IkdpDs/edit?usp=sharing A Stitch in Time DLC illnesses modifiers Here are diagnosis modifiers for all illnesses from A Stitch in Time DLC. The illness Parapox makes patients vomit a lot, without enough bins the hospital can quickly become very dirty. Chewed a Rose, Cod Piece and Reptile Dysfunction can't be diagnosed by wards at all. IllnessGPGDCardioWardPsyFluidX-RayMegaDNARevisit GPTreatmentArtificial Intelligence20%12%20%25%12%12%20%20%12%10%30%Beheadedness90%15%15%15%15%15%15%15%15%9%80%Bionic Plague25%20%25%15%5%10%20%20%10%10%40%Bloat of Arms50%17%7%20%17%35%17%17%17%9%60%Bone Head45%8%45%15%8%18%45%20%8%9%60%Byteheadedness90%15%15%15%15%15%15%15%15%9%80%Chewed a Rose40%15%15%-20%15%15%20%15%10%50%Clockjaw60%18%7%18%20%18%30%20%18%13.2%60%Cod Piece60%20%20%-20%30%20%20%20%12%60%Dino Sores45%7%18%15%7%35%15%15%15%11.25%50%Fomo Sapiens35%15%15%15%30%15%30%30%30%8.75%40%Forefraught55%15%15%20%40%15%15%15%15%11%70%Fossil Eyes25%10%10%10%10%28%10%28%28%10%50%Fractured Timeline50%15%25%15%15%15%15%40%15%9%50%Futurism28%10%10%10%10%45%45%45%45%8.4%50%Glass Dome25%12%7%25%12%12%25%25%12%5%20%Hacking Cough40%7%20%12%12%30%12%15%12%4.8%40%Historical Laughter35%15%15%30%30%15%15%30%30%8.75%40%Hologlands30%5%5%5%5%20%41%41%5%3%30%Hotheadedness90%15%15%15%15%15%15%15%15%9%80%Jester Infection60%20%20%15%35%15%35%15%35%6%60%Loopy35%20%25%20%20%20%25%20%20%8.75%40%Missing Link25%12%7%40%12%12%40%40%12%5%40%Mites of the Realm60%25%20%30%20%20%20%20%20%12%50%Parapox50%20%20%35%20%35%20%20%20%5%40%Pneumatic Tubes35%20%20%20%20%20%25%20%25%8.75%40%Predestinitis15%10%10%10%30%45%10%45%10%11.25%30%Reptile Dysfunction45%18%30%-30%30%18%18%18%9%60%Rock Star90%20%20%20%20%20%20%20%20%31.5%80%Rolling Stones45%8%15%8%8%18%25%18%18%11.25%70%Slackbladder60%25%22%7%22%30%22%22%22%15%60%Tarred Pits60%20%25%20%20%30%20%20%20%12%50%Time Warts25%10%25%10%10%10%10%25%25%10%60%Woolly Man-Mouth25%10%10%25%10%10%10%25%25%10%40%IllnessGPGDCardioWardPsyFluidX-RayMegaDNARevisit GPTreatment You can use the "mega spreadsheet" below to interact with those modifiers. Just make a copy of the spreadsheet to be able to change the staff level and upgrades settings: https://docs.google.com/spreadsheets/d/1TK9FKIUvC_bSgLTKgYwKA1DEE7HasQWpBd7s9IkdpDs/edit?usp=sharing Speedy Recovery DLC illnesses modifiers Here are diagnosis modifiers for illnesses from Speedy Recovery DLC. Special thanks to Nadjiggle from the TPH Wiki[two-point-hospital.fandom.com] who provided these data. Small disclaimer : we currently don't have time to double check if everything is good but the numbers seem coherent. IllnessGPGDCardioWardPsyFluidX-RayMegaDNARevisit GPTreatmentAlarmed40%15%15%15%15%40%15%15%15%10%50%Busy Body80%20%22%20%5%20%20%20%20%12%70%Cyclonic Irritation50%17%24%7%17%50%17%17%45%9%60%Frosted Tips45%15%15%7%7%35%18%15%15%11.25%50%Hairline Fracture50%15%25%15%15%25%15%25%15%9%50%Hazardous Waist50%20%20%35%20%35%20%20%20%5%40%Hive Mind28%10%10%10%10%40%40%30%10%8.4%60%Mean Feet35%15%15%30%15%15%30%30%30%8.75%40%Peaky15%10%10%30%10%10%45%45%10%11.25%30%Pelvic Crust25%10%20%10%5%20%20%20%20%10%40%Piste Off25%12%7%12%40%12%40%40%12%5%40%Scrambled Legs60%30%7%18%18%18%30%30%18%13.2%70%Shaken Kidneys45%8%8%20%8%18%45%45%15%9%60%Snow Problem28%10%30%10%10%10%40%40%10%8.4%55%Sticky100%20%20%20%20%20%20%20%20%25%75%Traffic Jam40%15%15%20%15%15%20%20%15%10%50%Under The Weather28%30%40%10%10%10%10%40%10%8.4%65%Weathered Veins45%8%25%8%8%18%18%18%15%11.25%70%Wet Behind The Ears60%20%30%20%20%25%20%20%20%12%50%IllnessGPGDCardioWardPsyFluidX-RayMegaDNARevisit GPTreatment GP dispatch analysis The following experiment took place at Lower Bullocks to see whether GP doctors dispatch patients randomly or to the best diagnosis room. At the start of the experiment all patients were kicked from the hospital and all diagnosis rooms were built close to each other to see where new patients are dispatched by the GP doctors. All machines were level 1 and all rooms had a prestige level of 2. Note that no room had a queue higher than 2 during the whole test except the ward that had 3 sometimes. TotalGDCardioWardPsyFluidX-RayMegaDNAVerbal Diarrhoea12511121-1Lazy Bones11171---2-Pandemic136----25-Portishead1054---1--Bogwarts6---2-31-Lightheadedness11112222-1Monobrow9--2--43-Freudian Lips11-414--2-Potty Mouth8--5111--Mock Star1934522-12Lycanthropy911-43---Jazz Hand10--4--51-Inflated Ego101-3-4-2-Total139232224161419174 As we can see, it's probably not the best hospital for DNA Lab since there aren't many "advanced" illnesses there. ^^ On the contrary, the ward is the most visited room. Notice that there seems to be a correlation between the diagnosis rates and where the patients are dispatched. Lazy Bones, Pandemic, Monobrow, Freudian Lips, Potty Mouth, Jazz Hand and Inflated Ego clearly show a preference for rooms where diagnosis rate tends to be higher even though it's not a hard rule. Bogwarts seems to be an exception (a bug ?) or maybe it's just that there isn't enough data. It seems like there is an illness/room modifier when a GP dispatches patients that increases the chance to be sent to the appropriate diagnosis room. Note however that proximity seems to be a factor too. After the tests I moved the DNA lab right next the GP offices and it seems like more patients visited it (mostly with "all around" illnesses like Mock Star and Lightheadedness). Here is a screenshot for those wondering what the layout of my diagnosis rooms looked like for the 2nd part of the test (the 2 GP Offices were in another building just below):
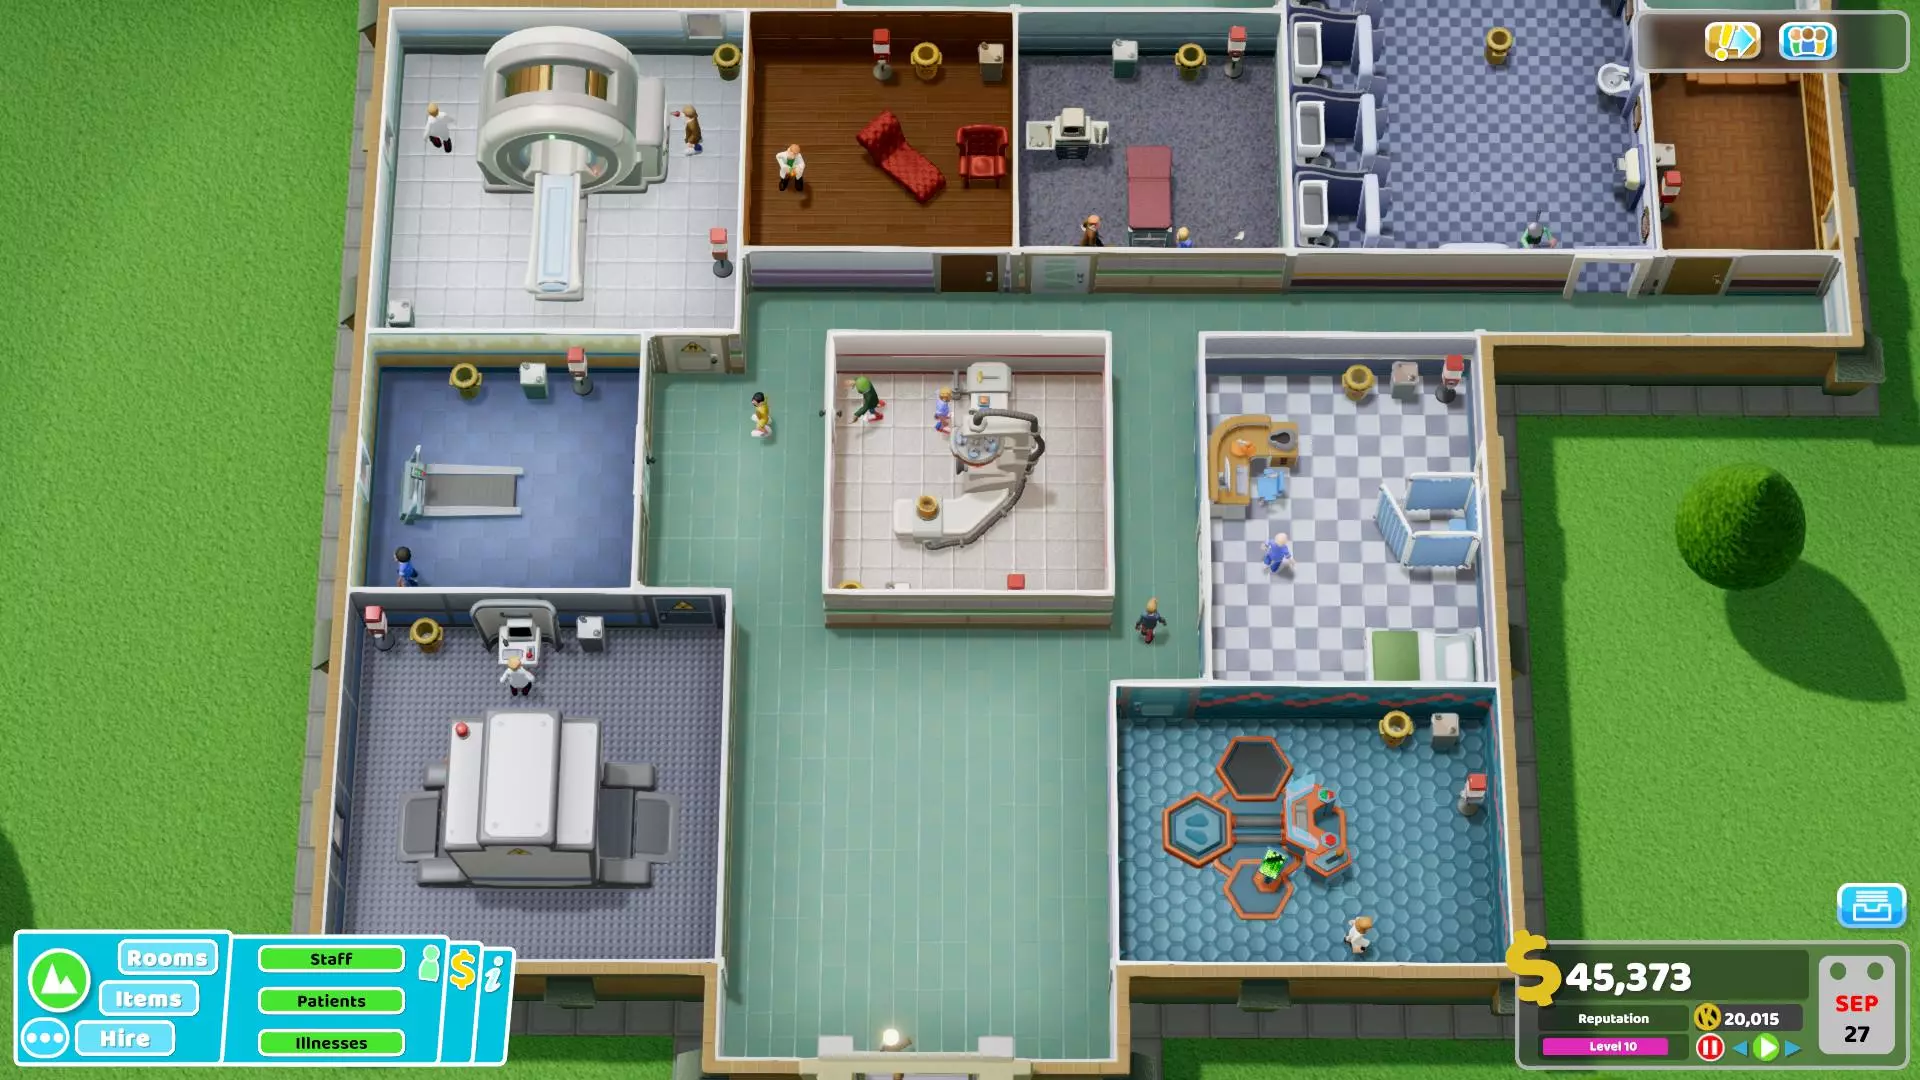
Note that those tests were done in a specific hospital with specific parameters. It's possible that there are more factors affecting the dispatch system like machine level, room prestige, queue size or other less obvious factors (and maybe even bugs). Also those results only show the first dispatch from a GP to a diagnosis room, maybe subsequent dispatches for difficult illnesses have their own priority rules. By the way, be careful and don't just build all diagnosis rooms after seeing those results. Building a room and recruiting an employee raise the hospital level gauge. This can significantly increase the number of patients coming to your hospital and have a big impact on queues if you aren't ready. Update (February 2020): Many people claimed that a well trained GP doctor is much better at dispatching patients to the good rooms. So I checked to see if that's true and the short answer is that the qualification itself doesn't matter, it's the level of the doctor that "improves" the dispatching ability. I tested the theory in a similar controlled experiment as above but I focused only on one illness this time. I chose Lycanthropy because of the interesting modifiers it has. To diagnose it, Fluid Analysis and Cardiology are much better than all other rooms with a 41% modifier. Psychiatry is good with a 20% mod but still inferior. All other rooms have a modifier of 5%. First I checked with a level 1 doctor, the dispatch ratio matched the modifier ratio which again proved the fact that GP doctors don't randomly dispatch patients and base their choices on the modifier values. This low level doctor sent most patients to Cardiology, Fluid Analysis but also a good amount to Psychiatry and from time to time but rarely to other rooms. I switched the doctor with a level 2, then level 3, then 4 and 5 fully trained GP doctor and what's interesting is that the higher the level and the less they sent patients to Psychiatry room and other rooms with low modifiers. In the end, the level 5 doctor was only sending them to the Cardiology and Fluid Analysis which are by far the best rooms in this case and not once to other rooms. Then I checked what changes the doctor behavior to confirm if it's the qualification, the diagnosis skill or the level. Ultimately, I found out that a level 5 doctor with only research skills and 120% diagnosis skill was only choosing the best rooms contrary to a level 2 doctor with 2 GP skills and 120% diagnosis skill. Conclusion: GP doctors naturally send patients to the rooms with the highest modifiers more often. The higher level the doctors are and the more likely they will choose the rooms with the highest modifiers. Their qualification and diagnosis skill don't matter, only their level is important to improve their dispatch efficiency. However, diagnosis skill is still very important anyway so teaching them General Practice skills exclusively remains the best training choice in my opinion. Chance to die and gauges depletion Here is another table with some data that aren't necessarily useful but still interesting I think. It includes the % chance to die when a treatment fails. For information, note also that for all illnesses in the game, the chance to show up as a ghost after death is 50%. Regarding Happiness and Health numbers, it basically means that a patient with a multiplier higher than 1 will have the Happiness or Health gauge deplete faster. For information, all other vital needs gauges deplete over time at the same speed for all base game illnesses except for "Boggled Mind" and "Bogwarts". Patients with Bogwarts have their Toilets gauge deplete twice as fast as other patients. Patients with Boggled Mind have their Hunger, Thirst and Boredom gauges deplete twice as fast as other patients. An interesting thing to note is that all illnesses in psychiatry have no chance to kill a patient when the cure fails. IllnessChance to dieHealthHappiness8-bitten50%11Animal Magnetism25%0.751Bed Face10%0.50.75Boggled Mind0%0.11Bogwarts20%11Broken Face30%11Clamp0%0.750.75Cross Bones30%11Cubism100%11Decision Rash40%11Denim Genes100%11Emperor Complex0%0.11Floppy Discs50%11Flumps100%11Freudian Lips0%0.11Grey Anatomy0%0.751Grout0%0.50.5Gurning Loins50%11Heart Throb50%11Humerus Injury30%11Hurty Leg30%11Inflated Ego0%0.11Jazz Hand10%11Jest Infection0%0.10.75Jumbo DNA100%11Lazy Bones10%0.751Leopard Skin100%11Lightheadedness100%0.751Litter Bug40%11Lycanthropy20%11Mime Crisis0%0.11Misery Guts20%11.2Mock Star0%0.10.75Monobrow10%11Mood Poisoning40%1.51Mucky Feet10%11Night Fever0%0.11Pandemic25%0.751Pipe Organs50%11Portishead10%11Potty Mouth20%11Premature Mummification25%11Pudding Blood40%11Rock Bottom40%11Shattered30%11Shock Horror50%11Spinal Bap50%11Spontaneous Combustion40%11Touch of Midas100%11Turtle Head50%11Verbal Diarrhoea20%0.750.75IllnessChance to dieHealthHappiness Full diagnosis during first GP visit - Part 1 Since diagnosis bonus provided by multiple medicine cabinets stacks, many of us wondered whether it's possible to diagnose all illnesses at 100% with only a single visit of the General Practice office. So take a look at the tables below to see how many cabinets are required to 100% diagnose an illness during the first GP visit. I wanted to have a table with all illnesses directly included there but it's too big for Steam. So I used a format similar to Mavocide's table that can be found there with interesting info: https://www.reddit.com/r/TwoPointHospital/comments/9f623m/gp_diagnosis_formula_and_number_of_medicine/ GP modifiers and illnesses (for reference) 10%: Spontaneous Combustion, Touch of Midas, Anty Matter, Hyperrealty 15%: Gurning Loins, Jazz Hand, Jumbo DNA, Pudding Blood, Aurora Snorealis, Evergreen, Goobris, Buccanear, Jellied Feels, Placid Reflux, Shadow Boxer, Highly Ill-Suited, Isotrope, Warped 20%: Emperor Complex, Knightmares, Nerological Imbalance, Space Caged 25%: Cross Bones, Denim Genes, Flumps, Heart Throb, Leopard Skin, Shattered, Dead Arm, Half Pipe, Shin Blintz, Tartan Telomeres, Camel Toe, False Tan, Jet Leg, Lemon Soul, Limb Empathy, Gorm Deficiency, Grunt, Neutrainers, Platenary Ring, Star Struck, Telemutation 28%: Cubism, Premature Mummification, Monster Mishmash, Screwball, Lack of Humanity 30%: Lycanthropy, Pipe Organs, Turtle Head, Displaced Glands, Mechanical Metropolism, Reptilian Metropolism, Skull Chutney, Blank Look, Loose Jowels, Painapple, Wanderust, Bowhine, Extraterrestical, Flat-Packed, Frogborne, Hero Complex 35%: Boggled Mind, Mucky Feet, Anomalitis, Bard Flu, Football Crazy, Logic Problem, Deeply Ill-Suited, Horrorscope 40%: Decision Rash, Inflated Ego, Monobrow, Shock Horror, Bloaty Dread, Curdled Blood, Sore Judgement, Cauliflower Ears, Trumidity, Vested Insects, Aller-Gs, Zodiac Arrest 45%: Floppy Discs, Litter Bug, Mime Crisis, Spinal Bap, Blaggis, Cheese Bored, Paranoyance, Rantlers, Beach Wail, Brain Farts, Desserted, Wild Spore, Astroknot, Confidentures, Situational Gravity 50%: Broken Face, Grey Anatomy, Night Fever, Potty Mouth, Rock Bottom, Cold Shoulder, Inverted 1080, Thin Skinned, Budgie Struggler, Fool's Mould, Knobbly Knee, Cosmoss, Home Sick, Sputneck 55%: Freudian Lips, Brain Freeze 60%: Bogwarts, Hurty Leg, Jest Infection, Misery Guts, Boneless Thigs, Face Plant, Sweet Teeth, Heat Wave, Limpette, Tooth Mutiny, Continuthumb, Fanatick, Flack Hole 70%: Pandemic 75%: Portishead, Tongue Splinters, Hermitism, Science Friction 80%: Lazy Bones, Mood Poisoning, Barking Mad, Eye Candy, Crispy Skin, Oozmosis, Asterrhoids, H. G. Swells 85%: Bed Face 90%: Humerus Injury, Lightheadedness, Mock Start, Basic, Menace Elbow 100%: Verbal Diarrhoea, Sandy Crack, Meteormites Buffs referenced in the table below are "Happy" and "Energised", they both add +10% diagnosis skill. GP illness modifier10%15%20%25%28%30%35%40%45%70% diagnosis skill132284861146940837430725621675%122778556443137434328023219580%114473052239834531525621117785%107168148636931929123519316190% (GP1 w/ 0 buff) 100663845334329526921617714695%948599424319275250200162133100%895564398298256232185149122105% (GP1 w/ 1 buff) 848532374280239216171137111110%805504353262224202159127102115% (GP1 w/ 2 buffs) 76647733324721018914811793120% (GP2 w/ 0 buff) 73045331523219717713710885125%6964312982191851661289977130% (GP2 w/ 1 buff) 6664112832071741561199271135%6383922691951641461118564140% (GP2 w/ 2 buffs) 6113742561851541371047858145% (GP3 w/ 0 buff) 587358244175146129977253150%564343232166137122906648155% (GP3 w/ 1 buff)542328221157130114846143160%522315211149123108785639165% (GP3 w/ 2 buffs)504303202142116102735135170% (GP4 w/ 0 buff)48629119313511096684731175%46928018512810490634327180% (GP4 w/ 1 buff)4532691771229885583923185%4382591691169380543520190% (GP4 w/ 2 buffs)4242501621108875503117195% (GP5 w/ 0 buff)4112411561058371462814200%398232149997866432511205% (GP5 w/ 1 buff)38622414395746239228210%37421613790705836196215% (GP5 w/ 2 buffs)36320913286665533163 Full diagnosis during first GP visit - Part 2 GP illness modifier50%55%60%70%75%80%85%90%100%70% diagnosis skill185159137104907868584375%16614212290776657483380%14912710878665647392585%1351139668574738311890% (GP1 w/ 0 buff) 1221028558483931231195%110917550403124175100%9981664333251811-105% (GP1 w/ 1 buff) 907358362719126-110%81655130211471-115% (GP1 w/ 2 buffs) 745845241692--120% (GP2 w/ 0 buff) 66513919114---125%604533147----130% (GP2 w/ 1 buff) 544028103----135%4835236-----140% (GP2 w/ 2 buffs) 4330192-----145% (GP3 w/ 0 buff) 382515------150%332111------155% (GP3 w/ 1 buff)29177------160%25144------165% (GP3 w/ 2 buffs)21101------170% (GP4 w/ 0 buff)187-------175%144-------180% (GP4 w/ 1 buff)111-------185%8--------190% (GP4 w/ 2 buffs)5--------195% (GP5 w/ 0 buff)3--------200%--------- It's actually possible to build mega GP offices to 100% diagnose all illnesses, for example with 386 medicine cabinets in hospitals with big buildings. It's expensive, requires a lot of efforts to place the cabinets and is kind of boring so it's not something I recommend at all. I did it for the sake of experimentation during the last mission with 4 huge GP offices + other big GP offices but I still also required more smaller GP offices because of the number of patients. For science, here is how this kind of very ugly hospital can look like:
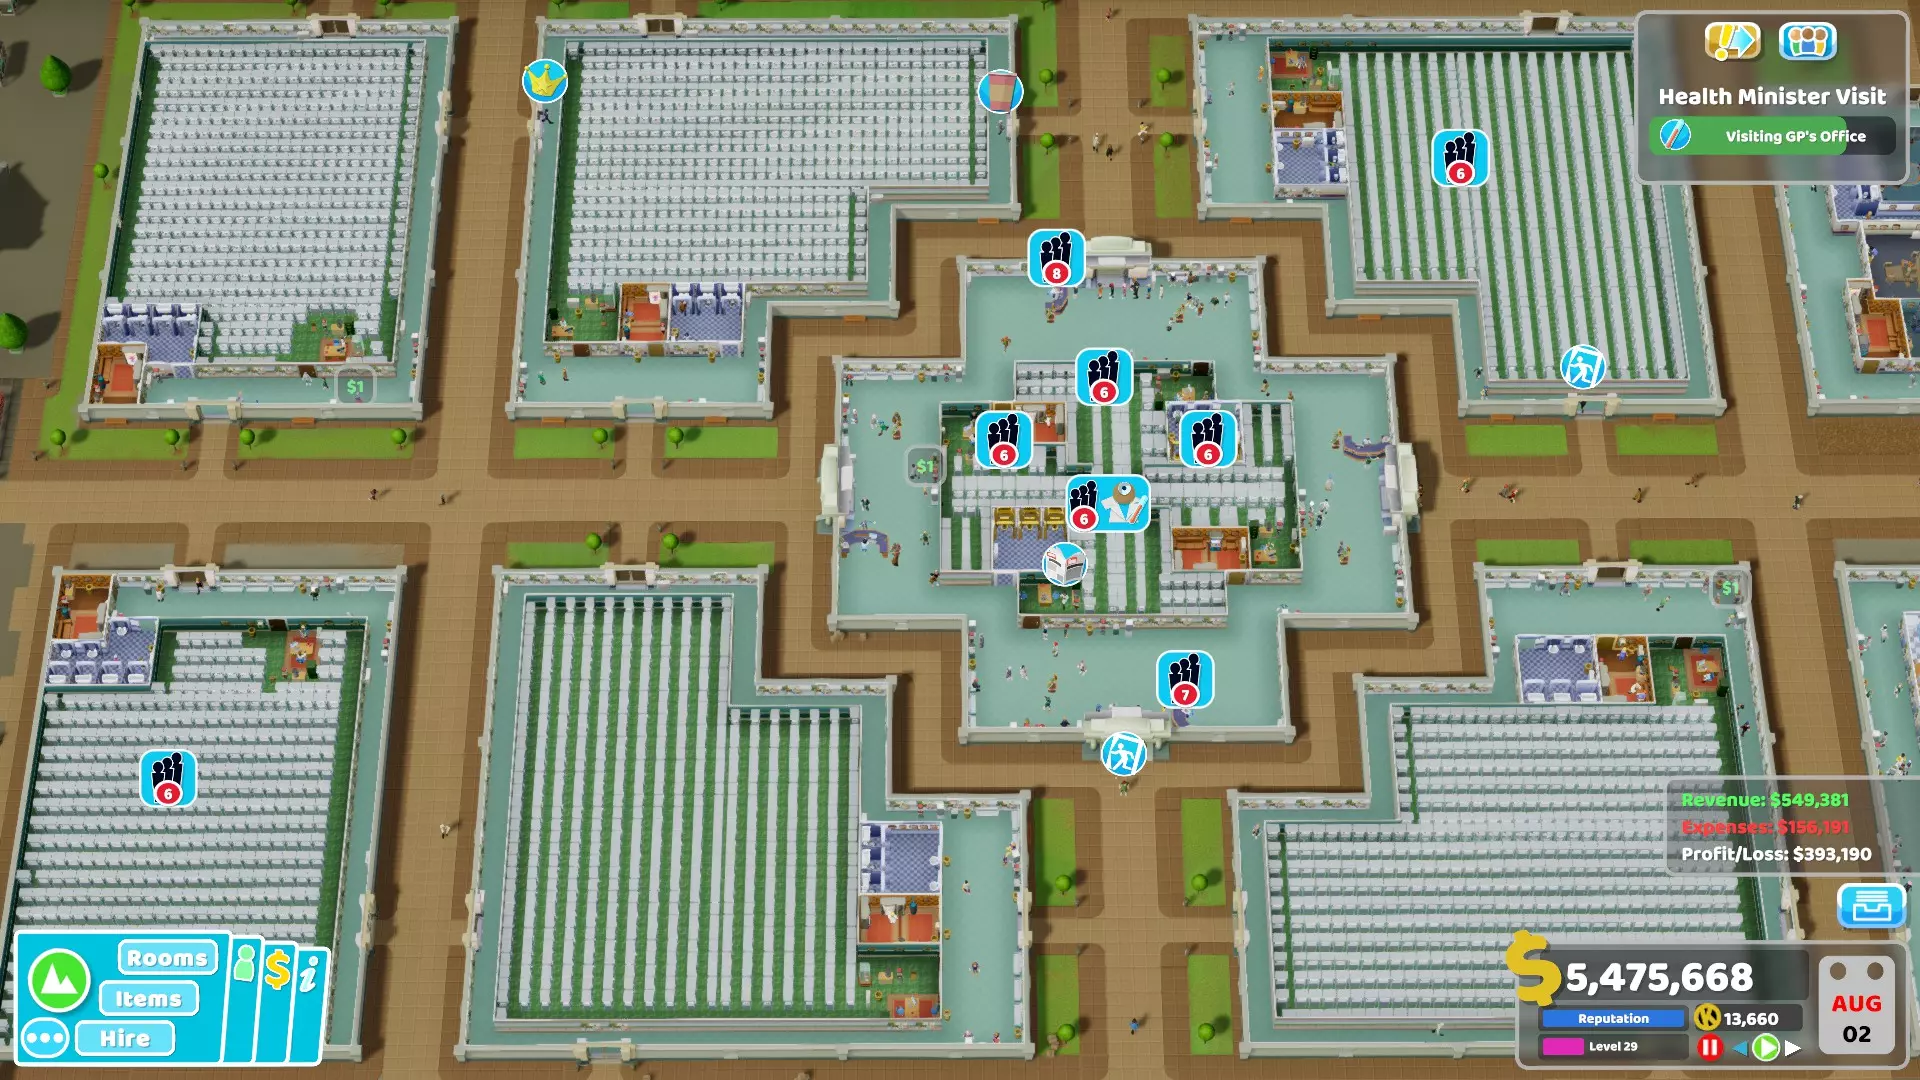
In any case, it's still a good idea to add some medicine cabinets when you have space in your diagnosis rooms since every little bit helps. Best diagnosis rooms for each hospital What's the best diagnosis room to use in this hospital ? It's one of the most difficult question to answer because of many factors... The diagnosis % of a room can be better than others at various stages of the game (early, mid or late game). For example, the ward is better than other rooms to diagnose some illnesses when their machine aren't upgraded yet but become worse after. Depending on the doctor/nurse's level and machine level, the range of illnesses that can be fully diagnosed with just a GP visit + any diagnosis room visit varies a lot too. Moreover, some diagnosis rooms are much better to diagnose some difficult illnesses than others. Some rooms are faster, cheaper or more profitable, etc... Regarding missions, the illnesses show-up progressively. Actually, it's even possible to get 3 stars in a hospital without encountering all illnesses that can show up. Another factor is that the amount of patients isn't the same for all illnesses, some will be much more common than others. That's why it's impossible to have a reliable ranking system per mission because it changes over time. Not all factors can be taken into account so my "ranking" below with only be based on these specific parameters: - All staff members are specialized and at level 3 (look the "Staff specialization" chapter for more info) - All machines are fully upgraded - All illnesses showing up in the hospital will be taken into account no matter if they come early, late or less frequently The ranking will be based on the extra amount of illnesses a room can fully diagnose compared to others or the highest diagnosis % than can be obtained for an illness. You will see below that overall X-Ray seems to be the "best" diagnosis room. The reason is that it has good illnesses modifiers and an advantage because the "Radiology" skill provides an extra +10% diagnosis skill to the doctor working there compared to most diagnosis rooms with a machine. It makes this room slightly better than others when they have the same base modifier. The fact that X-ray is also the fastest to diagnose a patient makes it a great room to build in any hospital. Just make sure the doctor working there has the "Radiology" skill for the bonus. "Best" rooms are ranked from top to bottom. The number between parenthesis is the amount of illnesses for which a room is better than all other rooms (excluding of course illnesses that can already be fully diagnosed by all rooms). 1. Hogsport Illnesses are easy to diagnose here so it doesn't really matter which room is used. GD (1) = Cardio (1) = Psy (1) = Fluid (1) = X-Ray (1) = Mega (1) = DNA (1) Ward (0) 2. Lower Bullocks Fluid (3) = X-Ray (3) Cardio (2) = Mega (2) GD (1) = Psy (1) = DNA (1) Ward (0) 3. Flottering X-Ray (4) Cardio (3) Fluid (2) GD (1) = Psy (1) = Mega (1) = DNA (1) Ward (0) 4. Mitton University Fluid (7) Cardio (6) = X-Ray (6) GD (4) = Mega (4) = DNA (4) Psy (2) Ward (0) 5. Tumble X-Ray (5) Cardio (4) = Fluid (4) = Mega (4) GD (2) = Psy (2) = DNA (2) Ward (1) 6. Flemington X-Ray (11) Fluid (8) Cardio (6) = Mega (6) GD (5) DNA (3) Psy (2) Ward (0) 7. Smogley X-Ray (10) Fluid (7) Mega (6) Cardio (4) GD (3) = DNA (3) Psy (2) Ward (1) 8. Melt Downs Fluid (7) Cardio (4) = X-Ray (4) Mega (2) = DNA (2) GD (1) = Ward (1) Psy (0) 9. Duckworth-upon-Bilge X-Ray (13) Fluid (8) Cardio (6) GD (5) - Mega (5) DNA (4) Psy (2) Ward (1) 10. Sweaty Palms X-Ray (12) Fluid (11) Mega (10) DNA (8) GD (6) Cardio (6) Psy (2) Ward (1) 11. Grockle Bay X-Ray (13) Fluid (10) Mega (8) DNA (7) GD (5) Cardio (5) Ward (2) Psy (2) 12. Blighton X-Ray (12) Fluid (11) Cardio (7) DNA (7) GD (6) Mega (5) Psy (2) Ward (1) 13. Rotting Hill X-Ray (12) Fluid (7) = Mega (7) DNA (5) Cardio (4) GD (3) Psy (2) Ward (1) 14. Pelican Wharf X-Ray (19) Fluid (12) Mega (11) DNA (9) GD (7) = Cardio (7) Psy (2) Ward (1) 15. Croquembouche X-Ray (23) Fluid (17) Mega (13) Cardio (11) DNA (10) GD (8) Psy (4) Ward (2) Bigfoot DLC 16. Underlook Hotel X-Ray (9) Fluid (7) Cardio (6) Mega (5) GD (4) DNA (3) Psy (1) Ward (0) 17. Swelbard X-Ray (15) Fluid (14) Cardio (10) Mega (8) GD (5) = DNA (5) Psy (2) Ward (0) 18. Roquefort Castle X-Ray (18) Fluid (13) Mega (9) Cardio (8) GD (5) = DNA (5) Psy (1) Ward (0) Pebberley Island DLC 19. Pebberley Reef X-Ray (17) Fluid (15) Cardio (9) Mega (8) GD (6) DNA (5) Psy (2) Ward (0) 20. Overgrowth X-Ray (17) Fluid (14) Cardio (9) = Mega (9) GD (8) DNA (6) Psy (3) Ward (1) 21. Topless Mountain X-Ray (21) Fluid (16) Cardio (12) Mega (11) GD (9) DNA (7) Psy (3) Ward (1) Close Encounters DLC 22. Goldpan X-Ray (13) Fluid (11) Cardio (8) GD (7) Mega (6) = DNA (6) Psy (2) Ward (1) 23. Camouflage Falls X-Ray (21) Fluid (14) Mega (12) GD (9) = DNA (9) Cardio (8) Psy (2) Ward (1) 24. Chasm 24 X-Ray (20) Fluid (14) Mega (13) DNA (10) GD (9) Cardio (7) Psy (2) Ward (1) Off The Grid DLC 25. Wanderoff X-Ray (17) Fluid (12) Mega (9) DNA (7) GD (5) = Cardio (5) Psy (2) Ward (0) 26. Old Newpoint X-Ray (20) Fluid (14) Mega (12) GD (8) = DNA (8) Cardio (7) Psy (2) Ward (1) 27. Windsock X-Ray (21) Mega (14) Fluid (13) DNA (10) GD (9) Cardio (6) Psy (2) Ward (1) Culture Shock DLC Plywood Studios X-Ray (12) Fluid (11) Mega (6) Cardio (5) GD (4) = DNA (4) Ward (1) = Psy (1) Mudbury Festival X-Ray (15) Fluid (12) Mega (10) GD (8) Cardio (7) = DNA (7) Psy (2) Ward (1) Fitzpocket Academy X-Ray (17) Fluid (11) = Mega (11) DNA (8) GD (6) Cardio (5) Ward (1) Psy (0) A Stitch in Time DLC Clockwise-upon-Thyme X-Ray (6) = Mega (6) GD (5) = Fluid (5) Cardio (4) = DNA (4) Psy (3) Ward (1) Clockwise-before-Thyme X-Ray (11) Fluid (10) Mega (8) Cardio (7) GD (4) = DNA (4) Psy (3) Ward (1) Clockwise-above-Thyme X-Ray (17) Mega (14) Fluid (12) Cardio (7) = DNA (7) GD (4) Ward (2) = Psy (2) Conclusion: With a specialized doctor having the "Radiology" skill, a fully upgraded X-Ray is the most reliable diagnosis room mid-game and allows to get a high diagnosis % for a big range of illnesses. Fluid Analysis is also great and works well in combination with the X-Ray. A third room I recommend is the Mega Scan which is overall well-rounded and better at diagnosing most difficult illnesses. Even though diagnosis rooms aren't really there to make money, the Mega Scan is also a good source of money. Note that late game with level 5 employees, overall the Mega Scan tends to become better than other rooms followed by the X-Ray. The Fluid analysis room stays good but the DNA Lab becomes more reliable since it's better to diagnose some of the difficult illnesses. That being said, it's important to remember that you can be very flexible with which diagnosis rooms you can build. It's possible to complete all missions with less than 3 different diagnosis rooms as long as staff is trained and machines upgraded. It's also possible to just progressively build all diagnosis rooms to complete all missions since higher level GP doctors tend to send patients to the best rooms anyway. However, keep in mind that sometimes large queues can form up for one specific diagnosis room. That's why it's sometimes better to have for example 2 pairs of 2 different diagnosis rooms to share the queues more efficiently than 4 different diagnosis rooms. Dear Hospital Administrators This guide took a tremendous amount of time to research/experiment, to write and to double-check everything so I hope it will help some of you. ^^ If you spot any issue, do not hesitate to let me know in the comments below. Thanks for reading. Yours fragrantly, Freiya