换一换
换一换 


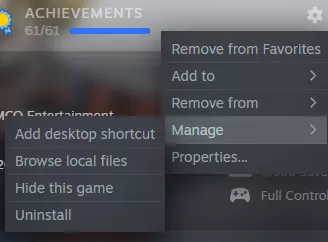
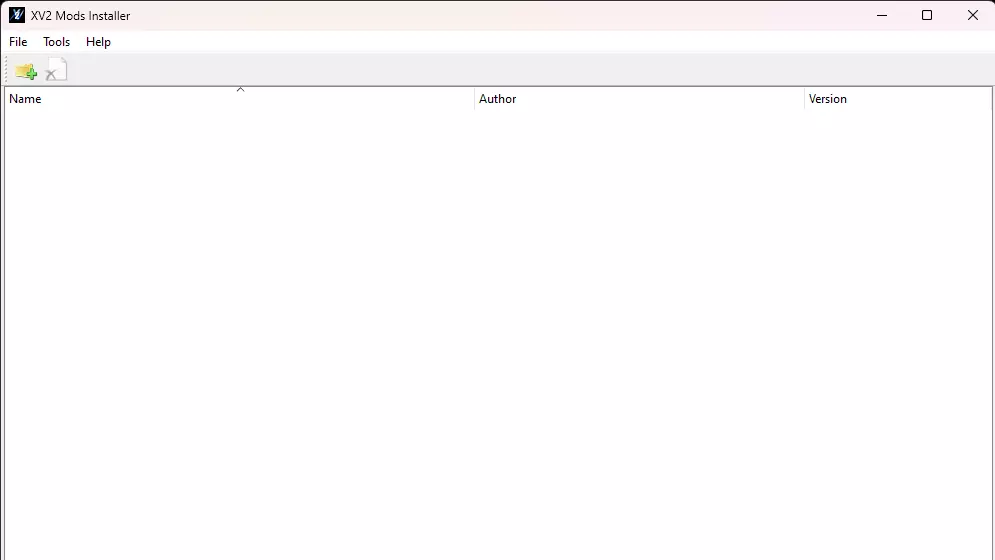
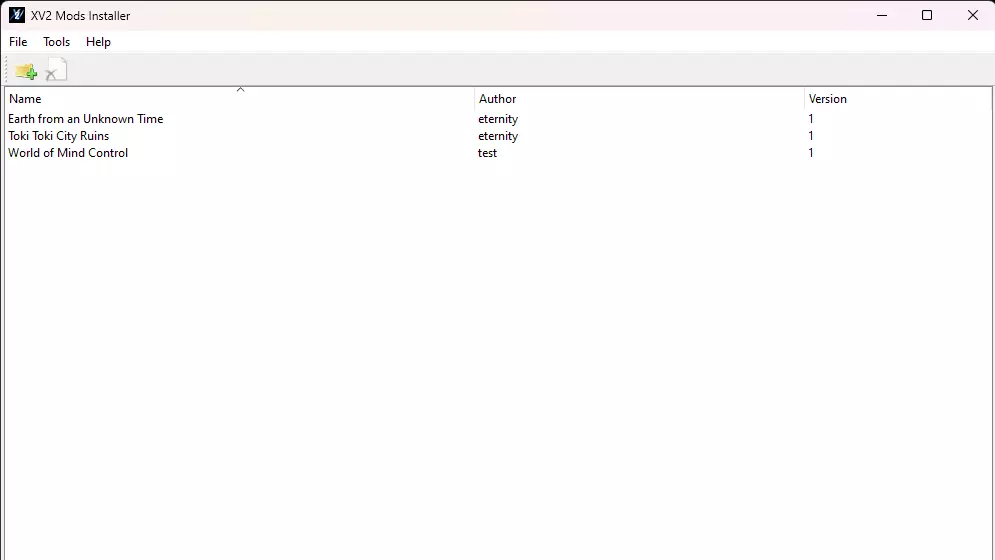
This guide is intended to showcase the full process of installing mods of various types in the most recent version of the game, as well as some recommended tools and add-ons to go along with it and common errors you may face during the installation process. 0. Disclaimer This guide will contain a link to every tool or mod showcased, so that you don’t have to go out of your way looking for them, and they shall always be updated to the newest available version. Depending on the feedback this guide receives, I may also update it to include instructions and overviews on tools to make your own mods or how to modify pre-existing ch presets. WARNING: DO NOT USE MODS ONLINE, unless the person you're playing with has the same mods installed, otherwise online play will not work correctly. The game also automatically detects if you have a modified roster or skills and can stop you from playing an online quest or with a user who does not have the same mods as you. You also cannot play online if you disabled the Easy AntiCheat. In addition, do not use these mods to cheat or gain unfair advantages - no one likes that. Credits go to the Revamp Team for the pic of Semi-Perfect Cell, who is a new playable character in the 5.0 update of their mod. 1. Required Tools The following is a selection of tools you’ll need to install and play with mods. Some of them are mandatory while others are optional but highly recommended. All of these will be explained further in the tutorial. Note: these tools will also require you to locate and modify the directory containing the game’s files. To locate it, go to your Steam library, right-click on Xenoverse 2, go to ‘Manage’ and then click on the ‘Explore local files’ option. This will open the folder containing the files for the game, which you will need to use throughout this whole tutorial. 1.1 Mandatory- XV2 Patcher - X2M Installer (part of Eternity Tools) 1.2 Optional (Recommended)- A Save Editing tool (Save Editor or XML Serializer) - LB Installer (part of Lazybone Tools) - Helix Mod 3D Vision - ReShade - Other Eternity Tools - Other Lazybone Tools 2. Setting Up the Patcher Setting up the Patcher is a very straightforward step. Just follow the steps below: 1 - Download and extract the ‘XV2INS.rar’ folder from here.[videogamemods.com] 2 - Copy the ‘xinput1_3.dll’ file and paste it into the ‘bin’ folder in the game directory. 3 - Copy the ‘XV2PATCHER’ folder to the main game directory. And that’s it! Your game is now moddable, congrats! There are additional steps which you can take though, which allow for further modifications. 2.1 Additional ConfigurationThe patcher contains a file named ‘xv2patcher.ini’ which allows you to configure other functionalities to your liking, such as: - Unlocking all stages - CPU transforming during quests - Keep transformations on during Story Mode cutscenes - Frieza Siege events taking place offline - EAC bypass Each item is adequately documented on the file, so take a look at it and change it according to your liking. 2.2 Gamepad IssuesIf you are facing gamepad issues with the game, open the ‘alternative dll’ folder, copy the ‘dinput8.dll’ file and paste it on the ‘bin’ folder, then DELETE the ‘xinput1_3.dll’ file; both DLLs cannot coexist. This solves the issue and allows you to play it adequately. 2.3 UI ExtensionsAn additional feature from the patcher are the UI extensions, giving you additional options such as dumping an image of your CAC’s portrait or taking control of your CPU allies during quests. Each setting for each functionality must first be enabled in the xv2patcher.ini setting. To enable it, copy the ‘data’ folder instead of the ‘XV2Patcher UI Extensions’ folder and paste it into your main game directory before you install any other mods, then configure it on the ‘xv2patcher.ini’ file to choose which options you wish to enable or disable. 3. Installing Mods 3.1 Where To Find/Download ModsTwo main websites host Xenoverse 2 mods: Video Game Mods (VGM) and Nexus Mods, though VGM is by far the most popular of the two. VGM link: https://videogamemods.com/xenoverse/ NM link: https://www.nexusmods.com/dragonballxenoverse2/mods/ 3.2 Recommended ModsSome of my recommendations for mods to greatly improve your game experience (I am not affiliated with any of them). XV2 Revamp https://videogamemods.com/xenoverse/mods/revamp-xenoverse-2-project-complete-edition-compatibility-update/ Mythic Marvels Pack https://videogamemods.com/xenoverse/mods/mythic-marvels-pack-1-godly-essence/ Unleashed’s More Transformations https://www.patreon.com/posts/68369841 3.3 Method 1 - X2M InstallerThe most traditional way of installing mods is through the X2M Installer, but some newer ones, such as Revamp, may only be installed with Lazybone’s. You can find and download the installer here.[videogamemods.com] For this part of the tutorial, I will be using Eternity’s Pack of Internal Stages,[mega.nz] specifically the Toki Toki City Ruins, Earth from an Unknown Time and World of Mind Control stages. For the installer, the only things you will need are the ‘xv2ins.exe’ file and the ‘Internal’ folder. Copy and paste both of them into the game directory and open the installer. The other programs are for mod creators, so we won’t be using them in this tutorial. During your first time opening the program, it will look just like this:
舞台模组存储在.x2m文件中,程序会读取并安装这些文件。点击左上角带有绿色“+”号的文件夹图标,找到模组各自的.x2m文件。选择你想要安装的文件并点击“打开”。每个模组会安装到其各自的【槽位】中,你可以手动卸载它们。完成后,界面应该会显示成类似这样。
从这里,你可以关闭安装程序,你的模组将会完成安装。如果你希望同时安装多个模组,安装程序会询问你是否通过【静默模式】进行安装,这意味着已安装的模组将被更新,所有新模组将安装在各自独立的位置,在大多数情况下你可能都需要这样做。不过暂时不要打开游戏,因为你可能需要先按照本指南后续部分所述的某些额外步骤进行操作。 3.4 方法2 - LB安装程序 懒骨头安装程序是一种较新的模组安装方法,虽然不像永恒安装程序那样普及,但功能非常强大,并且开始被一些大型热门模组所采用,例如【Revamp】。这个安装程序的使用方式与Eternity的不同。它主要供模组创作者使用,他们可以将自己的模组与LB安装程序打包成.exe文件(这类文件通常会附带'.installinfo'文件),这样模组就能自行安装,无需手动进行X2M安装。简而言之,如果某个模组使用LB安装程序,那么你就不需要Eternity的任何工具来安装它。 4. 推荐附加组件 4.1 Helix Mod 3D Vision Helix Mod为《龙珠:超宇宙2》提供了两种不同的视觉修复“模组”,分别是较新的Geo-11和较旧的3D Vision。然而,Geo-11实际上并不兼容英伟达30或40系列显卡以及某些现代GPU驱动程序,而3D Vision则可以兼容。因此,本教程将仅涵盖3D Vision,它更有可能在绝大多数人的电脑上正常运行。 3D Vision为游戏提供了多种不同的视觉修复,包括但不限于反射、折射、波浪效果、光线轴、镜头光晕等,还提供了一些可选功能,例如禁用HUD和大厅NPC名称、调整卡通渲染强度或完全禁用黑色轮廓、纹理锐化和泛光开关(下图展示了禁用角色轮廓后的游戏画面)。

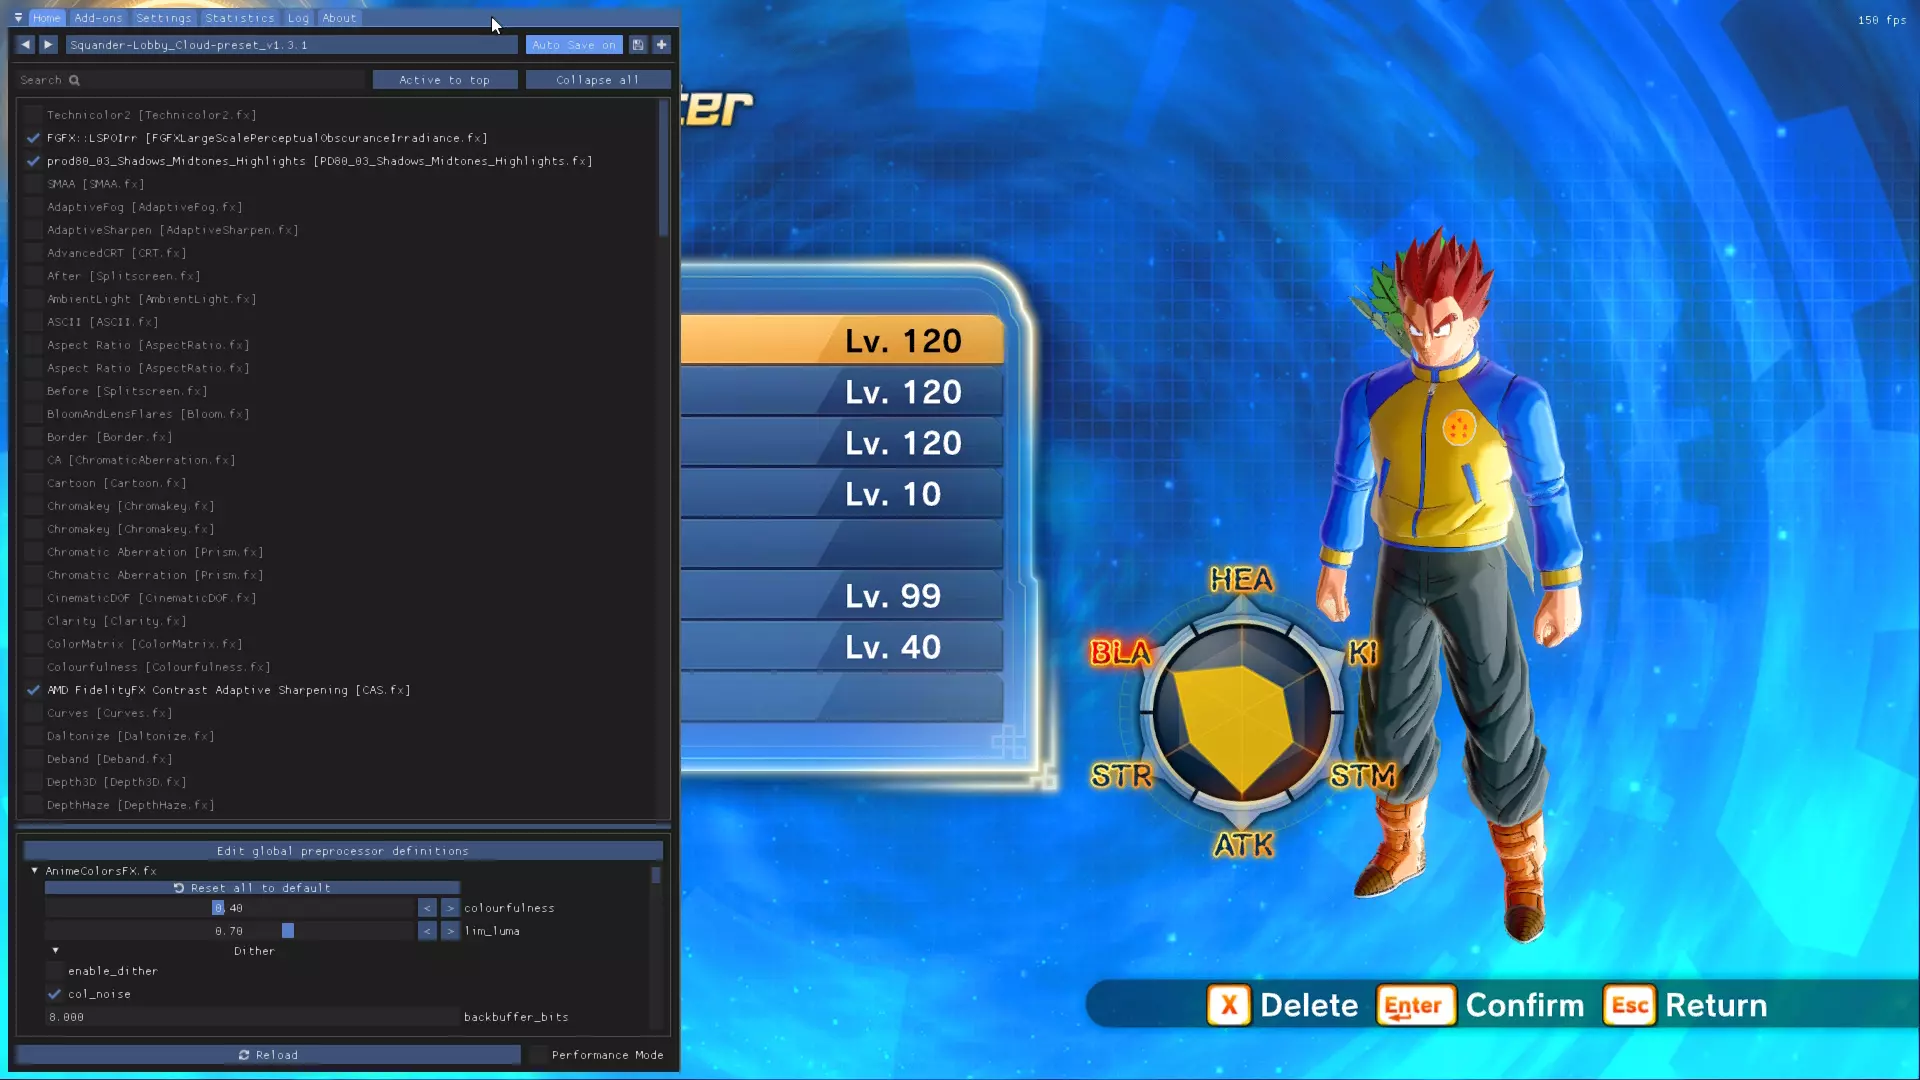
本次安装非常简单,不需要使用之前提到的任何模组安装器。操作方法如下:下载该文件,解压后将所有内容粘贴到“bin”文件夹中,即可自动完成安装。 注意:3D Vision也会触发Easy Anti Cheat(反作弊系统)保护,因此你需要像运行其他模组一样运行它。 4.2 ReShade(更好的后期处理) ReShade是一款为(几乎)所有3D游戏提供高级后期处理的工具,这意味着可以通过着色器和其他视觉效果来改善画面。如果你想让《龙珠:超宇宙》拥有类似动画的画面,甚至添加电影颗粒感,这款工具非常合适。与其他模组不同,ReShade无需补丁程序和安装程序即可使用,并且可以在线使用,完全没有问题。 ReShade可通过其官方网站下载,仅包含一个可执行文件。安装时,打开该可执行文件,选择“DBXV2.exe”文件,然后点击“下一步”。此时会提示选择相应的渲染API,选择“Direct X 10/11/12”即可。之后,安装程序会提供选择自己的着色器或基于现有预设安装的选项。《龙珠:超宇宙2》有多种ReShade预设,尤其是在VGM上,你可以选择最喜欢的进行安装。 启动游戏时,屏幕顶部会出现一个覆盖层。然后你可以按下【Home】键打开配置菜单,从中选择已安装的预设,并调整与之配套的各种着色器(下方是游戏中ReShade配置覆盖界面的图片)。
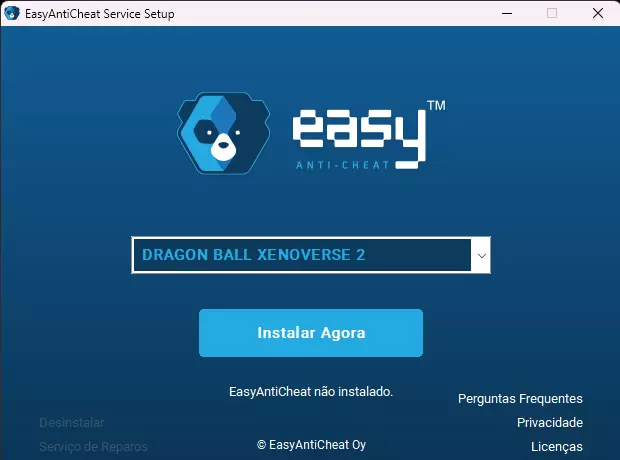
5. 启动游戏 有两种使用模组游玩游戏的方式。如果你打算完全离线游玩,选择第一种方法。否则,如果你想与安装了相同模组的朋友在线游玩,选择第二种方法。如果你安装了模组,将无法与使用原版(未安装模组)游戏的玩家在线游玩。 5.1 离线游玩(DBXV2.exe - 无EAC) 要使用模组进行离线游玩,安装模组后,通过“bin”文件夹内的“DBXV2.exe”文件启动游戏……这样就可以了!只需确保始终通过这种方式启动游戏。如果你通过Steam库或桌面图标启动游戏,将会开启Easy Anti-Cheat(反作弊系统),这会阻止游戏启动。或者,你可以在游戏目录的专用文件夹中打开程序并禁用EAC。但请注意,这样做后你将无法在线游玩游戏(以下是从【七龙珠:超宇宙2】中卸载Easy Anti-Cheat程序后该程序应有的样子)。
5.2 在线游玩(START.exe - 带EAC) 要使用模组进行在线游玩,你只需再调整一次“xv2patcher.ini”文件,具体是“excessive_air_contamination”选项。默认情况下,该选项设为“false”,你需将其改为“true”。 此选项将使补丁程序绕过启用Easy Anti-Cheat(EAC,易反作弊)的要求,让你可以通过DBXV2.exe可执行文件直接带模组在线游玩……某种程度上是这样。 如前所述,你不能与原版玩家一起玩在线任务或对战,因为如果你使用模组技能或拥有模组角色列表,游戏不仅会自动将你踢出在线对战(离线任务不受此影响),你还可能面临被禁止在线游玩的风险。使用模组进行在线对战的唯一方式是,你和一起游玩的朋友都安装了完全相同的模组,并且模组的排列顺序完全一致(即相同的“data”文件夹)。如果满足上述条件,你和朋友就可以畅玩任意模式,无需担心其他问题(【团队任务】除外,只要安装了任何模组,就无法进行团队任务)。 6. 存档编辑 在《龙珠:超宇宙2》中,编辑存档主要有两种方法,分别是存档编辑器和XML序列化器。虽然存档编辑器是一个专用程序,拥有独立的有序界面,可让你编辑任务进度或分数、金钱数量、 inventory(物品栏)中的物品等内容,但序列化器是一种用于解密存档文件的工具,以便你能在任何文本软件中手动编辑存档。尽管它使用起来不那么容易,但能够完成存档编辑器无法实现的某些操作,例如编辑剧情标记或更改当前可用或已解锁的离线任务。 注意:为避免在编辑过程中可能出现的任何问题,请务必在编辑前备份你的存档文件。你的存档文件位于“Steam > userdata > [用户ID] > 323470 > remote > DBXV21”文件夹中,文件名为“DBXV2.sav”。 6.1 《龙珠:超宇宙2》存档编辑器 Lazybones的存档编辑器是最广泛使用且常见的存档文件编辑方式。它拥有专属的用户界面,每个选项都有详细说明,使整个操作过程变得非常简单。
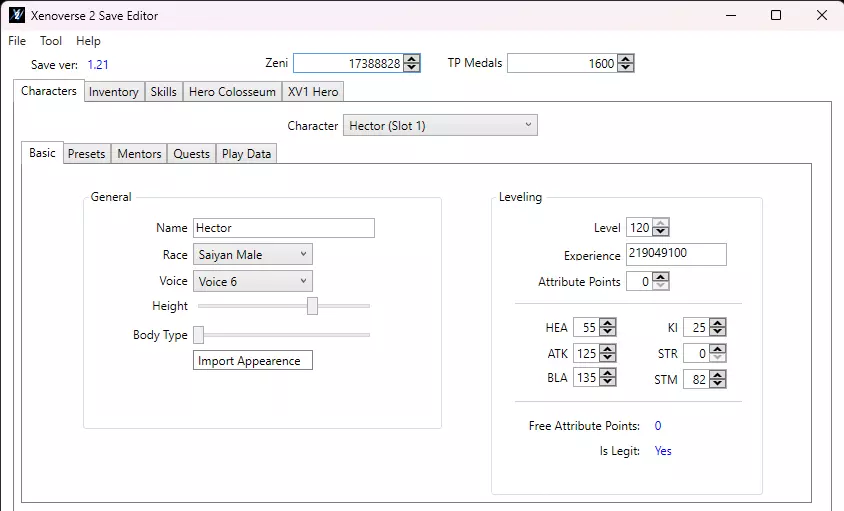
使用方法:解压文件夹并打开“Xenoverse 2 Save Editor.exe”程序。首次使用时,软件会提示你输入游戏目录。完成后,编辑器界面将加载。接着,点击左上角的“文件”选项,然后点击“打开”。在上述目录中找到你的存档文件并打开。编辑器随后会加载你的存档文件,允许你编辑其各项属性。 6.2 XML序列化器 该序列化器是一款可将许多XV2文件从二进制转换为XML格式,也可将XML转换回二进制的工具,包括你的存档文件,之后你可以使用任何文本编辑软件(如Notepad++)手动编辑。使用此方法,请按照以下步骤操作: - 将你的存档文件复制粘贴到序列化器文件夹中; - 将其拖放到【XV2 Xml Serializer.exe】文件上; - 会出现一个CMD面板,持续几秒钟,表明程序正在转换你的存档文件; - 几秒钟后它会自动关闭,并生成存档文件的.xml版本; - 要将其转换回.sav文件,请删除原始存档,然后按照上述相同步骤操作。 7. 常见问题 - 如果Eternity的安装程序要求你插入包含游戏的目录,那是因为可执行文件不在游戏文件夹内。如果是这种情况,只需按照步骤1中列出的相同方法找到游戏目录,并将其粘贴到“游戏路径”栏中。 - 【“Failed to apply patch [patch name]”】:你使用的补丁程序版本已过时。下载并安装最新版本即可解决此问题。 - 【“InitCharaList failed.”】:你可能安装了与游戏最新版本不兼容的模组,或者补丁程序尚未更新。解决方法同上。 - 【“The application was unable to start correctly (error code). Click OK to close the application.”】:你尝试通过启用了EAC的START.exe以EAC模式启动游戏。若要离线游玩,请改为通过DBXV2.exe启动游戏;若希望使用模组在线游玩,请在补丁程序中启用EAC选项。-“此X2M需要更新版本的安装程序/创建器。”:请阅读此提示。 以上就是全部内容!希望你喜欢本指南。如果你对本指南有任何需要补充或改进的内容或主题建议,欢迎在下方留言,我会认真考虑。 祝你游戏愉快!