换一换
换一换 


讨论帮助新玩家提升《魔法门之英雄无敌:元素守护者》(MT2)表现的策略、技巧、窍门和游戏机制! 介绍及本指南使用方法 龙、天使、虫子、蘑菇、疯狂科学家……它们有什么共同点?答案是,它们都有一列火车需要守护,而且需要你的帮助!然而,塞拉芬和他受泰坦祝福的爪牙正准备将你的圣火彻底摧毁,有时他们确实会得逞。那么玩家该怎么办?当然是反击回去=D 抵御他们的攻击,粉碎敌人的阵线,获取金币来增强你的卡组实力,然后狠狠地反击他们!
本指南面向新手和初级玩家,尤其是那些在游戏系统方面遇到困难,以及在契约1中难以获胜的玩家。如果你对卡组构筑/类rogue游戏非常熟悉,并且能轻松应对永恒炽天使及其爪牙,那么可以直接查看我其他氏族的指南。但如果你的圣火总是被摧毁,又不确定自己哪里做错了……那你来对地方了!我们将探讨《怪物火车2》独特的游戏玩法、游戏中的各类挑战、改进卡组的方法以及需要避免的误区。 只要稍加练习,无论你的队伍是由龙裔天使还是苔藓科学家组成,你都能成功击退永恒炽天使!如何使用本指南 本指南涵盖了《怪物火车2》中各种学习和提升技巧的内容。不建议您通读所有内容,而是专注于您遇到问题的相关部分。 如果您是游戏新手,想要了解如何获胜: 目前,先从基础入门技巧、重要游戏玩法要点、获胜策略以及主要强化:飞行首领遗物等部分开始。这些内容将为您提供一些建立基础的建议。 如果您不确定在地图上前往何处以及购买哪些升级: 您需要查看钢铁/魔法/武器/饰品商人以及地图元素相关的部分。我们将探讨所有这些选项的价值,以及选择不同路径能获得什么。 你本来进展顺利,结果一个烦人的首领/敌人毁了你的游戏进程!这种情况屡见不鲜!在这里,你需要浏览【危险敌人】部分、【敌人波次:应对后排威胁】、【首领】和【飞行首领】。这些部分将讨论游戏中遇到的各种威胁,以及相应的潜在应对方法。 我无法应对游戏后期敌人巨大的生命值!没错,这是该游戏的核心挑战之一。我们将在【首先,了解你的氏族】、【接下来,利用你的氏族效果】、【组合示例】以及多个【利用暴躁头】的示例部分中讨论通用策略。如果你还没读过【获胜的哲学】,那部分内容在这里也很重要。我知道如何造成伤害和击败敌人,但我的单位被摧毁得太快了!当然,坚固的防御与打造超强进攻卡牌同样重要。现在是时候了解【保护后排攻击者】【确保单位安全】【坦克的记忆】和【格挡者:新手与伙伴】这些内容了,其中讨论了生存策略。 我打到最后了,但就是打不过炽天使艾特努斯!每个炽天使的三个形态都有对应的【最终 Boss 部分】!你可以在游戏开始时看到自己将要面对的形态,这样就能提前了解最终的对手,做好准备~ 我喜欢这款游戏,但讨厌【腐化】!我们都有过这种感受。我专门有一个章节讲【腐化】……它确实很棘手!如果你还没有浏览过相关内容,【阻碍者】、【危险敌人:统治者】以及【永恒炽天使:统治者】部分也会对你有所帮助。 我已经了解了这里的所有基础知识,并且想在特定氏族/单位/冠军方面变得更强!很好!现在可能是时候查看氏族专属策略指南了,我已在此处提供链接。 【注意:这些内容包含可解锁游戏内容的轻微剧透!】
火裔氏族战略指南
放逐之城 氏族战略指南
月神女巫氏族战略指南
地下军团氏族攻略指南
拉撒路联盟氏族战略指南
无官方中文译名,无法准确翻译,已删除。

《怪物火车2》基础入门指南 在深入了解游戏系统细节之前,我先为大家提供一些《怪物火车2》的通用入门技巧! 选择契约等级1开始游戏:在开始游戏后不久,《怪物火车2》会允许你逐步挑战各种“契约等级”(难度层级),这些等级只会增加游戏对玩家的挑战性。唯一的例外是契约等级1,它会通过为你的 run 额外提供卡牌以及来自你所选择的两个氏族之一的免费稀有级旗帜单位作为奖励。
虽然敌人会比初始难度稍强一些,但我强烈推荐契约等级1,因为新增的卡牌和额外单位是了解游戏中不同卡牌和策略运作方式的绝佳途径!在契约等级1下,你也能轻松获得大量游戏乐趣并解锁所有内容。这没有任何缺点,而且会让你比坚持无契约模式游玩变得更强。 暂时坚持你的英雄路线:选择英雄路线后,只要你继续沿着该路线前进,就始终能解锁该路线的第二和第三层级。随着你对游戏和英雄优缺点的了解加深,我强烈建议将你的英雄路线提升到第三层级。这些改动将以易于理解的方式自然提升角色能力,让玩家能更轻松地逐步掌握游戏的复杂机制。 尝试挑战试炼!在战斗开始前,非飞行类首领战会提供提升战斗难度的选项,具体方式包括:对玩家施加限制(例如每回合减少一次抽卡或余烬数量)、为敌方单位添加特殊效果(例如因“复活”效果需多次击败),或在战斗开始时增加额外敌人(例如一群低生命值的杂兵,或能阻挡部分攻击的雕像)。

虽然这些试炼有时可能很艰难,在错误的情况下甚至可能导致当前回合失败,但通过这些试炼获得的额外金币非常可观,这将大大有助于提升你的游戏进程!如果你的单位拥有出色的属性,你的法术也有很棒的升级,那么游戏中的挑战就会更容易克服,而这一切都需要你有足够的金币! 所有飞行 Boss 都会在部署阶段放置了单位的最高楼层生成。它们的生成点是预先确定的!知道这一点很有帮助~ 尝试使用不同的单位吧。我知道,也许你曾经用恶魔雏鸟和他那奇怪的战斗呐喊完成了一次精彩的游戏。所以现在每次遇到他你都想选择他?嗯……不要这样。应对游戏中的挑战有多种方法,即使使用完全相同的氏族组合和英雄也是如此。学习如何让其他类型的单位和卡牌发挥作用是提升游戏水平的重要途径之一。 当你开始一局游戏时,唯一确定的就是你的英雄和初始卡牌……即使你反复获取流放旗帜,你心爱的新手单位也可能永远不会出现,因此多样化选择并了解它们的能力是个好主意! 如果有疑问,我在氏族策略指南中讨论了游戏中的每一个单位(无论大小),如果你不确定某个单位的作用,可以去浏览这些指南。请注意,这些指南包含未来游戏解锁内容的轻微剧透! “跳过”也是一个选项!在游戏过程中,你会不断获得新卡牌。和其他卡牌游戏一样,过度扩充牌组会限制你稳定发挥卡牌效果的能力。虽然在遇到旗帜单位时通常不应跳过,但如果在选牌阶段没有找到能配合你当前构筑的卡牌,那就跳过吧!选择少量金币,避免牌组变得臃肿。 大多数情况下,一局游戏中你这样做的次数不会超过几次。始终停留在初始弱卡牌阶段的牌组通常无法应对游戏后期的挑战!但加入一张高灰烬消耗且效果与其他卡牌不匹配的稀有卡牌,可能会得不偿失。只要击败 Boss 就能获胜!即使中层和顶层有一波波敌人会让你的【Pyre】(火堆)陷入毁灭,一旦 Boss 被击败,战斗就宣告胜利!如果你的配置足够强大到能摧毁 Boss,就可以“放过”一些可怕的敌人。 并非毫无希望:在失败前重试战斗!我懂这种感觉……Boss 在三楼,血量丝毫未减,如果你按下结束回合按钮,它就会把你的【Pyre】砸得粉碎。它一路击溃你的盟友,你感觉无助。 但并非如此!因为你要在列车的多个楼层进行防御,你有多个盟友,还有一副充满各种卡牌的牌组,你的牌组表现有时可能完全取决于你决策中的微小变化。拥有践踏效果的 Boss 极为稀少,因此,一个能多承受一次攻击的坦克(拥有更高护甲/生命值)可能会带来天壤之别! 在放弃之前,先尝试其他方法……“布局调整”(不同楼层安排不同盟友,或左右重新排列单位)曾帮助我们在看似无法攻克的高难度战斗中赢得数十场胜利。尝试给不同单位使用增益效果/装备,尝试集火不同敌人……甚至,如果能因此击败 Boss,让较弱的敌人到达火堆也无妨! 无论如何,即使是微小的决策改变,也可能带来巨大的不同,这会让你感到惊讶。试试看吧! 用升级来填充(部分)卡牌!我们稍后再讨论这个问题,但选择少量强力卡牌比选择大量中等卡牌要好得多。游戏中你将有机会复制卡牌,无论其升级多么强大和昂贵,所以专注于打造一些值得复制的优秀卡牌吧!来自【天穹壁龛】的事件可能会让你为已满级的卡牌添加更多升级,这非常棒~
哎呀! 别追求大,要追求极致!我们稍后会详细讨论,但《怪物火车》的系统就是要让你全力投入到强力卡牌和策略中。寻找机会对强力卡牌进行反复、大量的投资,才能赢得胜利。避免使用传统RPG逻辑,比如给坦克加攻击力,给攻击者加生命值。 借鉴他人经验 假设你已经阅读了本指南,也看了氏族策略指南,但该死的是,你还是不知道怎么赢。不过,游戏中的“每日挑战”虽然给游戏系统增加了许多奇怪的修正,但也有一个非常实用的功能…… 在你的回合结束后(即使你立即放弃),你可以查看玩家的在线排行榜,包括他们的最终卡组!虽然不必只关注顶尖玩家,但每天都会有数十名玩家获胜,查看他们的套牌,你就能了解他们所创建的卡牌类型! 正如我们稍后会讨论的,制作出色的卡牌是这款游戏成功的最大关键。查看其他玩家的套牌,你可以了解他们构建的强力卡牌,以及未来你如何进行类似操作。所以别害羞,借鉴一下他们的思路吧! 重要的游戏玩法与【光明熔炉】 游戏内的提示和教程战斗已经很好地介绍了游戏的核心基础,但让我们花几分钟时间谈谈游戏的一些重要方面,这些方面有助于你在每次游戏过程中做出决策。你可以查看整个地图,并了解将要面对哪些飞行 Boss!在地图界面时,你可以向上移动/滚动来查看地图上各个地点的分布情况。这对于选择要前往的地点非常有帮助。 此外,你将遇到的飞行 Boss 战斗也是固定的,包括它们技能的任何变体。尤其是在你熟悉游戏的各种细节之后,提前了解将要面对的敌人并据此做出决策会非常有帮助。
作为新手,建议先学习游戏的系统、战斗流程和策略,再尝试过度规划你的游玩路线。但如果某个飞行 Boss 一直让你头疼,那么当你的游玩路线可能会遇到他们时,或许值得留意一下! 你可以随意升级你的卡牌!如果你玩过《杀戮尖塔》这类游戏,《怪物火车》和《怪物火车2》可能会让你惊讶于卡牌可添加的升级数量和类型。与“普通/升级”卡牌不同,单位卡和法术卡通常有两个插槽,可添加你选择的升级。这让你有更多灵活性来创造有趣的组合~在天穹凹室,卡牌永远不会真正满格。天穹凹室(《怪物火车2》中相当于初代游戏隐藏洞穴的区域)充满了各种事件,这些事件能以多种方式改变你的卡组。其中许多事件甚至会为你卡组中现有的卡牌添加强化效果。在这种情况下,你可以为卡牌添加的强化数量没有限制!即使一个单位的两个强化槽已填满,若天穹凹室允许你为该单位添加强化,你仍可以将其添加到这个“已满”的单位上,使其变得更加强大!
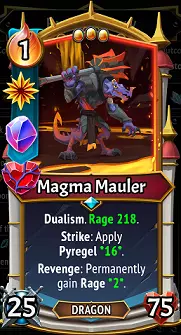
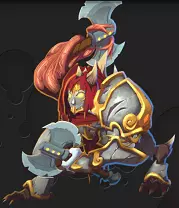
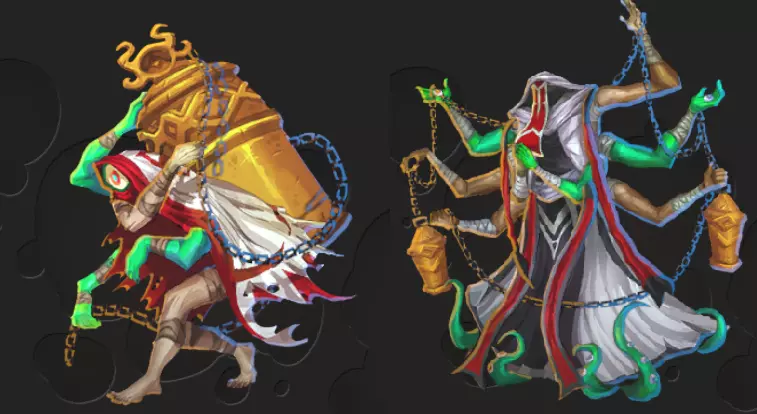
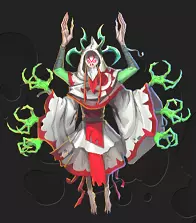
这只可怕的熔岩巨兽已经“装备”了二元性和巨石,但天界凹室事件让我们也能为他施加野性祝福! 游戏进程中没有经验值/XP/成长系统。敌人和 Boss 会在整个游戏过程中逐渐变强,最终生命值和攻击力会达到非常高的数值(甚至远超原版《怪物火车》的数值)。你在每场战斗中的目标是生存下来,赚取一些金币和有用的新卡牌。然而,当敌人的力量不断增强时…… 你的单位卡牌和法术卡牌不会自行成长。赢得一场战斗只会为你带来金币和新的卡牌,仅此而已。你必须在地图上的商店使用整个回合中获得的金币来提升卡牌的效力。卡牌初始时拥有相同的属性和功能,只能通过你选择的升级来强化。不过,每个回合都有两个例外情况……你的英雄和光明熔炉。
你的套牌中有一张重要的卡牌会在整个游戏过程中不断增强。每局游戏都会有一张【冠军】卡牌助力你的征程;它在战斗开始时总是可以免费使用,即使被击败也不会有任何惩罚,而且你在一局游戏中最多可以访问三次【锻造炉】来提升其能力。每个【冠军】都有三条潜在的成长路线,而【锻造炉】每次都会为你提供其中两条路线供选择。在第二次访问【锻造炉】时,它通常会提供你所选路线的第二阶段,或者另一个融合了多条路线特点的选项(通常称为“灵活选择”)。只要你处于某条路径的二阶(例如,你选择了金冠菲尼克斯,并将其升级到金冠二阶),第三个熔炉也会保证为你提供该路径的三阶,这非常有帮助,因为一阶到三阶会使你的英雄效果的属性和效力逐步提升。
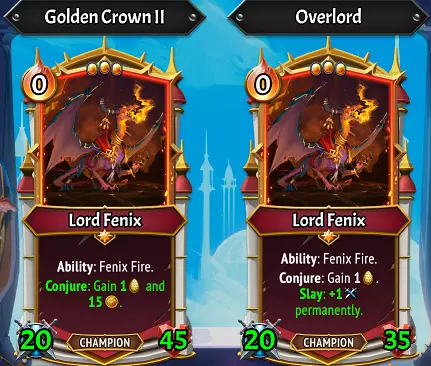
当你刚开始玩这款游戏时,我强烈建议你坚持从I到III的同一条路线。这将让你更容易理解你的英雄的潜在技能组合,而且通常比灵活路线提供更高的属性和效果强度。灵活路线往往会导致属性较弱,并且在游戏后期的成长水平较低,因此更适合那些已经完全理解游戏系统的玩家。虽然使用各种英雄进行灵活搭配有很多理由,但在你学习游戏的过程中,应专注于英雄每级提升的效果和属性,并思考这对你预期的使用方式意味着什么。 在图示示例中,你可以看到我所说的例子。持续选择金冠II和金冠III会不断提升菲尼克斯的生命值以及【召唤】效果的强度。转向其他路径会略微降低他的属性,并将增强的召唤效果强度替换为其他可能对当前游玩进程不值当的效果。 切换路径或转向其他路径可能会带来一些非常有益的收益或组合,或者在初始路径不奏效时成为一个关键选择。需要明确的是,这样做有很多理由——例如,在顶级玩法中,地下军团的冠军 bolete the guillotine 转向其他路径的次数比他达到III级的次数更多。但在学习阶段,建议先坚持I-II-III级,先了解该冠军的表现! 你的冠军的光明熔炉在一局游戏中会出现三次。第一次是在开始时,用于确定你的初始路径。第二个在第三环/第三场战斗的首个飞行 Boss 之后,第三个在第六环/第六场战斗的第二个飞行 Boss 之后。除了锻造炉外,大多数英雄的技能不会有变化,所以请记住,这也意味着你的英雄在那些飞行 Boss 战斗中可能会有些吃力……这完全正常!你的其他卡牌可以通过英雄无法使用的方式升级,因此尽管你的英雄状态与三场战斗前相同,但飞行 Boss 战斗会带来更强的敌人。说到飞行 Boss,战胜它们也是你自动提升力量的另一个关键途径…… 主要增强:飞行 Boss 神器
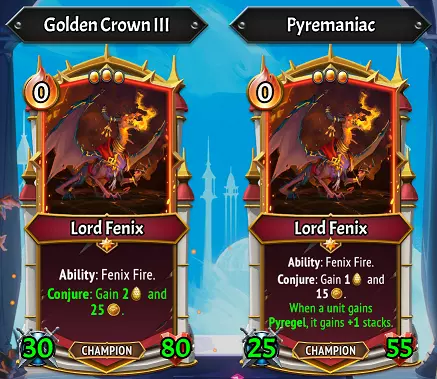
击败飞行 Boss 后,你将获得三个非常强大的【圣物】供选择,它们都会提升你的【柴堆】的生命值和攻击力。这些圣物对于在整个游戏流程中提升实力至关重要,有时选择起来可能会很困难。无论击败的 Boss、使用的氏族或选择的【柴堆之心】如何,圣物选项都是相同的(不过不同的【柴堆之心】可能会获得不同的属性加成)。选项如下:

地狱之火:每回合额外获得1个余烬,并额外获得1个部署余烬。这使你的每回合默认余烬变为4个,部署余烬变为6个。更多的余烬能帮助你在回合中使用更多卡牌,并负担更强大的卡牌。更多的部署余烬则有助于你在战斗开始前放置更多单位,这也能帮助减小你的牌组规模(因为你已经使用过它们,不会再抽到了)。
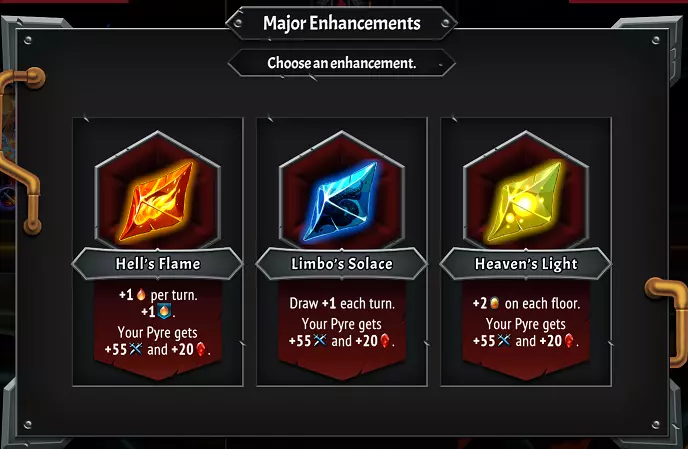
幽界慰藉:每回合额外抽一张牌,标准手牌上限增加1。你的初始手牌上限为5,每次获得幽界慰藉都会使其+1,帮助你更快抽完牌组,且每回合拥有更多手牌。由于通常无法控制抽到升级卡牌还是较弱卡牌的顺序,因此抽更多牌对几乎所有对局都非常有利。

天堂之光:列车每层额外获得2个空间,总共可多放置6个单位空间。这是一个巨大的提升(是《怪物火车》一代所提供数值的两倍!),能让你更轻松地填满列车楼层,从而更充分地利用单位卡牌的效果、攻击和技能。重要的是,我可以说超过90%的游戏对局至少会选择一次天堂之光,因为列车拥有更多空间能为你提供更大余地,从而从影响整层友军的效果中获得更大收益。 通常来说,选择哪个都没有错,因为它们都能为你的对局带来极大益处。在个人体验中,99%的对局里,【圣光】或【地狱之火】都是我们的首选。《怪物火车2》是一款需要你快速为敌人波次做准备的游戏,这两个选项都能更有效地帮助你准备列车以应对即将到来的威胁……要么是获得空间在楼层上部署更多盟友,要么是能在开局部署更多盟友并使用更强的法术/装备。 【圣光】是我们最常选择的首个选项。当你面临这个选择时,除了你的冠军外,你可能至少已经获得了3个单位,至少还有两个持盾护卫和两个持矛护卫。如果想填满楼层,每层5个空间是不够的!这让你在多个楼层部署单位时拥有更大的灵活性,也能更好地利用提升所有盟友的效果。一个很好的例子是【费尔的先锋者】路线,它能为她身后的盟友提供勇气……如果有多个盟友在她身后,就能很好地利用这一效果! 【地狱之火】是我们一开始的第二选择。与你的英雄不同,可部署/旗帜单位都至少需要1点余烬,其中许多还需要2点或更多。提升到6点部署余烬对于更快派出强大的盟友非常有帮助,如果你已经创建了可部署卡牌,这也会很有益处。此外,每回合额外获得1点【余烬】可能至关重要;你解锁的前四个氏族可能拥有消耗3点【余烬】的普通卡牌,这意味着一回合内你需要用尽所有【余烬】才能打出这些卡牌!因此,如果你想使用像【放逐者】氏族的【神性】或【焰生】氏族的【炼金术】这类虽昂贵但实用的卡牌,4点【余烬】会非常关键。 【灵界慰藉】是个通用的选择,但我不建议将其作为你的首个首领遗物。每回合多抽一张卡牌固然不错,但如果你缺乏打出这些卡牌的【余烬】,或者你的列车空间太拥挤而无法部署所有单位,那它就没什么帮助了。 你选择的第二个首领遗物应根据当前游戏进程来决定!如果你觉得自己有足够的空间和【余烬】,【灵界慰藉】会是一个安全且实用的选项。不过,如有需要,你可以轻松选择与第一次相同的神器……两个【地狱之火】将产生5点余烬和8点部署余烬,而两个【天堂之光】会让每层列车拥有9个空间!所有这些都非常有用,这也是游戏中少数能随着时间自然增强效果的方式之一。除此之外?就是时候花掉那些金币了!

地图元素:选择轨道一侧 在整个游戏过程中,一个关键的决策点是选择你要行驶的轨道一侧,每次成功战斗后,你将能在地图上获得至少3个元素。各种选项包括: 光明熔炉

为你的冠军提供免费升级。这是你的套牌自然提升强度的少数途径之一。如果你的冠军因任何原因被清除(通常是通过虚空武装装备、碎魂天体壁龛事件,或特殊的运行 modifier【堕落冠军】),则此地点将失效。 赫尔扎尔的宝库
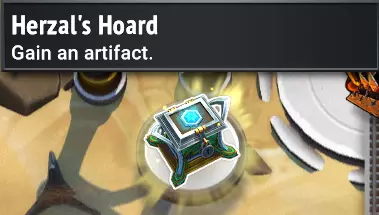
你可以选择两件免费的【神器】。在第一场战斗开始前,你将与【冠军锻造炉】一起获得其中一件。 你可能会获得一件无氏族神器(共37件),或者来自你所属两个氏族中任意一个的神器(每个氏族各11件)。除非你使用【焰生氏族】的能力掠夺【巨龙宝库】,否则在本次游戏过程中,你未选择的神器将不会再次出现!由于你只能从59个选项中看到2个,因此找到特定想要的神器的几率非常低。不过,【饰品商人】处的神器价格昂贵,每件约125-175金币,所以免费获得一件是相当不错的! 如果愿意,你也可以选择跳过并获得少量金币。 氏族与子氏族旗帜
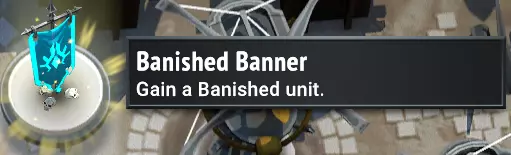
从该氏族获得1个稀有(蓝钻石)或史诗(紫钻石)旗帜单位。这些单位始终是可部署/“旗帜”单位(卡牌左侧有可见的蓝色旗帜标识),并且你总会获得2个不同选项可供选择。虽然你可以消耗少量金币跳过这些选项,但我强烈建议不要这样做,尤其是在游戏初期,因为《怪物火车2》的游戏平衡机制设定,当你进行到几场战斗后,需要拥有多个旗帜单位! 第一场战斗后(第2环),每个氏族都会提供1个旗帜单位,并且在第3环首次飞行 Boss 战前还会额外提供1个旗帜单位。后续旗帜单位最晚可能在第5环出现。虽然不是地图元素,但要记住,首次击败飞行 Boss 也会奖励你一次免费抽取旗帜单位的机会;你将从三个选项中选择一个,其中可能包含来自你任意一个氏族的 uncommon(稀有)或 rare(史诗)单位。 另外,希望名称已经说得很清楚,rare(史诗)单位要稀有得多,所以如果遇到了一定要重点考虑! 【天体凹室】

查看一个能让你通过选择来优化本局游戏的事件。这是《怪物火车2》中与初代游戏里“隐秘洞穴”功能相当的设计。地图上会在不同时间出现多种不同的事件,它们对本局游戏的影响程度各不相同,小到几乎可以忽略不计,大到能让你“现在完全基于这个策略来构建一切”。 地图的两侧在第3环都必定会有一个【天界凹室】,该区域位于首次对抗飞行首领阿尔基翁或织肉者之前。以下是一个事件示例:
柴堆:余烬

为你的圣焰恢复其最大生命值的30%。圣焰生命值会在战斗间继承,而恢复它的机会非常稀少,因此这是一个值得前往的重要地点。即使你在战斗中毫发无损,【天界凹室】事件以及更高等级的【契约】也可能引入会伤害圣焰的元素,这使得在每次游戏流程中至少规划一次前往此处通常是值得的。军械库

从房间与装备卡牌中选择一张加入你的卡组。这些房间与装备可以是无氏族的,也可以是你当前使用的任意一个氏族的。这是除了拜访武器商人外,少数能获取无氏族房间与装备的途径之一,而且和赫尔扎尔的宝库一样,获取这些卡牌无需花费。虽然我很少会因为某个区域有军械库就特意选择它,但几乎每次前往都值得。 需要注意的是,提供的卡牌不一定是“新”的。军械库中的卡牌可能与卡牌 draft 中提供的相同(如果属于某个氏族),也可能与武器商人出售的卡牌相同。尽管概念相似,但这使得它的功能与赫扎尔的宝藏略有不同。如果愿意,你也可以选择消耗少量金币来跳过此步骤。遗忘恩赐

无风险的黄金注入。对提升你的游戏进程非常有用,若与商人搭配,可视为增加收入,帮助你有足够资金购物。钢铁商人
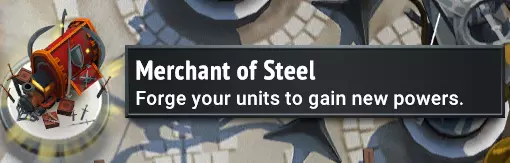
花费金币升级你的单位卡牌。这通常是游戏中最重要的商店,我建议每次游戏至少访问两次。魔法商人
花费金币升级你的法术卡牌。这通常是游戏中第二重要的商店,不过一些以法术为主的构筑可能比钢铁商店更需要它,而武器商人拥有独特的特性,可能使其成为更优的选择。武器商人

花费金币可购买新的装备和房间卡牌,包括无派系选项。此外,武器商人还提供两项其他服务:花费金币将装备或房间变为可部署状态(可在部署阶段使用),以及装备融合(将两张独特的装备卡牌合成为一张【融合装备】)。 这两项服务是武器商人独有的,考虑到装备和房间卡牌的潜在效力,在这里停留对一局游戏可能非常有价值。不过与【钢铁与魔法】不同,它没有固定的商店商品,因此随机性更大。 饰品商人

花费金币购买新的遗物。在与塞拉芙·艾特努斯战斗前,火车轨道两侧必定会出现这家商店。和赫尔扎尔的宝库类似,这里可能包含各个氏族的任何遗物,或是37件无氏族遗物。每件遗物的购买价格通常在125-175金币之间。 在合适的构筑中,这家商店可能非常强大,但由于较高的成本、更广泛的选择池以及可能出现时机不当或无用的遗物,它通常是最不重要的商店。 不稳定漩涡

【天界圣泉】:可免费从你的牌组中移除最多两张非冠军卡牌。这有助于减小牌组规模,确保你能在战斗早期抽到更优质的卡牌,同时避免在部署阶段因部署/旗帜卡牌过多而触发10张卡牌的“手牌已满”错误。在高契约等级时,如果你不想在战斗中尝试处理钙化余烬灾厄卡牌,也可以用它来移除这些卡牌。
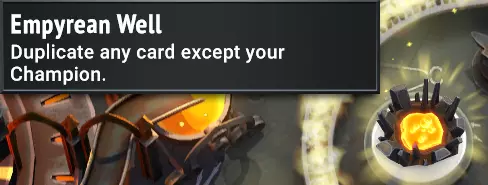
复制你牌组中任意非英雄卡牌的精确副本。关键在于,这包括该卡牌上的所有升级和加成!创建一张非常强大的卡牌并复制它是游戏中成功的绝佳策略,因此一旦我们创建了非常强力的卡牌,我们通常会根据复制它的可能性来决定接下来的行动方向!这是一个很棒的地点。 钢铁商人:你的最佳伙伴! 在你的游戏过程中,你需要决定在哪里以及如何花费你的金币,因此虽然我们会讨论商店,但我们将从游戏中最重要的商店——钢铁商人开始说起。
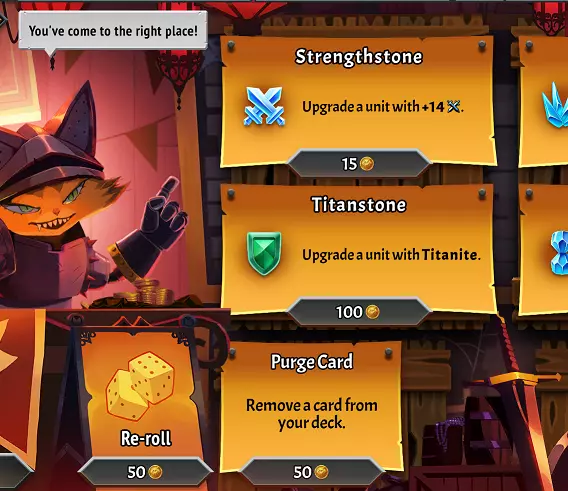
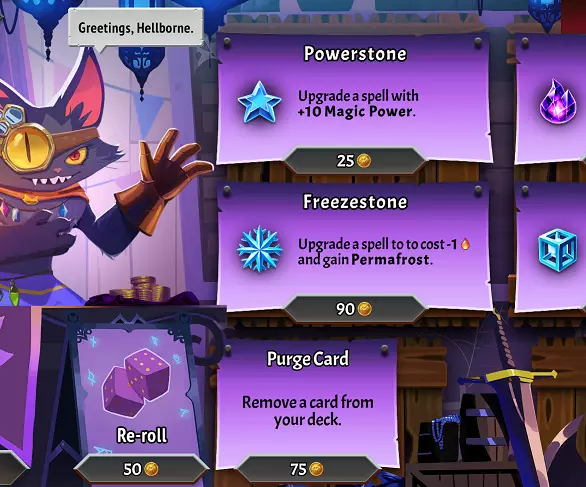
我们当然有! 为什么它最重要?特别是由于《地铁:最后的曙光》中的部署阶段,你的单位将成为你在游戏中表现的最重要元素。旗帜/可部署单位可以在第1回合准备好攻击和防御你的列车,然后通过各种方式提升它们的性能。如果你能让它们存活下来,这意味着单位的升级将在战斗的每一个回合都对你有所帮助!而且游戏中很少有不依靠单位就能可靠战胜敌人的构筑,因此钢铁商人对于提升单位性能至关重要。 钢铁商人升级:在商店中,你将始终获得四个固定升级中的两个,以及七个“稀有”升级中的两个。如果你有能力刷新商店,将会获得“另外两个”保底升级,以及七个“稀有”升级中的另外两个。刷新后不会出现相同的选项,因此请确保在刷新前先从商店购买你想要的物品。 从策略上讲,这意味着你也可以提前做些规划,比如,如果商店里没有力量石或生命石,你知道刷新后它们就会出现!稀有升级也比保底升级贵得多,所以如果你希望刷新并获得某个特定升级,有时可能需要跳过购买某个升级。 保底升级

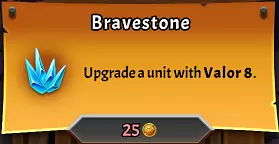
心石:+20生命值。这对于保持你的单位存活是一个重要的增益。在高契约等级下,即使是持盾侍从的25生命值也无法对抗早期首领,而且游戏只会从那里变得更难!这个升级最常用于你想要放在前排/为你承受伤害的单位,但对于你觉得无法保护的后排支援单位,或者为了增加阻挡单位所阻挡的生命值总量,这也是一个不错的选择。在紧急情况下,你可以将其给予攻击者,但正如我们在【保护你的后排攻击者】部分将要讨论的,这通常是一个糟糕的选择。
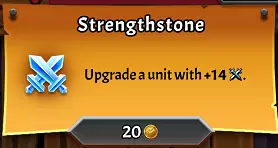
力量石:+14攻击力。这是提升部队进攻潜力的重要且廉价的方式。它能使持矛护卫的战斗力翻倍,也能为后排支援单位提供不错的小幅加成。绝对不要将其交给前排坦克,尽管在某些情况下还有其他强力的进攻型升级,但对于那些能反复攻击/打击的单位来说,这是一个很棒的升级。像夜莺、暴躁者、瘟疫医生等单位装备它效果显著!此外,由于该升级非常便宜,你可以放心地将其用于任何不需要其他特定升级的后排友军。
氏族专属升级:你的主氏族拥有一个必定出现的独特升级,例如贪婪石、勇气石、微光石、苔藓石和科学怪石头。这些升级价格低廉,价值差异极大——如果你想深入了解它们的价值,可以参考氏族策略指南。

子氏族专属升级:你的子氏族升级也会作为一个保底选项出现! 钢铁商人:续篇 稀有升级
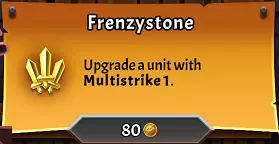
狂热之石:多重打击 1。这在《怪物火车》一代中是极为重要的升级,在此作中依然重要。让那些能获得攻击力/狂怒/勇气,或在攻击时施加效果的单位进行多次攻击,是一个强大的增益。大多数游玩流程都希望至少能见到一次这个升级!

速度石:+10攻击力及【迅捷】效果。虽然比力量石稍弱,但【迅捷】伤害的加成能让你在战斗开始前就消灭敌人,即便你无法通过法术和技能做到这一点。这对拥有【横扫】效果的单位,或是能在战斗中大幅提升自身攻击力的单位最为有用。记住,敌人的波次通常会把防御型坦克放在前排,所以如果无法提升这些数值,一次小小的【迅捷】攻击对他们来说可能意义不大!
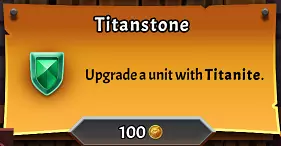
泰坦石:泰坦矿石。这是坦克单位的强力升级,泰坦矿石能将受到的所有伤害减半,相当于生命值翻倍!更棒的是,即使该单位获得护甲,泰坦矿石的效果依然有效——这意味着即使某单位通过某种效果获得10点护甲,装备泰坦矿石的单位也需要受到20点伤害才会被击破!这是一项极佳的升级,无论你是依赖治疗还是护甲/英勇值来维持生存,它都非常出色。

二元性:双重性。重要的是,此效果对许多单位无效。双重性会提升该单位施加的增益或减益效果的强度,以及单位卡牌本身自带的增益或减益效果。进行此强化时,若未看到卡牌上的效果发生变化,则可认为该单位不受双重性影响。不过,对于合适的卡牌而言,将效果强度翻倍是极为强大的效果,这是因为许多单位的设计核心就是施加效果——将效果翻倍就如同获得了两倍的支援! 此外,有两种情况双重性会产生效果,但不会立即显示在卡牌上。如果某个单位拥有带有减益效果的技能,例如鼻涕幼龙或肉钩,该技能本身会获得双重性加持,效果强度翻倍。同样地,如果某件装备会施加增益/减益效果,并且将其给予拥有【二元论】特性的单位,例如【永恒之光】在攻击时施加的【英勇2】效果,那么该效果的强度也会翻倍!

【微型石】:缩小至1格。你的楼层容量十分宝贵,因此占用1格的单位最容易部署!其特别之处在于,无论单位原本体型多大,使用后都会变为1格,即便之后再为其升级【大型石】也不会使其变大!通常你的坦克是体型最大的单位,将它们微型化有助于节省空间,但对其他单位(如集群上校)使用微型化也能带来不错的效果,以便在楼层上容纳尽可能多的单位。
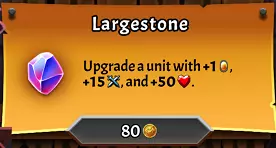
巨石:+50生命值,+15攻击力,+1空间。这是一次极佳的强化,其价值超过2个心石和1个力量石的总和!虽然它会增加单位的体型,但只要你能为其腾出空间,由此获得的属性提升几乎总是值得的。生命值的提升足以让任何单位都能充当一定程度的坦克,攻击力的加成是该商店能提供的最高数值,并且其效果甚至可以与微粒石叠加。

不朽之石:无尽。这是一种可能改变游戏格局的效果,能确保被击败的单位成为你下一张抽到的卡牌,并完全恢复生命值,随时可以再次出战!拥有无尽效果的单位会保留其在战斗中获得的所有属性加成,但会失去所有施加在它身上的增益和减益效果。常见的应用包括:反复使用带有召唤或消灭触发效果的单位;将其用于坦克单位,使其在被击败后重新召唤(在无情Boss阶段有助于保护多层区域);以及帮助抵消来自敌人和Boss(如支配者炽天使艾特努斯)的腐蚀类效果。需要注意的是:a) 你必须再次支付打出无尽单位的余烬费用;b) 由于你会在下一回合抽到此单位,重新抽到无尽单位会减少你抽到的新卡牌数量,因此可能会减慢你过牌的速度。换句话说,确保你能从无尽单位中获得良好的价值! 稀有升级的重要性:虽然氏族专属升级以及心石/力量石可能对表现有帮助甚至至关重要,但那些稀有升级往往能提供决定 run 走向的攻防能力,因此应该积极寻找。它们将在本指南的强力卡牌示例中占据重要地位! 魔法商人:你可靠的伙伴!
为什么这很重要?如果你和钢铁商人是最好的伙伴,那么魔法商人就是你联系人列表中第二重要的人。法术卡牌是游戏中数量最多的卡牌类型,它们定义和提升你游戏进程的潜在能力,很大程度上取决于你能为它们提供的升级种类。降低魔力消耗能让某些强力卡牌更频繁地使用,提升魔法强度有助于应对更大规模的敌人波次,还有各种其他强化可以提高法术的稳定性和强度。 不过,在一场典型的战斗中,大多数法术卡牌只会被使用一到两次,因此对这些卡牌的升级,其影响往往不如在钢铁商人处升级良好的单位那么显著。此外,某些氏族的初始卡牌和预设物品可能完全不包含法术牌,这使得早期前往魔法商人处变得毫无意义。因此,请查看我们下面将要讨论的升级内容,并考虑你的套牌是否有足够的法术牌来充分利用这一点。例如,你可能使用【地下军团】氏族的【断头台博莱特】,并搭配【炎生氏族】的【吉尔达女士】作为副氏族,同时拥有她的【肿胀幼兽】。此时游戏会为你预设两张【感染室】和两张【熔岩护甲】装备牌。在这种情况下,访问魔法商人只能为博莱特的【狂热征兵】卡牌添加升级,而许多昂贵的稀有升级完全不值得花费金币!魔法商人升级 在商店中,你将总是获得四个【固定升级】中的两个,以及七个【稀有升级】中的两个。如果你有足够的资源进行商店【重roll】,你将获得另外两个【固定升级】,以及另外两个七个【稀有升级】中的两个。重roll后不会出现与之前相同的选项,因此请确保在重roll前先从商店购买你想要的物品。 从策略上讲,这意味着你也可以提前做一些规划,例如,如果商店中没有【烬石】或【燃石】,你知道重roll时它们就会出现!【稀有升级】也比【固定升级】贵得多,所以如果你希望通过重roll获得某个特定升级,有时可能需要跳过购买某个升级! 【固定升级】

【烬石】:减少1点烬消耗。这总是很有用,它能让高烬消耗的法术在常规回合中更易使用,或者让原本消耗1点烬的珍贵法术变为“免费”施放。由于每次拜访魔法商人只能获得一个烬石,你需要优先选择那些你总是想用的法术,以及/或者那些你打算进行其他昂贵升级的法术。

【能量石】:+10魔法强度。这是提升治疗和伤害法术效果的廉价升级。如果法术已调谐,还会额外增加50点效果强度。+10伤害在前期能对敌人造成更大打击,在后期敌人生命值较高时也能确保该卡牌仍有作用。一个很好的例子是Pyreborne的【闪烁】,这是一个造成1点伤害的范围法术……将其提升到11点伤害会有很大帮助!
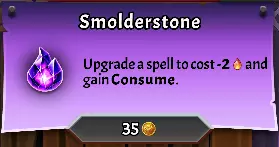
【烬石】:减少2点余烬消耗并获得【消耗】效果。此升级仅可添加到尚未拥有【消耗】修饰符的卡牌上。2点余烬是相当大的削减!【消耗】通常意味着你在每场战斗中只能使用该卡牌一次,但余烬消耗的减少提高了你有足够余烬使用它的可能性。通常最适合用于2-4点余烬的卡牌,但你也可以合理地将此升级用于0-1点余烬的卡牌,单纯为了添加【消耗】效果以帮助在战斗中缩减你的牌组。

Surgestone:+20魔法强度并获得消耗。只能添加到尚未拥有消耗修饰符的卡牌上。它是能量石效果的两倍,并且能使已调和卡牌的效果显著提升100!这对于帮助法术对敌人造成更大伤害以及强化强效治疗都非常有用,即便在游戏后期敌人威胁增强时依然实用。与余烬石类似,它能在战斗中帮助你精简牌组,因此很适合添加到像“Firestarter”或“Witchweave”这类本身不算强力但每场战斗仍能发挥一次作用的卡牌上。 魔法商人:续篇 稀有升级

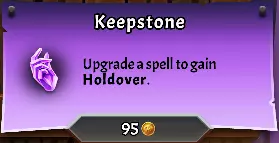
永恒石:移除消耗效果。通常来说,带有消耗效果的卡牌在设计上会比普通卡牌略强一些,所以永恒石能让你拥有多次使用强效卡牌的选择。这也使得消耗卡牌同样能享受留存效果。你还可以将永恒石与已附加了余烬石或涌动石效果的卡牌进行组合。例如,流放者的神性卡牌获得余烬石效果后,消耗变为1点余烬且具有消耗效果。再添加永恒石后,就只需1点余烬了!

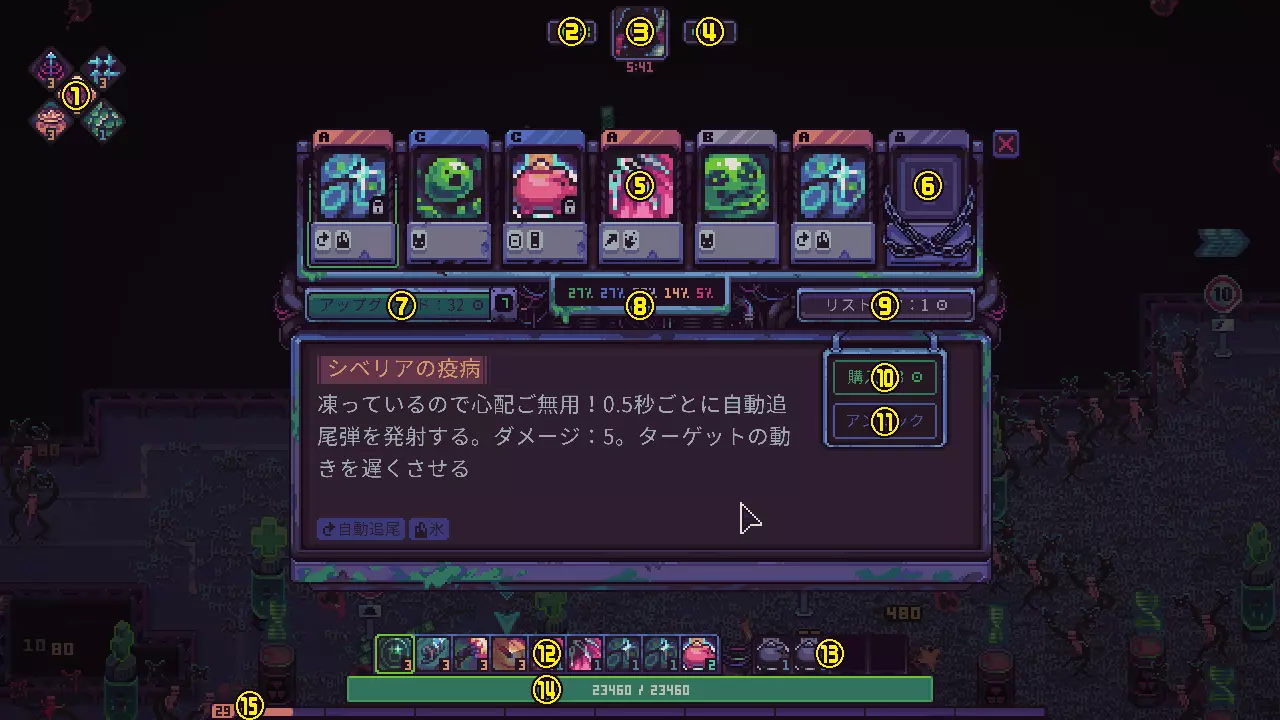
冻石:添加永久冻结效果并消耗1点余烬。和其他卡牌游戏一样,有时你会抽到不需要的法术牌,或者缺乏足够的余烬来使用它们(例如,炎生给你两张3余烬的炼金卡牌,而你在同一回合抽到了这两张)。冻石可以将其保留在你的手牌中,直到你准备好使用它。最适合用于需要把握最佳时机的法术,尤其对“爆发型”/X费卡牌效果极佳,这类卡牌在使用时会消耗你大量余烬。
持留石:添加持留效果。在合适的情况下,持留效果堪称天赐,它能确保法术牌使用后返回牌组顶端,以便再次抽到时(通常是下一回合)使用。这对于每回合都能提供普遍帮助的卡牌,以及能持续摧毁敌人波次的强力法术牌来说非常好用。不过,重新抽到这张牌也会减少每回合抽到的“新”牌数量,从而降低你循环牌组的能力。因此,要注意不要将此效果添加到效果不够强大的卡牌上,也不要在牌组中添加多个持留效果。如果你不确定是否要每回合都使用该法术,可将其与冻结石搭配使用!

觅石:添加固有特性并消耗1点余烬。固有特性是一个非常酷的效果,它能确保你在部署阶段后的初始手牌中包含此法术牌。对于那些在战斗初期建立优势的效果而言,这尤其出色。虽然第一波敌人通常是最弱的,但要记住第一波也可能出现飞行 Boss,这意味着你也可以在战斗开始时及时对它们施加减益效果!
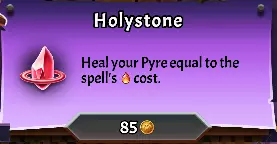
圣石:根据此卡牌消耗的余烬为你的火盆恢复生命值。这是一个有趣的升级,与X费卡牌和高余烬消耗卡牌搭配效果很好,能让你在战斗中为火盆恢复少量生命值。如果你想追求更高分数,火盆获得的任何治疗量都会抵消战斗中受到的伤害,当有敌人漏网或你选择不使用灾祸卡牌时,这一点很有用。
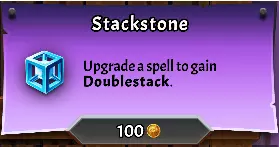
堆叠石:添加双重堆叠效果。此效果仅适用于【增益和减益卡牌】,并为卡牌添加2倍状态效果。由于这实质上能让你从法术卡牌中获得双倍价值,因此对于那些本身就具有强大效果的卡牌而言,这会带来非常显著的增强。该效果的成本过高,不适合用于低效果的卡牌,因此不建议将其用于初始卡牌,例如引火者、正当理由、月之仪式、鼓舞、孢子绽放等。 由于生成、增殖和混合不属于增益/减益效果,因此尽管它们的法术卡牌上有数值/数量显示,也无法获得双重堆叠效果。不过,你仍然可以通过我们接下来要讨论的双子石来复制它们的效果。
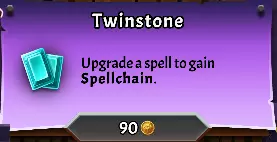
双生石:添加法术连锁效果。法术连锁非常强大,会立即将该卡牌的另一张复制加入你的手牌,可立即使用!但你也必须拥有足够的余烬来打出下一张卡牌,因此添加此效果到高余烬消耗的卡牌时需谨慎。此外,即使卡牌带有消耗修饰符,该效果依然生效,这为你提供了另一种重复使用消耗卡牌的方式。 武器商人:甜点菜单!
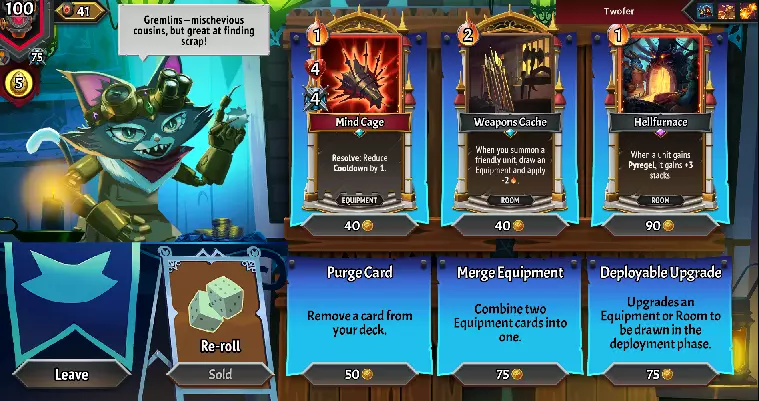
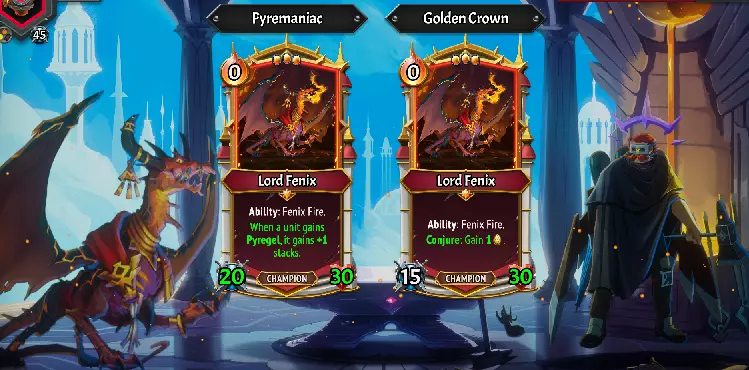
为什么军火商人成了“甜点菜单”?因为它提供的商品与餐厅里的其他所有东西都截然不同,有时候它是你餐点的完美补充,但有时候你就是没那个心情点它。 这在一定程度上是因为军火商人的运作方式与“钢铁与魔法”有多处不同:“钢铁与魔法”的商人都有保底升级,旨在强化你牌组中现有的卡牌。而军火商人更像是典型角色扮演游戏里的“商店”,你可以在这里购买新的卡牌加入你的牌组!商店会提供三张卡牌,你还可以重roll一次,再获得三张新的卡牌。 军火商人还提供两项独特服务,只有拜访这里才能获得。你可以为房间或装备牌添加【可部署】效果,确保其在部署阶段被抽中。你还可以【融合】装备,将两件独特装备的效果和灰烬消耗合并。每次探索中,这两种操作各只能使用一次。 军火商人是你在游戏过程中获取【无氏族】房间和装备牌的两种途径之一,这些牌在战斗结束后的卡牌 draft 中不会出现。商店的商品可能包含无氏族卡牌,以及你所选择的两个氏族中的卡牌。(示例图片中提供了两张炼狱之子卡牌和一张无氏族卡牌) 最后,由于武器商人会提供新卡牌供购买,因此它可能会比你通常预期的更早出售稀有卡牌(卡牌中央有紫色钻石标记)。 我们将花一点时间来讨论每个潜在方面的好处。 无氏族房间与装备 由于战斗结束时你所选取的卡牌总是属于你的两个氏族之一,因此你通常不会看到这些卡牌,必须通过地图上的军械库或武器商人处的 offerings* 来获取它们。
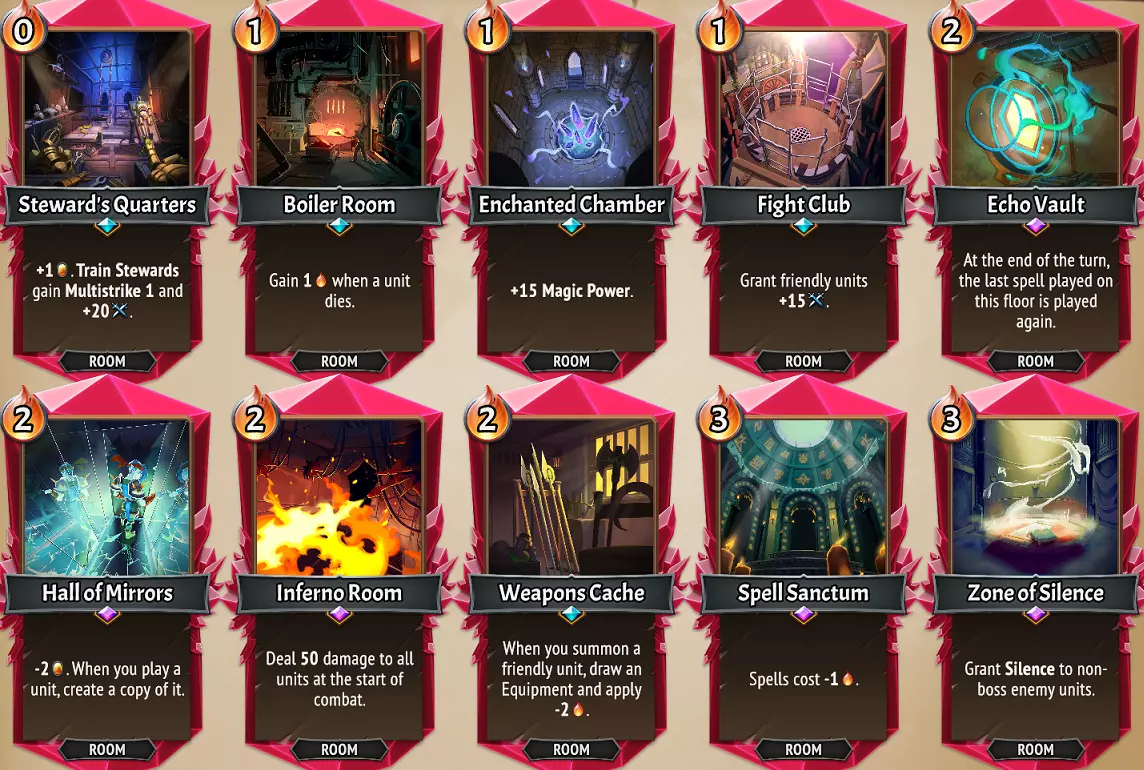
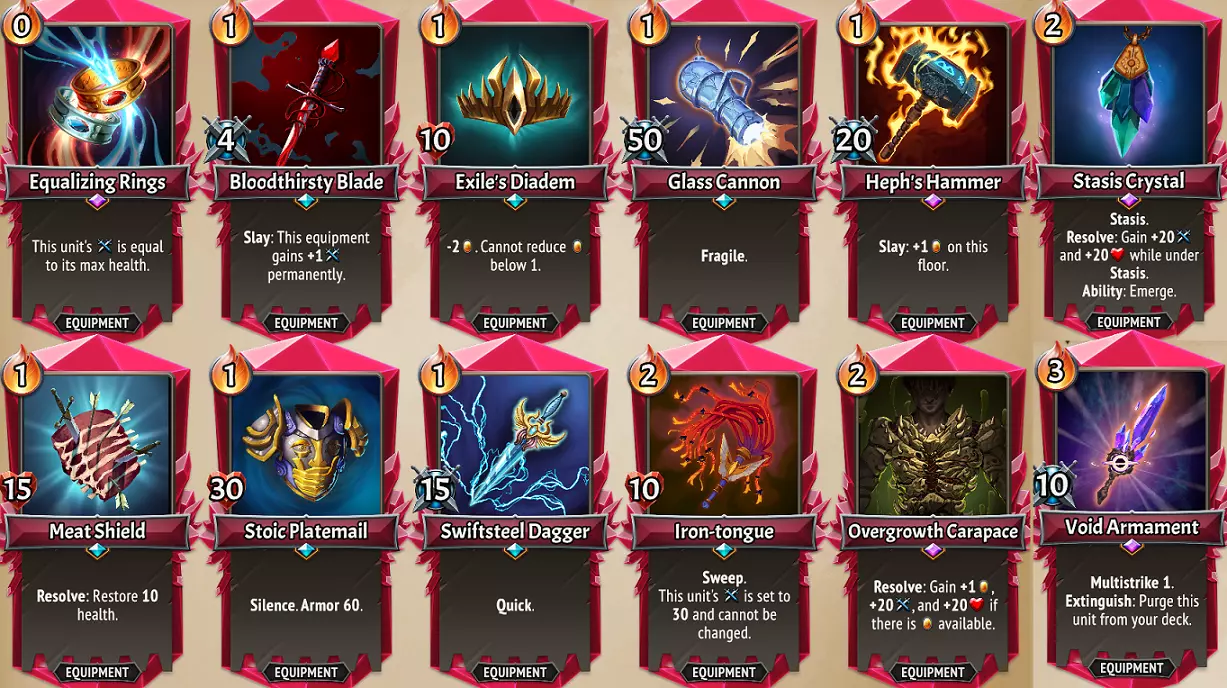
*Heph's Hammer is not available at the Merchant of Arms. It comes from an exclusive Celestial Alcove event. These effects are "Clanless" because they have nearly-universal value within any combination of clans in the game, and thus can be extremely valuable in a variety of builds, decks, setups etc. This means a visit to a Merchant of Arms expands the variety of Room & Equipment options you'll see each run. Merging EquipmentOnly available at the Merchant of Arms, Merging your Equipment gives you a unique option to add two unique Equipment effects onto a single card. This opens up some new options for creativity with players, who may seek to double-down on beneficial effects, or to give a unit two new effects compared to the one they're typically limited to. Looking at the Clanless examples above, here are some potential example Merges: You Merge the Meat Shield with the Exile's Diadem. For 2 Ember, you now have a piece of Equipment that boosts a unit's Health by 25, shrinks them by 2 Size, and heals them 10 Health at end of the turn. You Merge the Swiftsteel Dagger with the Glass Cannon. For 2 Ember, you now have a piece of Equipment that boost a unit's Attack by 65, and gives them both the Quick (yay!) and Fragile (aw.) effects. You Merge the Void Armament with the Stoic Platemail. The unit gains Multistrike, 30 Health, 60 Armor, 10 Attack, and the "Silence" effect Mutes the Void Armament's Extinguish Trigger, ensuring they are not Purged if defeated.. awesome! Also the resulting Equipment now costs a painful 4 Ember. Merging Equipment will shrink your deck by one card, and open some cool potential benefits, so it's generally a pretty fun effect to pursue! However, you must have two unique pieces of Equipment to even utilize the service. Further, there are plenty of reasons to keep Equipment separate, and the increased Ember costs from Merges may make Equipment too Ember-hungry to easily play. Make sure you consider these things before dropping your hard-earned Gold on this! Deployable upgradeA very cool option here, Deployable Rooms and Equipment will be drawn during the Deployment Phase, which can be fantastic if those Cards are a key part of your strategy! You cannot add a Seekstone upgrade to Equipment/Rooms, so without Deployable, there are few ways to ever guarantee you Draw these items early in a battle. Beyond the cost to use the service, there are two important things to consider here: One, the Deployable Room/Equipment still has an Ember cost attached to it... if you say, have 4 Deployment Ember and typically Deploy 4 Ember worth of units, adding a 1 Ember Deployable Room now means you're going to have to choose to not play one of these at the outset! This is especially noteworthy if you've Deployed an Ember-heavy Merged Equipment, or Rare Room cards like Spell Sanctum or Zone of Silence that cost 3 Ember! Two, the 10 Card Hand Limit in the game also applies to the Deployment Phase! Your Champion is one card, all Banner units are a card each, as well as Artifacts and Celestial Alcove effects that may add cards to your Deployment hand. If your total amount of Deployment cards exceeds 10, then only your Champion is guaranteed to be drawn, and you may not draw a crucial Banner unit or Deployable Card. This won't be a concern in most runs, but if you utilize the Empyrean Well to copy units/Deployable cards, or take specific Artifacts, you could run into a situation where you spend money to Deploy a card, but still don't Draw it at the start! So, you'll want to consider your Deployment Ember, number of Deployment Cards, and if the card gives tangible benefits when utilized on Turn #1 when making this choice. Increased Draft optionsOnce you've started your run, the game's seed has already determined what cards will be offered to you after battle throughout the run, and no amount of visiting Merchants of Steel/Magic will change that. However, because the Merchant of Arms is a traditional "Shop" that will offer cards, it's one of the only ways to increase the likelihood of adding a Clan-specific Room or Equipment card to your deck. As an example, you're doing a run with Pyreborne, and you have the Magma Cultist unit that adds Pyregel on Incant. You would love to have their Rare Room card Hellfurnace that adds +3 Pyregel when applied, as this would make the Cultist 4 times as potent! However, none of the Card Drafts offered after battle ever offer you the Hellfurnace. Because it's a Room card though, the Merchant of Arms may potentially have a Hellfurnace for purchase, which you may have never seen as an option otherwise! Now keep in mind, there's a large pool of Rooms & Equipment in the game, so going to a Merchant of Arms hoping to find one specific Card is... quite the gamble. However, certain builds are so strong with specific Room/Equipment cards that it may be worth a visit to this shop just to increase the odds you find a Card that wasn't going to show up otherwise. Did we save room for Dessert?Wrapping this up, the Merchant of Arms has multiple unique services that can be awesome, is one of the only ways to see Clanless Equipment & Rooms, and it can increase the amount of Card Drafts available to you. It also may offer you six Cards that are meaningless to your run, you may not have Equipment cards worth merging, and you may lack the Ember to play a Deployable card even if you wanted to. As a result, this one's a bit swingier than Steel & Magic, which are guaranteed to offer tangible benefits in any build. There's also run-defining power housed within this shop, so give it a shot when the map's offerings work well for you! The Merchant of Trinkets: Wildcard, b*****s!
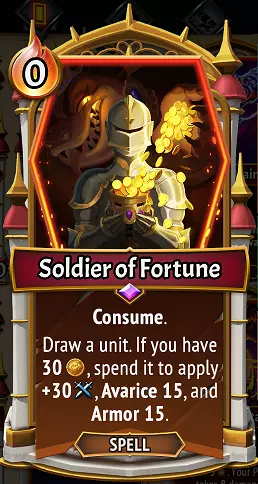
And finally we arrive at the most mercurial, tsundere, wildcard of shops, the Merchant of Trinkets! This Shop functions more like the Merchant of Arms than Steel/Magic, offering three Artifacts for purchase, and a Reroll options for another three. The items in question here are chosen from the pool of 37 Clanless Artifacts, plus the 11 Artifacts from each clan you're playing as, and cannot be an Artifact that was previously offered from Herzal's Hoard, or any prior visits to Merchant of Trinkets*. Note that the Pyreborne's unique Dragon Hoard mechanic breaks these rules. Looting the Hoard can result in Artifacts you've seen in Merchants/Herzal's Hoards, and can even offer the same Artifact more than once, particularly if you're repeatedly looting it.Though they're not as expensive as they were in Monster Train 1, Artifacts cost around 125-175 Gold each, making a visit to this Merchant fairly pricey. Visits to this Merchant are thus very discouraged if you're low on funds, though this can be mitigated somewhat if there is a Forgotten Boons pile on the map with this. Uniquely to the Merchant of Trinkets, there is one guaranteed on the map each run, right before fighting Seraph Aeternus. The prior battle has a Trial worth at least 400 Gold if you succeed, which is intended to give you some big Gold reserves heading into your final purchases before Seraph. The Good, the Bad, and the Ill-timedGood: Artifacts can be very powerful in this game, adding new strategies, significantly boosting existing strategies, and even patching up holes that might exist in your clan combo. A visit to the Merchant of Trinkets allows you to see a wider pool of available Artifacts, increasing your odds of finding great ones for your build. Some decks go from "strong and capable of winning" to completely overpowered with the right Artifacts. Bad: Artifacts vary wildly in both their potential power and how likely they are to benefit a run. Sometimes that's because an Artifact is just blatantly stronger than others (not a knock on the developers at all, imagining designing hundreds of Artifacts in a game with hundreds of Cards and all are equal in strength!), and other times it's because the effects from an Artifact may not benefit your build. Faced with a pool of 59 Artifacts and seeing only about 8-15 of them each run, a Merchant of Trinkets doesn't offer near the reliability of visits to Steel/Magic, and it lacks the extra services that Arms has. Ill-Timed: Unfortunately, there is no "weighting" of Artifacts based on when they may show up in the game. Why does that matter? Well, certain Artifacts can be fantastic if they show up early in the game, yet useless in the endgame*. You'll also never know what Artifacts are available in a Merchant of Trinkets when choosing the train path** or card drafts***. As a result, while overall unlikely to happen, a visit to the Merchant of Trinkets can actually end up completely useless, only offering Artifacts that have lost their functionality, or ones that cannot interact with any cards/effects in your deck. * Artifacts like the "Golden Idol" that award Gold for taking Trials is meaningless at the end of the game, yet it may be offered in the final Trinkets shop. ** This happens all the time, but the final Trinkets shop may offer something like the "Lightstone Casing" Artifact (three slots for Spells), but you chose the side that didn't have a Merchant of Magic on it to make use of this. *** Too many examples to list, but as a basic example, say you choose not to draft either a Meddler or a Moon Pixie for Luna Coven, which are Common cards of the "Fae" race that will not be offered again. The "Fae's Nook" Artifact is now completely useless to you, but may be offered in the Merchant of Trinkets regardless.When should I go, in that case?Crucially, you should always go to the final Merchant of Trinkets shop, even if you're low on Gold. There's no "opportunity cost" here, it's a freebie. Even if you don't have the Gold for a Reroll, at least check its starting three Artifacts. However, when choosing a train path that has a Merchant of Trinkets on it, my recommendation is to only do so if you'll have at least 300 Gold available for shopping, and/or if that side of the path you've chosen has other important options worth picking up. Seeing 6 of 59 available Artifacts certainly increases the odds of finding a great one, but this ultimately lacks the consistency and reliability of the other Merchants in comparison. My Clan guides written for each Clan do have a section for the Artifacts of each Clan & Clanless if you're curious about my subjective opinion on them =) The Philosophy of winning: Awesome cards Even if you've played other deckbuilders (whether online, or offline if you're a Clank!/Dominion/Star Realms fan), one thing that's particularly important to understand about Monster Train and Monster Train 2 is that this game system is asking one important thing of you as you seek to win the game. It's a simple concept, but extremely critical for learning to succeed at this game: Make AWESOME cards Basically, Monster Train's system is not a game system that asks you to find a delicate balance of effects, nor does it expect you to balance the stats of your units so everyone has a balance of offense and defense. Nay! Monster Train says don't put 5 Valor on that unit, put 40 Valor on it instead. Don't give it 2 Rage, give it 58 Rage. Don't put a bit of Pyregel or Decay on that boss, keep putting Pyregel & Decay until it begs for death!! You don't win and improve at Monster Train 2 by say, repeatedly going to the Merchant of Magic and putting +Damage upgrades on your Firestarter cards until they're all stronger, or by putting Heartstones on Spear Stewards and Strengthstones on Shield Stewards to 'balance' their stats. Instead, you make awesome, killer, run-defining cards that will escalate your offense & defense until you can take on all comers! Find synergies between your cards & effects, invest in good upgrades & growth for your crucial cards, and ignore/sideline/Purge your weaker cards to make room for all the heavy hitters. Here's some very basic examples of what I'm talking about... any card in the game can become useful/powerful, but here's some we utilized on recent runs! Awesome Spells

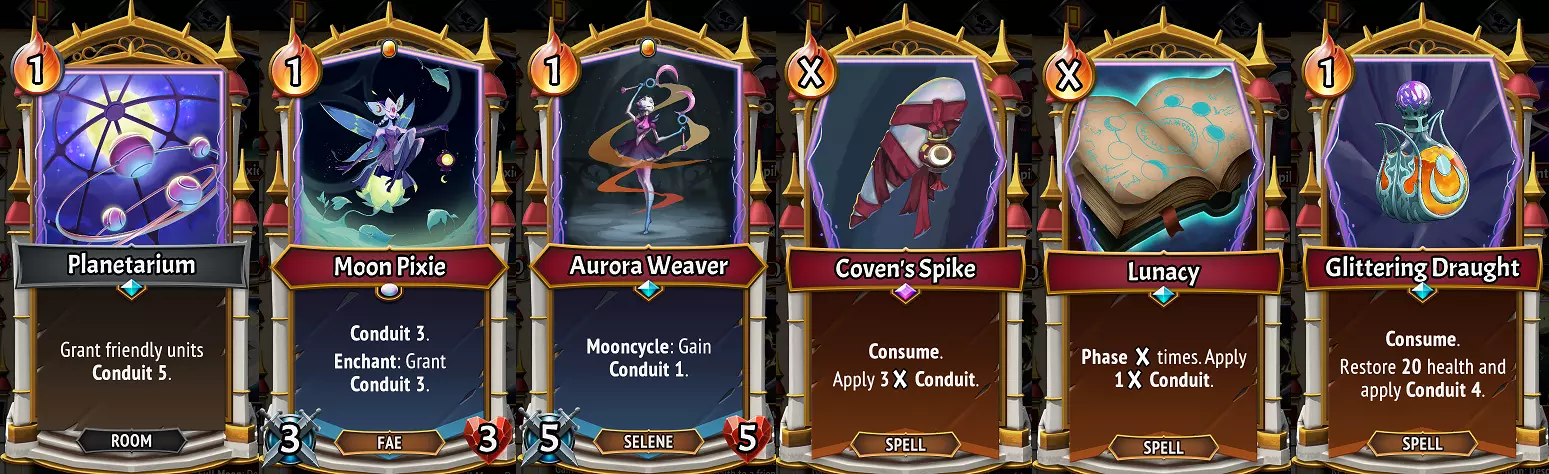
凭借固有特性,这张牌初始就在我们手中。使用两次可以叠加多次派雷格尔效果和伤害(这也会触发咒术!),并且由于留存特性,它在下一回合依然可用。我们在法术圣所房间使用了这张牌,所以每次的余烬消耗仅为1点!
免费情况下,我们可以将两个冷却时间为2的单位(例如暴躁者和好事者)减少到1,甚至可以减少像菲尼克斯和菲尔这类单位每回合都必须使用的冷却时间为3的技能!【觅石】或【固有】升级本会比【余烬】减少更好,但商人处并未提供。
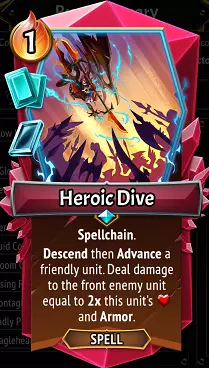
原本应是强大的一次性消耗效果,却被赋予了法术连锁以触发两次,还附加了永恒石使其未来可再次使用。现在这张卡牌既能让多名友方单位下移一层,以配合楼层增益效果(例如永恒之光装备),也能在位移友方单位的同时对敌人造成高额伤害。

神性通常是3点余烬兑换10点勇气的高价技能,而这个简单的组合将其效能翻倍至20点勇气,同时将成本降至仅1点余烬。我们复制了这个机制……原本消耗3点余烬可能获得10点勇气,但现在消耗3点余烬最终可能获得60点勇气!

【二元调和】已激活,这意味着一次简单的+10升级就能转化为50点魔法强度,而【持留】效果则让我们每回合都能使用它,无论是治疗受伤的坦克还是攻击强大的敌人。当与【导管】效果叠加时,甚至可以消灭生命值极高的敌人! 出色的单位
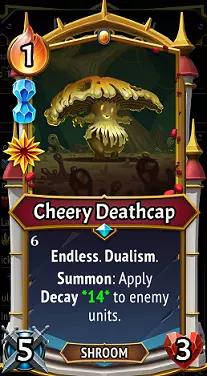
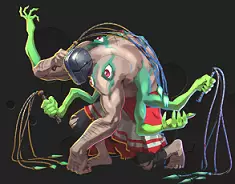
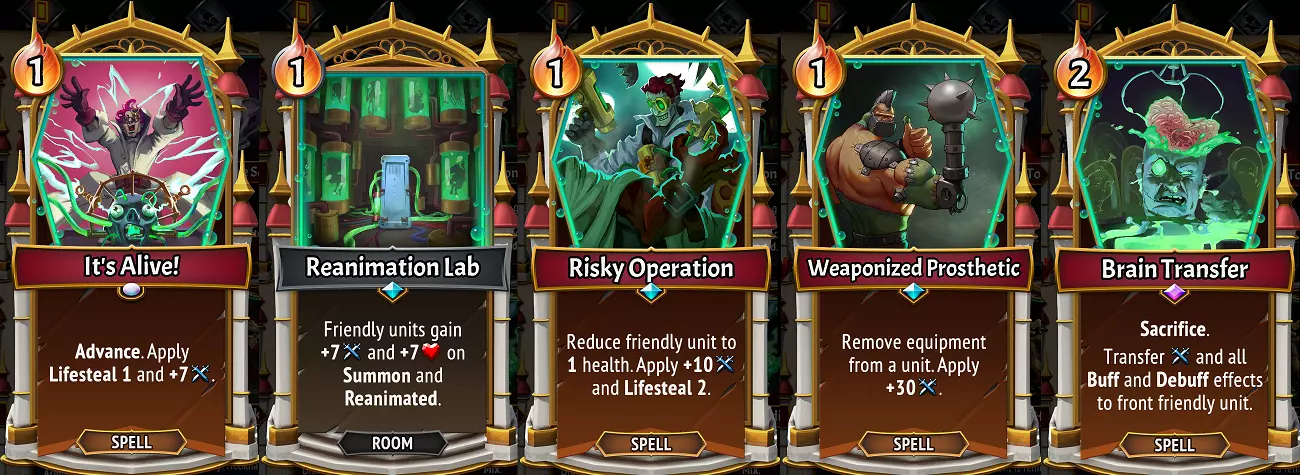
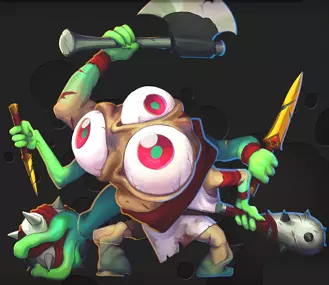
这株欢乐毒蝇伞可以说是凭一己之力就能赢得对局,仅消耗1点余烬就能让敌人叠加大量腐蚀效果,自身也很容易被敌人摧毁,为队伍抵挡一次攻击,然后凭借无尽特性回到你的手牌中,让你可以再次使用!

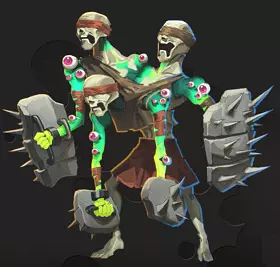
这个多刺绒球独自应对了一波又一波的敌人,依靠生命回复(Regen)治疗大量伤害的同时,还让敌人身上堆满了衰败(Decay)效果。一次天界凹室(Celestial Alcove)事件让我们能给它再添一个升级,还赋予了它大量的复生(Reanimate)能力!

在整个游戏过程中,【针垫】持续获得装备加持,如今已成为兼具攻击与防御能力的致命战力!
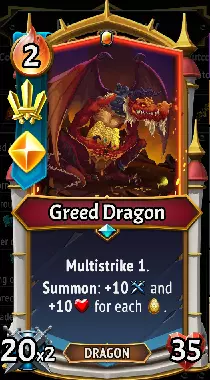
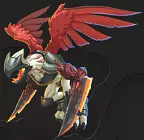
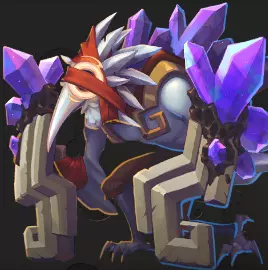
这条贪婪巨龙在被召唤时将获得大幅属性加成,它已被“压缩”至仅占用一个格子,并且可以进行多次攻击!
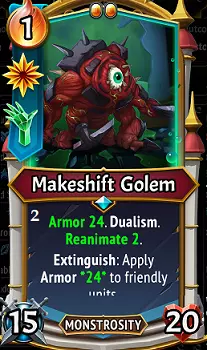
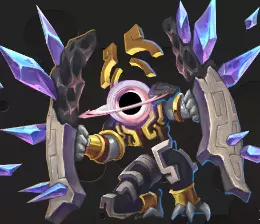
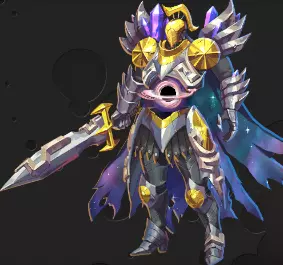
这个临时魔像是个很棒的坦克,凭借其【复活】能力,被击败时能存活两次,而且在复活时还会为楼层内的所有盟友提供大量护甲!
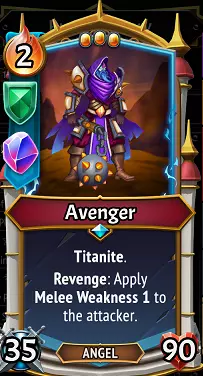
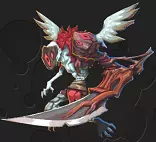
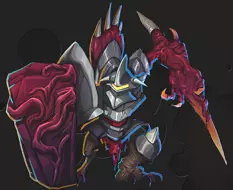
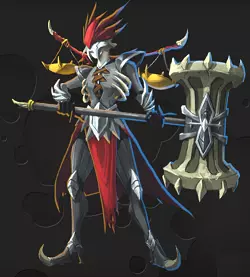
得益于大回复石提供的生命值加成以及楔形石强化,这名复仇者能够承受高达180点伤害才会被击败!此外,凭借其攻击加成和近战弱点效果,他还能造成高额伤害。
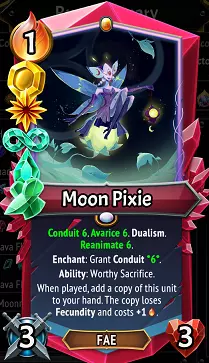
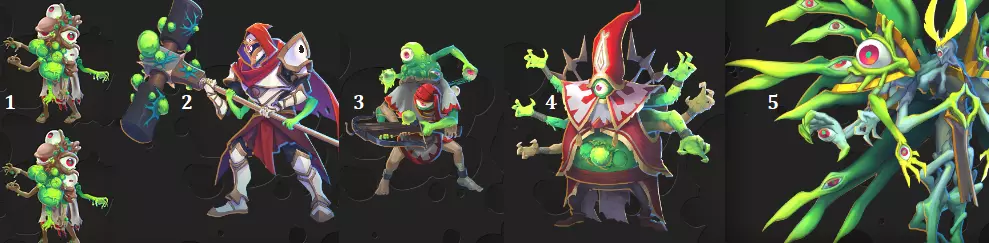
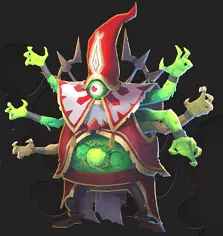
以下是利用天界凹室事件为单位添加超出常规上限额外效果的示例……这只月之精灵现在强得离谱!它能赚取金币,能在楼层布满导管,能通过格挡攻击反复承受伤害,还能用技能获得余烬,而且在使用它之后,我们还能获得第二只并将其加入楼层中。 换句话说:全力以赴!不要半途而废,挑选你牌组中的卡牌, drafting新卡牌,尽你所能让它们变得强大!不要组一个满是25张“还不错”卡牌的牌组;而是要组一个只有5-10张“超棒”卡牌的牌组。然后,考虑前往地图上的九天之井复制这些卡牌,这样你的牌组就会逐渐拥有越来越多的超棒卡牌。 敌人:你最大的敌人!从第一环第一波敌人,到为守护圣火与无情的炽天使艾特努斯展开最终决战,你的列车将不断遭到一群天使系敌人的登车袭击,他们企图伤害你并冲向圣火。你的目标是在他们的攻击下存活,并予以猛烈反击!这或许已经足够明确,接下来让我们谈谈你将遇到的敌人类型。 大多数天使系敌人(包括炽天使艾特努斯!)都受到了泰坦的祝福,因此他们大致可分为三种潜在类型。 野蛮型:红色/肌肉发达的敌人。这是最标准的角色扮演游戏 archetype,受到野蛮泰坦祝福的敌人主要特点是高生命值和高攻击力。这些敌人大多会对你造成高额伤害,承受大量伤害以保护其较弱的盟友,或者两者兼具!对付它们的最佳方法是很容易找到的——你通常只需要考虑摧毁它们并承受它们的攻击。最糟糕的是,这些攻击和生命值可能非常可怕,远远超过其他类型敌人的属性。 熵系:紫色/结晶化敌人。受到熵之泰坦祝福的敌人往往拥有使其更难被击败的效果,可能还会试图用削弱效果弱化你的单位,并且如果放任不管,它们还会获得力量。许多这类单位都带有额外效果,使得处理它们比平时更具挑战性。此外,由于它们拥有强大的防御能力且倾向于积蓄力量,一旦它们接近你的【柴堆】,就会变得格外致命。这类敌人最糟糕的地方在于极难被击败,且具有摧毁柴堆的潜力。不过好在它们对我方单位群体的威胁以及对整个战局的破坏程度是最低的。 【支配者】:绿色/球状的多臂敌人。受到支配泰坦祝福的敌人会通过【腐蚀】效果不断削减我方单位的生命值,还能治疗自身所受伤害,并将无用的【灾祸】卡牌塞入你的牌组。腐蚀是一种极其危险的减益效果,后续会有专门章节进行介绍,许多战局都不可避免地因它而失败!灾祸卡牌会迫使你承受不必要的圣火伤害,同时减缓你抽牌的进度,从而破坏你的策略。这些敌人最大的优点是通常生命值最低且最容易击败。最糟糕的是,它们甚至能瓦解最坚固的防御,并干扰你循环抽牌的能力。 至关重要的是,各种戒指和 Boss 会组合出现所有这些类型的敌人,但了解你面对的是什么以及它们的类型对你应对它们仍然有帮助。你会遇到很多敌人,所以我们不会全部介绍,但我们会花几分钟时间介绍一些需要注意的最可怕的单位,并讨论我们可以做些什么来阻止它们!危险敌人:野蛮之力 我们先从受野蛮之力加持的敌人开始!以下是你将遇到的部分极具威胁的独特敌人: 恶意猎手
威胁:这些翅膀能让它们获得【急速】效果,并直接飞向顶层,完全跳过中间楼层!这会减少你阻止它们接近柴堆的时间,且可能导致顶层出现比平时更多的单位。 应对方法:由于生命值极低,它们容易被较弱的法术卡牌击杀。如果它们通过【急速】越过为其承受伤害的单位,就会在顶层暴露自己,使其容易被击败!确保顶层有合适的坦克单位,以应对它们的出现。尖刺陷阱也能轻松应对它们。 贪婪的狂热者
威胁:这种敌人包含两部分威胁,它们拥有【多重打击】能力,能轻易击溃你较弱的坦克/阻挡单位。尽管它们的设置是为了保护一些高生命值的盟友,但如果你通过【尖刺】、【横扫】或【法术】等效果击败它们身后的敌人,它们还会获得更多攻击力。和许多受【野性】祝福的敌人一样,它们也拥有较高的生命值需要突破! 应对策略:坚固的防御在这里很有帮助,任何能够恢复所受伤害的坦克(例如【再生】、【英勇】、【治疗】)都能阻止这些敌人。通常来说,摧毁狂热者身后的盟友仍然比完全避免触发其【收割】效果更好……当然,狂热者的攻击力会变得更高,但被3个【凶猛投斧手】攻击会糟糕得多!眩晕和削弱效果能有效削弱它们,而尖刺由于多重打击的效果,对它们造成的伤害比平时更高。怒翼刺客
威胁:游戏中唯一拥有横扫伤害的敌人!如果没有遇到这类敌人,你或许能在整个游戏流程中让后排盟友完全处于安全状态。如果你依赖低生命值的后排盟友(例如颂歌者或精灵),且没有办法阻止它们,怒翼刺客会劈开你的阵型并终结这些盟友带来的增益效果!尤其在获得来自“野蛮的永恒炽天使”的狂怒效果后,它们会变得特别可怕。 应对方法:它们的生命值极低,任何魔法强度/导管至少提升10点的攻击性法术都能轻松解决它们。拥有快速和横扫能力的盟友也能轻松应对。让后排盟友获得生命值/护甲加成也是一个可靠的应对策略。尽管坦克上的尖刺可以摧毁它们,但要注意,即使坦克的尖刺足以摧毁它们,它们的横扫伤害仍会完全生效!它们的攻击力也不是很高,所以【生命虹吸】也能很好地克制它们。 狂热角斗士
威胁:你会逐渐讨厌这些烦人的“血牛”敌人,它们体现了游戏中敌人生命值的自然提升——在第7环及以后出现时拥有375点生命值(在高契约等级下更是高达500点!)。这些怪物的存在就是为了考验你在保护其他敌人的同时提升伤害的能力。虽然它们的伤害不高,但庞大的生命值意味着你的圣火可能需要多次攻击才能成功击败它们! 应对方法:到游戏的这个阶段,除非它们被【野蛮的永恒炽天使】赋予狂怒状态,否则它们的攻击伤害对你来说应该几乎不值一提。你只需要在游戏的这个阶段用你能聚集的所有伤害来对付它们。比如使用【圣火凝胶】、【衰变】效果、来自【不稳定】状态的伤害、【导管】强化的法术、【勇气】强化的盟友等等。如果你发现无法击败这三层的敌人/卡牌,这表明你在当前回合中未能充分提升自己的进攻能力。 恐怖融合体
威胁:这些手持长矛的鹰类怪物是极其可怕的生物。它们拥有极高的生命值——基础为300点(在高契约等级下为425点),这本身就已经足够令人头疼,而它们还有一个针对“空楼层”的恶劣手段。当它们触发决心效果时,如果你的楼层没有友方单位,它们会立即对柴堆造成5点伤害。这会严重削弱你的柴堆,尤其是当你的阵容难以让底层盟友存活时。 应对方法:如果你的阵容不足以快速击破它们庞大的生命值,有几种方法可以阻止它们攻击柴堆。沉默效果(例如来自沉默区域房间或狮鬃食人魔女士)和眩晕效果都能阻止其对柴堆的攻击。只要让你的楼层布满友军单位,并且能让他们存活下来,他们就会停止攻击(注意:在圣火打击生效前,混种怪的所有波次都会发动攻击,有可能将你击败!)。最后,被停滞水晶施加了停滞状态的单位可以阻挡混种怪的打击!即使目标的攻击在当时为0,腐蚀效果也无法阻止这次打击。 危险敌人:熵 接下来,我们将介绍被熵祝福的痛苦敌人。 懒散骑士
威胁:虽然起初非常弱小,但如果这些单位位于楼层前排(即你已消灭前方的野蛮长矛兵),它们会获得可怕的攻击加成,每次造成10点伤害,而在游戏中很少有坦克能可靠承受这种伤害。此外,对柴堆造成10点伤害是非常可怕的打击,尤其是在游戏初期。 应对策略:多层布局在这里是最佳选择,因为游戏初期很少有氏族组合能够同时应对斯洛文骑士的盟友、它们的攻击加成以及它们受熵祝福的生命值池。如果其中一个即将到达柴堆,考虑重新开始战斗并尝试不同的布局来阻止这种情况发生! 坚定持盾者
威胁:这些小鸟旨在克制施法策略,它们会在施法时吸取你整排盟友的生命值,减缓你的攻击者的进攻节奏。如果你的策略涉及大量小型法术(例如,为被放逐者反复使用推进/转移),这会变得尤其麻烦。它们总是位于敌人队伍的前排,凭借一定的护甲和生命值来阻挡身后更可怕的威胁。尽管它们一旦到达你的火堆旁就会变得极其脆弱,但问题在于它们吸收了本可以攻击身后更危险敌人的伤害! 应对方法:如果你此时已获得沉默技能,沉默可以阻止它们的施法效果。否则, sap( sap)会随时间衰减,所以盟友身上沾到少量 sap 并非世界末日,尤其是当法术还附加了 pyregel( pyregel)时。具有前进/晋升/撤退效果的技能可能有助于将这些讨厌的家伙移出前线,让他们的盟友暴露在伤害之下。最后,他们的护甲值高于生命值,因此不稳定或穿透效果能更快地解决他们。 伤痕哨兵

威胁:起初,它看起来更像是一个野蛮系敌人,拥有高额生命值和中等攻击力。然而,熵魔在此设下了一个恶毒的诡计——当它获得决心状态时,会获得5层泰坦之皮,这使得它在每一层都会逐渐变得更难击败。如果它带着高达15层的泰坦之皮抵达火堆,将会造成致命打击! 应对策略:这个敌人是对你进攻能力的考验,它在你最底层的车厢时最为脆弱,因此奖励那些能通过攻击和法术快速累积伤害的构筑。例如,一个有良好导管加持的底层车厢可以轻松击败它们。除此之外,施加诸如火焰凝胶和腐朽之类的效果来逐渐削弱它们也非常有效。如果你只有一个“主要”的输出车厢,尽量让它们待在列车较低的位置! 净化之魂

威胁:这些敌人属于玻璃大炮类型,生命值仅有脆弱的1点,但拥有高达12点的恐怖攻击力,尤其值得注意的是它们往往会大量涌入楼层。它们默认带有两层法术护盾,这使得范围法术和暴躁头目的火焰吐息等常用有效策略都无法奏效。尽管它们很容易受到尖刺/复仇伤害,但如果让它们全部以12点攻击力发动攻击,你的坦克将会承受重创!你可能会遇到以这些敌人为主题的【入侵印记】试炼,如果无法在顶层解决它们,就等着你的柴堆生命值告急吧! 应对方法:幸运的是,尽管这些敌人很可怕,但有很多方法可以应对它们。任何快速横扫伤害都能立即消灭它们,像炼狱之子的“天降火雨”这类多次打击的法术可以击败它们,炼狱之子的“诅咒龙杖”等非法术伤害效果也能做到。只要你的坦克能承受住猛攻,即使是1级尖刺也足以消灭所有这些敌人。由于它们的生命值极低,多重打击和践踏效果尤其能迅速击溃它们。即使是少量的腐蚀和不稳定效果也能轻松消灭它们。如果将拉撒路联盟的“精准打击”减少到0余烬,其穿透效果能立即消灭这些敌人,因此特别有效。最后,无派系神器“千斤顶”在这里值得一提,当移动到新楼层时,这些敌人都会死亡,完全消除它们的威胁,防止它们攻击火堆。无法识别
威胁:天界壁垒的存在纯粹是为了阻碍你的进程,它们是中期令人头疼的敌人,因为其拥有庞大的护甲值,并且总是试图阻挡在更具威胁的盟友前方。当与智天使之王凯尔战斗时,如果天界壁垒吃到智天使提供的食物,从而进一步提升自身属性和效果,它们会变得比平时更加麻烦。 应对方法:天界壁垒低生命值与高护甲的组合使其容易受到不稳定和穿刺伤害等效果的影响,这对拉撒路联盟较为有利。横扫和范围法术伤害效果有助于直接“越过”它们。前进/后退/上升效果在这里非常有用,因为如果它们到达你的柴堆,通常不会造成任何伤害!危险敌人: Dominion 最后,我们遇到了那些被Dominion祝福的、令人衰弱、虚弱不堪且极度恼人的敌人! 鞭笞者
威胁:如果说双刃剑是一种生物,那鞭笞者就是这样的存在。作为前期需要注意的敌人,鞭笞者会缓慢自残,这降低了它实际抵达你的柴堆的可能性。不过,它每回合都会提升攻击力,拥有异常庞大的生命值,并且有时会与不祥侍僧搭配,后者能治疗鞭笞者造成的自残伤害。如果它抵达柴堆,情况会非常糟糕! 应对方法:如果想尽早消灭它们,你需要使用一些高伤害的法术/攻击,但在游戏的这个阶段可能很少有这样的技能可用。优先消灭它们身后的侍僧和后排单位通常是最佳策略,因为实际上你只需对鞭笞者造成少量伤害,它们就会自行毁灭。确保你的高层有角色能够承受这些攻击,或者快速击杀/法术击杀它们。 振奋笛手

威胁:与上述的恶意猎手类似,吹笛者不仅自身拥有【加速】效果以跳过你的中层区域,还会将该效果施加给其他敌人!如果你依赖三层区域或中层区域的布局来消耗敌人生命值,这会带来很大麻烦。 应对方法:幸运的是,吹笛者也极其脆弱,可通过定向法术、范围法术、技能和横扫伤害轻松消灭。万不得已时,你也可以利用移动效果将其与盟友分离,或者在拥有【沉默】效果的情况下对其使用。 畸形恶魔

威胁:这些脓疱比它们初看起来要危险得多,它们基本上就是“毒弹”,会让你最前排的单位充满腐化值,逐渐消耗其生命值。它们的生命值极低,这实际上对你不利,因为即使是最被动的坦克也可能在消灭它们的过程中被腐化。虽然通常你不希望敌人接近你的薪火,但值得注意的是,薪火不会被这些脓疱腐化,所以即使它们到达那里也不是世界末日。 应对方法:针对这些脓疱的实际应对手段很少。沉默有效,但这种效果在游戏中极为罕见。通常情况下,最有效的方法是使用【阻挡单位】,即让前排单位吸收腐蚀值,然后再使用法术、攻击或技能来击败敌人。我们稍后会详细讨论这个概念。枯萎界域守护者
威胁:这些敌人与畸形恶魔造成的腐蚀值相同,但生命值显著更高,通常用于保护身后的盟友。这使得它们既是难以逾越的障碍,也是会让坦克反复承受攻击的危险敌人。 应对方法:幸运的是,它们比畸形恶魔有更多的应对手段。眩晕/潜行可以阻止其攻击,由于其攻击力较低,即使少量的生命吸取也能将其压制。沉默一如既往是一种选择。在游戏后期,它们的生命值远低于受野蛮与熵祝福的敌人,因此强大的范围攻击和横扫效果在这里也非常有效。 亵渎信徒与不谐异端
威胁:将这两者归为一类是因为它们的机制相似。它们都会安稳地待在敌方波次的后排,如果放任不管,就会在你的牌组中放入一张恶毒的【天灾】卡牌,迫使你浪费【余烬】来防止【柴薪】受到伤害,同时拖慢你抽牌的进度。如果让多个这样的敌人聚集起来,情况会非常糟糕! 应对方法:除了【沉默】和【眩晕】外,只有直接消灭它们才能解决问题。所以如果你的氏族或卡组不擅长攻击后排敌人(例如【被放逐者】氏族通常不擅长这一点),你可能需要寻找其他方法来消灭它们。比如利用【复仇】/【尖刺】伤害,或者使用位移卡牌将它们暴露在攻击范围内。【祈求者】很容易被单体或范围法术击杀,但【异端者】拥有20点生命值,有时会更难对付。着迷的热心者
威胁:这是治疗者单位的第三个版本,为何其他版本未曾构成威胁,而这个版本却值得讨论呢?该单位拥有一个棘手的【咒术】触发效果,能为其所在楼层的友方单位增加攻击力!除非你拥有快速伤害技能或强力法术来消灭敌人,否则当这家伙在场时,你需要谨慎使用法术。 应对方法:通常最好能优先使用范围攻击或单体法术/技能将其解决,这样你就能放心使用其他法术卡牌而无风险。足够的快速伤害也能让它失去作用,好在它不会为 Boss 敌人提供 buff。沉默一如既往是有效的应对手段。 震耳传令官

威胁:震耳传令官是游戏中最棘手的敌人之一,它会使你整层的盟友陷入沉默状态,几乎禁用你单位的所有效果。由于多个氏族依赖自身效果和技能来增强实力,因此你需要提前做好应对这些家伙的准备,因为在与熵之炽天使埃忒耳努斯战斗时,它们会频繁出现。 应对方法:你可以反过来沉默它们,但通常只有通过沉默区域才能实现,因为它们会直接沉默狮鬃夫人的食人之鬃。由于震耳传令官生命值较低,快速清扫伤害可以轻松消灭它们,即使是较弱的法术(单体或范围),只要进行+10魔法强度的升级也能应对。你还可以操控它们的移动,例如将它们从一层传送到下一层。尽快消灭它们!畸形搭档

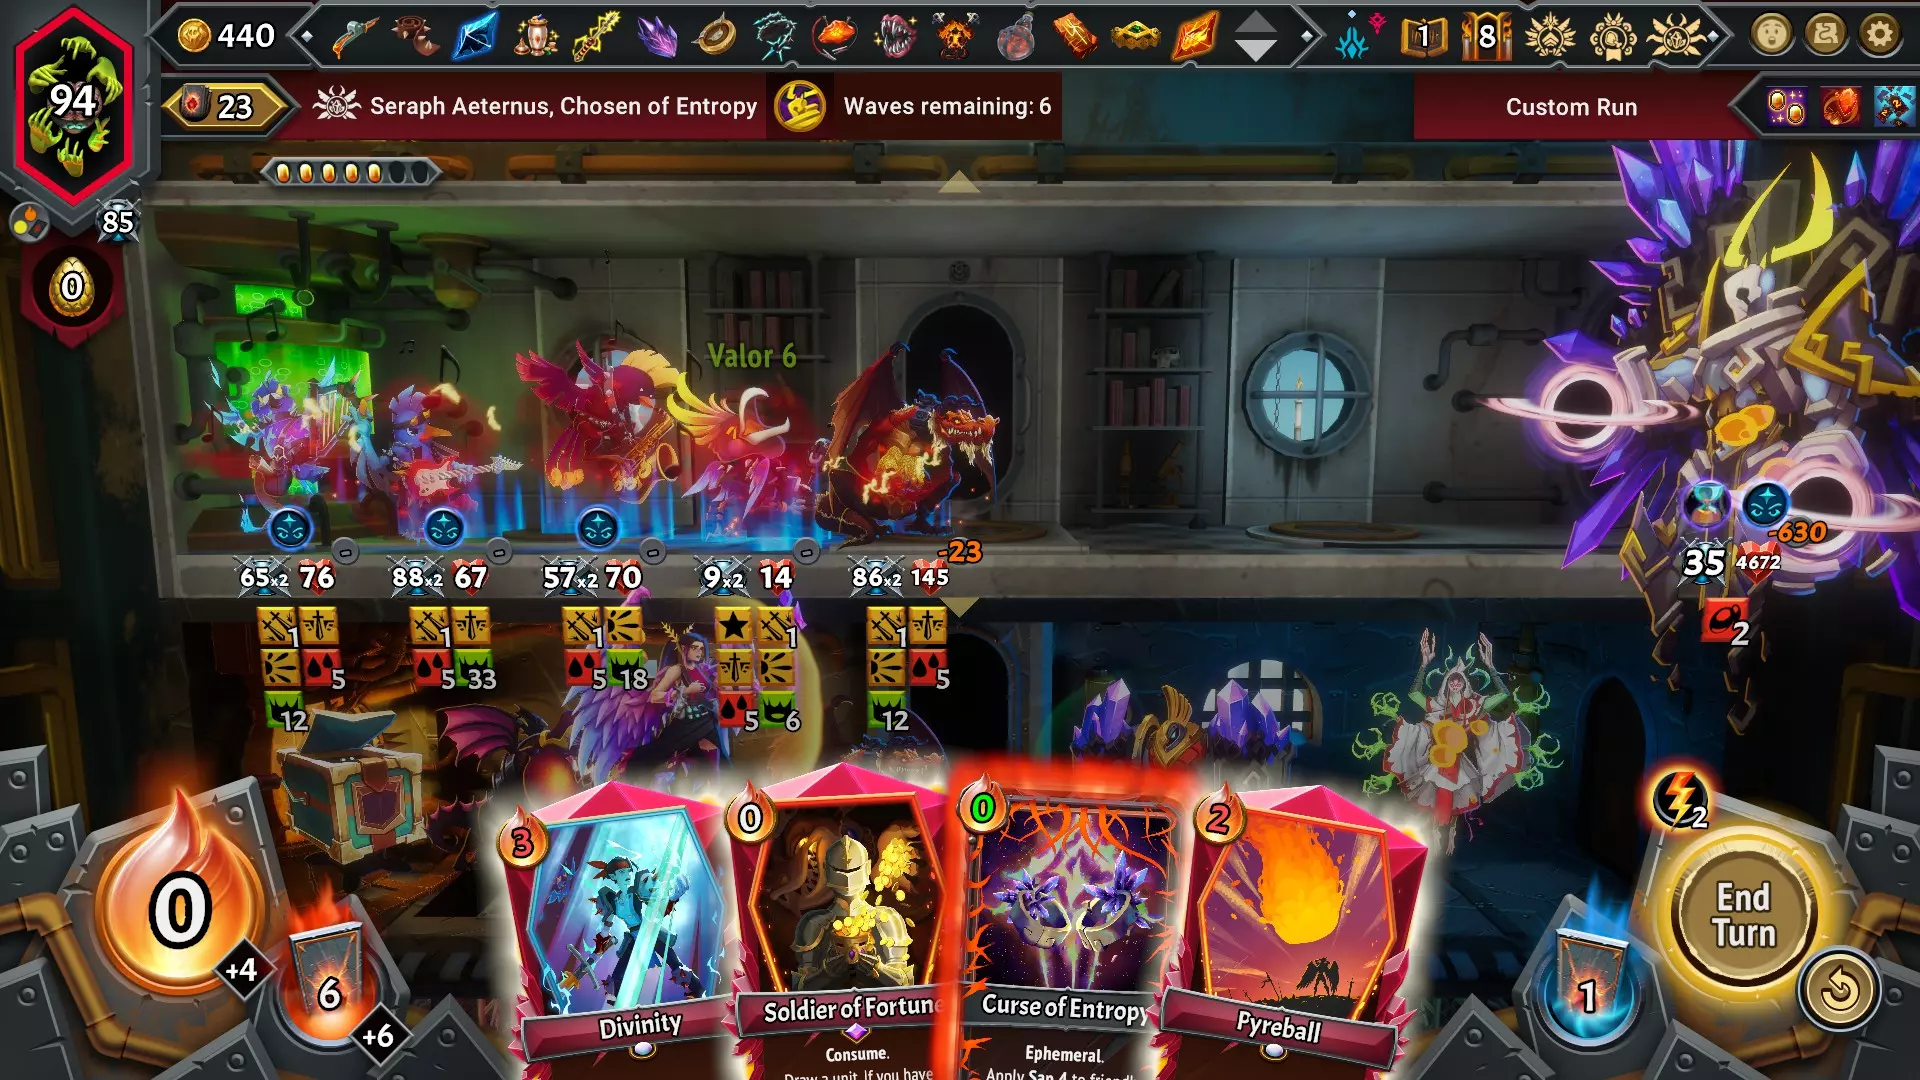
威胁:一种极其致命的腐蚀者,这些敌人会造成游戏中最高的腐蚀值(除了塞拉芙·艾特努斯——支配者之外),并且拥有复活层数,能轻松抵御诸如“残留”范围法术(如闪烁)之类的攻击。 应对方法:沉默一如既往有效,不过 daze(眩晕)同样可行且更容易获取。汲取也能奏效,但由于它们的攻击力更高,所需的汲取量要比对抗枯萎守卫时多得多。在某些情况下,你可以用多段伤害的法术和技能(例如暴躁者的火焰呼吸、金钱雨法术、多重打击的清扫者等)消灭它们,但如果没有这些,你可能需要利用生命值提升的格挡者来承受它们的箭矢,而不是让你的主坦克去承受!敌人波次:应对后排威胁 在游戏的每场战斗中,你都有一个主要目标:阻止敌人波次摧毁你的圣焰。途中若能进行良好投资固然不错,成功消灭收藏家(《怪物火车》中的“宝藏哥布林”)更是锦上添花,但最终只要圣焰尚存且 Boss 被击败,你就获得了胜利!即便你的恶魔雏鸟菲尔和所有管家在此过程中被击败也无妨,他们会在下一轮回归! 因此,你的注意力应集中在敌人波次上,思考如何在它们消灭你之前削弱并摧毁它们。下面来谈谈应对敌人波次时需要考虑的一些重要事项。通常情况下,最危险的敌人是后排单位。就像你需要在前方部署防御来保护脆弱的盟友一样,敌人也经常采用类似的布局,将更致命的单位、治疗者以及会向你牌组中添加灾祸牌的敌人——全都藏在坦克和“肉盾”型敌人的安全后方,这些敌人拥有更高的生命值来阻挡你。收藏家也只会在楼层的后方生成,如果你能及时消灭它们,它们掉落的金币对你的本次冒险非常有价值!
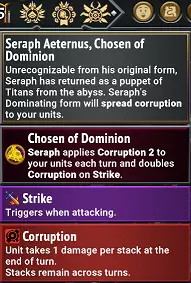
In many cases, your Pyre is at much larger risk if enemy backliners march their way to your Pyre, whether that's because the backliners have more Attack power to beat on it, or because Healers like Ominous Acolyte have repeatedly healed away the damage of enemy meatshields, letting them repeatedly strike the Pyre. In the pictured example, both enemies behind the Shieldbearer are far more threatening if they reach the Pyre! Similarly, your tanks will find themselves lacking in Health and survivability if they're all repeatedly being battered by the strongest Attackers in enemy waves. So, let's talk about how we address those issues! Addressing Backline ThreatsThere are numerous ways we can potentially destroy these well-defended meanies. You can... Utilize Spell cards that allow you to choose targets ("Targeted"), and target those enemies directly. Destroying a Savage Spearman before battle may save your tank 6 damage, much less other tanks and the Pyre! Or, destroying an Ominous Acolyte means the enemy tank won't be healed by 15, which might have offset all the damage you did this turn. Starter cards like Witchweave, Sporebloom, and Firestarter are all designed around this concept. Advantages: Can prevent prevent damage taken by tanks, flexibility in which enemies you focus on. Downsides: Many of these cards are weaker and will become less useful throughout the run, requiring Magic Power buffs or Conduit effects to keep up with stronger enemies. Also dependent on drawing these at the right time! Utilize Spell cards that strike all enemies ("AoE"), blowing multiple away at once. These cards may be more expensive or of low potency, but they're intended to help you address multiple enemies at once. Spells like Flicker, Cleave, or Celestial Storm can potentially address an enemy wave full of backline threats simultaneously before battle. Advantages: Economical from an Ember standpoint (e.g. spend 0 Ember on Flicker to destroy three backline enemies rather than playing 3 Firestarter cards for 3 Ember), also helps weaken the tanks as well. Downsides: Many of these Spells are expensive, or in a situation like Flicker, potentially very weak without Magic Power boosts. Also dependent on drawing these at the right time! Use units & card effects that do damage to enemies on "Revenge", letting them get destroyed while fighting your tanks. Multiple cards & effects are built around this effect, such as the Shield of Wyngh, the unit Prickly Puffball, or Lazarus League's Spikes effect. This will require your tank to take some punishment and will not address non-Attacking enemies like Acolytes, but it has the advantage of working continuously throughout the battle. Advantages: Very low-maintenance, allows you to focus on playing spell cards elsewhere. Downsides: Limited to specific clans (Pyreborne & Luna Coven do not have units or buffs like this, for instance), and because your tanks must be taking damage, you'll need to supplement this with effects like Healing, Valor, Regen etc. to keep them alive. Look for "Sweep" effects, which allow your allies to Strike entire lines of enemies. You can find units capable of this effect like Zealot, Selene Acolyte, and Test Subject Alpha, or the clanless Equipment card Iron-tongue. If combined with the "Quick" effect, you could destroy these threats before they get a chance to act in battle! Advantages: Sweep damage can completely destroy backline threats each turn, and can even be given the Quick effect to destroy them before they get a chance to Attack you. Downsides: Sweep units typically do very little damage by default. They're relatively rare in the game and tend to have some downsides. To wit, Zealot is very Rare, Selene Acolyte must be in Full Moon to Sweep, and Test Subject Alpha is an expensive 3 Ember to play. Manipulate the movement of enemy units. The Banished clan has multiple cards like Fel's Just Cause, or early cards like Rising Rage that can be used on enemy units too, allowing you to reposition them, exposing them to your units' Attacks, even when they should normally be safe! This is especially fun to do when a Collector is out of reach for the Banished... use a card with the "Advance" effect to bring the Collector in front instead! Advantages: Movement cards tend to be highly useful due to their ability to adjust the placement of allies on the train, trigger Shift for Banished's Angel units, or put enemies into better arrangements for you. Downsides: Limited to only a few cards. Fel's Just Cause cards and Lazarus League's It's Alive would also strengthen the enemies! Utilize Abilities! Lord Fenix's Fenix Fire Ability can be used to destroy backline enemies, and his Overlord path is designed around consistently doing this! Lady Gilda's Bloated Whelps can also destroy themselves to hit backline enemies as well. Advantages: Can be used on-demand when needed and cost no Ember to utilize. Downsides: Very rare as an effect. Lord Fenix's Ability has a large Cooldown. Bloated Whelps only do 1 Damage when blowing up. If none of the above are an option... Fight your way through! If you can rack up enough damage to destroy their frontline tanks, those backline enemies will be exposed in future waves, giving your higher floors an easier time cleaning them up. The Banished is fond of this strategy, often desiring a floor to build up big numbers of Valor/Attack to strike through enemy lines. Luna Coven also has spells that deliberately strike the front enemy for big damage numbers like Silver Strike and Moonbeam, helping your Attackers to gain access to backline enemies. Advantages: Every clan can do this, as they all have Attackers meant for damaging enemies. Strategies like stacking Pyregel, Mageblade, Valor etc. are designed around it as well. Downsides: May expose you to Scourge cards from backliners repeatedly if you can't reach them in time, and requires your tanks to take lots of damage in the process. All of these are viable methods, and considering you don't know what kinds of cards & effects you'll be offered during the run, you'll typically want to utilize multiple different effects to clear out those nasty enemies. Corruption: ...it's bad! No matter how polite they seem, regardless of how charming they may act, these enemies are not your friends:
腐蚀(即典型RPG中的“中毒”)是一种致命的减益效果,即便是游戏中最强大的坦克也可能被它迅速击败。新玩家在游戏初期或许就曾有过惨痛的经历:他们的坦克明明获得了勇气加成,却在通过勇气 buff 重新获得护甲之前,就因叠加的腐蚀效果而死亡! 由于这是一款回合制卡牌游戏,许多效果会在回合结束后生效,因此你没有机会在战斗结束后、腐蚀伤害生效前对被腐蚀的队友使用治疗卡牌。更重要的是,清除减益效果在游戏中极为罕见,MT2 氏族的任何套牌都不具备这一能力。管理并尽可能避免腐蚀对于克服《魔法门:英雄交锋2》的部分挑战至关重要,所以让我们来谈谈这些烦人的敌人以及应对其腐蚀效果的方法。 1. 畸形恶魔:只能沉默和阻挡。这些生物很让人头疼,因为它们总是堵塞敌人的前线,生命值极低(如果你缺乏小伤害或践踏技能来突破它们,这会非常讨厌),并且在被击败时会触发爆炸,给你的前排单位施加腐蚀。吸血/眩晕无法解决这个问题,在战斗前消灭它们也完全无法减轻腐蚀。 除了处于沉默区域的房间外,你最好的选择是用另一个单位阻挡腐蚀,就像上面的例子所示:
And use Spells/Quick damage/Abilities etc. to defeat them so the Corruption doesn't pile up on your Tank. If not, you'll just need to suffer through it! Also note that around mid-game, a Mark of Invasion Trial can have 9 of these on the top/middle floors. Whatever unit takes the Corruption from defeating these is almost guaranteed to be defeated, so consider using a less-important Tank for this! #2 - Blightbound Guardian: Sap, Daze, Mute, Block, or Quick. These guys have a modest Health pool and a Hammer that puts a bit of Corruption on Strike, meant to both weaken your Tanks and protect some threats behind them. Fortunately, they're also the easiest to address, as Sap 2 is enough to ensure they don't strike at all, Daze stops the Attack/Corruption, and their Health is plausibly enough to destroy with Spells and Quick attacks. Additionally, a blocker with even a Heartstone upgrade can take a bunch of hits from enemies like this. So, annoying, but rarely your biggest problems. #3 - Deformed Duo: Sap, Daze, Mute, Block, or Quick x 3 One of Seraph Aeternus the Dominant's biggest threats, these Crossbowmen are physically stronger than Blightbound Guardians and thus take more Sap to halt Attacks. They apply the most Corruption of these three enemies on Strike, they come with Stacks of Reanimate that ensure you cannot easily take them out with Spells/Quick damage, and they'll melt through your allies with the combination of Strike & Corruption. Their overall Health is low though, so if you can exploit this with multiple-hit Spells (a good example is Pyreborne's "Make It Rain"), a Multistriking Sweeper, Spellchained effects, or effects like Decay that will strip away their Reanimate stacks, you can overcome this. Otherwise, hope for Daze/Mute, or be ready to feed this damage to a disposable unit! #4 - Qel the Corruptor: Mute only. Your worst enemy if units like Hymnists/Whelps/Fae factor heavily into your strategy. At low Covenants, all you really need to worry about with him is not excessively Incanting on his Floor, where he'll quickly overwhelm you with Corruption on all units. Either make sure your units can survive on his floor without spells, or choose very carefully what you play! At high Covenants he's much harder, now immediately blasting all floors of allies with Corruption on Summon, completely destroying low-Health allies like Hymnists/Whelps/Fae/Spear Stewards. MT2 clan cards completely lack a Mute effect that works on him, outside of Madame Lionsmane's amazing Maneater path. Alternatively, any unit played after he arrives will not get the same Summon-Corruption trigger, so saving unit cards for Relentless is a valid strategy! #5 - Seraph Aeternus: The Dominant: Daze, Mute, lots of Sap, Movement or Block. The bad news: this Seraph is a dangerous foe for certain clans (Banished & Luna Coven both have tough match-ups against him) and often obnoxious even with better matchups. The good news: you know from the moment you start your run if you'll be fighting him, so you can plan accordingly! The Dominant will put small bits of Corruption on all of your units in the backline as an Action effect, enough to require low-Health units get some Health/Healing/Armor to survive the fight. Where things get scary however is his Resolve on Strike, where he doubles the Corruption values of the unit he Strikes. Considering his enemy waves are awash in Corruption effects, this can quickly melt down even the Heartiest, Titanite-iest tanks in town. Daze is a powerful counter here, stopping the Action effect & preventing him from Striking. Mute is again only available with MT2 clans with Madame Lionsmane's Maneating path, but is very potent for shutting down his effects. You may use cards that Ascend/Descend Seraph to force his effect to go off against other Floors to prevent him from weakening an important floor of allies! Sap does stop his Strike but you have to apply a LOT of this or Propagate it enough to hit 0 Attack, so this strategy will rarely work. Again, Blockers are great here, letting Seraph "waste" his Attack and Resolve on a disposable unit instead. Your Blockers will often need a lot of Health to survive multiple enemy hits in these waves, particularly if you need multiple floors to clear away the enemies. Occasional Counter: Damage ShieldsA Damage Shield can absorb the damage from Corruption, no matter how many stacks a unit has! It may not be easy to keep a steady supply of Damage Shields, particularly if this needs to go on a Tank (who's losing them from enemy Attacks), but in the right setup, this can negate Corruption damage entirely. The universal counter to Corruption: EndlessIf an Endless ally is destroyed, all buffs & debuffs are purged from their card, and they keep any stat gains they earned along the way. This means that any Endless unit that's defeated from Corruption will come right back to your hand with no Corruption on them, fully Healed and ready to go! This makes it a plausible counter to all Corruption-based effects in the game, and it pairs extremely well with effects that increase stat gains as well, so the unit card increases in potency despite defeat. Note however that an Endless card counts "against" your Draws in future turns, as they'll become the first cards you Draw instead of your regular hand. Additionally, you must play the Ember cost again, which can be sometimes be expensive, particularly with units that are fantastic with Endless like the 2-Ember costing Greed Dragon & Shadeguard. You also need room on the train to play them, which can be difficult if you're filling & overstacking your floors with allies. Finally, since Buffs go with them as well, this can be a bad idea if your strategy involves stacking effects like Valor/Rage/Conduit/Regen that will disappear upon defeat. If utilized properly however, it's the only universally-available counter to Corruption... as long as the Immortalstone upgrade happens to show up for you as an upgrade in the Merchant of Steel! There is a Celestial Alcove event that grants Endless to a unit, but it's a very rare event. First, understand what your Clan's strengths are Every Clan in the game has Cards and strategies capable of beating the game as the highest difficulty levels without ever utilizing effects from another Clan. However, fortunately you're never forced to play the game that way, because you always board the train with a combination of two Clans! Much of the fun in this game system comes with finding strong combinations of effects within your clan combination. Additionally, managing the game's escalating difficulty may hinge on utilizing one clan's strengths to patch up another's weaknesses. Here I'll discuss some general overview of each clan, and then some ideas of how your two clans can support each other. Banished

放逐者拥有类似英勇的效果,可同时支持进攻和防御成长,还有如上升/下降/飞行等移动效果,帮助操控楼层移动,以及用于吸收大量伤害的伤害护盾,高生命值单位使用时能造成伤害的效果,还有增强攻击和柴堆伤害的近战弱点效果。 焰生

火裔氏族拥有名为【Pyregel】的强力进攻性减益效果,能帮助玩家对敌人造成巨额伤害,即便使用较弱的法术和攻击也能实现。他们的独特机制【龙之宝藏】使他们在一局游戏中能获得比其他氏族通常更多的金币和遗物,再加上【贪婪】效果,还能收集到更多金币。此外,他们还有许多旨在对整层敌人造成直接伤害的法术和技能。 月神女巫会

月神女巫会拥有【导管】增益效果,该效果能强化一整层的魔法强度,使即使较弱的法术也能达到较高的治疗量和伤害值,尤其是在与【法术弱点】减益效果结合时。她们独特的【法师之刃】效果还能让单位基于导管获得攻击力加成。月神女巫会拥有多种减伤效果,如【眩晕】和【潜行】,并且其单位的生命值和攻击属性会随时间增长。 地下军团

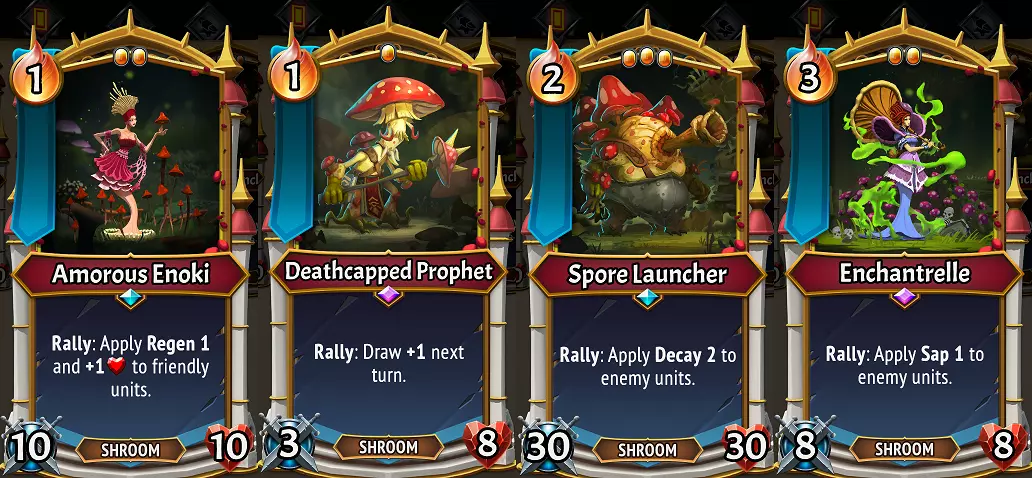
地下军团可以用真菌部队堆叠来堵塞地面,从用于阻挡攻击的普通士兵,到能抵挡最强攻击的强大塔楼,还有利用召唤部队的集结触发效果。他们拥有强大的衰败减益效果,会在每个回合结束时对敌人造成伤害,帮助他们逐渐削减敌人的生命值。他们可以非常注重防御,通过生命值提升和再生 buff 来抵消战斗中受到的伤害,以及用汲取减益效果来削弱敌人。最后,他们拥有独特的增殖效果,有助于提升现有 buff 和 debuff 的数值。 拉撒路联盟

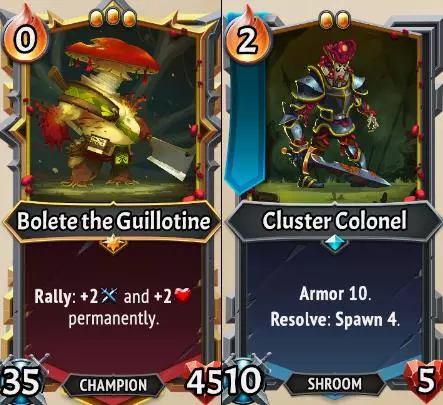
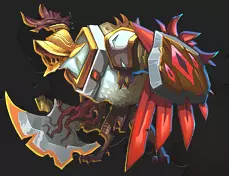
Lazarus League has the widest variety of buffs & debuffs in the game with their Infusion/Mix effects, allowing them to solve all sorts of enemy problems. Their unique Reanimate buff allows your units to cheat death, and can be combined with Extinguish effects to repeatedly gain benefits. Many of their Support units are "Grafted" and can generate valuable Equipment to be used on other units, and/or can be used to Attack & Block hits before the Graft is severed. Next, utilize your Clan effects for strong combos! Now that we have a general understanding of what the Clans are capable, let's think about how their powers can interact! Banished + PyreborneThe Pyreborne can take advantage of Valor effects to help keep them alive and gaining Attack values. Banished units often Strike their way through enemy lines, so enemies debuffed with Pyregel will be easier to carve through! Pyreborne have high-Health units like Greed Dragon that can be very powerful with Banished's Health-based effects. The Banished can utilize Gold gained from Pyreborne cards to afford expensive boosts to cards, and valuable Equipment Merge & Deploy effects that help their performance. The Banished can struggle to hit backline enemies, which Pyreborne has no trouble with given their many Spell & Ability effects that do so. Banished + Luna CovenBecause Valor doesn't actually "heal" units, the healing of Luna Coven combined with Valor can make extremely resilient units. Effects like Luna's Planetarium Room or Moon Pixie are better with more units on a floor, which Banished can help set up with Ascend/Descend/Flight. Luna Coven has units that gain and recover Health, making them great for use with Banished effects that damage based on Health. The Banished can struggle to hit backline enemies, which Luna Coven has no trouble with given their many Spell & Sweep effects that do so. Mageblade-boosted allies can do insane damage when combined with Banished's Melee Weakness effects. Banished + UnderlegionFunguy Troops can be spawned even on full floors, allowing huge floors of allies due to the Banished's capability of getting allies on the same floors with Ascend/Descend/Flight effects. Underlegion loves this, as it can set up multiple allies to take advantage of Spawn+Rally effects! Underlegion's Troops & Health gain effects can be very powerful with Banished's Health-based damage effects. Damage Shields are a very strong effect to Propagate. Underlegion's Decay effects can reach backline enemies that Banished struggles to reach. Banished + Lazarus LeagueThe Graft effects from Lazarus League can gift extremely valuable effects like Trample & Lifesteal that Banished units would love to take advantage of. Valor & Reanimate can create a versatile combo for survival, even against effects like Corruption. Lazarus League can help Banished units establish Armor with Valor and survive with Lifesteal effects. Unstable effects can set off chain-reactions of damage that destroy backline enemies that Banished may struggle to reach. Pyreborne + Luna CovenPyreborne has multiple low-damage Spells with effects that can become extremely powerful when combined with Luna Coven's Conduit buffs, and with Luna Coven's Spell Weakness effects. Luna Coven has Healing & Armor effects that can help offset the Pyreborne's lack of defenses. The Luna Coven can utilize Gold gained from Pyreborne cards to afford expensive boosts to cards, and valuable Deployed Rooms & Equipment that are hugely beneficial to Luna Coven units. Pyreborne + UnderlegionUnderlegion can significantly help protect Pyreborne's fragile allies with Funguy Troop stacks, Regen buffs, Health gains, or Sap effects. Pyregel combines with Decay for very powerful debuff damage. Many of Underlegion's Spell cards are best with expensive Merchant of Magic upgrades, so Pyreborne's Gold gain effects are very valuable to them. Underlegion is slightly inconsistent at reaching backline enemies, which Pyreborne is happy to help with! Pyreborne + Lazarus LeagueLazarus League can give the powerful Lifesteal effect that works well to keep Pyreborne units alive longer, or Reanimate for extra survivability still. Pyregel can significantly strengthen the effect of low-power Lazarus League spells, and the damage dealt from Unstable Explosions. The Merchant of Steel has multiple expensive upgrades that are fantastic on Lazarus League units, so they're happy to gain the extra Gold from Pyreborne's effects. Luna Coven + UnderlegionUnderlegion can Spawn additional Troop units on a floor, strengthening Conduit effects like those from a Moon Pixie or Planetarium. Underlegion's Propagate effects can be used on Luna's rare Spell Weakness effects, allowing for big spell-damage kills on enemies. Underlegion's Health & Regen effects can protect the lower Health of Luna's Attackers. Luna's variety of strong spells can help Underlegion destroy backline enemies and keep Troop stacks Healthy. Luna Coven + Lazarus LeagueLazarus brings multiple Graft Equipment options, Rage, and Attack boosts that can make Luna's Attackers very powerful. The combination of Heals/Armor from Luna and Lifesteal/Reanimate/Damage Shields from Lazarus makes very survivable units. Some of Lazarus' low-power Magic Spells can become extremely strong with Luna's Conduit buffs. Both clans have units that can grow in stats, making very powerful units that are tough for bosses to take down, and Luna has multiple ways to gain/save Ember which helps with Lazarus' Ember-hungry cards. Underlegion + Lazarus LeagueLazarus can apply numerous buffs & debuffs with its Infusions, and Underlegion can Propagate these for huge benefits. Lazarus' many ways of addressing backline allies can be utilized with an Infectory or Executioner Bolete to establish strong Rally/Troop combos. Reanimate effects can allow Green Recruit to trigger Extinguish multiple times. Underlegion can offer multiple card Draw effects that Lazarus has no access to typically. Combo Examples: Hot Head! Improving your performance in Monster Train 2 is often about developing combos that your clan combination of cards/effects/artifacts provides. While I've shown some examples of "good cards" earlier in this guide, let's consider some practical examples of the many potential ways we can potentially improve the performance of a unit. For this, we're going to use one of my absolute favorite units in the game, Pyreborne's Uncommon Banner unit Hot Head!

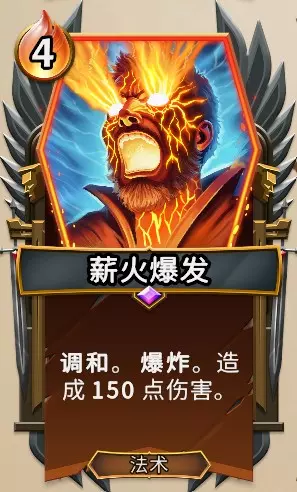
Hot Head是一个出色的单位,它拥有独特技能【火焰呼吸】,该技能能让它基于当前攻击力对场上所有敌人进行两次攻击,通常能轻松消灭后排敌人并削弱坦克。它拥有20点生命值,生存能力相当不错,尽管只占用2个单位空间,但其生存能力几乎与持盾护卫相当。Hot Head有潜力完全决定你游戏进程的成败,但根据其初始属性和效果,它存在一些问题,阻碍了其发挥真正的潜力。Hot Head的问题 Hot Head消耗2点余烬,这相当于初始部署余烬的一半;它仅有5点攻击力,对敌方坦克造成的伤害微乎其微,尤其在对抗首领时表现疲软——即便是基础的长矛守卫,其14点攻击力每回合造成的伤害也要高得多。最后,其火焰呼吸技能有2回合的冷却时间,意味着无法每回合都使用。这会导致后排敌人每两回合才能被处理一次,使得你的坦克承受伤害,可能让你获得灾祸卡牌,甚至可能让敌人趁机接近你的薪火。 解决Hot Head的问题:余烬 这是最棘手的问题,因为目前没有有效的方法来降低单位的余烬消耗。单位的余烬消耗通常能很好地反映开发者认为该单位的强度,即便一些非常简单/弱小的单位在合适的配置下也能变得异常强大。一般来说,对于暴躁者的余烬消耗,我们唯一能做的就是在某个阶段获取地狱火焰首领遗物,将部署余烬提升至6点。这或许是个不错的选择,尤其是当我们想搭配可部署装备或房间来提升暴躁者的性能时。 解决暴躁者的问题:2回合冷却 不过幸运的是,尽管暴躁者的火焰呼吸需要2回合充能,但暴躁者属于焰生氏族,而该氏族恰好有多种降低单位技能冷却时间的技巧:
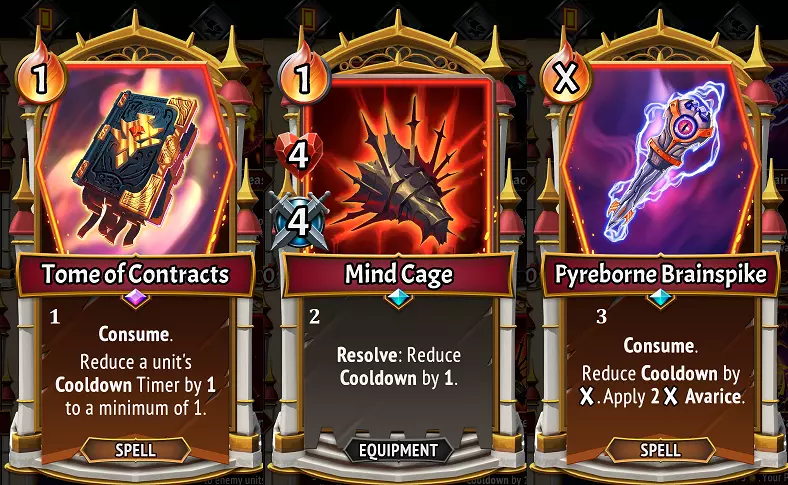
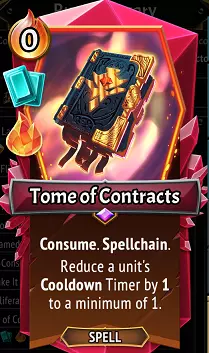
1. 契约之书会将暴躁头目的冷却时间减少至1!若获得觅石/固有升级,其将消耗0点余烬并在第一回合出现,确保暴躁头目有可能每回合都使用火焰吐息! 2. 心灵牢笼在决心阶段也会将暴躁头目的冷却时间减少1,确保其在使用后的下一回合即可就绪。它还附带+4/+4的属性加成,这将提升火焰吐息的威力。可以为其配备可部署升级,以确保在部署阶段就能装备! 3. 这是最不可靠的选项,因为焰生脑刺提供的是即时冷却缩减,而非永久效果。不过,如果暴躁头目的火焰吐息处于冷却中(包括该回合已使用过的情况),可以用它来重置冷却!理论上,可以同时给它装备永恒石和守护石来移除消耗和留存效果,使其每回合都能重复使用,这样消耗1点余烬就能反复释放火焰吐息。不过这种升级组合成本很高,我不太推荐。 或者,利用地图上的天界之井选项额外复制一个暴躁头!尤其是如果你已经给暴躁头装备了很多升级,拥有两个暴躁头也能让你每回合都使用一次火焰吐息技能! 解决暴躁头的问题:攻击力低 幸运的是,这是最容易解决的问题!钢铁商人有简单便宜的升级,比如力量石,可以给暴躁头增加14点攻击力,使其伤害提升两倍多。炽热头颅的火焰吐息初始对敌人造成5×2=10点伤害,但仅需一次力量石升级就能提升至19×2=38点伤害!甚至可以考虑再装一颗——如果炽热头颅装备两颗力量石,其攻击力将变为33×2=66点伤害。几乎不用花费多少金币,两次前往钢铁商人处就能让火焰吐息的伤害提升到初始值的六倍以上! 但为何要止步于此呢?以下是一些【无氏族】选项(可在任意回合的军械库或武器商人处获得),它们都能提升炽热头颅火焰吐息的性能:

一个装备了两个力量石和玻璃大炮的暴躁头,在斗技场房间内将拥有98点攻击力,这意味着火焰吐息现在能对其所在楼层的所有敌人造成196点伤害! 但这还没完!你的各个氏族将提供新的途径来进一步提升暴躁头的性能!所以让我们来思考一些可能的例子,看看如何将我们的敌人化为一堆燃烧的灰烬! 暴躁头的无氏族和炎生氏族选项 上面,我展示了无氏族装备和房间提升暴躁头性能的示例:
不过我们来做点有趣的事,想想如果将这些与《Pyreborne》技能组中“Hot Head”的能力结合起来可能意味着什么。 将“Equalizing Rings”与“Mind Cage”合并!让合成后的装备成为可部署型。现在我们可以不再提升“Hot Head”的攻击力,而是改为提升其生命值。为“Hot Head”装备“Largestone”升级,获得+50生命值加成。然后,你可以选择为“Hot Head”装备“Heartstone”升级以再获得+20生命值,如果你运气非常好的话,再装备一个“Largestone”以再获得+50生命值,或者装备“Titanite”来提供高额防御力,又或者装备“Smidgestone”将其缩小至1体积以便在地板上轻松放置。结果:暴躁头现在拥有至少74点生命值(非常适合长期生存),平衡戒指也会将攻击力设定为74,而心灵牢笼确保每回合火焰呼吸的冷却时间重置为0,这意味着你可以对楼层上的所有敌人造成74×2=148点伤害,并且暴躁头有足够的生命值来承受剩余伤害。任何剩余的生命值加成,比如心石,会将其提升至94×2=188,或者第二块大宝石会使其达到惊人的124×2=248每回合! 将嗜血之刃与心灵牢笼融合!使生成的装备可部署。由于火焰呼吸技能会攻击楼层上的所有敌人,因此必定能击杀多个敌人,从而提高嗜血之刃装备的攻击力。思维牢笼的冷却时间减少确保了每回合都能使用火焰呼吸,因此装备融合后的暴躁头的攻击力在游戏剩余时间内可能每回合都增长!其他任何效果,如搏击俱乐部房间或攻击力提升效果,都将进一步增强其威力。
图中这把嗜血之刃强化的暴躁头,会让那些登上火车的敌人后悔莫及! 在这两种情况下,一本内在契约之书可以替代与心灵牢笼的融合,从而实现其他潜在的装备融合,或者通过其他方式提升攻击值。 炎生族对暴躁头的贪婪馈赠:使用炎生族角色时获得龙穴,并从中掠夺,就能获得龙穴神器,这些神器能直接为暴躁头提供增益,例如:
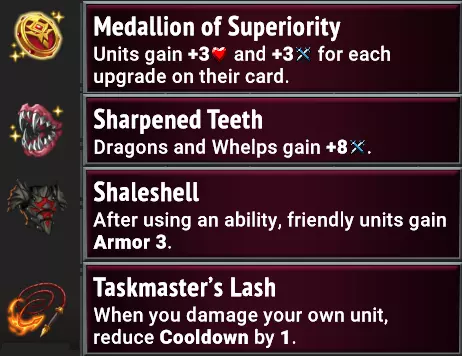
优势勋章和锐齿都能直接提升暴躁头目的属性,从而增强火焰吐息的伤害。页岩外壳能为整层提供被动护甲加成,如果暴躁头目每回合都使用火焰吐息,这个效果会特别好!而监工之鞭则提供了一种特殊的额外方式,有可能减少暴躁头目的技能冷却时间,让火焰吐息能更频繁地使用。 其他炼狱使者神器也能提升暴躁头目的战斗表现:
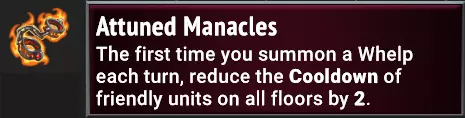

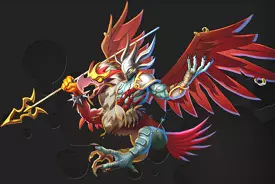
此外,Pyregel机制是通过给敌人施加减益效果来提供通用伤害加成的机制。如果敌人身上叠加了来自菲尼克斯领主、岩浆教徒、岩浆粉碎者、地狱熔炉、狂热者、吉尔达女士、鼻涕幼龙等单位的Pyregel效果,那么即使不提升炎头的攻击力,喷火技能造成的伤害也能得到增长! 这提供了一种替代策略:无需专注于将炎头的攻击力提升到极高水平,而是专门设置一层来施加Pyregel效果,任何到达下一层的敌人都必须面对炎头,而炎头的喷火伤害将因Pyregel减益效果的叠加而得到增强!虽然不会提升暴躁头目的攻击力,但炼狱之子的独特贪婪增益也能为暴躁头目带来额外效果,因为火焰吐息造成的未格挡伤害会根据你拥有的贪婪层数获得金币!所以,想象一下,如果你能通过这张卡牌来操控牌组以抽到暴躁头目会怎样。
暴躁头现在拥有15点贪婪值,通过反复使用火焰吐息攻击敌人,在一场战斗中就可能为你赚取数百金币。你甚至可以给这张卡牌叠加双重效果,将贪婪值和护甲值提升至30点,这让暴躁头在攻击加成之外,还拥有了难以置信的金币获取潜力! 你需要精心构建你的卡组,以确保抽到并使用暴躁头,因为它的目标是随机的……但这确实很棒,对吧? 暴躁头的有翼伙伴:天使与昆虫! 现在让我们来看看其他友好的氏族如何帮助提升暴躁头的性能。 暴躁头与被放逐者:总的来说,这是一个相当简单的组合。被放逐者拥有英勇这一兼具攻防的增益效果,每叠加一层都会提升单位的攻击力。这意味着任何赋予勇气值的效果也能提升暴躁头目的攻击力和火焰吐息伤害~
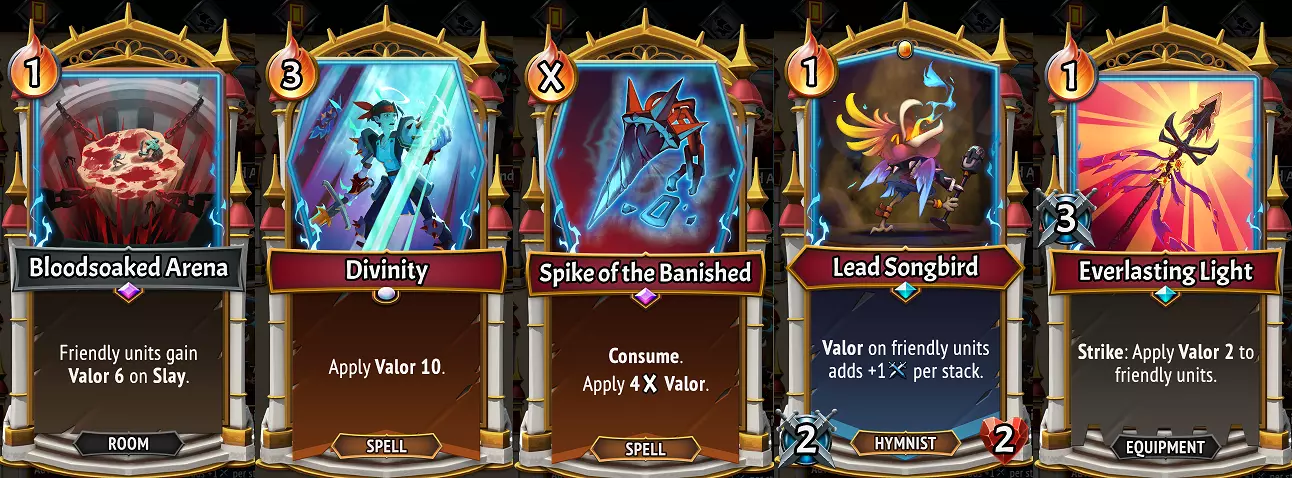
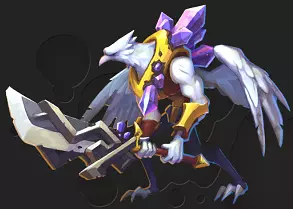
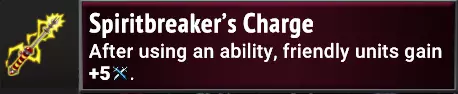
这类卡牌能显著提升【暴躁头】的伤害!【英勇】也是一种防御增益效果,可帮助你重新建立护甲,因此它能让【暴躁头】有机会在战场上承受伤害,吸收那些它用【火焰吐息】未能消灭的敌人所造成的伤害。 【血染竞技场】是【暴躁头】的绝佳房间,因为【火焰吐息】能消灭大量敌人,这既会提升【暴躁头】的攻击力,也能通过【英勇】获得大量潜在的护甲值!特别是当【暴躁头】拥有【泰坦石】或【大石块】时,它能成为兼具高额伤害和为盟友承受伤害的一站式来源!《放逐者的神性与尖刺》是两张简单但昂贵的卡牌,它们能增加大量勇气值。不过,如果与首席鸣禽赞美诗僧搭配,任何数量的勇气值增益都能显著增强,因为首席鸣禽赞美诗僧可以提升勇气值的攻击加成! 最后,永恒之光是一件不错的装备,它能根据打击次数增加所有单位的勇气值。虽然你可以把它交给暴躁者,或者与心灵牢笼融合,但这件装备如果交给具有多重打击或二元论能力的单位会特别有用。暴躁者使用火焰吐息来击退敌方后排,而拥有多重打击能力的盟友则可以利用永恒之光持续为暴躁者提供更多勇气值,从而提升火焰吐息的攻击威力!举个实际例子,假设你在有血染竞技场房间的楼层上部署了暴躁头,其后方还有一只首席鸣禽。暴躁头使用喷火技能,消灭了两个后排敌人,在此过程中获得12点勇气值和24点攻击力!经过多个回合的重复操作,你就能形成一个可怕的连招了=) 值得注意的是,我甚至还没提到流放冠军的各种职业路线,比如先锋费尔、战斗牧师塔洛斯和 enchantress Talos,或者如果你足够幸运能抽到稀有单位死亡舞者时的好运气! 暴躁头搭配月神女巫会怎样呢?起初,你可能会怀疑月神女巫除了及时治疗外,是否真的能提升暴躁头的性能。你的怀疑是有道理的,因为乍一看,似乎能提升攻击力的选择并不多:
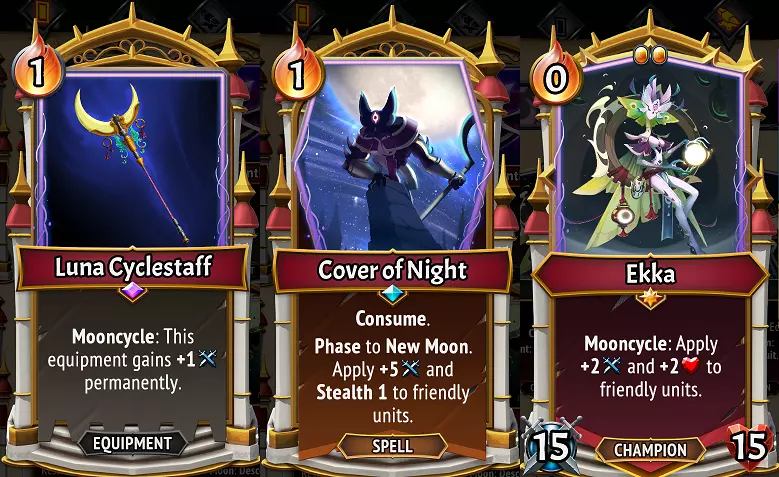
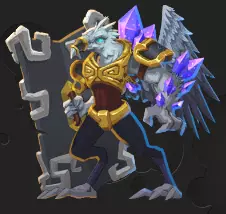
尽管“夜幕掩护”是一张强力卡牌,但“月相法杖”除非在游戏早期就抽到(考虑到它是稀有卡牌,这种情况不太可能),否则表现并不突出——它需要整整50个【月相】才能达到与“玻璃加农炮”相同的【余烬】消耗所能产生的效果!而“月相管家埃卡”这条路线还算不错,但与她的其他选择相比,往往需要【月相】相关的支援才能发挥价值。 不过!有一件出色的装备能够为这个氏族组合带来更多可能性:
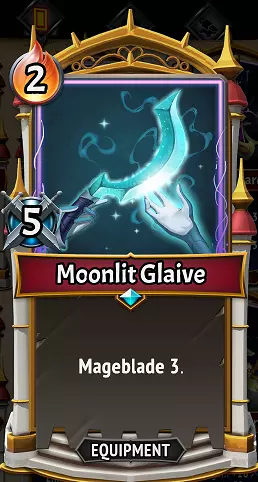
除5点攻击力外,这把月光 glaive 还能为任意单位赋予魔刃3效果,将其所在楼层的任意导管转化为可观的+3攻击力。若装备给暴躁头或与心灵牢笼融合,暴躁头便能通过此类导管效果获得大幅强化:
现在,这一系列提升导管的卡牌除了能在该楼层获得魔法强度外,也能为暴躁头提供大量的伤害加成。如果暴躁头与其他三名盟友处于天文馆房间,月光 glaive 现在将提供+65 攻击力!如果其中一名盟友是月之精灵,那还会额外增加+36 攻击力!要是那只月之精灵拥有二元论,就能再增加+72 攻击力,总计+137,太厉害了~ 获得导管的盟友、法术以及月神女巫团冠军,都能帮助你的暴躁头达到真正可怕的伤害数值!比如在天文馆的例子中,我们完全可以在楼层上放置更多盟友,或者多个月之精灵的复制体 =) 暴躁头的土壤与实验室培育的朋友们! 我们先稍微绕个路,暂时跳过地下军团,之后再回来讨论它……与拉撒路联盟的暴躁头回归到效果和连招简单直接的领域,拉撒路联盟为暴躁头带来了大量提升进攻的潜力:
混合效果中的【红色歌利亚】注入可以提供一些怒气加成,以提升暴躁头目的攻击力。

拉撒路有两张传统装备牌可以装备给暴躁小子,其中一张非常好用,而另一张则是个糟糕的主意!
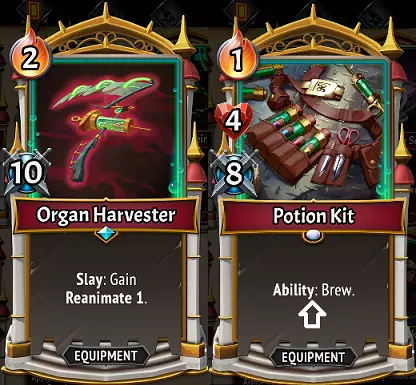
器官收割者是个很棒的选择,它能让暴躁头目的攻击力提升10点,并且在击杀时获得复生层数,这对暴躁头目来说非常容易达成!你也可以将它与上面的复生实验室搭配使用……让暴躁头目被击败几次以获得+7/+7的属性加成,提升火焰吐息的效果,之后再用生命偷取效果将其治疗回满血! 不过,尽管药水工具包是个不错的装备,能提供+4/+8的属性加成,但提供新技能的装备并不好,因为它会移除火焰吐息!单位一次只能拥有一个技能。 此外,通过嫁接单位获得的装备还能提供一些很酷的效果,比如这些:
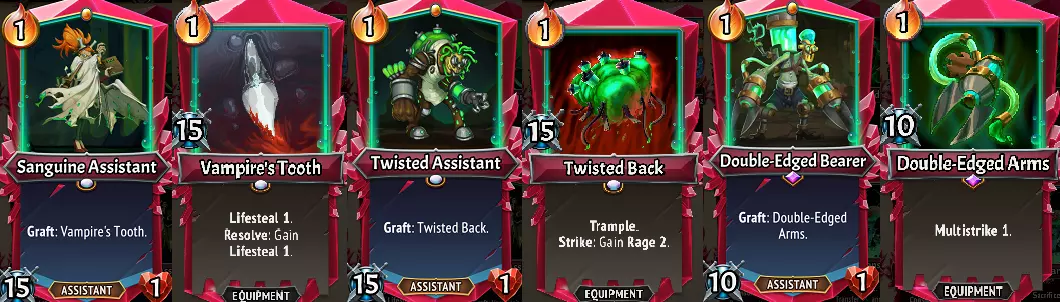
由于这些是嫁接到辅助单位上的,所以你无法将它们与心灵囚笼融合,这有点遗憾。不过,像生命偷取和多重打击这样的效果对暴躁头来说非常实用!虽然扭曲脊背提供的15点攻击力不错,但“火焰呼吸”并非打击技能,而且它很可能会消灭那些会受到践踏影响的敌人,因此这通常在具有横扫或多重打击的单位身上效果更好。 拉撒路联盟在这里提供了各种各样的选择和效果,虽然它们可能无法像法师之刃+导管组合那样轻松达到一些令人瞩目的数值,但生命偷取、复活以及大幅攻击力提升等效果的加持,能让暴躁头的工作更轻松,还能让它成为团队的半个坦克!我之前就建议过将巨石作为暴躁头目的升级选项——想想看,如果拥有强化生命值的暴躁头目在单次攻击后就能回满生命值,那该有多强! 暴躁头目搭配暗影军团 好了,如果你看到这里,有个令人惊讶的消息要告诉你……暗影军团的搭配对火焰吐息的伤害毫无提升!暗影军团能提供再生和生命值加成,让暴躁头目得以存活,但无法提升攻击力。此外,蔓延效果只能蔓延贪婪和再生……这对获取金币和生存能力有帮助,却无法增强火焰吐息。 那么,我们该怎么办?完全放弃暴躁头目?怎么敢这么想!只依靠无阵营和焚火者的效果?或许可以。或者……看看我们能否组合这些效果呢?
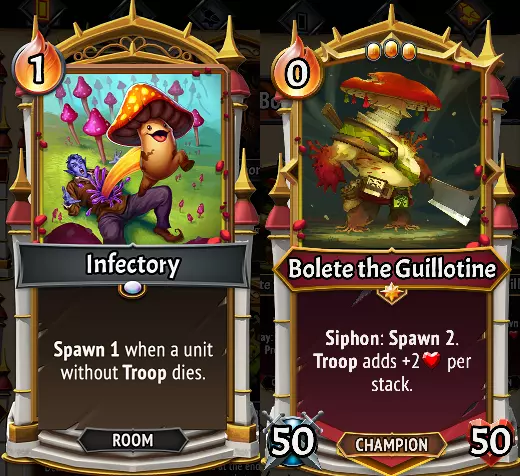
感染室和斩首者牛肝菌“断头台”都有这样一种效果:当敌人在某一层被击杀时,会触发生成效果。你知道谁在击杀后排敌人方面非常出色(而且恰好也能和牛肝菌搭配在同一层)吗?下层军团在某一层造成范围伤害的方式很少,而暴躁头在这方面比平时要好得多。所以如果我们有这两种效果中的任意一种,那就给了我们这样的选择……
将暴躁头与那些在集结触发下获得额外效果的单位搭配使用,由于暴躁头会不断使用火焰吐息摧毁敌人阵线,集结效果将持续触发。很有趣!哦,我差点忘了,地下军团确实有一种方法或许能强化火焰吐息……

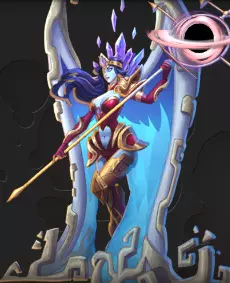
是这样吗?嘿,谁也说不准 =) 以炎头收尾 无论炎头是否会成为你最喜欢的单位,这都取决于你,但我在这里用它作为例子来说明在《怪物火车2》中提升性能的一种方法:选择具有良好效果的单位,找到能增强其性能的卡牌和组合,不断强化它们,直到炽天使埃忒耳努斯乞求地狱的温暖! 保护你的后排攻击者(如果可以的话) 尽管《怪物火车2》为你提供了许多应对敌人波次的工具,但很少有策略和选项能确保你的盟友完全不受伤害,尤其是在游戏初期,你仅依赖少数随机卡牌和效果的时候。尽管即使所有盟友都被击败,只要最终由Pyre(柴堆)击败 Boss 你仍能赢得战斗,但实际上,如果你能让攻击型盟友存活更久,游戏会顺利得多。所以我们来谈谈楼层的布置方式、可能出现的问题以及如何防止这些问题发生。 通常,你的后排盟友是安全的。敌人永远不会对你施放反击法术,带有横扫效果的敌人极为罕见且只会在游戏后期出现,同时很少有敌人拥有像尖刺这样能伤害后排盟友的效果。这些情况确实存在,但在游戏的大部分时间里并不常见,这意味着只要有可能,你就应该将最强大且关键的盟友安全地安排在坦克后面。虽然有许多单位非常适合作为你的先锋部队,而且合适的升级可以将任何单位转变为强大的坦克,但现实情况是,许多单位被设计成无法承受敌人攻击的危险战斗单位。月神女巫团中就有多个这样的例子,比如夜莺、塞勒涅侍祭和占星师。
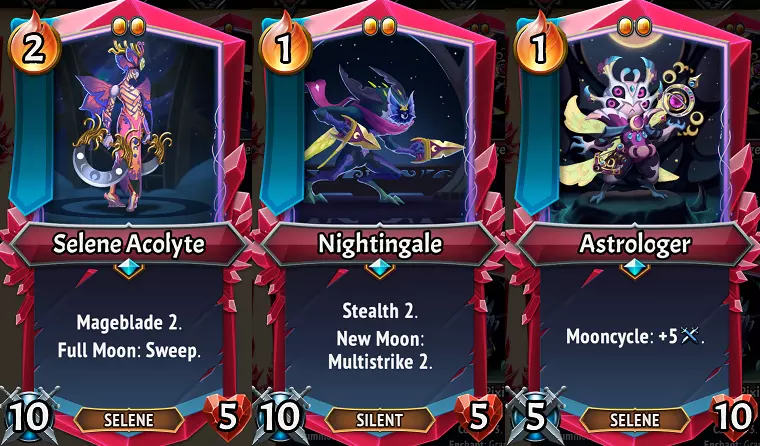
在合适的构筑下,这些角色都能成为极具破坏力的攻击者,但一旦被敌人攻击,它们都撑不过一回合。不过没关系,因为在游戏的大部分时间里,只要它们安全地待在更坚固的盟友身后,就不会受到任何伤害。
在游戏中,你有时会被迫根据可用的升级、拥有的金币数量以及有限的升级槽位(默认情况下单位和法术各两个)来做决定。我们很快会讨论这些的价值,因为尽管它们通常是安全的……但并非总是如此。 《怪物火车2》的乐趣在于让你时刻保持警惕,很少允许你沉迷于“一种”策略并重复使用直到消灭所有敌人。尤其是Boss战,会为游戏玩法增添新的变数,这些变数旨在惩罚特定的游戏风格,并迫使你在游戏过程中做出不同的决策。多个首领拥有专门针对你保护周密的后排盟友的策略和手段(飞行首领下方有下划线),例如: 军团拥有尖刺,对于像上述生命值较低的月神女巫盟友来说尤其可怕。 野蛮后裔阿奇昂拥有“顽固”路径,他会使被其攻击击中的盟友撤退,将你心爱的坦克推到后排,从而暴露你的后排单位。 织肉者有两条路径,“尖刺团块”会召唤出带有尖刺的血肉仆从,“腐化团块”则会召唤出在被摧毁时会腐化摧毁它们的盟友(通常是你的后排攻击者)的血肉仆从。 腐化者凯尔会为你的盟友叠加腐化效果,使其持续受到伤害流血,尤其是当你在他的楼层使用咒术时。塞缪尔,智天使领主拥有“滋养之馈”路径,若其滋养智天使能够对敌方单位进行滋养,便可为敌人添加尖刺效果。 阿萨内,不屈之末,当你在她所在的楼层进行咏唱时,会为该楼层的所有友军添加尖刺效果。 炽天使艾坦努斯 - 狂怒者会召唤具有横扫效果的敌人,并为其施加狂怒 enchant,使其甚至能够消灭拥有显著生命值加成的后排友军! 炽天使艾坦努斯 - 统治者会对我方楼层的所有友军施加腐蚀效果,迅速削减低生命值后排单位的生命值。 有趣的是,这遗漏了几个不具备后排目标锁定效果的首领,其中包括斯特莱克斯与哈洛,这对致命的首领组合正在《怪物火车2》玩家中造成严重困扰……这是因为更多的 Boss 会直接冲破你的敌人防线发动攻击,这意味着它们的设计初衷就是为了惩罚较弱的前线防御! 那么,作为玩家你应该怎么做呢? 选项 1:使用【Heartstone 升级】增加 20 点生命值。
在上述几乎所有例子中,给你的脆弱攻击者增加20点生命值足以完全解决这个问题。这也是一个非常廉价的升级,在钢铁商人处必定能获得。所以只需一个小小的调整,你就能解决问题。很棒!现在,如果你是这个游戏系统的新手,接下来的内容可能会让你大吃一惊: 这是最糟糕的选择。它有用吗?当然!你应该这么做吗?如果可以避免,就不要!《怪物火车》的游戏系统擅长打造少数几张强大、恐怖且极具威力的卡牌,而不是平衡一堆中等强度的卡牌。用本应给坦克和阻挡者的弱生命值升级来堆砌致命的攻击者,一旦出现拥有大量生命值的敌人,从长远来看会削弱它们的实力。如果你需要升级【心石】,你的坦克和阻挡单位应该优先升级!额外的20点生命值对它们来说大多时候毫无意义,因为一波又一波的敌人从它们身边经过,根本不会对它们的生命值造成任何伤害。而且如果在无情模式下,有 Boss 突破了你的坦克防线,+20生命值也很难阻止它们的肆虐。 选项2:让我的怪物成长吧!...使用【巨石】
一个明显更好的选择。虽然价格昂贵且会增加单位体型,但它们能获得超过两倍的生命值,+50生命值,外加+15攻击力,这甚至比力量石提供的还要多。这么多生命值可以在需要时帮助它们成为坦克(尤其是与阻挡单位的来源结合使用时),在前排坦克倒下后承受多次攻击,或者如果你的氏族有卡牌支持的话,同时充当坦克和攻击者。 选项3:无尽单位可以整天都这样做!
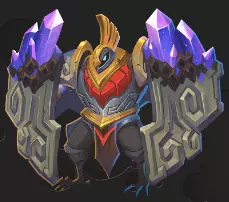
拥有【无尽】升级的单位在被击败后的下一回合会直接回到你的手牌,所有状态效果被清除,但保留战斗中获得的所有属性加成。你仍需要【余烬】和【空间】才能再次使用它们,但这可能是一个可行的选择,尤其是当相关单位在战斗中能获得属性时。不过,这种升级通常更适合坦克、阻挡单位或具有召唤/消灭触发效果的单位,而非你的攻击单位。 选项4:在需要时为它们装备物品 【焰生族】就是一个很好的例子,使用他们进行游戏时,可能会在早期获得【熔岩护甲】,这是一件“还不错”的装备,旨在为你的坦克上的攻击单位添加【 pyro gel( pyro gel)】。不过这张卡牌还能增加10点生命值,这或许足以让你的攻击者在会受到少量伤害的情况下存活下来。这是装备卡牌的一大优势,你可以将它们用在需要的地方,而这可能在每场战斗中都有所不同。 选项5:利用你的氏族提供的效果和卡牌!虽然上述所有选项在某种程度上都能奏效,但我们在这里找到了一个最佳解决方案……不要用昂贵的升级来进行缓解,而是使用氏族提供的工具来让他们存活,让他们专注于提升伤害!有些氏族和英雄在这方面表现更出色,但你不必仅仅因为攻击者最终可能会遇到一些尖刺陷阱就给他们一个糟糕的升级!放逐者拥有伤害护盾,月神女巫会为他们治疗或提供护甲,地下军团拥有生命回复或像多情金针菇(Amorous Enoki)这类能提升生命值的单位,拉撒路教派可以提供复生、生命偷取或伤害护盾。 保护你的单位免受伤害! 虽然我们讨论了多种规则例外情况,但在《怪物火车2》中,敌人波次造成的大部分伤害来自直接攻击并给你最前排盟友叠加腐化值的敌人。随着波次进入火车以及你在本轮游戏中穿越更多圆环,敌人波次和首领只会变得更强。《怪物火车2》要求你通过组建强大的攻击者、法术、装备和房间来持续造成伤害,以解决此类问题以及敌人不断增长的生命值。 但如果你无法让单位存活下来,这一切都毫无意义!《玛尔法蒂亚传说2》试图通过让玩家在游戏开始时拥有两个体型为3的大型单位【护盾护卫】来传达这一理念的重要性,它们初始拥有25点生命值,足以在游戏初期承受多波敌人的伤害。但随着游戏进程的推进,25点生命值就显得不那么够用了!例如,在较高的契约等级下,【阿尔基翁】和【织肉者】的组合能一击消灭这些护盾护卫。 那么我们该怎么办呢?一个选择是为自己配备一些非常强大的坦克单位,它们能够抵挡最猛烈的敌人攻势,保护你更脆弱的盟友免受伤害。 我们友好的初始卡牌:护盾护卫 在讨论坦克和阻挡者之前,让我们先了解一下你开始游戏时拥有的普通护盾护卫。

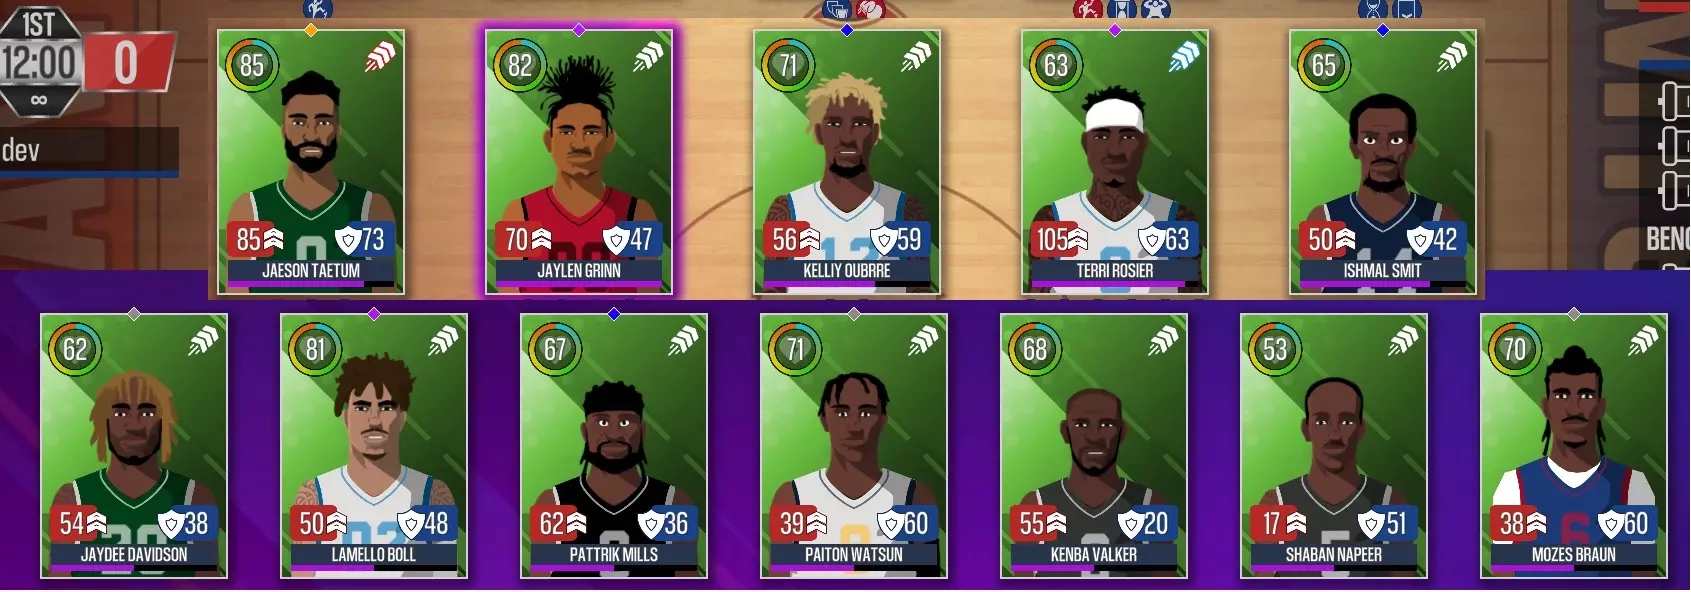
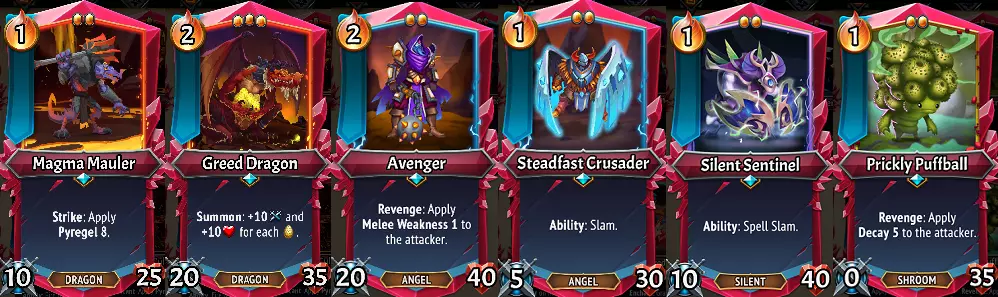
并将它们与我上面发布的一些氏族旗帜单位的图片进行比较
注意到了吗?所有这些单位都明显优于持盾护卫,而且这还不包括这些氏族中其他可能的单位。随着游戏进程,这是游戏在告诉你两件事: 1) 你需要像持盾护卫这样高生命值的盟友在波次中保护你免受伤害。 2) 持盾护卫实际上根本不是什么特别的单位!保留它们可能仍然有一定价值,但你的游戏过程很可能会为你提供更好的选择。 就像游戏要求你提高输出能力一样,我们也需要提升防御能力来跟上节奏。那么,让我们来谈谈如何为你的游戏构建一个强大的坦克。坦克记忆 用于保护可怕盟友的恐怖坦克 由于《怪物火车2》是一款打造强力卡牌的游戏,我将为大家展示一些我们为应对契约10(当前最高难度)而设计的坦克卡牌示例。 中型坦克 我们将从这些温和的升级开始,这类卡牌能在游戏早中期对进程产生较大影响,但在后期敌潮中需要一些帮助才能存活。不过,大家会发现我们也为部分单位赋予了额外功能。
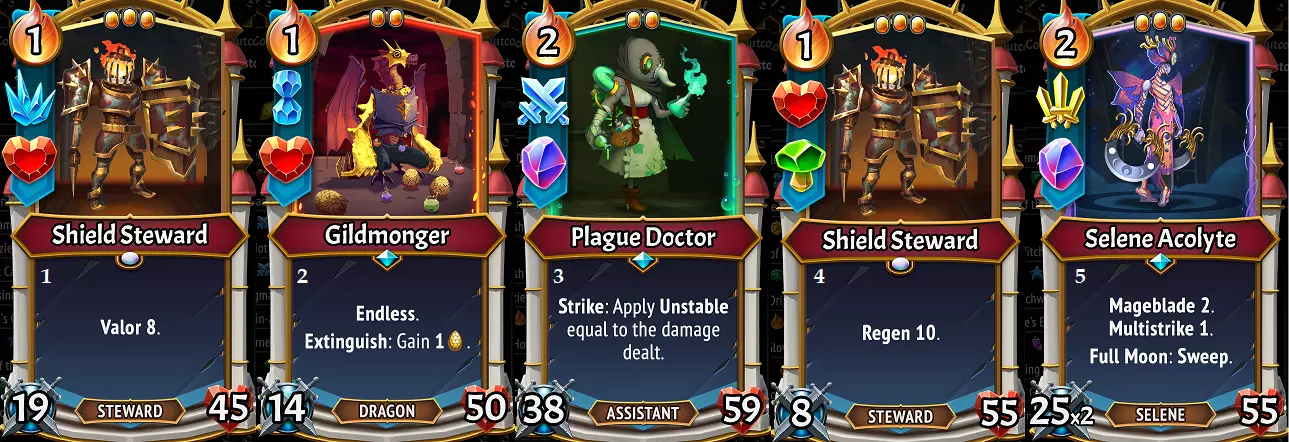
#1:一名拥有勇气石和生命石升级的盾牌护卫。45点生命值意味着它能承受几次较大的攻击,而8点英勇值意味着它每回合最多获得8点护甲,有可能在多个回合内保护自身。 #2:一名首先被赋予无尽特性的铸金师,这使它可以在被摧毁时获得龙之宝藏,然后下一回合仅花费1点余烬就能重新放置。游戏后期,我们为它装备了生命石,使其能够承受超过默认30点生命值的伤害。 #3:一名瘟疫医生,它根本不是坦克!但它体型非常小,给它装备一块巨岩之石后,它只占用2个空间,现在拥有可观的59点生命值,并且从巨岩之石和力量石中获得了攻击属性,以帮助它造成大量不稳定伤害。4:拥有心石和苔石的护盾护卫。我们现已将其初始生命值提高了一倍以上,并且当它受到伤害时,再生效果将帮助它在多个回合内存活下来。 5:塞勒涅侍祭,一个在后排部分提到的单位,因为她不是坦克……但这里要注意一个重要点!一块大宝石就使她的体型与护盾护卫相同,生命值与我们的第4个例子相同,但她还因狂暴石而获得了多重打击效果,变得非常强大。 第1和第4个例子只是强化版的护盾护卫,而其他例子则是我们赋予了额外生存能力和功能的单位,不仅仅是坦克。但如前所述,仅靠这些例子无法保护你的列车免受所有敌人的攻击……这些单位可能需要更多类似勇气、治疗、装备的效果,或者来自【格挡伤害】单位的支援,才能独自充当坦克。到了游戏后期,我们不会只依靠这类单位来保护盟友…… 所以,让我们来看看一些能做到这一点的大型坦克吧! 大型、令人畏惧的坦克
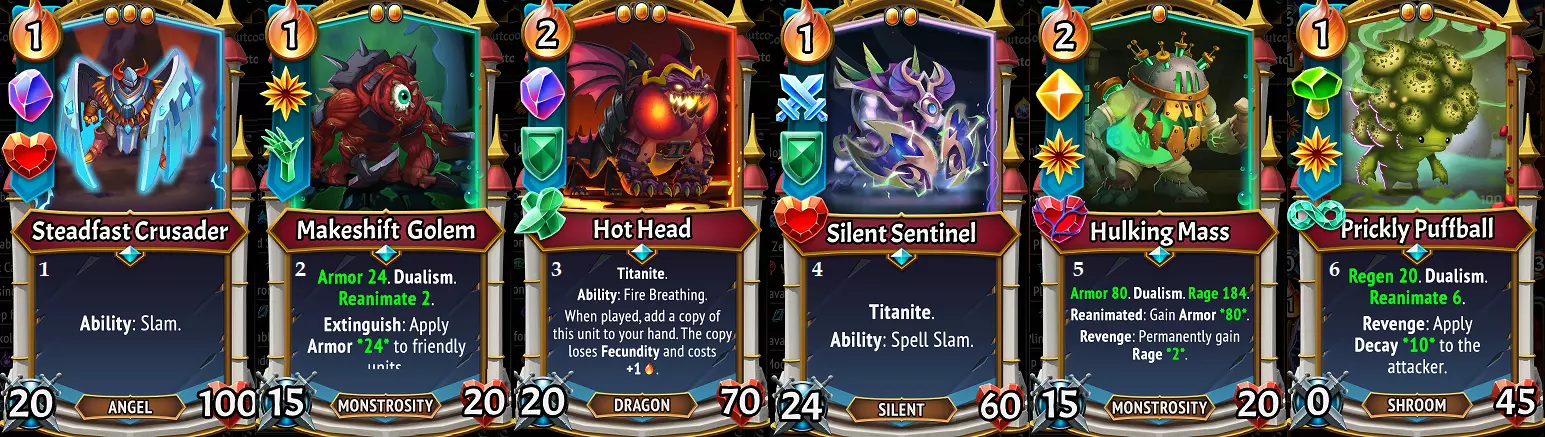
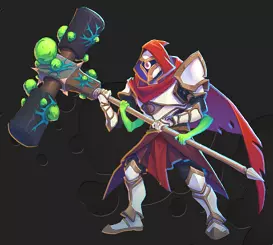
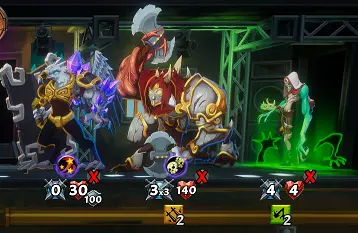
1. 我们坚定的十字军拥有【心石】和【大石块】,现在拥有可观的100点生命值。这意味着他的【猛击】也将造成100点伤害,而且由于他初始体型只有2,所以他的体型仍然和持盾护卫相同。 2. 临时魔像拥有强大的【二元论】和【科学怪石块】组合,确保它生成时带有24点护甲,还会至少再为自身和盟友施加24点护甲2次以上……为自身和盟友净增72点护甲,如果获得更多【复生】效果,增益还会更高! 3. 暴躁头拥有非常强大的【大石块】和【泰坦石】组合,将他的生命值提升至70点。【泰坦石】意味着他实际上需要承受约140点伤害才会被击败,而他的【火焰呼吸】技能将帮助他击败会对他造成高额伤害的后排敌人威胁。4:沉默哨兵拥有泰坦石与心石的组合(忽略那块力量石,那是玛利卡的火焰造成的!),这使他在被击败前最多能承受120点伤害。然而,他的法术猛击技能会将其生命值恢复至满值,这意味着在战斗过程中他可能承受大量伤害并不断将其治愈! 5:我们的庞大造物已通过微缩石缩小,以便更容易装在火车上,并且获得了强大的二元论升级,确保它生成时拥有惊人的80点护甲,并且在获得复生层数时会再次获得该护甲值!你会注意到它还从“天界凹室”事件中获得了“野蛮祝福”,这很有趣~ 第六点:“多刺绒球”的“二元论”升级意味着其上的“苔石”现在能提供20点回复,带来大量的回合间治疗(同时它会在复仇时用经二元论强化的“腐朽”技能轰击敌人)。45点生命值可能不足以独自扛到游戏后期——我们本可以搭配“地下军团”的装备/盟友来支持它,但我们通过“天界凹室”的“白鼬”事件给它提供了大量“复生”效果,而这是可以“扩散”的! 毫无疑问,你会在这里看到一些主题……大量的“心石”和“巨石”,以及在支持其构筑时的“二元论”。虽然这里没有包含“无尽模式”,但这对其中几个单位来说可能是一个可行的升级……比如说,坚定十字军可以拥有80点生命值和【无尽】效果,这样即使80点生命值耗尽,他也能复活。而且由于它带有【熄灭】效果,【无尽】可以很好地替代临时魔像上的【科学怪石头】。对于已经很肉的坦克来说,【小石子】也非常有帮助,尤其是那些获得了【大石子】升级的坦克! 所有这些都可以并且应该得到你氏族内其他效果的支持,但重要的区别在于,它们已经远远超越了我们卑微的持盾侍从所能达到的水平,能够为你的攻击型盟友提供喘息空间……在某些情况下,它们自己也能造成可观的伤害! 但是,这些并不是为你的队伍减轻伤害的唯一方法!阻挡者:蠢货与无尽伙伴 为什么体型最小的单位“财富幼兽”不直接为其他单位阻挡呢?不好了,“圣徒”有70点攻击力,即将攻击你受伤的坦克!这里要提醒各位玩家,游戏中绝大多数敌人都没有【践踏】效果。这意味着它们的攻击可以通过攻击其他可牺牲单位而非你的前线防御者来被有效“浪费”……这就是阻挡者! 吉尔达女士和格雷尔男爵都带有具有额外功能的初始卡牌,但值得注意的是,它们的体型和生命值都是1。

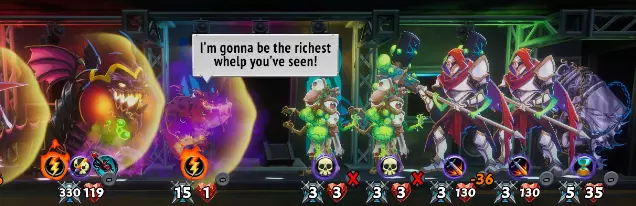
像这类单位的设计初衷可能就是为了让它们走向必然的失败,那为何不把它们放在前排来为友军吸引火力呢?与其让 Hallow的70点攻击力浪费在这些没用的家伙身上,不如用在对队伍配置至关重要的友军身上。还有这些烦人的小家伙,叫做【畸形恶魔】,它们会“自爆”并对前排单位施加【腐蚀】效果。

在你的前排放置这类阻挡者,并用法术/技能/快速效果消灭畸形恶魔是个好办法,因为腐蚀会转移到这个可牺牲的单位身上,而不是你重要的坦克~
我先在前方放置了一只肿胀幼龙,然后再使用暴躁头目的火焰吐息……幼龙会吸收腐蚀效果! 这一切可能都很明显,但任何继续玩这款游戏的人都知道,你不可能仅靠一次格挡就最终击败 bosses 并在致命的敌人波次中存活下来。不过,完全忽视这些单位是错误的,因为你可以用这些1体型支援单位做其他有潜力的事情。两个主要选择是:给它们升级以增加生命值和防御属性,使它们能够格挡多次攻击。我们将这些单位称为【生命值格挡者】。给单位添加无尽效果,这样它们可以在多个回合中格挡攻击。当与召唤/收获/集结/技能效果结合使用以获得额外收益时效果最佳。我们将这些称为【效果阻断器】 以下是我们在契约10中使用过的一些阻断单位示例! 生命阻断器
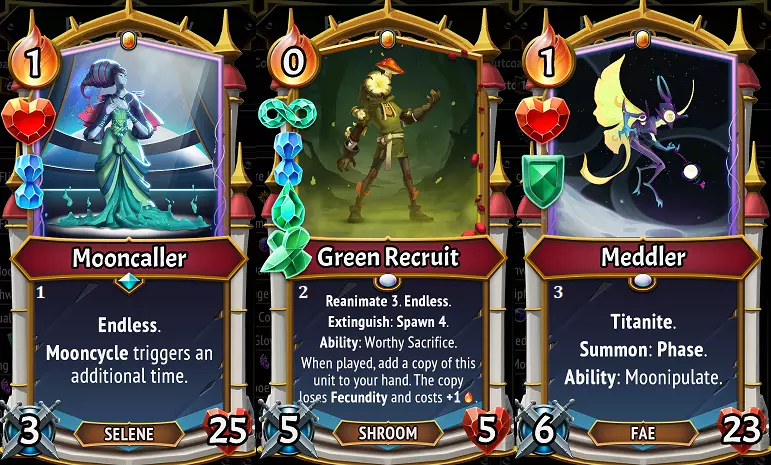
1. 我们的唤月者获得了心石和无尽特性。她可以放置在地板上,吸收至少25点生命值/腐化值,并且当她在地板上时,月相效果会翻倍。 2. 这个疯狂的绿色新兵获得了天界壁龛的复生3加成,使其在被击败时能反复召唤4个单位。我们自然也为其添加了无尽特性,让它可以不断重复这个过程,现在能帮助我们阻挡大量伤害! 3. 这个干涉者与月之管家埃卡融合,后者会在月相期间提升盟友属性。干涉者在召唤时和使用技能时都会触发月相效果。通过心石和泰坦石升级,作为一个1空间/余烬的盟友,他能承受大量伤害,并且其伤害可以被月神女巫会内的效果治愈!在列车上,空间往往是宝贵的,但如果空间充足,像示例1和3中的情况可以改用【大石块】,以获得显著更高的阻挡能力!不过在每种情况下,我们都创造了一种场景:一个低成本的友方单位可以登场,并为其他友方单位提供显著的伤害减免。 效果阻挡者
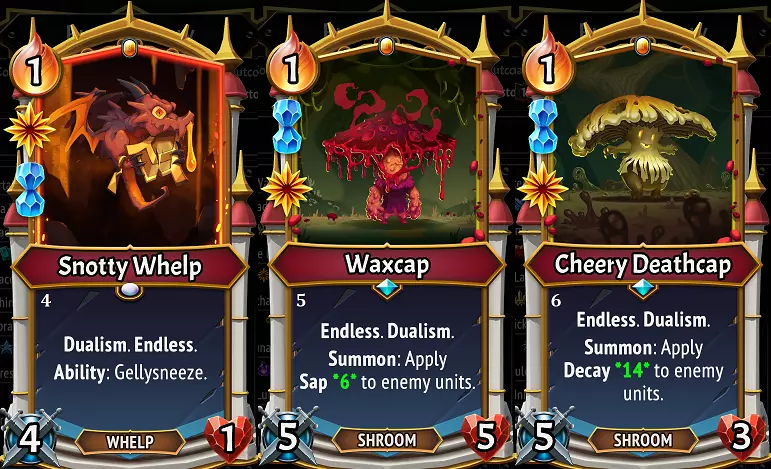
#4: Our Snotty Whelp's Ability is ready whenever he's Summoned, so not only will he block a hit for us, he'll also pile on a whopping 24 Dualism-boosted Pyregel on enemies before doing so. #5: This Waxcap will massively neuter the offense of enemy lines with Dualism-boosted Sap, sometimes even so much that it won't lose its 5 Health to be resummoned! This can protect even very fragile allies each turn. #6: The Cheery Deathcap becomes virtually a one-man pandemic, unloading massive amounts of Decay on enemies, and taking a hit for us before he goes away... ready to either unload Decay on a new wave of foes, or go "up a floor" and add yet more Decay to remaining enemies. With the exception of Waxcap, these allies are less efficient at soaking up damage, but they also provided incredible benefits to your team for multiple turns with their Endless upgrade & effects. Additionally, their Summoning & defeat can also help trigger effects like Rally & Harvest as well! And even if they're not soaking up a ton of damage, there's still many fights in which it's very beneficial for one of these units to continually eat the scary attack of an enemy, particularly high-Attack bosses like Fleshweaver, Arkion, Stryx & Hallow etc. A few caveats These can be very useful units all told, and in some situations can be strong enough to define the power of your run (those Underlegion Shrooms in particular are crazy strong), but there are a couple important things to remember in regards to using Blockers. Blockers are typically not DeployableIn every example I've shown here, these are Support units that are not Deployable/Banner units (note the lack of the blue banner on the left side of each card). That means without the Departure Manifest Artifact or other effects that summon units, you can't rely on having these units ready on turn #1 in most situations. Draws & summon effects can help with this, or you can make copies of the blockers to increase your odds of drawing them earlier. How important this it to your strategy will come down to how much use you get out of them. While I stand by the argument that Banner units are typically not Blockers, Lazarus League has two deliberate exceptions. Makeshift Golem (discussed in the Tanks section) functions similar to a blocker since its defeat also protects your allies. And the Rare unit Nine-Lived Nightmare is designed around repeatedly blocking hits for your team, ideally boosted with effects like Spikes or Unstable. These don't work in every situationEspecially as the run progresses, you'll fight increasingly powerful and plentiful waves of enemies, some of which may have effects like Multistrike... these can quickly cut through small Health pools, and thus can't be a one-stop solution for protecting your allies. This is why I didn't simply show a picture of say, an Endless Bloated Whelp; sure it can still be useful in the context of Harvest/Rally strategies, but that may wane in effectiveness over time. Many Seraph Aeternus enemy waves have 4-5 foes at once, and blocking a single hit won't necessarily save the day! This is more viable for some clans than othersYou'll note I have zero Banished examples here and didn't talk much about Lazarus League examples either. The Banished's Hymnist units are better kept alive in most cases*, and Lazarus League's Graft units are intended to be defeated once and otherwise ignored**. You can get a lot of value out of Blockers or you can ignore them entirely, and sometimes that decision will come down to the tools of your clan! *The Banished does have one very viable Blocker strategy, but it's extremely rare/niche: put Endless on an Upbeat Warbler when combined with the Artifacts Burning Feather (enrages friendly Angels on defeat) and/or Skysong Trumpet (gives 5 Valor to friendly units on Summon). This only really works with Upbeat Warbler since its effect will work on the floor before it's defeated, while the other Hymnists need to be alive through enemy attacks. **Lazarus League has one Support unit in Overworked Assistant that can become a decent blocker, because he's not a Graft unit. And unrelated to this section on Blockers, but the Sanguine Assistant can become a decent tank with Largestone upgrades, interestingly! Bosses (standard) Here we'll discuss each non-Flying boss you may encounter, their quirks, possible counters, and the potential Risk to your Pyre if they reach the top. If it looks like you're doomed, consider restarting the fight and trying different unit layouts and use of the cards in your deck! You'd be surprised what you can overcome with even small tweaks. Note that at Covenant level 4 (Cov4 for short), these gain new mechanics that can make things more difficult still. Covenant 7-8 adds higher stats, but if you're winning comfortably up to Covenant 7-8, you're probably not a beginner anymore =) Ring 1Note that at this point in the game you have almost no agency over your Deck. There are times that these fights will be very hard depending on your starting seed & clan combo. Yorael the First-Blessed
威胁:第一环两个首领中更危险的一个。高攻击力,可能轻易击败被堕落勇士和野蛮矛兵消耗的坦克,然后横扫后排。 应对方法:尽可能集结所有勇气/再生/护甲效果。可以保留一个【状态良好的坦克/持盾护卫】,让你的攻击者能安全地对其造成伤害。 圣火风险:低。某些配置难以完全阻止他,但只要对他造成一定伤害,圣火在此处就不会熄灭。 失落者阿斯特雷尔
威胁:生命值高于约拉尔,并且会逐渐失去其腐蚀值,战斗持续时间越长就越强。 应对方法:更容易受到强力攻击者和法术的伤害。派雷格尔和衰败在这里效果尤其好。 柴堆风险:中等。虽然比约拉尔容易击败,但他更高的整体攻击力/生命值以及在决心阶段(契约等级4+)的治疗效果,如果他到达柴堆,会造成更多伤害。 第二环:埃莱博尔,壁垒
威胁:攻击前恢复护甲,在保护身后盟友时会降低你的整体伤害输出。 应对方法:倾向于使用高伤害盟友,能够逐个击破其后排支援的效果,以及像腐蚀和Pyregel这样能逐渐削弱其护甲增益的效果。 Pyre风险:中等。他很难被击杀,并且在难度4级及以上时会获得一个伤害护盾,从而进行一次“免费”攻击。 军团
威胁:作为《戒指2》中更致命的首领,军团拥有尖刺攻击,能迅速击败低生命值的后排攻击者,让你来不及做出任何应对。 应对方法:如果拥有增加生命值或护甲的能力,可以使用。军团自身生命值较低,同时也容易受到高额法术伤害。 火堆风险:中等。它的尖刺也会伤害火堆!并且在难度4及以上时,它的尖刺数量还会进一步增加。 第四环:腐化者凯尔
威胁:会迅速用腐蚀削弱所有盟友,若使用惩罚性咒术则削弱效果更强。这迫使你判断在他的楼层使用法术是否“值得”承受所获得的腐蚀。在难度4时,他会立即召唤腐蚀,这将消灭未强化的长矛护卫、赞美者、精灵、幼兽、助手等生命值5点或以下的单位。拥有高生命值。 应对方法:为所有盟友提供防御以抵御腐蚀。提升盟友的属性以突破他的高生命值。 火堆风险:高。他拥有15点攻击力,你的火堆可能会在此受到重创。 审判者科林
威胁:会立即将所有剩余敌人拖至底层保护自己,迫使你必须击败它们,即便你通常可以在高层与之战斗或直接忽略。在难度4时,她会获得大幅强化,自身获得多重打击效果,同时也会赋予盟友该效果。 应对策略:如果你能在与她战斗前主动消灭敌人波次,她整体会非常虚弱。可使用不稳定效果消灭她的盟友,或用衰减效果在她受到保护时持续消耗其生命值,同时需要一名强大的坦克来承受攻击。 圣火风险:中等。在难度4时极高,因为她获得的多重打击会猛烈攻击你的圣火。 不屈的阿贾克斯
威胁:尽管他是第四环首领中生命值最低的,但他会以行动【汲取】你的盟友,迅速削弱他们的攻击值。在难度4时,他还会在攻击时附加更多【汲取】效果,如果你的坦克也在造成攻击/打击伤害,情况会很糟糕。 应对方法:高额攻击值、Pyregel、【腐蚀】以及法术都能在这里提供帮助。 火焰风险:中等。 第五环:绝对者夸托

威胁:初始拥有极高生命值和40层泰坦之皮,该效果会随着受到攻击/法术而减少。在难度4及以上时,他会在获得决心时恢复泰坦之皮;如果他迅速击败你的盟友,情况会很糟糕。 应对方法:大量低生命值的盟友能快速削弱他的泰坦之皮。强大的坦克可能会坚守足够长的时间来触发这些效果。多重打击效果以及腐蚀/冻伤也能削弱他。 火堆风险:极高。19点攻击力下,你的火堆撑不了多久,尤其是当他仍有泰坦之皮时。 不朽者
威胁:尽管生命值较低,但由于其拥有复活层数,必须反复将其击败。在难度4及以上时,它会在决心阶段获得更多复活层数,导致后续楼层需要不断应对这些复活的敌人。 应对方法:大量友方单位在此处会很有帮助,因为即使是较弱的支援单位也能通过1点伤害移除复活层数。多段攻击以及腐蚀/冻伤效果同样有效。如果你有击杀触发效果,对付它也会非常有利! 火堆风险:极高。由于复活机制,在难度4及以上时,如果它到达火堆,几乎必然导致失败,除非你的火堆极其坚韧和/或它身上带有强力减益效果。 【7环】阿thane,最后倒下
威胁:在前方召唤一个强效祈祷石,该祈祷石会在复仇时提升阿萨妮的攻击力。此外,在施法时还会给所有敌人施加荆棘效果。在第四章及以上难度中,如果她的祈祷石存活,将大幅提升她的护甲和攻击力。对充满低攻击敌人的楼层(这些敌人在第五环 Boss 战中很强)有惩罚效果。 应对方法:使用正义事业/挑战等进阶效果可以将她拉到祈祷石正前方,从而完全避开祈祷石的效果。她初始攻击力较低,如果强力法术/攻击者能摧毁她的祈祷石,她会变得弱很多。拥有再生/生命偷取的强力坦克在这里帮助很大。尽量避免施放过多法术! 火堆风险:极高。如果她到达火堆,此时她的攻击力很可能已经极高。很可能需要重试或失败! 被过度祝福者拉克斯

威胁:作为唯一一位受到三位泰坦祝福的敌人,拉克斯拥有极高的攻击力、多重打击能力、用于阻挡法术的法术护盾,以及用于自我恢复的再生能力。他在触发决心效果时会重获所有这些能力。在难度4级及以上时,他在决心效果下还会获得更多的多重打击次数,这使他变得异常恐怖。 应对方法: sap(削弱)、 daze(眩晕)和 stealth(潜行)是对抗他的有效手段,再生效果同样如此,尤其是装备了泰坦石的坦克单位。伤害护盾有助于减缓他的攻击节奏,而且由于他没有践踏能力,即便是复生单位也能有效阻止他。 圣火风险:极高。尤其是在难度4级及以上时,要么重试要么失败,他实在是太强大了。 飞行 Boss:阿尔基翁 温馨提示:请回顾基础入门技巧部分...所有飞行 Boss 都会在部署阶段放置了单位的最高楼层生成。这一点非常重要,原因如下: 1. 你的最高楼层必须做好应对 Boss 攻击的准备。 2. 如果你只在底层进行部署,Boss 的技能效果可能会让你难以招架。 3. 由于较高楼层没有敌波来保护它们,Boss 也会在较高楼层早期就受到伤害或减益效果的影响。 【野蛮之裔 阿尔基翁】
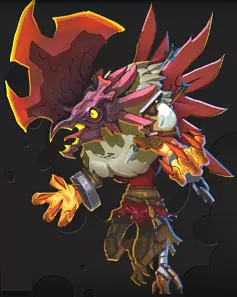
Arkion is blessed by the Savagery Titan, and contains a preview of multiple potential effects that you'll encounter among Savagery-blessed foes, that being: Multistrike effects Pyre Damage on empty floors Rage/Attack gain triggers As well as a unique effect that Retreats your allies on strike, an effect that Monster Train 1 players will remember from Talos the Architect's fight. Players may find themselves having to adapt to using different floor layouts to prevent the worst of his effects, or even holding off on destroying certain enemies to not Enrage him. Arkion's potential forms are: Furious Frenzy: Gains Rage on SiphonThreat: Despite starting with very low Attack, Arkion will go to floors with enemy waves, gaining significant Attack boosts through Rage as his allies are defeated. If many enemies are defeated in his presence, Arkion can reach unsustainably high Attack values quickly that will not degrade in time for Relentless. Particularly if fought at high Covenants & Titan Trials, in my opinion this is the most dangerous version of Arkion, as it punishes strong offense and can reach brutal Attack values that only Reanimate & Damage Shields may be able to withstand. Counters: Being too aggressive with your offense can hurt you here, particularly if you've already got a good deck setup going. You may want to be careful about gradually picking off enemies whenever Arkion is around, and consider that any Quick/Spell damage that destroys an enemy will increase Arkion's Attack. Because this is the only effect he has, this version of Arkion is particularly susceptible to movement effects, as moving him or enemies off the "killing floor" prevents him from getting stronger. Sap can offset Rage if applied in equal measure/Propagated. Additionally, Damage Shields & Reanimate are very strong here as they can help you survive his offense even if he's gained way too much Rage. Hard Headed: Retreats attacked units on StrikeThreat: By Retreating your front unit, Arkion may "expose" your backline units, easily disrupting traditional setups like a Spear Steward behind a Shield Steward. This can be problematic if there's limited space on your Floors to avoid this effect, which can result in Support units & backliners being defeated. Counters: Leaving space on your floors to tuck disposable/Blocking units is great here, as he only Strikes once at a time and will not Retreat anyone but the front unit. A full floor setup will only have this effect triggered a few times, so defensive effects can be very helpful here, as you can defend a lower-Health unit with Armor/Health/Damage Shield/Reanimate, and Arkion will knock them safely to the back for you. Although this can mess with certain setups and favors defense, working around this is not a big deal in my opinion. Banished movement cards are also a very hard counter to this, as you can simply reset their positioning afterward. If Sapped enough, he'll also not Strike at all, being a sitting chicken in the process. You also may consider not playing units during the Deployment phase, so you can set up later without fear of having your units rearranged. Pyre Hunter: Multistrike & Deals 5 damage to Pyre on empty floors Threat: A two-fold issue here, Arkion's newly gained Multistrike will make Blocking strategies less effective, still harming Tanks even if a Bloated Whelp/Assistant unit takes the first hit. Second, Arkion will Strike the Pyre in the same manner of a Terrifying Amalgam unit, which happens if the floor is empty after his turn. If you mostly have lower-Health units on floors, he may simply destroy two in a row with a Multistrike Attack and then hit your Pyre for 5 Damage as well! This is a uniquely dangerous version of Arkion if your Pyre has already taken significant damage from prior battles or Celestial Alcove events. The Multistrike aspect here also reduces the effectiveness of Damage Shields and Reanimate as strategies, as he'll blow through these twice as fast. Counters: Any sustained options for defense e.g. Valor/Armor/Regen/Heals are great here, as Arkion really can't do anything if you have a good tank setup on each floor. Because he has lower Attack, this version is also countered the hardest by Sap effects. You can also utilize movement effects to either switch Arkion or your own Units' location on the train to avoid him settling into an empty/undefended floor. Universal CountersDaze & Stealth are excellent against Arkion, since his effects are based around Strike & Resolve Triggers. Exposing Arkion to early doses of effects like Pyregel & Decay can set him up for early defeat. Sap is often strong against him as well. Flying Bosses: Fleshweaver
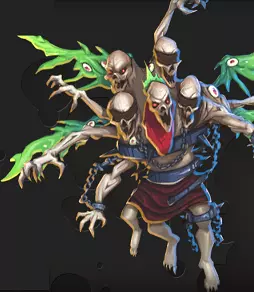
All versions of Fleshweaver have stacks of Mass: +Attack per Stack, and the Revenge trigger to lose 1 Mass and spawn a Fleshling. "Mass" is not a buff/debuff and thus cannot be affected by Propagate or the Cleansing Water Artifact. His Fleshlings gain different potential stats & effects based on his version, but all are summon with Rooted 1, ensuring they must wait at least one turn before beginning an ascent to the Pyre Chamber. Fleshweaver is blessed by the Titan Dominion, and is more "legion" than Legion before him, made up of a collection of Fleshlings that empower him. The inverse of Entropy however, Fleshweaver actually weakens as the battle continues, as he's at his strongest at the start of the battle, losing Attack with every Mass that gets pulled off him on Revenge. However, this means he also spawns with some scary high Attack values... an unpleasant realization if you were relying on your 25-Health Shield Steward to safely protect your train! Further, his Fleshlings become additional problems to deal with throughout the battle, whether it's for extra Attacks your allies are taking, Health to soak up damage that protects other enemies, or chipping away at your Attackers with Spikes & Corruption. Fleshweaver's potential forms are: More Mass: Highest stats and quantities of Mass/FleshlingsThreat: The simplest version of Fleshweaver from the standpoint of effects, his Fleshlings have the highest stats, and the extra quantity means Fleshweaver starts with some very high Attack. Standard Shield Stewards will get easily bodied here, and stripping off his Fleshlings brings more potential damage than usual to deal with. However, your backline Attackers are generally safe in this path, allowing you to potentially get through this with traditional Tank & Heal/defense strategies. Counters: If this fight is coming, a trip to the Merchant of Steel is advised so your units can keep up with these stats. You may also use Blockers to absorb his hit, or fall back on Damage Shields/Reanimate to survive. With more Mass to get through, you may want to hit him hard and fast with multiple strikes/spells quickly. Valor is particularly good here to help continually restore Armor after he & Fleshlings whittle away at it. Corrupted Mass: Lowest stats but Fleshlings Corrupt unit that destroyed themThreat: A very unusual Trigger effect happens here, as it's very rare for a debuff to be applied to a unit that defeats it - deliberately meant to punish your fragile backline Attackers. Corruption will be very difficult to handle for most clans at this point, and putting Health on backliners as a 'preventative measure' is generally a bad idea in this game. Sweep/Trample/Multistriking Attackers are particularly at risk since they may get multiple stacks of Corruption, and being able to sustain their Health every turn after that can be quite difficult! Counters: Offensive Spells are always useful against Fleshweaver, but here they're particularly amazing, allowing you to potentially destroy the Fleshlings without any Corruption to your Attackers. Regen effects will help offset the Corruption, and units like Underlegion's Amorous Enoki or Luna Coven's Champions with stat/Armor buffs counter this very well. Interestingly, because the Pyre is immune to Corruption, these Fleshlings do the least amount of damage if they reach the Pyre... not a bad fallback option if you need to avoid that Corruption entirely! Spiked Mass: Balanced stats and Fleshlings have SpikesThreat: A mixed bag between the other two paths, with Fleshlings having middle-ground stats, and Spikes to punish Attackers who go after them. Spike damage also hurts the Pyre if Fleshlings reach the top, which isn't a fun lesson if you hadn't learned that yet! If you lack Healing or defensive effects that target your backliners, they may find themselves Spiked to death, particularly Sweep/Trample/Multistriking Attackers. Counters: Spikes are just a bit less damaging than Corruption overall, because you can Heal off this damage and don't have to sustain this repeatedly, making Heals/Regen/Armor effects helpful here. Once again, Spell damage that destroys them outright can skip right past that Spike retaliation damage! Universal CountersOffensive Spells are fantastic on this fight, helping you remove Masses from Fleshweaver, and potentially destroy Fleshlings without getting your allies hurt in the process. Daze & Stealth are fantastic to stop his powerful Attacks, particularly early in the fight. Sap is wonderful in the fight, helping to quickly diminish his offense in a way that may never recover. Decay & Frostbite are very useful here as the bits of damage dealt will gradually strip Mass stacks off of him. Support units like Lady Gilda's Bloated Whelps & Baron Grael's Erratic Assistants are great allies for doing bits of damage to strip Masses while being disposable against Corruption/Spikes. Unstable effects are also particularly great here, helping your both clear away Fleshlings and set off chain reactions that can destroy other allies and weaken Fleshweaver. Flying Bosses: Cael, Lord of Cherubs
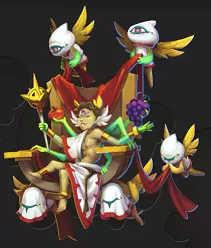
和他之前的织肉者一样,凯尔受到泰坦 Dominion 的祝福,他会召唤一群天国的小天使加入战斗,在此过程中试图提升盟友(或他自己!)的攻防能力。 所有三种类型的小天使都有“被吞噬”触发效果,当触发时,场上任何非小天使的盟友都会获得 buff 和/或属性加成,而小天使则会失去最大生命值的 1/3(这可能会导致它们被击败)。如果小天使在没有其他盟友的情况下存在,它们不会受到影响,会正常向圣火飞升。小天使也不会对圣火造成伤害,但它们的 buff 会使其他单位获得非常具有威胁性的属性和 buff。 凯尔通常被认为是第六环中比斯特莱克斯和哈洛更容易的 Boss。造成这种情况有两个原因:一是凯尔在游戏试玩版中就已登场,因此在斯特莱克斯和哈洛出现前,玩家已有数月时间练习与他战斗。二是凯尔的技能效果和招式最适合用大量攻击效果来克制,而大多数玩家都热衷于追求高攻击。即便你的卡组严重缺乏防御能力,足够的攻击力也能击败凯尔。相比之下,斯特莱克斯和哈洛会彻底摧毁缺乏防御的卡组。但需要注意的是,凯尔有可能比斯特莱克斯和哈洛更早摧毁你的火堆。小天使的增益和效果可能会造就一些极其致命的、能摧毁火堆的敌人,所以要准备好全力优先阻止它们! 凯尔的潜在形态如下: 滋养之馈:凯尔和小天使为敌方单位提供生命值和尖刺效果。

威胁:这里的凯尔的天使们那闪闪发光的苹果会大幅提升敌人的生命值,同时还会生成一些尖刺,对攻击者造成伤害。这可能会导致一种奇怪的情况:一个生命值极低的敌人可能拥有超过100点生命值,并在这个过程中对圣坛造成尖刺伤害。 然而,通常更具威胁的问题是凯尔本人会吃掉这些苹果,因为如果他在无情阶段拥有多层不断升级的尖刺,许多阵容将很难在凯尔的攻击下存活。 应对方法:进攻通常是应对凯尔的答案,在这里也不例外,要么摧毁低生命值的天使,要么输出超过它们提供的生命值增益。这场战斗中的移动效果总体来说表现出色,但在这个阶段可能最为关键,因为在该版本中凯尔会变得异常致命(游戏中没有其他首领能拥有如此多的尖刺!)。 就我个人而言,我觉得这是他威胁性最低的一个版本,但也有玩家说这是最可怕的,所以谁知道呢? 【吸血之拥】:凯尔与小天使会为敌方单位赋予攻击加成与生命偷取效果。
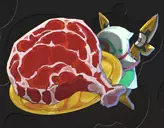
威胁:这些小天使的大理石纹肉是唯一能提升攻击等级的肉类,同时还会赋予生命偷取效果,这使得那些敌人有可能从你对他们造成的伤害中恢复生命值。贪婪的狂热者在获得这种增益后,其多重打击效果会变得非常可怕,而原本防御极高的壁垒单位也可能因此突然拥有高额攻击力。如果这些单位中的任何一个靠近柴堆,那将会是非常危险的情况! 相反,如果凯尔吃了这种肉,问题倒不大,因为生命偷取效果几乎无关紧要。不过在游戏的这个阶段,凯尔的攻击力本就不高,所以提升攻击力的收益也不大。 应对策略:比起苹果,你可能需要更积极地消灭这些多肉小天使,因此像往常一样,主动进攻是很好的解决办法。如果做不到,确保你的中层和顶层有足够的防御措施来应对强化后的敌人!移动效果在这里很有帮助,可以将肉块移出敌人的攻击范围,或者让生命值较低的敌人去吃它。 我个人认为这是最具威胁的版本,因为被肉块强化的敌人绝对能摧毁你的圣坛。 神圣喂养:凯尔和小天使为敌方单位提供伤害护盾。小天使的生命值翻倍。

威胁:神圣小天使拥有两倍于通常的生命值,更难被快速击败,而且它们为盟友提供的伤害护盾可能会成为真正的麻烦——如果你依赖大型单体攻击或法术来解决问题的话……带有伤害护盾的敌人不会受到攻击造成的伤害,即使你的【断头台牛肝菌】拥有大量践踏加成的攻击力也是如此!这也意味着这些敌人可能会对柴堆进行一次“免费”攻击,因为所有版本的柴堆都只能攻击一次,在此过程中只会剥离一层伤害护盾。 不过,这是凯尔最容易吞噬的小天使,因为一层伤害护盾在战斗中很容易被剥离。应对方法:多层阵容配置在这里会很有帮助,因为传统的阵容可能只能通过前排坦克单位的攻击来移除伤害护盾。如果你有幸拥有能够稳定摧毁蜜罐的横扫或范围伤害技能,那么这个版本可能会变得非常轻松!腐蚀和冻伤也能起到作用,因为它们同样可以剥离伤害护盾。 通用应对方法:进攻,进攻,再进攻。特别是如果你能用法术、横扫/践踏伤害、不稳定效果、腐蚀等技能消灭小天使,那么该角色可能会比当时的织肉者/阿尔基翁更容易应对。全层阵容配置在这里表现出色,因为传统的坦克+攻击者阵容很乐意有额外的盟友来帮助消灭小天使。最后,在这场战斗中,移动效果可能会非常出色,既可以通过【撤退/前进】效果来孤立小天使,也可以通过【上升】效果将小天使或凯尔从敌人获得危险增益的情况中拉出来。 飞行 Boss:斯特赖克斯和哈洛
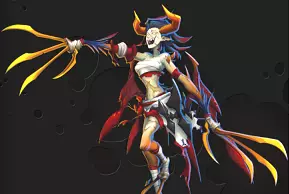

All versions of Stryx and Hallow have these effects Stryx: Multistrike and Live to Fight (boards the train & ascends like normal enemies, but retreats to the bottom rather than attacking the Pyre). If she dies, Hallow gains Multistrike, and Relentless begins. Hallow: Titanskin 10. If he dies, Stryx gains Titanskin 10, and Relentless begins. This deadly duo is typically considered harder than Cael, Lord of Cherubs, and has forced many players to re-evaluate strategies or face defeat. There are a few reasons for this:Stryx & Hallow were introduced many months after the release of the game, and function extremely differently than Cael, who players had been fighting/learning for months. There are far more Triggers, and two simultaneous bosses to fight here. They're thus a bit more complicated to understand and react to compared to Cael, who functions similarly regardless of his type of Cherub. The fight against Stryx & Hallow rewards strong defensive units/cards/strategies, and will brutalize "glass cannon" strategies. Depending on your Champion/Clan/units, there are plenty of ways to win even tough battles without shoring up your defenses until very late in the game. Because Cael could be solved almost entirely with offense, many players never built up solid defenses heading into this fight.If you see that your run is going to be fighting Stryx & Hallow, that's your cue to consider ways to boost up your defensive presence! While Cael is hopeless against an offensive-minded deck, Stryx & Hallow will turn into an adorable pair of try-hards if they can't fight their way through a brick wall of a tank. Stryx & Hallow's potential forms are: Inevitability Stryx: Grants +Attack to Hallow on Loop (returning to the first floor)Inevitability Hallow: Grants +Health to Stryx on Resolve each turnThreat: The simplest form of S&H, where their Attack & Health grow organically throughout the fight. Stryx may be "Hasted" in this form by enemy allies, seeking to rush her to the Loop trigger faster, which can be scary if Hallow reaches powerful Attack values during Relentless (particularly if Stryx is destroyed first). It's difficult to stop Resolve triggers, so Stryx will likely gain a steady supply of Health in this version, though possibly less than the other types that have Triggered effects. Counters: It's very important to have Spells or Sweep effects to stop those Haste effects, as Hallow can be extremely powerful in Relentless, particularly if Stryx dies first. However, you have much less to keep track of here, as their effects will mostly be incremental, and without triggers, you can set up floors however suits you best. This version is particularly great if you can destroy Hallow before Stryx as well. Otherwise, use their limited toolkit to your advantage here to set up robust defenses. Doombringers Stryx: Grants +Attack to Hallow on SlayDoombringers Hallow: Grants +Health to Stryx on IncantThreat: Stryx's Multistrike effect and decent Attack mean she's a pretty threatening killing machine if you've been relying on low-Health allies as blockers, and you're in for a particularly bad time if you haven't established yourself a sturdy Tank to protect backline allies. Additionally, you'll need to be careful with Incanting too recklessly when Hallow flies onto your floor... maybe not as scary as Incants on Qel the Corruptor or Athane, but still good to avoid! Counters: Strong frontline Tanks can stop Stryx from ever getting a Trigger here, which is great. Technically that applies to empty floors as well since there's no punishment in that situation... though Hallow will harass your "main" floor more consistently in that case. A unit with a Stasis Crystal can be great here, baiting Hallow onto an empty floor and not allowing Stryx to Slay anything! This version is the easiest to counter since you can control both Incanting, and avoid throwing fodder out to Stryx. However, this version will quickly destroy decks that lack good tanking, as Stryx will simply get a few Slays, and now Hallow is a flying purple murder-stone! Bloody Harvest Stryx: Grants +Attack to Hallow on RevengeBloody Harvest Hallow: Grants +Health to Stryx on SiphonThreat: Death of a thousand-buffs, Stryx's Revenge trigger is the hardest to avoid in this path, and will likely happen numerous times in the fight, particularly if you've been relying on effects like Sweep & Multistrike, or dare to put small amounts of Decay/Frostbite on her. Multiple-unit floor setups that are frequently amazing in this game may come back to haunt you here if you don't have a way to withstand a heavily-boosted Hallow afterward. Hallow, meanwhile, will fly around granting Health to Stryx on Siphon, similarly punishing you if you go hard and heavy on the offenses. Because it's much easier to proc Stryx's trigger repeatedly compared to Hallow, you may find Stryx dying earlier, leaving behind a murderous Multistriking Hallow to fight to the death. Counters: As much as you can, try to avoid piling on small bits of damage to Stryx, avoiding things like Spikes, Bloated Whelp explosions, small Unstable explosions, or modest amounts of Decay. When you hit her, hit her hard. Ascend/Descend effects are great if you can send her to an empty floor that won't give her any triggers! You'll ultimately need to destroy the enemy waves here too, so outside of movement effects or Mute, it's tough to stop Hallow's trigger, so don't focus as much on this. You may want to consider not deploying weaker units early in the fight here, and focus on getting a strong defensive front established first. Though not easy to accomplish, this is another situation where destroying Hallow first could be hugely beneficial! Universal CountersDefense, defense, and more defense. Unlike Cael, Stryx & Hallow solve almost all of their problems with their Attacks, meaning they have absolutely no recourse if they can't get through a mighty tank in front. There are no effects here that can target your backline Attackers at all! At the start, some spells may be important to defeat the allies that Stryx protects when she spawns on the bottom. Spells in general are nice since Hallow may be exposed to damage at times, and the "punishment" for defeating Hallow isn't as bad as Stryx's. Daze, Sap, and Stealth continue to be strong boss counters here if you have 'em! Mute like that from Madame Lionsmane's Maneater path can wonderfully shut them down with Sap & Mute alike. Movement cards can have some nice benefits to move them around the train as well, just be careful about Ascending Stryx on the Inevitability path! Final Boss: Seraph Aeternus the Savage I'll start with this important disclaimer: this is the hardest iteration of Seraph Aeternus overall. As much as I adore this game and I think the difficulty is good, if the developers said they were nerfing The Savage, I would eagerly welcome that.
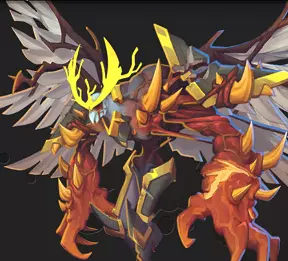
The SavageThreats:The Savage brings a host of issues for you to address, many of which are not easily addressed even with great decks!Melee Weakness. All friendly units begin with this, making them far more susceptible to enemy Attacks than usual. Seraph's first Attack will do multiplicative damage to your Top Floor Tank, easily destroying them even with modest Health upgrades. Even if a unit is Endless, the Melee Weakness will be re-applied when playing the card again. Rage Enchants.Seraph boosts allies, increasing their Attack significantly if they're on the same floor with him. In conjunction with the Melee Weakness debuff, this can result in your allies being quickly defeated by powerful attacks. Massive Health pools.This iteration of Seraph has the highest Health enemies, bringing a combination of Avowed Gladiators & Terrifying Amalgams with huge Health pools. More than the other two, this Seraph tests your Deck's capability to do big numbers of Damage consistently. Terrifying Amalgams. These bums constantly appear throughout the battle, putting your Pyre at risk of additional damage if you leave a floor empty... which is very easy to happen given how much damage Seraph and his allies are doing! This also punishes strategies that use an Inferno Room on the bottom Floor. Enemy Sweep damage. This is the only version of Seraph that has Ragewing Assassins, enemy units that do Sweep damage. You could plausibly go the entire game without encountering Sweep/Spike/Corruption damage that hits your backline allies, so this adds a requirement to additionally protect them, or address these with Spells/Abilities/Quick damage.Seraph Aeternus the Savage has numbers on his side in ways that other Seraphs do not. Huge Health pools on enemies, huge Attack numbers on enemies, and a debuff that's impossible to avoid that doubles-down on damage to your allies. Counters:Despite his many issues, there are plenty of ways you can potentially fight back: Stealth. While a hard effect to come by, Stealth completely negates these concerns, leaving your units unharmed by Attacks, and Amalgams failing to strike the Pyre. Daze. Dazed enemies don't Attack, which can be used to stop deadlier strikes, and keep Amalgams from striking the Pyre. Moving Seraph. Without his Rage buff, the enemy waves don't do a tremendous amount of damage, so using Ascend/Descend effects to prevent his Rage enchantment can be very helpful. Mute/Stasis. The Zone of Silence Room can mute a Terrifying Amalgam's Pyre-strike, in desperation. This is a Rare/Expensive Room though! Instead, a Stasis Crystal is a funny counter, because the Amalgam/enemies can't strike a unit in Stasis, but because they still exist on a floor, the Pyre strike doesn't happen. Titanite/Big Defenses. Mute/Stealth/Daze are hard to come by, so sometimes you need big numbers of your own to overcome their bigger numbers! Titanite is an incredible upgrade for softening up the damage taken by units, and is one of the only ways to eat numbers of damage consistently. Health boosts to backliners like those from Amorous Enoki or Lunar Steward Ekka can be enough to help mitigate even the scary Assassin enemies. Strategic Removal of Melee Weakness. That Melee Weakness hurts a lot more if Seraph's 30 Attack or a Raged enemy hits it, rather than a 'regular' Attack. You can attempt to deliberately let a weaker enemy Attack your unit to remove Melee Weakness permanently, allowing you to establish traditional Armor/Valor/Heal/Regen strategies afterward. Reanimate works as well, particularly if you can keep them alive after revival. Damage Shields. No matter how strong an Attack would be, a Damage Shield negates that hit! Though it doesn't simultaneously remove Melee Weakness, Damage Shields are a pretty strong counter to the big numbers he puts out. Pyregel & Conduit. Thanks to those big enemy Health pools, both of these effects can do wonders for destroying enemies. Get enough Pyregel loaded on foes, and even tiny Attacks from Whelps can put big dents in Gladiators. Conduit & Mageblade are also very strong here, as it's one of the few ways to do gigantic damage to these enemies with minimal investment. Big Valor. Enough Valor will re-establish lost Armor, giving wave-over-wave survivability even if Rage-boosted floors weaken you. Bad Matchups:Very few clans actually have favorable matchups against this jerk, importantly. But there's a few strategies that particularly suffer here. Endless Blockers. Because your Endless unit will regain Melee Weakness every time, they'll do a poor job of soaking up damage. Waxcap for Sap and Cheery Deathcap for the Decay are notable exceptions. Whole-floor Valor. Valor itself is a decent counter here, as long as you can withstand the initial hit. A unit like Firebrand can hold her own just fine with good upgrades/effects. However, because Valor only gives Armor to your frontmost unit, your units in back can still be easily defeated by the Assassins if you can't address them first! Quick w/o Sweep/Trample. The gigantic Health pools of these enemies makes it very unlikely you can Quick-strike your way through troubles. Sweep and Trample can help change that calculation, but a few Quick strikes might just dent a Gladiator and leave the rest unharmed. Single-floor setups. While many good strategies in MT2 involve big floors of allies, if your floor setup isn't on the Bottom and can't one-shot these enemies, the Amalgams will do big damage to your Pyre! Final Boss: Seraph Aeternus the Entropic Though this version of Seraph Aeternus is often considered the easiest to defeat, he's still got a host of nasty tricks that make him a tough fight for many builds.

The EntropicThreats:While The Savage was content to Rage you in the face and mow through your lines, Entropic instead tries to Exhaust & Debilitate your forces. Curse of Entropy. The Entropic will load your deck up with Scourge cards called Curse of Entropy. Though they cost 0 Ember to play, they Sap all allies on every floor of your train, weakening your Attack values. Though you can choose to not play these, each unplayed/unpurged Curse will hurt your Pyre for 3 Damage on Resolve! Sap Enchantment. Basically the exact opposite of The Savage... instead of Enchanting Rage to empower enemies, The Entropic enchants Sap to heavily weaken your allies on his floor. Combined with the Sap from Curses of Entropy, this could result in allies with even solid Attack values being unable to Attack at all! A big problem for units with Strike-based effects (e.g. Magma Mauler) or Equipment with Strike effects (e.g. Everlasting Light, Twisted Back). While we're at it, continuing with this theme... Highest Seraph Health pool. Not only does the Entropic want to wear you down, he also has a gigantic Health pool, larger than the other iterations. Considering he also does -not- have reduced Attack, the resulting strategy is for Entropic to weaken your units down to nothing, where they're too feeble to overcome his massive Health pool. Deafening Heralds. The majority of your units in the game get stronger through various Triggers, Actions, and effects, all of which become completely irrelevant if they're all Muted by the Deafening Heralds that routinely show up in this fight! Purified Souls. These enemies show up in big numbers in this fight, have very high Attack values, and are protected by Spell Shields that prevent you from easily exploiting their low Health. Ominous Acolytes. Waves that lack Deafening Heralds often are replaced by these Healers that now come with a nasty trick of empowering their allies with big Attack boosts if you repeatedly Incant on the floor. Higher Health foes. Though Entropic has many enemies with lower Health values, some big meatshields & tanks will still show up later, and unlike The Savage & Dominant, the Sap effects from Enchants & Curses may make you too weak to handle these, exposing your Pyre to damage.Counters:Lucky for us, there are multiple ways to work around these: Spikes/Revenge/Jackstrips/Quick. Due to the low Health of Purified Souls, effects like Spikes, the Jackstrips Clanless artifact, Revenge damage like from the Shield of Wyngh, and Quick damage (particularly with Multistrike, Trample, Sweep etc.) can eliminate these before they get a chance to continually damage your floors. Speaking of... Debuffs: Pyregel/Unstable/Decay. Sure you may be Sapped, but that means nothing to you if your strategy involves debuffs like Decay, Unstable, or stacking Pyregel such that even wimpy Attacks do tons of damage. Spells/Conduit/Mageblade. Sure you'd think that with Purified Souls' Shields, Muting, and Incant-punishing strategies, that Spells would be off-limits. But no... Spells can be fantastic for blasting away Heralds & Acolytes before they even get to use their effects on you! And even if you're Sapped a ton, Conduit & Mageblade effects will still be active, allowing you to do big damage regardless. Stealth. Units with Stealth can avoid all the damage dealt by this Seraph, even if an Acolyte gets many Incant triggers! Inferno Room. While this wasn't a great idea against The Savage, against both The Entropic and The Dominant, this can entirely defeat all Heralds, Acolytes, and Souls for you. Zone of Silence. A hard-counter to Heralds & Acolytes, having one of these will allow you to freely pursue even Incant-based strategies that struggle here. Pretty expensive Room, though! Outpace Sap with Valor/Rage. Though Valor is a weaker Attack boost compared to the loss of Sap, if applied in big numbers, you can shrug off the loss of Sap entirely. Rage is more potent than Valor, and offsets Sap in equal measure in most cases. Endless/waiting to play units. Replaying a defeated unit with Endless removes all buffs & debuffs, including all accumulated Sap! This can be a great strategy for beating The Entropic over multiple floors, as units Endless units can be replayed, keeping all stat boosts but losing the Sap debuffs. You may also choose to not play units until later in the fight if you can manage to do so, avoiding some early Sap from the Curse cards. Slow deck cycling. If you utilize effects like Holdover and Endless units repeatedly, you can "slow-walk" your deck, drawing very few new cards each turn, which makes you less likely to draw the Curses of Entropy! Ascend/Descend. Very good effects on this fight, either for moving Heralds/Acolytes out of the way, or sending Seraph to a different floor to avoid his Sap enchantments. Discards. If you're far enough in the game to unlock Discard-based effects, these can destroy a Curse of Entropy without actually playing them! Big Health & Defenses. Without Corruption & Rage + Melee Weakness, strong Tank units and Valor can perform better here than against the other two. Because Sap degrades over time, you can potentially beat The Entropic by simply holding the line defensively long enough for your Attackers to lose Sap and win! Bad Matchups:Incants. Every wave here punishes Incant strategies, either by empowering enemies with Acolytes, or by Muting the effect entirely with Heralds. Trigger-based effects. A wide category here, but any strategy that relies on Triggers that cannot defeat Deafening Heralds before battle will struggle here. Think ahead of how to shut up those Heralds, or your Banished Shifting/Underlegion Spawn strategies may become worthless, and Lord Fenix & Hot Head will be breathing no fire. Most of the good Equipment has Trigger effects too, so watch out! Strike effects/Death of a Thousand Cuts. Units that need to Strike foes will not do so at all if Sapped to 0 Attack! Similarly, swarming the train with lots of smaller hits (a valid strategy against the Dominant) will not work well here due to the Sap effects. Big Decks. A weird counterpoint to the "Slow deck cycling" aspect, because Entropic will fill your deck with Curses, a big Card deck may take many, many turns to cycle, leaving you more reliant on Draw luck. Final Boss: Seraph Aeternus the Dominant The Dominant
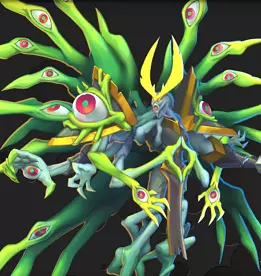
Many players may struggle with the Dominant even more than The Savage, particularly because The Savage's worst aspects come later in the game with Covenants & Titan Trials, and because The Dominant is the toughest fight for both Banished & Luna Coven, two of the earliest Clans a player will come across. In truth, The Dominant is the second most difficult boss overall, bringing some scary effects that can annihilate unprepared teams. However, he lacks the sheer overwhelming numbers that The Savage forces upon players, and he's a bit easier to counter. Threats:Corruption everywhere. Seraph will apply this to all of your allies on a floor, Misshapen Fiends will explode this onto your frontline units, and both Deformed Duos & Blightbound Guardians will load your defenders up with it. Outside of extremely aggressive use of effects like Daze/Mute/Stealth, it's impossible to avoid this entirely, and may come in incredible amounts you're not used to, thanks to Seraph doubling the effect on Strike. Scourges. Units like Discordant Heretics come out frequently in this fight, safely tucked away by lines of other allies. If these aren't destroyed, your deck will gradually fill with their brutal Scourge cards, dwindling your Ember, Card Draws, and potentially Pyre Health in the process. Reanimating Duos. Despite their low Health, the 2 Reanimate stacks on Deformed Duos make efficient destruction of them more difficult than usual. Hot Head's Fire Breathing, Multistrike Sweepers, even Spellchained AoE spells can't easily defeat these before battle, and given they do the most Corruption of any other type of enemy, these can be a real pain. Chump-Blocking Fiends. Let's say your first Attacker has an awesome 500 Attack, the type that could wipe out even a Covenant 10 Avowed Gladiator.. sweet! Only problem is, the Dominant loves to put multiple feeble 3 Health Misshapen Fiends in front, wasting powerful hits & spells if you lack Trample. On top of that, Mute is the only way to stop their Corruption, as even otherwise almighty effects like Daze & Stealth won't save you here. Backline Corruption. For the vast majority of the game, Corruption effects only ever strike the frontmost unit, allowing you to have extremely powerful units safely in your back line, even if their Health is 3-5 (this is also the case against The Entropic, and potentially against The Savage as well). Because The Dominant applies it to all units, this is no longer feasible without very specific counters, forcing you to seek out other ways to protect them. This could be as simple as putting Health upgrades on units, but Heartstones may hinder the performance of Attackers. You'll need to seek out ways to increase defenses even for backline allies in this fight, or they'll be gone in no time! Tank-melting Super-Corruption. The Dominant doubles the Corruption of your unit on Strike, having those values spike to insanely high numbers, particularly when combined with all the Corruption that will pile on them from enemy waves as well. These values will laugh in the face of even the most Valorous Tank you've got, which can be a nasty surprise for players at this point.In other words, The Dominant messes with traditional RPG strategies like big Meatshield tanks and hard-hitting backline Attackers that could have easily sailed through the entire game up to this point! Counters:If you've not yet come to understand the benefit of the Endless upgrade and Blocking units, it's time to sell you on those concepts!Endless. An Endless unit keeps all stat boosts earned in battle, but clears all buffs & debuffs. This is a huge counter to this Seraph, as the unit will return with no Corruption to speak of. Especially fantastic for units that will gain stats, or have Summon/Extinguish/Ability effects to repeatedly exploit. Blockers. Rather than traditional Tanks that will melt from Corruption, this fight is improved significantly by utilizing Blocking units who are placed in front of your floor, eat some of the Corruption that enemies dole out, then get defeated, leaving your Tank in better shape to keep fighting. Give that Blocker Endless as well and potentially some Health to prevent even more damage! Stealth. While a hard effect to come by, Stealth is as amazing as ever here, avoiding all Strikes from Guardians/Duos/Seraph himself. You'll still get some Corruption from Fiends & Seraph's Action, but it's a ton of Corruption saved overall. Daze. Dazed enemies don't Attack, which is amazing for stopping Seraph & his deadly strike, but also pretty nice for stopping the Strikes of Deformed Duos/Blightbound Guardians, or even skipping the Scourge Resolve effects of Heretics. Moving Seraph. If you manipulate Seraph's movement on the train, you can plausibly skip his Corruption AoE & Strike effects entirely until Relentless. Mute/Inferno. A Zone of Silence skips all Corruption effects from enemy waves, and prevents Scourge cards as well. A very expensive Room, but much better here than it was on Savage/Entropic. An Inferno Room is also pretty solid here, destroying all Fiends, Scourge-giving foes, and stripping a Reanimate stack off Deformed Duos. Defensive Buffs & Health gains. Reanimate can save a unit's life regardless of Corruption values. Regen can help offset the damage from Corruption. Conduit-boosted Heals & Armor gains from Luna Coven can protect your units for many turns. And Health gains combined with with these effects can give you extra flexibility, particularly if combined with Endless. A unit like Underlegion's Amorous Enoki is an incredibly good counter to this fight! Damage Shields. A Damage Shield absorbs any damage, regardless of how strong it was, which can be great if you're about to take 100 Corruption damage! The huge swarms of enemies on this fight makes it pretty hard to apply this in high enough numbers though; the best Damage Shield counter isn't available within the MT2 Clans. Trample. Trample is incredibly strong here, as the swarm of lower-Health enemies favors big Trampling Attackers who can destroy them in one good hit. Sweep/AoE Spells. Even though this won't fully counter Reanimate, even a 20 damage Sweep or AoE Spell will resolve multiple problems of enemy waves here. Pyreborne's Make It Rain is particularly awesome since it even strips away those Reanimate stacks too! Death of a Thousand Cuts. While it was a bad idea on The Entropic, swarms of small damage allies are great here, helping you chip your way through Reanimate stacks and The Dominant's low-Health waves. Decay/Frostbite. These effects will gradually destroy Reanimate stacks. A single Cheery Deathcap can do massive damage to entire waves here! Bad Matchups:Valor. This fight is pretty cruel to The Banished, as the Armor gain from Valor doesn't Resolve until after Corruption damage, meaning even Tanks with massive Valor gains may go down pretty fast in this fight. Single-floor setups. If you can't set up on multiple floors or manipulate his movement, he'll be continually harassing your one floor of allies, building up potentially insurmountable amounts of Corruption. Big hits w/o Trample. Many Champions and units build up to massive Attack values, and that may be entirely wasted on low Health enemy waves here. Support units w/o Heartstones. Hymnists, Fae, Whelps etc. are all toast here if unprotected by Health/Armor; very bad if these are vital to your strategies! Covenant Levels As you consistently get better at the game system, you might in turn find that the game's difficulty ultimately wasn't as high as it might have seemed originally. Great! Now it's time to start ratcheting up the difficulty of the game, if you're looking to increase the challenge levels. You must beat Seraph Aeternus at a Covenant level to unlock the next stage, with all effects being cumulative as you go up in level. Unlike Monster Train 1, there are only 10 Covenant levels this time, so you don't need to play as long to unlock the content! It also means the difficulty rises a bit faster than Monster Train 1, which is okay in my mind... you can also go back down a tier or two if the new levels are too punishing. With that in mind, here are the details on each Covenant level! (Note that the top Right lists the highest Covenant levels you've completed on your Champions with the current Clan combo)
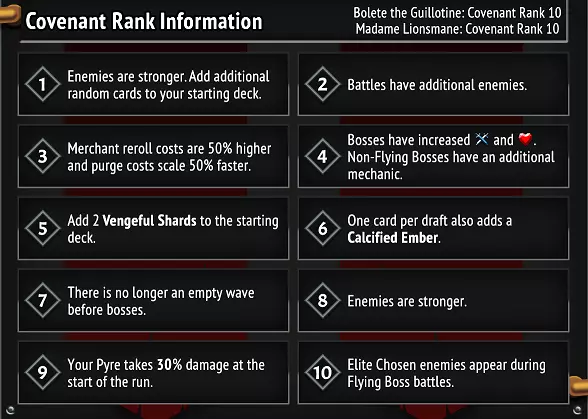
契约1:普通难度+预设卡牌 本质上,这一契约移除了“新手保护”——即敌人属性降低的设定,同时为你预设每个氏族各两张普通卡牌,以及一个从你选择的两个氏族中随机抽取的稀有旗帜单位。这是学习、提升游戏水平的理想方式,如果你只想轻松游玩而不考虑更高难度,这也是不错的选择。这是唯一会为玩家提供增益的契约等级……其余契约只会增加挑战! 契约2:敌人数量增加 此契约会提升波次中的敌人数量,让游戏对你的压制更强一些,因为你需要防御并击退比以往更多的敌人。契约3:更昂贵的重roll与净化 商人处重roll的金币消耗增加,花费金币净化卡牌的成本增长速度也更快。重roll成本的小幅增加会让快速购买商店中最强升级变得有些困难,因此这会使前期游戏略微更具挑战性。进行重roll前一定要计算好,确保有足够的金币购买商店的新物品! 契约4:更强大的 Boss 我在 Boss 部分提到过,契约4是一个重大改动,许多 Boss 会变得明显更具挑战性,在属性提升的基础上还会添加新机制。这可能会迫使你调整策略,并导致某些氏族与 Boss 的对战组合比以前更加不利。契约5:复仇碎片:你的牌组中会加入两张枯萎卡牌,且无法移除。
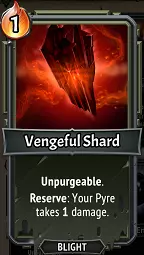
如果你无法支付1点余烬来使用这些卡牌,且它们在回合结束时仍在你手中,你的薪火将受到1点伤害。这会对你的牌组造成一定干扰,并让玩家需要决定是否值得花费1点余烬(可能因此无法使用一张有用的卡牌)来在战斗中避免薪火受到伤害。 不过,这些卡牌有两种解决方法。如果你能以任何理由将它们从手牌中弃置或消耗,它们的效果就会完全失效,很不错吧!铁路锻造氏族拥有可以用于这些卡牌的【熔炼】效果……只需熔炼它们就能获得1点余烬/锻造值,并避免薪火伤害的惩罚!最后,如果你使用【菲拉的贪婪薪火之心】(顺便说一下,这是一个非常适合学习游戏和在契约等级5+游玩的薪火之心),这些其实能帮上一点小忙……只需让这些薪火碎片对你的薪火之心造成1点伤害,就能获得10金币!还能节省余烬。 契约6:卡牌选牌中的钙化余烬 战斗后的卡牌选牌阶段(不是从旗帜选牌时!),这个小枯萎效果会随机分配到三个选项中的一个:

This is only meant to make your Card Draft choices more difficult at times, as there's nothing good about having these in your Deck, but it may be offered as a "package deal" with the Card you want the most out of a Draft. Unlike the Vengeful Shards though, these can be Purged from your deck, either by playing the 3 Ember cost in battle, or by Purging them with Shop/Unstable Vortex effects. Like the Vengeful Shards, the Railforged clan may Smelt these to gain 3 Ember/Forge, but this crucially will not Purge the card from your Deck. Additionally, pay attention if you've activated the Balatro crossover event at a Celestial Alcove and taken Perkeo... Perkeo will seed your deck with Calcified Ember cards that look very similar to this, but will have an additional bonus that automatically converts these to improved Spell cards instead. These Cards are different than each other, but are named the same, so be careful which you're dealing with! Covenant 7: No Brief RespiteRemember that nice empty wave they gave you before a Boss fight, letting you chill for a turn and set up defenses/clean up other floors? Now it's gone, and you'll face an extra wave of enemies instead. This will potentially put a bigger hurt on your defenses, and leave you with extra enemies to clean up if you can't defeat the boss on lower Floors. Covenant 8: Stat boosts for most EnemiesHonestly you'll barely even notice this at the beginning, as early enemies may only be boosted by 1 Attack or 5 Health, and early bosses gain about 20 Health. However, mid-game enemies tend to gain around 30 Health from this, and Bosses gain around 100 Health, asking a bit more of the player. Where things get really serious here is late game, as Rax & Athane gain a whopping 400 Health, Terrifying Amalgams & Avowed Gladiators gain an obscene 125 Health each, and every version of Seraph Aeternus gains another 1000 Health. Though there are some Attack gains here, the increased Health pools are the bigger deal here, forcing you to more rapidly escalate your offense to overcome enemy waves (especially against Savagery's defenses), and more defenses to survive Bosses that will take longer to go down. This can be a big escalation, so I hope you're prepared! Covenant 9: Wounded PyreYour Pyre starts damaged, potentially risking an earlier loss on the run, and/or forcing you to seek out Pyre Remains for healing earlier than you may have. If you've been doing pretty well at the game, this may honestly may not be a big deal. Or at least, certainly not as much as... Covenant 10: Scary Chosen enemiesThe final stage! Now some desaturated-looking "Chosen" forms of existing enemies will show up during Flying Bosses, and they are... not kind. These Chosen forms are big escalations in stats/threats: A Ravenous Zealot is 3/170 with Multistrike 1 and Harvest +1. A Chosen Zealot is 4/310 with Multistrike 2 and Harvest +2.. yikes. A Profane Supplicant only has 4 Health and adds one Scourge, where a Chosen Supplicant has 35 and adds two! Ultimately this final stage does two things: forces the player to face very powerful enemies alongside the Boss encounters, and expects veteran players to start preparing in advance for some new threats. For instance, Covenants 1-9 has Seraph Aeternus The Savage defended by Sweeping Ragewing Assassins, which have the advantage of being very low Health... easily defeated by even weak Spells, Abilities, Sweepers, Spikes etc. Covenant 10 introduces the Chosen Assassin, a 50 Health jerk that Multistrikes and gains Rage on Strike... not good if you were counting on a Holdover Flicker with +10 damage to solve your problems! Anyway, if you've made it here, you're certainly no beginner anymore, so congratulations! And if you're not a beginner, then maybe you're interested in fighting the game's superbosses?! Superboss(es): The Titans Well, if you’re here, you’re probably not a beginner anymore, which is great! Accessing this battle requires you to progress in the game quite a bit, and having the capability to beat all three Flying Bosses with enhanced mechanics called “Titan Trials”. Skipping any single Titan Trial locks you out from accessing this fight, so only attempt those Trials if you’re looking for the final challenge. Unlike Monster Train 1’s fight against the superboss Divinity, you have the opportunity to back out from this fight, even if you’ve beaten Seraph Aeternus with the 3rd Titan Trial. That’s important, because only a few types of builds/decks are capable of winning this fight without taking Pyre damage, so a badly damaged Pyre may make this fight unwinnable regardless of how strong your deck is. We’ll cover what each of the Titans bring to the table separately, but first we’ll focus on some important mechanics that should be understood going into the fight.Inevitable Pyre Damage. Dominion will continually strike your Pyre in this battle, and there will be yet-more damage potentially coming from waves of enemies, Savagery’s punishment of empty floors, and Entropy’s Curse of Entropy cards. Though there are ways to mitigate or heal off this damage, numerous successful decks will not have these available, so you must go into this fight expecting your Pyre to lose Health. Fate Link. All three Titans must be destroyed to win the battle, but the Titans do not simply stand on the sidelines once defeated… they instead keep functioning with all of their existing abilities, but are stuck at 1 Health (unless Healed). The fight can only be won if two Titans are already at 1 remaining Health, and the third is reduced to 0 Health. It doesn’t matter which go down in which order; it simply means your damage must be ultimately spread over numerous sources, on top of the enemy waves you’ll be dealing with. Due to the Fate Link mechanic and the way Lazarus League’s Unstable debuff works, you can neither cause an Unstable explosion on any Titan (they must reach 0 Health to be defeated, which is impossible until the end), nor can you win the battle even if 2 Titans have their Unstable thresholds surpassing their Health. Unstable wins can only happen if 2 Titans are already at 1 Health, and the 3rd one is defeated by Unstable.Titanic Immunities. The Titans are all immune to Rooted, neither Dominion nor Entropy can ever be Ascended or Descended on the train, and Entropy cannot be Advanced. This does not mean movement effects are useless, as Savagery is still susceptible to them, as are regular enemy waves. Importantly, the all-powerful Daze debuff does not work on Entropy, though it works as normal on Dominion & Savagery. Nice and simple, huh?! Enemy waves of all types. Since you’re fighting the Titans themselves, you’ll also be faced with waves of enemies matching the archetypes seen against all three forms of Seraph. This means enemy effects like Sweep, Corruption, and Silence may affect you here even if you didn’t have to deal with them against your prior Seraph fight. At Covenant 10, this means you'll face a Chosen Supplicant, a Chosen Assassin, a Chosen Acolyte, and a brand new Chosen Herald enemy as well. Extreme Front-line Tank danger. If you’ve managed to get here with only a middling amount of defense, this fight will be a rude awakening, as the front-line Tank on your floors must contend with: 1) Damage from enemy waves. 2) Corruption from Dominion and his Dominion-blessed enemy waves. 3) Savagery’s rapidly-escalating offense, including Rage, Multistrike, and Trample effects. And 4) Entropy’s consistent damage on every floor, which cannot be Dazed. That’s a very tall order for even great Tanks out there, and some decks may struggle mightily to keep them alive. Speaking of… Trample most Savage. Very few enemies in the game ever have the Trample effect, but Savagery does, and combined with his Rage & Multistrike, he can use that to brutally mow through your defenses. Although low-Health blockers absolutely can have their use on this fight (soaking Dominion’s Corruption and Entropy’s Attacks potentially), they mean nothing to Savagery unless combined with Damage Shield effects. Curses of Entropy. This will be no surprise to you if you just fought Seraph Aeternus the Entropic, but if you didn’t, you’ll now be introduced to these unfortunate Scourge cards that will be added to your deck throughout the battle. These will make it harder & slower to cycle through your deck, and often force you to choose between Sapping all allies on the train, or taking yet-more Pyre Damage. Corruption somewhat foul. On a similar note, you’ll be faced with some Corruption here, even if you ‘avoided’ it with Seraph Aeternus the Savage/Entropic. While it’s not anywhere as potent as the quantities seen with Seraph the Dominant, it’s present throughout the fight and will continue to be a blight on your allies. Multiple turns to win. Because Dominion is stuck in your Pyre chamber and is loaded with Spell Shields, defeating him quickly is extremely difficult. Even if you have a murderously strong deck that can mop the floor with Savagery & Entropy, you may still need to survive 7+ turns to win this fight. Got all that? =D Okay great, now let’s look at what we’re up against. The Titans: Dominion
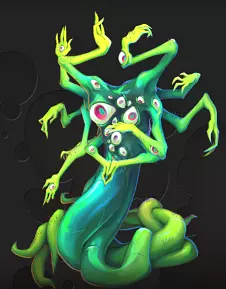
威胁:在战斗中持续攻击你的柴堆。虽然他的攻击力只有3,但随着时间的推移,伤害会迅速累积。此外,如果敌方波次到达柴堆,他还会获得“额外”攻击次数。 会对每层最前方的友方单位施加腐化效果。 无论你做什么,他都被困在柴堆室中,这使得许多常规策略对他无效。 拥有多个法术护盾来阻挡法术伤害。由于友方单位无法与 Dominion 一同处于柴堆室,这也阻止了诸如引导或触发/加成等潜在强力 buff 对 Dominion 生效。 值得一提的是,这就是 Dominion 的所有威胁了。凭借“最低”生命值和相当微弱的3点攻击力,Dominion 本身并不是很可怕。更大的问题在于他会持续消耗薪火的生命值,而且通常很难被击杀(这意味着即便你能快速击败其他敌人,也必须能够承受住野蛮攻击、熵能伤害以及敌人的波次攻击),此外他的腐化效果会让你的前排坦克越来越难存活。他确实很棘手,但在这场战斗中,他对整体威胁的贡献是最低的。 应对方法:【 sap(削弱)】。只需叠加2层削弱效果,就能让统治者的攻击力降为0,使其完全无法攻击薪火!因此,削弱在这场战斗中是极为强力的克制手段,尤其是当被削弱的敌人波次接近薪火时,薪火会反复攻击它们,从而造成额外伤害。 近战弱点。每叠加一层近战弱点,都会提升你的薪火攻击造成的伤害,从而加快战斗进程。这使得拉撒路联盟的虚弱灌注(虚弱+近战弱点)组合成为对抗 Dominion 的绝对最佳对策之一。 眩晕。被眩晕的 Dominion 完全不会攻击,太棒了!不过,这也会封锁他的决心效果,意味着你将无法获得他的薪火之光法术牌。说到这里… 薪火之光。只要你有多余的余烬来使用它,Dominion 就会给你薪火之光法术牌,这些牌在提升你薪火攻击力的同时,也能帮助对 Dominion 造成伤害。这让我想起… 高属性薪火之心。如果搭配属性阈值更高的薪火之心,这场战斗会轻松一些。攻击较高的焰心,如野蛮之焰、温格之灵和时光之父的回响,能更快造成伤害;而生命值较高的焰心,如原型心笼、菲拉的贪婪和熵之焰,即使在非常漫长的战斗中,也能更轻松地承受他3点的攻击。 其他减益效果。冻伤、腐朽、收割、焰蚀都是不错的减益效果,有助于增加 Dominion 每回合受到的伤害。但要记住,在焰心密室中通常无法触发效果或获得增益,因此如果没有一些特别强力的卡牌,可能很难大量施加这些效果。 法术(有时)。如果能移除他的法术护盾,Dominion 将永远无法恢复护盾,这让你有机会开始用法术伤害攻击他,效果非常好。如果法术护盾消失,他也会受到月神女巫团的天降法术的影响,该法术可以对带有导管增益的法术施放!此外,锻轨者的炼狱射击法术在这里当然也有效,即使支配者当时拥有法术护盾。 减益清除效果:虽然在MT2氏族中不可用,但少数减益清除卡牌在这里效果极佳,可以直接移除盟友身上累积的腐化。有一张卡牌甚至可以一次性移除他所有四个法术护盾! 阻挡者:与至高炽天使支配者不同,这里的腐化只会攻击你最前排的单位,因此放置在前方的阻挡者可以吸收这种腐化(也可能吸收熵的攻击!),非常有帮助。即使【野性】处于地板上,这在技术上仍然有效,因为【统治权】的腐蚀效果发生在【野性】的攻击之前。 《泰坦:熵》
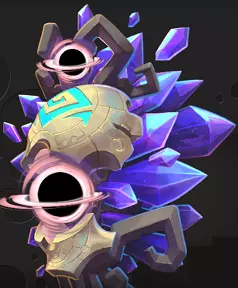
威胁:他无处不在,遍布列车的三层车厢。拥有15/20点攻击力(难度4+时),且对眩晕免疫,即便你有办法完全控制住狂暴状态和敌人波次,他仍能随着时间推移对盟友造成大量伤害。而由于他无处不在,这意味着…… 减益效果每次只能作用于他的其中一层车厢,限制了你持续削弱他的能力。当然,在有潮湿房间的车厢里他可能会被完全施加 sap(流血)效果,但他的其他车厢仍会正常对你发起攻击!这会让你更难集中减益效果来对付他。此规则唯一的例外是沉默效果,它能同时影响他的所有车厢。在战斗过程中,熵之诅咒灾祸卡牌会被加入你的牌组,这些卡牌会对你的所有单位施加【虚弱】减益效果,其【储备】效果还会造成额外的【圣火】伤害。该敌人拥有极高的生命值,并且由于其【凶蛮】特性以及敌方波次阻碍你接近它,很难对其进行稳定的攻击。除非【凶蛮】的生命值仅剩1点,或者你能在1-2个回合内稳定击败敌方波次,否则熵之诅咒总会被其他敌人阻挡,这使得你很难通过攻击来消耗它庞大的生命值。根据你的构筑不同,熵之诅咒可能会成为一个巨大的麻烦。在难度4及以上时,他每回合会对整列火车造成高达60点伤害。由于敌人众多,通常很难接近他。他的灾祸卡牌会塞满你的牌组,常常迫使你要么削弱所有盟友,要么承受更多的薪火伤害。他对眩晕的免疫既罕见又时常令人沮丧,只有沉默和削弱的组合才能真正将他压制。 应对方法: 削弱:在这里非常有用,如果施加足够的削弱效果,他就会变成一个活靶子。下层军团的黏糊房间在这里尤其出色,几回合后就能让熵的攻击力永久保持为0。不过这无法阻止灾祸卡牌,要做到这一点,你需要……沉默:这可以说是最棒的手段之一,如果你能沉默他,他就不会再往你的牌组里添加熵之诅咒,让你能正常抽牌,并且避免他带来的汲取/炼狱伤害这类灾祸效果。 践踏/横扫/范围法术及技能:由于场上会充斥着敌人,而且“野蛮”的生命值很高,所以攻击者的践踏和横扫效果,以及能攻击多个单位的技能/范围法术在这里特别有用,这样即使熵躲在后排(就像个懦夫一样!),也能持续对他造成伤害。 其他减益效果:像炼狱灼烧/腐朽/冻伤/收割这类减益效果在这里非常有用,即便他同时出现在三层场景中可能会带来一些麻烦。如果可以,尽量在同一层高强度部署它们,以充分发挥其潜力。 法术总体而言:游戏中的许多法术卡都是单体目标或范围伤害类型,而且在这场战斗中,只有少数几波敌人会像此前的熵之炽天使塞拉夫·艾特努斯那样,对咒术/施法策略进行针对性克制。因此,直接使用法术卡对他造成伤害会是一个不错的策略。 导管与法师之刃:由于他(熵)固定不动,因此非常容易受到堆满导管和法师之刃增益效果的大型楼层的攻击。只要你能让这些友军存活下来,他们就能在每一回合对他造成巨额伤害。对于导管流派,还可以考虑添加法术弱点效果,以加快击杀速度!无尽/泰坦石:泰坦石升级会将他的攻击伤害减半,使其在回合交替间威胁性大幅降低。无尽单位在这里也相当有帮助,尤其是它们身上的所有腐蚀效果会被移除,并且会保留战斗中获得的所有属性加成,让你能够通过消耗战来生存并击败熵。 减益清除效果:虽然在MT2氏族中不可用,但少数减益清除卡牌在这里效果极佳,可以直接移除盟友身上累积的 sap( sap 指持续伤害类减益效果)。 阻挡单位:特别是与统治氏族的腐蚀效果结合使用时,你的前排盟友在这场战斗中会承受巨大伤害,如果你让这些伤害由阻挡单位承受,情况会非常有利。不过需要注意的是,如果【野性】处于地板状态,这招很少会奏效,而且他很可能会在你的阻挡者阻止【熵】的攻击之前就击溃他们。 《泰坦:野性》
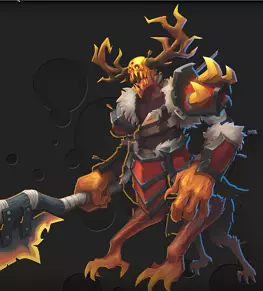
Threats: Violence incarnate, Savagery gains Rage & Multistrike throughout the fight, leading to Attack levels that continually increase throughout the fight, potentially making him an unstoppable Attacking force in protracted battles. Trample. Very, very few enemies in this game have the Trample effect... but Savagery does. This typically eliminates Blockers as a viable strategy against him, and leads to situations where backline allies can be eliminated even on turns where they had a Tank to protect them! Reanimating Tanks similarly do not protect their allies in this case, as the damage simply Tramples past them. By constantly moving throughout the train, Savagery's fairly substantial Health pool can be difficult to quickly overcome, particularly for the many strategies in the game that revolve around creating one strong floor of allies & effects. Particularly for Clans that lack movement effects, your wins may hinge on "waiting" for Savagery to cycle back to your floor of Attackers/Conduit/Abilities etc. Because Entropy can never be Advanced, Savagery will spend many turns "Blocking" damage for Entropy, until he's finally down to 1 Health. That floor must contend with the Attacks from both Titans as well, which isn't fun! Like Terrifying Amalgams, he Strikes your Pyre for 5 Damage on Resolve if the floor is Empty, which includes it being Empty because he just Multistrike+Trampled his way through your allies! This punishes train setups that don't cover all three floors... which is notably difficult to keep numerous floors of allies alive given all the damage going out in this fight!Counters: Sap: Noticing a theme?! Sap was great on Dominion, helpful on Entropy, but -amazing- against Savagery, able to completely shut him down if applied in high enough amounts. Who cares if he has Multistrike 4, you know what 5 times 0 is? STILL ZERO, you roided-up jerk. You know what's also great? Daze: An excellent counter, Savagery will simply not Attack and not strike your Pyre at all if Dazed. This gives Luna Coven one of two ways to ignore him completely, and also offers you options like having two Dualism-boosted Meathooks on the Train, which are enough to perpetually keep Savagery Dazed! What's the other Luna Coven counter? I'm glad you asked, it's... Stealth: Savagery can't hit what he can't see, making Stealth a great counter to Savagery, as he'll neither Attack an ally with Stealth, and cannot strike your Pyre since the floor isn't empty. You can also do that with... The Stasis Crystal/effect: A unit in Stasis can't be Attacked, but they still exist on the Floor, which stops Savagery from striking the Pyre. Really nice, this means that a single unit in a Stasis Crystal both protects a floor from Savagery's Pyre strike, and is fully immune to his Attack damage as well. Mute: A Muted Savagery gains neither Rage nor Multistrike, keeping his Attack at very manageable levels instead. Damage Shields: An incredible counter to Savagery, Damage Shield shut down his Trample damage entirely. Enough of these and Savagery can't do anything to harm you! Movement effects: Descend effects in particular are very hard counters to Savagery, as it can prevent him from gaining Multistrike on Loop. Ascend/Descend can be helpful here in general to try to keep him isolated to a floor where your damage is highest as well. Even Cards I'm not crazy about like Banished's Penitent's Deathsuit can be quite good here as Savagery repeatedly gains Melee Weakness while moving around the train. Pyregel: Extremely good on Savagery, as this can massively weaken his Health pool, even if small bits of damage (say, from Sapped Whelps) are happening throughout the train. If playing Pyreborne, the Jackstrips Artifact is particularly powerful combined with Pyregel here, as Savagery moves every turn, taking Pyregel-boosted damage each time! Titanite/Regen/Armor/Valor/Health-gains: If you can't stop or Sap his Attacks, the next best thing is to survive them, and for that you're going to want big defensive tricks, whether that be huge amounts of Valor, Titanite to halve incoming damage, or things like Regen/Armor/Health boosts to keep allies alive. Like Stryx & Hallow before him, if he can't Strike his way through your allies, he has no other tricks left! Endless: If you can't survive Savagery's offense, it helps to have Endless allies that can come back and fight on the train afterward! Very helpful if paired with effects that gain stats throughout the fight. Revenge Triggers: Because he gradually gains Multistrike, allies with Revenge triggers can put a real hurting on Savagery, provided they can survive the onslaught! Other Debuffs: Frostbite/Decay/Reap can be very helpful here to keep Savagery taking damage, even as he leaves your more offensive-minded floors. The Titans: In summation Ultimately, the Titans are a heck of a superboss fight, one that challenges your deck to deal with multiple simultaneous problems, while forcing you to spread out your offenses & defenses in ways you may never have dealt with before. Additionally, your Clans may have wildly different performance in this fight depending on the effects & strategies you're utilizing. For instance... Pyreborne vs. the TitansTheir Pyregel debuff is extremely good for rapidly taking down the Titans. Their lack of defenses can instead leave them a pile of well-financed-but-still-dead Dragons in a few turns! Banished vs. the TitansBig floors of boosted allies with a sturdy Valor-boosted Tank may be able to handle all the defense you need against Entropy & Savagery. But single-floor setups will be punished by Savagery's Pyre Strike, and Banished's Attacks may have issues reaching Entropy reliably. Luna Coven vs. the TitansEffects like Daze & Stealth are amazing here, and big Conduit-boosted floors can often handle Savagery & Entropy very quickly. Our fragile bugs may not last that long though, as the enemy damage here is massive and won't likely be solved by a few timely Witchweaves. Underlegion vs. the TitansSap is a universally brutal counter to the Titans, which can be Propagated further. Decay can be a great way to slowly whittle down their Health pools. However, if you've been previously relying on Spawning a few Troops to protect all of your allies, these may get crushed in seconds. Lazarus League vs. the TitansTheir huge variety of effects can solve a lot of problems, as Sap, Damage Shields, and Lifesteal effects can be massively beneficial, and a unit like Meathook's Daze effect is excellent. However, their Unstable effects struggle to get big returns against the Titans, and Reanimating allies can't block through Savagery's Trample. There are far more things to consider than that, but it's a general idea of how individual Clans can have both their highs & lows against these foes. But the good news is, I believe in you! =D Veterans of the game will have smoked these fools dozens of times over, and if they can do it, so can you~ Just remember that you'll need offensive solutions, defensive solutions, and Pyre-survival solutions (e.g. Holystone Heals or simply going in with a high-Health Pyre) to ultimately survive. Wrapping up/Change Log: Phew, this guide took more than a month to work on as I gradually chipped away at it... very tough to cover all aspects of the game. But I do love Monster Train a lot, and it seemed like a gap that needed to be filled. My clan guides go into great details, and some of the combos/'tricks' guides I've seen are very useful, but aren't designed around helping new players understand the systems, strategies, and what you can do without those specific combos. So, I hope this has been helpful, and please feel free to leave Comments here if you have any questions or need examples of things. I ran into a weird glitch that kept deleting my uploaded screenshots here too, so if there are any weird blanks that seem like they should have a picture, apologies for that... I'm trying to find and patch them all up X) Thanks for reading, good luck, and have a blast! 2/14/26: Added a section describing Covenant Levels (and a few tips for those), and a section for the Superboss Titans fight based on a user request.