换一换
换一换 


Covers these topics: EASY XP/LEVEL FARM TECHNIQUES, MODDING/BEST MODS, BEST STAR CARD COMBOS, dueling techniques, large scale gamemode techniques, LOADOUTS, Heroes vs Villains techniques. Everything I've learned in my 1200+ hours since the start of my grind in this game put together in a single guide, GUARANTEED to teach you something new whether you are brand new or a veteran c: Introductions Having started in December 2021, I've gained a good amount of experience in my 1300+ of hours since. This guide will have information that can help newer players and maybe teach a thing or two to experienced players. NOTE: on the right side you can skip to any section you want through the Guide Index. If you have anything you want added to the guide comment below, and I'd really appreciate a like and favorite ;) If you give the guide a steam award, type your name below and tell me which one you gave, and I'll add you to the shoutouts section :P This guide is constantly updated using the best info out there for the game from Youtube sources such as V_O_R_P_A_L, Krispy, CelesteQB, The Star Bazaar, AnarchYxNinja, all combined with my extensive testing and gameplay. XP FARM Guide, EASY LEVELLING The best way to level, unlock weapons and their mods, complete milestones, and therefore unlock cards for characters is by playing Co-op mode. Something you should keep in mind is Wednesdays have 3x xp active, and weekends have 2x xp active, so they are the best times to grind levels. If you don't want to level in coop, then best place to level is either Supremacy, or Heroes vs Villains. THE OVERALL BEST ERA FOR LEVELS IS THE GALACTIC EMPIRE, #2 is the Resistance, #3 is the First Order, #4 is Rebel Alliance, #5 & 6 Galactic Republic/Separatist Alliance BEST REINFORCEMENTS FOR FARMING: NOTE: this is not based on maps 1 - Sith Trooper (First Order) 2 - B2 Super Battle Droid (Separatists) 3 - Ovissian Gunner (Resistance) 4 - First Order Jet Trooper 5 - Death Trooper (Empire) 6 - Droideka (Separatists) 7 - Republic Jet Trooper BEST HEROES FOR FARMING: NOTE: this coincidentally also goes with map rankings, but these are overall 1 - Bossk/Palpatine (Empire/First Order + Empire) 2 - BB8 (Reistance) 3 - Iden Versio (Empire) 4 - Leia Organa (Rebels) 5 - Han Solo (Rebels) 6 - Chewbacca (Rebels) 7 - Darth Vader/Luke (Empire/Rebels) 8 - Anakin Skywalker (Republic) BEST Co-Op MAPS FOR LEVELLING NOTE: the XP Levels Gained is based on 3x XP wednesday, while following the instructions in the rankings, while on a hero, and efficiently farming every wave of bots. Reinforcements you can typically expect around 2/3s of the levels gained as heroes. #1) Tatooine: Jabba's Palace as the Galactic Empire - let the enemies take every point all the way up until the last one ASAP, that is where it's easiest to farm xp. 12 lvls/match #2) Takodana: Resurgent-class Star Destroyer as the Resistance - capture up until the last point ASAP, then make sure your team doesn't capture it and you farm from the two side entrances for the rest of the time. 10 lvls/match #3) Kessel: Coaxium Mine as EITHER the Galactic Empire OR the Rebel Alliance - on both, capture/let them capture until the last point ASAP, then make sure you run out the whole time as you farm them from the small tunnels. 8 lvls/match #4) Death Star II: Command Sector North as the Galactic Empire - the most time-efficient lvl farm as the only section good for lvls is the first point you have to defend, all you do is hold the blast doors on either point with hero abilities, then clean up the rest. 6 lvls/match #5) Kamino: Cloning Facility as EITHER the Galactic Republic OR Separatist Alliance - on both, capture/let them capture until the last point ASAP, then make sure you run out the whole time as you farm from the tunnels. 7 lvls/match #6) Takodana: Maz's Castle as EITHER the Resistance OR the First Order - on both, capture/let them capture until the last point ASAP, then make sure you run out the whole time as you farm from the entrances. 7 lvls/match #7) Yavin 4: The Great Temple as the Galactic Empire - capture up until the last point ASAP, then run out the time farming through the two side tunnels they come from. 7 lvls/match #8) Hoth: Outpost Delta as the Galactic Empire - capture up until the last point ASAP, then run out the time farming through the tunnels. 7 lvls/match #9) Tatooine: Mos Eisley as the Galactic Empire - capture up until the last point ASAP, then run out the time farming through the tunnels. 6-7 lvls/match HONORABLE MENTION: Endor: Research Station 9 as the Galactic Empire - BEST FOR VEHICLES, farm the second defence points with the AT-ST or the Speeder Bike, farm the wide open point if you are an AT-ST, farm the crevice point if you are a Speeder Bike. 10 lvls/match as AT-ST, 6 lvls/match as Speeder Bike RECOMMENDED MODS How to get Mods: Go to www.nexusmods.com and download FrostyMod Manager, then head to the Star Wars Battlefront 2 section and find the mods you want, follow the download instructions, then open Frosty, hit Add Mod(s), double click on the file, then apply. Mod List: (QoL) *NOTE: make sure that Improved Starcard Loadouts and Bigger SocialHub is below GameModeInfo (old version), or it won't work. BetterHitmarkers by Dyvine57 - improves the default hitmarkers which tend to glitch out Damage Reduction Percentage by Szaby59 - better especially for newer players, shows how much damage reduction both you and the enemy have next to the healthbars, helps with knowing when to attack. Alternate Stamina Indicators and Hexagon Fuel Crosshair by Szaby59 - I personally believe the vertical bar next to the crosshair is the best one, but I've seen others use the other options. Moves the stamina bar to be more easily visible. No Holograms Remastered by zatomos - Improves a lot of the bland selection and end screens to be more lively and vivid. Health on Scope Screens by Szaby59 - Improves the really annoying fact that long scopes don't show you your health as you take damage. Bigger SocialHub by Szaby59 - Improves the friend section of the menu. Enhanced Scoreboard by Szaby59 - Improves the scoreboard by showing everyone's actual kills, deaths, assists, and k/d ratio, instead of combining kills and assists as eliminations. GameModeInfo and Improved Starcard Loadouts by Szaby59 - Allows you to make different starcard loadout presets to switch between for different modes, GAME CHANGER. Also shows you map info in character selection screens. DUELING MECHANICS + GLITCHES It is extremely hard to learn these things from just text, so use the video links at the bottom to fully understand them after reading the text. Trial and error with a friend is the best way to master these techniques outside of just dueling. BASIC MECHANICS These are the simplest mechanics which will quickly improving your dueling capabilities. Controlled Attacks: Performed by holding block and waiting for a second swing until just about the end of your past swing. If done correctly, every swing animation will look the same. As a general rule of thumb, you should always be doing controlled attacks, never spamming. This is also the type of hit you perform is a basic parry. Basic Parry: Hit the enemy the second that they hit your block, time it off of the sound or the visible flash between the sabers on your screen, and it will result in you hitting them without taking any damage yourself. The basic parry can counter almost any mechanic in the game, including Grievous b-hops, hook swings, abilities, animation cancels, etc. Leaping Strikes: Every time you reset your swinging animations with a tap of the sprint button, you can swing while looking at the enemy and it'll make you leap at them with a swing, covering up to very long distances. Very useful for a follow-up hit right after an ability that pushes or throws an opponent, you will leap the distance to catch up to them. Dashing: Most of the time dash through the enemy, not away, is better. By properly learning this, you can hit the enemy once or twice even though they are blocking in the front, and you can also learn to bait swings or abilities from them just through dashes. This is mainly learned through experience. ADVANCED MECHANICS Here are mechanics that aren't needed to win, but if learned will take you from the average Low Gold Star duelist to the skill of a Max Level duelist. Double Parries: Performed by swinging twice during a parry rather than once. This only works if your first parry is perfectly timed on the first hit from the opponent, as the slight window still open allows you to hit again. To perform such a fast parry, you either need elite reaction speed or learn your opponents attack patterns to "pre-fire" a parry, then hit your follow up. The second hit will leave you open to being hit or even being double parried yourself, so be careful. Also, you can double parry with abilities as well, meaning you can hit your first perfect parry then use an ability right after and it'll connect as if it were a second swing, allowing easy knockdowns into combos. Parry Bait: Swing into an enemy's block, which most of the time will bait them to parry, but they'll usually miss-time the parry, hitting into your block instead. This is the easiest way to then follow up with double parries or an ability. Animation Cancel: Right after you dash in any direction, extremely lightly tap the jump button, then you can saber swing and it'll look like a half-swing animation that takes about half the time of a normal swing while still hitting whatever is in front of you. This means the opponent has Only works once per time you block, meaning you can reset it by unblocking and blocking again. Backwards Facing Glitch: When you dash forwards (with or without holding block), if you instantly turn 180 degrees and proceed to not move your mouse whatsoever, your character will look like it is blocking backwards, but you are really blocking the direction your camera is facing. This means you can leap strike, parry, or even pop abilities behind your character despite it facing the other way, making easy bait during a duel to chain combos or surprise your opponent. Works well with knockdowns and saber throws, and easy double parries. To counter an opponent doing this, just hook swing them or saber throw at their back while they are facing the other way, and you will get a connection. Hook Swing: One of the best methods to get past a saber block, you have to very lightly tap the jump button while turning 180 degrees in the air quickly and swinging as you turn your camera. Common mistakes are pressing jump incorrectly, swinging before you turn, and swinging after you touch the ground. If done perfectly and while extremely close behind the opponents block, the swing will hit twice. ABILITY PREDICTING: Knowing your characters abilities and your enemies abilities is extremely important to dueling. This typically only comes with a lot of experience. This also includes learning the characters/abilities that counter you and knowing which you can use to counter the opponent. A general rule of thumb is to have a count in your head of around 15 seconds right after the opponent uses a knockdown/stun, as that is the average time it takes for the ability to return. Other abilities aren't nearly as important as they don't typically change the fight drastically. Rey's Dash Strike and Han's Shoulder Charge are both 10 sec recharge times. GLITCHES Grievous B-Hop: Hold block while extremely lightly tapping your jump and swinging at the peak of your jump. You can chain this until you run out of stamina if done properly. Very useful against anything with a blaster, or anyone you knock down for insane damage output. Han Infinite Shoulder Charge: Right toward the end of the Shoulder Charge animation, use the melee key twice, then tap the Shoulder Charge button right after. By timing this properly you can infinitely run around at a faster speed, and you can cross-map travel to hit the shoulder charge on someone. Very useful for running away from bad situations, or running toward a teammate to help them. Grievous Leap Block Break: Performed by dashing away from an opponent while quickly turning 135 degrees toward either direction while also spamming the Thrust Surge Ability. If performed correctly it will let you travel insanely long distances to hit someone, and will occasionally knock an opponent even if they are blocking, but it depends on the direction they are facing. Kylo 4 Hit Frenzy: Performed exactly like the Grievous Leap Block Break but instead with Kylo's Frenzy. If done correctly, Kylo will hit 4 Frenzy hits instead of 3, with an extra block-breaking hit, meaning two of the hits will go through the opponents block rather than just one. Extremely useful when an opponent has no knockdown abilities left, and good against blasters. VIDEO SOURCES THAT WILL HELP: https://www.youtube.com/watch?v=am8EQ_Hqj6s https://www.youtube.com/watch?v=8WY8GFod-hk https://www.youtube.com/watch?v=Hfpn6wFLT8k&t=119s STAR CARD COMBOS Keep in mind that all star cards no matter the character, are up to personal preference in the end. HOWEVER, ALL of these loadouts have been tested by me for hundreds soon to be thousands of hours, and are also influenced by some of the best players I've found in this game. These combos are what lead me to get Match MVP in pretty much any mode I play every single match. If I don't mention what a gun is good at, it just means I haven't really used that weapon nearly as much so I don't have much to say. NOTE: no hero stamina cards are used because with enough experience, stamina isn't a problem. Learn to manage it wisely, take the right fights, and you'll only ever find that stamina cards take up the space of other cards that are very beneficial. When I say card numbers, such as card #4, it's from left to right, meaning the fourth from the start. For infantry classes, if its card B4, that means boost card #4, or card A8, would be ability card #8 Hero Cards NOTE: This section will cover the best loadouts for heroes for all gamemode types. LSG stands for Large Scale Gamemode (Supremacy, Galactic Assault), HvV stands for Heroes vs Villains, HS stands for Hero Showdown. IF NONE OF THESE ARE MENTIONED, ASSUME THE CARDS ARE FOR ALL MODES, Also, using the mods recommended near the top of this guide allows you to have all of these loadouts prepped for wtv mode you choose. *number = count from top left to right, if theres a slash, any of those cards are viable for that slot NOTE#2: all of these combos have been tested extensively, and I have used almost every single combo you'll find out there, these are what I believe are the most effective combos possible for each hero. Boba - 4, 6, 9 - Boba doesn't have to be played in the air for extended periods of time, increased concussion will keep you alive while feeding you free kills against anything with a blaster. Born to Fly is effective, but Boba is tied for the lowest health regen in the game at 150hp, meaning any nerf to his regen makes him worse. Bossk - LSG: 5, 8, 1/6/7 - 5 is glitched and gives you abilities back off of just shooting someone with your gun. This loadout makes you a menace against hordes of enemies. HvV: 2, 5, 7 - fast arming and multi-trap with ability cooldown reduction makes you unstoppable. HS: 2, 6, 7 - provides the same dmg output as the HvV loadout but while giving you dmg resistance for 1v1s Chewie - LSG: 2, 6, 9 - makes you an absolute tank while chaining middle ability for constant high dmg output. HvV & HS: 1, 6, 8 - makes you a tank against heroes, while allowing huge group dmg output. Vader - LSG: 1, 4/7, 5/9 - makes you unstoppable against any horde of enemies, 6 extra seconds or 25% dmg resistance while regaining stamina from kills makes you unkillable, the dmg penalty is hardly enough to make up for just how tanky you become. HvV & HS: 1, 2/4, 9 - makes you unkillable. Palpatine - LSG: 1, 4, 8 - makes every horde of enemies a free XP farm with chain lighting and shooting from a distance. HvV & HS: 2, 7, 9 - gives you way too much dps than an AoE non-saber hero should have. Card 2 is glitched to give the bonus dmg no matter what, while large electrocution radius allows for the bonus dmg to slaughter anyone you catch in the stun. Han - LSG: 1, 5, 6 - combined with the Han glitch of infinite shoulder charge, allows you to get out of any situation without the need of 3 dodge rolls. Card 5 is also glitched to reduce the cooldown of all your abilities not just shoulder charge. HvV & HS: 6, 7, 8 - simple yet effective loadout, 3 dodges makes you unkillable by sabers. Iden - LSG: 2, 4, 8 - makes Iden a unit against troopers, unkillable in shield form = free hp regen, increased droid reach means free horde wipes. HvV & HS: 3, 8, 9 - these passive cards all buff the aspects Iden needs to fight sabers. Kylo - 5, 6, 7 - combined with 4-hit frenzy, this makes Kylo a damage machine Lando- LSG: 2, 4, 5 - allows you to chain sharpshooter while increasing the time you can shoot your blaster for, increasing dmg output. HvV & HS: 2, 5, 9 - same thing but allows sharpshooter to target those farther away blasters you might find in HvV. NOTE: card 8 would be one of the best cards in the game if it worked. It doesn't work unless you leave the disabler there for 5 seconds, which makes it useless in a close range fight. Leia- LSG: 2, 7, 8 - makes Leia unstoppable against hordes of enemies, while making her crazy at sniping with alternate fire. HvV: 4, 5, 8 - makes Leia and her team unkillable. HS: 4, 7, 8 - makes Leia just strong enough to beat most sabers in a 1v1, with high dmg alternate fire to go through blocks. Luke - LSG: 3, 6, 9 - allows Luke to have a very versatile dmg output against groups of enemies. HvV: 3, 5, 6 - buffing his rush makes it insanely easy to deal with multiple enemies, blasters, or anyone trying to run away. HS: 1, 3, 5 - provides a good mix of defensive/offensive cards to make you unstoppable in a 1v1 Maul - LSG & HvV: 1, 6, 8 - card 1 is glitched to give huge dmg resistance while in spin attack, and is always necessary. The other two help clear groups of enemies and help run away if necessary. HS: 1, 4, 8 - even though card 4 is glitched to give closer to 6% cooldown reduction, saber throw and choke cooldowns are insanely important in 1v1s Rey - LSG: 4, 5, 7 - buffing dash strike makes it really easy to clear groups of enemiesHvV & HS: 1, 5, 7 - extra dodge makes it insanely easy to track and fake out saber players, while card 5 is glitched to permamently give the dmg bonus meaning you can easily finish off or start high dmg combos, longer insight just means higher dmg and lower stamina costs. Yoda - LSG: 3, 6, 8 - more dash strikes allows for easy kill combos on troopers, while buffing his heal ability allows for easy recoveries when surrounded by troopers. HvV & HS: 3, 4, 6 - increased dmg to villains in hero modes is extremely powerful when combined with the other cards Finn - LSG: 3, 6, 7 - card 3 is glitched to give permanent dmg increase, while 6 and 7 allow you to chain kills while constantly having the heal ability as a crutch. HvV & HS: 1, 3, 4 - increased dmg + dmg resistance, makes you a strong target against heroes. Phasma - LSG: 3, 6, 9 - card 6 is glitched to permanently instantly reduce ability cooldowns. Heat reset on kill while having dmg resistance makes Phasma a unit on the battlefield. HvV & HS: 5, 6, 9 - makes you a tank with reduced ability cooldowns. Grievous - LSG: 1, 5, 9 - card 1 is glitched to remove the regen penalty of card 5. Thanks to card 9, claw rush will wipe out large hordes of troops. HvV: 1, 2, 5 - makes you a high dmg tank. HS: 1, 2, 4 - allows you to regen back dmg while dealing high dmg. Dmg reduction on crawl is necessary against high skill opponents, they will try to parry your crawl. Obi-Wan - LSG & HvV: 1, 3, 7 - you will instantly notice the force push buff because it allows your insta pushes to reach farther away, meaning you catch most opponents off guard, while increased defensive rush dmg means one shotting troops and finishing off villains easily. HS: 1, 3, 4 - increasing duration of your mind trick is insanely valuable, allows for increased durations of aggression, or more time to fully recover. Dooku - LSG: 1, 2, 5 - even though you shouldn't play Dooku in LSG, choosing all passive buffs is best because you will almost never have time to pop your buff abilities against troops. HvV: 1, 5, 6 - allows easy counter to all saber heroes in the fight. HS: 1 or 8, 5, 7 - allows for an insane dmg output capable of 3-4 shotting saber heroes if you play it right. Anakin - LSG: 2, 7, 8 - 2 and 8 allow for one tapping troopers, 7 counters any aerials or far away troops. HvV: 1, 2, 7 - 1 is glitched to charge your retribution faster. You can counter blasters and sabers easily with this loadout. HS: 1, 2, 6 - allows for constant block break while making you tankier, charge retribution faster, and deal high dmg. BB8 - LSG & HvV: 1, 4, 6 - cable spin is the strongest ability to grace this game, use it. HS: 1, 4, 8 - allows for high single target dmg. BB-9E - LSG: 1, 5, 6 - gives BB9E a high dmg output for trooper kills. HvV: 1, 4, 5 - allows for high dps while also making it easy to ledge the opponents. HS: 1, 2, 5 - high dps mixed with pure annoyance, easy 1v1 wins. Assault Loadouts Assault can be considered the best class for 1 on 1 situations in modes, and can even do well for team wiping. It is also the most used infantry class, and is exceptionally good for speed running battle points at the beginning of matches. The class' speed, combined with it's aoe grenade, and close range shotgun with guns for almost any situation, makes it the perfect class for many players. To play assault at its best, use it as a flanking class. Assault is best when you are able to get the first hit in. Make use of cover to surprise enemies, and when fighting, use a combination of jumps, crouches, and combat rolls to make your movement less predictable, making it harder to be hit. Use your grenade when having trouble with a group, when trying to run away (throw right under you while running), and when you're trying to hold a choke point. Vanguard is incredibly strong when you're peeking behind an obstacle, as it one shots every infantry, and deals massive damage to heroes and reinforcements in close range. If you have killstreak or recharge vanguard, use it whenever it's ready (also based on the situation) because they give massive value. Scan dart is incredibly good for choke points, giving you the edge on knowing exactly where your opponents are, making the "try to get the first hit" much easier. If you are using toughen up (one of the strongest abilities in the game) activate it when you are entering combat with more than one person close by. Choosing a Weapon: A280: Best with mod #2 and #3. Very strong weapon in close to medium ranges, with some long range capabilities. Excells at killing other infantry, and even infiltrators and aerials. Its burst, if targeted to the head can easily destroy any health bar. CR-2: The best assault weapon for close range combat. This weapon will destroy anything if you are close to it thanks to its high fire rate, but besides close range, the weapon can be weak. Best with mod #1. EL-16HFE: Best assault weapon for medium-long ranges. Incredibly strong damage output, and if headshotting, it will completely destroy all infantry and reinforcements. Best with mods #1 and #2 E-11D: Basically the normal blaster for assault, but can put mods on it. It can be considered the weaapon in between the HFE and CR-2. Slightly slower firerate than CR-2, while having single shot damage slightly lower than the HFE. Best with mods #1 and #3 Best Cards: These are the most viable cards for assault: Boost Cards- #1, #2, #6, #7 Ability Cards- #1, #2, #3, #4, #6, #9 When choosing a loadout, normally you want to either focus on a single aspect, or try to get every aspect in. If you want survivability, you would choose something like B1, B2, A6. If you want to upgrade every ability, it would be something like A1, A4, and A6/A2. The best card setups for assault are usually the ones that combine every aspect. For this, you 99% of the time need A1/A3/A4/A9, A2/A6, and combine two of those with B1/B2/B6 These are some of the best combos: B1, B6, A1/A3 + E11D (aggressive loadout) A1/A3, A6, B6 +EL-16HFE (rounded loadout) A6, A4, B6 + A280/CR-2 (rounded/infinite ability loadout) B1, B6, A2 + CR-2 (close range/infiltrator loadout) This is my loadout:
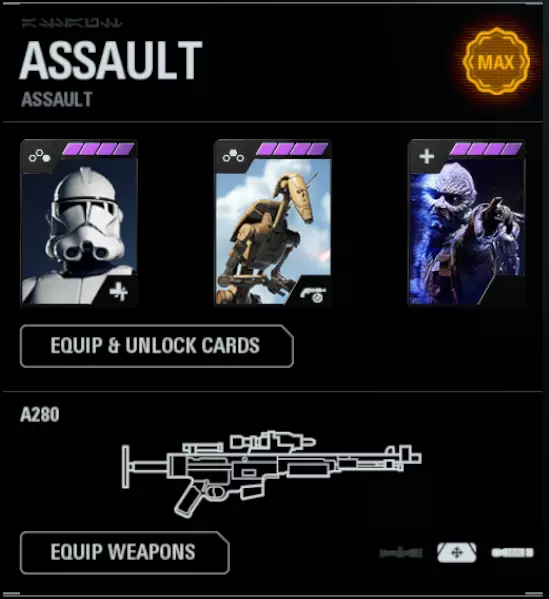
毫无疑问是最佳突击职业配装。A280提供了最全面的战斗能力,而这套配装能让你从一开始就进行极其激进的游戏风格。你在比赛开始时冲向第一个目标点,然后前往C点。凭借【强化】技能,你可以进行激进打法;当它处于冷却状态时,你可以蹲守角落,或者使用【充能先锋】技能冲向敌人,从而快速重置技能。【充能先锋】还能让你疯狂投掷手雷,在【强化】激活的情况下,用霰弹枪击倒一个敌人,再用手雷炸倒另一个,不断获取击杀。 配装2:
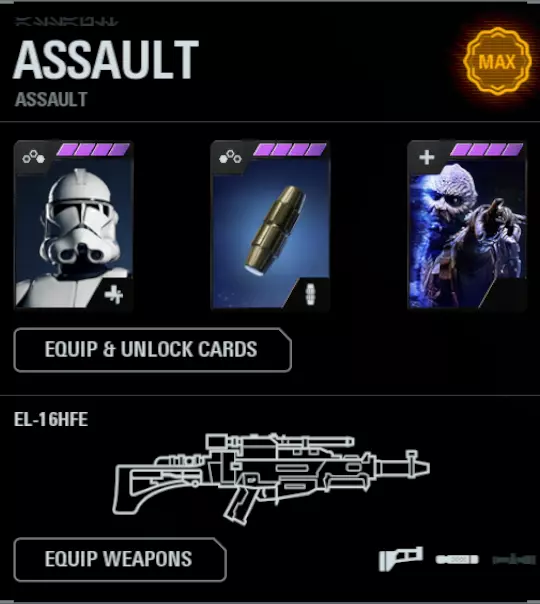
突击职业的第二套配装选择。你可以用先锋技能充能点数并轻松击杀敌人。EL-16HFE在爆头时非常强力,而离子手雷的冲击爆炸对于掩体后的敌人、载具或装备都非常有用。 重型职业配装 重型职业在一对一战斗中表现出色,而且在消灭整群敌人方面也极为擅长。重型职业的生存能力加上极高的每秒伤害,如果操作得当,会成为一个不可阻挡的职业。战斗时记得结合蹲伏、跳跃和翻滚动作,但由于重型职业可以承受伤害,所以这些操作的必要性没那么高。 重型职业的冲击手雷最适合在敌人处于较近范围内使用,它能将增援敌人的生命值削减到你可以轻松将其击败的程度。使用手雷时,一定要直接扔向敌人,这样才能造成最大伤害。哨卫模式在摧毁路径上的任何目标时都极为强大,如果使用超级充能,你可以像热刀切黄油一样消灭光剑英雄和增援部队。哨卫模式最适合在中远距离激活,不要害怕关闭它,因为如果在视野内没有敌人的情况下长时间开启,就是在浪费时间。也可以使用哨卫模式在 choke points 卡点。战斗护盾可能是决定你能否摧毁面前那3个步兵小组或那个执行者的关键因素。使用战斗护盾时,最好采用蹲姿,因为你的腿部/脚部仍然容易受到攻击。战斗盾牌也可以用作快速掩护,直到生命值恢复。使用时始终面向你要击杀的敌人。如果使用弹幕攻击,确保利用好弹跳效果,这样你可以将子弹射到更难到达的地方。将所有手榴弹扔向狭窄区域或敌人集群非常有效。震荡炸药在吉奥诺西斯或卡米诺等地图上效果显著,这些地图有走廊或进入点的狭小区域。你可以在无法掩护的位置投掷震荡炸药,同时向另一个方向射击;或者在生命值较低时,将其扔到拐角处,这样可以对付追击你的敌人。令人惊讶的是,大约90%的玩家会直接踩到震荡炸药上,要么没注意到,要么不在意。武器选择: DC-15LE:在任何射程下都能有效消灭目标,搭配1号和3号模组效果最佳,这样重型武器可以穿透护盾和光剑造成伤害。其出色的冷却能力在进入黄金冷却状态时表现极为出色。 FWMB-10k:近战武器,若配合离子射击,可有效应对重型战斗护盾或毁灭者机器人。但性能远不及TL-50。推荐搭配1号和3号模组。 TL-50:拥有极高的每秒伤害,类似突击兵的CR-2,但具备射程和冷却优势。能在近距离快速消灭步兵和增援单位,在中距离也能有效击杀步兵。最佳搭配为1号和2号模组。T-21:重型职业的狙击手,它拥有极高的伤害,可以消灭任何目标,但如果失手,其冷却时间会非常长,让你几乎陷入绝境。最好搭配2号模组,或者2号和3号模组一起使用。如果使用T-21,搭配B4卡片能极大提升其 effectiveness。 最佳卡片: 以下是重型职业最实用的卡片 强化:3号、4号、5号、6号、7号、8号 技能:1号、2号、3号、6号、7号、8号 构建重型职业配置时,大多数情况下重型职业会专注于单一方向:生存能力、目标任务或进攻能力。 最佳配置: B6、B8、A8 + DC-15LE/TL-50(全面型配置) A3、A7、A8 + DC-15LE(载具/护盾和炮塔杀手) B4、B3、A2 + T-21(单体目标摧毁者) A2、A1、B6/B8 + DC-15LE/TL-50(坦克+群体撕碎者) 我的配置:
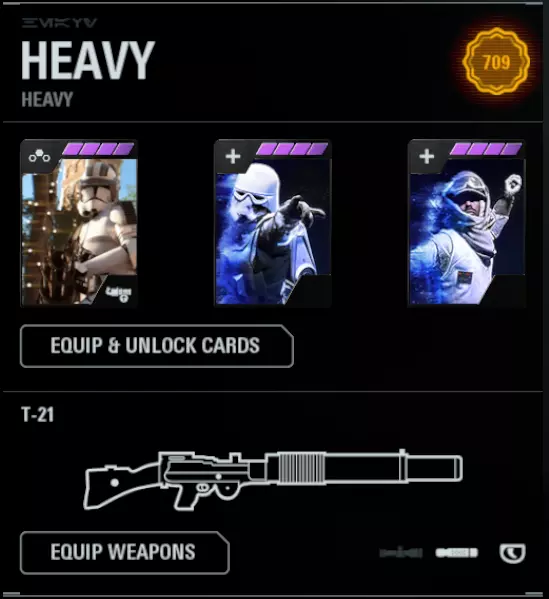
T-21异常强大,但也容易让你陷入被反击的境地。装备【保镖】技能后,只要瞄准敌人头部并利用掩护,你几乎可以对抗任何步兵和增援单位。为了弥补T-21在群体控制方面的不足,【超级充能哨卫】能为你提供高额的范围伤害输出,同时还能轻松摧毁载具和光剑使用者,仿佛他们不存在一般。有时我会切换到【弹幕】技能,作为一种更有趣的替代选择。 TL-50配置:
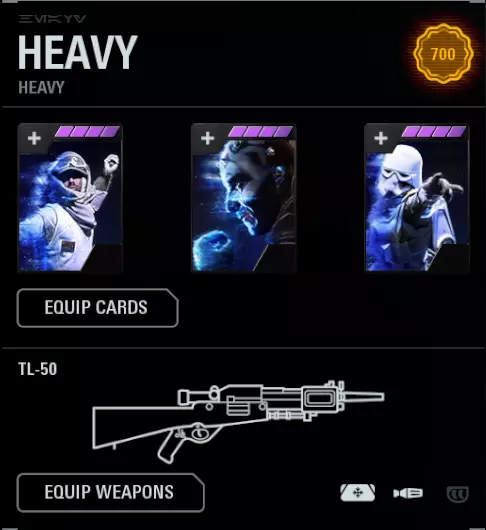
使用这套配装,你可以直接前往最近的点位/目标,在掩体后探头时立即部署哨戒炮来获取多杀。然后,战斗盾牌搭配TL-50能让你消灭足够多的敌人以占领所需点位,手榴弹则可用于消灭掩体后的单个敌人或对一群敌人造成伤害。为了弥补TL-50射程的不足,普通哨戒炮非常适合狙击敌人,尤其是爆头,同时也能作为不错的中距离武器使用。资源充沛技能能让你在所有技能就绪后立即使用,并且恢复速度相当快。 军官配装 军官是步兵中的支援职业。军官职业最适合在尽可能多队友身边作战,是获取战斗点数的最佳职业,甚至能在协助队友的同时消灭大量敌人。只要操作得当,军官可以消灭所有步兵和增援单位,但执行者除外。 军官的闪光手榴弹非常强力,它能致盲敌人,还能消灭生命值较低的玩家。将其扔向人群效果极佳,但要小心很容易波及自己。无论使用哪种战斗指令,最佳使用时机都是身边有3名及以上队友时,或者你想为英雄提供增益。大多数情况下,技能冷却一结束就应该使用,但强化战斗指令可以在战斗前为自己提供增益,类似于突击兵的“强化”技能。如果你拥有军官光环或护盾发生器,尤其要尽量待在队友附近。这两个技能能为队友提供支援,所以你应该紧跟地图上人数最多的队友群体。如果你使用炮塔,可以把它当作重型战斗护盾那样使用,用它来保护自己,甚至可以在某个地方蹲守,让它掩护你的后方或其他关键通道。不过建议待在炮塔附近,因为靠近时你可以修复它。另外,干扰器星卡能让你的队伍在对抗敌人集群时获得巨大优势,面对一群敌人时,它能禁用对方武器,让你轻松击杀。 选择武器: S-5:如果你只想要单发伤害,这是个不错的武器,而且与护盾发生器(用于掩护)搭配效果很好。BLURRG-1120:凭借其连发特性,对抗步兵单位表现出色,与突击兵的A280十分相似。最佳搭配模组【2】和【3】。 SE-44C:军官武器库中当之无愧的最佳武器,若搭配模组【1】和【3】使用。拥有极高的近距离 dps,同时具备不错的中距离 dps,几乎能摧毁一切目标。 DL-18:使用起来非常有趣,但性能被 SE-44C 超越。最佳搭配模组【3】,以及另外两个模组中的一个,具体可根据个人偏好选择。 最佳卡片: 强化:【1】、【3】、【5】、【8】 技能:【1】、【2】、【3】、【5】、【7】、【8】、【9】 在为军官构建配装时,你要么选择队友支援型,要么选择伤害输出型,或者两者略微结合的类型。最佳组合: B1、B8、A9 + SE-44C(队友支援) B8、A5、A9 + S-5(护盾支援) B8、A1/A3/B5、A2/A7/A8/A9 + SE-44C(全面型军官) 我的配装:
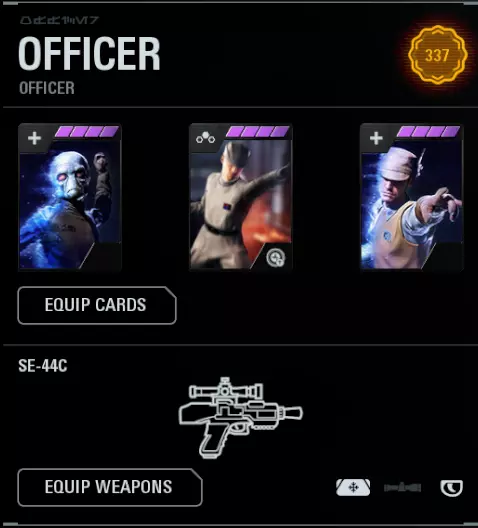
使用这套配装,在比赛开始的瞬间触发强化战斗指令,然后跟随团队大多数成员的位置移动,通常在 supremacy 模式中是 C 点,或者在银河突击模式中是当前的目标点。只需待在队友附近,为他们和自己恢复生命值,投掷闪光弹,并在冲锋杀敌时减少武器冷却时间,你就能非常轻松地达到所需分数。SE-44C 能让你轻松消灭那些被队友和你的闪光弹打残的敌人。强化战斗指令和保镖技能为你提供极高的有效生命值,让你很难被击杀,从而实现激进的游戏风格。爆破炮塔可以放置在拐角处,吸引敌人火力,为你侧翼包抄创造机会,同时也能作为你射击时的掩护。用爆破指令替换强化战斗指令也是不错的选择,这样无需为爆能枪充能就能消灭整支队伍。 干扰军官:
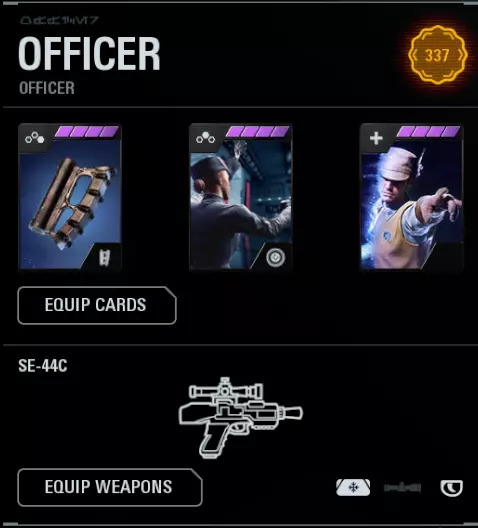
我经常切换到这套装备配置,因为你可以冲向人群,向他们投掷闪光弹,干扰他们,然后轻松将他们全部消灭,而他们会痛苦地意识到你拥有【充能指令】,并能让你的手榴弹和干扰技能重新恢复。使用这套装备配置,你所要做的就是在近距离遇到敌人时不断使用干扰技能,消灭他们,然后持续循环直到获得分数。【充能指令】对获取分数也非常有用,因为它比其他任何战斗指令的使用速度都快得多,在为技能充能后还能缩短技能的冷却时间。 专家职业配置 专家是步兵中的狙击手/渗透者职业。无论你是想远距离对敌人造成高额伤害,还是潜入敌后进行近距离消灭,专家职业对团队都非常有用。无论你选择哪种玩法,**横向移动都至关重要**,因为作为狙击手,如果你多次远距离击杀敌人,他们很可能会把你列为优先目标,而横向移动能让你在狙击时依然可以瞄准敌人头部。 专家职业的玩法要么是激进进攻,要么是在远处进行骚扰。**震撼手雷在扔向狭窄通道时效果显著**,能帮你获得大量分数。渗透技能无论是否升级,甚至基础形态都极为强大。它的使用方式很像突击兵的先锋技能,所以要确保利用障碍物来发挥优势,而且它能让你躲避扫描仪的探测,轻松绕后包抄敌人。它在近距离能消灭任何目标,所以应该以相当激进的方式使用,或者用于快速移动到某地。如果前方有一大群敌人,而你想追踪他们,热成像望远镜会非常有用。狙击时标记敌人真的很有帮助。如果你使用战斗盾牌,可以用它来脱离困境,或者保护自己免受狙击。如果你翻滚并瞄准,即使盾牌处于激活状态也能瞄准狙击枪,这样你就可以瞄准目标,关闭盾牌,基本上就是一次轻松击杀。 选择武器 IQA-11:使用模组2和3 A280-CFE:非常强力的武器,因为它能摧毁护盾和敌人。搭配模组2和3效果最佳。如果正确使用连发模式,能轻松撕碎步兵和增援部队。NT-242:游戏中最出色的狙击枪,除A280-CFE外轻松超越其他狙击枪。伤害极高,爆头可一击击杀步兵和飞行单位,一击击杀机器人,对其他目标也能造成大量伤害。 循环步枪:选择模组2和3 最佳卡片 强化:1、2、3、4、6、8 技能:1、2、3、5、7、8、9 为专家配置装备时,需全力辅助所使用的武器,因此装备需要一些基于武器的特定卡片。NT-242基本上需要B2卡片,A280-CFE则主要需要B4卡片。不过,随着经验积累,你不必依赖这些武器辅助卡片,因为你应该能够熟练操作武器。最佳组合: B2、B3、A8/A9 + NT-242(战斗点数) B4、B6、A3/A8/A9 + A280-CFE(激进狙击手) B2、B8、A2/A1 + NT-242(纯狙击手) B2、B6、A5 + NT-242(生存型狙击手) 我的配装:
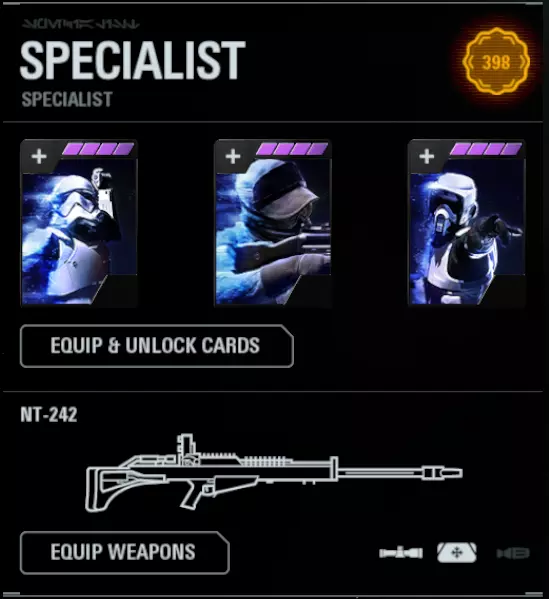
一套相当简单但极难掌握的狙击手配装。使用热成像望远镜和渗透技能来标记敌人,你既可以在近距离不使用瞄准镜并借助渗透技能消灭敌人,也可以在远处狙击他们。用这套配装掌握瞬镜和盲狙非常厉害,因为爆头能消除开火冷却时间。你可以轻松通过连续爆头来快速消灭多个敌人,获得即时满足感,而震撼手雷在守住关键区域、为你的狙击减缓敌人速度,甚至将敌人从特定区域引开方面都非常出色。 A280-CFE 配置:
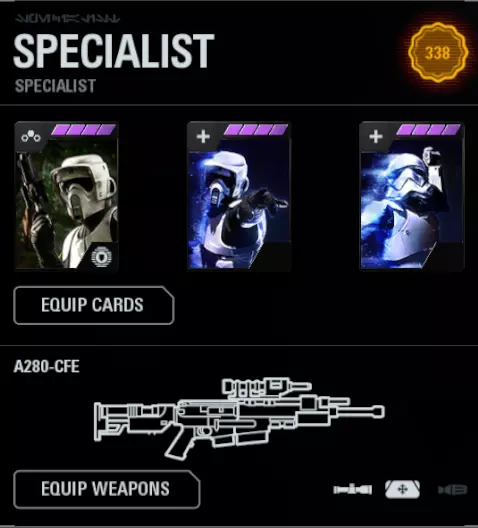
这套装备配置能让你成为一名绝对的坦克,让你可以直接冲向目标或据点,轻松击杀中远距离的敌人,而强化渗透和盲射能力则让近距离击杀变得异常简单。你获得的伤害抗性,加上用于封锁要道的震撼手雷,以及能了解对手位置的热成像望远镜,所有这些都让你成为强大的对手,甚至能应对1对3或更多敌人的局面。 支援卡牌 无论选择哪种支援,使用战斗翻滚、跳跃和蹲伏连按都能有效消灭对手。近战攻击在近距离时很有用,尤其是对于渗透者职业。 空中单位 空中单位通常最适合打侧翼。它无疑是游戏中最出色的职业,无论在哪个时期,空中单位都非常强力。它的高机动性让你能快速抵达目标点,也能迅速脱离险境。火箭发射器在消灭步兵方面表现出色,能将敌人打至残血状态,让你轻松将其消灭。如果你使用翻滚技能,空中单位会非常容易击杀,因为这能让你全程保持直立,极大简化瞄准操作。 最佳空中单位: 所有空中单位都不错,但它们的武器和冲刺技能略有不同,其中克隆人喷气士兵和第一秩序喷气士兵是最佳选择。第一秩序喷气士兵可以在普通攻击和右键技能攻击之间切换武器,实现无限耐力。 装备配置:
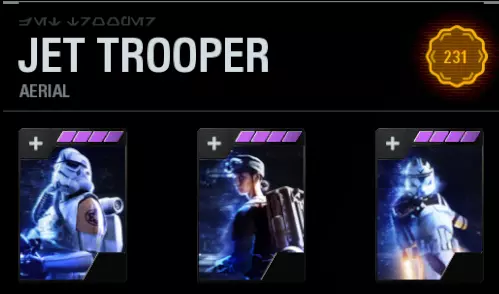
这套装备配置能让你每次击杀都恢复生命值,拥有更高的最大生命值,还能额外获得一次闪避机会。生存能力至关重要,而由于空中突击是专注于移动的职业,额外的闪避能帮助你应对大多数情况。 执法者 这是一个几乎适用于所有时期的优秀职业,擅长应对看似不可能的困境并取得胜利。执法者的爆炸物、一键触发的金色冷却时间,以及获得大量伤害抗性、受伤时恢复生命值或消灭敌人时恢复生命值的能力,使其成为生存能力最强的职业。执法者还拥有最强的伤害输出,实力强大到一名优秀的执法者几乎能与任何英雄一对一抗衡。最佳执行者: 除火焰兵外,其他执行者都非常出色,其中克隆突击队和超级战斗机器人是最优秀的。 装备配置:

这套装备配置能让你在消灭敌人时恢复生命值,还能增加总生命值并提升生命恢复速度。这些对于提高该职业的生存能力都至关重要。虽然延长持续时间的卡片效果很好,但我发现只要掌握好使用中间技能的时机,你往往会发现根本不需要它的完整持续时间,使用那张卡片反而只是浪费。所有执法者的生命恢复速度都极其缓慢,这也是为什么这套配置如此好用。 渗透者 这是一个非常强大的职业,擅长逐个消灭敌人。渗透者能够深入敌后,摧毁其路径上的大部分目标,这种能力非常强大。渗透者还能轻松定位你周围的所有敌人,让你能够积累高额的连杀数。优秀的渗透者也能对抗大多数英雄,要么将其击杀,要么使其血量大幅降低,以便队友完成最后一击。拥有副武器开火模式的士兵非常强大,这让一个擅长侧翼包抄的职业能够像狙击手一样作战。在中远距离使用副武器开火模式对付步兵和增援单位能让你斩获不少击杀,但在近距离时,普通开火模式更为适用。 最佳渗透者: ARC士兵、西斯士兵、卡菲克斯间谍和机器人突击队是较为出色的选择,而帝国安全局特工有时因其近战能力而有用,但伊沃克人几乎毫无用处。 装备配置:
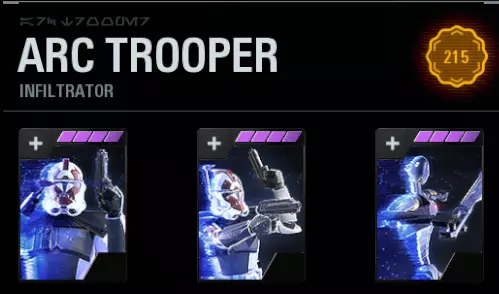
这套配装能让渗透者在击杀被其扫描侦测到的敌人时获得生命值,还能提供额外闪避,并且在受到攻击时为技能充能。该配装让你能轻松发现周围的敌人,同时快速充能扫描技能,这样你就能在每次消灭敌人时获得生命值,并凭借额外闪避在战斗中存活下来。 我的强度分级列表:
Individual Reinforcement Tips TIPS Overall tips for every single ground reinforcement. Aerial Since all aerials besides the First Order Jet Trooper are the same, here are a few tips. All: Utilize your directional jetpack jumps to quickly flank enemy teams. These jumps can also be used in combination with your rocket launcher to take out large mobs, or even kill enemies while escaping on low hp. Make sure to aim rockets towards weak points in vehicles, and then shoot those weak points to get easy vehicle picks. With all aerials, it is very important to aim for headshots, since you will shred through enemies. All of the blasters are also strong at a range. Aerial in general is the best unit to topfrag matches with. [First Order] Jet Trooper: The jetpack that all aerials should have. The FOJT is incredibly powerful with explosive shots, and the ability to fly up and stay high for long durations of time. You should aim for headshots or AoE damage, and use your charges when on the ground to knock down and harass heroes. If you learn to alternate between normal explosive shots and your grenade launcher, you have effectively infinite ammo. Both firing options are very viable and are up to you to decide between or combine for maximum effectiveness. FOJT is very effective against all ground units and vehicles, however, weak to the blaster heroes of the era. Enforcer [Republic] Wookiee Warrior: Though seemingly underwhelming, the WW can be very effective on groups of 3-6 infantries. Use Thermal Imploder on choke points or into groups of enemies to get a massive amount of eliminations. Overload is very, very useful in close range combat, limiting your speed, but allowing one shots on enemies. Use your slam to knock down enemies into a shot for free kills. Clone Commando: Probably the strongest of all the enforcers, the CC can destroy large hordes of enemies, obliterate vehicles, properly handle heroes, and dominate 1 on 1 situations. Utilize Repulsor Blast on overly aggresive heroes to knock down into free damage. Battle Focus should be triggered in tense situations for easy health gain on damage. Use Anti-Armor Attachment to bomb groups of enemies around corners, destroy any gadgets, and demolish vehicles. [Separatists] B2 Super Battle Droid: There isn't much to say about the B2 besides the fact that it is a one-man-army sort of unit. Fortify will gain you damage syphon, overload will give you infinite fire, and wrist rocket will deal a lot of splash damage. You can use the three interchangeably or all together for infinite survivability, and can solo vehicles by spamming overload down their weak points. Droideka: Incredible unit in the right hands. The Droideka is the strongest flank tool in the game, and when pulled off right it can devastate armies. Roll behind enemy lines, activate Overload and Energy Shield, and blast away. You can easily take all Infantry and Reinforcements in close, 1 on 1 combat, and take out whole squads with flanks. [Rebels] Same Wookiee Warrior as above. [Empire] Death Trooper: A really strong unit in the right hands. Use the Sonic Imploder to devastate large groups of enemies. Use Overload to take out hordes of enemies without needing a break, and use Fortify in combination with it to gain back health. [Resistance] Ovissian Gunner: Possibly the most underrated of enforcers. His ability to run and gun, charge and knock down enemies, and solo giant hordes with Defensive Stance is incredible. Trigger Defensive Stance when holding corners or taking out large groups, and use Anti-Armor Mode to take out vehicles. [First Order] First Order Flametrooper: Easily the worst of the enforcers and the most situational. Use his flamethrower to hold corners, his Incendiary Imploder to hold choke points or into large groups, and use Overload and Fortify whenever in close range combat. A very weak unit, and even in its best circumstances, every other unit does better. Infiltrator Scan: Since all Infiltrators have scan, I will explain it here. You should always have scan active unless you can see the enemies in front of you. However, if you are pushing into a large group and have syphon off scanned enemies, then have it active. [Republic] ARC Trooper: Very fun unit for flanks and even sniping. Always have faster fire active since it has virtually no downsides. For very long range snipes, use your right click fire. Shock Trap is very useful to toss at a corner, then trigger when someone passes for an easy knockdown into a kill. It can be used easily on saber heroes. [Separatists] Commando Droid: Very strong unit thanks to its Vibrosword. Use your smoke screen when trying to stay hidden in combat, or when trying to run away. Vibrosword is incredibly strong on any unit, including saber heroes. The third hit will knock down enemies, so use that to your advantage when going against strong units, following up with shots. [Resistance] Caphex Spy: Another criminally underrated unit. Rapid fire is probably amongst the strongest blaster abilities in the game, and can shred through anything in its path, especially with headshots. Unfortunately the melee is pretty much pointless when his blaster is so strong, but it is balanced out by the sheer insanity of his air strike. It can deal insane damage to anyone within its radius, and also reveal opponents to you. [First Order] Sith Trooper: My favorite reinforcement in the game. Activate Combat Rush and Seeker Tactics, and you can easily rush anybody with your incredibly strong blaster. Ran into a group? The incredible speed at which he throws the Oppression Grenade makes dealing with hordes extremely easy. To add on top of all this madness, he can also shoot charge shots similarly to an ARC Trooper, allowing sniping cross-map. [Rebels] Ewok Hunter: Unfortunately, the Ewok is very weak. Though, you can be an incredible annoyance by constantly tossing Wisties into choke points and groups of enemies. The low amount of damage caused by his bow is unfortunate, but charge shots can be strong. Utilize your Valiant Horn when going into combat. [Empire] ISB Agent: A very weak version of the Sith Trooper, as ISB you should trigger Double Your Effort and Assault Training, and run around the map meleeing people. ISB's melee is very fun to use, and can be very strong in one-on-one situations. Armor Vehicle Armor is incredibly good due to its battle point price, high damage, high health, and ability to take out almost anything. When someone uses armor, it's pretty easy to get MVP on modes like Supremacy or Co-op. Armor is usually best played by camping between a few points, and targeting the choke points. It should be remembered that you can also kill enemies by crushing them under the vehicle. The left and right ability should be used as much as possible, as they make it much easier to kill most enemies. Keep in mind that you can easily destroy any hero, so you should target them. Middle ability should be used all the time since it is generally the highest damage dealer for every armor. The only thing that can properly counter armor vehicles are people who use specific loadouts for doing so, such as heavy vehicle killer, sniper with disruptor shot, and a couple others, including supercharged sentry and Clone Commando's grenade launcher. Most of the time, nobody uses these sorts of loadouts, so the only thing you have to really worry about is other armors, of which you can usually beat by using every single one of your abilities. If you do encounter someone like this, then just target them above all other targets. The only times you'll need to back off and regen, is when your health is around 500 or lower. To regen, you'll have to be behind a really big piece of cover. My loadout:
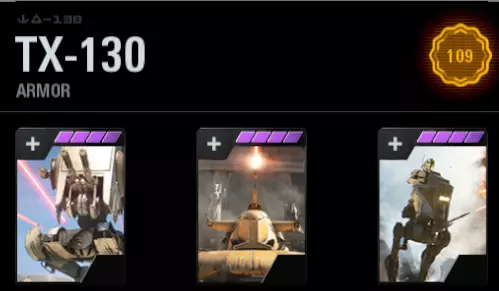
This loadout makes you much more resistant to damage dealt anywhere to you, and also increases the speed of your regen. Meanwhile, your middle will be much stronger and do insane amounts of damage to anything. Heroes Hero Tips Saber Dueling Tips these can apply to 1v1s or any combat between saber heroes 1. Always hold block. This means that you should move with combat roll exceptions: trying to bait enemy, purposefully applying pressure, regening stamina 2. Only regen stamina when you are safe. example: you are at a safe distance from the enemy and you know they have used their powers/their powers cant effect you 3.1 Keep in mind what your hero and the enemies hero can do, learn to parry, bait and hook 3.2 Know what abilities can go through blocks. 4. Don't jump. exceptions: have to get over something, doing a hook attack, baiting the opponent, overwhelmed by multiple saber heroes and you need stamina 5.1 Patience. There's no need to risk death if you can just be patient. 5.2 Know when to use abilities and how to use them. This includes knowing what abilities go well together. 6. if you are damaged, best thing to do is heal it back up to the cap. exceptions: opponent is lower and you want to finish them, you aren't low enough to need to worry about it. 7. Use dash through the enemy as much as you use dash to back away. It can lead to free hits. Blaster Hero Tips (In duels) these can apply to 1v1s or any combat between heroes 1. Depend on your combat roll, this will allow you to stay alive while fighting a saber, and also allow you to evade opponent's moves. 2. Focus on your abilities, all blasters have either a through block, or a knockdown ability. 3. Keep your distance, you don't want to get hit by the opponents moves. 4. If a saber is in close combat with you, only option is to spam dash through them and shoot them while they are dashing/using ability/attacking. 5. Just like infantry or reinforcements, make your movement unpredictable. Spam crouch, jump once in a while, and add in a combat roll. This will make it harder for them to read your movements, therefore making it harder for them to hit you. Hero Cards The cards you use for your characters in HvV and Hero Showdown are mainly based to opinion and playstyle. But, there are some cards that are generally better to use. I recommend watching this video and following the time stamps in the description for hero cards: https://www.youtube.com/watch?v=xTb9Tpby5Oc&t=2705s (All credit goes to vorpal) If you need to level heros to unlock their cards, co-op is your best option. Hero Counters Here are basic counters (heroes that normally have the upper ground over others). This is because of abilities that make those characters easily able to kill others. But, counter or not, overall, it's all based on skill and not as much the counters. Sabers Anakin: counters maul, and all other blasters. Luke: counters ren, can counter maul, and counters all blasters except boba. Obi Wan: counters ren, grievous, and counters blasters except boba and palpatine Rey: if played well, can counter all sabers Yoda: doesn't really counter anything Vader: can counter mostly anything Ren: counters all blasters, counters yoda Grievous: counters all blasters, counters yoda, luke, anakin, and can beat mostly anything if played well Dooku: can destroy all sabers, weak to blasters Maul: counters rey and can counter all blasters Blasters Han: counters vader, dooku, all blasters Leia: counters all blasters, if played well counters most sabers Chewbacca: if played properly, counters everything, but hard counters Boba by ragdolling him. BB8: counters Iden Finn: counters blasters, especially boba Lando: doesn't directly counter, but with a proper stun can kill any hero (usually not vader or grievous) Boba: can beat mostly anything except anakin Bossk: can counter anything if used properly Palpatine: counters all except Anakin, Han, Chewbacca, and Leia Iden Versio: can counter almost anything if used properly BB-9E: played correctly, can counter anything besides leia Hero Combos Simple Combos These are combos you can pull off with any saber. If done properly, the opponent's saber block shouldn't be a problem. Dash through, swing Dash forward for bait, dash back, swing Swing for bait, parry Hook swing, swing Hook swing, swing, dash through, swing Ability bait, swing once or twice/parry Complex Combos These are combos that also include abilities in them. Almost all of these combos require you to do the first part when the opponent isn't blocking, meaning you might need to bait first. If a hero isn't here, it means they don't really have a proper combo with their abilities Anakin: left ability, double tap mid ability, swing, then right ability Luke: middle ability, left ability, right ability, swing Rey: dash through, left ability, as many swings as possible before block Yoda: left ability, dash to catch up, swing, right ability Obi Wan: bait saber spam, double tap left ability, dash to catch up, swing, right ability Ren: left ability, right ability, hook, swing, if no knockdown ability then middle ability Vader: left ability and quickly to a right ability when they stagger from their block. right ability, hook, left ability. if running, middle ability, turn and right ability (makes it appear like you're looking forward) Dooku: always middle and right ability active. dash through, left ability, swing. hook swing, left ability, swing. dash through, dash back for bait, left ability, swing Grievous: left ability, right ability, cancel right, swing Maul: left ability, middle ability when staggered, right ability, swing How to Kill Heroes (As a reinforcement or infantry) Killing heroes can be quite the challenge, especially when the hero happens to be a player with hundreds of hours under their belt. This section will go over the overall tips, and then some specific tips for specific classes/reinforcements when you go up against a hero. Blaster Heroes A blaster hero can either be more or less difficult than a saber hero. On one hand, they usually are not right up in your face, however, their blasters have the ability to put you to sleep in seconds. There is not much to do when facing a skilled blaster, other than try to stick with a team and overwhelm them, peek corners while shooting them, or just charge them and deal as much damage with the abilities in your disposal as you can, while keeping in mind what that hero's abilities are. Saber Heroes Saber heroes can be the toughest to fight, however the most satisfying kills to pull off. The best thing to keep in mind, is when combat rolling or dashing, go through the opponent, and not away. This will not only stress the player out more, but it will also allow you to shoot behind their block. Timing these dodges right is what takes the most skill, as you want to time it right before their swing hits you. Using any sort of weapons that have an explosion will give you a huge advantage, since you will not have to even get close to them. With a team, surrounding the saber is an easy way to overwhelm them, and it usually results in their death. Individual Tips Assault - The grenade is an easy way to get quick damage on a hero, and will go through blocks. The biggest weapon in assault's arsenal for a duel with a hero is vanguard. A few shots of vanguard up close to a hero will shred their health, usually resulting in their death. Vanguard is especially effective when combined with the rolling through sabers, and shooting their back, giving you a fighting chance. Heavy - Using your bombs and sentry, you become a formidable opponent to heroes, especially with the supercharged sentry, since if you shoot the ground right below a saber's feet, they cannot reflect bullets, and take massive damage. Officer - Using your sentry as a distraction, and your flash grenade for blindness, you can use your blaster and recharge command to somewhat stand a chance against some heroes. With good usage of combat rolls, hiding behind cover, and dodging through a saber, you might be able to come out victorious. Specialist - Exactly like assault, you stand a chance in fighting a hero with infiltration. Especially with your shock grenade, since you can slow down heroes to a crawl speed, while blasting at them with your burst rifle. Utilizing dodges to go through sabers, combined with incredibly high close range burst damage, you can win duels. Enforcer - There are only two good enforcers against sabers in close range, and we'll get to those in a second. As for enforcers in general, you want to keep a good medium-long distance from sabers, and stay medium range to blasters, and use all your abilities to shred through their health before they do the same to you. Usage of health on hit and infinite fire along with your explosives will give you a fighting chance. The Wookie Warrior is really underrated in its ability to fight sabers. If you utilize a roll to go through the saber, and slam the ground, the saber will fall, giving you a lot of damage with your infinite fire, and the thermal imploder allows for insane damage for finishing off heroes. The Clone Commando is one of the top contenders for beating sabers in close range. The "air shove" as I call it, allows for easy knockdown of heroes, your blaster does insane damage at close range, and with the health on hit ability, and a grenade launcher to pick them off, you are a menacing opponent to all heroes. Infiltrator - Just like enforcers, there are only two good infiltrators at taking down sabers at close range, so for infiltrators in general, you want to keep your distance, and for those that do have it, use your explosive fire to shoot sabers through their blocks. The Arc Trooper is an incredibly fun reinforcement to play, and actually stands a chance against sabers. When rapid fire is on, and you properly use dodging through the opponent, along with your shock mine and alternate fire through blocks, you can sometimes find yourself winning some fights. The shock mine is the most important part however, since you need to land it in the right spot, and be ready to fire at them the second their block goes down. The Commando Droid is probably the best ground unit for fighting heroes. The smoke grenade can easily confuse many players, and when you are able to land the three vibrosword hits, the opponent will fly, and take a lot of damage, and you will be prepared to fire at them, allowing for normally easy kills. I find myself going on saber killing sprees with this infiltrator. Aerial - All aerials are incredible for fighting saber heroes due to their ability to easily dodge, and high mobility combined with their rocket to damage through blocks. Just like all the other units, use your dodge to go through the saber, and get a lot of damage in, and you can easily gain distance with your jetpack. The First Order Jet Trooper excels in hero killing, thanks to its fly tackle knockdown ability, an actual good jetpack, and explosive rounds that go through blocks. By combining the knockdown with a high damage blaster, and the ability to easily get and maintain distance, the First Order Jet Trooper becomes a saber killing machine. Tips for Modes These tips will be focusing more on MVPing/Top fragging, but can help you win the match. Supremacy Officer is usually the best class to start off as, because your entire team will spawn around you, meaning you can get a battle command on 18 players if done correctly. This will give you a ton of points, and after this, you can decide to either hit escape and respawn, or just continue as officer. If you decide you want to respawn right away, go as either heavy or assault. If you are in a map like Kashyyyk, Geonosis, or Hoth, then specialist would work if you want. No matter what class you go, you need to run over to the closest point to you and capture it (If specialist or Assault, use middle ability to get there faster). After capping, if you are specialist, get to a spot where you can snipe the area of point C and stay mostly hidden. If you are another class, you might be able to capture the closest point to you, and the other closest point, which can be done in maps like Kamino. After this, you want to get to choke points and focus on picking up kills, or if officer, stick with teammates. Picking up kills will be very important for whatever you are planning to do next. You can either fully live out your infantry lives, or you can just respawn when you have enough battle points to get whatever you want, whether a Vehicle, Reinforcement, or Hero. After this, if you're a Vehicle, you usually want to camp a point, as a Reinforcement you want to go from points to points, taking out enemies and capping, or you can flank the enemy teams, or stick with your team. Heroes need to always stay in the general vicinity of teammates, because if you get surrounded by enemies, there's basically nothing to do unless you can somehow escape. If you happen to die as a hero, if you're in the originals, then you'll have to go as infantry/reinforcement/vehicle until you get lucky eventually and get another hero. If you are in prequels or sequels, then you might be able to get a hero for the ship stage, and if not, go as a reinforcement. Use all the tips mentioned for the individual classes and heroes mentioned before in the guide, and by following this you can likely get high up in the leaderboard. Galactic Assault: GA is played basically the exact same way as Supremacy, but instead of going to points, stick with your team and do the objectives. If you need to kill vehicles for the objective, use the heavy objective loadout mentioned in this guide to do so. A thing to keep in mind though, is unlike Supremacy, GA is only players, no bots, making it harder to get free hp from syphon off of bots, so you'll have to play a lot more careful. Specialist is also about 20x better in GA than Supremacy, and same with blaster heroes instead of sabers. Game Settings These are recommended settings for better gameplay, some are just my settings :) Video: Fov: 110 Don't play fullscreen (it can bug your game a lot). VSync: Off Motion Blur: 0% Filmic Effects, Film Grain, Lens Distortion: Off Resolution Scale: 85-125% (medium quality-beautiful game) Graphics Quality: Medium (I believe the game looks best at medium with 125% resolution, also helps your pc) UI Scale: 50% Gameplay Crosshair color: your choice, I use purple, green is the most visible Weapon Heatbar: Below Crosshair (unless using the mod from the MODS section in this guide) Kill Messages: Medium Damage Reduction + Increase Message: Off Game Mode Updates: Off Name Tags: No Backgrounds Objective Style: Outline Obejctive Zone Visiblity: 28% Objective Outlines: Smart Extra blue UI is achieved from colorblind profile tritanopia, and it also highlights traps in Ewok Hunt for some reason. NOTE: this will mess with crosshair color Shoutout These are the people that have awarded this guide with a steam award and commented so down below :D Moltva Astrogamer54 KyloJay30 Saul Goodman NinjaShark923 OMEN-333 JeffVader1312 Mr. BawkBaGawk freebird_911 stillbx