换一换
换一换 


你是否在寻找一份不仅仅是技巧汇编的文字指南,而是能深入探讨《巴洛塔》获胜所需的机制和决策技巧的指南? 不知道如何玩扑克? 对《巴洛塔》的机制感到困惑? 被“类rogue”和“牌组构筑”之类的术语吓到了? 或者你尝试了很多次却依然无法获胜? 本指南将解释基础知识,并为你提供在游戏中做出重要决策的正确框架。 简介
当你看到“Rogue-like Deck Builder”这个描述时,你可能属于以下两类人群之一。 第一类人会疑惑:“Rogue-like Deck Builder是什么意思?” 而第二类人可能会想:“我以前玩过Rogue-like游戏和Deck Builder游戏,为什么玩《巴洛塔》时还是觉得难呢?” 让我们来解析这两个术语的定义: Rogue-like(类rogue) 无需把事情复杂化。Rogue-like简单来说就是以“局”为单位进行游玩,这意味着除了解锁的物品外,游戏进程不会在不同局之间继承。遭遇是半随机的:理论上,由于敌人、奖励和物品的组合不同,没有哪一局会完全相同。(你可以通过复制种子并在游戏开始时输入,来复现他人的游戏过程或你自己的特定游戏过程。) 市面上有许多类rogue游戏,例如《洞穴探险》《以撒的结合》《死亡细胞》和《哈迪斯》。但你在这些游戏中的经验在这里帮不上忙:它们要么是动作导向游戏,要么是平台跳跃游戏,你的反应速度和对敌人模式的记忆对游戏有重大影响。 《巴拉丁洛》则不同,它是回合制游戏,你真正面对的唯一敌人是你自己。 牌组构筑类游戏 牌组构筑类游戏是指你从牌组中随机抽牌并打出的游戏。不过,在游戏过程中,你将能够修改牌组中的卡牌,无论是添加卡牌、移除卡牌,还是以某种方式强化它们。一些热门的类rogue牌组构筑游戏包括《杀戮尖塔》和《怪物火车》。不过,擅长一款牌组构筑游戏并不一定意味着你能玩好另一款。原因很简单:每款牌组构筑游戏——至少是优秀的那些——都有其独特的逻辑。例如,在《杀戮尖塔》中,通过明智的战术决策,比如在游戏初期选择几张攻击牌并保持牌组精简,你就能深入游戏。相比之下,在《怪物火车》中,你必须考虑构建自己的游戏引擎,因为你需要卡牌之间的协同和组合才能成功击败最终 boss。将《怪物火车》称为更偏向引擎构筑的游戏更为恰当。另一方面,《巴洛塔》可以被视为一款牌组构筑游戏,因为你确实是从一副52张牌开始,并能够以某种方式添加、移除和强化它们。不过,对于新玩家来说,这有点像个陷阱。一个更好的理解框架是将《巴洛塔》视为【 tableau building 】游戏,在这类游戏中,你需要获取各种被动能力(例如小丑牌、代金券、星球升级)来构建一个能让你获得大量分数的引擎。 与其专注于从牌组中添加或移除卡牌,更有效的策略是考虑你应该投资哪些小丑牌和代金券。这并不是说牌组构筑没有影响——它确实有影响,但那是更高级的策略。可以说,有些构筑即使不修改牌组也能奏效,而有些构筑则需要调整牌组才能发挥作用。(这与《怪物火车》这类游戏不同,在《怪物火车》中修改牌组内容是获胜的关键。) 玩家可以通过打出扑克手牌来获得分数。决定打出哪些牌、保留哪些牌以及弃掉哪些牌,都是策略的一部分。 扑克 “扑克”也是这款游戏的另一个相关术语。如果你从未玩过扑克,不必担心。你并不需要真的懂扑克也能享受这款游戏。扑克元素主要是让你了解可以通过哪些牌型来得分,比如顺子、对子和两对。如果你不熟悉这些术语,不用担心,我会在本指南后面的章节中介绍它们。 另一方面,如果你是扑克爱好者,很遗憾,你的扑克经验不一定能帮助你玩这款游戏。扑克的一项关键技能是观察局势,判断何时该跟注他人的虚张声势或自己进行诈唬。但这在这里完全不相关,因为你唯一的敌人就是你自己。对你有帮助的是理解概率。但除此之外,在这款游戏中,同花可以击败同花顺,这就是为什么你的扑克技能不一定适用于《巴洛塔》。 得分机制 《巴洛塔》的基本规则很简单:你出牌并获得分数。你打出的牌“越好”,得分就越高。这可以用以下简单公式表示:X个筹码 × Y倍乘数
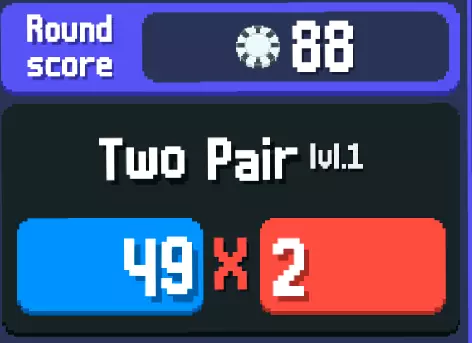
然而,细节决定成败,有几个因素会影响这个“简单公式”。 你的分数以筹码表示。 我将详细说明其计算方式。 一、你的扑克手牌 在扑克中,手牌存在等级之分。例如,顺子(五张连续的牌——比如任意花色的2、3、4、5、6)能击败对子(两张不同花色的相同牌)。 在《巴洛塔》中,游戏初期确实如此。以下是初始分数的计算方式:
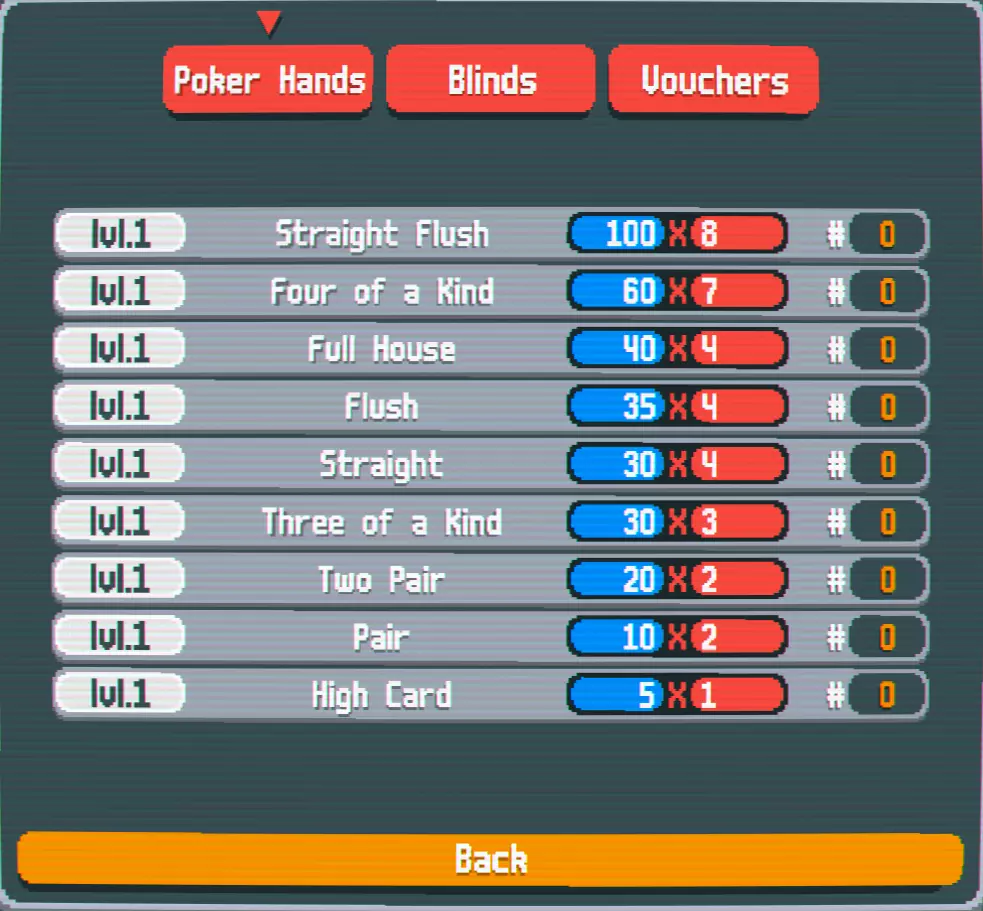
蓝色数字是玩特定手牌时获得的筹码基础值。此数值随后会乘以红色数字,即倍率。 例如,我们来比较对子(10筹码×2)和三条(30筹码×3)。通过简单计算可以看出,后者得分高于前者(90筹码对比20筹码)。 通常,在图表中位置越靠上的结果,出现概率越低,因此奖励也越高:你手中的每张牌都可能构成高牌,因为这只需要打出一张牌。而三条则难得多,因为需要三张数字相同的牌。 不过,这条规则并非绝对。在游戏过程中,可以升级特定的手牌。在《巴洛塔》中,传统扑克中通常较弱的手牌有可能成为你最强的手牌。
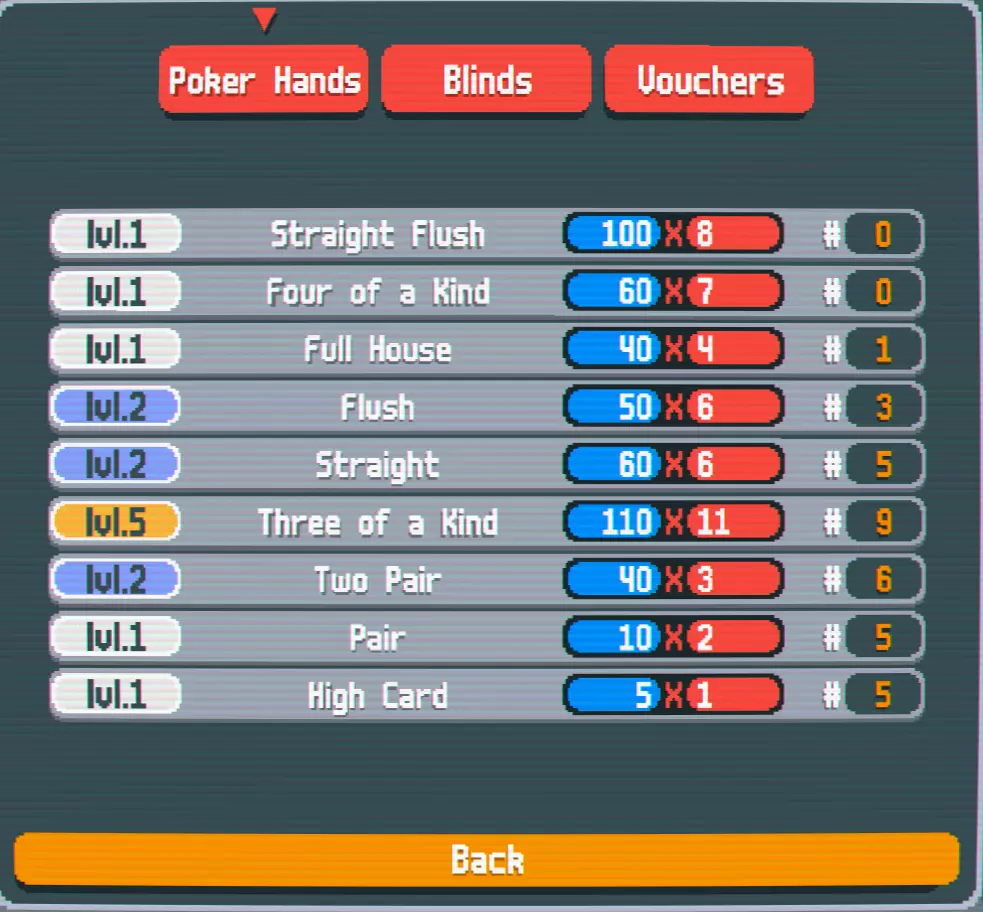
例如,在上图中,我们已将三条(按等级显示)升级到得分高于同花顺的程度。通过消耗星球卡牌,我们可以提高特定手牌的得分。 需要注意的是,即使你打出的所有卡牌都处于减益状态,这部分仍然会计算得分。 二、你打出的卡牌 确定要玩的扑克手牌后,接下来需要考虑的因素就是你实际打出的卡牌。 例如,一对的计算方式为10筹码×2。这10筹码会根据你打出的卡牌而增加。通常情况下,卡牌的筹码值与其数字相等(例如,3号牌价值3筹码,4号牌价值4筹码,以此类推)。而人头牌(国王、王后和杰克)的筹码值为10,A牌的筹码值为11。一对A的价值远高于一对3。一对A的计算方式如下:10筹码 + 11筹码 + 11筹码 = 32筹码。一对3的计算方式如下:10筹码 + 3筹码 + 3筹码 = 16筹码。这些数值会受到游戏中其他因素的进一步影响。例如, Joker牌可以增加筹码,塔罗牌中的强化牌也能增加筹码。如果你打出的所有牌都是被施加了减益效果的牌,你将跳过这部分公式计算。三、Joker牌:Joker牌也能够修改筹码及其倍数。以下是一些例子:狡猾的Joker:如果打出的手牌包含顺子,将增加100筹码。如果手牌包含顺子,疯狂小丑将增加+12的倍率。小丑模板会为每个空的小丑槽位增加x1倍率(游戏开始时有5个槽位,且小丑模板本身不计入槽位数量)。
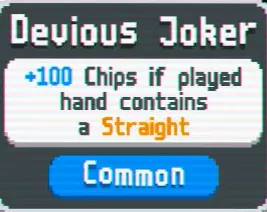
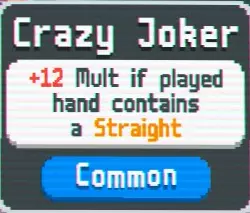
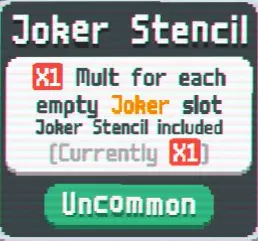
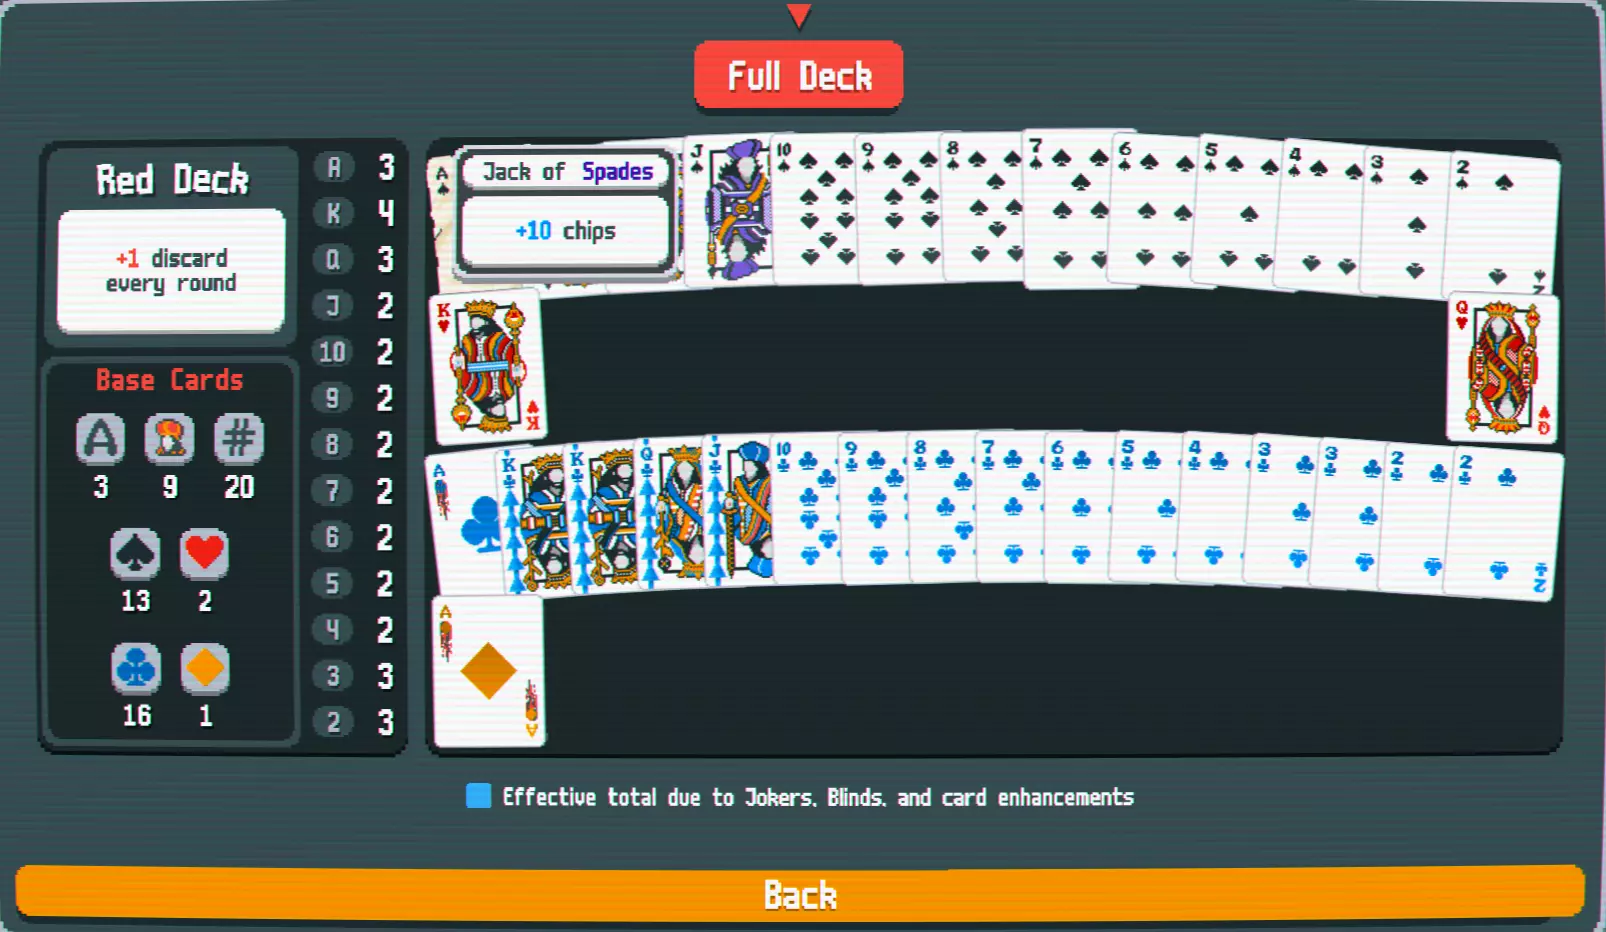
(Please note the difference between a + Multipler from a x Multiplier, as some new players miss this. The former is in red font, while the latter is white font boxed by a red frame.) Let's list our hypothetical scenario where you can only have one of the Jokers above. Which one would score higher? A level 1 Straight is calculated as 30 Chips x 4. Let's assume we played a 2, 3, 4, 5, 6. So 2, 3, 4, 5, and 6 Chips would be added to 30 Chips. Without any Jokers. that's a total of 50 Chips x 4, or 200 Chips. With Devious Joker, we would add 100 to 50, so the result would be 150 Chips x 4, or 600 Chips. With Crazy Joker, we would add 12 to the 4, so the result would be 50 Chips x 16, or 800 Chips. With Joker Stencil, assuming all five slots are empty, we would multiply 5 to the 4, so the result would be 50 Chips x 20, or 1000 Chips. If we added all three Jokers to the computation in the same order listed above (noting that both Devious Joker and Crazy Joker occupy a Joker Slot, reducing the Joker Stencil bonus to x3), the calculation would look like this: (100 Chips + 50 Chips) x ( (4 + 12) x 3) = 7,200 Chips. However, the order of the Jokers also matter. if the order were reversed (Joker Stencil being the left-most card and Devious Joker being the right-most card), the math would look something like this: (50 Chips + 100 Chips) x ( (4 x 3) + 12) = 3,600 Chips. IV. Conclusion Based on what we've listed above, there are several things we can conclude: Playing more cards leads to higher scores--because the more cards we play, the more Chips are added to the base value. We want a combination of bonuses; we want upgrades that increase the base number of Chips, upgrades that add to our Multiplier, and upgrades that multiply our Multipliers. It's important that we pay attention to the order of cards, as the same set of Jokers arranged differently can lead to a different score. There are several ways to achieve what's listed above. Planet Cards for example improve both the base number of Chips and our Multipliers. However, they can be hard to come by and it takes a long time to stack. Jokers, on the other hand, are very cost efficient in the sense that they can significantly provide massive bonuses as an upgrade under $10. Developing Your Engine Part I: Maximizing Your Score In the previous sections, you saw me mentioning about building your engine. Let me elaborate more on that part here. Building an engine basically means creating combos or synergies that enable you to do more. However, for new players, because there are several ways to go about it, they might be confused in which direction to head. I will outline below the areas you can focus your engine on, and which one to prioritize (as this game is very context-dependent, you don't need to be strict in following the hierarchy, but it can serve as a starting point when you evaluate which decisions to make). Maximizing Your Score Maximizing your score should be your number one priority, as this can determine whether your run ends or not. What does it matter if you've saved up $50 if you're dead? Or what does it matter if you can consistently draw Flushes if your Flushes don't score high enough to beat the current Blind? This is why developing an engine that increases your score should be your highest priority. Admittedly, at Ante 1, which is the earliest stage, you can probably postpone this part to a certain extent. But by Ante 2 and higher--especially at higher difficulty levels--you should be aiming for upgrades that either increase your Chips, your Multipliers, or both. To recap what I explained in the How Scoring Works section, you are looking for three things to increase your final score: I. Something that increases your base Chip value. This is very important in the early game and relatively common to find. Let's say you play a Pair. At level 1, this is calculated as 10 Chips x 2 = 20 Chips. Let's say you obtain Blackboard, an uncommon Joker. It gives x3 Multiplier if all cards held in hand are Spades or Clubs. If we were to apply it to the Pair, the formula would look like this: 10 Chips x 2 x 3 = 60 Chips. Compare this to one of the more common Jokers, Sly Joker: +50 Chips if played hand contains a pair. If we were to apply it to the Pair, the formula would look like this: (10 Chips + 50 Chips) x 2 = 120 Chips. So in this instance, when you really have nothing else to work with, Sly Joker has a more significant impact on your score than the Blackboard Joker. II. Something that increases your Multiplier. Also quite common are upgrades that increase your Multiplier (additively). Let's go back to the Pair as an example. Let's say you already have a Sly Joker, which adds +50 Chips to your base. In the hypothetical scenario that you could get another Sly Joker or a Jolly Joker (+8 Multiplier if played hand contains a Pair), the latter would be more beneficial. Let's break it down again: In the scenario where you have two Sly Jokers, the formula would look like this: (10 Chips + 50 Chips + 50 Chips) x 2 = 220 Chips. In the scenario where you have a Sly Joker and a Jolly Joker, the formula would look like this: (10 Chips + 50 Chips) x (2 + 8) = 600 Chips. III. Something that multiplies your Multiplier. Building on what we've established already, let's say you already have a Sly Joker and a Jolly Joker. You're now getting a minimum of 600 Chips from every Pair you play. Let's imagine the hypothetical scenario where you could obtain another Jolly Joker or a Blackboard. Here's how the formula breaks down: In the scenario where you pick another Jolly Joker: (10 Chips + 50 Chips) x (2 + 8 + 8) = 1,080 Chips. In the scenario where you pick Blackboard: (10 Chips + 50 Chips) x (2 + 8) x 3 = 1,800 Chips. There is some juggling necessary to figure out what is the optimum number of base Chips vs. additive Multipliers vs. multiplicative Multipliers that you need to figure out for yourself based on what your run gives you. However, based on the examples above, you want some combination of all three. What also gives you a more significant boost will depend on which stage in the game you are in. If your engine is configured correctly, the ideal play is with a single hand, you are able to defeat the encounter (as opposed to playing multiple hands). IV. Where to get your upgrades. During the Introduction, I mentioned that it's best to view Balatro as a tableau building game rather than a deck builder (although it is still technically a deck builder). I will explain my reasoning below. In general, there are three ways to increase your score: Jokers Planet Cards Tarot Cards (which creates Card Enhancements) Spectral Cards (which creates Seals on cards) For their corresponding cost, Jokers are the most cost effective methods for increasing your score. There are two reasons for this. One is that Jokers are computed last. The second is that they give a lot of value. Compare Sly Joker to the Mercury Planet Card (Levels up Pair by +1 Multiplier and 15 Chips): Sly Joker: (10 Chips + 50 Chips) x 3 = 120 Chips. Mercury Planet Card (10 Chips + 15 Chips) x (3 + 1) = 100 Chips. So Sly Joker is more efficient in this specific case. Other Jokers, like Blackboard, on the other hand, aren't limited to just Pairs and applies to other hands as well. This doesn't mean that you shouldn't obtain Planet Cards when you can. They can increase your scores, and amassing a lot of them does help in some specific builds. However, also be aware that the cards you obtain from Planet Cards are random, so you could be getting increases to hands you never or seldom play. Or that their bonuses are restricted to specific hands (while it's easier to pivot with some Jokers--just sell your existing ones and replace them with new ones). Both Tarot Cards (those that create Card Enhancements) and Spectral Cards (those that apply Seals to your cards) do qualify as Deck Building aspect and can enhance your build. However, they are not as efficient as the other two above for two reasons. One reason is you need to have those specific cards in hand in order to benefit from them. The second is that they are counted first in the formula, so any Multipliers they apply aren't as effective when compared to Jokers. Again, this does not mean you should ignore Tarot Cards and Spectral Cards completely. It just means that their use case is more situational or limited in comparison to Jokers and Planet Cards--unless you somehow increase your odds of drawing them. Card Enhancements also make it possible for various decks to be viable. For example, some new players might be wondering what Stone Cards are for (and why you would ever want them in your deck), and in general, they are helpful for hands that use less than five cards, such as Pairs and Three of a Kind. Developing Your Engine Part II: Improving Your Odds and Optimizing Wealth Improving Your Odds The next component you should consider building your engine around is improving your odds of success. For example, if you play a Flush, it's possible for you to score the 250,000 points you needed to win the game--but how can you guarantee that you are able to gather the cards needed for a Flush? This is where the Deck Building components come in, although not necessarily all the methods revolve around modifying your deck. In general, there are four ways to increase your odds: Change how the rules work Increase your Hand Size, Hands and/or Discards Add/Remove cards from your deck Change the cards in your deck I. Change how the rules work. There are some Jokers that alter how specific hands are calculated. Four Fingers for example makes it so that All Flushes and Straights can be made with 4 cards. II. Increase your Hand Size, Hands and/or Discards. There are Vouchers and Jokers that increase your Hand Size, number of played Hands before you fail, and how many Discards you have. Wasteful for example gives Permanently gain +1 Discard per Round. III. Altering the contents of your deck. In general, if you want to gain more deck consistency, you should be focusing on Tarot Cards and and Spectral Cards as they can add, destroy, or change the contents of your deck. Just be aware that it can take several Blinds before you are able to fully customize your deck. For example, if you're starting out with the standard 52-card deck, playing The Hanged Man (XII) only destroys up to 2 selected cards. So going down from a 52-card deck down to 50 isn't a massive change. However, if you persist at it, it's probably possible to trim down a 52-card deck to 40 cards, or perhaps create a scenario where there are two dominant Suits in your deck (as opposed to four).
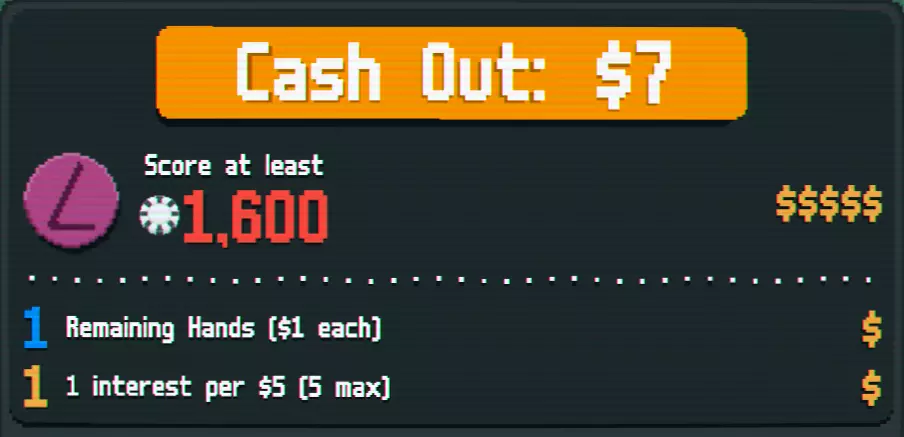
同时要留意能让你摧毁卡牌的【王牌】(例如【交易卡牌】),以及初始牌组规模较小的牌组(例如【格子牌组】)。 不过新手玩家面临的一个难题是如何调整自己的牌组。例如,虽然优化顺子的抽牌策略很明确,但要想抽到更多的葫芦或四条,需要对牌组做出哪些调整呢? 优化财富 最后一个要素是优化财富。 一方面,在第8轮赌注结束时,无论你有0美元还是25美元,都没有区别。 另一方面,你需要钱来支付我们上面提到的所有升级费用,无论是提高得分潜力还是增加成功几率。大多数财富优化方法,往好里说是存在机会成本,往坏里说则带有赌博性质或风险。下面我将对这些方法进行分析。 一、击败敌人 最直接的方法就是在游戏中战胜所有遭遇的敌人。每个敌人都会掉落一定数量的金钱,其中【小盲注】的奖励最少,【 Boss】的奖励最高。 但要注意,在更高难度下,【小盲注】不会掉落金钱,因此值得考虑下面提到的其他选项。 二、标签 【标签】是跳过【盲注】后获得的奖励。 有些【标签】提供的奖励比亲自击败【小盲注】或【大盲注】还要多,而有些【标签】则可能是一场赌博。 总之,值得查看【标签】的内容,而不是选择从不跳过【盲注】。例如,如果你比较缺钱,【优惠券】标签会很有用,因为它能让初始的【王牌】和【补充包】免费。(不过,它也可能给你一些你并不需要的【王牌】或【补充包】,所以这里面还是有一定风险的。) 手牌 每次对战结束时,你每剩余1张手牌,就能获得1美元。 从这个角度来说,《巴洛塔》鼓励高效的游戏策略。而那些能增加手牌数量的升级,也会间接提升你的经济收益。 利息 每次对战结束时,你每有5美元未花费,就能获得1美元。这个机制被称为【利息】。
This encourages not spending your money early on, but this can also be a trap. Some players take unnecessary risk in saving up $25 before they start purchasing anything in the shop. There is some risk in this approach, as you could end up dying due to lack of any upgrades. Also if you end the game with $25 in the bank, that's $25 that you could have spent purchasing upgrades for yourself to make the game easier for you. On the other hand, $25 in reserve will recoup your initial investment after five encounters (i.e. you'll earn $25 over the course of five encounters) so it's also another strategy in managing your wealth. Suffice to say, it's a judgment call here on whether to spend your money or whether to save it for Interest. A general piece of advice here is you find a useful Joker in the shop, it might be worth spending on, even if you only have $10 saved so far. Tarot Cards/Spectral Cards Specific Tarot Cards and Spectral Cards can provide you with money but you are gambling on obtaining those specific cards by spending money. Jokers Various Jokers can also help you with money, some immediate, some conditional, and a few that increases the sell value of your Jokers for when you cash out and sell them. The immediate opportunity cost here is that it's taking up a Joker slot, but you can always sell that specific Joker once your economy has stabilized to focus on Jokers that increases your score. Be flexible in your decision-making and sometimes it's worth taking a Joker that boosts your economy in the first few rounds and then replacing it with something else later in the game. Selling Various items in the game can be sold so always keep this in mind. This extends to Jokers, Planet Cards, and Tarot Cards you don't find particularly useful. Scouting and Risk Analysis For new players, Balatro might seem like a game that is too RNG-dependent. They will use the excuse that the reason they failed in their run is because of RNG. This is a common misconception among Rogue-like games. The reason individual skill in these type of games is because of the RNG; the skilled players are able to showcase their skills through their analysis, understanding, and ability to improvise given the specific situation. On the other hand, even the most skilled players sometimes lose to RNG. However, what sets skilled players apart is that they don't necessarily blame the RNG for their loss, understand that it is part of the challenge, and look for ways to improve their gameplay. Leveraging Balatro's RNG in your favor. The RNG presents itself in two ways: on the strategic level and on the tactical level. The strategic level is the overall flow of the game, such as the specific bosses you encounter, the Jokers you end up discovering, etc. The good news is that on the strategic level, there are ways to mitigate the RNG, and it works on a simple principle: scouting. At the start of the game and once you beat the boss at each Ante level, you can preview the Small Blind, the Big Blind, their corresponding Tags, and the Boss. This means that you can preview ahead of time whether you will be encountering a Boss that specifically counters your deck ahead of time or not. If you foresee yourself encountering a Boss whose special ability isn't a significant hindrance, you can relax. Otherwise, you have two options: You have two rounds to look for a solution in the Shop, even if it means making multiple re-rolls. Some Tags let you mitigate the Boss's special abilities, or even avoid them completely by providing you with a Boss re-roll.What I've listed above is not necessarily a perfect solution, but it does provide you with tools to overcome challenges. For example, The Pillar (Cards played previously this ante are debuffed) can be an annoying Boss to contend with. If you see this boss, you can either: Skip the Small and Big Blinds, or Play single hands during the Small and Big Blinds to minimize the cards that get debuffed. Another element where the strategic layer comes is in obtaining coveted Jokers. Sometimes the Shop will never show you the Jokers you want to get but there's a way to circumvent that: Tags. Some Tags either provide you with Uncommon or Rare Jokers (which is still a gamble in some situations), but there are Tags that guarantee Joker Editions and these don't necessarily need the special abilities of the specific Jokers to be beneficial to you. For example, if you are looking for a Joker that multipliers your Multiplier, then any Polychrome (x1.5 Multiplier) Joker will work as a (hopefully) temporary solution. If you end up with a Joker that's both useful and Polychrome, then that's already a significant win for you. RNG on the tactical level--that is the individual hands you play--has either been covered in the Improving Your Odds section, or understanding the mathematics behind Probability (which I will cover in a section below). Before we proceed there, however, it's important to understand that you are constantly making important decisions in Balatro. Some decisions might provide you with short-term benefits that ensure your survival, while others might risk the short term in order to benefit the long term (the concept of Interest is one example). There is no general advice here other than during each run, you will have to make these decision for yourself and weigh the corresponding risks and rewards. Sometimes, going for the short term benefit is the correct answer, while at other times, going for the long term benefit is the best decision to make. You also shouldn't be afraid to pivot your strategy, as sometimes what worked for you in the first few rounds of your run will not be sufficient to let you attain victory in the succeeding rounds. Here is a good rule of thumb: does your build enable you to beat the current boss in one or two hands? If the answer is no, then do you have an upgrade path before you get to the boss? Establishing the Baseline Before we proceed with the Math behind Balatro, it's best to establish what the baseline is, so that we can understand what are upgrades for us. They are the following: Hand Size: 8 Hands: 4 Discards: 3 Starting Money: $4 Joker Slots: 5 Item Slots: 2 Deck Size: 52 Vouchers: None It's important to understand that baseline when we select the decks we play with. For example, most of the "gateway" decks--the Red/Blue/Yellow Deck--essentially works with the baseline above and gives you $10 to work with. With the Red Deck, you are given an extra Discard--which is the equivalent to starting out with a Wasteful (Permanently gain +1 Discard per round) Voucher that costs $10. The same logic applies to the Blue Deck while the Yellow Deck flat out gives you $10. And then you have the more "advanced" decks which breaks the rules in some way. The Black Deck gives you an extra Joker slot for example, but comes at the expense of a Hand slot. The Abandoned Deck lets you start out with a smaller Deck Size, which can be a positive or negative aspect depending on your disposition. Balatro Math and Understanding Probability A common beginner question in Balatro is: for five-card hands, is it easier to do Flushes? There are three ways I can answer that question: how the UI presents it, fuzzy Math, and actual Math. User Interface (UI) In terms of the UI, it's easier for newer players to grasp flushes because there is literally a button on screen that sorts cards according to Flushes. Unfortunately for the other card combinations, such as Straights, Full Houses, etc., there is no easy way to immediately see this (depending on the cards you are given). You can order the cards by Rank, but this won't immediately isolate Straights, Full Houses, etc.
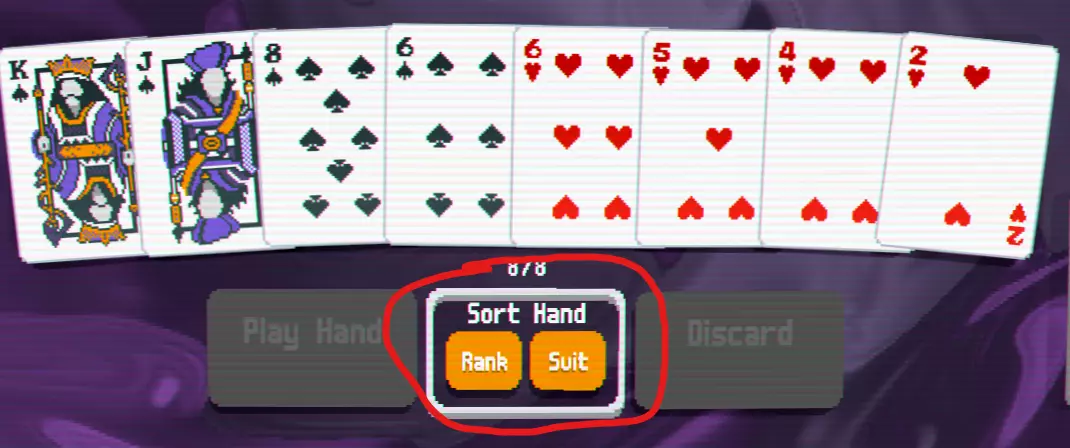
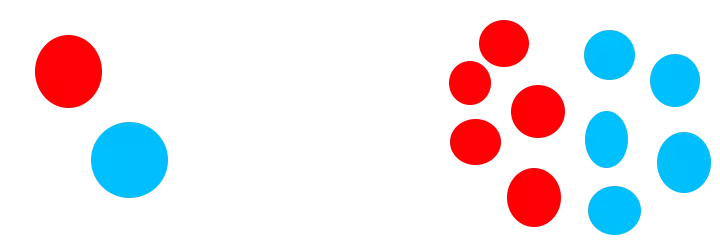
Fuzzy Math Fuzzy Math is what I would call eyeballing the Math without going deep into the mechanics. In Five Card Draw Poker, among the 5-card hands, Straights are technically the most probable of the card combinations, with Flushes being the second most probable. However, be aware that Five Card Draw Poker starts out with an opening hand of 5 cards, while Balatro starts out with 8 cards. A term in Texas Hold Em Poker used to describe the probability of obtaining a winning hand is called "Outs". If they say your hand has 4 Outs, it means that there are 4 possible cards that can win you the game. In the context of Balatro, if in your opening hand, you drew 4 Spades, and 4 of something else; we can claim that you have 9 Outs (basically the 9 other Spades in your deck). So viewing the game from a lens of Outs can make calculating probabilities easier for you, even if the actual Math is not quite accurate. The Math If you want a thorough breakdown of Math behind Poker hands, you can check out The Probabilities of Poker Hands[allmathconsidered.wordpress.com]. But for our purposes, here's the main difference between Poker and Balatro. Poker has 2,598,960 possible opening hands (13! / 5! 8!). Balatro has 752,538,150 possible opening hands (52! / 8! 44!). And this would only get more muddled if you add/subtract cards from your deck, as well as if you change your deck's composition. So in Balatro, what are our chances of drawing a Heart Flush in our opening hand? To do so, we would need to add up all the possible combinations: 5 Heart Cards and 3 Non-Heart Cards: (13! / 5! 8!) x (39! / 3! 36!) = 11,761,893 6 Heart Cards and 2 Non-Heart Cards: (13! / 6! 7!) x (39! / 2! 37!) = 1,271,556 7 Heart Cards and 1 Non-Heart Card: (13! / 7! 6!) x (39! / 1! 38!) = 66,924 8 Heart Cards: (13! / 8! 5!) = 1,287 So if we add all of them and divide them by the total number of possible opening hands, it would look like: (11,761,893 + 1,271,556+ 66,924+ 1,287) / 752,538,150 = .01740996120927556961730112951749 Now what would the math look like if we were using the Checkered Deck: (which has twice the amount of Hearts)? 5 Heart Cards and 3 Non-Heart Cards: (26! / 5! 21!) x (26! / 3! 23!) = 171,028,000 6 Heart Cards and 2 Non-Heart Cards: (26! / 6! 20!) x (26! / 2! 24!) = 74,824,750 7 Heart Cards and 1 Non-Heart Card: (26! / 7! 19!) x (26! / 1! 25!) =17,102,800 8 Heart Cards: (26! / 8! 18!) =1,562,275 If we add them all up, it would look like: (171,028,000 +74,824,750 + 17,102,800+ 1,562,27) / 752,538,150 = 0.35150088404155988636589387528061 That's actually a lot of calculations and if you really wanted to optimize how much your percentages increases by the miniscule changes you make to your deck, you can apply and/or derive the formulas you need based on the example above. But that's also a lot of work and why I prefer "Fuzzy Math" during actual play. In general, here's a rule of thumb: For Flushes, try to increase the Suit you want, and/or decrease the Suits you don't want. For Pairs/Three-of-a-Kind/Full House, you do benefit from getting multiple copies of the same number. Poker Hands For those unfamiliar with Poker, I will go through the various Poker Hands. I will also mention the differences between Poker and Balatro. These are ranked in terms of scoring and probability. High Card This is the lowest scoring hand you can play in Poker and occurs when no cards are matched. The lowest cards are 2's, while the highest scoring are Aces. The face cards--Kings, Queens, and Jacks--are ranked in that order. In Balatro, to score a High Card, you can play anywhere between 1 card to 5 cards. Playing 1 card for example is advisable if you want to keep the other cards in your hand, while playing 5 cards is useful if you wanted to virtually discard the four other cards and cycle through your deck faster. For example: you play a 10. One Pair This is the second lowest-scoring hand and occurs when you play two cards that have matching numbers. In Balatro, to score a Pair, you can play anywhere between 2 cards to 5 cards. For example: you play a 10, 10. Two Pair This occurs when you play two different Pairs. In Balatro, to score a Two Pair, you can play anywhere between 4 cards to 5 cards. For example: you play a 10, 10, 9, 9. Three of a Kind This occurs when you play three cards that have matching numbers. In Balatro, to score a Three of a Kind, you can play anywhere between 3 cards to 5 cards. For example: you play a 10, 10, 10. Straight This occurs when you play a set of five cards that are in chronological order. The suit does not matter. Aces connect to both 2 (e.g. Ace, 2, 3, 4, 5) and to Kings (e.g. 10, Jack, Queen, King, Ace). For example: you play 6, 7, 8, 9, 10. Flush This occurs when you play a set of five cards that are all in the same suit. For example: you play 2, 4, 6, 8, 10 that are all Diamonds. In Balatro, you can also unlock other sub-decks connected to the Flush, such as a Flush House (see Full House below). Full House This occurs when you combine a Pair and Three of a Kind. For example: you play a 10, 10, 10, 9, 9. Four of a Kind This occurs when you play four cards that have matching numbers. In Balatro, to score a Four of a Kind, you can play anywhere between 4 cards to 5 cards. For example: you play a 10, 10, 10, 10. Straight Flush This occurs when you play a Straight that is also a Flush. For example: you play 6, 7, 8, 9, 10 that are all Diamonds. Royal Flush--a term in Poker for when you score the highest possible hand, which is a Straight Flush that is composed of 10, Jack, Queen, King, Ace--is considered a separate hand type in Balatro. Other Hands Balatro will also have other hands not possible in Poker, such as Five of a Kind and Flush Five. Glossary Balatro uses a lot of terms (some based on Poker for flavor but no relation to the actual Poker mechanic) and special abilities, so here is a compilation. Ante: The effective "stage" you are in. You "complete" the game if you beat the Boss Blind at Ante 8, although you have the option to continue in Endless Mode. Blind: When you choose to face an enemy (instead of skipping them) in an Ante. There are three Blinds in an Ante--a Small Blind, a Big Blind, and a Boss Blind. Booster Packs: Purchasable at the shop and each gives you a number of cards to choose from. These are usually themed according to card type (e.g. Joker Booster Pack, Planet Card Booster Pack, etc.). Discard: Number of times you can discard cards from your hand. After which, you draw a number of cards to fill up your maximum Hand Size. Edition: This can affect Playing Cards and Jokers. Foil: +50 Chips Holographic: +10 Multiplier Polychrome: x 1.5 Multiplier Negative: +1 Joker Slot Enhanced Cards: Cards that have been enhanced via Tarot Cards. Each card can only have one enhancement (applying a new one will overwrite the previous one). Face Cards: The King, Queen, and Jack are considered Face Cards. Hand Size: The number of cards you initially draw. Hands: Number of times you can play your hand before losing the game. Jokers: Cards that usually provide some sort of bonus. Each one can have one Edition. Planet Cards: Cards that increases the Chip and Multiplier bonuses for a single hand type. Playing Cards: The cards that go into your deck and hand. These cards can be further modified with one Enhancement, Edition, and Seal. Spectral Card: These cards can drastically alter your game, such as altering an entire hand to one random suit. This is usually the only way to obtain Seals and Legendary Jokers. Tarot Cards: These are cards that either Enhance Cards, provide you with money, or create random Jokers. Vouchers: These are permanent upgrades. Seals: These are applied to cards in your deck. They usually have a special effect associated with discarding, holding, or scoring the said card. Stakes: Indicates the difficulty level of the game. Interest: The extra money you earn for beating a Blind. Accrues $1 for every unspent $5, maxes out at $5 (e.g. you gain $5 if you have $25 saved). Tags: The rewards you get for skipping a Blind. Bonus Tips and Recommended Reading I. Jokers and most of the consumables like Planet Cards and Tarot Cards are unique. You can use this fact to increase your chances of obtaining them by keeping the consumable you do not want in the inventory. For example, if you are looking to farm the Mercury Planet Card, you should keep the non-Mercury cards in your inventory to increase the chances of Mercury showing up in the shop or a Booster Pack. II. Cavendish is a potent, Common Joker. However, it can only appear once the Gros Michel Joker has been destroyed. III. During the early game, you are straddling the line between short term builds vs. long term builds. Sometimes, it's best to purchase a Joker that will benefit you in the short term (and then sell it at a later date) even if you have to give up a Joker that would have helped you in the long term. And sometimes you are lucky enough that you were able to obtain a Joker that helps you both in the early game and late game. IV. For Boss Blinds that obfuscate your Playing Cards, you can still sort them according to Rank and/or Suit. When sorting them by Suit, they are always in this order: Spades, Hearts, Clubs, Diamonds. You can also click on your deck to see what cards are still in your deck, and through deductive reasoning, realizing what cards you actually drew--at least in your initial hand if you're not keeping track of your discards. Recommended Reading Balatro Wiki[balatrogame.fandom.com] A Joker guide for crushing the first difficulty by /u/Zeeterm Here are tips on how to beat the Jokerless Challenge A thorough guide to beating Balatro Tags that cannot spawn on Ante 1 Balatro University Frequently Asked Questions What happens if you run out of cards? Do you reshuffle? You lose the game. When does the game "end"? The game "ends" when you beat the Boss Blind at Ante 8. However, the game gives you the option to continue to Endless Mode. Some of the numbers go up too high and I don't know how to interpret/read them. See E Notation under Scientific Notation[en.wikipedia.org]. Basically the number after E dictates how many "times ten raised to the power of" it is. E+21 means x 10^21 for example. How do you obtain Seeds? The Seed to your game is provided to you when you beat it or when you die, whichever comes first. (Please note that consoles and the PC version have subtle differences so their Seeds may not be identical.) How are Stone Cards used? Stone Cards are usually played with hands that are less than five. For example, if you play 2, 2, 2, 3, 4, normally only the Three of a Kind (the 2's) would score. If instead you played 2, 2, 2, Stone Card, Stone Card, then all five cards would score. What are Eternal Jokers? These are Jokers that cannot be sold. They are a handicap available at higher Stakes. Are Unlocks available on Challenge Mode? No. I checked the Wiki and the text there is different from my game. The Wiki is generally based on the PC version of Balatro. The Console ports are different, and there are some subtle differences, including unlock conditions for specific decks, Stake order, and how much Chips you gain from a Foil. How do Ante numbers work? The Ante Number is basically the "stage" or "level" of the game. Ante 1 will be way easier than Ante 6 for example. Each Ante has a Base Number (e.g. for Ante 1, it is 300). The Small Blind is 1x that base (Ante 1 Small Blind is 300), the Big Blind is 1.5x that base (Ante 1 Big Blind is 450), and the Boss Blind will have anywhere from 1x, 2x, or 4x the Base, depending on its special ability. How do I use Planet Cards? When I use it, it immediately disappears. Planet Cards are permanent upgrades. Look at Run Info on the left-hand side and you can see the level and formula for the various Poker hands. Intermediary Mechanics Part I: When Do You Add/Subtract Cards Your Deck This Intermediary Mechanics series is here to help advance your game once you've become acquainted with the basics. The goal of each section here is to focus on one gameplay mechanic and discuss they impact (or don't impact) your game. If you are coming from deckbuilder games like Slay the Spire and Monster Train, you know the value of adding/reducing the cards in your deck: they help make your deck more consistent. For those new to such type of games, let me explain their value: One of the reasons to add cards to your deck is to make drawing them more consistent. Most decks for example contain 4 Aces (one from each Suit). If you add an additional 4 Aces to your deck, you've increased your chances of drawing an Ace. On a similar track, if you remove cards from your deck, you'll also have a likelier chance of drawing the card that you need. It's easier to fish for the Ace that you need if there are only 40 cards in the deck, as opposed to 60. Or in the case of Discards, more importantly, eliminating cards that you don't want can save you on Discards as the cards you dislike never show up. For example, if you have a Joker that gives bonuses for playing Face Cards, and you've eliminated all the non-Face cards from your deck, then all the cards you play henceforth would obtain the Face-related bonus. So adding/subtracting cards seems like a good thing, but like everything else in Balatro, it needs to be balanced by the opportunity cost it comes with. I'll be discussing below the framework that comes into making such a decision. I. Can You Afford It In terms of priority, adding/subtracting cards from your deck falls under the Improving Your Odds category. So before you think about modifying the number of cards in your deck, the question you should be asking is whether you can afford it. If your scoring potential is good enough to get you through the current Ante (and/or the succeeding one) and you have some money lying around, then yes, it's worth considering this option. However, if you have difficulties completing the current Boss Blinds, adding/subtracting Playing Cards from your deck won't change the outcome--unless you are adding cards that affect your scores, such as Enhanced, Edition, and cards with Seals. II. Jokers If you can afford to add/subtract cards from your deck, you need to decide which specific cards you want to add/subtract. One guideline here is to check what Jokers that you currently have. If you have Jokers that give you bonuses to Face Cards, then you want to either add Face cards or subtract non-Face cards. If you have Jokers that give you bonuses when you play Clubs, then you want to either add more Clubs or remove non-Clubs from your deck. In the absence of a Joker that synergizes with your build, you can decide to hold off on that decision and let your unspent money accrue Interest. However, while risky, you can also "prepare" your deck for Jokers that you might run into the future. For example, if you are playing the Checkered Deck which has all your starting cards as Hearts and Spades, you can presume you will run into either a Lusty or Wrathful Joker (Played cards with Heart/Spade suit give +4 Multiplier when scored) eventually, as they are of Common rarity. So in this instance, you just need to pick either Hearts or Spades, and hope that you encounter the Joker that you want to obtain. III. Boss Blinds What can end most runs are the special abilities of the bosses. Thankfully, you can scout them ahead of time. When deciding which cards to add/subtract, you can keep track of either future Boss Blinds or those you've already encountered. For example, if you see an incoming The Club Boss Blind (All Clubs are debuffed), you can alter your deck to contain less Clubs. Or on the opposite end of the spectrum, if you've already encountered The Club, you might want to alter your deck to contain more Clubs, as it's unlikely you'll come across The Club twice in the same run. IV. Where You Want to Specialize Lastly, while ideally you should be adapting your decisions to what the game nudges you to lean towards to, at the end of the day, players have their own favored playstyle or go-to builds in the absence of more overt cues from the game. So at this stage, go with what you think is best. If you want to play Flushes, decide on which one or two Suits to lean towards to. If you want to increase your Pairs/Three-of-a-Kind/Full House/Four-of-a-Kind, then increase the number of copies of the high-ranking cards you have and reduce the copies of the low-ranking cards that you have. Intermediary Mechanics Part II: Scaling Upgrades and Long-Term Costs Not all players immediately grasp the risks and benefits involved with taking short-term benefits over long-term benefits. Or on the opposite end of the spectrum, some players always choose the long-term decision (such as not spending their money in order to accrue Interest) without taking into consideration whether they will survive in the next round or two. While there is a meaningful discussion to be had in comparing taking a Joker that optimizes wealth (theoretically a long-term decision) vs a Joker that maximizes your score (theoretically a short-term decision, depending on the Joker picked), that is a topic for another day. This section is here to solely focus on upgrades that increase your score--and what the short-term vs. long-term benefits are. Infinite Scaling Jokers As far as Jokers are concerned, the "best" ones to obtain are the ones that have infinite scaling potential. You only have 5 slots, so the ideal is you have a Joker that "levels up" along with you. Take for example these two Jokers: Crazy Joker (+12 Multiplier if played hand contains a Straight) and Ceremonial Dagger (When Blind is selected, destroy Joker to the right and permanently add double its sell value to this Multiplier). The Crazy Joker, in your best case scenario (e.g. you played a Straight), will always give you a +12 Multiplier. It doesn't matter whether you got it at Ante 1 or Ante 8. If you have 5 Crazy Joker, they would give you a total of +60 Multiplier. Contrast this to Ceremonial Dagger. In its worst-case scenario, it could give you a +0 Multiplier. However, there is no ceiling on your best case scenario; it depends on how much Jokers you fed to it and how many Rounds have passed. It could easily get a +60 Multiplier at the cost of one Joker slot. Or +120 Multiplier. It really depends.
Another way of looking at things is how many Joker slots are consumed. Crazy Joker gives you a +12 Multiplier. Let's say you combine it with Cavendish (which gives a x 3 Multiplier). These two Joker cards combined give you a total of +36 Multiplier. A Ceremonial Dagger "fed" over the course of 9 rounds, on the other hand, can easily get a +36 Multiplier. In this specific scenario, it's effective as two Joker cards while it only takes one Joker slot. However, Ceremonial Dagger has an opportunity cost as well. It needs time to build up and costs money to grow. If you are at $0.00, you cannot increase it. If you come across it at the start of Ante 8, unless you have an Egg (Gain $3 of Sell Value at the end of Round) waiting in the wings, it's not going to contribute much in comparison to coming across a Crazy Joker. However, obtaining one infinite-scaling Joker early in the game can really make a difference. Be sure to keep an eye out for them and value them accordingly. The earlier in the run you are in, the more value infinite-scaling Jokers provide, while the later in the game you encounter them, the less value they provide. Also don't limit yourself in terms of Multipliers. Infinite scaling Jokers come in various forms, such as: Space Joker (1 in 4 Chance to upgrade the level of played Poker hand before it's scored) Wee Joker (This Joker gains +8 Chips when each played 2 is scored. Starts at +10 Chips) Burnt Joker (Upgrade the level of the first discarded Joker hand each round) But also watch out for "misleading" infinite scaling Jokers. Hiker (Every played card permanently gains +4 Chips when scored) might seem good but the problem is that the bonus is spread over your 52 cards, so it's difficult--but not impossible--to create an overpowered build with this Joker. On the other hand, keep an eye out for "combos". An Eternal (Joker cannot be sold) Egg (Gain $3 of Sell Value at the end of Round) might seem "useless" for example, but if you combine it with Swashbuckler (Adds the sell value of all owned Jokers left of this card to Multiplier), it creates an infinite-scaling combo--although you also need to ask yourself whether a +3 Multiplier every round is worth the investment of 2 Joker slots. How to Infinitely Scale Without Jokers So what happens if you don't have an infinite scaling Joker? Should you quit your run? No. Various runs have been completed without infinite scaling Joker. What's important to learn here is the concept of constantly upgrading/improving your engine. So let's say by Ante 6, you have your ideal set of Jokers (that do not have infinite scaling). And let's say the bonuses you get are enough to get you through the end of Ante 6. How do you survive Ante 7 and Ante 8 with your current set-up? The answer is to look to upgrades in three areas: Special Editions, Planet Cards, and Playing Cards. Unlike Jokers, these do not come with an opportunity cost outside of spending money. Special Editions Your Jokers can each gain one Edition: Foil (+50 Chips), Holographic (+10 Multiplier), Polychrome (x1.5 Multiplier), and Negative (+1 Joker Slot). You either "fish" for these cards (especially Negative) in the shop as an upgrade path to your existing set-up, or gamble on The Wheel of Fortune Tarot Card to apply these (except Negative) upgrades to your existing Joker setup. Planet Cards Planet Cards upgrades the hands you play at a linear rate (e.g. leveling up Straight three times is three times as good of an improvement, leveling up Pair twice is two times as good of an improvement)--usually by increasing the base Chips and Multiplier. For example, Saturn increases Straights by 30 Chips and +2 Multiplier. While this isn't as "cost-effective" of an upgrade in comparison to Jokers, it's still an upgrade, especially in conjunction with all the other upgrades. If at Ante 6 your Jokers are all set, upgrading the bonuses you get from Planet Cards can be one way of further increasing your potential score. Playing Cards While not as consistent as all of the upgrades above, since you need to draw the Playing Cards with upgrades that you need, upgrading your Playing Cards is your next option in order to increase your scoring potential. (In fact, upgrading Playing Cards and Planet Cards is how you clear the Joker-less Challenge.) Playing Cards can be upgraded in three ways (these all stack): Special Editions (see above example except instead of Jokers, it applies to Playing Cards) Seals (Red Seals to be specific) Card Enhancements An explanation of the specific Seals and Card Enhancement can be found at the Wiki[balatrogame.fandom.com]. Please note that Red Seals trigger for both cards played and cards kept in hand, so it works well with both Steel Card and Mult Card. Edge Cases There are also very specific scenarios where you can obtain an infinite-scaling mechanic via other means. For example, the Voucher Observatory makes it so that Planet Cards in your inventory give x1.5 Multiplier for their specified hand. The Legendary Joker Perkeo creates a Negative (i.e. it doesn't consume a slot) copy of 1 random Consumable in your possession at the end of the shop. This combo thus creates an infinite x1.5 Multiplier, limited by how many times you leave the shop.