换一换
换一换 


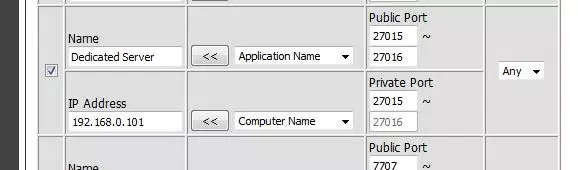
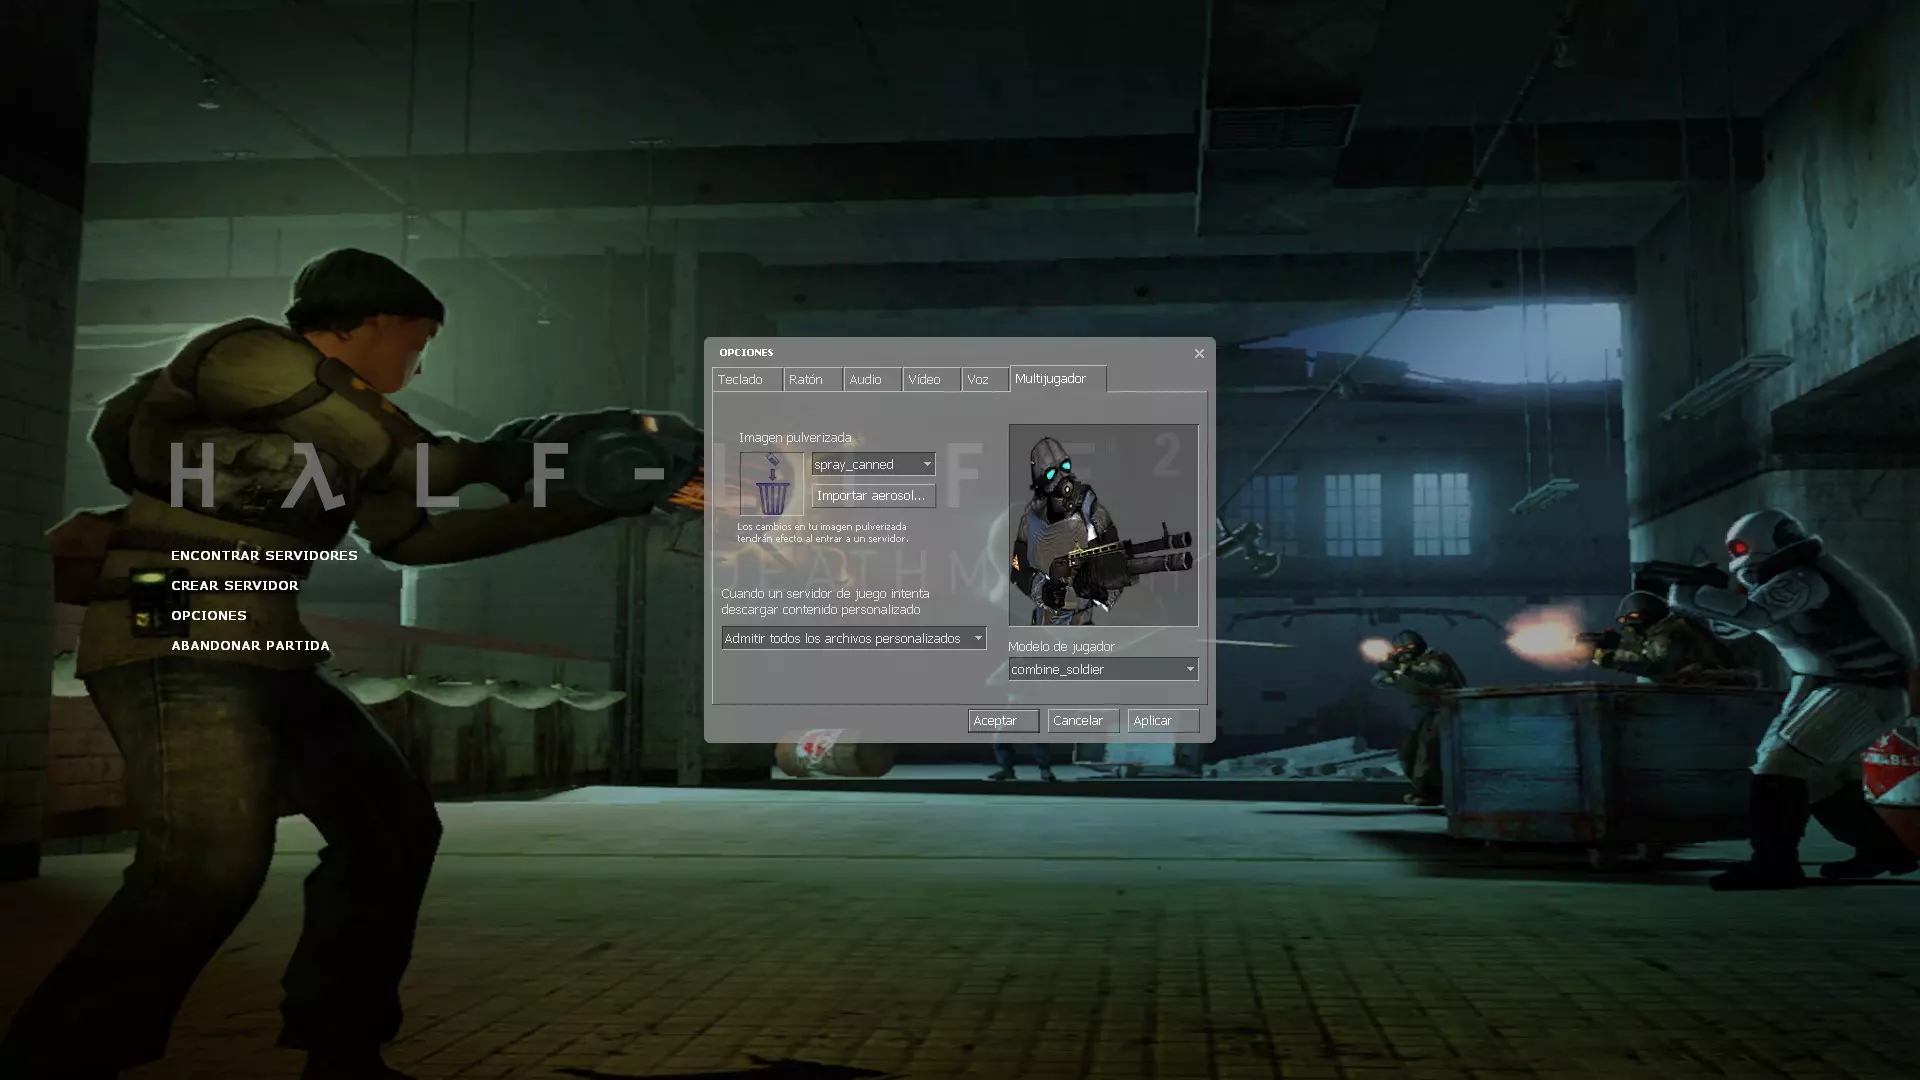
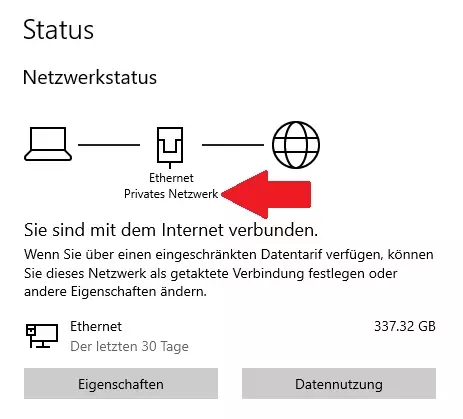
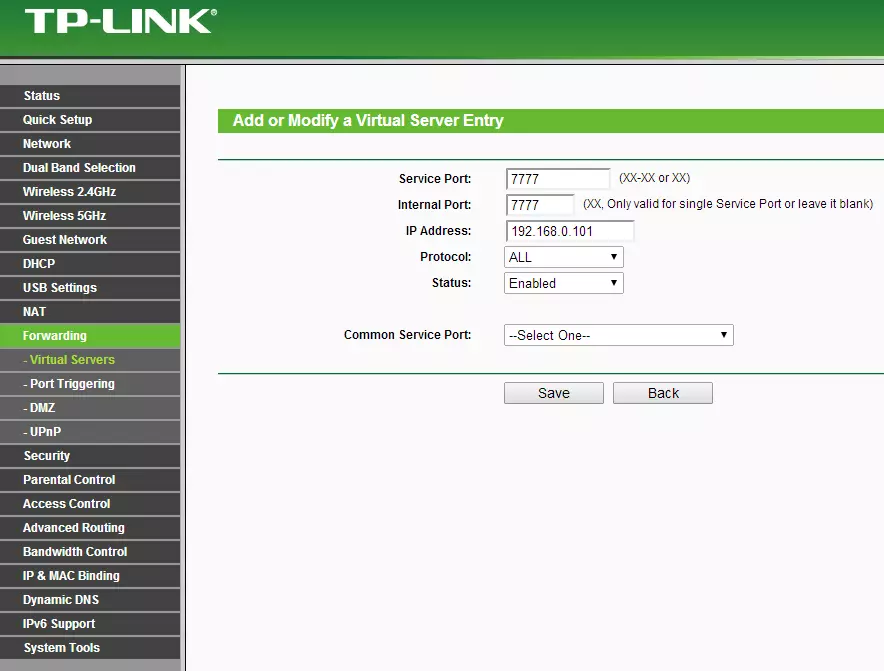
This guide will explain how to download, install and set up a dedicated server on a variety of different platforms. Foreword My previous guide on how to set up and configure a Half-Life 2: Deathmatch server is 5 years old at the time of writing this and is showing is age, combined with that i've recently been running a new dedicated server and been discovering new features and things i wasn't aware of before, instead of forgetting all of this i'd like to write it down and share it with the community, use it as you wish. My previous guide can be found here. (OUTDATED, DO NOT USE) Resources: Valvesoftware developer website. - SteamCMD - Source dedicated server information Sourcemod community[www.sourcemod.net]and Metamod[www.metamodsource.net] Docker Hub[hub.docker.com] Changelog 27 March 2025 Added "hl2mp_allow_pickup 1" to Global FAQ. Moved configuration to separate guide which can be found here: https://steamcommunity.com/sharedfiles/filedetails/?id=3453069427 Added server testing and configuration guide link section. 28 March 2025 Changed the guide description to better match the contents. 5 April 2025 Moved items from FAQ related to configuration to the configuration guide. Choosing a platform This guide will explain how to install the server on the following platforms: Windows Linux Docker on LinuxIf you're looking for long term hosting and not sure what to host your server on i suggest using Linux as it is more reliable on the long run, although the learning curve is a little steeper this guide will try to explain everything as detailed as possible. Platform │ └── Linux └── Machine used for dedicated server ONLY? ├── Yes → Linux └── No → Docker on Linux If you're hosting or running a VM (virtual machine) for the only purpose of running a dedicated server you'll want to chose the one without docker. Windows (Windows) Step 1: Setting up your folder structure. For the installation of the server we're going to need a folder for SteamCMD and a folder for the server itself, take the following as an example: Half-Life 2 Deathmatch Dedicated Server/ │ ├── steamcmd/ │ └── server/ In this example, the Half-Life 2: Deathmatch dedicated server will be installed into the server/ folder and s SteamCMD, which is used to download the server, will be installed into steamcmd/. Note: make sure to create this folders in a place where you have execution rights for example in your Documents folder. (Windows) Step 2: Setting up SteamCMD. The next step is to download SteamCMD, a download link for Windows can be found here, make sure you download the one under Windows, the file is called steamcmd.zip . Afterwards, unzip this file and put all of its content in the server folder, it should now look like this: Half-Life 2 Deathmatch Dedicated Server/ │ ├── steamcmd/ │ └── steamcmd.exe │ └── server/ After downloading, we can double click on steamcmd.exe to run it, following this, a terminal window will open which returns the following output: [ 0%] Checking for available updates... [----] Verifying installation... ... We can tell it has finished updating when we arrive at the prompt: [ 0%] Checking for available updates... [----] Verifying installation... Steam Console Client (c) Valve Corporation - version 1742420332 -- type 'quit' to exit -- Loading Steam API...OK Steam> After it has downloaded updates, checked for updates and verified the installation we can continue. Before logging into SteamCMD we must first set the location for the dedicated server to be downloaded and installed to, note that for this we have to use the absolute path. force_install_dir C: path to your server For example, installing the server onto your D: drive would be: force_install_dir D: Half-Life 2 Deathmatch Dedicated Server server When setting this on Windows make sure to use the back slash " " instead of the forward slash "/". If the installation path is not set, the directory in which SteamCMD is located will be used. The next step is to run steamcmd.exe by double clicking on it, this should launch a terminal window running SteamCMD. SteamCMD should update itself if necessary and it should end up with a prompt in which you can type commands. We can use the anonymous login feature to download the dedicated server as we don't need to make a purchase to download it, the command to login anonymously is: login anonymousFollowing this we should be logged into SteamCMD anonymously, SteamCMD will tell us: Steam>login anonymous Connecting anonymously to Steam Public...OK Waiting for client config...OK Waiting for user info...OK Steam> (Windows) Step 3: Downloading the dedicated server. Now that we are logged in and the installation directory is set we can download the dedicated server, to do this we use the following command: app_update 232370 validateapp_update will download appid 232370 (Half-Life 2: Deathmatch Dedicated Server) and validate the files after downloading. When the download is complete you may close SteamCMD and your server directory should be populated with files like so: Half-Life 2 Deathmatch Dedicated Server/ │ ├── steamcmd/ │ ├── steamcmd.exe │ └── ... │ └── server/ ├── hl2mp/ │ ├── ... │ └── ... ├── srcds.exe └── ... We can see that SteamCMD is downloading our server as the terminal writes the following output: Update state (0x3) reconfiguring, progress: 0.00 (0 / 0) Update state (0x3) reconfiguring, progress: 0.00 (0 / 0) Update state (0x61) downloading, progress: 0.00 (0 / 1049938646) Update state (0x61) downloading, progress: 4.09 (42987117 / 1049938646) Update state (0x61) downloading, progress: 6.80 (71391309 / 1049938646) Update state (0x61) downloading, progress: 12.91 (135573772 / 1049938646) Update state (0x61) downloading, progress: 19.76 (207506150 / 1049938646) Update state (0x61) downloading, progress: 28.76 (301982332 / 1049938646) ... Note: the progress is shown here in % and bytes. Following the download, it will validate the files which looks like this: Update state (0x81) verifying update, progress: 2.56 (26908998 / 1049938646) Update state (0x81) verifying update, progress: 9.25 (97137605 / 1049938646) Update state (0x81) verifying update, progress: 15.24 (160053481 / 1049938646) Update state (0x81) verifying update, progress: 21.81 (229023692 / 1049938646) Update state (0x81) verifying update, progress: 26.41 (277301554 / 1049938646) Update state (0x81) verifying update, progress: 31.65 (332265526 / 1049938646) Update state (0x81) verifying update, progress: 38.77 (407038805 / 1049938646) Update state (0x81) verifying update, progress: 44.93 (471691466 / 1049938646) ... When finished, it will tell us Success! App '232370' fully installed. (Windows) Step 4: Running the dedicated server Inside the server directory there should be a file called srcds.exe which will be used to run the server, to do this we make a .bat file to easily run the server and set parameters. The easiest way to do this is to create text file, enter the following command in this file and then save it as .bat file. srcds.exe -console -game hl2mp -maxplayers 10 +map dm_lockdown Optionally you can omit -console to run the server using a graphical interface. Running the bat file will start the server, we can see that the server is started when the server window tells us: Connection to Steam servers successful. Public IP to Steam is xxx.xxx.xxx.xxx Assigned anonymous gameserver Steam ID [A:x:xxxxxxxxxx:xxxxx]. VAC secure mode is activated. AT THIS POINT YOUR SERVER IS RUNNING, BUT FOR OTHERS TO BE ABLE TO JOIN IT YOU WILL NEED TO PORT FORWARD AND DO BASIC CONFIGURATION. THIS IS EXPLAINED FURTHER IN THE GUIDE BELOW Linux (Linux) Step 1: installing SteamCMD. Modern versions of Linux allow you to install SteamCMD directtly from your package manager, for example on my test setup ruinning Ubuntu, i can use the command: sudo apt install steamcmd Which will return: Reading package lists... Done Building dependency tree... Done Reading state information... Done The following additional packages will be installed: libstdc++6:i386 Suggested packages: steam:i386 The following NEW packages will be installed: libstdc++6:i386 steamcmd:i386 0 upgraded, 2 newly installed, 0 to remove and 0 not upgraded. Need to get 2,125 kB of archives. After this operation, 7,191 kB of additional disk space will be used. Do you want to continue? [Y/n] After this we can type y and press enter to start the installation. If your package manager and or package repository does not include SteamCMD you might have to manually install the dependencies and manually download the package, how this is done is described here. (Linux) Step 2: Creating a user for SteamCMD. Running the server under the root user is a bad idea and a scurity risk, most distributions force you to make a user account which should be used to run the server instead, if you do not have a user account, make one like so: sudo useradd -m newusername sudo passwd newusername Obviously, replaced newusername with a name of your choice. After this, login using the user account and use it from now on. (Linux) Step 3: Setting up your folder structure. After installing SteamCMD, we can set up the folder structure for our server. /home/username/hl2dm-ds/ │ └── server/ In this example, the Half-Life 2: Deathmatch dedicated server will be installed into the server folder. To create the new folders open a new terminal and type the following commands: cd ~ mkdir hl2dm-ds cd hl2dm-ds mkdir server I recommend using the home directory as the permissions will be set accordingly. (Linux) Step 4: Setting up SteamCMD. After installing SteamCMD and sertting up the folder structure, we can run SteamCMD with the following command: [ 0%] Checking for available updates... [----] Verifying installation... ... We can tell it has finished updating when we arrive at the prompt: [ 0%] Checking for available updates... [----] Verifying installation... Steam Console Client (c) Valve Corporation - version 1742420332 -- type 'quit' to exit -- Loading Steam API...OK Steam> After it has downloaded updates, checked for updates and verified the installation we can continue. Before logging into SteamCMD we must first set the location for the dedicated server to be downloaded and installed to, note that for this we have to use the absolute path. force_install_dir /path/to/your/serverFor example, installing the server into your home folder (recommended, permission will be set accordingly) force_install_dir /home/username/hl2dm-ds/serverWhen setting this on Linux make sure to use the forward slash "/" instead of the back slash " ". If the installation path is not set, the directory in which SteamCMD is located will be used. We can use the anonymous login feature to download the dedicated server as we don't need to make a purchase to download it, the command to login anonymously is: login anonymousFollowing this we should be logged into SteamCMD anonymously, SteamCMD will tell us: Steam>login anonymous Connecting anonymously to Steam Public...OK Waiting for client config...OK Waiting for user info...OK Steam> (Linux) Step 5: Downloading the dedicated server. Now that we are logged in and the installation directory is set we can download the dedicated server, to do this we use the following command: app_update 232370 validateapp_update will download appid 232370 (Half-Life 2: Deathmatch Dedicated Server) and validate the files after downloading. /home/username/hl2dm-ds/server/ ├── hl2mp/ │ └── srcds_run We can see that SteamCMD is downloading our server as the terminal writes the following output: Update state (0x3) reconfiguring, progress: 0.00 (0 / 0) Update state (0x3) reconfiguring, progress: 0.00 (0 / 0) Update state (0x61) downloading, progress: 0.00 (0 / 1049938646) Update state (0x61) downloading, progress: 4.09 (42987117 / 1049938646) Update state (0x61) downloading, progress: 6.80 (71391309 / 1049938646) Update state (0x61) downloading, progress: 12.91 (135573772 / 1049938646) Update state (0x61) downloading, progress: 19.76 (207506150 / 1049938646) Update state (0x61) downloading, progress: 28.76 (301982332 / 1049938646) ... Note: the progress is shown here in % and bytes. Following the download, it will validate the files which looks like this: Update state (0x81) verifying update, progress: 2.56 (26908998 / 1049938646) Update state (0x81) verifying update, progress: 9.25 (97137605 / 1049938646) Update state (0x81) verifying update, progress: 15.24 (160053481 / 1049938646) Update state (0x81) verifying update, progress: 21.81 (229023692 / 1049938646) Update state (0x81) verifying update, progress: 26.41 (277301554 / 1049938646) Update state (0x81) verifying update, progress: 31.65 (332265526 / 1049938646) Update state (0x81) verifying update, progress: 38.77 (407038805 / 1049938646) Update state (0x81) verifying update, progress: 44.93 (471691466 / 1049938646) ... When finished, it will tell us Success! App '232370' fully installed. To close SteamCMD we can use the command exit. (Linux) Step 6: Running the dedicated server Inside the server directory there should be a file called srcds_run which we will use to run the server, to run the server from the command line we can use the following command: ./srcds_run -game hl2mp -maxplayers 10 +map dm_lockdown After executing this, the server should start runnuing, we can see that the server has started succesfully because of the following output: Connection to Steam servers successful. Public IP to Steam is xxx.xxx.xxx.xxx Assigned anonymous gameserver Steam ID [A:x:xxxxxxxxxx:xxxxx]. VAC secure mode is activated. AT THIS POINT YOUR SERVER IS RUNNING, BUT FOR OTHERS TO BE ABLE TO JOIN IT YOU WILL NEED TO PORT FORWARD AND DO BASIC CONFIGURATION. THIS IS EXPLAINED FURTHER IN THE GUIDE BELOW Docker (Linux) A docker application is a quick and easy way of deploying an image to do one thing; run a Half-Life 2: Deathmatch Dedicated Server server. A docker container is simple to manage and configuration is easy. Certain operating systems such as Unraid[unraid.net] and or TrueNAS Community Edition[www.truenas.com] allow for application deployement in the shape of docker images from sources such as Docker Hub[hub.docker.com]. Installing such a docker container is relatively simple if you've set up docker containers before, for Unraid and TrueNAS use this link[hub.docker.com]. A docker container/ application can also be ran on Linux itself and is not difficult to set up, the following steps will explain: (Docker Linux) Step 1: Installing docker. Unlike SteamCMD, Docker cannot be installed from most repositories as far as i know and has to be added, we can do this using the following commands: First, login as root: sudo suRun updates: sudo apt updateFetch the GPG from docker and install it: curl -fsSL https://download.docker.com/linux/ubuntu/gpg | gpg --dearmor -o /usr/share/keyrings/docker-archive-keyring.gpgFetch the repository list and install it: echo "deb [arch=amd64 signed-by=/usr/share/keyrings/docker-archive-keyring.gpg] https://download.docker.com/linux/ubuntu $(lsb_release -cs) stable" | sudo tee /etc/apt/sources.list.d/docker.list > /dev/nullUpdate once more: sudo apt updateInstall docker: sudo apt install docker-ceNext we start docker and enable it so it starts every time we reboot our machine: sudo systemctl start docker sudo systemctl enable docker After this, docker should be installed, we can test this by running: sudo docker --versionWhich should return: Docker versions 28.0.1, build 068a01eThe version will be different for you most likely. (Docker Linux) Step 2: Setting up the folder structures. We will need to set up 2 folder structures for the Dedicated Server, one for the Linux operating system and one inside the Docker container, on the Linux system we want the folder structure like this: /home/USERNAME/dockerdata ├─ server │ └─ stamcmd In this case, on the Linux machine itself we have the server and steamcmd folder inside /home/username/dockerdata. Now we need to set up the folder structure inside the docker container which will look something like this: /dockerdata ├─ server │ └── stamcmd These folders don't need to be created as they are created for us when setting up the Docker container. (Docker Linux) Step 3: Setting up the Docker container. First we login as root: sudo suThen, go to the docker directory on your Linux machine, in the example shown above that would be /home/USERNAME/dockerdata, to do this, use: cd /home/USERNAME/dockerdata (make sure to change USERNAME with your username) Then, make docker-compose.yaml using the following commands: touch docker-compose.yamlOpen docker-compose.yaml using the text editor with: nano docker-compose.yamlThen, add the following lines to your docker-compose.yaml file: services: hl2dm: container_name: hl2dm-ds image: ich777/steamcmd:hl2dm restart: unless-stopped ports: - "27015:27015" - "27015:27015/udp" environment: GAME_ID: 232370 GAME_NAME: hl2mp GAME_PORT: 27015 GAME_PARAMS: "+maxplayers 24 +map dm_lockdown" UID: 99 GID: 100 volumes: - /home/USERNAME/dockerdata/steamcmd:/serverdata/steamcmd - /home/USERNAME/dockerdata/server:/serverdata/serverfiles Note: make sure to change USERNAME with your username! Note: the following lines indicate where the server will be installed to on our Linux machine and their respective path on the Docker container: - /home/USERNAME/dockerdata/steamcmd:/serverdata/steamcmd This indicates that /home/USERNAME/dockerdata/steamcmd is linked (:) to /serverdata/steamcmd in our docker container. The paths inside the docker container have to be /serverdata/steamcmd and /serverdata/serverfiles because this is what the image expects! (Docker Linux) Step 4: Running the container Some parts of our server configuration are written inside the docker-compose.yaml file such as the port the server will use and the server parameters including the starting map, this file can be updated when the server is turned of in case you ever need to change these. Next we can start our container using the following command: docker compose up -dAfter running the command and letting the images download, we should get the following output: [+] Running 7/7 ✔ hl2dm Pulled 5.6s ✔ 69fb10dc82f9 Pull complete 3.8s ✔ 05ba2b01b3ef Pull complete 4.0s ✔ dc2b3bbca85d Pull complete 4.0s ✔ 8a56348ea875 Pull complete 4.0s ✔ 1df2777fc818 Pull complete 4.0s ✔ 6e694c0deac5 Pull complete 4.0s [+] Running 2/2 ✔ Network dockerdata_default Created 0.0s ✔ Container hl2dm-ds Started 0.2s Here we can see it has pulled all the required data to set up the docker container and we can see our container name is hl2dm-ds, this name will be important to identify our container. (Docker Linux) Step 5: Reading the logs, interacting with docker and other useful commands. We can see what the container is doing by reading the log, after the container has been created it will start by itself and start downloading the dedicated server, after this it will start the server. To list our containers we can use the following command: docker ps -a This should return something like this: CONTAINER ID IMAGE COMMAND CREATED STATUS PORTS NAMES 4dde2e97d806 ich777/steamcmd:hl2dm "/opt/scripts/start.…" 8 minutes ago Up 8 minutes 0.0.0.0:27015->27015/tcp, 0.0.0.0:27015->27015/udp, [::]:27015->27015/tcp, [::]:27015->27015/udp hl2dm-ds We can open the logs from our container with the following command: docker compose logs -f hl2dm-dsThis should return the following output: hl2dm-ds | ---Ensuring UID: 99 matches user--- hl2dm-ds | ---Ensuring GID: 100 matches user--- hl2dm-ds | ---Setting umask to 000--- hl2dm-ds | ---Checking for optional scripts--- hl2dm-ds | ---No optional script found, continuing--- hl2dm-ds | ---Taking ownership of data...--- hl2dm-ds | ---Starting...--- hl2dm-ds | SteamCMD not found! hl2dm-ds | steamcmd.sh hl2dm-ds | linux32/steamcmd hl2dm-ds | linux32/steamerrorreporter hl2dm-ds | linux32/libstdc++.so.6 hl2dm-ds | linux32/crashhandler.so hl2dm-ds | ---Update SteamCMD--- hl2dm-ds | Redirecting stderr to '/serverdata/Steam/logs/stderr.txt' hl2dm-ds | ILocalize::AddFile() failed to load file "public/steambootstrapper_english.txt". hl2dm-ds | [ 0%] Checking for available update... hl2dm-ds | [----] Downloading update (0 of 49,478 KB)... hl2dm-ds | [ 0%] Downloading update (0 of 49,478 KB)... hl2dm-ds | [ 0%] Downloading update (0 of 49,478 KB)... hl2dm-ds | [ 0%] Downloading update (0 of 49,478 KB)... hl2dm-ds | [ 0%] Downloading update (0 of 49,478 KB)... hl2dm-ds | [ 0%] Downloading update (1,018 of 49,478 KB)... hl2dm-ds | [ 2%] Downloading update (2,225 of 49,478 KB)... ... hl2dm-ds | [----] Installing update... hl2dm-ds | [----] Cleaning up... hl2dm-ds | [----] Update complete, launching Steamcmd... hl2dm-ds | UpdateUI: skip show logo hl2dm-ds | steamcmd.sh[33]: Restarting steamcmd by request... hl2dm-ds | Redirecting stderr to '/serverdata/Steam/logs/stderr.txt' hl2dm-ds | Logging directory: '/serverdata/Steam/logs' hl2dm-ds | [ 0%] Checking for available updates... hl2dm-ds | [----] Verifying installation... hl2dm-ds | UpdateUI: skip show logo hl2dm-ds | Steam Console Client (c) Valve Corporation - version 1741737873 hl2dm-ds | -- type 'quit' to exit -- hl2dm-ds | Loading Steam API...OK hl2dm-ds | Connecting anonymously to Steam Public...OK hl2dm-ds | Waiting for client config...OK hl2dm-ds | Waiting for user info...OK hl2dm-ds | Update state (0x3) reconfiguring, progress: 0.00 (0 / 0) hl2dm-ds | Update state (0x61) downloading, progress: 99.77 (917262123 / 919359275) hl2dm-ds | Update state (0x61) downloading, progress: 99.77 (917262123 / 919359275) hl2dm-ds | Update state (0x81) verifying update, progress: 4.33 (39775643 / 919359275) hl2dm-ds | Update state (0x81) verifying update, progress: 18.78 (172636393 / 919359275) ... hl2dm-ds | Update state (0x81) verifying update, progress: 87.07 (800489212 / 919359275) hl2dm-ds | IPC function call IClientAppManager::GetUpdateInfo took too long: 42 msec hl2dm-ds | Success! App '232370' fully installed. hl2dm-ds | ---Prepare Server--- hl2dm-ds | mkdir: cannot create directory ‘/serverdata/.steam/sdk32’: No such file or directory hl2dm-ds | cp: target '/serverdata/.steam/sdk32/' is not a directory hl2dm-ds | ---No 'server.cfg' found, downloading...--- server.cfg 100%[] 1.76K --.-KB/s in 0s hl2dm-ds | ---Successfully downloaded 'server.cfg'--- hl2dm-ds | ---Please wait--- hl2dm-ds | ---Server ready--- hl2dm-ds | ---Start Server--- hl2dm-ds | Auto detecting CPU hl2dm-ds | Using default binary: ./srcds_linux hl2dm-ds | Server will auto-restart if there is a crash. hl2dm-ds | Setting breakpad minidump AppID = 232370 hl2dm-ds | Using breakpad crash handler hl2dm-ds | dlopen failed trying to load: hl2dm-ds | /serverdata/.steam/sdk32/steamclient.so hl2dm-ds | with error: hl2dm-ds | /serverdata/.steam/sdk32/steamclient.so: cannot open shared object file: No such file or directory hl2dm-ds | Looking up breakpad interfaces from steamclient hl2dm-ds | Calling BreakpadMiniDumpSystemInit hl2dm-ds | 03/15 18:53:20 minidumps folder is set to /tmp/dumps hl2dm-ds | 03/15 18:53:20 Could not find steamerrorreporter binary. Any minidumps will be uploaded in-process03/15 18:53:20 Init: Installing breakpad exception handler for appid(232370)/version(9540945)/tid(182) hl2dm-ds | [S_API] SteamAPI_Init(): Loaded local 'steamclient.so' OK. hl2dm-ds | Using shader api: shaderapiempty_srv.so hl2dm-ds | Using Breakpad minidump system. Version: 9540945 AppID: 232370 hl2dm-ds | Loaded 11 VPK file hashes from /serverdata/serverfiles/hl2mp/hl2mp_pak.vpk for pure server operation. hl2dm-ds | Loaded 11 VPK file hashes from /serverdata/serverfiles/hl2mp/hl2mp_pak.vpk for pure server operation. hl2dm-ds | Loaded 1 VPK file hashes from /serverdata/serverfiles/hl2_complete/hl2_complete_misc.vpk for pure server operation. ... hl2dm-ds | Loaded 5 VPK file hashes from /serverdata/serverfiles/platform/platform_misc.vpk for pure server operation. hl2dm-ds | server_srv.so loaded for "Half-Life 2 Deathmatch" hl2dm-ds | Parent cvar in server.dll not allowed (hl2mp_bot_debug_ammo_scavenging) hl2dm-ds | maxplayers set to 24 hl2dm-ds | maxplayers set to 24 hl2dm-ds | ConVarRef dev_loadtime_map_start doesn't point to an existing ConVar hl2dm-ds | Unknown command "port" hl2dm-ds | Network: IP 172.19.0.2, mode MP, dedicated Yes, ports 27015 SV / 27005 CL hl2dm-ds | Initializing Steam libraries for secure Internet server hl2dm-ds | CAppInfoCacheReadFromDiskThread took 0 milliseconds to initialize hl2dm-ds | Setting breakpad minidump AppID = 320 hl2dm-ds | SteamInternal_SetMinidumpSteamID: Caching Steam ID: 76561197960265728 [API loaded yes] hl2dm-ds | SteamInternal_SetMinidumpSteamID: Setting Steam ID: 76561197960265728 hl2dm-ds | dlopen failed trying to load: hl2dm-ds | /serverdata/.steam/sdk32/steamclient.so hl2dm-ds | with error: hl2dm-ds | /serverdata/.steam/sdk32/steamclient.so: cannot open shared object file: No such file or directory hl2dm-ds | Looking up breakpad interfaces from steamclient hl2dm-ds | Calling BreakpadMiniDumpSystemInit hl2dm-ds | SteamInternal_SetMinidumpSteamID: Caching Steam ID: 76561197960265728 [API loaded yes] hl2dm-ds | SteamInternal_SetMinidumpSteamID: Setting Steam ID: 76561197960265728 hl2dm-ds | [S_API FAIL] Tried to access Steam interface SteamUtils010 before SteamAPI_Init succeeded. hl2dm-ds | Setting breakpad minidump AppID = 232370 We can see above that the container has downloaded and updated SteamCMD, downloaded and installed the dedicated server and started the server. At this point our server is running, we can restart the container using the following command: docker restart hl2dm-dsAnd we can stop the container using this command: docker stop hl2dm-dsAT THIS POINT YOUR SERVER IS RUNNING, BUT FOR OTHERS TO BE ABLE TO JOIN IT YOU WILL NEED TO PORT FORWARD AND DO BASIC CONFIGURATION. THIS IS EXPLAINED FURTHER IN THE GUIDE BELOW Port forwarding Port forwarding is required for to be done for others to be able to join your server from the internet, without port forwarding your server will not show up in the server list and people who are not on the same network as you are will not be able to join. Port forwarding is different for each and every set up, this guide will assume you're hosting a dedicated server from a home network and that you are using a home router and or firewall, if you're paying for a VPS or another server space you will have to figure out with them how to open ports to allow for game traffic from the internet. (Port forwarding) Step 1: Finding your router IP adres. To find our router's IP adres on windows we can open the command prompt and use the following command: ipconfigWhich will return: Ethernet adapter Ethernet: Connection-specific DNS Suffix . : home IPv4 Address. . . . . . . . . . . : xxx.xxx.xxx.xxx Subnet Mask . . . . . . . . . . . : xxx.xxx.xxx.xxx Default Gateway . . . . . . . . . : 192.168.1.1 In this example, my default gateway which is my router, has the IP adres 192.168.1.1. To do this on Linux we can use the following command: netstat -rnWhich will return: Kernel IP routing table Destination Gateway Genmask Flags MSS Window irtt Iface 0.0.0.0 192.168.1.1 0.0.0.0 UG 0 0 0 ens2 192.168.1.0 0.0.0.0 255.255.255.0 U 0 0 0 ens2 In this case we can see that our router's IP adres (gateway) is 192.168.1.1 (Port forwarding) Step 2: Logging into your router's web interface and opening your port. Open a web browser and enter the your gateway's IP adres, this should give you a login page to enter your router's web login. The password for this web login is usually found on the bottom of your router and is not the same as the Wi-Fi password. After logging in we must find the port forwarding options, for me they can be found under Network > NAT > Port mapping. Next step is to add a port mapping/ port forwarding rule, the IP adres to use for this rule is the IP adres of the computer that your dedicated server is hosted on, for example this could be 192.168.1.10, next we must set the port to 27015 (or whatever port you're using) and the protocol to UDP/TCP (both). An example port forwarding rule may look something like this: Enable this rule: ☒ IP: 192.168.1.10 Protocol: TCP/UDP Private Port: 27015 - 27015 Public Port: 27015 - 27015 After doing this, start your server and it should now be joinable from the server list, but we haven't changed configuration yet which is required for changing the name of the server and optionally setting a password, without changing the name it will be very difficult to find your server in the list. To directly connect to your server from the internet you can open the console and use the following command connect xxx.xxx.xxx.xxx:27015, replace the x's with your public ip. Configuration and testing your server Configuration At this point your server will be running and should show up in the server list, to be able to find your server in the server list you will have to change the name and do basic configuration which is explained in my configuration guide, along with that the guide also explains how to install addons and set up a FastDL. https://steamcommunity.com/sharedfiles/filedetails/?id=3453069427 Testing your server Even though your server will be hard to find in the server last if you haven't changed the hostname, w can still test our connection by connecting to it directly. To do this, the console in Half-Life 2: Deathmatch by pressing ~ if enabled in the settings and type: connect xxx.xxx.xxx.xxxMake sure to change the xxx.xxx.xxx.xxx with your public IP address or with the LAN IP address that the server is running on. If you cannot connect to your server check if you've followed all the steps as described or leave a comment below. FAQ (Windows) Where should i install my server? The server can be installed to any directory on any drive as long as you have execution privileges. How do i enable/ disable the server GUI (Graphical User Interface) on the server? When starting the server, you can add or remove "-console" to the startup command in the bat file. How do i run multiple servers/ a server on a different port? If you're running multiple servers they cannot use the same port, to change the port edit your launch parameters like so: srcds.exe -console -game hl2mp -maxplayers 10 +map dm_lockdown -port 27016 FAQ (Linux) Where should i install my server? The server can be installed to any directory on any drive as long as you have execution privileges. How do i run my server in the background? Start a screen named hl2dm-ds: screen -S hl2dm-dsStart the server on this screen by going to your server directory and using: ./srcds_run -game hl2mp -maxplayers 10 +map dm_lockdownMove the screen to the background: CTRL+A+DIf you want to bring it to the foreground use: screen -r hl2md-ds How do i run multiple servers/ a server on a different port? If you're running multiple servers they cannot use the same port, to change the port edit your launch parameters like so: ./srcds_run-console -game hl2mp -maxplayers 10 +map dm_lockdown -port 27016 FAQ (Docker) How do i change server parameters? If you want to change things such as the starting map or the game port, edit your docker-compose.yaml file and make the necessary changes. If you want to change the game port make sure to change all ports in the file. If you want to change launch parameters change them at GAME_PARAMS:. How do i access my game files inside the docker container? In your docker-compose.yaml it will say where your serverfiles and SteamCMD are mounted locally, look for the lines under "volumes:", the part before the colon is where your files are locally mounted. How do i change the mount point for the server files? Your docker-compose.yaml will state where your game and SteamCMD folders are mounted under "volumes:", to change these edit the first part before the colon, for example: - /home/USERNAME/dockerdata/server:/serverdata/serverfiles Can be changed to: - /a/different/path/for/your/server:/serverdata/serverfiles Make sure to not change the part after the colon. FAQ (Global) How do i allow for more player slots on my server? (more than 24) To increase the maxplayers add "-unrestricted_maxplayers" to your launch parameters and set "+maxplayers" to your desired number e.g. "+maxplayers 101" How do i change the tickrate for my server? Add "-tickrate" to your launch parameters like so "-tickrate 100". If you have any further questions, feel free to ask below.
《半衰期2:死亡竞赛》专用服务器指南

2026-02-19 16:00:18

导读
这是一篇《半衰期2:死亡竞赛》专用服务器搭建指南,涵盖Windows、Linux、Linux Docker三种平台的服务器下载、安装、运行步骤,还包含端口转发、服务器测试及常见问题解答,可帮助玩家顺利搭建专属游戏服务器。

评论
共0条评论

Re.Poly专用服务器搭建指南
本指南将逐步为你介绍如何为《Re.Poly》创建自己的专用服务器! 安装SteamCMD 首先,我会说明如何以及在哪里下载和安装SteamCMD。 第一步,下载…
2026-03-25 04:000赞 · 0评论
《噬血代码》专用服务器设置综合指南
一份详尽的《Vein》专用服务器搭建指南。本指南将带您从零开始,一步步完成服务器的下载、安装、网络配置及参数调整,覆盖 Windows 与 Linux 系统。无…
2026-02-14 13:000赞 · 0评论

单机游戏 征途魔盒版本架设
魔盒架设 1.虚拟机安装: 不讲了 2.数据库安装: 不讲了 3.去看前期的视频教程:https://www.bilibili.com/video/BV14P4…
2025-11-06 17:100赞 · 0评论
创建多人游戏
本指南适用于在《欧陆风云3》中进行多人游戏时遇到主机创建问题的玩家,也可能对想要加入游戏的玩家有所帮助。 端口转发 创建《欧陆风云3》多人游戏的第一步是进行端口…
2026-04-01 07:000赞 · 0评论
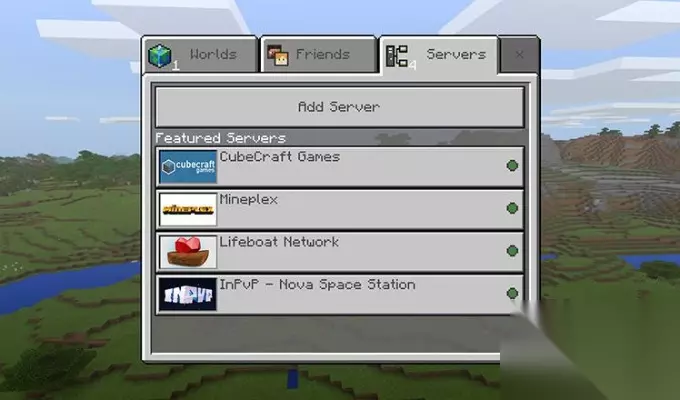
minecraft联机 怎么联机玩我的世界 4种方法实现跨平台同乐
Q1:为什么需要联机玩《我的世界》?
2025-09-13 02:070赞 · 0评论
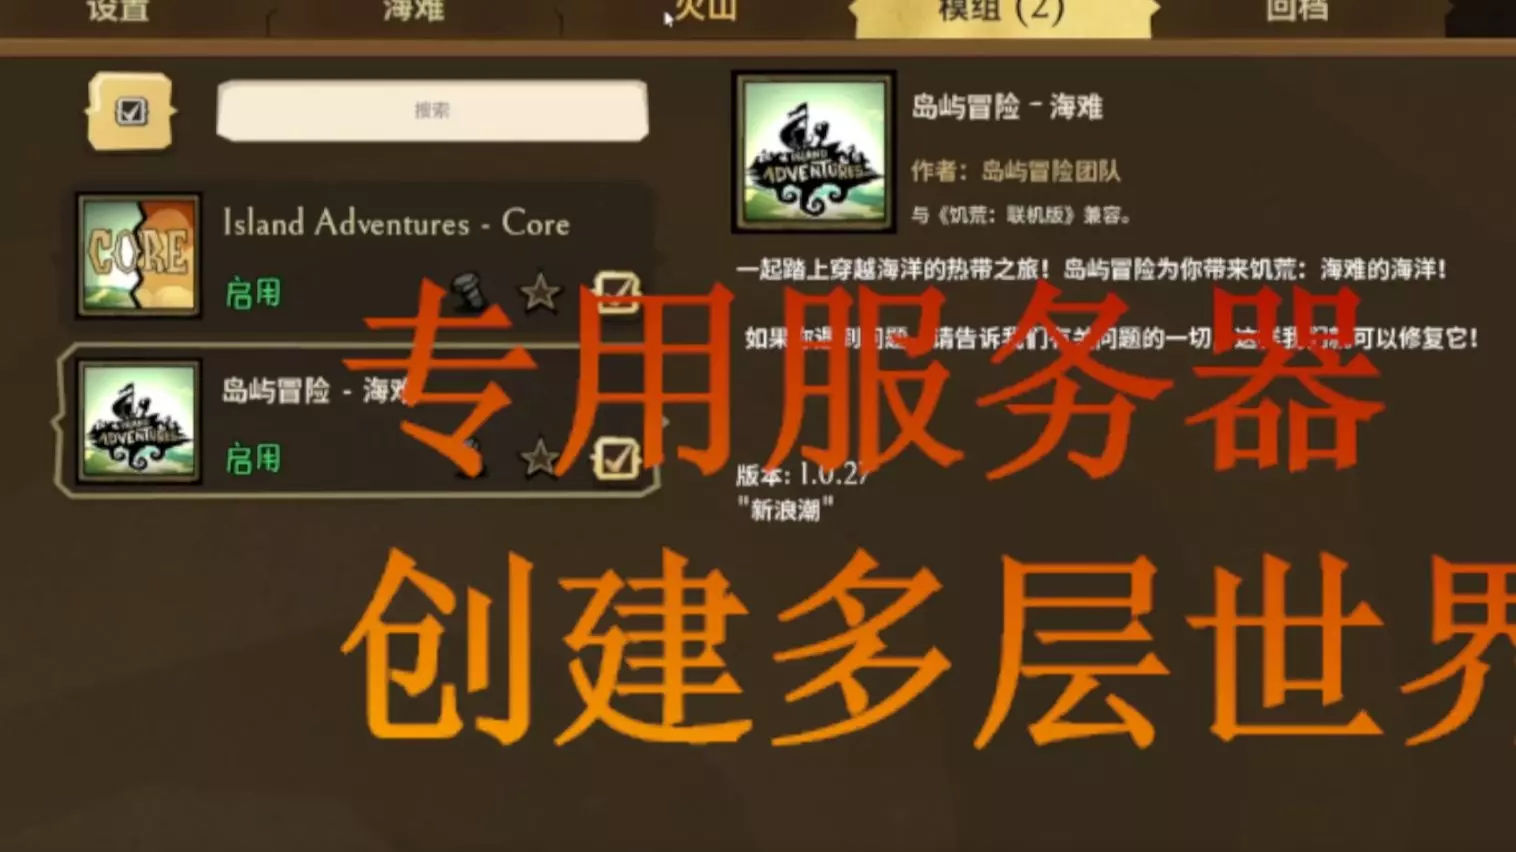
服务器 Steam饥荒联机版专用服务器+多层世界教程
服务器令牌文件名:cluster_token 专用服务器mod名前缀:workshop- 启动器文件配置: start "Don't Starve Togeth…
2025-08-12 18:140赞 · 0评论
《魔力遗迹》主机指南
本指南将指导你如何创建《魔力遗迹》游戏房间。有两种方法:Hamachi和端口转发,本指南将对这两种方法进行说明。 如何创建《魔力遗迹》游戏房间? 简介 要与他人…
2026-04-04 16:000赞 · 0评论
使用SteamCMD上传模组
其他上传工具无法正常使用时的替代方法 准备工作 本指南旨在提供模组上传方法,不会教授如何制作模组。此方法适用于所有游戏。 你需要:已完成的模组文件、SteamC…
2026-02-15 22:000赞 · 0评论
如何开启多人游戏/合作模式
《创世理想乡》多人联机/合作模式设置指南 修复多人联机问题 本指南已更新,底部新增Hamachi使用说明。本指南适用于在游戏内创建服务器并让好友通过Steam进…
2026-03-20 22:000赞 · 0评论
通过TCP/IP进行联机(已更新)
本指南将介绍如何通过TCP/IP协议使用4种以上的方法与好友加入和创建游戏。你需要将电脑配置为既能作为玩家也能作为服务器主机的多人游戏模式。 简介
2026-02-20 13:000赞 · 0评论
暂无更多
最新更新
- 如何手动更改玩家模型和喷漆(无需插件) — 本指南提供了一种无需使用任何插件,手动更改玩家模型和喷漆的简单方法。 第一章 - 修复方法 由于此问题已存在很长时间,以下是一种无需过多麻烦即可轻松修复的方法:…
- 《半条命2:死亡竞赛》2025年FPS提升、优化、按键绑定、脚本及界面设置指南 — 本指南提供了包含多种实用指令、提升帧率设置、便捷按键绑定和自定义HUD的配置文件。老玩家会喜欢的! 前言 本指南是为朋友们以及所有可能用得上的人创建的! 在这里…
- 半条命2死亡竞赛 玩家模型 — 因为我找不到一份像样的《半条命2:死亡竞赛》玩家模型概述,所以我自己整理了一份。也许这对其他人也有帮助。 简介
- 第一个俄语角色扮演服务器(2010年开放) — - 服务器的首批测试版本早在2010年就已启动。 - 2010年9月,RRP项目网站正式上线。这被视为RRP整体的创建日期。 - 2011年5月23日,服务器开…
- [白俄罗斯] 白俄罗斯语版《半条命2 死亡竞赛》当前可用 — 当前内容涉及非官方本地化信息,且未提供符合规则的可翻译有效内容,已按要求处理。
- 《半条命2:死亡竞赛》修复公告 1. 修复游戏内字体中Ё、Ы和Э字母的显示问题 — 《半条命2:死亡竞赛》20周年更新版界面字体 Ё、Ы、Э 字母爱好者修复补丁 问题说明: 在20周年更新后,游戏界面使用的GorDIN字体中,未包含 Ё、Ы、Э…
- 我对《半条命2:死亡竞赛》中可投掷物品的排名 — 我需要描述一下吗 有件事我必须承认 我可能有偏见 排名 我可能会在某个时候添加更多内容 我使用的布娃娃模组 爆炸桶
- 将Quake3地图转换为半条命2死亡竞赛地图 — 将Quake3地图转换为《半条命2:死亡竞赛》地图的方法 将Quake3地图转换为《半条命2:死亡竞赛》地图 转换地图需要以下程序: 1.q3map_2.5.6…
- 《半条命2:死亡竞赛》武器与地图基础指南 — Este juego es una versión del Half Life 2 pensado para un modo multijugador con …
- 如何打开游戏 — 本指南将教你如何开始《半条命2:死亡竞赛》(绝非标题党,100%真实有效)。这是一份不错的指南,非常实用。 只需按下【开始】按钮即可。