换一换
换一换 


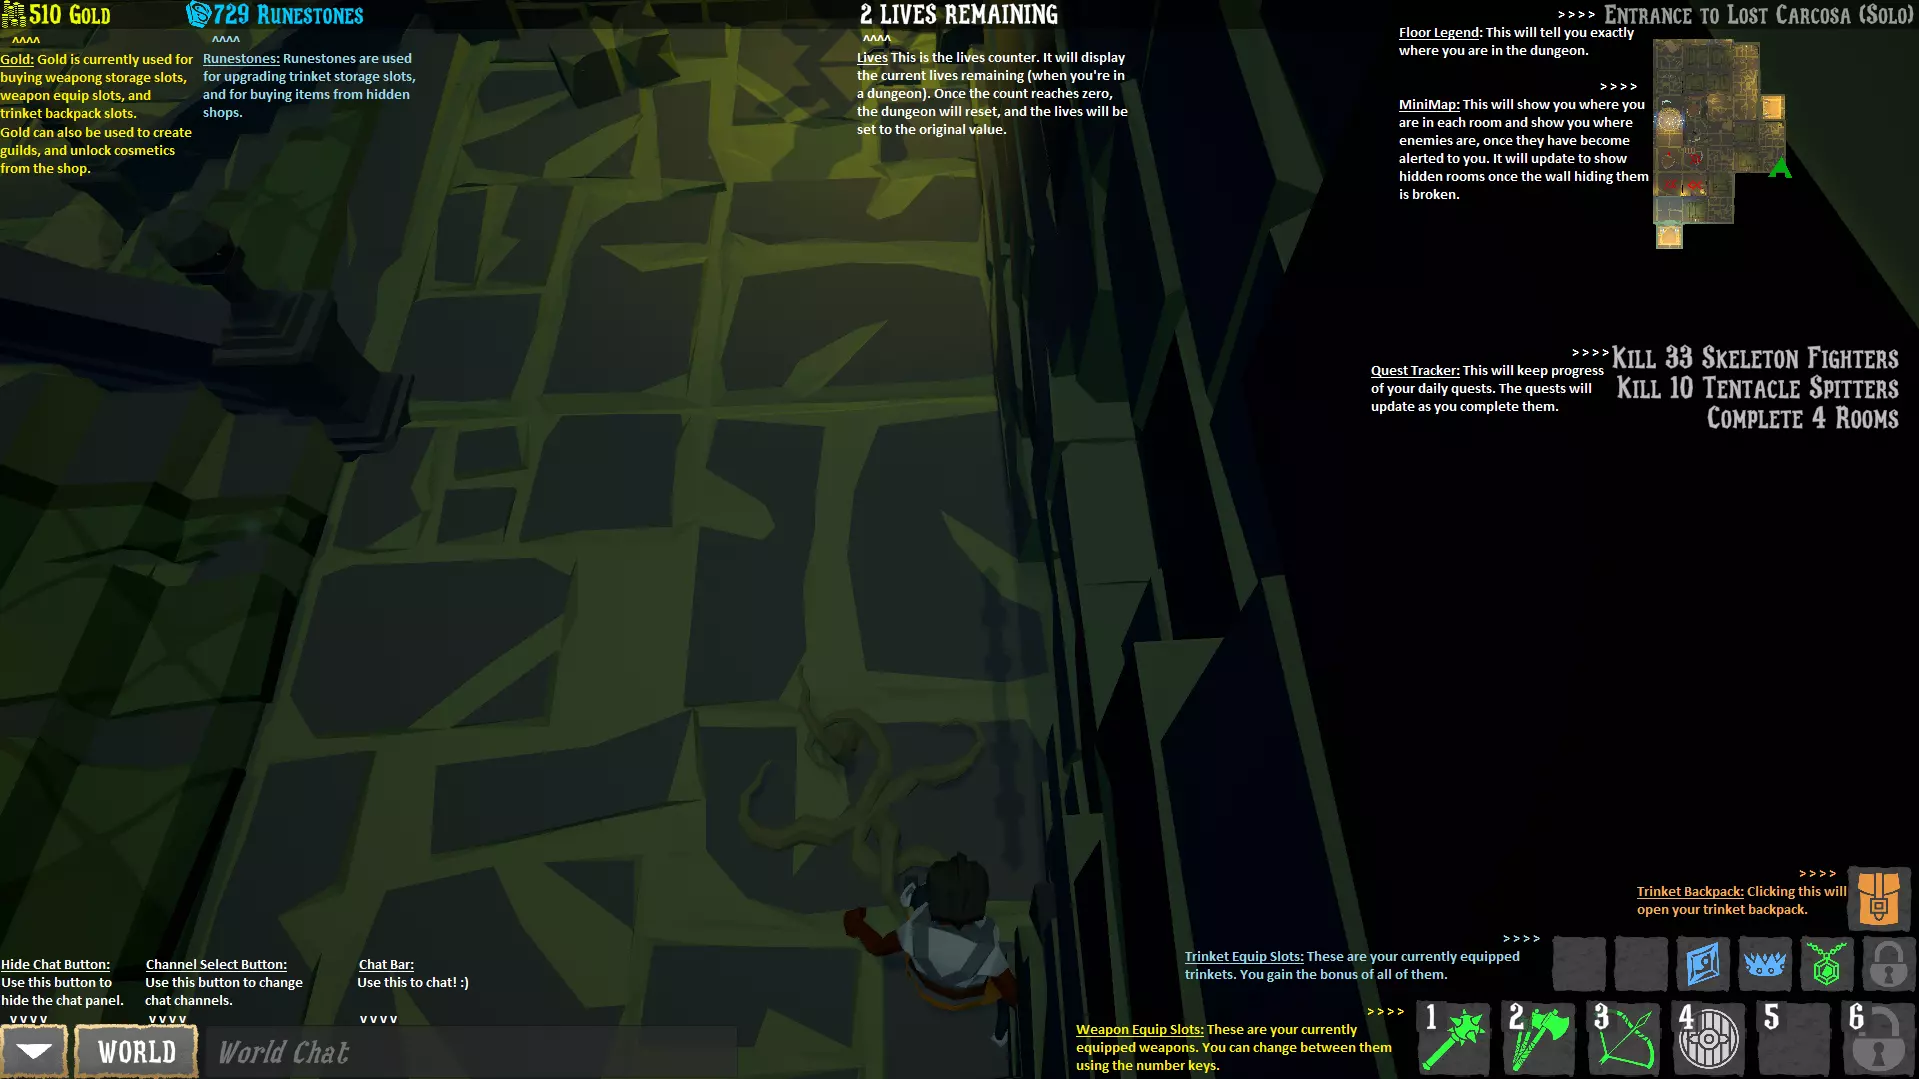
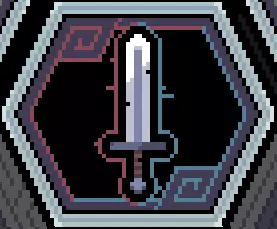
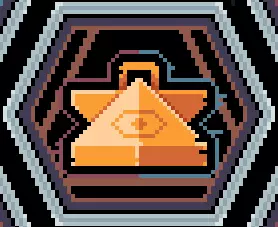
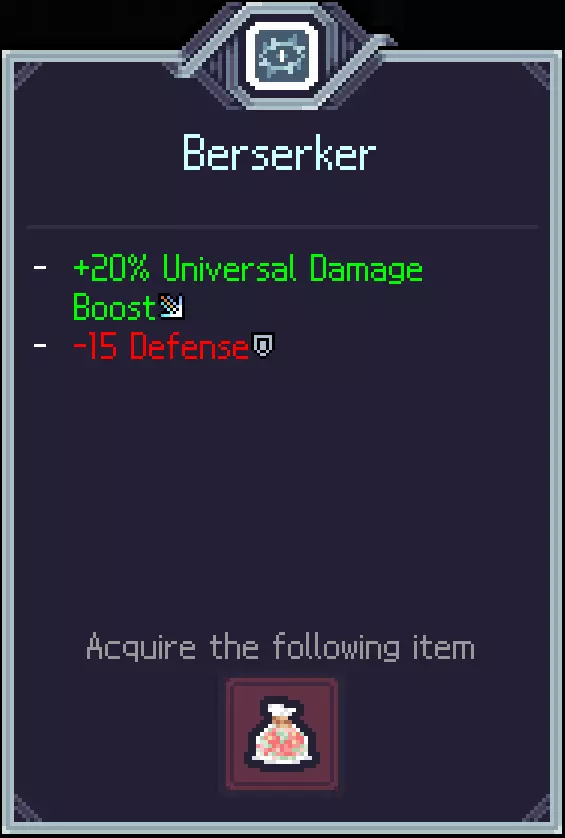
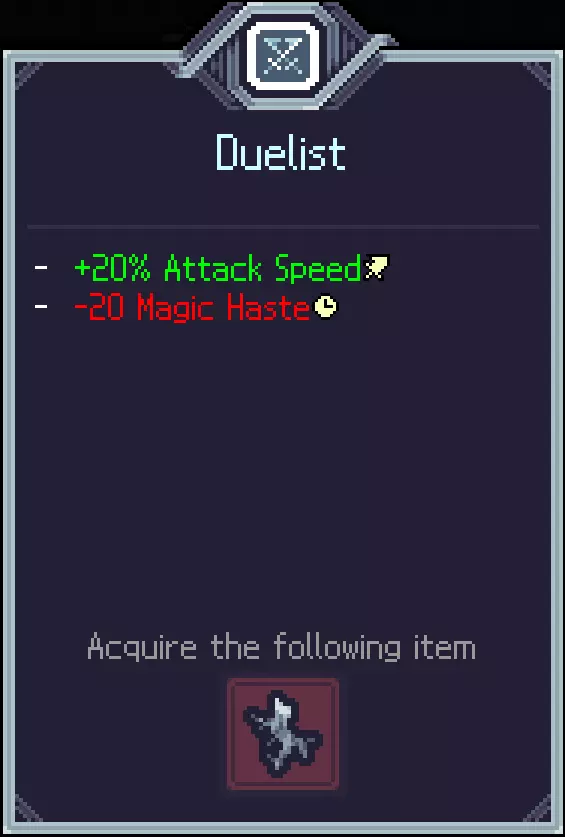
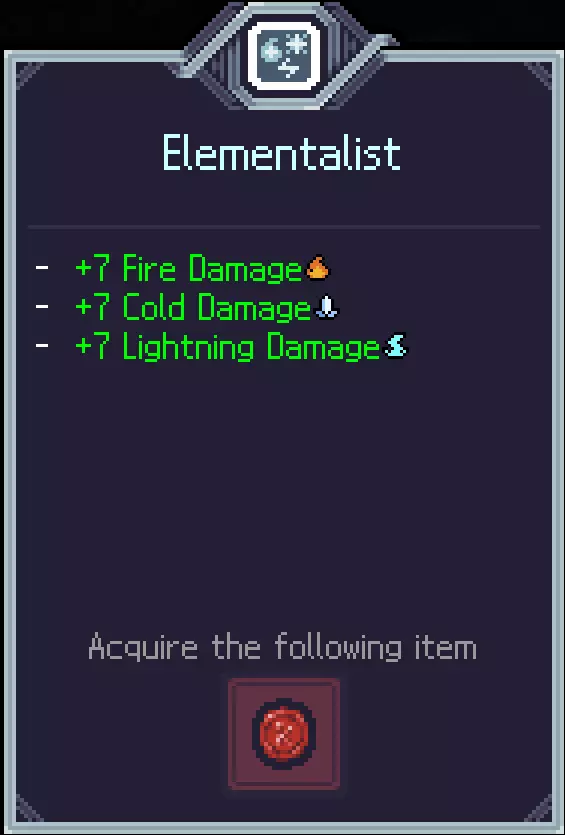
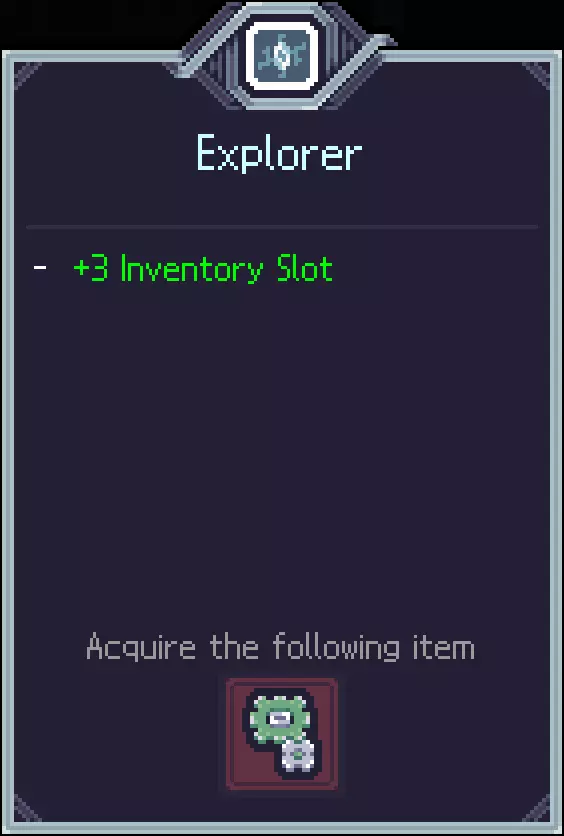
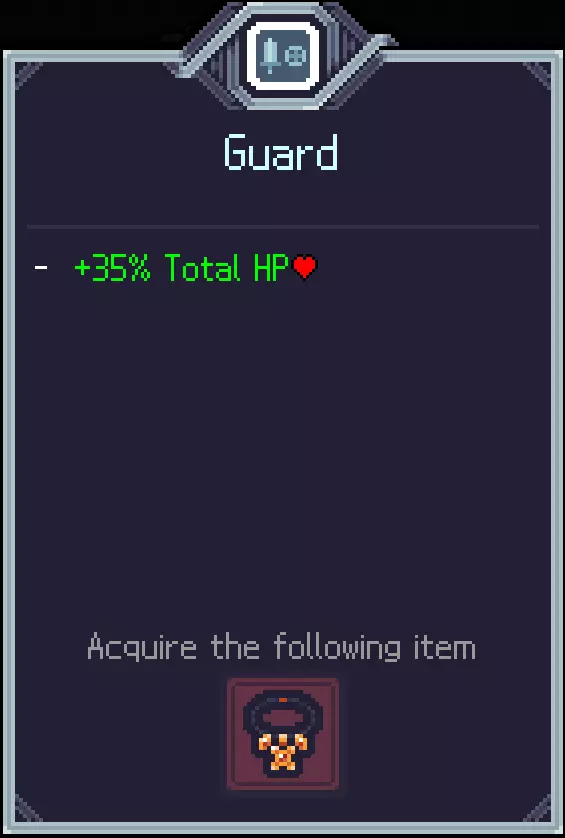
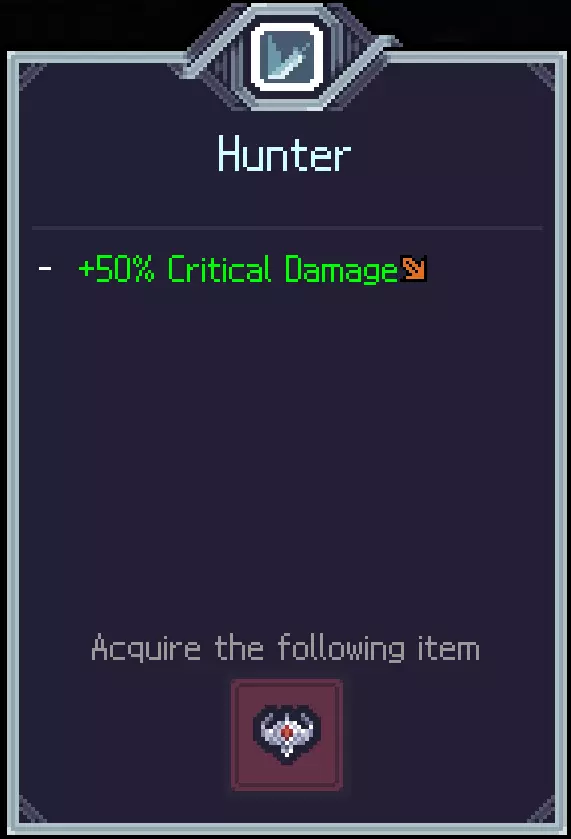
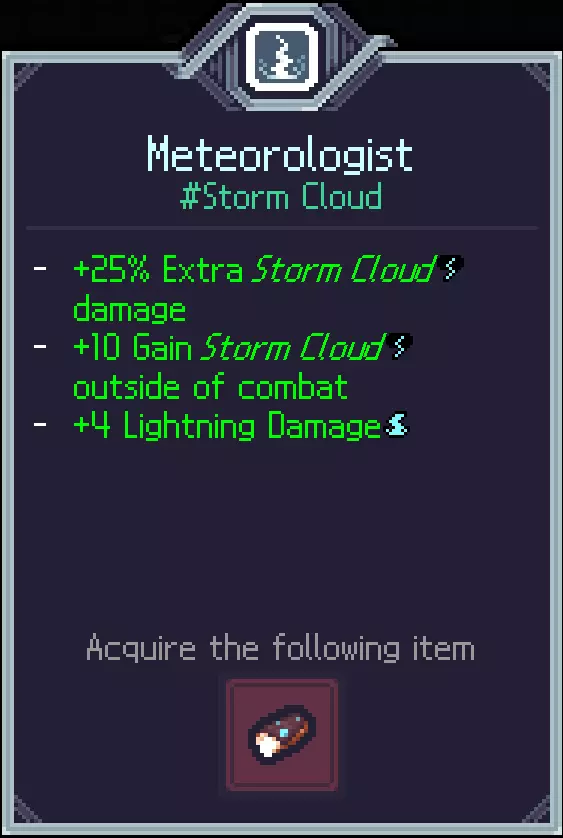
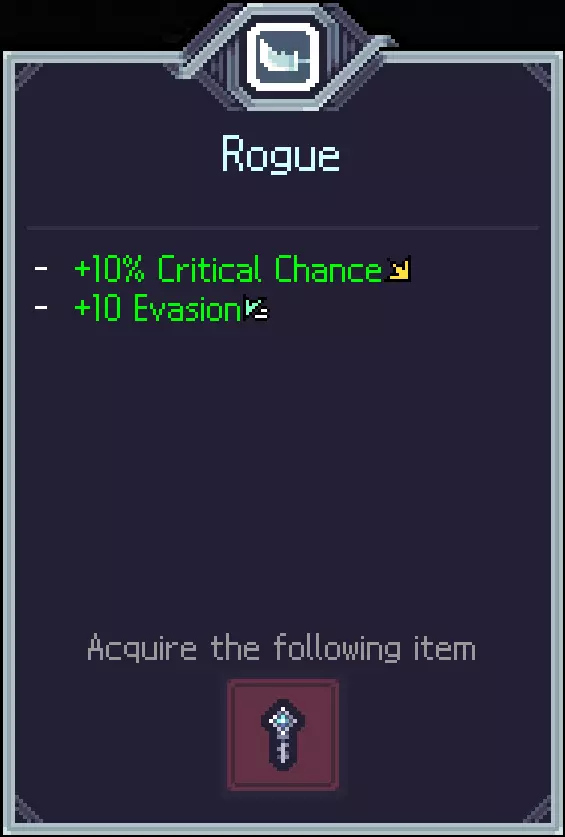
Basic Guide to Introduce players to the Game Sephiria (based on version 0.7.31, made an update for 0.7.35 covering some of the new information) as well as giving some overall information. Introduction This Guide will cover some basics and contains some tips/tricks for the beginners as well as the guide for 13 achievements(for the moment of Alpha) at the end. I'm not sure about some of the information but i will share my experience and my thoughts. (this is my first guide so don't be strict when judging it :3 ) General Information Stats Common Stats Physical/Flame/Cold/Lightning Damage: Initial Values: 20 each There are four types of damage and represent the default value of each type of damage. The actual damage is determined by multiplying the coefficients specified according to the attack method, and then calculates other factors such as fixed damage and so on. HP Initial value: 50 You die if it reaches 0. MP Initial value: 50 Used by the spell books, special attacks or blocking with shield. MP regeneration defines how quickly it restores: MP regeneration/10 seconds. Defense Initial value: 0 The damages they receive are reduced to a certain percentage depending on the defense level. The higher the defense, the more reduced the defense, the more the efficiency is. Evasion Initial value: 0 Ignore the damage caused by a certain probability of avoidance. Like defense, the probability of evasion is reduced the higher the avoidance level. Critical Strike Chance / Critical Damage Initial Value: 0% / 50% All damages except for the attack of a colleague can cause a critical strike due to the critical striking chance, which causes the increase of damage by additional Critical Damage Percentage. Attack speed Initial Value: 100% Adjust the speed and magic casting of weapons attacks. Move Speed Initial Value: 100% Adjust the usual movement speed. Dash Recovery Speed Initial Value: 100% It indicates how quickly the consumed dash recovers. Number of Dashes -> Initial Value: 2 Barter Initial Value: 0 Adjusts the prices of items traded by merchants. Purchase: Initial = 100% of the item price. Actual Cost = Initial(100%) - Barter * 1%. Selling: Initial = 50% of the item price. Actual sell price = Initial(50%) + Barter * 0.4%. Luck Initial Value: 0 Increase the probability of the emergence of higher -class items. The probability of emergence of higher -class items is luck * 1.16%. Experience Drop Initial Value: 100% Increases the dropped experience from mobs. Leaf Drop Initial Value: 100% Increases the amount of obtained leaves in dungeon. (Currency) Special Stats Damage Universal Damage Boost Initial Value: 100% Regardless of the type, the final damage of all damage types is adjusted to the ratio. True Damage Initial value: 0 Regardless of the type, all damage types are added to the true damage level. Defense, increased damage and critical hits are calculated after this value is added. Weapon Weapon Damage Initial value: 100% It is calculated at a ratio to the values determined by the damage type to determine the damage of the weapon. (damage of the weapon it self) Normal Attack Damage Initial value: 100% Adjust the damage of general attacks (left click) except dash attacks. Dash attack damage Initial value: 100% Adjust the damage of the dash attack. Special Attack Damage Initial value: 100% Adjust the damage of special attacks (right mouse). Magic Magic Damage Initial value: 100% Adjust the magic damage of the quick slot(Spells). Magic Haste Initial value: 0 Adjust the speed at which magic cooldown decreases(1% = 1pt). For 200%, the cooldown is half. Steal Life Steal Initial value: 0 Restores HP proportional to the damage. (Damage*0.1%*Life Steal Points) MP Steal Initial value: 0 Restores MP proportional to the damage. (Damage*0.1%*MP Steal Points) Tips and Advices If you click Esc -> Journal. You can see all the unlocked Artifacts and Tablets. As well as weapons and its upgrades so you can decide on your build of weapon at any time and choose properly. (0.7.32: now you can see also all the Miracles) Skeleton HP is fixed to 50 so you can't increase it, neither decrease it. So Artifacts which increase/decrease the Max HP do not affect it, same is for miracles. So use it as your advantage use the Artifacts decreasing the max HP since now they only give beneficial effects. As described above the magic damage ONLY affects spells and does not increase elemental damage When you look over an Artifact you can see the empty stars above it which show the max level of the Artifact. By clicking <Q> or <E> you can either decrease or increase the level of Artifact while in preview so you can see how the tablets would affect the Artifact. You can also do it while chosing the Artifact after a level up or in an Artifact Choice. Killing the vampire bat in the event room will decrease the Barter by a certain amount(10 I believe) and will not allow you to use the Iron Maiden so make sure to use it in case of need before killing the NPC. If killing the final boss feels too difficult try to recruit Colin, its a great way to disturb the boss and she is a great punching bag. Dungeon(Tower) Structure The general layout of each dungeon floor in Sephiria follows a consistent pattern: Starting Room: Every floor begins with a designated starting area. Node Selection (3 Options): From the starting room, you will typically have three distinct paths or "nodes" to choose from, each potentially leading to different encounters, challenges, or rewards. Boss Room: Eventually, navigating through the chosen nodes will lead you to the floor's Boss Room, where you will face a floor boss.Repeat: This cycle of Starting Room -> Node Selection -> Boss Room then repeats for subsequent floors of the dungeon. Until completing the first chapter, the last floor(3rd) goes straight to the boss room on the start node without a fixed shop and a mid nodes. Fixed Store on Subsequent Floors: An important element to note is that on every starting floor except the initial first floor, you will find a fixed store. This provides a consistent opportunity to purchase/sell Artifacts, Tablets, or consumables before venturing further into the dungeon's challenges on that floor. Note: there is also a Training Doll to test the damage. Nodes Node Types: Displayed at the Top of the Node Level Up: This node features a large green light ball that is on the exit of the first room. Approaching the light grants experience to instantly level up to the next level. Some floor layouts can be manipulated to bypass this light. In these nodes, if you are close to leveling up, you can avoid the light, level up in another room, and then return when your experience is lower. Artifact: Standard nodes that have a room with an Artifact choice. Enchantment: A node containing an altar room that enhances the level of an artifact. Initially, the altar could be used 1 to 3 times, depending on the size of the altar(see screenshots below). Tablet: Standard nodes that have a room with a Tablet choice. Money: Nodes featuring a room with a money box containing currency. Green Heart: A node with a room that increases your maximum HP by 15. Anvil: A node leading to an anvil room where you can upgrade your weapons. Dice: A node offering a room with two dice. This option is only available after unlocking the Destiny inscription upgrade(see Destiny Inscription section). Shop: A node containing a merchant NPC. Has poorer assortment than the fixed store on the start node of each floor. Tree Roots: A unique node that appears only once in the dungeon. A single Miracle can be obtained per exploration. This node does not overlap with the store and has no additional options or random events, neither fight rooms. (See below for the miracles)Node Additional Options: Displayed at the Bottom of the Node Common: An ordinary node without any additional modifiers or signs. Derangement: Indicated by a double knife icon. Enemies within this node are randomly enhanced. Mini Boss: Marked by a small gray skull. This node features a room where the mini-boss specific to the current floor appears in addition to the standard layout. Defeating these mini-bosses yields valuable Artifact rewards. Random Event: These nodes are not visually indicated on the map. Arena: This node type has a simplified, linear layout: an entrance, one large combat room, and an exit. You will face approximately 3 to 4 waves of enemies within the large room. 0.7.32 : rewards have a chance to appear additionally upon clearing combat wave event rooms Secret Room: Identifying a secret room requires a keen eye for cracked walls. Look closely at the dungeon walls; subtle cracks, often visible on the top of the wall, indicate a hidden passage. To reveal the secret room, simply approach the cracked wall and strike it. Upon success, a notification will appear confirming your discovery. Initially, the secret room will not be visible on your map. However, once you've uncovered it, the room will be added to your map but no passage will be shown. These rooms contain special rewards such as money boxes, artifact or slab rewards, dices, or rare potion boxes. Lucky Clover: This node allows you to choose one of two permanent bonuses: +6 maximum HP or +4 defense. Wandering Merchant: In addition to dedicated Shop nodes, a rat merchant NPC can randomly appear within this node. This merchant has a 10% lower bargaining power compared to store merchants, resulting in slightly better trading prices for you. Pocket Dimension: This node features a large crack in the environment. Interacting with the crack reveals specific artifacts in a set order. You can unlock and obtain these Artifacts by spending Sapphires(You obtain the Artifact you buy). Once all artifacts are unlocked, the crack serves no further purpose. There is a total of 9 Artifacts that can be unlocked. Obelisk: This node contains a purple Obelisk. Reading the text on the obelisk will randomly increase or decrease your stats based on random levels. Fountain: This node features a fountain. Drinking from the fountain can have no effect or change the water's color, triggering an event. Green water grants experience, gold water provides money, and red water spawns monsters. Colin: A room where the NPC Colin appears. For 500 leaves, you can purchase an artifact that is part of the "#Companion combo." Colin has a fixed bargaining power of 0 and only sells tokens; he does not buy the player's items. Blood Donation: This node contains a vampire bat and an Iron Maiden. Paying 33% of your current HP to the Iron Maiden typically rewards you with an Artifact. Killing the vampire bat grants the "Providence of Jinjo's Providence" potion. Additionally, completing five Blood Donation events is a requirement for unlocking a specific costume(see secrets section below).2 Enchants:
3个附魔
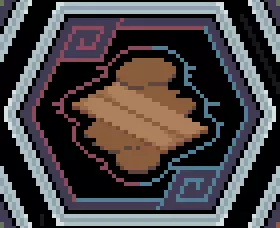
按照逻辑,存在1级附魔,但更为稀有。 口袋维度入口:
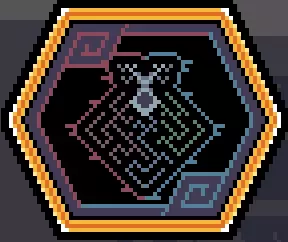
命运铭刻 本部分将介绍命运铭刻,其作用相当于角色升级的技能树。 升级该树中的节点要么免费,要么需要蓝宝石。蓝宝石可在角色死亡时于地牢内获得。获得的蓝宝石数量与你在本次地牢探索中的进度深度以及击败的 Boss 数量直接相关。注意:蓝宝石也可作为地牢口袋维度内的货币,用于购买物品。 下图展示了完全解锁的命运铭刻以供直观参考。
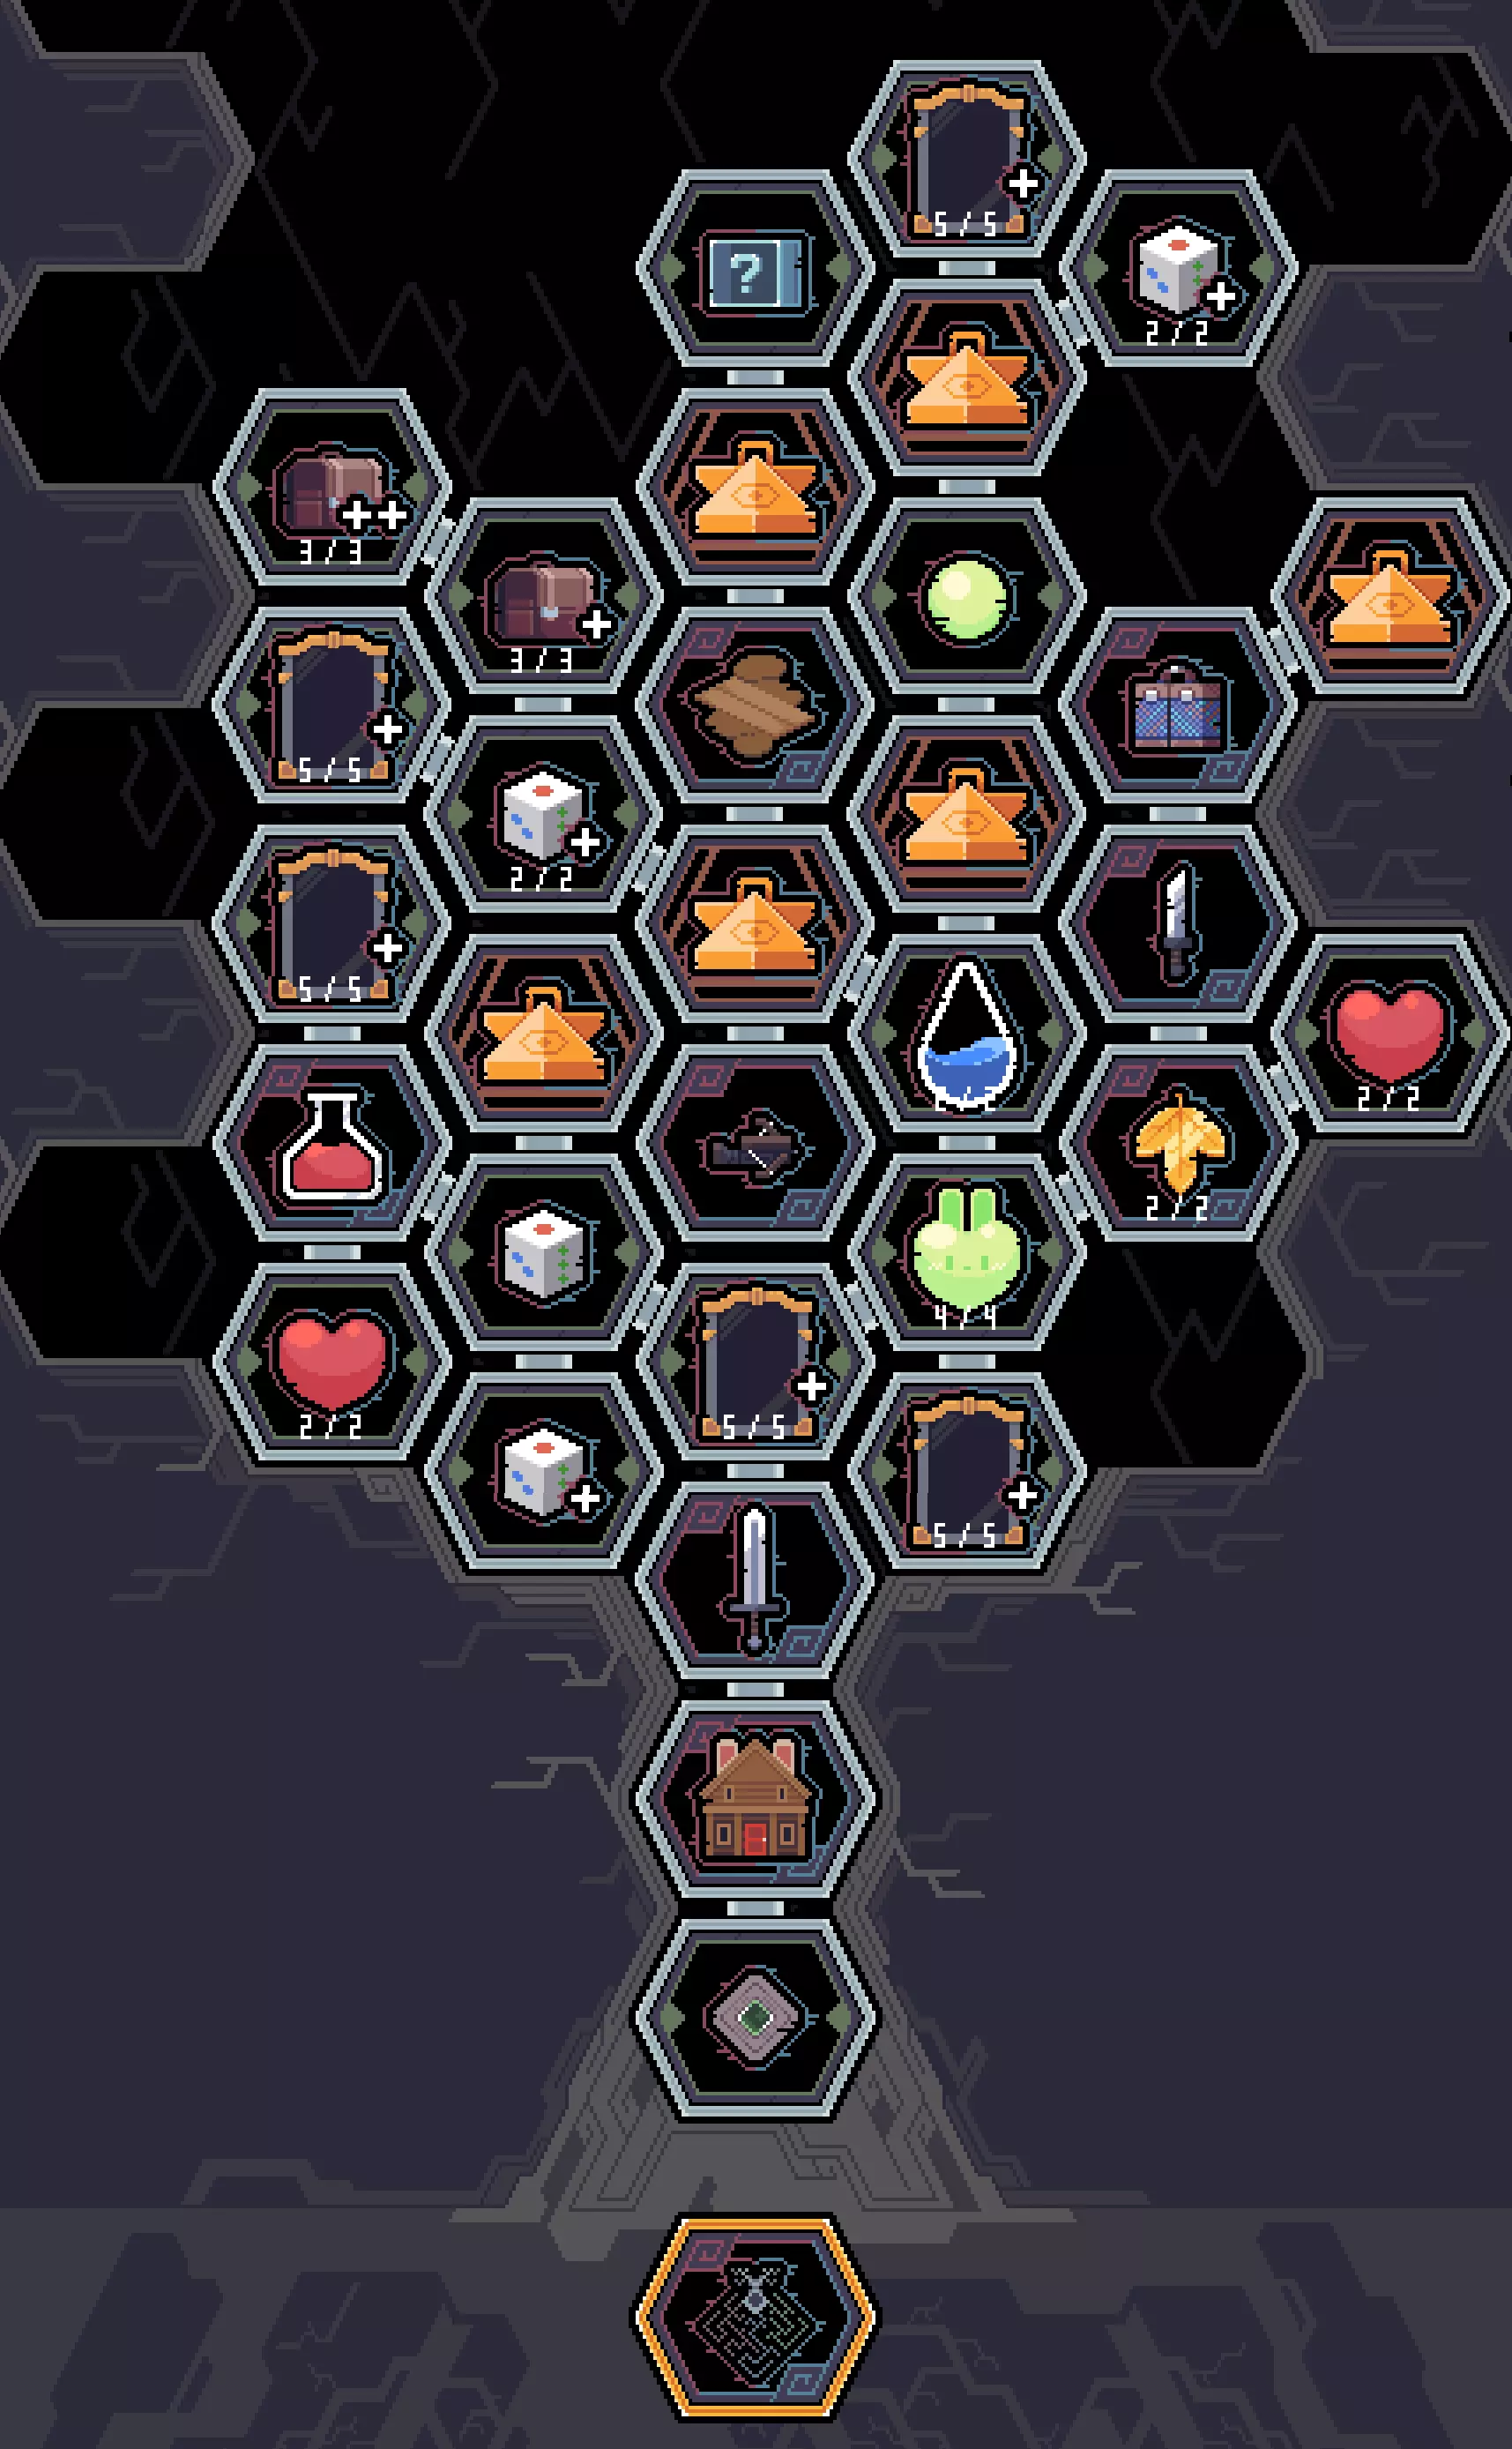
关于它的一些细节如下: 升级有特定路径可遵循,六边形之间的连线即表示该路径。要解锁下一项升级,至少需要先升级前一项。 【村庄升级】 【房屋修缮】:是推进任务的必要条件,并且能解锁天赋。
地形恢复:完成支线任务后解锁新天赋:意志力(运气)

魔法工坊:完成支线任务后,背包将专门增加2个用于存放药水的槽位。
“章节升级”:树根部的底部升级以黄色高亮显示,在完成第二章后出现,可免费解锁。解锁内容:【困难模式】,该模式可额外获得5点天赋点。
角色升级:武器解锁: 升级树中有3个武器解锁,第一个是长剑。
升级后,你需要完成村庄里的一个任务来解锁该武器。完成任务的步骤如下:首先与莫罗对话,然后进入右侧的建筑并选择你需要的训练场。 完成任务后,你就能在地下城使用刚解锁的武器了。 对于位于技能树更深处的匕首和十字弩,解锁流程类似。 天赋点:
命运铭刻总共可提供25点天赋点。这些天赋点用于升级天赋,从而获得不同的能力和属性(所有天赋升级均可逆转,你可以在地下城外随时通过使用镜子或点击【P】键进行更改)。 骰子:
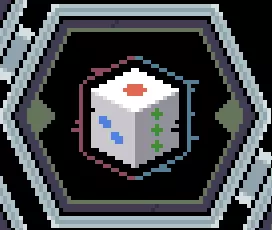
骰子升级共有4种。骰子可用于重 roll 物品奖励,重 roll 奖励时会消耗骰子。 第一种骰子升级位于天赋点升级旁边,解锁骰子功能并在每次 run 开始时提供2个骰子。 底部带有+符号且只有1级的升级,可在击败楼层 Boss 时获得骰子(每次击败楼层 Boss 获得2个骰子)。 天赋树顶部的两个升级,每个升级可使初始骰子数量增加1个。因此,每次 run 开始时最多可拥有6个骰子。 等级提升恢复:

在地下城内升级时恢复生命值 升级时恢复3%/6%/9%/12%生命值(升级1-3级的3个百分比为个人猜测,实际可能不同) 莱莉的馈赠:

完成村庄的支线任务后,你将永久获得一个药水,该药水会在每次游戏开始时提供。因此,每次游戏开始时你将拥有1瓶恢复药水。增加生命值

最大生命值增加5/10,因此从命运铭文中共可获得20点额外生命值(每个节点10点)。魔法值再生

MP再生速度提升3/6。初始资金:
将初始树叶数量增加至200/400。【树叶】是在地牢中用于购买物品的货币。 新增神器:
解锁大量可在地下城获取的新【神器】。额外经验掉落:

使地牢中怪物的经验值掉落增加10%。扩容背包
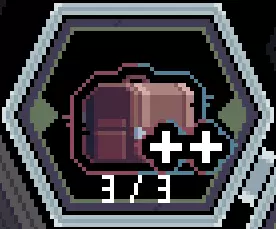
将背包容量扩展1/2/3个槽位,因此通过命运铭文(额外1条属性)总共可获得6个额外槽位。 可能性宝箱

此节点允许每位玩家花费2颗蓝宝石获取3件新的商人道具。之后你可以重随道具以获得新的道具组,每次重随的花费会翻倍(4、8、16……)。 多人游戏:每位玩家的操作和花费都是私密的。所有人都使用自己的蓝宝石来获取自己的道具。 奇迹(根源) 根源是一个独特的节点,在地下城仅出现一次。每次探索可获得一个奇迹。此节点不会与商店重叠,且没有额外选项或随机事件,也没有战斗房间。 以下是游戏中18个奇迹的列表。请注意,选择奇迹所获得的道具通常是随机的,可能并不总是与你选择的特定奇迹在主题上一致。 更新0.7。现在可以通过Esc->日志->奇迹查看所有奇迹


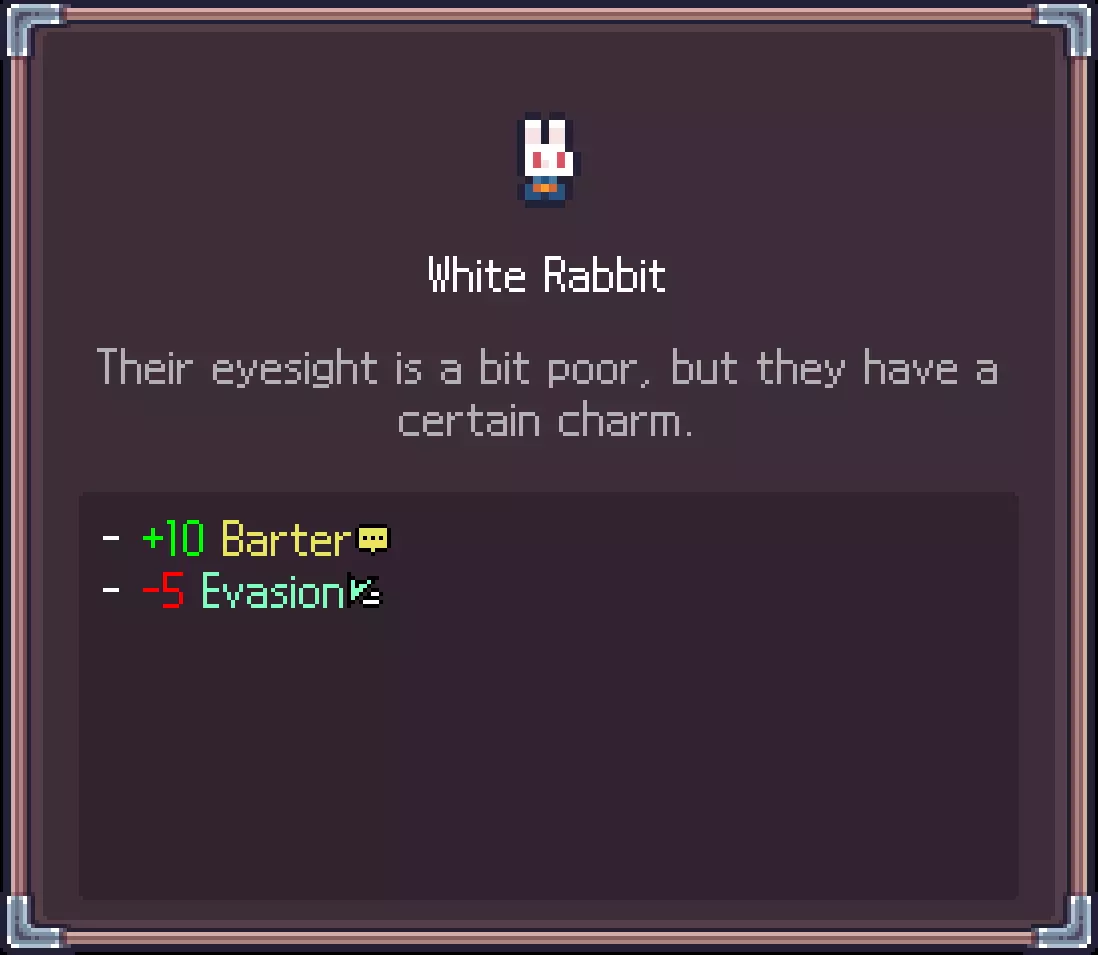
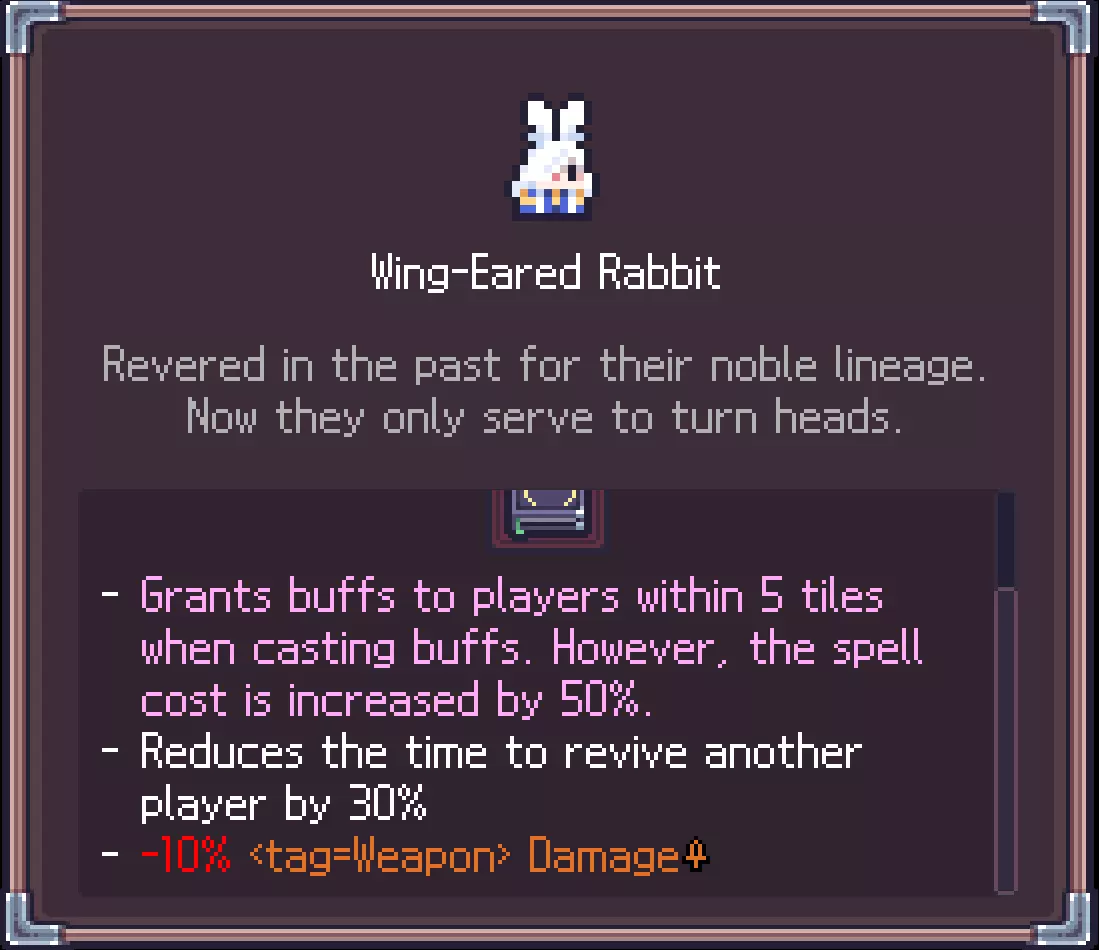
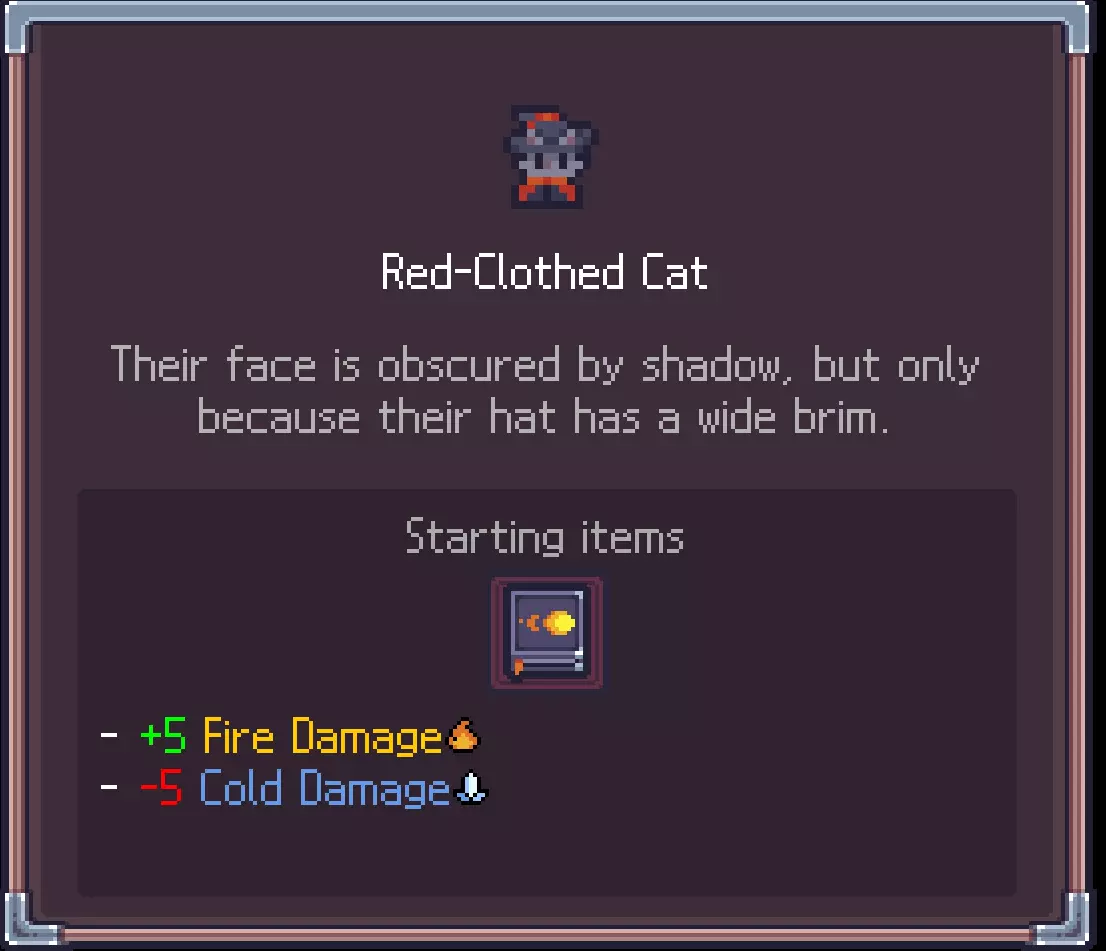
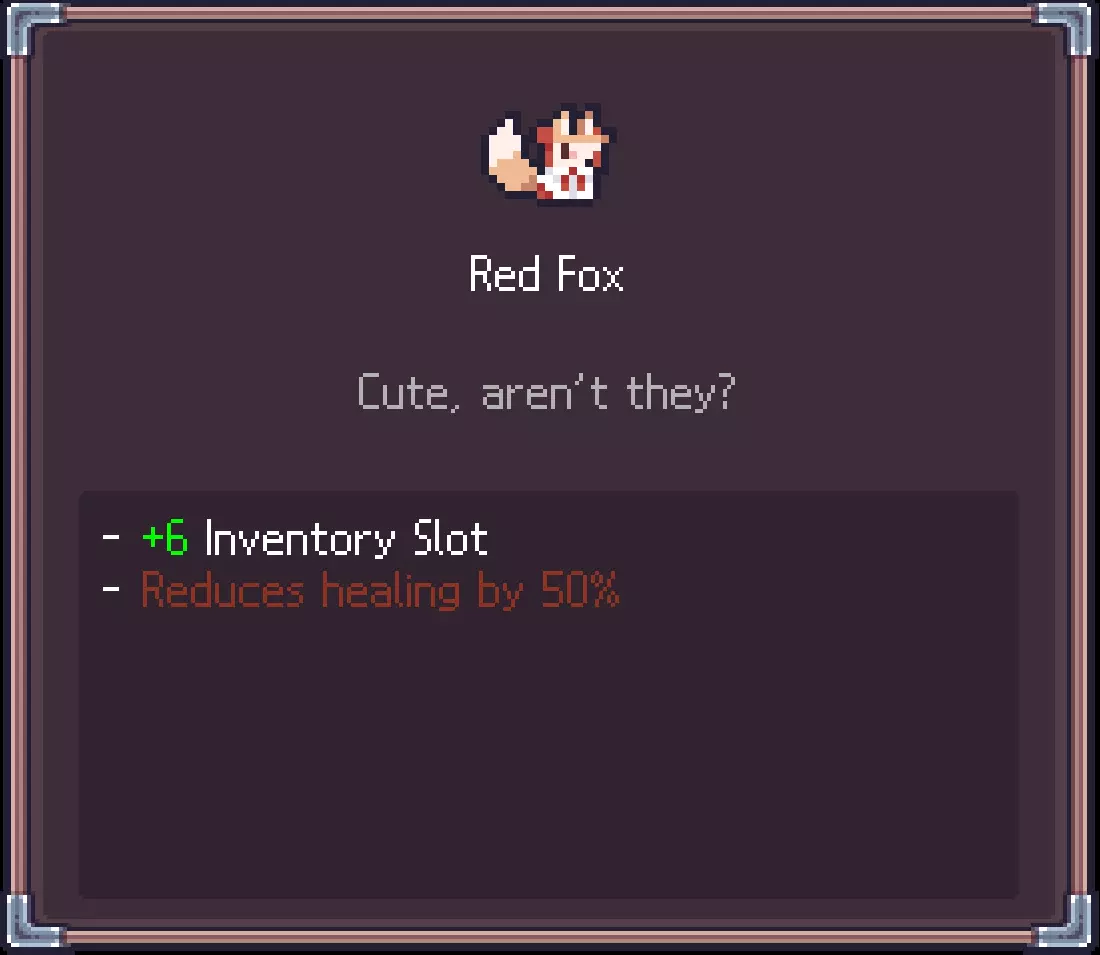
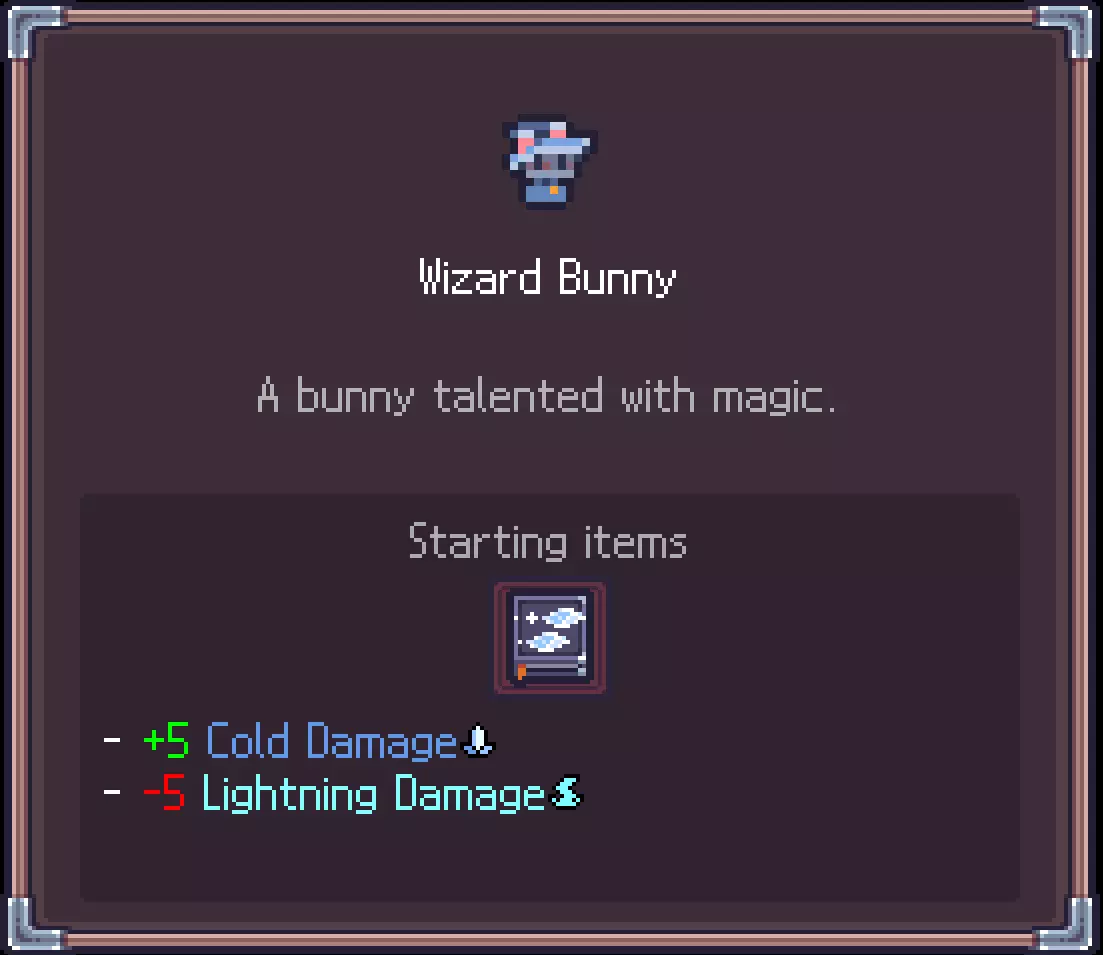
服装 在塞菲利亚中,你选择的服装是进入塔楼前初始构建的关键部分,因为大多数服装会改变你的初始属性,从一开始就带来不同的优势或劣势。每次游戏开始时,你都需要选择想要的服装。 共有17种服装可供发现: 8种默认解锁服装:从冒险开始时即可使用。 6种可解锁服装:需要完成特定任务,可在服装更换菜单中查看。 3种秘密服装:隐藏的服装,需要更多知识才能解锁。 值得注意的是,部分服装除了改变属性外,还会提供初始物品,从一开始就提供独特的战略选择。默认服装 粉色兔子

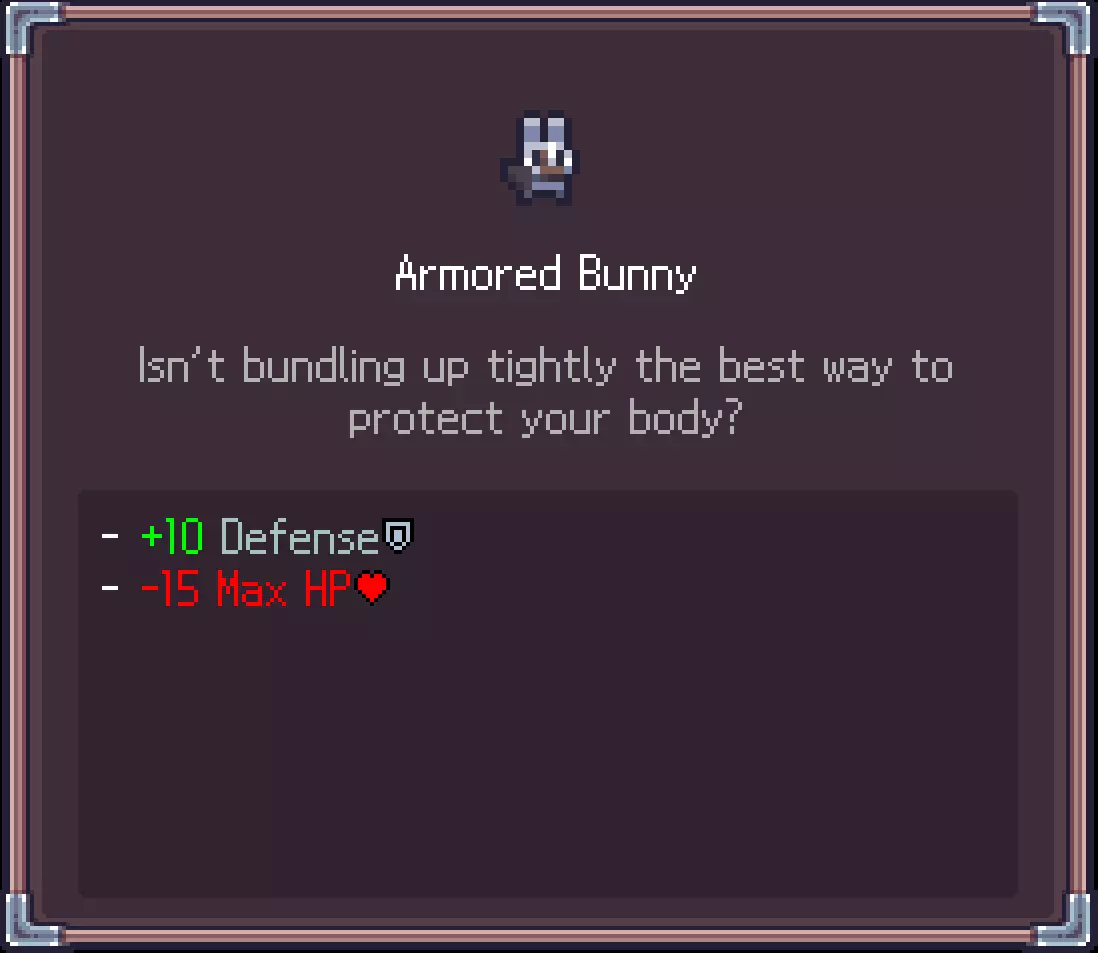
装甲兔子
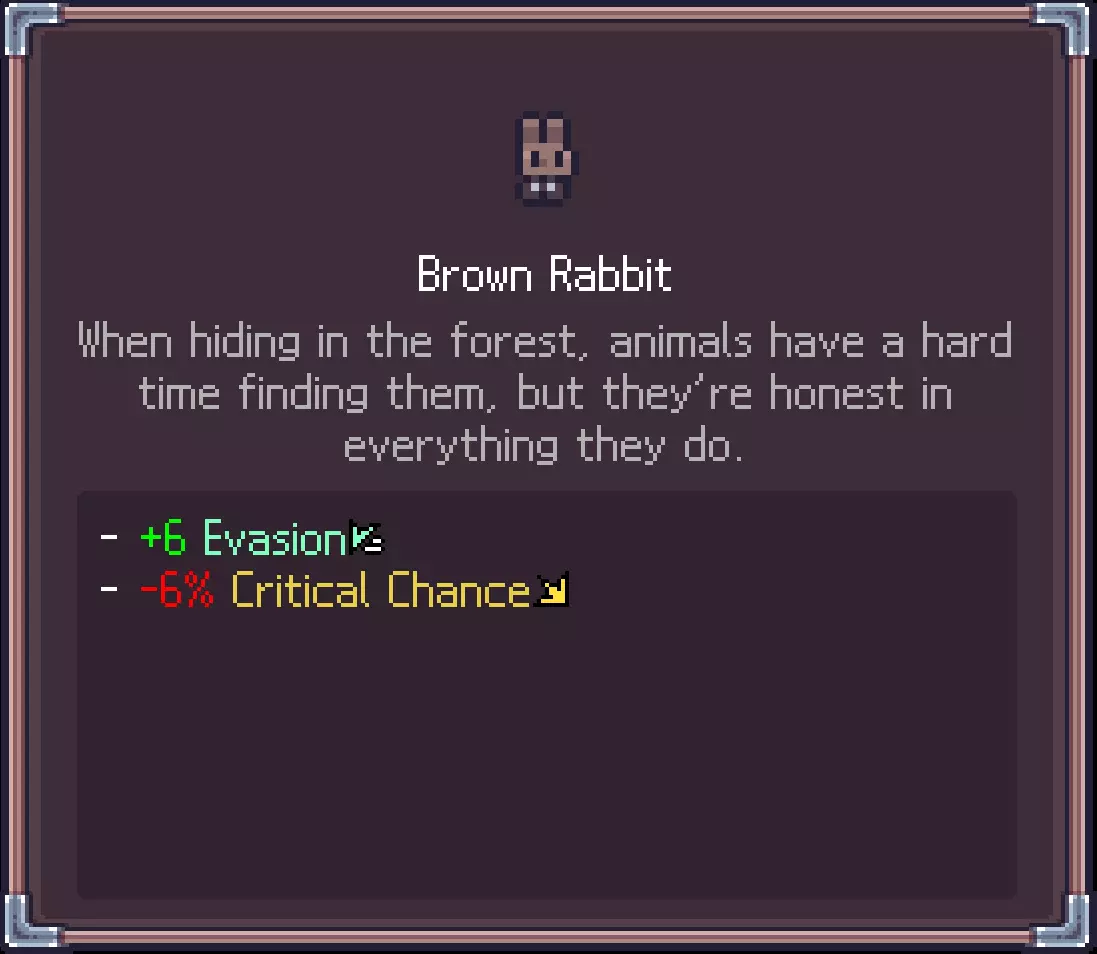
棕色兔子
麻花辫兔子

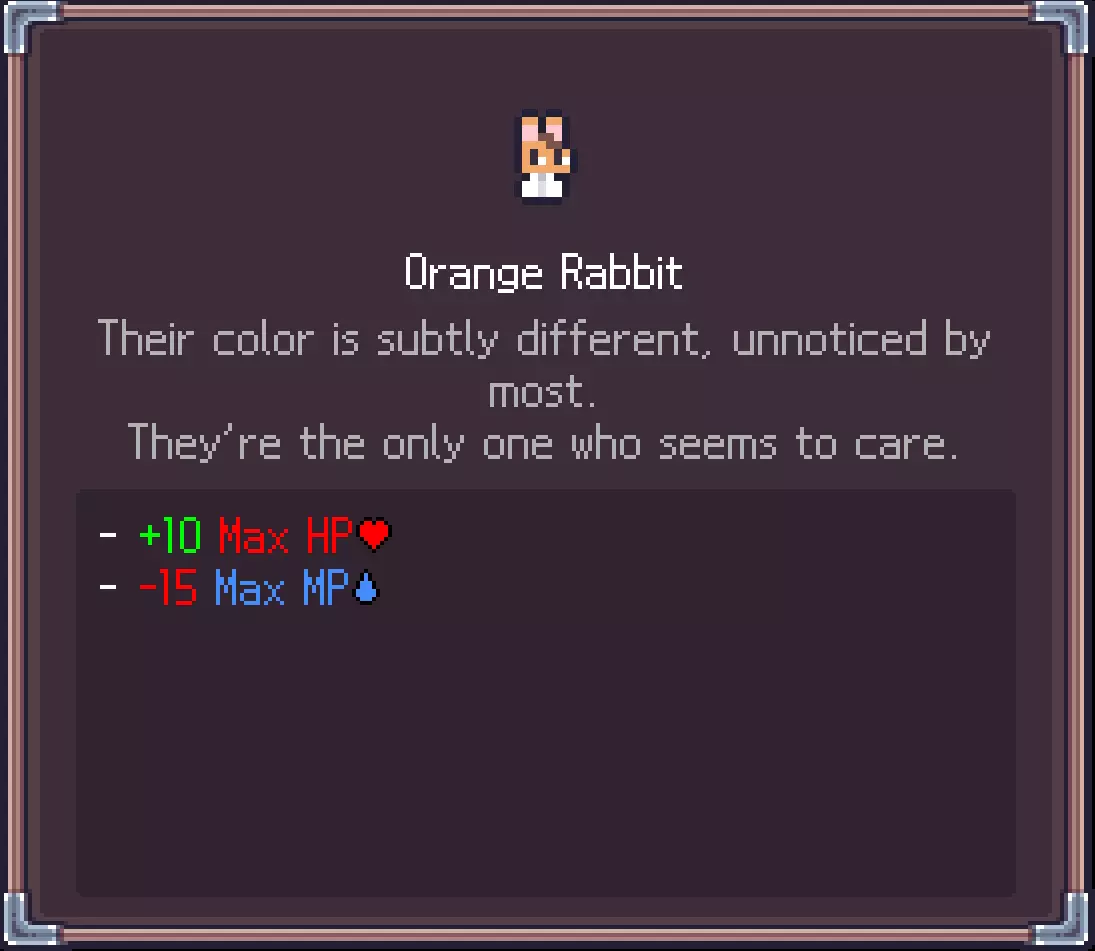
橙色兔子
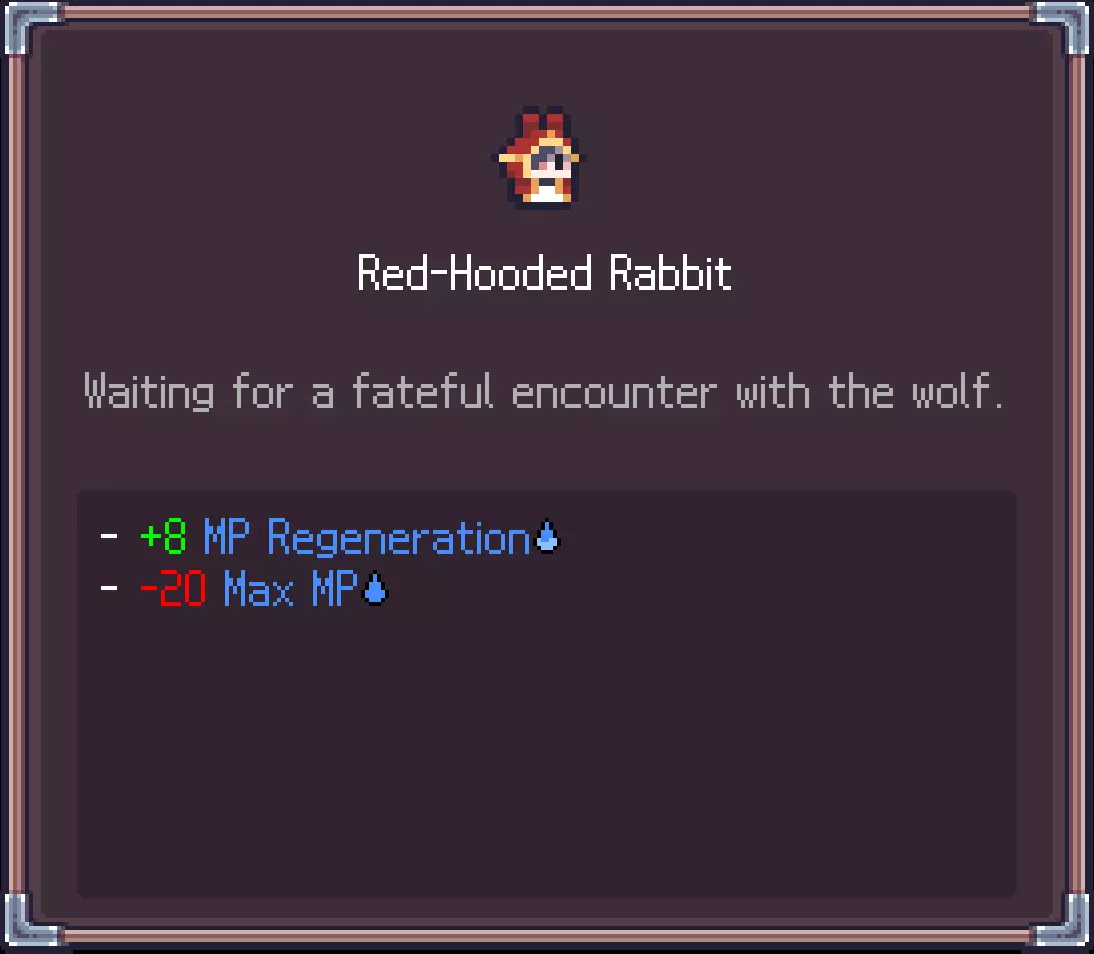
红帽兔子
ç˝ĺ
翼耳兔
可解锁服装【红衣猫咪】 提升火焰伤害最高至50点(提升火焰伤害特性最高至50点,可在【特性】中查看)
赤狐:在一次冒险中获得10个或更多石板。(若想轻松解锁,可在一次跑图中尽可能多地收集石板,不过在顺利的跑图过程中通常也能自然解锁)
青蛙 将你的闪电伤害提升至50⚡。(将闪电伤害特性提升至50,可在【特性】中查看)

击败300只狂热鼹鼠。(很明显,鼹鼠可以在塔的第一层找到)

白狼:击败掠夺者首领拉塔卡超过5次。(击败第二个首领5次)

魔法兔子 使用魔法击败敌人50次。(使用法术/书本击杀50个敌人)
隐藏服装 相关信息可在指南的隐藏部分找到。 骷髅 解锁条件:在单次地牢 run 中累计承受 333 点伤害。

无翼蝙蝠 解锁条件:成功完成5次献血事件。这些事件会在你探索地牢时随机出现(较为稀有,所以看到时至少要完成一次以解锁该服装)。

冒险家兔子 解锁条件:此独特服装需在您的Steam账户中拥有游戏【Dungreed】方可解锁。我推测,如果您的库中拥有【Dungreed】,那么冒险家服装将在塞菲莉亚处可用(请注意,我不确定这是否属实,这是根据我找到的游戏维基推测的)。

UI变更:当你完成第一章后击败最终Boss时,更换服装界面中的图标会从以下状态发生变化:


无法翻译,已删除。


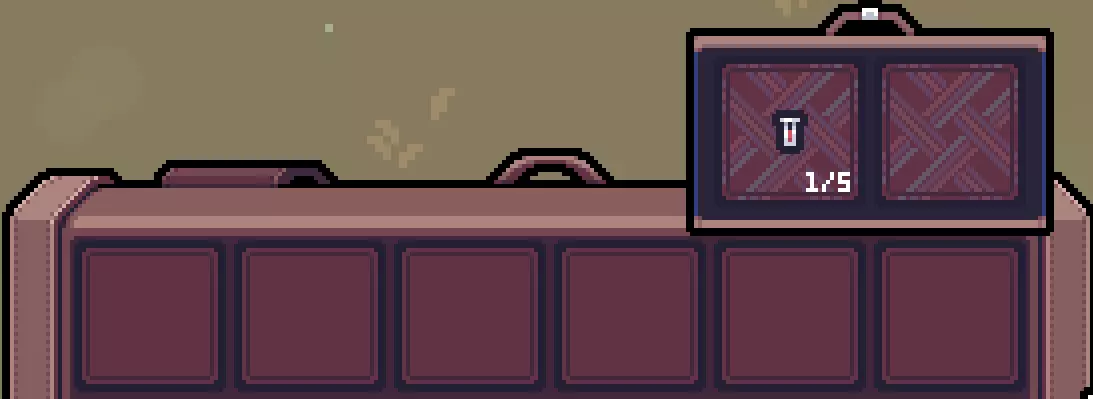
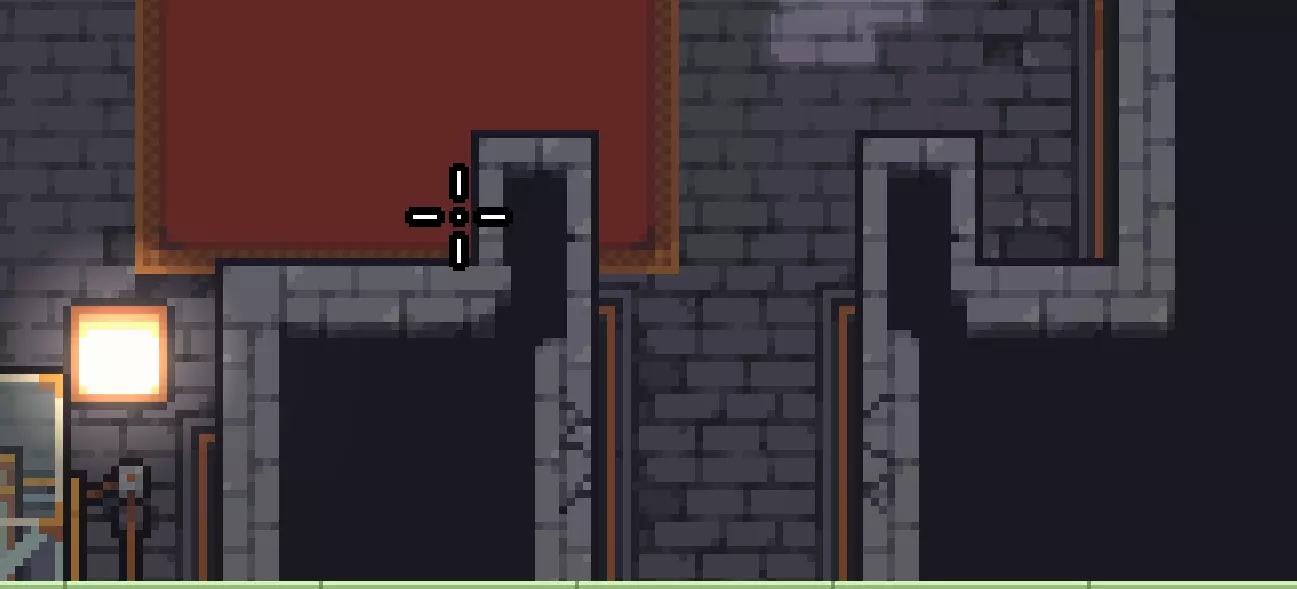
秘密 塞菲莉亚是一款充满隐藏秘密的游戏,其中最明显的发现之一就是秘密房间(它是某个成就的一部分)。 秘密房间 在探索地牢时,你可能会偶然发现这些隐藏区域,它们会提供宝贵的资源来帮助你的冒险。这些奖励可能包括有益的增益效果、额外的骰子投掷(2次)、珍贵的叶子(游戏内货币)、额外经验值,甚至是物品选择。 识别秘密房间需要敏锐的观察力来寻找有裂缝的墙壁。仔细观察地牢的墙壁,通常在顶部附近可见的细微裂缝,就表明有隐藏通道。要揭示秘密房间,只需靠近有裂缝的墙壁并攻击它。成功后,会出现通知确认你的发现。起初,密室不会显示在你的地图上。但一旦你发现了它,该房间就会添加到地图中,不过不会显示通道。以下截图为示例:
隐藏服装 除了主要游戏内容外,塞菲利亚还为那些探索其深处甚至在游戏之外冒险的玩家准备了一些服装秘密!共有三套隐藏服装可供解锁,每套都有其独特的解锁条件: 1. 骷髅 解锁条件:在单次地下城冒险中累计承受333点伤害。这意味着在一次完整的冒险中所承受的总伤害需要达到这个特定数值。
2. 无翼蝙蝠 解锁条件:成功完成5次献血事件。这些事件会在你探索地牢时随机出现(较为稀有,所以看到时至少要完成以解锁该服装)。
3. 冒险者 解锁条件:此独特服装需在您的Steam账户中拥有游戏【Dungreed】方可解锁。据我推测,若您的游戏库中包含【Dungreed】,那么冒险者服装将在塞菲莉亚处可用(请注意,我并不确定这一说法的准确性,此结论基于我找到的游戏维基百科)。
成就 本部分详细介绍了游戏的全部13个Steam成就,以帮助你达成全成就。基于0.7.31(Alpha)版本 (我会尽力按顺序排列) 注意:本部分可能包含剧透 以下是《Sephiria》(0.7.31版本)的Steam成就及其解锁方法: DIY

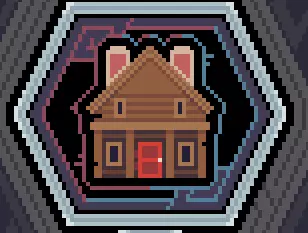
要修复房屋,你需要先在命运铭文(树形升级)中使用蓝宝石解锁它。它是从底部数第二个升级项。据点探索

基本上要击败楼层的第一个首领(第一层) 旅行者:

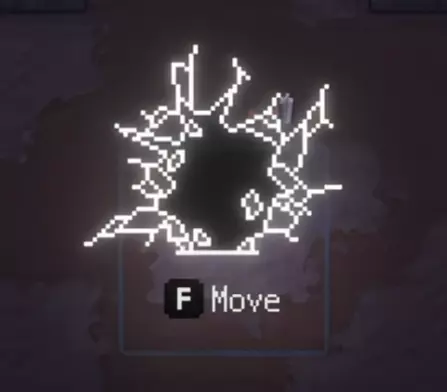
找到一个隐藏房间。房间可以通过检查墙壁找到,其中一些墙壁上有裂缝。靠近裂缝并击打,就会打开隐藏房间并出现一条信息。你可以在下方截图中看到墙壁上的裂缝(顶部)和隐藏房间。它并不总是在房间底部,所以要仔细寻找。
无官方中文译名,无法准确翻译,已删除。

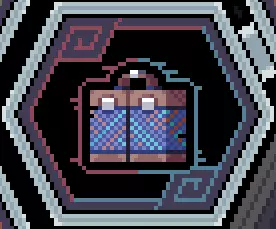
击败楼层的第二个首领(二楼) 蓝色存在居住之地

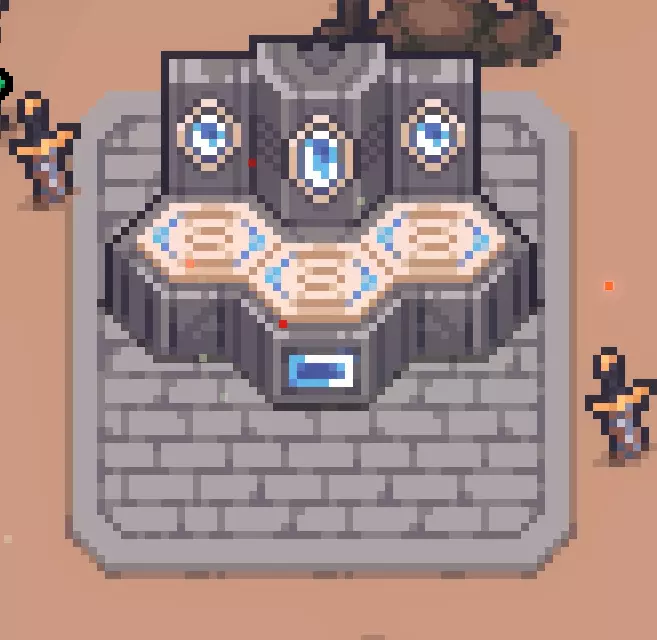
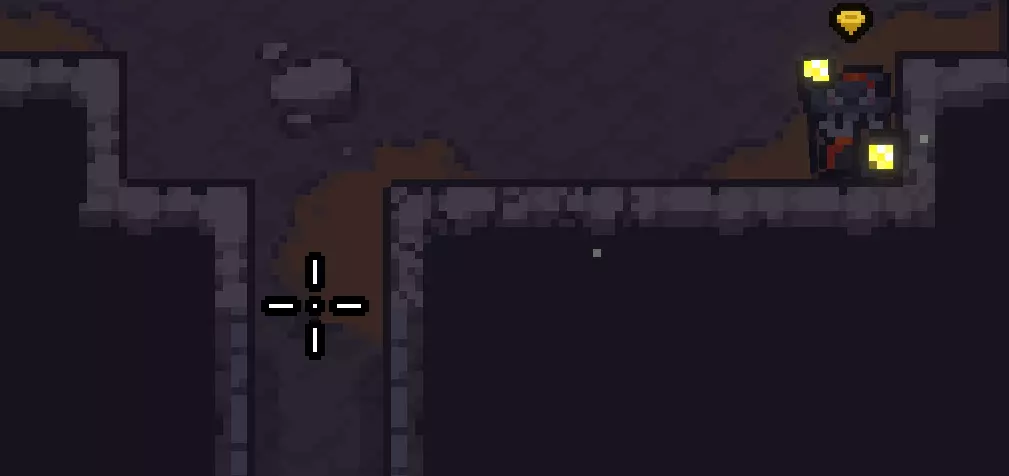
口袋维度是地牢中极少生成的区域。下方截图展示了通往口袋维度的传送门外观。
这不是跟踪:

击败第3层的第3个首领。开明学者:

击败最终Boss(4层)。【重要提示】:你需要在第一章击杀阿斯卡德(Askard),这样Boss才不会变异。第一章:

首次击败阿斯卡德后,去和树对话。这将解锁第二章,届时其他成就也会开放。 Endless Bombs:

进入第二章后,第一层的首个 Boss 有概率会被替换为“更强”的版本,即爆破专家。 狩猎对决:

进入第二章后,有概率出现第二关Boss被【暗影之刃】这个“强化”版本替代的情况(二楼)。没错,它就是二楼的小Boss,但实力要强得多。 Qliphoth Contractor

击败变异的阿斯卡德(4楼)(完成第一章后替代最终Boss) 第二章:

第二次击杀最终 Boss 后,再次与树对话。(注:需击败变异阿斯卡德,参见上方成就)。这将完成第二章,并开启目前尚未开发的第三章(Alpha-0.7.31) 灵魂计划:

我不确定这个成就是在游戏的哪个时刻解锁的,但我是在完成第二章后解锁的。只需前往胡萝卜农场找到佩尔并与他交谈,之后会触发一段过场动画,你和佩尔会出现在树旁的浮岛上。与树和佩尔进行几句对话后,你就能获得这个成就。 感谢您抽出时间阅读本指南!希望这些信息能对您在塞菲利亚的冒险有所帮助。 在完成本指南后不久,我发现了一个很棒的资源,它更深入地探讨了游戏的各个方面。你可以在这里找到大量额外信息:【已删除外部链接】如果你发现本指南中遗漏了任何重要信息,请随时在下方留言。你的反馈对于为塞菲莉亚社区打造全面且准确的资源非常宝贵。祝探索愉快!