换一换
换一换 


面向回归/新玩家的最新指南。【2025年将迎来大型指南更新】 前言 这是我第一次制作指南,希望不会太差。我从没想过自己会制作指南,尤其是《冒险岛》的指南。但现在我做到了。如果你有任何反馈,我很乐意听取,只要是我能参考的建设性意见。 我会尽量更新本指南,确保其时效性。你可以在右侧查看本指南的最后更新时间。如有任何问题,欢迎在评论区向我提问。 我还会尝试制作一个精简版指南,供需要快速参考的玩家使用。遗憾的是,人们往往会忘记这一点,所以我首先要说:【不要忘记这是一款游戏,而游戏的初衷就是为了带来乐趣】。这款游戏就像一场马拉松,而非短跑冲刺。在这里,你无需与任何人竞争。请记住这一点,按照自己的节奏享受游戏吧。
前言 在开始之前,我希望所有回归玩家都能把过去对这款游戏的认知抛诸脑后。因为《冒险岛》已经和过去完全不同了。无论你是否喜欢,自那时起游戏已经发生了翻天覆地的变化。《冒险岛》有时会让人感到无所适从,可做的事情太多,这往往会导致玩家失去动力。但不要因此却步,随着经验的积累,或许在看完本指南后,你对这款游戏会有更深入的理解。本指南的内容较多,请循序渐进,按自己的节奏来。即使你需要多次回顾本指南也没关系。如果你有任何不理解的地方,随时可以问我,我很乐意提供帮助。 既然在这方面大家都是“新玩家”,那我们就开始吧。什么是《冒险岛》?《冒险岛》是一款顶级的横向卷轴大型多人在线角色扮演游戏!大多数大型多人在线游戏将你带入奇幻世界,但只有《冒险岛》能带你进入一个复古的2D宇宙,让人回想起游戏的黄金时代。 从战士、魔法师到海盗和忍者,从四十多种独特职业中选择。与数百万其他玩家一起踏上史诗般的冒险,追捕邪恶的黑魔法师。与数十位个性鲜明的非玩家角色互动,或与朋友组建公会。《冒险岛》的可能性几乎是无穷无尽的,并且会通过激动人心的更新定期添加新内容。《冒险岛》看起来可能很可爱,但不要以貌取人。其富有挑战性的玩法甚至会让经验丰富的老手都面临考验。

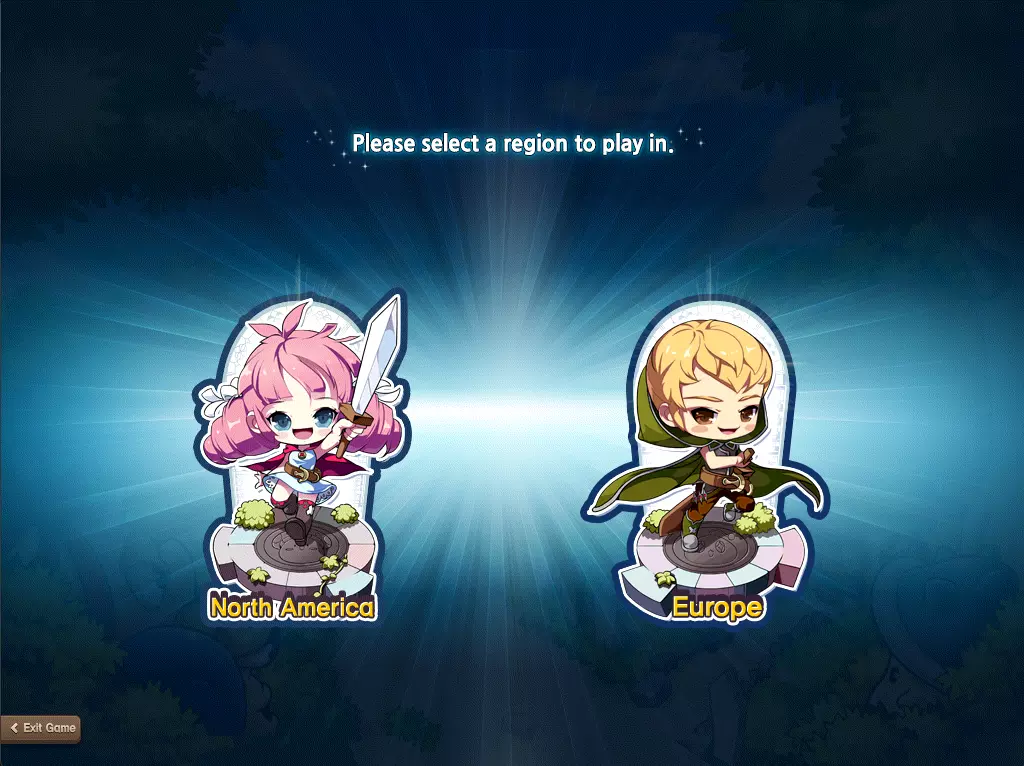
如何游玩:我之前制作过这份指南,但当时甚至没有解释如何游玩这款游戏。《冒险岛》并非传统的大型多人在线角色扮演游戏。正如我在“什么是《冒险岛》?”中所提到的:“《冒险岛》是一款顶级的横向卷轴大型多人在线角色扮演游戏”,这里要强调“横向卷轴”这一特点。 《冒险岛》很像格斗游戏(不包括《灵魂能力》和《铁拳》)。在移动方式上,它只有四种方向。与360度自由移动不同,你只能上下左右(↑↓→←)移动。 那么该如何游玩呢? 和其他大型多人在线角色扮演游戏一样,《冒险岛》有许多可使用的技能。但与需要点击或瞄准才能释放技能的游戏不同,《冒险岛》的技能只有固定位置释放或方向释放两种。这意味着在大多数情况下,你无需瞄准技能的释放位置。这使得游戏更容易上手。 但别被这一点迷惑,《冒险岛》是一款易学难精的游戏,这意味着它不只是一款你随便拿起就能玩的简单游戏。因此我才创作了本指南。 在《冒险岛》中,你需要使用方向键(↑↓→←)来移动,而非传统的WSDA键。所有技能现在都可以绑定到以下按键:0-9、a-z、F1-F12、Ctrl、Alt、Ins、Del、Home、End、Page Up、Page Down。 你会需要用到每一个按键绑定,因为《冒险岛》有大量的技能、药水等。 区域与世界: 开始游戏时,你首先要选择游玩的区域。可选区域为:1. 北美;2. 欧洲。根据你选择的区域,游戏体验会略有不同。这一点我稍后会详细说明。
现在有什么选择? 以下是可供选择的两个地区及其包含的世界: 北美 希拉 贝拉 欧若拉 埃利西昂 重启(现为克洛诺斯与许珀里翁)

欧洲 露娜 重启
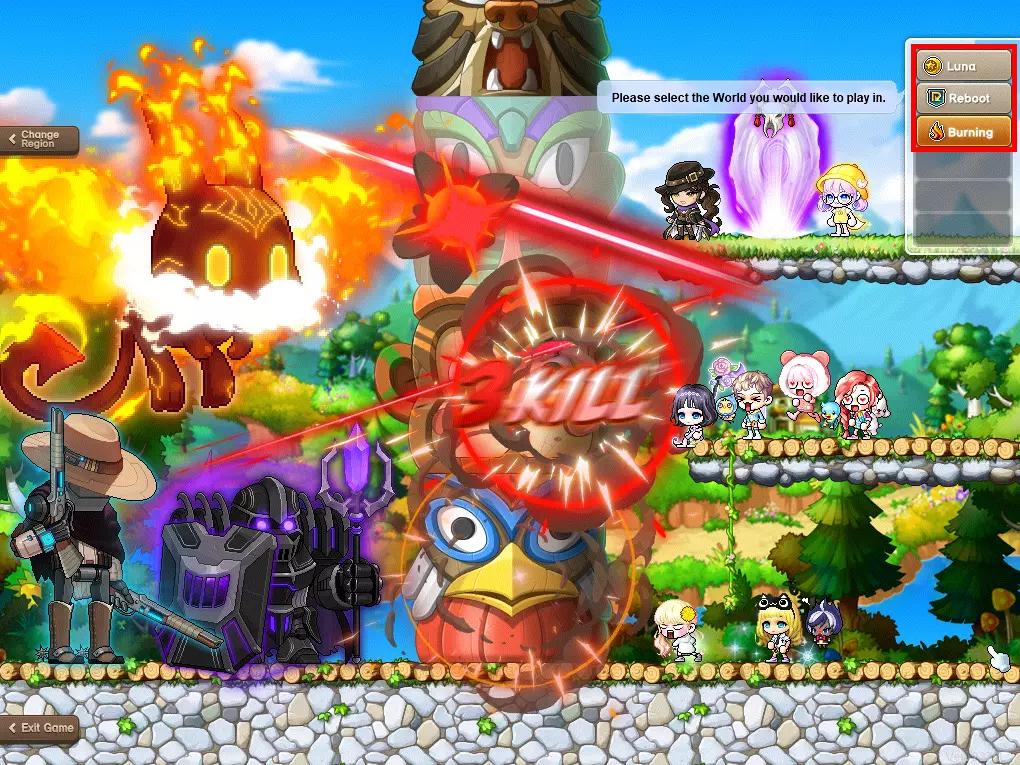
Now which region should you choose and why?The biggest difference in these two regions is the amount of players. This can either be a pro or a con, depending on your preference. NA being more populated than EU. Sidenote; I've been playing NA even though I'm EU. Because of the fact that I have people on NA to play with, I can't speak on EU since I don't really have played on it(as of lately). I am sure EU is lots of fun too. (The latency on NA isn't that bad for me. Especially using ExitLag. (not a sponser)) Moving on to the worldsDepending on which region you chose the outcome of the worlds will be different. Let's start with EU since it only has 2 regions. But before we start about worlds within each region you need to know the difference between a regular server and a "Reboot" server. What is a Reboot server? And how is it different from a regular server?A "Reboot" server is a server where "p2w(pay2win)" features are removed. What does that mean? It means that everything you can buy with real life money to progress faster in the game is removed. Instead of that they made it to where you can buy those things with ingame money instead of real life money. But the trade off is, that you can't trade with other people. No pun intended. Reboot also has additional exp and meso drop rates. Meaning you will level up faster and gain more money ingame. This is a given because everything in this world cost ingame money. So you'll be needing lots of it. At first this sound good on paper/sounds easier. But in reality this is and will be harder when you are a new player. The reason is that because you can't trade you can't progress further if you're stuck. No new gear, no better potions etc. One of the other changes in this server is that you can have more than one profession. Unlike regular worlds, where you can only have one. I will go further into details about what a profession is later in this guide. You now also have a second option when it comes to Reboot: Hyperion. The exact same as Kronos just a fresh start, meaning less players. This is both a pro and a con, refer to the statement on the EU server having less population. Note; that cosmetic items are still purchased through real life money. Keep that in mind. Sidenote; there are a lot of botters(hackers) in this world. Making it sometimes impossible to play(because of no training spots). But this only applies to higher level areas. You won't have to worry about it until very late. I do not know too much of this and neither do I know what Nexon has done to prevent this. Keep that in mind if you if you really want to play in this server. I'd suggest doing a more research for this world. So why EU? And what does EU have to offer?EU has two worlds to offer. One being the Reboot we just talked about and the other being a regular server called; "Luna". This is the only regular server, unlike NA who has more than 1 regular server. EU used to have more worlds but they all merged into one, due to the fact that the worlds were underpopulated, making Luna the only world left. With this in mind, EU is a less populated region making it more calmer than NA. If you want a more calmer experience I'd recommend EU. The reason why this is a pro is because if you want to train in a spot it's less likely to be taken by another person. A con, depending on your perspective, is that there are less people to interact with. So why NA? And what does NA have to offer?So unlike EU, NA has more regular worlds to choose from. And same as EU, it has Reboot in it. And this being more populated than EU means that this Reboot server will have more botters((hackers)but again, I do not know of this too much. So do your own research). You have more variety to choose from. NA has less populated worlds and also populated worlds. A bit of both, as it should be. Balanced. Out of all these worlds Bera is the most populated. Most streamers either play in Reboot or Bera. So if you want to play with streamers I'd recommend playing in one of those worlds(again I wouldn't recommend Reboot, unless you know what you are doing). But if you don't there are plent of worlds to choose from. But keep in mind that the more players in a server, means less training spots will be available but more gear you can buy from other players. So it's a pro and a con. This goes the other way for less populated worlds, more trainingspots less gear to trade. And depending on which world you choose the economy will be different too. If there are more people, more people will sell the same stuff, making those items less valued. The other way around in less populated worlds. Less people means less items and that means higher prices. No clue where to start?/Need a recommendation?/Need someone to play with?I use to play in Bera, now I play on NA Kronos. If you need anyone to play with I'm more than happy to play with you, although I don't play on regular server anymore. My recommendation depends on what you like. But I would for sure recommend NA as a region. Due to the fact that you have more options. Even if you are from EU, the latency isn't that bad(for me). Aside from the region I would recommend NA Bera/Hyperion, but do go to a less populated server if you don't want to play with a lot of people. With that in mind I would recommend either Aurora or Elysium. Aurora being my first choice. FAQ #1 So now that you have chosen a region and a world, what now? Now you can choose a class to play the game with. Before choosing a classThere are two events that help you level your character extremely fast. These events are called burning events. Make sure you make use of these events as it's extremely easy to level. What is the Burning event?Burning events let's you level 3 times instead of 1 for each normal level. Meaning if you would level up from lv. 10 > lv. 11, instead you level 3 times; so from level 10 > 11 > 13. How do you access a burning event? Well that depends on when the event is running. Only when this event is active can you make a burning character. Does burning last forever? Yes and no. Yes being that after the burning is done you get to keep your character. No being that you character will no longer level 3 times instead of 1 and will go back to the usual 1:1 levels. Does burning have a limit?Yes Burning has a limit. As I mentioned before there are two burning events. One goes till lv. 150. And the other one goes till lv. 200. 150 being Mega Burning and 200 being Tera Burning. IGNITION UPDATE: HYPER BURNING TILL LV. 260(6th job) Note: That in this event you can get a lot of goodies. I.e. good gear and other various items. Make good use of these and these events. An overlook of all the classesGenerally there are 5 types of classes. Warrior Mage Pirate Bowman Assassin Each of those classes have their sub-classes and some of those sub-classes have their own sub-classes. That'll make sense in a minute. So let me explain that. Let's take the ancient explorer class for example. If you choose to make an explorer you can choose within that class what you want to become. You can choose one of the above mentioned classes. Let's say you want to become a Warrior. You job advance into a warrior. But within that warrior job class, there are 3 different ways you can choose. Dark Knight, Hero or a Paladin. Depending on what kind of warrior you want you can choose between those three. Dark Knight being a Spear/Pole Arm user. A Hero being a Sword&shield/Two-handed Sword/Axe&shield/Two-handed Axe user. And lastly Paladin being a Sword&shield/Two-handed Sword/Blunt weapon&shield/Two-handed Blunt weapon user. And the same goes for Mages, Pirates, Bowmans & Assasins. But not all classes have these type of sub-classes. For example a Mihile is a warrior. But he can't choose between other warriors because his job is also a Mihile. Unlike Explorers they have warrior class and Dark Knight, Hero & Paladin as jobs. Before maining a classBefore you make a class there are a few things to point out. Just like any MMORPG, there are classes to choose from. Meaning there will be a class "better" than one another. But this is a stupid way of choosing your class. Never, and I mean never, choose a class based on this. Unlike a MOBA where you playing META will give you advantage over another player, here that wont be it. Mainly because of the fact that this game isn't a PVP game. And just as I stated in the intro, this game is NOT A SPRINT. NOT A COMPETITION. So choose a class YOU LIKE. Not because it's "better"/"META" or because someone else tells you that class "sucks". That being said there are some classes that are "essential" to make. Which classes are "essential" and why?Let's start with the why. Why are they essential you ask? Because they change the fundamental of how you play this game. Depending on the class, it can change how your main plays. The reason why you need these classes are they buff your main class. How? Because of a thing called "Link Skills". Link skills lets you give a fixed skill of that class to another class. Each class has their own fixed link skill, that you can't change. Let's take a Mercedes(archer type class) for example. Her link skill is "Elven Blessing". Her link skill allows you to gain more %EXP. So it's easier to level. And that's one of the many link skills you can get. You can give that to any of your other classes. This is why it's important to make lots of other classes, solely for that purpose. To buff up your main. But to be able to get these "link skills" you have to have that specific class to at least level 70. There are usually 3 levels of a link skill. First level unlocks at lv. 70, to be able to be used by other classes. After that the second level will be unlocked at lv. 120. And last but not least at lv. 210. Usually level 2 is enough as you start. So which classes would I recommend for links skills?First and foremost I would say wait for a Burning Event. So it's easier to level them and get their link skills. As of which I would recommend? A Mercedes, just as I said in my example, her link skill is essential. To be able to level faster is a godsend. So first and foremost I would recommend Mercedes(you don't say). Lv. 120 should be enough for now. As well as every other link skill until you either reach a wall or when you're reaching end game. Secondly I would recommend Aran & Evan. As these three classes have EXP boosting link skills. But feel free to skip Aran & Evan. There are others that have a bigger impact on your gameplay than these, but for the time being leveling is your focus until you reach 200. Besides it's good to have EXP based link skills so if you make more characters you can level them up more quickly. For all other classes link skills, go to Scardor's Google Docs: here[docs.google.com]. There you can see not only the link skills but also the Legion. What is Legion?Much like Link Skills, Legion is a grid system buff for your whole world. It's a bit like Tetris, Legion being the grid and your characters are the blocks. And much like Link Skills each class gives their own fixed stat. Your character will be graded according to your lv. The higher the level of the character the higher the grade. For example a SS grade is linked to lv. 200+ and so on. And with that grade comes their own "Tetris" block. Just like how to grade gets better as the level gets higher, the block also gets bigger as the level of your character increases. And just like the fixed stats from the characters the Legion grid also gives bonus stats. You can see the legion in the above mentioned link, along with the link skills. How should I choose my main?This all depends on what you like. Who you think looks cool. Because your first character will always be a gamble. You have no idea how each class plays, and each class is different from one another. You can always look at a DPS chart and say; "yeah, I want the strongest class". But do you really want that? What's the fun in that? Like I said in the beginning, and I really can't state this enough, this game is meant to have fun not to be the strongest, nor is it a sprint/competition of who is better/stronger. Play who you like and who you enjoy playing as. If that's a Pirate, YARR away. If you really aren't sure or if you think multiple are cool looking I would recommend a channel called; KyoWantsCute. He is a Maple content creator and goes over all the classes and their skills. So you can get a general idea of how each class plays and how they look like and if it's for you or not. FAQ #2 A fresh startNow that you created your character and have gone through the tutorial. You start your STORY in the Maple world. Now there's two ways to play this game. You either skip all the quests and go straight to grinding or you explore the Maple world and embark on various quest to explore the story. If you choose the latter I have to warn you that it will be a painful journey and that lots of quests are outdated but that doesn't mean that their not interesting. Especially when you are a new player. You get to explore the Maple world and see what it has to offer. And just as I stated previously. TAKE THIS GAME ON YOUR OWN PACE. TAKE YOUR TIME WITH IT AND HAVE FUN. That being said regardless of what you choose there are some quests that are worth doing. Note; Some classes have their own storyline, which you have to do in order to do certain stuff. Like job advancement. I will talk about this in the paragraph below. Job advancementRegarding the job advancement's there was four job advancements, but that all changed and now there are six job advancements in total. The job advancements goes as follows; st job advancement = Lv. 10 nd job advancement = Lv. 30 rd job advancement = Lv. 60 th job advancement = Lv. 100 th job advancement = Lv. 200 th job advancement = Lv. 260 Common words you need to know(Boss-)Mule(s)= is a character who serves a singular purpose(i.e. only for bossing(boss mule)) BiS = Best in Slot MVP xx:35 ard/cyg/MS = EXP buff at xx:minutes Ardentmill/Cygnus boss/Mushroom Shrine SF = Starforce FZ = Frenzy(increases the spawn rate of mobs in that map) FS = Firestarter(increases the burning stage % inside a map) AH = Auction House(previously called FM(Free Market)) (B)POT = (Bonus)Potential CDHAT = A helm with CDR(CoolDown Reduction) as potential CC = Change Channel/Current Channel CS = Cash Shop IA = Inner Ability WAP = Wealth Acquisition Potion Lomien = Lotus+Damien What are Special Content?Special Content falls under 4 categories; Story, Growth, Competition & Arcane River.

主题副本是一系列剧情任务,完成后可获得各种奖励,奖励有好有坏。因此,了解哪些副本值得做、哪些不值得做非常重要。由于剧情较长,主题副本通常需要花费大量时间才能完成,每个副本大约需要两小时,若不熟悉流程甚至会更久。所以,为了高效通关,建议观看攻略视频,这样能减少每个副本的通关时间。 什么是燃烧阶段/地图?燃烧阶段/地图是指拥有10%-100%额外经验值加成的地图。这些地图从100级及以上开始出现,100级以下怪物所在的地图不会有燃烧阶段/地图。


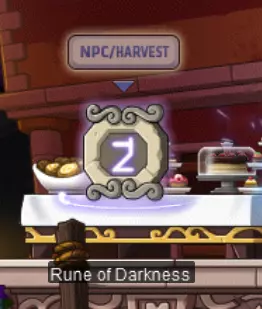
什么是符文和经验球?符文会在大多数地图中经过一定时间后生成,通常情况下它们已经处于生成状态。你可以使用这些符文获得+100%经验值增益,该增益持续180秒。你可以通过与NPC对话来激活符文,符文的冷却时间为15分钟。存在多种不同的符文,每种符文都有特定的作用。有些符文效果更好,但你主要使用符文来获取经验值增益。此经验值增益可以与其他经验值增益叠加,因此请尽可能使用它。
通过连续击杀可以获得经验球。当连击数达到50、100、150、200等整数时,会生成一个经验球。如前所述,走过这些经验球即可获得经验值。经验值的数量会随着连击数的增加而变化。经验球机制没有冷却时间,仅与连击相关。你需要连续成功击杀敌人,且击杀间隔不能过长,才能触发该机制。


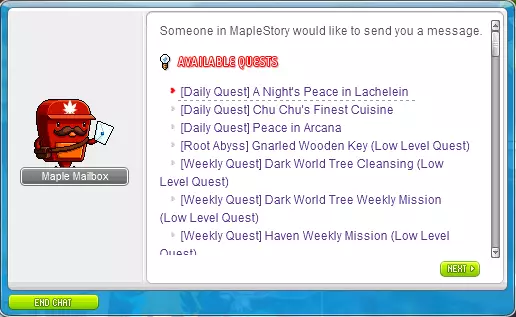
什么是拍卖行?拍卖行是以前被称为“自由市场”的功能,但操作更简便。拍卖行能让你轻松出售物品,也能让你轻松购买物品。这是寻找装备和其他所需物品的好方法。你还可以查看每件物品的售价,这样就能将自己的物品以相近的价格区间出售。 什么是每日任务/每周任务?每日任务是指游戏中每天可以完成的内容,例如:打BOSS、乌斯、怪物公园、枫之旅游等。 每周任务是指游戏中每周可以完成的内容,例如:暗黑树海与天堂、困难BOSS等。
什么是乌斯?乌斯是一个每日18人组队的首领副本,能为你提供大量的【梅斯】。在特定时间内,【梅斯】会翻倍。具体时间我不太清楚,因为我的时间和你的不同,我来自欧盟,我们的时区存在差异。在这个首领副本中,你只能使用四转及以下的技能。你造成的伤害越高,获得的【梅斯】就越多。系统会根据你的伤害给予你一个排名。不过,你的排名不仅受伤害影响,还会受到复活队友等因素的影响。

注意:熊乌斯是一个18人组队任务,这意味着可能会出现卡顿。如果没有立即加载进去,请耐心等待。有时你甚至可能在完全加载完成前就被击败。 什么是怪物公园?怪物公园是一个每日副本,你需要进入并通关各个阶段,最后一个阶段有一个 boss,通关后可以获得大量固定经验值,因此经验值 buff 在这里无效。你每天总共可以进入7次,其中2次是免费进入,其余次数需要用 RP 购买。在 reboot 服务器中,你可以用金币购买额外次数(每次350万金币)。此外,每周的每一天都会有不同的奖励箱,里面包含各种固定物品。周日的奖励箱中,每个箱子会提供15分钟的2倍经验值 buff,因此你最多可以获得7次该 buff。务必至少在周日完成怪物公园以获取2倍经验值券。

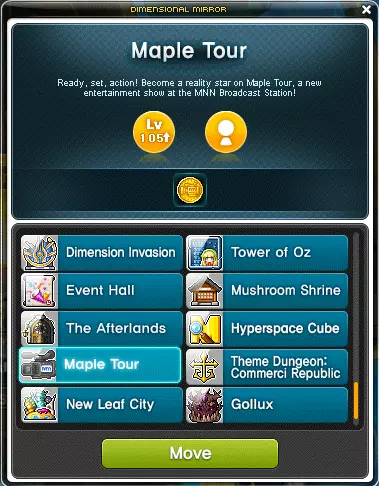
什么是枫叶旅游?枫叶旅游是一个每日副本,你需要进入并通关各个阶段,最后一个阶段有一个 boss,每次完整通关后都能获得大量固定金币。准确来说,你可以在一周后领取这些金币。这意味着你必须等待七天才能获得这七天内收集到的全部奖励。你也可以提前领取,但这样获得的金币会更少。每天最多可以进行7次,其中2次免费。其他次数需要用RP(奖励点数)购买。
什么是奖励点数?奖励点数通过击败 Boss 获取。你可以每日获得这些点数,但会在一个月后过期。你可以在【商店】中使用奖励点数购买各种每月补货的物品。


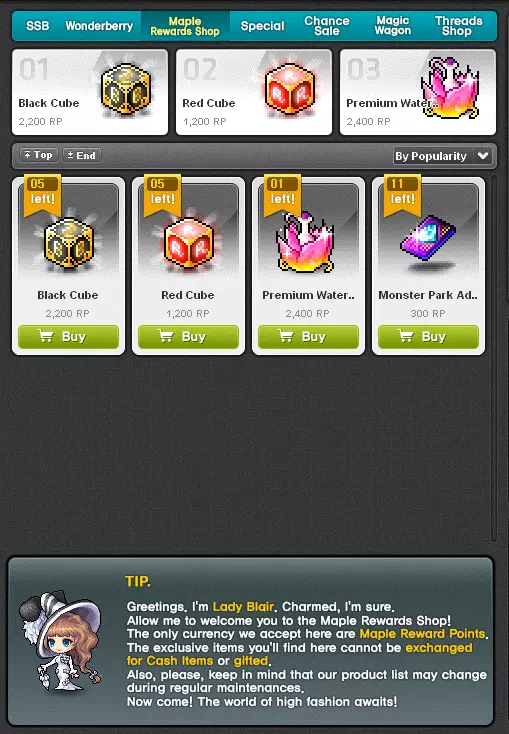
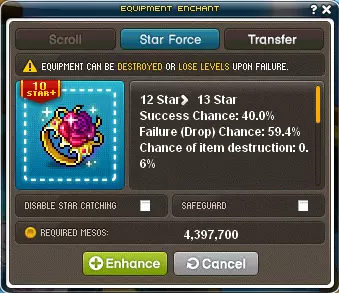
提示:你每天可以通过玩《冒险岛M》获得500 RP。《冒险岛M》是一款《冒险岛》系列的移动游戏。你可以通过完成每日任务来获取RP。 常见问题3: 什么是星之力? 星之力是指你的装备上拥有的星星数量。每颗星星都会为装备增加大量属性,星星数量越多,属性加成越好。但提升星之力需要付出代价,一方面是需要消耗大量的金币,装备等级越高,消耗的金币就越多;另一方面是每提升一颗星星,成功概率就会降低。在星之力提升的后期阶段,失败时可能会摧毁装备,或者星星数量会减少。10星和15星是安全节点,一旦达到这两个星星数量,星星就不会再低于该数量。
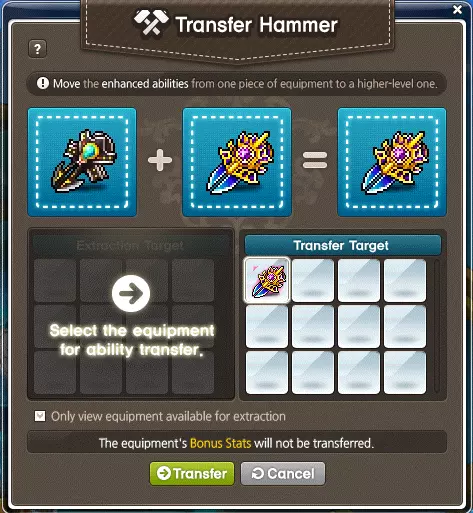
什么是转移锤?转移锤允许你将星星从一件装备转移到另一件装备上。例如,如果你强化失败导致装备“爆掉”,就可以使用转移锤。转移需要相同的装备,但你也可以用它将【强化等级和潜能(最高至稀有级)】转移到更好的装备上。转移要求如下:两件装备等级差距需在10级以内,且必须是同一类型装备/同一职业专用。这意味着如果你想转移所有星星,装备必须是战士职业对战士职业、双手剑对双手剑,且等级需为110级转120级、120级转130级、130级转140级等依次递增。
什么是潜能?潜能是装备上的额外属性。并非所有装备都有潜能。潜能可通过潜能卷轴获得,或在怪物掉落装备时自带。潜能分为四个等级:稀有、史诗、独特和传说(传说是最高等级)。每个等级都有其代表颜色:稀有为蓝色,史诗为紫色,独特为黄色,传说为绿色。等级越高,额外属性越好。
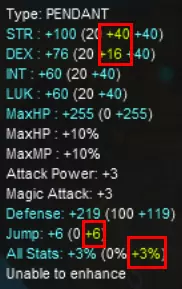
什么是火焰属性?火焰属性是装备基础属性旁的额外属性,以+绿色显示(+蓝色是由于卷轴/星之力)。额外属性系统只会增加属性,除非你重洗火焰属性,否则不会减少属性。
如何重洗潜能火焰属性 潜能火焰可用于重洗装备的潜能火焰属性。潜能火焰可通过击败BOSS、参与活动、游戏内商店购买、采集矿石、开启悬赏袋以及怪物收藏等途径获得。 并非所有装备都可进行潜能火焰重洗 可进行潜能火焰重洗的装备: 帽子 脸部饰品 眼部饰品 耳环 项链 上衣 下装 整体套装 腰带 披风 手套 武器 鞋子 口袋物品 不可进行潜能火焰重洗的装备: 纹章 徽章 护肩(但绯红护肩可以进行潜能火焰重洗) 戒指 副武器(包括盾牌和短刀) 勋章 机器人 机器人心脏 所有本身不具备额外潜能火焰属性的装备,均无法进行潜能火焰重洗。 什么是内在能力? 内在能力在角色达到50级时解锁。与潜能系统类似,内在能力是一种基于随机数生成机制的系统,用于获取额外属性。与潜能具有相同的等级和颜色。每个职业都有自己的最佳内在能力,具体因职业而异。现在你还可以为内在能力设置3个预设,这意味着你可以分别为打BOSS、刷怪和特殊情况各设置一个内在能力。这是一个极大的便利性提升。
什么是魔宠?魔宠是一种可用于战斗的怪物。你可以通过怪物掉落获得魔宠,但并非所有怪物都会掉落魔宠卡片。魔宠与潜能非常相似,每只魔宠都拥有一种潜能,分为普通、稀有、史诗、独特和传说等级。传说级是付费选项(且在【重启】服务器中不可用)。因此,本次我们将讨论到独特级为止。魔宠卡片有机会成为这些等级中的一种,其中普通级最为常见(这里并非双关语)。你也可以通过将100只相同的魔宠合成一只,使其升级到5级,以此提升魔宠等级。让魔宠出战并进行刷怪即可提升其等级,魔宠的最高等级为5级。一旦达到升级要求,你就可以为它们升级。通过提升它们的等级,你有机会提高它们的品阶。但这样做会重置宠物的潜能,所以要确保宠物当前没有好的潜能。除了提升品阶外,没有其他方法可以重置宠物的潜能。因此,一旦达到最高品阶(在这种情况下是独特),除非你想付费获取传说品阶,否则你必须用新的宠物重新开始——将其升级到5级,并将100只相同的宠物融合为一只。话虽如此,潜能的效果确实非常好。你可以获得【无视敌人防御百分比】、【 boss伤害百分比】、【金币获取量提升】和【掉落率提升】等效果。这些数值会随着品阶的提升而增加。例如,稀有品阶可能有10%的无视敌人防御,而独特品阶则可高达30%的无视敌人防御。刚才给出的具体数值并不准确,仅作示例参考。获得一只好的宠物需要不断尝试。获取一个好的魔宠既需要时间,也需要大量魔宠。你在游戏后期(大约250级左右)之前都不需要用到这个。

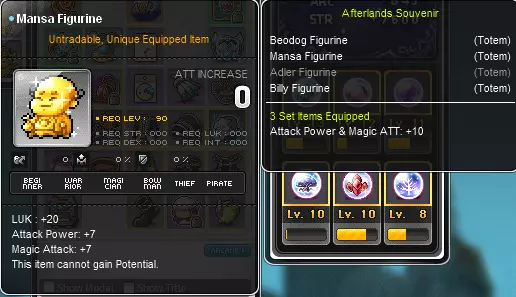
PNO有几率掉落传说级宠物,但概率极低。 刷级 主线任务 随着“Ride or Die”的推出,游戏对任务系统进行了重做。现在新增了“主线任务”板块,该板块优化了游戏剧情,并提供了一种新的升级至200级的途径。其实际效果目前尚待验证。大量的剧情和无法跳过的过场动画可能使其不如常规刷级方式划算。不过,完成主线任务可获得军团遗物(每个+500),因此实际上可能值得一做(尤其是对新账号而言,因为还能解锁一些 Boss 的前置任务,反正早晚都得做)。目前我还需要收集更多数据。 三转前的主题副本 大部分引导任务可将角色等级提升至30级。如果还没到的话,建议先做一些任务升到30级。30级时你可以获取职业的第二次转职,解锁它需要完成一个任务。通常这些任务很简单,不需要提前做什么准备,但有些职业必须完成主线剧情才能进行转职。转职后你会解锁更多技能,变得更强。30级时我建议去刷主题副本直到55级左右。这是该等级段最轻松的升级方式,而且你能从这些主题副本中获得不错的奖励。这些道具能让你用到100级或130级左右。《冒险岛》本身会推荐一些主题副本,你可以通过快捷键打开任务推荐界面,默认快捷键是“U”。如果没有的话,你可以打开按键设置,找到名为【指南】的按键并为其设置一个按键。在这里你可以获取所有当前等级推荐的任务。这个指南在你所有等级阶段都会非常有用。我稍后会详细说明。但当你达到30级后,你有三个选项可供选择。我建议你选择其中两个。会有一个【精灵学院】主题副本和一个【里恩海峡】主题副本。但重点关注前两个主题副本,因为它们能提供最好的奖励。完成这两到三个副本后,你的等级应该会达到50到60级左右。 现在你已经60级了,你将迎来第三次职业进阶。完成第三次职业进阶后,我建议你再去一个主题副本。这个主题副本很可能会让你升到80-100级。这个主题副本名为【后巷】。这是一个不错的主题副本,因为它会给你一些特别的东西。它会给你图腾,这些图腾非常好,因为目前你无法获得其他永久图腾(有些活动会提供更好的永久图腾,但这些活动很少出现)。再次强调,我强烈推荐查看这个副本的攻略,因为这个主题副本可以一次性快速完成。你总共可以获得4个图腾。每个图腾都有自己的属性:力量、敏捷、智力和运气,以及额外的7点攻击力+魔法攻击力(每个图腾)。此外,如果你装备3/4个图腾,还会获得套装效果。图腾最多可以装备3个。

Afterlands walk-through. God bless this man, truly a blessing this guide. Leveling upGrinding is the main thing you will be doing throughout all of MapleStory. Just as every other MMORPG. There's an overwhelming amount of things to do in MapleStory. But we will go about that as we level. At level 100 you will unlock your 4th job. There's a trick that will net you 12 levels if done correctly. First and foremost you will need to be lv. 100, exact lv. 100. If you meet this requirement you will be able to unlock your "first" boss. This boss is called Zakum. We will want to defeat normal Zakum. But before we do that we need to activate a rune, to get the most EXP out of it as possible. Now when fighting Zakum make sure to target his arms first as those arms give the most EXP. Each arm gives huge amount of EXP. He has six arms in total, three on each side. If done correctly you will gain around 6 levels. Making you around lv. 106. After this it's a long grind till 200. I'd recommend skipping all quests and going straight to grinding. But don't let me stop you from doing quests, make sure to have fun and progress on your own pace. One last trick you can do is when you reached lv. 199. You can go to Scrapyard Haven and accept a quest where it's all dialog and you will gain one full level. Lv. 199 to lv. to 200. But this will be a long way, so skip this for now. But make sure you keep this in mind because it save you a lot of trouble and time. Does not work anymore Note; stay within your level range when hunting monsters, or else it won't be optimal. For regular servers up to 10 levels above/below and in Reboot up to 6 levels above/below. Trainingspots Before you look at this, do know that it doesn't really matter where you train, as long as you are within level range(in Reboot +-1 your level). That being said, there is an optimal path to take for leveling more efficient.(subject to change) USE THE INGAME GUIDE BUTTON & MAIN QUEST INSTEAD. LVL 10 - 20 = Savage Terminal, Wasted Treatment Planet 1/Henesys, Golem's Temple Entrance LVL 20 - 30 = Savage Terminal, Stray Dog Alley 1/Ellinia, Giant Tree LVL 30 - 50 = Savage Terminal, Mr. Hazard's Lair 3/Shaded Dump Site LVL 50 - 60 = Perion, Wild Boar Land LVL 60 - 70 = Sleepywood, Silent Swamp/Humid Swamp LVL 65 - 80 = Orbis, Stairway to the Sky 1 LVL 70 - 75 = Aqua Road, Red Coral Forest LVL 75 - 80 = Verne Mine, Shaft 4 LVL 75 - 85 = El Nath, Ice Valley 1 LVL 80 - 90/100 = Ariant, Sahel 2/Desert of Serenity LVL 97 - 100 = Leafre, West Leafre Forest LVL 100 - 106 = Normal Zakum boss(solo) + rune and/or 2x EXP LVL 100 - 110 = Minar Forest, Cranky Forest/Steep Hill LVL 110 - 120 = Ludibrium, Toy Factory <Apparatus Room> LVL 110 - 130 = El Nath, Sharp Cliff 2/3 LVL 130 - 135 = Korean Folk Town, Wanted Sign Quest till Goblins LVL 130 - 140 = Korean Folk Town, Black Mountain Entrance LVL 135 - 145 = Korean Folk Town, Goblin House LVL 140 - 150 = Kerning Tower, 2F cafe/higher levels LVL 150 - 160 = Leafre(theme dungeon), Colossus West Road 2 LVL 160 - 161 = Normal Horntail boss(solo) + rune and/or 2x EXP LVL 160 - 165 = Omega Sector, Boswell Field 2 LVL 165 - 170 = Omega Sector(Inside the Mothership), Corridor 103 LVL 170 - 175 = Omega Sector(Inside the Mothership), Corridor 203 LVL 175 - 190 = Temple of Time(Gate to the Future), Knights Stronghold LVL 180 - 190 = Temple of Time(Gate to the Future), Twilight Perion: desolate Rocky Road LVL 190 - 200 = Temple of Time(Gate to the Future), Forsaken Excavation Site 2 LVL 199 - 200 (FREE LEVEL) = Scrapyard Haven, introduction quest(talking only) (From 200 you generally want to follow the storyline as through that you will progress to new stages of the game) (no longer works) LVL 200 - 205~210 = Weathered Land of rage/Sorrow, Upper Stem Crossroad LVL 205 - 210~215 = Below the Cave, Eastern Cave Path 2, Reverse City(storyline) LVL 210 - 215~220 = Slurpy Forest Depths, Mottled Forest 3, Torrent Zone 3/1(only if you can one shot them) LVL 215 - 220~225 = Hidden Illiard Field, Mushbud Forest 5, Hidden Mushbud Forest LVL 220 - 230 = Revelation Place 3, Chicken Festival 1/2, Occupied Dance Floor 2(only if you can one shot them) LVL 225 - 245 = Cavern Lower Path (1/2), Between Frost and Thunder 2, Labyrinthine Cavern (- Upper Path/Side Path), Deep in the Cavern - Upper Path 2 LVL 235 - 250 = Mirror-touched Sea 2/3/4 LVL 240 - 255 = The Final Edge of Light 4, Plunging Depths 1/4, Star-Swalloing Sea 1/4 LVL 245 - 255 = Last Horizon 5, Mysterious Fog 2, Void Current 1/3 YouTube guidesLv. 10-202 Coppersan Lv. 202-250 Coppersan Lv. 10-250 Nucleous Maplestory Lv. 10-210 ClanKaiser Guilds Once you're level 101+ you can join a guild. I would highly recommend joining a guild. There are plenty of people offering you to join their guild. Guild gives a lot of benefits, such as get carried, free stuff and you can also get Guild buffs which js probably themain thing you'll want. Guild buffs are but not limited to; EXP BUFF, MESO BUFF, G-POTS and more.
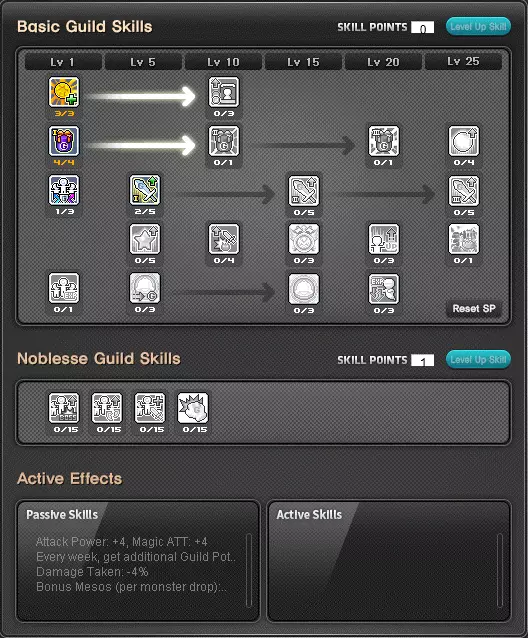
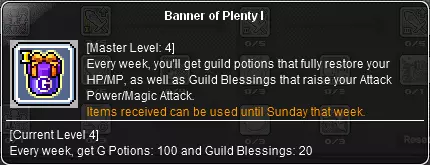
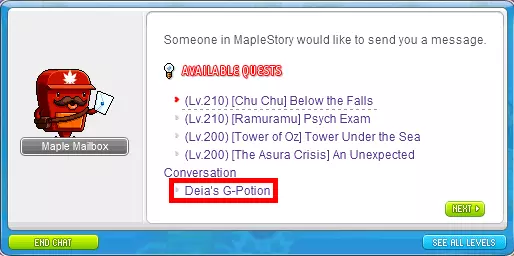
什么是G-pots?Deia's G-pots是一种公会技能,需要公会会长提升等级,成员才能领取。这些道具每周由公会发放,包含200瓶灵药(可恢复99,999点生命值和魔法值)和30个地图增益(全地图攻击与魔法攻击增益)。每周一刷新。你可以通过点击屏幕左中部的灰色灯泡图标,找到【Deira G-Potions】来领取。
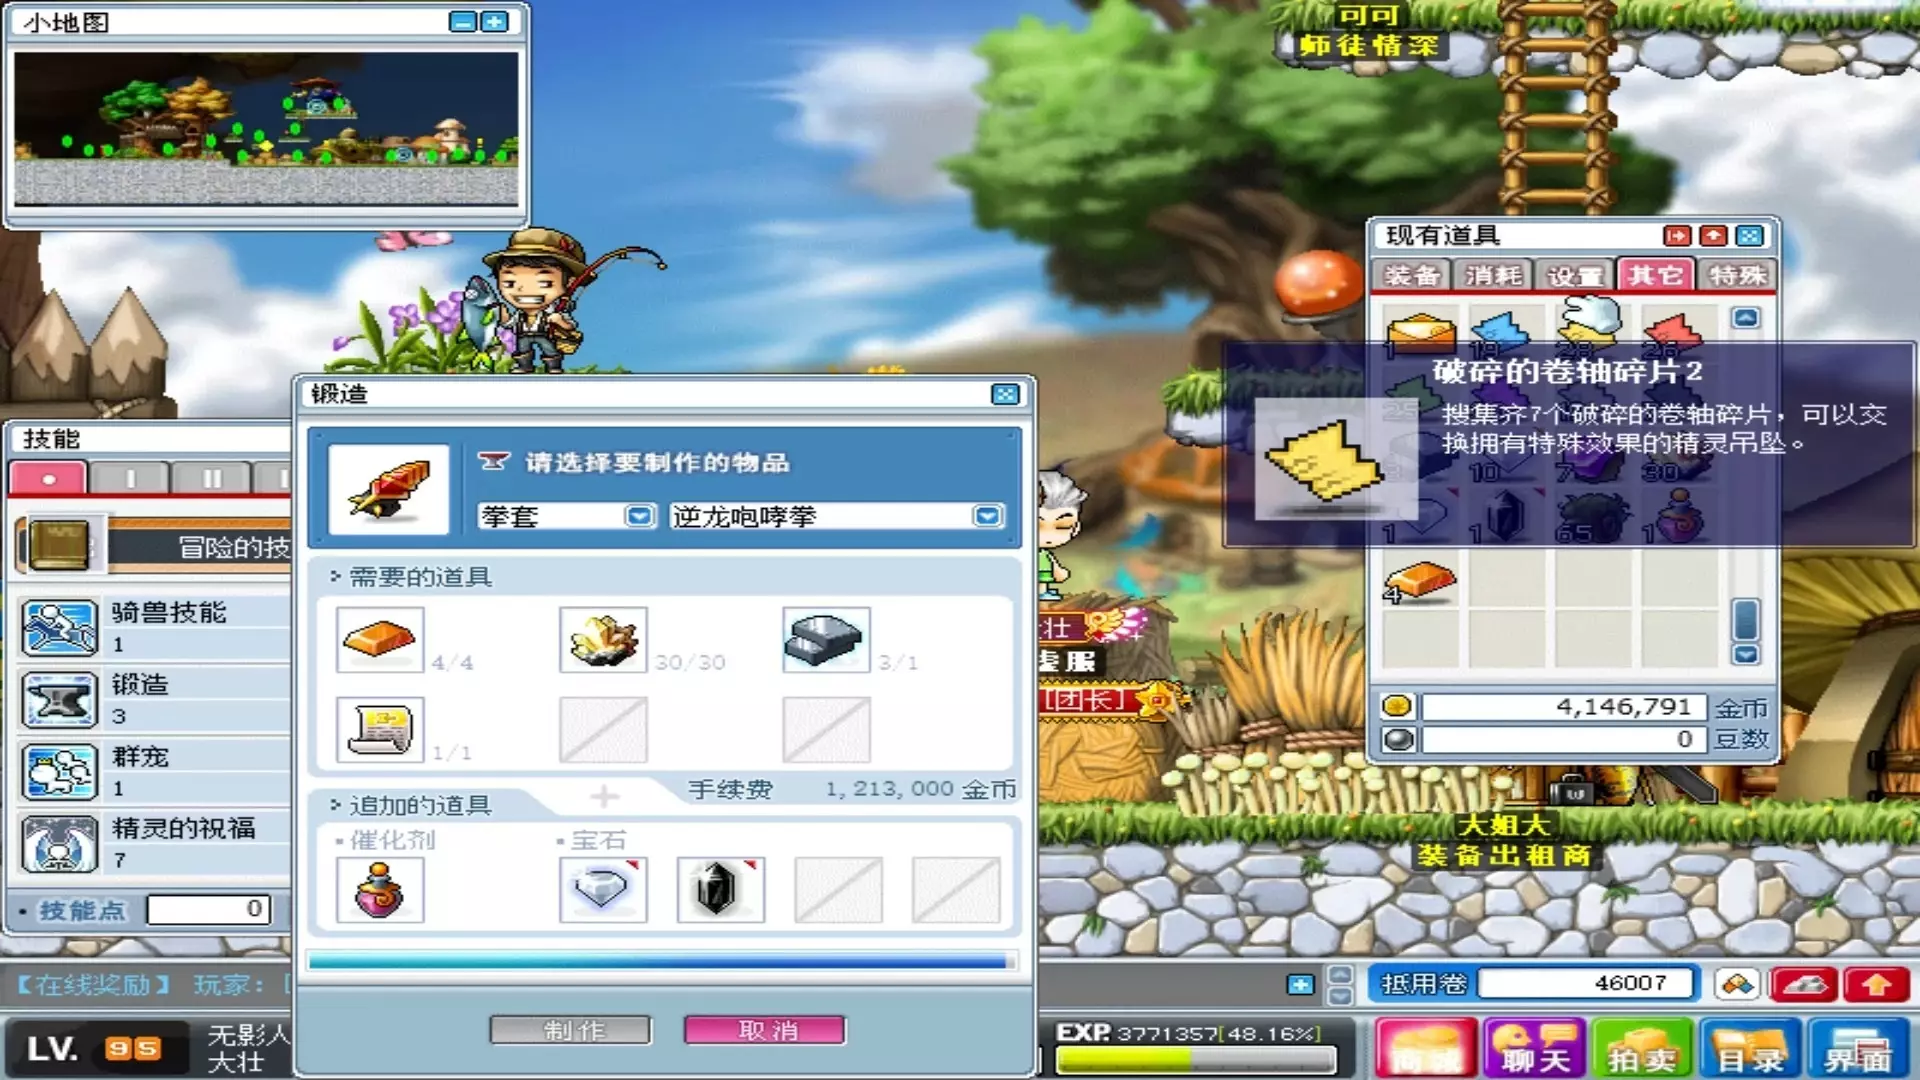
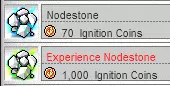
第五职业与节点 当你达到200级时,可以开始第五职业的转职。完成第五职业转职后,你将解锁名为V矩阵的第五职业技能标签页。通过这个新标签页,可以获得新的技能。其中一些技能仅适用于你的细分职业(例如:夜使者、主教等),而另一些技能则适用于特定的职业群(例如:战士、法师等)。要获取和升级这些技能,你需要节点石。这些节点石完全随机,打开时会获得随机的【节点】。你也可能获得重复的节点,但无需担心,因为你可以将这些节点合并以提升它们的等级。此外,还有【经验节点石】,可以为你想要升级的节点提供大量经验值。这些物品可以升级任何类型的节点。如果你不想要或不需要某些节点,也可以将其分解。分解节点会获得【节点碎片】。当你收集到70个节点碎片后,就可以选择一个特定的节点进行制作。
V矩阵在角色达到200级并获得五转后解锁。解锁V矩阵后,你将根据自身等级获得插槽。这些插槽用于配置你的节点。在较低等级时,节点插槽数量有限,因此需要谨慎选择节点。每提升5级,V矩阵就会增加一个插槽。你也可以花费金币解锁额外插槽,但等级越高,所需金币成本也越高。【不建议这样做】,因为当你达到下一个插槽解锁等级时,通过金币解锁的插槽不会保留。例如,如果你在213级购买了一个插槽,当你达到215级时,这个购买的插槽会被215级的插槽取代,而不会额外增加一个。你的金币最好用在其他地方。
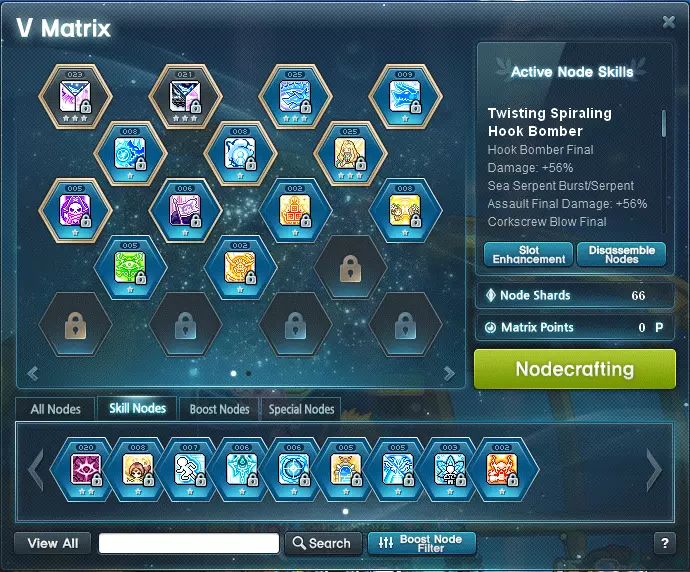
什么是【插槽强化】?200级后,每提升1级将获得1次插槽强化机会。这些机会可用于升级V矩阵的插槽,插槽最高等级为5级。插槽强化的作用是提升该插槽内节点的等级,例如若插槽等级为5级,放入其中的节点将获得+5级加成,且可突破节点自身的等级上限。 技能节点的通常最高等级为25级,通过插槽强化可提升至30级。 增益节点的通常最高等级为50级,通过插槽强化可提升至55级。 技能节点的等级与插槽等级共同决定所获得技能的等级(特殊节点除外)。例如:若将2级技能节点装备到3级节点槽中,则后续技能将为5级。 特殊节点可装备到强化槽中,但不会因此获得任何增益。 什么是【节点石】?节点石是可使用的道具,能为你提供随机技能。技能分为3类: 强化节点 技能节点 增益节点 强化节点:强化节点可进一步强化你现有的技能,因此被称为“强化节点”。它们对任何职业都至关重要,能大幅提升你的伤害输出。这些节点以3个为一组,即3个技能强化节点组合成1个槽位。这些节点基于随机数生成,因此你需要重新随机以获得“完美三重节点”。
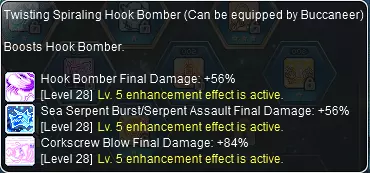
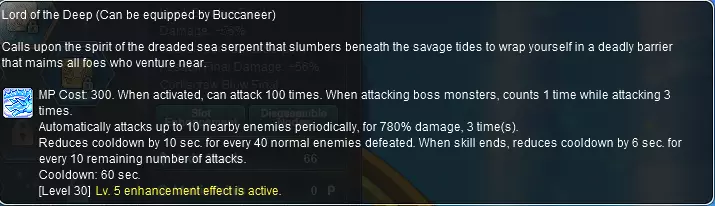
技能节点是能让你获得全新五转技能的节点。正如我所提到的,这些节点可以是全职业通用的,也可以是仅限子职业使用的。这些技能通常冷却时间较长,但威力极其强大。
Buff NodesBuff Nodes are temporary nodes that buffs certain things. I.e.(in example) you can get boss damage and lots of other stuff. One trick with this is that you can disenchant these buff nodes right before they expire. Giving you some Node Shards in return without losing anything. [No Image] How to get Node Stones?Node Stone are obtainable in various ways: Weeklies Monster drops EVENTS What is the "Perfect Trio" Node?The "Perfect Trio" Node is 3 SKILL BOOST nodes combined into one Node Slot, that you mainly use. This varies per class, some need more than just 1 pair of 3 and some just need 1 pair of 3 Skill Boost Node. You usually have 2 types of "Perfect Trio" Nodes; 1 being for bossing and the other for mobbing. It's best to join a Discord for your main class. They usually have all the answer to your class. All Class Trio Nodes[thedigitalcrowns.com] What should you level first?Generally for EVERY class you would want to MAX out your "Perfect Trio" Node. This is essential to every class as it will boost your damage by a high amount. After that it depends on what you want to do. Do you want to grind and reach a higher level? Go for your newly obtained 5th job skills, DHS(Decent Holy Symbol), Erda Shower(this is a stationary summon that deals damage, which helps you train) etc. QoL updateYou now have 30 slots instead of the usual 25 slots, meaning you can add more nodes. Additionally everyone now also has access to a new common node skill called: Decent Holy Fountain(Bishop skill). This heals you and your party members each time you press up. Good for bossing. Alongside this Decent Speed infusion and Decent Advanced Blessing have now become passive skills alongside Maple Warrior(not a 5th job skill but including it regardless). Which means more slots on the Pet Auto Buff. 6th job & Sol Erda fix formatting and add additional information Requirement: Lv. 260 and above (Zero characters must have completed up to Chapter 2). Character must have completed the ‘[Convergence] True Form’ quest, ‘5th Job: Record of Power’ quest, and 5th Job Advancement. 6th Job Advancement can be started by accepting the ‘[6th Job] Merged Dimension’ quest within the lightbulb notifier on the left side of the screen. Reminder: Your character must meet the following requirements to start the 6th Job Advancement: - Lv. 260 and above - Completed the ‘[Convergence] True Form’ and ‘5th Job: Record of Power’ quests - Completed 5th Job Advancement As you progress through the quests, you’ll receive the following quest items. You must activate the stones and defeat monsters near your level (20 levels below and 20 levels above) to fill each of them with EXP. Once you complete each quest, you will receive EXP as a reward. - My Arcane Stone - Vanishing Journey Stone - Chu Chu Island Stone - Lachelein Stone - Arcana Stone - Morass Stone - Esfera Stone [more information coming soon] Hexa Matrix Hexa Skills Hexa Skill Nodes consist of the following: - Skill Node: New Origin skill will be given once activated - Mastery Node: 4th Job or lower skill will either be enhanced or replaced once activated - Boost Node: 5th Job skill will be enhanced once activated - Common Node: New skill that is shared between characters of the same class will be given once activated. Common Nodes will be available at a later date, so stay tuned! Hexa Stats Hexa Stats are stats that can be obtained and enhanced through Hexa Stat Nodes. Hexa Stats consist of the following stats: - Critical Damage - Boss Damage - Ignore Defense - Damage - Attack Power & Magic ATT - STR/DEX/INT/LUK (MAIN STAT) You can set one Main Stat with a higher value and two Additional Stats with a lower value per each Hexa Stat Node. - You can set one type of stat once within all Hexa Stat Nodes - Ex: Boss Damage stat can only be set as a Main Stat for one of the six Hexa Stat Nodes - You can set up to two duplicate types of stats as Additional Stats within all Hexa Stat Nodes - Ex: Critical Damage stat can be set as one of the two Additional Stats on Stat Node #1 and Stat Node #2 - You are unable to equip the same type of stats within the same Stat Node - Ex: If the Main Stat is set as DEF Ignore, the two Additional Stats have to be set among the five other stats Hexa Skills and Hexa Stats can be activated or enhanced by using enhancement materials: Sol Erda and Sol Erda Fragment. Sol Erda Sol Erda is used in the following ways: - Activate and enhance Hexa Skills - Activate Hexa Stats Sol Erda can be obtained by earning Sol Erda Energy after completing the 6th Job Advancement. You can earn Sol Erda Energy by the following methods: - Completing daily quests - Defeating monsters in Sacred Powered Grandis areas - Defeating the following bosses: - Lotus (Hard) - Damien (Hard) - Lucid (Hard) - Will (Hard) - Verus Hilla (Normal, Hard) - Guardian Angel Slime (Chaos) - Gloom (Chaos) - Darknell (Hard) - Black Mage (Hard, Extreme) - Chosen Seren (Normal, Hard, Extreme) - Kalos the Guardian (Chaos) - Kaling (Normal) You get 1 Sol Erda (untradeable) when you collect 1,000 Sol Erda Energy. Each character can have up to max 20 Sol Erda. If the character has 20 Sol Erda in their possession already, Sol Erda Energy will no longer drop for that character. Sol Erda Fragment - Sol Erda Fragment is used in the following ways: - Activate and enhance Hexa Skills - Activate and enhance Hexa Stats - Sol Erda Fragment can be obtained after completing the 6th Job Advancement. - You can earn Sol Erda Fragment by the following methods: - Completing daily quests - Defeating monsters in Sacred Powered Grandis area - Sol Erda Fragment is tradeable within account in Aurora, Bera, Elysium, Luna, and Scania worlds. It is untradeable in Reboot worlds. For characters that completed 6th Job Advancement, you will the following sources to earn Sol Erda Energy and Sol Erda Fragments: Daily Quest - You will be asked to defeat 3,000 monsters near your level (20 levels below and 20 levels above) in the Grandis area to complete the daily quest. Daily quests can be completed per character. - Upon completing the daily quest, you can receive the following Daily Quest Rewards: - Sol Erda Energy (x600): Untradeable, 7-day duration. (This is a use item, if you use it you will store it in your gauge, in which you can hold 20 max(Sol Erda). This is NOT the "Sol Erda Fragment". Those stack within your "ETC" tab. Which you can farm infinitely. - Sol Erda Fragment (x12): Tradeable within account, Permanent. (Item is untradeable in Reboot worlds.) - Sol Erda Fragments are given only once a day per world. After claiming the Sol Erda Fragment for the day, additional characters that complete the daily quest will only receive Sol Erda Energy. 6th Job Skills To learn more about all the new 6th Job Skills, you can refer to the v246 Patch Notes here[www.nexon.com]! 260 DungeonsHigh Mountain & Angler Company(soon to be released) are lv. 260/265+ dungeons where you can get a huge amount of EXP, Sol Erda Fragments & Sol Erda Energy. Which is crucial for account progression as you don't get much Sol Edra Fragments. High Mountain
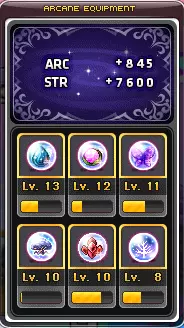
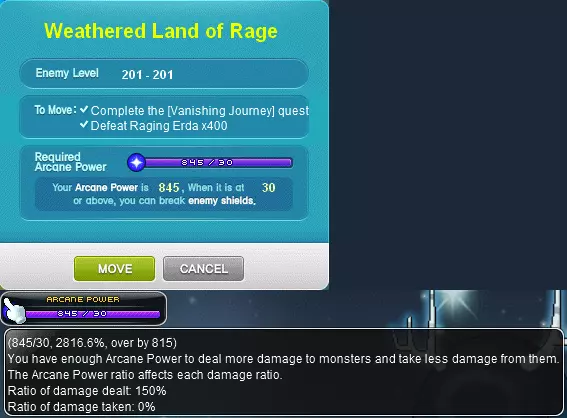
制作人员:Duky 符号 随着五转的开放,出现了一个全新的区域——神秘之河。随之而来的还有新的BOSS、装备、剧情,以及神秘符号的引入。完成VJ剧情后,你将获得第一个神秘符号。这些符号是进一步推进剧情和探索区域所必需的。没有它们,你将无法对这些区域的怪物造成伤害。原因是这些区域有特定的符号要求,就像某些需要特定SF值的区域一样。这一点稍后会详细说明。 五转之后,过渡到六转时,你将解锁“格兰蒂斯大陆”。它与神秘之河类似。 作为神秘之河的对应物,格兰蒂斯大陆的“神秘符号”被称为“神圣符号”。哪些与神秘符号完全相同且作用一致。因此,我现在只讲解神秘符号。 什么是神秘符号?神秘符号是可装备的【球体】,能为你提供额外属性。你会根据自身职业自动获得属性加成,且仅提升你的主属性。这些球体有等级之分,等级越高,获得的属性越多。神秘之河的每个区域都有各自对应的神秘符号,总共有6个符号。
为什么需要神秘符号?正如我上面提到的,你需要这些符号才能在游戏中进一步推进。它们不仅能为你提供免费的主属性,让你变得更强。根据你拥有的符号数量超过该区域所需数量的多少,你还会获得更多伤害加成。例如:如果某个区域需要100个神秘符号,而你拥有250个,那么你对这些怪物造成的伤害会增加150%,这会让你更容易、更快地击杀它们,并获得更高的每分钟经验值。
如何提升神秘符号等级?既然已经解释了它们的作用,那么提升等级也确实需要付出代价。要提升这些符号等级,你需要完成“每日”和“每周”任务。这些神秘区域是随着五转职业一同推出的。完成任务后,你会获得神秘符号的重复道具,之后可以将它们进行合并。当所有符号合并完毕并达到升级所需的条件(即需要合并特定数量的符号)后,你可以通过消耗金币来提升它们的等级。符号等级越高,升级所需的金币就越多。这些符号的最高等级为20级,总共有6种符号。

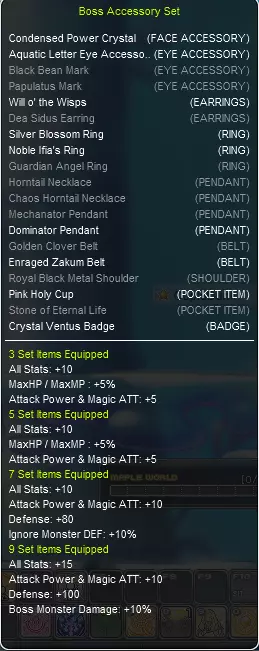
How to get Arcane Symbols?As I have stated in the aforementioned section you can get these Arcane Symbols by doing either: Dalies Weeklies Killing MOBS in their respective area's(Extremely rare chance to drop) Getting them from EVENTS Sacred SymbolsThe same process goes for Sacred Symbols(SAC Force). But this time SAC Force gives even more stats and cost even more to level up. Dailies & weeklies What are dailies? Dailies are things you do daily in Maplestory, such as: Bossing Symbols Quests Monster Park Maple Tour Ursus What are weeklies? Weeklies are things you do weekly in Maplestory, such as: Hard Bossing Symbols PQ Dojo Guild Contents Dark Tree (AbsoLab Coins) Haven (AbsoLab Coins) Why are "dailies/weeklies" so important? Dailies/weeklies are important because they are easy(for the most part) and rewarding. In order for you to get stronger you have to do this at the very minimum. If you don't have time to play this game and still want to get stronger, this is the way. By doing this you gain EXP & Mesos. This adds up as you will be doing these daily/weekly. If you keep doing this you will eventually be really strong. Arcane RiverThere are 6 daily Arcane River quests that you can do to get Arcane Symbols of their respective area. To increase your Arcane power. The Arcane River Symbols consists of: Vanishing Journey (lv. 200) Chu Chu Island (lv. 210) Lachelein (lv. 220) Arcana (lv. 225) Moreass (lv. 230) Esfera (lv. 235) Each area has their own "Party Quest", which you can do in addition to the normal quests. These do not only give Symbols but EXP as well. In the same order as the top list: Erda Spectrum (lv. 200) Hungry Muto (lv. 210) Dream Defender (lv. 220) Spirit Savior (lv. 225) Ranheim Defense (lv. 230) Esfera Gaurdian (lv. 235) GrandisThere are 6 daily Grandis quests that you can do to get Sacred Symbols of their respective area. To increase your SAC power. The Grandis Symbols consists of: Cernium (lv. 260) Hotel Arcus (lv. 265) Odium (lv. 270) Shangri-La (lv. 275) Arteria (lv. 280) Carcion (lv. 285) Grandis DungeonsGrandis Weekly to get EXP, Sol Erda fragments & Sol Erda Energy. The Grandis dungeons consists of: High Mountain (lv. 260) Angler Company (lv. 265) Monster ParkMonster Park is unlocked at lv. 105+. Each day has a different gift. For more info go to FAQ#2 MP is really usefull on the later stages of the game. Free EXP for 2min work at most. There are in total 4 doors/Dungeons: First door - Beginner Dungeon: lv. 105 - 139 Second door - Intermediate Dungeon: lv. 140 - 179 Third door - : lv. 179 - 259 Fourth door - Extreme Dungeon: lv. 260+ Each day has a different gift: Monday: Creation Box Tuesday: Enchament Box Wednesday: Trait Box Thursday: Honor Box Friday: Gold Box Saturday: Festive Box Sunday: Growth Box Maple TourMT is unlocked at lv. 105+. Each day you can accumulate some money. After 1 week exactly(so after 7 days) you can claim your money. For more info go to FAQ#2 MP is really usefull on the early stages of the game. Free money for 2min work at most. Thre are 5 levels in MT: Commerci - San Commeric Outskirts Studio: Level 160-169 Commerci - Sospetto Forest Studio: Level 170-179 Zipangu - Midnight Pine Forest Studio: Level 180-189 Zipangu - Showa Town Studio: Level 190-199 Masteria - Krakian Jungle Studio: Level 200+ UrsusUrsus is daily and at a certain time it's 2x mesos. Meaning you will get the double amount of what you regularly would get. So do this at those times. For more info go to FAQ#2. (I can't tell you the exacy time because I do not live in NA, so you will have to figure this out on your own sorry.) Dark Tree + HavenDark Tree & Haven have 5 quests each. You need to do this in order to get AbsoLab gear. For more info look at Gear Progression. DojoDojo is a weekly ranking system that allows you to see how strong you are. Dojo ranks you with the same class so you can compare to other people of the same class. Players of level 105+ can participate. You can access this content by talking to the Dimensional Mirror found in most towns. Once you enter the dojo there's an NPC called So Gong who you can talk to to enter the dojo rankings. There is no EXP penalty for dying, but your attempt will be terminated. There are a total of 80 stages. You have a 15 minute time limit to clear as many stages as you can. Based on your best record for the week, you can get rewards. Guild ContentsThere are 2 guild contents you can do in order to boost your Guild level. You gain GP(guild point) by doing this. The 2 Guild Contents are: Culvert Flag Race Culvert Culvert is a weekly boss you can do for you guild. Just like Dojo you have certain stages to the boss you can beat. The more you beat the boss the higher you score is. Your score is a contribution towards the guild. You can level a guild doing this. Flag Race Flag Race is a race minigame that you can play to achieve the same as Culvert. This and Culvert contribution score stack. So do them both to gain more Guild Points for the guild. This guide is a bit outdated, but it'll suffice. In the future(kms update) some of these dailies will become weeklies. Bossing When it comes to bossing there are certain things you need to know. TBA YouTube GuideWatch these to understand the mechanics of each boss and get usefull tips. Make sure to read the comments aswell for additional info, since they have usefull tips! Bossing MulesTBA Gear progression YOUTUBE VIDEO DOWN BELOW Everything up until 150 doesn't really matter, with a few exceptions. But I'll go over that as we go. Just wear gear for each appropriate level up until you reach 150. After that it's all about min/maxing. From 150 onward you'll have reached "Late Game". You should have already done the Totem Dungeon grind. Which nets you 3 free totems that you will be having untill a new event comes which gives better totems. Untill then you are stuck with those. Note; Pensalir gear(lv. 140) will just do fine if you can't get lv. 150+ gear. Pensalir gear will get you really far till even lv. 200+. This set is dropped by monsters that are lv. 130+. ExceptionsThere are some exceptions for some gears. Typically for mules. As I mentioned lv. 140 gear is generally really good for content even beyond lv. 200. Other gears that are good to know, especially for bossing is the lv. 120 Necromancer set dropped from the Boss Hilla. As this gives boss damage on set effect. Typically good for boss mules. AccessoriesGetting accessories. While doing bosses you can get various accessories. You will want to do (C)Zakum, (Chaos)Horn Tail & Von Leon. (C)Zakum will give you eye & face accessories, (belt). (Chaos)Horn Tail will give you pendant, earring & ring. And lastly Von Leon will give you ring, earring & pendant. Which WILL NOT count towards the "boss set" item. Von Leon has it's own set. BUT If you gather 10 Von Leon Accessories which include the aforementioned accesories(ring, earrings & pendant) you can combine them to make 1 super ring called; "Noble Ifra's Ring"(You will need to have completed the whole Von Leon questline in order to be able to do this). This WILL count towards the "boss set". Other accessories that you'll want to get later one are from; Arkarium, Pink Bean, Hilla & Magnus. Arkarium will give you Mechanator/Dominator pendant. Pink Bean will give you Pink Bean mark & holy cup(pocket slot). Hilla will give you, (other than the Necromancer set), A free PET(that can loot items for you, very low chance in normal(Hard version which gaurantees the drop)), earrings & stone of eternal life(pocket slot). Magnus will give you a badge, royal black metal shoulder. PNO(Princess No) Gives you a "secondary" equip. This is a weekly boss, meaning it's a though boss which you can do each week. This boss is also really annoying. In order to get the secondary you will need to collect 15 tokens that the boss drops. Lastely you'll want to grind Gollux daily as you have to buy his accessories. What you want to aim for is Superiour Gollux accessories. After you defeat Gollux he will drop a few coins. He can additionally drop some gear ranging from cracked to superior(which is extremely rare). These are the main boss accessories drops you want to look out for:

如果你装备了所有这些装备,将获得提供额外属性的套装效果。这将是你在游戏后期前的主要装备。
混沌根源之渊(CRA)是你的第一套“后期游戏”装备,等级要求为150级。你需要击败根源之渊系列的混沌 Boss 来获取这套装备,包括混沌女皇、混沌皮埃尔、混沌凡·伯恩以及最后的混沌贝伦。击败女皇可获得下装,皮埃尔掉落上衣,凡·伯恩掉落帽子,贝伦则掉落武器。混沌根源之渊装备不包含手套、鞋子、肩膀和披风。其中上衣和下装将作为你的后期装备,直到265级以上(当你开始挑战某个终极 Boss 时)才需要更换。 这些 Boss 难度较高,尤其是在你刚起步的时候。但如果你在普通世界游玩,那么你很幸运,因为可以在拍卖行(AH)购买这些装备,通常价格不会太高。装备价格会根据你所玩的职业而上涨或下跌。由于战士是最常用的职业,他们的装备也最贵。如果你在【Reboot】服务器,你应该寻找自强队伍,或者如果有人愿意带你。 【混沌扎昆】和【高阶希拉】会掉落150级装备,你可以用来过渡。混沌扎昆掉落披风,而高阶希拉掉落手套、鞋子和肩膀。不过只有在你准备获取【埃苏莱布斯】装备时才需要考虑这些。 你现在的装备大致应该是这样的:
AbsoLab是你的下一个成长阶段。你可以通过完成“周常任务”来获取该装备。周常任务是每周可完成的任务,从200级开始解锁。你可以前往【HAVEN】或【DARK TREE】接取这些任务。HAVEN会提供“核心”,而DT会提供“石头”,你需要每周收集这些物品。收集到核心/石头后,你还需要另一种物品——通过击败【Lotus】(HAVEN的“核心”)或【Damien】(DT的“石头”)获得的BOSS核心/石头。制作1个AbsoLab硬币需要20个核心/石头以及对应的BOSS核心/石头。制作装备需要大量的AbsoLab硬币,武器需要4个硬币,防具需要2个硬币。更多说明可前往上述地图与NPC对话了解。 通常情况下,你会希望保留CRA的上衣和下装。因为上衣和下装比整体装备更好。上衣和下装能提供比整体装备多得多的属性。但除此之外的其他装备都将更换为埃苏莱布斯装备。与克雷塞尔装备不同,埃苏莱布斯装备确实包含手套、鞋子、肩膀和披风。所以你会使用这些装备。 这些核心/石头应该是这样的。较小的是每周任务奖励,较大的是BOSS掉落物。
刷完【埃苏莱布斯】后,你的装备应该大致是这样的:

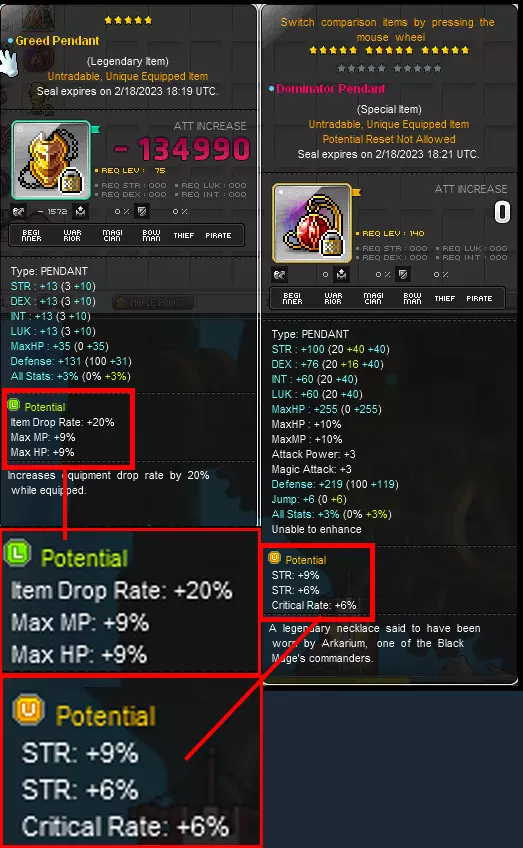
DOM吊坠和副手可以替换为CHT吊坠和冰冻副手。如果你还没有创建角色,也可以在大多数城镇的副手商人处购买副手。 装备缺口/升级完成后,通常你会获得一些活动戒指。活动戒指非常强力,因此建议装备它们来替代“BOSS套装”戒指(银花戒指/诺巴伊芙拉戒指)。建议保留多余的戒指,因为你可以将它们转化为掉率/金币装备(掉率/获得金币)。 此外,你还需要一个“心脏”和一个“机器人”。通常活动会提供这些道具。部分心脏的属性优于其他心脏,而部分机器人则具有不同的功能。有些内置商店,有些内置增益冻结器。通常心形图标代表免费属性提升。现在它看起来应该是这样的:

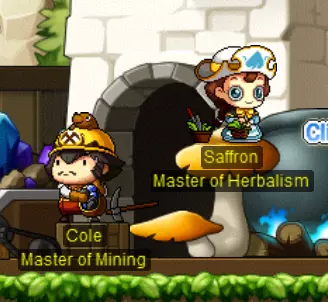
NOTE; THAT THE HEART WILL ONLY WORK WHEN YOU HAVE THE SAME OR HIGHER RANK ANDROID. MEANING A RANK 5 HEART WILL NOT WORK WITH A RANK 4 ANDROID. ONLY A RANK 5 OR HIGHER ANDROID CAN BE COMPATIBLE. IF YOU HAVE AN INCOMPATIBLE HEART AND ANDROID YOU WILL NOT RECEIVE THE STATS OF THE HEART. Advanced gear progression Arcane UmbraOnce you have reached lv. 260, you can start grinding for your Arcane gear. You will now want to run Lucid/Will(LuWill for short) parties. Just like AbsoLab you will need to kill Lucid & Will to get the Boss "tokens". Except this time Droplets are farmed a different way instead of weeklies. There are no weeklies for Droplets, therefore Droplets are much harder to get. You can get Droplets by defeating Lucid/Will or by killing MOBS after Lachline region. You can also buy them from other players in the AH. In Reboot can buy these at merchants after Lachline region, coming in at 50 mill a Droplet or alternatively from Event Shops. Alternatively you can hope for some Arcane Boxes drops from HLuWill. These are hard to come by so if it is your main I would recommend buying your first gear off the NPC shop. And use these as backups for when you want to push past 17*. MORE TBAdawn set pitched ethernals GolluxHellux is the hardest difficulty which you can do to get superior Gollux items. The only 2 obtainable droppable items are the Belt and the Earrings. How do you get the Ring and the Pendant? The Superior Ring and Pendant are able to be bought at for 700 Gollux coins each. Both the reinforced and the superior rings are BiS(in REBOOT, not so much in regular sever). Try to hold off on buying the Belt and the Earrings as they have a chance to drop. These drops are low chance so it might be difficult to get. Your priority should be on buying the Ring and the Pendants since they have NO chance of dropping. If you have enough coins let after that(1400 coins for both Ring and Pendant) then you can get the Earring/Belt. But even then I would rather buy Reinforced Ring and Pendant. The Belt alone has a base MATT + ATT of +35. Which is absolutely insane. The reason as to why I say Reinforced pendant as well is because: you get the additional +2 set effect but not only that you can never have enough rings/pendants/accessories/earrings. Why? You'll find out in the next headline. Mesos obtainedMesos gear allows you to obtain more mesos while you grind. So it's a win/win. If you would grind regardless why not make some mesos while you're at it. Why is "mesos gear" so important? After reaching late to end game you will want to min max your gear. But to do that it'll cost you a pretty penny. This is where mesos gear comes in. How to get "meso gear"? Through potentials. "Mesos obtained +20%" is a legendary potential line. Meaning you can only get it in the "legendary" tier. The same goes for "Item drop rate +20%". +20% is the only % you can get for both of them. So no more, no less. But you can get 2 lines of those 20% on one equipment. As they do stack with each other, regardless on what equipment it is. Which gear can obtain "mesos obtained +20%" potential? Rings Pendants Face accessories Eye accessories EarringsLet's say for example that you have 1 line of mesos obtained on each equipment. That'll be +100% mesos obtained. What else can give mesos obtained aside from gear? Besides equipment there is: Legion's Wealth coupons Wealth Acquisition Potion(WAP for short) Inner Ability(IA for short) Phantom legion card Monster Life(for reg server) (REBOOT get free 500% base mesos obtained)Legion's Wealth coupons gives +50% WAP gives you 20% IA gives you up to +20% Additionally Shadower's have a passive that nets them another +20%. These are all stackable. Legion is additive, wealth is multiplicative. Lastly I would HIGHLY recommend to cube EVENT RINGS for mesos obtained. As these rings fully built up have +40 all stats and +25 MATT/ATT. The reason why I say this is because to reach +40 all stat on a starforce-able ring you will need to have at least 15 stars on it. Which will cost a lot of mesos. And to add because it has "mesos obtained +20%" line on it, it takes up a spot of main stat % line. Meaning you will lose out on some damage. Drop rateWhy is "drop gear" so important? After reaching late game you will fight the harder weekly bosses(From Lucid up to Seren, including Hard Lomien). These weekly bosses drop their boss set. Which is much better than the old boss set. This new boss set is called pitched. But these are extremely hard to get due to the chance of them dropping is incredibly low. This is where drop gear comes in. How to get "drop gear"? Through potentials. "Item drop rate +20%" is a legendary potential line. Meaning you can only get it in the "legendary" tier. The same goes for "Mesos obtained +20%". +20% is the only % you can get for both of them. So no more, no less. But you can get 2 lines of those 20% on one equipment. As they do stack with each other, regardless on what equipment it is. Which gear can obtain "Item drop rate +20%" potential? Rings Pendants Face accessories Eye accessories EarringsLet's say for example that you have 1 line of item drop rate on each equipment. That'll be +100% item drop rate. What else can give item drop rate aside from gear? Besides equipment there is: Legion's Luck coupons Wealth Acquisition Potion(WAP for short) Inner Ability(IA for short) Legion Artifact (REBOOT get free 500% base mesos obtained)Legion's Wealth coupons gives +50% WAP gives you 20% IA gives you up to +20% Drop rate can usually be put on fodder equipment that you don't use. The reason why is because most(not all) bosses now have chests that you need to break before getting the loot. That means you can take your time and switch to drop gear. This saves you from having to fight with the drop gear equipped. Making you lose some stats. Written Guide[docs.google.com] Credits: Uncapped Games Star Force & Spell Tracer Star ForcingGeneral rule of thumb, you usually do not want to Star Force without events. What is "Starforcing"? Starforcing is upgrading your equipment's stars. Most equips have a number of stars to them. The higher the equipment level requirement, the more stars it has, the more you can upgrade it. You upgrade them with mesos. Upgrading works with chance%, more on that later. So what does it do? With each upgrade(each star) you get a permanent stat boost for that equipment. The higher the upgrades(the more stars you get on an equipment) the stronger equipment gets and the more stats you gain from it. This also means it gets more expensive which each star. The max stars you can get on a single piece of equipment is 25★. However you will most likely never reach the max stars. I will go in to detail as to why later. Every 5★'s is a milestone. 0 - 5 > 5 - 10 > 10 - 15 > 15 - 20 > 20 - 22. You will never go higher than 22 as that is a net loss. With each star the % of increasing the star decreases. So from 0 - 1 it will always be 100% succession rate etc. From 0 - 15 stars: gets progressively more expensive and the % succession rate depletes. From 15 stars onward: a small chance to "boom"(destroy) your item gets introduced. On top of that, stars now drop on each failure(cannot go lower than the milestone(15 stars)). But to help you with the next +2★ you get a safegaurd. Safegaurd: allows you to remove the chance to "boom"(destroy) your item but doubles the cost of the upgrade. This will ONLY remove the chance to "boom"(destroy) and NOT help with regressing stars. What happens if I "boom" my equip? At 15★ and beyond, items have a chance of becoming destroyed upon failure and will leave behind a trace. Traces serve as the remnants of the destroyed equipment and will retain all of its stats and Star Force value up to 12★, but they cannot be equipped. To restore a trace, it must be transferred onto a new piece of the same equipment through the enhancement UI. [INSERT PICTURE HERE DO NOT FORGET] [ADDITIONAL INFORMATION HERE] SPELL TRACER TBA EventsStarforcingChance Time When an equipment's stars decrease twice in a row, chance time activates, which guarantees the next enhancement attempt to succeed. The guaranteed attempt will only apply to the item that is currently being enhanced. When chance time triggers when upgrading from 15★ → 16★ or 16★ → 17★, safeguard is disabled as it would provide no benefit "5/10/15" During certain Sunny Sundays, the success rate for upgrading from 5★ → 6★, 10★ → 11★, and 15★ → 16★ increases to 100%, colloquially referred to as "5/15/15". When upgrading from 15★ → 16★, safeguard is disabled as it would provide no benefit. (ONLY FOR 15★ → 16 SAFEGAURD ON 16★ → 17★). 30% off 30% off Star Forcing. As the name implies. Potential progression Potentials are usually for "late game" players but that doesn't mean you can't start now. Eventually there will be a point where you will need to min/max your gear and a part of that is your potential progression. Potentials are RNG based meaning they will be random. Cubing tips&tricksBefore running off to do this, read the note at the end. The cost of cubing a certain equipment scales with it's level. The lower the level is the less mesos you have to spend on it to cube it. For example the cost of cubing lv. 120 equips costs 10% of the cost of lv. 130+ equips, so cubing lv. 120 gear and using the transfer hammer to transfer it to lv. 130 gear can save a large amount of mesos when going for EPIC(9%) potential early on. Especially if you can get full sets each each 120>130>140(Pensalir) gear while grinding from lv. 110 to lv140. NOTE; AFTER EACH TRANSFER HAMMER YOU WILL LOSE 1*(STAR) OF STARFORCE AND ONLY EPIC POTENTIAL OR BELOW WILL BE TRANSFERED OVER TO THE NEW EQUIPMENT. Where to start?As above mentioned start with wherever you can and make your way up to Pensalir gear(lv. 140). Once you have gotten yourself a Pensalir set, do not cube yet. Reroll as many time as you can to find the perfect Flame Stat equipment. As both POT and FLAMES will be transfered with TH(transfer hammer). What to cube first?WSE in that order. What is WSE? WSE stands for Weapon, Secondary & Emblem What should you aim for? Main stat ATT Boss DMG Crit DMG IED CDhat Flame Progression TBA Familiar progress Like I stated in FAQ #3, familiars provide extra bonus stats while having them out. With familiars you will be min/maxing your end game with a little bump in some stats/survivability. More on the survivability part later. Ideally you'd want to focus familiars when you're lv. 230+. The reason why is that area's above lv. 230 drop familiar cards unlike area's like VJ(Vanishing Journey), Chu Chu etc. where MOBS don't drop familiar cards. Since you will be training in those areas when you are lv. 230 + it's best to farm up all the cards you can. There are 2 requirements you need to fulfil in order to rank them up. Level them up to lv. 5 Merge 100/150 of the same mobs together How does familiars work?Once you have obtained a familiar card you can use it(in the "USE" tab) and give them a name. The name is optional or you can give them their default name. You can always change this later. Where to find your familiars?After giving them a name they will dissapear, but to where? In order for you to access your familiars you will have to set up a keybinding for them. The keybinding is orange and is called; "Familiar". No surprise there. How to set up your familiar?Now that you have a keybinding for them press and open up the familiar tab. Once you're in there head over to: "Collection" and look for your familiar. Once you found them click on them and under the picture on the left there will be a box with a GIANT "?". Click on that to reveal the potential/bonus stat they will provide. This cannot be changed unless you rank them up. If you do not like the potential/bonus stat you will have to find another familiar card. After that is done head over to the "Setup" tab and double click your familiar to place them in the slot. Make sure to press "SAVE". How to summon your familiar?In order to summon your familiar you have to setup another keybinding. Open up your "Skills" and head over to TAB "0". There you will find a skill called: "Summon Familiars". Set that up to a keybind and you'll be ready to summon your familiar. How to level familiars?You level familiars up by have them equipped and out battling alongside you while you train. The max level is lv. 5. So remember to summon them before grinding. How to merge familiars?In order to merge familiars you need a total of 100, 150 if it's an EPIC fam, of the same familiar cards. Head over to the "Collection" tab and to the "Fusion" sub-tab. MAKE SURE YOU SELECT THE CORRECT FAMILIAR YOU WANT TO MERGE. Once you have selected the CORRECT familiar go ahead and merge them all together by click the "Select All" button on top and press "Fuse". How to rank up familiars?In the same aforementioned tab you can click the button "Rank Up". Ths will only be clickable when you meet the above mentioned requirements. Badge progressionIn order to unlock more familiars slots(so you can use more familiars(up to 3)) you need to collect a set of familiars for each region to unlock badges. Some are long others are short. Some are easy some are hard. Each region has it's own level of monsters(from level 10 up to level 260). Having 1 badge unlocks your second familiar and you get your 3rd familiar once you unlocked 10 badges in total. Other benefits badges give: Badges give stats depending on which badge you have. Having a low level badge(so early game badge with weak monsters in it) will give you a low stat badge. Total RNGProgressing a familiar into something good is total RNG. In order to get good familiars you need to have them at least unique.(Refer to the familiar section above on how to level a familiar) Ardentmill progression How to start? As soon as you reach lv. 35 you can start your Ardentmill progression. You can accept the quest on the left side, grey lightbulb. After you have accepted the quest, go down and talk to two people at the far right called: "Cole - Master of Mining" & "Saffron - Master of Herbalism". Cole will unlock "Mining profession" and Saffron will unlock "Herbalism profession".
学会这些之后,你就可以开始采矿和挖掘草药了。 注意:我建议尽快开始。开始得越早,你收集到的矿石和草药就越多。你还将开始提升你的【采矿】和【草药学】专业等级。所有5个专业的等级上限为10级+2级(另外2级为【大师】和【专家】)。
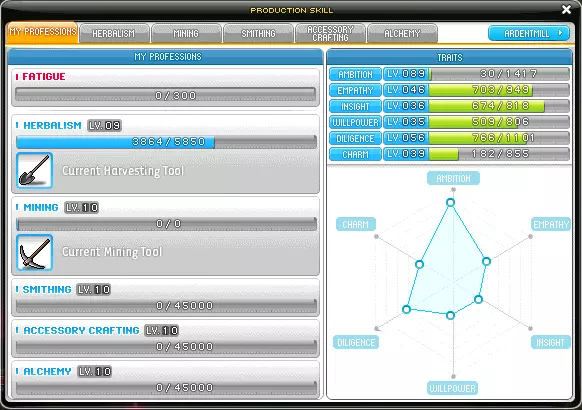
After you have the 2 main professions, you can now start either crafting or brewing. You have 3 professions to choose from. In regular servers you can only choose 1/3 but in Reboot you can choose them all 3/3. The reason being is that you can't trade in Reboot. Here are the 3 professions you can choose from: Smithing Accessory Crafting Alchemy HerbalismHerbalism is needed to craft ingredients for Alchemy. MiningMining is needed to craft ingredients for Smithing & Accessory Crafting. SmithingSmithing allows you to craft armor and weapons from various levels and classes. Smithing Tech Arrows are the best way to level your Smithing level. This only works up to levle 10. After that you will need to start making gear to level up to Meister. Accessory CraftingAccessory Crafting allows you to craft accessories from various levels and classes. AlchemyAlchemy allows you to brew various potions. Ranging from EXP pots to damage dealing pots to stat pots. Alchemy Tech You can easily level by making transformation potions. These do have a cooldown after each brew. This can be done up to Meister. FatigueAfter each craft/brew and/or mine/dig you get fatigue. Once you fill out the red fatigue bar to 300/300 you lose the ability to craft/brew for the day. You will need to wait for reset to be able to craft/brew again. Eventually you will reach level 10 and most crafting/brewing and/or mining/digging will cost no fatigue. Item ExtractionOnce you reach lv. 1-6 on any profession you will be able to extract items. You can extract higher level equipment the higher your profession level is. Once you reach lv. 6 you can extract any level of equipment. Once you extract an equipment you get crafting materials. This can only be done inside Ardentmill. Item FusionOnce you reach lv. 1-4 on any profession you will be able to fuse items. You can fuse higher level equipment the higher your profession level is. Once you reach lv. 4 you can fuse any level of equipment. You will need 2 of the same item in order to fuse. The reason why you'd wanna do this is to get better flames on an item, instead of throwing a rebirth flame on it. This can only be done inside Ardentmill. Recipe'sIn order to craft/brew certain items you will need to have the recipe for them. These can be obtained by monster drops. Some recipes are to be used within 1 day others are a one time use. For both of these if you want to craft more you will need to have more recipe's for them. Stats progression Each class has their own progression. As each class has different wants and needs for each different situation. You have 3 presets for each of the following, usually 1 for mobbing, the other for bossing and the third is fodder. Generally you'll want something along the lines of this: Inner AbilityFirst Line (Legendary) +1 Attack Speed 30% Boss Damage 30 (Magic)AttackSecond & Third Line (Unique) % Damage to monsters inflicted with Abnormal Status Item Drop Rate Meso Drop Rate <30 (Magic)Attack % Damage to normal monsters Buff skill duration % Critical Rate Hyper StatsHyperstats is a points based system. It is unlocked at lv. 140. Each subsequent level will net you points which you can invest into (bonus)stats. Each level up costs more points than the previous level. Max level is 15 (10 if you haven't reached lv. 200). This is different from the main stat level up you get after each character level from lv. 10 onward. (You unlock a new tab for this) In this order: Mobbing: Damage Normal Damage (+Damage against normal monsters) Attack Power & Magic ATT Optional/only do if have high critical rate Experience Obtained Arcane Force/Power Critical Rate (get around ~100% if can, not higher) Critical Damage (only after you've reached >95% rate)EXP is for grinding. Arcane Force is if you cannot 1 shot MOBS(monsters) in the area you are training at. (requirement lv. 200+) Lastly, the reason being is that you'll spend too much points on these if you don't have enough critical rate. Which can be invest into other (bonus)stats. Bossing: Damage Ignore Defense (also called IED(Ignore Enemy Defense)) Boss Damage Critical Rate (get around ~100% if can, not higher) Critical Damage (only after you've reached >95% rate) Attack Power & Magic ATT Your class's Main StatFor this is the critical rate is NOT optional. You will need 100% crit. rate and the crit. damage. Link SkillsYou can equip 12 Link Skills. Link skills are unlocked when a character reaches lv. 70. After which it can be transferred to another character. Each character has their own Link Skill. In total you'll have 13 Link Skills (including your own characters Link Skill). Mobbing: Mercedes Link Skill Aran Link Skill Evan Link Skill Hoyoung Link Skill Kanna Link Skill Demon Avenger Link Skill Lara Link Skill Khali Link Skill Bossing: Kinesis Link Skill Ark Link Skill Explorer Mage Link Skill Explorer Thief Link Skill Demon Avenger Link Skill Demon Slayer Link Skill Xenon Link Skill Kanna Link Skill Luminous Link Skill Lynn Link Skill Cadena Link Skill Angelic Buster Link Skill(Optional) Resistance Link Skill Phantom Link Skill Kain Link Skill Adele Link Skill (for party play) Explorer Warrior Link Skill MapleScouter MapleScouter is a tool to gauge how strong you and which bosses you can clear/attempt to clear. This is not a perfect metric to rely on but it will help you as it has a lot of features you can take advantage of. See the videos below for more information. Credits: Duky; https://www.youtube.com/@Duky Credits: Drew; https://www.youtube.com/watch?v=ArDiGSVDO9I&t=4s Resources: GMS Conversion Help Sheet for MapleScouter[docs.google.com] End game TBA FOMO What is FOMO?
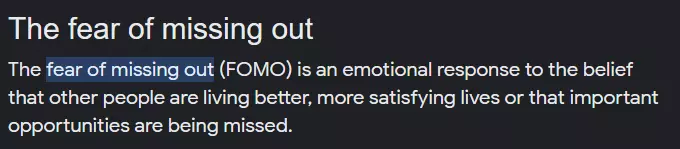
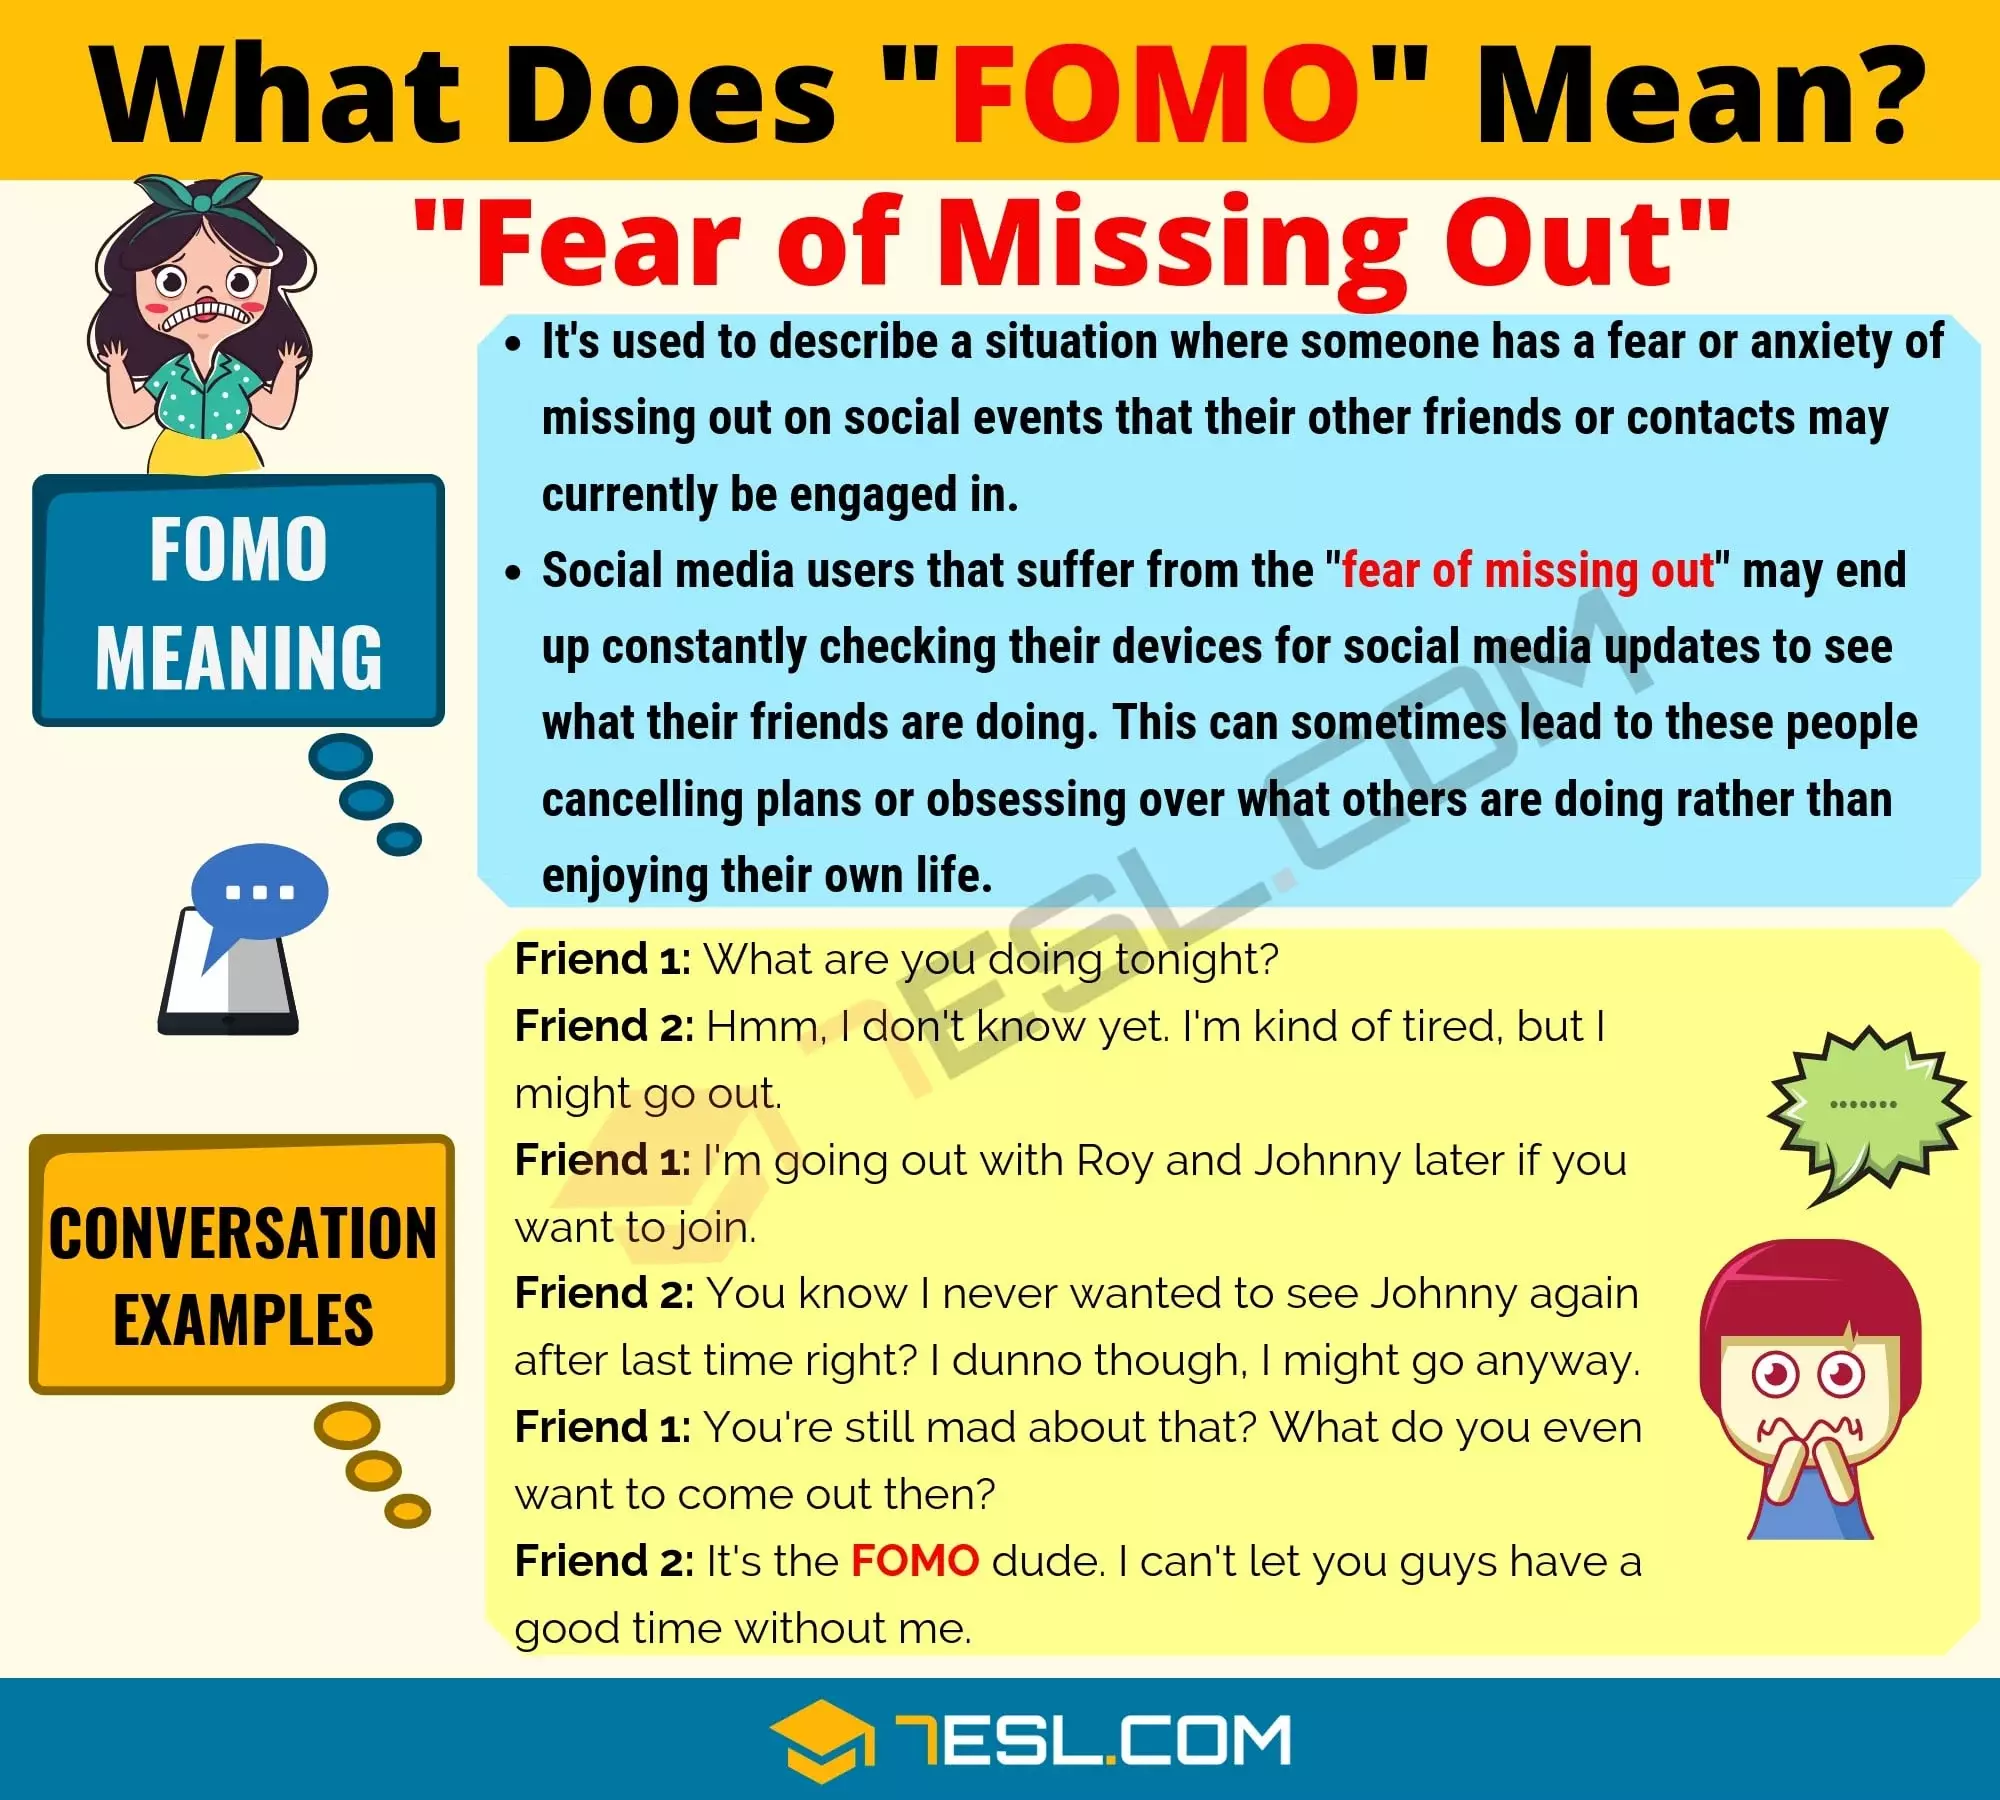
为什么游戏环境对玩家群体如此不友好且充满恶意?我现在说这些话可能像在重复播放录音,但我还是要一直强调。 游戏本该是带来乐趣的,《冒险岛》是一场马拉松,而非短跑冲刺。 这无关乎谁更强、谁更快,这是一段旅程。一点一点地进步,最终你会变得越来越强、越来越好。收获会慢慢但稳定地累积。 就像在现实生活中一样。永远不要拿自己和别人比较,贬低自己,更不要贬低他人。 活动 玩家在这款游戏中产生错失恐惧症(FOMO)的主要原因就是活动。 《冒险岛》的不同服务器会有“专属内容”。例如,国际服有高露洁(Gollux),而韩服则没有。 但这些只是服务器之间的差异而已。游戏中还有“传承”物品和“一生仅此一次”的物品。《冒险岛》经常举办活动,而这些物品很少会再次出现,这意味着你可能会错过某些物品。 这就是“错失恐惧症”(FOMO)的来源——害怕错过这些物品。 但你知道吗?未来总会有带有“一次性”物品的活动不断推出。错过了这次活动的物品没关系,下一个活动还会有其他“一次性”物品。 本质上,你其实从未真正错过什么。这些微小的增益对能否击败某个 Boss、完成某个活动或任务等没有任何影响。 你会失去一个可能很酷的物品吗?是的。但这值得你为此耗费心神或拼命肝吗?不,绝对不值得。 错失恐惧症是人们放弃这款游戏的首要原因。它会导致 burnout(倦怠),让游戏变得不那么有趣。这是第100万次提醒: 游戏的初衷是为了带来乐趣,《冒险岛》是一场马拉松,而非短跑冲刺。 所以无论你是输是赢,是错过还是没错过,都无关紧要。归根结底,这只是一款游戏。你退出游戏后,生活依旧继续,明天、后天,日子总会一天天过下去。没有理由在退出游戏时带着愤怒或沮丧的情绪。 当你真正享受其中时,《冒险岛》才是最有趣的,尤其是当你从容不迫地游玩时。 不要让错失恐惧症(FOMO)控制你。它就像一种瘟疫,会毁掉游戏、社交生活以及它所触及的一切。别让它发生在你身上。 首页 待定 技巧与窍门 一些提升游戏体验的技巧与窍门,助你获得更优质的整体体验。 聊天过滤:你可以清除聊天框中的所有垃圾信息/无关内容(如扭蛋相关信息等)。操作方法如下:
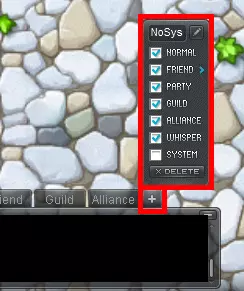
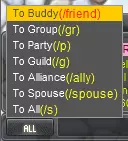
注意:当前聊天已开启过滤功能,会过滤系统更新信息(例如“你无法拾取更多物品”等)。若需重新查看这些信息,请将聊天模式切换为【全部】。 聊天指令 无需为“说”“队伍聊天”等功能设置单独按键,你可以使用聊天指令实现相同操作。 聊天指令通过按下【/】键触发。 指令(快捷键)= 说明 /say(/s) = 全体聊天 /party(/p) = 队伍聊天 /buddy(/b) = 好友聊天 /guild(/g) = 公会聊天 /alliance(/a) = 联盟聊天
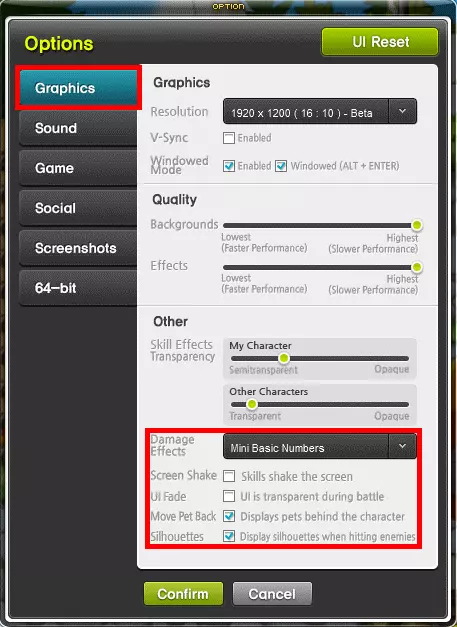
游戏设置 以下是一些可能改善你游戏体验的设置选项。 这些设置有助于提升能见度。你可以将技能透明度调整为任意数值,但在挑战首领时,我建议将其调低。即便是清小怪时,我也会调低透明度,否则画面会显得过于混乱。大多数情况下,我不需要看到其他玩家的技能特效,但我会保持显示,以便在某些情况下获取信息。
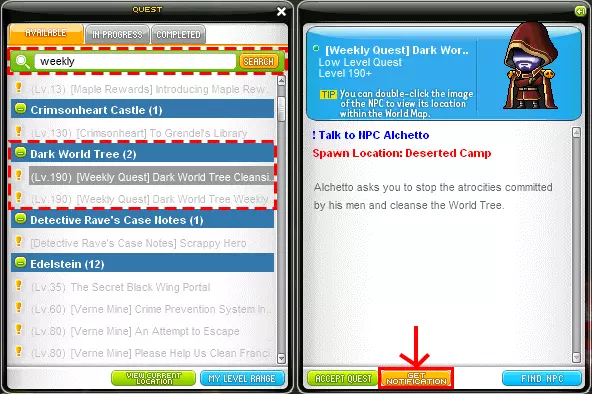
背包 若你想将一枚戒指与已装备的全部4枚戒指进行比较,可按下滚轮,在已装备的4枚戒指间滚动切换。 你也可以按住右键点击背包中的装备,查看该装备的套装效果,而非将其与已装备的物品进行比较。 点击金币旁的三条横线图标,可对背包内物品进行排序,共有3种排序选项: 【合并】= 将所有物品上移 【按类型排序】= 按物品类型排序 【锁定/解锁排序】= 按锁定状态排序 此外,点击排序按钮旁的箭头图标“[->]”可扩展背包视图,对于低分辨率屏幕,这会使背包占满整个屏幕。 装备 “装备”标签页中新增了一些便利性更新。装备标签 现在你可以隐藏你的勋章和称号。如果你觉得它们不好看,可以取消其显示。属性等效果将保持不变。 现金标签 现在你可以保存现金装备的预设,不过这个功能的运行方式有点奇怪。更有趣的是【默认武器姿势】功能。你现在可以更改握持武器的方式。我个人喜欢【枪械】姿势,尤其是如果你玩的是战士职业。你的剑现在会被角色的非惯用手握着,我觉得这样看起来很酷。 注意:你需要拥有NX武器才能使用此功能,如果没有NX武器则无法生效。 隐藏“每日/每周”任务 在任务日志的“可接”标签中,找到你想要开启或关闭通知的任务。此功能仅对尚未接取的任务生效。
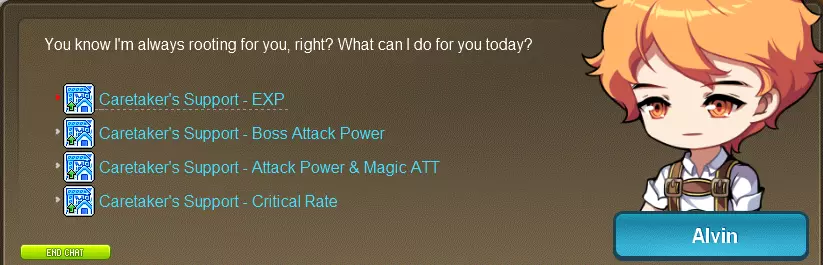
家园增益:解锁并完成家园前置任务后,你可以与【管家】对话以获得增益效果。
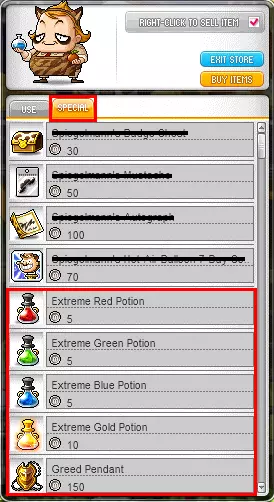
怪物公园MP中有一些实用物品,首先是商人出售的商品: 红色药水(30分钟内攻击力+30) 蓝色药水(30分钟内魔法攻击力+30) 绿色药水(30分钟内增加攻击速度,突破攻击速度上限) 黄色药水(30分钟内经验值+10%,可叠加) 贪婪吊坠(被动效果:20%掉率,可交易)

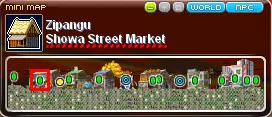
昭和镇有一些有用的东西。首先是一个商人,他出售: 苹果酒(武器攻击力+20,持续5分钟) 糖苹果(全属性+7,持续30分钟) 姜汁汽水(恢复75%的魔法值和生命值)

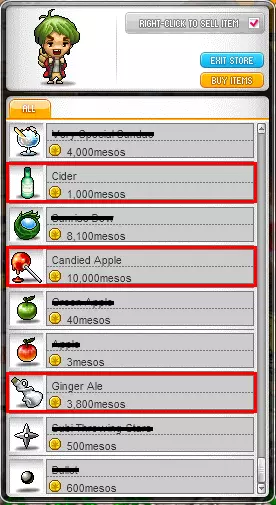
注意:苹果酒在背包中无法叠加,每购买1个苹果酒会占用1个背包格子。苹果酒和糖渍苹果在购买后有使用期限,意味着你只能在特定天数内使用它们。 蘑菇神社也有一些不错的【消耗品】。 忍者城堡有一些【锻造锤】装备。 天堂科技:当你达到199级时,只需对话即可免费提升到200级。方法如下:前往天堂,在左上角找到一个机器人,与其对话,你可以选择跳过所有对话。之后你将获得一次免费升级。【此方法现已失效】。 扎昆技巧+免费联盟/链接等级:当你达到100级时,可以获得约12级的免费等级。方法如下:首先找到一个【符文】来增加经验值,然后前往扎昆,并确保选择【普通扎昆】。优先集中攻击他的手臂,因为这是你获取所有经验值的地方。用符文击杀这些手臂后,你将获得大约12级的提升,从100级升到112级。 记住,当你击杀所有手臂后,可以退出到【世界选择】界面。现在每30分钟你可以再次尝试这个过程并重复刷级。 最终你会达到更高等级,升级将需要更多次尝试。你需要一直刷到140级,因为这将解锁【军团】的S级评价,并给你一个更大的放置区块。120级将解锁你的【链接技能】2级。 此外,一旦你拥有一些链接技能和不错的装备,并且你的等级达到...125-130级时,你可以前往【韩国民俗村】,从【兔子任务】一直做到【哥布林任务】,这些任务的等级范围是125级到150级。完成这些任务不仅能获得大量经验值,还能获得【梅斯】。 此外,你最多可以获得【彭萨尔装备】。你可以用做任务获得的梅斯进行【星力强化】和【转移锤】操作,从110级装备转移到120级,再到130级,最后到140级。击杀怪物以及完成任务后都会获得梅斯,如果你愿意,最终可以培养一个【BOSS小号】。 【彭萨尔套装】非常适合刷怪,它具有不错的套装效果,装备6件时可获得攻击力+魔法攻击力、对普通怪物伤害提升以及无视怪物防御力的加成。 如果你没有【克雷塞尔套装】或者无法获取,【死灵法师套装】是不错的打BOSS选择,该套装可从【希拉】处掉落。5件套效果总共为你提供15%的BOSS伤害。此外,该效果已不再生效。 注意:部分内容可能已过时,具体取决于你阅读本指南的时间。我会尽量保持本指南的更新。 ScardorScardor有许多实用的指南。如果你正在寻找某些内容,他很可能已经制作了相关指南。米哈尔) 5)恶魔/反抗者/ xenon 6) beast tamer 7) kinesis 8) sengoku 9) flora (illium/ark/adele) 10) anima (hoyoung) 11) zero kyowantscute通用冒险岛技巧 冒险岛指南播放列表 你想成为一个"职业"(过时) 2020-你想成为一个"职业" 五转技能 五转觉醒技能更新 觉醒你的冒险岛职业 职业对比 无资金职业对比 扔掉这个boss(ttt)-boss指南 待定 鸣谢/来源; 冒险岛维基-所有考虑因素 scardor: scardor的twitch scardor的youtube kyowantscute kyo的twitch kyo的youtube coppersan coppersans的twitch coppersans的youtube akkad3 akkad3的twitchAkkad3的油管频道 无限制游戏 无限制游戏的油管频道 模板 Twitch Youtube