换一换
换一换 


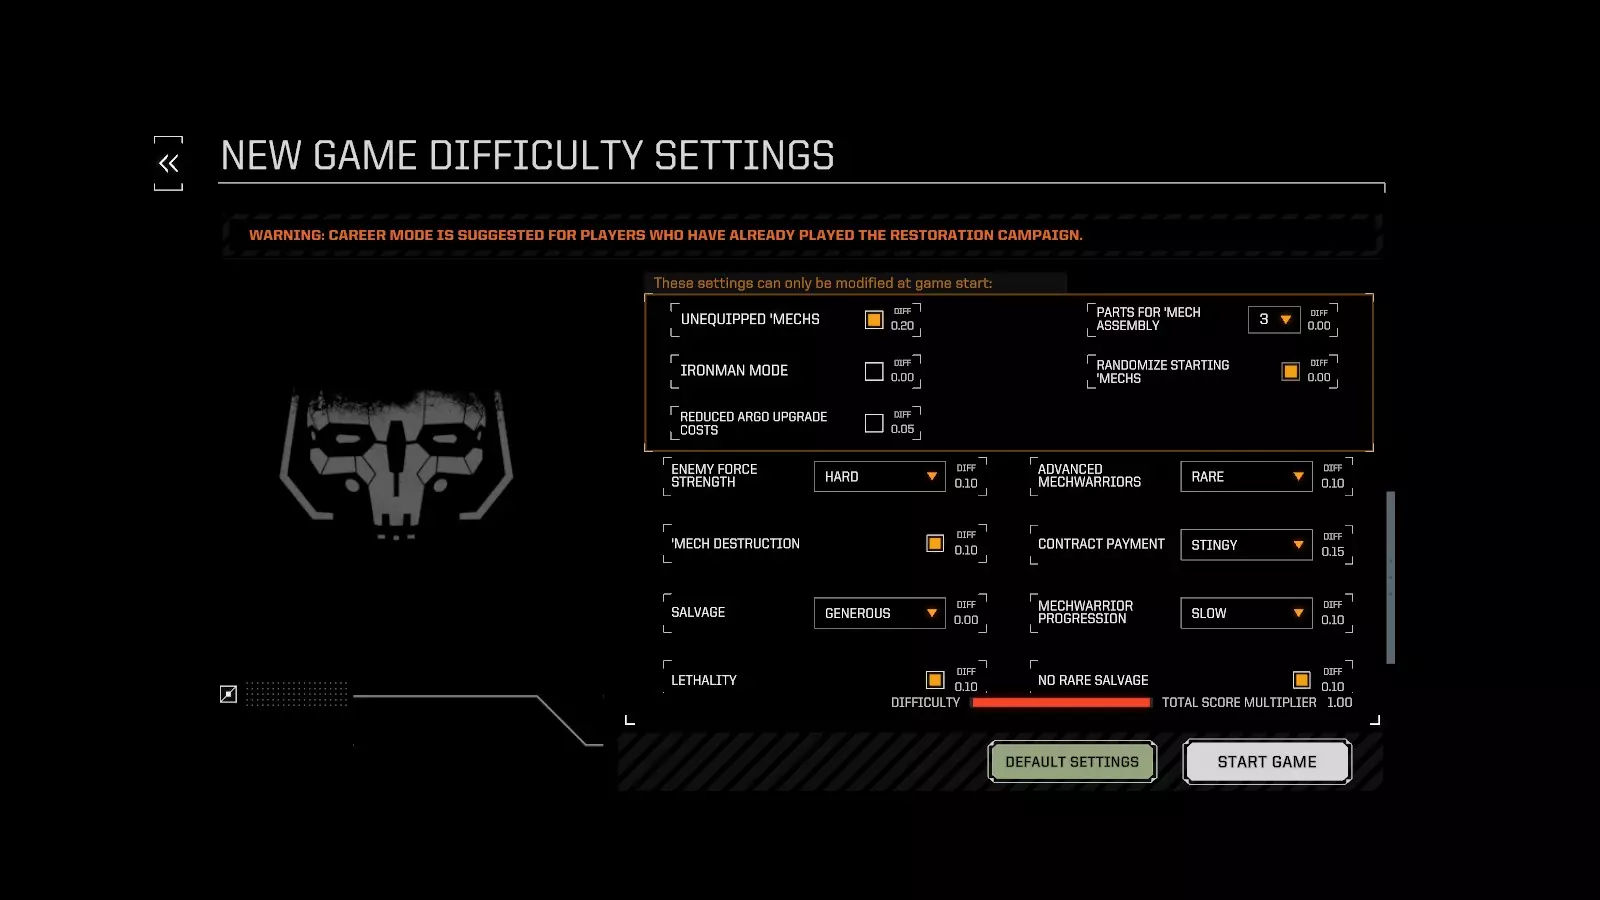
《暴战机甲兵》职业模式登顶进阶技巧(v1.9.1,新增DLC相关章节) 概要 在《暴战机甲兵》基础游戏(v1.9.1)中可以进行克伦斯基生涯。 游戏难度必须设置为最高。00倍乘数,包含以下必选要素:机甲组装3个部件、高敌方部队强度、普通或丰厚战利品、普通或缓慢的机甲战士进度。为最大化得分,请使用以下策略:将大部分合同奖励作为战利品获取,并尽可能多地击杀敌方飞行员,同时击落所有看到的手臂和侧躯干以减少非机甲类战利品。通过使用多余的C-Bills购买机甲部件、组装新机甲并将其卖回,实现资金循环。通过提升与两个敌对派系的声望,然后在战争中同时为双方效力,以最大化可获取的高价值合同数量。仅降落在 Jump点到星球距离较短的星系,并通过跳跃星系来积累访问次数。你的职业生涯目标应是达成以下基准:平均每7天访问一个新星系;平均每3天执行一份合同,或每15天在一个星系内执行5份合同;每份合同平均获得至少2,000,000 C-Bills(星际币)奖励;如果使用“慢速机甲战士”进度模式,保持平均任务难度大于3 skulls(骷髅头)。 简介:本指南介绍如何在生涯模式中达成Kerensky rating(克伦斯基评级),即获得至少760,000分(总分770,015分)。本指南面向已熟练掌握《暴战机甲兵》机制并至少完成过一次生涯模式的玩家。新玩家或不熟悉生涯模式机制的玩家可能会觉得本指南帮助不大,建议参考Steam上的其他指南或在讨论区寻找提示。以下策略均基于原版游戏开发,但同时适用于原版和DLC;文末新增了DLC相关调整的讨论部分。 游戏难度设置 开始新职业生涯时,在接触机甲之前,你需要先进行一系列决定,这些决定将影响游戏的走向,即游戏难度设置。你的难度设置必须产生1.00的总分倍率——允许的最大得分偏差仅为1.3%,因此倍率若为0.95或更低,将绝对无法达成Kerensky生涯。毕竟,如果能在大幅降低难度的情况下获得满分,那这个成就也太没意义了。在选择设置时,我发现以下几点至关重要: - 机甲组装设定为3部件。最大化 salvage 奖励,并将以此方式组装的机甲出售,能为你带来足够的 C-Bills(星际币),助你开启 Kerensky 生涯。我可以明确地说,增加每台机甲所需部件数量并选择 C-Bills 而非 salvage 的策略,在收入生成方面是无法跟上的。 - 敌人部队强度设为困难。敌人越多,意味着 salvage 越多。 - salvage 数量设为普通或丰厚。想必你现在已经明白原因了。 - 机甲战士升级速度设为普通或缓慢。要获得机甲战士经验的所有点数,你的兵营中需要相当于24名满级经验飞行员,但在生涯模式中,若选择极慢升级速度,时间上是不够的。缓慢升级速度下会是一场漫长的苦战,但仍可完成。好消息是,其余设置均可调整——只要你愿意在其他方面做出牺牲以保持1.00的倍率,那么你可以将任意一项设置调至最简单,仍有机会名列前茅。 通常来说,这意味着你需要选择保留铁人模式或无装备机甲模式中的一个。关闭无装备机甲模式能让你更快起步,并且获得更多C-Bills,因为你组装的每台机甲都会附带一些可出售的组件。关闭铁人模式则意味着随机数生成器不会破坏你的游戏进程,考虑到完成一个生涯模式需要花费大量时间,这一点非常重要。我曾成功以铁人模式开启、无装备机甲模式关闭的组合完成克伦斯基挑战,反之亦然,所以这完全取决于个人偏好。当然,如果你愿意的话,也可以同时开启这两项并调整其他设置。 我最初玩克伦斯基(Kerensky)时的难度设置:
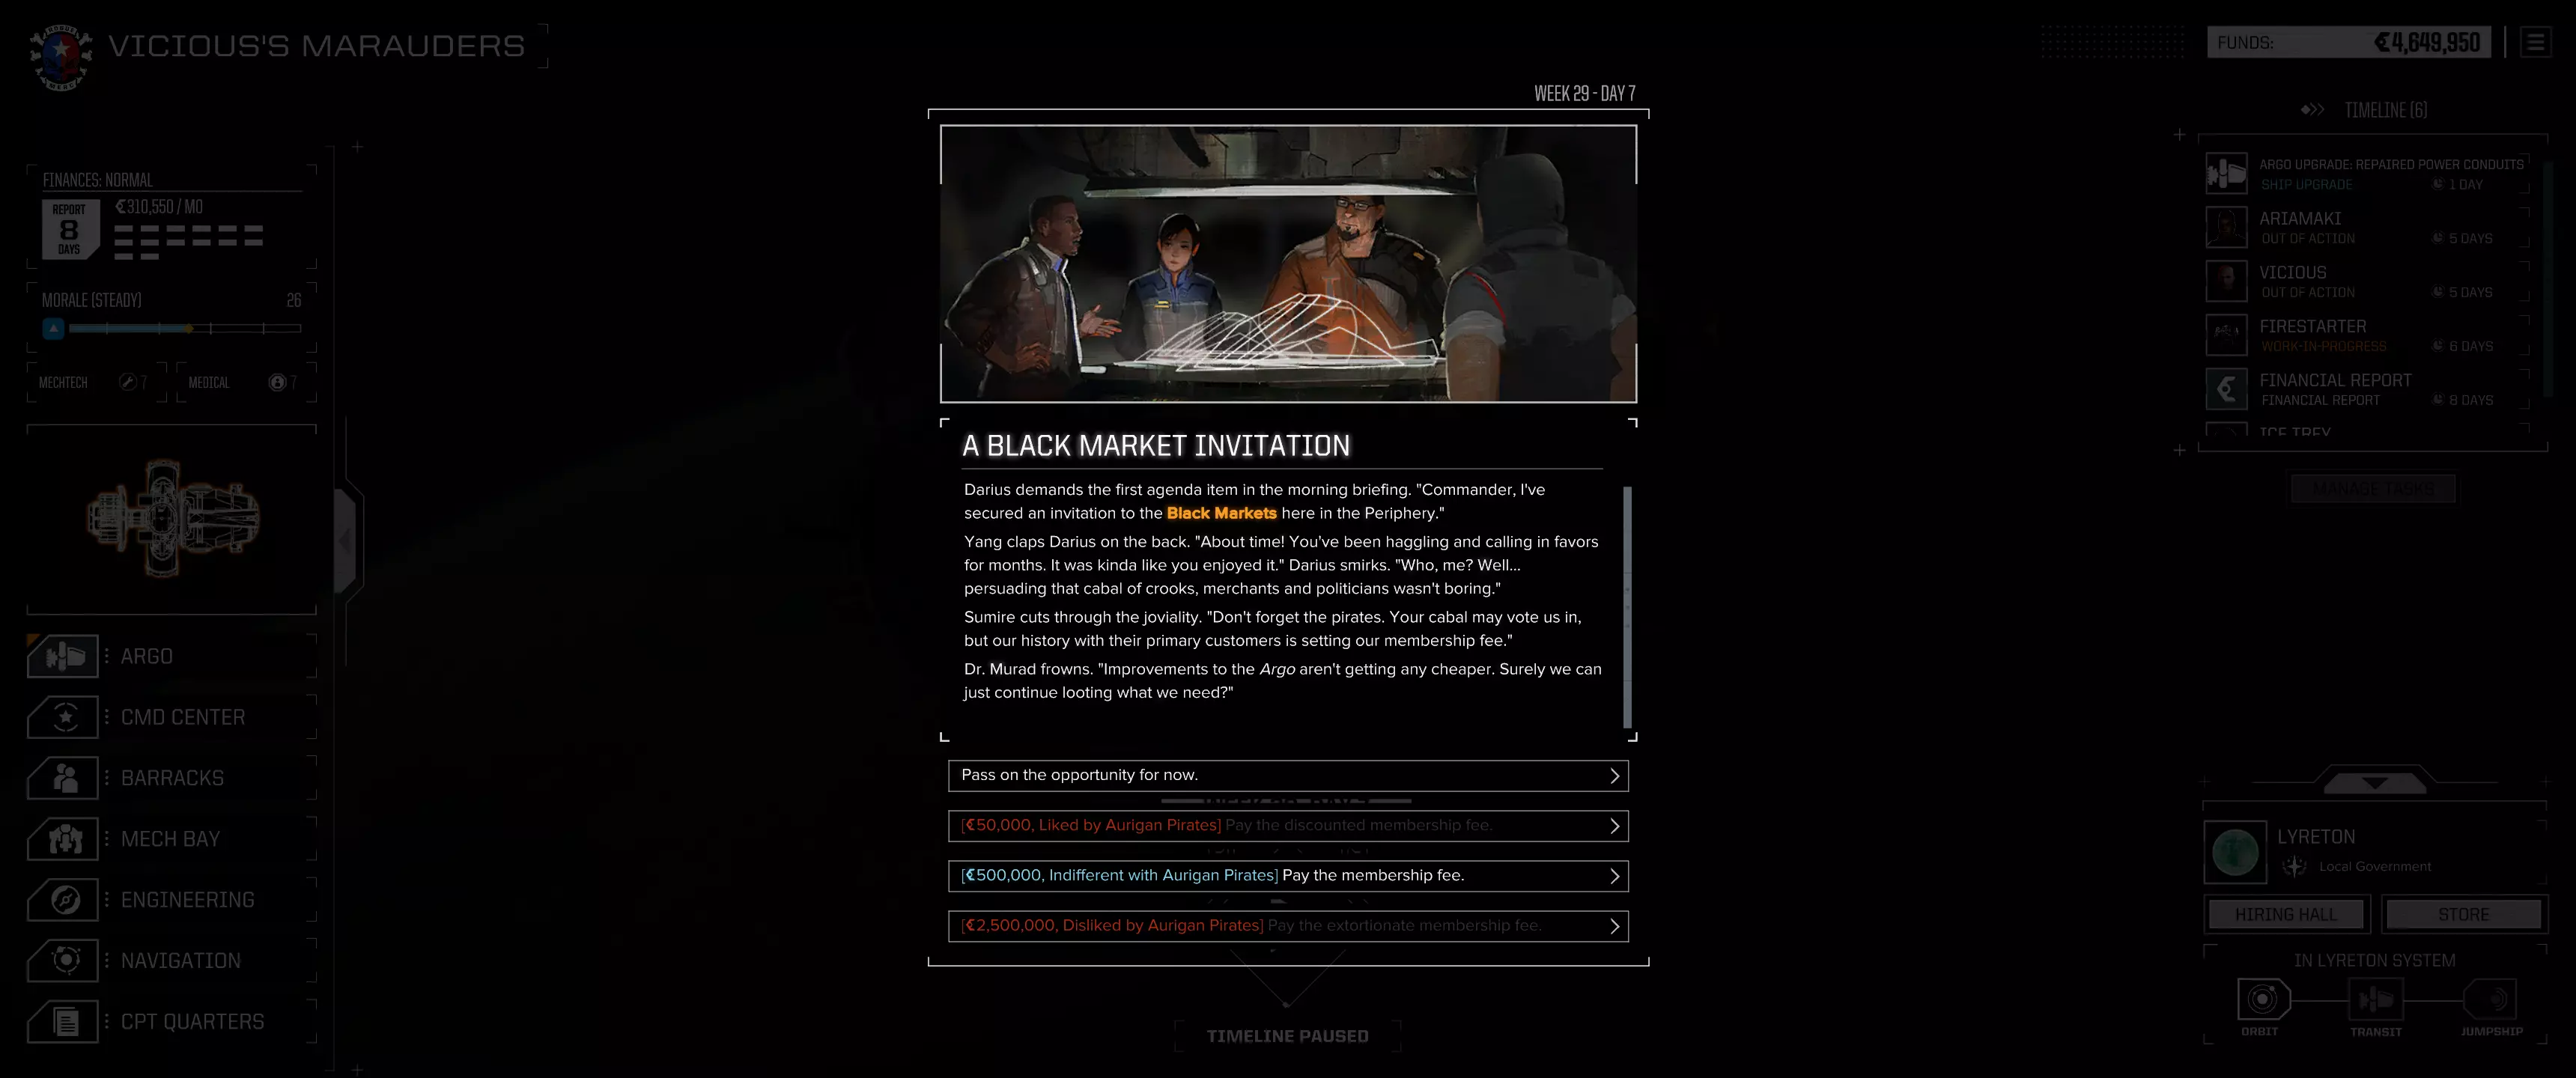
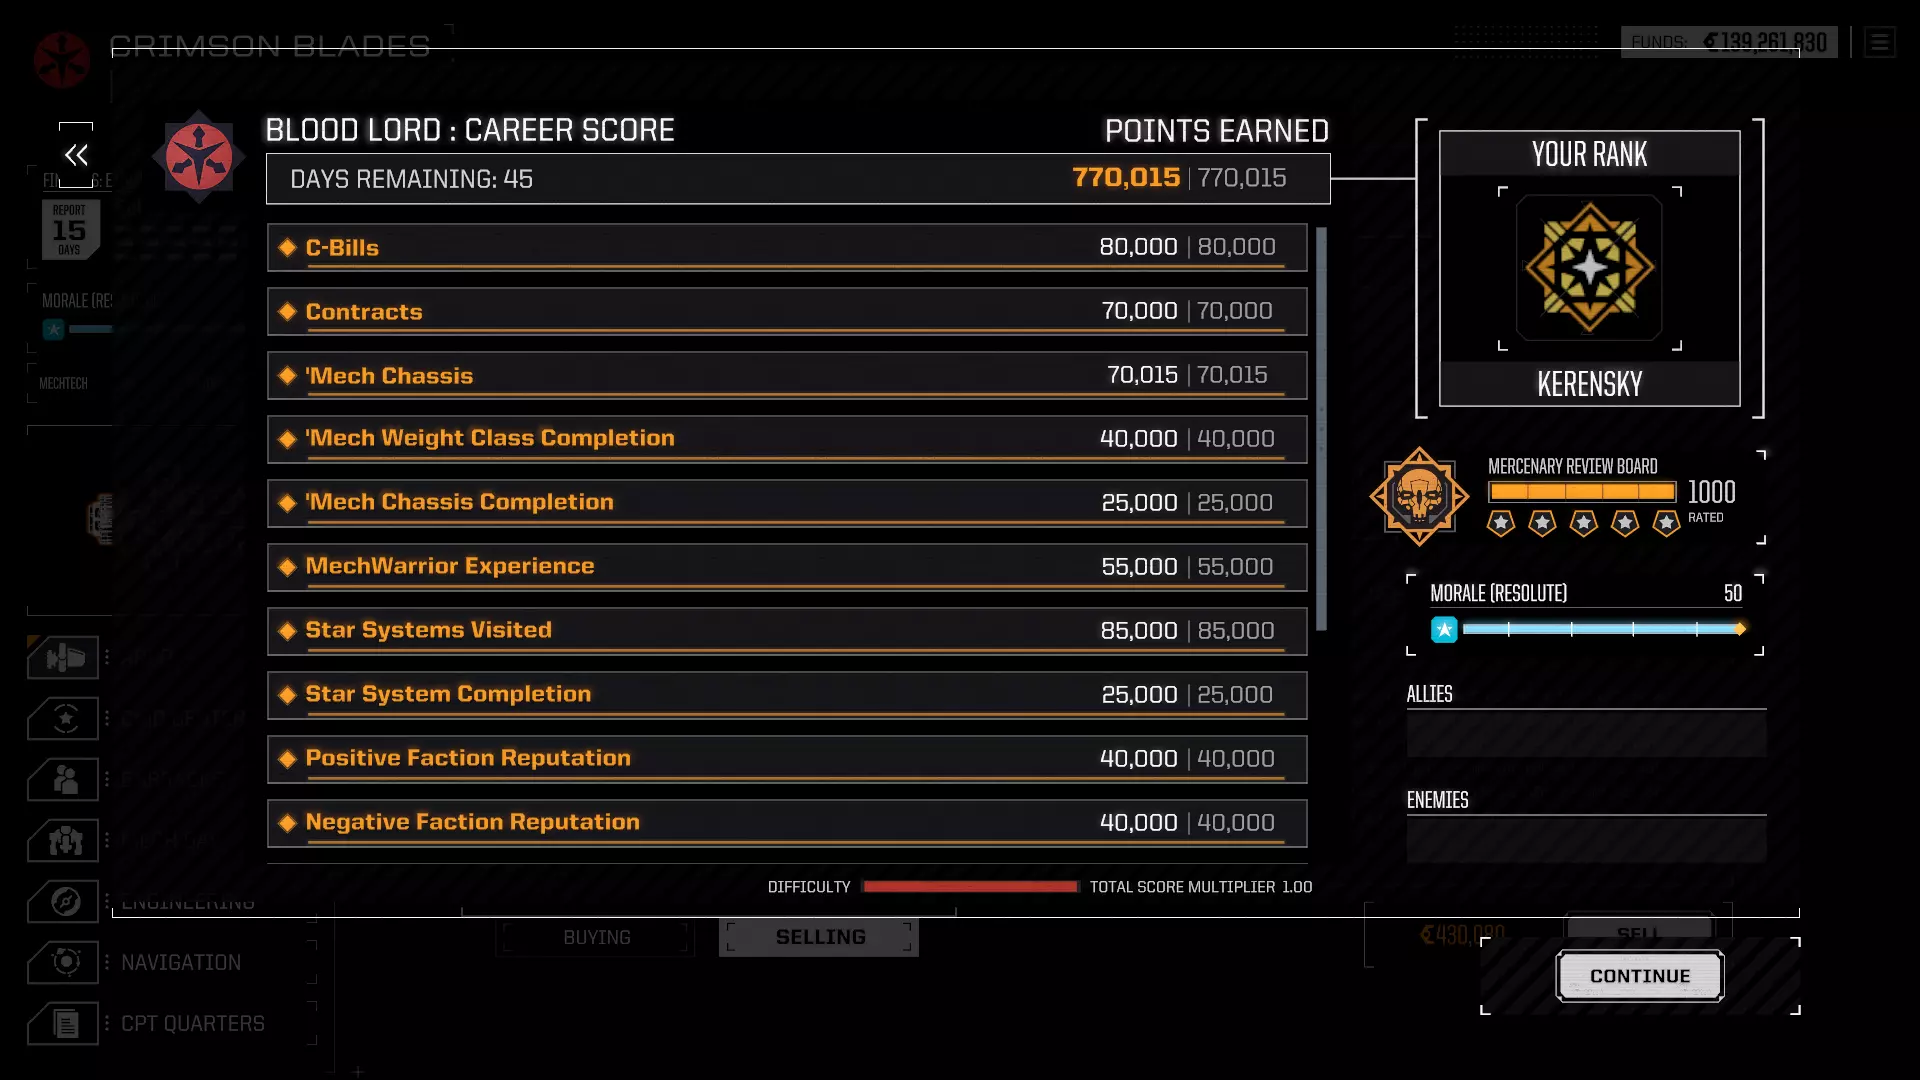
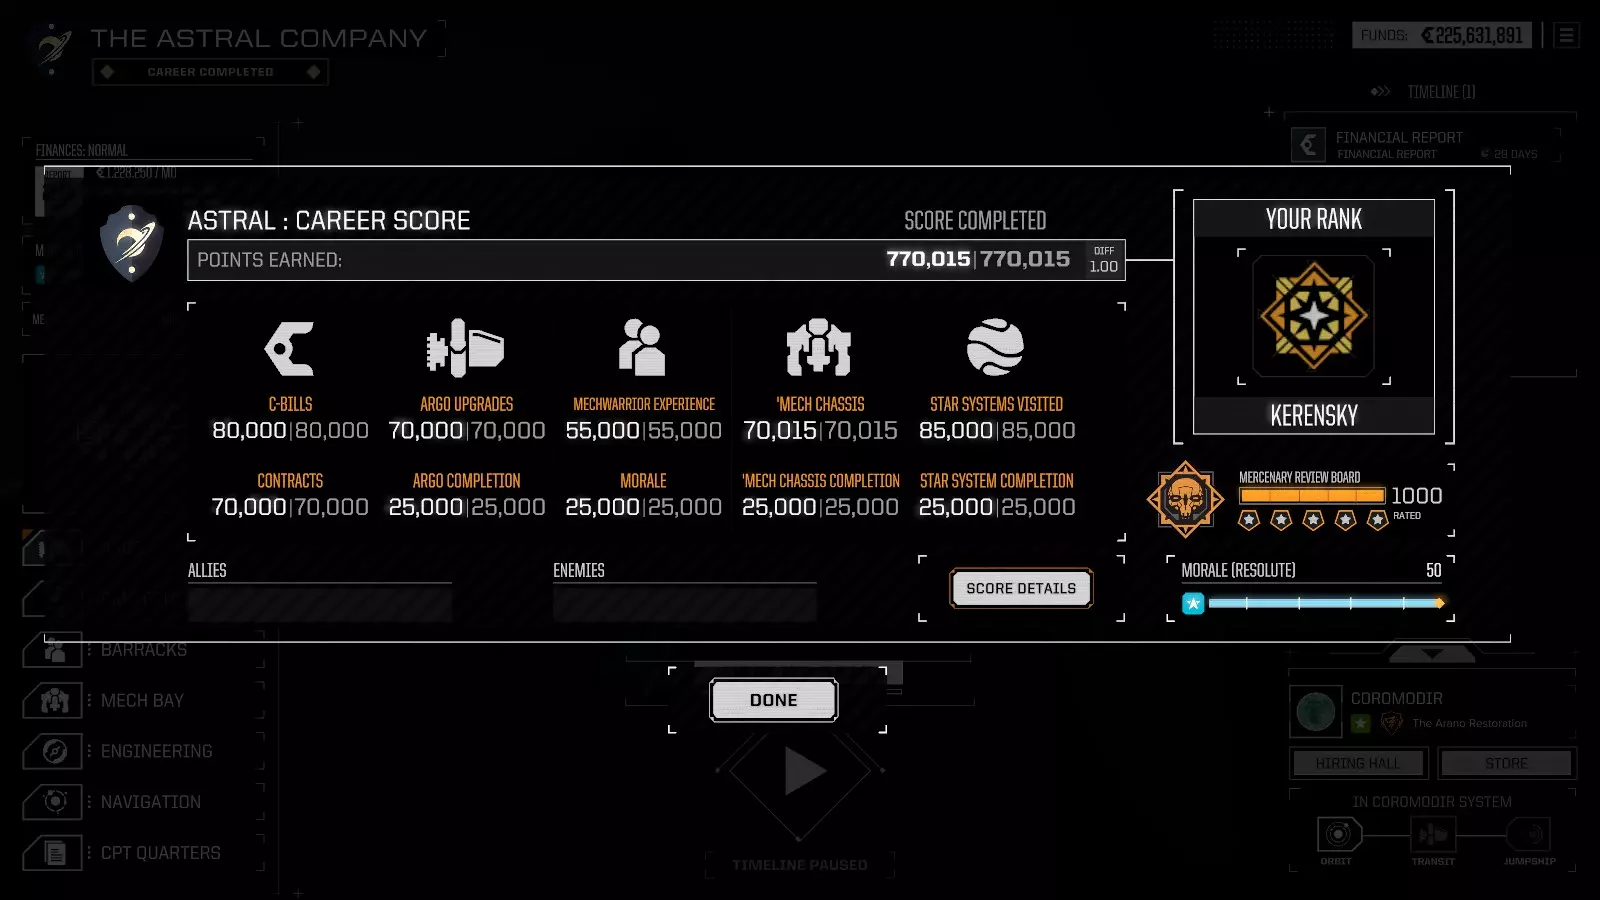
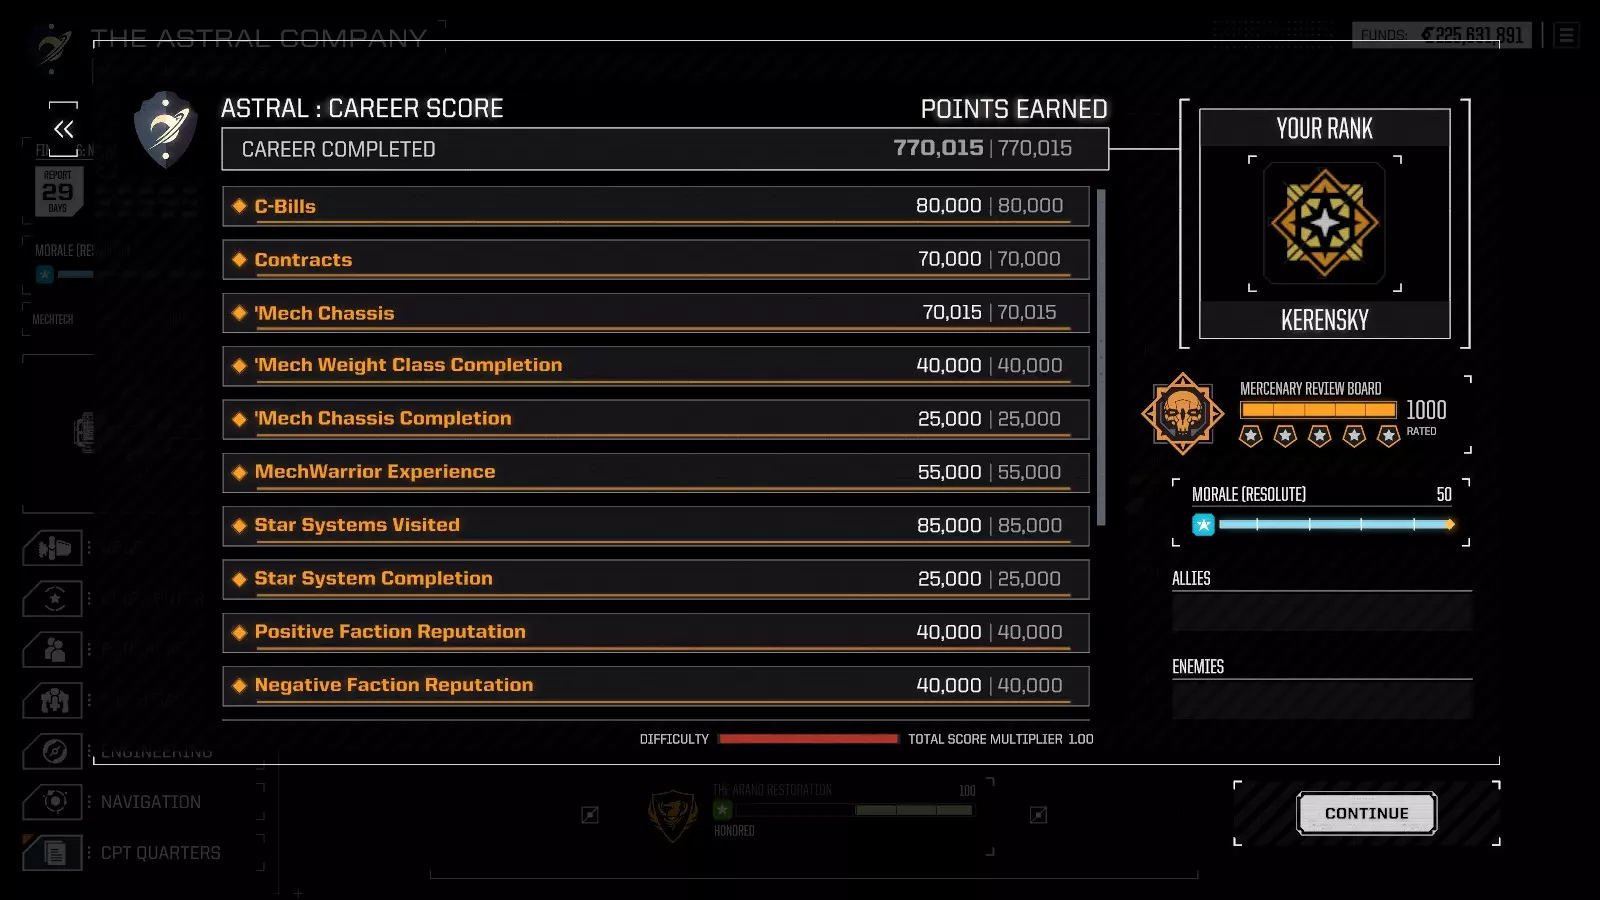
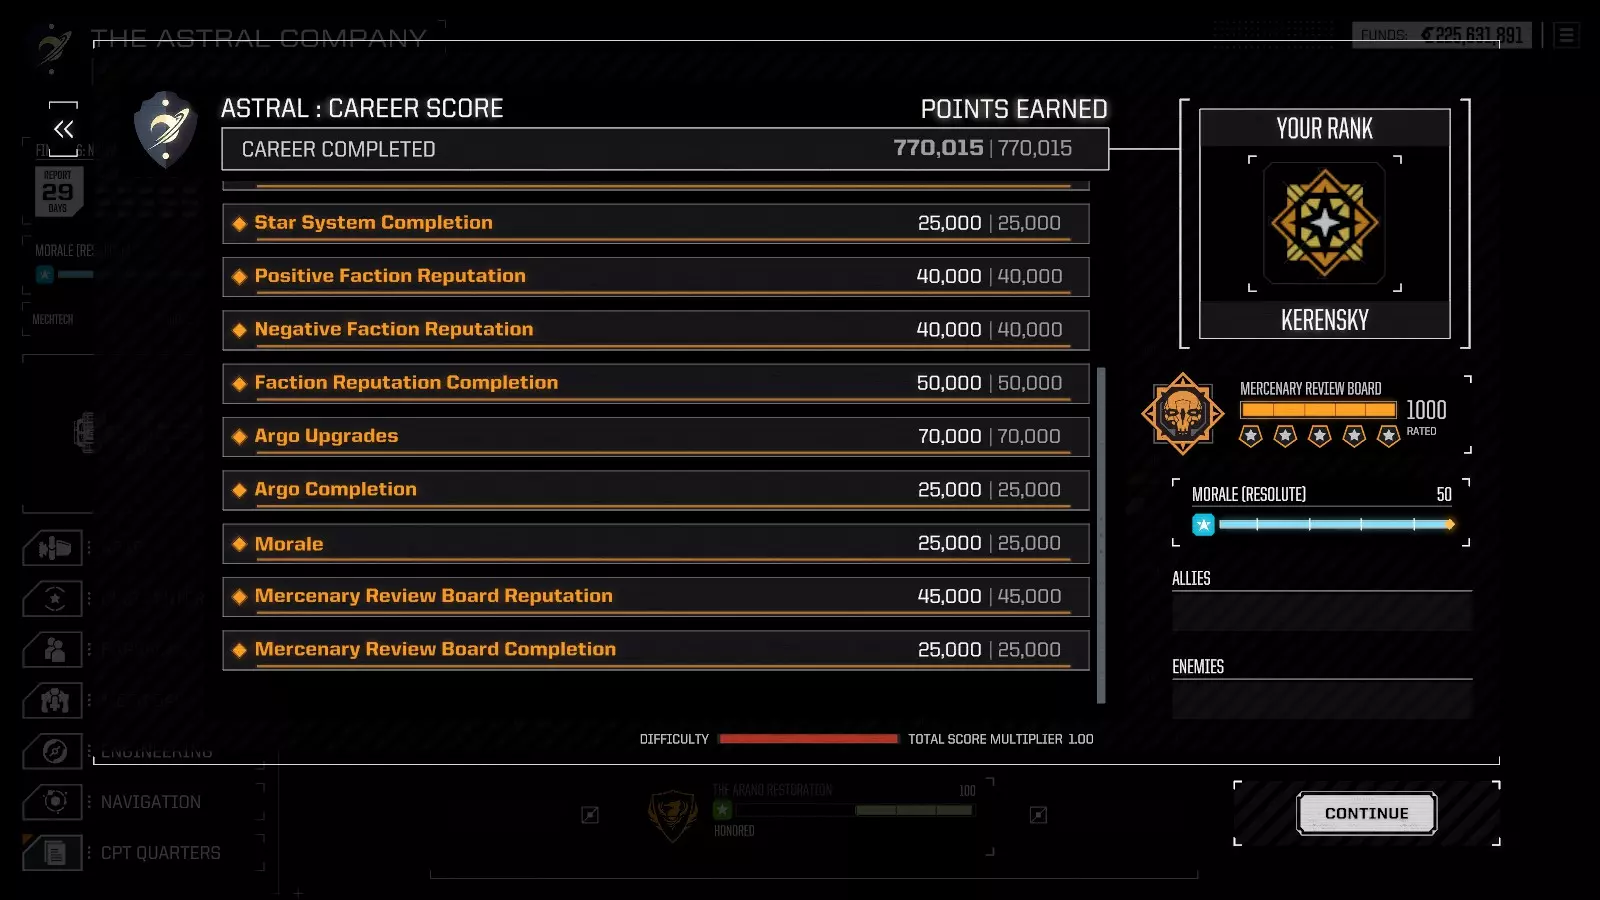
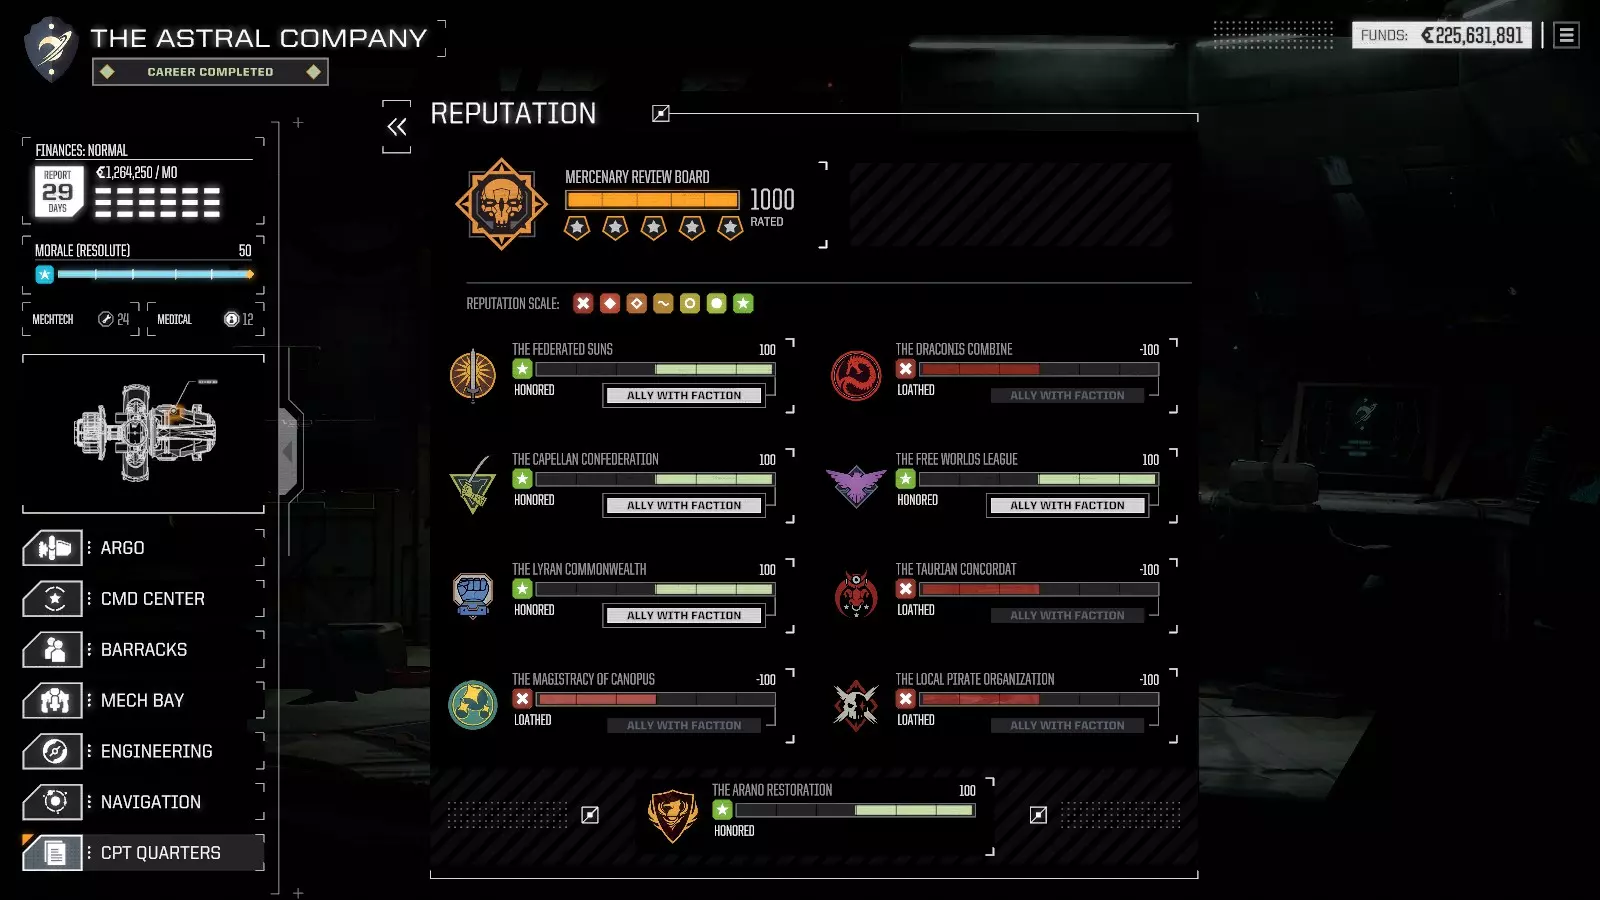
Points Strategies Right, now you’ve picked out your difficulty settings, customized your commander, maybe rejoiced/raged over the starting ‘Mechs you got dealt if you went for a random draw - let’s have a look at the ways you can earn points for a Kerensky career. Others have covered the basics of the career scoring mechanics and presumably this isn’t your first rodeo, so to start I’ll just say that contracts, ‘Mech chassis/weight class, Argo upgrades, morale and MRB reputation should all take care of themselves well in advance of the 1200 day mark, even if you’re a little sloppy about them. ‘MechWarrior experience also falls into this category on Normal progression. We’re going to leave all of those alone because you’re a reasonable adult mercenary captain and so I won’t insult your intelligence by spelling out the obvious in those categories. That leaves four broad areas that to discuss in more detail: C-Bills, ‘MechWarrior experience, Faction relations and Star Systems. Points Strategies: ‘Mech Surgery (C-Bills) As stated before, the primary reward strategy of your missions revolves around salvage - specifically, assembling ‘Mech chassis from your salvage and selling the completed products. An obvious decision from that is that you generally want to take max salvage for mission rewards. Another factor is that you would like to see as many ‘Mech parts in the salvage pool as possible, so pilot kills and headshots are ideal instead of making a bloody mess and coring everything. But even the best reward packages max out at 8 priority salvage, meaning that a good headshot farmer will still tend to get only a little more than 3 full ‘Mechs at most from that 8/39 package. What’s a poor ‘Mech farmer to do? The trick is to upgrade from a ‘Mech farmer to a ‘Mech surgeon, carefully cutting out the ‘Mech parts you want and disposing of the rest. This means that you want to blow off as many components as you can before you drop a ‘Mech, because the only things that make it into the salvage pool are the components on a ‘Mech when it drops and the sweet sweet ‘Mech parts. In practice, this is done by destroying both side torsos (and by extension the arms), plus any one leg on a ‘Mech. Such a ‘Mech is still worth 3 parts in salvage, while limiting the less valuable components to whatever’s on the head, CT and remaining leg. Ideally just the process of doing all that damage results in a pilot kill (two injuries for the torsos, one for the knockdown on the leg, and maybe one knockdown in there somewhere from LRMs) but in the late game you’ll need to finish the job by gently (or not so gently) bonking the ‘Mech on the head. This will lead to you being compensated like any other surgeon: way the hell more than anyone expected when they first signed you up for the job. As an example of just how much this can affect your earnings, let’s take a hypothetical mission where you take 8/33 salvage and the OpFor is 8 Atlases. A stock Atlas has 22 components that you don’t want - 21 if you manage a clean first-round headshot - and can offer up only 3 ‘Mech parts. Perfect headhunting then yields 24 Atlas parts and 168 pieces of trash, and you can guarantee receipt of only 8 parts, so more than 90% of the pool is stuff you don’t want when it comes down to your 25 low-priority picks. On the other hand, if you reduce each Atlas to CT and one leg, you’re looking at 24 Atlas parts, 16 MLs and 16 heat sinks, or 16 of each after you take your high-priority share. All of a sudden, those low priority salvage picks get really valuable! Obviously, this is an idealized maximum case, but there’s still a substantial advantage to ‘Mech surgery in practice, and it adds up over hundreds of missions. ‘Mech surgery is the core of your income generation and could theoretically max out C-Bills on salvage alone in a lucky career. The main shift in strategy as a ‘Mech surgeon is that you no longer care quite so much about the biggest alpha strike or pure DPS; rather, making sure damage goes where you want it to go becomes your first priority. Knockdowns also gain in relevance as they yield pilot injuries and free Called Shots. Slightly less optimal builds with a mix of damage outputs can ensure that you destroy side torsos with a minimum of CT damage; I used a specialist Marauder with weapons at 25, 35(x2), 45(x2) and 50 damage so that it could fine-tune damage output alongside a more traditional ERML Marauder. Additionally, the value of pilot kills means that LRM boats with an eye towards stability kills and not pure damage are more useful than normal; some Assaults have enough armor to survive getting dropped twice by LRMs without blowing up, and that extra pilot injury can come in real handy. Conversely, the highly efficient SRM boats have an unpleasant tendency to put too much of their damage on CTs unless you have a side shot. Tactically, you will likely leave enemy ‘Mechs alive for longer and get shot at a little more than you’re used to, and also have low-risk denouements at the end of missions where all that’s left are two weaponless Assaults you’re trying to headcap or some such. Trust me, though, it’s worth it - your account balance and score will thank you! Of course, this only applies on missions where you can get good use out of maximum salvage. Under certain circumstances, particularly in the early game or on Defend Base missions, you may find that enemy ‘Mechs aren’t worth salvaging or you don’t have the time to carefully dismantle your OpFor. Treat those cases as vacations from your surgeon job and go golfing core as many CTs as you’d like! Points Strategies: Money Cycling (C-Bills) Aside from your core ‘Mech surgery business, there’s a side hustle that can help boost your C-Bill score once you find yourself flush with cash (and you will, don’t worry.) The key is that any income increases your C-Bill score, while money paid out as expenses doesn't change a thing. Therefore, if you have excess funds, cycle your money by buying up ‘Mech parts in stores and selling back the assembled ‘Mechs. While this does reduce your cash on hand, you still get points for those sales, and the money’s no use to you anyway if it’s just piling up in your account. This can be good for tens of millions of C-Bills over your career, which may not sound like much but in a close run could be the difference between being a legend and a legendary failure. Points Strategies: Both Sides of the War (C-Bills, Experience, Faction Reputation) Right, we’ve talked about what to do in missions and what to do with the proceeds from them. The next item is how you get those missions in the first place: contracts, and the reputation management related to them. The first consideration is maximizing the number of contracts you can get. At any given system, there will always be 7 contracts generated when you first search for jobs; these will be divided up among the active factions in some manner, and most of the time two or more factions who are at war with each other will have contracts on offer. Because you want to maximize the number of contracts you can take, it’s helpful to keep good relations on both sides of a conflict. Additionally, the faction reputation gain from a mission slightly outweighs the reputation penalty for taking the same mission against a faction, so taking a mission for the Capellans against the Federated Suns and then following up with a Federated Suns mission against the Capellans nets a small reputation increase with both factions, assuming the missions were of equal difficulty and you didn’t hit the reputation cap. A second consideration is that high-difficulty contracts are especially valuable to you in the middle and late game, since in addition to boosting you in the reputation game, they pay well enough to keep you on pace and also make up for your poorly-compensated early contracts. Most of the high-difficulty systems (3.5 skulls or higher) are concentrated in the map’s northern end, and the Free Worlds League, Capellan Confederation and Federated Suns collectively have a presence in all of them. The Lyran Commonwealth and the pirates are in a reasonable number as well. The Draconis Combine and the Taurian Concordat are basically in a subset of the Federation planets only, while the Magistry of Canopus is represented in only a handful of Free Worlds systems. With these two points in mind, if you want a bunch of high-level contracts, playing the Free Worlds, Capellans and Federated Suns off each other is an excellent approach, with the goal of eventually getting all of them to Honored at the end. It mostly doesn’t matter who you pick for your fourth Honored faction, as long as it isn’t the Magistry. Note that you only need to be Honored by 4 factions and Loathed by 4 others at the end of the game, so I like to also maintain good standing with the pirates for Black Market access for most of the game, and then tank their rep hard in the last couple hundred days. It’s also not unreasonable to try for decent rep with the Taurians for a while if you’d like the extra contracts. If intending to burn the Magistry, the Commonwealth or the Combine, do so aggressively because it’s a bit harder to get contracts against them and their limited reach should not cost you too many missed contracts. A special note on the Arano Restoration: their reputation doesn’t count for any points, but they have only two enemies (Taurians and pirates) and almost exclusive control over a decent bit of space. As a result, I prefer to visit them in the late game to drive my rep with the Taurians and the pirates to Loathed without having to worry about angering one of my Honored factions. Points Strategies: Travel Agent of the Year Award (Star Systems) Okay, so we’ve talked about C-Bills, experience and faction rep. If you’ve been keeping an eye on the scoring system on the way, you should have realized that there’s a little bit of slack in the scoring. Specifically, you need 760,000 points for a Kerensky and the maximum is 770,015 points, so you can come up a touch short on any or all of these categories and it wouldn’t cost you the run necessarily. The last category to discuss, Star Systems, is by comparison brutally unforgiving. There’s a completion bonus of 25,000 points for visiting 170 star systems, which really means that there’s a penalty of not getting a Kerensky career if you don’t collect your 170. The good news is that you don't have to hit every system; there are 219 systems and so there's some leeway to skip the really inconvenient locations. As a result, when it comes to the star map, you need to start thinking like a travel agency and follow three principles: try not to backtrack, avoid problem destinations and look for opportunities off the beaten path. Let’s go through these one by one. Try not to backtrack: aside from the obvious short-term meaning, the idea here is to divide up much of the map into chunks so you can focus on visiting most or all of the systems in any given chunk, mark it as completed, and then leave it alone for the rest of the game. This is most easily demonstrated by looking at the territory owned by the Magistry of Canopus - it’s possible to take a linear path through all of their holdings by starting at Addasar, traveling to Dunianshire in the corner, and then going from there to exit Magistry space at Early Dawn. As long as you’re not relying on the Magistry for contracts (and you shoulldn’t be, in case you missed it above), this is an efficient way to deal with that portion of the map. Similarly, you can break down all the unaffiliated Rim systems into a few chunks, and Arano Restoration space is also amenable to such treatment. You don’t want to do this with the entire map, since it’s helpful to be able to vary up your contract partners and targets as part of the relations game. Even then, though, if you plan to cross Capellan space repeatedly, try to route one of your trips along the southern end of their systems, another through the middle, a third along their northern edge, and so on. Some repeat system visits are unavoidable, but they can be minimized with some advance planning. Avoid problem destinations: specifically, avoid systems with a long travel time from the jump point to the planet itself. Mechanically, making planetfall in a system includes the travel time from your starting planet to the jump point, one or more jumps to your destination system, and then travel time to the destination planet. Jump time is fixed at 3 days, while travel time from planet to jump point is highly variable, ranging from 3 to 18 days in an un-upgraded Argo. Note that if you make planetfall in a system, you pay the planet to jump point distance twice: once on the inbound trip and again on the way out. This makes systems with a long planet to point distance very costly. The good news is that you can look at the time costs for any destination, subtract out the jump times, and use that to get an idea of how problematic a system is. There are also maps of system travel times available outside of Steam. In general, anything with a travel time of 10 days or more is not worth it, and you should look around for better options than systems in the 7-9 day range, though a few are okay. Look for opportunities off the beaten path: when at a JumpShip while traveling along a previously set course, you can pause the game and use the map to set a new destination. This is advantageous if you’re trying to maximize travel to new systems because each system has a different set of connections with its neighbors and so changing course midway through can get you to some systems that the map would normally route you around. It also allows for very long journeys designed just to visit systems quickly. Note that this doesn’t work if you’ve already detached from the JumpShip and are traveling under the Argo’s own power, and once you reach a system that you have designated as your destination, you immediately undock from the JumpShip and proceed to the planet with no option to change your mind. Therefore, if you want to travel three systems away and then change course, set an initial course four systems away so the game gives you the chance to change. An additional tip on a game traveling bug: Since my Kerensky run, I learned from ColorsFade that If you plot a multi-jump course to a system and then use the Travel to System button on the Argo screen when at one of the intermediate systems, the travel time from the JumpShip to the planet is fixed at 3 days. To use this trick, you would find your preferred target system, set a course that goes one system beyond that, and then use Travel to System as soon as you get to your target system, shaving some time off the JumpShip to planet travel. You still have to spend the full system to JumpShip travel time on the way out, though, so its benefits are a bit minimized if you're avoiding problem destinations. Nevertheless, it's another way to squeeze a few more systems in. Benchmarking So now you’ve got some strategies on how to maximize your points for your career - all well and good. But a career is a marathon, not a sprint, and it can be tricky to figure out if you’re staying on pace with the relatively limited records the game itself provides. Up next, we’re going to go over the metrics you can use to judge if all your shooting and looting is actually making up enough ground. There are three main metrics: new system visit rate, average contracts per system, and average reward per contract, plus an additional metric of average contract difficulty if you’re using Slow ‘MechWarrior progression. New System Visit Rate: Over the course of your career, you will need to visit a new system every 7 days or less on average. This is because you must visit 170 systems and you have 1200 days, which works out to 1200 days / 170 systems = 7.06 days per system. During your campaign, then, you can quickly check the number of days elapsed divided by the number of systems visited to see if you’re staying on pace overall. Additionally, when planning jumps, it becomes easy to see if that three-jump path you’re planning will set you back in terms of time. It’s possible to run a little faster than this benchmark - in my Kerensky run, I hit system 170 on day 1079, or 6.3 days per system with 121 days to spare - but as long as you stick to this pace you should max out the star system points by the end. Average Contracts Per System: Completing a contract every 3 days on average, or more relatably, visiting a system with 5 contracts every 15 days, puts you on pace for 400 contracts over the course of your career. That’s enough contracts to generate sufficient C-Bills and pilot XP on Slow Progression (more on both of those in a second) while leaving in some room for error. Unfortunately, the game doesn’t track total contracts for you, so you will need to keep a count separately to use this metric. My Kerensky run had 366 missions over 1079 days, or 416 missions over 1200 days, both for an average of a mission every 2.9 days. As a note, I originally recommended aiming for 350 contracts, or one every 3.4 days, but that's more the practical minimum for a maxed-out score than a good target for a career. Average Reward Per Contract: An average mission reward of 2,000,000 C-Bills from both cash rewards and selling salvage is about the minimum you need to max out the C-Bills score given a 400 contract career. Conveniently, it's also enough to get at least 700,000,000 C-Bills given a 350 contract career if you're trying to finish with time to spare. This can be a little hard to track on a running basis because you should only sell ‘Mechs once fully assembled instead of selling the parts on their own, and trying to guesstimate the value of all the ‘Mech parts you’re carrying around is an unpleasant process. Instead, I prefer to check each mission by calculating 9% of the raw salvage value (or 10% if Unequipped 'Mechs is off,) adding the cash reward, and seeing how that stacks up against the 2,000,000 C-Bill benchmark. Obviously your starting missions will fall under this, so I use this mostly to make sure most missions are over this benchmark after day 300 or so. Using this conversion, I made an average of 2,176,457 C-Bills per mission in my Kerensky run through day 1079. My overall average was a little lower at day 1200, at 1,854,090 C-Bills, but only because I stopped maximizing rewards when I finished out the scoring. Average Contract Difficulty: Given a minimum of 350 contracts per career, you will also want to keep up an average contract difficulty of approximately 3.5 skulls over the course of your career if you’re playing with Slow ‘MechWarrior progression. In all likelihood, you’ll be doing this anyway - the C-Bill benchmark is about the average reward I saw for 3.5 skull contracts - but it’s worth noting because if you went for Generous mission rewards in the difficulty settings, it’s possible for XP and not C-Bills to become your slowest category to complete. As with total contracts, there isn’t a nice way to track this with in-game statistics, so I logged all my mission difficulties in a spreadsheet. I had an average mission difficulty of 3.4 skulls in my Kerensky run and finished XP just a few systems before C-Bills. Timepoints from a Kerensky run DAY 300: 275,654 (Regular). Completed ‘Mech chassis. 7,169 on C-Bills, 20,900 contracts, 20,000 weight class, 9,555 experience, 24,000 star systems, 23,600 positive faction, 7,100 negative faction, 40,000 Argo, 21,500 morale, 31,815 MRB. The only completed category is ‘Mech chassis, as I’ve been hoarding one copy of each that I find. I just recently acquired a LosTech Marauder and Griffin, as well as a LRM assault, so my score still reflects the weaker drop capability I had for most of the first quarter where a Centurion, or later an AC/5 Marauder, was the core of my lance. I am pretty close to weight class completion (which doesn’t show in the score), as well as morale, although that’s not surprising as it has a direct bearing on my combat capability and so should get cranked up quickly. Note that a few categories are way off the pace, most notably C-Bills and experience. DAY 600: 619,175 (Elite). Completed ‘Mech chassis, weight class, Argo, morale, MRB. 40,470 C-Bills, 69,250 contracts, 34,240 experience, 46,500 star systems, 39,000 positive faction, 24,700 negative faction. A bunch of categories clear in the second quarter of the game now that my company is hitting its stride - I have added a Gauss-wielding MAD-3R to the team, and all my top ‘Mechs have good components, plus the company includes experienced pilots to make the most out of these machines. Contracts is basically done, and the faction scores are close, so it’s mostly down to C-Bills, experience and star systems. DAY 900: 715,243 (Legendary). Completed contracts, ‘Mech chassis, weight class, positive and negative faction, Argo, morale, MRB. 70,972 C-Bills, 52,256 experience, 67,000 star systems. The contracts and faction relations categories clear in the third quarter, although the faction relations scores will continue to fluctuate a little until I head to Arano space to finish up. I added a second LosTech Marauder during this period and outfitted it with a range of laser weaponry for maximum surgical potential. As discussed, C-Bills, experience (on Slow progression) and star systems are the three lagging categories. If this had been Normal progression, experience would be long done and I could hit Kerensky by never running another mission and just tagging all the systems needed. DAY 1079: 770,015 (Kerensky). All score categories complete. I finished experience, then C-Bills, and finally star systems, although that’s due to a conscious decision on my part to leave star systems last because there’s no chance involved in maxing out that score, and if I had wanted to rush a Kerensky score I would have prioritized finishing star systems since its completion bonus was the only item holding me back. DAY 1200: 770,015 (Kerensky). All score categories complete. After first reaching the maximum score, I punted around in Arano space to get an idea of just how much leeway I had on completion. Despite an event dropping my morale, I retained the maximum score at the end. I ended having visited 172 systems, orbited 70 planets, completed 416 contracts and a lifetime income of approximately 910 million C-Bills. I suspect 1 billion C-Bills is possible since I more or less stopped doing 'Mech surgery and cash cycling after day 1079. Conclusion A Kerensky career is absolutely possible in v1.9.1 base BATTLETECH - more than anything, it’s an achievement of planning and consistency. If you decide you want it and keep to the plan you too can score something like this:
DLC说明 - 新增内容! 完成本指南后,我已体验该DLC,现说明:上述核心策略在DLC中均无变化。若你正经营机甲改造业务,以下是最重要改动的快速影响评估: 机甲:在新增机甲中,ECM大猫、HQ独眼巨人,尤其是公牛鲨,均为同吨位下价值极高的机甲,若你希望最大化C-Bills收益,它们应作为优先 salvage 目标。装备:新增的TAG(目标获取装备)让你在将敌方机甲打残后,更可靠地击杀驾驶员——头部命中仍会造成伤害,而其他部位的命中可能不会致命,即便你需要多次攻击机甲才能完成最后一击爆头。诚然,这种“机甲外科手术”式的打法相当耗时,但如果你急需回收那台“阿特拉斯”机甲,或是C-比尔(游戏内货币)不足时,这会是个不错的选择。其他新增物品不会从根本上改变原版游戏的策略……不过随机道具池中物品增多,意味着从黑市获取心仪物品需要更长时间。任务类型:在特定骷髅等级下,新任务【目标获取】和【攻击与防御】往往比基础游戏任务更难,因为这两个任务都有2个以上 lance 的初始敌方部队、来袭的增援部队,以及一些严重的目标相关复杂情况。在游戏初期要小心这些任务!一般来说,【目标获取】任务由于存在时间限制,不适合进行机甲拆解;除非你完全确定在标记目标和摧毁少数敌人时,能够承受至少一整个 lance 的攻击,否则不要为了最大化战利品而逗留。另一方面,攻防战对于后期的机甲小队来说是福音;敌方规模庞大,意味着有很多获得优质战利品的机会,而且所有援军都会提前出现,所以你可以在他们到来的路上设下埋伏。一旦你能够应对游戏中的任何挑战,就能将一波波敌方机甲转化为巨额财富。 闪点任务:至少从理论上讲,闪点任务可能会有所帮助——它们比每个星系标准的7个任务能提供额外的合约,是获取派系声望的重要来源,并且在游戏初期有可能获得能决定小队实力的战利品。不过问题在于,尽可能多地接受闪点任务会打乱你的旅行计划。由于星系评分机制最为严苛,这意味着你通常应该忽略闪点任务,除非它们正好位于你偏好的行进路线上的星系中。此外,大多数闪点任务都位于难度低于4 skulls的星系,因此在游戏后期,你需要权衡它们的收益与前往更高难度星系的机会成本——更高难度的星系可能通过其标准的高难度合约,比完成7个简单合约加上一个闪点任务能获得更多收益。作为直接对比,我进行了一次承接所有闪点任务的游戏流程,虽然我在更少的星系(64个)中完成了更多的合约(422个),但在评分上少了16个星系,平均合约难度也只有3.2 skulls。如果你想达成Kerensky career成就,这些都是严重的问题!综上所述,【未知起源】、【狩猎季节】和【沙漏】是我唯一会特意规划路线去完成的闪点任务,因为免费获得的公牛鲨MAZ型机甲非常不错,而获取公牛鲨M3型机甲则更好,它们无疑是你能回收的最高价值底盘。【原型机】闪点任务可能也值得一做,这样你之后就能回收配备ECM的破袭者机甲。此外,任何顺路且不在低难度星系的任务——咳咳,比如【猎犬的咆哮】——都可能会有帮助。 总体而言,该DLC略微提升了克伦斯基路线的战术难度,因为部分新敌人和任务比普通任务更麻烦,但也略微降低了战略难度,因为平均回收价值更高,且闪点任务让声望管理变得更容易。致谢