换一换
换一换 


《耻辱》全面攻略:主要聚焦游戏玩法,包含基础信息、技巧与战术、敌人概述、战利品位置等内容。 简介
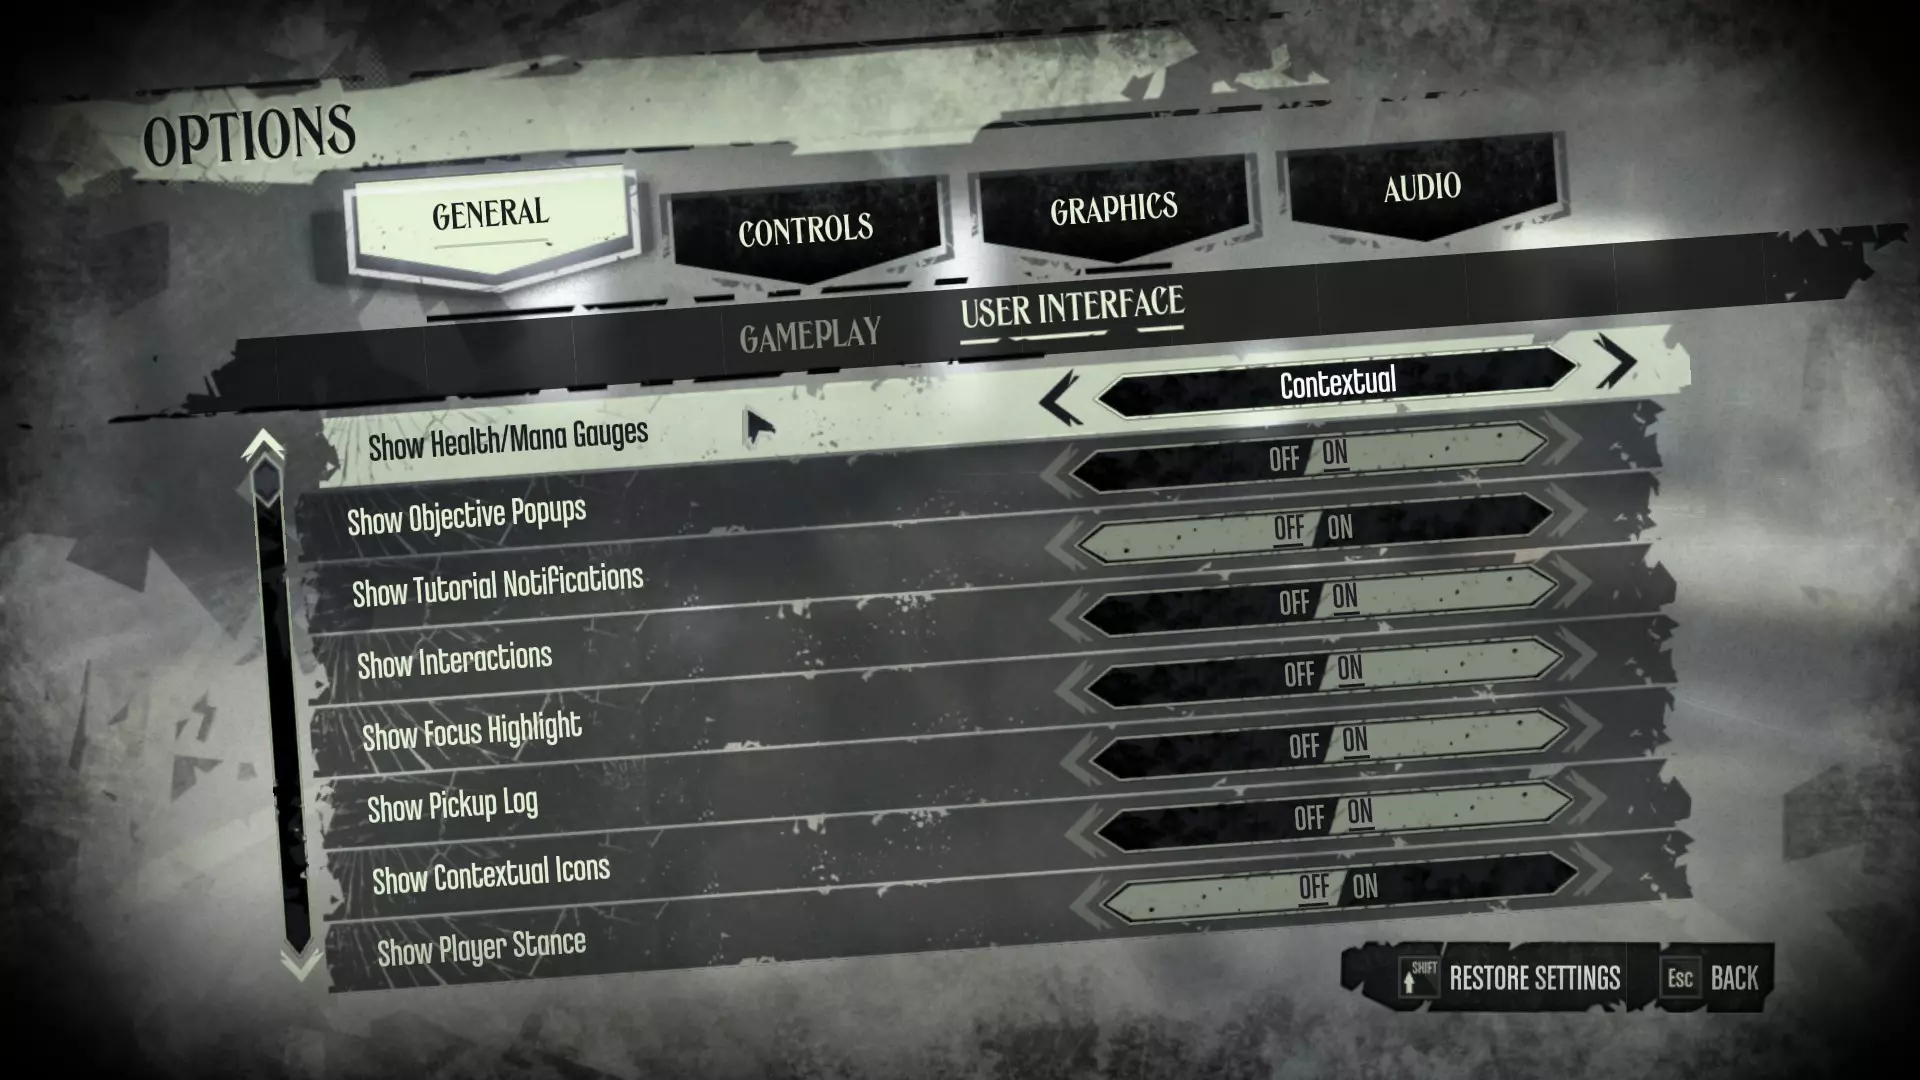
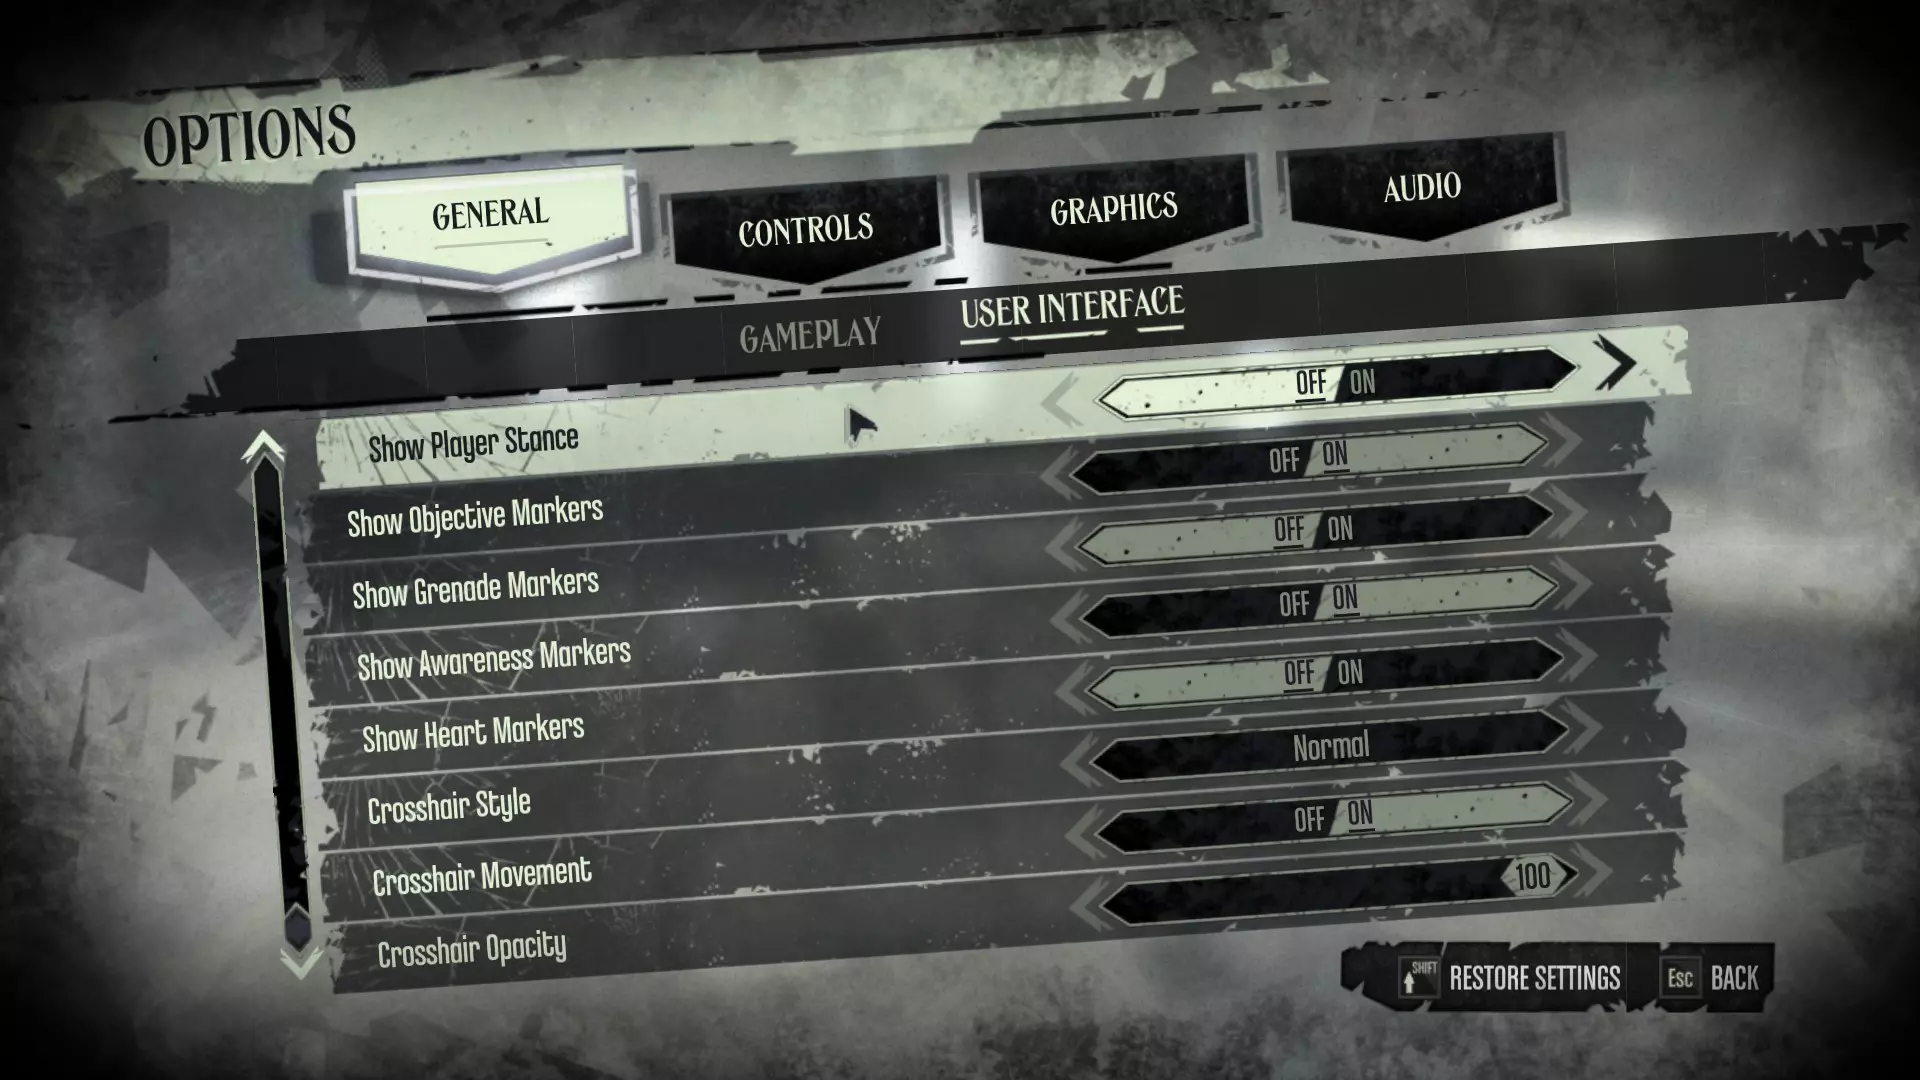
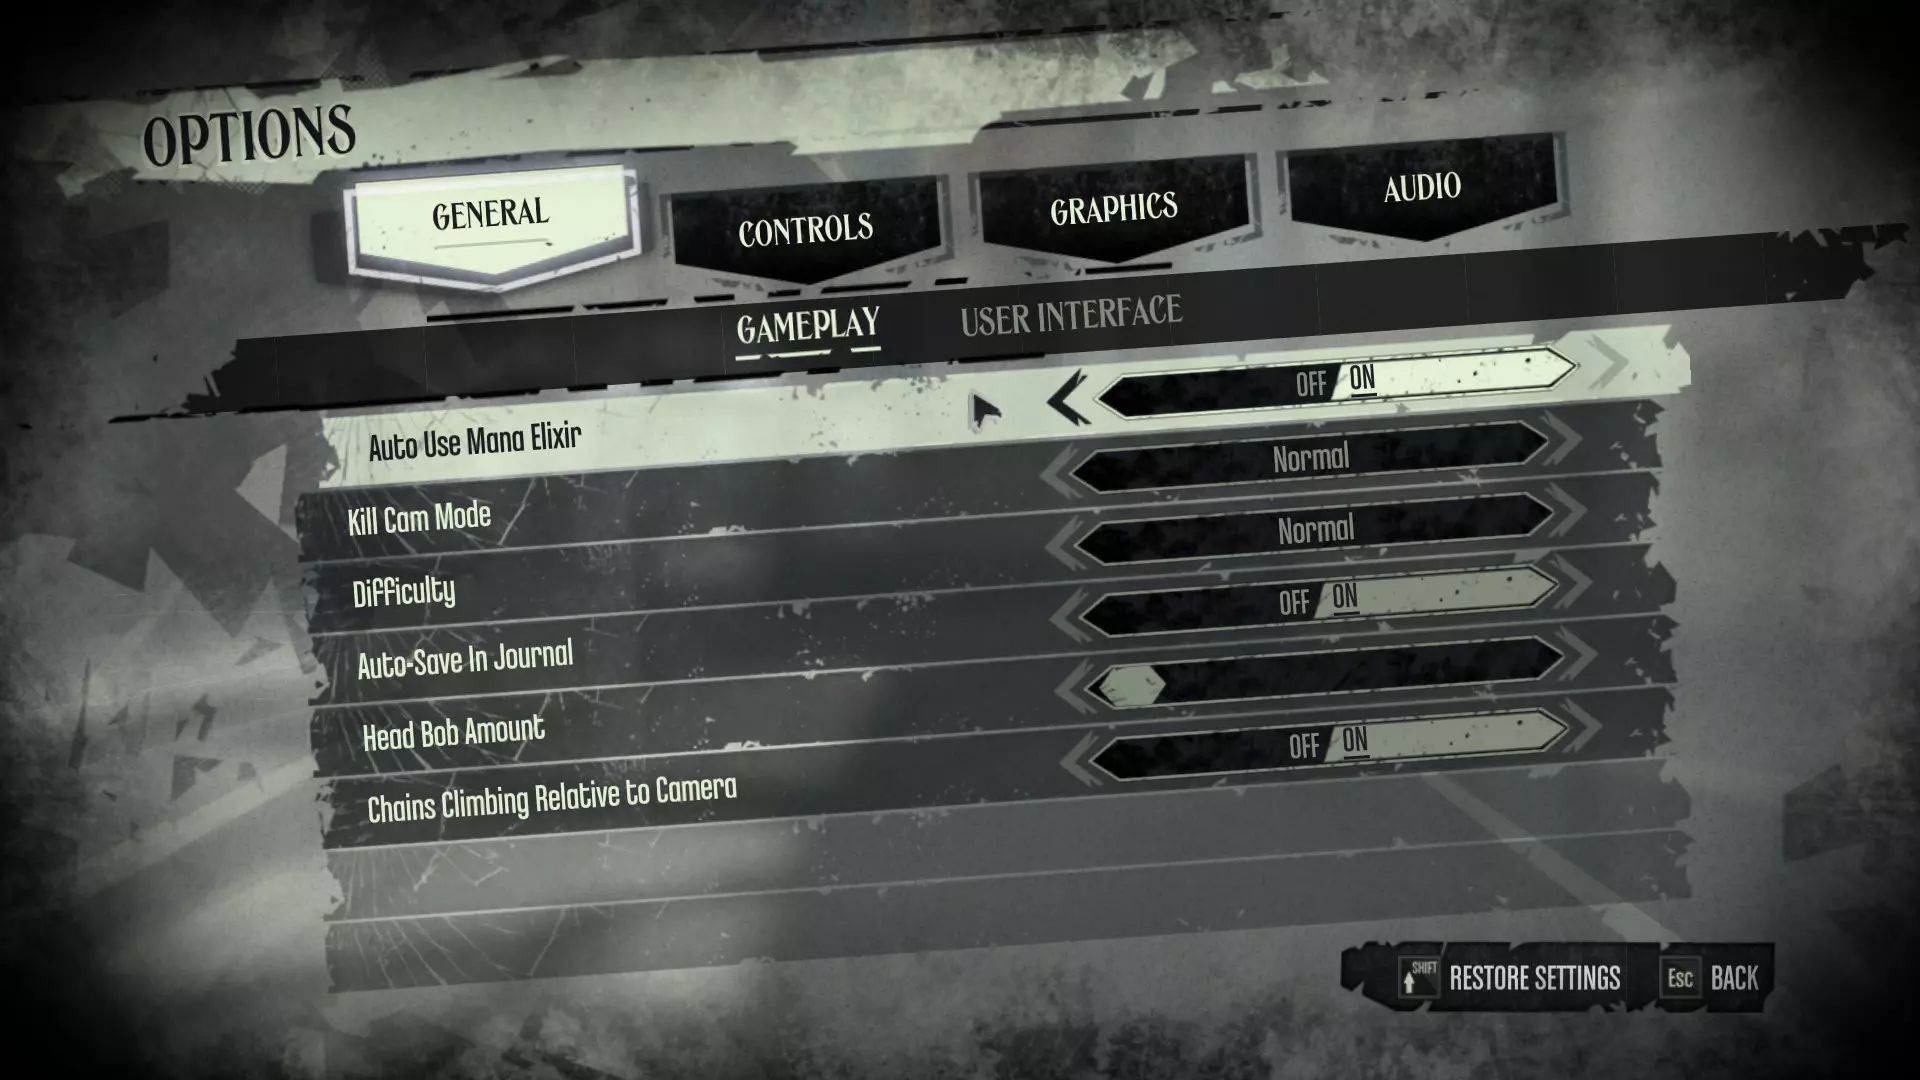
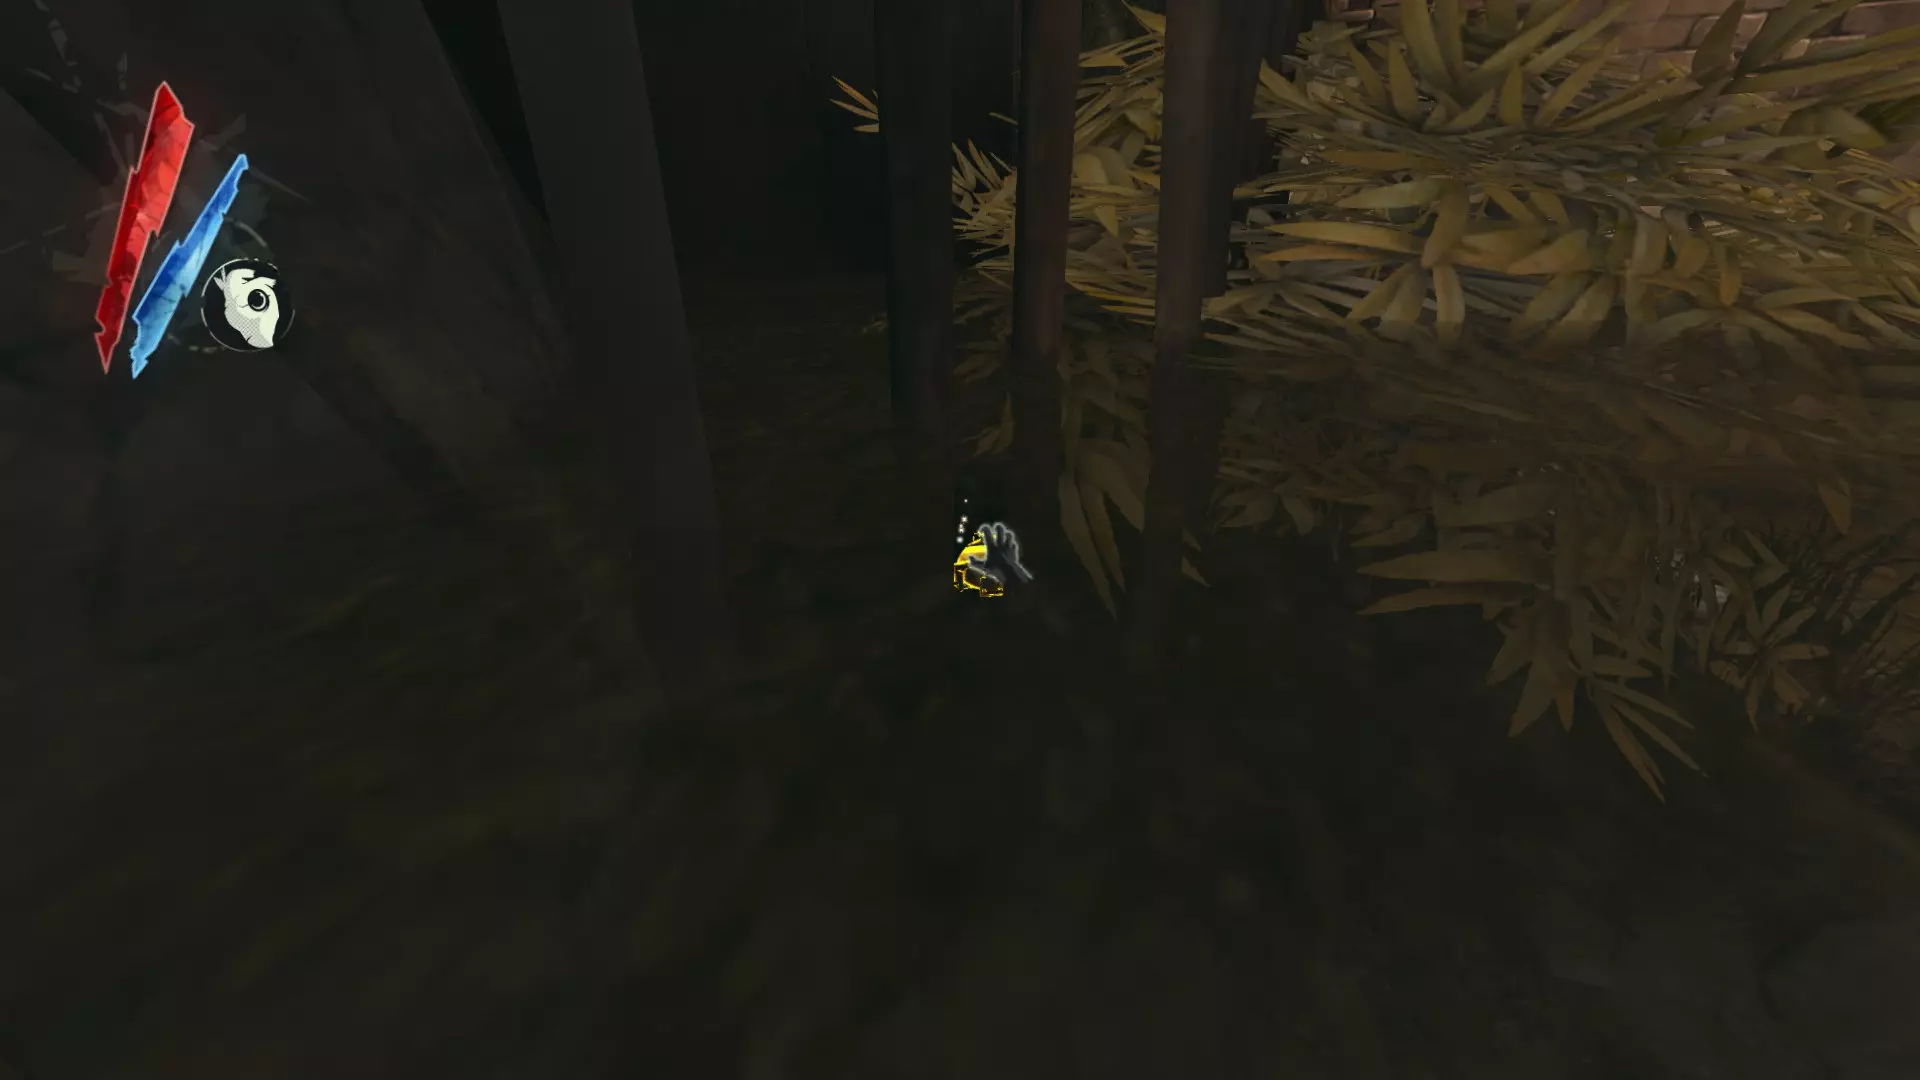
Welcome to the Assassin's Almanac, a comprehensive guide to Dishonored. The first few sections are intended for newer players, while the "Advanced" sections (along with a few others) include more complex, niche, or obscure tricks and techniques. This guide is written primarily for the PC Definitive Edition of Dishonored, but most of it will still apply to other versions and platforms. Additionally, The Knife of Dunwall and The Brigmore Witches are not covered in this guide at present. I plan to cover said DLCs in the future. Rather than only a tutorial, this guide is also intended as a reference. Explanations of all items, weapons, powers, upgrades, and enemies are included, and some of the more opaque game elements are explained in some detail. Things like the Chaos System are only briefly touched on in-game, and there many details and techniques which aren't mentioned at all. While browsing available community content, I noticed that there weren't many comprehensive gameplay guides (see "Conclusion & News" for a more complete explanation as well as helpful links). This guide aims to address that. A NoteA warning to those wanting a truly "blind" experience: This guide will contain gameplay spoilers. No major story spoilers will be present for the most part (the section on the Chaos System includes the various endings), but those wanting to avoid them should also be aware that the "Enemies & NPCs" section includes entries on characters central to the story. I have marked a majority of the clearer cases as spoilers, so they will be easy to avoid. Of course, I can't black out every single thing which could be considered a spoiler, hence this warning. A Second Note This guide is long as hell. Controls & Configuration An overview of basic controls, and my personal recommendations for HUD, gameplay, and general configuration. This section is written under the assumption you're on PC with default binds, but the in-game settings screen will tell you which buttons are the equivalent if you are on console. Controls Default Bind Action Notes W, A, S, D Move forward, left, backward, right. Sprint can be used in conjunction with the A, D, or S keys to strafe in their respective directions more quickly. F Interact Hold while not interacting with anything else to sheathe your weapons. This will slightly increase your movement speed. Spacebar Jump Jump while against any straight edge to mantle it. Shift, C Sprint, enter Stealth Mode. Crouch while sprinting to slide. Q, E Lean left, right Lean around corners to look ahead without being detected by enemies. Left Alt Activate zoom function Two tiers of magnification, both unlocked with upgrades. Use to scout upcoming areas and to snipe more effectively. J Open Journal (includes Inventory, etc) I prefer to rebind this to Tab, as you can then access the Journal without lifting your hand from the WASD position. Mouse 1, Mouse 2 Attack with sword, Use left-hand Gadget/Power Can be pressed simultaneously. Left Control Choke/Block Pressing this input while your weapons are sheathed will draw them more quickly. Mouse Wheel, Number Keys 1-0 Access left-hand gadgets/powers Hold Mouse Wheel/middle mouse down to open the Quick Access wheel, which slows time. While hovering over an item or power, hit a number key to quickbind that item or power to said number key. R, T Use Health/Mana Elixir If "Auto-Use Mana Elixir" is enabled, mana elixirs will be automatically consumed as needed. Health must be replenished manually. HUD & Gameplay SettingsMost of the default settings will work well. However, I find the following changes make for a more immersive experience. Show Tutorial Notifications Turn this option off. This will disable the tutorial screens appearing during gameplay. If you're reading this guide, these won't be necessary anyway. You can still access these in-game tutorial screens from the "Tutorials" option in the pause menu at any time. Heart Markers This option controls whether HUD icons appear during the game when you're searching for runes and bonecharms. If you turn this off, there will still be other indicators to follow--See the "Items & Equipment" sections if you want to know beforehand. I find that "hunting" for these items using these more subtle clues to be much more engaging--with the icons enabled it basically removes that entire aspect of it, making the exploration process much less interesting. You might want to look around and tweak other things to your liking. Some people prefer to disable "Chains Climbing Relative to Camera" for example, while others might find its default setting more intuitive. Another option is to set "Health/Mana Gauges" to Contextual. This means that the Health/Mana/Breath HUD gauges will disappear when not in use (actions such as consuming food or elixir as well as drawing weapons or receiving damage will make these elements visible). Here are screenshots of my personal recommendations:
可选配置(PC) Steam启动选项 在Steam库中找到《耻辱》。 选择“管理”选项(齿轮图标)。 从菜单中选择“属性”项。 在“启动选项”下方会有一个文本框。复制粘贴“-nostartupmovies”到该文本框中。 按Enter键。 尽管看起来没有任何变化,但游戏启动时将不再播放开场动画(发行商标志、工作室标志等)。 文件配置 我强烈建议你尝试此方法。实施起来非常快速且相对简单,不会显著改变原版游戏体验;只需修改游戏配置文件中的一个值即可。《耻辱》默认设置允许每个区域同时加载5-10具尸体。在2012年,这种限制或许是合理的,但现代系统(尤其是个人电脑和当前世代的主机)已无法从该限制中获益。只要你的设备性能还算不错,这应该不会影响你的游戏表现。即便真的产生了影响,重新调整数值或重新安装游戏也十分简单。 打开文件资源管理器。 打开文档文件夹。 打开“我的游戏”文件夹。 打开名为“Dishonored”的文件夹,然后打开“DishonoredGame”。你也可以通过Steam直接导航至该位置:选择“管理”(点击“开始”图标右侧的齿轮图标,或者右键点击左侧库视图中的游戏条目),从弹出的下拉菜单中选择“浏览本地文件”,此时你应该能看到“DishonoredGame”文件夹。 打开“Config”文件夹。打开【DishonoredAI】文件夹,它应该是列表中的第一个文件夹。找到名为【CorpseAbsoluteMaximumCount】和【CorpseIdealMaximumCount】的条目。将这两个条目的值都设置为999(数值位于“ = ”符号之后)。选择左上角的【文件】,然后点击【保存】。现在可以安全关闭所有窗口。操作完成!潜行
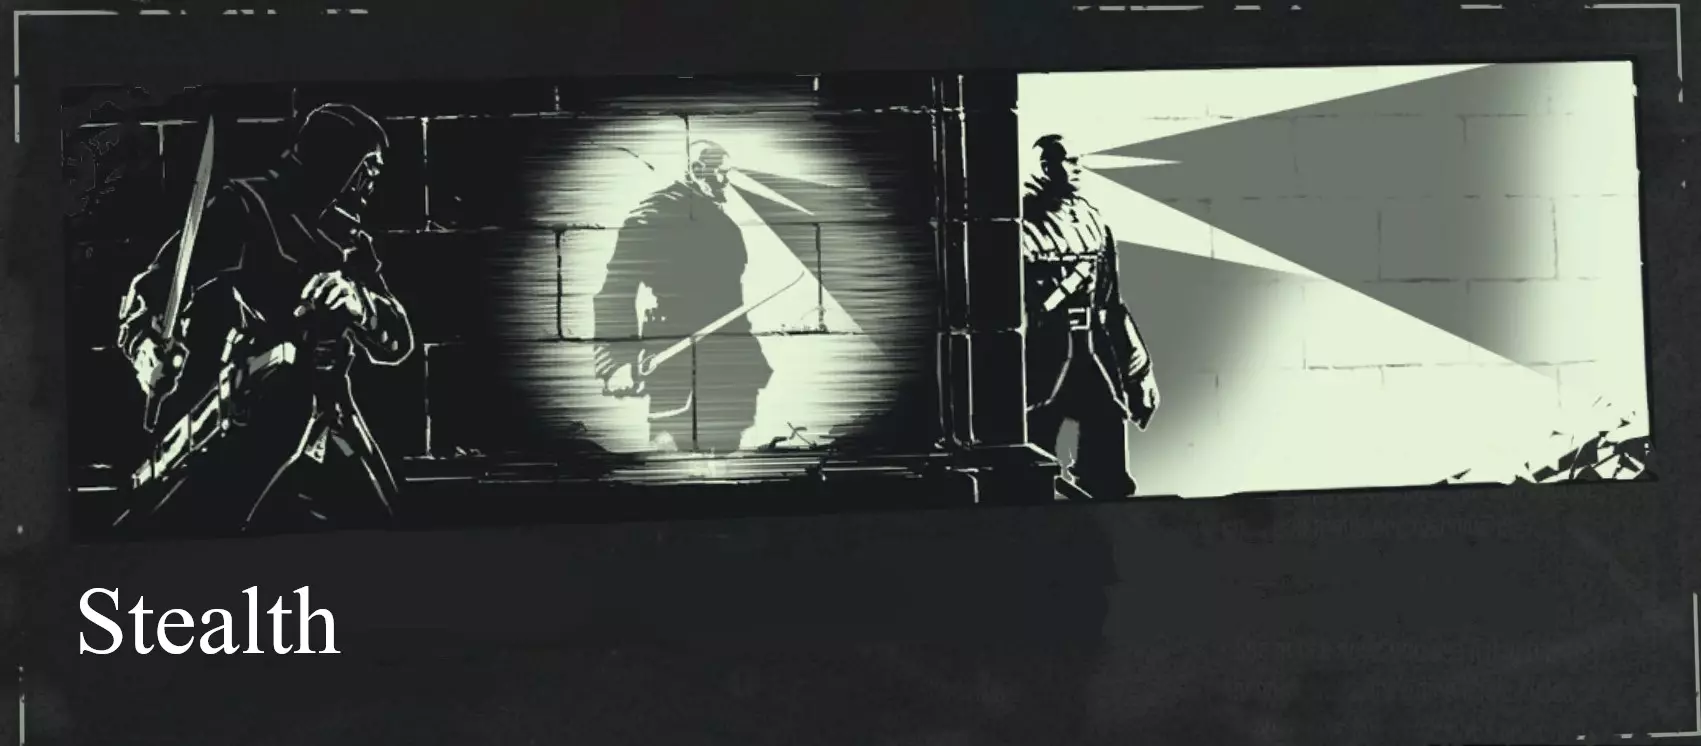
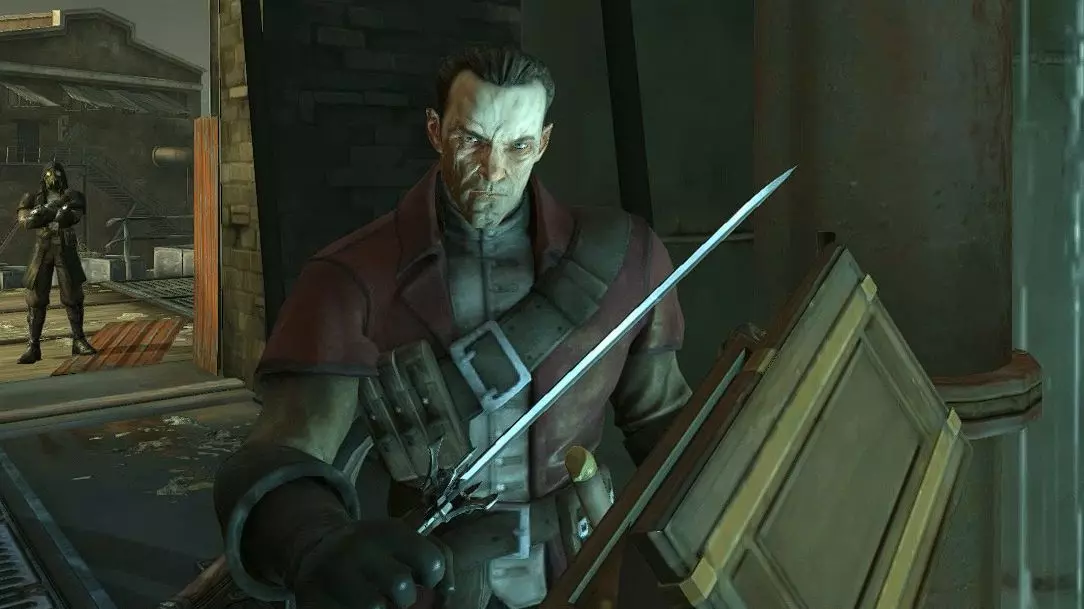
Stealth and Combat are the two primary gameplay types in Dishonored. Most players favor one or the other, but you're free to mix them at will. For this guide, though, I'll be splitting the two types into separate sections to better explain them. For a first playthrough, these two sections will give you an overview of the basics, and are enough to get you through the game without feeling lost or wondering what certain things are meant to do (e.g. "How do I even use Sleep Darts when they take thirty years to put someone asleep?!"). See the "Advanced" sections further in for additional techniques and advice. Overview of Stealth In Dishonored, stealth is primarily based on two factors: Sound, and LOS (Line Of Sight). In some stealth games, light is the important visual factor (such as in the Thief series, where shadows make you largely invisible). Dishonored is different. If you try sneaking past a guard by sticking to a shadow, you'll quickly get spotted. Instead, the key is to always keep a physical barrier between you and the enemy. Cover breaks Line Of Sight and therefore keeps you from being detected. The other element is pretty self-explanatory--loud noises will make enemies suspicious. However, an enemy will still need to see you before they will attack; sound alone will never be enough to raise an alarm. Positioning & MovementNormally, it is very easy for your enemies to detect you. Combat this by entering Stealth Mode (toggle by hitting crouch button), which silences your footsteps and makes you tougher to spot. You'll know you're in Stealth Mode by looking at your sword. If Corvo is holding it in reverse grip (blade pointing to the right) you're in Stealth Mode. If the sword is pointed upwards, you're not. Stealth Mode makes you move more slowly, so switch stance if an enemy spots you. Use your Powers frequently. Blink, the default teleport power, is far and away the best tool in the game. Use it to get out of tight spots, find alternative routes, close the distance to a patrolling enemy, and skip that annoying "inch forward nervously" part of stealth by teleporting between pieces of cover. Detection Lightning bolt icons will appear in pairs around enemies' heads as they detect you. Two or four bolts means they are suspicious, while a full six bolts means they will start searching for you. Remember: This does not mean you have been spotted! If a full set (three pairs, six total) of bolts "break", or disappear suddenly, then and only then have you truly been spotted. The game's music will help confirm this--pay attention to the games' soundscape while sneaking. It is adaptive, meaning it will change dynamically depending on the current situation. For example, tense music likely means an enemy is physically close to you, while sudden strings indicate that they have become more aware of you. Assassinations & TakedownsNow that you are behind an unaware enemy, you are ready to attack. If you have HUD enabled two icons will appear on your screen, indicating that you are in range for a stealth attack. There are two such moves you can choose between: Press the attack button to silently kill the enemy, or hold down the choke/block button to choke them out. The latter leaves them unharmed. Be warned that their body (dead or unconscious) will fall to the floor and create a small amount of noise. If another enemy comes across a body, they will become alerted. Don't let that happen. Instead, pick up the body by holding the interact button, and move them to a better location. You want somewhere hidden--on rooftops, inside dumpsters, and underneath tables are all good spots. An unconscious enemy will die if they fall off a height or into water, so consider your placement carefully. Tools of Stealth Crossbow Bolts Useful for two things: Making noise and sniping enemies. Aim for the head or body if you can--a successful headshot will always kill an enemy. Make sure not to miss, as bolts will make noise when they strike walls or other hard surfaces. Of course, you can instead use this to your advantage by purposefully shooting walls or objects near a specific enemy to lead them away from their allies, letting you eliminate them more easily. Sleep Darts Enemies or NPCs shot with a Sleep Dart will be knocked unconscious after a short delay. You'll know you hit them if they swoon and stagger. If you intend to stick to the nonlethal route, I highly suggest purchasing the upgrade "Combat Sleep Darts". This title is misleading, as the darts will still be usable in stealth (and will actually be incredibly useful, as this upgrade makes their effects instantaneous). Without this upgrade, you'll generally want to dart only one or two enemies at a time. A good combo for nonlethal stealth is to Sleep Dart one enemy before immediately choking out another--use this to incapacitate two enemies near one another. Traps By using gadgets like the Rewire Tool and Springrazor, you can set traps for enemies, which will remain undetected until they are activated. Use a vantage point to study the movements of enemy patrols. This will show you where to place your traps (not to mention alternative routes which may allow you to sneak past more easily). If an enemy is chasing you, consider leading them to a trap you have set up. I Got Discovered. What Do I Do?Whatever you like! Shoot the enemy with a Sleep Dart, Assassinate them (remember that you can safely kill around 10 enemies per level and still get the "good" ending) before they can call for help, or simply teleport away--this last option will work better than you think. The only suggestion I have for you is to keep your finger off that Load Quicksave button. In stealth games there is a strong temptation to reset every time you get spotted, but this isn't always a good idea. It's a hard habit to break and may limit the breadth of fun you can have in a game like Dishonored. Of course, sometimes quickloading is necessary for challenge runs and achievement hunting, and some people just prefer to get the perfect run. But for a casual playthrough, it will usually be much more fun to keep playing. You have a sprint key for a reason. Combat
第二种主要游戏模式是战斗。无论玩家是否采用潜行玩法,《耻辱》的侦测机制始终生效。这让你在遭遇战中有更多应对方式,即使是专注于战斗的玩家,也能通过初始的潜行攻击来开启战斗并从中获益。 战斗概述 如果敌人察觉到你,他们就会发起攻击。大多数敌人会近战冲锋,而有些敌人则会保持距离使用远程武器攻击。按下攻击键(默认PC键位为鼠标左键)挥舞你的剑,按下使用道具/能力键(鼠标右键)使用当前装备的能力/道具(包括像“闪现”这样的超自然能力以及手枪等武器)。使用快捷键(数字键1到0)或快速访问轮盘(鼠标中键)选择你想要使用的技能/装备。注意快速轮盘也会减缓时间,为你提供一些额外的反应时间。 当你与敌人交战时,他们很可能会惊动同伴。一旦其他敌人察觉到你的攻击,他们也会冲过来攻击你。如果附近有警报器,敌人会触发警报,这将引来更多援军。可以通过移动或格挡来躲避攻击——否则,攻击会减少你的生命值。必要时使用生命药剂和食物来恢复生命值。你可以随时按下快速恢复按钮(默认PC按键为R)来进行恢复。由于你一次最多可以携带10瓶生命药剂,这为你提供了充足的生命值来应对战斗,所以在战斗中不要犹豫使用这个功能。另外要注意,这些药剂在游戏中分布十分丰富,因此几乎没有必要为以后节省补给。 格挡与反击:当敌人用剑攻击你时,按住你的格挡键,角色会进行格挡,从而免受伤害。如果你在敌人攻击即将命中的瞬间进行格挡,敌人会失去平衡(即进入硬直状态),完全暴露在你的攻击之下。一旦他们向后踉跄,立即向前并按下攻击键,即可用名为【反击】的特殊动作处决他们。格挡→反击的循环是近战战斗的关键,因为它能让你通过两个快速步骤既保护自己又消灭敌人。请注意,在本指南的后续内容中,反击将被称为战斗暗杀。 在与一群敌人交战前,花点时间(哪怕只有几秒钟)计划你的攻击。是否有特别危险的敌人在场?附近是否有一堆炸药?第一次攻击很重要。这是你在其他敌人开始攻击你之前获得击杀的唯一机会,所以通过消灭最大威胁来让这次攻击发挥作用。即使在战斗中,也不要被非首要目标的敌人分散注意力。优先目标包括装备远程武器的敌人。如果没有明显的目标,就专注于离你最近的威胁。 同时与三个以上的对手战斗会非常危险。在狭窄空间与一群敌人战斗时,使用你的远程武器和弹簧陷阱等 gadgets(原词)来快速压制对手。按住格挡键看似诱人,但被包围时实际上无法保护你——所以要保持攻击性并灵活移动。如果在任何时候你开始感到难以应对,只需逃跑,使用闪烁技能传送出危险区域。一旦安全,你可以转身从更有利的位置重新与敌人交战。 了解自身极限 战斗时,了解多少敌人对你来说太多是很重要的。时刻留意你的生命值和灵药储备——如果补给或生命值较低,考虑避开或智取大群敌人,而非直接与之战斗。重新连接的光墙或电弧塔能一次性保护你免受许多敌人的伤害,而爆炸物或其他环境危险通常能削弱敌人的力量。或者,你可以在重新战斗前先寻找额外的补给。 战斗工具 手枪 这是你获得的第一把远程武器。它对单个敌人造成不错的伤害,在极近的距离还会击退附近的敌人。注意,基础手枪的 reload 时间相对较长。科尔沃的手枪 这把武器是基础手枪的升级版,非常适合在中近距离对付小股敌人。瞄准一名敌人进行攻击(事实上,他们可能会被直接击杀),但要确保利用好武器对附近敌人造成的爆炸伤害。用你的剑来解决脆弱的对手。 十字弩箭矢 在激战中,用十字弩击中远处目标可能很困难。更有效的用法是对付中近距离的敌人,这些目标更容易命中,且威胁更直接。射中身体会使大多数敌人踉跄数秒,这意味着攻击你的敌人会少一个。对付单个对手,一支箭矢就是死刑判决——趁他们踉跄时用剑解决他们。爆炸物 手榴弹最适合在中等距离使用——离得太近使用可能会伤到自己。尽量把手榴弹扔向敌人聚集的地方或狭窄的空间,让他们无处可逃。鲸油桶和威士忌瓶在紧急情况下也是很好的武器,所以当守卫向你冲来时,不要犹豫,扔一个过去。 物品与装备
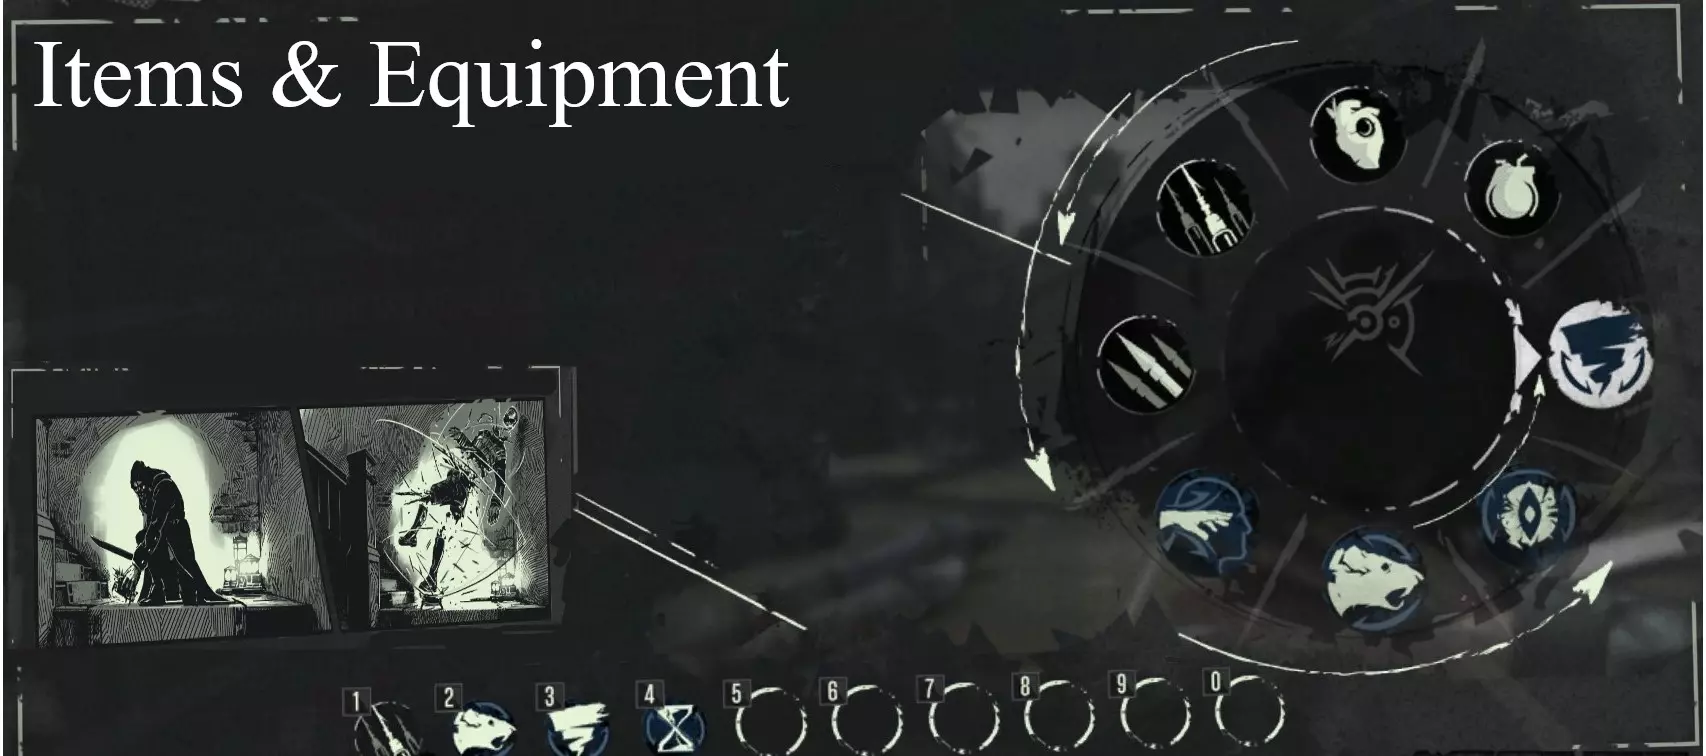
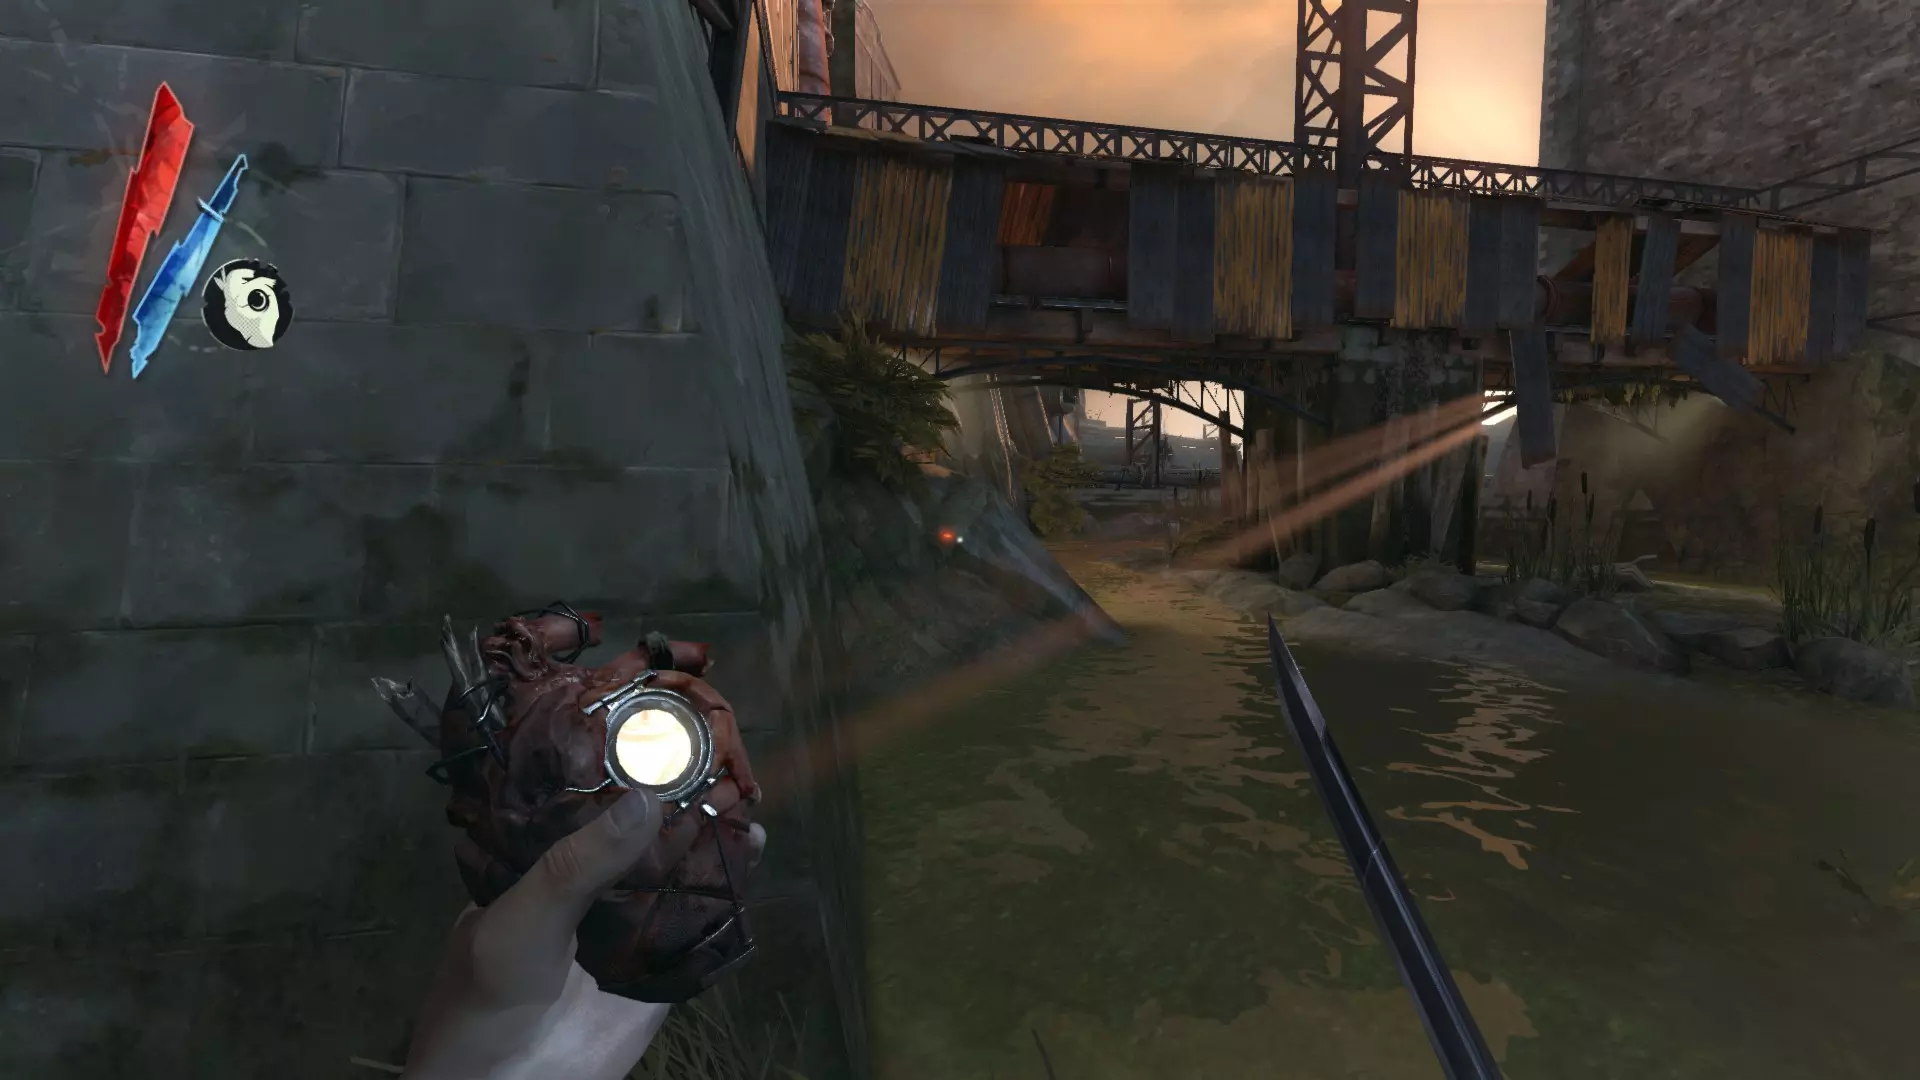
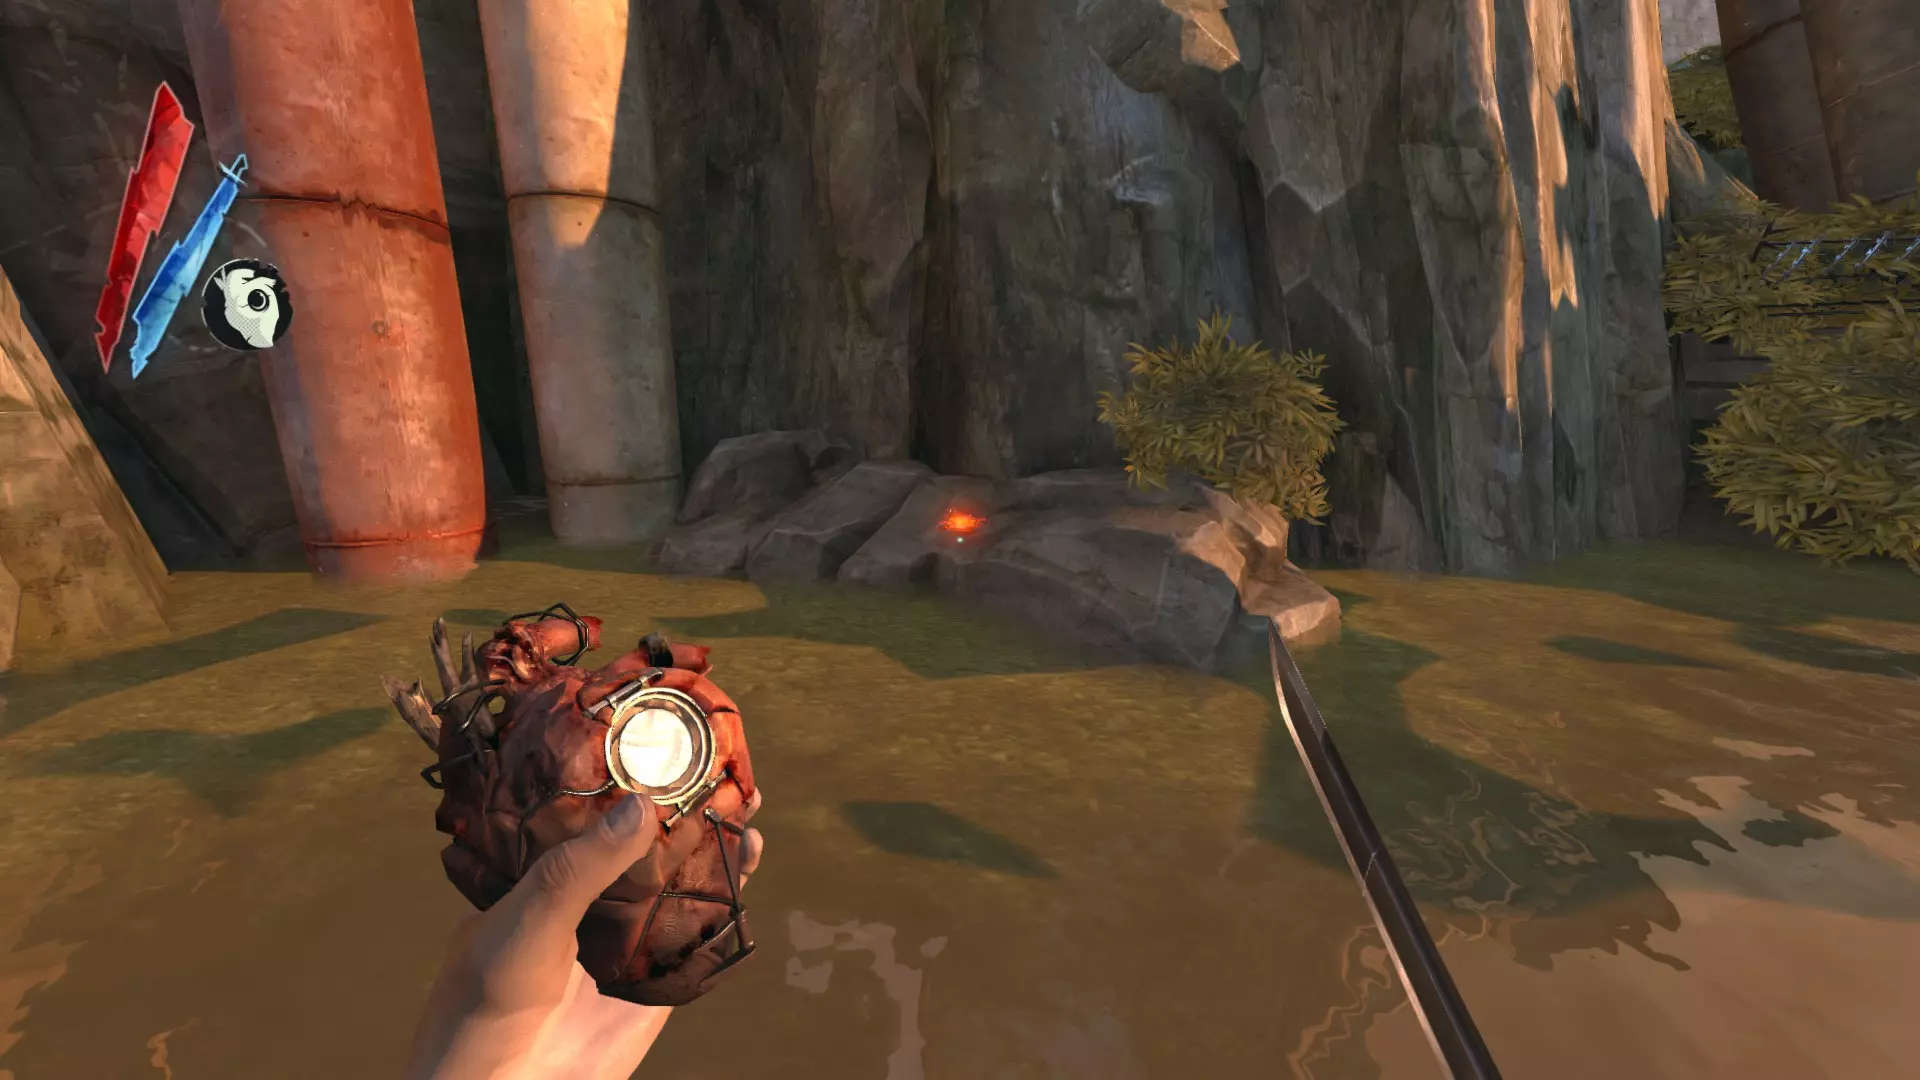
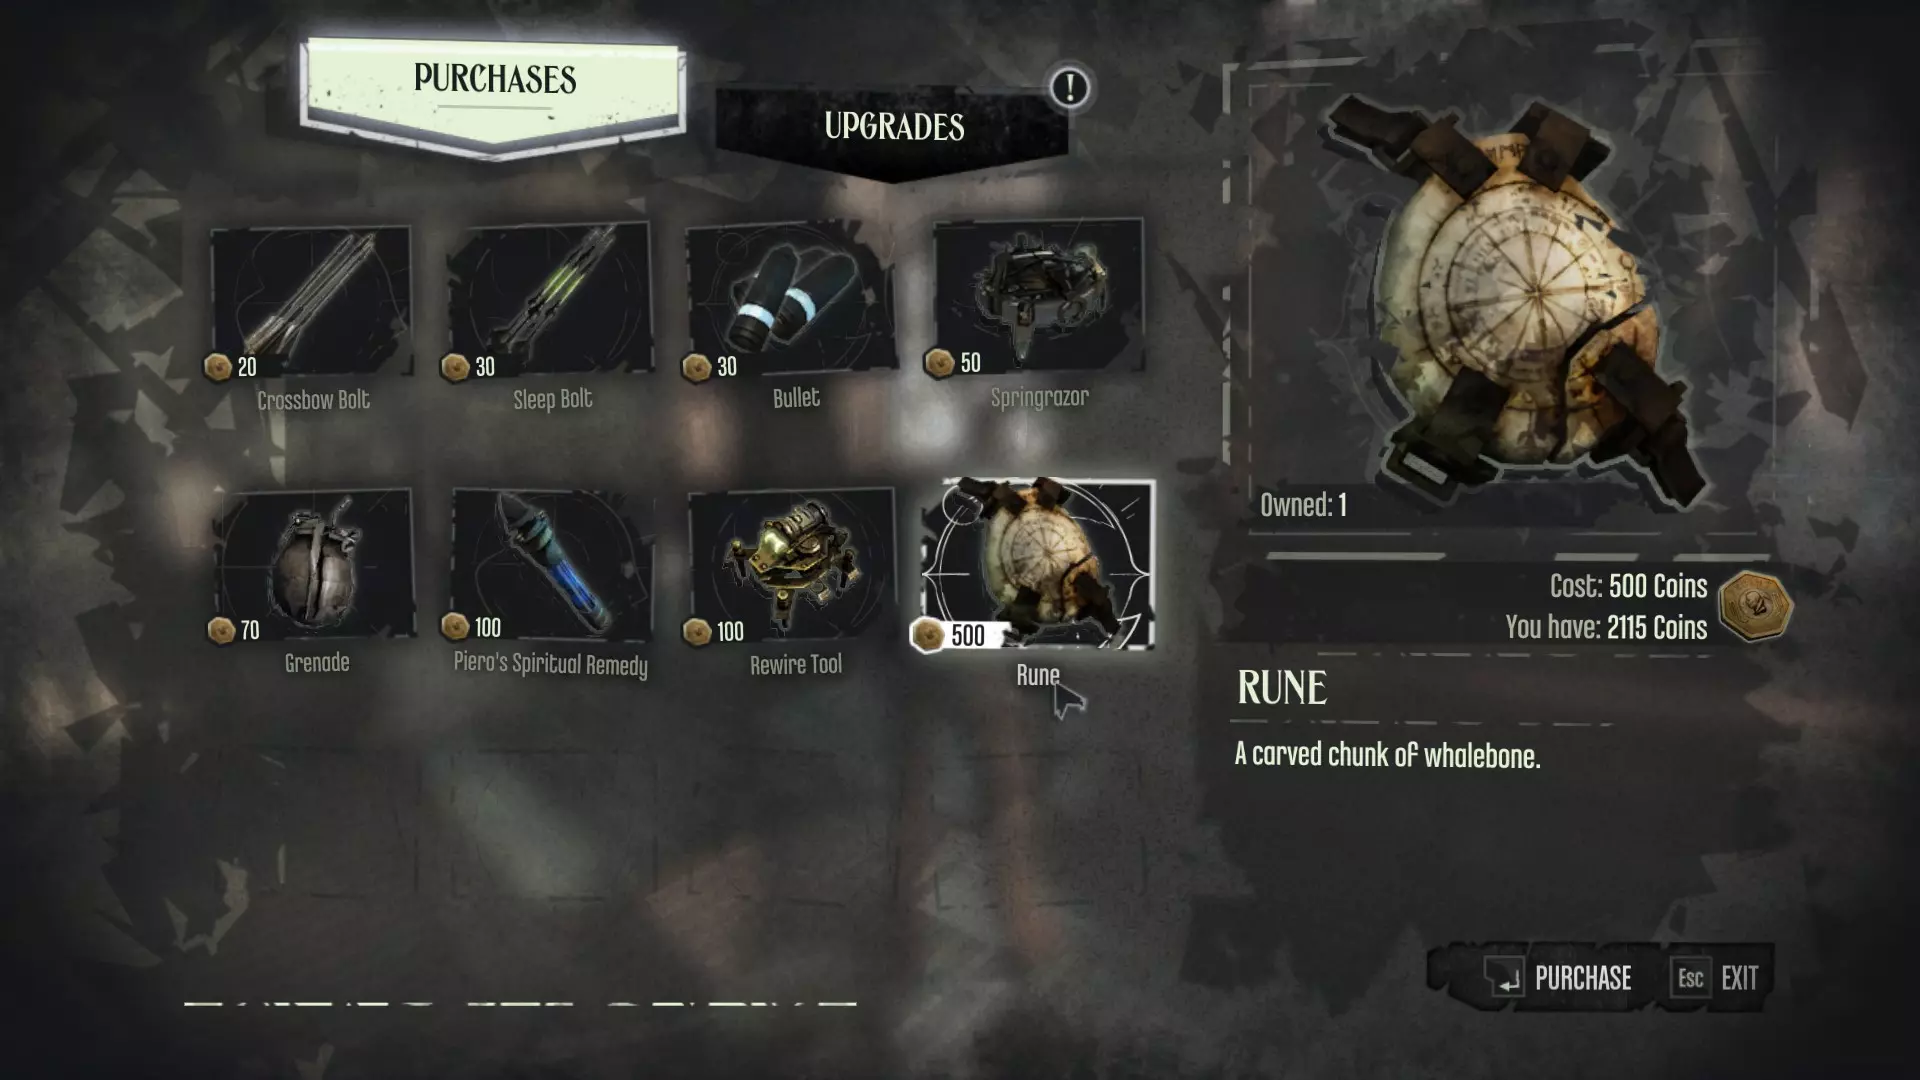
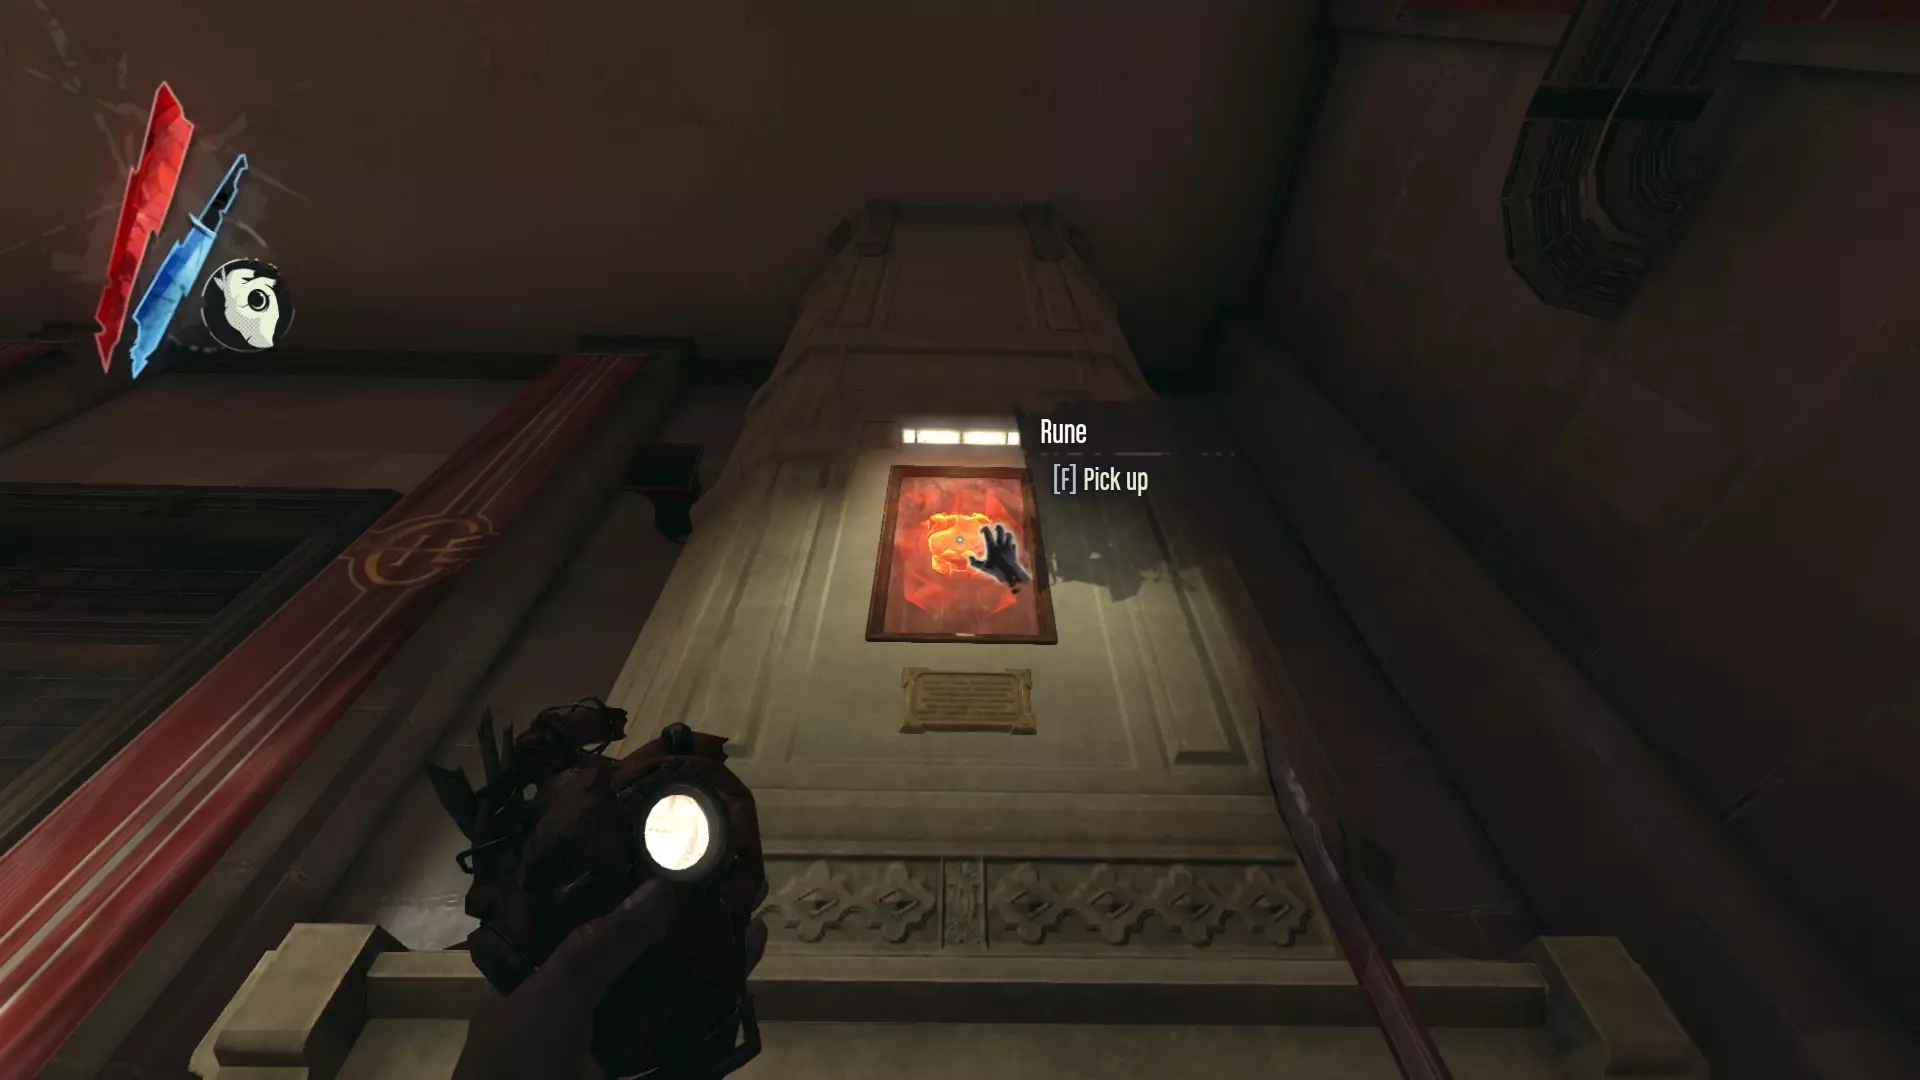
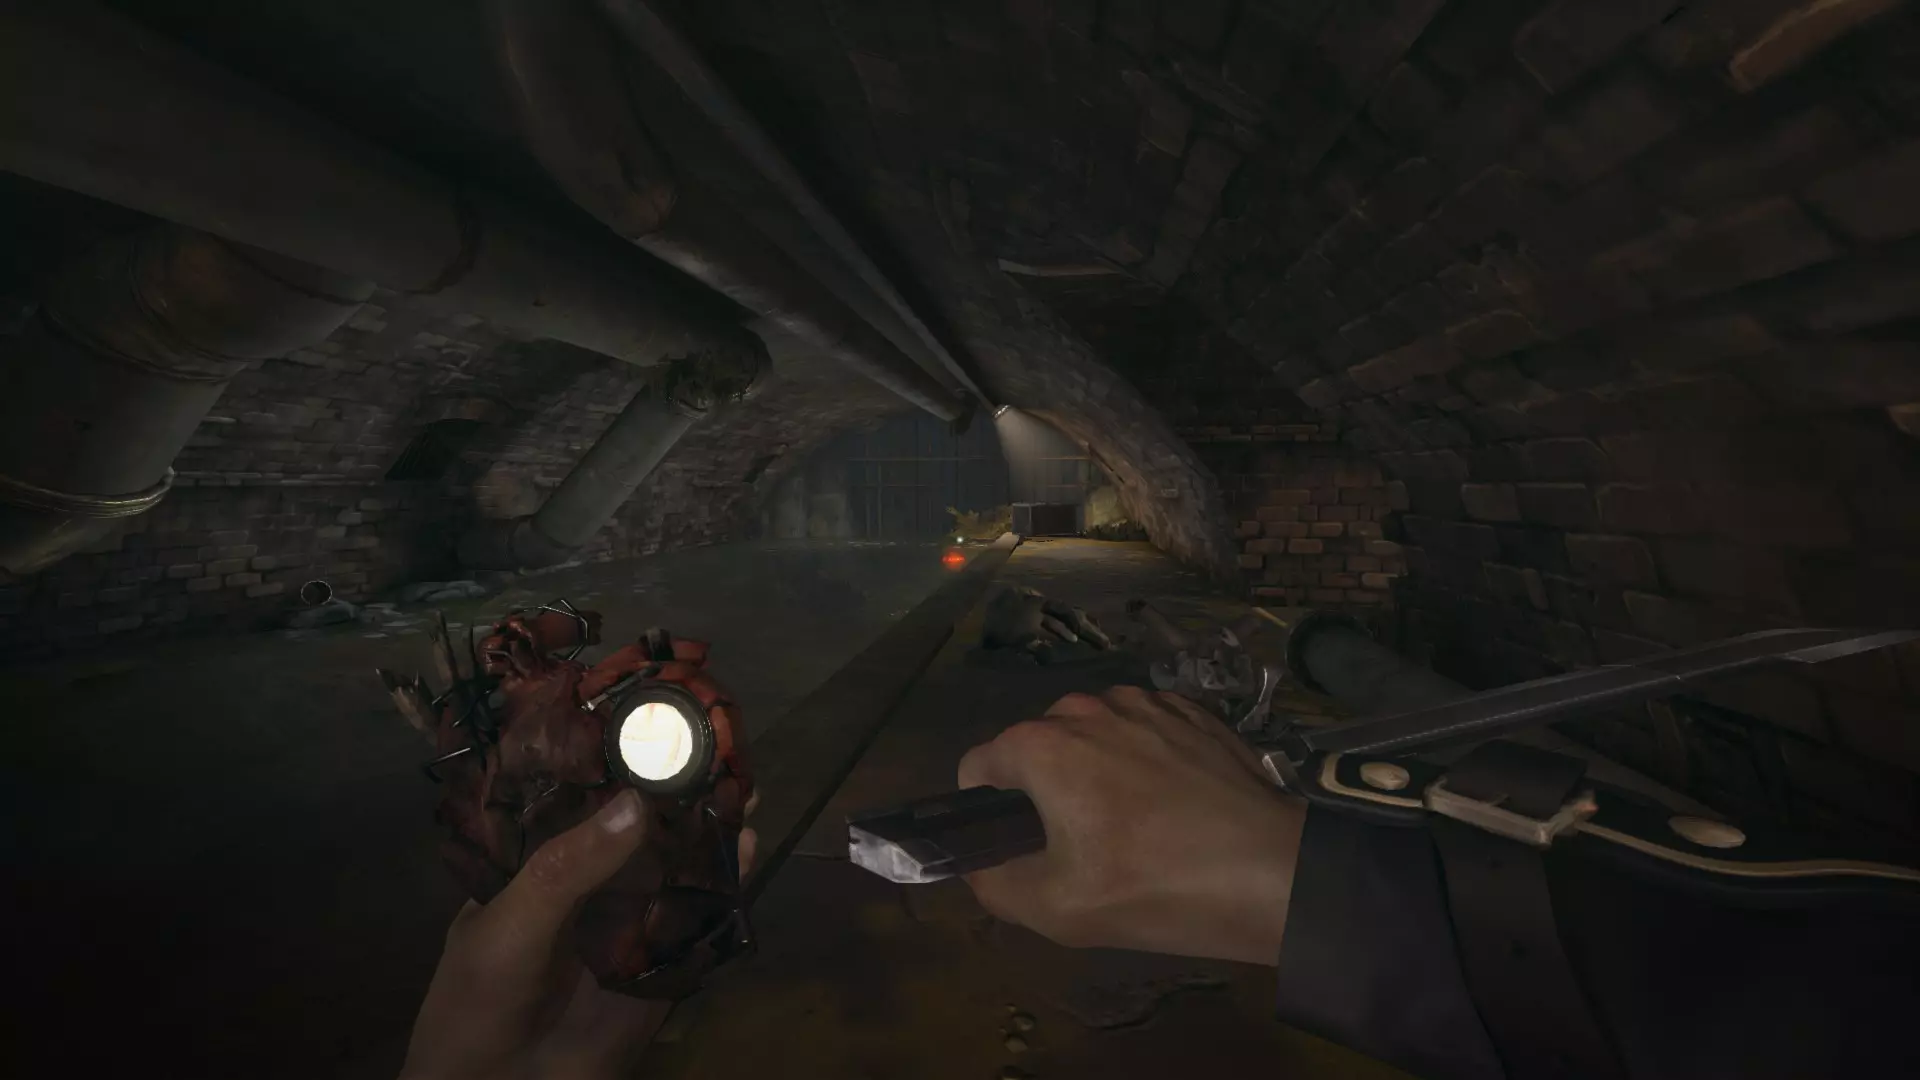
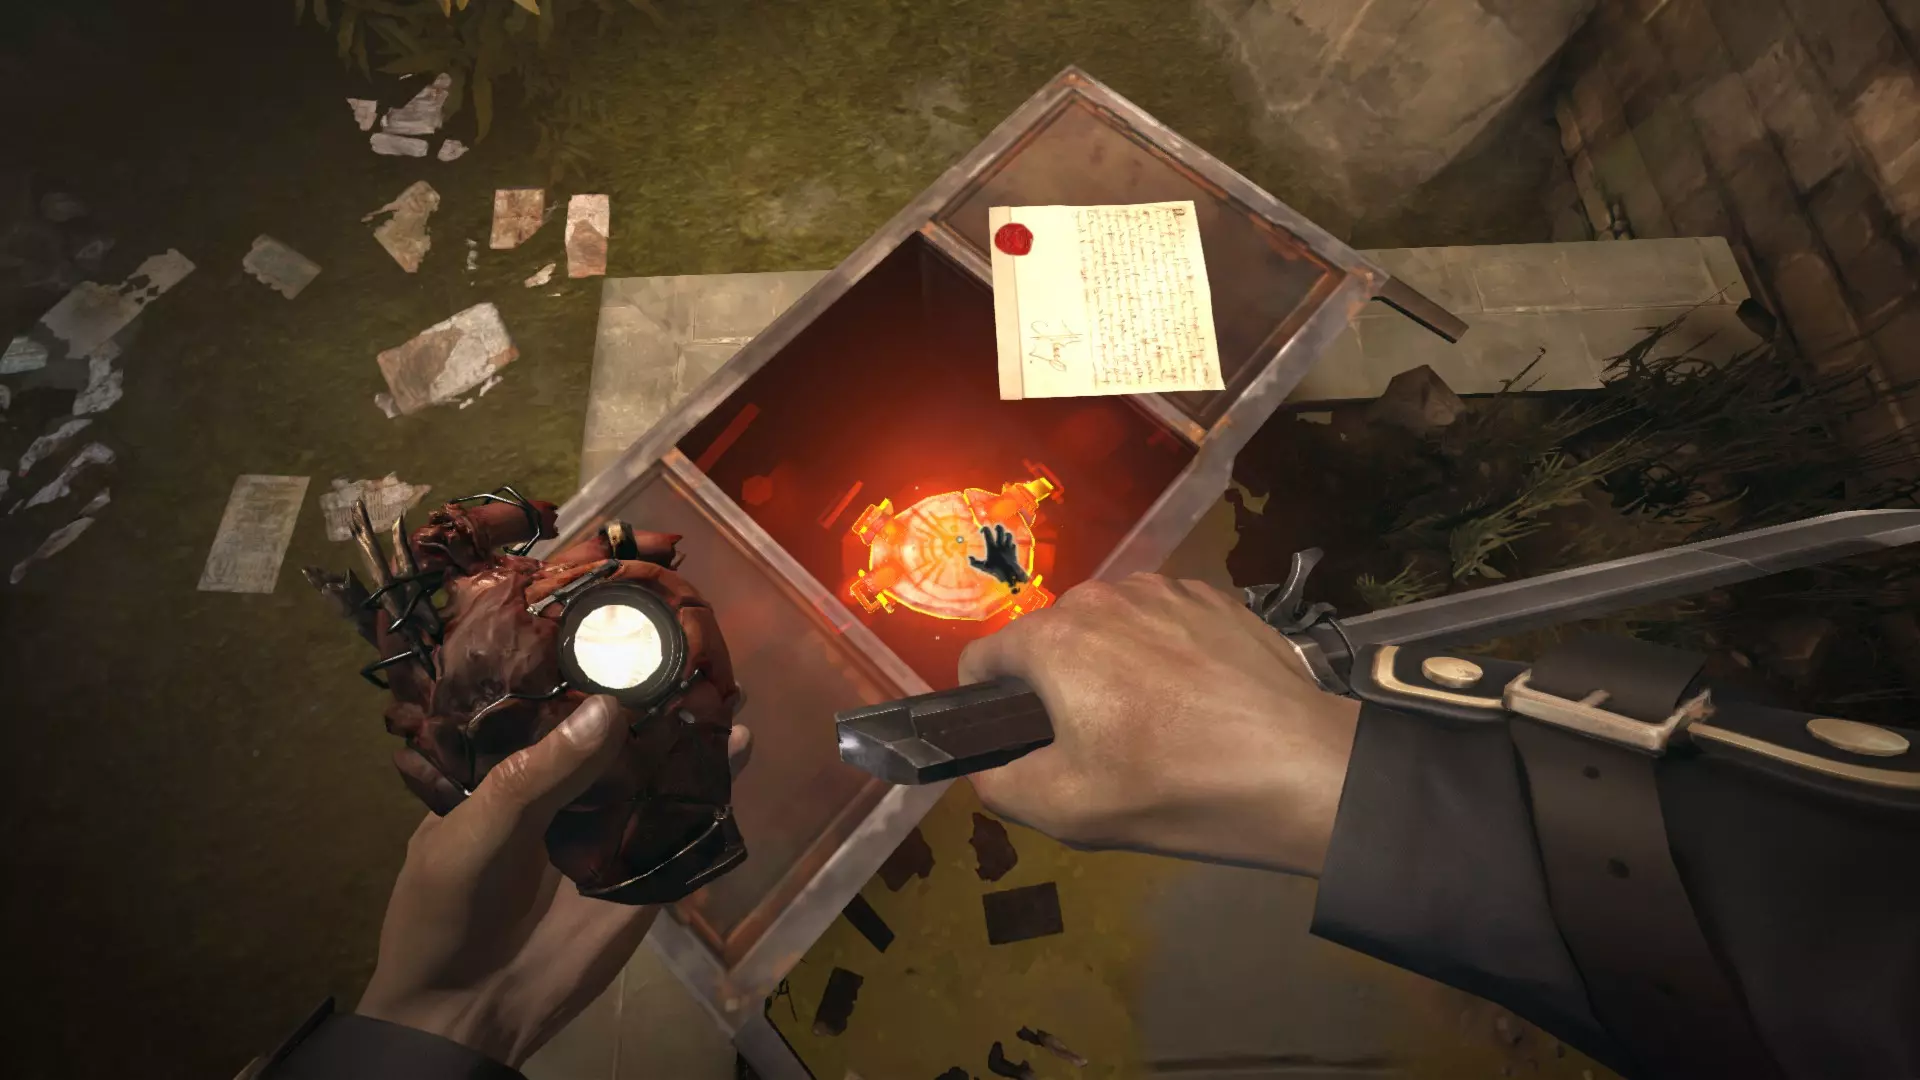
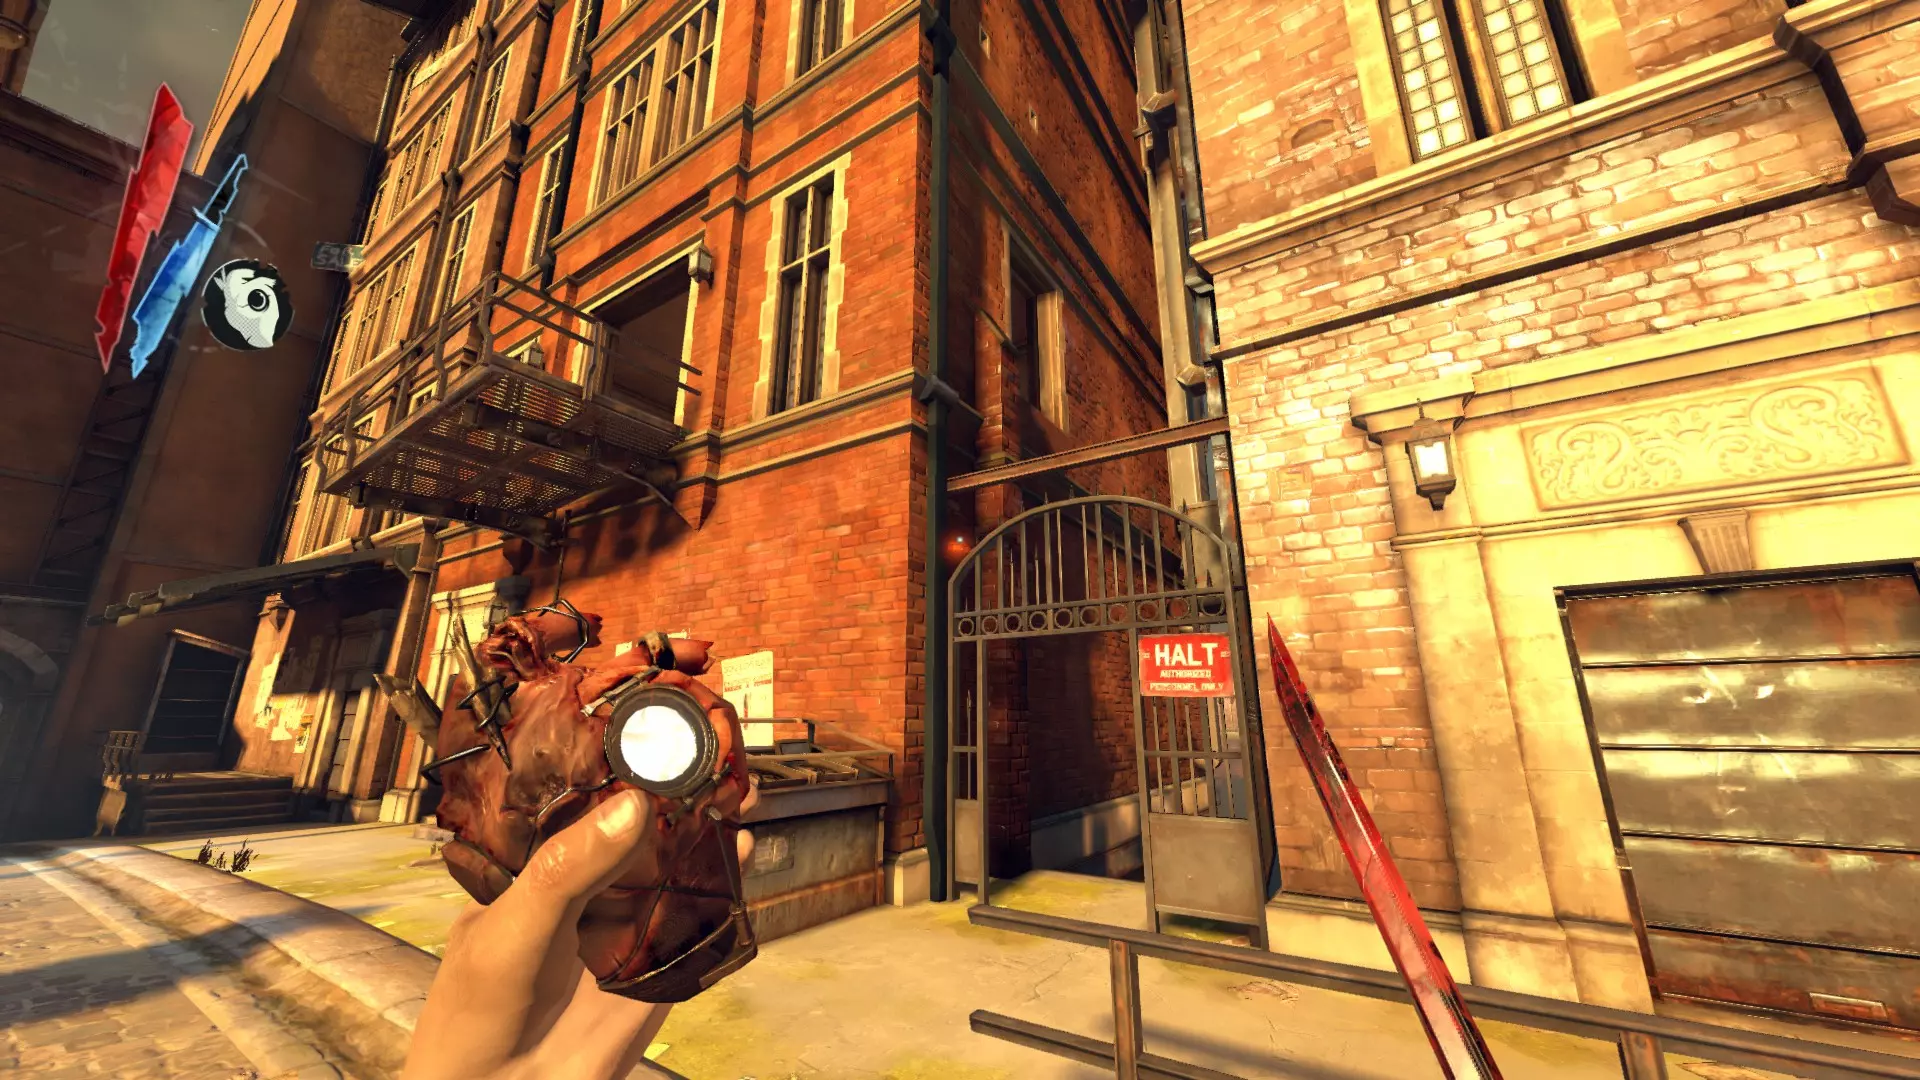
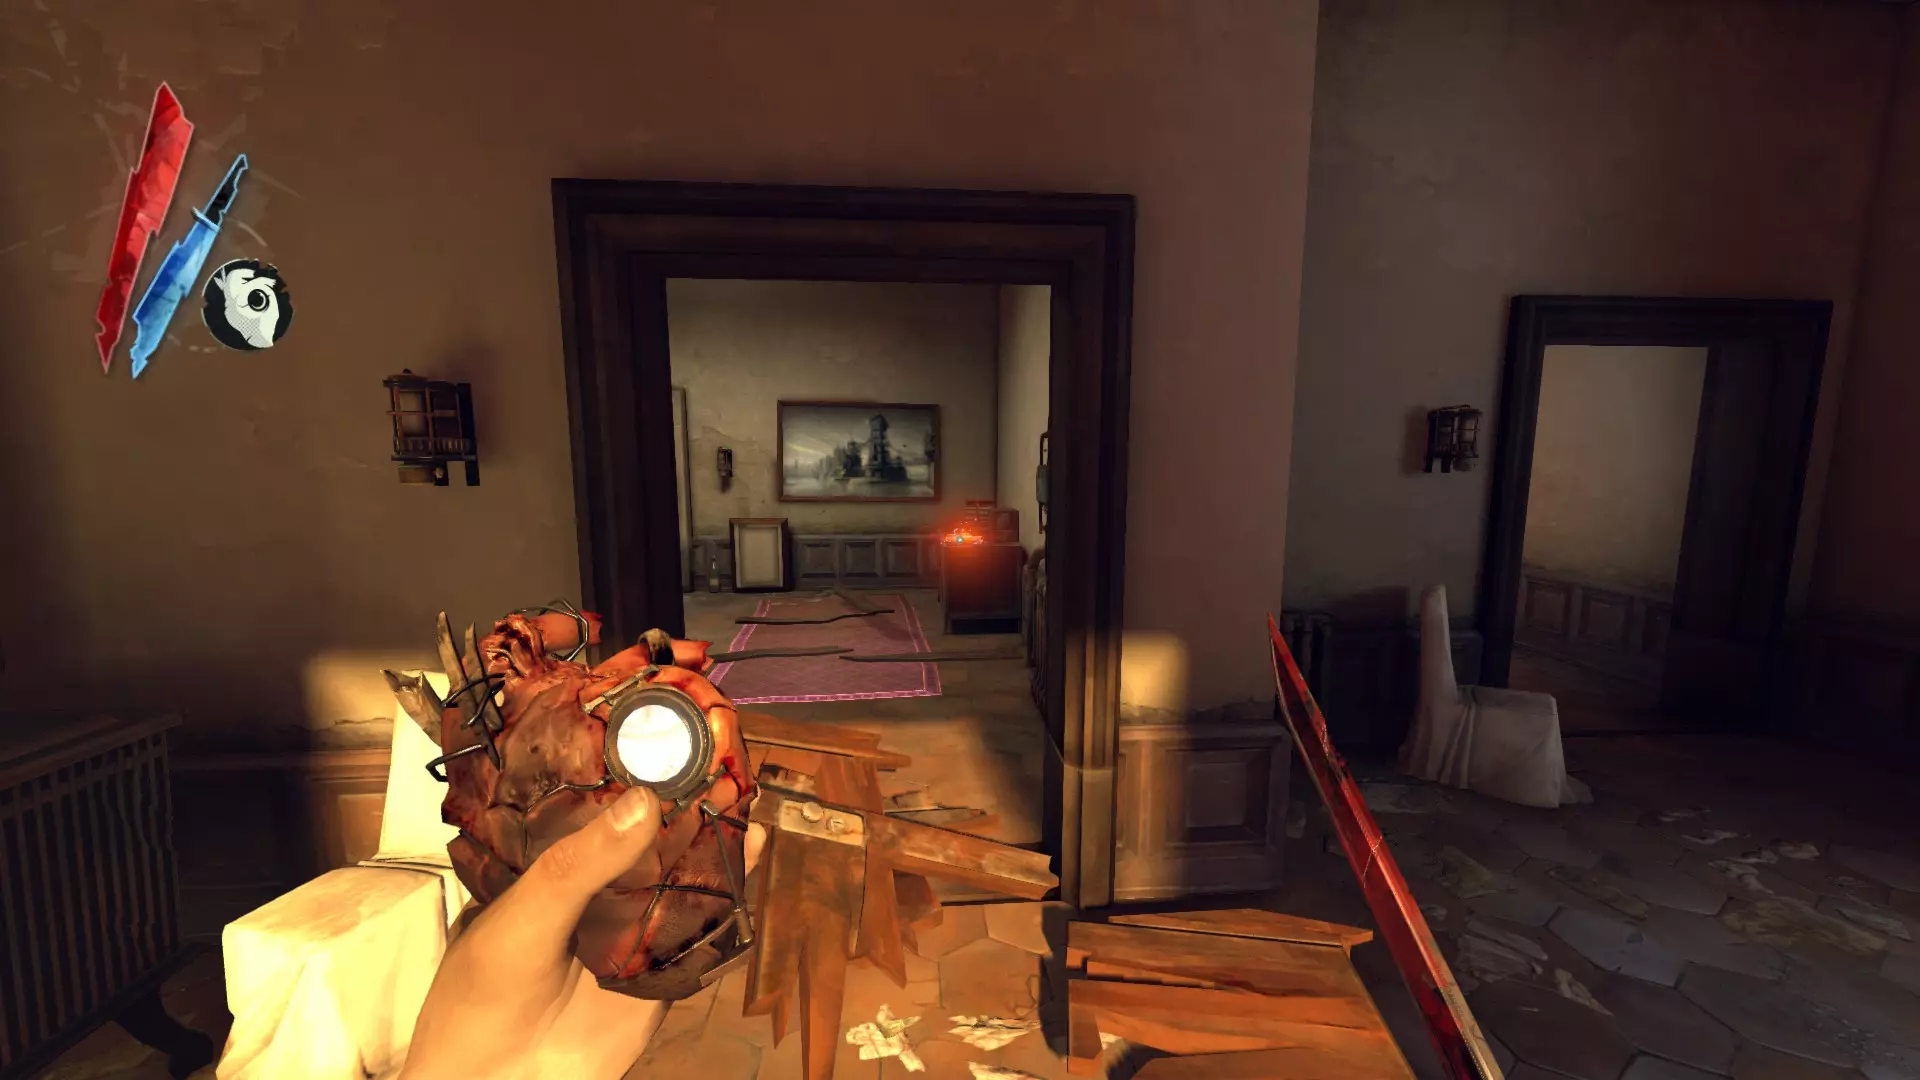
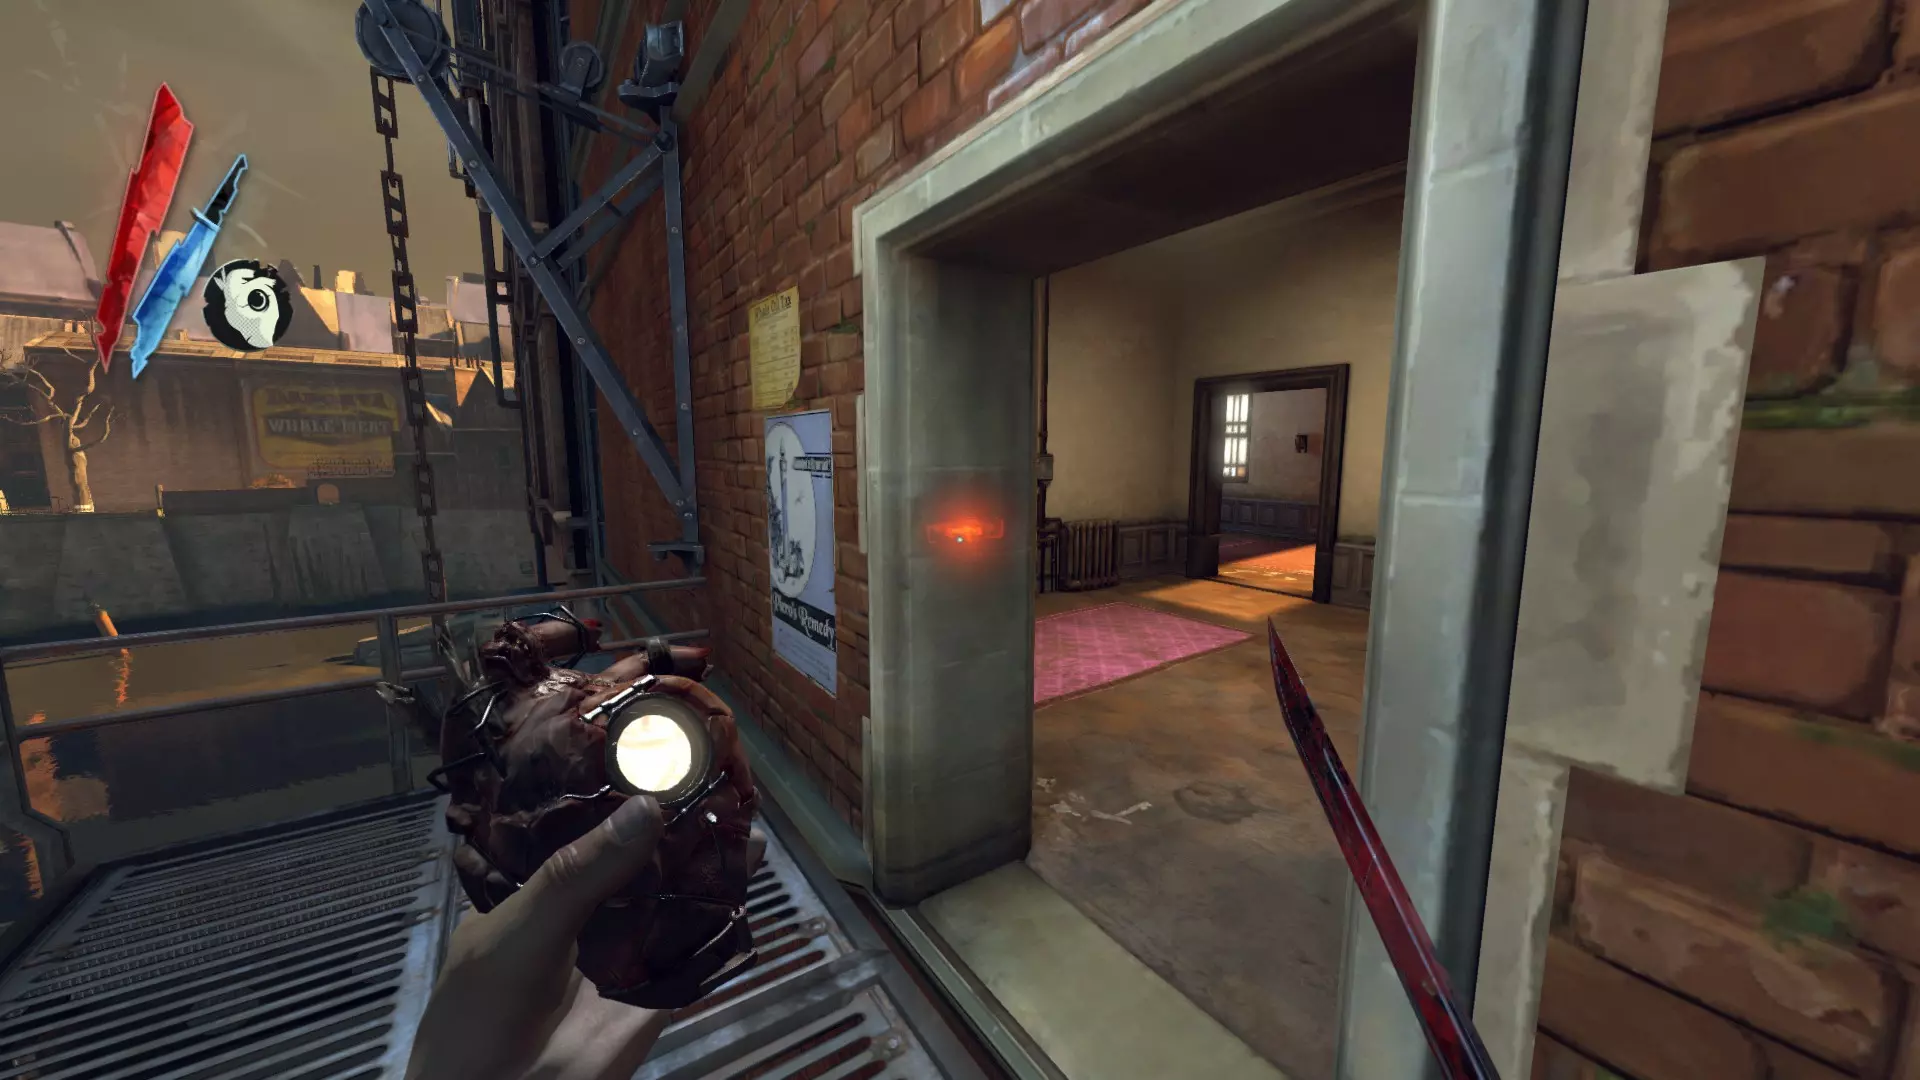
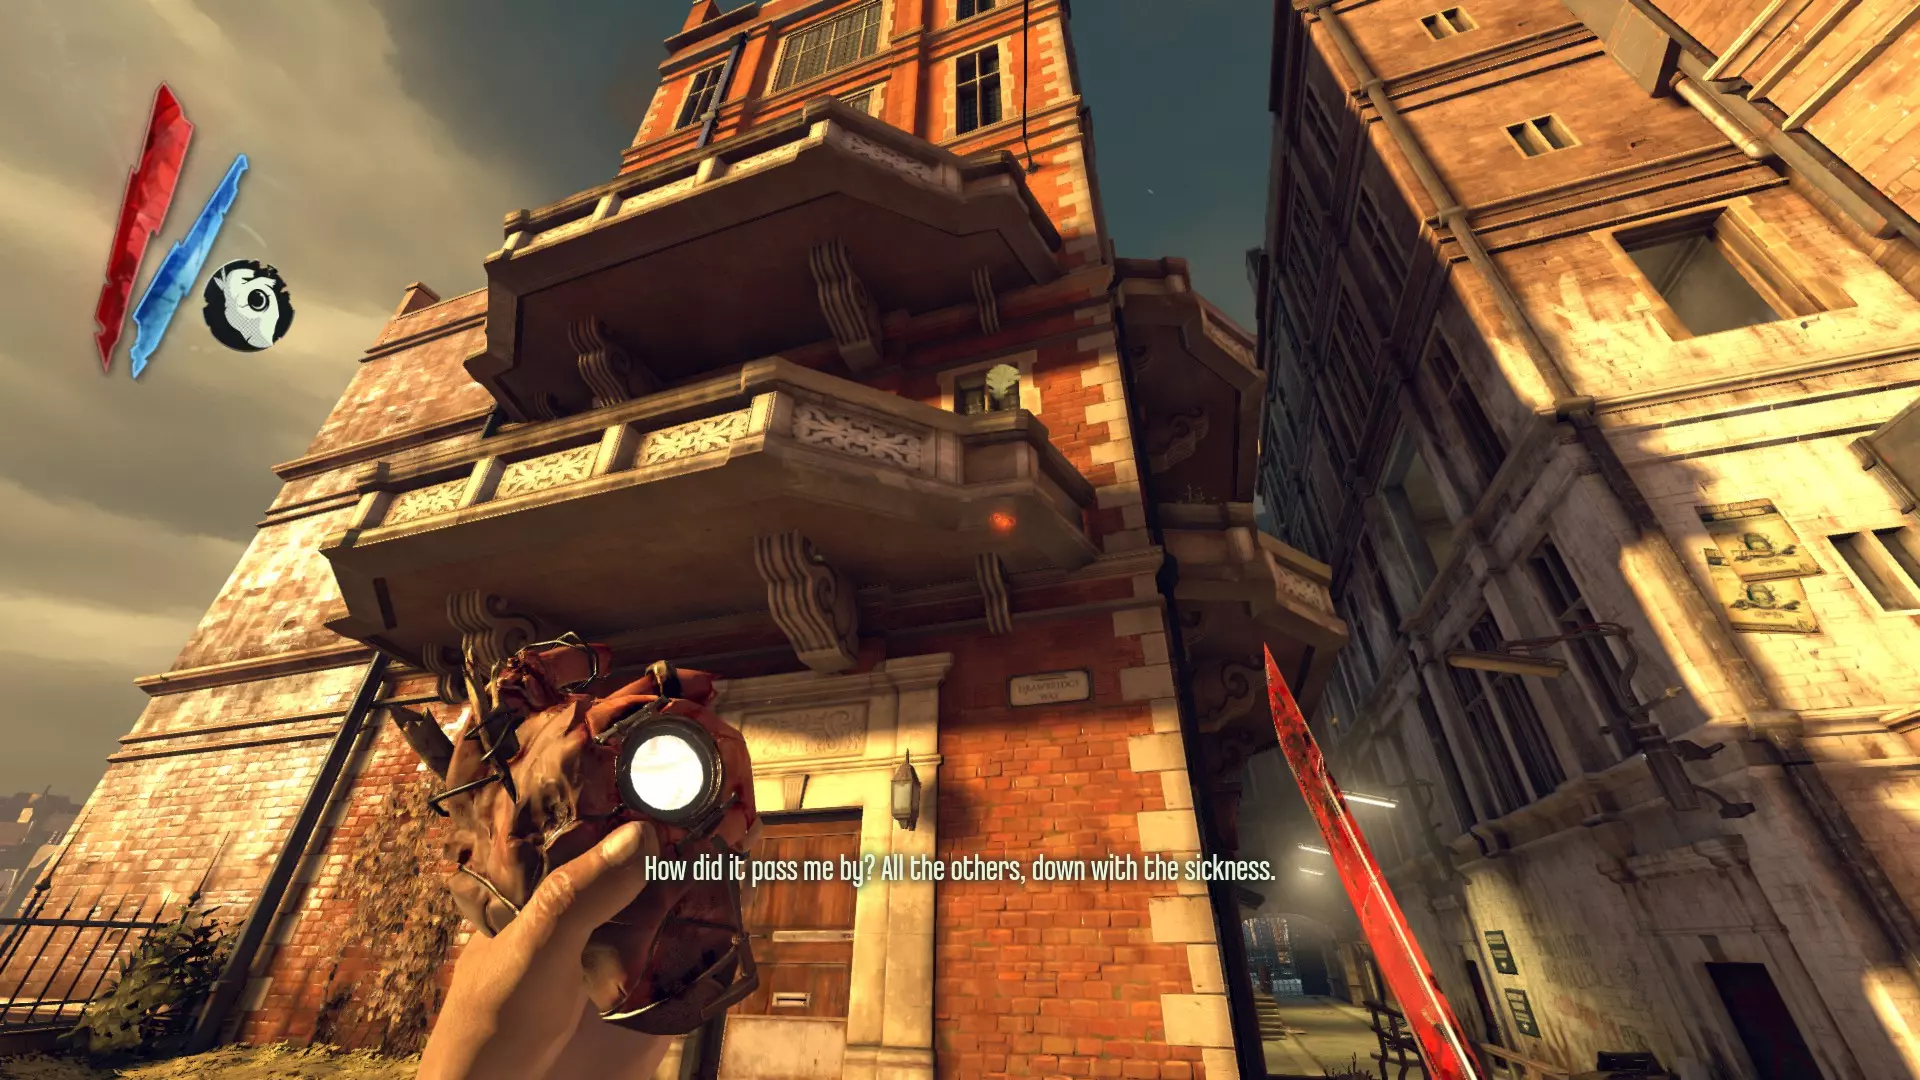
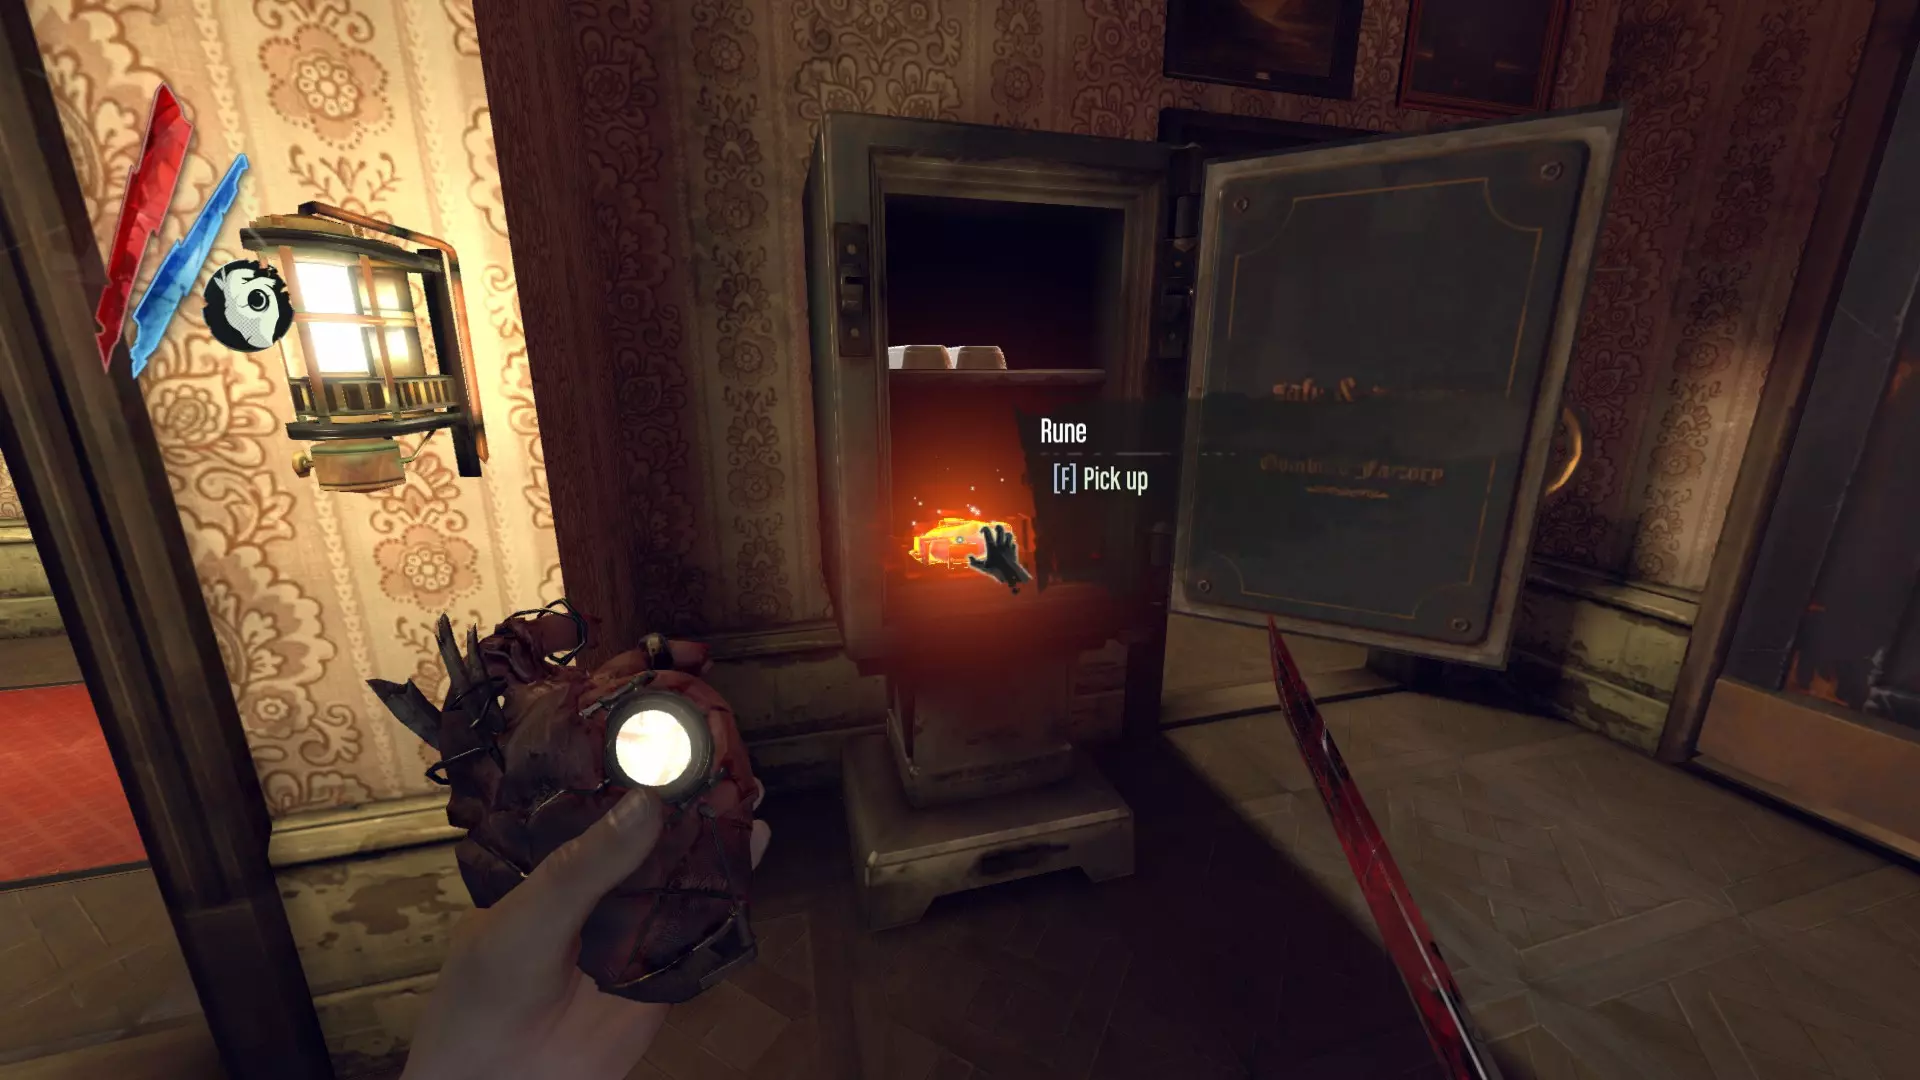
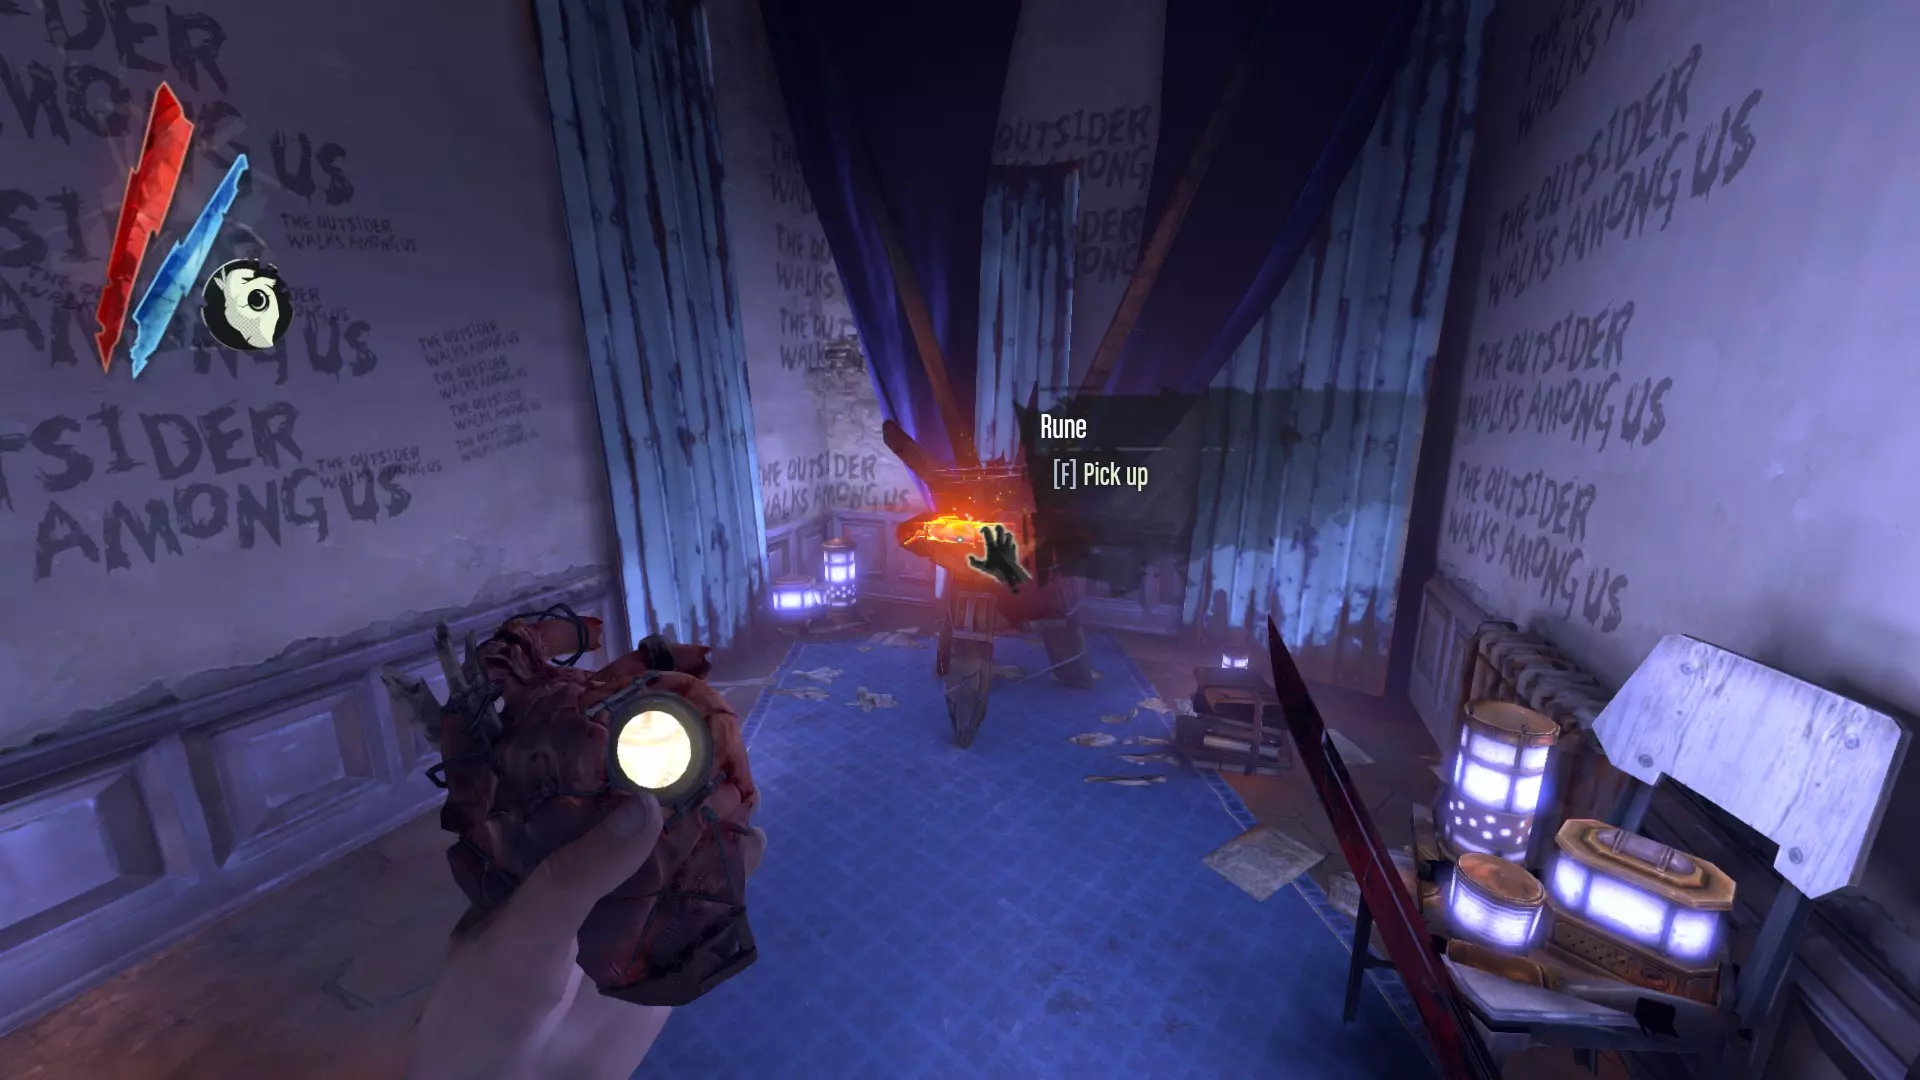
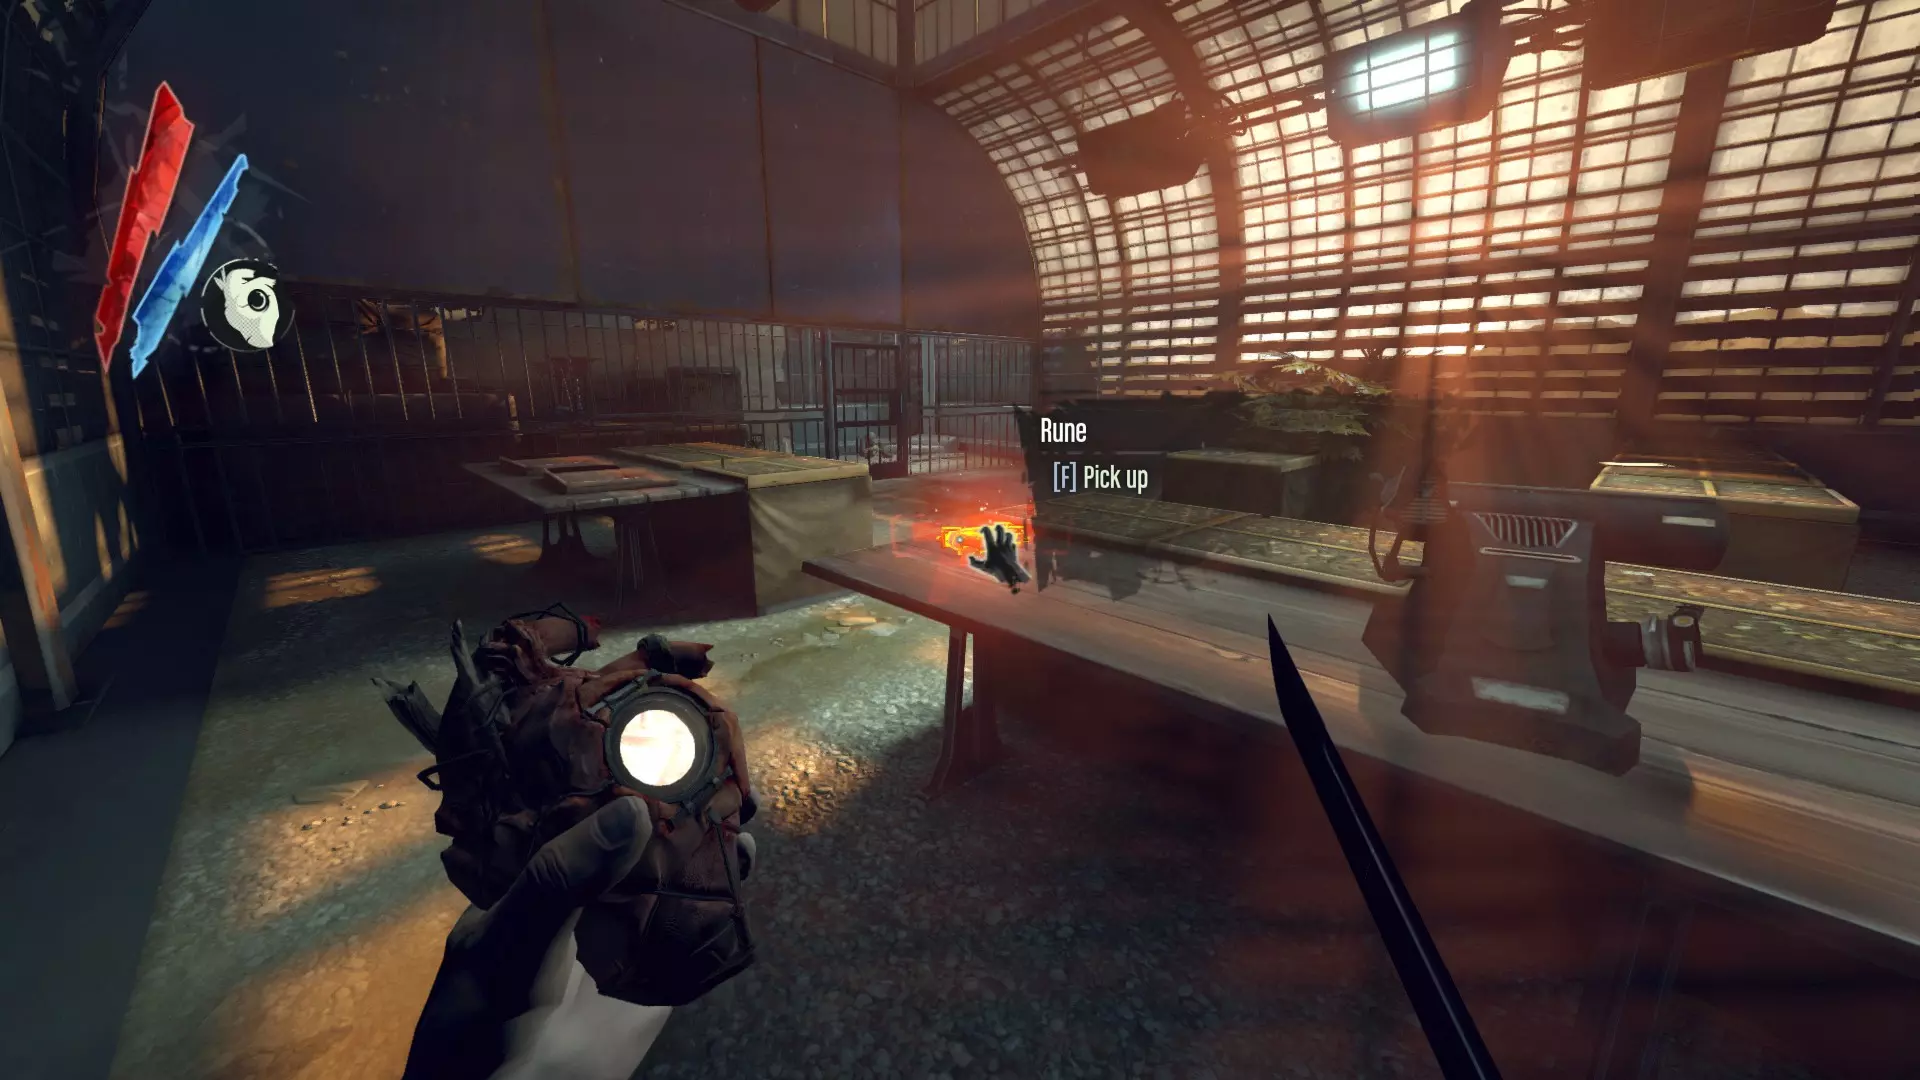
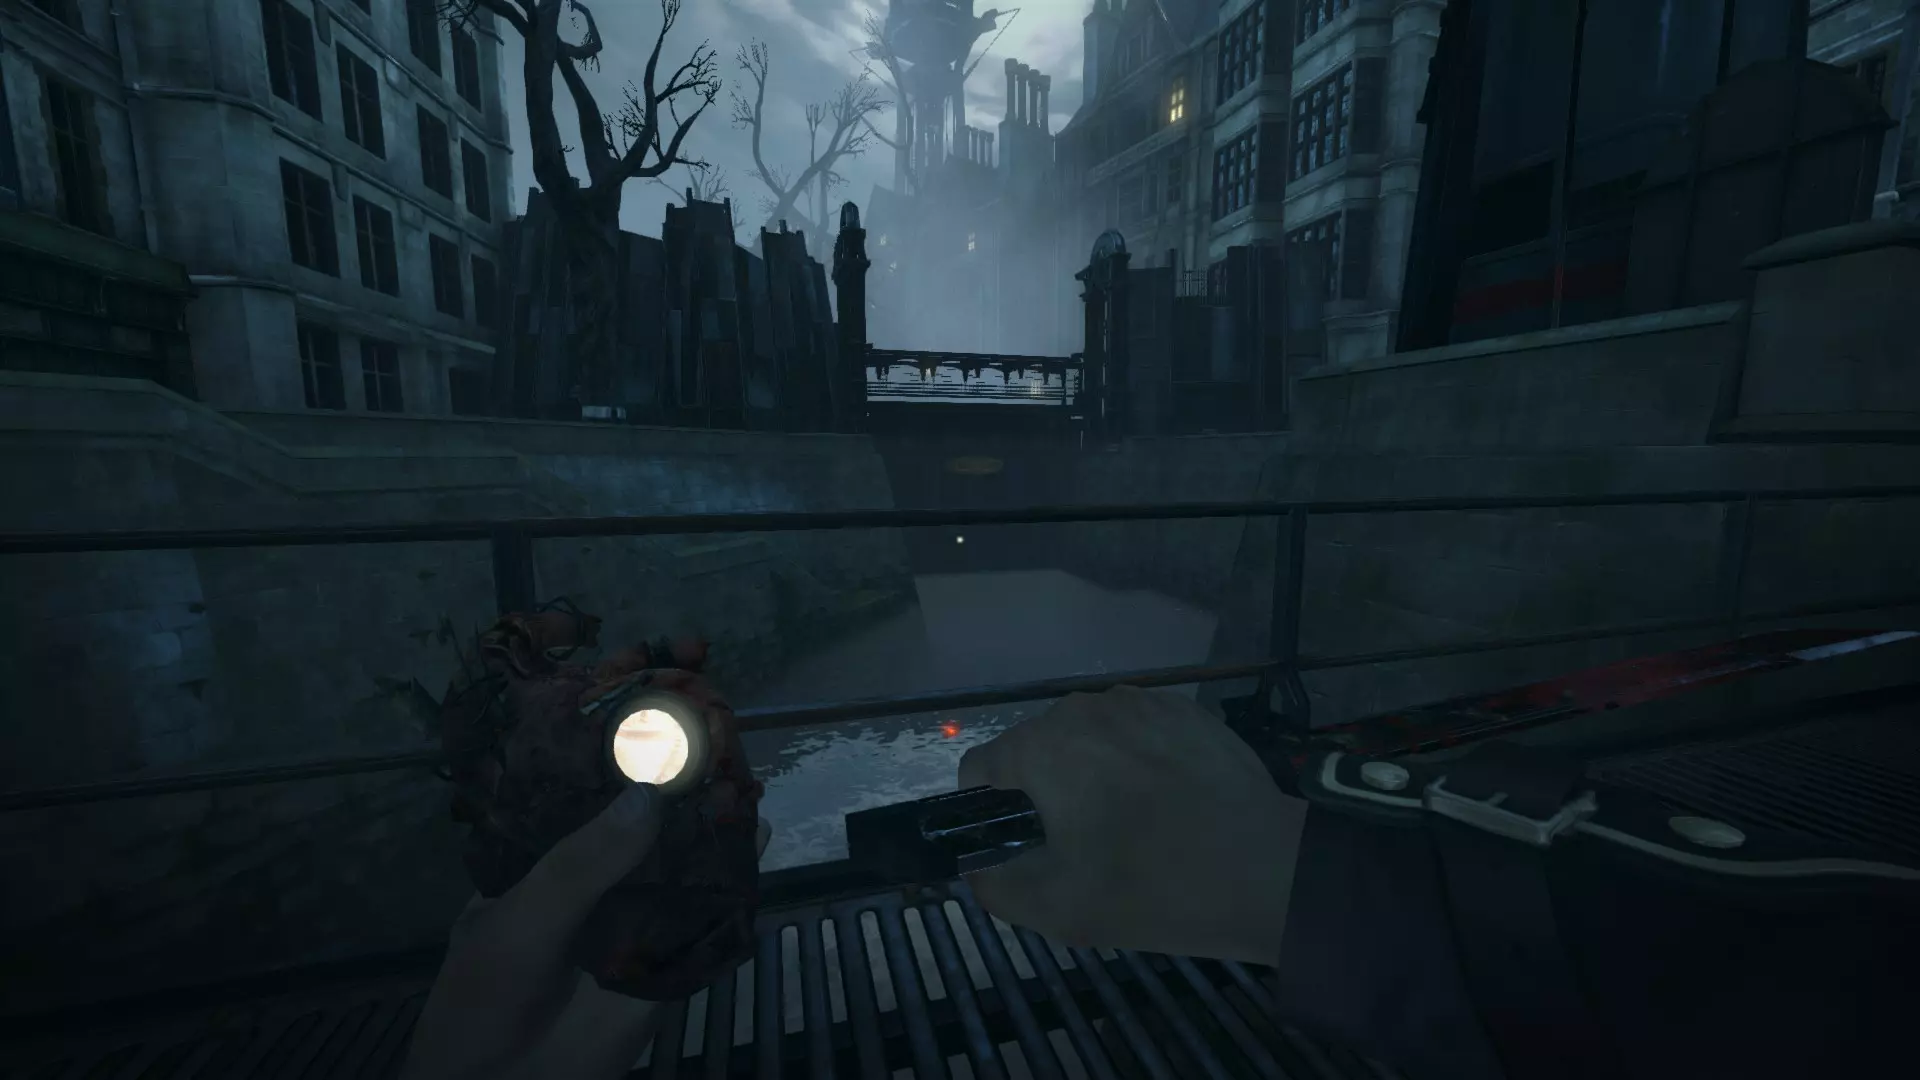
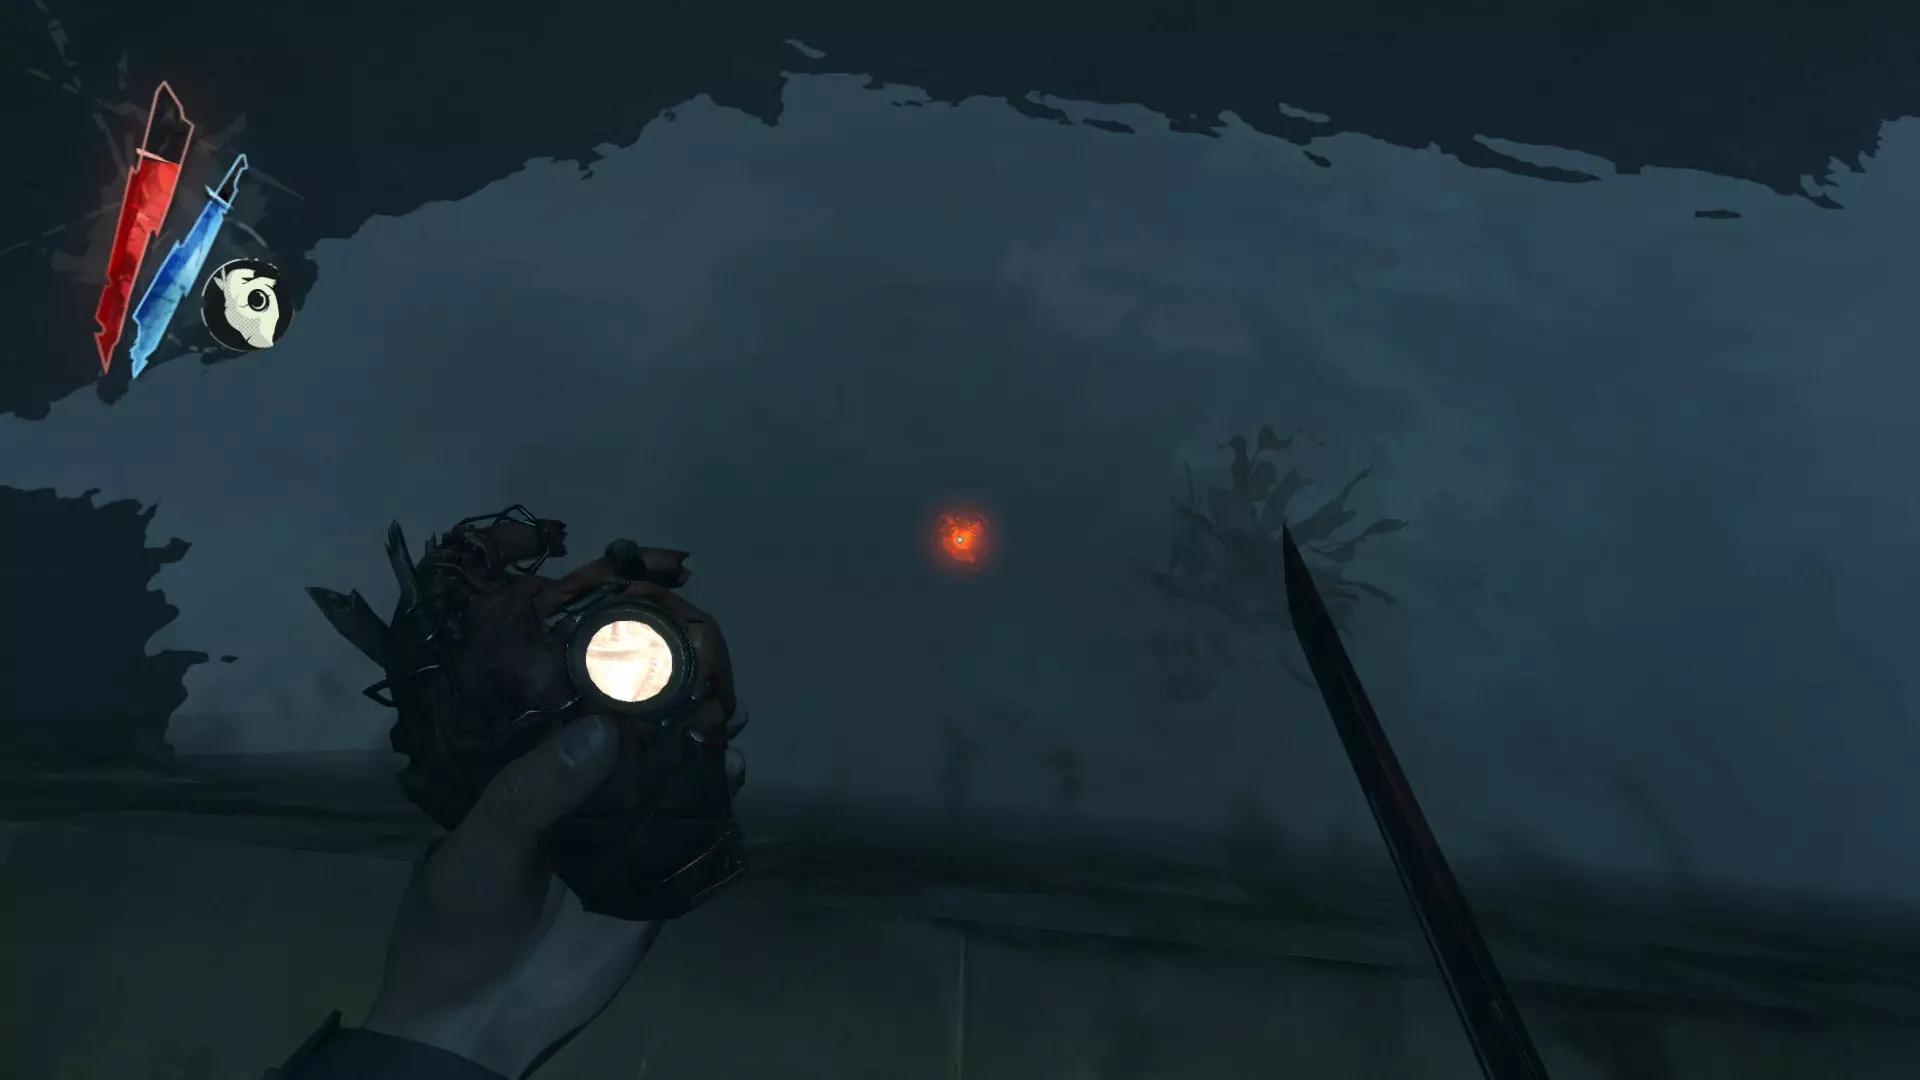
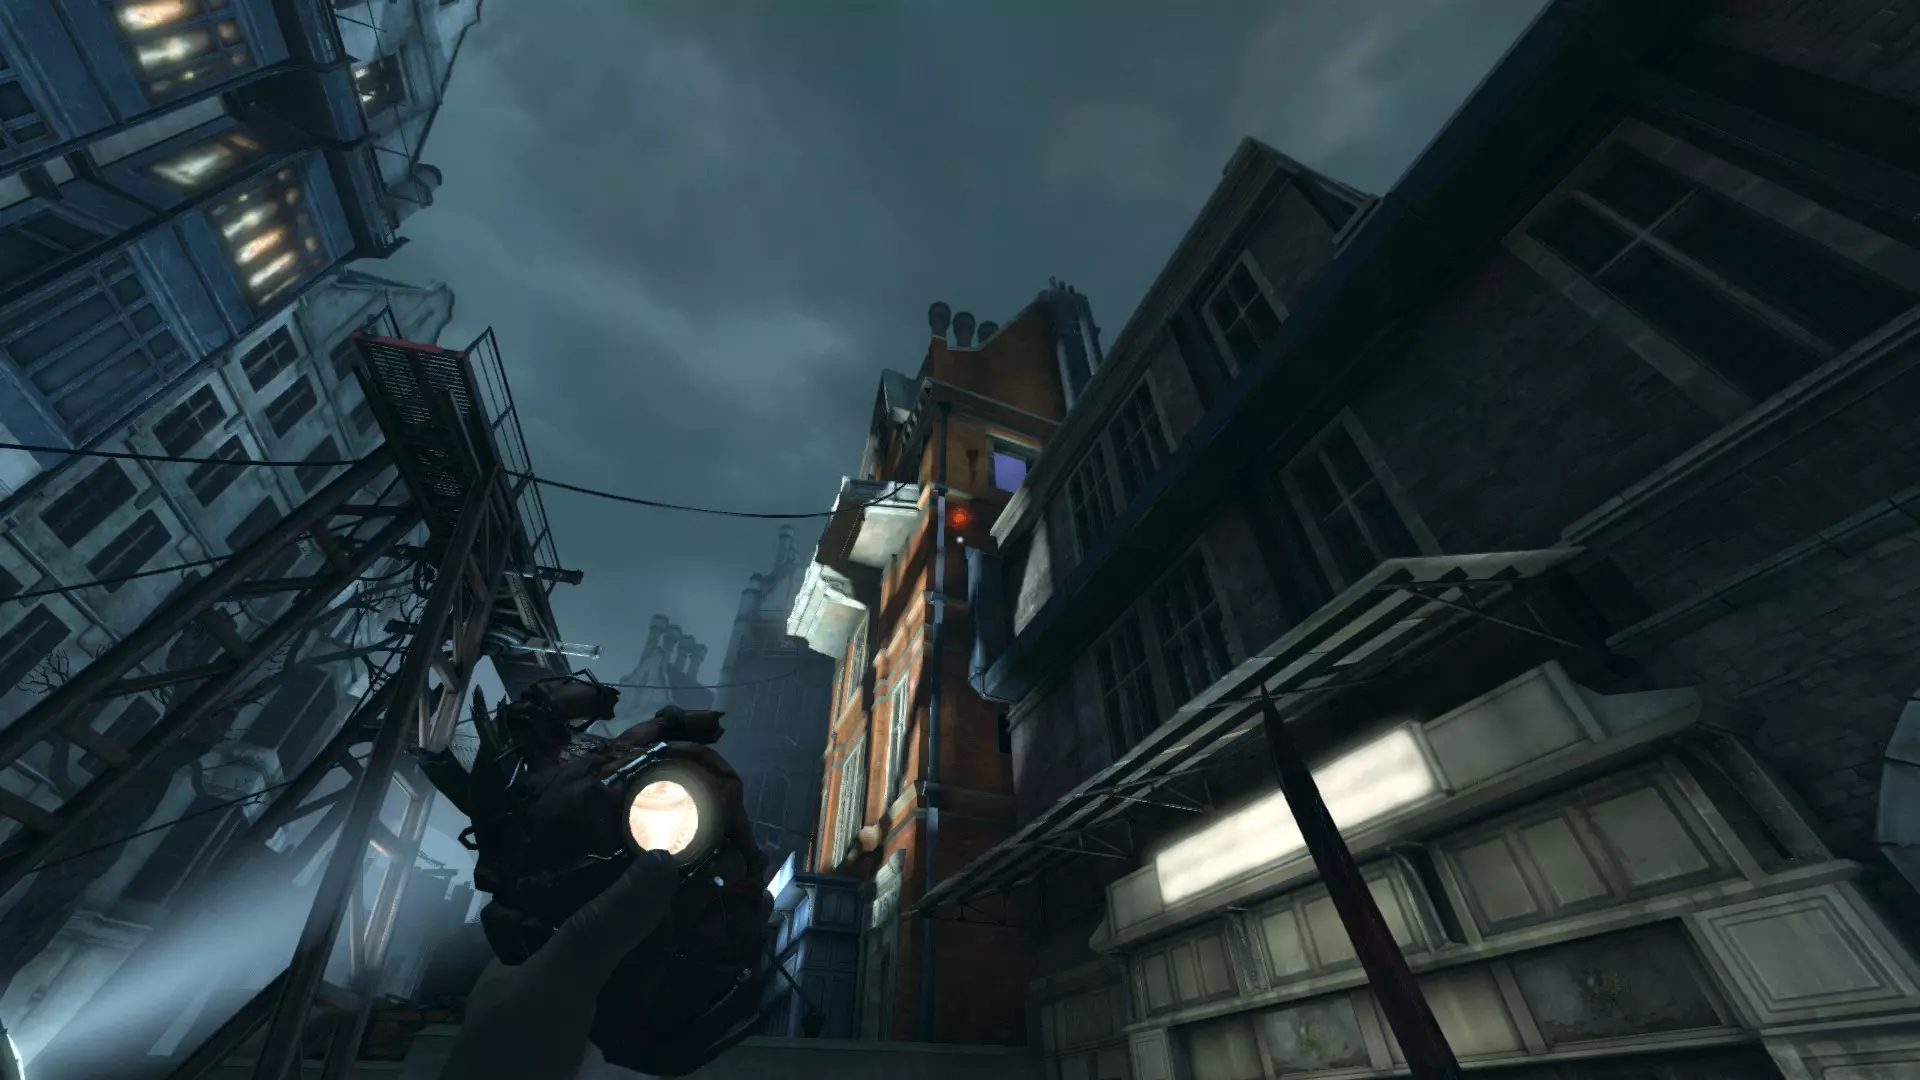
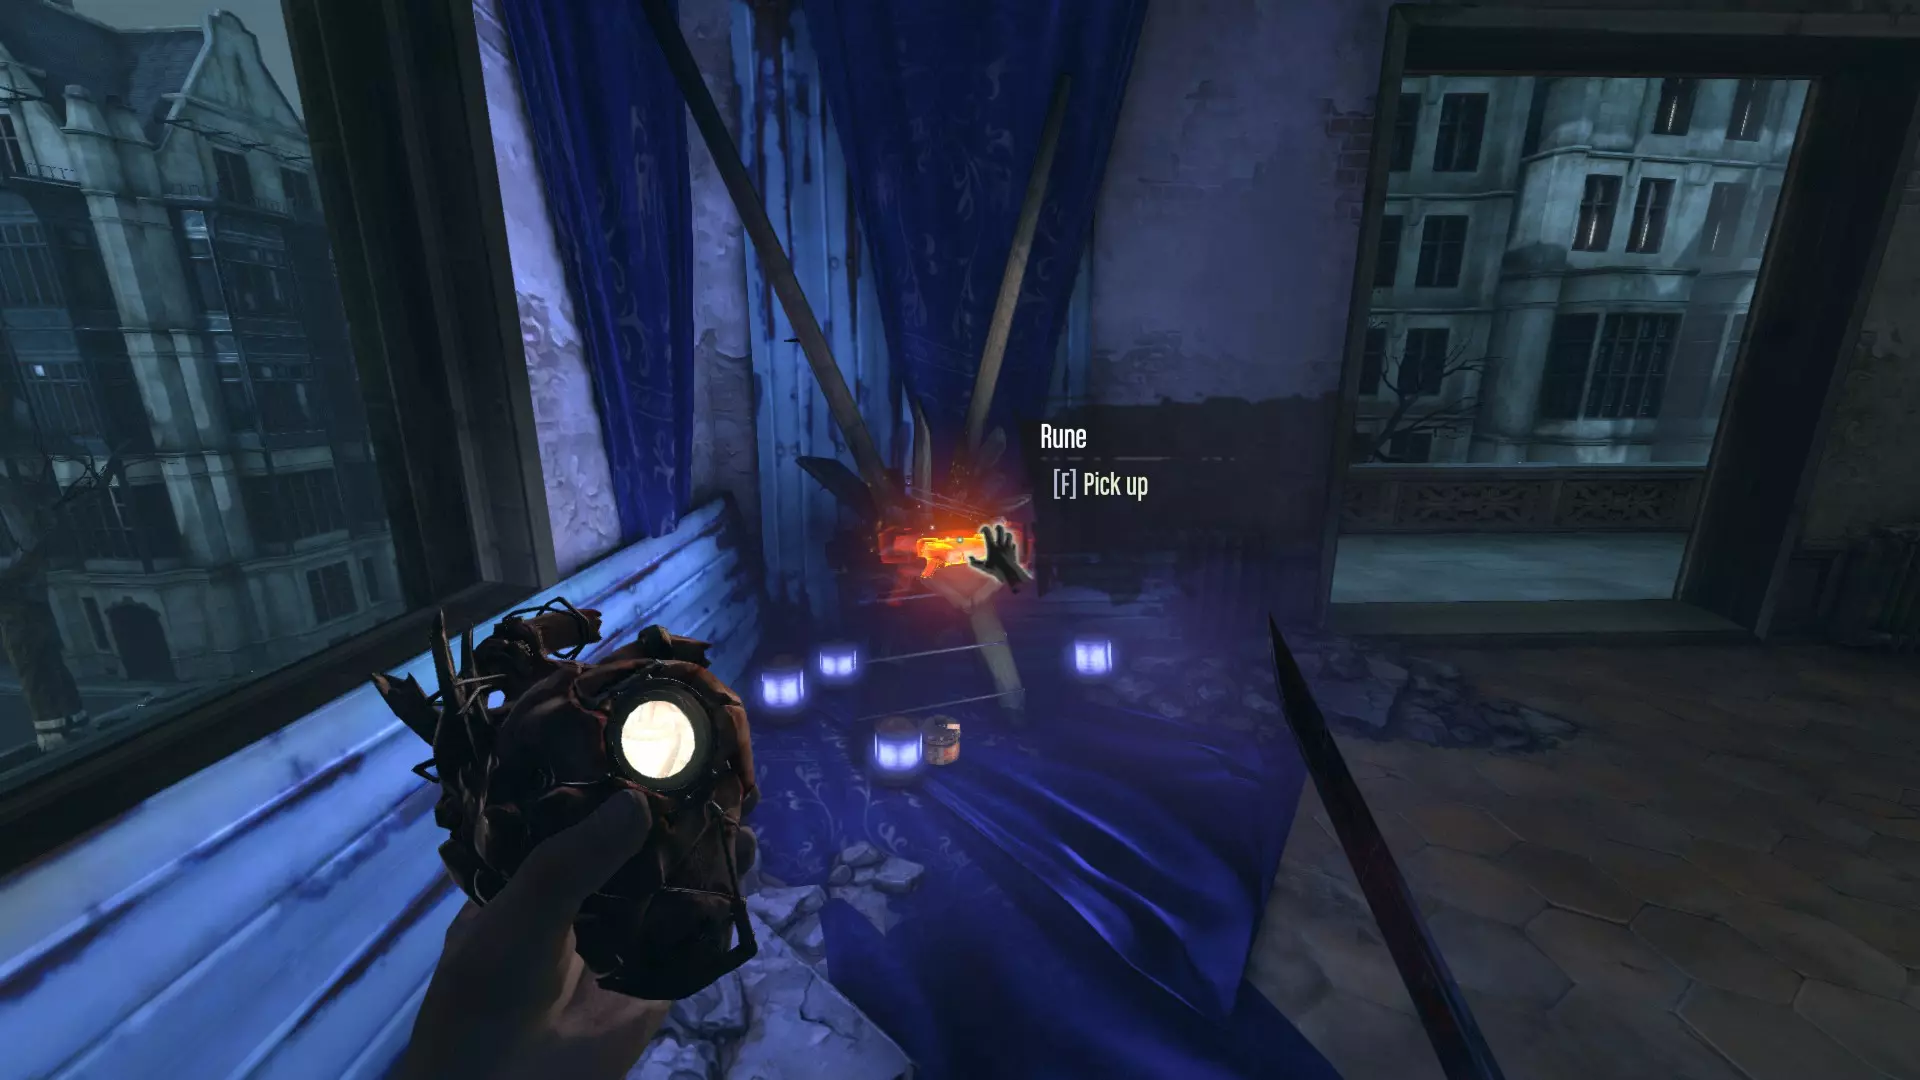
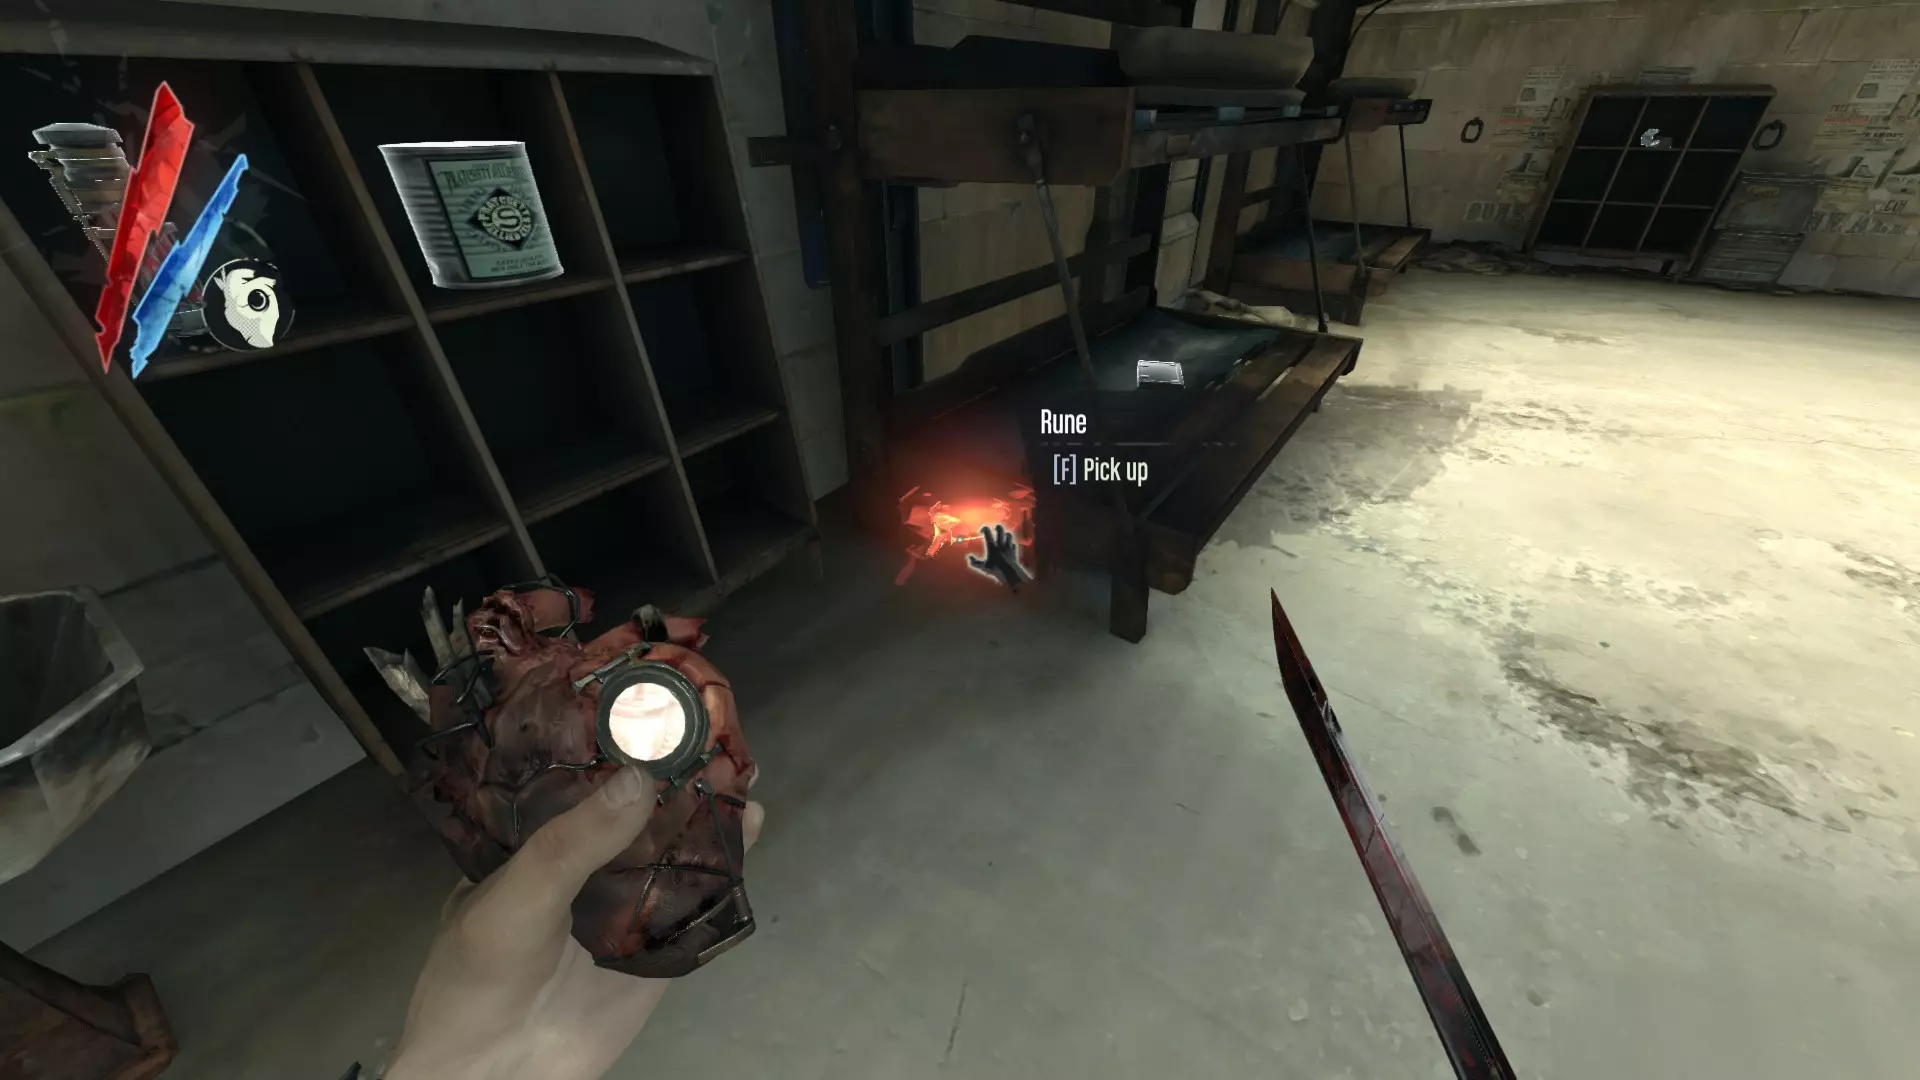
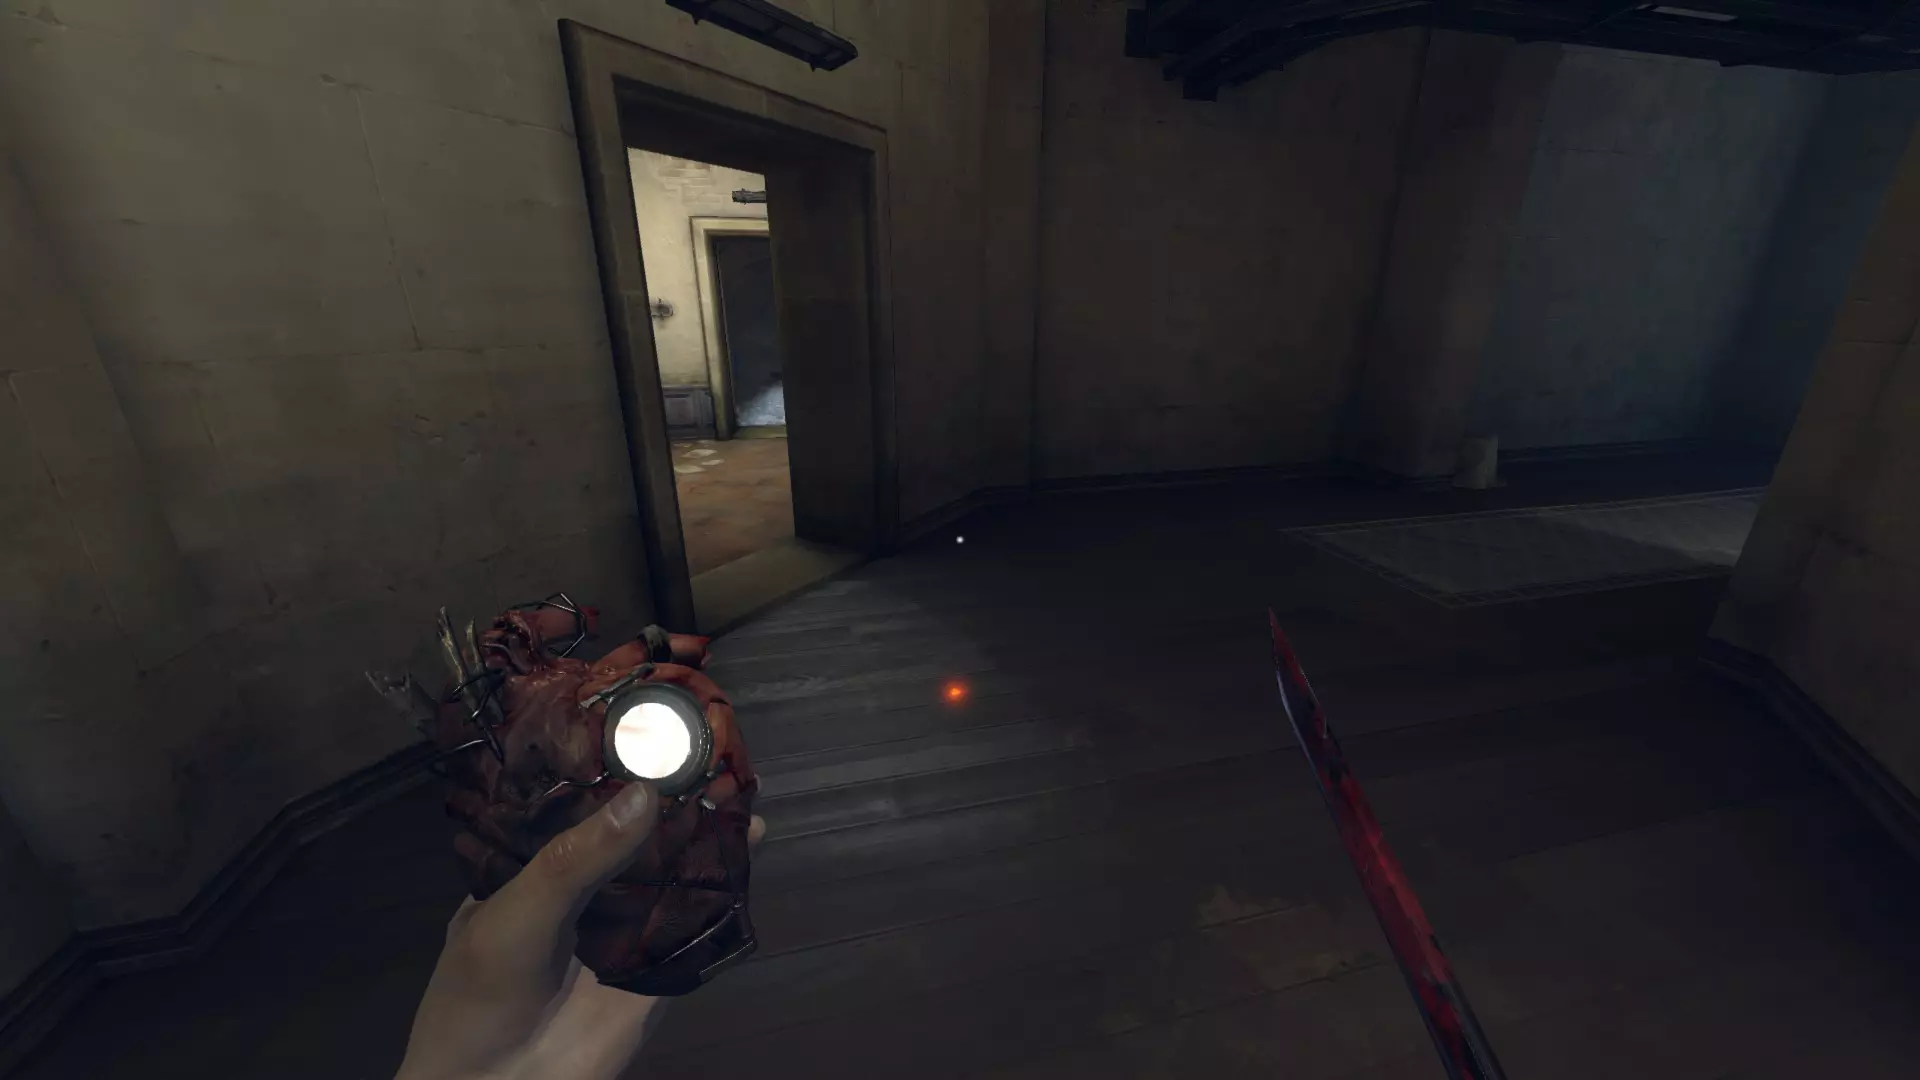
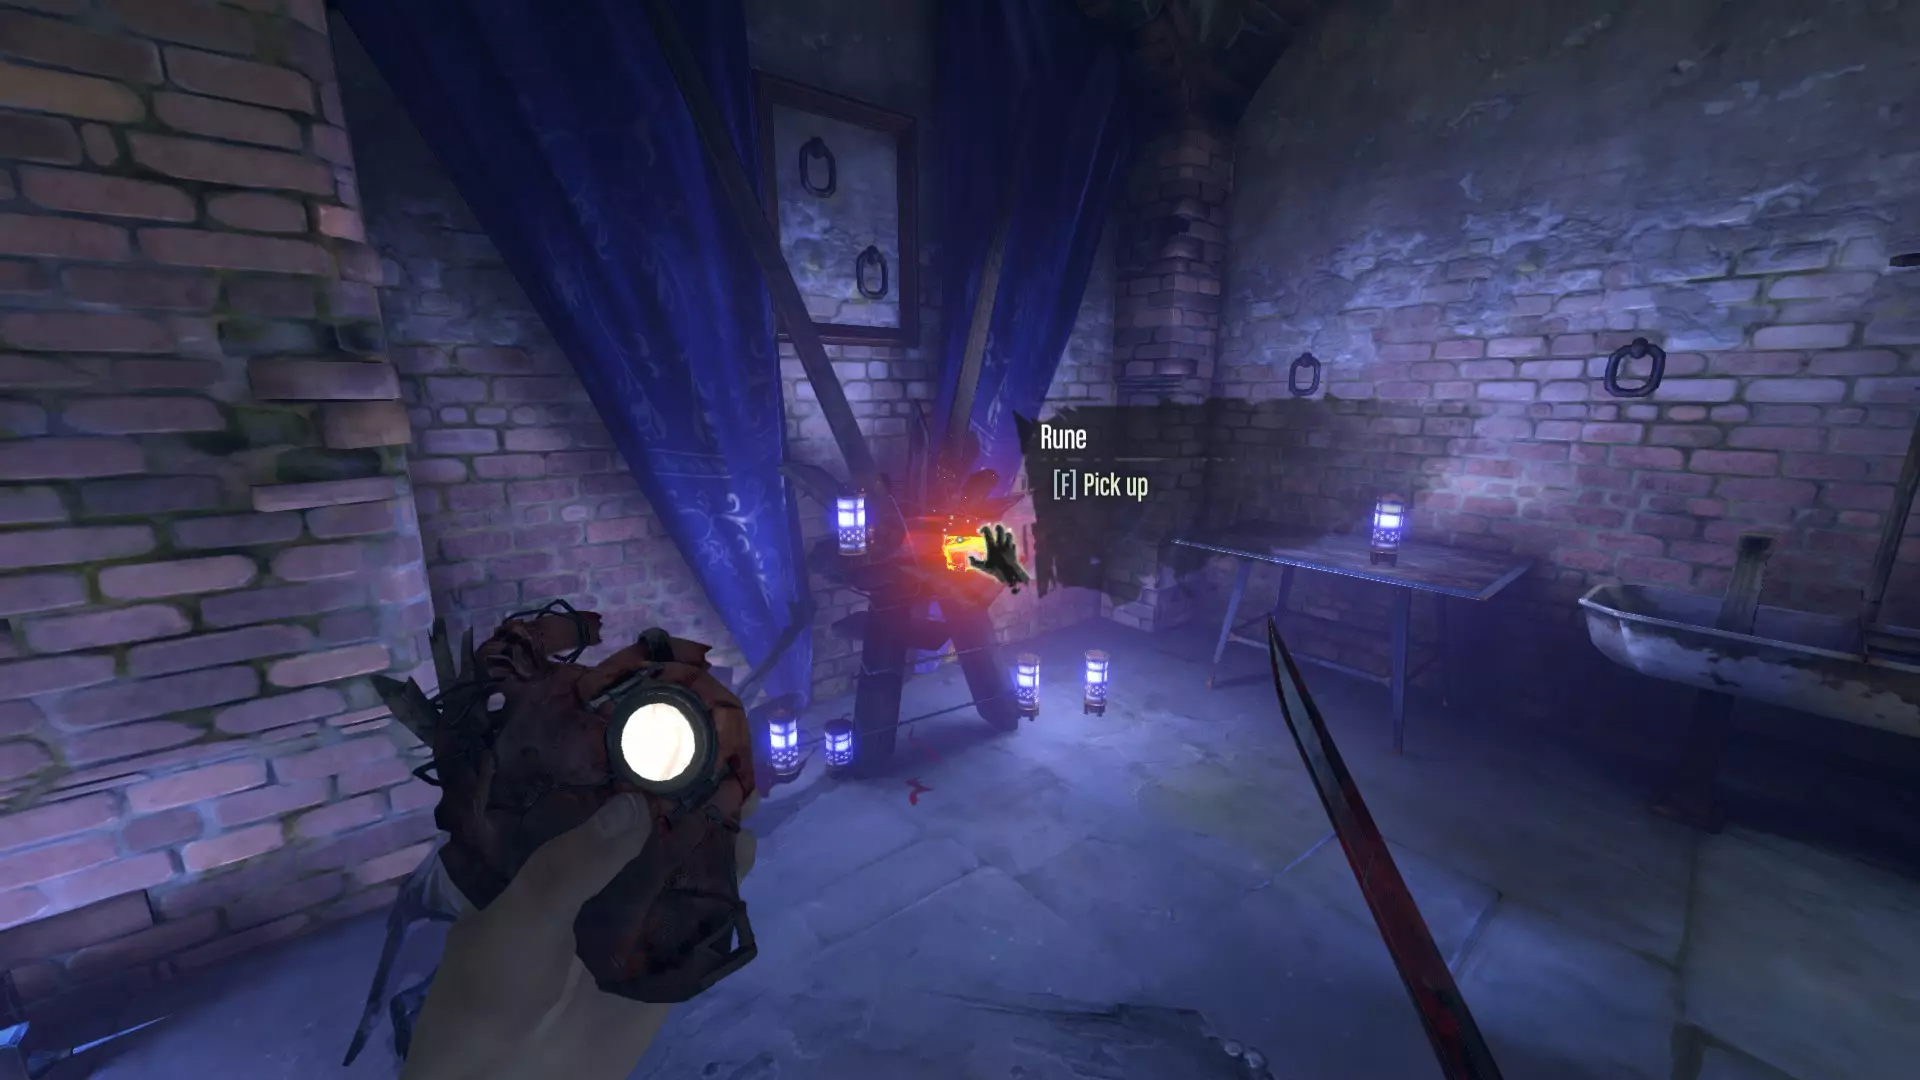
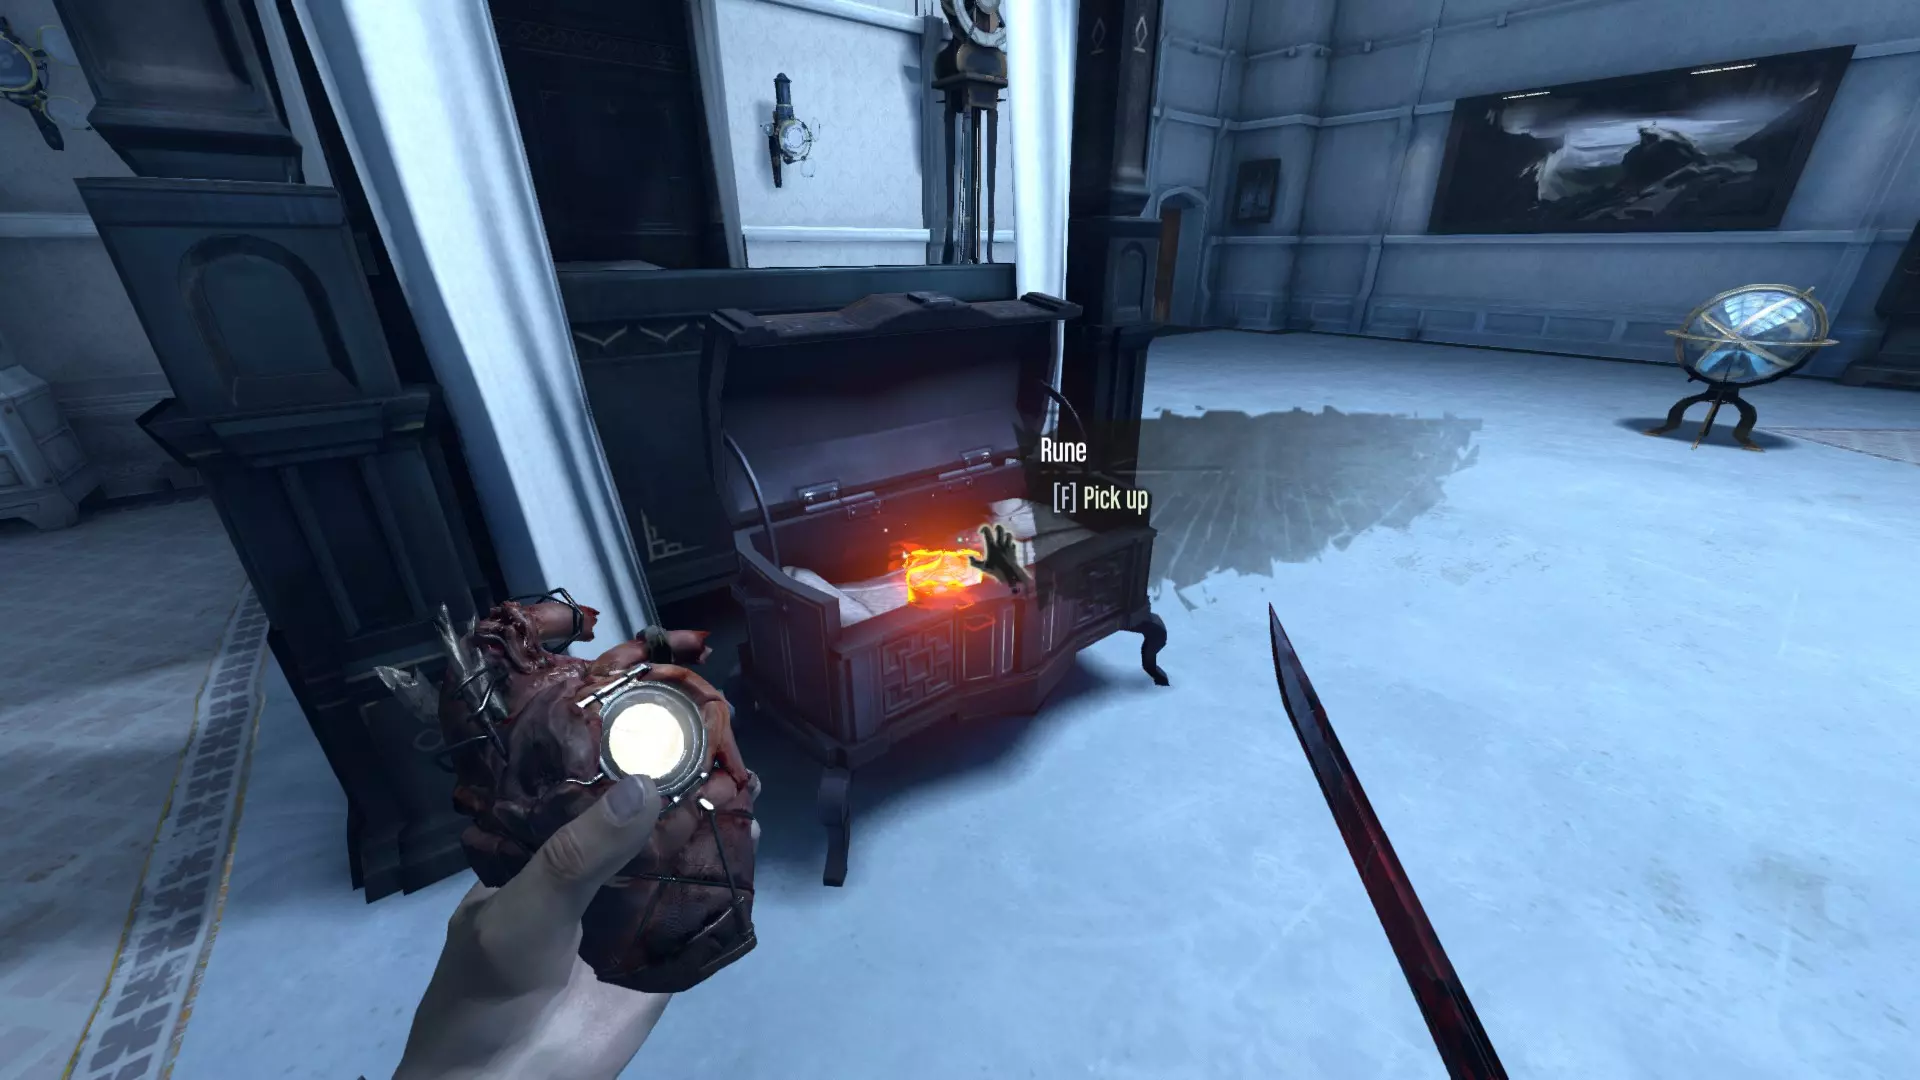
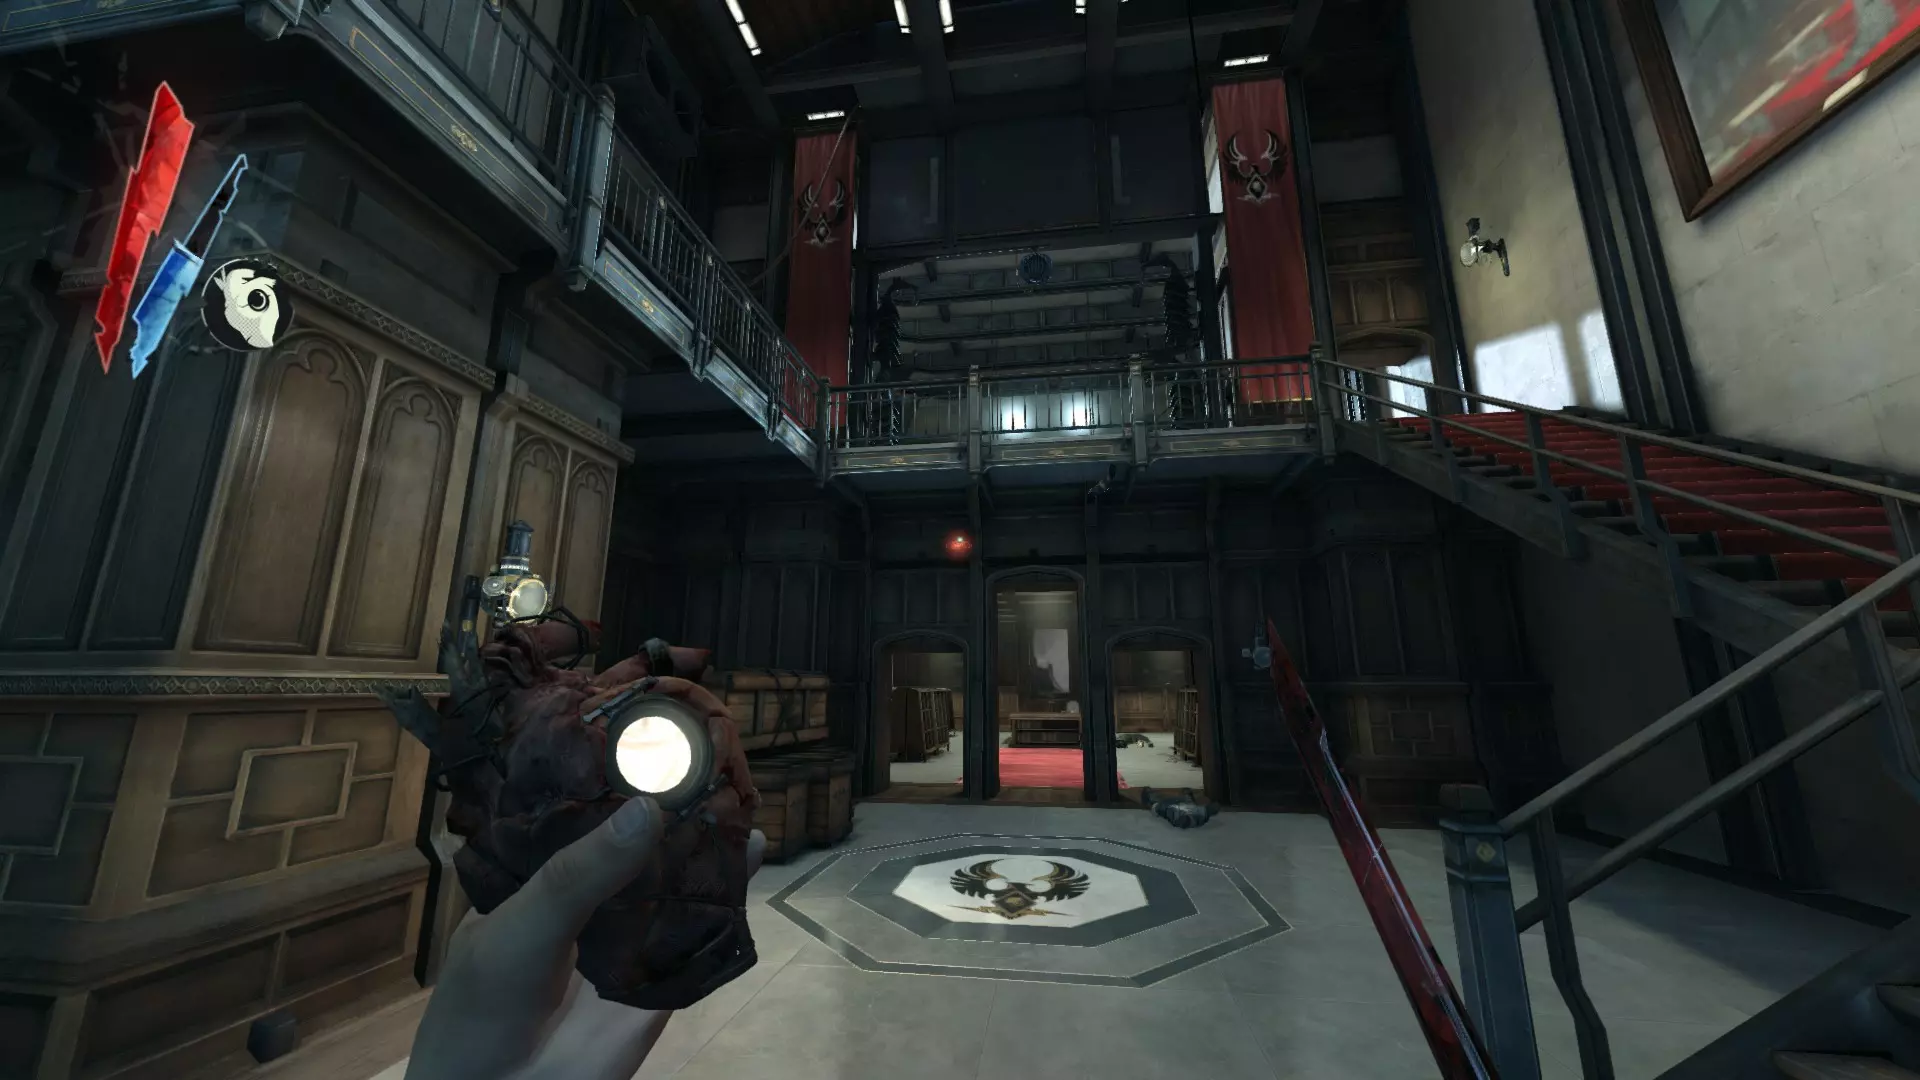
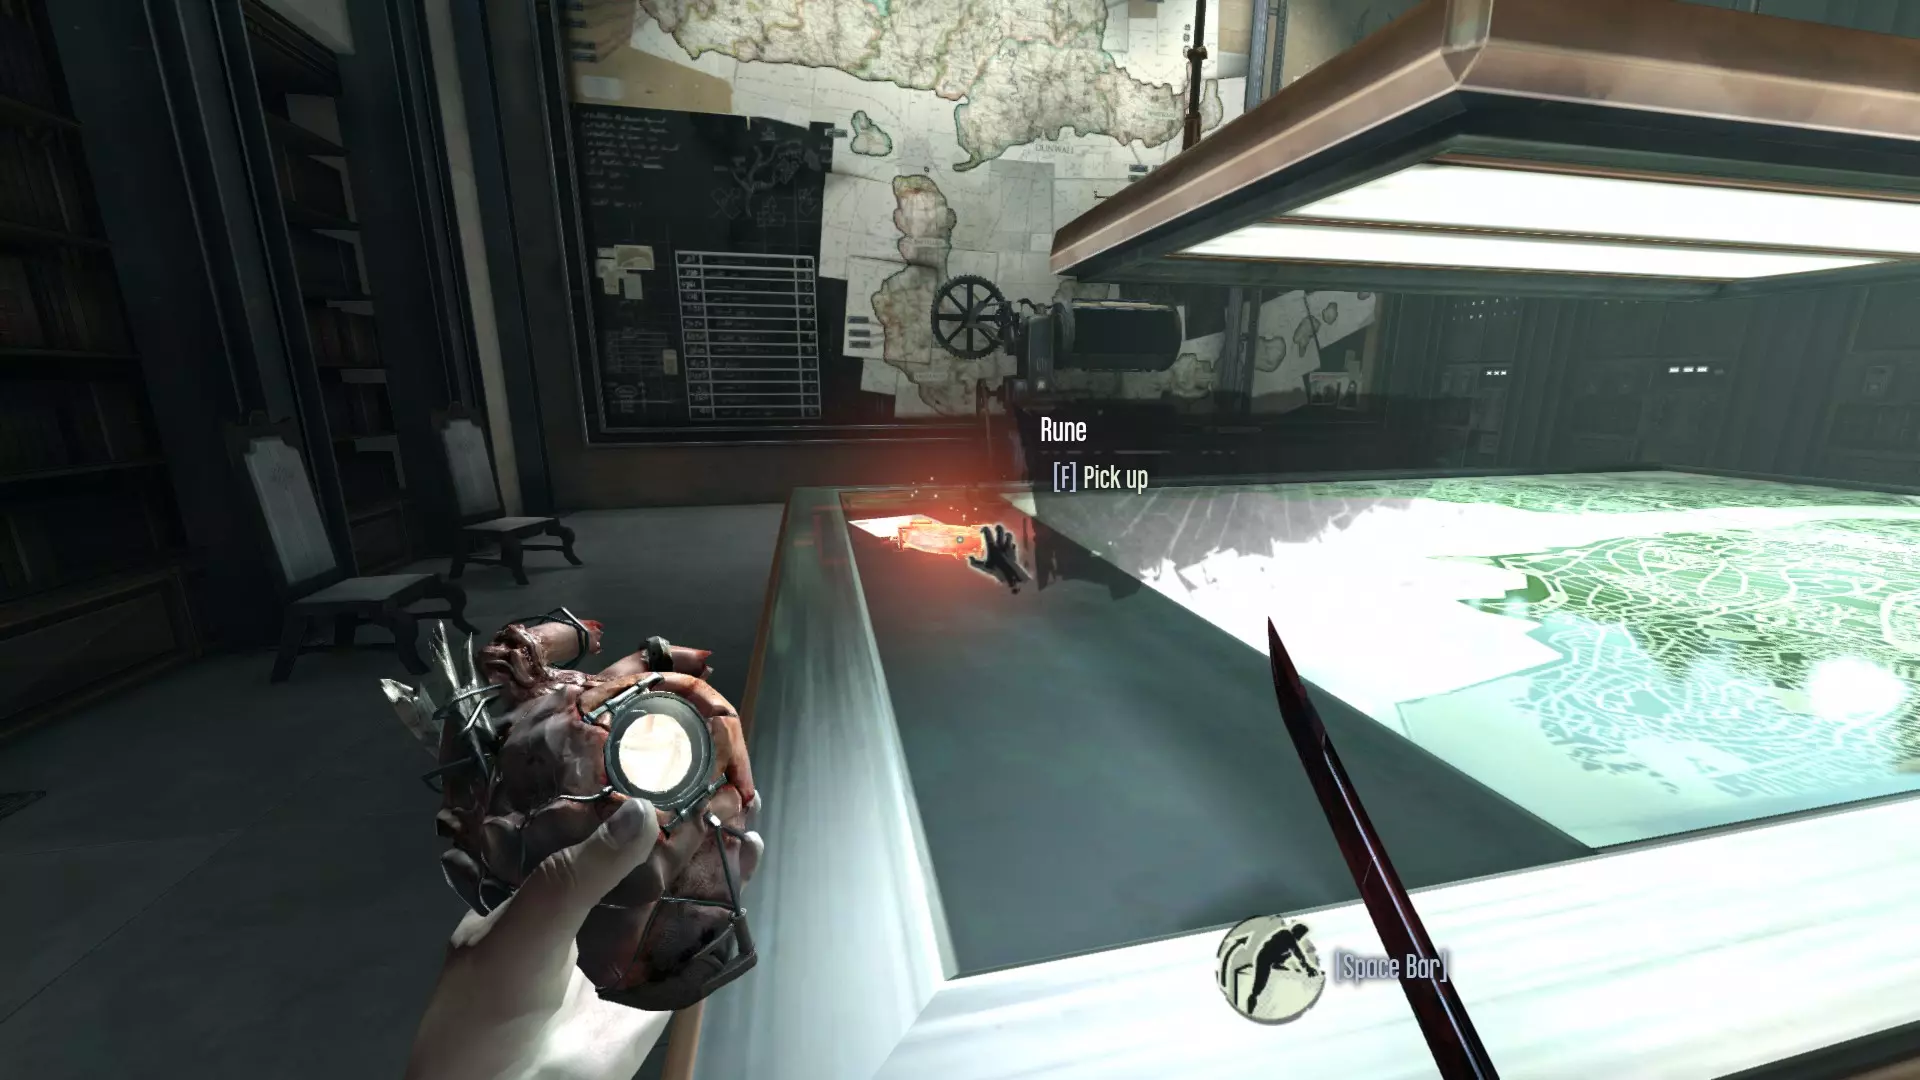
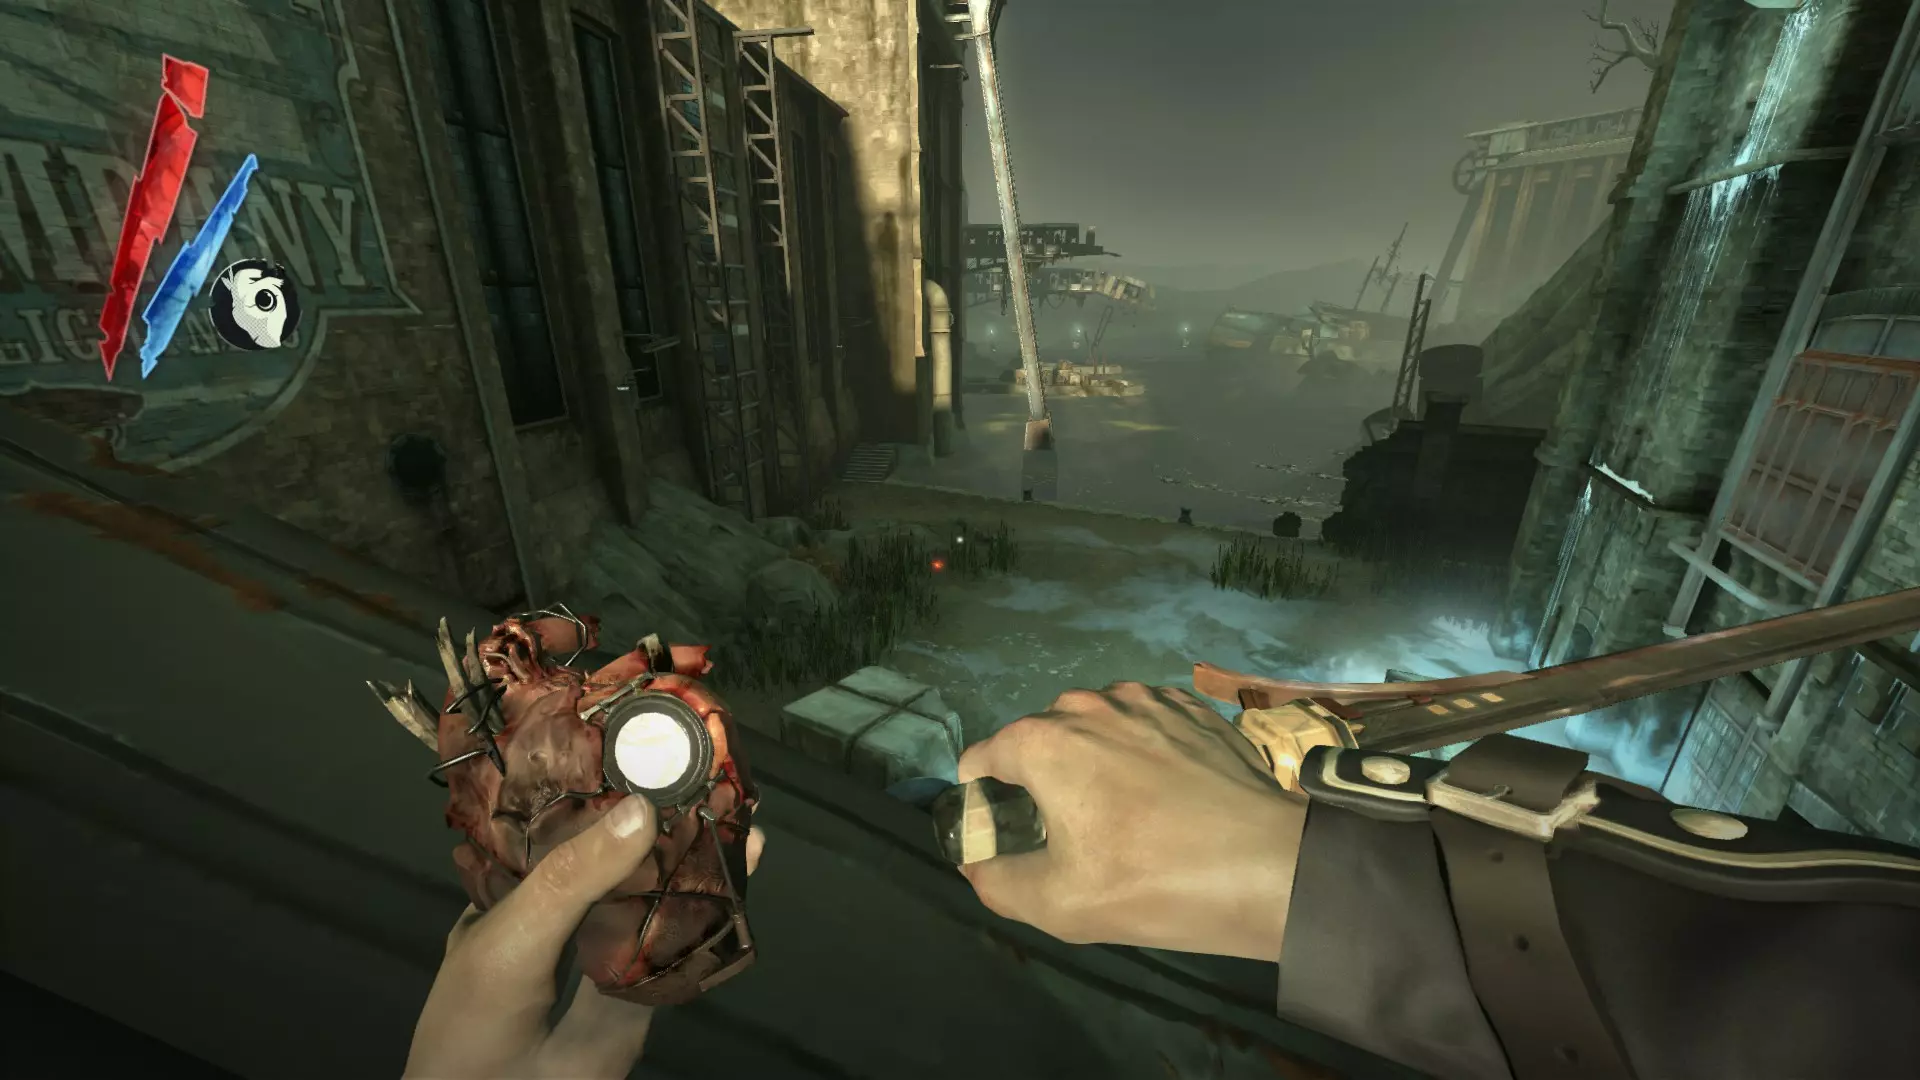
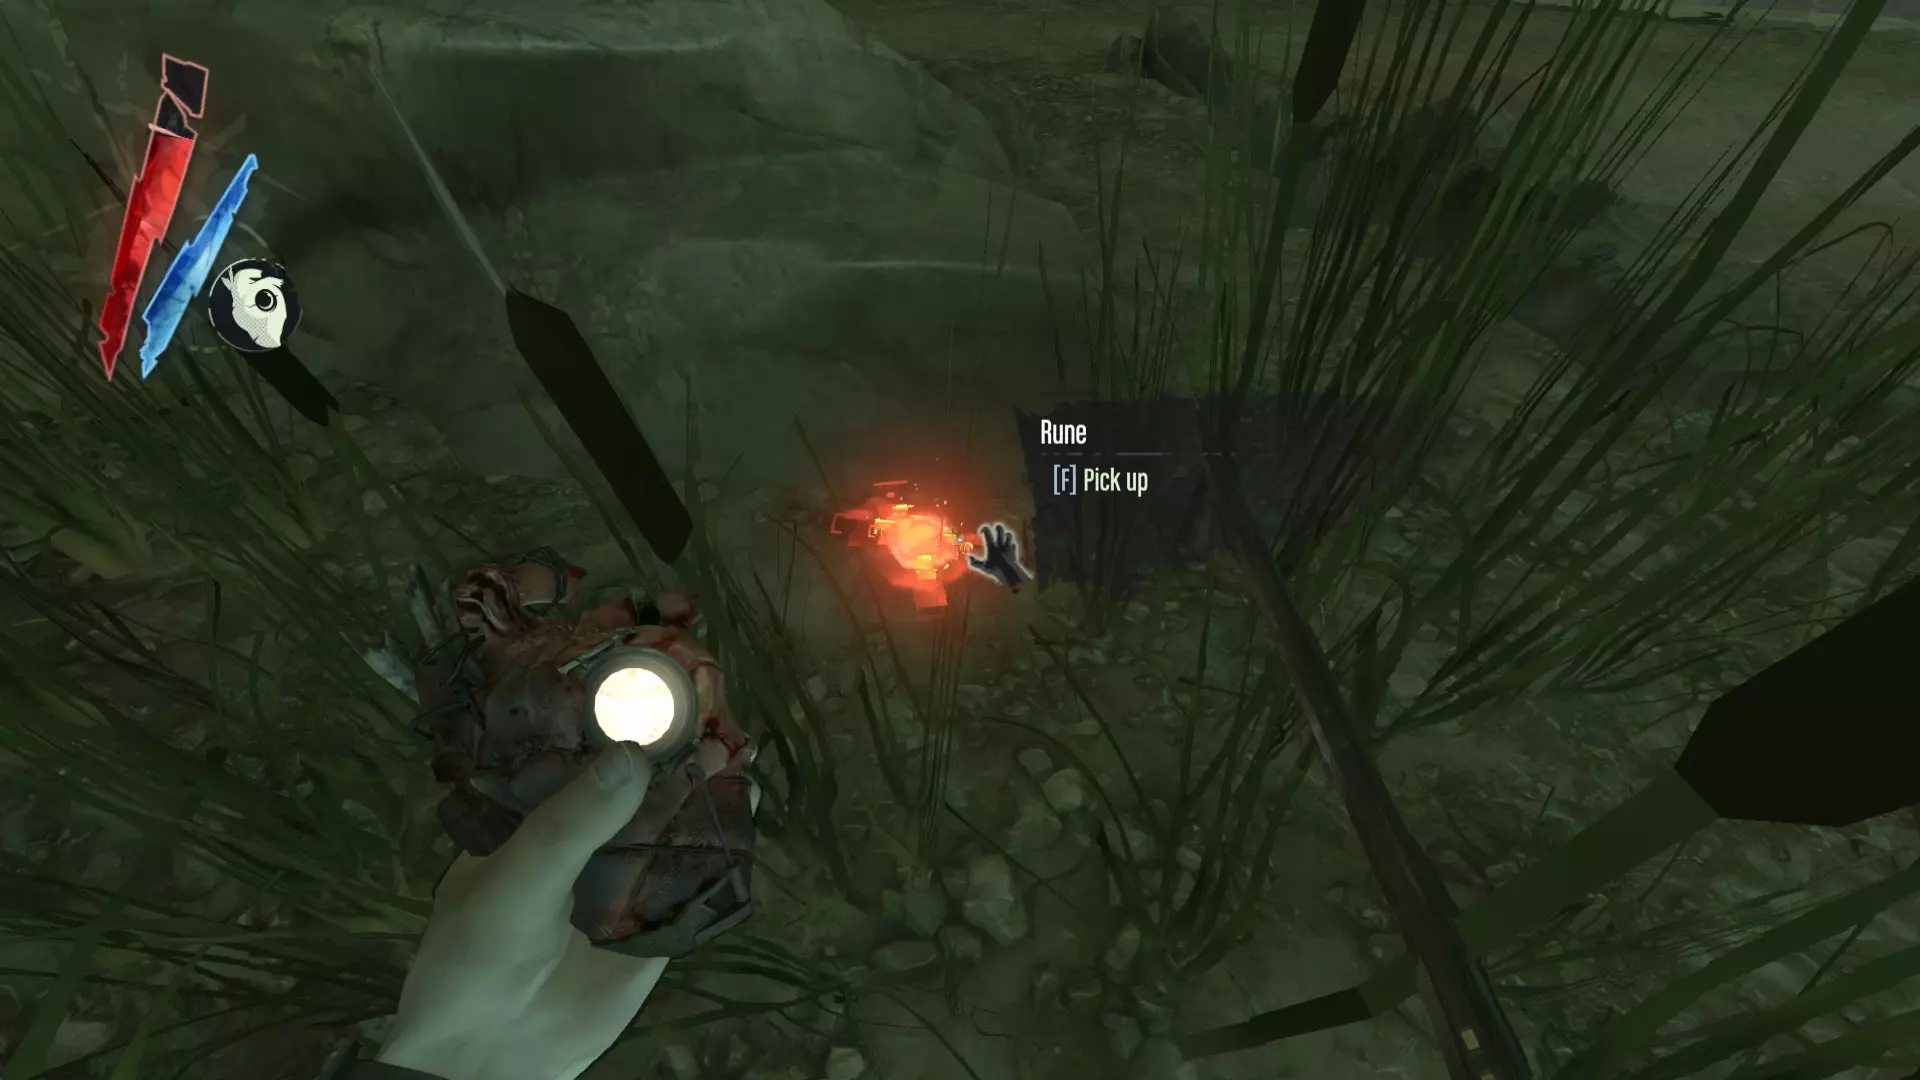
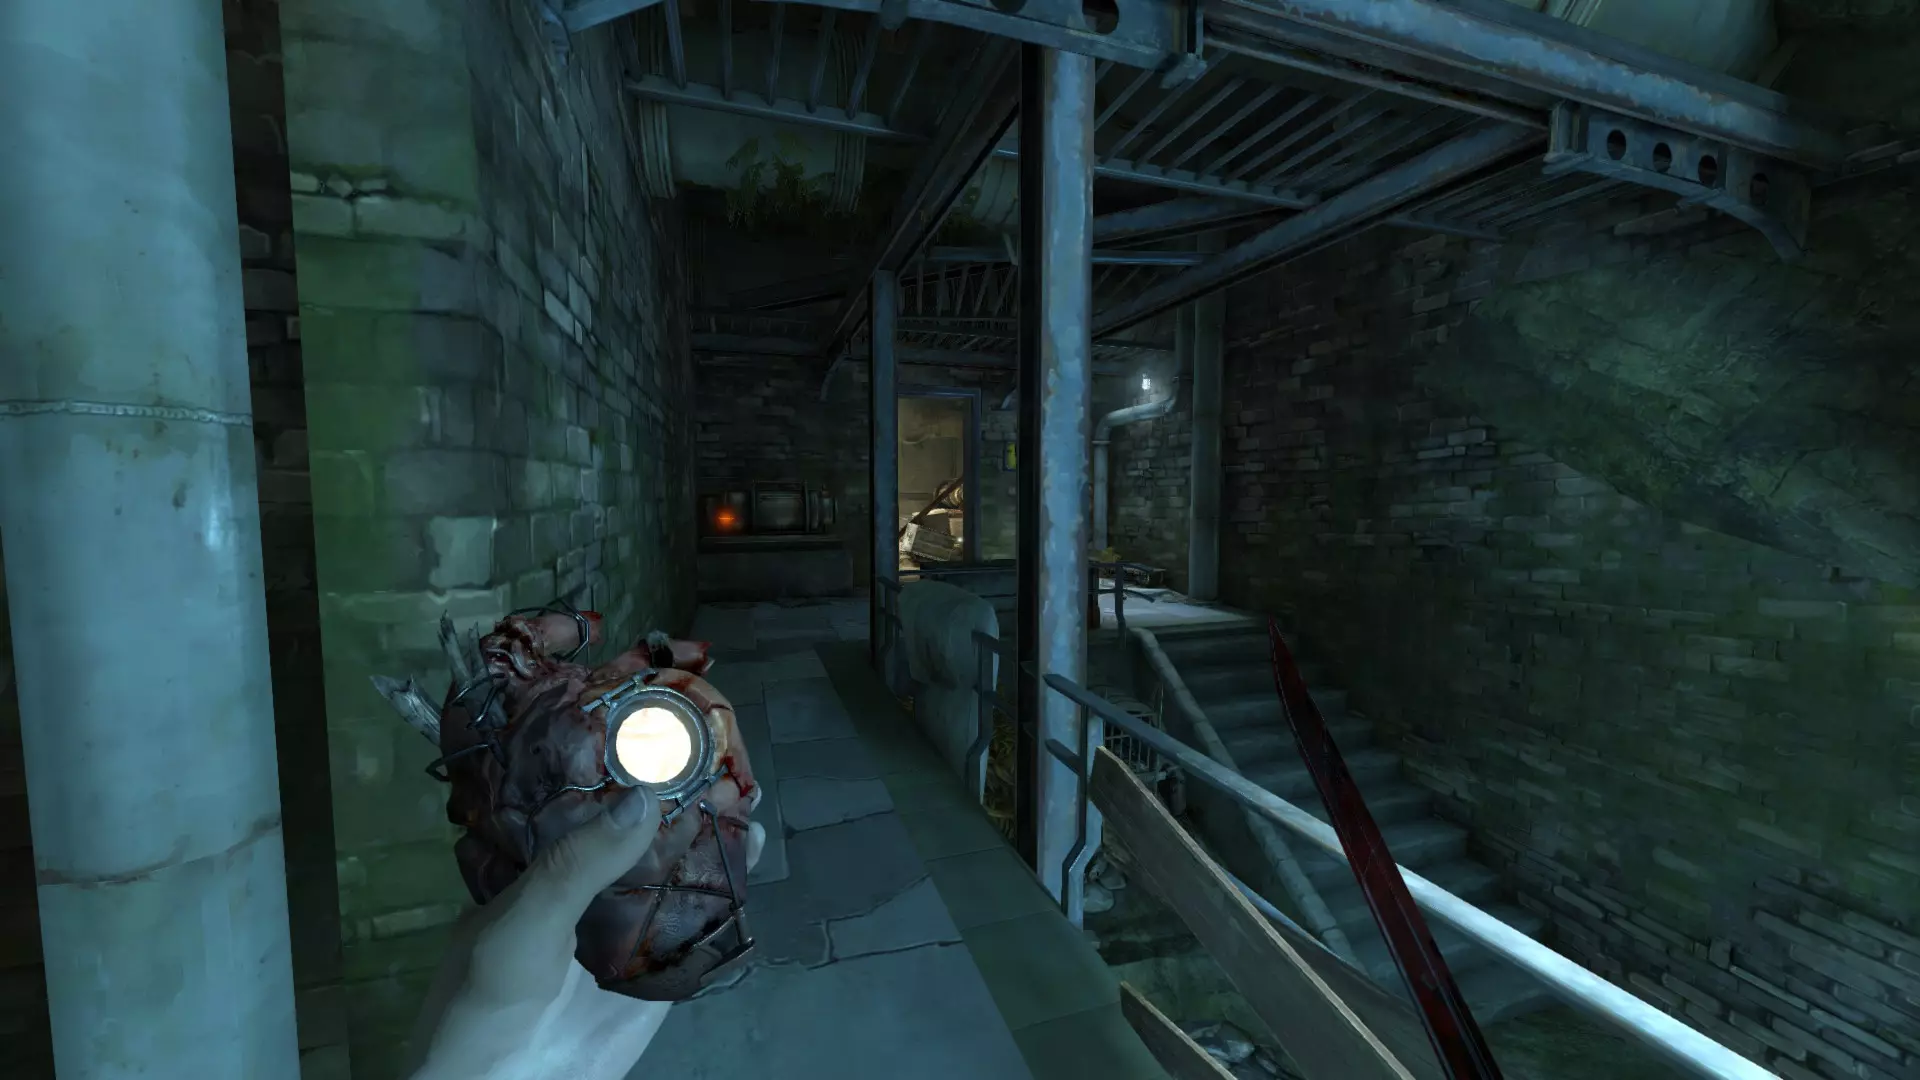
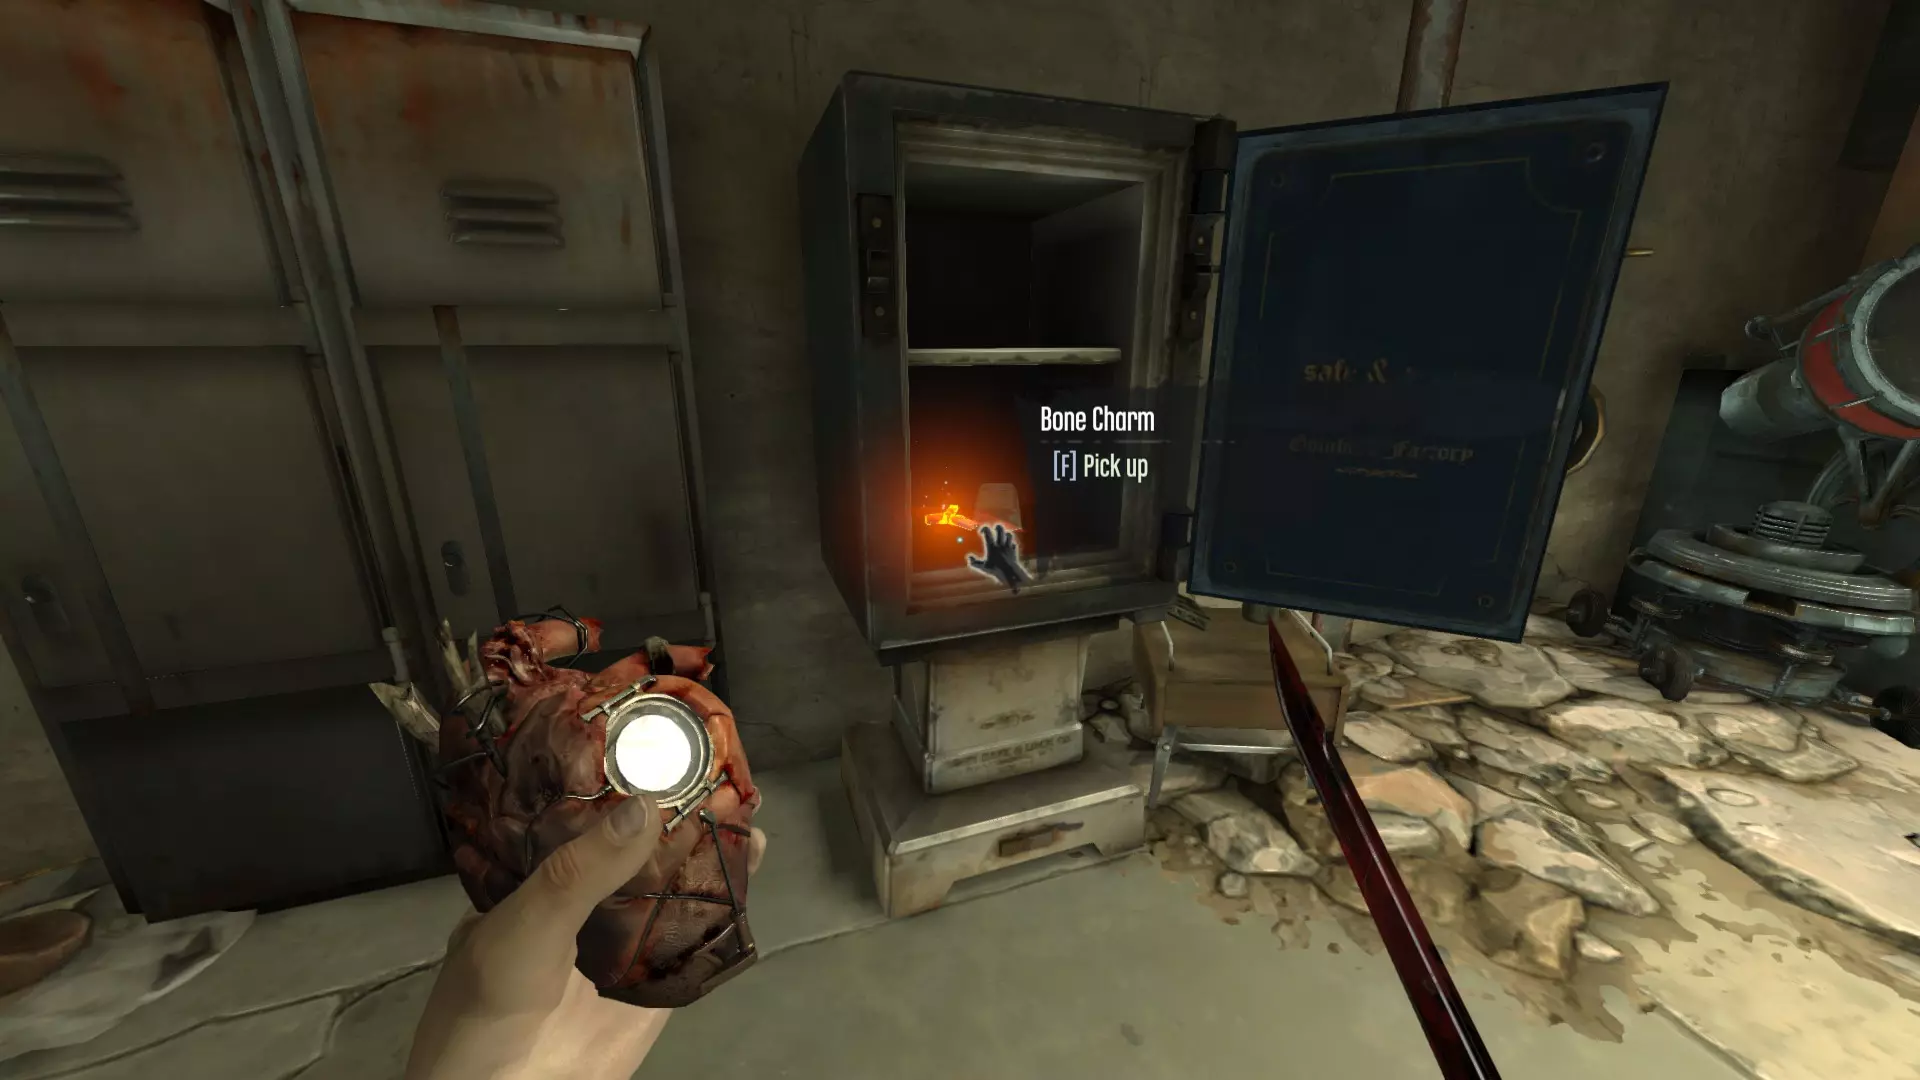
In Dishonored, you have a wide range of gadgets and weapons available to you. At any one time you may have 1 weapon OR 1 power equipped along with your sword. So, if you wanted to check for nearby enemies before sniping a guard, you would select Dark Vision, activate it, then switch to the type of crossbow ammo you wish to use, then aim and fire--note that each ammo type, not necessarily each weapon, is what you will be selecting. In the vast majority of cases, you will have access to most of the games' tools throughout your playthrough. Ammo is rarely a concern if you spend sufficient time scavenging--keep an eye out for loot and ammo and make sure to visit Piero before each mission. Unless you are burning through ammo at a truly prodigious rate, you won't be required to scour every level to replenish your reserves. Merely get in the mindset of looting and you'll be fine. Part of the fun in Dishonored is adapting to situations on the fly, so consider getting creative with what you have instead of waiting until you have more of what you don't. Items which can be purchased from Piero include a {bracketed} price tag alongside their entry, giving a quick indication of their value. Weapons Sword The cornerstone of your arsenal, Corvo's folding blade is incredibly powerful if used correctly. Along with the Crossbow and Pistol, it forms the "starter set" you receive near the beginning of the game. The sword will (under normal circumstances) automatically be drawn while you have any left-hand power or tool equipped. In the "Flooded District", Corvo's sword may be replaced with either an Assassin's Blade, an Overseer Sabre, a City Watch Sword, or a Gang Cleaver for the duration of the level. If the player chooses to forgo the optional objective to recover your gear, the chosen replacement may be kept for the remainder of the game. You may also forgo a replacement and finish the game without a sword. See the Combat sections for more details and techniques. Crossbow Along with the Sword, the Crossbow will probably be among your most used weapons. Firing and reloading the Crossbow is completely silent to enemies; bolts only make noise when they strike certain surfaces. A perfectly suitable combat tool, the Crossbow is also great for headshots and triggering explosives from afar. The Crossbow can be upgraded at Piero's, and in my personal opinion has some of the most useful upgrades in the game. See the Stealth sections for more details. Crossbow Bolt {20} Headshots with a bolt will often decapitate enemies and will always kill them instantly. Bolts can be looted from Whalers and may also be found throughout the world. Depending on the surface a bolt strikes, it will generate a certain amount of noise, as well as have a chance to either break or remain intact. Bolts shot at metal will always break and generate a loud noise (see Advanced Stealth), for instance, while bolts shot at wood or flesh will often remain intact and generate minimal noise. Intact bolts can be retrieved from surfaces and enemies (you can even collect bolts from enemies mid-combat). Sleep Dart {30} The Sleep Dart silently injects enemies with a chemical cocktail, rendering them unconscious after a short delay. Note that if the target is Alert this delay is increased by about 1 second. This type of ammunition can be upgraded to instant Sleep Darts, which do not have this initial delay. Does not have drop. See the Stealth sections for more details. Incendiary Bolt {50} Upon impact with an Enemy, NPC, or surface, this type of bolt triggers a Small Explosion, which incinerates living things but deals minimal damage to other objects. Note that since this bolt does not produce splash damage; a direct hit is required. Although regular bolts fired from the Crossbow have drop (or an "arc"), this effect is much more pronounced in the Incendiary Bolt, which can make aiming it more difficult. They can be collected from fallen Tallboys as well as the bolt-thrower booby traps found throughout the world. Pistol | Corvo's Pistol {600} Think of your pistol as a one-handed shotgun. Bullets themselves deal a large amount of damage to a single target and can be used at range, but the Pistol's real utility is in its blast stagger. Firing at close range Staggers, or puts off-balance, enemies. Several enemies can be staggered at once in this way, allowing for easy combos. The pistol creates a significant amount of noise when fired, making it a lackluster stealth tool (although they are an easy albeit loud way to break open wooden doors). Corvo's Pistol can be purchased from Piero as an upgrade to the base Pistol, and can be subsequently upgraded itself. In fact, Corvo's Pistol has the most upgrades (7 in total) of any weapon in the game. Unupgraded pistols are decent weapons, although vastly inferior, lacking the blast damage and upgrade options of the former. See the Combat sections for more details. Regular Bullet {30} Standard ammunition for the Pistol. Deals significant damage to a single target. Note that the blast damage originates from the Pistol, not the bullet, and therefore will not apply at long ranges. It is not often necessary to buy these as bullets are easily found for free in cases of bullets found throughout the world. You can also collect free bullets from the pistols of fallen enemies by interacting either with the pistol itself or with the enemy's body. Explosive Bullet {50} Explosive Bullets are an unlockable type of ammunition. They do extra damage compared to regular bullets and inflict an additional area-of-effect blast, but only one round can be fired before reloading, regardless of acquired upgrades. Additionally, they cause even more noise. They are purchased in sets of 2 for 50 coins per set.Grenade {70} An explosive which can be thrown by the player as well as certain enemies (i.e. Overseers). Press the secondary attack button (Mouse 2 on PC defaults) once to throw your grenade or hold to cook it (shorten the delay before it explodes). Interact (F) while cooking to reset the grenade, cancelling the explosion. Note that they typically bounce once when thrown. Shooting an active grenade with any projectile will instantly trigger it. See "Advanced Combat" for more details. Sticky Grenade {100} Sticky Grenades function identically to regular Grenades, with the exception that they will attach to the first surface they impact after being thrown. This makes them especially useful for dealing with River Krusts and Tallboys (note that Sticky Grenades will attach directly to living things as well as inanimate surfaces such as walls or dead bodies). Unlike regular grenades, Sticky Grenades are only employed by the player. Springrazor {50} A static device which can be attached to any surface by the player. Springrazors are triggered by close proximity of an enemy or NPC (any NPC will trigger them, even friendly characters) as well as the impact of a sword, throwable object or a projectile such as a Crossbow Bolt. This means they can be triggered remotely by the player with a well-placed shot (Bolts can even be recovered afterward). Springrazors are largely silent, making them a good option for stealth. In combat, a springrazor can be attached directly to an attacking enemy (even charging enemies), Staggering them. The device will activate a second later, instantly killing any enemies within its radius, the size of which may be upgraded (note that the player takes reduced damage from springrazors). A Springrazor is also an effective choice when clearing out Rat Swarms. Items & Equipment (Continued) Consumables Sokolov's Health Elixir {200} The first of two types of consumable restorative available to you. Sokolov's Elixir replenishes Health; simply press the appropriate quick bind (R on PC defaults) to consume an elixir and regain said health. It can be quickly distinguished by its red color and larger size. Found frequently throughout the game world, Sokolov's Elixir can also be unlocked at Piero's, and is sometimes carried by Whalers. Piero's Spiritual Remedy {100} The second consumable concoction. This one restores Mana, and can be identified by both its blue color and slimmer profile. Press the quick replenish button (T on PC) to consume a remedy; this instantly restores mana (allowing you to use expensive powers in quick succession by spamming T). Whalers will sometimes carry Remedies, and they can also be found throughout every level. Being its inventor, Piero will happily supply you with this potion. For a price, of course. Rewire Tool {100} This item can be purchased from Piero, but can also be occasionally found in the game world. By accessing a Wiring Panel, you will be able to Rewire Security Devices to your advantage, at the cost of one Rewire Tool. See "Stealth" and "Security Devices". Rune {500} Runes are large, round objects constructed from whalebone. They are very valuable high-tier loot, as they function as Dishonored's primary upgrade currency, allowing you to purchase and upgrade Powers and Enhancements. Runes cannot be consistently purchased from any Vendor, instead being found throughout the world. Runes are also frequently given as rewards for optional objectives and alternative choices, so consider completing a couple as the opportunity arises. A single Rune may be purchased from Piero for the sum of 500 coins. See "Upgrades & Loot" for locations. Objects Food From Jellied Eels to canned Whale Meat, almost every food item in Dishonored can be consumed for a small amount of health. See "Powers, Enhancements & Bonecharms". Explosives Whale Oil Tanks are the obvious example, but thrown grenades and the whiskey bottles employed by certain enemies are also explosive. Whale Oil Tanks and grenades cause Large Explosions, while objects such as whiskey bottles (which are good for clearing out River Krusts/Rat Swarms in a pinch, incidentally) cause Small Explosions. Explosive objects can usually be triggered by a projectile, a sword-strike, or rapid collision with a surface. See "Powers, Enhancements & Bonecharms" and "Advanced Combat". Throwables Bottles, flasks, whiskey tumblers, empty and full Whale Oil tanks, etc. These objects will generally (though not always) be glass, and can typically be picked up, broken, and thrown. Breaking such objects creates a localized noise, which can be utilized to distract and manipulate enemies; additionally, they may be thrown directly into enemies to stagger them (you can even do this with severed body parts). Of the throwables which may be broken, many have different impact thresholds, with the blue-green bottle being the most susceptible to breakage. Most can be dropped from just below eye level without breaking. Throwables can be freely walked through--generally they will break or be moved only when thrown, struck, or slid into. Breakables Chairs, traffic barriers, wheelbarrows, boards, tables, and certain windows. Breakable objects will generally be made of wood or glass. Note that breakable glass is usually transparent, while opaque windows will always be unbreakable. Boards in particular are often found impeding the main route; slide into them to get through more quickly. Knocking an enemy into a breakable object will deal additional damage, often enough to kill them. Interactables Globes, desks, chests, safes, and more. These objects can be interacted with but are not breakable or movable. Some, like candles, notes, or Alarms, have gameplay utility, while others hold loot or simply decorate the environment. Books and notes are also included in this category: The latter usually contain important information (secrets, combinations, useful info, and so on) while the former will usually impart lore. Props Most of these objects can be moved or knocked over by collision with a projectile, sword, an NPC, or the player during a slide, but are not breakable (e.g. metal tins). Many of these objects are made of metal and are therefore relevant to stealth. Utility Objects such as keys and attachable crank-wheels. These the player can pick up and or throw but are not breakable. These objects may sometimes be required for progression, but those instances are easily recognizable. Keys are almost always worth collecting, while a stray crank-wheel may signal the opportunity to find extra loot. Miscellaneous The Heart The Heart is a strange artifact given to Corvo by The Outsider, which is able to relate details about NPCs and environments to the player. Note that in order to hear a character/enemy specific voice line, the crosshair must be centered directly on said character or enemy. If not aimed at an NPC or enemy, the Heart will cycle through a set of secrets relevant to your current location. If you enjoy lore and story, try and remember to use the Heart in many different situations. It's easy to write it off as a broken record, but there are actually many lines specific to important moments in the game, even ones you might not expect. While The Heart is equipped, HUD markers will show the location of Bonecharms and Runes by default. However, these markers can be turned off and are not necessary, as the Heart will also beat and light up when facing in the direction of a Bonecharm or Rune, which will themselves appear as vague pulses of red light.The Heart is heavily implied (and, later in the series, outright confirmed) to contain the essence of Empress Jessamine Kaldwin, who shares her voice with the otherworldly construct. See "Controls & Configuration". Corvo's Mask | Magnification After receiving the Mask from Piero near the start of the game, an upgrade becomes available for purchase allowing it to magnify distant locations. An additional level of magnification can then be unlocked and subsequently purchased (see Upgrades & Loot Items). With these upgrades it is possible to zoom in on any enemy, NPC, or location. Magnification is most useful when used in conjunction with the Crossbow while "sniping". It can also be used to scout out distant areas, in order to assess threats. See the "Stealth" sections for more details. Upgrades & Loot (Blueprints+Upgrades)
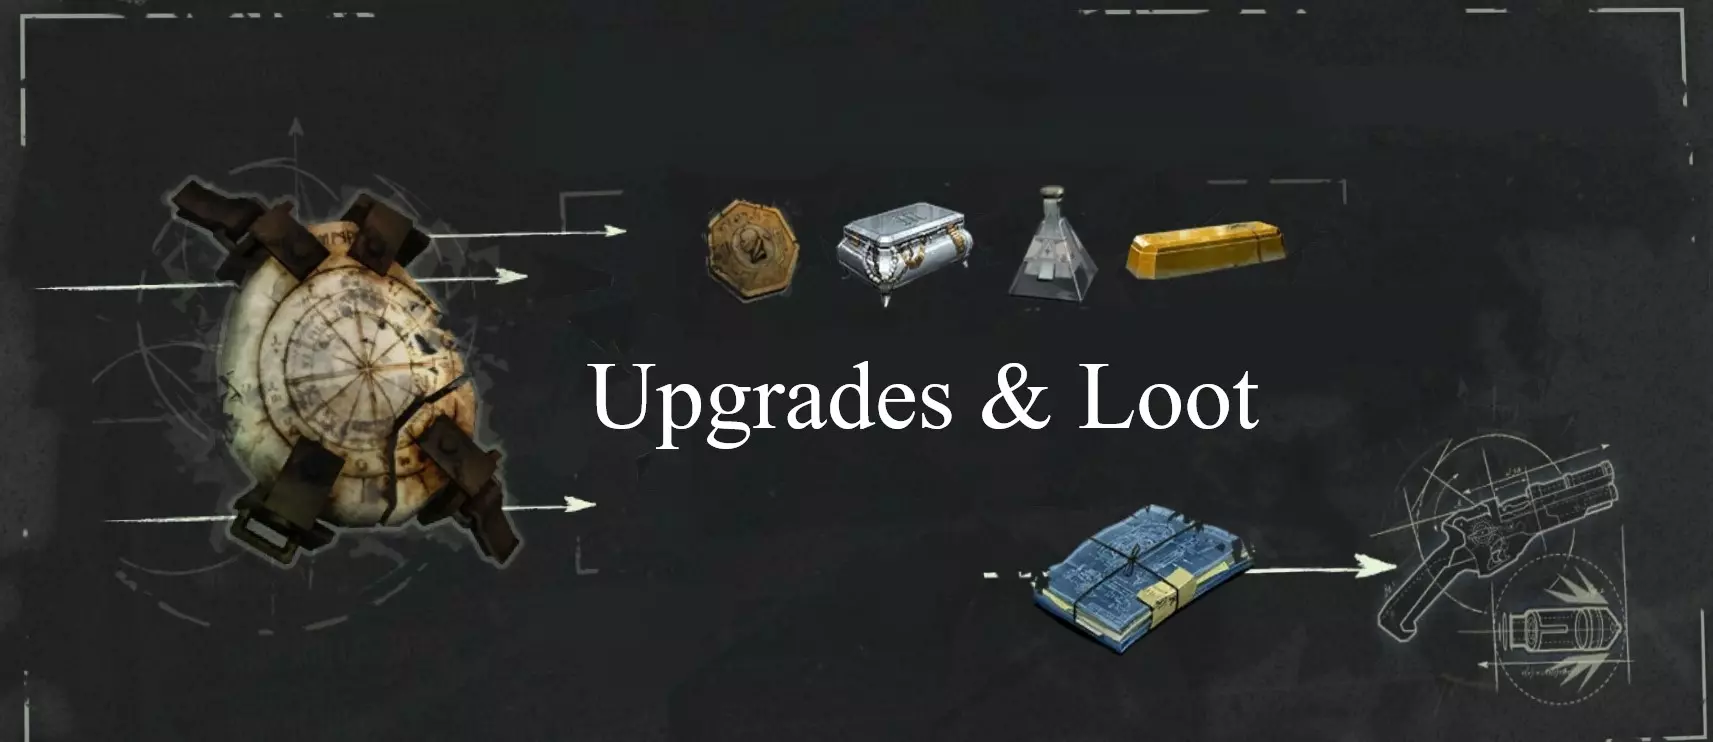
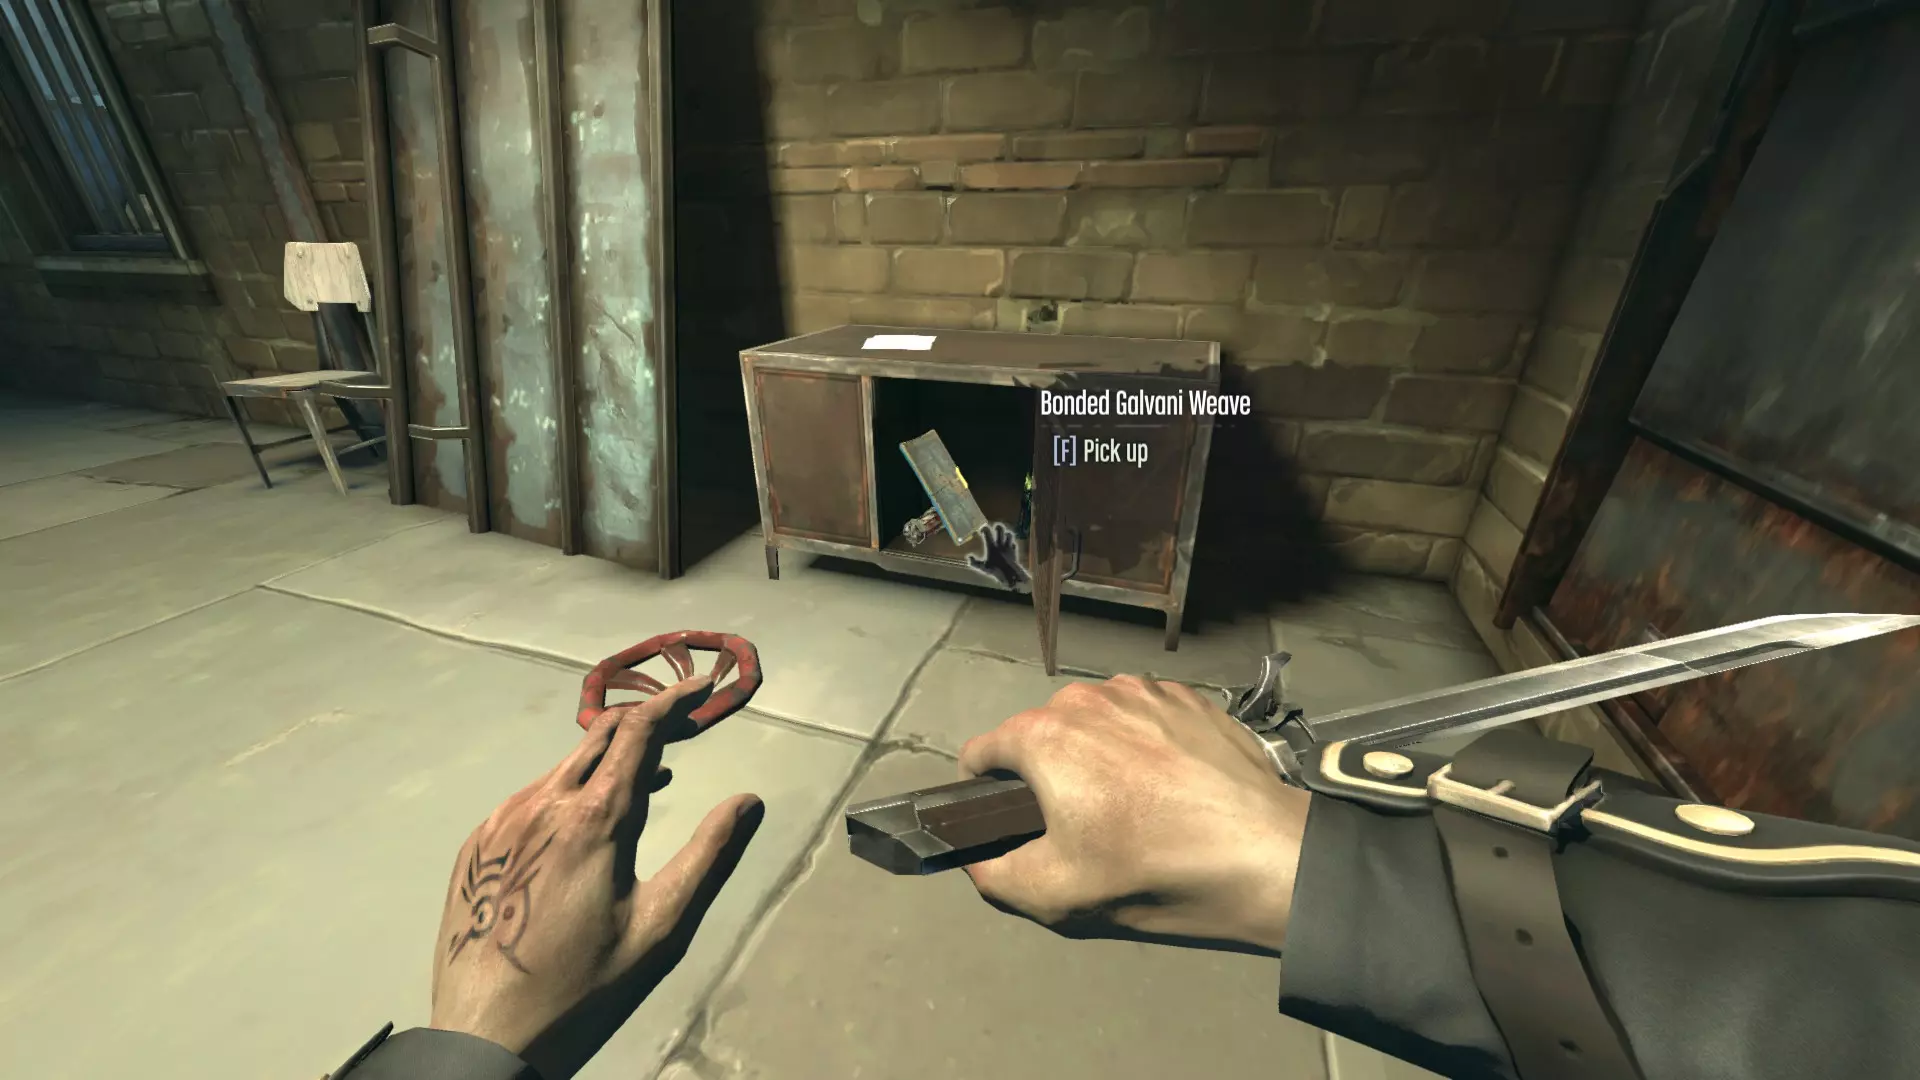
所有可收集蓝图和升级项,包括它们的价格、位置以及购买后提供的强化效果。默认可用的升级项会特别标注。升级价格/物品价值以【】标注。蓝图位置在每个条目后注明(如适用)。 蓝图 | 升级项 ---|--- 邦德 galvanic 编织 | 强化护甲【600】 通过抵消部分受到的伤害来提升生存能力,而非直接增加生命值。 位于高级督军办公室后院的工坊内的上锁箱子中(任务2)。
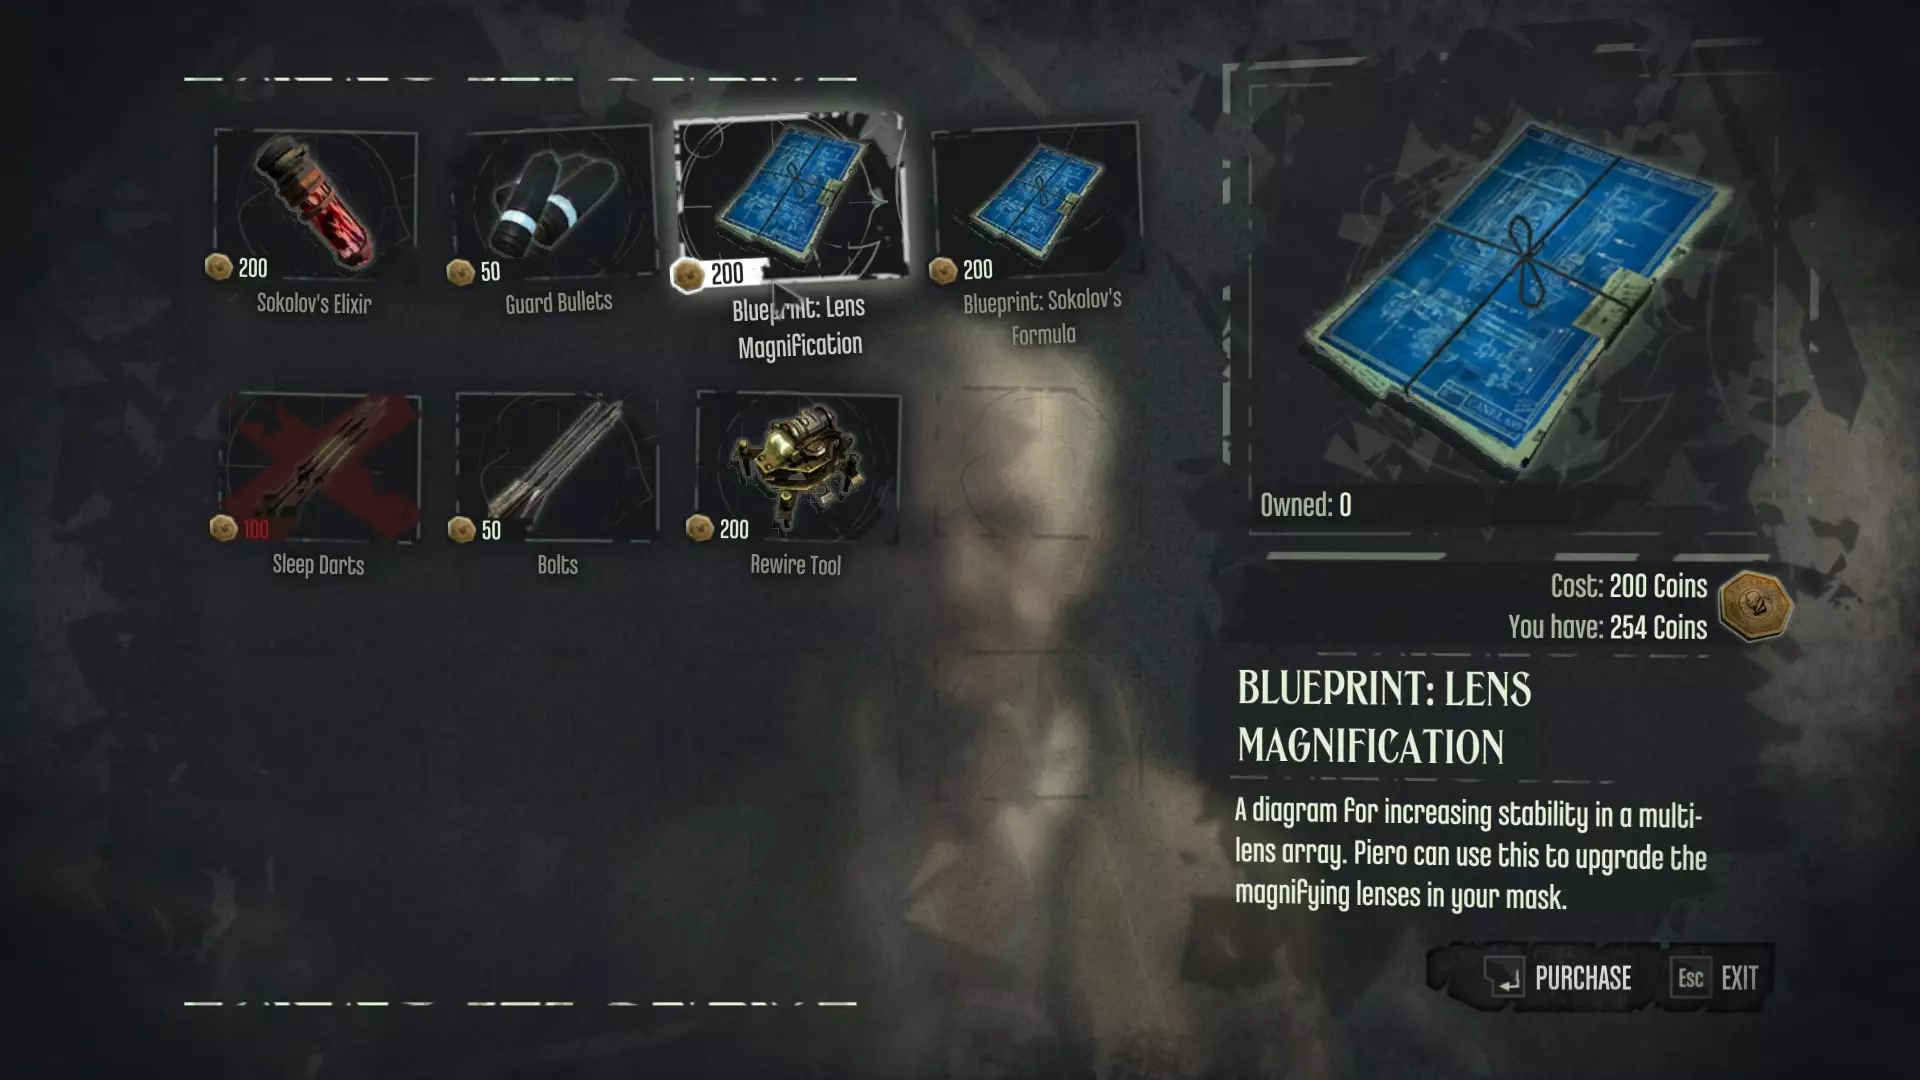
默认 | 面具光学I【300】 按下绑定按钮(PC默认左Alt键)可进行缩放。还会放大来自被放大区域的声音。 镜头放大【200】 | 面具光学II【400】 缩放后,按下互动键可切换至第二级放大。对潜行和狙击非常有用,在无HUD模式下几乎是必备功能。 可从血牛道的格里夫处购买(任务2/3)
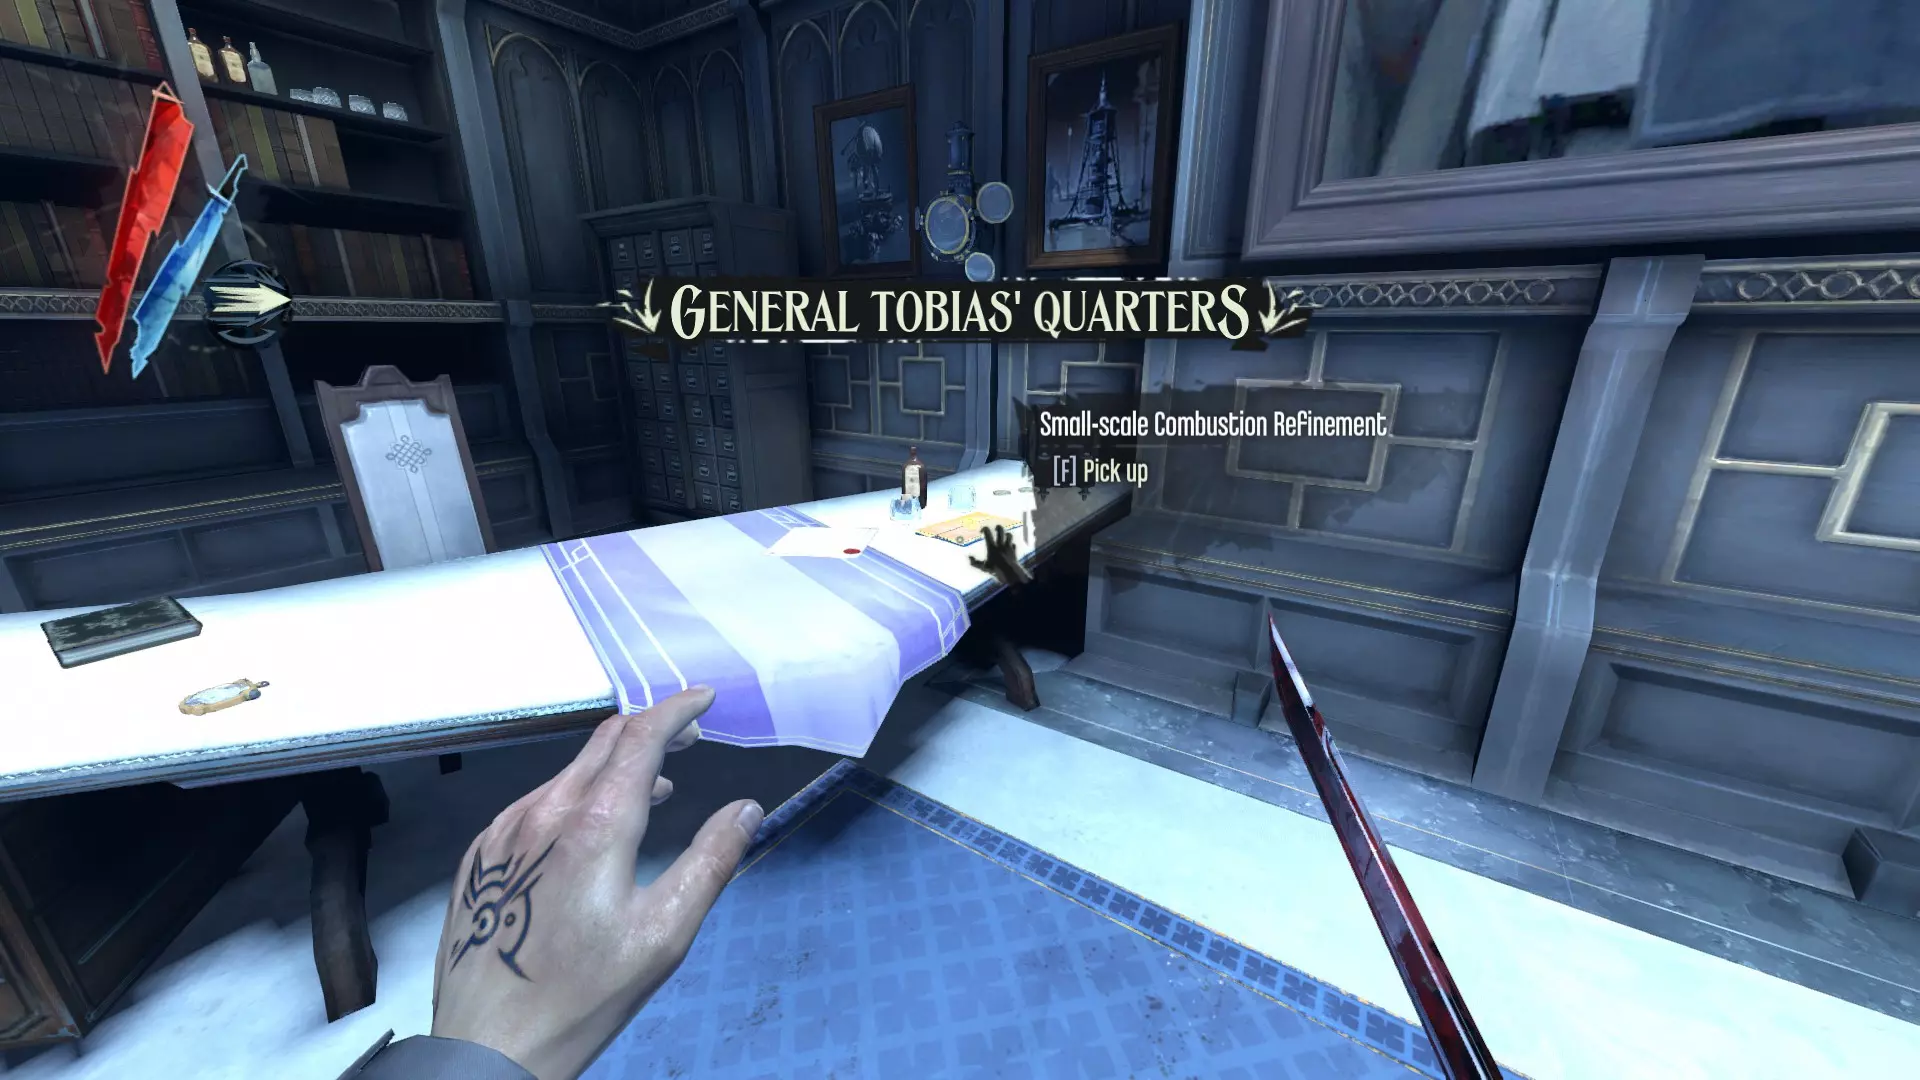
默认 | 战斗睡眠飞镖 {600} 使睡眠飞镖的效果立即生效,无论目标是否处于警觉状态。对潜行和战斗都极为有用——实际上这对几乎所有敌人来说都是非致命的一击制敌。由于效果延迟缩短,还允许一次连续对更多敌人投掷飞镖。 默认 | 科尔沃的手枪升级 {600} 此升级为手枪增加了短程扩散伤害,并解锁了手枪的多个升级路径: 手枪装填 I、II {300}、{600} 大幅加快手枪的装填速度。II级使装填变为自动(按互动键可手动装填)且速度极快。 手枪弹匣 I、II、III {300}、{450}、{600} 增加手枪弹匣的额外弹容量,意味着在需要重新装填前可以连续射击更多次。每个等级增加1个额外回合,最多共4个回合。 手枪精准度I、II【300】、【600】 降低手枪的随机子弹散布(RBS)。在《耻辱》中,即使没有升级,这种子弹散布也不是很明显,但有时可能会决定是爆头还是差之毫厘。准星大小可直观显示当前散布情况(注意: sprint会始终增加散布)。 小规模燃烧改进|爆炸子弹【450】 解锁手枪的爆炸弹药。 位于丹沃尔塔托拜厄斯将军的办公室(任务6)。
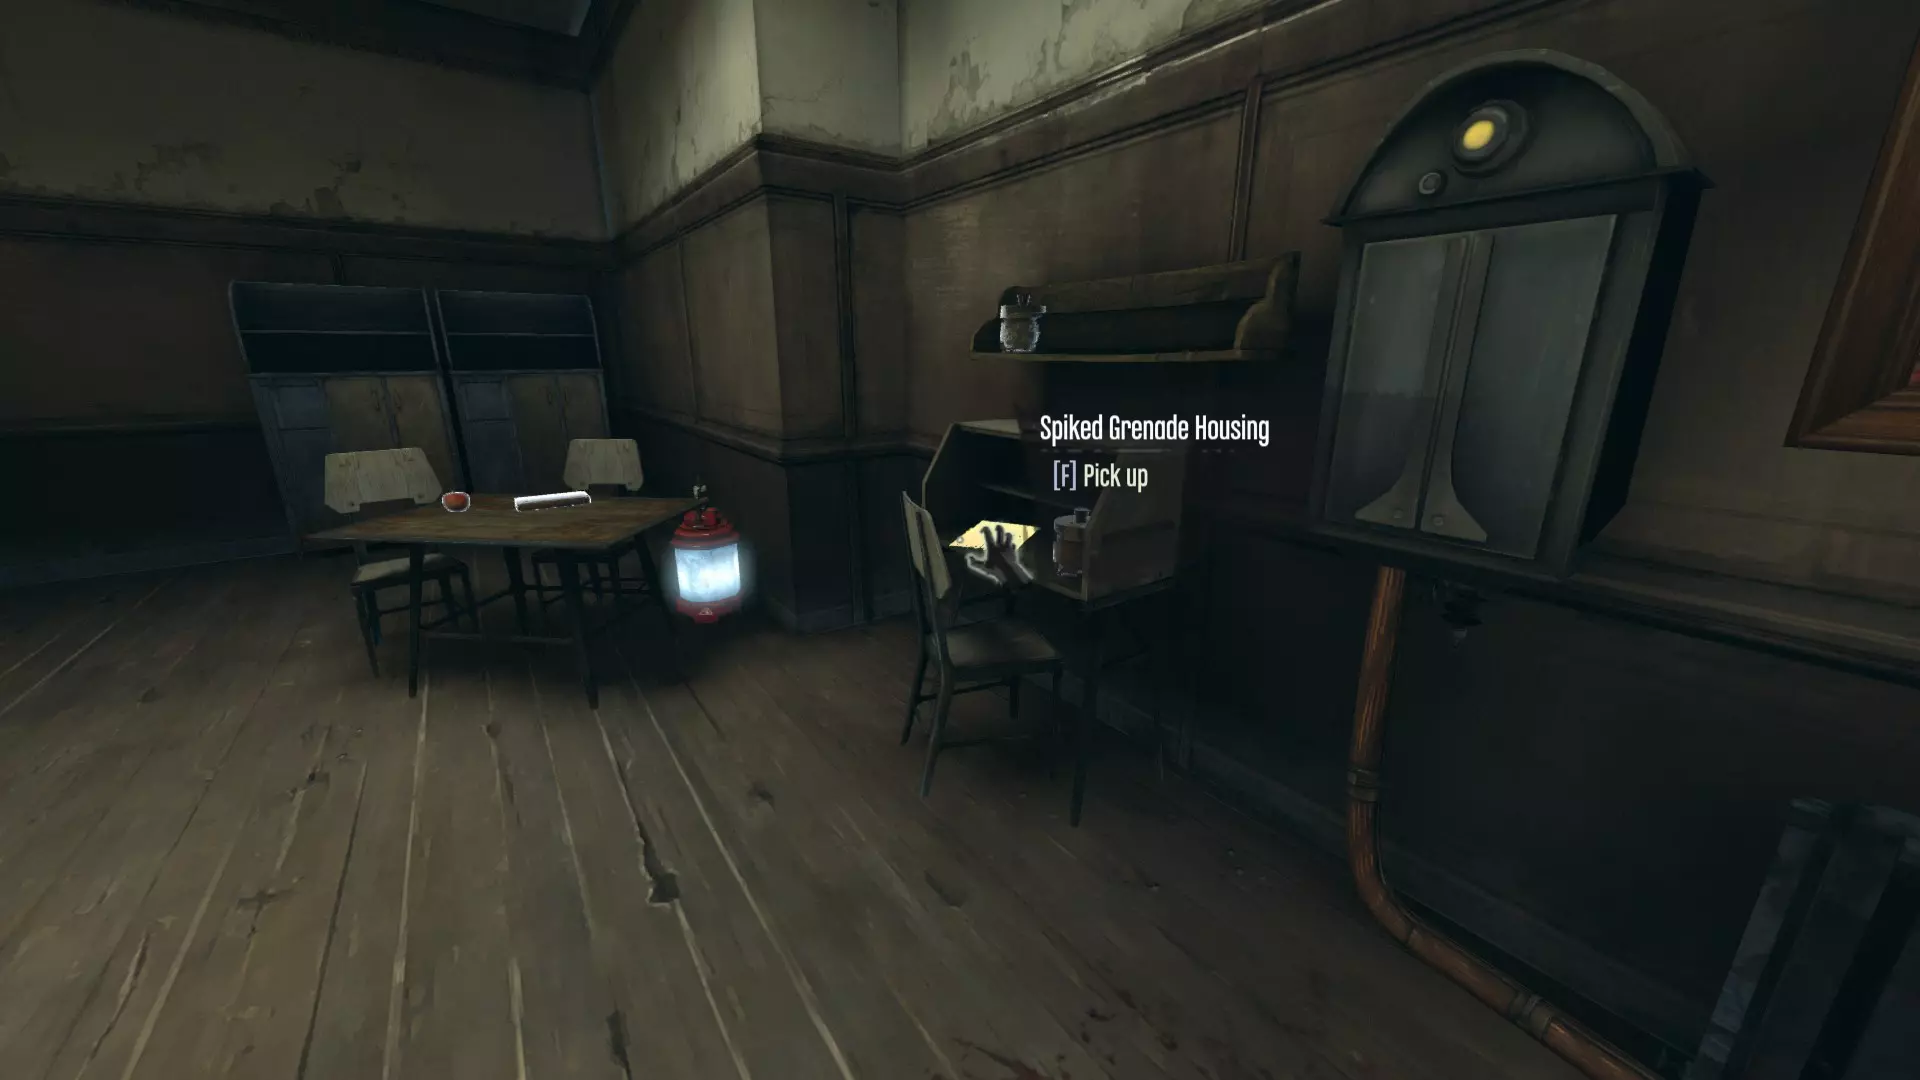
【粘性手榴弹外壳】| 粘性手榴弹 {600} 在皮耶罗的商店解锁粘性手榴弹。 位于博伊尔庄园的保安室——在主入口右侧。
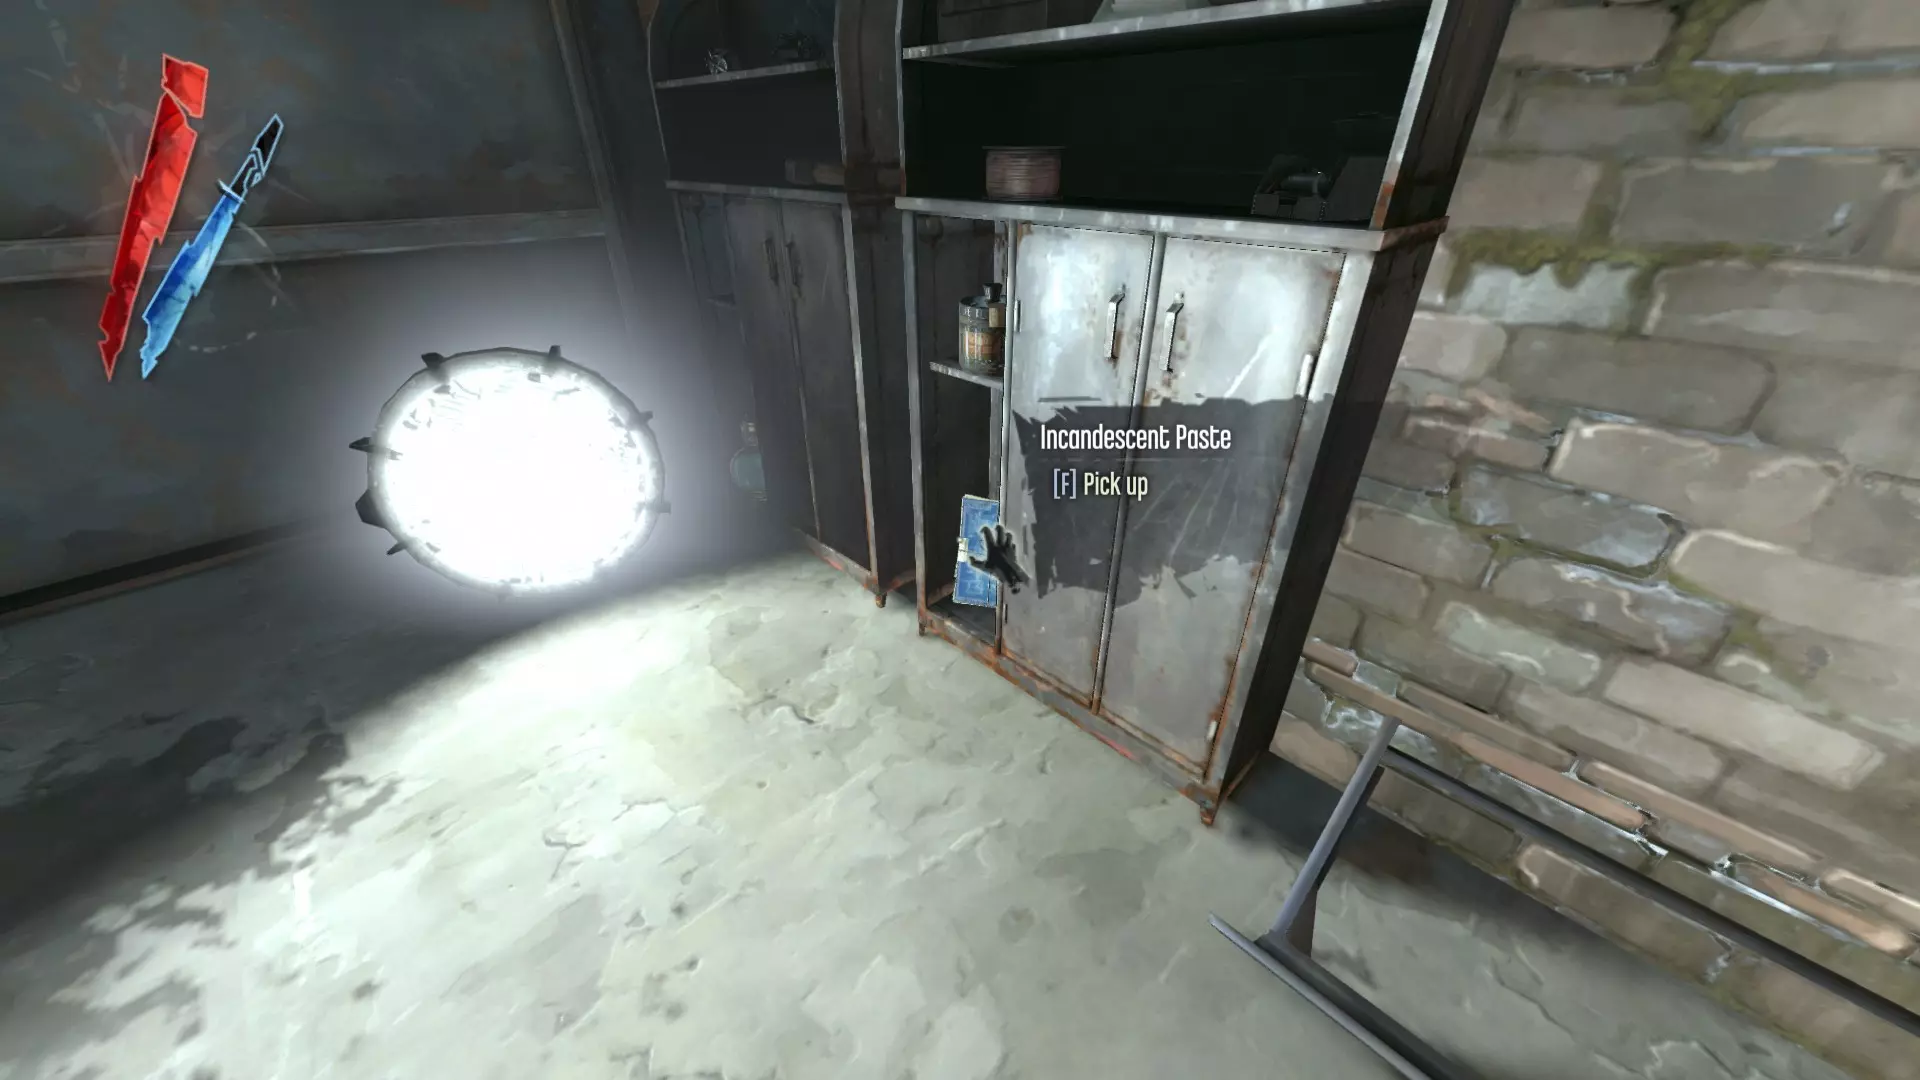
燃烧膏 | 燃烧螺栓 在皮耶罗的商店解锁燃烧螺栓。 位于酿酒厂的储藏室——进入主建筑后第一个右转处(任务3)。
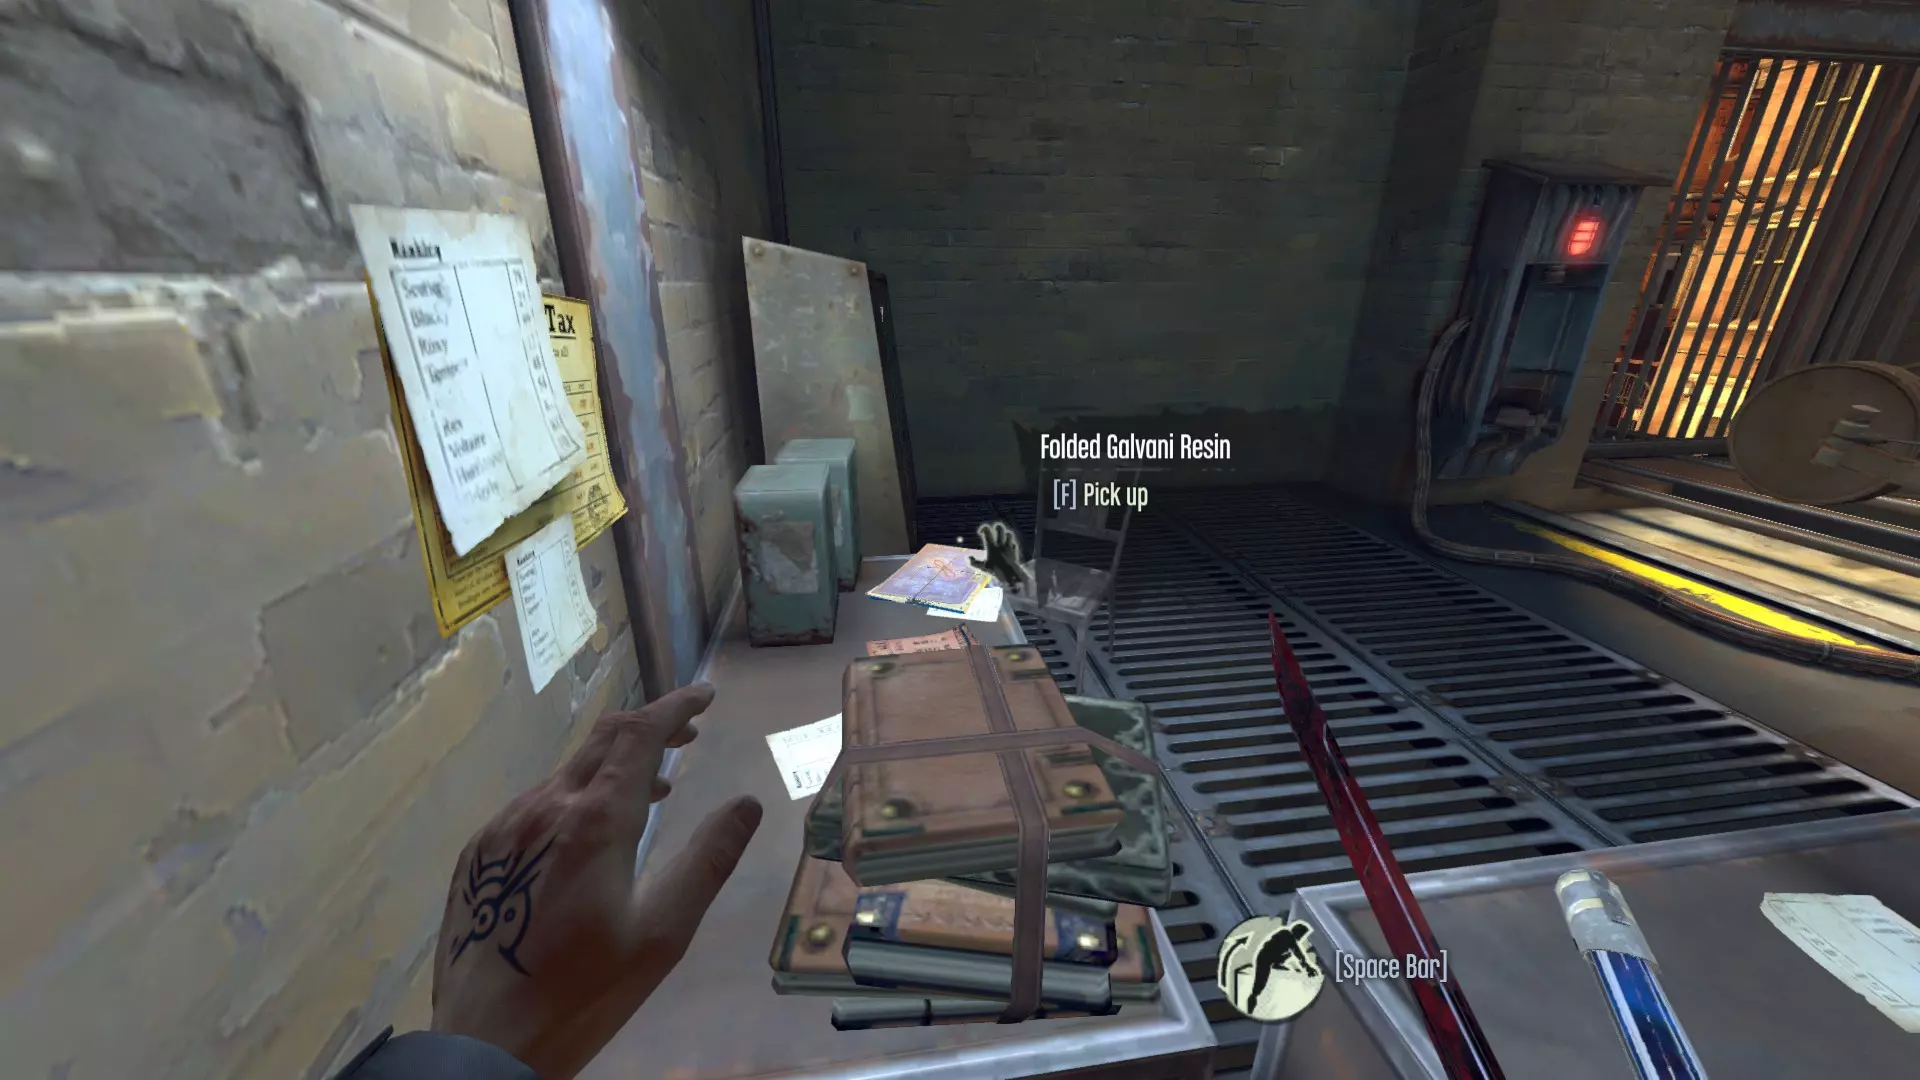
默认 | 十字弩箭矢容量I、II {300}、{600} 增加十字弩箭矢容量10发,与默认10发容量结合后最大容量为30发。 默认 | 十字弩精准度 {300} 降低十字弩的RBS(随机箭矢散布),使其弹道更稳定,从而提高精准度。 默认 | 十字弩射程 {450} 增加十字弩箭矢的射程和飞行速度,对狙击很有用。 默认 | 十字弩装填 {600} 为十字弩添加旋转上弦机制,移除手动装填,使其变为半自动。在大多数游戏流程中是比较重要的升级之一,不过也可以通过快速切换武器来替代(参见“额外技巧与杂项”)。默认 | 子弹容量I、II {300}、{600} 每级增加10发常规子弹容量,与默认10发容量叠加后总计30发。 默认 | 手榴弹容量 {450} 将手榴弹容量从5个增加至9个。 默认 | 弹簧刀容量 {450} 将弹簧刀容量从5个增加至9个。 默认 | 弹簧刀半径 {600} 增加弹簧刀触发时的作用范围。 折叠加尔瓦尼树脂 | 靴子潜行I、II {450}、{600} 此升级路径会降低移动时产生的噪音。1级使行走时保持安静。2级使行走和 sprint(冲刺)时均保持安静。但即使在2级,非潜行模式下落地仍会产生噪音。 位于任务4第一个区域的有轨电车旁。只需沿着路走,找到瞭望哨后面的木门,然后走上金属楼梯。
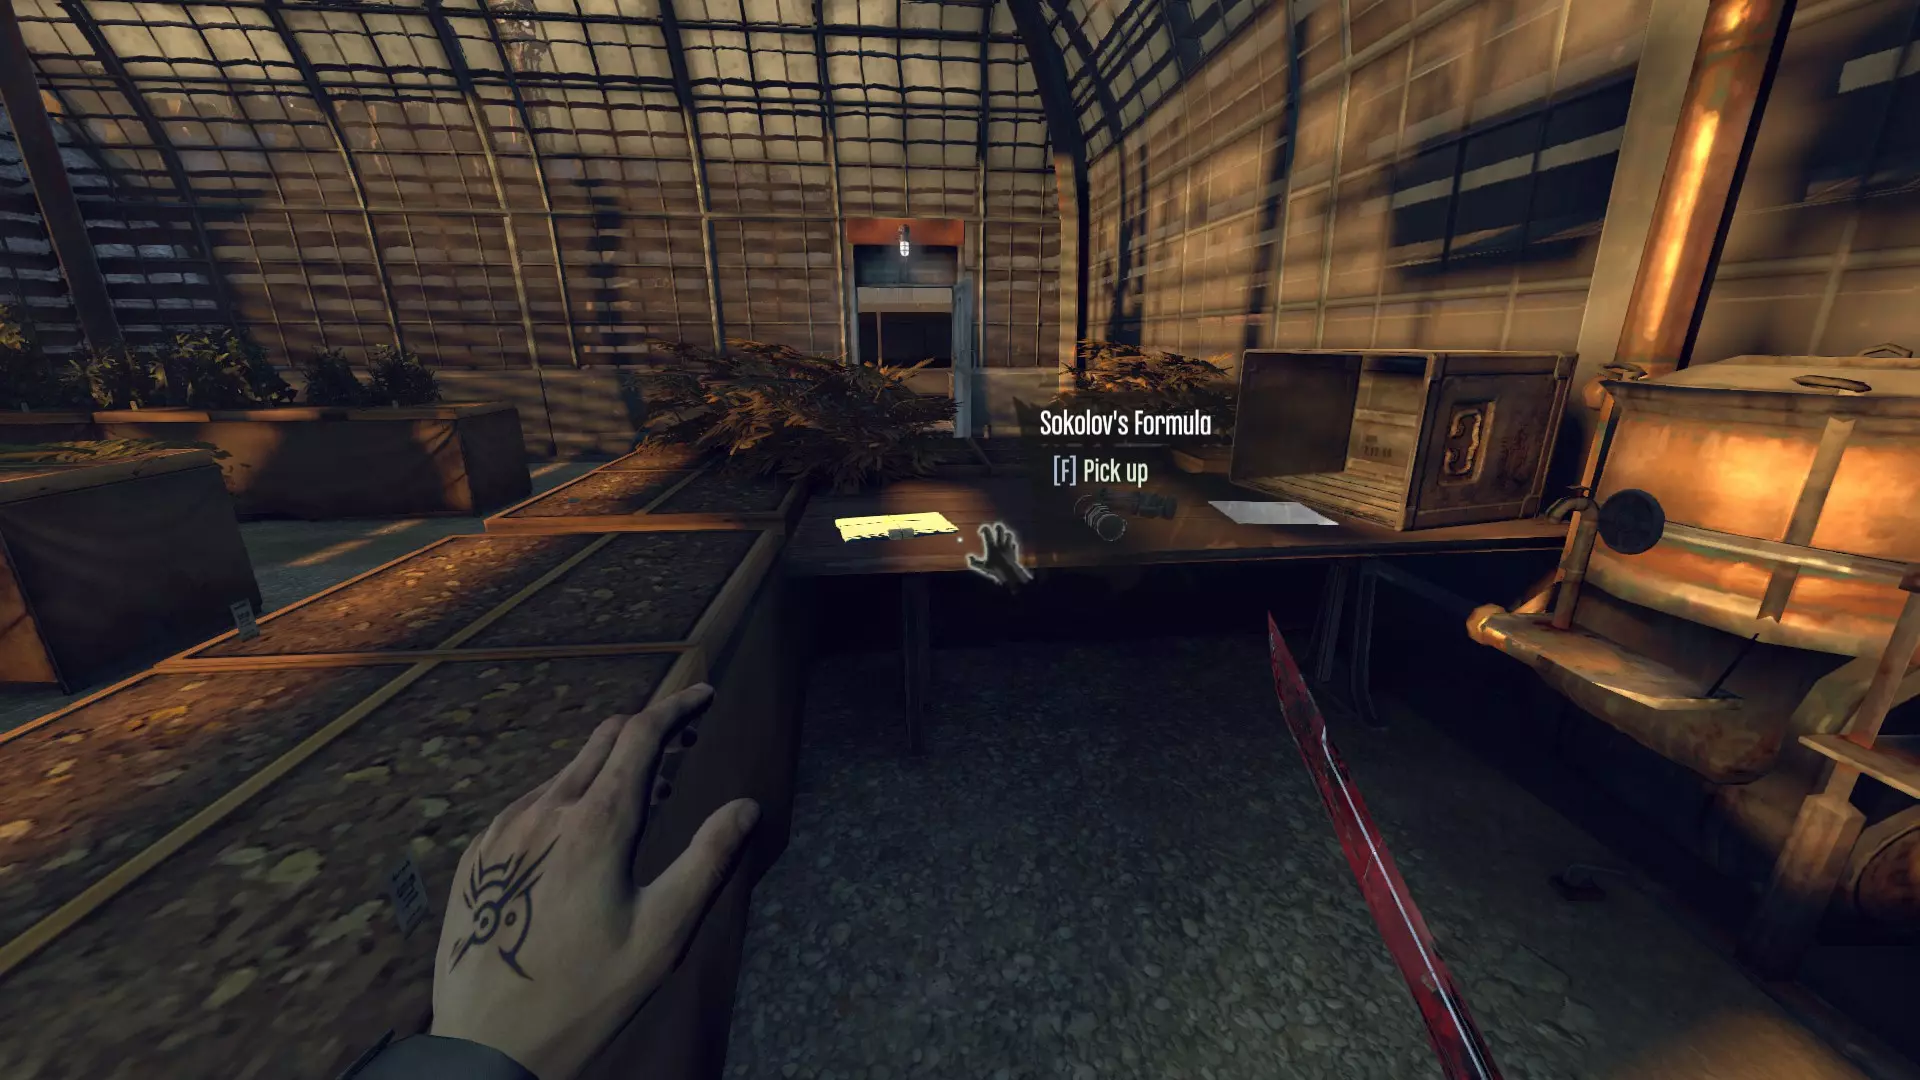
默认 | 十字剑(600) 此升级能提升科尔沃的折叠刀在剑锁时的效果。同时,它会极大改变剑的外观,从银钢色变为抛光黑色并镶嵌金色纹路。由于剑锁情况较为罕见,此升级更多是外观选择——我个人经常购买它,只是因为喜欢升级后刀刃的样子。 默认 | 骸骨护符容量I、II(300)、(450) 这条路径允许你同时装备额外的骸骨护符。I级增加1个额外槽位,II级再增加2个。若与所有遗物(见下文)搭配,装备骸骨护符的最大总数可达10个。 索科洛夫的配方(200)| 索科洛夫的生命药剂(200) 允许从皮耶罗处购买生命药剂。我个人建议不要购买这个蓝图,因为生命药剂在游戏中已经可以免费获得。不过,如果你经常很快耗尽储备,那么它可能是个有用的选择。可从格里夫处购买(任务2/3)
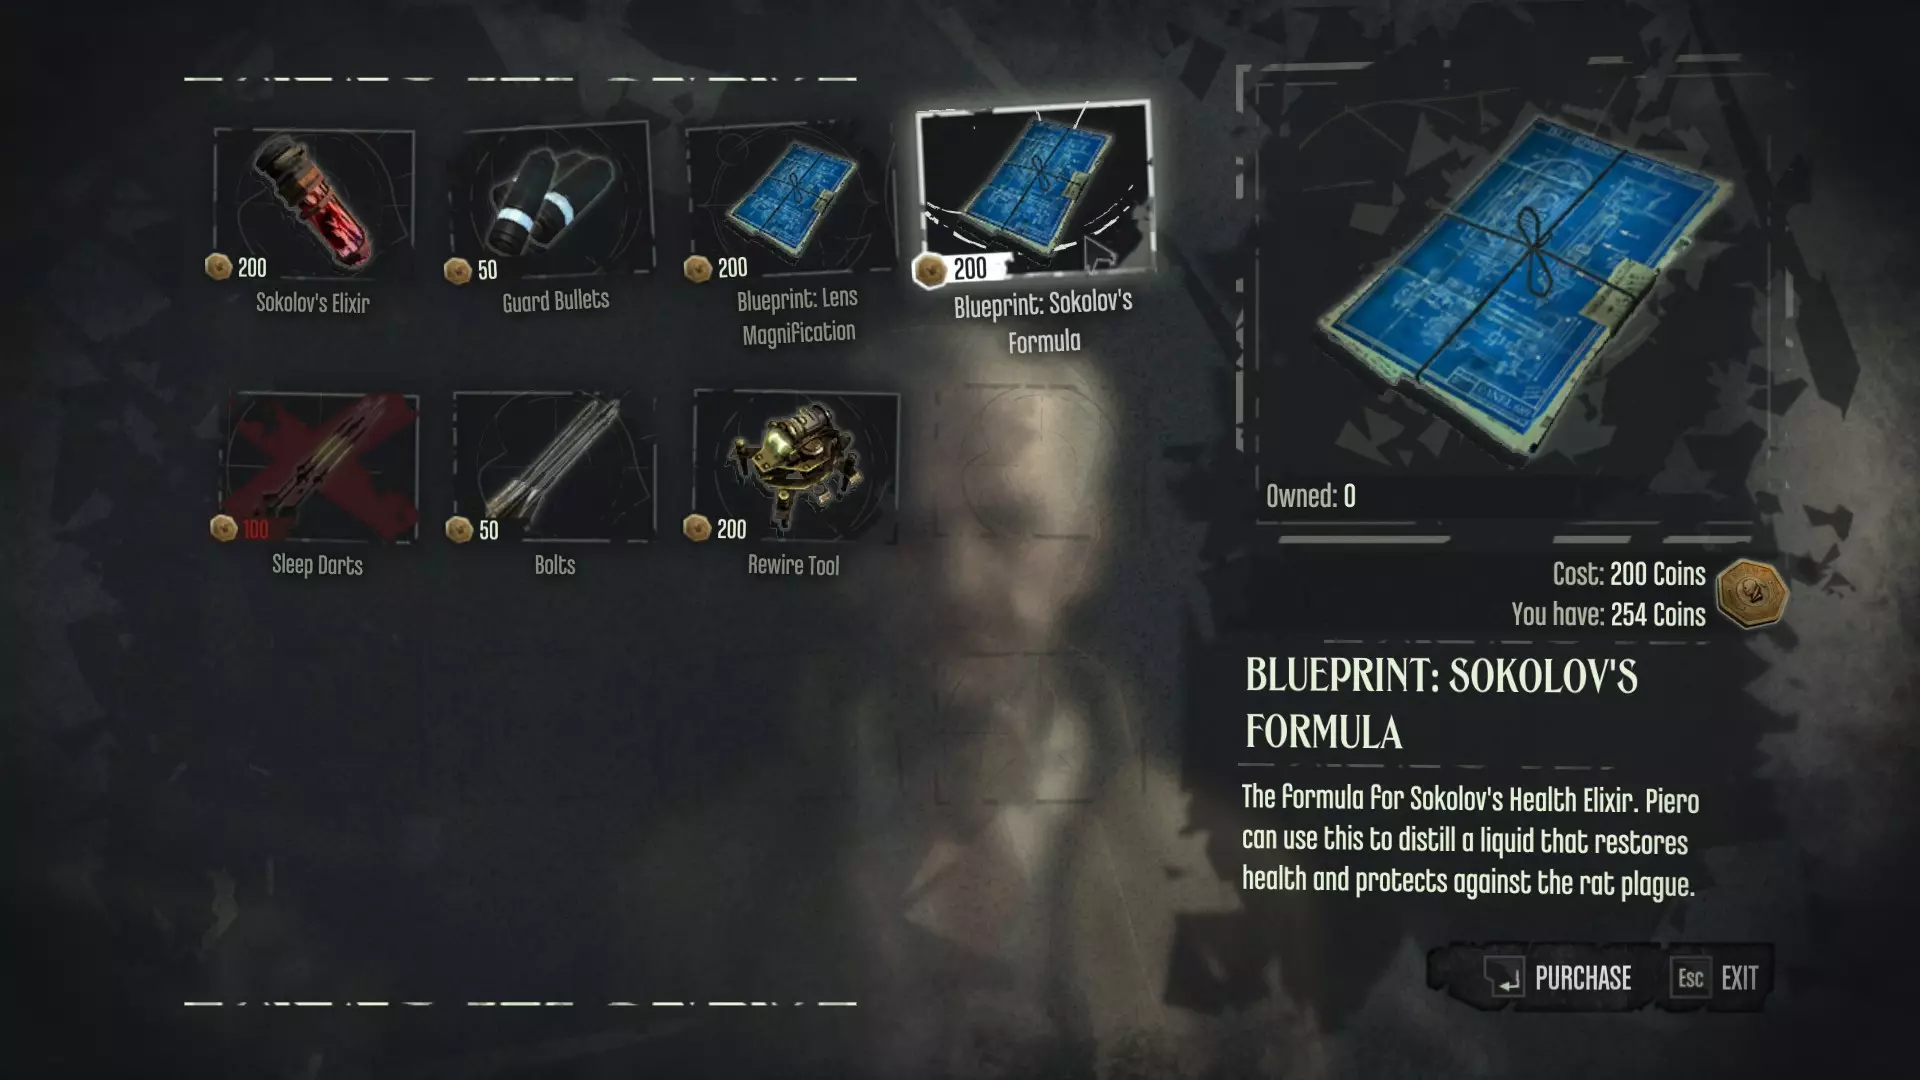
或在索科洛夫的屋顶实验室中找到(任务4)
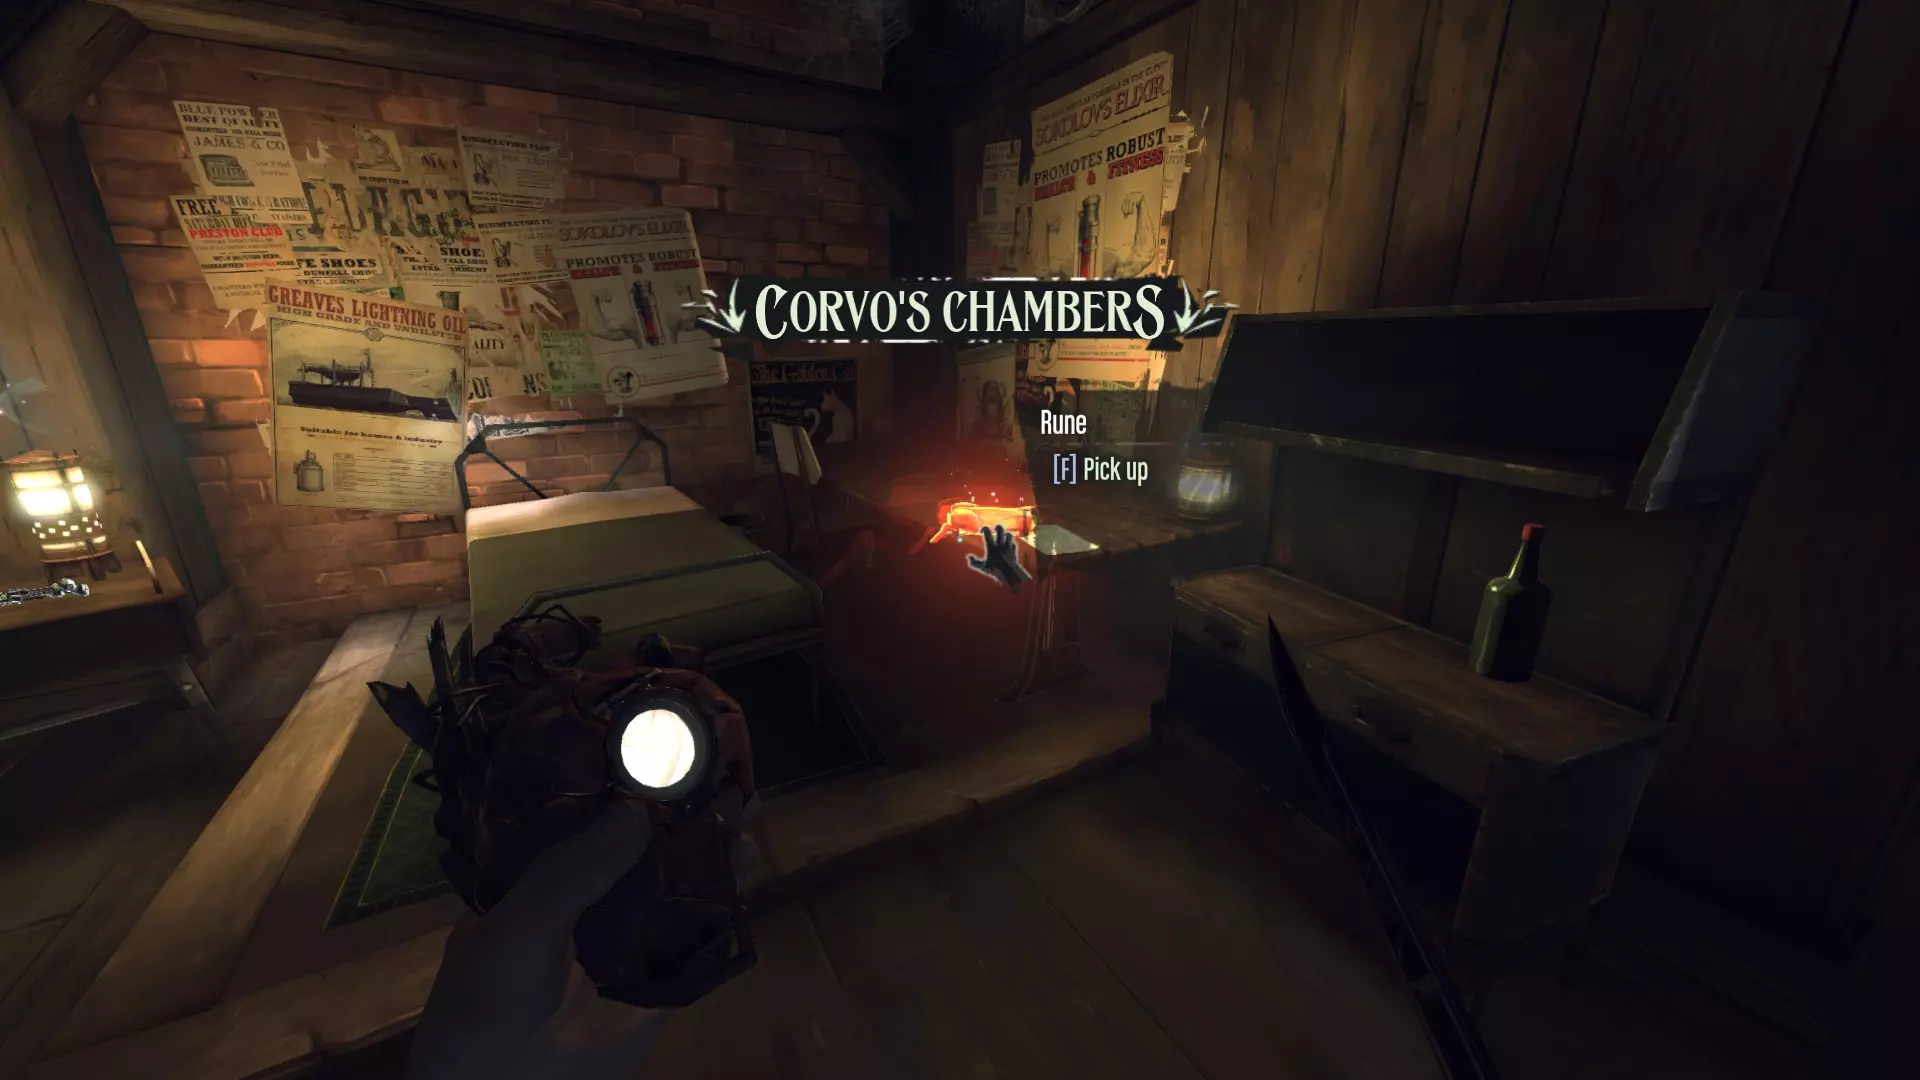
Upgrades & Loot (Coin Items) Loot ItemsCoin value listed in {brackets}. Tyvian Ore {20} Is apparently of higher quality than Gristolian ore, as Admiral Havelock's note to Piero confirms. Processed Whale Oil {30} Hemlock Essence {20} Ingot {100} River Krust Pearl {25-50} Loot these from dead River Krusts. Can also be found throughout the world. Copper Wire {10} Kingsparrow Feathers {10} Medicinal Herbs {20} Powdered Crystal {30} Perth/Moray/Inchmouth/Carmine/Boyle Decor Plate {50}/{50}/{100}/{100}/{150} Moray/Inchmouth/Carmine/Boyle/Imperial War Medal {50}/{100}/{100}/{150}/{150} Perth/Moray/Inchmouth/Carmine/Boyle/Imperial Cigarette Case {50}/{50}/{100}/{100}/{150}/{150} Perth/Moray/Inchmouth/Boyle/Imperial Pocket Watch {50}/{50}/{100}/{150}/{150} Found on the desk of General Tobias' office in Dunwall Tower. Perth/Inchmouth/Carmine/Boyle/Imperial Jewel Box {50}/{100}/{100}/{150}/{150} Imperial Cameo {150} One can be found on the uppermost shelf in Cecelia's apartment, next to a can of Pratchett Jellied Eels. Boyle Cameo {150} Stowed in a chest in the secret attic space of Boyle Manor, which may be accessed through two trapdoors near the roof of two of the three second-floor bedrooms. These trapdoors are activated via a pair of tasseled pulleys found in either bedroom. The Cameo was intended to be the grand prize awarded to whomever could guess the true identities of the Boyle Sisters, so by completing that objective, you technically qualify for the reward. Not that they would give it to you, of course. Boyle/Imperial Egg {150} Holger's Opal {200} Hidden inside the Urn of High Overseer Scott Grafton, who was supposedly cremated with it in acknowledgement of his efforts against the plague. Perth/Moray/Inchmouth/Carmine/Boyle/Imperial Urn {50}/{50}/{100}/{100}/{150}/{150} One can only hope that these urns are empty. Perth/Moray/Inchmouth/Carmine/Imperial Sextant {50}/{50}/{100}/{100}/{150} Map/Star Chart/Survey {75} Sokolov Painting {300} Unique works of art which can be collected for a hefty profit, each painted by Anton Sokolov. There will generally be 1-3 paintings per mission. Collect them all for an achievement. Pouch {5-100}, {500} These can be found hanging from the belts of certain enemies and NPCs or scattered throughout the world. They will yield anywhere from 5 to 100 coins (note that in the Definitive edition, 5 unique pouches worth 500 coins each will spawn in Corvo's Chambers after the first Void sequence). Luckily, citizens of Dunwall tend to wear their purses directly behind them, providing easy access to their hard earned coin. How strange. Perth Fish Statuette {50} Carmine Hound Statuette {100} Boyle/Imperial Whale Statuette {150}/{150} Mystical Artifact These figurines, coming in the likeness of a rat, a fish, a hound, and a whale, increase Bonecharm capacity by 1 for each Artifact collected. Exclusive to the DLCs/Definitive Edition. Coin {1} Single coins are small and silver. Coin of 5 {5} Coins of 5 have a copper/bronze colored rim with a silver core. Coin of 10 {10} Coins of 10 are large and have a golden rim with a silver core. Clockwork Explosive {9999999999999999999999999999} Found in the unlocked safe during the escape from Coldridge Prison. And actually, I lied about it being worth four hundred and twenty corvoillion coins. It has no value other than the cool explosion you use to blow open the front gates. Not totally sure why I'm including it, but it felt right. Upgrades & Loot (Safe Codes+Trivia) Safe Combinations & TriviaSpoilers! Jelly's Safe: 451 The combination for this safe is actually an easter egg found in many games, particularly those of the Immersive Sim genre. By tradition, the first combination in the game is this number. Allegedly, it was the combination to the front door of Looking Glass studios, the founders of the genre and developers of such titles as Thief and System Shock. In fact, many key Dishonored developers also once worked at Looking Glass. The full sequence is usually 0451, but Steel Monitor safes only ship with a 3-digit mechanism, so the first digit was omitted. Doctor Galvani's Safe: 287 According to a book found in his home, Dr. Galvani chose this combination because it was the most important date of his life: The day he met Anton Sokolov. Overseer Bunkhouse: 203 Fun Fact: By stealing from this safe, the player is arguably breaking three of the Seven Strictures: Restless Hands (by not working for the goods themselves, instead stealing them), Wandering Gaze (by desiring material wealth), and Roving Feet (by trespassing in the Bunkhouse). Locked Kennel Door 217 A note in the Overseer Workshop relates the Kennel master's outrage at one Overseer's attempts to create wearable explosives for the Wolfhounds, in order to turn them into "living bombs". Not a dog person, then. Art Dealer's Safe 138/696/879 Slackjaw asks Corvo to get him the combination for this safe, which is randomized between the three options shown above. Once you have the combination, you can actually go to the Art Dealer's Apartment first and take the goods for yourself, then give Slackjaw the combination to gain his assistance as well. This will also net you an achievement. Pratchett's Safe: 473 Pratchett lives (or at least owns a house) on Kaldwin's Bridge and seems to be a wealthy businessman. In game, tins of "Pratchett Jellied Eels" are found throughout Dunwall, suggesting that this may be the source of his wealth. His house also has a war medal displayed proudly on the wall, implying that either he or his relative fought in combat. Given the time frame, it is possible this medal was awarded to him or his brother or father for fighting in the Morley Insurrection, which would also help explain his prestigious position. Collapsed Building Safe 294 Located near the entrance to the area containing Sokolov's home. It is behind a painting hanging from a destroyed building, above a makeshift prison cell housing two civilians. One of them will give you the combination in thanks if freed. Lord Regent's Safe: 935 This safe is located inside what was once the Empress's bedroom in Dunwall Tower. A message from her killer, Daud, can be found inside, saying that he wants more payment due to the fact that he had not planned on Corvo being there during the attack. This gives context to the line the Regent says at the beginning of the game when Corvo arrives: "Corvo, two days early. Full of surprises, as usual". It seems Corvo made sure he returned to Dunwall Tower as quickly as possible, perhaps to preempt a possible attack. Underwater Safe 428 Found in Central Rudshore, submerged near the former Chamber of Commerce (head down the alley found to the left of Central Rudshore's entrance area until you arrive at a courtyard with flickering lights--the safe is located within the flooded apartment accessible via a wooden door hidden below the surface). Rudshore was once a rich and prosperous district, but due to years of neglect, the local flood barriers failed, submerging the entire area in the waters of the River Wrenhaven. The Heart has a cut line that mentions how the Plague Rats were driven out of Rudshore by the flood. In real life, things like construction and flooding can indeed drive vermin out of their nests into surrounding areas. Considering the fact that the Plague Rat infestation actually originated in the poorer, inner area of Dunwall (and not the ports as one would expect), this would almost make sense as the insertion point for the infestation. However, the district was actually very wealthy before the flood, and the Lord Regent introduced the rats in order to cull the poor. This is probably why the line was cut. Jelly's Riddle Safe 528 Found in the sewers of the Old Port district, leading to the Hound Pits. The book providing the hints to solve it shows that the Empire uses a 13 month calendar. This is another abandoned safe apparently meant for someone named "Jelly", a smuggler or black-market trader of some kind. We can infer that Jelly is perhaps not the brightest fellow around due to the fact that both safes come with what are essentially veiled instructions and yet are unopened. One could argue that perhaps the player merely comes across these safes before Jelly does, but the first is surrounded by tools and implements--one is even wedged in the door in a futile attempt to open it. Upgrades & Loot (Runes+Bonecharms) Spoilers! Rune LocationsHound Pits I Unmissable; end of first Void sequence.
在河岸下游的一块岩石上,桥的另一边。
在皮耶罗的魔法虚空储物袋中。
高级督军坎贝尔 在奶奶家后面的封闭小巷里。
接下来的两个都可以在她房子第二层的船下面找到,与可选目标相关联。
在克拉弗林大道尽头、关卡转换前的瞭望哨站处。

高级监督者办公室会议室的壁炉架上方。

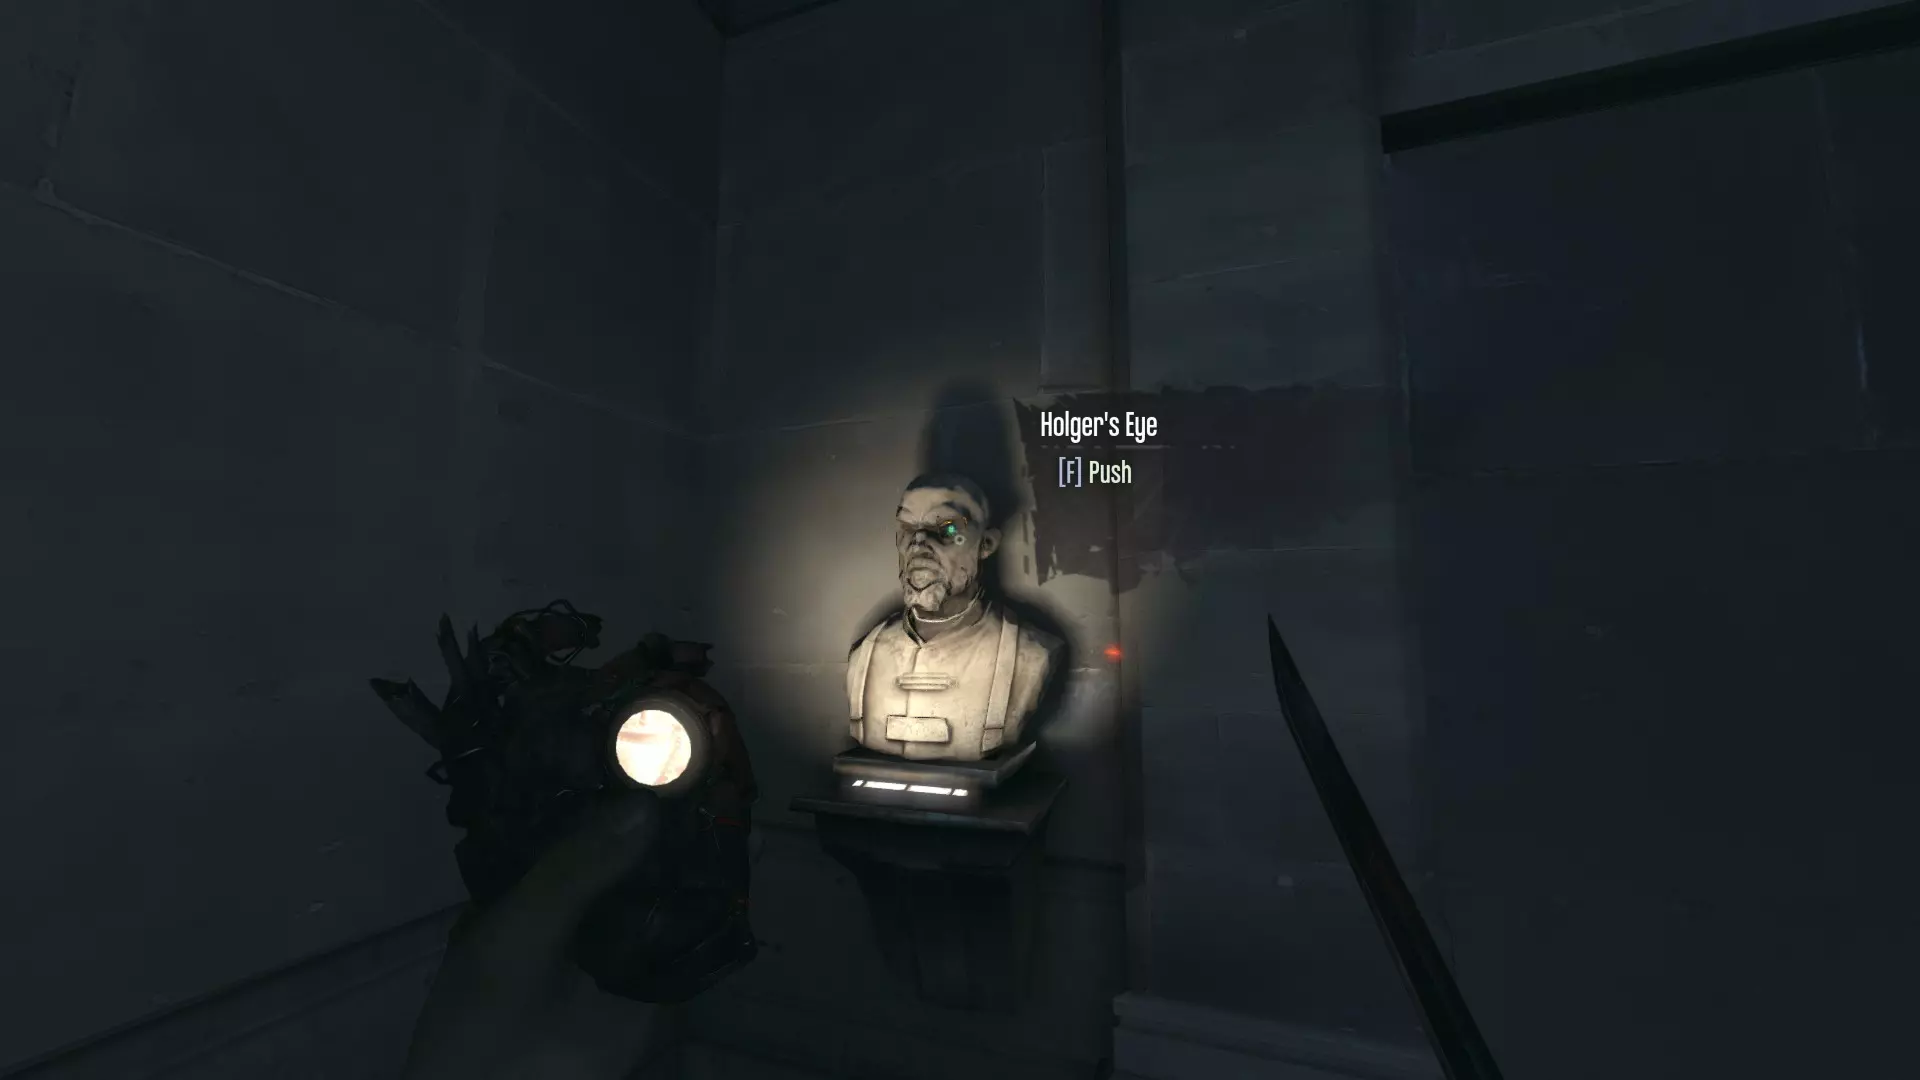
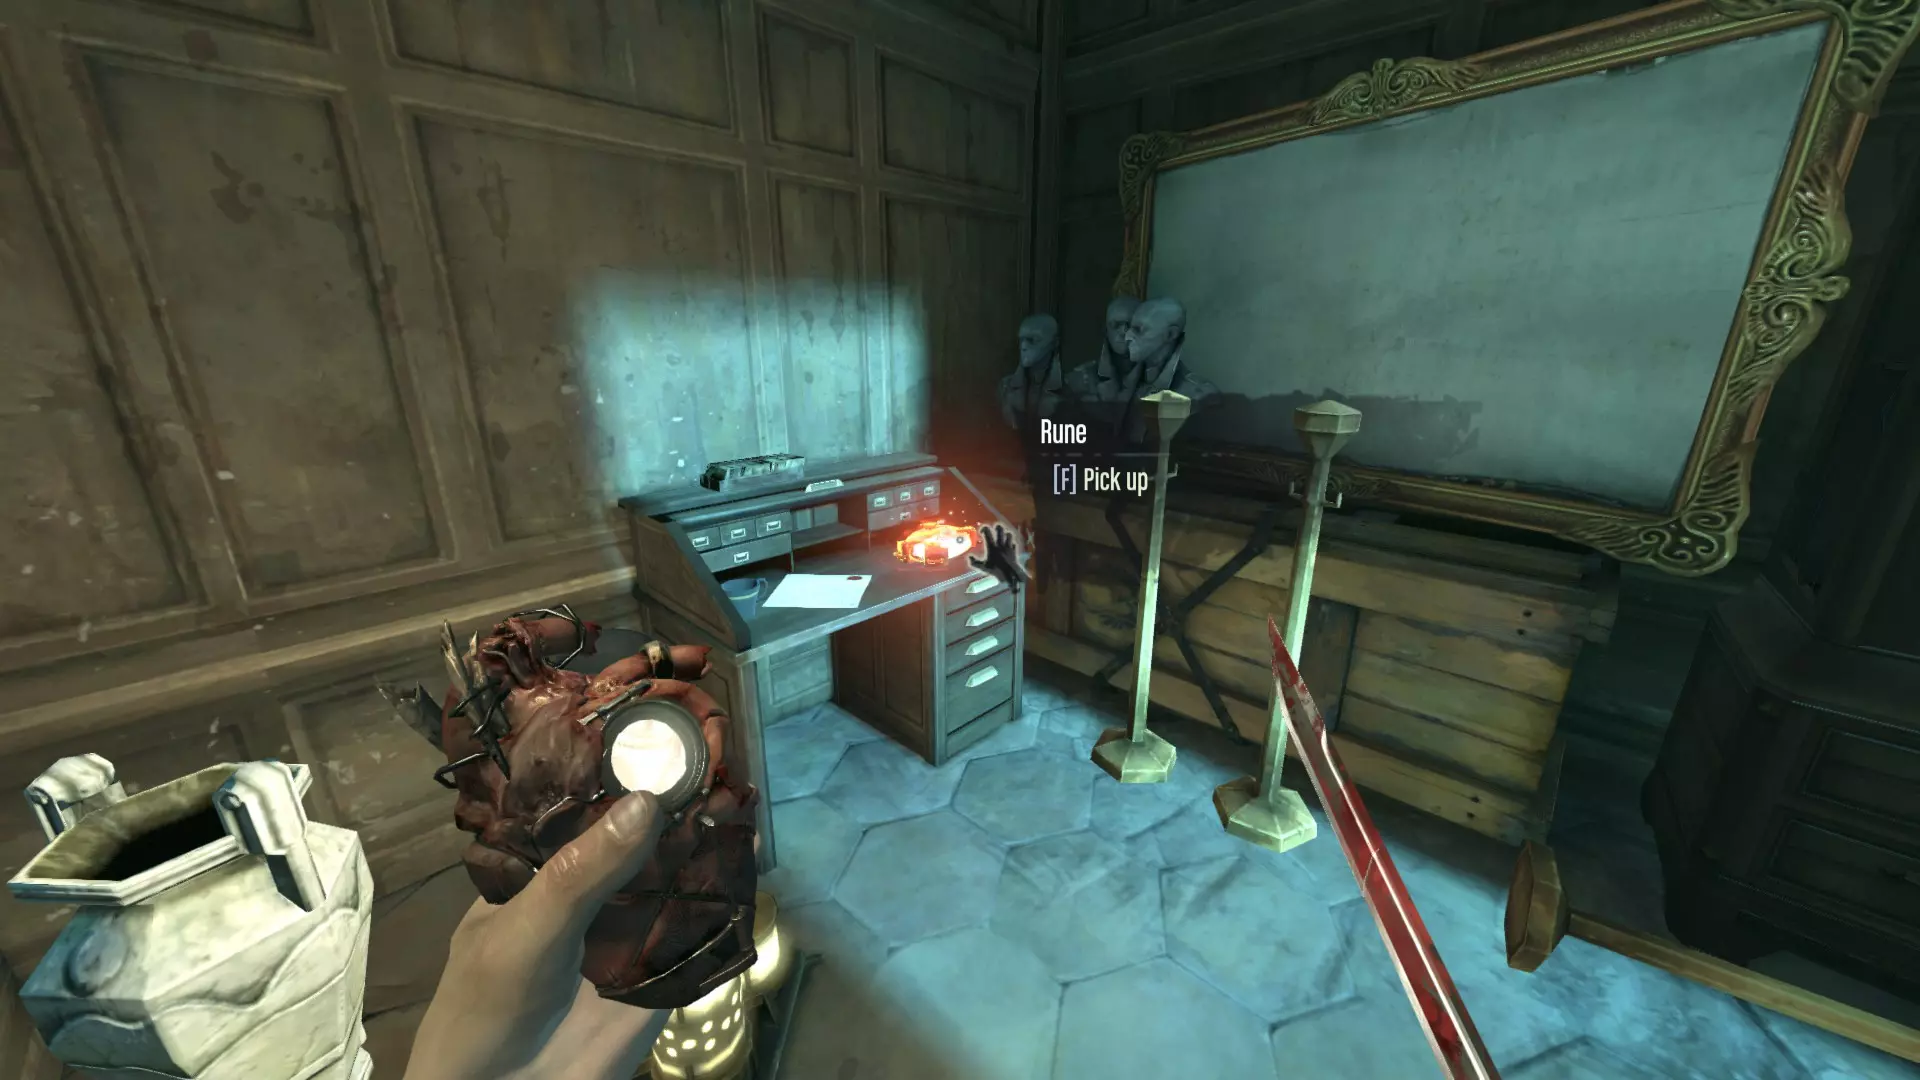
在坎贝尔的秘密房间的展示柜中(从大厅楼梯下去,戳霍尔格的眼睛即可打开)。

在任务最终区域的工坊内。
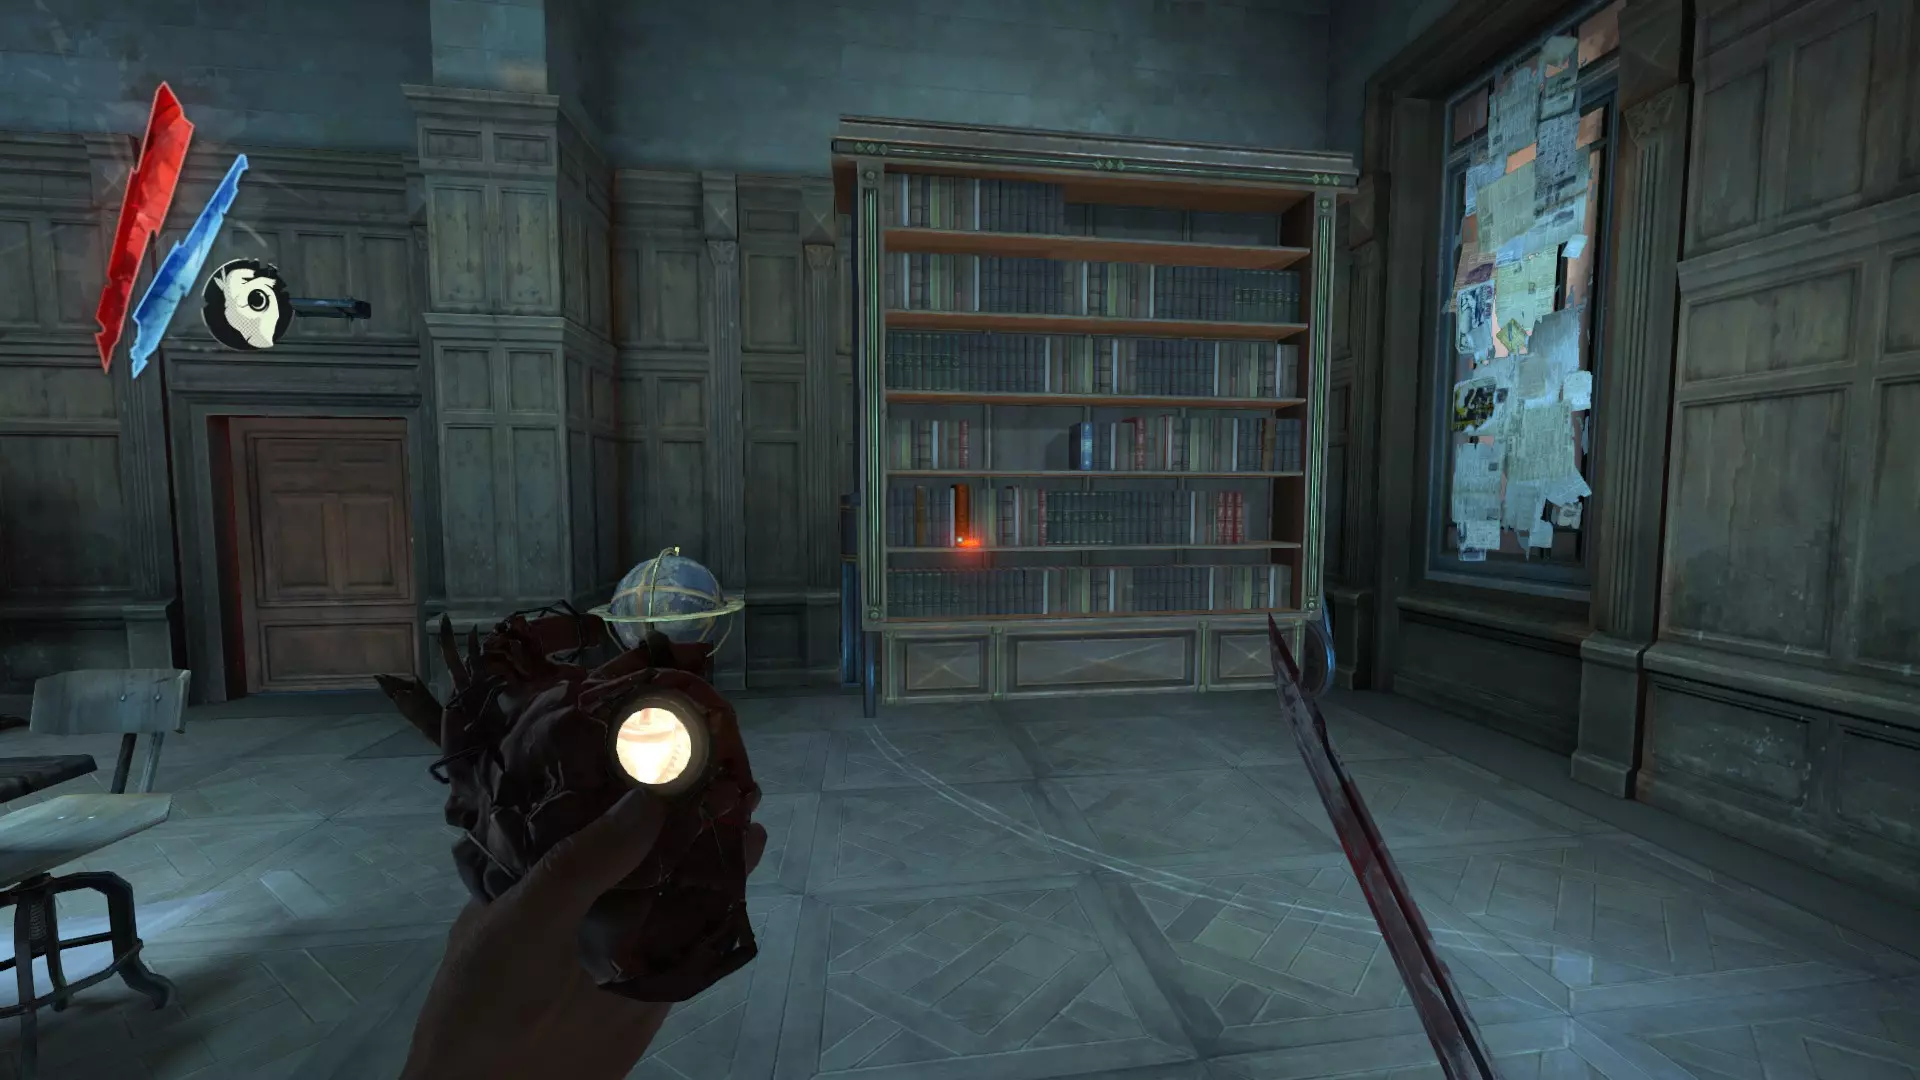
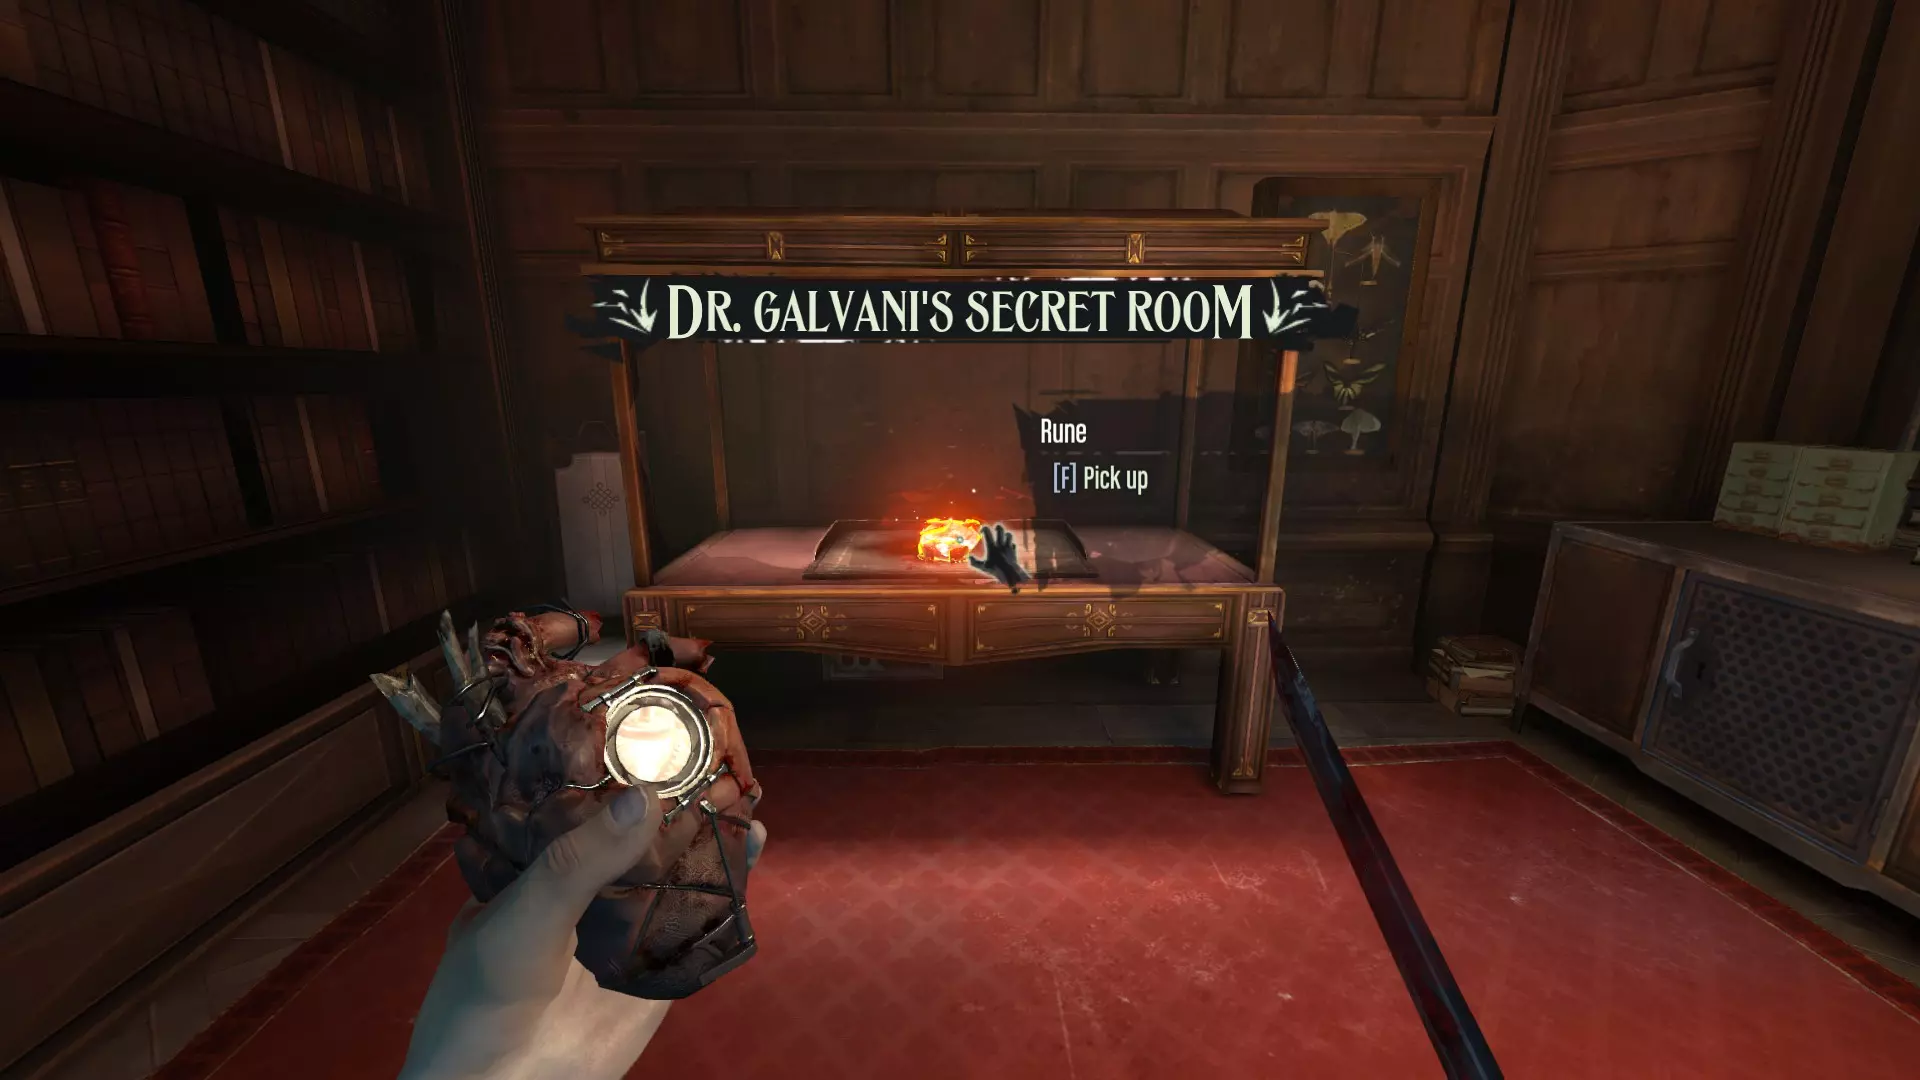
欢乐之屋 在顶层加尔瓦尼医生的秘密房间内,移动书架后方(与红色书籍互动;他的房子位于克拉弗林大道左侧)。
在艺术品经销商的步入式保险箱中(克拉弗林大道右侧的安全屋,靠近酿酒厂入口)
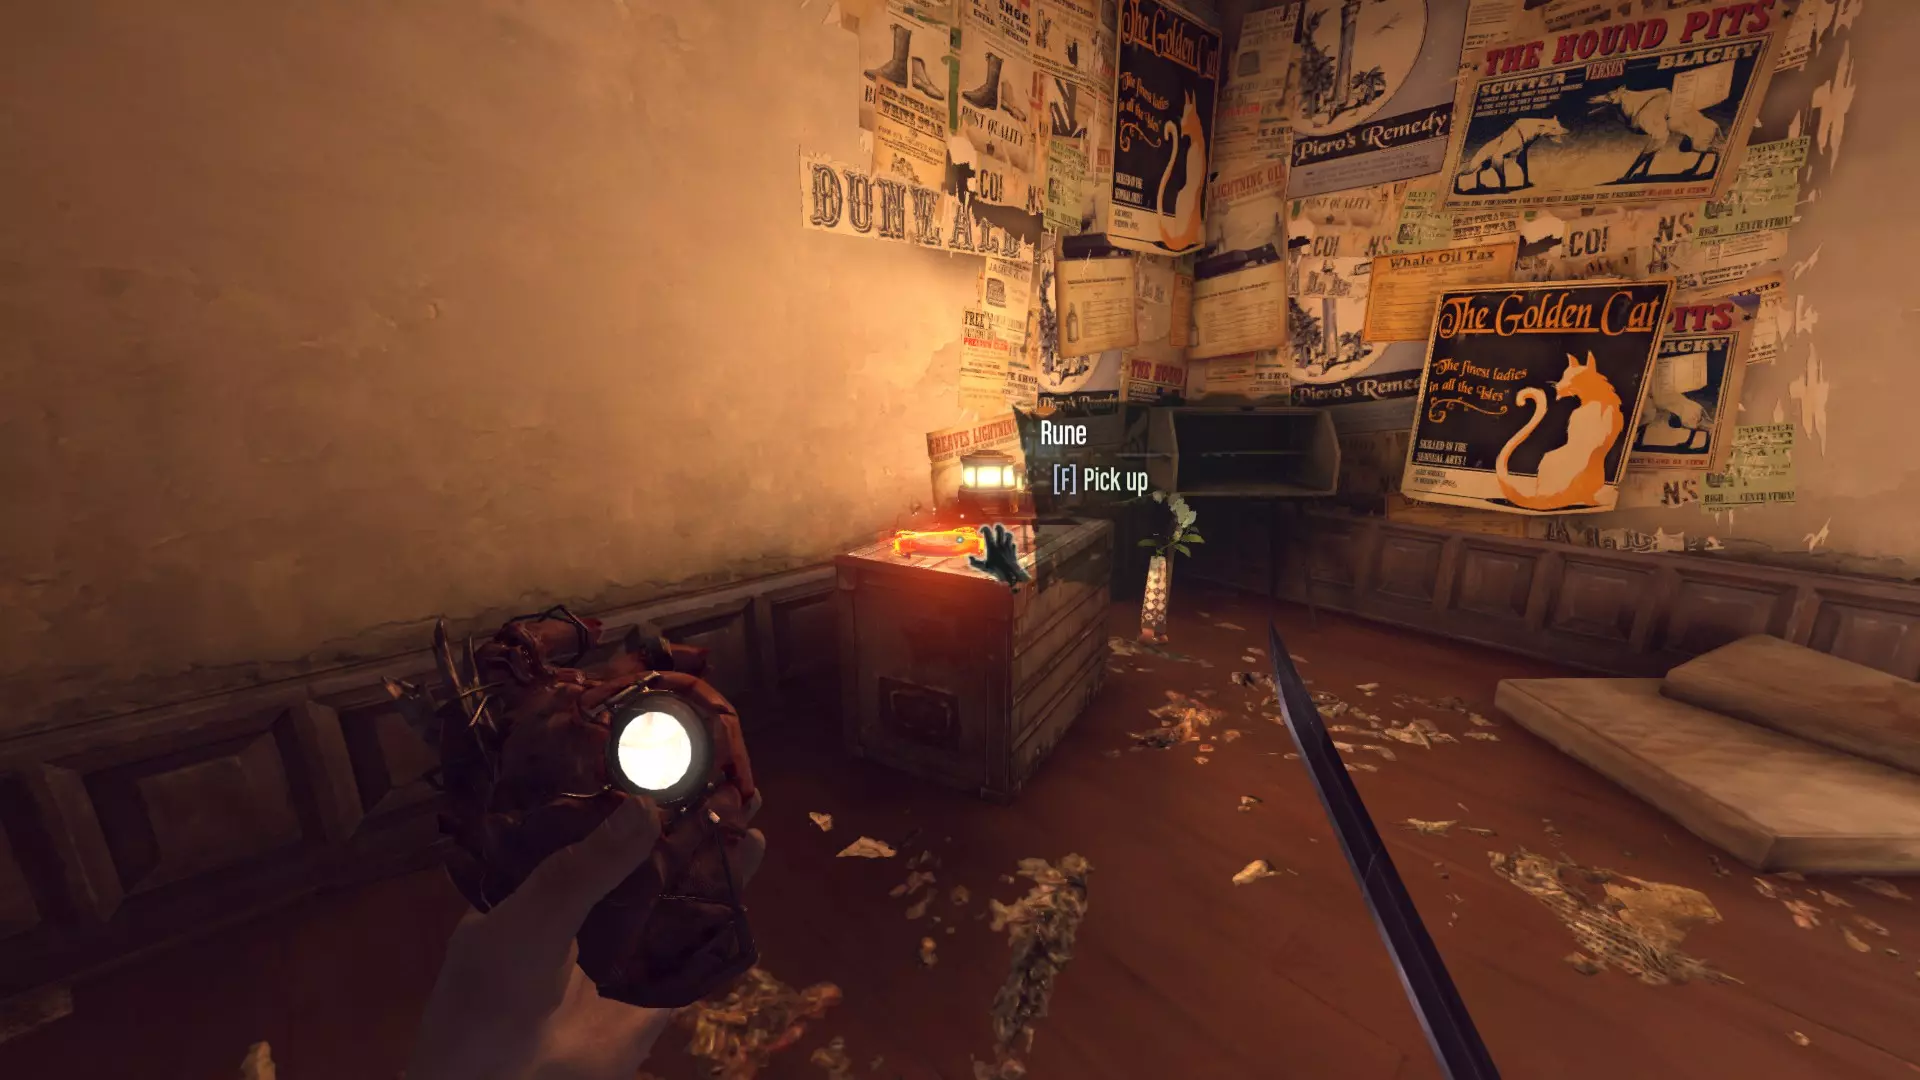
在金猫妓院旁边那栋破败建筑的上层。
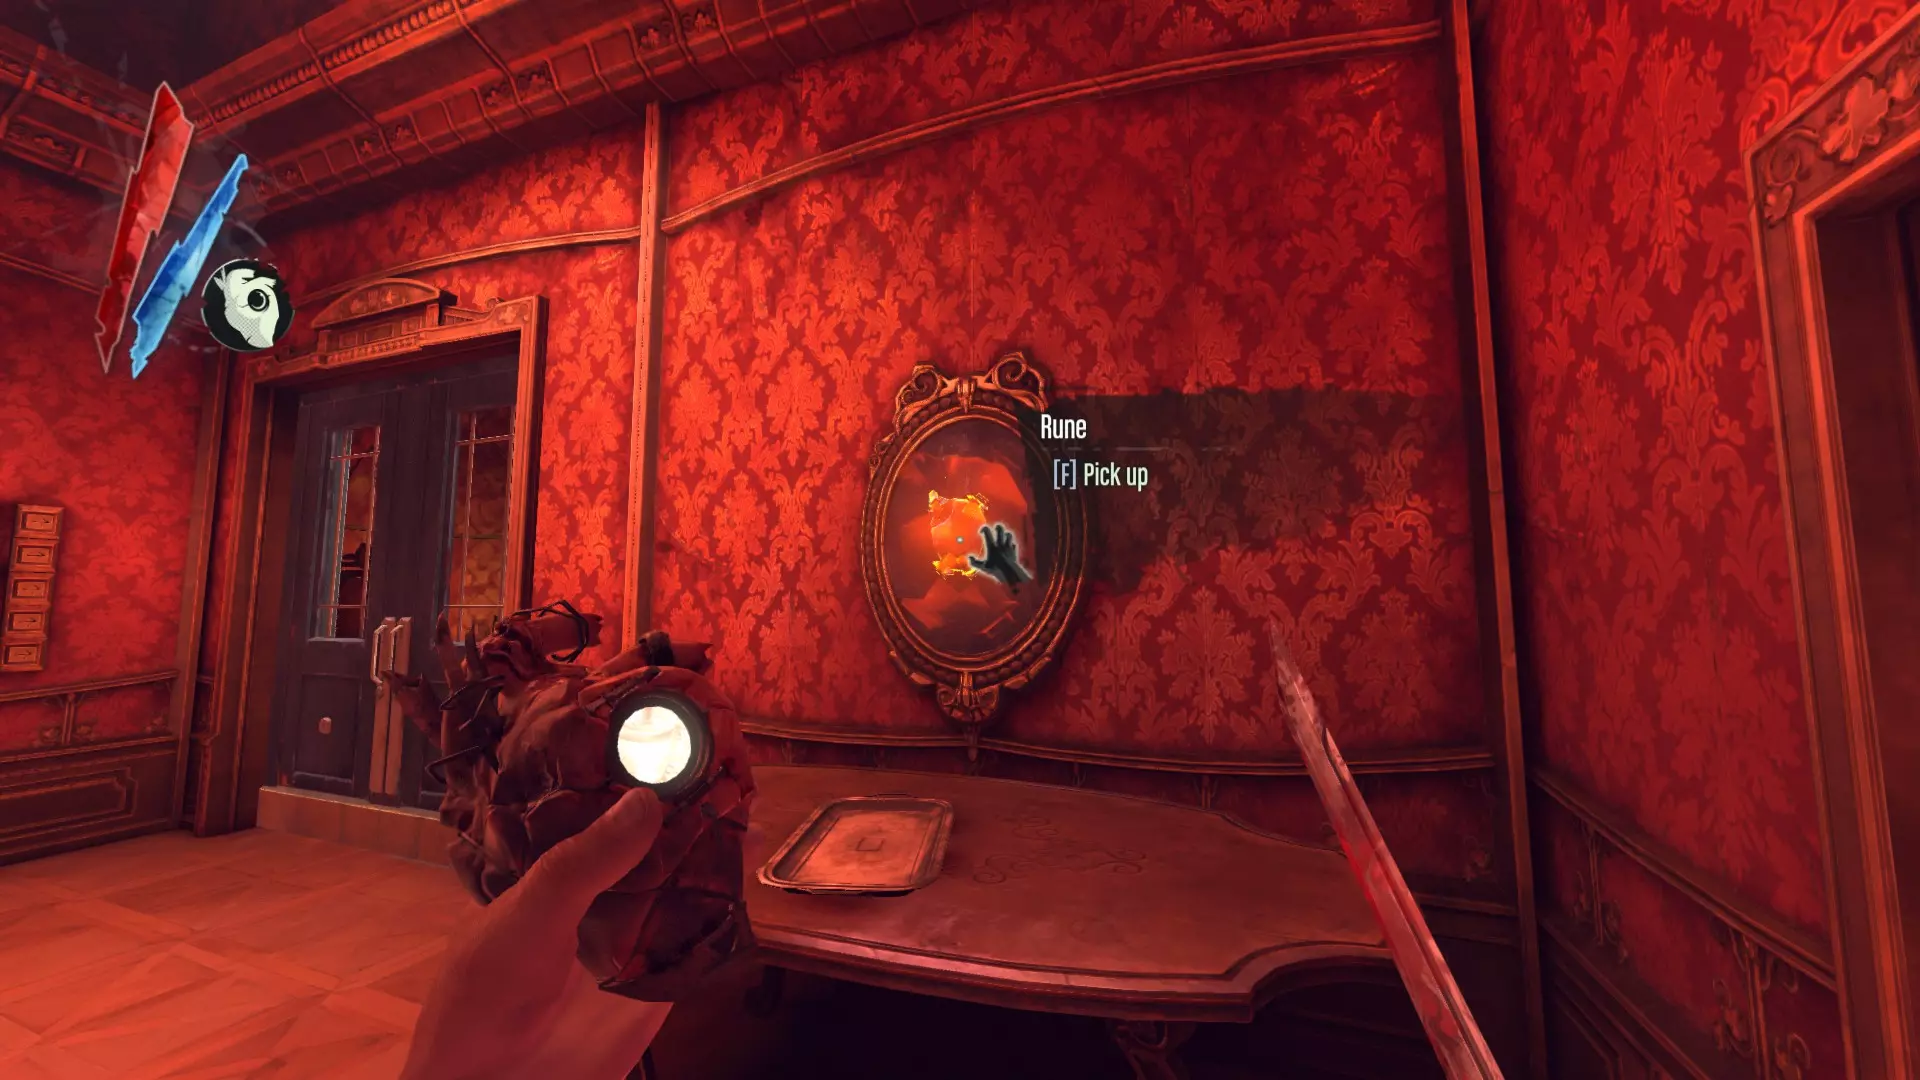
通往猫之主厅的红色房间内
在猫咪上层区域的第一个房间里。
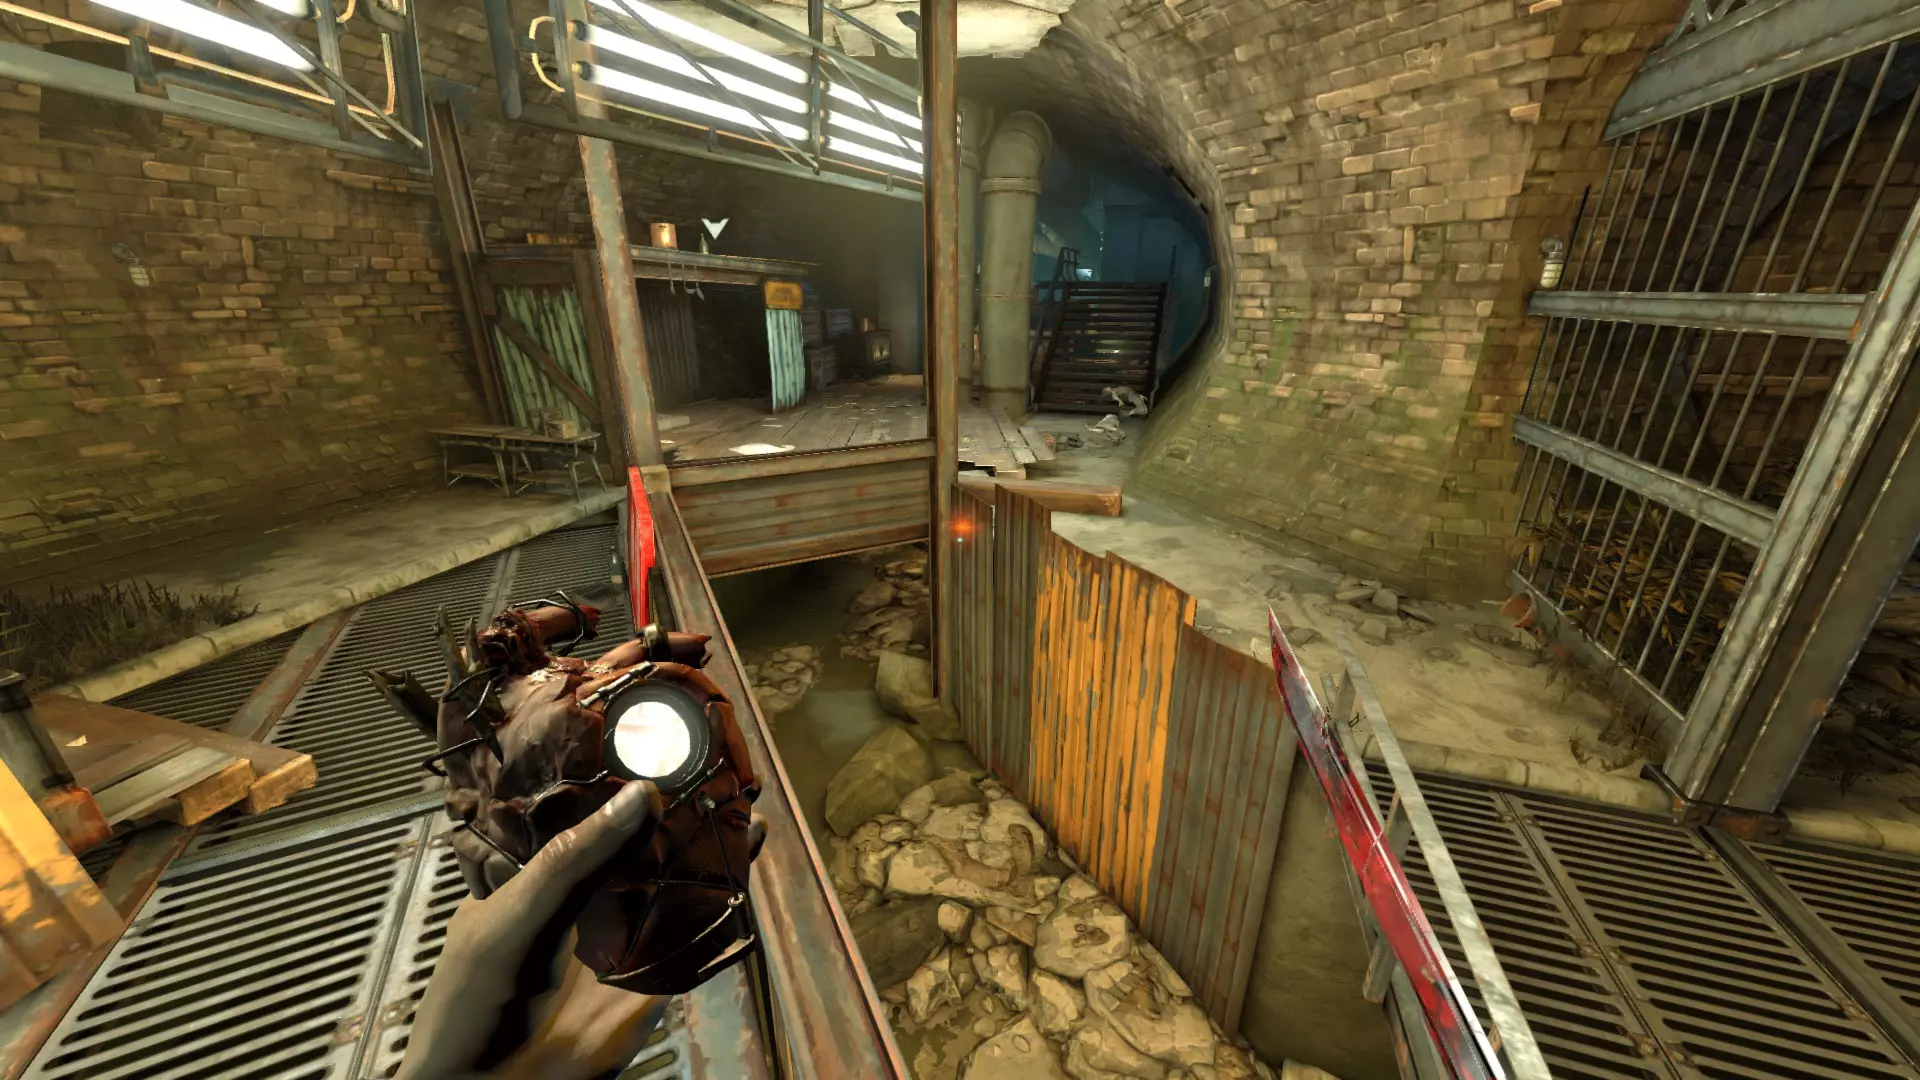
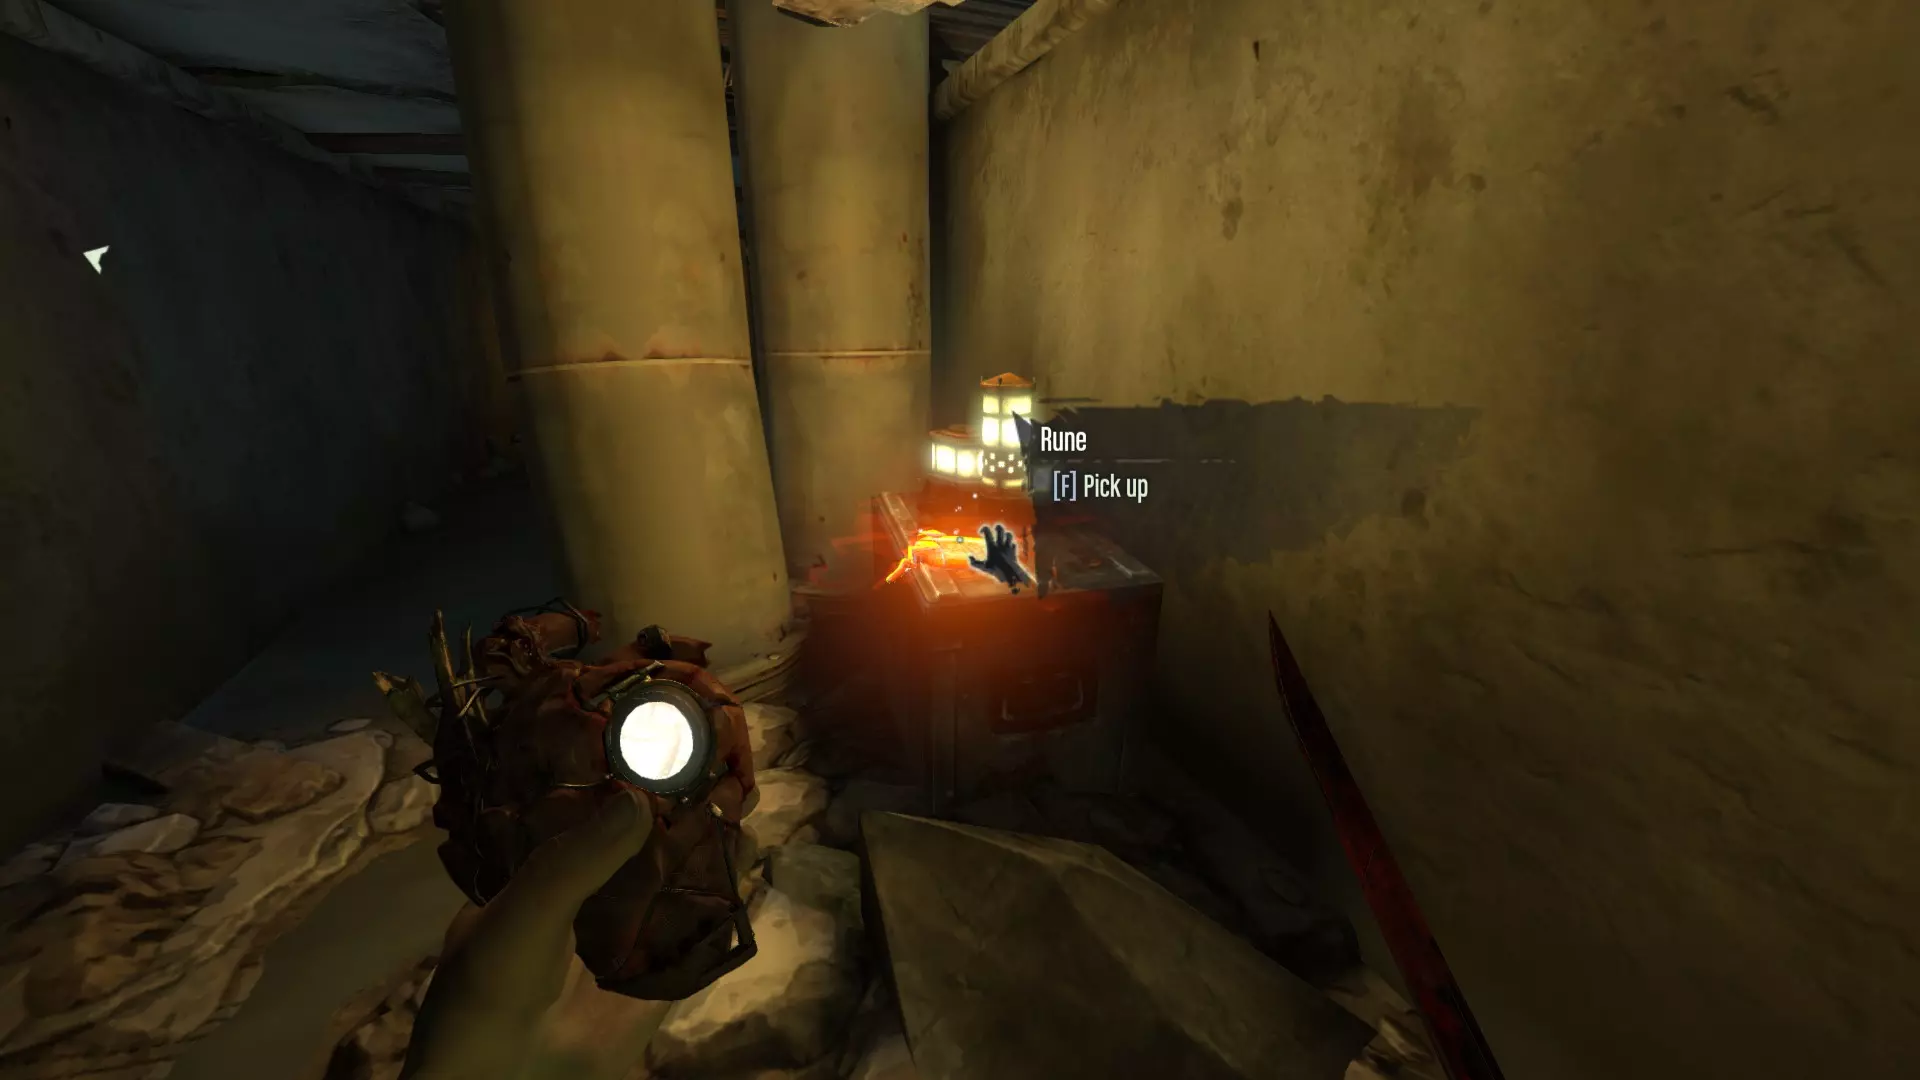
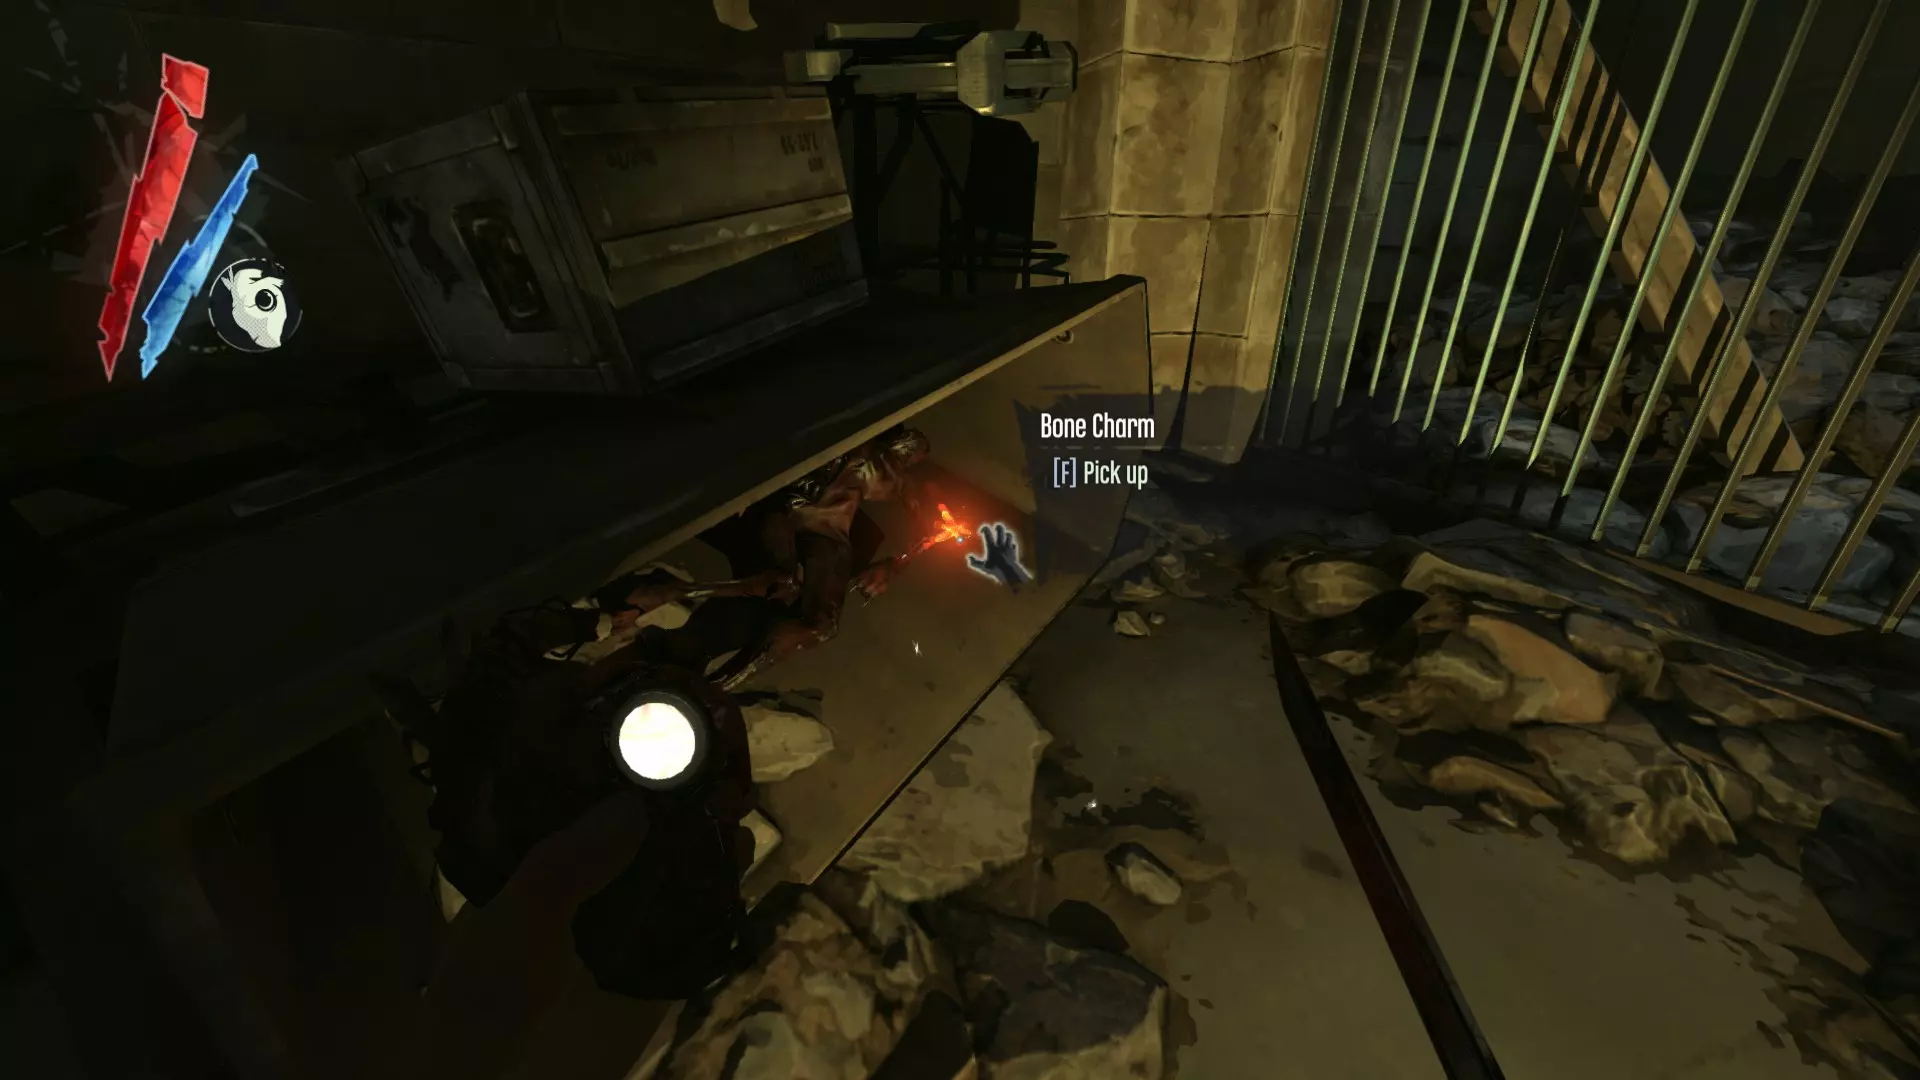
猎犬酒馆 III 下水道里,一个符文在一个翻倒的柜子里,另一个在铁栏后面的水中。
宫廷医师 位于第一座桥右侧的公寓内,一道带栅栏的门后。或者,穿过临街的敞开大门,从后方攀爬铁链进入。
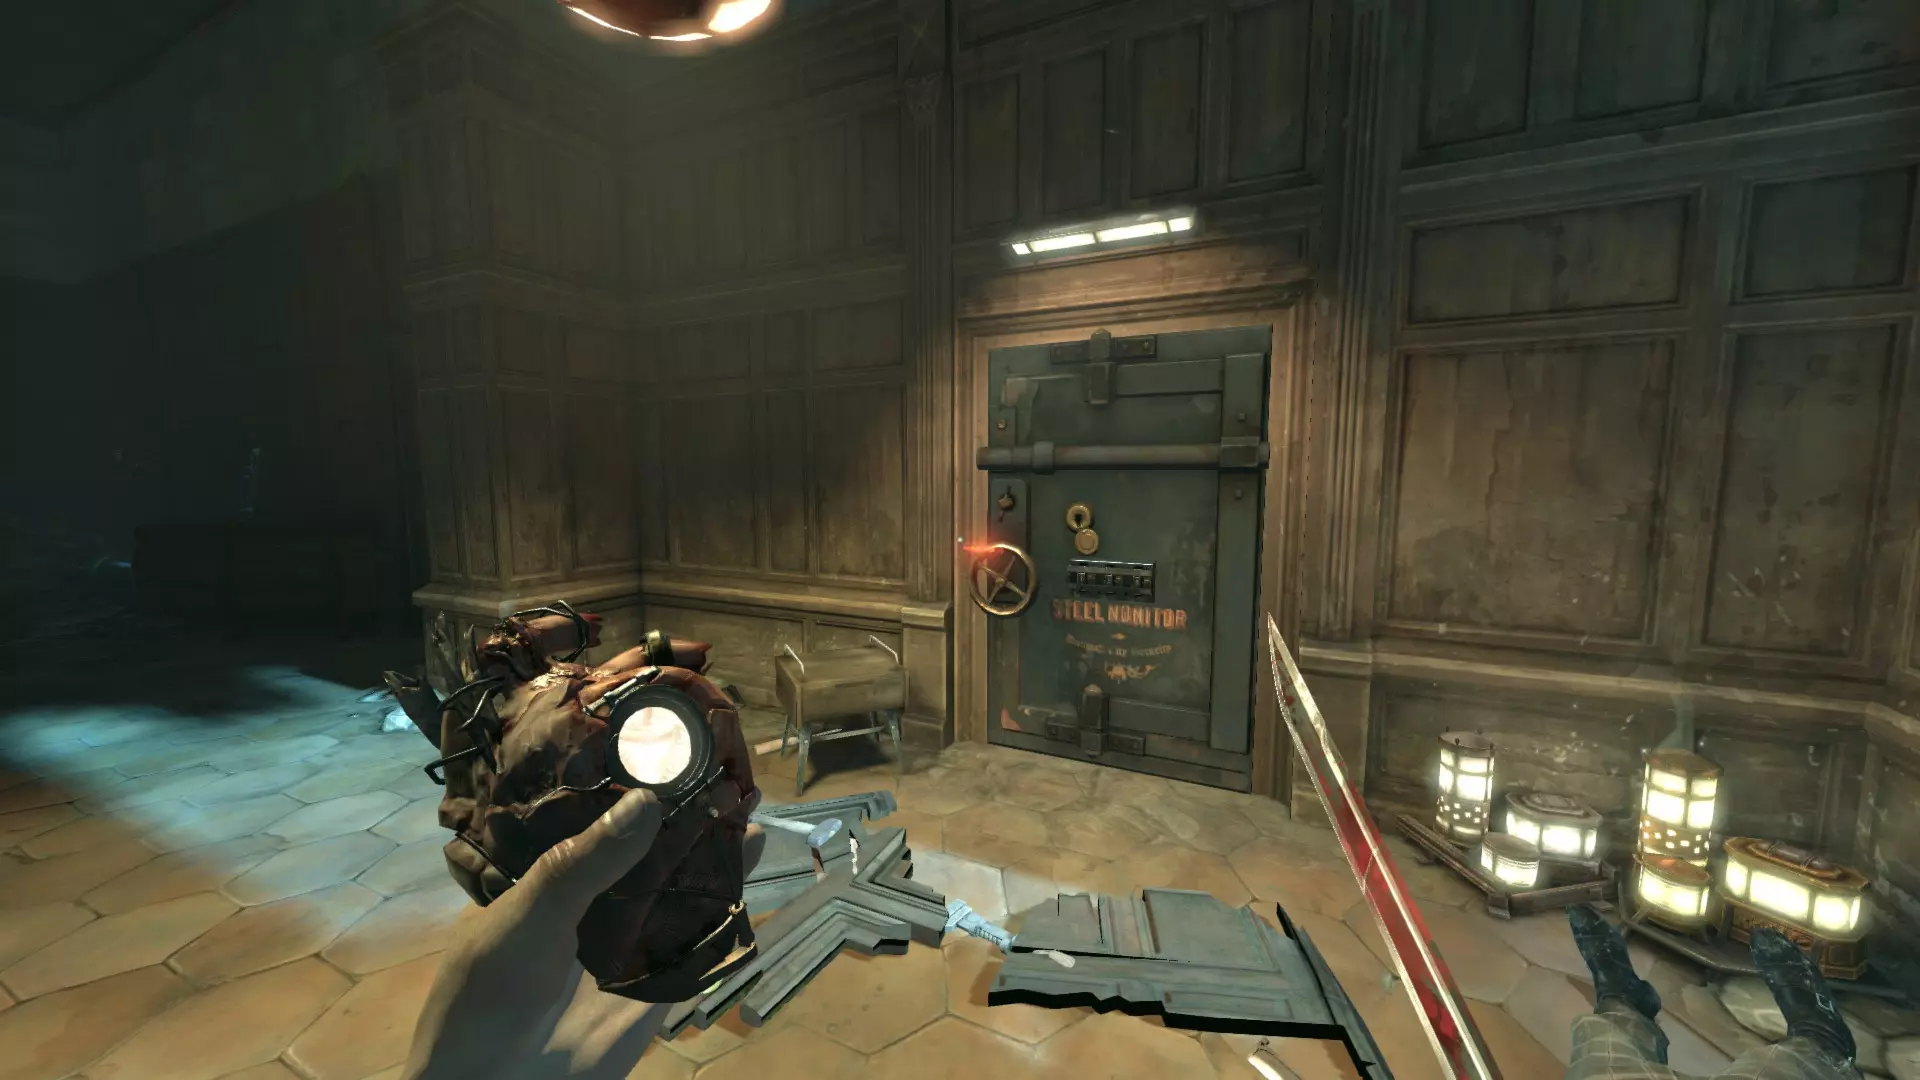
普拉切特的保险箱内部
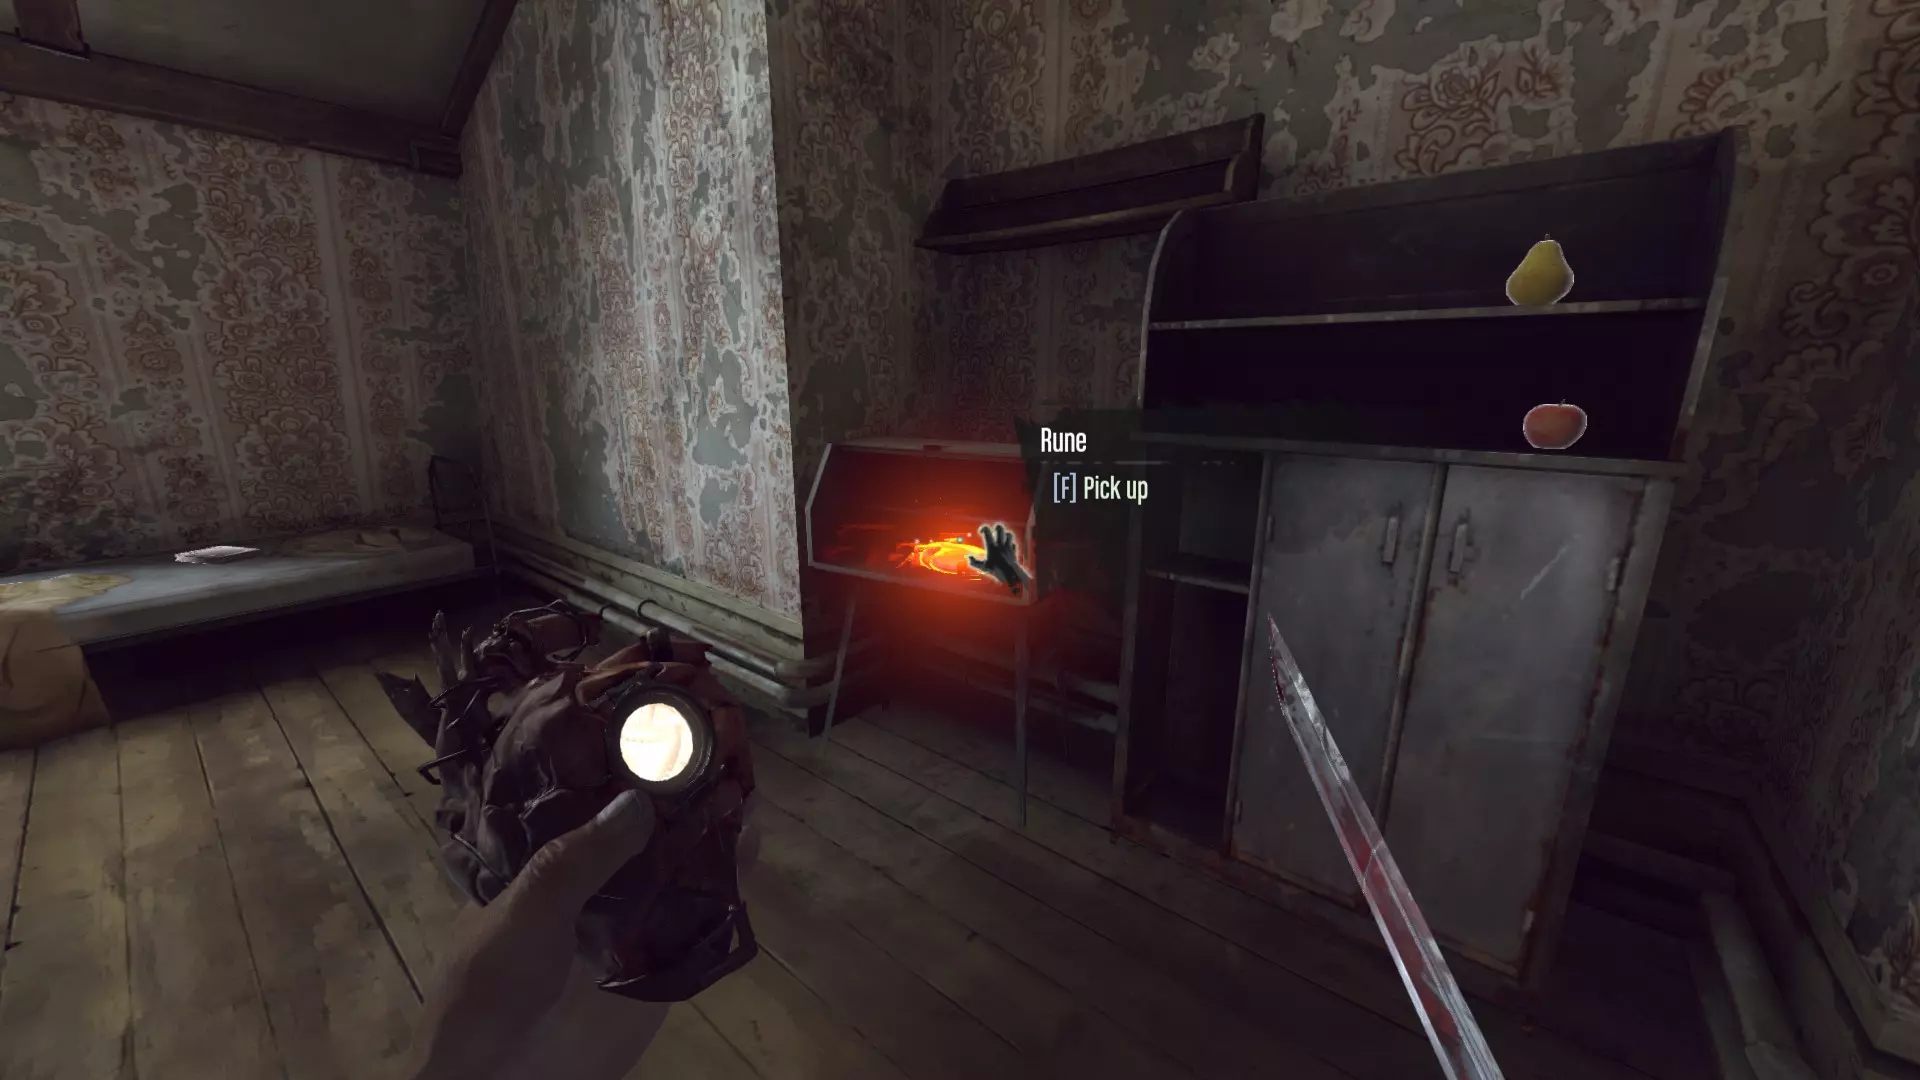
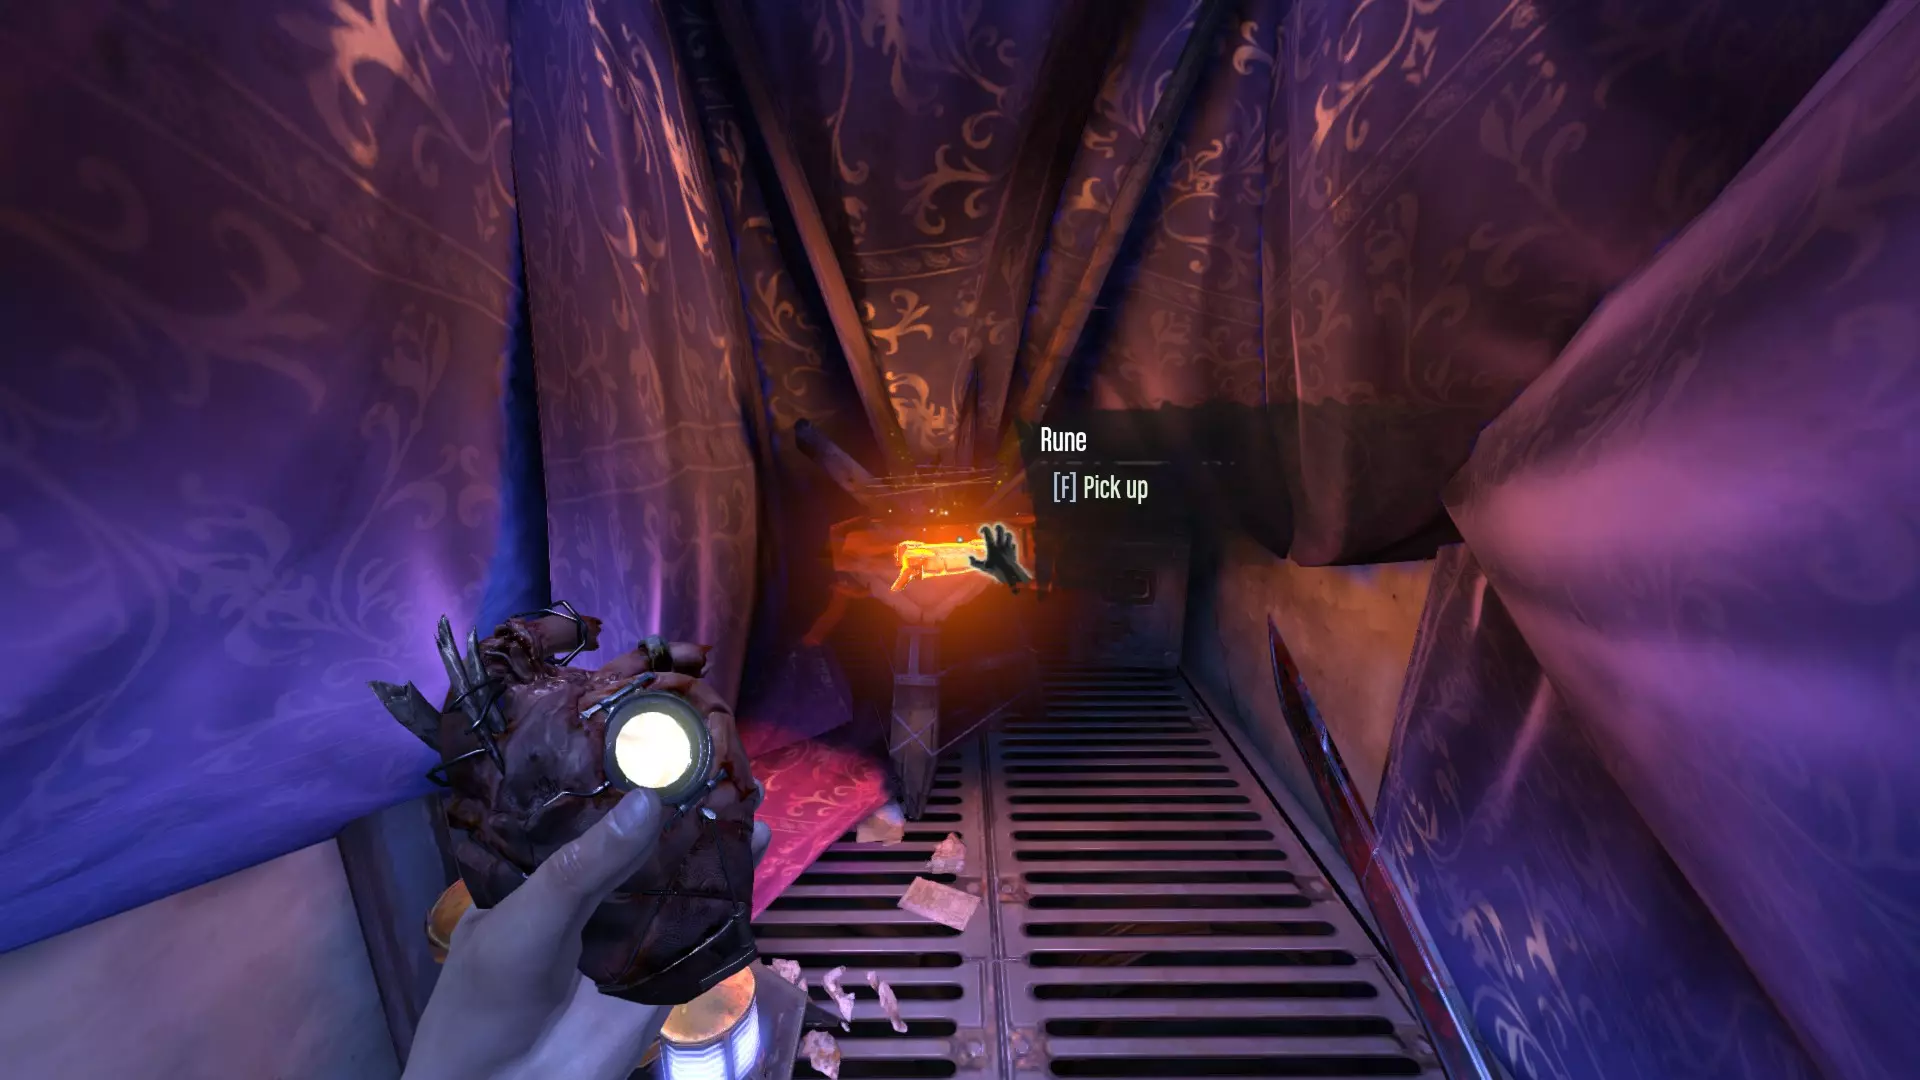
在普拉切特家过去的那个疯子的公寓里。
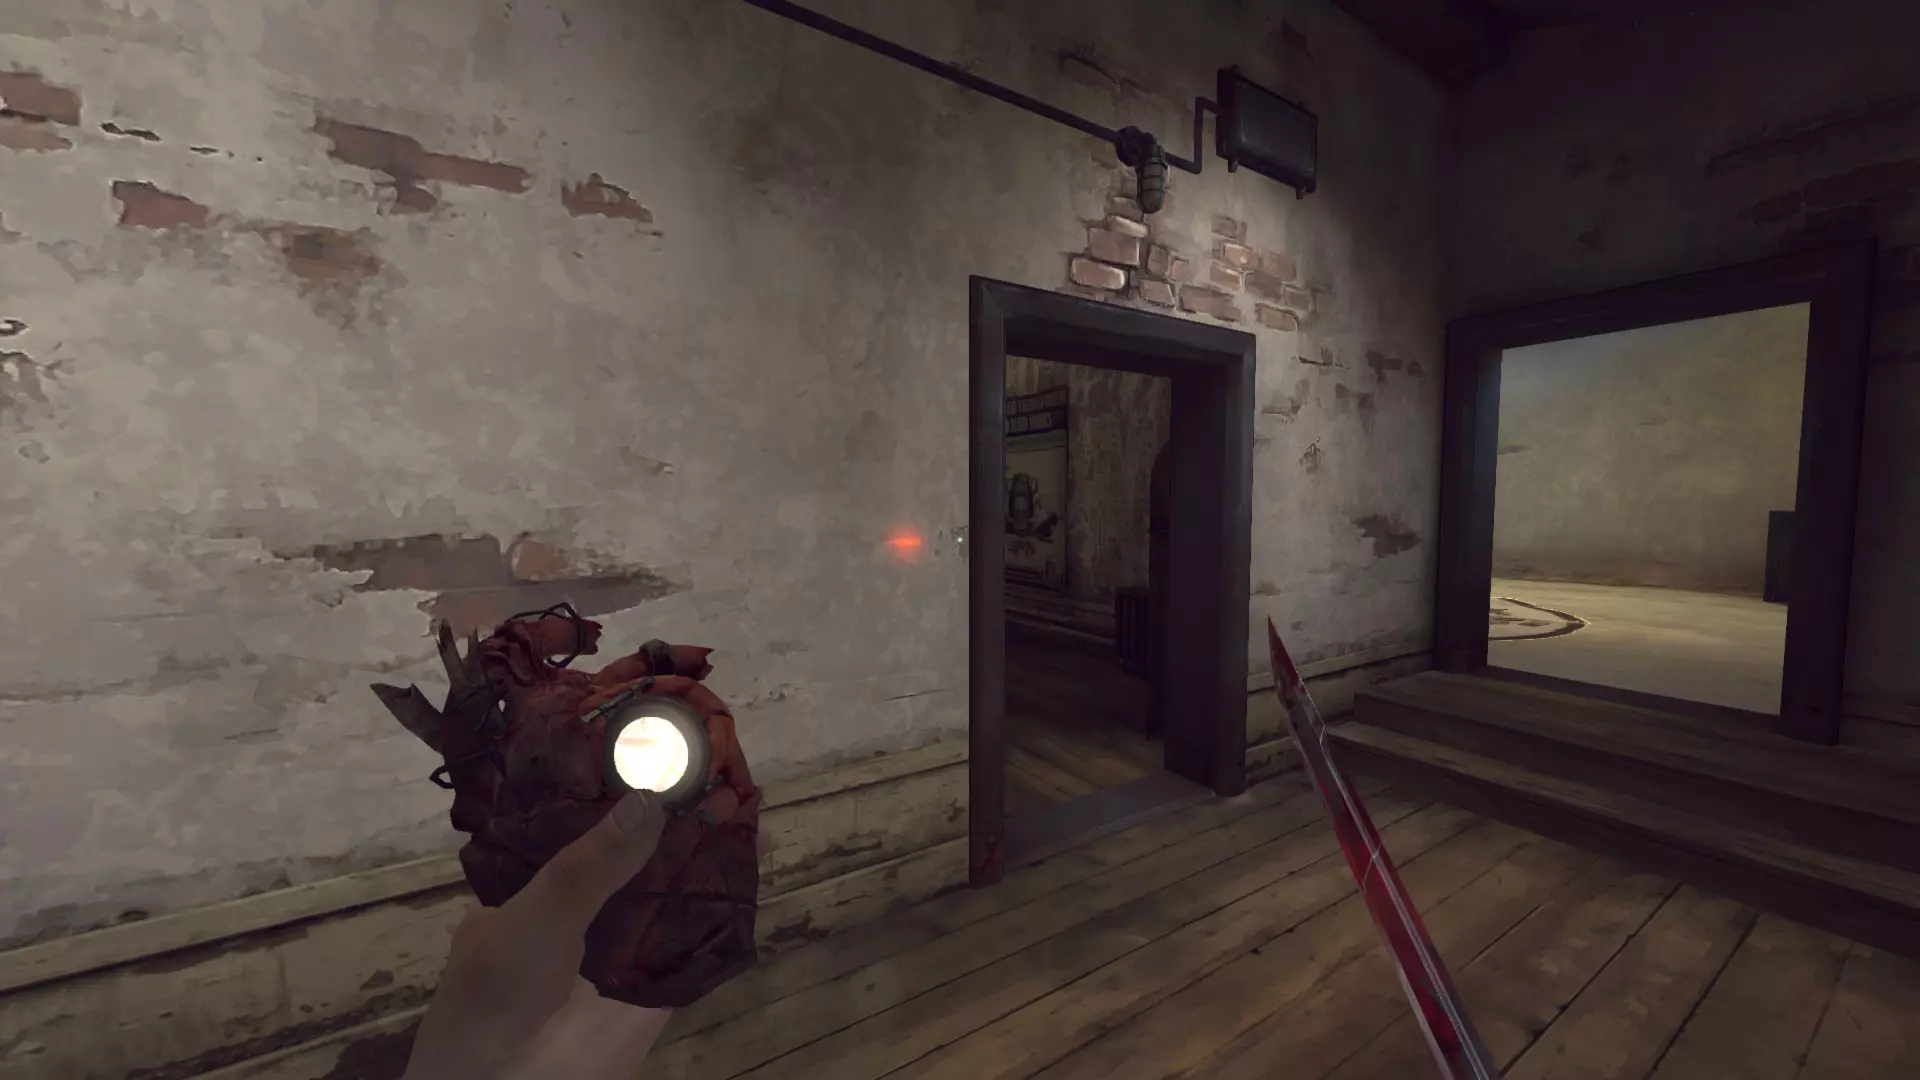
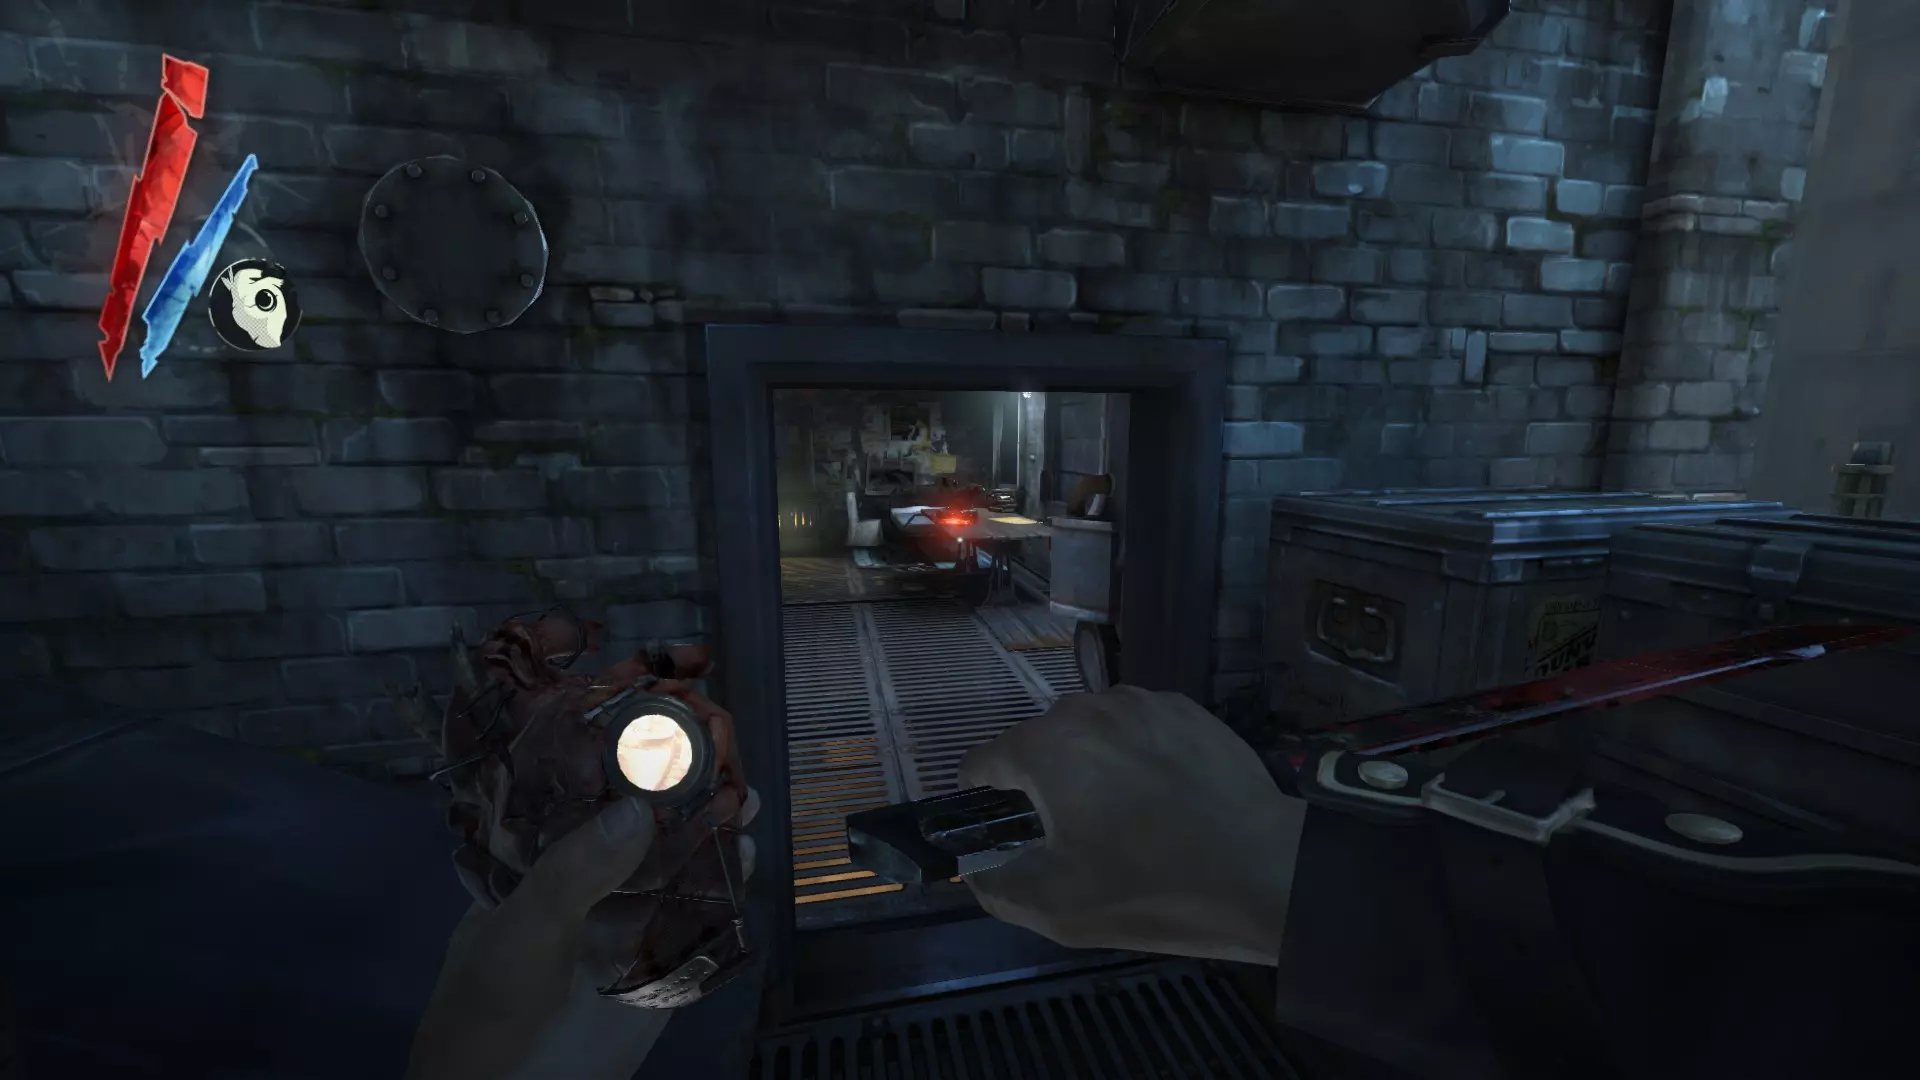
在关卡过渡到米德罗变电站后的房间里
在北端区索科洛夫屋顶实验室的桌子上。
升级与战利品(符文+骸骨护符,续) 博伊尔女士的最后派对 在运河尽头附近的水下,经过最大的那座桥。
在奶奶老屋的楼上。
在博伊尔庄园的地下室安全屋——可以使用厨房区域相邻的老鼠隧道,或者用在莉迪亚·博伊尔房间找到的钥匙开门(她的房间是三个房间中离另外两个最远的那个,另外两个房间还可以通过带流苏的滑轮来区分)。
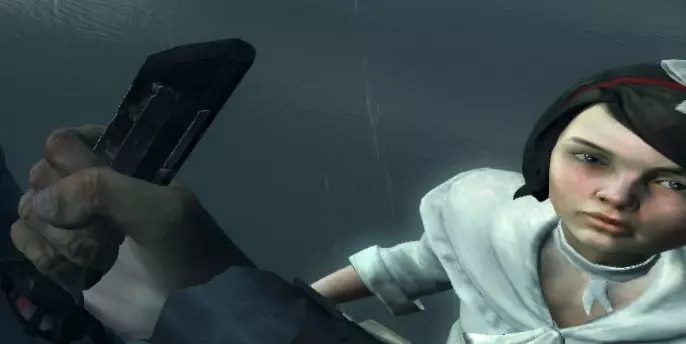
猎犬酒馆 V 在此任务中,找到艾米丽并偷走她的新玩具。
如果你在派对上为平普尔顿杀了沙特勋爵,那就去向他要你的血腥钱吧。
如果你在派对上杀死的博伊尔家族成员不超过两个,就去你的房间拿这个。
返回塔楼 在兵营的一张床铺下方。
在拷问者的地下室牢房中——找到铺着破旧地毯的长廊,可通过主入口大厅右侧相邻的木门进入,该木门正对着前门。或者使用二楼楼梯平台后方的门(寻找有展示柜和座位的区域)。
在王室寝宫的一个箱子里。
在塔楼屋顶摄政王安全屋的地图桌上。
淹没区 在格里夫斯精炼厂周围的水域中
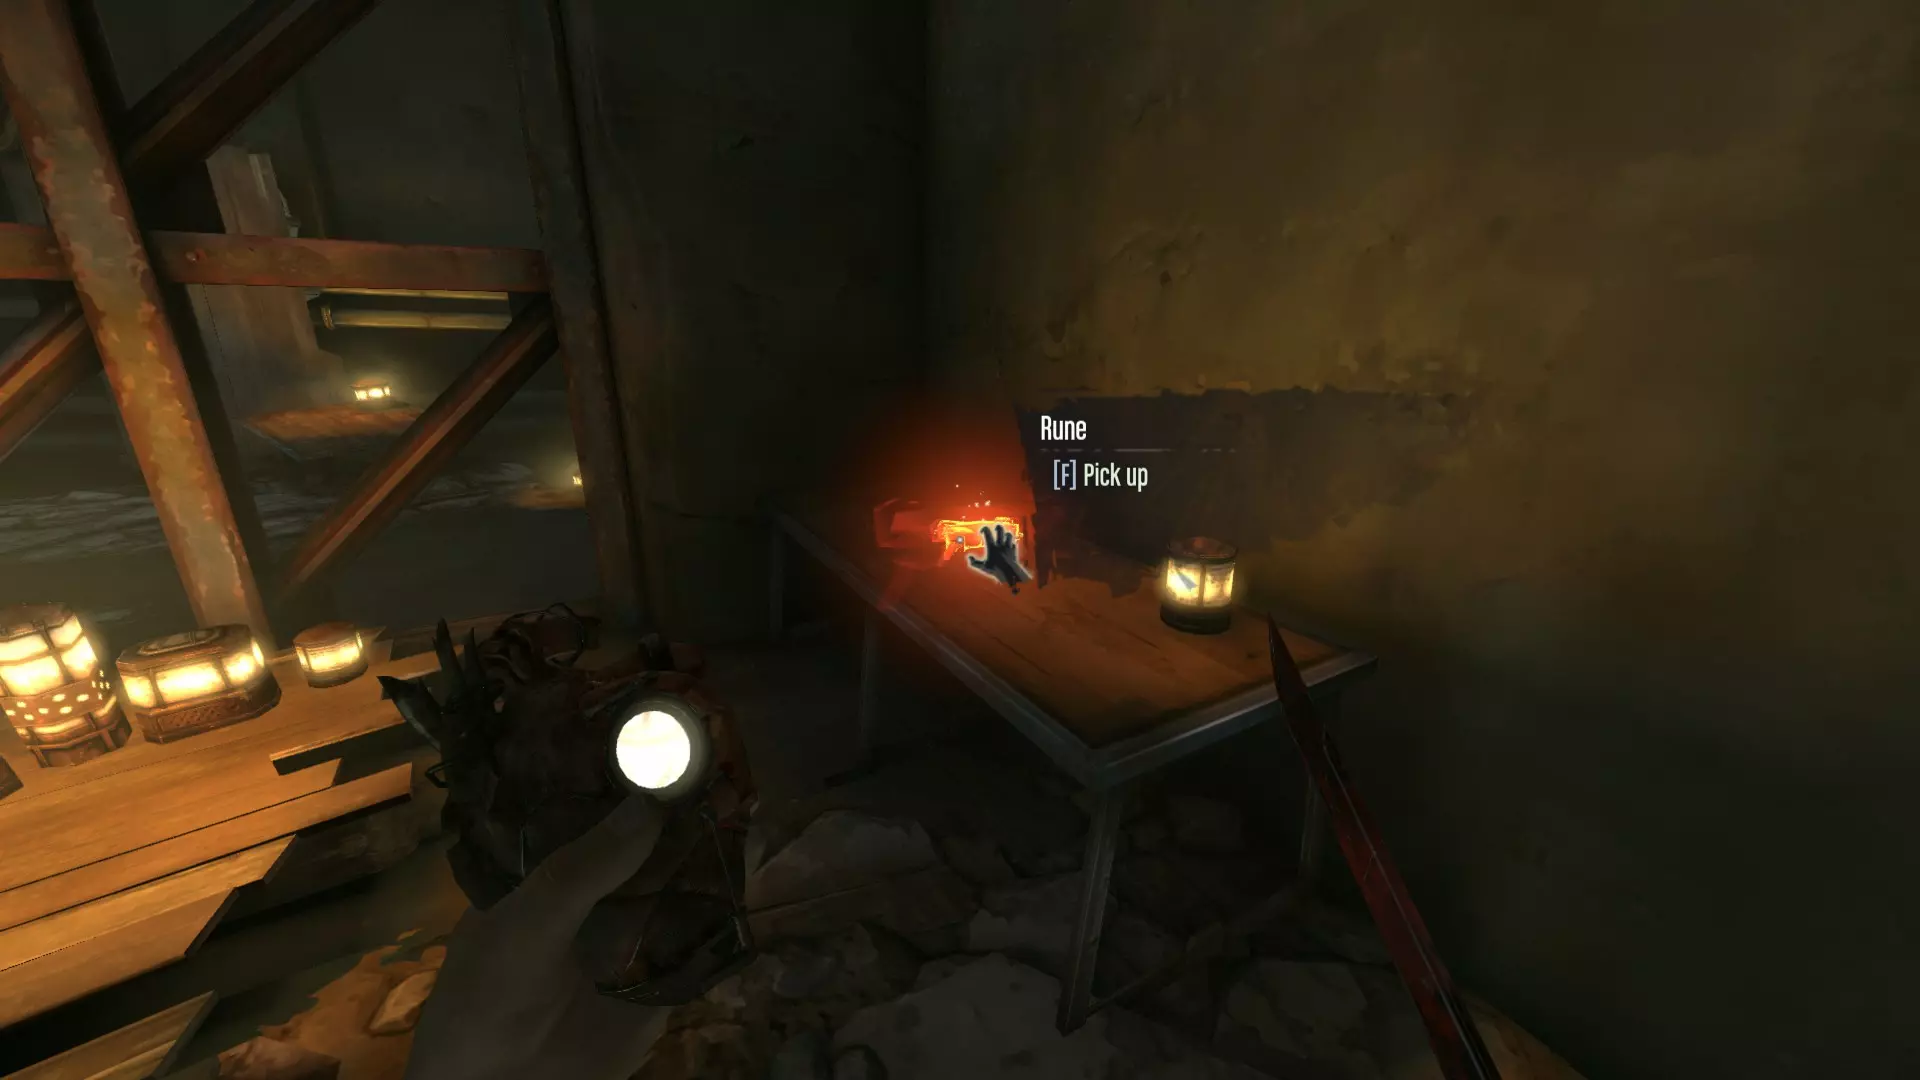
在道德基地那个有锁链的破败房间底部的桌子上。
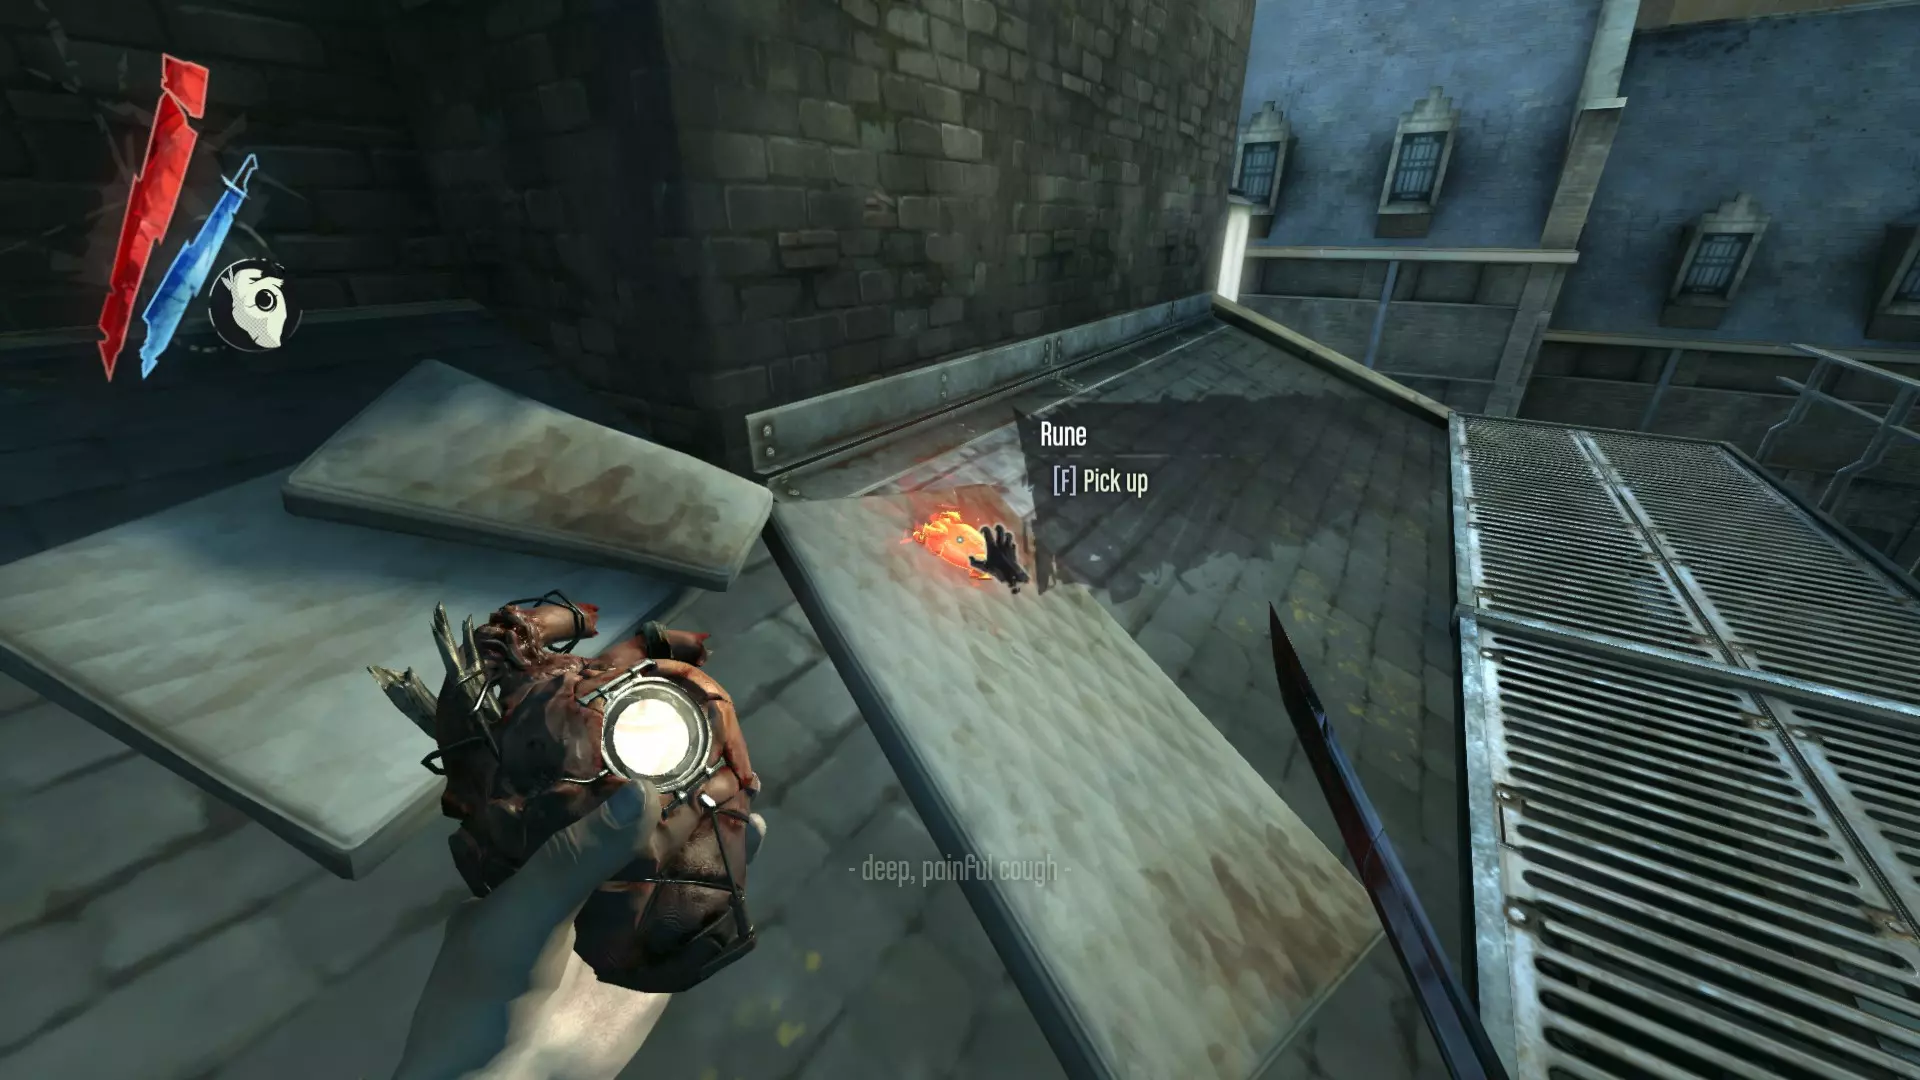
在铁路线附近的屋顶床垫上——找到有生病女人的建筑,它位于瘟疫坑的左侧。
在下水道棚户区的中央深坑中。
在奶奶的巢穴里的神社处,就在被木板封住的水道旁边。

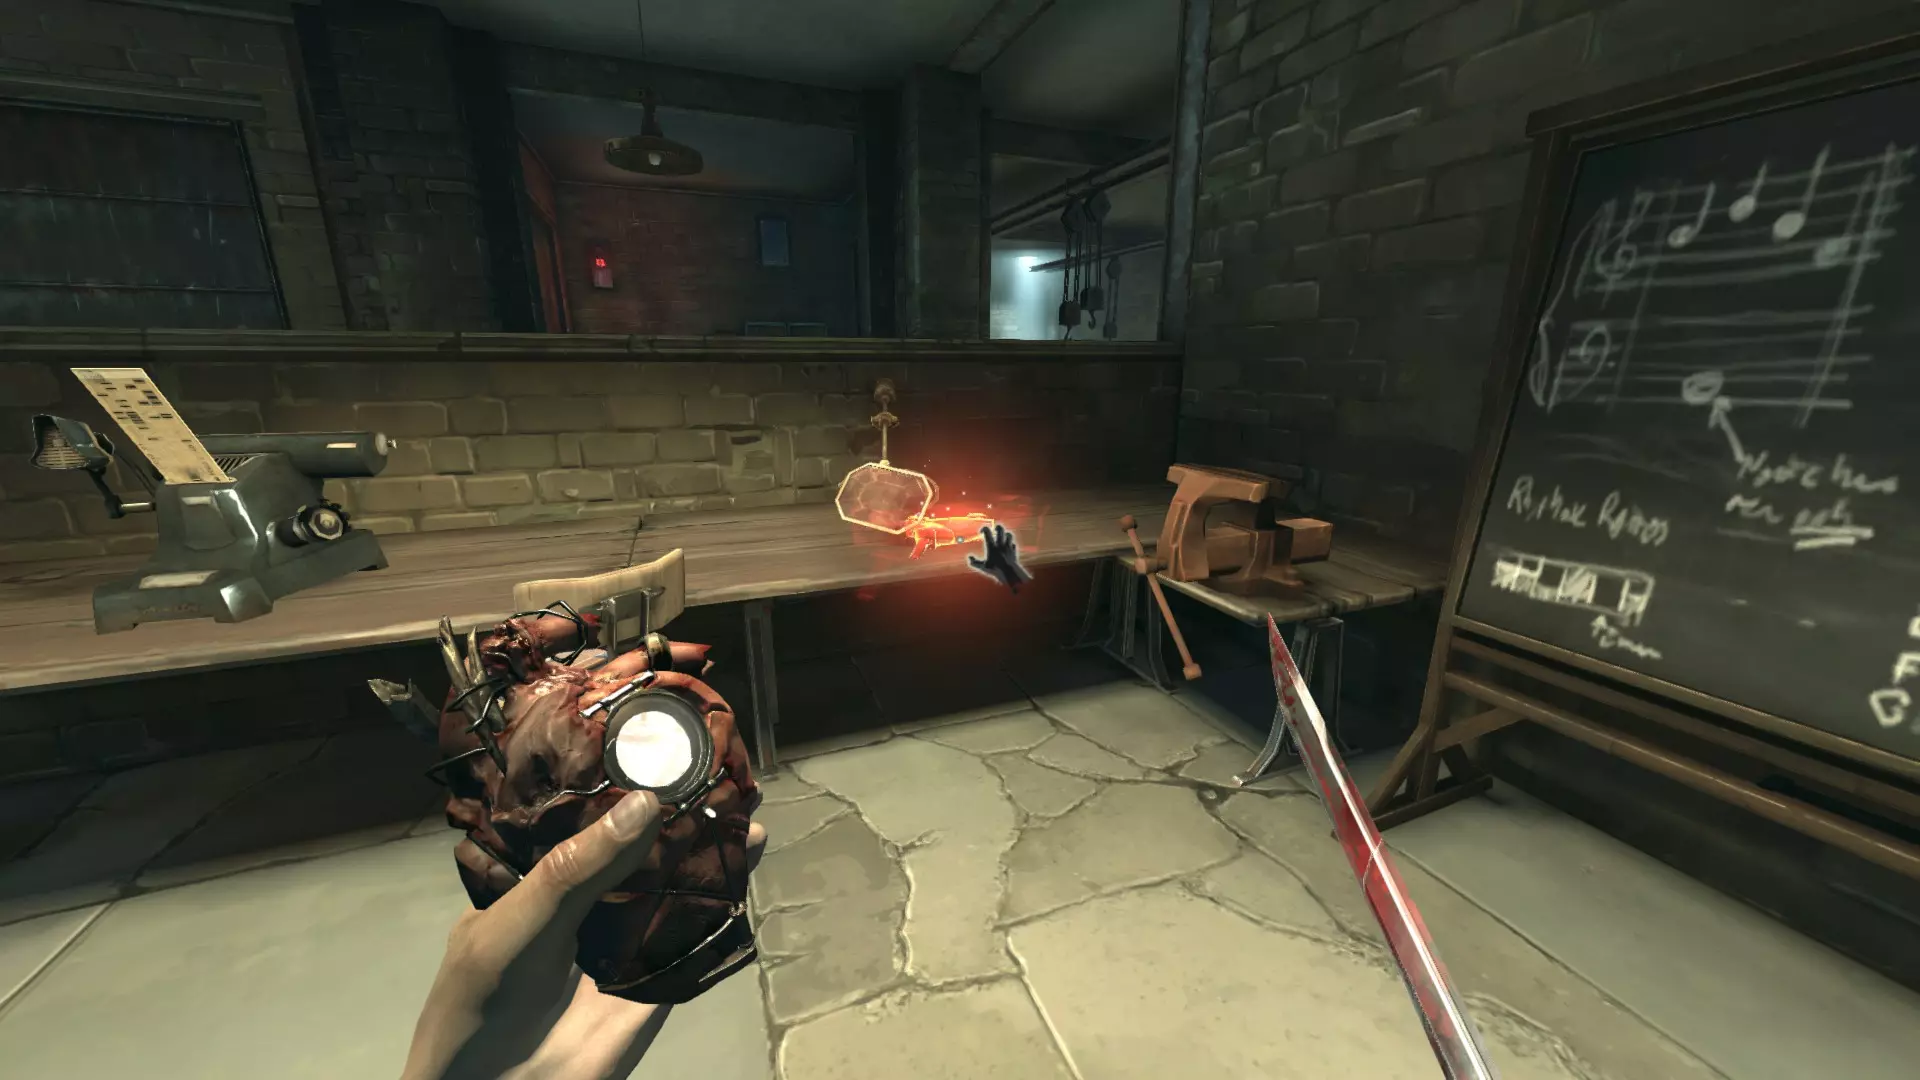
忠诚派 在皮耶罗工坊的桌子上,他的床边。
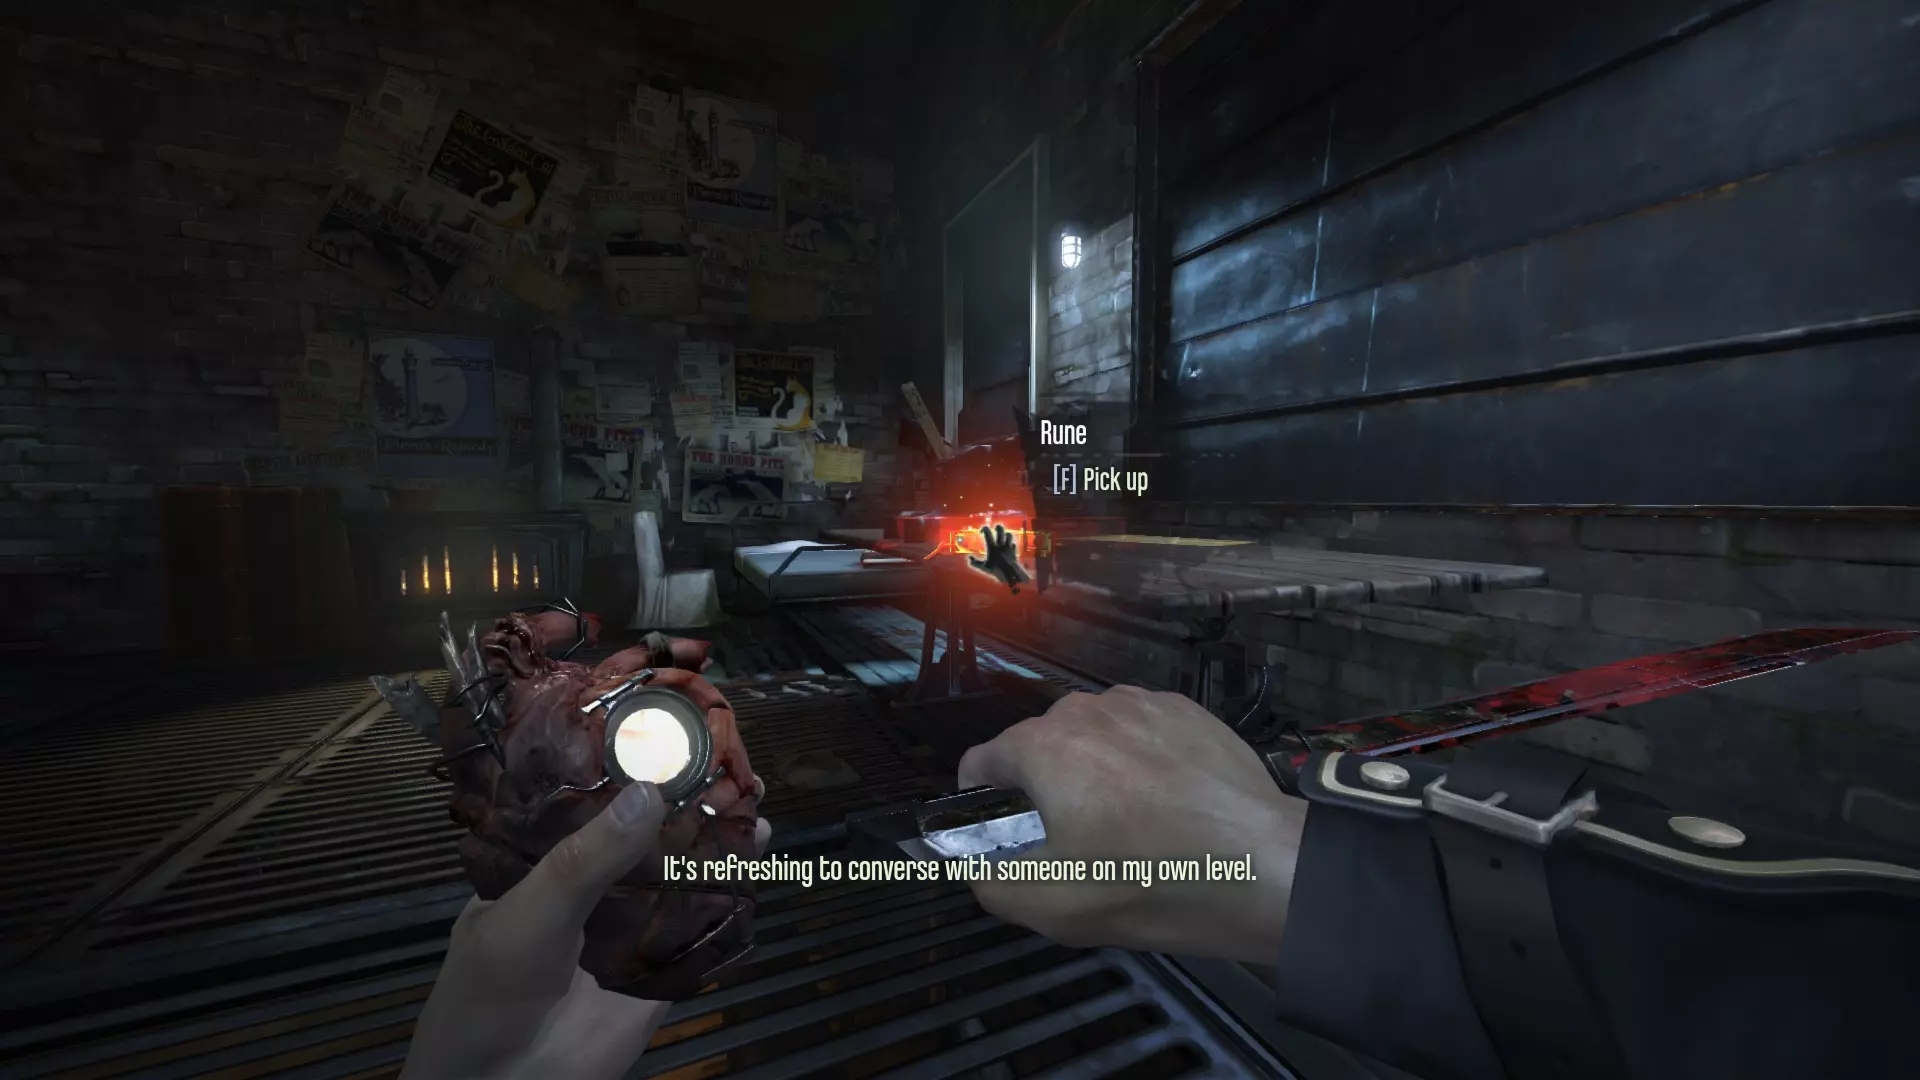
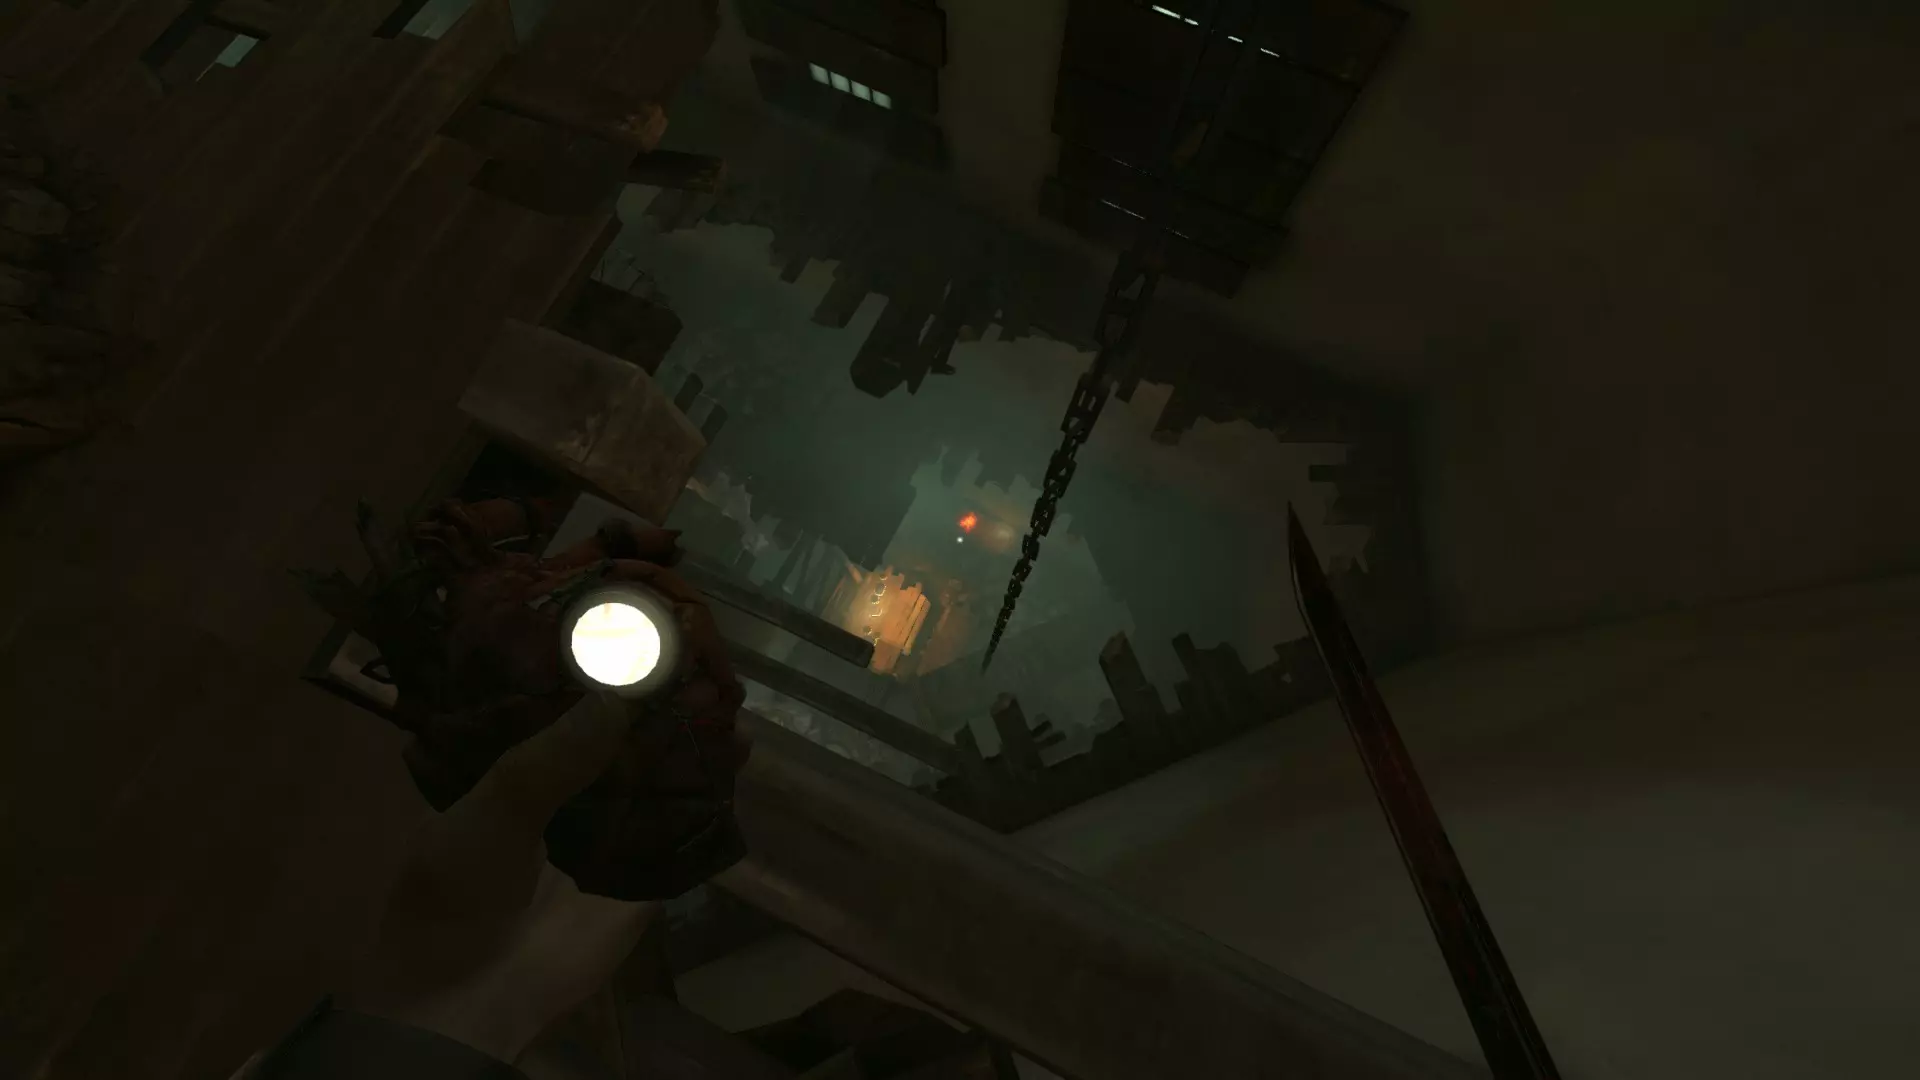
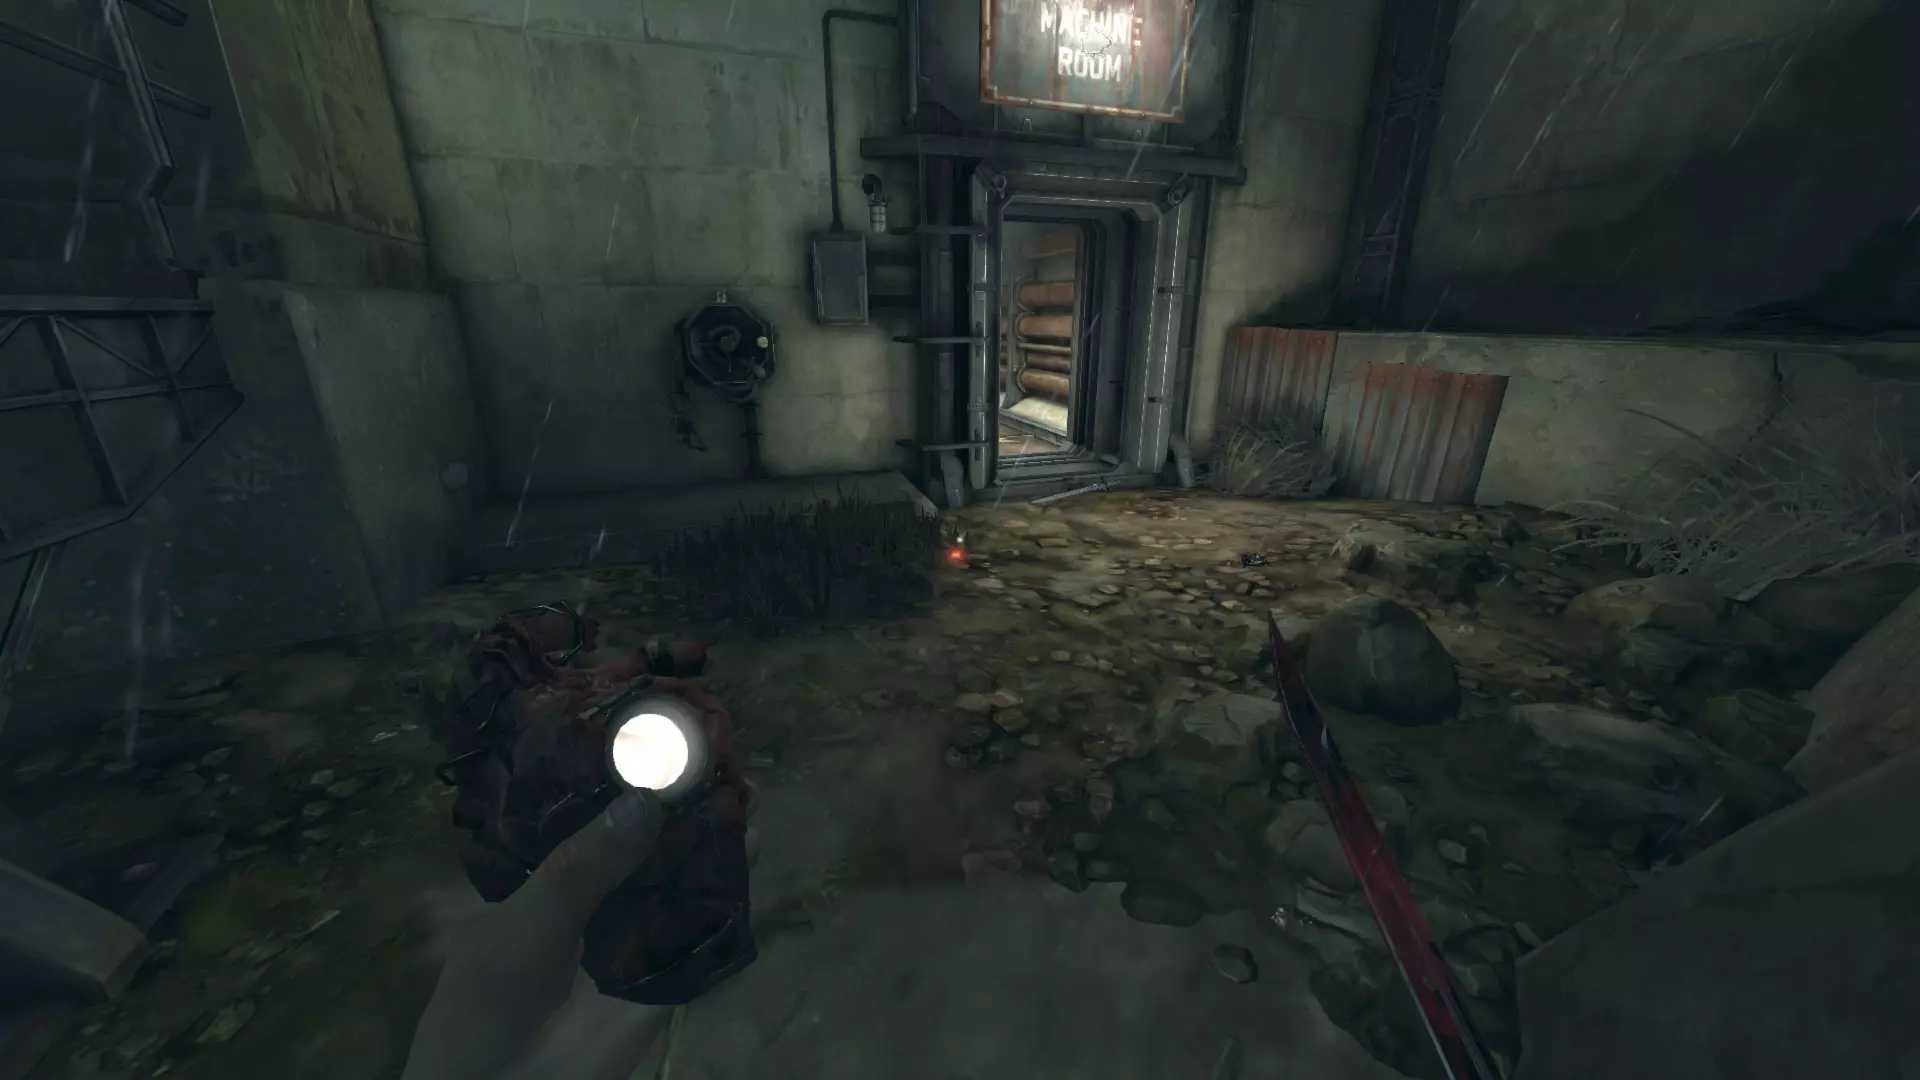
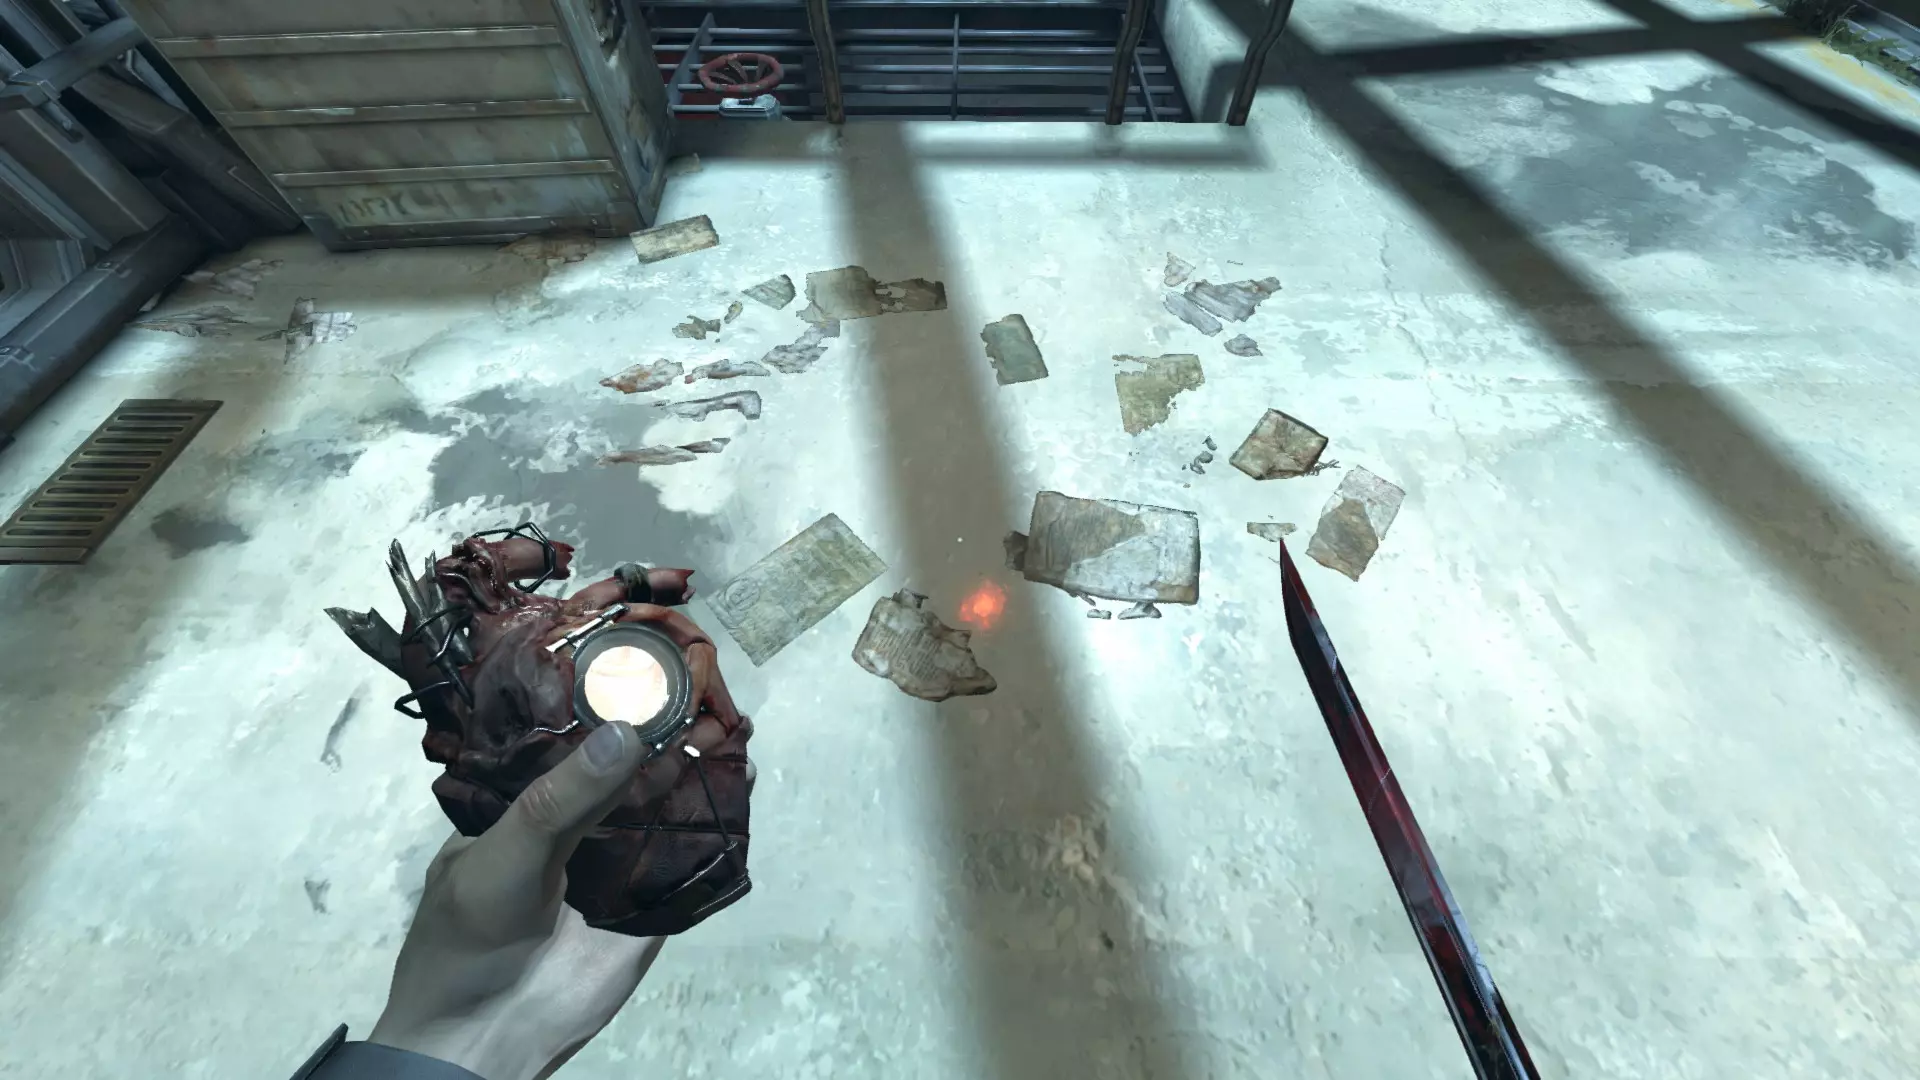
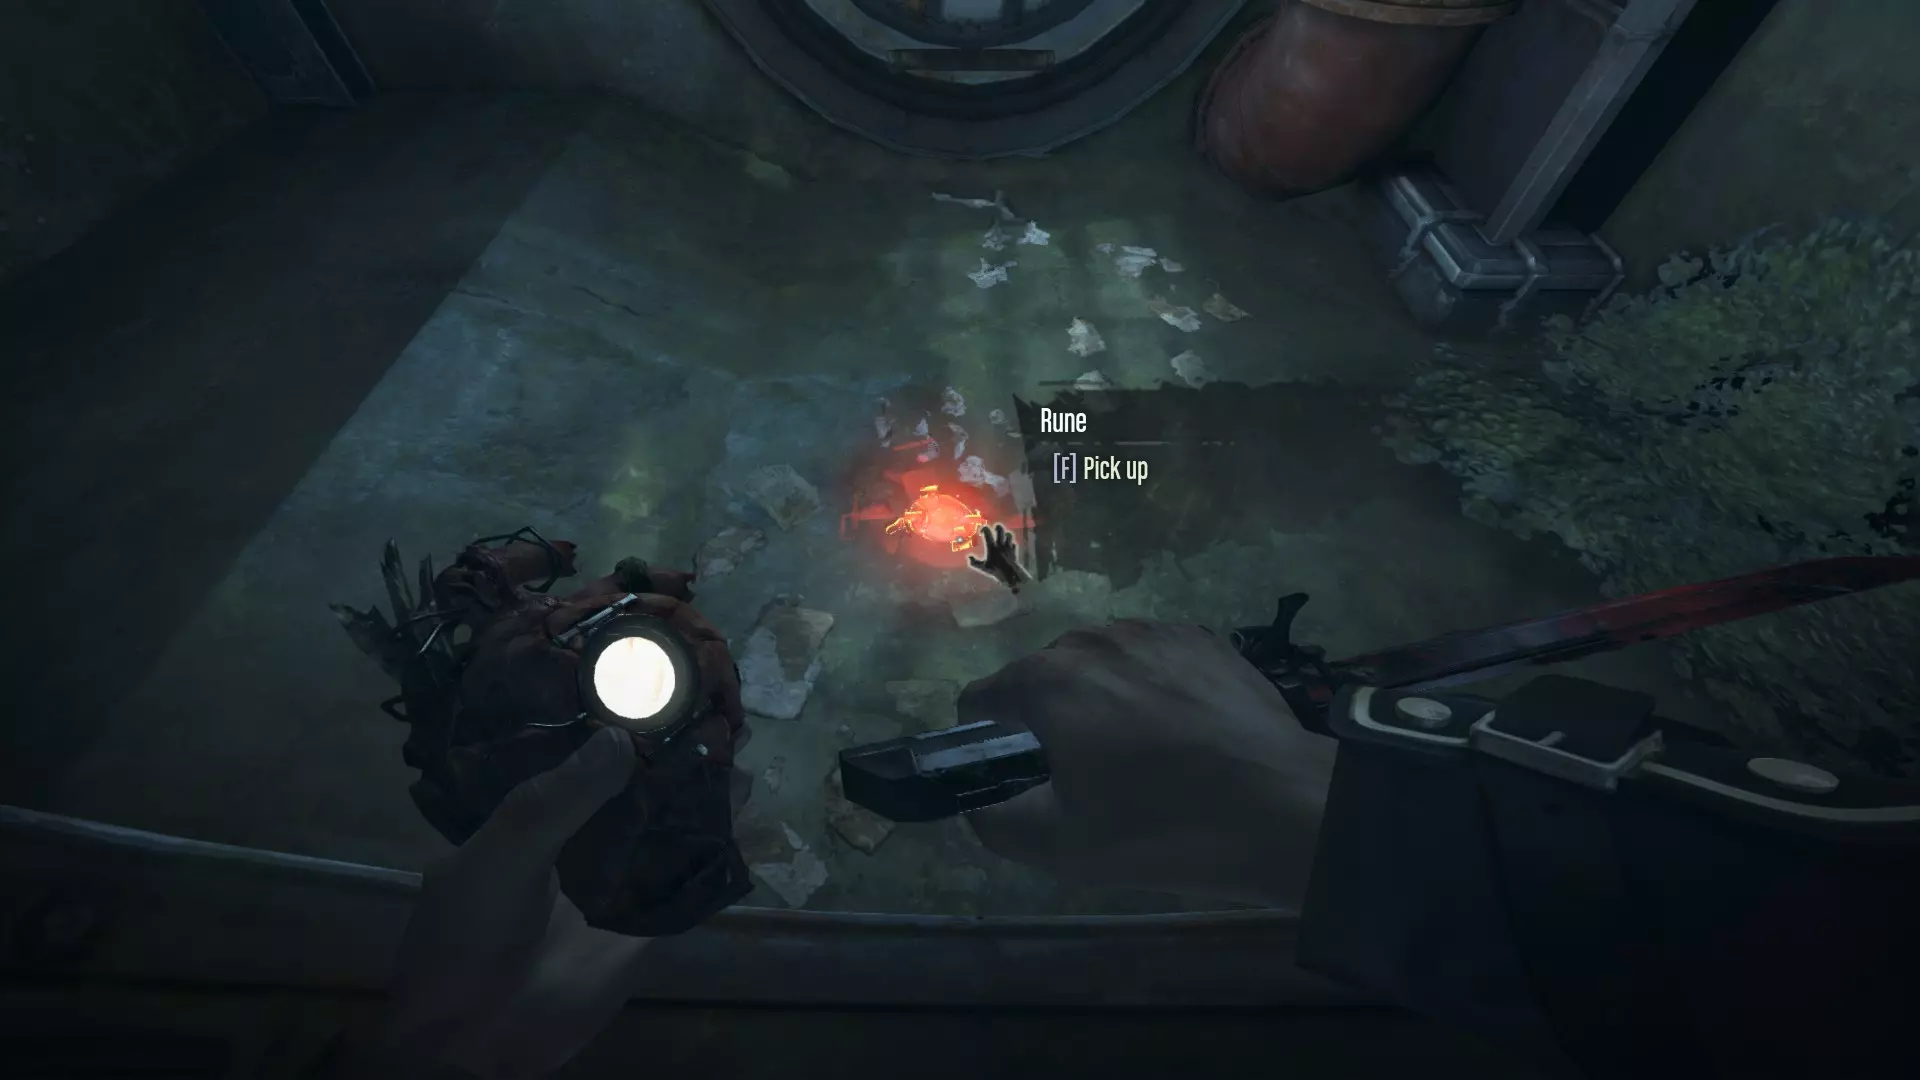
终点之光 在两个排水闸之间的水中,可从中央庭院旁的机房进入。前往房间右侧,顺着悬挂在那里的铁链向下爬。
骸骨护符刷新位置【开发中】 注:每个位置找到的骸骨护符在每次游戏中都是随机的,这意味着我无法告诉你具体哪些护符会出现在哪里(请注意,对于少数特定的骸骨护符——此后标记为§——可以通过存档刷取来规避随机性)。 高级督军坎贝尔 欢愉之屋 皇家医师 波义耳女士的最后晚宴 重返高塔 水淹区
保皇派 能力、强化与骸骨护符
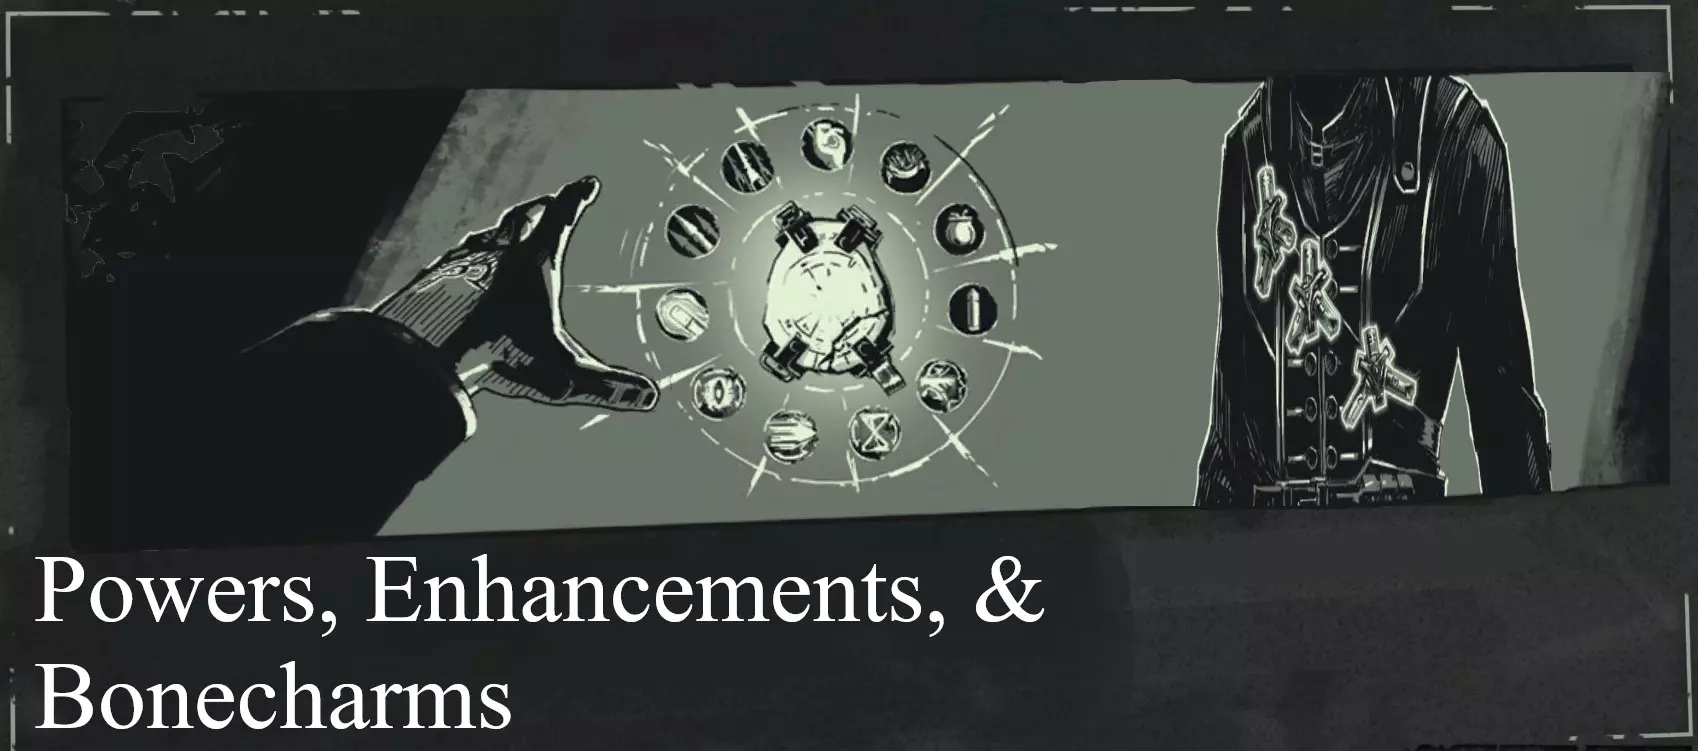
Below follows a list of all attainable supernatural abilities, complete with descriptions and advice. These generally must be purchased with Runes, which can be found or purchased throughout the game. Rune costs are listed in {brackets} after each entry. PowersActive powers which must be triggered by the player and are accessed alongside gadgets from the quick-access wheel or quick binds. These consume mana. Mana costs per usage are listed in [brackets]. Notes: Powers are activated upon releasing Use Power/Gadget button (Mouse 2 on PC defaults). Most powers can be cancelled before releasing said button by Interacting (F) or switching to a different weapon or power via the Access wheel or quickbinds. After using a power, its mana cost is subtracted from your current mana. A small portion of the consumed mana (roughly 20%) is then slowly regenerated, visually represented by a semi-transparent section of the mana bar. This bonus is lost if more mana is used during the regeneration period. If you do not have enough mana or some other condition is interfering (e.g. obstructed L.O.S) the power will fail. Blink I, II {Default}, {3} [20%] The best power in the game. Level II simply increases the maximum range of the power, and it's still one of the better upgrades available. Holding the Use Gadget/Power button down will display an in-world indicator, which shows where you will be teleported should you choose to release the button and thus activate the power. Aiming this indicator at a ledge will change its shape, indicating that you will mantle the edge after teleporting. The range of Blink is drastically reduced as the angle increases; upward movement is much more limited. Blink can always be performed due to the fact that it requires 20% mana--the regenerating amount. Theoretically you could go the entire game without using a Remedy and retain access to Blink. Dark Vision I, II {1}, {2} [20%] Visualizes the position and vision cones of entities (alive, dead, and unconscious) within its effective range as well as sounds generated by the player. Level II also reveals loot/food (green objects) and security devices/utility objects (blue). Like Blink, Dark Vision's mana cost always regenerates. For newer players it can be a powerful tool for stealth, though there are some who feel it makes stealth too easy. Once the positions and numbers of enemies are memorized the power loses some of its utility outside of certain niches (e.g. finding hidden loot). Note that its range is greater peripherally. Possession I, II {3}, {5} [60%] Level I allows you to merge with living creatures; Level II unlocks humans. You'll remain concealed for the power's duration and be able to move and interact in whatever ways available to your current host: Rats can traverse rat tunnels, Hagfish can swim and breathe underwater, Wolfhounds can sprint very quickly, etc. Small animals like Hagfish and Rats will die after Possession, while larger creatures like humans and hounds will instead become briefly disoriented. Note that almost anything can be possessed, even River Krusts (though you'll be unable to move or attack). Enemies can also be possessed--including Tallboys--and human enemies can interact with security systems, doors, etc, though they cannot sprint. Even mission Targets and other important characters can be Possessed. If your target is damaged, your health will be reduced accordingly for the power's duration. Possession automatically loots the target and also cancels fall damage. Devouring Swarm I, II {3}, {4} [40%] Spawns a Swarm of Plague Rats which are friendly only to you, Pests, and Weepers. They will be spawned immediately upon release of the Use Gadget/Power button. Level II spawns a larger Swarm. The rats are indiscriminate, and therefore not very practical for a Low Chaos run, but can make for a good distraction or to set up an attack. Level I can easily defeat one or two enemies, but more than that and their chances drop quickly. Level II can handle about 4-5 but not much more. Like all rats, spawned rats can have Springrazors attached to them and may also be Possessed. Windblast I, II {3}, {4} [50%] Releases a powerful blast of wind which affects objects and entities, breaks glass and can ignite explosives like Whiskey Bottles. The power has a limited range and is best suited to stunning a large number of enemies or knocking them off ledges. Enemies hit by Windblast are Knocked Down, providing an easy opportunity for escape or attack. Level II increases the force of the blast, to the point where enemies knocked into objects or walls will immediately die. The power can shatter breakable doors (usually made of wood) and is also useful for reflecting non-bullet projectiles (grenades, bolts, etc) and for clearing Rat Swarms or Hagfish. Bend Time I, II {2}, {8} [60%] Slows time for its duration. This effect affects projectiles, entities, explosions, everything--except you of course. Daud is also immune to its effects: In "The Flooded District", Daud will Bend Time himself in order to duel Corvo, and will ignore the effects of the power if the player chooses to activate it themselves. Level II stops time completely, albeit for a much shorter duration of, uh, time (~8 seconds compared to 12). This power is extremely useful for both stealth and combat, as it allows the player to navigate crowded spaces more easily without being detected and to attack large numbers of enemies without facing much resistance. Level II enhances those advantages even further and would be quite overpowered were it not for its exacting mana cost and shorter duration. Still, it's a great power, and makes many tricks and combos possible. EnhancementsUpgrades which passively affect the player in various ways. These do not consume mana. Vitality I, II {1}, {3} Increases maximum health. Level II makes your health regenerate (after consuming a Health Elixir) more quickly. Useful for combat, although I tend to forgo it, preferring to avoid damage entirely. That said it is still useful in other ways; more health means a greater survivable fall distance. Bloodthirsty I, II {2}, {3} Unlocks the Adrenalin meter (note that this is not visible), which is charged by several actions: Killing enemies, parrying (perfect blocking), and dealing damage. Once full, the screen will pulse and buzz and a visual filter will be applied. While in this state, press Block/Choke+Attack to initiate an attack which will insta-kill any enemy it touches. This attack can miss, and the meter resets afterward. Level II grants 2 attacks per charge and causes Adrenalin to build up more quickly. All Adrenalin attacks trigger slow-motion, and you are free to move and use left-hand weapons or powers during their duration--this means you can kill upwards of 3 enemies per charge (e.g. 1 for each attack, 1 with a Bolt/Bullet). Does not grant I-frames. Agility I, II {2}, {3} Level I grants a powered jump, which is performed by holding down the jump button. It also reduces fall damage. Level II increases movement speed. Extremely useful for stealth and combat--most playthroughs will greatly benefit from either this, Blink, or both. An Agility jump is high enough to perform a Drop Assassination. Good for accessing loot and alternative routes. Shadow Kill I, II {2}, {4} Dissolves the bodies of enemies you kill, provided they are not Alert at the time of their death. Also dissolves Sticky Grenades attached to enemies as they die, making that weapon a viable option for stealth. Level II dissolves all enemies that you kill regardless of Awareness level. Highly useful for stealth, as it largely removes the need to hide bodies. Powers, Enhancements & Bonecharms (Continued) Bonecharms Collectable items which can be found throughout the game world. They must be equipped manually, and provide various passive benefits to the player. These do not consume mana. Tip: Remember that collected Bonecharms can be swapped out at any time--so rather than picking one set for the whole level/playthrough, consider switching out charms as they become relevant (e.g. equipping Delicate Touch before breaking glass to access loot, swapping it out for Robust/Tough Skin before a combat encounter, equipping Gutter Feast to top off your mana, etc). Powers & CharacteristicsVoid Channel Blink and Windblast receive increased range. Other powers receive a +20% bonus to duration time. Probably the best bonecharm in the game. Throwing Hand Thrown objects travel slightly farther (does not affect grenades). Acrobat Slightly increases (chain) climbing speed. Fleet Fighter Removes the normal movement speed penalty applied when Corvo has his weapons drawn. River Affinity Increases your swimming speed. Useful for dodging Hagfish. Good Lungs Slightly increases your breath meter. Mana & Health Blood Ox Heart Increases your maximum mana (+20%). Tough Skin Increases your maximum health (+15%). Along with Vitality I, this Bonecharm allows you to significantly increase said maximum. Spirited I, II Spiritual Remedies grant +5%, 10% more mana. This does not exceed your maximum mana. Robust I, II Health Elixirs grant +5%, +10% more health. This does not exceed your maximum health. Falling Star Drop Assassinations restore mana (+20% of total). This does not exceed your maximum mana. Raven Drop Assassinations restore a small amount of health. This does not exceed your maximum health. Spiritual Pool Mana recharge time is slightly faster. Twist of Fortune I, II A Spiritual Remedy will restore full mana very rarely, occasionally. Spirit Water Drinking from fountains, taps, and faucets grants mana (+20% of total). This does not exceed your maximum mana. Water of Life Drinking from fountains, taps, and faucets grants health (+7.5% of total). This does not exceed your maximum health. Healthy Appetite I, II Food grants slightly, moderately more health. Stealth Delicate Touch Reduces the noise made when the player breaks glass or glass objects. Very useful for stealthy looting. Voyeur Adds a gradual magnification effect while peering through keyholes. Swift Shadow Increases movement speed while in Stealth Mode, such that you move at the same speed as when walking. Undertaker Increases movement speed while carrying a body (compared to carrying a body normally). Strong Arms Choking is significantly faster. This one is incredibly helpful for nonlethal stealth, particularly if you plan on neutralizing enemies as opposed to simply avoiding them. Combat Blast Resistant Slightly reduces the damage you receive from explosions. Clockwork Malfunction Increases the detonation time on enemy grenades. Somewhat useful for combat, not much else. Fire Water Increases the explosion radius of Whisky Bottles. Fencer Advantage when locking swords. Stack this with the Sword Locking upgrade to stand a better chance when locking swords with Daud and Admiral Havelock (both of whom are particularly challenging in this rather niche area of combat, other martial qualities aside). Whirlwind I, II Sword attack speed is slightly, moderately faster. Due to the nature of the mechanics this essentially only affects slashing, which is made much more effective with the level II charm. Unnerving Target I, II Enemies have a slight, moderate chance to miss with Pistols. Very useful for combat, particularly from mission six onward due to the increasing abundance of Officers. Quick Dodge Enemies miss more often with non-bullet projectiles (bolts and arrows). Vengeance Receiving damage grants a small amount of Adrenalin. Sustained Rage Bloodthirsty charges take longer to dissipate. Rats/Miscellaneous Carrion Killer Killing rats grants a small amount of Adrenalin. Combine this with Devouring Swarm to convert mana into Adrenalin. Plague Affinity Damage from Weepers grants you a small amount of mana. This does not exceed your maximum mana. Plague Resistant Damage taken from Weepers is reduced. Rat Scent Rats will attack you only when approached. Gutter Feast Allows you to convert white rats into mana (5% of your total) by interacting with them. This does not exceed your maximum mana. White Rats Friend Makes white rats friendly. Albinos Increases the spawn chance of white rats. Unless you're willing to dedicate additional slots to other "White Rat" bonecharms, this one is pretty useless. Welcoming Host White rats may be possessed for a longer time (30 seconds instead of 20). Scavenger Chance (50%) to receive extra ammo from ammo pickups (e.g. Bullet Cases, Assassin pouches, etc). Reinforced Bolts Bolts shot at enemies (specifically those that hit enemies) break less often, allowing you to recover additional ammo. Enemies & NPCs
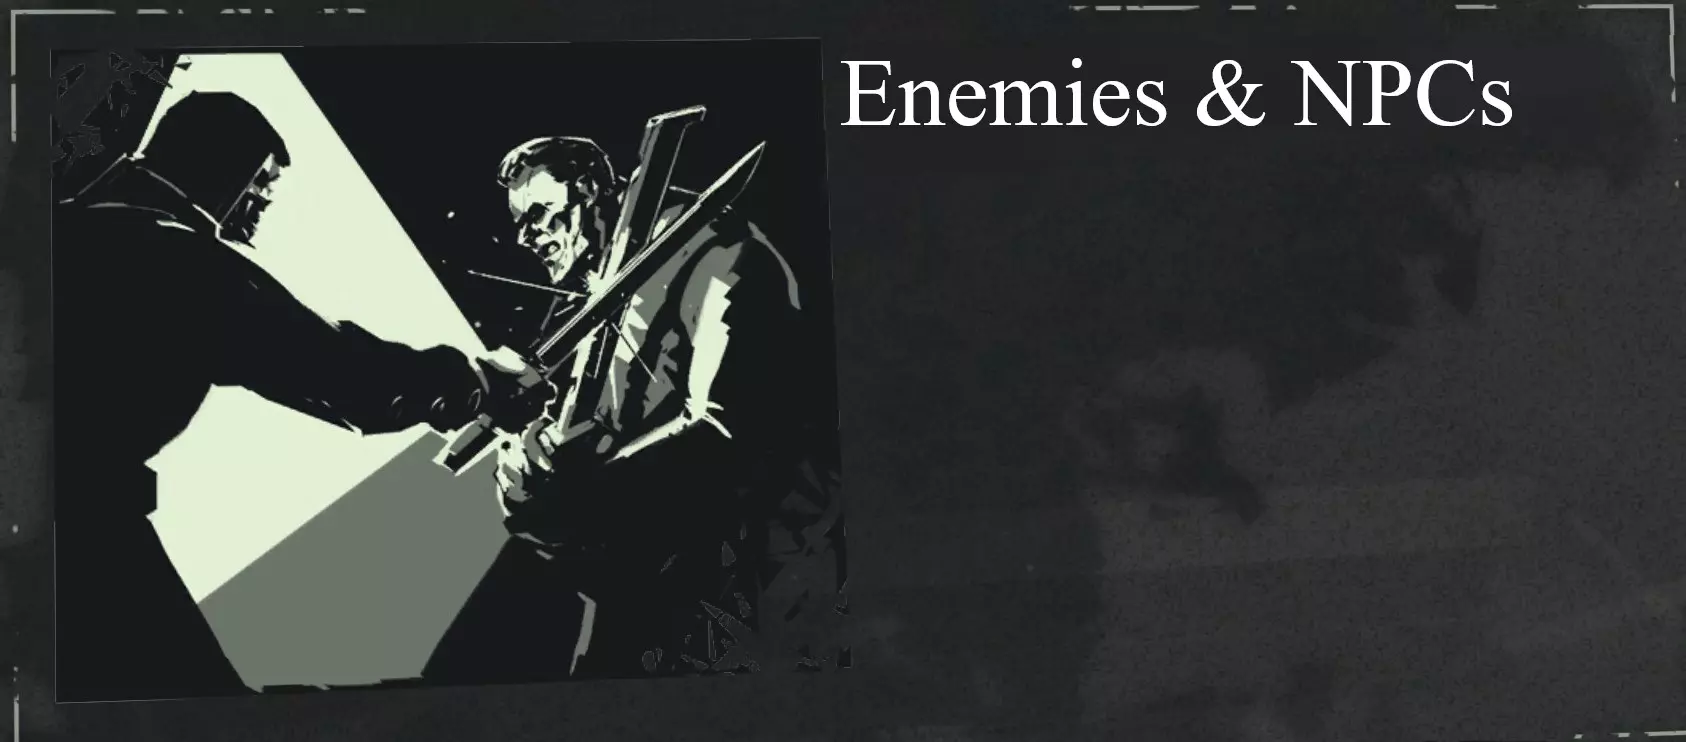
While the term NPC obviously refers to any Non-Player Character, it is often applied to non-enemies. So, for the purposes of this guide, NPC will refer to characters who cannot attack the player, while Enemy refers to anything which attacks the player by default. Enemies The City Watch Dunwall's police force is versatile in its responses to both combat and stealth. Watch Lower Guard One of the most common enemies in the early game, Lower Guards are extremely weak. They have less health when compared to most other enemies (a single crossbow bolt puts them down) and are especially vulnerable to staggering. In groups they are still capable of threatening the player, however, and they will often run for the alarm should you be spotted. Avoid letting them team up with reinforcements in combat, and don't discount them in stealth, since they are just as perceptive. City Watch Guard Generally bulkier and more imposing than Lower Guards, Watch Guards are accordingly more capable in combat. If the player moves to a position they cannot reach, they will often throw large rocks in an attempt to knock you from your perch; strafe to dodge. They can actually be quite dangerous, especially when working with Officers, due to both their increased health and their signature charge attack, which lets them close the distance with a shocking amount of speed. Seriously, you almost wonder if these guys have Blink too. Use powers or ranged attacks to avoid getting swamped. Watch Officer∆ Wearing ornate uniforms and wielding pistols, Officers are one of the few multi-range enemies in the game. They are quite competent in melee combat, but their greatest tool is their pistol, which they will use to shoot you with sniper-like accuracy at virtually any range. This attack will deal a considerable amount of damage. Officers are mostly difficult because they are rarely alone, usually rallying a squad of guards or even other Officers to attack you. The combat scenario of being tied up by two or three guardsmen (thus unable to attack the Officer directly) will quickly grow deadly once the Officer starts shooting. Circumnavigate this situation by staying mobile: Whether through Agility, Blink, or good old fashioned sprinting, close with the Officer to eliminate them first. Though accurate, Officers can still be made to shoot their allies with proper positioning, so don't hesitate to use your current opponent as a meat shield. Take their aiming animation (often accompanied by "Firing!" or "Stand clear!") as a cue to either break LOS or else disrupt them with a projectile. In melee, they have a selection of possible abilities: A single slash (be wary of their variable attack speed), a 3-hit combo, and a kick which deals knockback and interrupts you. They also sometimes pull their pistol even in close quarters (simply stand right up against them to prevent them from firing) and occasionally enter a "dodge state" which will render all of your slashes ineffective until it ends--stagger them or use an ability to bypass this (they may block rather than dodge, but this is effectively an aesthetic difference and can be countered similarly). In stealth, they are equivalent to other enemies, but note that they will often carry more coin in their purses (often up to 50 coins), making them a good pick-pocketing target. Tallboy∆∆ Also called a Stiltwalker, the Tallboy is the most intimidating member of the City Watch. Moving on mechanical stilts and wielding compound bows, the Tallboy is a walking watchtower, serving as a powerful assault unit used to drive out Weepers. Their stilts render them immune to both Rat Swarms and Weepers, and also give them a height advantage in most circumstances. The Tallboy is able to launch explosive arrows as well as use their clawed stilts to stomp anyone who gets too close. They can be difficult to deal with for newer players, as many strategies effective against other enemies simply do not work against the Tallboy. Before I explain how to overcome these obstacles, I want to emphasize that avoidance is absolutely an option--for any enemy in Dishonored, but especially for Tallboys. By their very nature, they are meant to be an oppressive and overbearing force, forcing you to use your wits to outmaneuver them. Taking an alternate route to avoid the clatter of a Tallboy fight can be a victory in its own right, and sometimes ghosting your way past a couple of these choffers can feel downright awesome. The key to defeating Tallboys is positioning. Realize that their height is far from insurmountable--there are plenty of places above their field of view. Once you know there is a Tallboy patrolling, use a moment to climb up high. The Drop Assassination is the silver bullet here; just one will end them. An agility jump will also put you in Assassination range if you have the Adrenalin Enhancement unlocked and charged. Blink I is also enough, if only barely, to get within Assassination range. 5 Bullets, 3 Incendiary Bolts, or 1 Sticky Grenade will each also put them down. Aim for the whale oil tanks on their back or even for their eye slit if you're feeling confident. The fastest way to kill a Tallboy is with a Power Slash (see Video Demonstrations). Be warned that Tallboys are immune to all Sleep Darts due to the drugs used to dull their pain centers. The worst way to fight is on even terms; avoid running up to a Tallboy and just blasting away. The Abby of the Everyman The Abby is a religious faction possessing their own military forces, which are tenacious and dogged in combat. Overseer Equipped with sabers and metallic masks, Overseers are a relatively common enemy that can still be quite tough. Their masks will deflect projectiles, making headshots difficult. Note that you can still shoot them in the side, back, and top of the head (the side is more difficult but still possible), and further note that deflected projectiles will still stagger them. There are three types of Overseer: One carries a pistol alongside their sabre.∆ The second wields grenades--these make movement a top priority when fighting Overseers, so be quick and don't stay in one spot. The third type carries a Music Box, also known as Holger's Device, which disables all supernatural powers when activated in addition to dealing continuous damage and knockback. These effects only apply within its range (a bit greater than the distance that can be covered with one Blink), so the best methods to counter them are to either quickly defeat the Overseer in question, or else break LOS via cover. Note that the Device will shield them from most projectiles (aim for the legs or back), but explosives, springrazors, and Assassinations will still work well. Just as Officers should be prioritized when fighting the Watch, Music Box Overseers should be your first target, lethal or not.∆∆Wolfhound Wolfhounds are large canine creatures trained by the Abby to assist their Overseers. Awareness applies to them, and they can actually be more perceptive than their Overseer masters when it comes to detecting you. They are very easy to kill with the advantage of surprise, as they do not have much health. However, should they become alerted to you, they will sprint with great speed towards you to attack. They have two possible attacks: A slashing bite, dealing considerable damage, and a tackle which will down you for its duration. If it manages to land this latter attack, the wolfhound will latch on to your arm for a minimum of a few seconds. If this happens you must press the Attack button rapidly to beat the Hound away. This attack is devastating because it deals a huge amount of damage and incapacitates you for several seconds, exposing you to other enemies. So, don't let wolfhounds get close. Enemies & NPCs (Continued) Gangs Dunwall is home to numerous gangs, several of which are seen in-game. Enemies from these factions are less common than the Watch, and will often be found in groups secluded from other enemies. Keep in mind that these enemies will fight the City Watch if either is provoked. Bottle Street Thug Armed with kicks, Gang Cleavers, and the surprisingly deadly Whisky Bottle, thugs are one of the tougher melee opponents in Dishonored. Besides the regular dodges and kicks, they also use their bottles of whiskey to breathe fire at close range, dealing significant damage (try moving to the side just as they initiate this attack to avoid the damage and get a free attack or two in). Note that staggering a thug will cancel this attack; throwing bottles or jumping on their head are easy methods (a sword slash alone won't work, though a quick shot from the Pistol or Crossbow will). In scenarios where Watch guardsmen would throw rocks, Thugs will instead throw their Whiskey Bottles, which explode on impact and deal moderate damage (these may also be detonated on your terms with a well-aimed projectile). Can also charge. Be wary of close quarters. Whaler Bemasked and bearing razor-sharp cleavers, these Assassins are quite capable in close combat. Their real advantage lies in their Wristbows, which allow them to launch bolts at range or up close; these bolts will briefly stagger you, so listen for their distinctive audio cue. Some may also use Pull to draw you closer--a quick Bolt or Bullet to the body will put a stop to that, while staggering them at the same time, giving you a good opportunity to get away or finish the job. And remember, Assassins will teleport (often, directly behind you). Pests, Hazards, Miscellaneous Generally, the Awareness system does not apply to these enemies. They function more as environmental hazards than typical enemies, and can therefore be exploited to remove or distract other threats. Hagfish Small, muscular, and bristling with needle-like teeth, Hagfish are aquatic hunter-scavengers which patrol the rivers, pools, and sewers of Dishonored. They will pursue and attack any player who strays too close, and in greater numbers can be frighteningly effective. Use Bonecharms like River Affinity to make avoiding them easier, and don't hesitate to use Blink or another power to circumvent the fish entirely. Hagfish are pretty persistent, but it is possible to find spots where they will not attack you. The best strategy is to simply minimize your exposure to them by focusing on getting to your destination. As long as you don't hang around they will inflict only minor damage. Along with Plague Rats, Hagfish fill the scavenger niche of Dunwall's ecosystem. Thus, Hagfish will feed on any body available to them just as rats do, making them a useful tool in the removal of bodies. They can also be possessed, and there are many underwater passages and openings which can be exploited this way throughout the game. River Krust∆ Strange organisms resembling armored crustaceans, River Krusts are found near water. Sewers, canals, overhangs, and flooded land are their habitat. Usually found in groups, Krusts occupy one of four states: Three "closed" states, wherein they are protected from attack, and one "open" state, during which they can be damaged. Unaware of an intruder, they remain in their Passive state. Once aware of an intruder, they will switch to their Flared state, opening their shell slightly and making warning calls. If attacked, a Krust will transition to their Locked state, hunkering down to resist the damage. While in these three states, Krusts are impervious to most attacks, including sword-strikes (note that multiple pistol shots will still kill them, as will a grenade. Aim for the center of the colony for maximum damage). If the threat approaches further or does not leave quickly, the Krusts will transition to their Attacking state, launching gobs of acidic discharge at the player (or any other threat). These projectiles deal a moderate amount of damage, but most often they will be launched in volleys by multiple Krusts, rendering the unprepared player demised in mere seconds. Due to their low projectile speed, these attacks can be dodged with simple strafing, and any projectile will kill the Krust while it is open and exposed. By timing your advances and attacks (shooting at a passive Krust will keep it hunkered down for several seconds. If using the Crossbow, remember to collect your bolts afterward), it is possible to manipulate the Krusts. Remember that you control the flow of the fight--if there were more than you anticipated, simply Blink over to the colony and keep them locked down. With good enough timing it is actually possible to Blink over to an Attacking Krust and kill it with your sword before it can clam up, so to speak. For colonies in tricky spots, Sticky Grenades are best. Plague Rat The Plague Rat, as Dr. Galvani discovered, is distinct from the common rat in several ways. In small numbers they are completely harmless, and in fact provide opportunities for Possession (most levels will include several Rat Tunnels, damaged venting which can be navigated in rat form). They will continuously spawn in certain corners--often near rat tunnels--and scamper away when approached. Nearly all NPCs and Enemies will kill rats given the opportunity, crushing them underfoot (avoid all NPCs while Possessing a rat). When a group of Rats exceeds a certain critical mass (~5), they become a Swarm. A Rat Swarm will attack the nearest body, NPC, or Enemy, including the player, immediately once formed, devouring them completely unless their numbers are reduced to below the critical threshold. Enemies, particularly members of the City Watch, will attack Rat Swarms on sight. Swarms can be distracted with bodies or bypassed by staying above ground--even a small object can be enough to keep you clear of the furry tide. The key is to avoid panicking--never attempt to fight a rat swarm with only your sword of the game is set to a higher difficulty. Unless, of course, you stand on an object as mentioned. Grenades, Incendiary Bolts, both types of Pistol ammunition, explosives, and certain powers are also effective (Windblast can kill many rats at once, while Agility II allows you to outrun them entirely). Certain Throwables such as bottles can be thrown at Rat Swarms to kill a few at a time. Uniquely among the hazard type enemies, Rat Swarms can also be summoned by the player. Weeper Those who fall to the Rat Plague, having not the elixir to keep themselves inoculated, inevitably progress to a certain terminal point, whereupon they will begin bleeding from their eyes, hence the moniker. Weepers have lost awareness of themselves and do not have conscious control over their actions. They will stumble around a small area, digging through garbage and vomiting. Upon discovering the player, Weepers will quickly become agitated, charging the player and vomiting on them--much like Wolfhounds, you will be obligated to spam Attack to knock them off. Be wary of this attack as it has a very large range. Biting flies also accompany most Weepers, and these flies can be heard buzzing and stinging the player while a Weeper is near them, dealing constant damage--avoid even Assassinating Weepers while low on health, as this attack applies at all times and does not heed the I-frames normally granted by assassinations. At close range, Weepers can deal astonishing amounts of damage, making long or mid range the ideal engagement distance. Weepers are something of a special case among the hazard type enemies, as the normal states of Awareness apply to them (note that they will initially detect you less easily than most enemies, due in part to their default behavior patterns). Additionally, they count towards Chaos (see The Chaos System). Enemies & NPCs (Civilians+Targets) CiviliansCivilians will walk around certain areas of a level. They will often carry purses; Commoners will usually carry less coin than Aristocrats. Feel free to interact with them--in public areas, they won't be suspicious of you, even if you have your weapons drawn. The exception is when in "Hostile Zones", wherein all NPCs will be suspicious of you and should be avoided. For example, the NPCs at the Golden Cat will panic and run for the Watch if they see you, even though NPCs do not typically do this in other areas.However, all NPCs will become fearful and alerted should they witness the player perform certain actions, such as attack someone or hold a body. Unless otherwise specified, all NPCs follow this AI archetype. Aristocrat Commoner Courtesan Target Mission Targets come in two categories: Armed, or unarmed. The latter behave much like NPCs. The former are equipped with sword and pistol, which they may use to attack you. Awareness applies to all targets; armed targets may attempt to search for you. Some Targets will immediately attempt to flee to a certain location should they become Alerted to your presence, while others will always attack you. See the table below for who does what (NB: This contains major plot spoilers). Target Response when Alerted High Overseer Campbell Flee / Attack (if in safe room) Pendleton Brothers Attack Sokolov Panic/Flee Boyle Sisters Panic Lord Regent Attack Daud Attack Pendleton | Martin Die Admiral Havelock Attack (Low Chaos) / Die (High Chaos) Enemies & NPCs (Special Characters) Special Characters & Neutrals Spoilers! Note that this is not a complete list of all characters, just the ones with unique functions, AI, etc. Daud Killer of the Empress and leader of the Whaler gang, Daud is a mission target who is encountered in the Flooded District. He may be openly engaged, stealthily choked out, or pickpocketed. If Alerted to you, he will Bend Time in order to duel. He is exempt from the effects of Bend Time and Possession, though the former will slow his Awareness slightly, and is also immune to assassinations. In addition to being the most dangerous enemy in the game, Daud is normally accompanied by his Whalers, who will come to his aid should they be able to. Windblast will stagger him, and though projectiles will be frozen due to Bend Time, they can still be placed in his path to create traps. Slackjaw A neutral character who can be found in the back offices of the Bottle Street Distillery, Slackjaw is the leader of the Bottle Street Gang. He offers several side objectives, some of which grant alternative mission routes and extra loot if completed. Normally he will not attack the player, but will retaliate alongside any available thugs if provoked. Granny Rags An old woman living on Endoria Street in the Distillery District, Granny Rags is a neutral character who will not attack the player unless provoked or opposed. She offers many side objectives and will often reward the player with Runes should you complete them. If attacked, she will dissolve into a swarm of plague rats. If the player has also encountered Slackjaw, "The Loyalists" is altered to include a diversion to Granny Rag's lair, where you will find Slackjaw dead or captured, depending on Chaos Level. Granny Rags can be killed in this section should you choose to do so: Head to the room beneath the dead whale head and grab the cameo beneath Granny's pillow. Place it in the furnace nearby and use the red lever to incinerate it. After this, Granny's spell will be broken, allowing you to deal with her once and for all. The Torturer The so-called Royal Interrogator is found below Dunwall Tower during "Return to the Tower". He can be killed to complete an optional objective, or simply to satisfy your own spite--true to his name, the Torturer is briefly introduced at the start of the game as he finishes torturing Corvo. His dungeon contains a Wolfhound, an Outsider Shrine, and a few scraps of coin. He can easily be killed if you remain undetected, but presents a formidable threat if challenged head-on. He is immune to sleep darts as well as the effects of several supernatural powers, and has a good deal of health. He will attack with Pull (the same supernatural power the Whalers use to incapacitate Corvo at the start of the game), kicks, and his red-hot iron brand. Sokolov Initially a Mission Target, Sokolov eventually turns into a friendly character after being kidnapped. He can be killed during "The Loyalists" if you choose, but may have positive story effects if left alive: In Low Chaos, the Outsider reveals that Sokolov and Piero cure the plague shortly after combining their efforts. Lord Brisby A partygoer found in "Lady Boyle's Last Party". He tells Corvo that he knows what he is here to do, and begs him to spare "the woman [he] loves": Lady Boyle. He offers to take her somewhere far away, promising that she will never be seen or heard of again. The player can choose to go along with this plan by rendering her unconscious and delivering her to the waiting Brisby, who will row off into the canals. Despite his attitude, the man's love does not appear to be reciprocated; Lady Boyle is the mistress of the Lord Regent after all, and a letter found in her room reveals that there is at least some positive relation between the two. Furthermore, Lady Boyle never mentions Brisby, and no evidence is present to suggest there is any feeling between them. For these reasons and their implications, the nonlethal option for this mission has been considered especially morally reprehensible by many. Lord Shaw Another noble at the Boyle Party, Lord Shaw can be given a sealed letter from Pendleton in order to complete an associated optional objective. The letter apparently contains less than kind words, for Lord Shaw will proceed to initiate a duel with Corvo. The player can choose to participate or walk away. If the former is chosen, two Officers will oversee the duel. Each duelist takes a pistol from a case (strangely this will equip Corvo's Pistol, complete with all obtained upgrades, if that upgrade was purchased) and the paces and count are measured out. The player is free to shoot and kill Lord Shaw during this duel. Something of note is that the pistol can actually be swapped out for another weapon (say the Crossbow) at the last moment. This means it is possible to knock Shaw out via a Sleep Dart and spare him. The two guards will still assume he is dead, however, and will have the same conversation about having to clean up another body. Another observation is that the manner in which Lord Shaw initiates the duel seems to suggest that Pendleton's letter actually proposes the duel, with Corvo as his surrogate. Captain Curnow Callista's uncle. The Captain is meeting with High Overseer Campbell during the mission of the same name, and will be lethally poisoned by him should the player not intervene. The poisoned cups can be switched (causing Campbell to beg Curnow to burn his Black Journal before dying), left alone, mixed (causing both characters to die), or broken (this results in a unique scenario in which Campbell leads Curnow down into his secret chamber, supposedly to retrieve a better draft but really to run him through). If saved, Curnow can be knocked unconscious and transported to a dumpster near the door to the back yard of the Office in order to be considered safe from the Overseers' schemes. If he detects the player, Curnow will attack just as any Officer might--unless you switch off the music blaring in Campbell's secret chamber just as the Overseer draws his sword. Curnow will then be alerted to his adversary, defeat him, and let you go on your way in thanks. Loyalist The Loyalists behave much like Civilians. Most of the time you will interact with them in between missions at the Hound Pits, during which time they can be talked and interacted with, and can also be seen interacting among themselves. Each Loyalist has several unique Heart secrets (details which the Heart will relate to you should you activate it while looking directly at a character), and many provide side objectives, gifts, and so on. VendorsGriff the Scavenger A friendly character who resides on Bloodox Way in the Distillery District. In "High Overseer Campbell", he can be found being extorted by two Bottle Street Thugs. If the player chooses to help Griff defend himself, he will survive and subsequently offer various items and blueprints for purchase. Despite his claims to the contrary, his prices are terrible. However, he still offers at least one blueprint (Lens Magnification) which is very valuable, and can also serve as an emergency source of basic supplies. Piero Joplin The primary source of upgrades and supplies throughout most of the game, Piero is a Natural Philosopher who most often resides in his workshop at the Hound Pits. Further upgrades can be unlocked for purchase once their relevant Blueprint is collected. Piero is the one who crafted Corvo's custom weapons and mask, and the Heart reveals that the Outsider has been visiting Piero in his dreams nightly (it also mentions that he has "brain fevers", which may or may not refer to the same thing). Piero also mentions his increasingly absorbing visions, which are why Corvo's mask looks so bizarre and disturbing. Security Devices
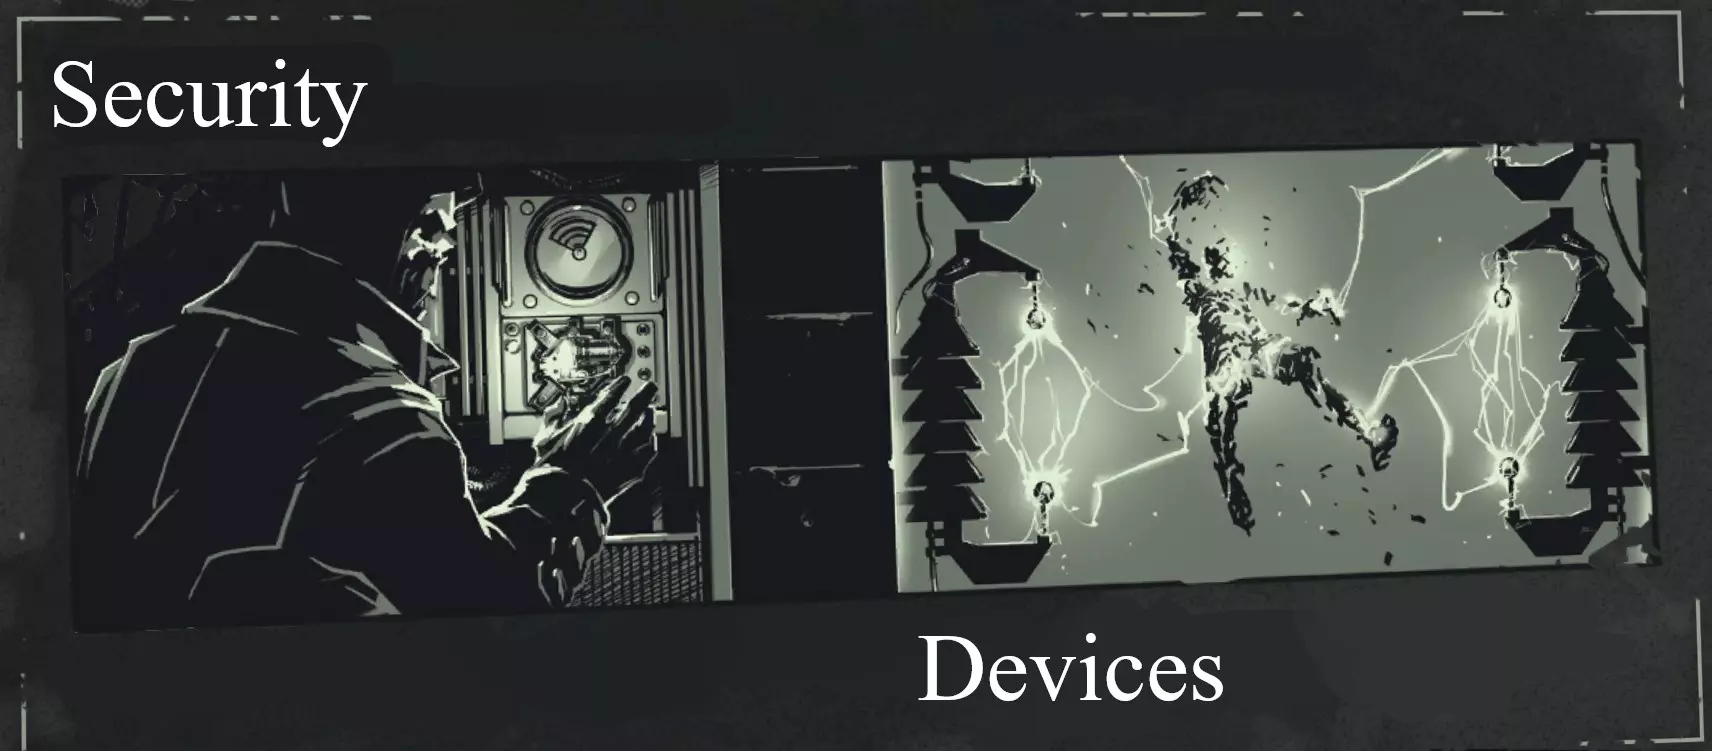
Wall of Light Walls of Light are composed of a pair of emitter arrays, an alarm light, an electrical panel, and a power unit containing a single Whale Oil tank, usually protected by a cover. The space between the emitters flickers with lightning while the wall is active. Any living thing which passes through this space (unless they have been attuned to the Wall) will be instantly vaporized by the arcing lightning. This includes the player, and no amount of health enhancements or armor upgrades will save you--it is always a one-hit kill for any entity, including mission Targets and Tallboys. Projectiles and objects will also be vaporized as they enter the Wall. As an unattuned entity approaches the Wall, the alarm atop it will blare, while the approach of an attuned entity will result in beeps. It is possible to tell whether, when, and how many enemies are passing a Wall of Light with hearing alone by listening to these beeps. Removing the tank from the power supply will instantly deactivate the Wall--easily find it by following the copper power cable. The electrical panel can be opened and Rewired using a Rewiring Tool to attune the player to the Wall (this means you will be able to pass through it unharmed, but enemies doing the same will be turned to ash). Note that initially enemies will be unaware of the rewiring. Walls are often accompanied by Rat Tunnels or alternative routes, so they are easily bypassed if you wish to do so, especially if one has Blink or Agility. On the topic of Blink, note that you cannot Blink through most Walls of Light--you will be vaporized as usual. Arc Pylon Arc Pylons are composed of the Pylon itself, an electrical panel, and a power supply containing a single Whale Oil tank. While active, the Pylon will spark and flash, and any unattuned entity who enters its range will be struck by repeated lightning bolts until vaporized. Note it is possible, although unlikely, to survive being struck by an Arc Pylon, as the first bolt will not always kill you. Generally speaking, however, they are just as dangerous as Walls of Light and perhaps more annoying, as their area of effect extends in all directions. Once again, the Pylon can be powered down or Rewired. Note that there is a brief charge-up period after an unattuned entity enters a Pylon's range, wherein said Pylon will begin to glow and sound an alarm. You can avoid the incoming damage by immediately leaving the Pylon's range as it charges up. Watchtower Large structures, armed with a spotlight, a turret, and an access catwalk around the back. A Watchtower contains its own electrical panel and power supply, which are located on the rear catwalk. From here and as usual, the Watchtower can be powered down or Rewired. Note that if Rewired, the tower will begin to shoot at any enemies it can detect. This can result in a great deal of collateral damage and is, needless to say, not very stealthy. A gangplank extends out from the left-hand side of the catwalk and is slightly lower (and therefore easier to reach) than the rest. While active, a Watchtower will rotate back and forth, searching with its spotlight for unattuned entities (this rotation can and will have you falling like a moron if you're not careful). If such an entity is detected, the tower will sound an alarm, its spotlight will turn red, and the tower will begin launching volleys of explosive arrows (these volleys are presaged by a high-pitched charging sound that can be used to determine whether and when one needs to Blink away). Immediately Blinking away as soon as the light turns red can confuse the tower and cause it to revert back to normal. The tower will also revert once all visible targets are dead, or after they (e.g. the player) have been out of its view for a period of time. If you do get spotted by a tower, an easy way to avoid damage is to position yourself right beside its support pillars--basically right underneath it. Assuming you are close enough, the tower won't be able to see or fire at you. Something interesting lore-wise is that the Watchtower appears to be autonomous and at least somewhat intelligent, since rewiring reverses its function and it is able to recognize and distinguish living things visually. Other machines later on in the series share this same ability but are much smaller and more advanced, suggesting the technology has been refined from its origin in Sokolov's devices. Alarms About the height of a man and equipped with four sirens, Alarms are activated via a rotating ring (Interacting with this ring while the alarm is active will instead silence it). Enemies will attempt to activate an Alarm when Alerted, assuming one is present--this will Alert any enemies in the area as well as summon reinforcements, which will typically consist of a squad numbering at least two enemies, though later missions see this number steepen dramatically. Normally, you can expect the type of enemy summoned to align with the type of enemy present; City Watch will summon Guardsmen or Officers, Overseers Overseers, and so on. Reinforcements spawn in one of a handful of designated locations removed from the immediate area--memorizing these allows one a great degree of situational awareness. Alarms will shut down if all enemies are either incapacitated or evaded. Bolt Launchers & Tripwires Although distinct from the other devices on this list (in that they were not designed by Sokolov) Bolt Launchers are still relatively common throughout the game (particularly in sewers and other underground or run-down areas). Resembling a small metal box, Launchers will always be triggered by a nearby tripwire. Though the tripwire itself is thin and possible to miss, it will be attached to distinctive anchors at either end, which are easier to spot. Interacting with the Launcher will disable it; this will also give you an Incendiary Bolt, assuming you have the space to pick it up. Tripwires can also be purposefully triggered by Interacting or collision with either a sword, a thrown object, or any projectile. Whale OilAll Security Devices run on Whale Oil tanks, which may be taken from and placed into standardized magnetic receptacles found near said devices. Whale Oil Tanks are sometimes shielded by a protective cover, which can be opened with the Interact button (F on PC defaults). They are highly explosive, causing Large Explosions when detonated. Oil Tanks not protected by covers can be detonated from afar with a projectile or throwable object in order to deactivate any Security Devices it may be powering. As a Security Device consumes energy, the volume of oil within the tank which is powering it will decrease (you can see this happen for yourself by throwing bodies into a Wall of Light). The amount of Whale Oil consumed per action depends on the action itself: For Walls of Light, bodies will consume more oil than projectiles. A very gradual drain will also apply whenever a Device is active. With this in mind, it is possible to drain a Device's supply of Whale Oil and therefore cause it to deactivate. Once the supply is gone, the Device will shut down and the Whale Oil Tank will become an empty tank, which will not explode but still may be picked up and thrown. Empty tanks can be placed into Whale Oil Refilling Stations, which feature a red lever. Interact with said lever to fill the tank. Additional tanks can be obtained from Tank Dispensers, which are almost always found right next to a Refilling Station. Simply interact with the red lever to receive an empty tank. There is a limit to how many tanks a single station can provide at once; when this limit (5) is reached the dispenser will cease to function. However, as soon as the number of tanks falls below this limit again, the dispenser will be able to provide tanks again, up to the limit. Security Devices (Notes) Fence Spikes/Razor Wire Found topping fences, walls, and barriers of all kinds throughout the game. These inflict a small amount of damage and a larger amount of knockback upon contact with the player (fun fact: it's possible to bring up the Quick Access wheel just as this is applied in order to amplify the knockback and send yourself flying in the opposite direction). Don't let them discourage you from attempting to bypass such barriers--in almost every case, it is perfectly possible to do so. Do mind where you Blink, though. Street Speaker Large armored loudspeakers frequently found hanging from cables above the streets of Dunwall. These will explode should they strike the ground with sufficient speed--shoot or slash the cable directly above the speaker to send it falling. Notes on Power UsagePossession While possessing someone who is attuned to a Security Device, you too are effectively attuned, safe from its effects. This is another easy way to circumvent devices. However, if you possess an enemy or character who is not attuned to an Arc Pylon or Wall of Light and move them into the device's range, they will be killed--but you will survive! This can only be accomplished with human hosts, as smaller hosts will cause you to die alongside them. Rewire a Wall of Light, possess a Tallboy or other enemy and walk them through said Wall to kill them while leaving yourself unharmed. Stop Time & Bend Time During Bend Time, the activation of Pylons and Watchtowers will be slowed, but not stopped. If you're quick, you can pop it and deactivate the device in question, or else move past its area of effect. Note however that Walls will still instantly kill you. Stop Time, however, will allow you to completely bypass all Security Devices for its duration. You can walk through Walls of Light, past Arc Pylons, and in front of Watchtowers without being harmed. Devouring Swarm Summoned rats will be vaporized by Pylons and Walls. This also drains said devices' Whale Oil supply. Dark Vision Level II highlights all Security Devices in blue, which can be useful for locating rewiring panels and power supplies. Windblast Can be used to deflect projectiles launched by Watchtowers. Blink Good old Blink is also useful for dodging Watchtowers (both their volleys and their searchlights--that Blink-to-reset-Awareness trick works on them too), quickly exiting a Pylon's AOE, or maneuvering around a Wall of Light. Advanced Stealth
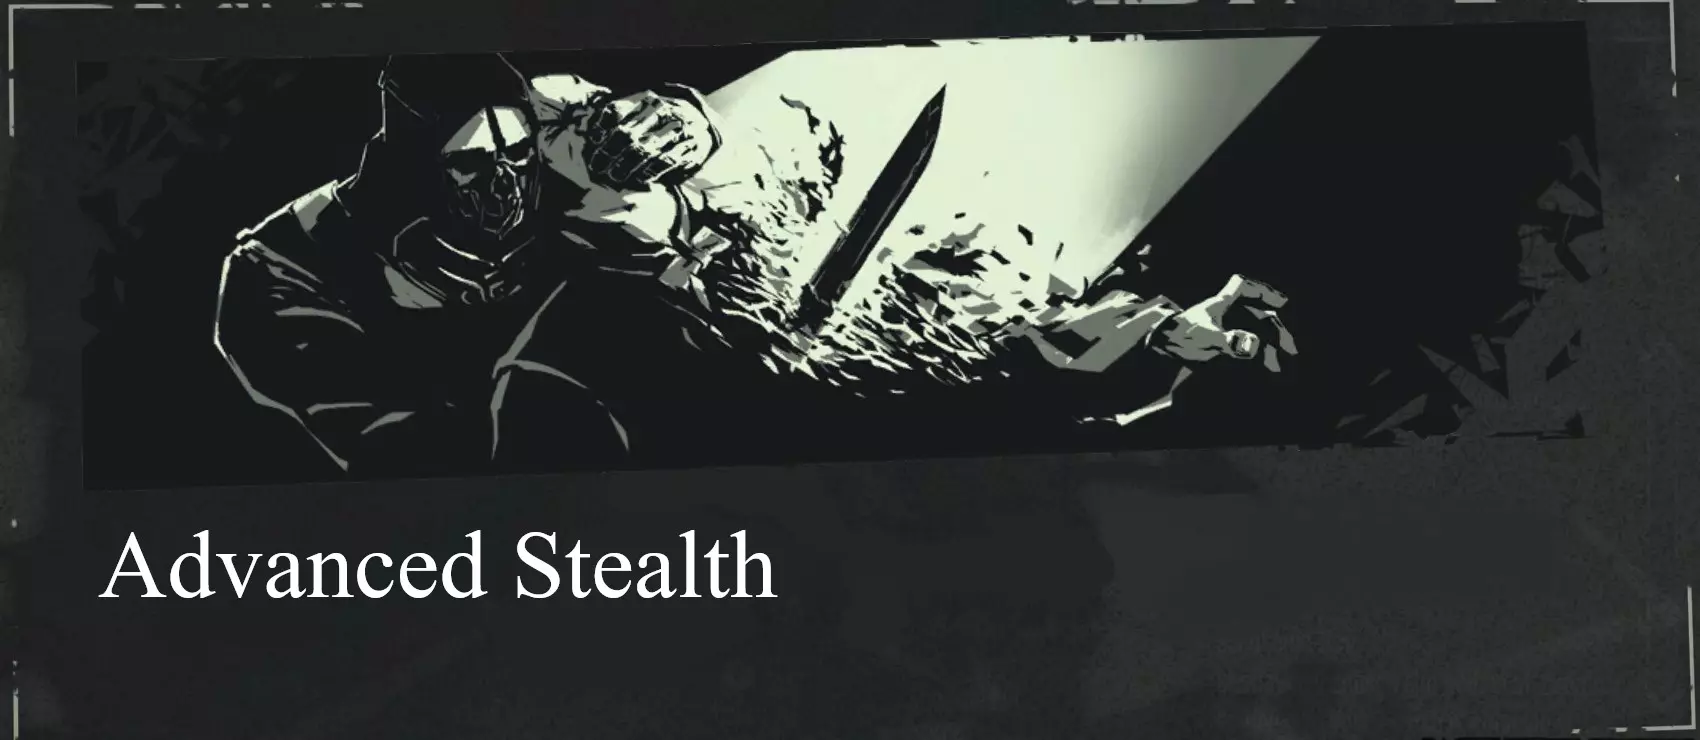
Now that you have a good understanding of the essentials of Dishonored, feel free to study this collection of techniques. In this first section I delve deeper into the specifics of how stealth works and the various states enemies and NPCs can be in. Two Types of Stealth Once you have the fundamentals down, you'll probably realize there are actually two kinds of stealth: High Chaos Stealth, and Low Chaos Stealth, which itself has two unique playstyles--regular nonlethal stealth, involving Takedowns and Sleep Darts, and "ghosting", a playstyle which centers around never being detected (things like sleep darts can still be used in a ghost run, but are not necessary as it is usually more effective {and in-line with the ghost ethos} to simply skip past enemies altogether). High Chaos Stealth, popularized by players such as StealthGamerBR, is quite different. In its finest form, High Chaos Stealth is not about avoiding enemies so much as removing them with brutal efficiency. After all, there's no need to hide bodies if there is no one left to find them. These playstyles are not absolute. Because of the way the Chaos System and Stealth (or the lack thereof) intersect, there is a very wide range of potential playstyles to discover and tune to your liking. Every player has tricks they like most, so experiment with what you like. All that said, let's get to the good stuff. Awareness StatesEnemies and characters who the Awareness system applies to are in one of several states, depending on the state of the game world and the actions of the player. These states are represented by HUD icons resembling lighting bolts, which hover around the character's head. Note that these bolts appear in pairs. Lightning Bolts State Behavior 0 Unaware Enemy will act as normal. 2 Suspicious Enemy will continue their current action, but may voice their suspicions. 4 Wary Enemy may stop their current action, in order to confirm their suspicion. 6 Searching Enemy will stop their current action, and begin searching the area. Note that even with a full 3 pairs of bolts, you are not detected! If you successfully evade the searching enemy, they will eventually return to a lower level of Awareness. - Alert If the enemy detects you further while Searching, they will become Alert. This means they can see exactly where you are and will rush to either attack you, call reinforcements, or trigger an Alarm if one is present. By maneuvering out of the enemy's L.O.S. (particularly via the use of a supernatural power) it is possible to lose them, causing them to revert to the Searching state. Note that Blink always causes Alert enemies to instantly revert to Searching. This means you can quickly Blink out of an enemy's L.O.S--potentially even above or behind them, allowing you to easily dispatch the enemy in question. Remember that if you Blink to a location visible to the enemy, they will immediately become Alerted to you once more. Possessing an entity as well as repositioning with Bend Time II are also effective evasivion options. Noise & Light Levels Making noise while an enemy is nearby will raise that enemy's Awareness state. A visual representation of this noise is displayed during Dark Vision's duration. Note that noise alone will never fully Alert an enemy: They must see you directly. For this reason, it is more than possible to forgo slow, careful movement for speedy traversal and still remain undetected, as long as you remain out of your enemies' L.O.S. Noise is generated by projectiles, the use of certain weapons and gadgets (e.g. the pistol), walking or sprinting while not in stealth mode, landing, destroying breakable objects or materials (e.g. glass), striking a surface with your sword, and so on. Certain upgrades and Bonecharms reduce or eliminate the noise you make during some of these actions, while stealth mode will reduce all movement-related noise. Jumping is always silent, unless you fall far enough to trigger a landing animation. Light level has an effect on stealth as well, albeit in a very limited way. While you are in shadow, enemies' rate of detection (the rate at which they progress through Awareness states) is slightly slower. This effect will not prevent an enemy from becoming Alert if given enough time, and is mainly noticeable at longer ranges. If you find yourself exposed while moving between cover, than sticking to the shadows can be helpful, especially in wide open spaces. In general, however, these shadows will be inferior to actual cover or good positioning. You can see if you are currently in shadow by looking at Corvo's hand(s). Bodies When an Enemy or NPC is killed or rendered unconscious, they become a body, which possess different characteristics when compared to regular NPCs. Whether dead or unconscious, a nearby body can be picked up by holding Interact while looking at them. Carrying a body will slow your movement, disable sprint and remove the use of your sword. Bodies can be dropped by pressing Interact and thrown by pressing Attack (Mouse 1). If an enemy finds an unconscious or dead body, they will typically run over to the body, immediately switch to the Searching state and inform their allies of the threat. Unconscious bodies will become dead if they touch water, receive damage of any kind or fall more than a certain distance (roughly twice your height). Advanced Stealth (Movement) Movement | How to Hide & Get AroundRather than slowly creeping between cover, utilize powers like Blink and Agility (especially in combination with map memorization) to engage in a much faster mode of stealth. Good movement technique (knowing how far you can jump, the detection range of enemies, etc) will facilitate this as well, even without powers. While some of this simply comes down to practice, there is a portion of technique that can be imparted directly. Movement is key to stealth--especially vertical movement. Because all NPCs in Dishonored have significantly reduced vertical awareness, it is possible to avoid detection simply by staying above street level. Even the smallest difference in elevation can prevent an enemy from detecting you, particularly if that enemy is directly below you (note that enemies who are farther away may be more able to become Aware of you depending on your elevation; the steeper the angle the better). The game is designed to complement this and every area will feature alternate pathways and vertical elements abundantly. Staying below enemies is also preferable to ground level. When stranded on the street and without cover, it is possible to use superior mobility and positioning to avoid enemies' vision directly, staying behind or to the side of them as they move around and Blinking between cover. For lethal stealth, it is often best to eliminate an enemy and immediately move on (especially when using Shadow Kill). This becomes more difficult the more enemies are present, so level awareness is useful. Even if you don't have levels memorized, exploration will often reward you with additional approaches. Knowledge of how Awareness works, watching patrol patterns and timing your advances accordingly, and learning how long you can afford to be exposed for all make stealth more efficient. Sufficient distance will also hide you--the further away an enemy is, the less perceptive they'll be. Level transitions (usually doors leading to other areas) stop time when interacted with (note that enemies cannot follow you between levels) meaning you can rush through and leave an area much more safely than you might otherwise. Movement Notes Sprinting In addition to increasing your movement speed (and therefore your jump distance), sprinting generates a significant amount of noise by default. Leaning While hiding behind an object (or any other time, though cover is needed to gain the stealth benefits), hit the lean buttons (Q and E on PC defaults) to lean to one side. This lets you peek out from behind an object without being seen. The easiest way to tell if you will remain hidden while leaning is as follows: If the enemy cannot see you when you are not leaning, then they will not be able to see you while you are. Mantling Almost any straight edge in Dishonored can be mantled, even extremely small ones (speedrunners use this fact, in conjunction with high framerates and precise setups, to mantle individual pixels, allowing them to mantle tall buildings). Additionally, the mantle animation can be triggered from much farther down than you might think, provided you are close enough to the wall or surface. Many jumps I once assumed to be impossible have since proved to be doable, if only just. Be aware that mantling disables your left-hand weapon/power for its duration. Vaulting Mantleable objects can be jumped over entirely via vaulting. There is not really a trick to this; the difference between mantling and vaulting is that during the former, the edge of the object is grabbed (by jumping against it) while in the other, the object is jumped over entirely. This often requires sprinting at the object before initiating the jump slightly before you would while mantling. Vaulting actually bumps the player up over the object, making it the fastest way to traverse many obstacles. Blinking Blink downward or into a mantle to break a fall; note that in the former case you will begin the descent by blinking and fall the remaining distance if needed. Landings There are four types of landing, which occur sequentially depending on how far you fall prior to contacting the ground. The first is a soft landing, which is silent. The second is a hard landing, which creates noise and involves a landing animation. The third is a soft damage landing, which inflicts fall damage, and the fourth both inflicts damage and triggers the landing animation. Quickslides & Slide Cancelling The problem with sliding is that it often leaves you exposed on the floor for precious seconds, or puts you a little further out of cover than you intended. You can actually cancel a slide at any point in its duration by sprinting in a different direction than you slid in. Note that the sprint button must be released and pressed again, not simply held down. Slides can even be cancelled mid-air, allowing you to pick your landing zone with greater accuracy. Note that sliding can be triggered almost immediately after sprinting--it is not necessary to "build up" momentum. Simply press the crouch button right after the sprint button. These quickslides can be continuously chained together to slide smoothly along the ground or even uphill. Advanced Stealth (Takedowns) Assassinations & Takedowns | Kill SkippingThere are several types of Assassination, each with their own set of animations: Stealth Assassinations, Combat Assassinations, and Drop Assassinations. The latter can be performed on an enemy as you fall towards them from above. Drop down and press the Attack button just before you land. This kills the enemy, is silent and negates all fall damage, regardless of how far you fell prior to performing it. Stealth Assassinations differ in that they must be performed on an unalert enemy, that is, one who is not currently in the Alert awareness state. All Assassinations kill enemies silently, but they also have several other useful characteristics. Initiating an Assassination automatically places the player and the enemy in the correct positions for the resulting animation, which means that it is possible to "teleport" to an enemy as well as cause them to be "teleported" to you. This allows you to catch up to enemies more quickly. Notes on Technique Assassinations can be initiated more quickly than the contextual icons would have you believe--there is a slight delay in the icons' appearance. Taken with the fact that assassinating "teleports" the involved entities, this means that the entire activation range of the attack can be physically skipped--a considerable distance in the context of stealth. This also applies to Drop Assassinations, as the activation area around the targeted enemy is actually quite large. It's possible to initiate a Drop Assassination from even the smallest vertical distance, and once you are falling, Kill Skipping also applies here. Think of the activation area as a tall cylinder, which widens near the enemy. NB: Remember that an Assassination can still be performed on an enemy with a higher level of Awareness--if the enemy's Awareness bolts have not broken (and for a brief moment after they have), you can still Assassinate them. And, provided they are vulnerable, you can execute (heh) an Assassination from any angle, not just behind someone. There are even multiple animations for each angle. Exploit this to quickly silence enemies before their Awareness rises fully and/or before they can alert their allies. This also applies to choking. Generally, the safest time to approach and neutralize an enemy is when they initiate an animation, such as dusting a shelf, smoking, or taking a piss. Note that you can drag your target backwards while choking them out by holding the appropriate button (S on PC). This allows you to snag an enemy and pull them into cover if you remain mindful of the angle at which you approach (as this will dictate which direction "backwards" will be once you begin your takedown). You do not necessarily have to share an enemy's elevation to initiate a choke--an enemy leaning against a table may still be approached from behind and choked out, for instance (see also Sticky Choking). Finally, when Assassinating or choking an enemy, you can hold the Interact button as the animation occurs. This will automatically grab the body, preventing it from falling to the floor and making noise as well as saving precious time, assuming you intend to hide it. Note too that you are free to move while this animation occurs, affording you even more flexibility when attempting risky takedowns. Kill Chaining & Stealth DamageAny attack made on an unaware enemy will receive a damage bonus. This includes all weapons and even applies to ranged attacks that clip the target or miss the head (i.e. a Bolt to the arm, leg, body). Headshots normally kill enemies instantly even without this, but knowing that this stealth damage applies to other attacks can be useful. Stealth damage also helps facilitate Kill Chains--sequences of attacks designed to allow the stealthy player to quickly defeat several enemies without being Detected. It can be as simple as a headshot with a Bolt followed by an Assassination to take out two enemies nearby one another. Obviously speed and precision are key here, as attacks must flow unceasingly and be designed to kill or incapacitate multiple enemies within seconds. Take a moment to plan out your attack, take stock of your resources and the environment. Powers allow for chains to be extended even further (particularly Bend Time). Springrazors can be attached to ceilings, walls, and living things, and can kill many enemies instantly. Killing an enemy with a headshot will raise nearby allies' Awareness to Searching, yet they will not instantly detect you if proper positioning and or timing is maintained, allowing you to finish them off without raising an alarm. Two Unaware enemies nearby one another can be Assassinated without detection if the attacks are performed quickly enough. And so on. Combine this with map memorization to rapidly eliminate dozens of enemies. Note that Sleep Darts and choking can be used together for the same purpose, particularly Instant Sleep Darts. Power Slashes In conditions where an enemy would normally be vulnerable to an Assassination, a slash of the sword can be performed instead, instantly killing them. The conditions needed for these slashes are similar to those that allow Assassinations (an enemy that is largely within range, is not currently Alerted to the player, or is currently Staggered). If however the enemy is too far away from the player, partially obstructed, or one of a few other factors apply, the Assassination animation will not play, and the sword will instead execute a Power Slash. Power Slashes instantly kill enemies and are mostly silent. These slashes can be triggered most reliably by initiating an attack while looking away from an enemy or while jumping (though you cannot of course be currently able to perform a Drop Assassination at the time of this attack; see "Video Demonstrations"). Useful for quickly taking out Tallboys, or in any circumstance where speed is essential. Advanced Combat
Now that you have a good understanding of the essentials of Dishonored, feel free to study this collection of techniques. This section focuses on the various techniques and components of combat, including tactics and strategies. For those reading through both sections, note that some techniques may be listed in both, as they are useful for both modes of gameplay. Components of Combat Assassinations There are actually several types of Assassination: Stealth Assassinations, Combat Assassinations (AKA "Counterattacks"), and Drop Assassinations. This last kind can be performed on an enemy as you fall towards them from above. Drop down and press the Attack button just before you land. This kills the enemy, is silent and negates all fall damage, regardless of how far you fell prior to performing it. Combat Assassinations differ in that they are performed on an Alert enemy. The special condition to allow for this is that the enemy must be staggered or otherwise vulnerable. Staggering enemies is the key to combat. Slashes & Blocking A slash is a sword attack made without the special conditions of an Assassination or Power Slash. It deals minimal damage to most enemies. A combo of 1-3 slashes will stagger an enemy (depending on the enemy: Lower Guards require only 1 for example, while Overseers need 3). The attack has some additional utility as well. For instance, active grenades struck by your sword will bounce at speed in the direction you slashed in--a faster alternative to picking it up and throwing it back manually (which you can do as well by Interacting → Attacking. This gets you an achievement). Blocking intercepts attacks made with other melee weapons. It does not protect against ranged weapons or attacks coming from elsewhere, such as the rear. You may hold a block for as long as you'd like, though doing so slows your movement and disables the use of your left-hand power/weapon. Successful parries stagger and knock back enemies, making them an essential tool. Blocks will take priority over (or "cancel") any other combat input, meaning you can cancel a sword strike at any time by pressing the block button. Healing When a healing item is consumed, a portion of your health bar regenerates (this also occurs after severe damage, to a more limited extent). The speed and quantity of this regeneration can be affected by specific bonecharms and enhancements. If further damage is taken before the regeneration is complete, the remaining health will be lost. Knockdowns Enemies can be Knocked Down through various means. The easiest way to Knock Down an enemy is by shooting their knee with a Crossbow Bolt (this also instantly Staggers them). Windblast, upgraded pistol ammunition, and explosions are also fairly consistent options. Landing on an enemy will down them and cancel fall damage, but will also immediately Alert them. While an enemy is Knocked Down, a type of Assassination can be initiated against them which will kill them where they lie. Any other attack made against a Knocked Down enemy--even one getting up--will also kill them. Staggers An enemy can become staggered in several ways, the first of which is parrying (briefly explained in the "Combat" section). Additional methods will be explained shortly. While in this state, an enemy cannot attack, call for help, interact with Alarms or other security systems, and is vulnerable to all forms of attack. Additionally, staggered enemies can typically be Assassinated regardless of their Awareness level. Typically, any type of explosion, collision (with an object or the player) or attachment (of a springrazor, sticky, etc) will Stagger, as will the effects of several powers (Possession/Windblast) and the application of sufficient damage. Notes on Technique First, note that there is a window of time after the enemy exits their staggered state in which they can still be Assassinated. Second, swords (both you and your enemies') can strike at a greater distance than their models would suggest. For you as the player, this means that you can slash enemies who are farther away than your sword appears to reach. Kill SkippingDuring an Assassination, the player and the enemy are automatically placed in the correct positions for the animation, which means that it is possible to "teleport" to an enemy and/or cause them to be "teleported" to you. This allows you to move around the battlefield more easily and is another way to manage distance between you and non-vulnerable enemies. Additionally (and more significantly), Assassination animations include I-frames. I-frames, short for invincibility frames, are defined as a period of in-game time wherein the player is immune to damage. This means it is possible to skip not only distance, but incoming damage as well via properly timed Assassinations. Think of enemies as tools--each one represents an instance of safety to be used at your discretion. Timing: An Example Due to the short invincibility window offered by Assassinations, timing is paramount if you are to make the most of it. Usually, initiating a kill just before an enemy attack will guarantee your protection from said attack, and perfect timing can sometimes expose the attacking enemy to a quick slash before they can attack again. You can use staggering to prepare a Kill Skip for yourself. For example, imagine you are fighting two enemies who have just approached you. You stagger the closest one with a Bolt and immediately Assassinate them just as the other attacks. That damage is negated, but the enemy is still alive, and you see a third charging in. Blocking the second's strike, you wait for the third enemy to approach. The second enemy recovers, so you shoot him with a Bolt, staggering him again. The third enemy attacks you as the second is Assassinated. Now he is alone. Power Slashes In conditions where an enemy would be vulnerable to an Assassination, a slash of the sword can be performed instead, instantly killing them. The conditions needed for these slashes are similar to those that allow Assassinations (an enemy that is largely within range, is not currently Alerted to the player, or is currently Staggered). If however the enemy is too far away from the player, partially obstructed, or one of a few other factors apply, the Assassination animation will not play, and the Sword will instead execute a Power Slash. Power Slashes instantly kill enemies, and are mostly silent. These slashes can be triggered most reliably by slashing at a vulnerable, on-screen enemy while keeping your crosshair clear of said enemy (see "Video Demonstrations" for a tutorial). Note that distance management is also an integral part of reliably executing these slashes--at very close range it will be much more difficult to avoid triggering an Assassination. The Power Slash is much quicker than a Combat Assassination and has a larger range, but does not grant I-frames. Advanced Combat (Continued) Staggering & CombosThough the Parrying → Assassination cycle is indeed foundational to combat, there are, as mentioned, a multitude of methods to induce this state in enemies. Regardless of the cause, every Staggered enemy functions the same way (with the notable exception of "boss" characters such as Daud or the Torturer, who may still be Staggered but will even then remain immune to Assassination. Treat their staggers instead as brief openings to use simple attacks). While an enemy is Staggered, Combat Assassinations can be initiated against them, and they will be vulnerable to all forms of damage. Because Assassination is, along with movement, the primary method to avoid damage (see Kill Skipping), it is important to set up and capitalize on Staggers as needed, or to do so in conjunction with simple attacks (see below). Between all the powers, weapons, and environmental hazards in Dishonored, there is an enormous number of possible combos, far too many to include here. Here are just a few: Crossbow & Sword There are many different variations and attack patterns possible with this combo. An easy one is as follows: Bodyshot (First Enemy) → Assassination; Kill Skip (First Enemy) → Parry (Second Enemy) → Assassination (Second Enemy) [Repeat]. Another: Parry (First Enemy) → Bodyshot (Second Enemy) → Assassination (First Enemy) → Assassination (Second Enemy). Headshots are surprisingly consistent at close range, so consider incorporating them as well. Springrazor & Sword The Springrazor excels at removing clustered groups of enemies quickly. Example: Springrazor → Assassinate (Survivor; Repeat). A great addition is to slide-stagger (see Types of Attack) the front-center enemy before planting the Springrazor. Pistol & Sword The upgraded pistol is an absolute monster when it comes to damage output, but its greatest strength is the fact it Staggers (and, in the case of Corvo's Pistol, damages) nearby enemies when fired. This makes it an exceptionally easy combo builder. Example: Bullet → Assassination [Repeat]. Another: Bullet → Assassination → Parry → Assassination [Repeat]. Grenade & Pistol A thrown grenade will actually stagger an enemy, which is useful for preventing their escape. Grenades are most viable at medium range due to their inaccuracy and blast damage. For this reason it pairs well with the Pistol. Try throwing a grenade behind an approaching group of enemies--they will shield you from the blast provided you are not too close, and most survivors will be sent flying towards you. Grenade → Bullet (Survivor; Repeat) → Assassination (Knocked Down survivors). NB: Sprinting will drastically reduce the accuracy of ranged weaponry. Accuracy upgrades can help to mitigate this. Also, certain enemies (Officers, Thugs, and Assassins) will sometimes dodge or block your sword attacks. While this can be annoying, realize they are incapable of performing other actions (i.e. attacks) while in this state--if you are fast enough this can present an opening for a follow-up attack, a rapid reposition, or a chance to deal with a different enemy. Typically, staggering the enemy will remove them from this evasion state. Types of Attack Though the safety and surety of an Assassination is certainly valuable, not every attack will (or should) Stagger an enemy. Sometimes, it is preferable to employ a simple attack (one intended simply to reduce a target's health rather than Stagger or Assassinate them), of which there are some capable of killing outright. This latter category includes headshots, rewired Security Devices, "mine" weapons (including grenades and springrazors), powers or enhancements like Bloodthirsty or Windblast II, and much more. The choice to use a Combat Assassination, a Bloodthirsty combo, a simple attack (whether with Devouring Swarm or a grenade), or a Power Slash over any of the alternatives is one that should ideally be made with some intention. Each type of attack has its strengths and weaknesses--some are faster, some are more flexible, and some are more reliable. There is no perfect attack in this game. Combat is a puzzle, but it's closer to a Jenga tower than a jigsaw. Chaos and creativity are the gems buried in the beating heart of Dishonored's combat system. All this to say... It's up to you to pick and choose the particular deaths awaiting your enemies. Have fun! Advanced Combat (Movement) Circling & DodgingWhile fighting multiple enemies, remaining in place will get you surrounded and overwhelmed. Movement is often preferable, for several reasons. Circling and or sidestepping enemies allows you to continually slash your opponent, which, as mentioned, is a viable way to kill or stagger an enemy (particularly when using certain bonecharms, i.e. Whirlwind). Another use is evading damage. Many enemies in Dishonored charge at or lock onto the player before attacking them, making it all too easy to move aside at the last minute, much like a matador circling a bull (which, incidentally, helps you maintain mobility and situational awareness). This positional advantage is the real value of circling. On the topic of movement, it is possible to physically dodge enemy sword slashes, which usually fall into two categories: Vertical and horizontal. The latter is more common, but both can be dodged with precise timing. To dodge a horizontal slash, slide or crouch--note that you must be within the correct range as well (generally not farther than a pace or two from the enemy). To dodge a vertical slash, strafe to the side instead (also a viable reply to charges). Quickslides & Slide CancellingSliding can be triggered almost immediately after sprinting--it is not necessary to "build up" momentum. Simply press the crouch button right after the sprint button (these quickslides can be continuously chained together to slide smoothly along the ground and even uphill). Note that while sprinting generates noise by default, sliding is silent, making it a good way to close that last bit of distance. The problem with sliding is that it often leaves you exposed on the floor for precious seconds, or puts you a little further out of cover than you intended. You can actually cancel a slide at any point in its duration by sprinting in a different direction than you slid in (note that the sprint button must be released and pressed again, not simply held down). Slides can even be cancelled mid-air, allowing you to pick your landing zone with greater accuracy. Slide Staggers An easy way to stagger an enemy is by sliding directly into them. This will stop them in their tracks and instantly stagger them, providing an easy kill. You are free to use weapons or powers while sliding or as you rise, including Springrazors. After either killing the staggered enemy or shooting another, a slide cancel or a quick teleport will negate the danger of being immobile on the floor. Relocating to the side, back, or above the group of enemies is preferable. The best combo for slide staggers, though, is to slash with your sword as you collide with your target. This combo is surprisingly effective, as it instantly kills the enemy (and often dismembers their leg[s] as well). Positioning & Prioritizing | Environmental AwarenessWhile using all of these techniques, it is important to remain aware of the environment. Thrown bottles stagger enemies. Enemies colliding with breakables will receive extra damage and be Knocked Down. Windblast and basic sword slashes will send enemies flying off nearby ledges to their death. The cables supporting street speakers can be shot with projectiles or cut with the sword to send them falling down onto enemies, delivering an explosive end. Rewired Walls of Light and Arc Pylons can serve as makeshift safe zones. Enemies can be lured into said devices by the dozen. Wooden doors are breakable via bullet, explosion, and Windblast, while metal doors may trap you if they are not unlocked beforehand. And so on. In any combat encounter, prioritizing the most dangerous targets is essential. Rather than running headlong into enemy squads, develop strategies and tactics to dismantle their ability to defeat you--either on the fly or before attacking. Generally, prioritize enemies with ranged attacks. If you happen to review the "Enemies & NPCs" sections, I have marked priority targets with ∆. Remain aware of the area: Open ones allow many enemies to surround you, while chokepoints and corners protect your flanks and funnel enemies toward you. On the other hand, open areas provide ample opportunity for escape and quick movement, something that may not be present in tighter areas. Differences in elevation can prove useful tools, whether for Drop Assassinations or for evasion. Damage Reduction Attacks made from off-screen (or in other words, damage originating from enemies who are not on-screen) actually have a damage penalty applied to them, such that the player is able to survive 1 additional sword strike. The effect is probably intended to prevent the player being killed by enemies they didn't even know were there. Extra Tech & Miscellaneous Unmentioned ElementsBecause Steam has a frustratingly strict character limit and this guide has enough sections already. Keyhole Peeking Hold Interact to peer through the keyhole of any door (except for those which are level transitions). You will be able to hear and see beyond said door; use your mouse or stick to move your view. Press Interact at any time to exit this mode. Always check your surroundings before peeking since your awareness of the room you are actually in will be essentially nonexistent. Note that it is not necessary to physically position yourself in front of the door to do this--it can be accomplished from any position from which you can Interact with the door, including above or below it. Locking Swords Occasionally, if you and an enemy slash at the same time, your swords will become briefly locked together. This disables the use of your left-hand tools, but other enemies will not attack during the struggle (though they may attack immediately after). Whoever loses the contest will become momentarily staggered. Press Attack (Mouse 1) rapidly to overpower your opponent and gain the advantage. Water Bodies of water will break your fall, though be aware that there will likely be Hagfish in any such body of water. Additionally, and perhaps this is obvious, but very shallow water--including puddles, fountains, etc--will not negate fall damage, breaking little except your ankles. NoveltiesMiscellaneous tricks. Usefulness not guaranteed. C-Tapping & Crouch Jumping By rapidly switching stances (entering and exiting stealth mode) as you move forward, you can achieve a slightly faster speed while making reduced noise. Combining this with the Boot Stealth upgrades reduces the potential for noise further. Another, more consistent option is continuously jumping while remaining in stealth mode. This is also slightly faster than regular crouching while making no noise. Time Bomb Activate Stop Time. Throw a grenade at your chosen target(s), then shoot an Incendiary Bolt directly in line with the grenade, which will have frozen in mid-air due to Stop Time. When Stop Time ends, the bolt will strike the grenade, propelling it at great speed and causing considerable damage. Variants: Stop Time. Fire a Crossbow Bolt at your chosen target(s). Attach a Sticky Grenade to the Bolt. End Stop Time, or simply sit back and watch. Quick Switching This technique allows you to reload the Crossbow and Pistol much more quickly, prior to or in lieu of upgrading reload speed (because it reloads the entire magazine, this is actually always the fastest way to reload the pistol, even with max reload upgrades). To perform it, fire your weapon and immediately equip another power or gadget using its quick bind (any power or any other weapon will work). As soon as Corvo's hand starts to rise back up towards the center of the screen, immediately switch back to the original weapon. This will skip the reloading animation, letting you fire at a much higher rate relative to the base reload speed. Similarly, you can also use this technique to switch ammunition types more quickly. Body Launch While holding a body, press Interact. As the body falls, quickly fling your crosshair towards the right, far enough to look almost directly behind you. With the correct timing, the body will be flung at great speed away from you. Consistently aiming these launches is difficult, so there are few situations in which they will be useful in most playthroughs. It's still pretty fun though. Bomb Slide While holding a Whale Oil Tank, its hitbox will be disabled (note you may also walk through a static tank--only sliding or attacking will affect it). This is presumably meant to stop enemies from shooting the tank while you're holding it in front of your face, but it also means we can do a few tricks. While being chased by one or more enemies, obtain a Whale Oil Tank. While holding the tank, execute a slide. At some point early on in the slide, press Interact to drop the tank to the floor. Switch to a ranged weapon and turn around quickly to trigger the tank as your pursuer approaches it. NB: You can also simply drop it without sliding, but this may make the tank's landing position less consistent. If you're lucky, the tank will collide directly with the enemy and trigger on its own. This works best in chokepoints where your pursuers will have to funnel through a tight space. Best used for situations where you are too close to the enemy to throw it normally without damaging yourself. Swap Launch While holding a grenade, activate it. Wait until the point you desire to throw it at, then switch to another power or gadget via quickbinds. This will automatically toss the grenade, allowing for faster combos. Additionally, the grenade will be thrown much further if the launch has the perfect angle. Emergency Knockout It is possible, though not entirely consistent, to render an enemy or NPC unconscious by throwing an object (such as a bottle or glass) at their head. This works best on unaware characters. Be warned that if this should fail, you may have a problem on your hands, so consider saving your last Sleep Dart for such an emergency. That way if the tactic succeeds you save ammo, and if it doesn't you're still prepared. Springrazor Surprise Attach a springrazor to any throwable, including body parts, Whale Oil tanks, and bottles. Then, pick up said throwable, making sure to interact with it rather than the springrazor--this will leave the razor attached to the object in question, and leave you free to throw the improvised shrapnel grenade at whatever unfortunate you so choose. Highly effective against Tallboys. Razor Bolt This only works with Bend Time II. Bend Time. Fire any variety of Crossbow Bolt toward your chosen target(s). Equip a springrazor and attach it to the bolt--try to attach the springrazor to the side of the bolt facing the target(s). Note that interacting with said bolt will temporarily bring it into your time, causing it to fly forward before freezing once again. As the bolt nears the enemy, the springrazor should trigger automatically, hopefully killing your target. This one-shots tallboys and can be great for clearing out groups of enemies, especially when you consider that it is possible to launch several of these bolts per use of Bend Time. Razor Jump Speaking of Springrazors, it's possible to use the knockback they inflict to launch yourself into the air. Simply place several and slash to trigger them. The more razors, the higher you'll go--and damage received remains minimal thanks to the Springrazor protection applied to the player. Sticky Choking Fall towards an enemy that is currently facing away from you. Just as you approach their head (note that you must not be directly above them), press and hold down the Choke/Block button. Properly timed, this will result in a choke just as if you had approached an enemy normally, canceling all fall damage and allowing you to knock them out. Arc Welding Anything other than a living, attuned entity will activate a Wall of Light, but once triggered the discharge does not discern between entities present--anything between its emitters will be vaporized. This means you can trigger the Wall with a projectile, throwable, or body in order to eliminate any other enemies passing through it, even if they would ordinarily be unharmed. As you can see, there are dozens of potential combinations to try--I couldn't list them all if I tried. So, if you take away anything from this section, it should be the encouragement to experiment and find tricks of your own. Video Demonstrations {W.I.P}
展示了部分前述技巧和原理的视频。请注意,本部分仍在制作中,并非所有技巧的完整目录。 注:部分视频没有音频,对此深表歉意。 战斗遭遇示例中使用的技巧:使用闪烁技能重新定位(此处用于躲避远程攻击、缩短距离并为潜行攻击创造机会)、下落暗杀、嗜血连击接手枪、子弹打断敌方远程攻击、对倒地敌人的暗杀,以及利用近距离手枪的爆炸击退效果进行的战斗暗杀。
强力斩击教程 应对高个敌人:强力斩击 应对高个敌人:能量使用 注意击败第二个高个敌人时使用的强力斩击。 击杀跳过示例A 击杀跳过示例B:滑铲击晕 切换投掷 电弧焊接 注意格挡的击退效果如何将军官推入光墙。 快速切换 潜行遭遇战示例... 敌人操控:环境利用 注意用于制造噪音的金属重新接线面板。 粘性窒息 剃刀跳跃 混乱系统
Dishonored reacts to your gameplay in several ways; this constitutes the Chaos System. The basic description "on the back of the box" is that this system dynamically reacts to your choices. While technically true, but those descriptions leave it pretty vague. Because of this, many players have felt frustrated with the Chaos system, as it is only momentarily mentioned in the in-game tutorials. I've heard many express the opinion that the system punishes them for playing aggressively. I understand how someone might feel this way, especially in the case of alternate endings (see below). Personally, I have developed a different opinion on this, which I will include after the more objective information. By sharing this information and explaining more clearly how this system actually works, I hope that you will be able to avoid feeling confused or punished. Effects of Chaos LevelUnique encounters, dialogue, the quantity of certain enemies, and certain physical environments are affected by Chaos Level. In High Chaos, Guards, Weepers and Plague Rats appear more frequently and in higher numbers. Characters express pessimistic or cruel thoughts. The special encounters involving enemies and NPCs found throughout Dishonored become more miserable, violent versions of themselves. In Low Chaos, characters are kinder and more optimistic, there are fewer Weepers and Plague Rats, and once again certain aspects of some physical environments are changed to reflect the reduced chaos. Some encounters themselves have alternate outcomes which are related to Chaos. For example, Griff the Scavenger can be found being extorted on Blood Ox Way during "High Overseer Campbell". Obviously the player can choose to help him out and gain access to his wares, but if Griff is left to fend for himself, he has his money stolen and cannot afford elixir, and so becomes a Weeper by the next mission. Endings Another major outcome of Chaos Level is the state of the final level, "The Light at the End", and the final ending cutscene. Note that only the Chaos Level at the start of the last level is considered for the purposes of the ending, and that Chaos-specific events are determined from the last Chaos level achieved. Therefore, it is possible to have High Chaos for several levels, then work your way down to Low Chaos before the last couple of levels, or visa versa, and so on. You can play lethally for the first few levels and still get the "good" ending. Spoilers! Note: Hover over the black bar and scroll down without moving the cursor to easily view this section on PC. High Chaos When the player surpasses a certain Chaos level, the game is considered to be in High Chaos. In this state, Kingsparrow Isle is in the midst of a storm and the traitorous Loyalists have turned on one another. Pendleton and Martin die by wound and suicide respectively, unless the player intervenes. Admiral Havelock, alone up in Burrows Lighthouse, panics at the approach of Corvo and threatens to drag Emily off the top of the tower. There are several ways to save Emily and or defeat Havelock: A careful shot from a ranged weapon, powers such as Possession and Stop Time, or simply Blinking forward and letting him fall but grabbing Emily (Interact). There's even accommodation for a stealthy approach in the form of a ramp structure below the main catwalk, which allows you to sneak up behind Havelock and Assassinate or incapacitate him. After rescuing Emily, the Outsider shows you a vision of the world as it is, and what it will be: Full of death and misery. There are various scenes, also seemingly taking place in the Void, which reflect the specific choices and circumstances made in your playthrough. Medium Chaos Yes, there is actually a Medium Chaos. It is achieved when the player has a higher chaos total than Low Chaos but less than what would be considered High Chaos. The ending cutscene and level state is generally the same as High Chaos, but there are a few small differences. For example, Samuel has a different speech to Corvo as the two arrive at Kingsparrow Isle, wherein he also expresses his disappointment with Corvo and general disillusionment, but will not alert the guards to your arrival (unlike in High Chaos, where he will do both). High/Medium Alternate Ending In High Chaos, if Emily falls or otherwise dies, the game over screen does not actually appear, and the game instead ends as normal (after a short delay to allow for quick-loading). The Outsider then shows you the Void vision. There are still various scenes reflecting the specific choices and circumstances made in your playthrough--including, in this case, Emily's death. The overall effect is that the world seems to be even worse than in High Chaos. Low Chaos If the Chaos level is below a certain threshold, the game is considered to be in Low Chaos. In this state, Kingsparrow Isle is brighter, under fair skies. Samuel will express his admiration for Corvo and wish you good luck. Pendleton and Martin are found in Burrows Lighthouse in this ending, where they sit dead at the table after having been poisoned by Admiral Havelock. In this version Emily is locked in a nearby room and Havelock will claim that he does not wish to fight you (he will actually attack once you take the key, unless you take it as he speaks). After rescuing Emily, the Outsider shows you the vision. As always, there are various scenes reflecting the specific choices and circumstances made in your playthough. If Sokolov and Piero are still alive, for example, it is revealed that they work to cure the plague and are ultimately successful. What Counts?Killing and performing certain actions (e.g. certain side objectives {i.e. Granny Rags missions}, choosing lethal options for mission Targets, etc) raises Chaos. Conversely, certain actions can lower Chaos, and incapacitating or avoiding a majority of enemies also results in Low Chaos. Interestingly, Chaos Level is raised not only by killing enemies, but by Alerting them as well. Therefore, the Chaos total of a lethal but stealthy player would be lower than one who kills all enemies openly. Finally, note that a significant number of enemies may be killed per level without resulting in High Chaos (around 20% of the total number of characters per level, which is usually about 50-60, meaning the Chaos buffer is usually 10). For every six enemies killed, four Chaos points will be accrued. EntityRaises Chaos?Human (Guard, Whaler, Thug, Civilian, etc)YesWeeperYesPest (Rat, Hagfish, Krust)No WolfhoundNo TallboyYes TargetLethal: Yes; Nonlethal: No Why?Now that we understand how the system works, I'm sure you're wondering: Why? What else are we supposed to do with all the weapons the game gives us? While I want to avoid spending too much time here since this isn't a review, I do think there is a genuine intent behind this. The game has a theme of power and how it corrupts people. Many characters exhibit this corruption. Now it's the player's turn, to use their god-like power how they choose. By making the "good" choice require you to forego the temptation of mechanical fun, Arkane incorporates the moral struggle directly into the gameplay. If you dislike the system, that's understandable. To those who feel this way, I suggest ignoring it. After all, most of the effects of High Chaos allow for more combat/High Chaos stealth. From a gameplay perspective, it only provides a better challenge. As for the "bad" ending that some lament, I'd simply suggest trying a LC playthrough next. Difficulty & Challenge Runs
Difficulty ExplainedDishonored has four difficulty settings, which affect several gameplay factors: How much damage the player receives, how quickly Awareness rises, and so on. Generally, difficulty in Dishonored is a pretty smooth and linear progression. Stealth remains fairly consistent throughout all these settings, with speed of detection being the central variable. In combat, enemies deal more damage, attack more quickly and gang up on the player in greater numbers (that is, a greater number can attack the player at once). Still, Dishonored is not an exceptionally difficult game, as it is designed to permit you to experiment with the various tools and powers freely. Of course, you can make it as exacting as you like by completing various challenge runs (see below). Here I have listed my personal opinions and experience regarding each difficulty level. These are just to give you an idea of what the game generally feels like on each setting. Easy Easy is marginally less difficult than Normal. I find its effects are most noticeable in stealth, which feels significantly different (and much easier) from stealth on the highest difficulties. Easy difficulties have something of a stigma in gaming, but Easy difficulty is actually the preferred choice for speedrunners, as it allows for greater movement potential (due to things like decreased fall damage, etc). Normal This is the default setting of the game, and it is a fairly balanced and forgiving experience. With some games starting on a harder difficulty can be more engaging, but I do think this is one case where most first time players will have more fun on Normal. Hard On Normal and Easy, good movement technique is not really necessary, as Awareness rises much more slowly and enemies are weaker. On the higher difficulties though, good fundamentals are much more valuable. Very Hard Combat, as always, does get more difficult, becoming quite unforgiving. That said, if you are able to confidently handle a squad on Hard, Very Hard will not be much of an adjustment. Once you have a good grasp on the basic mechanics, higher difficulties are great for practicing technique and skill. I would recommend that new players avoid jumping straight to this difficulty, as hack-and-slash combat will not be very viable on these settings and it can be more fun to have that extra bit of leeway to experiment with. Many attacks are capable of bringing you to the brink of death instantly (looking at you, fire breathing). Still, if you wish to jump in at the highest difficulty, it will be doable--the real choice that I might caution against for a first playthrough would be going for a challenge/achievement run on Very Hard, again simply because it might distract from enjoying the story/atmosphere and or experimentation. But to each their own. Below follows a table showing how many sword strikes are needed to kill the player (from full health) on each difficulty setting. No health or armor upgrades were used during testing except where so noted, and the enemy was a standard City Watch Guard. Difficulty SettingSword Strikes to Kill With Vitality+Upgraded Armor Easy6 7 Normal5 6Hard45 Very Hard34 Note that there is a limit to how many enemies may attack you at once. This changes with difficulty setting, and is why it is so crucial to avoid being surrounded on the highest difficulties. Three attacks to die may seem like a lot, but when 4+ enemies are attacking you at once it is reached almost instantly. Other things, such as enemy movement speed, do not change with difficulty, which is why good movement is always useful. Challenge RunsGhost The aim of this run is to complete the base game without being detected once. There's actually an achievement for it, so it will be clear enough if you succeed. Make sure that the "Never Detected" indicator on the mission summary screen is checked after you complete each mission. Awareness bolts do not count towards being detected: Only enemies who are fully Alerted to you count. The first time I completed a ghost run, I made the mistake of assuming any level of Awareness counted, so I ended up going through the entire game without raising a single bolt. Flesh and Steel If you're going for the achievement, you are still allowed Blink (just make sure you finish the game without purchasing another power/enhancement, including Blink II). This is a stricter variant which requires you to not use any power or enhancement other than Agility I. Agility is necessary to progress past a specific spot in the game, so it's the only exception allowed. Playing Dishonored without Blink is an interesting experience. It can be somewhat frustrating for players who have gotten used to using it, but (in a testament to the level design) the game is still more than playable, although much more difficult. Ghost of Steel (S.O.G) The ultimate hardcore challenge, only to be attempted by the realist and most epic Dishonored gamers. Here are the rules: Never be detected (as in, fully Alert any enemy or NPC) Never raise an Awareness bolt Don't use any powers or enhancements, besides Agility I (Blink I is allowed in Void sections; if you substitute Blink for Agility you'll get the Mostly Flesh and Steel achievement, but the run will be much easier) Don't equip any bonecharms, because magic is cringe Never take damage (see below) Play on the hardest difficulty (Very Hard) Optional: Never kill anyone (this will also nab you the "Clean Hands" achievement) Optional: No knockouts (choking, sleep darts, etc) Optional: Disable player HUD (leaving on certain elements, i.e. Awareness bolts, is still allowed) Technically all these rules are optional, as you can play however you like. However, if you want maximum challenge, said rules make for an interesting experience. A piece of advice to those trying this out, especially if you're following the "optional" rules: Rebind your quicksave/quickload inputs to be easily accessible (I prefer "," for save and "/" for load), and quicksave whenever you find a safe spot. Also, don't forget to manually save often and leave the "Auto-save in Journal" option enabled. You'll want another file to fall back on should you quicksave in a bad spot. I was surprised to see there wasn't really an established name for this type of run online, so I'm presenting this one. Feel free to comment yours if you think it's better. 100% Also a speedrun category, this entry is pretty self-explanatory. Collect all collectables--loot, coins, runes, bonecharms, etc. You can speedrun this if you want (https://www.speedrun.com/), or simply 100% the game at your own pace. Miser This is just a variant of the 100% run, where all valuable (coin-giving) items must be collected but other collectables can be skipped. Doing this while also purchasing no upgrades (thereby maximizing profits) is known as a Greedy Run--see suga show's guide. No Hit Complete the game without taking any damage. Some people discount fall damage, but generally any enemy attack counts. You can combine this with other runs as well to provide an enhanced challenge. Piero% This challenge run involves completing the game without purchasing any upgrades from Piero (and as he is the only source of upgrades, this means no upgrades at all). The title is mostly a joke, since this is not a speedrun category. But it could be. It could be. Conclusion & News
感谢阅读,希望你能学到一些东西。我计划在未来更新本指南,收集更多技巧、进行更多测试并提升自己,敬请期待。 其他资源 以下是一些可能对你有帮助的其他资源。它们大多侧重于一般游戏玩法之外的内容,或者只是其中的一部分而非整体,这也是我制作本指南的原因。不过,它们仍然是很棒的资源,值得一看(我确实看过)。每个人都有自己的视角和侧重点。 DMA64的简洁界面指南 如果你想要一个特别精简和简约的界面,这个指南就是你的不二之选。 suga show的《羞辱1》趣味玩法!各种挑战! 更多让你忙个不停的挑战玩法。 羞辱维基不出所料,这个来源内容相当深入,但更侧重于背景故事等方面,而非游戏玩法策略。如果你想了解该系列的故事和角色,不妨查看一下。 Stop disappearing bodies!(作者:c0h3n) 这是我获取文件配置部分信息的来源。 《羞辱》全硬币位置(作者:blunus) 如果你想要一份《羞辱》中所有硬币和战利品位置的全面指南,我推荐这篇。 《羞辱》深度指南(作者:Nos) 有趣的是,我在最初的搜索中不知为何没有找到这篇,但幸运的是现在找到了,因为它确实是一份很棒的指南。 《羞辱》全成就指南(基础游戏全部50个成就)(作者:ThePugHybrid) 献给所有成就猎人。请注意,本指南仅涵盖本体游戏,正如标题所示。关于DLC成就,已有其他指南可供参考,其中部分由同一作者撰写。 100%成就指南 - 《耻辱》,作者:RothMax 另一篇成就指南——这篇同样涵盖DLC内容。 模组 对于希望增强或改变《耻辱》游戏体验的玩家,有一些不错的模组。以下是我遇到的几个,如果你知道其他未在此列出的模组,欢迎在评论中分享。 《耻辱》ENB和SweetFX,作者:Carinth 一个调整游戏画面的模组。我觉得效果相当不错,不过有些人更喜欢原版画面。 Wwemod 一个支持许多(单人!)游戏的修改器/作弊引擎。这是《耻辱》的一些模组介绍,能为新游戏+提供相当有趣的替代体验,也有助于获取特定片段或进行测试。 《耻辱》模组“Medieval Tavern”可改善游戏体验,它对肢解系统进行了修改,并对战斗机制做了一些调整。注意:目前相关链接无法使用,不确定未来是否会恢复。 《耻辱 终极版》非官方补丁由Outsider 1及其合作者制作,包含众多bug修复、文本错误修正,还有核心及可选模组等内容,所有功能整合在一个补丁中。 最新更新内容: 1. 添加了分区标题。 2. 重写了多个条目。 3. 新增了用于容纳护符/符文列表的章节。 4. 扩充了安全装置相关内容。 5. 补充了多个缺失的护符条目。 6. 对各类条目进行了说明澄清。重构并完成了骸骨护符部分。 编辑了初始部分的内容。重写了战斗和潜行部分。 全文进行了逐行编辑。 添加了大部分符文位置。 补充了更多符文位置。增加了若干提示。在战利品列表中补充了遗漏物品。 完成了符文位置的整理。添加了更多提示。 逐行编辑。添加了大部分蓝图位置。 小幅度编辑。 重写并扩展了多个部分。 逐行编辑。 将“Watch Captain”替换为游戏内准确名称“守卫军官”。 添加了新的演示视频。 进行了三次小幅度修正和补充。