换一换
换一换 


Want to like the game but you’re bouncing off the opening hours? This guide is designed to get you started and equip you early with skills that make the game easier (spoiler-light). Use the section "Least-Effort (low-spoiler) Route" of this guide as your main path. Consult other sections of this Guide if needed. Especially the section "25 Early-Game Charms". This guide covers approximately 15 hours of playing time. Read Me First Hollow Knight can certainly be played without a guide. But I felt like writing one. This guide reflects only my writing/explanations. If it seems complicated or unclear, that’s on me — not the game. If you find it confusing or demotivating, please just ignore it and play without this guide. There may still be errors in it. This guide covers 15 hours of pure playing time (some people will need less time). If you are playing the game for the first time, however, this can quickly turn into 30 hours. So you should enjoy it. Please don't torture yourself through it. Instead, play the game differently. Above all, slower. Team Cherry gives you an infinite amount of time. Comments and suggestions are very welcome — feel free to leave one! TLDR Reach a total of 8 Notches[hollowknight.wiki] early by collecting 25 specific Charms[hollowknight.wiki]. More notches and more charms mean stronger loadouts, making the game much easier without removing the core challenge. This isn’t a step-by-step walkthrough — explore, experiment, and use the Hollow Knight wiki if needed (links included). Preface Lost in Hallownest? There’s a way to make Hollow Knight much easier — without mods or cheats — just by playing as early as possible on a path that focuses on Charms and Abilities. Team Cherry actually built this option right into the game. Scope (early game, spoiler-light)This guide covers only the opening hours. We stay in early-game areas and require no bosses beyond Hornet Protector. No mid- or endgame zones, no story reveals — just a least-effort order of what to pick up and when. The goal is to unlock core abilities and collect readily available Charms[hollowknight.fandom.com] and Notches[hollowknight.wiki]. Hollow Knight’s “difficulty setting” (without a slider)There’s no toggle in the menu, but the game quietly gives you one by let you collect 25 specific Charms[hollowknight.wiki] early and gives you access to 8 Notches[hollowknight.wiki]. That makes the Knight much stronger early on. Even if you’re not at the very start anymore, when you’re struggling and don’t yet have all of these early pickups, this checklist will still help you tune the difficulty to your comfort. Check which steps in section Least-Effort (low-spoiler) Route you’ve completed and fill in the gaps to grow stronger and tackle challenges without unnecessary frustration. What this is: A strategy checklist — basically a shopping list of 25 early Charms[hollowknight.wiki] to reach a total of 8 Notches[hollowknight.wiki] fast, with the goal of making Hollow Knight significantly easier early on. This guide is also a collection of useful links. What this isn’t: A step-by-step walkthrough or exact location guide. Explore, experiment, and follow the links or do your own research. How it works?Charm Lover Salubra[hollowknight.wiki] sells her Notches[hollowknight.wiki] at charm-count milestones; once you’ve collected 25 charms, she offers the final one. Conveniently, there are exactly 25 charms you can collect with relatively little effort — no higher-tier bosses, no mid- to late-game content. You start with 3 notches. While collecting the 25 charms, buy Salubra’s 4 notches and add 1 easy-to-reach notch in Fungal Wastes. So you reach 8 notches. Those notches and charms unlock tons of loadout options for upcoming challenges, and even while collecting you’re ahead — running the most notches and the widest charm pool for each stage. Who this is forIf you want to play Hollow Knight but feel lost and the fun is slipping away, this guide offers a gentle, low-spoiler on-ramp. Use it as a nudge when you’re stuck. If you enjoy roaming Hallownest and making your own discoveries, skip the guide — or set it aside the moment the joy returns. The sequence presented here is not canonical. You are welcome to do it differently, and the design of the game fully supports that. Why is this guide a bit pushy at times?At certain points, this guide will give you a little push. Here’s why: if you always take the easy route, Hollow Knight will only get harder — even early on. That early phase will last even longer. And since you don’t want that, you’re here. 25 Early-Game Charms Salubra’s charm-count milestones for Notch purchases buy 1st notch – requires 5 charms buy 2nd notch – requires 10 charms buy 3rd notch – requires 18 charms buy 4th notch – requires 25 charms This guide divides the collection of the Early Charms into 5 phases.The order below is intentional to minimize backtracking and to hit Salubra’s notch-buy milestones. Treat it as a flexible route — not a hard rule. It’s intended that you progress through the phases one by one but it’s fine if you obtain Charms earlier than this guide suggests. Note: The phases build on one another, adding abilities as you go. Swapping charms across phases can be problematic if you don’t yet have the required ability (Dash/Mothwing Cloak, Mantis Claw, Crystal Heart, Dream Nail). If you rearrange, make sure you can reach the area with your current abilities and keep the milestone counts (#5, #10, #18, #25) intact. 1st Phase (Begins after you have found Cornifer.) Wayward CompassCharm Count: 1 2nd Phase (Begins after False Knight fight.) Soul Catcher Stalwart Shell Gathering Swarm Charm Count: 4 3rd Phase (Begins after Hornet fight.) Thorns of Agony (#5 -> 1st notch buy milestone) Longnail Shaman Stone Lifeblood Heart Steady Body Quick Focus (#10 -> 2nd notch buy milestone) Fragile Greed Fragile Heart Fragile Strength DashmasterCharm Count: 14 4th Phase (Begins after obtaining Mantis Claw and buying all purchasable charms.) Grubsong Fury of the Fallen Joni's Blessing Baldur Shell (#18 -> 3rd notch buy milestone)Charm Count: 18 5th Phase (Begins after Crystal Heart is obtained.) Deep Focus Dreamshield Sprintmaster Heavy Blow Glowing Womb Spore Shroom Grimmchild (#25 -> 4rd notch buy milestone)Charm Count: 25 Note: To obtain Grimmchild, you first need the Dreamnail. The 25 Early-Game Charms at HK wikiA list of the Early-Game Charms (alphabetical order) with links to the wiki. Baldur Shell[hollowknight.wiki] — (Howling Cliffs) Dashmaster[hollowknight.wiki] — (Fungal Wastes) Deep Focus[hollowknight.wiki] — (Crystal Peak) Dreamshield[hollowknight.wiki] — (Resting Grounds) Fragile Greed[hollowknight.wiki] — (Fungal Wastes — Leg Eater) Fragile Heart[hollowknight.wiki] — (Fungal Wastes — Leg Eater) Fragile Strength[hollowknight.wiki] — (Fungal Wastes — Leg Eater) Fury of the Fallen[hollowknight.wiki] — (King’s Pass) Gathering Swarm[hollowknight.wiki] — (Dirtmouth — Sly) Glowing Womb[hollowknight.wiki] — (Forgotten Crossroads) Grimmchild[hollowknight.wiki] — (Dirtmouth — after summoning Grimm Troupe) Grubsong[hollowknight.wiki] — (Forgotten Crossroads — Grubfather reward) Heavy Blow[hollowknight.wiki] — (Dirtmouth — Sly, after Shopkeeper’s Key) Joni's Blessing[hollowknight.wiki] — (Howling Cliffs — Joni’s Repose) Lifeblood Heart[hollowknight.wiki] — (Forgotten Crossroads — Salubra) Longnail[hollowknight.wiki] — (Forgotten Crossroads — Salubra) Quick Focus[hollowknight.wiki] — (Forgotten Crossroads — Salubra) Shaman Stone[hollowknight.wiki] — (Forgotten Crossroads — Salubra) Soul Catcher[hollowknight.wiki] — (Forgotten Crossroads — Ancestral Mound) Spore Shroom[hollowknight.wiki] — (Fungal Wastes) Sprintmaster[hollowknight.wiki] — (Dirtmouth — Sly, after Shopkeeper’s Key) Stalwart Shell[hollowknight.wiki] — (Dirtmouth — Sly) Steady Body[hollowknight.wiki] — (Forgotten Crossroads — Salubra) Thorns of Agony[hollowknight.wiki] — (Greenpath) Wayward Compass[hollowknight.wiki] — (Dirtmouth — Iselda)For exact locations and details just use the Hollow Knight wiki. There’s no need to repeat what’s already there in detail. Just click on the links. Accessibility of the 25 Early-Game Charms Note: The Mothwing Cloak (Dash) from Hornet Protector is required to reach Salubra and certain charms like Thorns of Agony. In this guide, "Easy" means easy after obtaining the Mothwing Cloak (Dash) from Hornet Protector. Without Dash, Hollow Knight is considerably harder and several charms in this category are inaccessible. CategoryCharmsrequired abilities Very easy (Almost automatic or directly on the main path.)Gathering Swarm, Stalwart Shell, Wayward Compassnone Easy (Requires small detours, simple platforming and first boss fights.)Fragile Greed, Fragile Heart, Fragile Strength, Lifeblood Heart, Longnail, Quick Focus, Shaman Stone, Thorns of Agony, Soul Catcher, Steady BodyMost require Dash. Medium (Requires reaching a further area or overcoming some tougher obstacles.)Baldur Shell, Dreamshield, Dashmaster, Deep Focus, Fury of the Fallen, Grubsong, Heavy Blow, Joni’s Blessing, Spore Shroom, SprintmasterMost require Dash and Mantis Claw. Deep Focus requires Crystal Heart (Super Dash). Spore Shroom gets easier with it. Joni’s Blessing requires Lumafly Lantern. Harder (Platform fight over spikes with multiple waves of enemies.)Glowing WombRequires Crystal Heart and Mantis Claw. Special (Requires two steps. 1st summoning The Grimm Troupe, 2nd get the charm in Dirthmouth.)Grim ChildDream Nail Note: Here, Grimmchild is included solely to make up the 25. In its base form it offers virtually no value. Any other Charm is arguably more helpful, but they’re significantly harder to obtain early — outside this guide’s least-effort scope. Just Summoning The Grimm Troupe[hollowknight.wiki] at the Howling Cliffs to get access to this charm. Abilities and items Abilities Vengeful Spirit[hollowknight.wiki] – from the Shaman in the Forgotten Crossroads after skipping or defeating False Knight. Mothwing Cloak (Dash)[hollowknight.wiki] – after the fight with Hornet. Mantis Claw[hollowknight.wiki] – attainable early; reaching Mantis Village may be challenging for new players. Crystal Heart (Super Dash)[hollowknight.wiki] – found after another not-too-demanding traversal section. Dream Nail[hollowknight.wiki] – for access to Grimmchild; given by the Seer in Resting Grounds. Items Lumafly Lantern[hollowknight.wiki] – needed to reach Crystal Peak; buy it from Sly. Shopkeeper’s Key[hollowknight.wiki] – found in Crystal Peak; needed to unlock more items from Sly. Least-Effort (low-spoiler) Route Use this sequence as your main path. Consult other sections of this Guide if needed. Especially the sections 25 Early-Game Charms above and Your Bosses below. See also Comments on Least-Effort Route if you like. Here are the steps (backtracking is fine): First things first: Buy the map from Cornifer and the Wayward Compass and Quill from his wife Iselda (get the needles too if you have enough geo). END OF 1st Phase: You own 1 charm (Wayward Compass) and 3 notches. Open Stag Station in Forgotten Crossroad then skip False Knight and get Vengeful Spirit. Outcome: Spell unlocked to clear Elder Baldur → opens Greenpath. Note: False Knight is skippable after first stagger; See Video in Your Bosses section. Fight Gruz Mother → free Sly (shop) Outcome: Sly opens in Dirtmouth (early purchases). Hint: Buy all his charms. Open Greenpath Stag Station Outcome: Unlock the Greenpath Stag Station + nearby bench for fast retries (against Hornet). Obstacle: An Elder Baldur is blocking the way to Greenpath. Take him out. Hint: This route takes you across most of Greenpath. Farm Geo as you go (Gathering Swarm[hollowknight.wiki] helps), use the benches you pass, and — above all — find Cornifer to buy his map! Fight Hornet Protector (P1) → Mothwing Cloak (Dash)[hollowknight.wiki] Outcome: Mothwing Cloak (Dash) → access to Salubra and many areas Hint: See "You Bosses" for more details and a possible strategy (Video included). END OF 2nd Phase: You should own 4 charms and 3 notches. From Greenpath back to Forgotten Crossroads and head into the Fungal Wastes Outcome: Access to Leg Eater and the approach to Mantis Village. Requires: Dash Hint: To get from the Forgotten Crossroads to the Fungal Wastes, head southwest from the main area of the Crossroads and use your Mothwing Cloak (Dash) to cross the gap that was previously impassable. That takes you straight into the Fungal Wastes area. NOTCH MILESTONES: Once you have collected 5 charms, buy your first notch from Salubra. Once you have collected 10 charms, buy your second notch from Salubra. Hint: When you head to Manis Village, things can get rough. 5 notches are recommended. Helpful charms: Longnail and Soul Catcher (Try out what works well for you.) Find the Mantis Village in Fungal Wastes to get Mantis Claw (Clinging)[hollowknight.wiki] Outcome: Wall-climb unlocked (can be challenging for new players; take your time). Hint:: Before you decent in the Fungal Wastes, try to find Cornifer. Charm tip: You can pick up 4 charms en route (Fragile charms from Leg Eater, Dash Master). Make sure you have 6 Masks! See the Ancient Masks section for details. Purchase all the charms you still find at Salubra, Sly and Leg Eater. Explore as much as you like to earn Geo. Farm Geo if necessary. It is a good time to obtain the remaining Grubs in order to get Grubsong. END OF 3rd Phase: At this point, you should have 14 charms and 5 notches. Buy Lumafly Lantern (Sly) Outcome: Safe access to dark areas; required for entering Crystal Peak and to obtain Joni's Blessing. Hint: Farm Geo as needed before moving on. Obtain Fury of the Fallen at King's Pass Requires: Dash, Mantis Claw and Nail-bouncing Hint: In Dirtmouth go all the way west and simply climb up. You need a combined jump and dash to finally enter the King's Pass. Shortcut: Once you're there, feel free to find and open the shortcut to the Howling Cliffs as well. Howling Cliffs: Pick up Joni’s Blessing and Baldur Shell Requires: Dash, Mantis Claw and Lumafly Lantern Hint: You can get there via King's Pass. Greenpath provides another route to get there. NOTCH MILESTONE: Once you have collected 18 charms, buy your third notch from Salubra. Remember: You will receive Grubsong from Grubfather. To achieve this, find the necessary grubs. Do Crystal Peak (reach it via the dark corridor in east Crossroads) → obtain Crystal Heart (Super Dash)[hollowknight.wiki] Outcome: Super Dash obtained (huge traversal boost). Requires: Lumafly Lantern, Dash and Mantis Claw Also: Grab the Shopkeeper’s Key[hollowknight.wiki] along the way. Hint: You have to complete a parkour course. Read section Crystal Peak!END OF 4th Phase: This phase has added four more charms. After this phase, you will have 18 charms and 6 notches. In Crystal Peak get Deep Focus[hollowknight.wiki] Requires: Crystal Heart, Dash and Mantis Claw Hint: Please read the Crystal Peak section, if you find it difficult. From Crystal Peak to the Resting Grounds Outcome: Obtain the Dream Nail[hollowknight.wiki] and pick up Dreamshield[hollowknight.wiki]. Requires: Lumafly Lantern, Dash and Mantis Claw Stag: Unlock/use the Resting Grounds Stag Station to return. Hint: A dark corridor strewn with obstacles leading to a chasm. Just fall down into the chasm to reach the Resting Grounds. Make sure you have one more Soul Vessel! See the Soul Vessels section for details. Visit Sly again. Also obtain missing charms. Recommended: Crystal Heart Obtain Glowing Womb. Check out section Glowing Womb for more tips on this. Requires: Crystal Heart Hint: Perhaps the most difficult single task in this guide. If you're struggling with it, take care of the two Shrumal Ogres first to give yourself an extra notch for this task. Howling Cliffs → Summoning Grimm Troupe[hollowknight.wiki] Requires: Dream Nail, Dash and Mantis Claw Outcome: Makes Grimm Child available in Dirthmouth. Hint: This charm is somewhat out of place in our system, as it is the only one that requires the Dream Nail. This means you can only obtain it once you have been to the Resting Grounds. We will obtain this charm at the very end in order to reach 25.END OF 5th Phase: You should now have 25 charms. This means you can purchase Salubra's last notch, which brings you to 7 notches. Fungal Wastes → Fight Two Shrumal Ogre[hollowknight.wiki] and get your 8th notch Hint: See section The 8th Notch — Fungal Wastes. Bench: The one at Leg Eater is the closest for fast retries. Comments on Least-Effort Route Descriptions kept briefThe descriptions are deliberately kept very brief and in bullet points. Explore and discover the details yourself. Feel free to deviate from this order or explore areas not covered here. That’s explicitly encouraged — it's how games like Hollow Knight work. The sequence is not canonical.You can swap things around, but it is not always possible (or sensible) to do so. But if you get desperate, then just try something different. This may include exploring an area that is not covered here. Why not pay a visit to Queens Station? Go ahead and do it. To be honest, it's unlikely that you'll follow this guide slavishly if you enjoy the game. That is neither necessary nor desirable. Make your own experiences. Backtracking is fineWhile the Least-Effort Route itself avoids backtracking, you should feel free to do so. In Hollow Knight, backtracking often greatly increases the fun of the game. You fail, go somewhere else, and come back later better prepared. No map paths Exact map paths aren’t listed on purpose. Look at the individual charms in the wiki if you need more details. You can find the links in section "The 25 Early-Game Charms at HK wiki". Find all maps on the Hollow Knight wiki[hollowknight.wiki] (SPOILERS AHEAD). If you run into trouble recovering your Shade[hollowknight.wiki], see the “Quit to Bench” safety trick section. Facing the Wrong Boss at the Wrong Time The bosses in Hollow Knight are grouped into so-called pantheons, each of increasing difficulty. There are four — P1, P2, P3, and P4 — with P1 containing the easiest bosses and P4 the hardest. Some bosses also appear in simpler main-game versions, often called mini-bosses (e.g. Gruz Mother in the Forgotten Crossroads). Note: We use the P1–P4 grouping. A few edge cases exist, but they don’t affect this guide. Hollow Knight is a Metroidvania. Bosses from different pantheons are placed throughout the world. So you may encounter them in a less-than-ideal sequence — sometimes much earlier than their difficulty would suggest. This means you might run into bosses that are too strong for you early on. For some players, this can be a major roadblock — when you’re still relatively weak, these fights feel twice as hard. Because of this, a good strategy — especially for new players — is to focus early on charms rather than bosses. Fight only the bosses you need for progression, but grab every charm and notch you come across. You’ll need these charms sooner or later anyway, and the enemies won’t get any weaker — so it’s best to grab them early, when they can make the biggest difference. Your Bosses This approach only asks you to defeat one P1 boss and one mini-boss completly. All charms and notches in this strategy can be collected without taking on higher-pantheon bosses or entering particularly dangerous areas. Required fights: one and a half bosses (P1) + one mini-boss in this order: False Knight (P1)[hollowknight.wiki] — the “half” boss; skippable after first stagger (access to Vengeful Spirit) Gruz Mother[hollowknight.wiki] — mini-boss (frees Sly) Hornet Protector (P1)[hollowknight.wiki] — full boss; grants Dash(Click on the links above for details.) False Knight — the SkippableAt this point you have 3 notches but only Wayward Compass. Use the Forgotten Crossroads Stag + nearby bench for fast retries. You can skip False Knight right after his first stagger by breaking the left wall and leaving the room. Note: Alternatively, you can also defeat this boss, of course. Gruz Mother — no spoilers, enjoy itAt this point you have 3 notches: equip Soul Catcher and Wayward Compass. At this point you sould have Vengeful Spirit. If you spot a safe moment to heal, take it. Otherwise, stay patient. A low-HP mini-boss with a small surprise. Hornet Protector — many paths, no way around herAt this point you have 3 notches: equip in any case Soul Catcher! Use the Greenpath Stag + nearby bench for fast retries. There are many valid ways to beat her — expect lots of attempts until a pattern clicks. She’s a regular P1 boss: tough at first, but fair. Vengeful Spirit deals triple Nail damage. Mathematically, Hornet requires 45 hits with the Nail or 15 Vengeful Spirits to be defeated.One possible strategy for you as a beginner: Play it safe and reactive. Stay at long range and bait Hornet’s diagonal dash. Step in for a quick punish (one hit) and back out to reset your spacing. Heal only when you’ve created a window. Use Vengeful Spirit to chip from afar. Mistakes are fine — just go back to the the loop: distance → bait dash → punish once → reset. See the video for a full example. As you can see, the player keeps making mistakes and is sometimes unsure. The important thing is not to dwell on mistakes, but to immediately return to your discipline and your own strategy. Then it will work eventually — definitely. On that note, it can also help your concentration if you turn the music off or lower it during the fight. Optional prep: If it doesn’t break your retry flow, top up SOUL on nearby small enemies before the fight. Pick up your Shade first if you lost it. With a full SOUL vessel you can cast Vengeful Spirit up to three times (~45 total damage), or use that SOUL to heal up to three masks. Easy Grubs for Grubsong (10 easy picks) Minimal hints only — if needed you can find detailed information here: https://www.thegamer.com/hollow-knight-all-grub-locations-guide Don't let yourself be spoiled more than necessary. You'll find all the grubs you need to obtain Grubsong from the Grubfather in these beginner areas: Forgotten Crossroads (5 Grubs) Greenpath (4 Grubs) Fungal Wastes (2 Grubs) Howling Cliffs (1 Grub)So that's 12. But you only need 10 of them to obtain Grubsong. If you can't manage 10: There are also some easy grubs in Crystal Peak that you can pick up along the way. Grubsong often makes the difference for weaker players. It is a very powerful charm due to its many synergies, which only consume a single notch. And you need it to get to 25 charms at the beginning. Ancient Masks You should definitely get one additional Ancient Mask before heading to Crystal Peak. You need four Mask Shards[hollowknight.fandom.com] to obtain one Ancient Mask. See the wiki for locations (just click on the link). From the wiki’s list, recommended picks for the Mask Shards: Buy one from Sly in Dirtmouth. Buy another One from Sly in Dirtmouth. One is given from the Grubfather after rescuing 5 Grubs. One in a hidden location in Forgotten Crossroads[hollowknight.wiki] (Mantis Claw needed). Crystal Peak At Crystal Peak: start using your options! If you haven’t been experimenting with your loadout yet, do it here! Using your charms is what actually makes the game easier. Heads-up: Crystal Peak isn’t a pure beginner area. Even the easier route we take here is noticeably tougher than everything before — all the more reason to tailor your charms. It is also advisable to enter Crystal Peak with no less than 5, but preferably 6 notches. Fortunately, there is plenty of Geo to be found in Crystal Peak. Backtracking is part of the game.If you realise that you are not yet strong enough for Crystal Peak, then perhaps try to at least find the Shopkeeper's Key[hollowknight.wiki] and return with it to Dirthmouth to unlock further items in Sly's shop. Farm geo and come back when you're stronger. You don't have to complete Crystal Peak in one go. Backtracking is part of the game. Charm setupsExperiment: there isn’t a single “best” setup. What works depends on your playstyle — swap charms at benches and keep what feels right for you. Below are two examples of charm setups. It is assumed that you have 6 notches.If you only have 5, then leave Grubsong out. But that makes it more difficult, as you cannot heal as much. Explore buildBuild: Wayward Compass + Grubsong + Soul Catcher + Longnail Grubsong + Soul Catcher: mistakes and your hits both give Soul Longnail: extra reach for your nail. Crystal Peak already has quite challenging parkours. If you are unable to proceed, you could try the following. Parkour buildBuild: Wayward Compass + Grubsong + Soul Catcher + Fragile Heart Fragile Heart: Start with +2 masks (so you have 8). Unlike Lifeblood Heart, these masks can also be healed. Be careful not to die, as this will destroy Fragile Charms. Use the "Quit to Bench" safety trick as soon as you have fewer than three masks or recharge yourself on enemies (use harmless ones). Grubsong: Taking damage grants 15 SOUL per hit (~3 heals from 7 hits). Deceptively strong in platforming: those extra 2–3 heals often make the difference and keep you calm. Soul Catcher: Allows you to quickly refill your soul vessel on the way to the parkour. Experiment with your charms. These are just (conservative) suggestions. Do you have your own ideas? Try them out! But be on your guard — Crystal Peak is a tough place for a beginner. Deep FocusThis charm can be found in Crystal Peak. You can reach it after obtaining Crystal Heart. At some point, you may feel like you're stuck. But the simple answer is one single Nail Bounce[hollowknight.wiki] and a Dash. Soul Vessels You need three Vessel Fragments[hollowknight.wiki] to obtain one Soul Vessel. See the wiki for locations (just click on the link). From the wiki’s list, recommended picks for the Vessel Fragments: Buy one from Sly in Dirtmouth (#1) Buy another one from Sly in Dirtmouth (Requires having the Shopkeeper's Key) (#2) Found one in Greenpath (#3) The Vessel Fragment in Greenpath is much easier to reach with Crystal Heart (Super Dash). But at one point you have to do a little bit of Nail Bouncing[hollowknight.wiki] on moving platforms. Longnail and Dash Master can help. Deep Focus has high notch costs, but helps enormously, because you can regenerate twice as many masks. You may need to try this a few times. Use the bench in the lower east of Greenpath. Important Merchants & NPCs Salubra[hollowknight.wiki] Sly[hollowknight.wiki] Iselda[hollowknight.wiki] Leg Eater[hollowknight.wiki] Grubfather[hollowknight.wiki] Glowing Womb The Glowing Womb charm is a harder one to reach early on. You’ll need Crystal Heart from Crystal Peak first; only then can you access the section where the charm sits. Inside, you’ll face a short but tense platforming fight over spikes. Bench & attempts - The nearest bench (Forgotten Crossroads) is close. Why this is a good grind spot - The encounter lets you practice combat and movement while also earning Geo. Suggested charm combo Grubsong — gain SOUL Dreamshield — passively blocks projectiles and hit enemies. Thorns of Agony — punish enemies when you take damage. Gathering Swarm — auto-collects Geo so it doesn’t fall into the spikes. Quit to Bench just before you fail: pause → quit to menu → continue. You’ll reload at the last bench without losing geo, letting you reset quickly for another attempt. Also see section “Quit to Bench” safety trick. Other useful charmsBe sure to experiment with Longnail and Soul Catcher as well. Try things out — it’s fun, and you already have plenty of charms. Consider whether you should defeating the two Shrumal Ogre first.If you simply cannot progress any further, then consider fighting the two Shrumal Ogres[hollowknight.wiki] first. This may be easier and give you a sense of achievement and, more importantly, an extra Notch. See section The 8th Notch — Fungal Wastes . The 8th can also be the 7th if Glowing Womb causes you greater difficulty. The 8th Notch — Fungal Wastes Defeating the two Shrumal Ogres[hollowknight.wiki] in the Fungal Wastes rewards a charm notch. The two don't count as a boss but they can cause headaches (literally). You have already survived several battles and earned 25 charms and 7 notches. Take a close look at your charms and think about a strategy against the two mushroom ogres that will work Prep – Arrive with 7 notches so this otherwise demanding fight becomes much easier. – Experiment with your charms and notches. You already have many possibilities. – Make use of Vengeful Spirit (farm soul before the fight, if necessary). – Use Bench at Leg Eater for the closest retries. Beat them, grab the notch — that’s your 8th. You can try this fight earlier.This fight isn't as difficult as it may seem at first. Glowing Womb in particular could be a bigger challenge for you. If that's the case, then take on this battle earlier. Just give it a try. It will give you an extra edge and make everything else easier. “Quit to Bench” safety trick Use this when your Shade is stuck in a nasty spot, or when you’re deep in a platforming section with 1 mask left. How it works and when to use it: Your Shade is in a nasty spot. You pick it up, but you keep dying on the way back out. So after you pick up your Shade, pause → Quit to Menu → reload your save. You’ll respawn at your last bench — with your Geo and SOUL Vessel restored from the Shade. If you’re about to die in a parkour: pause → Quit to Menu → reload. You’ll be back at the last bench with whatever Geo you had (enemies reset). Notes: If you quit without reclaiming your Shade, it stays where it was. Not an exploit — it’s normal save/load behavior. Use it to keep your flow. Another solution: Rancid Egg Buy a Simple Key from Sly. Use it on the locked hut in Dirtmouth (you’ll know the one). Find out the rest yourself. :) From Here: Collect, Upgrade, Make It Easier For now, just experiment with these 25 Charms and 8 Notches — they’re a great starting point for making the game easier. Even after this initial phase, you can continue to influence the difficulty level yourself. By collecting Charms, Nail upgrades, Vessel Fragments, Mask Shards and other abilities before tackling harder bosses, you’ll make those fights far more manageable. What's next beyond this guide?This guide covers only three bosses (see the ‘Your Bosses’ section). For any other boss fight, you might want to visit the Nailsmith[hollowknight.wiki] first; otherwise, the game can be quite tough.Exception: There is an optional boss in Greenpath who is not too difficult and can be defeated relatively easily even without this. Next boss fight main route: False Knight (P1) → Dung Defender (P1) → Broken Vessel (P2) → Soul Master (P2) Note: False Knight, of course, only if he was skipped. Strategy: Defender’s Crest first (very helpful for Broken Vessel), then Monarch Wings / Double Jump (useful everywhere); Desolate Dive comes last. Hint: Once you’ve beaten the Dung Defender, head out to find Isma’s Tear. Note: This is just the main route. You’ll still have plenty to do: mini-bosses, Nail upgrades, Vessel Fragments, Mask Shards, key items, benches/Stag stations, Geo for purchases, etc.
进入巨龙之地——《空洞骑士》的【简单模式】

2026-02-16 06:02:05
转载

导读
这是一份《空洞骑士》低剧透简易模式攻略,核心是通过分阶段收集25个特定护符,解锁8个护符槽,以此提升角色战力降低前期难度,仅需击败少量必要BOSS,还包含路线指引、护符搭配、实用技巧等内容,适配新手玩家。

评论
共0条评论

全成就指南 | 100%游戏通关攻略
《空洞骑士》全流程攻略,包括获取游戏内所有成就。 1. 国王山道 1. 拾取护符【坠落之怒】[1/40] 2. 坠入污秽之地(可选:与长老对话)——通过水井进入…
2026-02-19 16:000赞 · 0评论
全护符收集(含秘密组合)–「格林剧团」更新
这是一份关于《空洞骑士》护符的详细指南:包括所有护符和护符槽的获取位置与方法、它们的确切效果(包含具体数值)、列出强力及隐藏的组合,以及解释什么是【过度护符】。…
2026-02-18 04:000赞 · 0评论

112%完成度攻略与地图
随着《空洞骑士:丝绸之歌》的终于到来,原版《空洞骑士》可能会迎来新玩家的回归热潮,同时也会有一些老玩家重新体验。本指南旨在帮助前者顺利通关这款难度较高但充满乐趣…
2026-02-20 19:000赞 · 0评论

《空洞骑士》无剧透地图攻略 12.蜂巢&呼啸悬崖
转自B站玩家:糊露露露露
2025-12-05 07:255赞 · 1评论

112%完成度
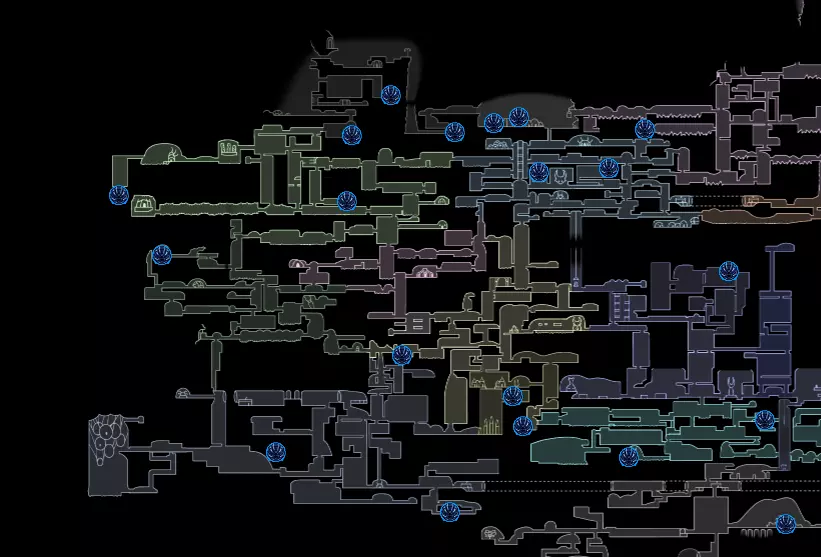
困难?更像是耗时 护符 游戏中共有45个护符,但只能装备40个,每个护符提供1%的加成,这是它们的位置图 只需收集全部40个护符,就能获得40%的加成
2026-03-23 20:061赞 · 0评论
《骑马与砍杀2》新手怎么玩?2026年入坑必看,从零开始详细教程攻略
2026-07-02 22:040赞 · 0评论

《空洞骑士》新手怎么玩?螳螂村无伤通关攻略,112%全流程收集指南
-
2026-06-12 20:140赞 · 0评论

无伤 哀【空洞骑士】3.新手不受苦无伤全流程112%攻略-真菌荒地
-
2025-12-19 20:090赞 · 0评论

给大家带来了新手攻略,后面的我会慢慢发,希望能帮到大家
2025-02-12 08:2128赞 · 5评论
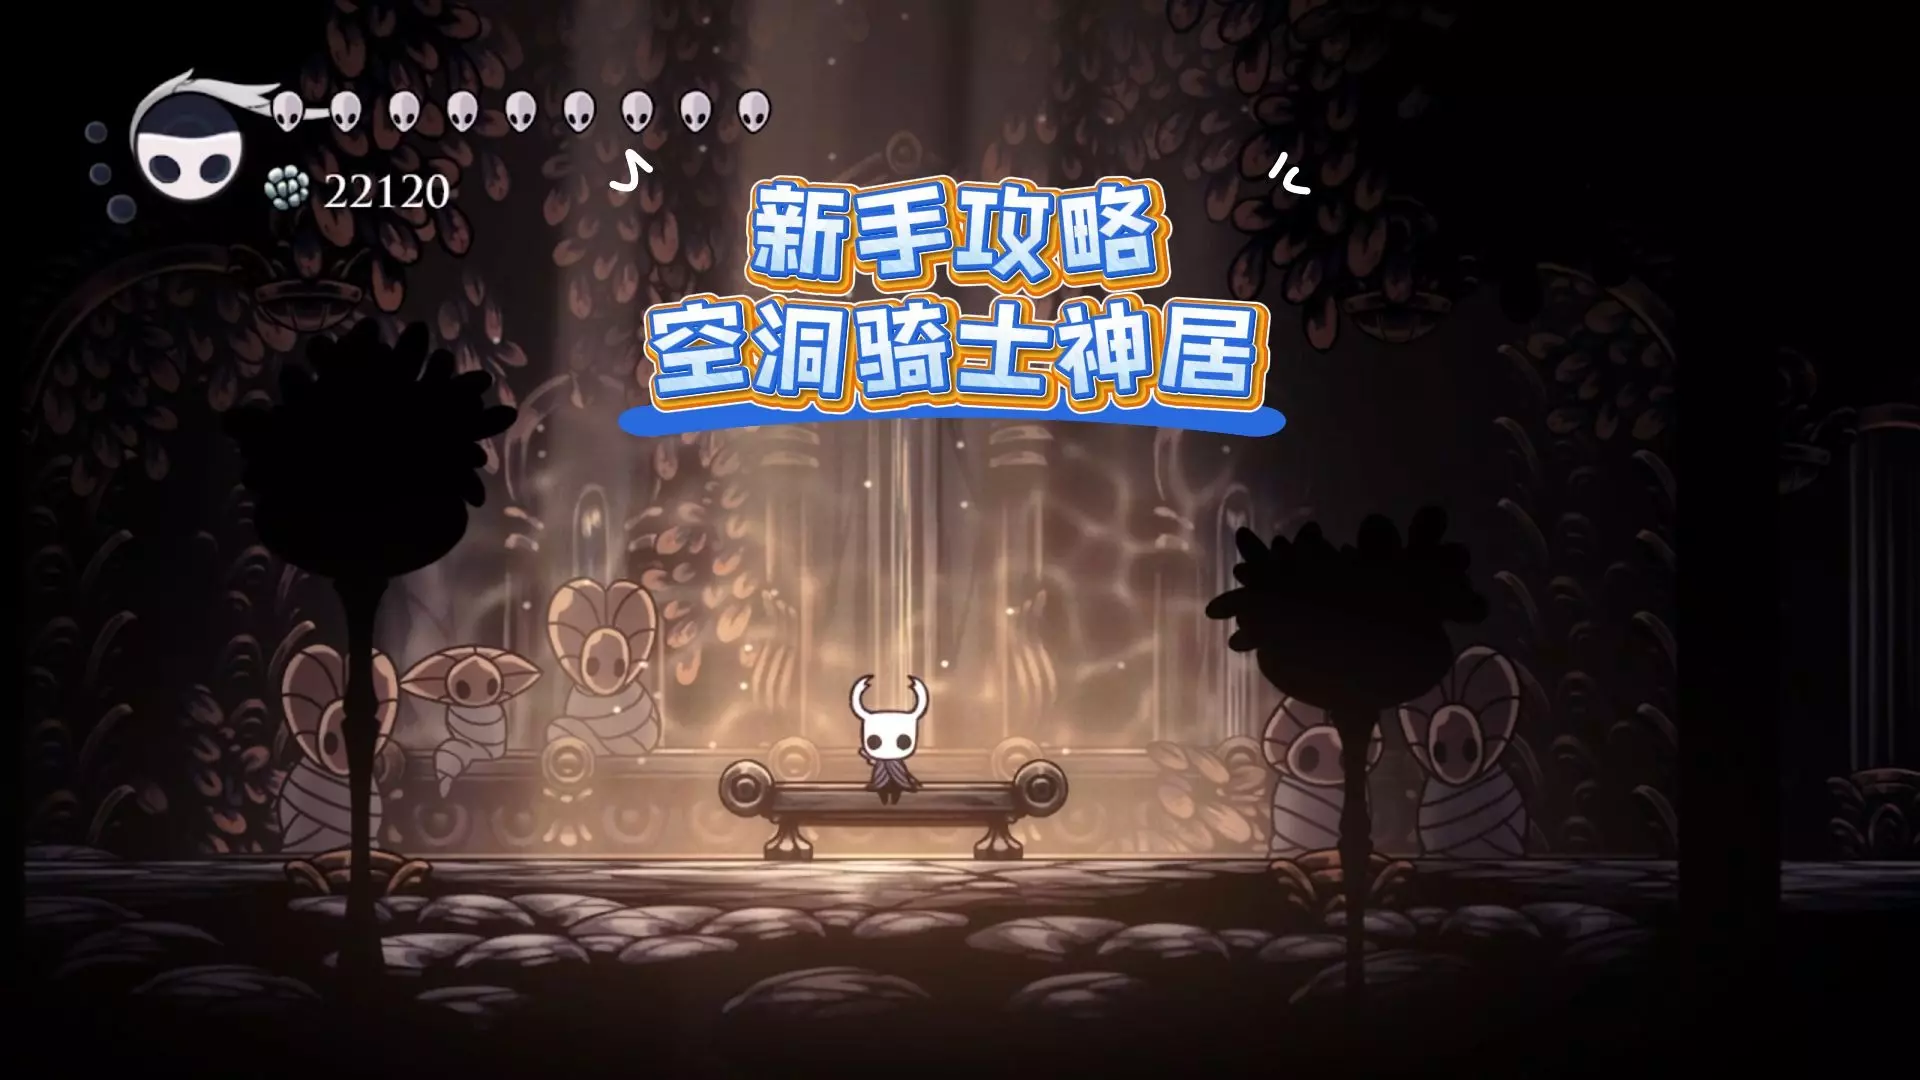
#空洞骑士流程攻略 空洞骑士:新手向全收集流程攻略神居
神居那么多房间都是干什么的呢?本期视频就带大家了解透彻神居的组成。感谢大家的观看。有什么意见和建议也欢迎指出,谢谢各位的支持。
2025-12-04 14:500赞 · 0评论
暂无更多
最新更新
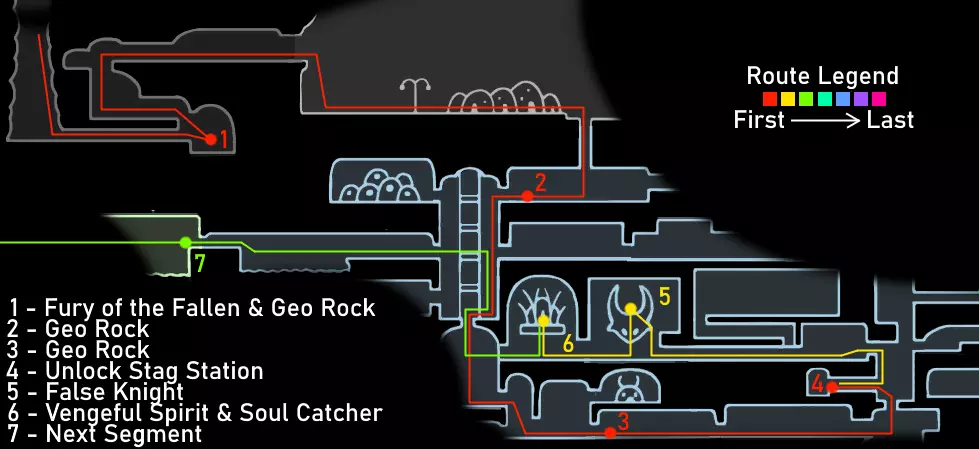
- 如何击败螳螂领主 — 这是一份《空洞骑士》中与螳螂领主战斗时的实用技巧和注意事项指南 环境 战斗的第一阶段将面对位于中间的螳螂领主。战斗开始时,墙壁会降下,将你困在竞技场中。墙壁下方…
- 如何使用自定义骑士模组添加自定义骑士皮肤 — 如何添加皮肤 下载模组安装器。 下载自定义骑士模组。 下载你想要的皮肤ZIP文件。 解压下载的文件。 打开《空洞骑士》游戏文件并进入mods文件夹(路径示例:我…
- 钢铁意志法则 — 大家好。这是我制作的又一篇攻略。这次我将介绍(至少在我看来)想要通关钢铁之魂模式的玩家应遵循的原则。 免责声明 我知道这篇攻略原本应该是关于灵魂暴君的,但我还没…
- 如何为游戏安装模组 — 如何为《空洞骑士》安装模组 1. 下载适用于你操作系统的安装包。 2. 将下载的文件解压到另一个文件夹中。 3. 进入该文件夹,运行可执行文件。 4. 系统可能…
- 访问DLC(无剧透)(重新上传) — (原作者:rudlab)一份无剧透的《空洞骑士》内容扩展包获取指南。 简介 本指南适用于已完全通关《空洞骑士》本体游戏,但在寻找新内容时遇到困难的玩家。我假设阅…
- 如何行走 给不知道怎么走路的悲伤的人的指南 — 你好!欢迎来到新的行走指南,其实很简单,你只需要计算角色的量子质量、细胞/像素,在电脑上按左右方向键,或者用手柄向左右移动摇杆,这样就能行走了。现在去杀死那些丑…
- 《空洞骑士》1.5.12620版本更新内容 — 《空洞骑士》更新内容 1. 新增繁体中文翻译 2. 修复了浏览物品栏时音量过低的问题 3. 修复了绑定宽方形按键(如Shift/空格等)到某个动作时文本对齐重叠…
- 112%完成度 — 困难?更像是耗时 护符 游戏中共有45个护符,但只能装备40个,每个护符提供1%的加成,这是它们的位置图 只需收集全部40个护符,就能获得40%的加成
- 娇嫩之花任务指南 — 关于达成【Solace】成就的实用指南 本指南概述 首先我想说——这部分内容急不得。 请按照地图上的路线前进。
- 魔法与技能指南 — 《空洞骑士》不仅非常出色,而且是一款相当复杂的游戏。我希望通过制作一系列从简单到困难的游戏指南,来稍微降低这种复杂性。在本指南中,我将介绍法术和能力。 引言