换一换
换一换 


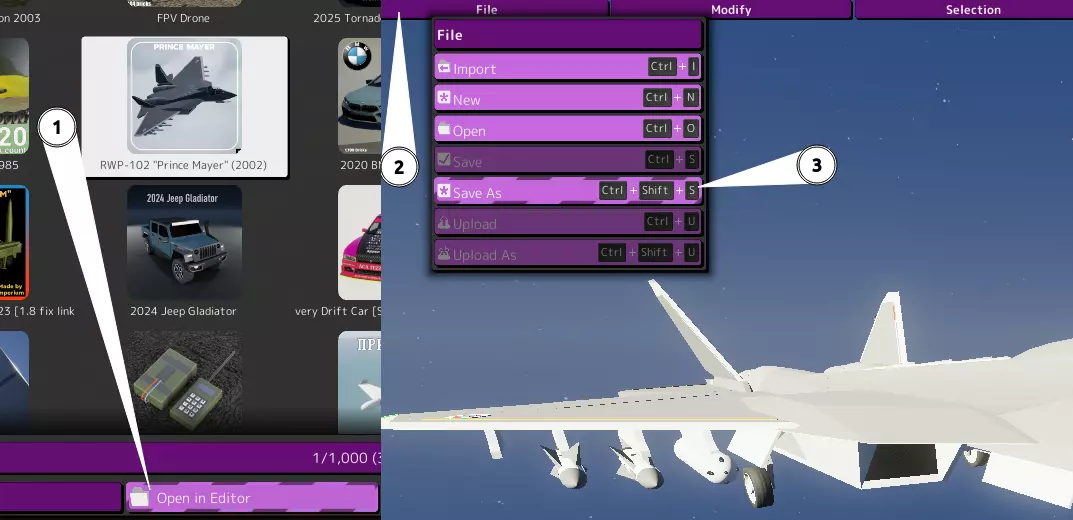
本指南列出了《Trailmakers》中可用于打造载具和装置的不同组件的勘误信息及功能。对于各个组件,本指南旨在: 指出组件的实际用途 深入探讨其与物理系统的交互方式 提供组件定位建议以实现预期效果 此外,本指南还将介绍如何使用这些部件构建不同类型载具的基础知识。 注意:本指南不涉及“公海”DLC专属组件,但会详细说明该更新中新增的免费部件。编辑器控制说明 由于《赛道大师》的编辑器帮助部分未列出此类内容,以下是我所知道的编辑器中可使用的快捷键: WASD/方向键(已选择部件时)- 向所按方向微调选中部件1个单位。此操作与你的相机视角相关,例如,若你从正前方直视载具并按下W键,部件将向上移动1个单位。 此操作会将部件移动到其可占据的下一个有效空间,可用于在紧凑部件间或载具中部的缝隙中滑动部件。 Ctrl+左键 - 选择多个部件。 Ctrl+左键双击 - 选择载具上所有完全相同类型的部件(例如,若你对此操作于越野车轮,将选择编辑器空间内所有越野车轮)。插入-复制。需要特别注意的是,根据相机的角度,这会将物体向你拉近1个单位,其工作原理与微调机制类似。如果你从车辆的另一侧对着座椅执行此操作,通常会使组件的旋转围绕座椅镜像(这是测试版镜像功能推出前的主要操作方式)。 按住Alt键-快速显示旋转控制柄 按住Alt+Shift键-使用旋转控制柄向相反方向旋转。 座椅

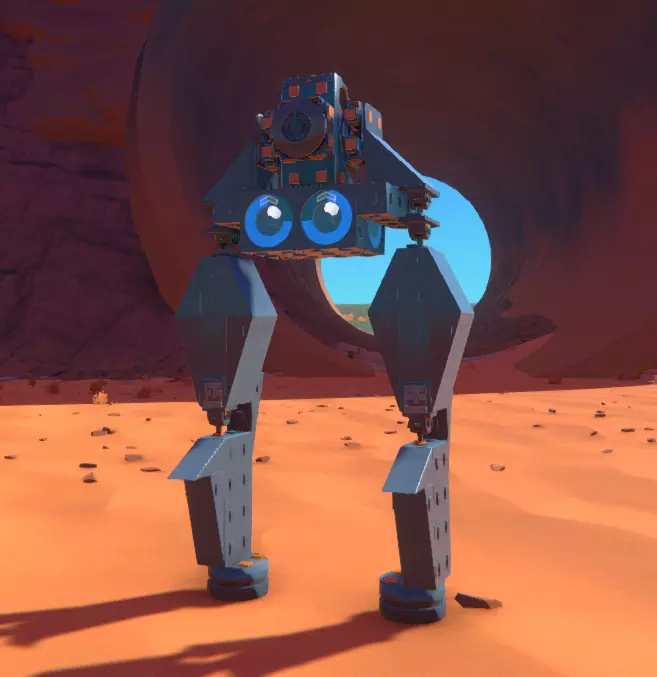
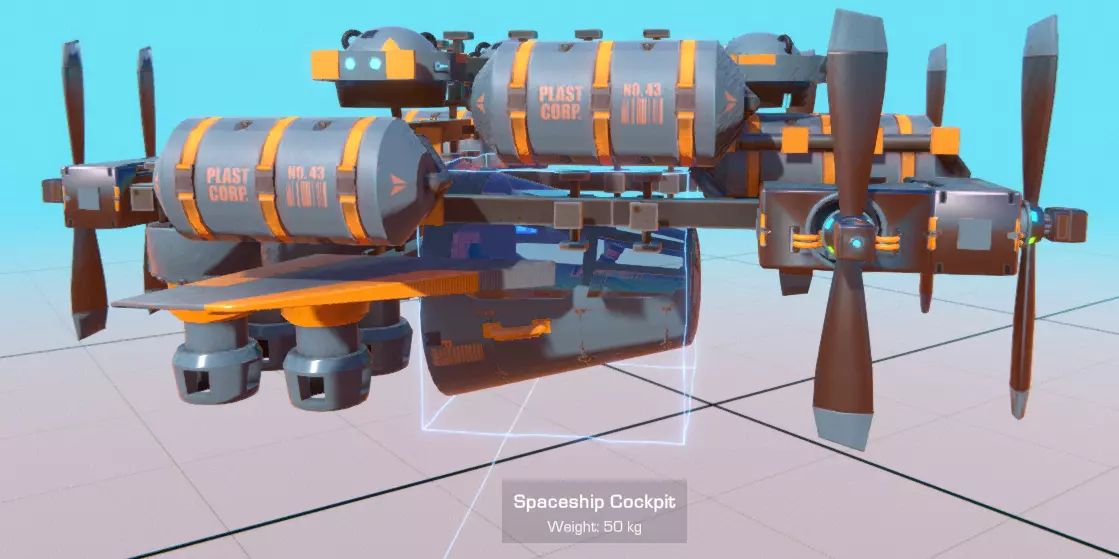
Seats are required on anything you make that you want to have rideable or directly controlled. They aren't required for any creations you make that you want to have automated (by using logic blocks) or that serve as stationary constructions or emplacements (things like traps, walls, barriers, or turrets). That said, 90% of things you'll be building will have at least one seat. Special notes about using seats: The Seat is generally treated as the main point of 'durability' for the entire vehicle, with connectivity of different parts determined by how or if they are still attached to it. If blocks or components that the seat is attached to different parts of the vehicle are damaged, this can sometimes render a vehicle inoperable, even if you are still attached to the rest of your structure. Be wary of this if the main way your seat is attached to the vehicle is through a moving part (i.e. a servo or piston, instead of just normal blocks) Seats have configurable properties that allow you to adjust how and what they control. Air Control defaults to being on, and allows the person in the seat to slightly shift their weight to influence how a vehicle controls. This is mapped to the same keys used to walk around (WASD on PC, and the main analog stick if you're using a controller) and its effects become more pronounced the lighter or smaller your vehicle is. Camera Controls also default to being on. If turned off, sitting in this seat will prevent you from using the Right Mouse Button to re-aim the camera. Seats will eject you under certain circumstances. The most common cases where this occur include: If the seat has been subjected to a strong enough impact. In Campaign Mode, being ejected in this way kills your character and forces you to respawn. If the seat is put underwater. This will not kill you, but does prevent you from piloting most vehicles when submerged. For seats that do not have a top to them, landing upside down will also eject you, and in campaign or rally modes, will also kill you. This will occur even if you land slowly enough to otherwise avoid crashing. For a majority of camera modes (you can switch between using the C key), the seat is the central point where camera focus will be based around. Otherwise, most camera modes focus on the center of your vehicle's mass instead. Seat - This roll-cage equipped, normal seat is the one you start the Campaign mode out with. Overall, its traits include: 2w x 4h x 4l Decent durability with slightly higher-than-average weight Mediocre drag High number of connection points on all sides - this is a very easy seat to construct with Will eject you if you crash too hard or fall into water Will not eject you if the seat touches ground upside-down.It's a useful starting seat, but other seats you'll find will often have more specialized uses they can apply to, without much extra costs. Armored Seat - The armored seat is a fully-enclosed seat that protects the rider from crashes. Its traits include: 2w x 3h x 4l Heavy and indestructible Fair drag Connection points on all sides Terrible first-person visibility Will only eject you if you fall into water.Finding this seat is a top priority for Campaign mode, as it will allow you to recover and repair yourself in more places than would otherwise be possible, allowing you to save more progress as you travel. For the purposes of lightweight vehicles, however, this seat can prove more of a challenge than a benefit, especially for any game modes that don't 'kill' your player character. That aside, almost entirely a full improvement over the standard Seat. Diving Bell - This spherical glass diving bell is made specifically to allow for submarine navigation. Its traits include: 4w x 4h x 4l Average Weight Fair Drag A few connection points on each side towards the center, but not at the edges. Only ejects you if you crash - not when you go underwater or if you land upside down.This is an easy seat to use in Campaign mode to allow you to hunt for things underwater, being the first one you can possibly find for this purpose. Of the two seats that are underwater-capable, it is much easier to build with. Ship Wheel - Operated with your character standing at the wheel, it evokes the imagery of an old-timey captain piloting their boat through a stormy sea. Its traits include: 4w x 5h x 2l Average weight Connection points are only on the bottom Bad Drag Ejects under all circumstancesThis thing's just for show really. It basically has nothing going for it other than being a way for your pilot to stand out. Motorcycle Seat - A lightweight seat. Traits of this one include: 3w x 3h x 4l Lightest seat, tied with Go-Kart seat Few connection points: on front, back, and bottom. Fair Drag Ejects under all circumstancesThe odd block width of this seat makes it very awkward to build with, as many mechanics, motors, and other components come only in even-numbered dimensions. This means that, if you wanted to balance out a load of engines, you'd need to have at least one on each side to cancel it out. Overall, it's this aspect that makes the motorcycle seat rather undesirable, even with its other traits. Cockpit - An enclosed, highly-streamlined seat: 2w x 3h x 5l Lighter than average Lots of connection points on all sides except the top. Very good drag Noticeable first-person perspective obstructions Doesn't eject if flipped upside down.For many circumstances, this is a good seat that's easy to build with as well - certainly the seat of choice I use for larger-scale speed vehicles such as racecars or jets. Go-Kart Seat - An open-topped, lightweight seat. It's the first seat type you use when doing the Rally game mode but is found pretty late in the Campaign mode otherwise - and for good reason. Its traits include: 2w x 3h x 4l Lightest seat Connection points on all sides except for the top. Bad Drag Ejects under all circumstancesIn essence, this is the Motorcycle Seat, except possible to use, owing to its identical weight, and basically the only practical difference being its block width. Its drag can be cancelled out by placing down a nice windshield, and its fair number of connection points means that the number of extra blocks required to balance the vehicle are much lower. In short, it's the ultimate lightweight piloting seat, in spite of its poor durability otherwise. Operator Seat - A standing open-front seat. 2w x 4h x 2l Average Weight, Fair durability Connection points on all sides except the front. Bad Drag Does not eject if landing upside downThe operator seat is more intended for aerial use or for tall builds rather than streamlined ones (helicopters or walker mechs). It's fairly average otherwise. Spaceship Cockpit - A large, heavy, streamlined pod. The Spaceship Cockpit is basically the end goal of the Campaign mode, while also being a fair reward on its own in some ways: 4w x 4h x 4l Heaviest seat (tied with armored) Many connection points, but they're all on the back. Some first-person obstructions Fair drag Never ejects under any circumstances (fully indestructible and sealed).Despite being extremely difficult to fit into lighter-weight builds, the Spaceship Cockpit is otherwise the ultimate when it comes to making a vehicle that can withstand any conditions. It makes this seat usable for heavy-duty aircraft (i.e. if you wanted to survive a crash), large submarines, and other durable vehicles. Frame

框架组件是构建建筑的基础模块。除极少数特殊情况外,任何建筑都需要使用这些组件。从功能上来说,它们没有实际应用,仅在尺寸上有所不同。不过,该类别包含五种不同的通用“类型”组件: 基础方块——最基本的组件。 这些方块的所有可能侧面和表面空间上都有连接器。 它们具有中等耐用性,并具有多种尺寸,从小巧的1x2方块到4x8方块不等。方块越大,整体耐用性越高,因此通常更建议使用数量较少的大尺寸方块,而非大量小尺寸方块。不良空气阻力 它们与周围所有物体都有很高的连接性——这既有利也有弊。优点是能构建出连续、坚固的结构,即便遭受攻击也能保持整体稳定;但如果你想打造一个与底盘其他部分明显区分开的活动部件(例如,通过机械零件连接的部件,如果是通过普通方块或其他连接方式接合的,可能无法按预期移动),这种高连接性就会成为阻碍。 护盾 - 保护性外部覆盖物。 仅在一侧设有连接器。 durability高,但连接性低,因此需要巧妙使用,否则作为装甲的效果不会太好。 重量明显 有1x2、2x2和4x2三种尺寸。 垂直放置时空气阻力差,但水平放置时空气阻力非常好。护盾可用作表层覆盖,以隐藏方块上的“凸起”(这也得益于其独特的涂装选项)。如果放置得当,还能将交替的方块对绑定在一起,增加一定的耐久性。不过它无法让你无敌(例如,高速撞墙时护盾基本起不到作用),但能让你的载具外观更美观。就其尺寸而言,护盾相当厚重,因此也可用于略微调整载具的平衡。 网格方块——轻量化的框架组件。 【高连接性】:多数侧面的最远端设有连接器。 【尺寸】:有1x2和1x4两种规格。 【重量】:体积虽大但极其轻盈。 【阻力】:中等。 【颜色】:不可染色。网格块在打造轻量化建筑时发挥着重要作用,它们或许是此类用途中重量最轻且最易用的组件。总体而言,网格块能提供更多连接点,且比同等尺寸的管道更轻,这使得它们在协调组件间的内部连接方面比外部分支更具优势(在外部分支场景中,使用管道,尤其是长管道会更为合理)。 连接器具有非常特定的用途: - 有1x2、1x3和1x4三种规格 - 两端各有一个连接点,且均位于同一侧 - 重量极轻 - 不会产生任何阻力 它们的作用是以管道无法实现的方式,专门连接两个距离较远的模块。它们还能帮助绑定相邻的方块,使其更难被破坏,但这基本上就是它们的全部作用了。 舷窗——它们基本上只是装饰用的。 有小型1x2x2尺寸和大型4x4x3两种变体。 与方块的重量相同,大小也一一对应。 风阻较大。 正面和背面(即窗户所在的位置)没有连接器。只是标准的方块变体。 推进

这些部件是你制造载具时的主要核心组件。推进部件具有以下共同特性: - 均会消耗动力核心能量,这限制了你为提升性能和速度所能安装的部件数量。 - 大多数推进部件可配置,并能接受控制装置以影响它们与其他部件的交互方式。 - 大多数推进选项在水下无法工作! 推进装置可分为以下几类: 发动机
引擎会为车辆上安装的车轮提供扭矩。默认情况下,引擎会为每个车轮提供扭矩,但也可以配置为仅向特定车轮输出动力。如果引擎数量多于车轮数量,将引擎动力分配到不同车轮上可能有助于提升最大速度和加速度,因为为单个车轮配备的引擎数量越多,其带来的收益就会逐渐递减。
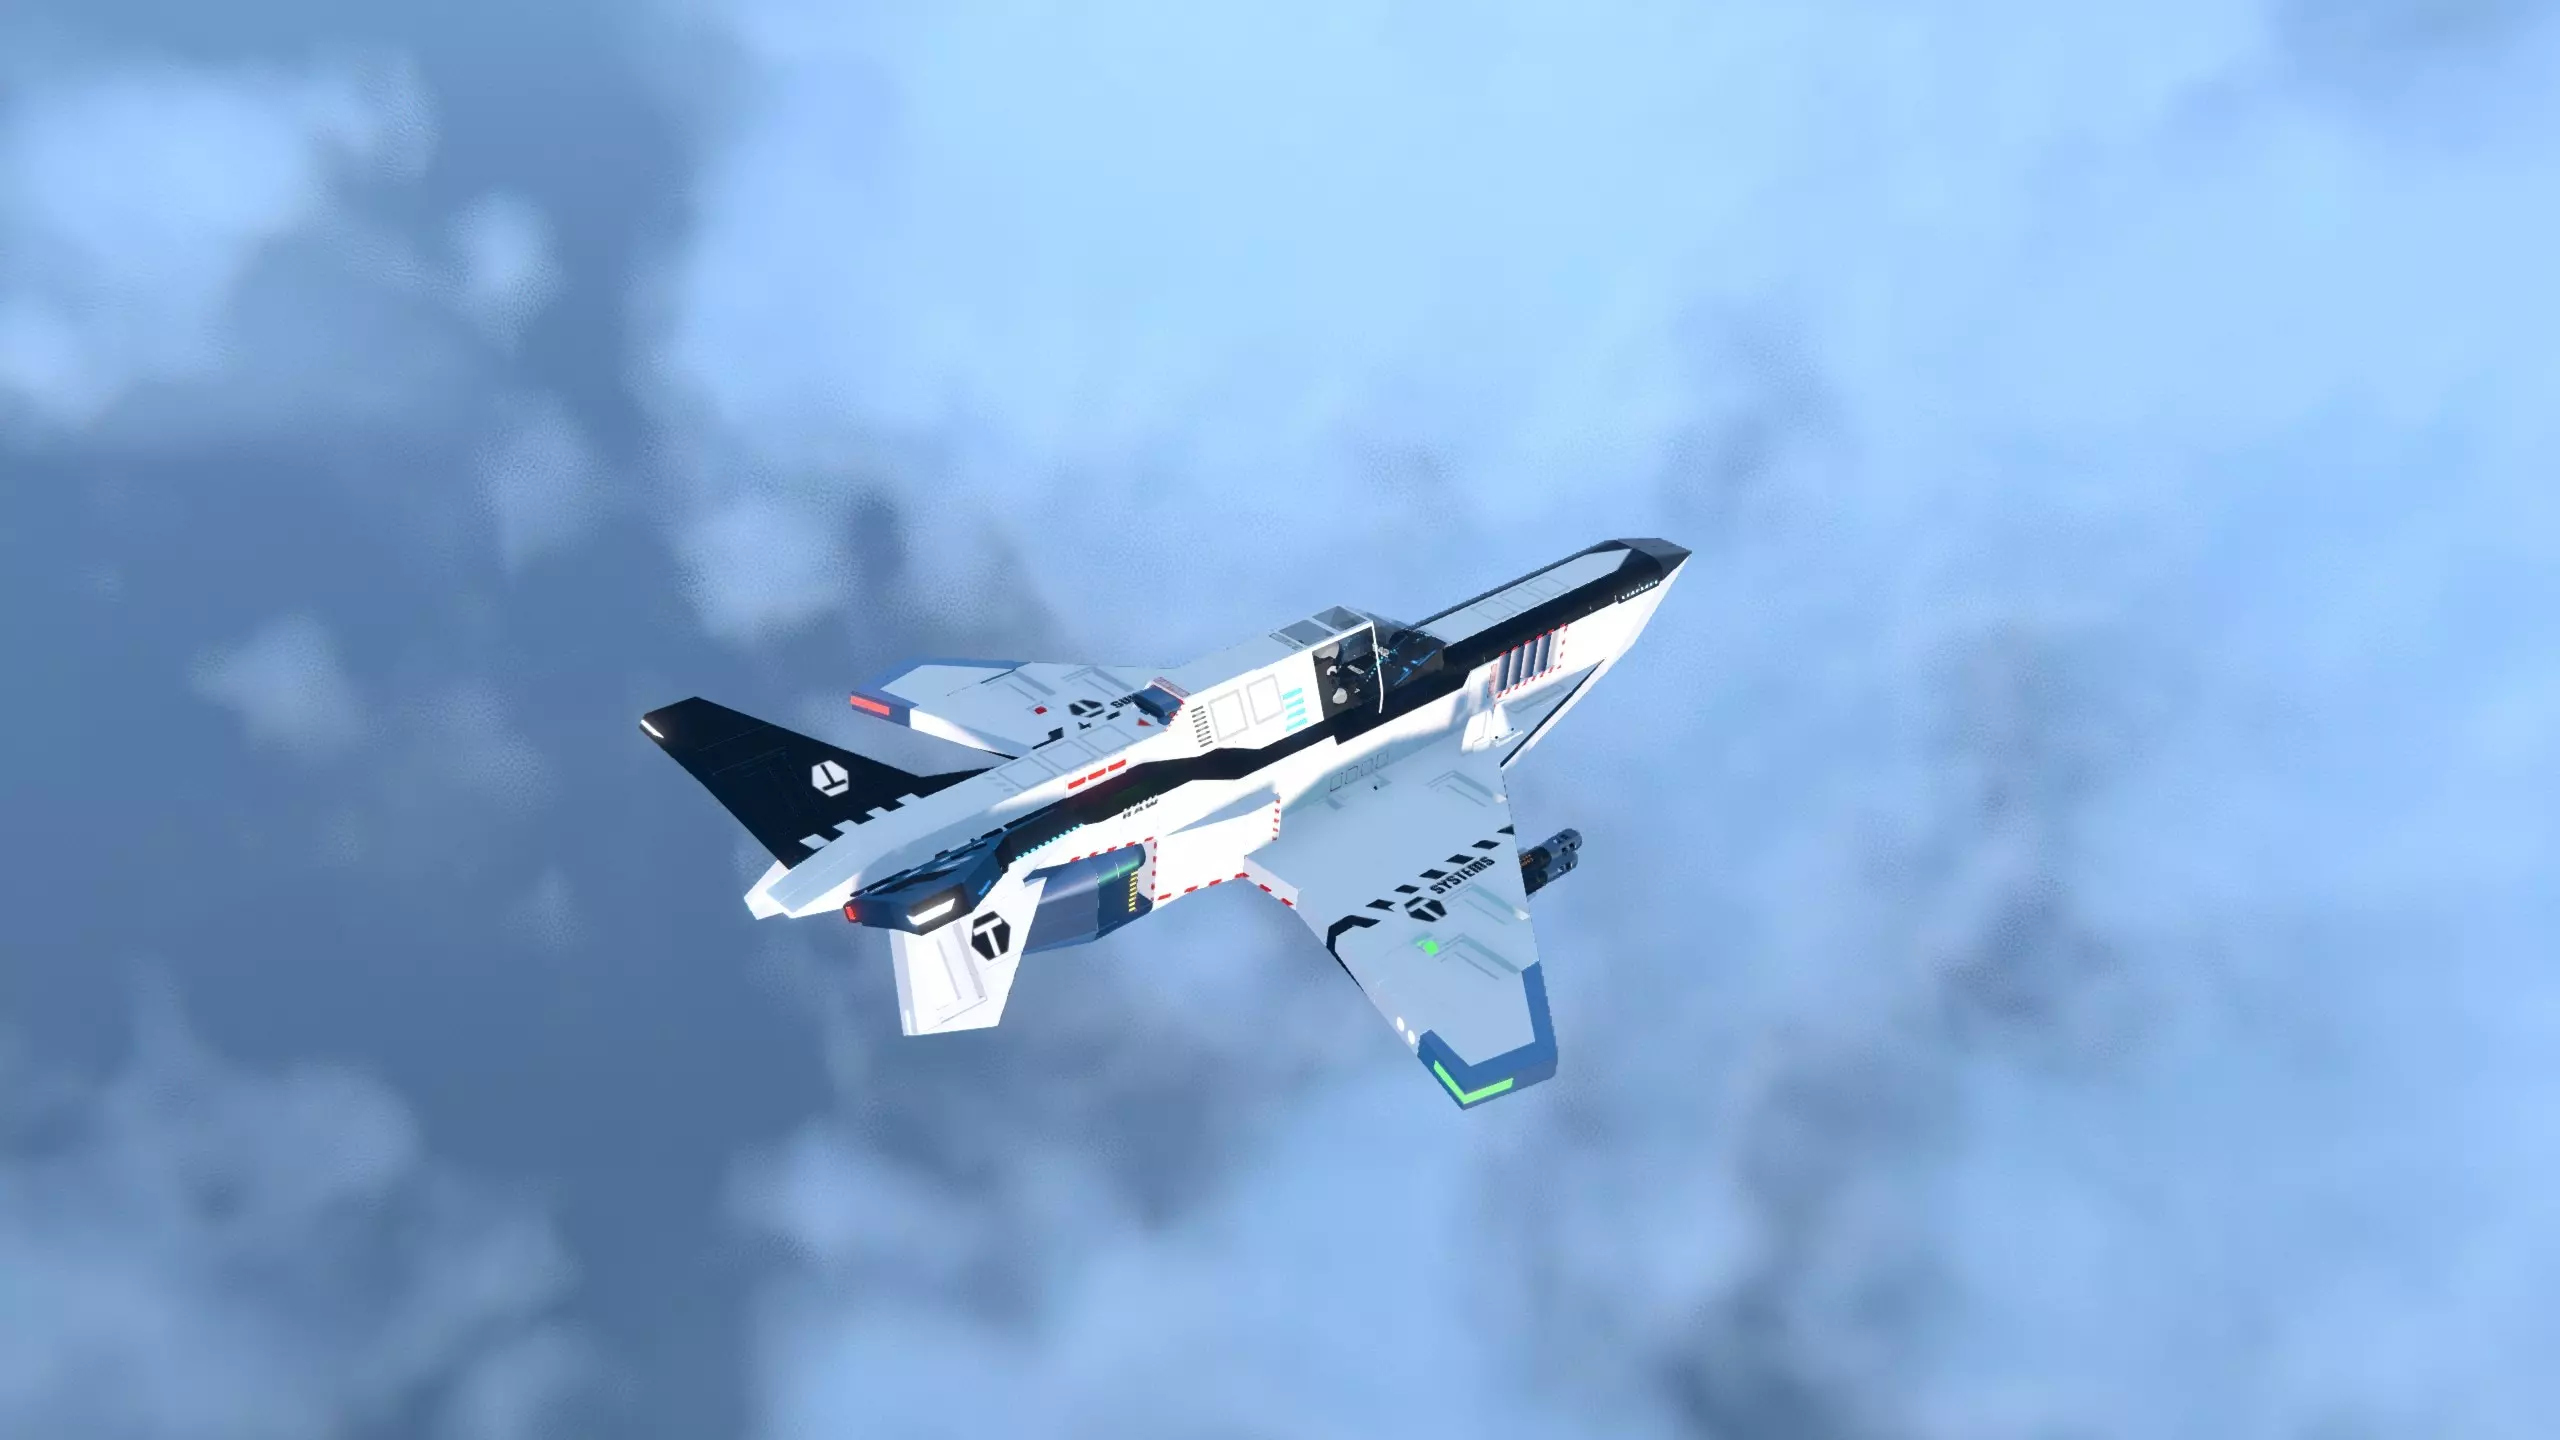
Splitting engine workload like this also enables you to set up advanced driving maneuvers using logic gates (i.e. handbrake systems for powersliding) that apply torque to only specific wheels. Bulldawg Engine - This is the engine and only propulsion that you start the Campaign mode with. It's defined by its small size, high acceleration, and low maximum speed. Engine distribution only begins to show through after stacking around 2 engines per wheel, and its low torque means its usefulness is limited for any heavier vehicles. RAW Engine - The Raw engine is a large, heavyweight engine with a big profile, high maximum speed, and low acceleration. With higher torque, the benefits of splitting engine workload between tires occurs with even just 1 engine/tire assigned. Its higher power makes it more viable for heavyweight vehicles, especially construction equipment, and it apparently can work with the following engine type to increase your maximum speed. Of special note: The RAW engine has a very specific angle at which it minimizes drag - despite how it looks, putting the large protruding bit towards the front minimizes drag. It makes some sense on closer inspection, since this appears to be some type of air intake. This is still quite noteworthy, since it's the only engine that has this directional drag difference (and for that fact, the only engine that doesn't have bad drag). Dragon Engine - Fitting into a pretty square package, this is a high performance engine with both acceleration and pure power. Putting out 10x the power of the Bulldawg engine and being half the weight of the RAW, it squarely outclasses the other two engine types in just about every way, and similarly to RAWs, can benefit from distributing engine power to individual wheels at as few as 1 engine/wheel. While extremely powerful and both lighter and smaller than the RAW, its sheer power can make it quite dangerous to use on very lightweight cars, and it has the highest Power Core draw of the engines (3). ThrustersThrusters put out pure thrust in the direction their exhaust is pointed, allowing vehicles to move through the air. They have a wide variety of applications for all sorts of vehicles, including ground-based cars or bikes (either as methods for sticking to the ground, balance, or temporary boosts), as well as all types of air-based movement as well (hovercrafts, planes, and any other flying machines that aren't copters.) Globally, thrusters have some of the highest maximum speeds of all propulsion options. For example, a car equipped with Dragon Thrusters will go faster than a car equipped with an identical number of Dragon Engines. As a bit of a cost, thrusters can only apply their force in a single direction - if you have thrusters pointing forwards, for example, you'll be able to use them to propel yourself forward, but not backwards. Their positioning also determines how they move your vehicle as well: if offset from your vehicle's center of mass, they will cause your vehicle to rotate, instead of being purely pushed forwards. Mini-Thruster - Small and low powered, these jets are often too weak to be usable as a main means of propulsion, but are great as support thrust for any ancillary movement or support - they can be faced downwards to help vehicles stick to the ground, put at far ends to allow hovercrafts or flying vehicles to turn in midair, and otherwise make small adjustments - these are great thrusters to use when off-center from your center of mass, precisely for this reason. RAW Jet - The RAW Jet is all about all-out thrust and acceleration - at the cost of consistency. As with its Engine equivalent, it's the largest and heaviest variant of thruster, and the mid-cost when it comes to power core usage. The RAW jet can only be active for a maximum of ~1.5 seconds, and requires ~3 seconds to cool off once being active for that long. It can also cool down over time without hitting this limit. It's best used as a temporary speed boost, sometimes seen on cars as a way to gain a turbo boost (often in the Rally game mode.) Dragon Jet - Dragon Jets are the main workhorses for jet airplanes and other high-speed jet vehicles. Unlike RAW jets, they can be active constantly, though unlike the RAW/Dragon Engine relationship, the Dragon Jet is not more powerful than the RAW jet (only having half the power/acceleration). However, they are lighter and smaller, and generally are more useful. Compared to the RAW Jet, Dragon Jets appear to have the same maximum speed, but will take a bit longer to reach this limit. Gimbal JetDespite being called jets, these aren't really comparable to standard thrusters. Instead, they always apply their thrust upwards (or downwards if you give them a negative speed), making them some of the most useful propulsion components for stability and balance. No matter what angle a Gimbal jet is placed at, it will always point its thrust upwards, and because they always apply force in the same direction, this does mean that even one gimbal jet, theoretically (with a chassis light enough to be lifted with it) will always go up - it won't always stay upright, but it always will apply that force upwards instead of rotationally. Placing these at the corners of a flying machine you want to make can help create a highly-stable aerial vehicle without using any aerodynamic wing components (i.e. a blimp), and with configurable thrust, they can be used to create a neutrally-buoyant vehicle that can levitate. Propulsion (continued) Hover BlockFlat plates that put out air resistance against any surface below. These are used to create hovercrafts, and work best when placed similarly to Gimbal Jets (with one caveat that they usually shouldn't be rotated.) Hovercrafts have a couple of advantages and disadvantages as vehicles: + can hover over hot lava without taking any damage + can avoid triggering explosives placed on the ground + can cross water when going at speed + can reach extreme maximum speeds with very little additional propulsion - have no friction, making them extremely difficult to control in tight corridors - will fall through water if they come to a stop - always require other propulsion pieces to actually move (jets or propellers are the most common) - very awkward to adjust using configuration menuHover Blocks used in unorthodox ways can also be leveraged to provide ground-based stabilization: because they always want to hover over the surface they are pointed at, you can apply them against your own frame (a surface) to provide an odd source of propulsion if placed vertically, or to keep a car rooted to the ground or a wall (making a spidercar) if placed upside-down. PropellerPropellers work very similarly to thrusters/jets; they provide force through the air, allowing vehicles to fly, and similarly work in relationship to your center of mass. There are some key differences, however: Unlike jets, Propellers can provide thrust both forwards and backwards. The propeller 's 'forward' is the direction the propeller itself is facing (keep this in mind if you're placing rear-mounted props). Clever placement can make use of a single propeller to turn both ways, or to go forwards and reverse. Propellers have no visible power rating, and overall have very poor acceleration. Even though they can go in reverse, doesn't mean they can change directions quickly. Most uniquely, Propellers are one of the few propulsion types that work underwater. However, they work even slower than normal under these circumstances. Helicopter EngineHelicopter Engines come in a basic and v2 variety, with the only difference being that the v2 has additional connection points on its top (which are stationary). The addition of the v2s top connection points allows you to stack helicopter engines (preferably rotating in the opposite direction to counterbalance the other one). An insidious thing about the helicopter engine is that the rotation of it provides gyroscopic force, meaning even a base Helicopter engine, with nothing attached, gives your vehicle rotational momentum. Several template vehicles make use of this principle to give themselves rotational control and tilt, and with Logic components, can allow you to build auto-stabilizing vehicles. However, if you're trying to make an actual helicopter and don't know about this - prepare for your copters to spin wildly out of control. There's a reason real-life helicopters have these in pairs, after all. Helicopter engines, like propellers, can go forwards and backwards - in this case forwards is clockwise rotation (relative to its square base) and backwards is counter-clockwise. Vertically placed, either direction, when fitted with lift-generating wings or blades, will allow you to go up, so usually this is more essential when dealing with cancelling out gyroscopic force. Helicopter Engines work underwater, and their modular attachment points mean you could technically fit them with flippers to make a swimming watercopter. Underwater PropellerAs the name implies, this is a propeller that works only underwater, and is the simplest option that works under these circumstances. Compared to using a propeller or helicopter engine in the same circumstances, they provide about 3x as much overall speed and acceleration. The drawback is that they are entirely useless out of water. Wheels

Wheels are the primary component you'll be using to make any ground-based mobility. Compared to just about every other block, wheels are designed to interact with and make contact with the ground, and have special friction properties that interact with different terrain. As discussed in the Propulsion section, wheels are designed to get direct power from Engines. They otherwise are simply attached to your vehicle via a freely-rotating axle (implicitly), and relative to the engines used, will rotate in the direction the arrows show. These can be disregarded if the vehicle being used doesn't use engines, but for quick reference, the arrows on the top of the wheel should point forwards. Offroad WheelThe wheel type you start out Campaign mode with, they serve well during its progression, since none of the areas explored in it have any roads. It otherwise handles sand, grass, and dirt well, and despite the description, does fine on tarmac as well. However, it faces a bit of challenge when going through mud (note: almost no tires like mud at all). With dimensions of 2w x 3h x 3l, offroad wheels are moderate-size, and have an okish amount of drag. It is one of the few wheel types that can float in water. Racing WheelThis wheel type is something of a mainstay for most racing modes, serving as a mid-profile wheel optimized for onroad driving. Racing Wheels flawlessly handle tarmac and pavement, with great acceleration on these surfaces. They're passable at handling solid rock as well, but become unusably slippery and slow when on grass, sand, dirt, or mud. Like offroad wheels, they are 2x3x3, but benefit also from having very low drag. Monster Truck WheelThe heaviest and largest wheel type, Monster Truck Wheels suffer from these facts, as their mass makes them inherently difficult to accelerate with and means they suffer from an inability to really climb slopes that well. Other than that, they have good to average handling on most surfaces, and are one of the few wheel types that handles mud exceptionally well. At 4x7x7 and with mediocre drag, they aren't speedy in any sense of the word, but their large size does make them quite good for creating a vehicle that can wade through water. Doubly so, as the Monster Truck Wheel floats in water, with their significant mass contributing to them serving as strong ballast. Go-Kart WheelAt a size of 1x3x3, Go-Kart wheels are nearly the smallest of all wheels, and nearly the lightest. They have similar handling to Racing Wheels, but suffer from their extremely small size - they can only take so much torque before they just inherently begin spinning out, meaning they are only feasible to use on ultra-light cars. Their aerodynamics are not as good as their larger brothers, either, being similar to Offroad wheels. Slim WheelDespite looking larger, Slim Wheels are still the same dimensions in the editor as Go-Kart wheels (1x3x3) and are the lightest of all wheels. They don't have that good of grip on most surfaces, but overall have a very similar profile to most other racing wheels - that is to say, passable traction on tarmac, and awful traction anywhere else. This all said, these are the go-to wheels to use on any vehicles that won't be primarily using them, such as aircraft landing gear - doubly so, because they have excellent aerodynamics. Drag Racing WheelThese chunky, 4x5x5 wheels can be thought of as the on-road equivalents to monster truck wheels. Being the second heaviest wheels, and generating a fair amount of drag, they require a lot of engine power (much like monster truck wheels) to be used effectively. Their big size and chunkiness does mean that any roadster that uses them will be highly stable and have great traction under those circumstances, however. Truck WheelThese rugged wheels are the smaller variant of the Monster Truck Wheels, standing only at 2x5x5, with moderate drag and being the third-heaviest wheel type, truck wheels are well-suited to heavyweight vehicles that don't need to traverse really rough terrain like mud. The Truck Wheel handles most ground about equally, with slowish acceleration. Unfortunately, it misses out on the big benefit that Monster Trucks get, in that it doesn't handle nearly as well on mud as those do, and it also does not float in water. Spiked WheelThese wheels have almost identical dimensions and appearance to Offroad wheels, but have the added benefit of improved handling on mud - it's not great handling, still being noticeably worse traction, but it is by far the best option for wheels if you want to quickly go over muddy land. Otherwise, it similarly handles most terrain quite admirably, and similarly to the offroad wheel, floats in water. Motorcycle WheelThese small, lightweight wheels are 1x3x3 in size, the smallest of them all. Despite this, they handle everything just about equally well. They can be seen as a counterpart to the Spiked Wheel, proving to be valuable as yet another tire type that can accelerate pretty well on mud (though again, not good turning regardless). If you're planning to do races on Race Island, Motorcycle Wheels serve quite well, owing to their overall adaptability and light weight, and the average amount of traction on them lending themselves well to performing drifting. SkisOnly really wheels in the most technical of the sense (I mean yeah they're made to make contact with ground, right?) they provide a slippery, lightweight, and effective contact point with it. These are the ideal choice for takeoff gear for aircraft, but cannot provide propulsion by themselves - you'll need to pair them with jets or propellers instead of engines. They also can float, but their mass is so small that it's unlikely its buoyancy would really be able to practically hold up any vehicle of size. Mechanic

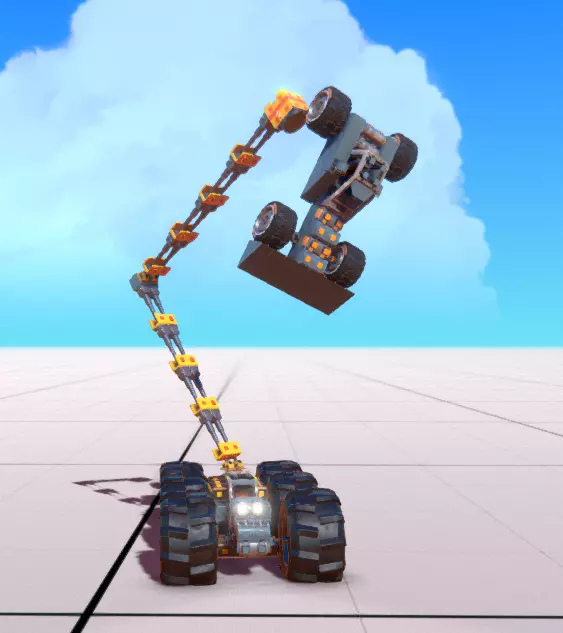
机械部件是高级零件,可让你协调载具各部分相对移动,实现弯曲、旋转、伸展、收缩等动作。与完整的推进部件相比,机械部件在强度和速度上不足以作为完整的移动装置。不过,它们在精度方面的优势远超这些不足。使用机械部件时,需要通过配置菜单进行设置,才能获得所需效果。 为方便起见,本指南将详细介绍如何调整这些设置以达到预期效果。为方便参考,以下是一些常见设置的作用说明: 速度 - 决定机械部件在接收到输入时移动到位的速度。在一定程度上,更快的输入可用于施加力(尽管单个部件产生的力有限),如果你希望转移车辆重量,这会很有用。不过,如果你想让部件保持稳定(例如起重吊车),使用较低的速度会更有利。 某些情况下,部件的速度可以设为负值。此时,输入本质上会反转,并沿相反方向应用速度。 角度 - 决定机械部件从其静止位置可以弯曲或旋转的最大角度。在了解这些功能的工作原理时,请注意这是一个相对于其在编辑器中显示的基准位置的角度,通常可双向调整。限制角度有助于防止载具自身部件发生碰撞,而扩大角度则能让部件拥有更大的活动范围,同时也能提供更多积累速度的潜在空间。 强度 - 决定组件在无输入时保持其位置的力度。范围从100(始终尝试保持位置,刚性)到0(自由摆动关节)。可用于让机械部件在压力下有一定的“弹性”。 保持位置 - 一个切换开关,用于指示机械装置在无输入时保持其最后位置。默认情况下为关闭状态,此时机械装置会回到其基准状态。关闭它适用于转向系统等场景,在这些场景中,你希望机械装置能回到中立位置,以帮助直线行驶。同时,开启它更适用于需要长时间进行更精细定位的情况,例如旋转起重机。
使用机械装置的一些连接技巧还包括: 确保框架的连接点仅通过机械部件进行连接。如果一个机械部件两侧连接到车辆底盘的同一个方块上,它将无法正常工作。 自碰撞:车辆活动部件的碰撞箱是根据所有组件计算的,但不包括管道、气动方块、任何小于标准“方块”部件的框架方块以及其他1x1x2或更小的物体——不过这并不完全一致(例如,转向铰链虽然只有1x1x1大小,但似乎不喜欢穿过物体,较长的网格方块也无法很好地穿过)。
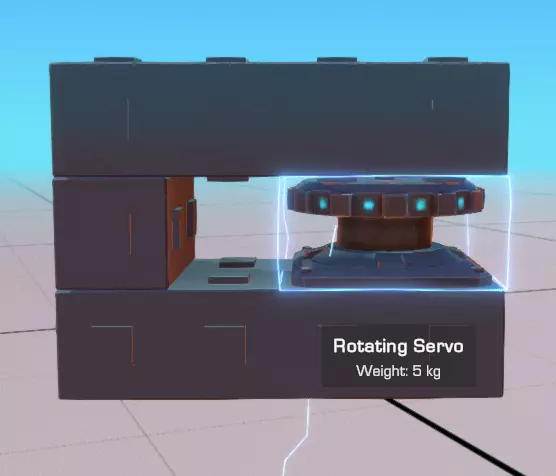
转向铰链 这是你在战役模式中初始获得的机械部件——一种基础铰链,可向两个方向各弯曲最多90度,主要用于通过将车轮连接到这些铰链上,使你的车辆能够转向。正向输入会使其沿绿色箭头方向弯曲,负向输入则使其沿红色箭头方向弯曲。 转向辅助——这决定了根据当前速度应减少的输入量。默认值为100(随速度完全减速),但可以完全关闭——关闭此功能对于那些不用于实际转向系统的铰链可能很有用。大型铰链 一种更大版本的转向铰链,沿其旋转轴方向更宽。大型铰链的弯曲角度较小(最大60度),但稳定性更高,更适合移动非车轮组件——尤其是因为大多数车轮通常安装在1x1的连接点上。 拖车铰链 在机械组件中较为特殊,拖车铰链没有可配置的控制选项,而是作为两端部件之间的松散摆动、完全活动的关节。这对于构建能够承受并适应地形弯曲的松散“牵引”延伸部分非常有用。不过,要注意不要在两端都使用动力推进装置——因为两部分之间的角度实际上可以是任意的,这会使以这种方式连接的载具操控起来非常不稳定! 悬挂弹簧:这是一个1x2x3的组件,能对角吸收冲击力,两侧各连接一个组件。它非常适合直接连接车轮。 悬挂组件有两个可配置的设置,但不需要任何输入: 【刚度】——压缩弹簧所需的重量。较重的载具应使用较高的设置(否则悬挂会一直处于压缩状态,无法发挥其作用——应对颠簸的着陆和路面凸起)。否则,过度的硬度会使车辆的悬挂位置更高,从而提高其重心。 阻尼 - 决定悬挂抑制运动的程度。较高的设置稳定性更好,更适合平坦地形;而较低的设置会让悬挂更具“弹性”,对运动的反应更灵敏,非常适合崎岖地形,但在平坦表面上可能更难控制。 要仔细观察这两项设置的变化对车辆的影响,请注意车辆在离开编辑器着陆时的弹跳程度,以及静止时的高度。根据个人喜好进行调整。 旋转伺服器:这种扁平(2x1x2)的盘状机械装置可在设定角度内缓慢且精确地转动。输入为正时,它会顺时针旋转(相对于其方形底座),输入为负时则逆时针旋转。 旋转伺服器速度慢、运行平稳且精度高,最适合用于需要精确旋转的部件,例如起重机、炮塔或飞机的方向舵调节。其配置中特别值得注意的是角度范围,最大可达360度,这使得旋转伺服器能够实现完整的周期性旋转运动。 机械装置(续) 旋转伺服器 这个更高的(2x2x2)部件与旋转伺服器的精确控制不同,它用于更快、控制较少的旋转——两者不应混淆!旋转伺服器始终以快速且不受控的速度进行360度全范围旋转。它无法被指令保持位置,只有在接收到反向输入时才会停止旋转,除此之外其运作方式与(低功率)直升机引擎颇为相似。总体而言,它的实际应用场景远少于旋转伺服器——任何你想使用它的地方,使用某种真正的马达可能会更好。 窄活塞用于线性运动,可安装在1x4x1的空间内。在低速时,它们可用作收纳长部件以便移动的方式;而在高速时,则有可能用于创建能让你跳跃的系统!收缩时,它们可收纳进1x1x1的空间。活塞或许是所有机械部件中最大速度最高的,这使得它们非常适合提供爆发力——然而,由于其运动仅为线性且存在最大长度限制,所以它的作用也就仅限于此:一次爆发。正输入会使活塞伸出,负输入则使其缩回。 起始位置——简单设置,用于设定活塞是从伸出状态(1.00)还是收缩状态(0.00)开始。 自动重置——活塞版的“保持位置”设置,但作用相反。未勾选时,活塞会保持当前位置;勾选后,活塞会重置到起始位置滑块所定义的值。
一个奇怪的小勘误:活塞向后移动的速度比向前快,这意味着如果你将活塞的速度设置为负值,然后将其负输入绑定到你想要用来伸展活塞的控制上,你会获得比最大正速度更强的冲击力。 可分离方块 这个特殊的机械部件用于将你造物的一部分与自身分离。它可用于制造多种装置,例如:分支车辆、能部署一次性地雷或导弹的武器系统,以及多级火箭等。 不出所料,可分离方块只能触发一次,触发后它会无害地自我销毁,从而切断两端方块之间的连接。一如既往,连接回路原则在这里同样适用——如果两端的方块通过不可拆卸的方块在你的底盘其他位置相连,那么该组件就会自行删除且不发挥任何作用。 技术方面需要注意的是,从基础结构分离出的每个组件都会算作独立载具。因此,如果你重生该组件,游戏世界中的载具部件数量可能会呈指数级增长,这可能会对性能造成一定影响。请谨慎使用;很明显,其预期用途是用于在特定时间后会自毁的分离组件。 直向悬挂:与悬挂弹簧类似,但这次是沿完全线性方向应用,且适配1x2x1的空间。这些部件对于任何可能与地面发生正面撞击的车轮系统(而非更被动的接触)都很有用,也适用于为可能发生碰撞的载具创建溃缩区。逐个方块比较,这种直悬挂部件在其指定方向上吸收冲击的效果更好,但在保持质心方面表现较差。通常,它最适合用于较重的载具,以及分隔车架的不同部件,而不是作为部件的直接安装座。 空气动力学

气动方块是框架方块的变体,其斜面或曲面设计专门用于最大限度减少风阻。它们在以下方面非常有用: 1. 通过减少气动阻力来提高载具速度(最明显的用途) 2. 减轻载具重量——单位体积的气动方块总是比同等空间的完整框架方块更轻 3. 限制连接以实现紧凑的机械结构——带有曲线或斜面的表面会限制在其表面上的连接。每个气动方块通常以产生最小阻力的朝向显示。将方块的斜坡或曲面朝向正面,通常会比其他朝向产生更小的阻力,在这种情况下,该方块的阻力与标准框架方块相同。 大多数气动方块的作用不言自明,且没有任何控制方面的注意事项。 灯光

它们能照亮黑暗区域。 关于这些组件,唯一需要说明的是其控制设置: 【灯光按键】——尽管名称如此,启用此选项后,其实际作用是将生成时的灯光默认状态设为关闭而非开启(这一点在编辑器中也会有所体现)。如果你计划通过控制装置以任何有意义的方式与灯光进行交互(例如,通过按钮开关灯光,或者仅在倒车时点亮尾灯),那么你需要勾选此选项。否则,无论你进行何种额外的映射设置,灯光都将始终保持开启状态。 尾灯仅用于展示和提升可见性,而基础前大灯比v2版本的前大灯照射范围大得多,但代价是重量更重且空气动力学轮廓更差。接下来继续介绍。举起与拖拽

升力件和阻力件可操控气流,用于制造能够飞行、悬停或贴地行驶的载具。该类别中的每个部件都会影响载具在空气或水中的移动方式,通过对移动做出反应来产生飞行效果或推进力。
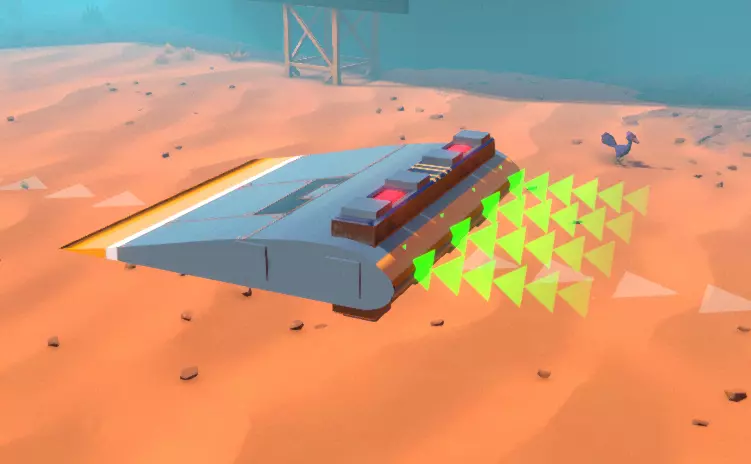
这种超轻型部件会产生与其顶部相对的反向升力。显然,它的设计初衷是让你的车辆更好地贴地行驶,但你也可以将其翻转过来当作临时机翼使用。不过,它不像其他部件那样易于用于此目的,因为其连接点都位于侧面和底部,这意味着如果推力仅安装在机翼上,你将无法平衡推力。 模块化机翼
这些机翼专门用于制造完全飞行的机器,其顶部、底部和侧面均设有连接点。请注意,它们比扰流板重得多(小型机翼的重量是扰流板的10倍——但仍仅重1千克),不过在高速行驶时,机翼产生的升力足以抵消其重量,并且可以通过机翼顶部和底部的推力来实现平衡。 模块化机翼有小型(4x1x2)和普通型(4x1x4)两种尺寸。产生升力的正确安装方式是将较厚的一端朝前,机翼的平面朝下。若将机翼倒置(平面朝上),则会产生向下的力而非升力;若将机翼反向安装,则会限制车辆在空中的倾斜和转弯能力(这在需要稳定时可能有用)。尾翼 这些部件主要用于模块化机翼的末端,其尺寸与机翼相当接近。除了“尾翼”部件外,所有尾翼都仅在一端进行连接。 最轻的型号是小型尾翼(1x2x2),其次是简易尾翼(1x3x5),最重的是基础尾翼(2x4x2)。小型和简易尾翼在升力与重量的比值方面表现更优,而基础尾翼在顶部设有连接点,且宽度均匀,能够居中安装在大多数载具上(不包括使用摩托车座椅等奇数宽度座椅的载具)。 尾翼原则上设计为垂直放置——与机翼不同,它们两侧对称,产生升力的能力也不如机翼。相反,它们提供旋转稳定性和操控性。如果你的飞行器尽管有推力,却难以直线飞行,试着添加一个这样的部件来更轻松地瞄准方向。 直升机叶片:直升机叶片旨在与直升机发动机配合使用,通过旋转产生升力。它们前后对称,这意味着如果你将它们安装到直升机发动机上,无论发动机朝哪个方向旋转,叶片都会产生升力。与模块化机翼类似,但直升机叶片带有曲线设计,旨在根据自身运动产生升力。如果将其倒置安装——那么,它们会朝那个方向产生升力,这意味着你会下降而不是上升。如果你想获得升力,确保他们刀刃上的凹陷是朝下而非朝上的,就像右侧图片所示。
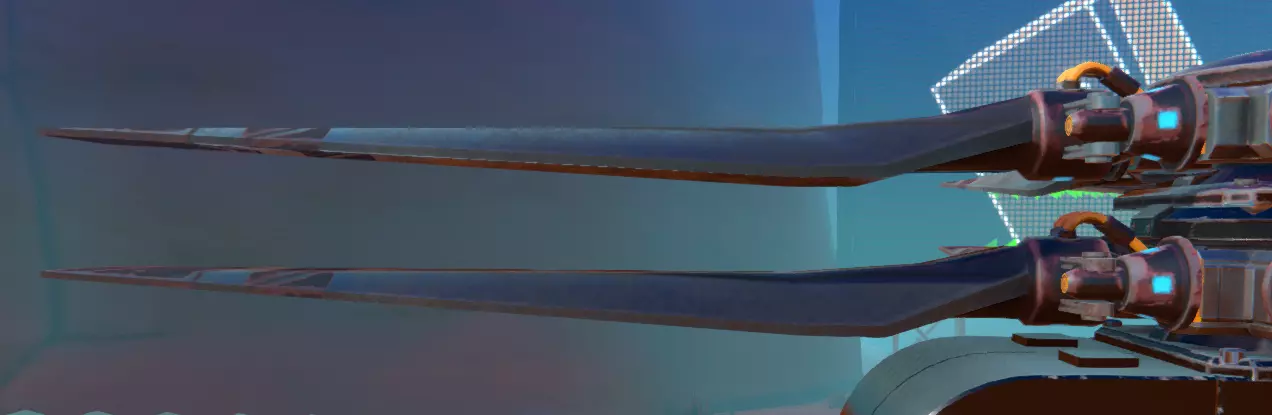
直升机旋翼占据2x1x8的空间,其宽度使其非常适合安装在恰好具有2格宽度和2个连接点的直升机发动机上。桨叶
虽然该类别中的其他所有物品都是为与空中移动交互而设计的,但船桨是专门用于推动载具在水中行进的。船桨的顶面和底面呈对称结构,与尾鳍类似,因此可以灵活调整角度以在水中产生推进力。船桨最直接的用途是作为方向舵,与水下螺旋桨配合使用,以提供转向所需的旋转力(尤其是当你只有一个动力核心可供使用时)。即使不考虑这一点,创造性地使用桨叶也能提供推进力——例如,将角度合适的桨叶通过固定铰链连接到直升机发动机上,可以近似模拟水下螺旋桨的效果,而对这些部件的非常规使用甚至能造出类似划艇的东西。 桨叶有常规尺寸(2x1x3)和大型尺寸(4x1x4)两种。 动力尾鳍:动力尾鳍的基本尺寸与普通尾鳍相同(分为简易型、小型和常规型),但有两个主要区别: 1. 每个动力尾鳍会消耗1点核心动力。 2. 它们会产生额外的阻力——换句话说,对任何不与其朝向平行的运动都会产生额外阻力——也就是说,它们非常不喜欢侧向移动。简而言之,如果你在稳定飞机或直升机时遇到极大困难,并且希望它们能非常笔直地飞行,就使用这些东西。否则,【人工增强阻力】通常会限制你在某些方向上的机动性,同时还会消耗动力核心的能量,而这些能量本可以用于额外的推进或实用 gadgets。 导管

管道主要是1格厚的组件,擅长以下三项主要任务: 1. 与同等数量的框架方块(网格方块除外)相比,能减轻重量。 2. 限制使用机械或推进方块进行交互的连接性,这些方块可能会定义活动部件。 3. 允许造物的活动部件相互穿透——在涉及自碰撞时,大多数实际为管状的管道部件不计入此类碰撞。 除此之外,管道的实用性往往有所欠缺——如果使用网格方块,它们产生的阻力相同,更易于旋转和配置,甚至重量更轻。与此同时,管道弯头部件与其占据的单个空间相比显得过重。此外,这一类别中的锥形方块也完全不合逻辑(我完全不明白为什么它们会在这里,而不是放在空气动力学方块部分)。 不过,考虑到较大方块往往更耐用的规则,较长的管道变体可用于轻量化的远距离连接(1x8管道在这方面表现突出),并能实现一些特定的精确连接(例如,斜向部件非常适合连接扰流板等组件)。否则,如本指南前面所讨论的,有更快、更轻的建造方法可供选择。 平衡

平衡块用于重新分配载具的重量和浮力。这类部件通常对工程车辆(起重机、推土机、炮塔)和船只更有用,而大多数赛车和飞行器反而会因这些部件而变得笨重——该类别下几乎所有部件的风阻都很差,进一步加剧了这一问题。 重量块 重量块是体积小(2x1x2)但重量极大的方块。它们有两种规格:一种是圆柱形基础重量块,重30千克;另一种是重型重量块,呈矩形,各面均有连接点,重量为50千克。虽然重型重量块的连接性更强,但其风阻比圆柱形基础重量块更差。
配重块对于打造带有起重机等部件的工程车辆至关重要,在战役模式中尤其关键。它们能帮助你在搬运物体或处理细长突出部件时提供杠杆力,防止车辆倾倒,或让车辆在承载较重负载时仍能移动。 浮筒是专门用于制造船只的漂浮装置,有小型(2x1x1)、中型(4x2x2)和大型(8x4x4)三种尺寸。尺寸越大,重量自然也越大,但能为车辆提供更强的浮力。显然,船上需要足够的浮筒来保持漂浮,但过多的浮力则是浪费。浮筒只有单侧设有连接点,因此它们通常会安装在载具的外围。 浮筒的安装位置应尽量高一些以保证稳定性,但也可以安装得低一些来尝试让船只浮得更高。浮筒的安装大致遵循与安装机翼或万向喷射器类似的放置原则。请记住,这与你的重心密切相关——如果重心位于浮力中心上方,那么船只在航行时若倾斜角度过大,通常会发生倾覆。 浮筒纵向放置时阻力更小,这是它们相较于其他两种浮力装置的优势,也使它们非常适合安装在水上飞机上。浮力控制装置 浮力控制装置(BCD)是一个立方体的中型(4x2x2)浮筒,具有可调节浮力。在大多数方面,它只是基础浮筒的平面升级版,只是连接点略少一些。 向浮力控制装置输入正值会增加浮力,输入负值则会减小浮力,使其下沉或下潜。 浮力控制装置主要用于建造潜艇,通过调整浮力可以调节水下深度和朝向,遵循与中心浮力相同的一般规则(如果想让潜艇倾斜,也可以使用非中心浮力)。同样不错的是(即使对于非潜艇而言),该模块的初始浮力可以调节,范围从完全不浮到与标准中型浮筒一样漂浮。虽然它们无法将浮力设定在特定水平,但这使得它无需控制装置即可用于精细平衡水上载具。 船体方块:船体方块是完美的立方体(4x4x4)部件,各面均有大量连接点,包括角块、边块和中心块,适合建造船只结构。如果你计划建造的船只不太注重优化漂浮高度(或者说只是想制作某种能浮在水面上的筏子或船只),这些部件非常理想。它们可以轻松地连接在一起,并与其他结构相连,组成大型漂浮载具。 除此之外,它们在重量等方面与大型浮筒大致相当。 gadgets

Gadgets are specialty tools that use up your Power Cores to give your creations additional options of what they can do. Globally, most are small, but can pack a big punch. Just about every piece of gadgetry is configurable in some way. CannonsBring out the big guns, Cannons are used to inflict damage to objects and vehicles with projectiles. They come in a subclass of Large Cannons (The Tank Cannon and Large Cannon), which cost 3 power cores and fire an explosive shot once every second, and the Small Cannons (Small Cannon and Tiny Cannon) which cost only one power core, and fire a high speed ballistic bullet every 0.5 seconds. The only difference between the two choices in the subclasses is how they're positioned, with the Large Cannon and Small Cannon being mounted on an angled turret, and the Tank Cannon and Tiny Cannon being mounted directly facing off of the surface they're attached to. Otherwise, there are minor differences in how they all compare in weight and size but they otherwise operate exactly the same. Cannons generate recoil, so keep that in mind when slapping them on a very lightweight vehicle. Alternatively this does make them a possible source of propulsion if used wrong enough. Cannon projectiles drop off over time (with greater gravity applied to Heavy Cannon shots than the light ones), and have a limited range, turning from yellow to green as they go further. The shot speed also scales with the speed of the cannon, meaning that attaching a cannon to a piston or other moving component that thrusts it forward while firing will make the shot travel faster as well. DispensersDispensers are gadgets equipped to generate physics objects in the world. They have both positive and negative input, with the positive input spawning (really more flinging) the object out from their spawner, and their negative input despawning generated objects immediately. When you use positive input for any dispenser that has a nozzle (ones that take up 2x4x2 instead of 2x2x2) you can charge the dispenser up to fire out the object at a higher speed, getting it more range (and potentially more damage on collision.) It takes roughly 0.3 seconds to reach a maximum charge for this firing. Beach Ball Dispenser - Dispenses whimsical bouncy beach balls. These fire out at a lower maximum speed than most other dispensable objects, and do not cause any damage to vehicles, making these good for sports or play. Snowball Dispenser - Dispenses orbs of snow. Unlike most other dispensed objects, snowballs destroy themselves on contact with any surface, no matter how fast or slow they fly or fall. Their maximum launch speed is quite high, and they do cause damage to vehicles. Concrete Wall Dispenser - This is the only dispenser that doesn't charge up and fire its item, but rather just plops it out unceremoniously nearby. Concrete Walls are wide, sturdy, and heavy, meaning they make for rude traps and blockades to stop people from moving. Metal Crate Dispenser - These dispense large metal crates that are heavy and cause damage on contact, while also not falling apart on contact with the ground. Dispensable objects globally follow these rules: They cannot be interacted with using the Tractor Beam They persist until they either reach a spawn limit for the number of objects for the given player, or until they manually despawn using negative input. They do not float in water. Tractor BeamThis used to be called the Electromagnet (which made its lack of interaction with metal crates all the more confounding). Nonetheless, the tractor beam's utility in Campaign Mode cannot be understated, and its ability to otherwise attract non-player-generated objects such as orbs or salvage makes it highly useful for manipulation and moving objects. The Tractor Beam can also influence other player vehicles. Positive Input to the tractor beam will attract objects into its area, while negative input repels objects instead. Each Tractor Beam on your vehicle can latch on to one object. When not hanging on to something, it emits a wide cone of energy, which will shrink as soon as something is within its grasp. Having multiple Tractor Beams (properly spaced) can thus allow you to carry along multiple objects at once. Anchor PinThis gadget is the most unusual - it has no Power Core cost, doesn't have controls, and basically is the inverse of the Detachable Block (a mechanic piece, where it honestly might make a little more sense?) What it does is: as soon as it makes contact with the ground, an object, or another vehicle, it forms a permanent sticky bond. This even extends to dispensable objects (i.e. the things that Tractor Beams cannot affect). Anchor pins stay bonded to the object they are stuck into, until you repair your vehicle. The most valuable uses for the Anchor Pin are in fact, not for vehicles, but for basically any stationed emplacement or structure, like a turret, tower, standing ride, or house. For this it's especially valuable when getting stuck in terrain, as it forms essentially the ultimate counterbalance. DynamiteThese small blocks of explosive (2x1x1) can be fitted onto a vehicle to make it explosive, allowing you to either just destroy yourself in a horrible blaze of glory, or to set deadly traps or create custom missiles. Dynamite explodes when either detonated manually (using the positive input) or when subjected to a strong enough force, similar to volatile pieces of salvage in Campaign mode. If you want to use them to make deadly traps, it's valuable to combine their nasty explosion with logic blocks to define a trigger, since there's currently no way to give a remote, separated part of your vehicle signals after they detach. Logic

最复杂的方块——逻辑方块包含多种逻辑门、传感器和工具,可用于自动控制载具部件,或将载具控制按特定用途分配到不同按键。 逻辑方块通过输出缩放值来控制发送给其他组件或逻辑门的“控制”等级。对于大多数标准用途,+1.0和-1.0的值能产生最佳效果,但更精细的数值可用于执行诸如保持空中或浮力部件的微小角度以及微调等任务。 关于逻辑方块,有几点需要注意: 它们的重量始终与相同尺寸的等效数量完整方块(如“框架”类别中所示)相同(如果存在此类方块)。大多数传感器模块对朝向敏感,这意味着它们会沿模块所面对的方向检查条件。通常,这与模块上带有显示屏的指示器或表面相对应。 逻辑运算模块接受输入,包括手动输入和来自传感器模块的输入。传感器模块仅生成输出。 传感器模块的输出始终是二进制的。如果其设置的条件不成立,则输出“0”;当条件满足时,将输出其设定的值。 逻辑模块将任何非零输入视为有效输入。此时,它们会将该数字(可以是正数或负数)缩放为模块上列出的输出值。例如,一个输出设置为-0.5的逻辑模块可能会接收到-0.9的输入。当它检测到这个-0.当数值为9时,它会将该数字四舍五入为-1.0,然后将该值乘以-0.5,结果反而得到+0.5。希望这能讲得通。 任何逻辑模块的输入都是其接收到的所有输出信号的总和。这意味着如果一个逻辑门接收到+1.0和-1.0的信号,它们会相互抵消,逻辑门不会产生任何动作。 手动输入始终为+1和-1。 需要注意的是,将这些模块的输出用于驱动其他组件(例如机械装置或引擎)时,往往会在一定程度上削弱这些部件在正常控制下所具有的“平滑性”。有时直接通过组件本身进行手动控制效果会更好。 逻辑模块 - 与门、或门和异或门

这些2x1x1的方块是逻辑门。当满足特定的输入规则时,它们会生成输出。其显示界面会展示一个维恩图,直观地表示其功能,同时还有两个箭头——一个指向内部(输入箭头),一个指向外部(输出箭头),箭头会变为红色或绿色,以反映它们接收或生成的输入/输出类型。白色轮廓的箭头表示未接收或生成任何信号。 从限制最少到最多的逻辑门如下: 或门——只要连接到或门的任何输入(无论是传感器、其他逻辑门还是手动控制)变为非零值,或门就会生成输出。或门是构建逻辑输入链以同时控制多个组件的最简单方式。异或门 - 异或门仅在输入中只有一个非零信号时才会生成输出:如果它从单个组件或传感器接收到信号,就会根据该输入生成相应的输出信号。如果在此基础上,又从其他传感器、逻辑门或控制输入接收到信号,异或门就会停止输出。相互抵消的信号也会触发此限制,因此即使两个传感器/门分别发送+1和-1信号,最终结果为0,异或门仍然不会生成任何输出。 异或门可用于生成反相(即非)操作,方法是将其连接到一个始终开启的传感器,然后接入另一个能使其停止信号的输入源。 与门 - 与门只有在且仅在接收到的每一个输入源均为非零信号时,才会被触发。这也适用于与其相连的所有其他门或传感器,以及可能在其自身上配置的任何直接输入。虽然这有助于定义可能仅在非常特定情况下才会发生的精确控制,但在简单情况下使用时确实有很大限制。作为异或的反运算,相互抵消的额外信号会促成其激活,而非阻碍。 逻辑 - 传感器 传感器根据从周围空间收集的信息生成输出。这是你使用逻辑组件构建各种酷炫自动化系统的主要方式,例如 proximity mines、自动平衡陀螺仪、自动扶正机制或中性浮力漂浮装置。传感器有以下常见配置: 反转触发 - 这相当于传感器本身的非运算符,当传感器满足与其标准条件相反的条件时发送输出信号。这对于创建“常亮”输入信号特别有用,尤其是对于任何非驾驶机制。 距离传感器 - 距离传感器测量其2格长边所在平面到前方任何固体物体的距离。如果物体在该距离内,屏幕会亮起白光并发送输出信号。距离传感器是最容易调整为持续生成信号的传感器,这得益于其小巧的尺寸(2x1x1)和简单的配置:只需反转其信号,并将激活距离设为0,因为它可能检测到的所有表面都会比这个距离更远。 速度传感器——速度传感器的1x1小侧面有一个箭头,指向一个开口,用于测量其所附着的载具或机器沿该方向的行驶速度。一旦超过此速度阈值,它们就会生成信号。 它们在检测线速度(即沿传感器方向直线前进的速度)方面表现更好,而在检测角速度(即原地快速旋转)方面则稍逊,但显然也可以通过这种方式使用。速度传感器可用于为汽车和气垫船创建制动系统,其原理是感应前进/后退速度,然后将这些信号输入或门,再连接到启用输入的与门,为轮胎或喷气发动机提供反向速度。与距离传感器类似,速度传感器也可调整为“常亮”信号模式。 高度传感器——在用于生成信号的传感器类型中,高度传感器可以说是最不实用的。它是唯一完全与方向无关的传感器类型,不过其仍会受自身在载具上的位置影响。当高度传感器高于设定的海平面高度时,就会生成信号。 高度传感器的独特之处还在于,它是唯一能准确显示数字(代表该方块高于海平面的高度)的传感器。因此,它的主要用途是进行测量,以及协调高级船只或潜艇的机械装置。 角度传感器——这些较大的传感器(尺寸为2x2x1)能检测自身的倾斜角度。无论传感器如何放置,其箭头始终尝试朝上。当箭头(或仔细观察时,传感器内部的球体)处于蓝色区域(该区域始终相对于你的载具)内时,传感器就会发送信号。这类传感器是配置选项最多的,有两个设置: 方向:激活区域相对于传感器顶部的旋转对齐方式。实际上,你只需使用0-90范围内的数值,因为其他所有角度都可以通过旋转整个传感器来实现。角度:传感器可被激活的范围大小。
角度传感器对于自扶正或自平衡系统的反应至关重要,但通常至少需要两个角度传感器,以便为系统提供足够的环境信息,判断载具可能的倾斜方向,从而确定激活哪些平衡组件以及激活方向。如果需要同时检测左右和前后方向的倾斜,情况会更加复杂,这需要额外放置两个与第一个传感器垂直的角度传感器。 出于上述目的,角度传感器通常垂直放置比水平放置效果更好——这同样是因为它们的感应点倾向于朝上。我猜这些传感器也可以用于检测微小倾斜?指南针 指南针与角度传感器外观基本相同,但呈红色。它的指针始终会尝试指向北方,这可用于在较大区域提供额外的导航参考(无需在游戏和地图之间频繁切换)。和高度传感器一样,它似乎更像是一种信息工具,而非信号生成器——当然,除非你想制造一枚能快速朝北飞行的火箭。 需要说明的是,指南针的工作方式与角度传感器相反,平放时价值最高。或许可以通过创意方式利用它们来协调精细的横向移动,但这种情况下可能至少需要4个指南针才能获得有意义的结果。物理基础 为了帮助打造功能正常、操控良好的载具,以下一些概念值得探讨: 【质心】 载具的质心可理解为其整体平衡的中心点。大多数载具的质心通常是固定的,但如果机械包含可伸展或弯曲的部件,质心可能会发生偏移。这种偏移既可以被利用,也可能导致载具出现意外的操控表现。
To find it, it's usually best to hover over parts on your vehicle and try to find where the heaviest parts of it are. Sadly there's no shortcut to this, it's just a thing you have to get a sense for by knowing how and where the pieces are. Trailmakers' built-in help files discuss this concept slightly, but it cannot be overstated how important knowing how and where to estimate this center of mass is for making any type of vehicle, because just about every source of propulsion or movement interacts with how it's centered in relation to it. The most general rules I can give for designing things in relationship to this center of mass would be: Cars/Ground Vehicles: Should form a pretty stable pyramid between wheels to avoid tipping over. More out of necessity than performance, cars need to have their wheels below center of gravity. Air vehicles: Center of mass should be balanced against the center of lift - primary sources of lift (the big wings of a plane, or the main propeller of a copter) should be around or on top of this point to avoid tilt upwards or downwards, and work best, inversely to wheels, when placed towards the top of the vehicle. Sea vehicles: Center of mass works with centered buoyancy, and you'll need more buoyancy to counteract heavier parts of your machine. In these cases, excess buoyancy can help for making boats capable of lifting heavy loads without sinking, and you will always want to put your center of buoyancy above your mass to avoid capsizing. Hovercrafts and jet-directed mobility: Thrust that's centered and balanced around the center of mass will produce linear movement (accelerating), whereas thrust imbalanced around it can produce intentional or unintentional rotation. Use this to turn hovercrafts, or to re-angle submarines or jets. The heavier your vehicle gets, the harder it becomes for minor weight shifts (either from the vehicle's motion itself or from anything it might be lifting or moving) to offset that. This means that heavy vehicles, while they might be slower, benefit from being able to haul larger objects without unexpectedly capsizing. Turning TechniquesTo rotate vehicles, you generally can take one of three approaches: Force Direction - Re-angling a component that applies force. Examples of real-life vehicles that use this include cars, motorboats, and helicopters. Airflow Direction - Re-angling the vehicle using changes in air-resistance or buoyancy. Examples of real-life vehicles that use this include airplanes, sailboats, and submarines. Specialized Direction - Usage of specific components that are individually created to control turning. Examples of real-life devices that use this method include self-guided missiles, Roombas and other robots, and EVA modules. Force direction usually involves usage of Mechanics parts to bend parts of your vehicle that generate your forward motion. The most classic and upfront way that Trailmakers demonstrates this is through use of wheels directly attached to turning hinges - but you can take this principle even further: nothing's stopping you from attaching underwater propellers, helicopter engines, or entire halves of your vehicle to these kinds of hinges either. Redirecting the way you apply force tends to be one of the simplest ways you can make a turning system, and in some ways, there is considerable overlap with how this manifests with how directing airflow also occurs. The key element here is that there's a fundamental change in the direction in which force is being directed: you turn a car's wheels right, and the movement to turn right is both due to how the wheels themselves change angle and are rotated forwards, but also because there's now movement forward being generated in that direction. Meanwhile, the Helicopter is an even better example of this, because the direction the top rotor is angled determines how it moves laterally. Pros: Very easy to implement with Trailmakers' tools, works well with redistributing mass of the vehicle. Cons: Difficult to turn or maneuver in tight corridors Airflow direction emphasizes use of actual aerodynamics to produce desired direction and turning. Rather than relying on a source of thrust or propulsion to produce a change in direction, a change in pitch, direction, or yaw is generated because of how the vehicle is travelling through the air. Consider a propeller airplane: the engine on its nose doesn't change angle relative to the rest of the plane's chassis. Instead, it can roll, bank, and turn by using specialized mechanical parts that re-angle parts of its wings and rudders to generate that motion. Granted, it's obviously being combined with Force direction to achieve maintained flight with the propeller, but it's on a scale outside of the vehicle itself. Pros: Essentially zero power core draw, lends itself well to higher speed navigation Cons: Requires strong understanding of aerodynamics, coordination of mechanical parts, and close attention paid to your vehicles mass and physics. Specialized direction is perhaps the most flexible and novel of turning methods, and just about all the examples I can think of this in real-life are machines or robots rather than true vehicles. This principle makes sense, since it relies on the employment of several individual sources of force that can be utilized to control facing or movement. Consider the Roomba: This is a robot that moves using two individual wheels aligned on a single "axle" (they don't actually share an axle however, and for a very good reason we'll get into). In contrast, cars have two axles, and they turn by re-angling at least one of them to produce a curving motion. In contrast to that, Roombas rotate in place by turning one wheel forward, and either turning the opposing wheel backwards (to rotate in place) or keeping it still (to rotate in an arc). This kind of motion wouldn't be possible if the wheels actually shared the same axle - and thankfully, that also isn't a consideration that cars or wheels in Trailmakers have to worry about anyways! This approach oftentimes is seen in practice with lots of mini-thrusters (i.e. the Gimbal Car, which uses sideways thrusters on the front and back to rotate), but also combines well with Logic blocks to coordinate these controls and send positive/negative impulses to different parts to produce the desired movement. Pros: Unrivaled maneuverability and stability, full customizability, great interaction with Logic sensors Cons: Requires effective use of components positioned at correct parts of your vehicle to operate. Can have a high Power Core draw. Often sensitive to external forces or unexpected obstacles.