换一换
换一换 


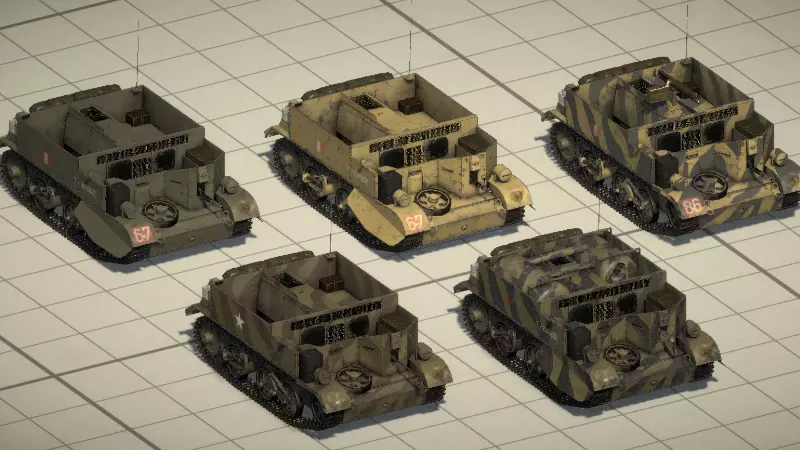
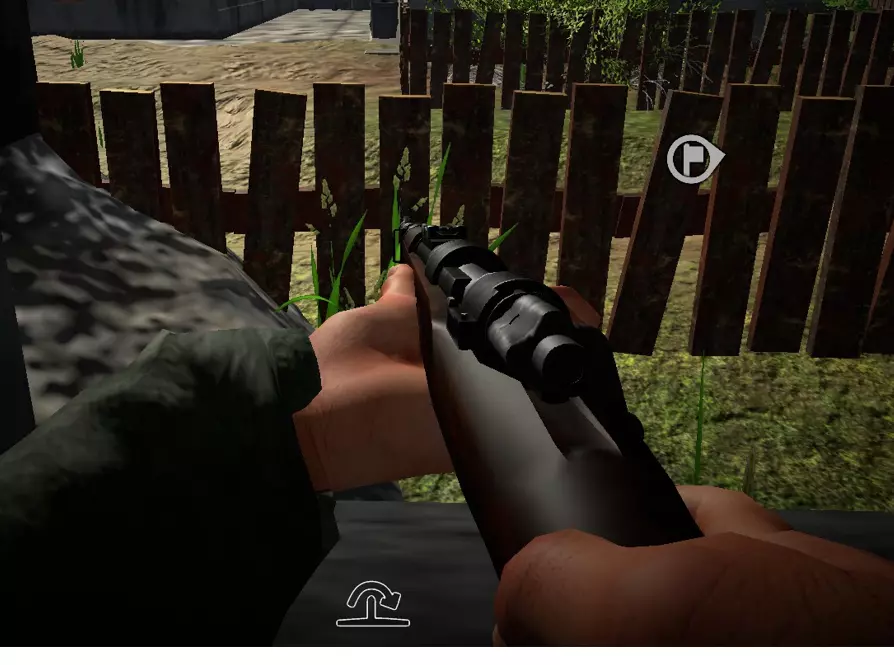
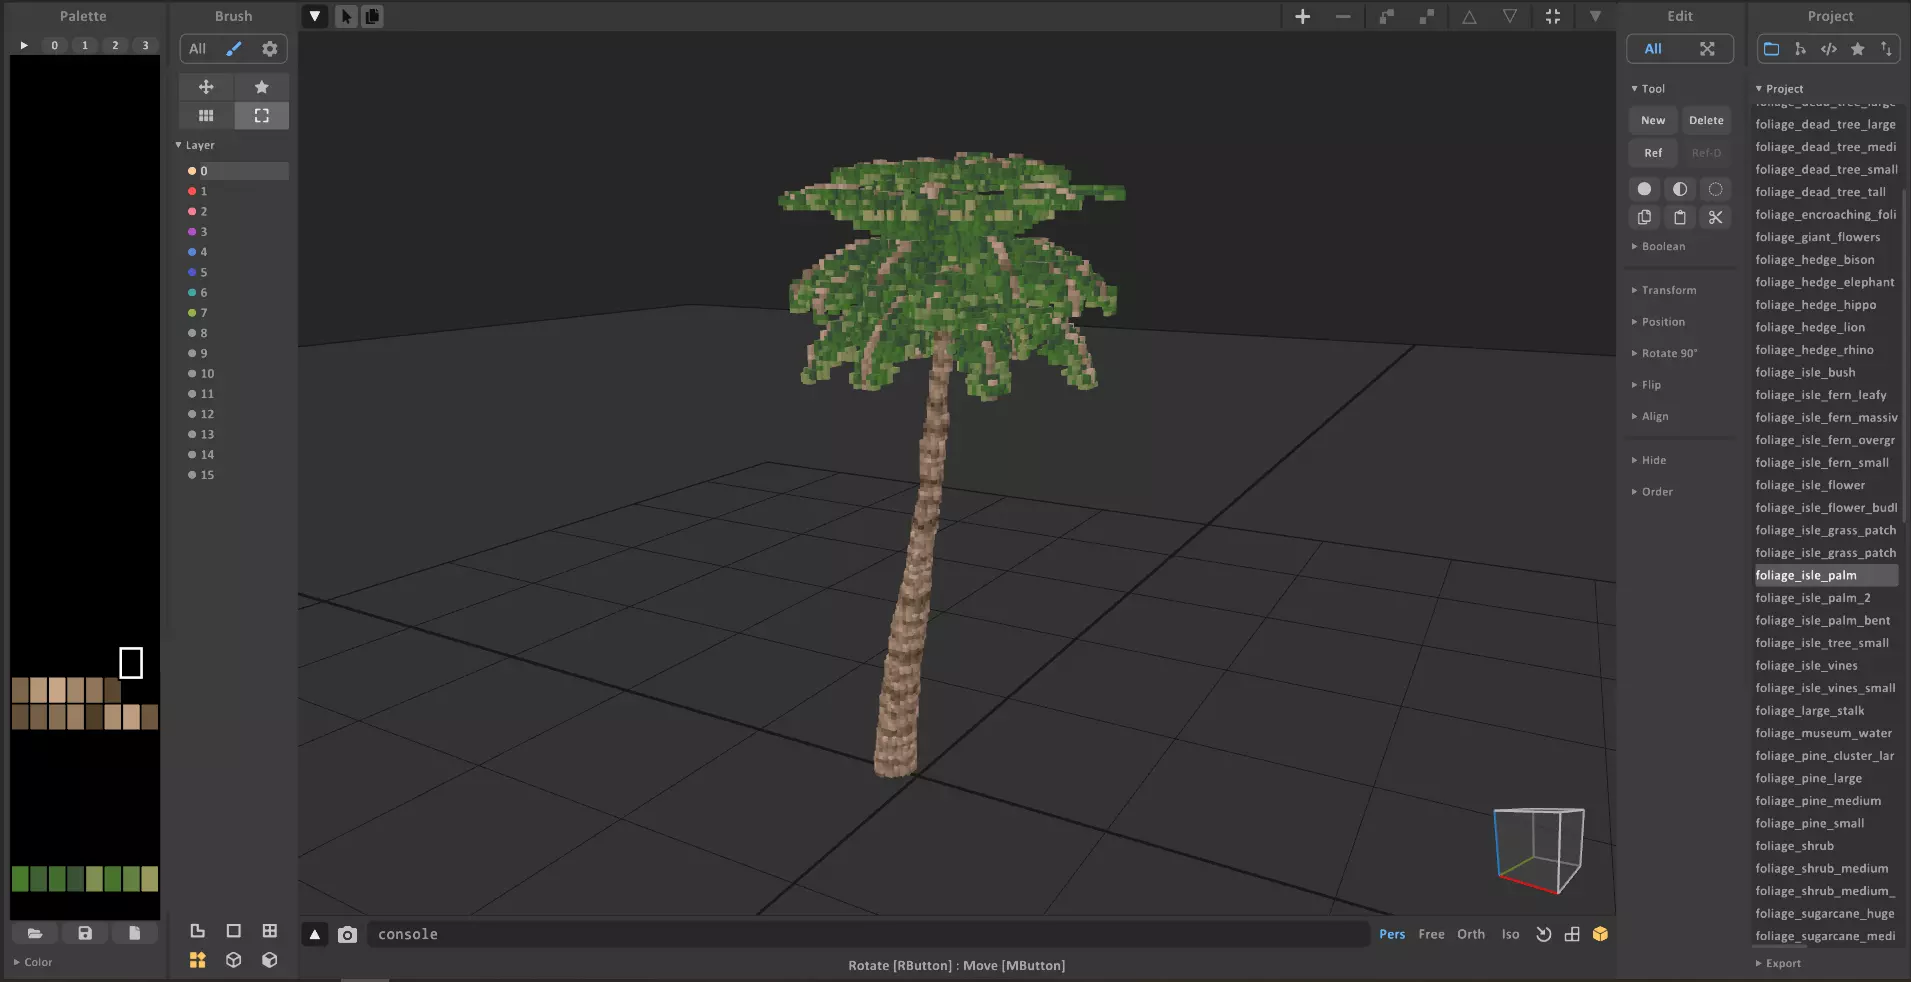
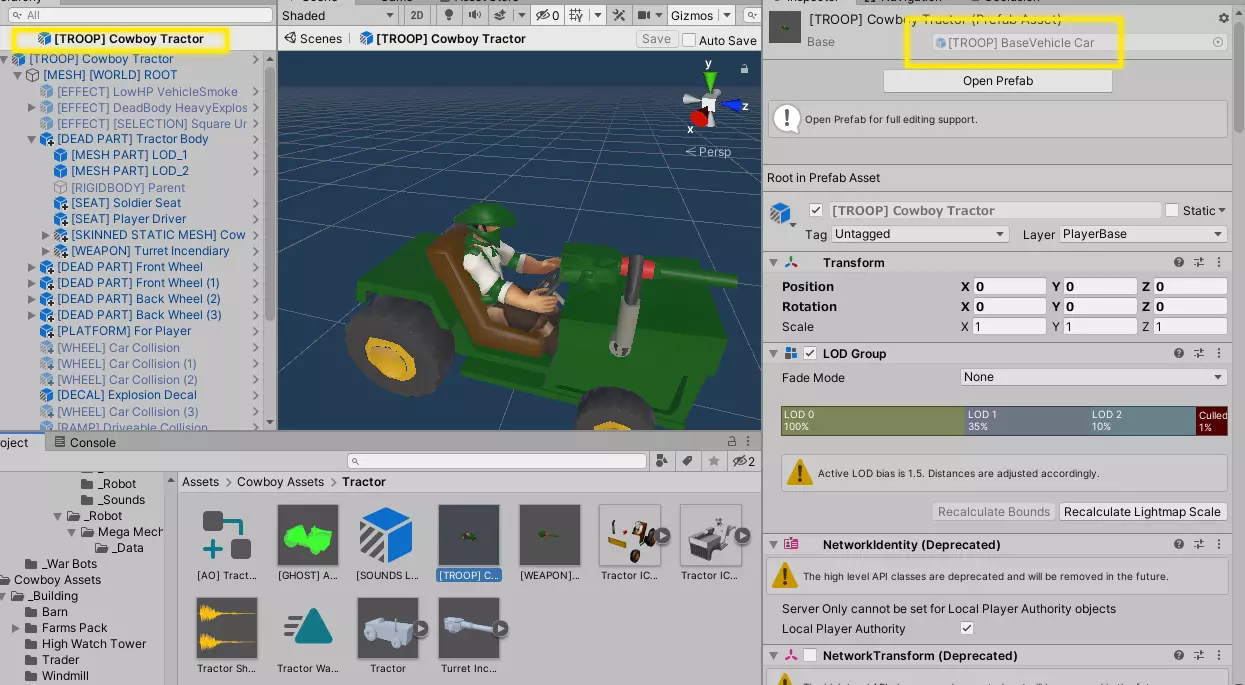
Some things not mentioned in Marco's tutorials that I trial-and-error'd while working on my mod, in the hopes that I can save other modders from the same fate. I also listed effects in case anyone has the same problems and can't figure out the cause. Will be updated as I learn more. Making Anything: -Remember to ALWAYS re-subscribe to your workshop mod after compiling and uploading it from Unity, just in case Steam doesn't do it. This will avoid a lot of confusion. -If anything (usually guns or vehicles) gives an error when you try to load it in (or doesn't load in at all), go back into Unity and reupload the mod in question, then resubscribe to it. This has solved 90% of errors that I had with modded items not loading into the game properly. - When attempting to reduce the polycount of pretty much any model in Blender (usually one taken from the internet), ONLY merge faces if said faces are perfectly flat with each other (as in you could draw a line over the top of them and it will perfectly ride along all faces you intend to merge, without bending). Your merged face will be invisible in Unity/Easy Red 2 otherwise, even if the face orientation is correct. (For an insanely easy way to fix this, select the affected face in Blender, then right-click and select "triangulate faces") Making Maps: - When planning the layout, I like to use an asphalt-colored brush to map out the roads before I place any props. This especially helps with scaling down a city/town I'm trying to replicate, which you will typically have to do unless you are mapping a very small area of one of these. - When placing trees, I recommend using the minimum brush size and randomly clicking where you want trees, because the brush will sometimes place trees inches away from each other if it's larger. The 2.0.1 update added a feature to control prop spacing, ignore this tip. - I haven't seen this mentioned yet, but with the raise/lower brush in the terrain editing tab, holding the Alt key while using the brush will have the opposite effect. This can help you modify terrain to your liking a bit faster. Making Missions: Here's a straightforward way I use to balance my Operation missions: * Set attacking infantry respawn times to 30, defending infantry to 50. Increase this for vehicles (I usually use 70) * Set the attacker ticket count to the maximum * Playtest your mission as the DEFENDERS, and make sure that the attacking AI can successfully capture every phase on their own * If they manage to make it to the final phase (and as soon as they are about to win), look at the "attackers left" counter in the top left and remember the number * subtract that number from the ticket count you set (for example, if I playtested with the attackers having 500 tickets and they had 100 left right before they won, then I'd change the tickets to 400). This obviously isn't perfect since the AI doesn't move or attack the same way every time, but it works well enough. You also may want to change respawn times especially for larger phases if the AI can't clear them. - On larger-scale missions, try and use a balanced mix of "AI Once" and "AI Non-Stop" spawners for the attackers. This'll ensure a more steady flow of battle no matter which non-stop spawners the AI decides to use. Making Guns: - Make sure your gun is aligned properly with the right hand while walking in third-person IN THE GAME, before animating your gun, as the rig testing hands are not the best reference for this. This is probably the biggest time-saver here and I encountered way too many problems because I didn't do this first. -To resize a gun, DO NOT CHANGE THE SCALE OF THE PARENT AT THE VERY TOP. Instead, change the scale of the two empty objects containing the gun parts and move all of the fire, eject, and weaponSight positions to wherever you want. It's best to upload the gun without a magazine for it to test the scale in-game BEFORE you separate the scope, magazine, and bipod parts into their own thing. However, if you already did this: * make an empty object within your gun * place all the gun meshes in it + positions * select the empty object and rescale it to whatever you wish * place the parts back into "yourgunname (Clone)" and delete the empty object * reposition the firePosition, weaponsightPosition, etc, if you have to * reset the scale of the magPosition back to 1 for all three values - When making gun animations, try to use the forearm bones over the shoulder/arm bones. I've had the uniform clip through the first-person camera due to the latter. -When making gun animations, ensure that ALL bones and the gun are assigned a keyframe at the beginning and end of your animation, both the position and rotation. The gun and bones will get messed up in-game if you don't. -When making gun animations, you are allowed to animate the Center_Spine (as Marco says). However, make sure that the center spine is in its default position at the end of every animation (aka the same position it is in before you start animating). Otherwise, your gun will jolt forward when a squad leader gives orders (if the uniform clips through the camera when sprinting, move the right shoulder back instead and move the right forearm forward to compensate). - Make sure your weapon animations are assigned to the same bundle, but DON'T assign your weapon sounds to the same bundle. It will break your gun completely. -Do NOT use ANY of the generic animation sets for guns. It causes problems when switching from a generic animation gun to a modded gun with a custom animation. -When animating a one-handed gun, you will still have to animate the left arm to be completely down at all times. The left arm will flip around in first-person if you don't (you can also just not animate the center spine, if you're willing to spend a little more time on the animation) - When making a gun that has separate non-magazine parts for an animation (single bullet, stripper clip, ammo belt, etc), make sure to: * Parent them to the gun, not the ammo box. Your part won't animate otherwise. * Hide these objects within the gun (usually the stock) and not off-screen because said objects WILL FLOAT AROUND ANY SOLDIER HOLDING THE GUN if you do. - When making a scope sprite in Photoshop or wherever, apply an extremely transparent (1% opacity) black layer over the entire scope. You will get white shapes filling your scope if you don't. Making Vehicles: - In Unity, make sure your vehicle is above the Unity ground and that the origin (the three-arrow point) of the vehicle is slightly above the Unity ground. Your vehicle will clip through the ground upon spawning in if you don't. -When making a boat, the origin (aka the three arrow point when you click on the parent of the entire vehicle) has to be below the model. Your boat will tip over upon spawning in if it isn't. -Some ammo just doesn't work with vehicle cannons for some reason (the ammo will show up as "75 mm he ewdw" and you will not be able to fire the gun). Just go back into Unity and switch the cannon round to a different caliber of choice until it registers properly. (This issue can also happen if you misspell the ammo ID or if the vehicle can't find the magazine linked in the ammo field.) - To rescale a vehicle, simply rescale the parent at the very top of the prefab - To assemble any turret without guessing and checking the pivot positions over and over: * In BLENDER, make sure the origins of the turret and gun are correct/they rotate correctly * In UNITY, right-click the turret ring part and turn it it into its own turret (I'll call this the Main Turret) * Right-click the turret gun part and turn it into its own "turret" * Drag the gun model into the XAxis folder * Delete the XAxis object within the Main Turret * Drag the XAxis object from the turret gun "turret" into the YAxis object in the Main Turret * Click on the turret and reassign the XAxis, firePos, and scopePos It'll feel slow at first, but you'll get used to it and it's way faster than constantly adjusting either part by sight.
省时模组使用技巧

导读
这是一篇《Easy Red 2》省时模组制作技巧帖,涵盖模组物品、地图、任务、枪械、载具制作的实用技巧,比如模组上传后重新订阅、Blender模型减面注意事项、枪械动画制作要点等,能帮模组制作者避坑,提升制作效率。


评论
共0条评论

初学者 给自己19分钟,快速导入人物模型到Gmod里面玩!
工具包:https://wwaok.lanzouv.com/ipz6M3n9xu1a awa我好累吖,我绑定了该死的骨骼两小时最后全忘了。。。多练习才是真吧
2026-05-07 21:320赞 · 0评论

将《拆迁》模型移植到《盖瑞模组》
一份希望能教你如何将《拆迁》模型导入Source引擎,或者如果你想的话,仅导入盖瑞模组的指南。这是一个有点高级的流程,所以不要以为你能很快完成(除非你以前做过!…
2026-03-17 10:000赞 · 0评论
《文明时代》模组怎么制作吸引人?《文明时代2》新模组推广与让玩家记住的技巧攻略
《文明时代》模组怎么推广才能火?想让玩家记住并喜欢你的模组,可以从这几个方面入手: 1. 打造独特核心玩法,避免同质化。 2. 设计精美的图标和吸引人的模组名称…
2026-06-07 17:470赞 · 0评论

玩具大作战 MOD:玩具地面载具
• 创建【部队】载具模组 之前与载具地面相关的指南 玩具兵大作战模组:玩具士兵 玩具载具地面的制作流程与玩具士兵非常相似。 按照之前的指南获取前期步骤和信息 ⚑…
2026-04-01 07:000赞 · 0评论
暂无更多
最新更新
- Easy Red 2-视频介绍
- 《简单红色2》色彩校正指南 — 在《简单红色2》中可以创建自定义色彩校正。以下是操作方法: 创建LUT纹理 LUT(查找表)纹理是用于将电脑可显示的每种颜色映射为另一种颜色的精灵。使用LUT纹…
- Dog Tags (100%) — 《简单红色2》狗牌终极指南! 最新信息! 狗牌的作用机制是什么? 有时AI士兵会在特定(固定)地点生成特殊装备。他们不属于任何其他小队,因此通常很容易通过单独作…
- 简易红色地图档案 — 《风起云涌》各战术地图小型地图档案 简介 这是一份小型指南,提供《风起云涌》原版地图的地图图片。 诺曼底
- 【已废弃】改善游戏流程 — 如何提升你的游戏体验 按键绑定 默认按键绑定体验欠佳。部分高频使用的操作按键设置较为别扭,例如:绷带键、物品栏键、地图键、抬高瞄准镜倍率键、指令键。 绷带键:在…
- 新手须知 — 士兵们,大家好! 众所周知,《血色太平洋》需要一种相当独特的游戏体验,这是其他同类型射击游戏所不具备的。本指南旨在帮助那些因难以掌握游戏而未尝试《血色太平洋》的…
- 《简单红色2》基础 — 各位玩家好,欢迎阅读《简单红色2》基础指南。若没有本指南,你可能很难按照预期方式游玩这款游戏,因此我强烈建议阅读本指南,学习如何根据个人喜好调整游戏设置。 训练…
- 如何在MOD SDK中制作一个类似于M12 GMC的炮架 — 在游玩《精英危险2》时,我偶然注意到M12 GMC自行火炮在停止时炮架会自动展开,而移动时炮架会收起,于是我想到在SDK中能不能用MOD实现相似功能。 正文 答…
- ER2补丁档案 — 以下是可用于创建自定义任务游戏补丁的.png文件列表 使用方法 下载补丁并将文件/图片放入任务文件夹,命名如下: "defenders_patch_unif.p…
- 《轻松红警2》玩法模组 — Gameplay mods change or expand on core gameplay, not just adding additional vehi…