换一换
换一换 


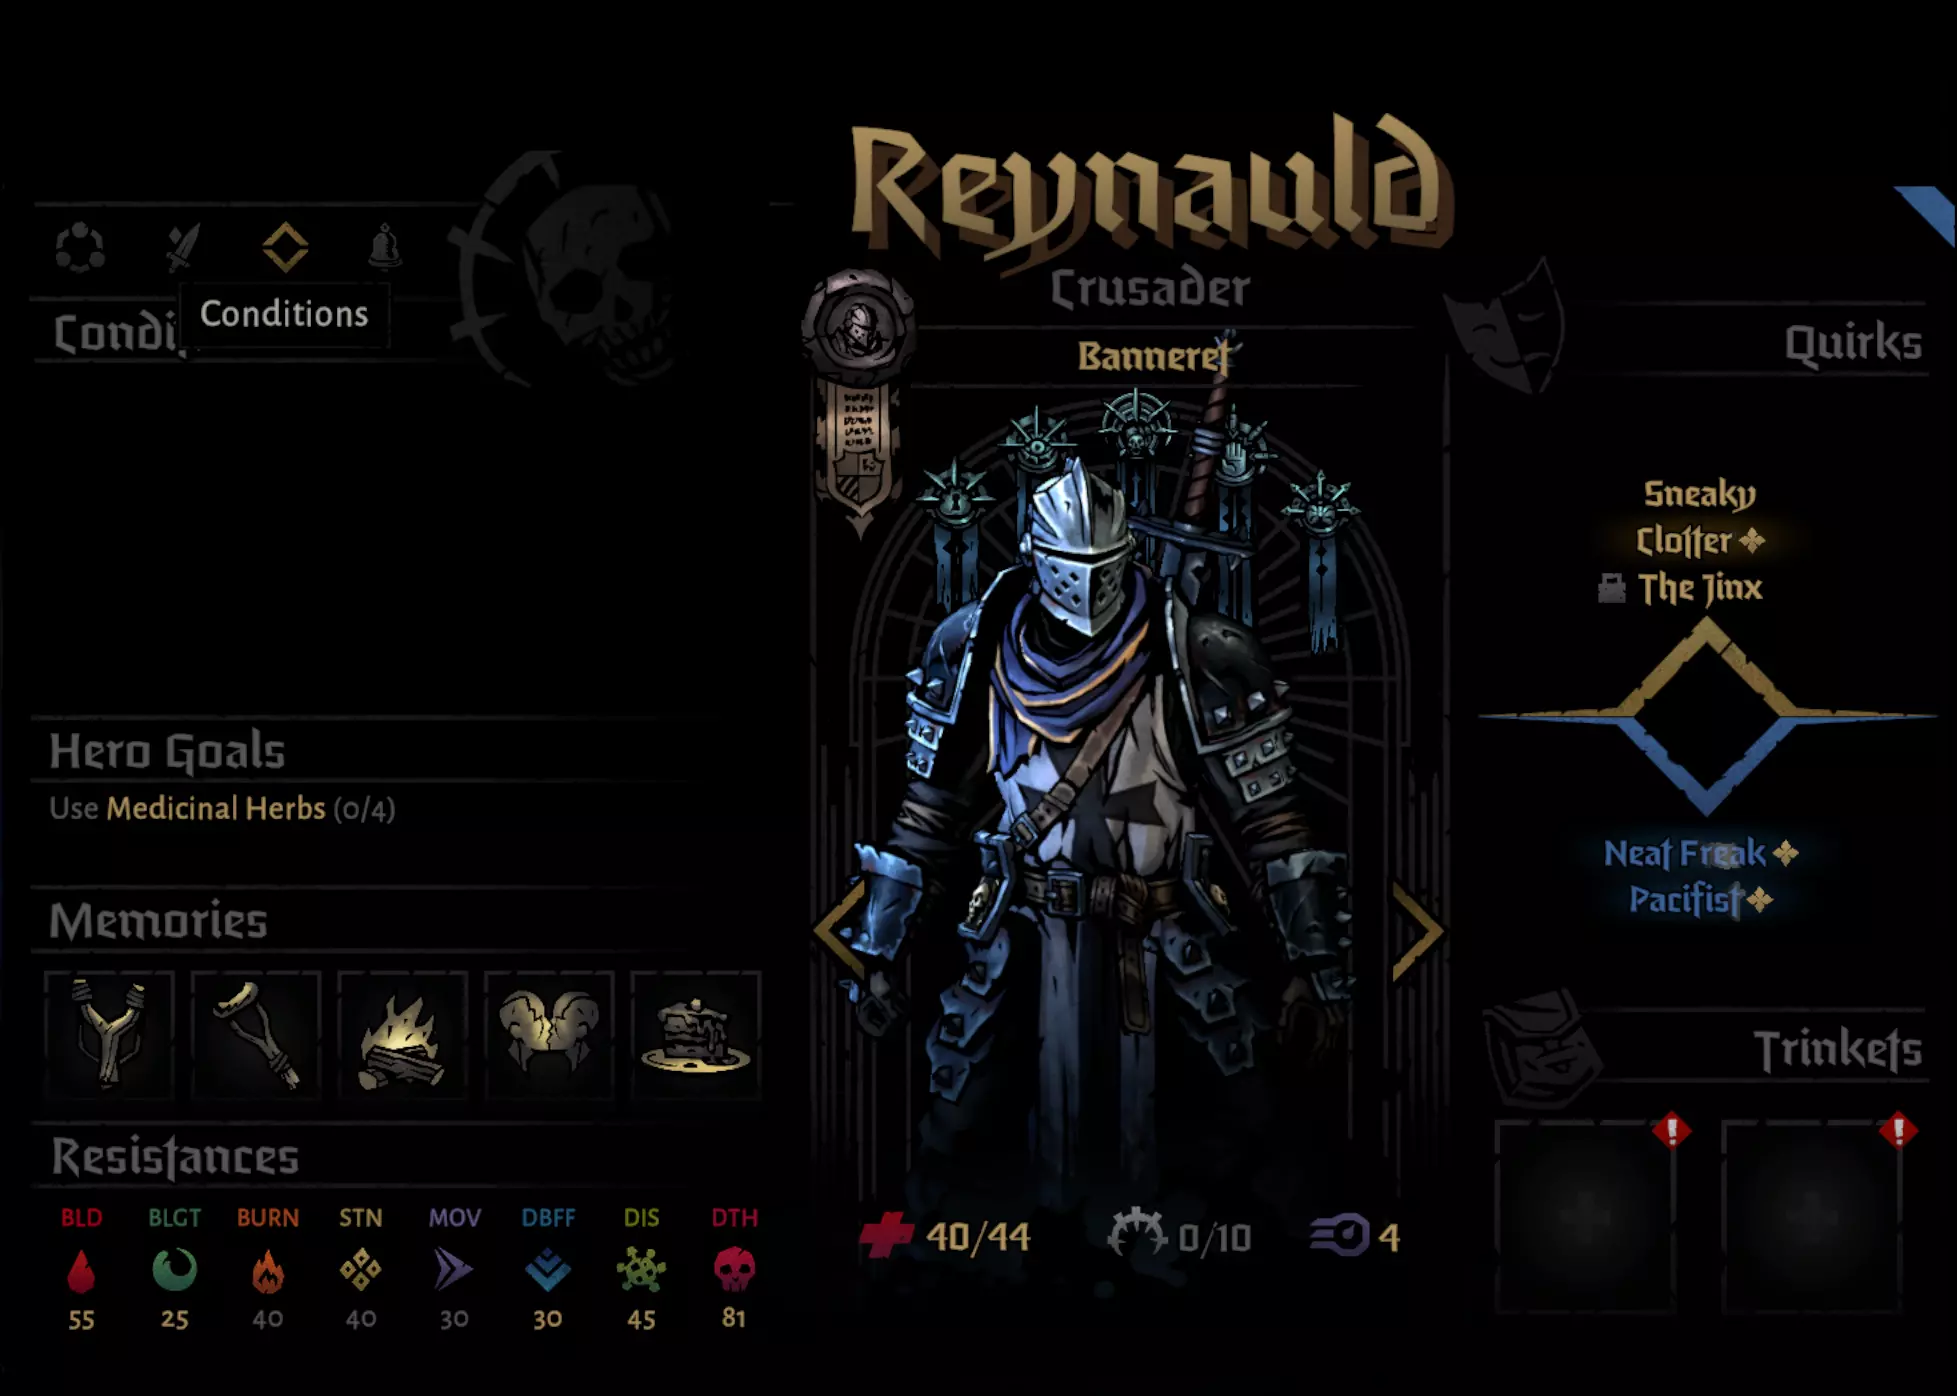
同时获取“Maitre De La Lame”“Battle Hardened”和“Grand Slam”成就的指南 概述与信息图表 如果不想阅读长篇说明,这里有一些信息图表,介绍队伍配置、威胁以及注意事项。 编辑:我已使用全部3名当前DLC角色完成了一次大满贯,更多信息可查看本指南底部。 关于2025年7月瘟疫医生重做 将瘟疫医生的路径换回漫游者。十字军/敌对决斗者的连击标记或饰品提供的连击标记足以抵消枯萎值的减少。此外,此次重做可能会使本指南部分内容过时,由于我更倾向于在Red Hook发布新DLC角色时制作新指南,因此不会过多维护现有信息。前置条件: - 【绑定之刃】DLC(必须) - 已解锁以下技能路线:十字军的旗手、决斗者的挑衅者、鞭笞者的鞭挞者、瘟疫医生的炼金术士 - 已完全完成十字军和决斗者的反思圣所 - 已完成瘟疫医生反思圣所第三章 - 已完成鞭笞者反思圣所第四章 推荐升级/解锁: - 完全升级永恒木材 - 解锁瘟疫医生和鞭笞者的所有技能 - 至少拥有孤狼幼崽 - 驿站马车配备3个车轮和3件护甲 - 带有枯萎和火焰抗性穿透效果的饰品 - 注释教科书、早期实验、他的囚笼、恋人手套等英雄饰品角色路线与等级顺序 等级1:敌对决斗者 等级2:天灾苦修者 等级3:炼金瘟疫医生 等级4:旗手十字军 关键技能
缺失技能:致盲毒气为可选技能 技能升级优先级
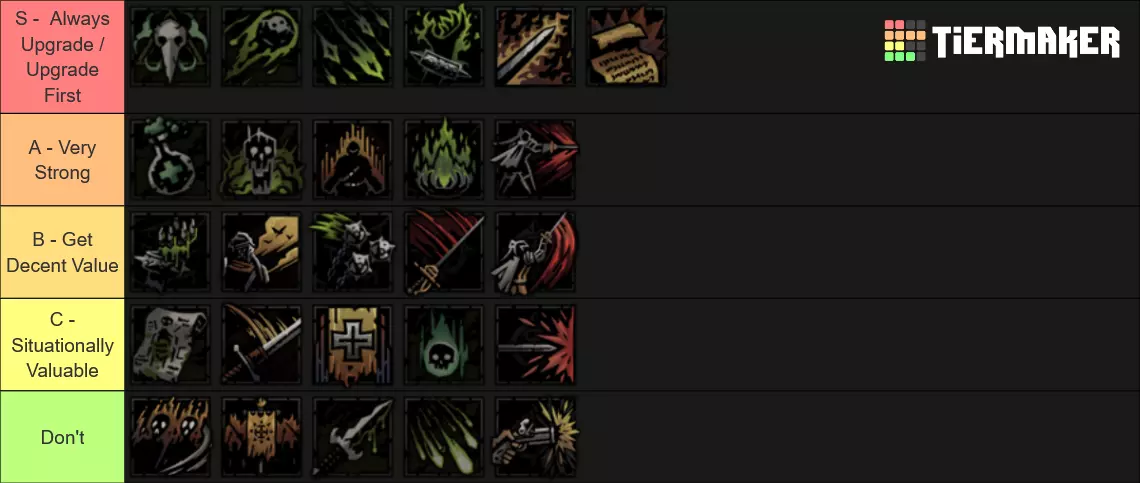
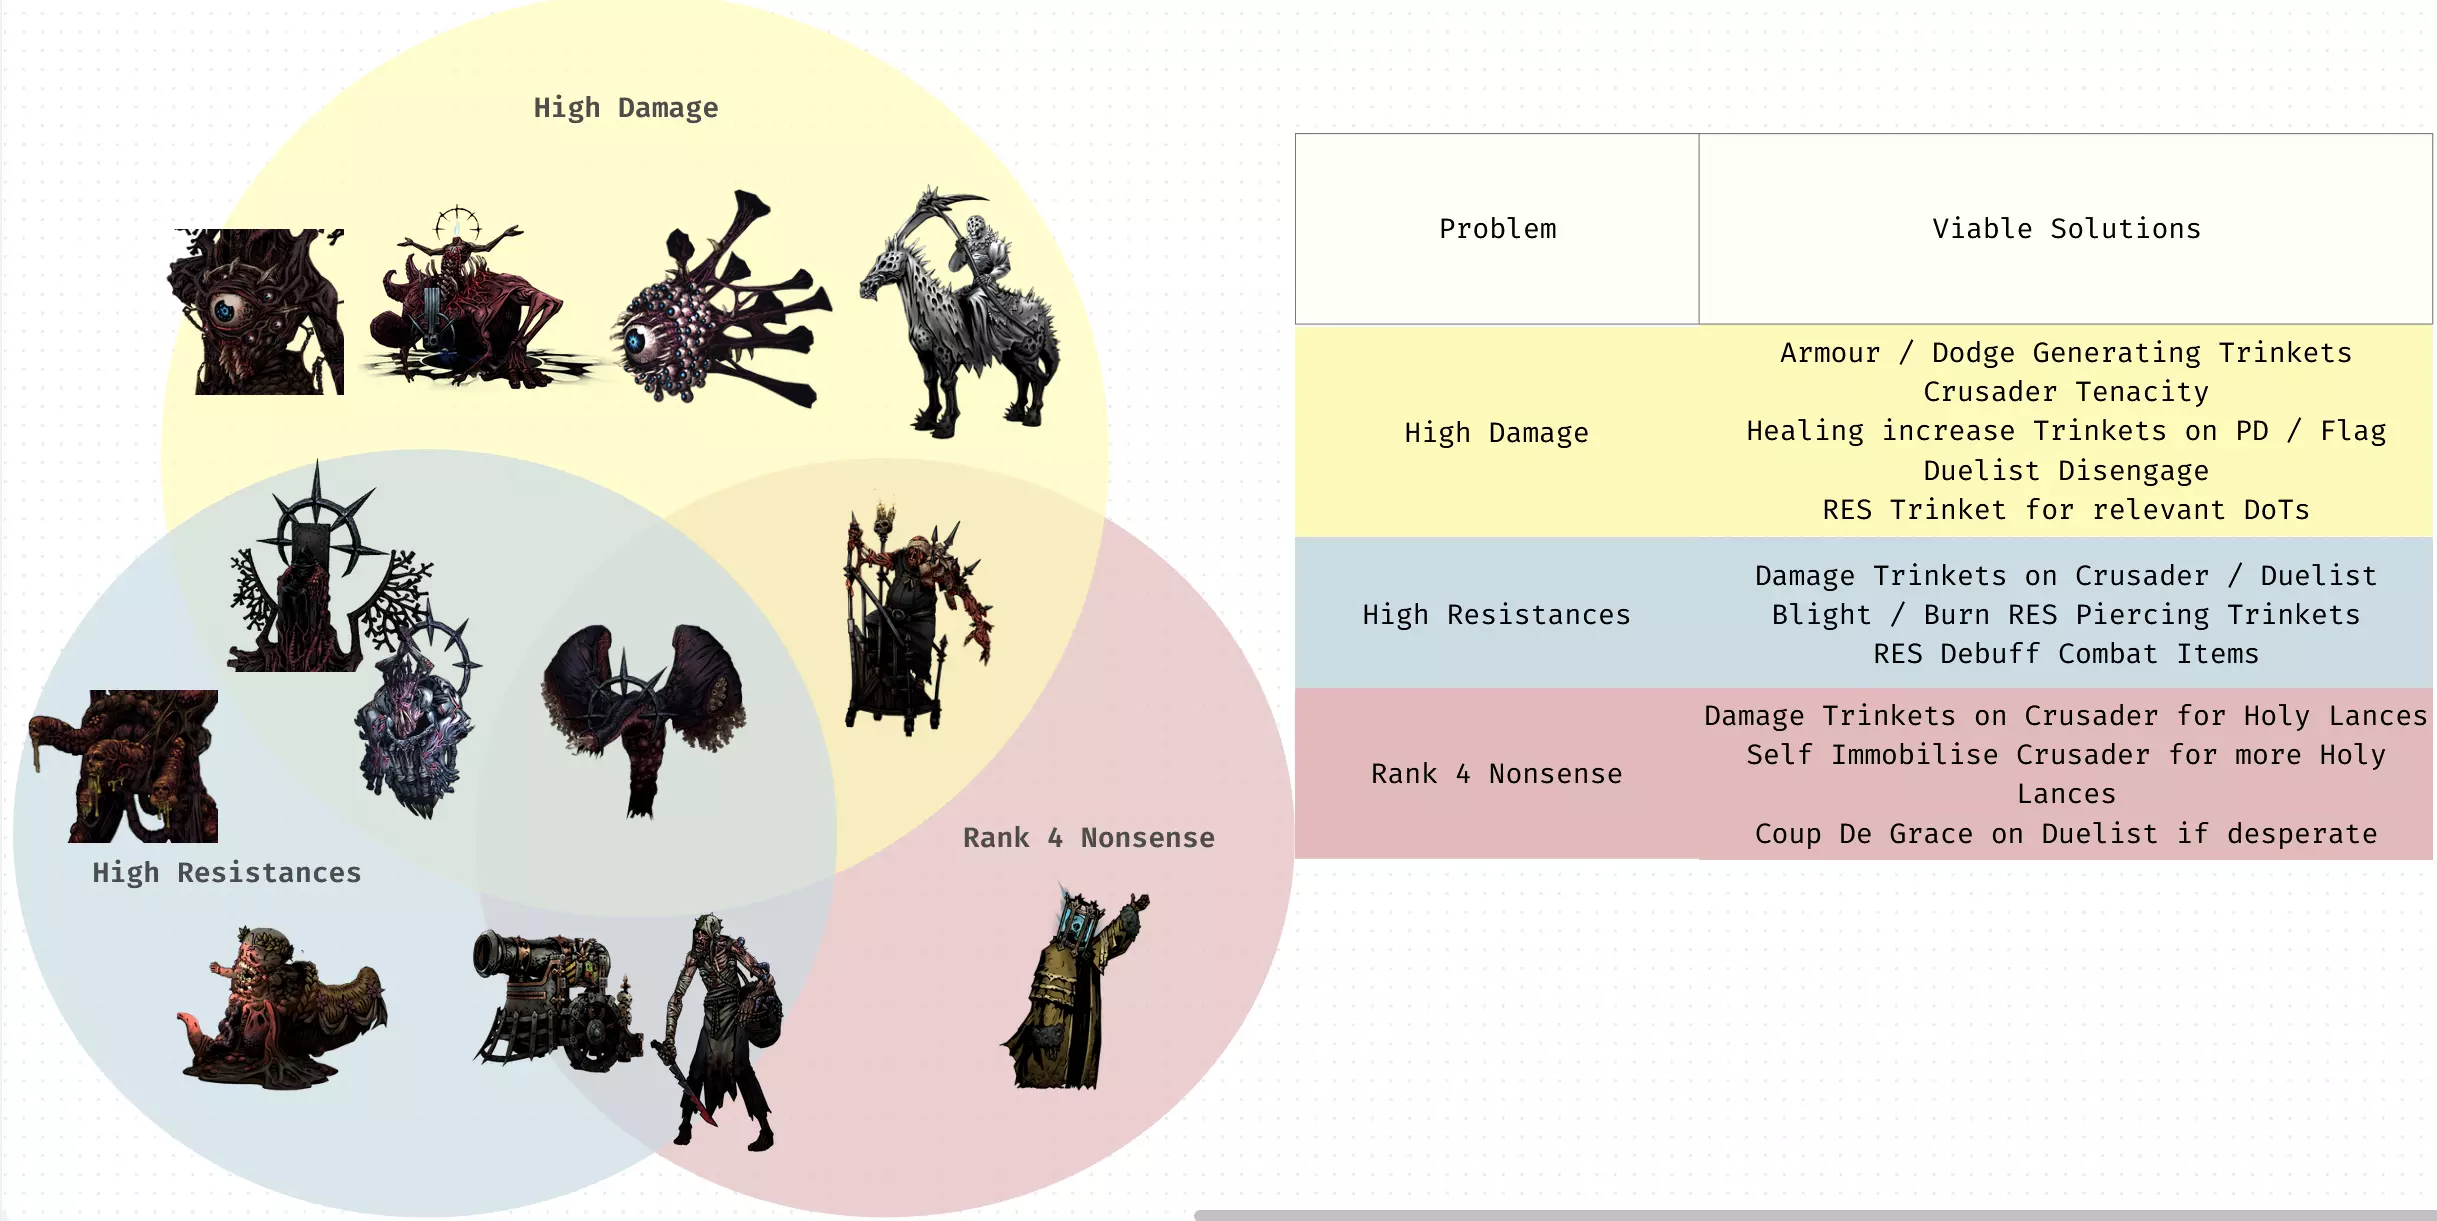
缺失技能:致盲毒气未实装 主要威胁及应对方法
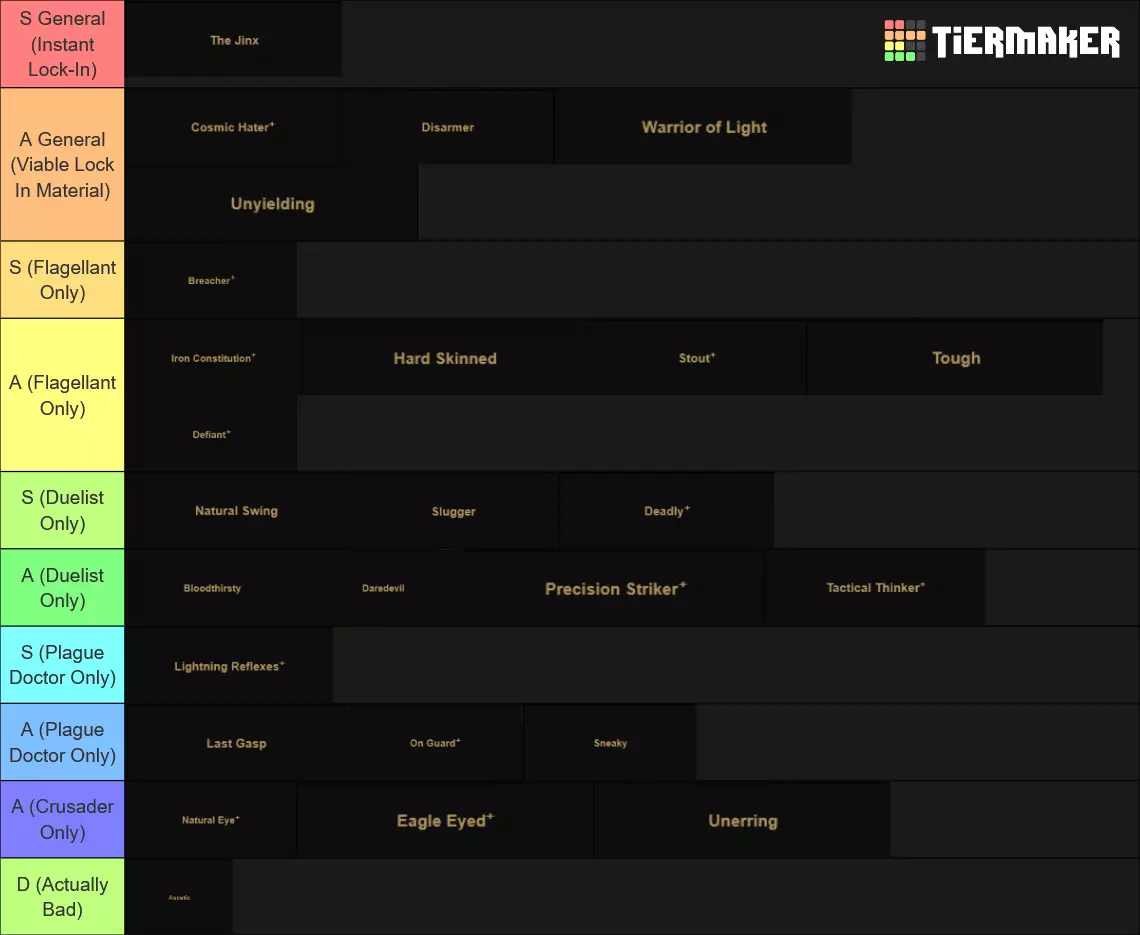
个性锁定优先级
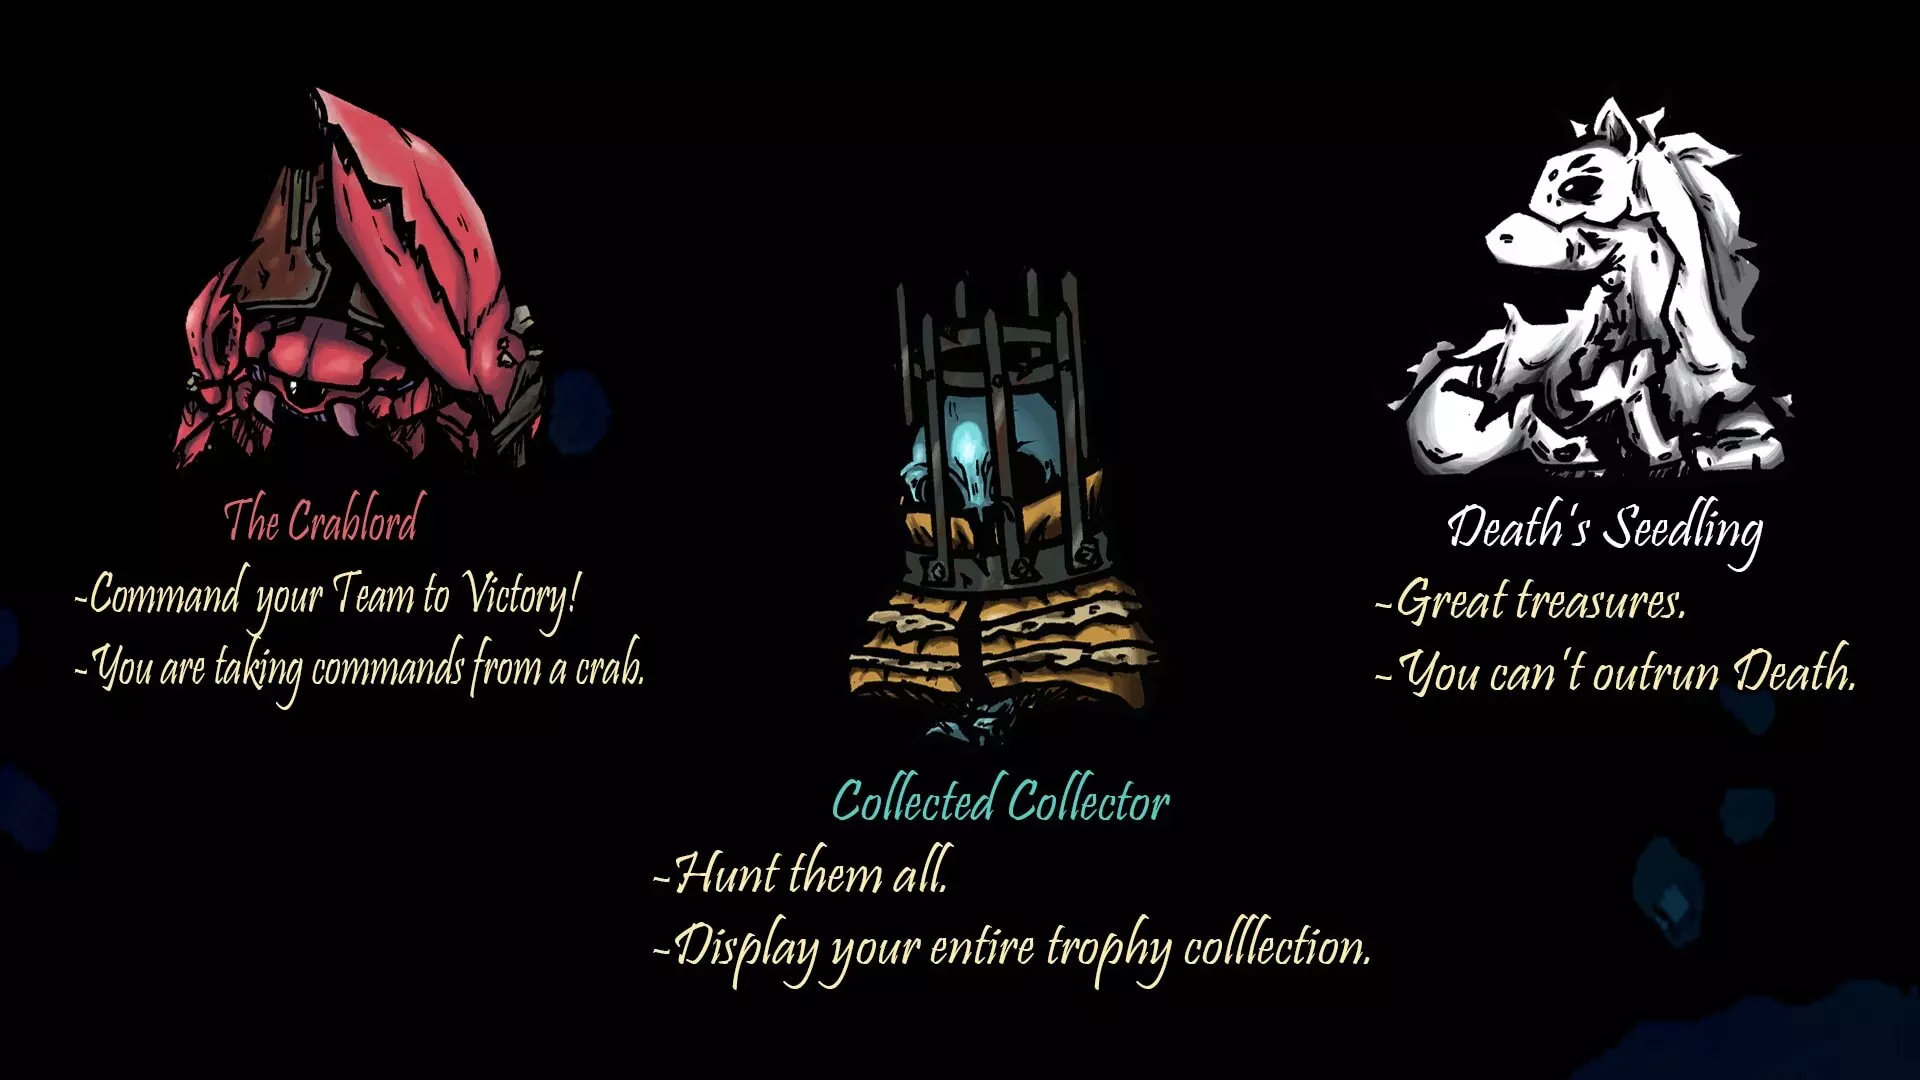
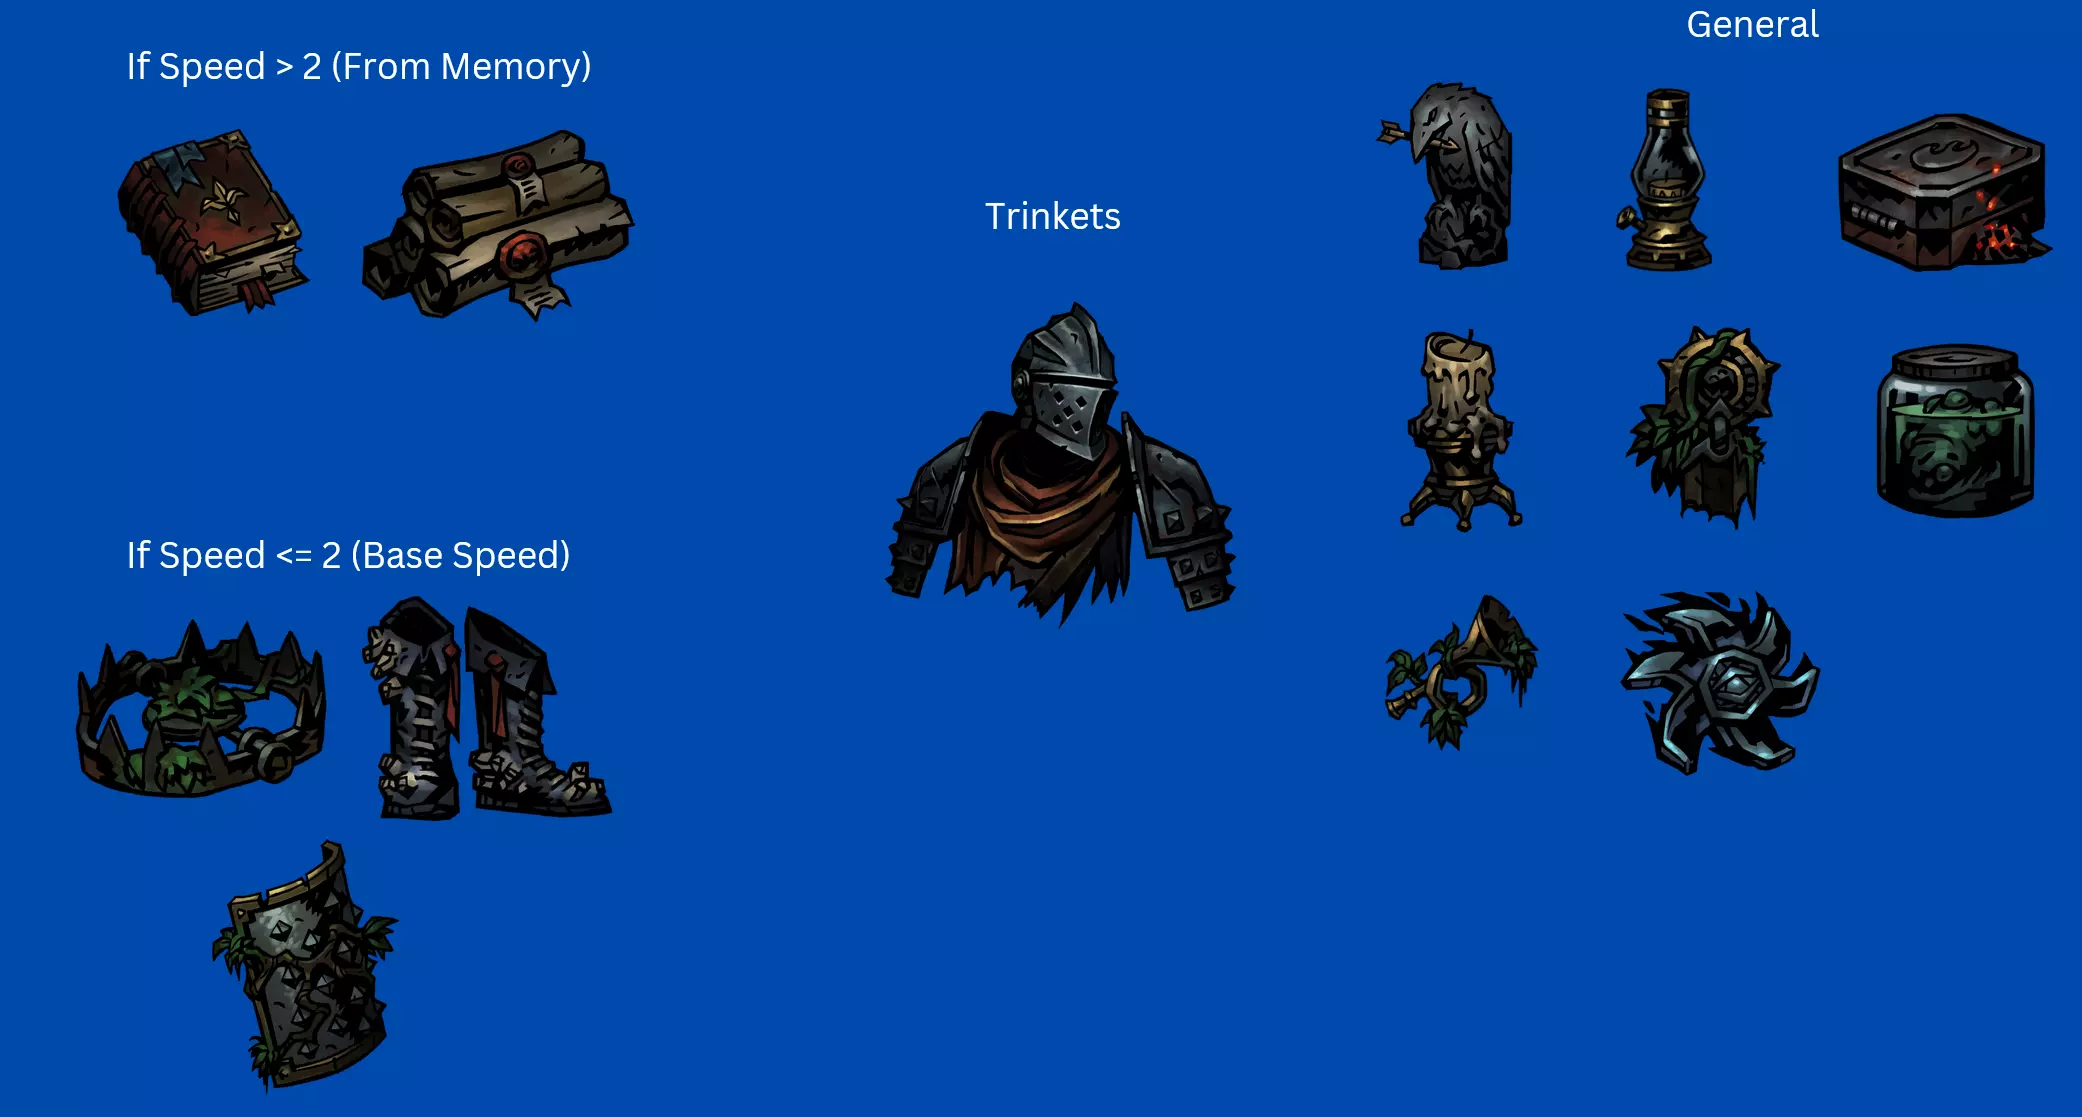
负面癖好移除优先级 没有梯队排名。只需去除任何妨碍角色执行主要职责的癖好(例如:苦修者生命值降低)或任何降低关系几率的癖好。 路线规划 区域顺序(也适用于决定优先挑战哪个 Boss): 纠缠之地 > 迷雾之地 > 蔓延之地 > 腐臭之地。永远不要去泄洪道。 如果忏悔 Boss 因憎恶值达到最大值而获得 buff,尝试在酒馆结束任务以保留角色,因为这样不会丢失他们的记忆。 饰品 十字军
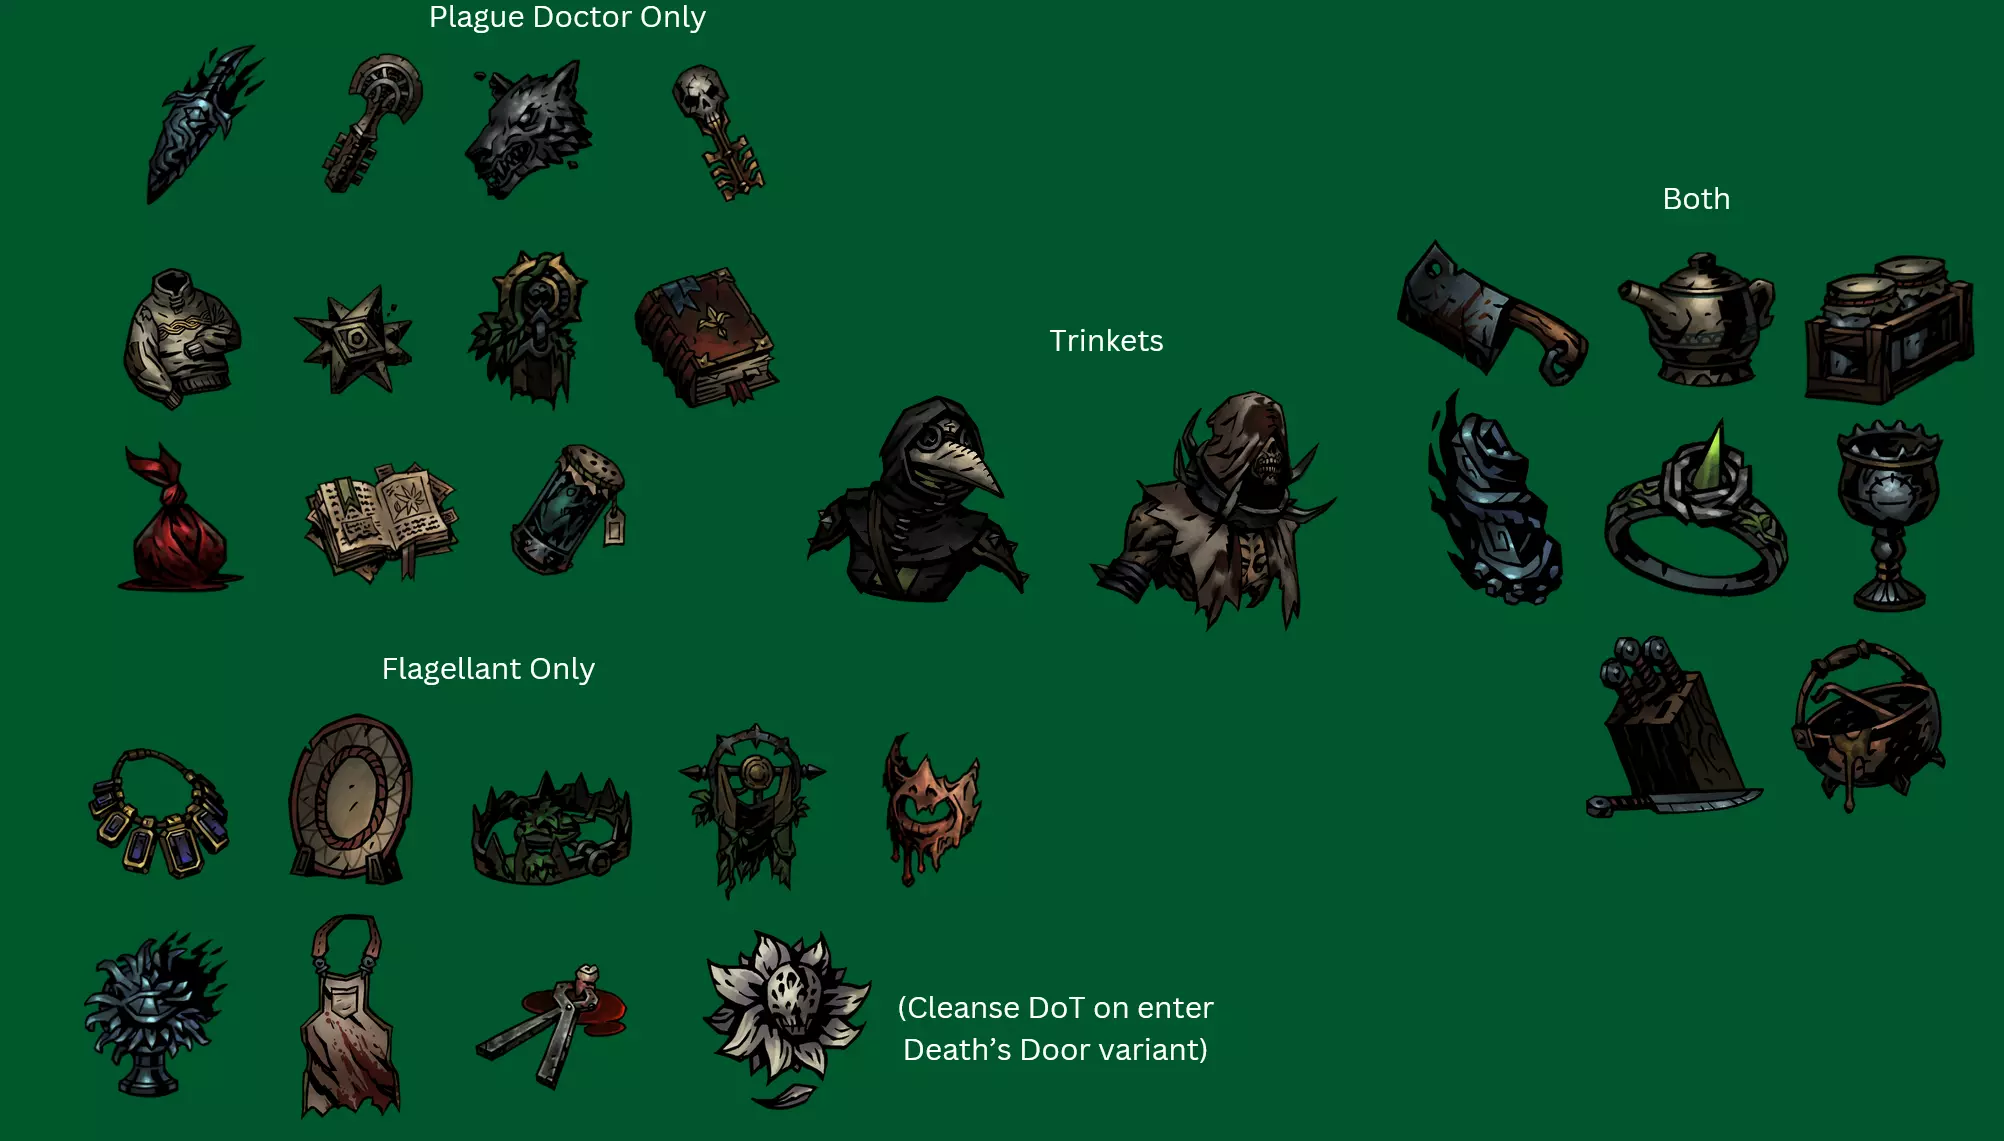
瘟疫医生和鞭笞者
决斗者

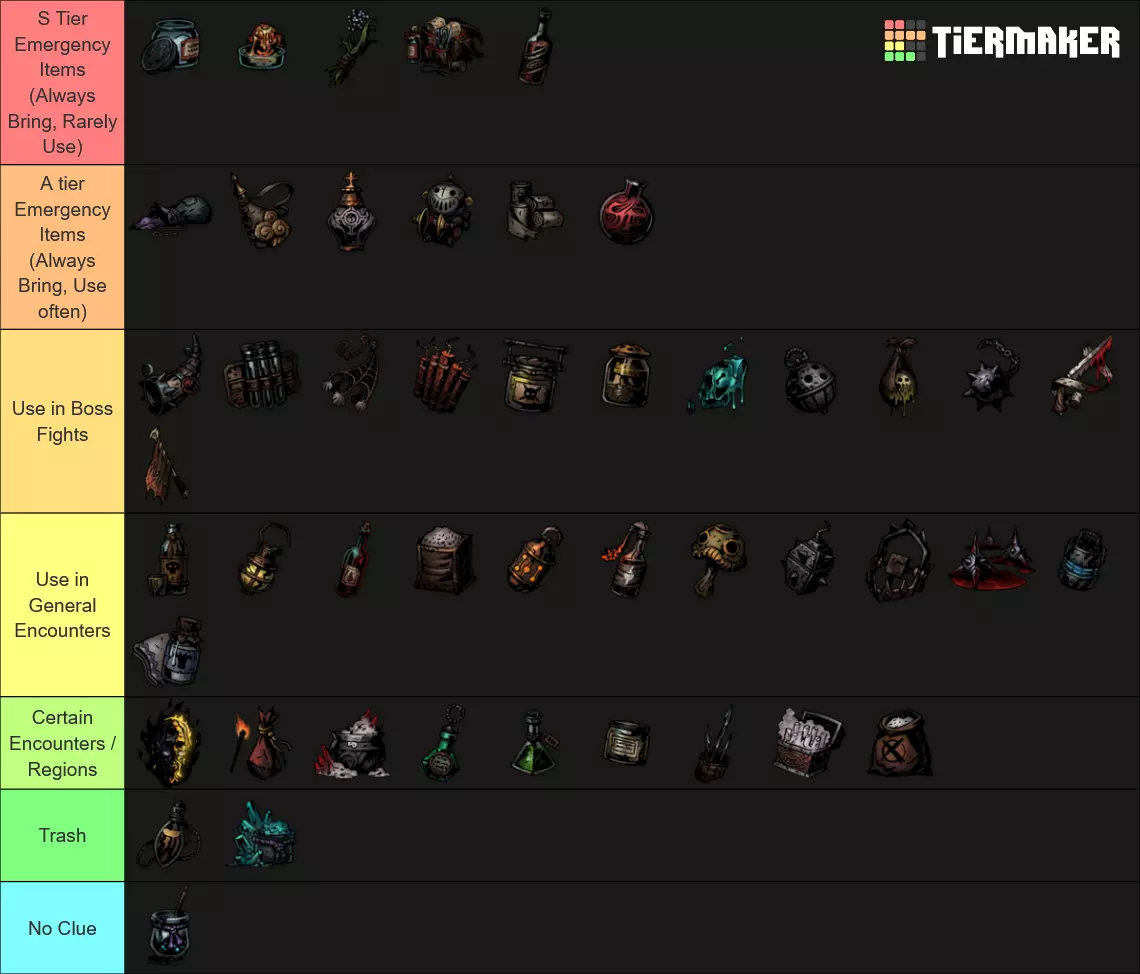
战斗物品
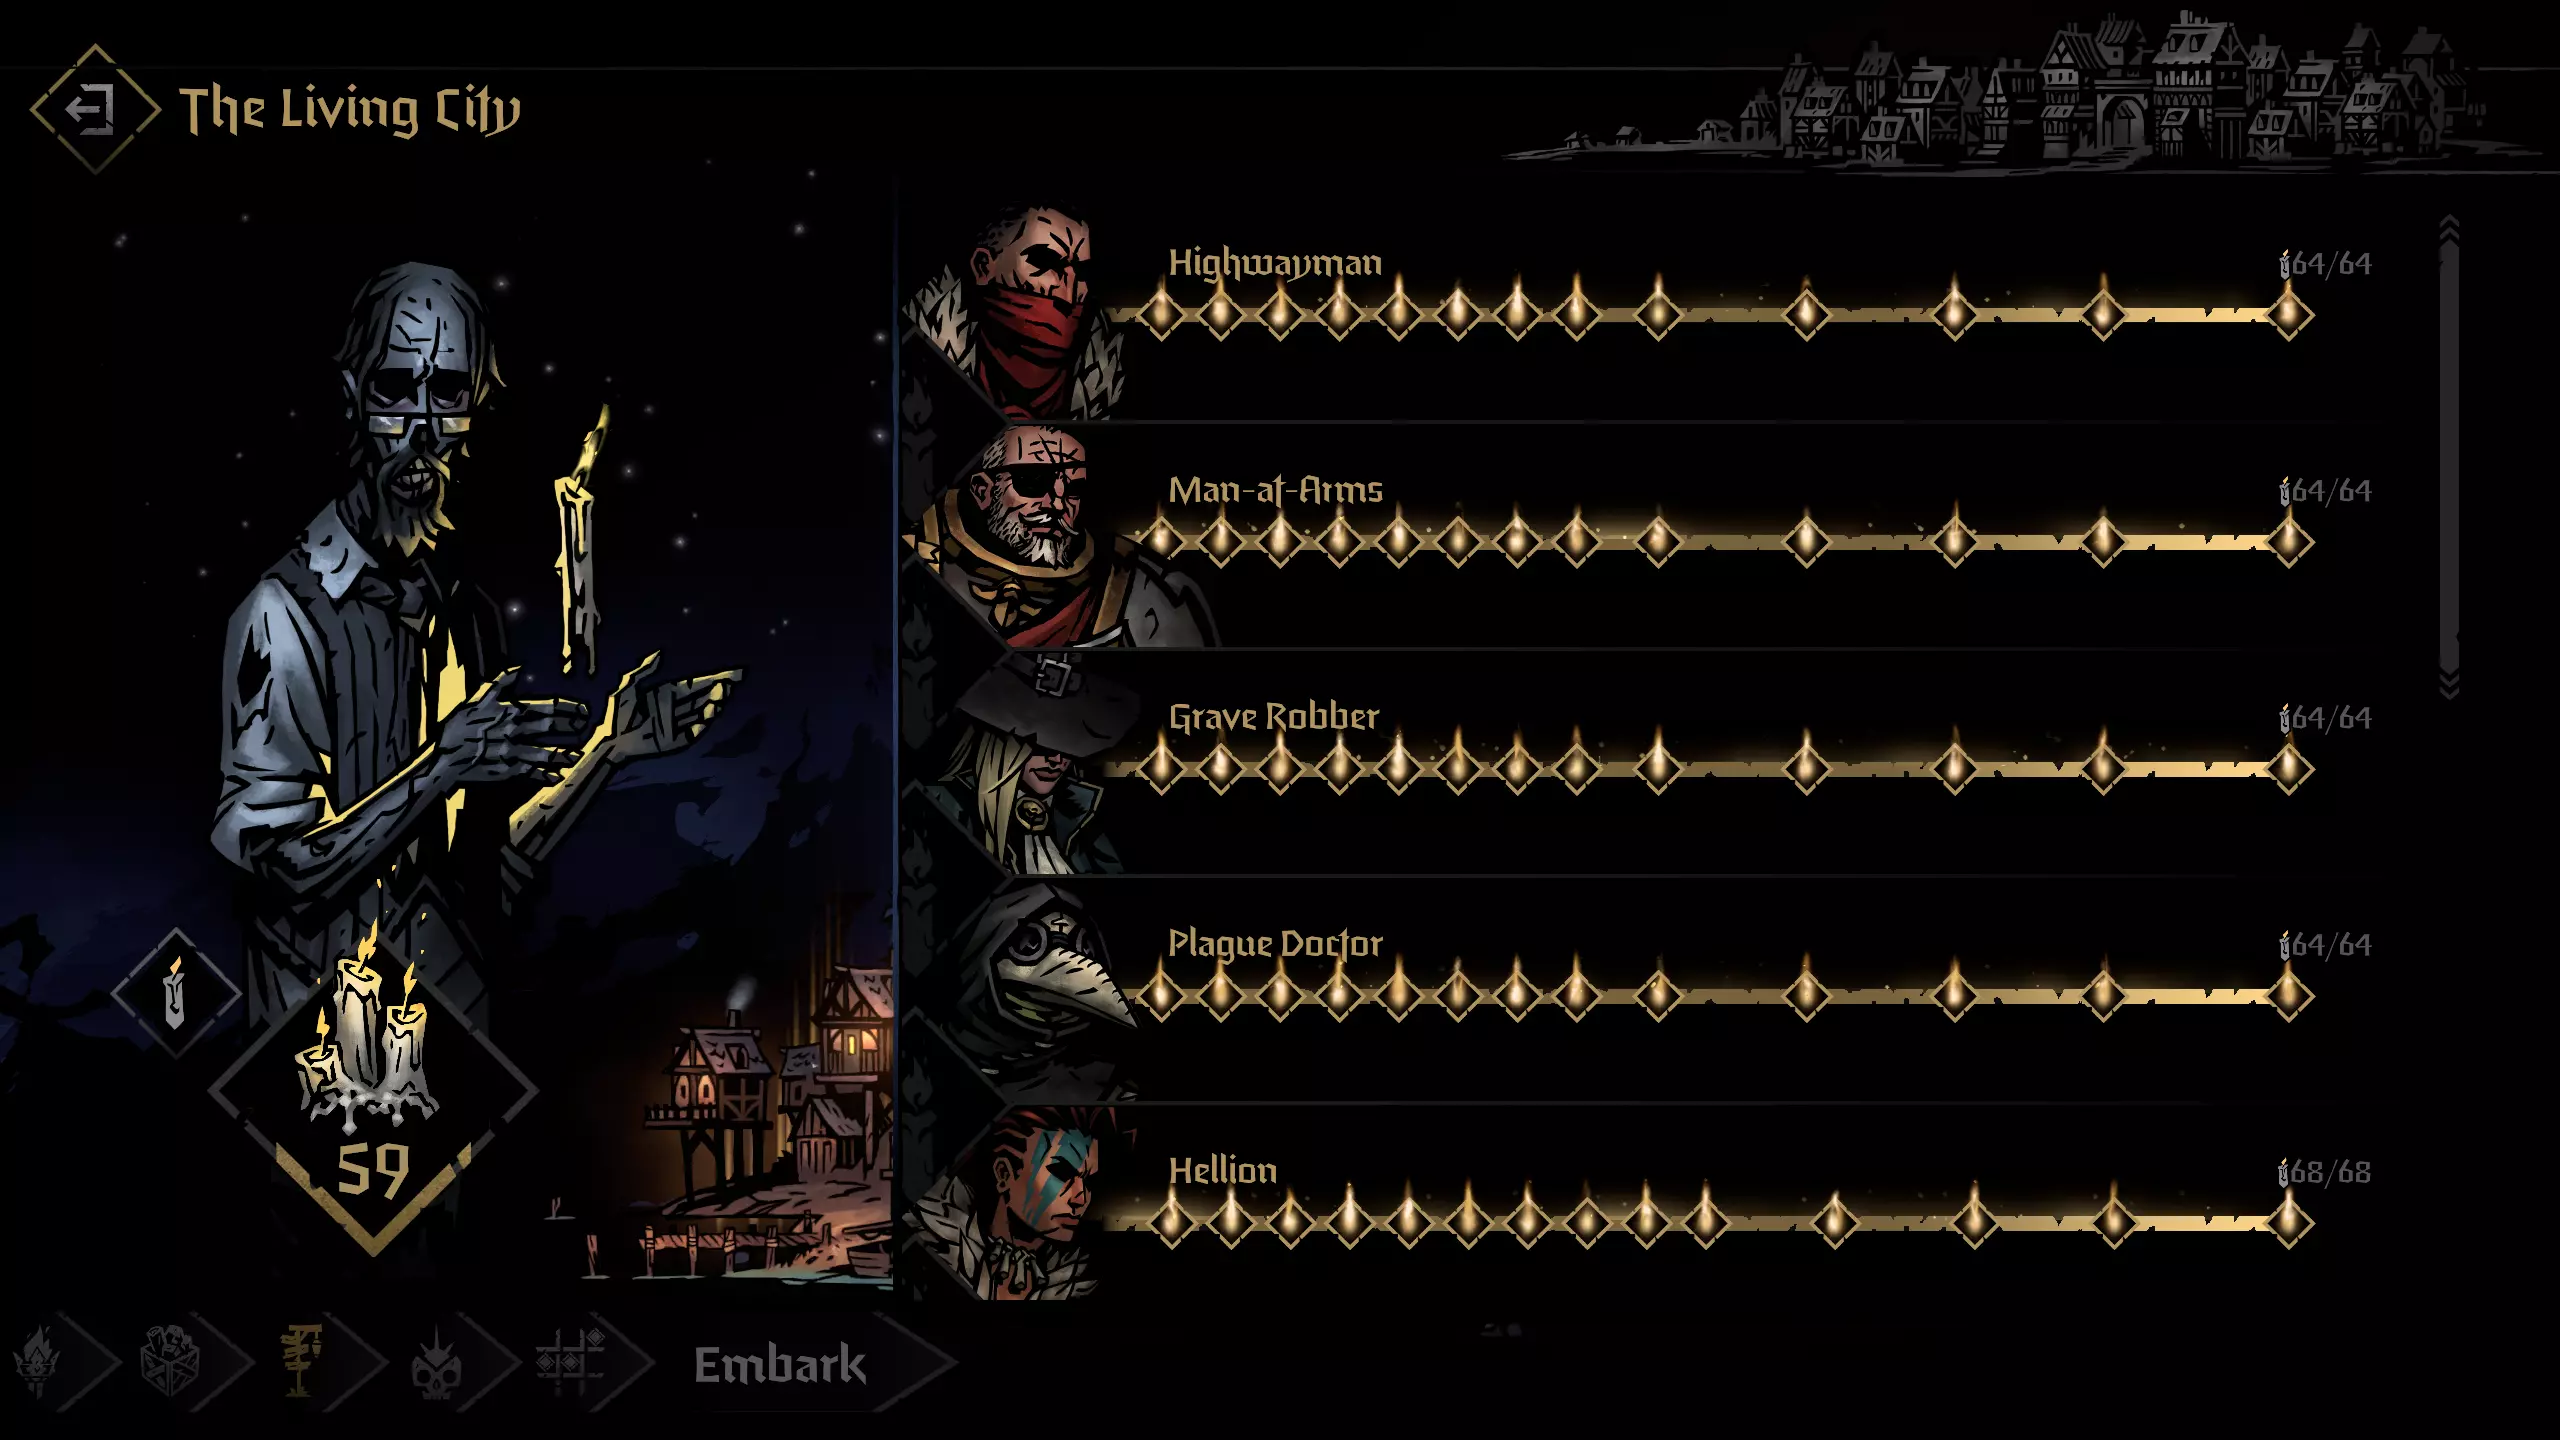
介绍 “憎恶在哪里?”我在DLC发布前就开始撰写本指南。此外,我对憎恶不够熟悉,无法就他在这类挑战中的表现给出建议或评估其潜力。最后,我查看了憎恶的技能,发现他没有稳定的嘲讽手段,这会迫使队伍组成发生巨大变化。队伍可能的组成形式会列在文末,但我尚未实际尝试。请见文末。 《暗黑地牢2》有3个成就,要求都颇为相似,但单独完成它们对大多数人(包括我自己)来说可能耗时过长。因此,我想探索是否有办法同时达成【Maitre De La Lame】、【Battle Hardened】和【Grand Slam】这3个成就。当我寻找团队指南或配装方案时,发现很少有能提供全面信息概述的内容。因此,本指南旨在实现这一目标。 本指南将涵盖游戏的所有方面,因此会包含所有告解 Boss、特殊独特遭遇、饰品等内容的剧透。 团队配置 好了,言归正传,让我们进入本指南的核心部分。 1号位:Antagoniste Duelist
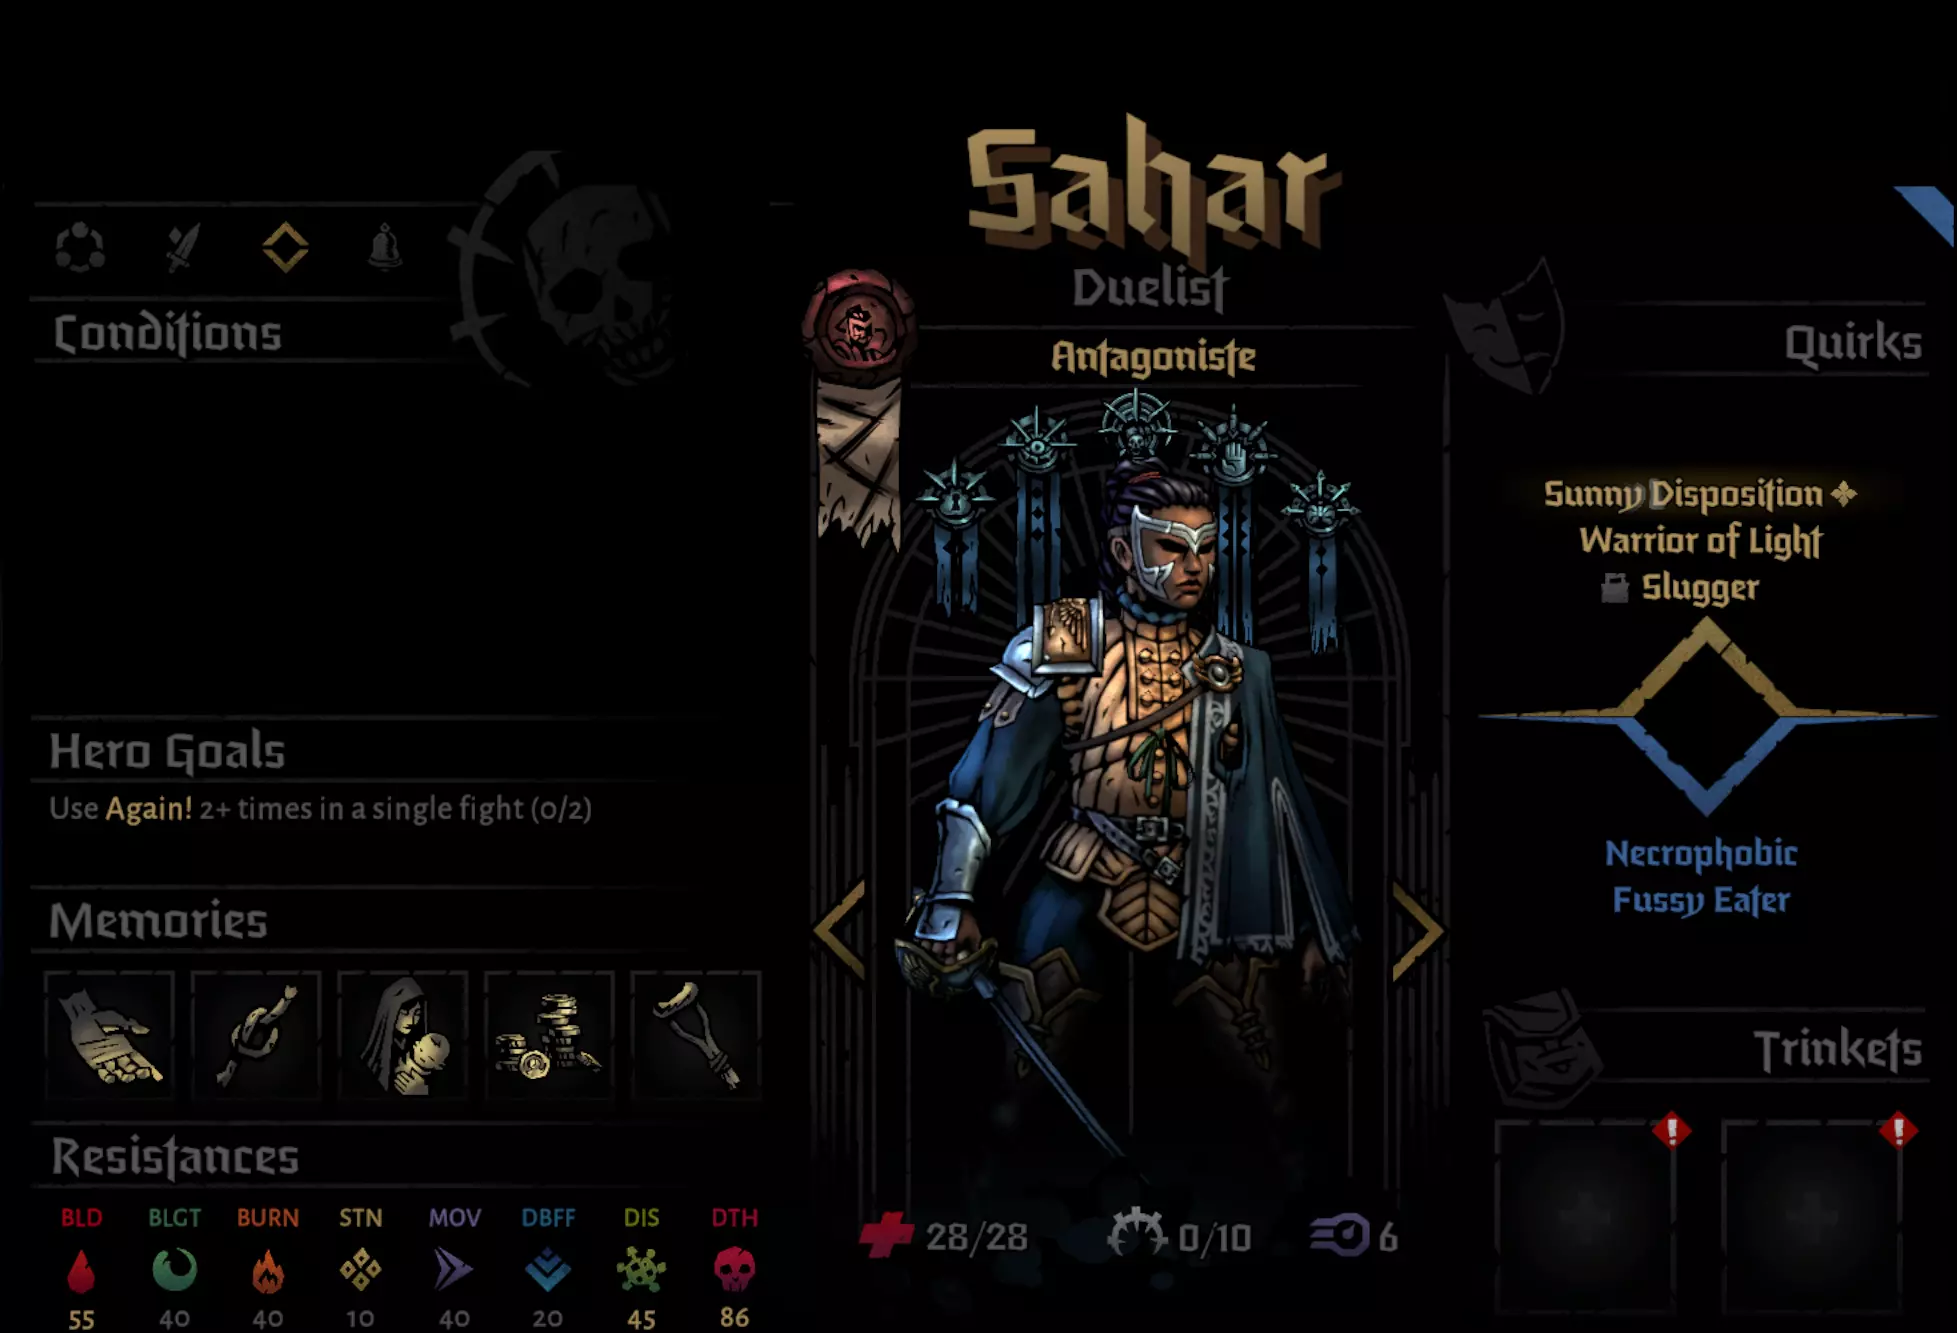
推荐技能:脱身、佯攻、迅疾突刺、致命一击和精准穿刺。 作为队伍中第一个必需角色,决斗者被设计为非常灵活的伤害输出者,旨在助力构建类似《暗黑地牢1》中的“舞蹈派对”阵容。不过,由于对持续伤害输出和生存能力有较高要求,她的角色定位略有不同。此决斗者build使其能够快速移动和切换姿态,实现自给自足。我在大多数战斗中都使用“脱身→佯攻→迅疾突刺”的连招直至敌人倒下,效果显著。精准穿刺和致命一击则为决斗者提供了更多灵活性,例如避免因使用精准穿刺而意外将十字军推至1/2号位,或用致命一击狙击4号位低生命值目标。决斗者通用游戏计划:在不会造成队伍位置混乱的情况下进行撤退(例如3号位的旗手或1号位的十字军)。通过佯攻来为突刺技能创造额外伤害加成。在不会造成队伍位置混乱的情况下使用突刺技能。根据需要使用精准穿刺或致命一击。 决斗者推荐饰品:额外伤害类饰品,因为决斗者是最稳定的固定伤害输出者,提升其伤害输出会有显著效果。暴击率:我发现决斗者在没有队友太多协助的情况下也能获得大量暴击(不像盗墓贼),因此提高暴击率有助于突破更多持久战。闪避类饰品作为对抗强力攻击的最后手段。装备恋人手套后,决斗者在战斗开始时处于进攻姿态,这意味着你可以将决斗者放在2号位,并在每场战斗开始时立即使用突刺技能。2号位:鞭笞者。
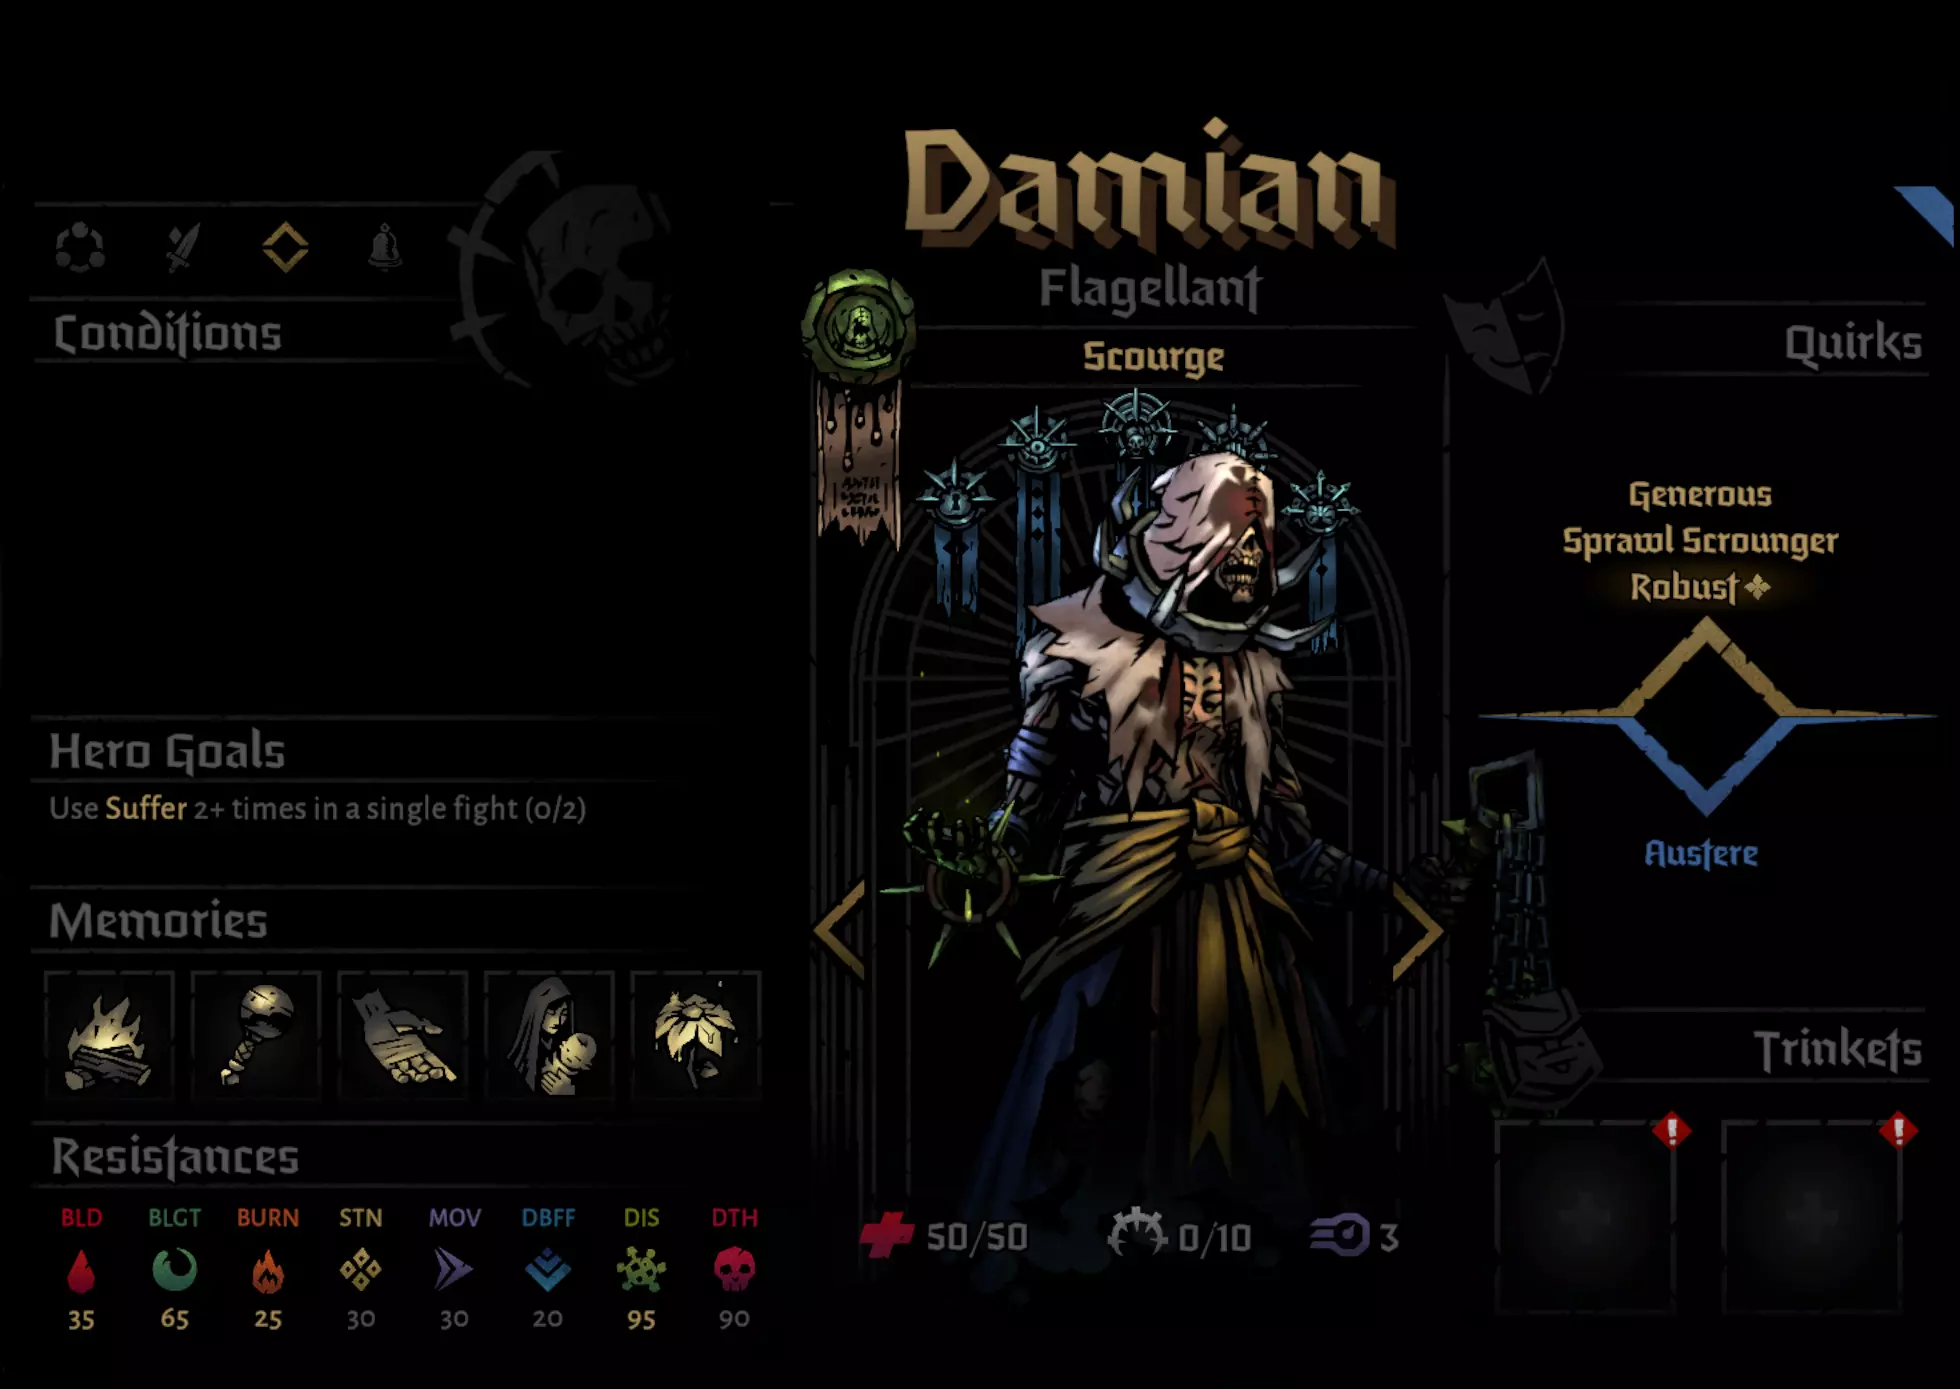
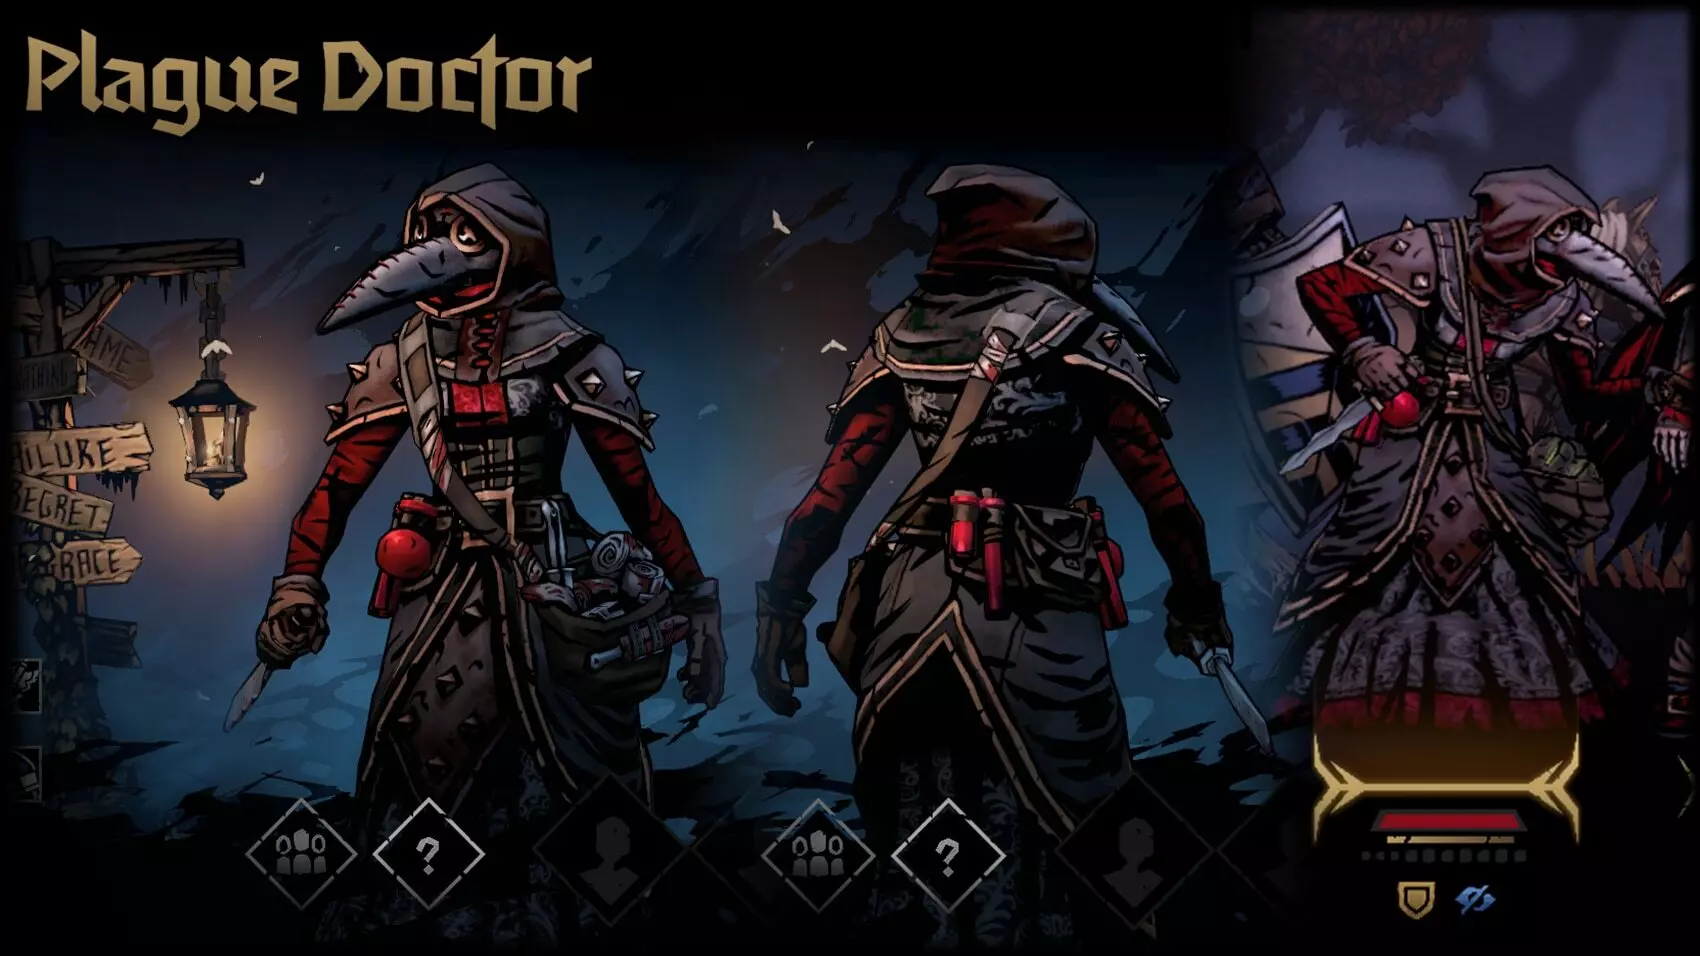
推荐技能:惩罚、不死、酸雨、再来!再来!以及脓毒症。 在尝试这次大满贯之前,我在《暗黑地牢》和《暗黑地牢2》中都不太喜欢苦修者,因为他总给人一种难以稳定使用的感觉,但这种看法很快就改变了。苦修者或许是游戏中最出色的英雄,也可能是最优秀的坦克。单凭“再来!再来!”这一技能就能让每场战斗变得轻松许多,99%的情况下你都应该在第一回合使用它。凭借其惊人的基础生命值,再加上一些饰品或特性,他能成为一堵坚不可摧的墙,必要时甚至能承受连续的暴击。此外,酸雨对后排能造成显著伤害,尤其是搭配连击或抗性饰品时。苦修者的【不屈】和【脓毒】技能还能让他执行其他任务,比如对高生命值目标叠加大量持续伤害效果,或者在瘟疫医生无法治疗时为队友提供额外的治疗来源。 苦修者通用游戏计划: 如果处于3号位,将自己移动到1号位(我知道这很糟糕,但苦修者需要能够使用【再来!再来!】,而且十字军也更适合待在后排)。 第一回合:使用【再来!再来!】 第二回合:使用【酸雨】 重复上述步骤直到后排敌人被消灭(之后改为持续使用【惩罚】),必要时用【不屈】治疗或用【脓毒】释放持续伤害爆发。 苦修者推荐饰品: 优先选择【枯萎抗性穿透】饰品,因为这个队伍难以稳定对1-2号位目标施加连击效果。 其次是任何增加生命值或提供护甲的饰品。闪避饰品是可行的,但更适合其他角色使用,因为苦修者希望被击中。抗性饰品的选择取决于区域或敌人类型。苦修者被敌人攻击移动位置可能会让战斗变得有些棘手。当到达山脉区域后,他的【囚笼】饰品会变得可行,因为负面对话不再是问题。三阶:炼金瘟疫医生
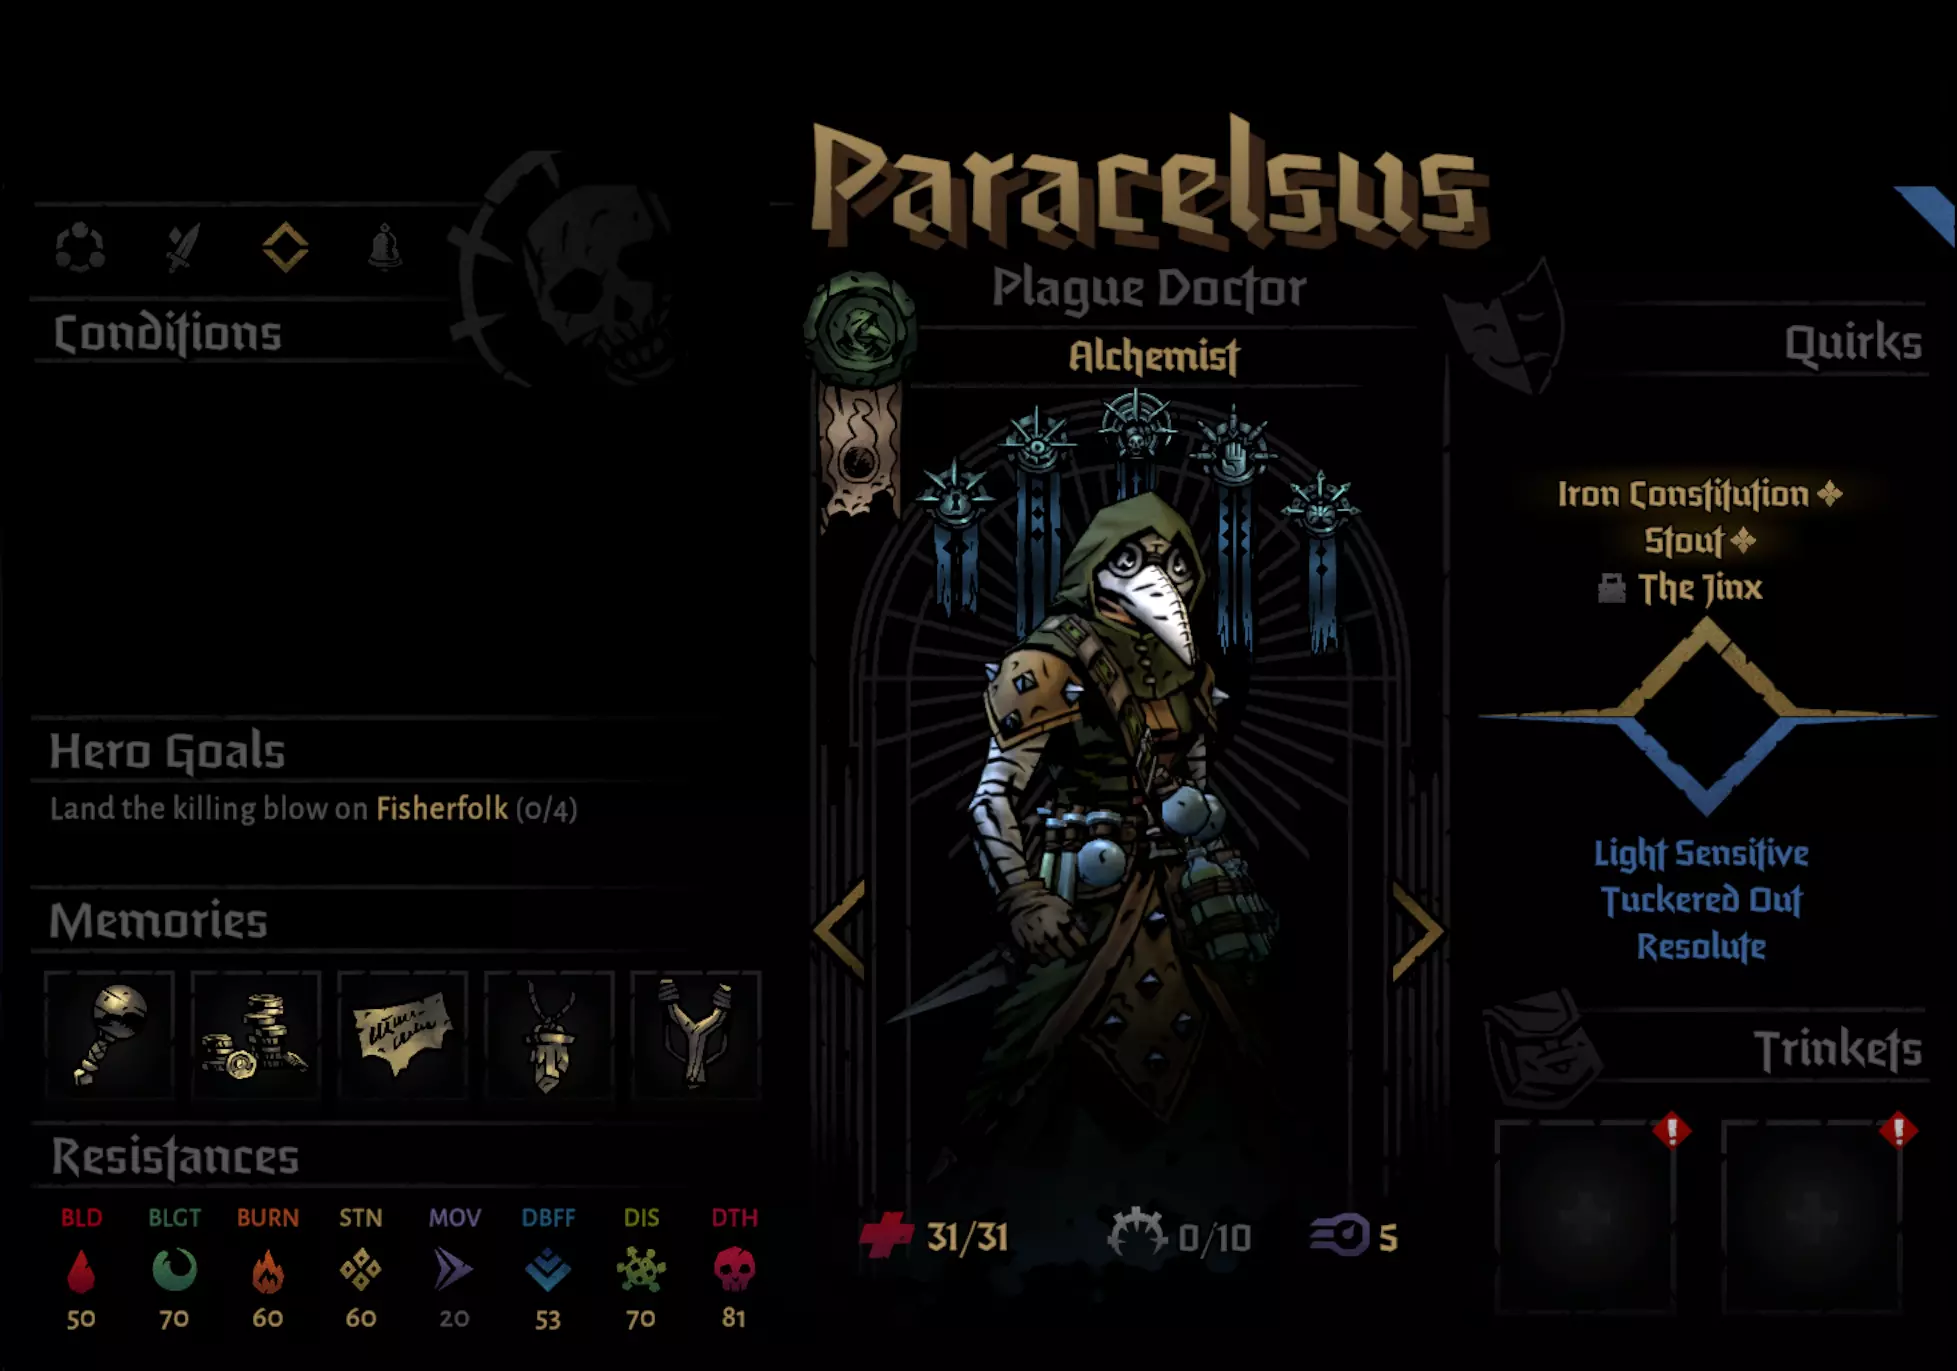
推荐技能:毒性爆发、战地医疗、瘟疫手雷、无差别科学,以及从切割、致盲毒气、预防措施、死亡原因、镁雨这几个技能中选择1个。 炼金瘟疫医生可能是大满贯模式中最常用的英雄之一,这是有充分理由的。战地医疗和无差别科学是整个游戏中最出色的两个治疗技能,再加上其天生的疫病抗性带来的几乎必定触发的疫病伤害,瘟疫医生既能造成可观伤害,又能提供显著治疗。较低的生命值可以通过饰品、食物、额外的持续伤害抗性以及鞭笞者和十字军提供的防御辅助(再加上致命一击的一些帮助)来弥补。 瘟疫医生通用游戏策略:如果后排敌人存活,就持续使用瘟疫手雷。若前排存活,持续使用剧毒爆破。 根据需要使用战地医疗/无差别科学。 使用镁雨来移除闪避效果。 在蔓生区或腐臭区使用预防措施。 瘟疫医生推荐饰品:增加枯萎持续时间或枯萎伤害的饰品,但不要枯萎抗性穿透。99%的情况下,你不需要增加枯萎抗性穿透。 注释教科书(如果你有草药) 早期实验(如果你有剧毒战斗物品) 任何提供生命值、闪避或护甲的防御性饰品。 命运预言者,因为它能提供自我续航,且由于抗性提升,触发概率很高。 增加速度的饰品,以减少因敌人快速攻击或决斗者受到持续伤害而导致的死亡之门判定风险。 四号位:旗手十字军
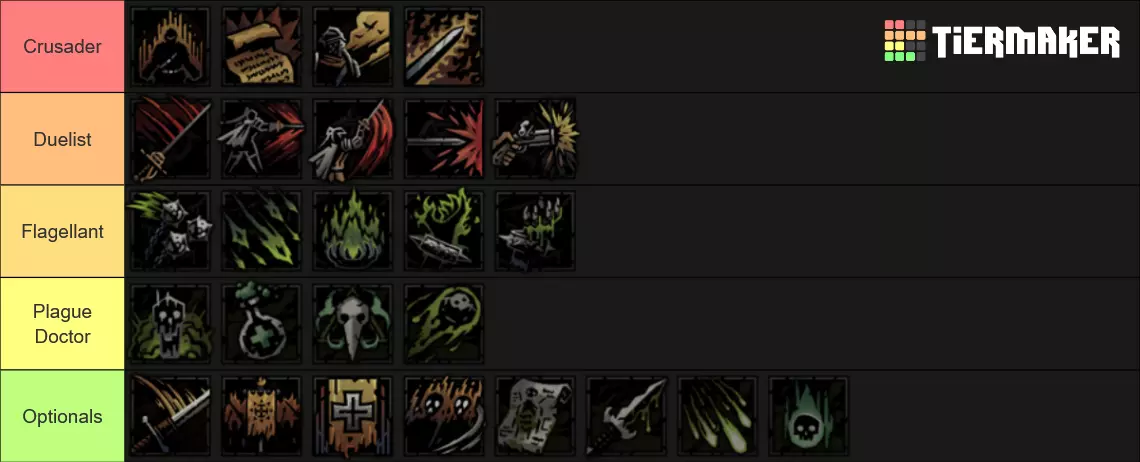
Recommended Skills: Zealous Accusation, Inspiring Cry, Holy Lance, Tenacity and 1 between Smite / Stunning Blow / Reap Crusader is probably the most modest part of this team composition but it doesn't mean he is dead weight. The Crusader provides invaluable support and covers some major weaknesses that the other 3 characters struggle to deal with. Being in Rank 4 instead of Rank 3 allows the Crusader to fire Holy Lance 2-3 times in a row to shred most high priority Rank 3-4 targets, aid in taking down bulky Rank 2 threats and is the most reliable source of Combo Tokens for this team when upgraded. Tenacity can protect the entire team from massive AoE attacks and Inspiring Cry will ensure minimal meltdowns and keep relationship's high. Zealous Accusation is a decent source of Dodge/Armour Removal and doesn't force the Crusader to move ranks if he doesn't want to and having an attack option in Rank 1/2 is important as it is very possible for team to end up in an awkward position. Crusader General Game plan Dodge/Armour Removal or apply Burns to backline with Zealous Accusation. Burst important threats with Holy Lance. Don't Holy Lance if Flagellant will end up in Rank 3. Use Inspiring Cry as needed to prevent Meltdowns (This includes the Flagellant in non-Mountain regions as keeping relationships healthy before then is important.) Use Tenacity if you know a big attack is coming soon.Crusader Recommended Trinkets Ranged Damage increase. Vital for the Act 2 Confession Boss. Fire RES Piercing, damage increase or duration increase. Charred Litany is one of the stronger ones. Due to Crusader's natural bulk and defensive tools, you shouldn't give him any defensive trinkets as it would be better suited for Plague Doctor / Duelist. Giving Allies buffs like with Hastening History or Insulating Insignia are fine. Potential Run Killers (And how to deal with them) No team comp in Darkest Dungeon can single handily deal with every enemy and boss in the game with ease, so there are some potential threats to be aware of and how to deal with them. ImplicationThe Problem As one of the few enemies in the entire game immune to both Burn and Blight, it can be a struggle to remove it from the battle. As a result your team could end up taking multiple "BOOOOOOOM!"s which does insane damage and large AoE stress. In addition, reloading gives it 2 armour and sends it to the back ranks where most of your damage falls off due to its DoT reliant nature. Lastly, as it is an Elite Pillager encounter, you can never prepare your team in advance to deal with it. The Solution Kill the other bandits first and remove their corpses as soon as possible to force The Implication into the front ranks to allow your Duelist to use her more suitable skills like Touche with Aggressive Style. Use Crusader Tenacity, Duelist disengage, PD Blinding Gas to reduce/avoid the damage from "BOOOOOOOM!" ExemplarThe Problem Exemplar is one of the most consistent high damage threats in the game with its combination of "Prelude" into "The Fall" that can put PD and Duelist at Death's Door in 1 turn. In addition to its very strong riposte and support from other Cultists, it is one of the most formidable enemies. The Exemplar was the only time I ever lost a hero trying to do this Grand Slam, my Duelist in Act 4 just before the boss. The Solution Blight shreds through the Exemplar quite well, especially if you have RES piercing trinkets on your Flagellant. It is also quite common for there to be Cultist allies to be on Rank 4 meaning you can use Plague Blast and Acid Rain to both hit the support and the Boss for extra value. Flagellant "MORE! MORE!" must be used Turn 1 because Flagellant's HP is so incredibly high he can tank even a Crit "The Fall" if needed. ChirurgeonThe Problem Chirurgeon is a bit of an unusual threat as its not because he has high damage, DoT or debuffs, its because of how durable he can be and threatening if mismanaged. Buffing his allies with strengths and crits can mean damage and stress can rack up quickly. In addition, his bloodletting ability may remove diseases from your party, but it comes at a hefty stress price. Lastly, he converts DoT into healing over time making the fight potential drag on if target prioritisation isn't decent. The Solution The main threat in the fight is the supporting enemies he comes with, so they should be dealt with asap. In addition, try to not use PD or Flagellant to attack him with DoT as to prevent him from healing. Crusader inspire's can deal with most of the stress inflicted here. CollectorThe Problem The Collector is another roaming boss that can surprise teams with a variety of mechanics that can destabilise a run. Collected Highwayman can rack up very high amounts of bleed that can tough to heal through, Collected Vestal stalls out the fight much longer and make squishy targets vulnerable to massive damage, Collected Man-At-Arms can make reaching the Collector a massive pain. On top of all that, the Collector himself has reliable token application, self healing and bleed. The Solution The Collector is very slow and will spend his first turn in Rank 1. This gives you a massive opportunity to deal significant damage and set the tempo of the fight, and some combat items can be very cheeky by abusing his 10% Stun Resist. After he uses "Collect Call" I have found the best strategy is to remove the Vestal and Man-At-Arms whilst trying to apply backline AoE at the same time. Plague Grenades and Acid Rain can make swift work of them and even the Collector if enough Guards have been used. DeathThe Problem Death can show up after general enemy encounters randomly and throw a wrench in your plan, catching off guard and weakened team comps in a really bad situation. That with high bleed damage and occasional hiding at Rank 3-4 means you can easily lose a hero. The Solution As its a random encounter, you cannot prepare for this every single time, but Death is weak to blight so smart use of PD and Flag can neat you an easy win. Harvest ChildThe Problem Harvest Child is the most difficult out of all of the region bosses in the game with its high Blight resist as well as strong shuffling potential forcing your team into very weird positions. There is very little debuff resist available in the game making its debuff almost guaranteed. Its AoE cleave attack is very deadly and wipe out unprepared Duelists / PDs. The Solution The easiest way to deal with the Harvest Child is to not force yourself into a position where your only option is to fight the Harvest Child. Visit the Foetor as little as possible and fight other bosses to meet the requirements to go to the Mountain. However, if you are forced into fighting the Child here is what you can do. Get debuff resistance as that will prevent Harvest Hunger being applied. Have Blight RES piercing trinkets on Plague and Flagellant to bypass the child's high resistance. Be smart with your position of units as they will move forward by 1 and if they are in the front row, they will be forced to use "Feed the Hunger." For example, Duelist and Crusader can move forward and put Flagellant in Rank 3 preventing "Feed the Hunger." Confession Bosses One of the most dangerous part of Grand Slams are each of the confession bosses as they all pose significant risk to your party. Proper planning and team building is required to ensure you can survive this challenge. Shackles of DenialThe Problem Denial of Reach and Denial of Arms can severely hamper your backline or frontline DPS and with various debuffs and stuns, can ware down teams who can't heal the stress of damage with Denial of Reason and Denial of Denial of Fortitude. The Solution As this the first confession boss in the game, it is much easier than the others and is an effective way to start a Grand Slam comp by giving your characters some very powerful memories early on. Ensuring every character has at least 2 different types of moves will mean that characters won't have to awkwardly shuffle / pass turns. I usually focus on Lamentation first as Plague and Crusader are heavily impacted by Denial of Reach. Not much strategy otherwise, just general good play ensuring you play around the possibility of bad skill blocks (e.g. Heal blocked and you have someone on Death's Door.) with either combat items or just good foresight makes this fight very easy. Seething SighThe Problem The Lungs being immune to both Burns and Blight mean that matching the DPS check on the lungs can be very difficult as you become reliant on Crusader to match the Rank 4 Lung and Duelist to match the Rank 1 to do the heavy lifting. The Solution Damage Trinkets on both Duelist and Crusader can help meet the DPS requirements each lung. Crusader Tenacity can also mitigate damage if you can defeat the front lung for some reason (and the buff might last long enough to help deal with a double lung attack.) Focused FaultThe Problem Focused Fault to put simply, is the most uncontrollable and most dangerous part of the run. I got very lucky with my 2 attempts (I still had to pass a Death Door Check on PD) on the boss but its very obvious why most other achievement hunters consider this to be the biggest run killer. Crit Limerence damage forces PD and Duelist down to Death's Door whilst Crusader and Flagellant don't want to be hit by too many either, it can't be redirected by taunts and its possible for it to be used 2 times a round meaning you don't have an opportunity to prevent Death Door checks. In addition it can be an immense struggle to remove "Seen" tokens on heroes and sometimes down to RNG on how many tokens each party member has. The Solution Despite all of these problems, there are still many options for you to wrangle back control into your hands. The most reliable way to remove "Seen" tokens is through killing Cloistered Eyes and careful positioning and attacks can potentially mean most characters enter Phase 2 with no tokens. Additionally, both Duelist and PD can either give Dodge or Blind Focused Fault to remove tokens in phase 2 and various trinkets, quirks and combat items can provide dodge. Crusader Tenacity can help provide stability and reduce risk of Death Door check. Flagellant is durable enough to reliably survive even with multiple tokens if the turn order works out in your favour (For example, Crit at start turn, PD heals Flag, Crit again, Flag heals himself.) Ravenous ReachDreaming General Trophy that immobilises you is super strong here, same with Crusader's Inspiring Cry. Rest To Be Done. Body of WorkAs this is the longest fight in the game, extensive preparing needs to be done to ensure you can outlast the onslaught that 3 phases of fights will do to your team. To Be Done. General Advice QuirksOne of the most important aspects of the run will be having frequent visits to the field hospital to purge negative quirks and protecting valuable quirks. Having multiple characters with strong quirks can make many aspects of the game much easier. For example, the team I had locked in the following quirks: PD: Jinx Crusader: Jinx Duelist: Slugger Did not lock in a quirk for Flagellant. Recommended Quirks to keep / lock The Jinx (All characters) Debuffs are very strong and the fact that it can apply multiple times on AoE attacks can significantly neuter some threats like Tangle Knights and The Implication. Positive Relationship Chance Buffs (All characters) Having positive relationships are a strong boon to have but it additionally will also prevent the possibility of negative relationships which are very detrimental. Cosmic Slayer / Cosmic Hater (All characters) Has all of the Act bosses are labelled as Cosmic, it would give your team extra damage and durability against them which is very solid. Slugger (Duelist) Has Duelist almost always uses Melee skills and how stuns are very strong, it never hurts to tip the odds of Crits and action economy in your favour. Field Surgeon (PD / Duelist) As PD and Duelist are the faster characters on the team, having access to a 50% heal can very useful, especially on Duelist as she could prevent DoT checks on PD or respond to a fast threat. HP / Armour buffs (Flagellant) Extra durability on the strongest tank in the game is a no brainer. Speed increase (Not Crusader, see notes on Crusader and Speed) Speed is a very strong stat in Turn Based Combat, in addition, applying DoT before the enemy has a turn will mean fights can end very quickly with 1 - 2 turn kills. Speed on PD is probably the highest priority has you can be more likely to also out speed the Duelist which can be useful if they might die from DoT. RoutingWhat makes this team incredibly effective is that with decent routing and planning, the trip to the mountain can be very risk free and you can easily get strong trinkets and ability upgrades. Region priority for me was: Tangle -> Shroud -> Sprawl -> Foetor -> Sluice TangleProsConsistent results vs most enemies Easy match up vs Boss Good Boss Trophy synergy Strong defensive region Trinkets Cons3 Foot Soldier + Drummer is awkward and may result in Drummer using Death before Dishonour Little damage increase from Trinkets Bullseye Barrett with Drummer is incredibly threatening Tangle enemies are very simple with little gimmicks that can disrupt your game plan as there is little dodge, blind, shuffle or debuffs. Drummers and Bishops can easily be hit with AoE DoT from Crusader, Flagellant and PD. Dreaming General is also incredibly easy as you focus fire him turn 1, use 3-4 AoE attack turn 2 and then appropriately balance regular 3-4 AoE attacks, stress heals and Crusader Tenacity for the Waking Dead. Dreaming General also gives the team comp one of the best Trophies in "The General's Dream" which immobilises your party for 5 turns meaning you can spam Duelist Fleche and Crusader Holy Lance for 5 turns without risk of Crusader or Flagellant being out of position. ShroudProsConsistent results vs most enemies Easy match up vs Boss Some niche trinkets for PD ConsMost Trophies and Trinkets are not usable Bosun knockback and pulls can mess with positioning Docker is very threatening Barnacles can be dangerous for Duelist I usually visit the Shroud if I already have a boss trophy or a need one and want to minimise any risks getting one. The Shroud like the Tangle has relatively simple enemies with only minor annoyances coming from knock back and pulls from Bosun as well as a small chance for Cabin Boy's to get dodge. Leviathan is a very easy boss that requires little specific strategy. The main downside is that this region has little trinkets or trophies that help with this build outside of PD with Sodden Sweater for 100% Bleed RES and decent Move RES and maybe Fisherman's Line on anyone that isn't Duelist because if they have a net you can roll 15% stun on rank 3-4. SprawlProsSolid trinkets for Duelist and Crusader Decent match up vs Boss Ok dodge and blind removal ConsDuelist struggles to deal with Dodge / Blinds Crusader struggles with high Fire RES Librarian can be a bit dangerous Sprawl is better loot wise than Shroud but it comes at cost of each encounter being more difficult and annoying. Plenty of blinds and dodges causes potential risks of bad rng. FoetorProsVery strong trinkets for PD and Flag Duelist doesn't have to deal with much Debuffs or Enemy buffs You can clear corpses semi-reliably with PD / Flag ConsMinus Death Blow Resist Trophies Majority of enemies have Blight RES that even Alchemist can't break through Harvest Child is extremely dangerous High Disease Risk Foetor is very high risk for a slightly decent reward as many trinkets are a great benefit to PD and Flag. Only go if you are confident enough to fight the Harvest Child as otherwise you risk diseases and very slow fights for maybe 1 decent trinket? I just avoid the Sluice as its unpredictable routing and lack of progress for getting to the mountain means its an optional region, thus an unnecessary risk. Combat ItemsTo Be Done See Tierlist for general pointers. MemoriesMost memories are very underwhelming and don't help you in future runs that much. The main things to look out for are Favourite Toy to PD and Flagellant to give their DoT that much more power. Optional for the Crusader. Promise Kept / Lesson Learned for Duelist to help fill the role of direct damage and crit spam. Mother's Comfort and Spring Rain for Flagellant to give RES to his weaker stats. Rare Treat and Second Chance for anyone to just help reduce risk of losing characters. Harmless Mischief on anyone that isn't Crusader (See notes on Crusader and Speed.) Notes Crusader and Speed The Crusader has a base speed stat of 2 which puts him in the unique threshold to interact with various trinkets. This includes Clenching Claws which can immobilise him enabling more uses of Holy Lances at Rank 4. However, some trinkets punish slow characters like Sprawl Burn damage and Fire RES Piercing. With the Crusader, be careful with Harmless Mischief as that takes him out of the 2 speed category which some trinkets have interactions with. So if you want to run Clenching Claws to keep Crusader in Rank 4 spamming Holy Lance, don't give him Harmless Mischief, but if you want to take various Sprawl trinkets for bonus Burn damage and Piercing, give him that memory. Abomination Is Possible!!! The ProblemWhen deciding which character between PD or Flagellant to remove, we lose to major aspects of the team that keeps the glue together. Lose an amazing healer, or lose an amazing Frontline. In an addition, Abomination doesn't hit Rank 4 for much, almost nothing if the enemy resists blight. What do we get in return? Character that can apply a lot Debuffs and Combo Tokens. Which is nice but it isn't really either of those things, not to mention how little value Combo Tokens are getting with this current lineup. Abomination's other paths can help spec into healing or a very situation Guard but it isn't enough. So who is the 4th slot? I have thought of a few teams but I cannot attest to their viability at the moment. EDIT (09/03/2025): Its possible! A team with Abomination, Crusader and Duelist is possible and I have completed a Grand Slam with them. I may write another guide for operating them but that will take time. The Team: Alchemist PD, Wanderer Abomination, Wanderer Duelist and Banneret CrusaderBulwark of Faith to provide taunts in place of Flagellant. Crusader uses the Combo Tokens from Abomination with Smite. So far this team was able to beat Seething Sigh with only 1 Death Door check that was completely preventable in hindsight (Duelist had to pass 1 burn DoT check but Abomination was faster and I could of equipped medical herbs on him instead of the Duelist.) Very little Death Door Checks elsewhere, there was 1 close call where my Duelist dodged an attack that could of been killed during the Act 1 Boss. I did Acts 2 -> 1 -> 3 -> 4 -> 5. Its vital to change Duelist from Wanderer to Antagoniste on Act 5 as so not accidentally knockback the spectre to rank 4.