换一换
换一换 


Want to beat the hardcore mode on the highest difficulty ? That's the right place. Global advices One year and half after first creating this guide, I decided to release it. In the meantime, I lost the notes I took while playing, which result in a non-exaustive guide. However, most of the tips present here will be useful for playing on hardcore mode. Goodluck ! - You will die a lot. You'd better not try ludicrous hardcore unless you have already beaten reagular game in ludicrous difficulty. Most of you death will be caused by your will to go too fast. You have to take your time, get the right trinket, the right elemental resistances, and do not be too greedy. You are your own nemesis buddy. Deal with it. - Game mechanics. You need to know it. it will be way easier to complete the game. For instance, I have never paid attention to resistances before I tried to complete hardcore mode. You will need them, it's so important you just can't play without paying attention to them. You got a nice purple helm with no toughness on it? Recycle it ! In the savanna, you will need between 20 to 40% toughness to survive without being killed in one hit. Some monsters are pacifists. They won't attack unless you provoke them by gathering a specific ressource, or attack them. By engaging a fight from a non-melee position, flux will have to move forward and warn the monster. You'd better initiate a fight when already in close range. You will gain enough time to hit 1 or 2 more times, depending on the enemy. Fight using hit and run tactic. Use zqsd (or wasd) to dodge will permit you to keep hiting ennemies while moving (if you move with you mouse, Flux will just stop fighting) The in game timer won't stop when you're in menus, or even not playing. Your seeds keep growing when you're afk in the game menu, but the time played won't increase. - Don't take a fight where you can get killed in one shot. Sometimes, even smaller monsters will instant kill you on a critical strike, that's bad luck. Resistances could do the job. A monster with the name in red? Avoid it ! The more time you take to kill a powerful monster, the more likely you are to get killed. - Equipements. Craft new equipements as soon you got a new workstation. Additionnal HPs are always welcome ! With the experience of hardcore mode, you will learn by yourself the equipements you can skip. Level 11 helm for instance, more infomations on the Savanna>Zug section. Swords are you friend. As you are going to play Hit&Run style, you don't want or need to be stuck near a monster. Swords got the fastets attack rate in the game. You can hit 2-3 time before dodging. Axe are good too, and sometimes are easier to craft. However, if you want to play combo bleed/poison/bleed, swords are best. You will need a lot of toughness on your equipements. Move speed is great too, but if you have to choose, go for resistance. - Don't deconstruct the fat catfishes you fish in the savana. You can pick them in construction mode. They will make the bawg way easier by shortening the fishing step. - Pets Wompit is the best. Gives you toughness. His AOE is nice, and he will kill ennemies while you hide or run like a coward. Also, it's a bit risky but wompit AOE helps you killing multiples ennemies when they pack together. Most of tier2 monsters drop eggs. - Gadgets Space Wrench: best gadget in my oppinion. Got a long range if you need to pull one monster, tells what monster your pet should focus if you're trying to fight while fleeing. It can also break an attack of a monster and let you enough time to give 3-4 sword swing. Blo-pipe: if you play with sword, bonus dammages are great. Only a few monsters are not afflicted by poison. Fingarang: When already bleeding, you have additionnal dommages to inflict. Works 2 times in one throw. Dbot: Invincibility, seems nice but could be risky. You can dive into a rain of projectiles without paying attention, however if it ends sooner than your expect and you don't have time to run, it's over. Most if the time, you will get killed in one shot, so you won't avoid death with this trinker. I stil use it though with a lot of care. - Trinkets Mercurial boost: running faster is great. Safety gogs: 10% mort critical strike. (Another good point for swords, +4% if you carry one) Grounder: gives 20% lightning resistance (reciepe given by tartils) Medecine bag: gives 20% poison resistance Also I use beakler and jar of joom to boost my poison chance/ poison dommages. I chose the combo bleed/poison because it's the easier to get and it's pretty effective. You can play with frost and lightning if you want, but in early game you won't have trinkets that inflicts/boost theses elements. - Bosses Never try to fight them without toughness and the last tier equipement aviable. Some others resistances are adviced, see below. Potions are useful too. Anger omlet for your wompit, and any stat-booster for Flux. - Miscellaneous: * Potted plants are great. Some are more useful than others. * Growing other plants from seeds is a fast and safe way to gather ressources and reciepes. * You just need to upgrade your wompit. No need to fight huge monsters, beside gathering souls to craft potions. Don't forget: Even with last tier equipement from the bawg, critical strikes from tartils or zugs are dangerous. * Signs: craft a lot of them, it will save you time when looking for something specific. In my case, I always leave a sign with a label when I encounter a fishing shrine, many fish schools or some rare ressources (a pack of glowberries, or even dusks cristals) * Floors: always have 20 of them in your stash. It's awesome if you need to cross rivers. * Hearth: you will need that to craft large healing potions. If you're having some trouble to find the reciepe, plant some logtrees seed, then use a harvest bomb. The savanna Average time 2 to 4h Tricks: - Glipodus: can be easily killed if you stuck them onto ressources. As they fly, they can block their hitbox on a tree stump, or a reed. As you hide behing, they will charge in your direction, but won't be able to hit you. You can do this trick with ennemies having no range attacks. - Wompit/Tartil: fight them with high toughness. Threats: - Yourself: I can assure you, a missclick happens often. As getting stuck on ressources, trying to hide behind them. Don't pay attention a second, and it could be over. Too much noise around you while playing? Annoying girlfriend wants to talk? Stop playing. Stay focused ! - Zugs. You're first challenge. They are horrific. They will kill you a lot. Don't ever try to fight them without 40% lightning resistance. Their homing lightning ball will leech your health so fast you won't have time to react. Best advice against them: put a river between you and them, and let the pet do the job. Use the space wrench to keep your pet attacking it. You also need some ressources to hide behind. Lithgning balls disapear when they hit an obstacle. Sometime, you will try to escape from a ball following you, but it's faster than you. In that situation, just run 90° left of right. You won't have much time to react and take the right decision though. Don't try to craft the level 11 helm from the crystal kiln. It requires a component given by a tamed zug. Getting the zug egg is tricky, as you will have to fight tier 3 zugs ... (not sure tier 2 zugs gives you eggs, or it's super rare) They get upset when you harvest walkerroot near them. Also, you can break their IA if you don't want to play fair. Get their attention, and put a ressource between you and them. Stand still behind. The zug will come close enough to take hits from your weapon, and will not retaliate. Massive zug have a larger AOE, so this trick does not work everytime on big zugs. In that case, just run behind another ressource. - Tartil. They have a huge AOE, you won't have much time to hit before you have to run. Stunning them could be efficient to take them down quickly. Still want to go fast? Follow these tips at your own risks Craft the first station once you got the saw. Then craft the sawmill, get the sword and each piece of equipements. Then kill wompits to craft the skinnery. Craft the pickaxe, then gather some rocks to craft the stoneshaper. You can skip lv3 equipments as you only need to kill wompits to craft the stoneshaper. Avoid fights, you only need 3 wompit sinew and harvested ressources. Craft lv 3 sword and a bed. You know need to be at night to kill gluterflies. Small ones are easy to deal with, no need to upgrade your armors. Now you will need two wompits hearts to craft the chemworks station. Wompits heifer have a decent drop rate and are not that dangerous. Larger wompits tend to attack twice more frequently. Also, you can loot the wompit egg. Craft a new lv 5 sword. You now need 30 glipodus siphon and 2 more wompit hearts to craft the next saw and the next station. Next step: harvesting squees until you got the squathe workstation reciepe. Time to fish, and you will need to fight tartils. So you may need to craft new armors (wooden armor won't help you not getting one shot by tartils) with toughness stat on them but you can kill small tartils without being hit. (about 1h game) Now, you really need lv 9 items with electric resistance stats. Yep, it's time to kill some zugs. Their AoE attack they launch have a super small cast time. If you see it as you're in the zone, most of the time it's too late and you will die. Bosses - Barricaded signal => Blockstock Has a lot of HP, melee is not adviced. You won't have to dodge thousands of projectiles, but the massive stomp is deadly. Even with 40% resistances and maximum savana tier equipement, one critical strike and you're dead. (happens me once, since then I avoid melee) Gives you D-Bot The butterfly Stunning mirror - Mouthy signal => Baconweed Fairytooth Just dodge. When he's not throwing blue balls, you can go melee Gives you Giantbone helm Glorb Baconwand - Venomous signal => Baary You can drink an elixir of antivenom. 15% more poison resistance is always nice against barry. Also, equip medecine bag and glorb It's the easiest and fastest boss in the savanna Rewards you with the beakler (good item, grants 10% chances to poison melee attacks) Jar of Joom (boost poison dommages by 20%) Also, he drops a smash racket. The bawg Threats: - Nurvas. with savana equipements, you can be killed by lightning they emits. (700 to 1000 dommages without any lightning resistances). Avoid nurvas field when you arrive in the bawg. - Fishing spots. If you're not careful enough, you start fishing and then a monster rushes into you. You won't have enough time to react, to exit the fishing mode, and with bad luck, you died. - Large bamlis. When they teleport, sometime you can take instant lightning dommages. Smalls bamlis emits smalls lightning balls, it happens less often. 40% lightning resistance is advice if you want to challenge them. However, you don't have to try. Really. Mosts ennemies have a simple pattern. Wojack can be tough to kill. In early game, just use your pet and kill ennemis using jollychomps. You can kill smalls vommas, wojacks, throak and snorbles using jolychomps. Theses little chomps are your best friend there. Walkthrough: Kill your first vomas until you can craft the trovel. Then, use jolychomps to kill voomas and wojacks. You'll get the 2 first workstations in a couple of minutes. Once you got the jackweaver workstation (2nd of the bag), you can now get the cauldron reciepe by gathering random plants. The third station takes time to get. You need to kill dangerous throaks. A lot of them if you're unlucky. Can also be loot by chopping nurvas down. Way more easy if you can grow them at your camp. Next step, chopping artrees with your brand new pickaxe to get the Compressor workstation. The fish step: don't fish by night. You can go back to the savana to use the fishing turbo shrine. Last step: farming bamlis. You'd better get some lightning resistances. Then you can already go kill the bosses at this stage, the last workstation (granvil) is not required. If you want to get the juiceforge, you can seek for Jessica. Note that the sword lv 23 is 1/3 more powerfull than the lv 21. Bosses: Jilted signal => Jessica Easiest fight in the game. Get a Fingarang, a biopipe and enjoy. You just have to run dodge. If you play safe enough (don't try to combo too much with the batarang), you won't take a hit. If're you're terrible at dodging, you'll need toughness, fire and poison resistance. But if you're that bad at dodging... you'll never make it to the bawg anyways. :) Reward you with the juice forge ! Also terrifying fetish (not that useful) and nematoblaster. I have never used this, not sure it's useful. Plus, don't forget to pick up "the bubbler" that has appeared on the floor. A little purple ball with eyes. It's easy to miss. This trinket gives you a pet that multiplies itself and explodes at the contact of ennemies. Glitchy signal => Ynnix I'm pretty sure the big blue balls that he throws at you can one shot you. They are slow, you can avoid them easily. Others projectiles inflicts 2k to 4k dommages with 25% toughness. It's an easy fight, you can even get close enough to use your sword. Fingarang, blo-pipe and wompit will do the job in less than 5 min. Rewards: Chemwand: trinket that ignites ennemies with 10% on hit. The blood root. A good hammer, you will need to get the special component given by haircones I guess. Also, need high tier bamli ressources... tricky to obtain. Anyways, just forget this, it's a hammer. Plague injector: device that deals 100% dps a poison on an area. Gross Signal => Toomah Static boss. You could use poison resistances. I advice using Medecine bad trinket (gives 20% poison resist) With 40% resistance and a few toughness, you'll be fine. First and second phase, you can go melee. Avoid it in the 3rd phase. Well, you can but you need to use the D-Bot. There's so many projectiles to avoid, you just can't get close. This boss regenerates it's health, so it makes take some time to kill it. Not that dangerous, but tedous... screen shaking, ennemy blinking, projectiles everywhere ... => Take enough healing potions (15-20 is safe). You don't want to heal with Pyn, that gives you only 2.3k hp as you have 10k hp. Rewards: Wealthy statuette: trinket gives you 10% chances having double components on breaking any ressources Heating pad (gives 20% ice resistance) + the orb of forn Before leaving to the tundra, adapt your resistances: you will need toughness and electric resistances. Smalls monsters are pretty strong there. Glazers can be super deadly with no resistances. The Tundra Now you have the juiceforge, it will be way more easy to get the right resistances. Assembling this workstation requires a charged zug molt, but you are strong enough to defeat Zug Mugs (tier 3) or even Zug Dug Lug (tier 4). Don't forget lightning resistances and avoid zuguardians, the rewards are not worthing the risks . If you haven not enlarge your wompit to womplord state, it is time to. (with 48% toughness, womplords only deals 1k2 dommages) Smashblossoms deals about 6k dom when you have no toughness. Be careful when searching geysirs. You will encouter strong monsters that may one shot you (like royal glasers). Smalls lyffs are pacifists, but will be triggered if a geysir falls on their head. All of them will be triggered. Also, slurbs are triggered by geysirs oppening. Next hard step is to get the glaser pet. Huge glazers can kill in one shot if you have less than 40% lightning resistance. Play safe. First station (Shredbasket): Chop smashblossoms and furgrasps Second station (gastropestle): kill glazers, be careful with their lightning. You'd better get lightning resistances. If you can get potted parapoid, craft a dozen. You will need a lot of them to refine slurries. You need to tam a glazer to craft the fishing rod. Third station (tumbler): Once you have the fishing rod, you need some lyff tongue (x2) and a few more slurb spines (x4) to get the next saw. Beside, you'll have to explore the deep land of frost. Don't do it by night, you don't want yet to fight blastcrabs. One hit and game over. You can use flunguses to poison lyffs. It's quite efficient. Be patient, once, it took me more than 2 hours ... In this station, you can get frozen fish food to add additionnal fishing spot near your basecamp. Also, geysir drill to add more geyseirs. Not that useful though. This station unlock the tier 5 saw. Fourth station (burnchurn). Unlocks the tier 5 pickaxe. Fifth station (refinery). Unlocks tier 4 trowel. You need to craft the bagpump to get the trowel, to get the last station. Sixth and last station. The good news is every item in this station is legendary tier. Bosses: Angled signal => The poteti / lightning resistance + ice/toughness. It will be a long fight, he has a ton of hp. The huge ice shards falling from the sky are super dangerous. They deal massive dammages. (deals both physical and frost dammages) With less than 50% toughness, it's one shot. Also, try to avoid the shard that spins around Poteti. It deals massive dammages too. The 3 ghosts that spins around him deals poison on contact (and disapear on touch) Rewards: cleave bat (makes you harvest thing faster. Totaly useless at this point) laser leash (may be nice to fight EMG which is a static mob, if you use a static pet like vooma) demonic boots (lv 27 boots, useless) Encrypted signal => E.M.G / toughness and fire resistance might be useful. Don't hesitate to drink an elixir of fireproofing (+15% fire resist for 20 min) Take care to the lightning shot by his eye. It one shots. Unidentified signal => The I.H.O toughness / fire resistance. Not sure of the types of dammages dones by these bouncing spiky balls Just use your pet, batarang, firethrower ... don't try to get close. It's super easy to dodge by just turning around I.H.O Reward: megagong lure. Could be nice to have the Megagong, but you need to tam a gulanti ... could be dangerous. However, lv 35 weapon is about 14500dps and the megagong is about 21800. electro fuzz-knuckles. Boost electric dom by 30% clarm (boost pet damages by 20%) Now you're ready to go to space to fight hewgodooko. You will need luck, because it will take ages to take him down. First phase, he spaws healing plot that restores him 40k hp. It takes 3 hits to destroy them if you carry the megagong... Wich will take 3 secondes, meanwhile hewgodooko will have 200k hp restored. What you need to do, is to use bombs (like de mines you've been fishing since the beginning) or the smashing racket. Most of the time, it destroy them with one hit. Second phase, the healing plots are replaced by gravity plots that prevents you from escaping if they attract you. You can still come closer, but then you won't be able to escape unless you destroy them. You'd better avoid getting too close. All lasers are easy to dodge. Once you are in the second phase, the combat will be more easy to handle. Once he has about 20% hp, he will summon again healing wards. A good strategy is may be to use dommage reflection with almost perfect resistance to lightning. It is risky, and I'm not gonna try it.
如何通过荒谬难度硬核模式

导读
这是一篇游戏荒谬难度硬核模式通关指南,涵盖各区域玩法技巧、装备选择、宠物与道具推荐、BOSS应对策略等核心内容,帮助玩家掌握游戏机制,规避死亡风险,顺利通关荒谬难度硬核模式。

评论
共0条评论

试练之地 《侍魂胧月传说》试炼之地机制详解 攻略前十五层
本文目录一览 1、《侍魂胧月传说》试炼之地攻略 《侍魂胧月传说》作为一款非常受欢迎的动作角色扮演游戏,在试炼之地这个模式中给玩家提供了更多的挑战和乐趣。但是,对…
2025-10-27 07:590赞 · 0评论

女巫森林 《炉石传说》女巫森林打法攻略 女巫森林怎么打
炉石传说女巫森林怎么打?很多玩家不知道女巫森林怎么打,具体的流程是什么?为了让大家能够快速完成任务,233乐园小编为你准备了最新的图文攻略,感兴趣的玩家赶快一起…
2026-05-13 01:300赞 · 0评论

3个DLC角色大满贯指南(2025年10月更新)
The most efficient and stupid way to get all 5 Memory DLC character achievements…
2026-02-20 16:000赞 · 0评论

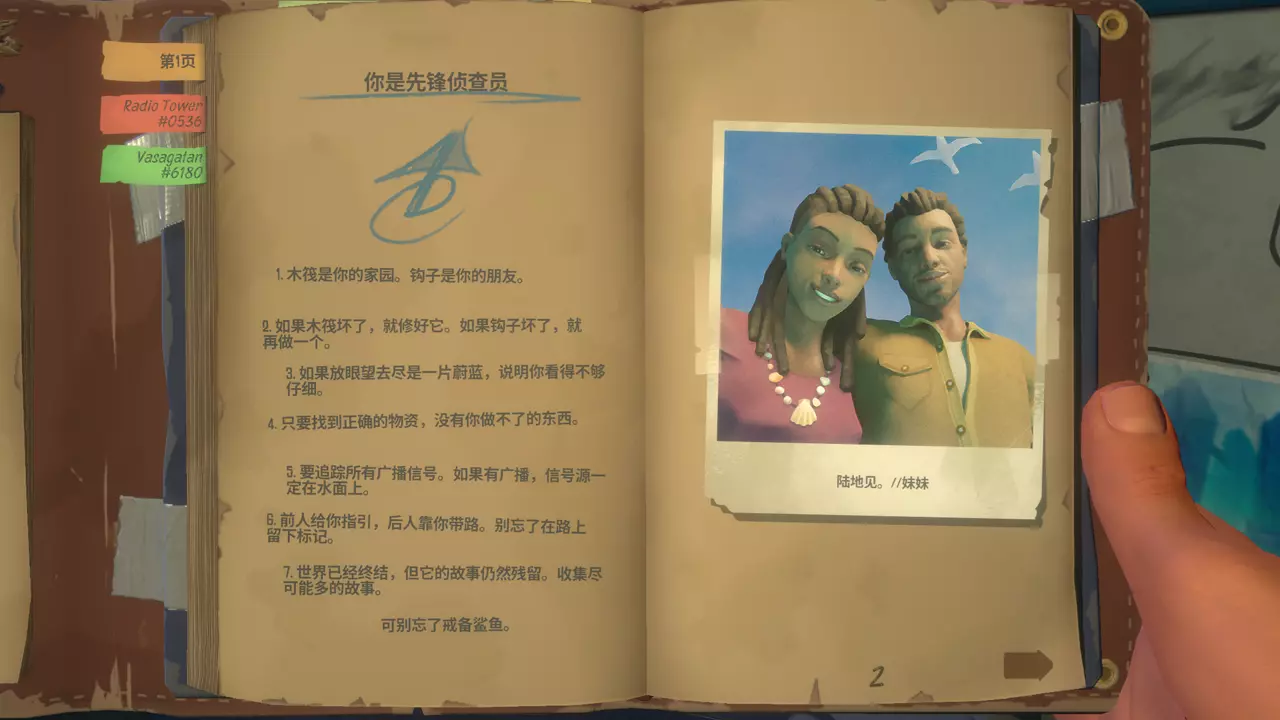
木筏:主线岛流程攻略
《木筏求生》共有8座主线岛,每座主线岛上都会有一些特有资源,可以多转转收集一下,流程中不多赘述。前两座主线岛随波逐流就能抵达,如果错过的话在前行方向还会再次出现…
2026-02-13 09:030赞 · 0评论
幻影回廊 永恒之塔2 5星困难 400K就够? 幻影回廊攻略来了!
非常简单,推荐大家去试试,如果号够大很多机制都可以跳。 这几个BOSS吃黄药都可以减免DOT。 老一: 落地砸后记得跳, 点名一定找篮圈。 紫地吸人加走位, 分…
2025-09-24 00:010赞 · 0评论

仙剑奇侠传人物介绍 《仙剑奇侠传》游戏后期强力角色大揭秘 一个不容错过的游戏攻略
本文目录一览 1、《仙剑奇侠传》游戏后期强力角色详解 作为中国RPG游戏的代表作,《仙剑奇侠传》深受广大玩家的喜爱。而在游戏的后期,想要在战斗中更加得心应手,就…
2025-08-24 03:260赞 · 0评论

四门绝阵 《梦幻西游2》四门绝阵副本攻略 四门绝阵刷怪技巧大公开 -
其丰富的副本系统吸引了大量的玩家、《梦幻西游2》一直是玩家们最喜欢的MMORPG游戏之一。但是由于其难度较高,其中,因此本文将为大家介绍四门绝阵的攻略技巧、许多…
2025-06-26 19:270赞 · 0评论

技巧 【异环】通行正义全阶段,十四个技能详解,包学包会!
简介神了
2026-05-15 00:440赞 · 0评论

《最终幻想X》无攻略100%完成:技巧与提示
不看攻略,100%完成《最终幻想X》……这可能吗?不管怎样,这正是我想要挑战的目标。但问题是,只要查阅任何关于某个机制的资料,都会直接看到现成的完整攻略。于是我…
2026-02-15 07:000赞 · 0评论

重生细胞 如何前往山洞地图 萌新必看
-
2025-12-11 03:410赞 · 0评论

暂无更多
最新更新
- 崩溃大陆-视频介绍
- 崩溃大陆-视频介绍
- 如何达成100%成就 — 如何100%完成《崩溃大陆》成就!!——这只是成就翻译(我会尝试更新) 制作
- 崩溃大陆 — 指南 大家好 经过长时间的工作,我终于完成了《崩溃大陆》的西班牙语翻译模组。 首先声明:这并非完美的翻译。由于游戏中混合了自创词汇、罕见表达和无意义的名称,我不…
- 获得巨型铜锣 — 这是一份关于如何获取超级铜锣的指南。超级铜锣获取难度大且概率极低,因此无法保证一定能获得,但本指南可以提高你的获取几率。 什么是超级铜锣? 超级铜锣是游戏中最强…
- 【荒谬级】卢勒的极致效率与战斗能力纲要 — 大家好!经过一年的构思,我终于要分享我的发现和心得了。我相信本指南的内容会让那些已经通关游戏,但想深入了解Flux及其装备的玩家感兴趣。你将看到的内容包括:流派…
- 《我也找得到的隐藏地点/道具》 — 隐藏地点第五花园地精和货运飞船位置以及隐藏家具花园地精获取方式。 获得步骤:在最终决战打败休戈后,先别急着离开,打开地图菜单,点击回家图标。
- 培根杂草精灵 boss — 这是一份关于如何找到培根草仙子——游戏中最简单 Boss 的指南。 寻找培根草仙子 培根草仙子或许是游戏中最简单的 Boss。不过要与她战斗,首先得找到她。你需…
- 《崩溃大陆》新手攻略与技巧 — Hello Strangers and Stranded, This Guide is designed to be a Compendium of Infor…
- 根据规则,内容包含外部链接,需删除。 — 在本指南中,我将介绍如何为大家喜爱的《崩溃大陆》安装期待已久的俄语本地化补丁。 引言 大约5年前,当我接触到这款作品时,我一直被一个问题困扰:哪里有俄语或俄语本…