换一换
换一换 


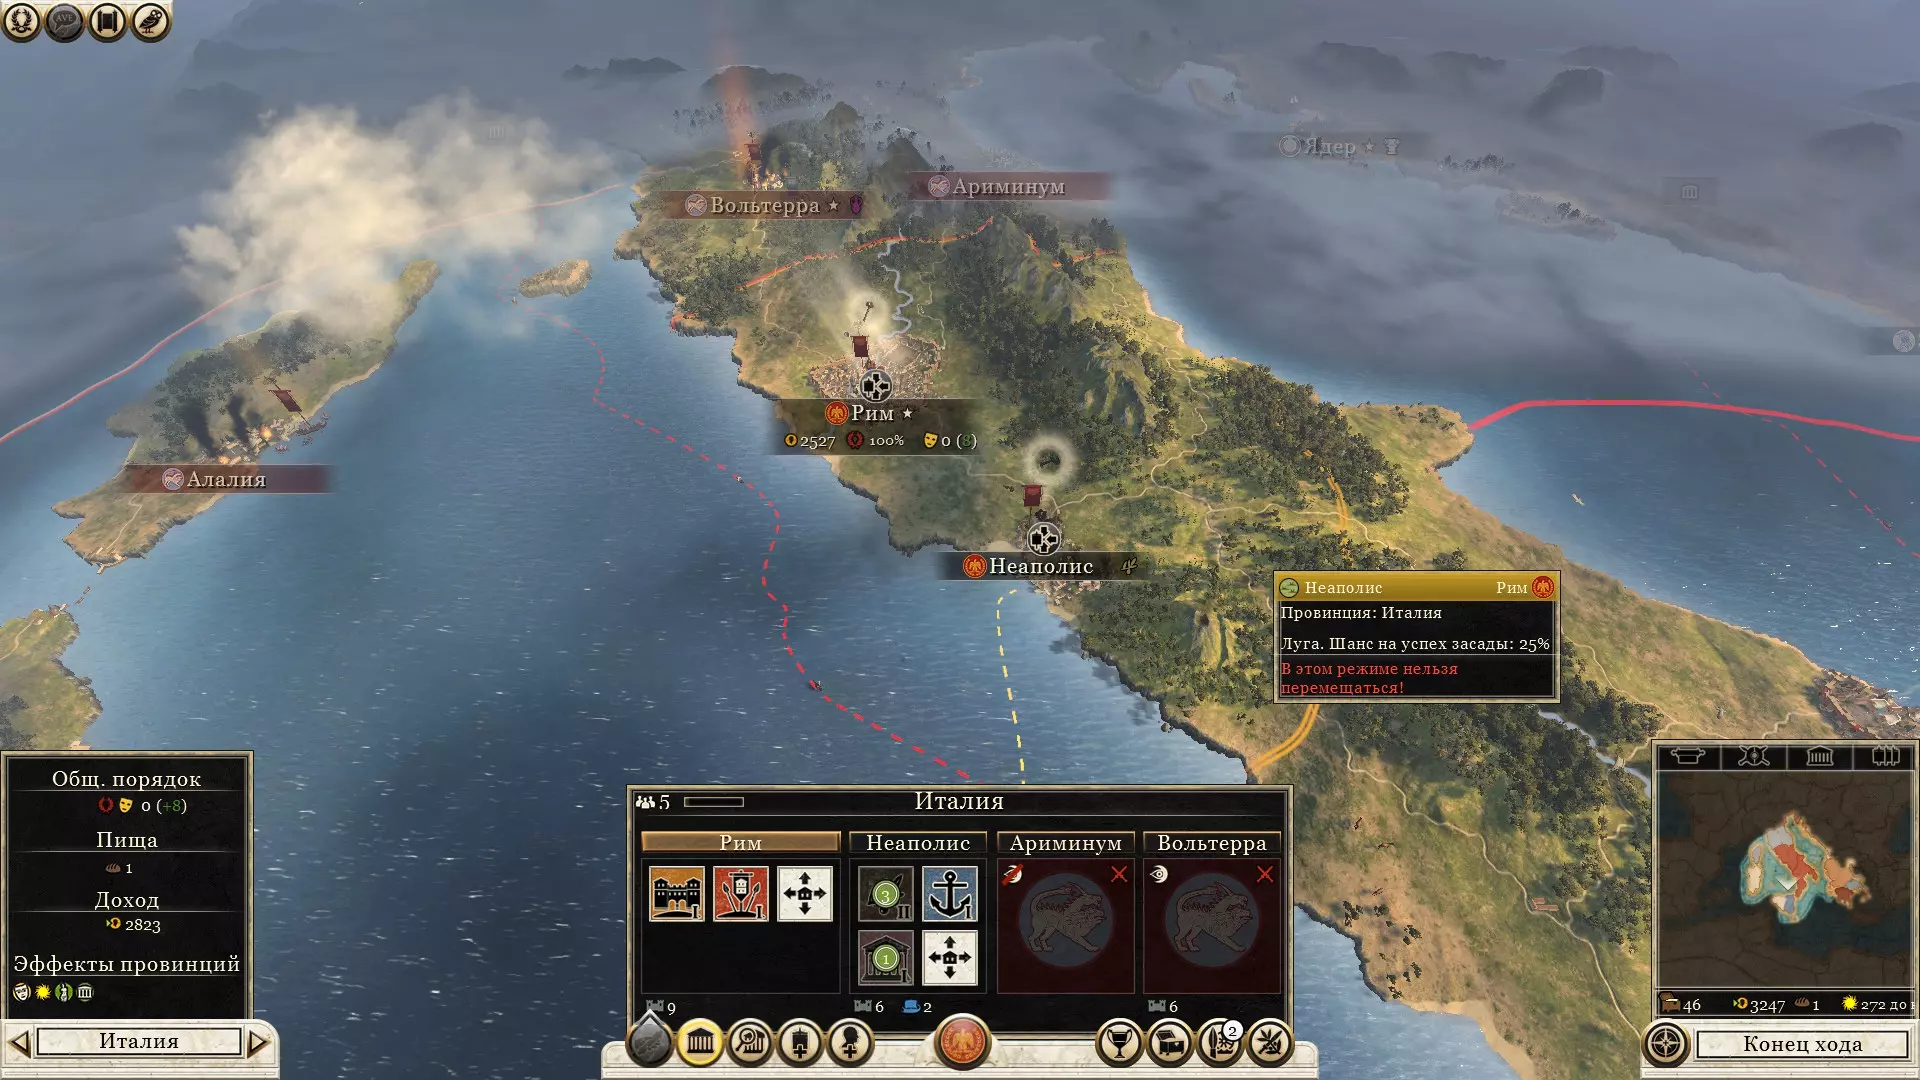
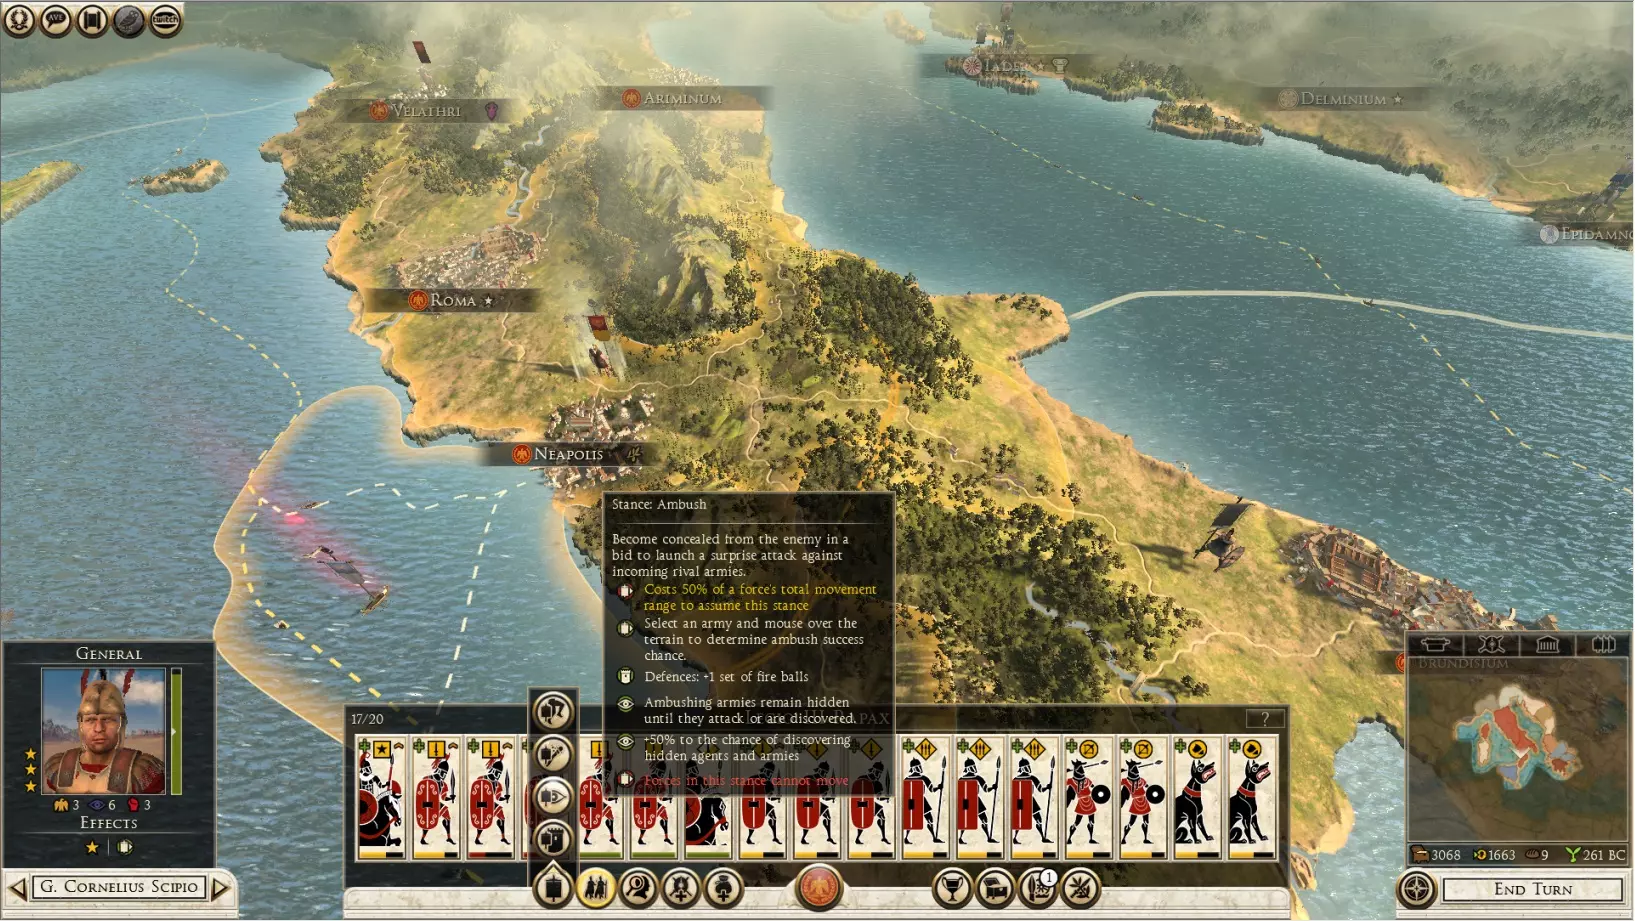
本指南专为《全面战争:罗马2》新手准备,不包含针对老手的高级策略。目的是帮助新手快速掌握基本概念,避免因众多初期看似难以理解的功能而感到无所适从。由于《阿提拉:全面战争》基于《罗马2》的引擎开发,本指南中的部分技巧可能也适用于《阿提拉:全面战争》的新手。但《阿提拉》存在一些差异,因我未拥有该游戏,故无法深入探讨。若你认为本指南有遗漏之处,欢迎提出反馈。 基本概念 单位招募与维护 所有单位必须由将军招募并率领。每个单位都有一次性招募成本和每回合的持续维护费用。除部分特殊单位外,通常更强大的单位招募和维护成本更高。 公共秩序 公共秩序代表省份的幸福度。同一省份内所有你拥有的定居点共享同一公共秩序值。选中定居点时,会以彩色表情显示其状态,具体为绿色(满意)、黄色(中立)和红色(愤怒)。红色表情表示公共秩序为负值。当该负值达到-100时,省份内将出现叛军。叛军最初会以小型军队形式出现,若放任不管,后续会变得更强大且更难镇压。 文化 定居点的文化构成可能从100%本派系文化到100%外来文化不等。当你的定居点中外来文化水平高于自身文化时,会导致严重的公共秩序问题。解决方法是建造神庙,以加快文化向自身文化的转化进程。 campaign移动 所有军队都拥有移动点数,点击军队后,其周围出现的彩色边界即为移动范围。若将军队设为强行军姿态,可增加移动点数,但在此状态下若遇攻击,必定会遭到伏击。 控制区域 所有军队周围都有红色的控制区域(zoc)。如果你的军队进入了中立军队的控制区域,除非向该派系宣战并攻击阻挡的军队,否则整回合都无法移动。决定绕过其他派系的【控制区域】会消耗宝贵的移动点数,除非你宣战并正面攻击阻挡的军队。 姿态 军队可以采取以下几种姿态。这些姿态会提供加成,但通常也会有惩罚。请根据军队的情况明智选择。
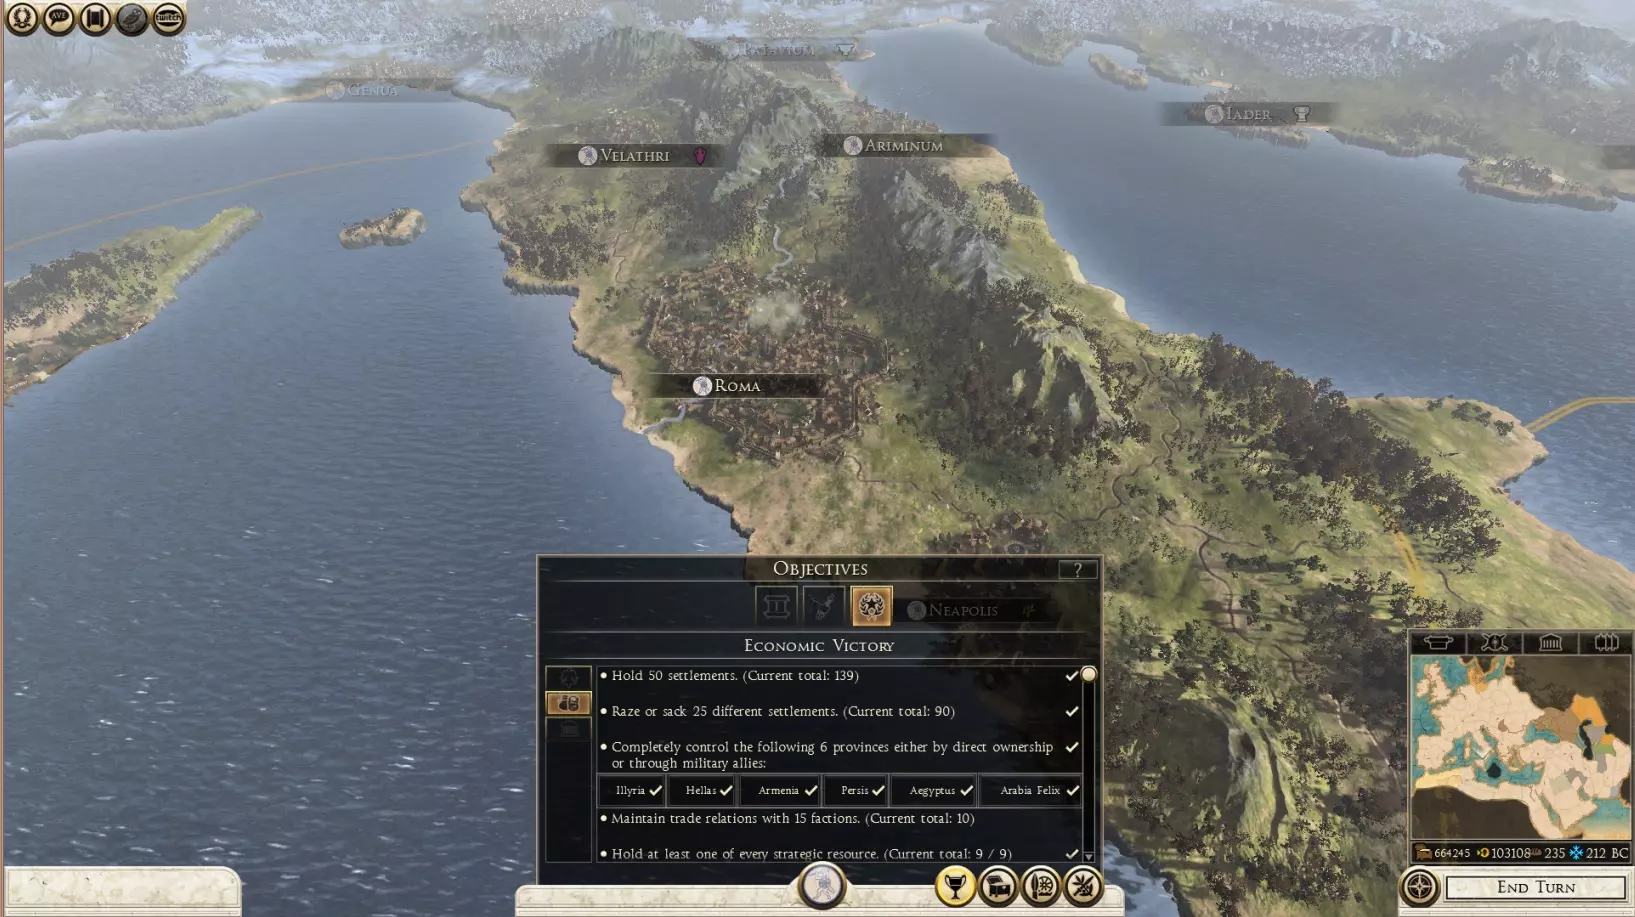
视线 视线(los)指的是每个单位的视野范围。视线可能会被丘陵或森林等地形阻挡,导致隐藏在这些障碍物后面或内部的敌军无法被你的部队发现。同样,如果你的部队隐藏起来,敌军也无法发现你的部队。当某个单位缺乏视线时,其上方会出现幽灵眼睛图标。 如果战斗开始时你无法看到敌人,最好将你的部队移动到更开阔的区域,尽可能迫使敌人部队离开其隐藏位置。例如,移动到地图极端角落的开阔地带,可能会迫使隐藏的敌军为避免被侧翼包抄而重新部署到开阔地带。敕令 你必须拥有同一省份的所有定居点,才能为该省份颁布敕令。这一点在《阿提拉:全面战争》中可能有所变化,但我不确定。你选择的敕令所提供的加成仅适用于颁布该敕令的省份。 短期与长期目标 当你首次开始一场宏大的战役时,你将收到一系列短期目标中的第一个,完成这些目标会获得金钱奖励。在主要短期目标下方,还有可选的额外目标(I、II、III、IV等),如下所示。
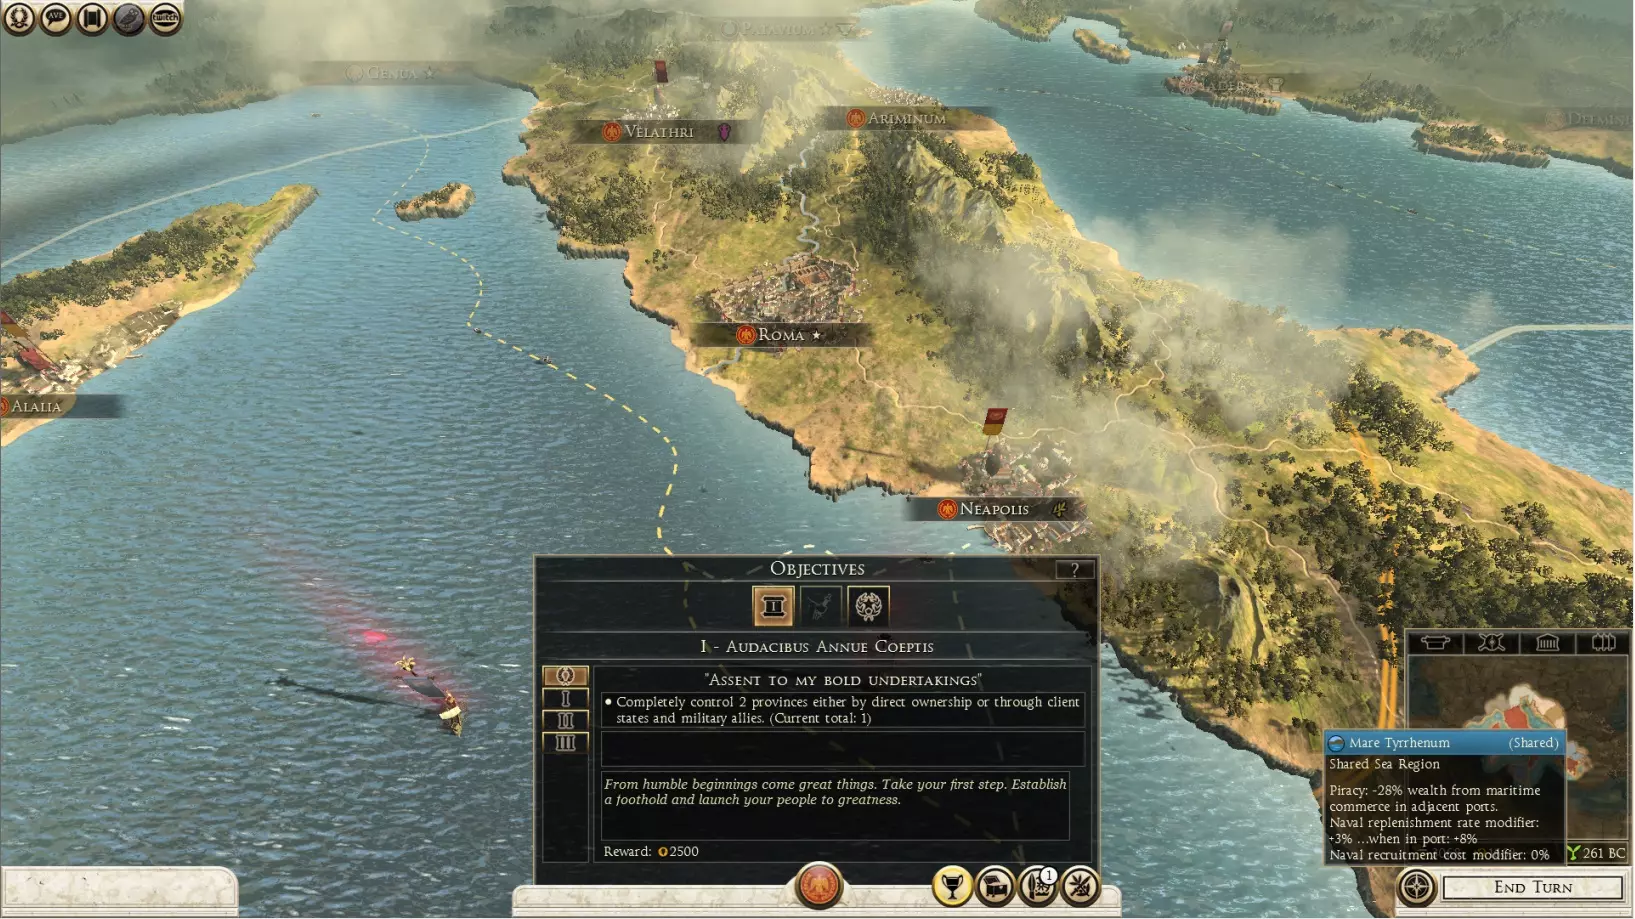
你的长期目标是达成军事、经济或文化胜利的必要条件,具体如下。如果在当前战役情况下,你觉得追求某一特定胜利类型耗时过长,可以考虑转而争取其他类型的胜利。当然,如果你想解锁全部三种胜利类型的成就,也完全可以这样做。
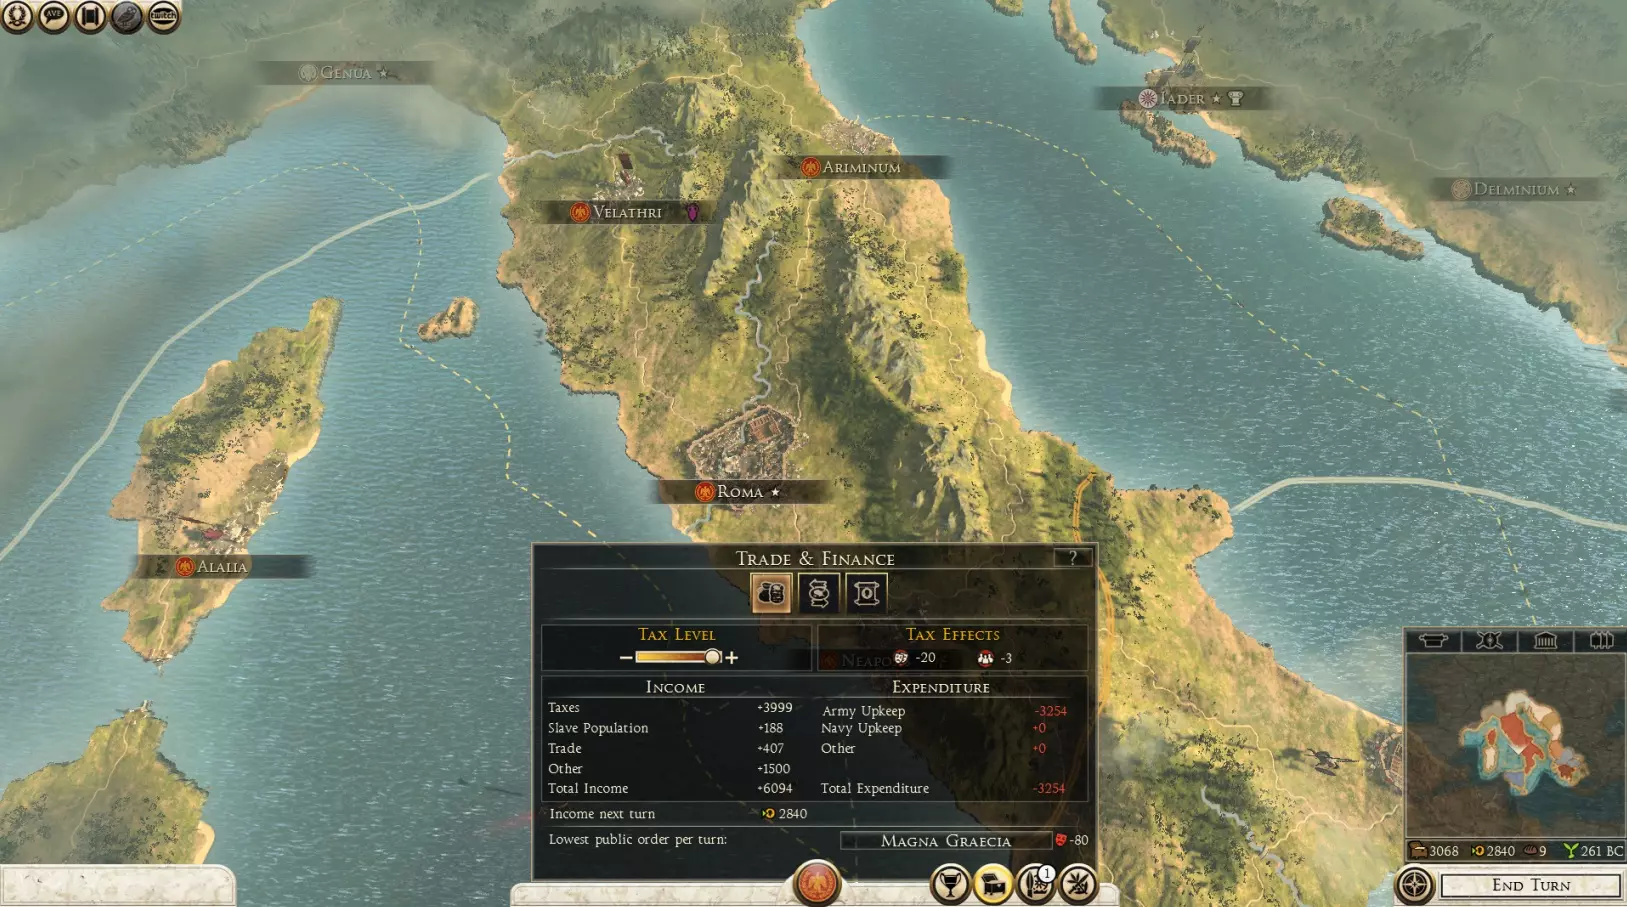
经济与收入 为什么收入很重要?因为如果没有足够的资金,你将无法招募部队并支付部队维护费用。每回合收入显示在回合结束按钮上方的国库收入旁边。如果是正数,国库每回合会增加相应数额;如果是负数,国库则会减少。 当你需要快速增加收入时,可以暂时将税收滑块调至最高税率。但不要过度这样做,因为这会增加公共秩序,而且我认为还会影响定居点的发展。
新占领的定居点会有较高的混乱度。你可以选择占领、洗劫或灭绝,每种选择都会带来不同后果。占领会导致较低的混乱度惩罚,但不会获得其他收益。洗劫能获得大量金钱,但会有外交惩罚和更高的混乱度惩罚。灭绝可以立即清除外来文化建筑(这些建筑会增加混乱度,且通常不会给你的派系带来任何好处),而无需等待一回合进行拆除,但会造成最严重的外交惩罚和混乱度惩罚。偶尔,占领某些定居点时还会出现解放选项,让你可以解放该定居点之前的所属派系,使其成为你的附庸国。附庸国的大部分收入会在每回合流入你的国库,作为你在其遭受攻击时提供保护的回报。 除税收外,其他收入来源包括: -与其他派系进行贸易 -建造能提供收入加成的建筑,包括贸易港口 -劫掠(注意,劫掠贸易路线可能会激怒那些与你未处于战争状态但贸易也因此受到影响的派系) -洗劫/掠夺定居点 -来自附庸国/总督辖区的贡金 建筑类型与建造槽位 建筑类型 《全面战争:罗马2》中的不同建筑类型根据其分类采用颜色编码,如下所示。这些包括农场(绿色)、寺庙(紫色)、娱乐与政府建筑(黄色)、工业与军事建筑(红色)、海洋建筑(蓝色)以及采矿建筑(深灰色)。

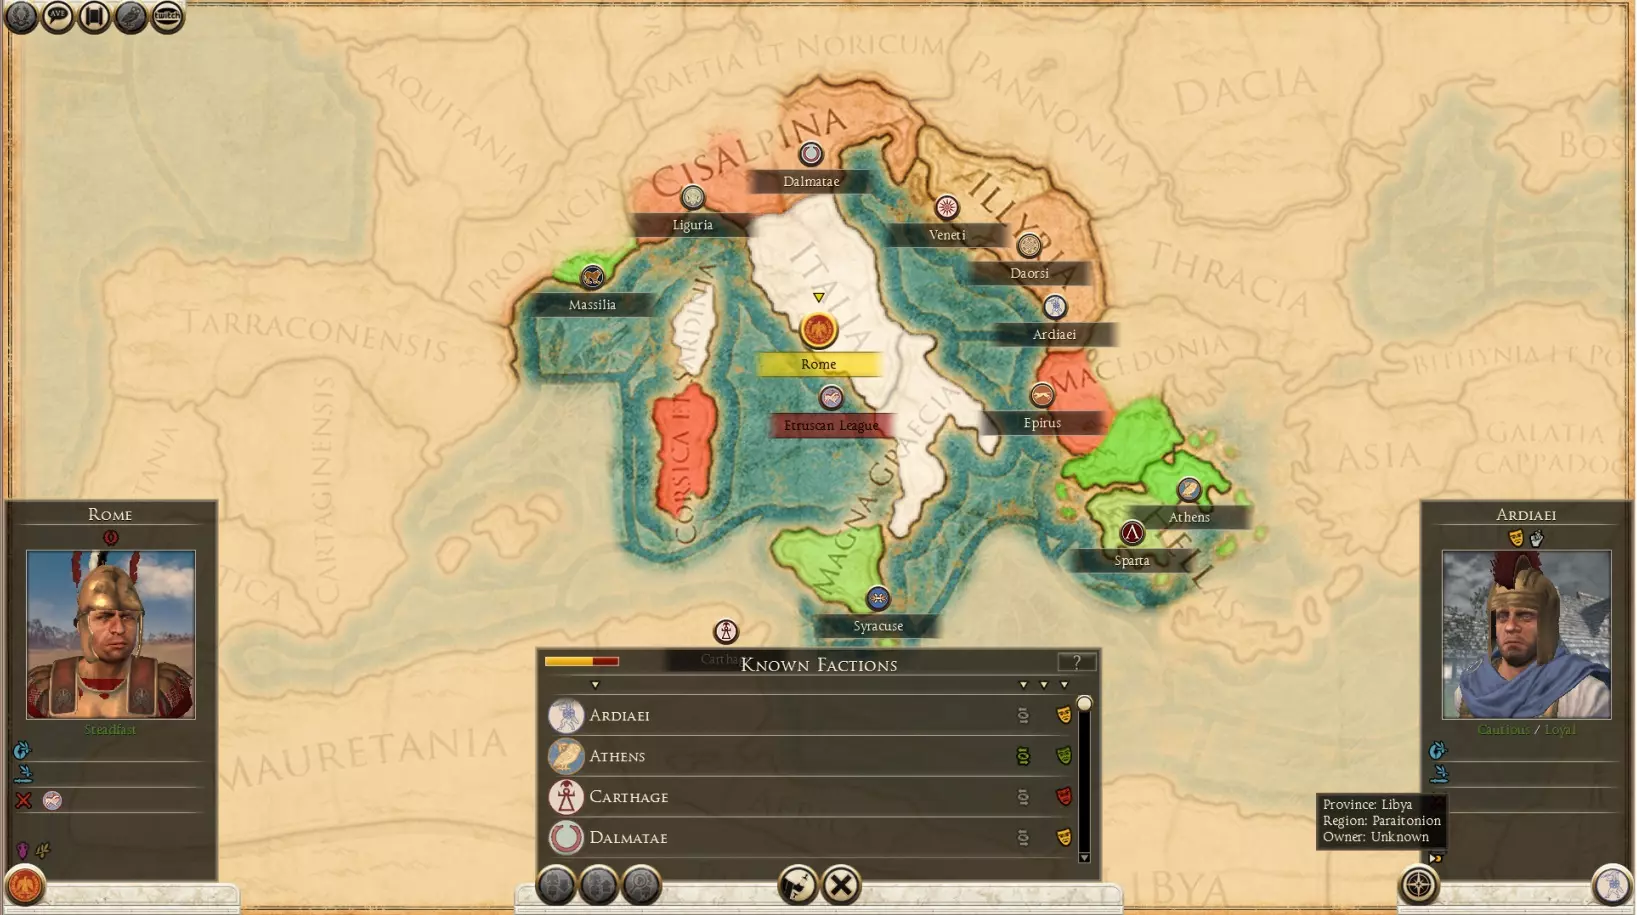
尽管不同派系的具体加成可能有所差异,但它们通常会为同类型的所有建筑提供通用增益: 农场=+粮食 神庙=+公共秩序/文化转化/部分派系可招募特殊单位 娱乐与政府建筑=+公共秩序/收入/研究加成/部分派系可招募特殊单位 工业与军事建筑=解锁新的陆军单位/+收入 海军建筑=解锁新的海军单位/+贸易/+粮食 矿业建筑=+收入 尽管这些加成颇具吸引力,但它们往往也需要付出代价,比如消耗粮食或增加混乱度。 建筑槽位 每个行省可能有2-4个定居点,其中全部、部分或没有定居点归你的派系所有。拥有4个定居点的行省比拥有2个或3个定居点的行省总建筑槽位更多。要增加定居点的建造槽数量,你需要等待其发展。 由于每个定居点的建造槽数量有限,你需要决定在该省份建造哪些最合适的建筑。你可以将其打造成招募中心,让大多数建造槽被不同类型的军事建筑占据;或者将其打造成经济中心,只建造能增加收入的建筑。 通常来说,将边境附近的省份设为军事中心是个不错的主意,这样在需要时可以在前线附近招募军队。帝国腹地的省份则应专注于经济,以确保你有足够的收入来维持军队。外交与贸易 点击外交按钮会显示一个列表,列出你在战役地图探索过程中已经接触或遇到的所有派系。他们对你派系的态度可能从非常友好/友好(绿色面孔)到中立(黄色)再到敌对(红色)不等。如果某个派系对你派系的态度达到-70或更低,他们就有可能向你宣战。但这也取决于该派系的特性(例如好战或谨慎)、你的实力以及你与其他派系的关系。
派系对你越友好,就越有可能接受协议。他们接受提议交易的可能性会显示为【低】、【中等】或【高】。如果显示为低,你需要增加交易的吸引力,或者等待更合适的时机。 谈判时提出过多要求往往难以成功。例如,如果你同时提议贸易和互不侵犯条约,而成功几率显示为【低】,可以先尝试达成互不侵犯协议。然后在后续回合再提出贸易提议,此时对方接受的可能性可能会更高。这是因为每一次成功的交易都会提升你与该派系的外交声望。 盟友的行为方式取决于其联盟的性质。军事盟友可以为彼此设定战争目标,防御盟友只有在联盟成员遭受攻击时才会加入战争,而互不侵犯条约则不包含在对方遭受攻击时提供援助的义务。 正如成功的交易能提升你与其他派系的外交声望一样,向其盟友宣战、袭击其贸易路线、过早撕毁协议以及背叛或拒绝援助受攻击的盟友,都会带来外交惩罚。因此,你的总体声望是正面外交声望与负面惩罚的净值。通常情况下,你不应在达成协议后的10回合内撕毁协议,以避免外交惩罚。只与短期内不打算入侵的派系结盟,并且在撕毁协议时提前通知,而不是立即宣战,这样可以避免受到惩罚。 释放敌方部队会让他们的盟友不那么憎恨你,但你的盟友会感到不满。处决敌方部队会让他们的盟友更加憎恨你,但你的盟友也会更喜欢你。奴役敌方部队可以增加奴隶人口带来的收入,但奴隶过多可能会破坏公共秩序并引发叛乱。 研究 研究分为军事(红色)和民事(蓝色)科技分支。这些分支又进一步细分为3个不同的专注领域。一般来说,军事科技通常会提供战斗加成并解锁更高级的单位,不过如果它们能降低招募和/或维护成本,也可能对国库有所帮助。民事科技通常会提供收入、贸易、政治或文化加成,并解锁更高级的建筑。如下所示,研究每个专注领域各阶段(I、II、III)的所有科技还会获得额外加成。
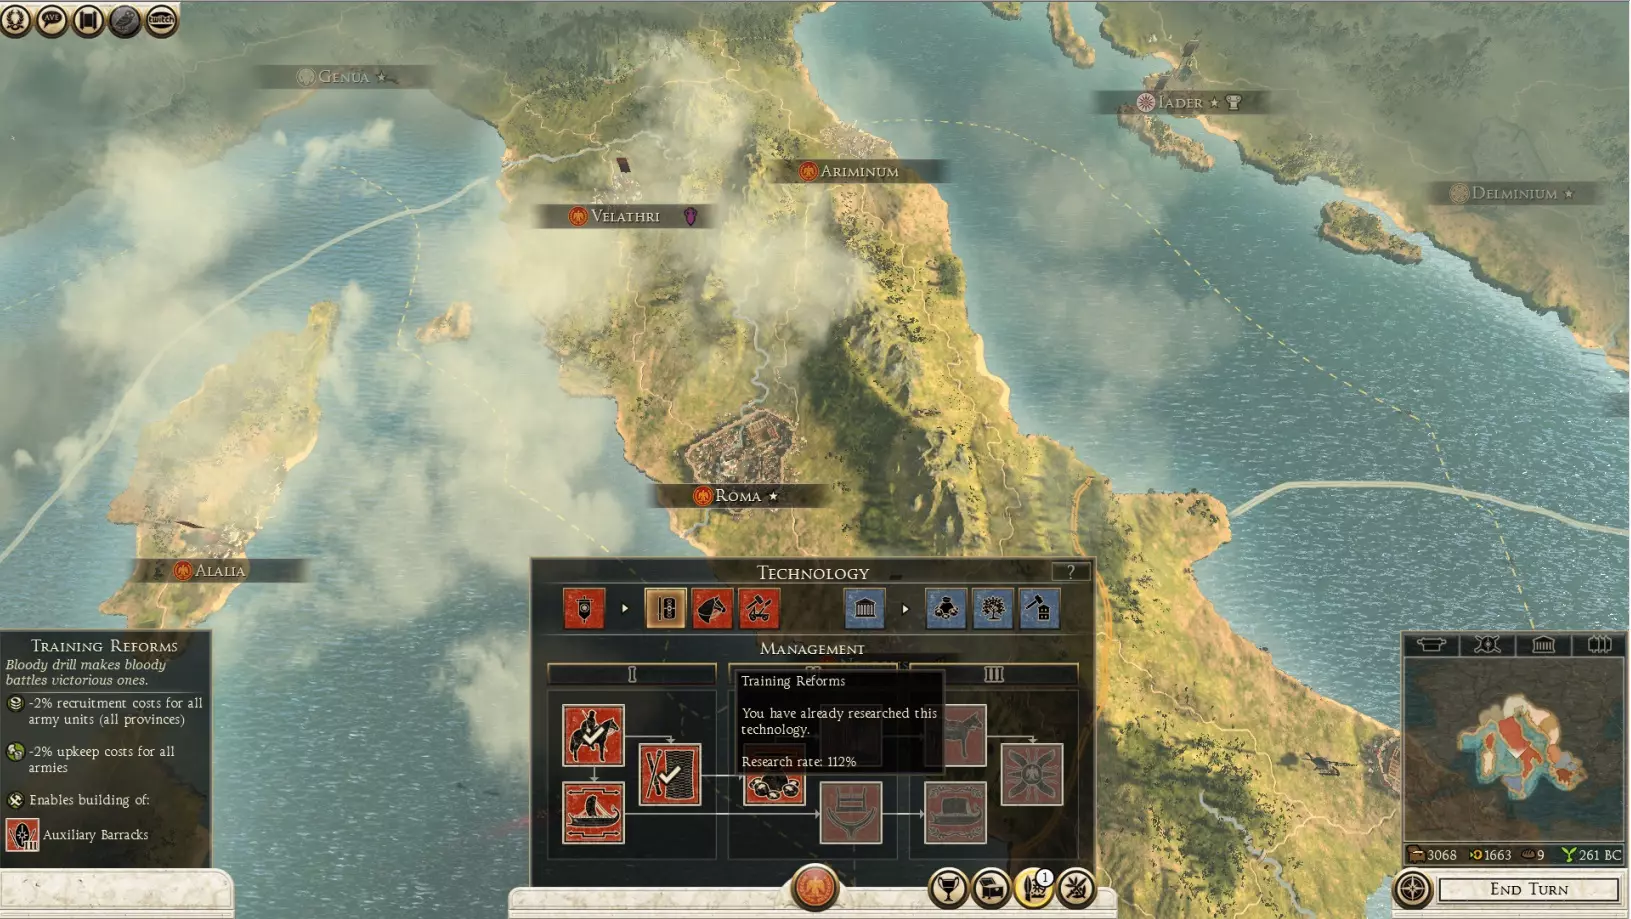
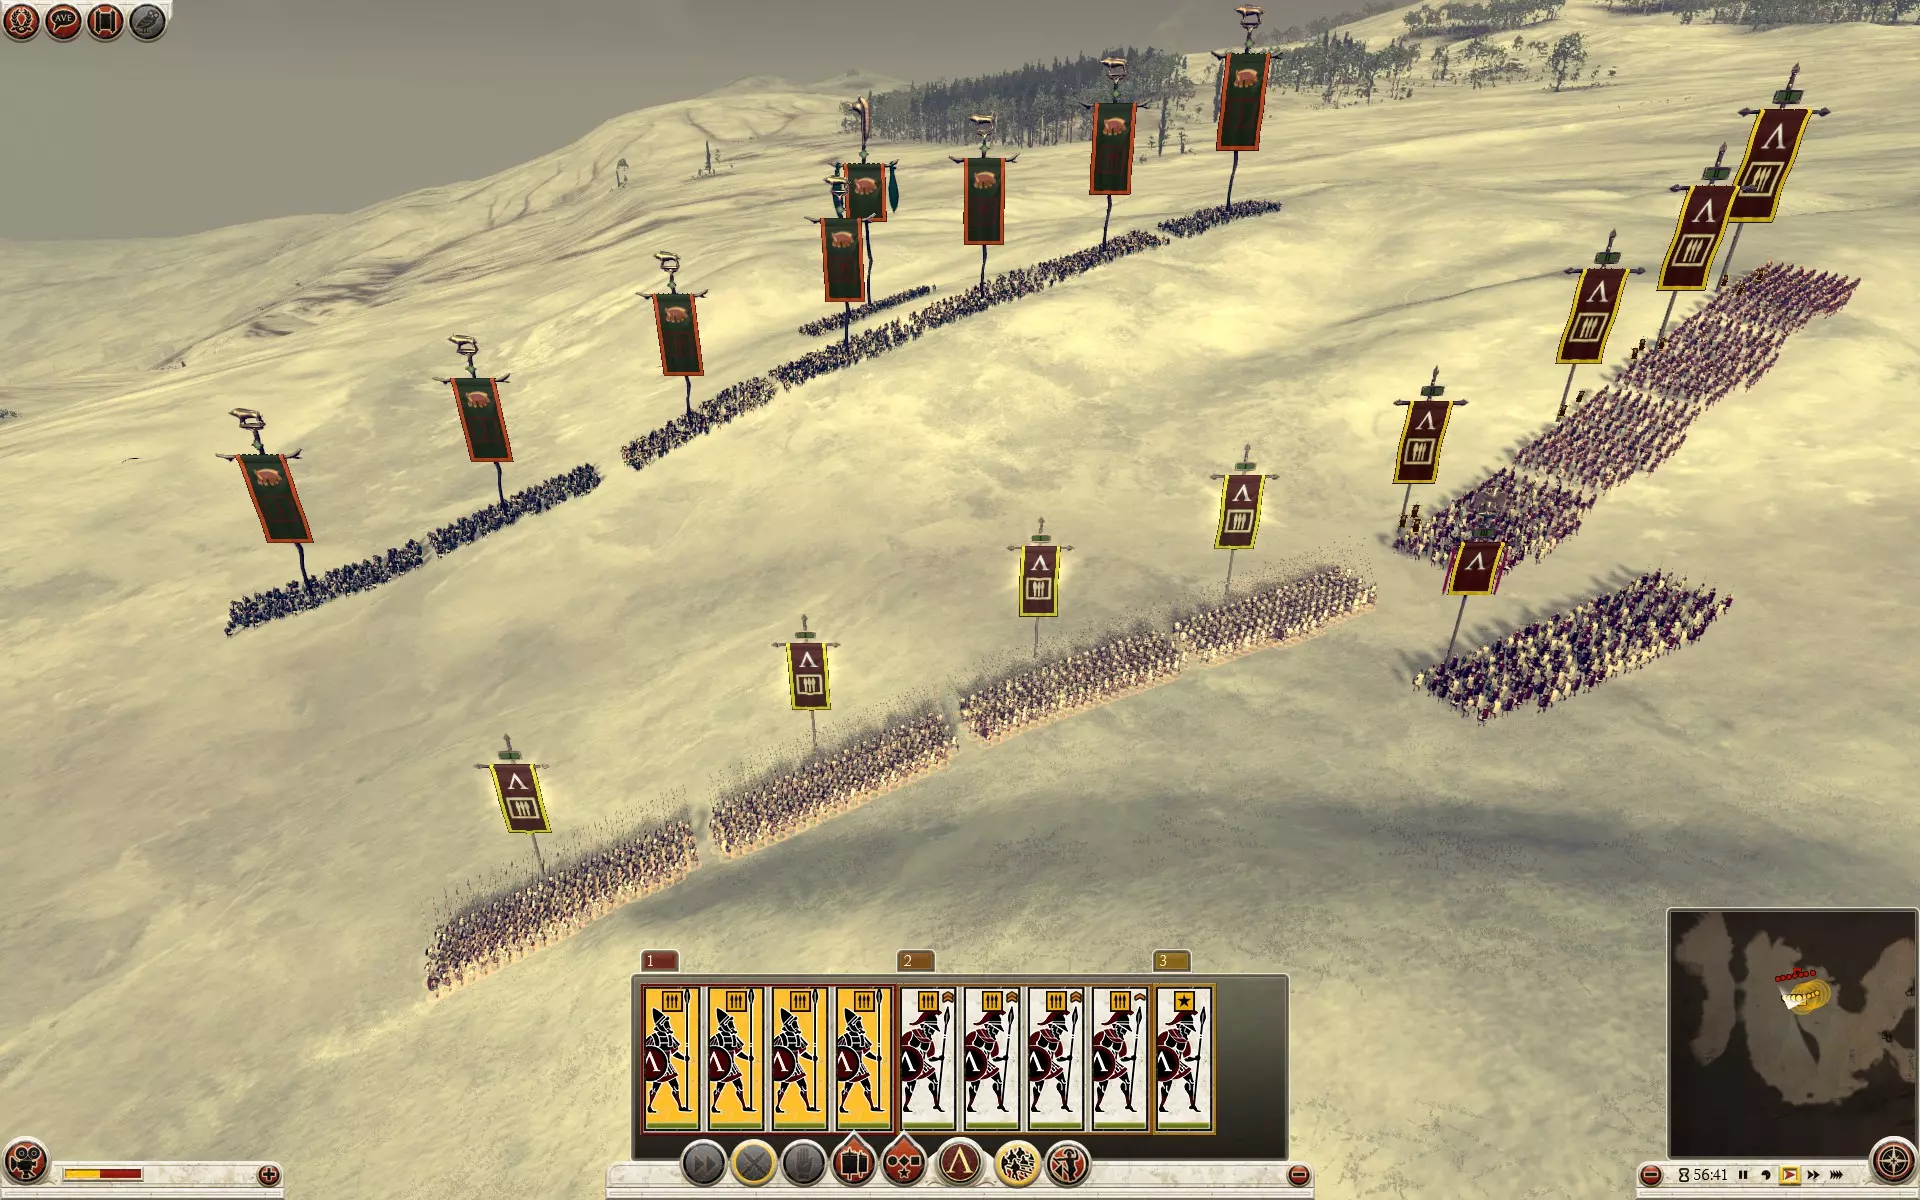
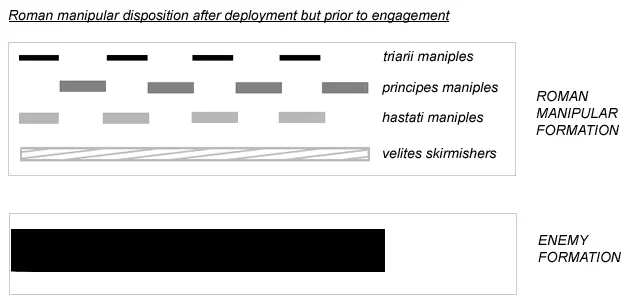
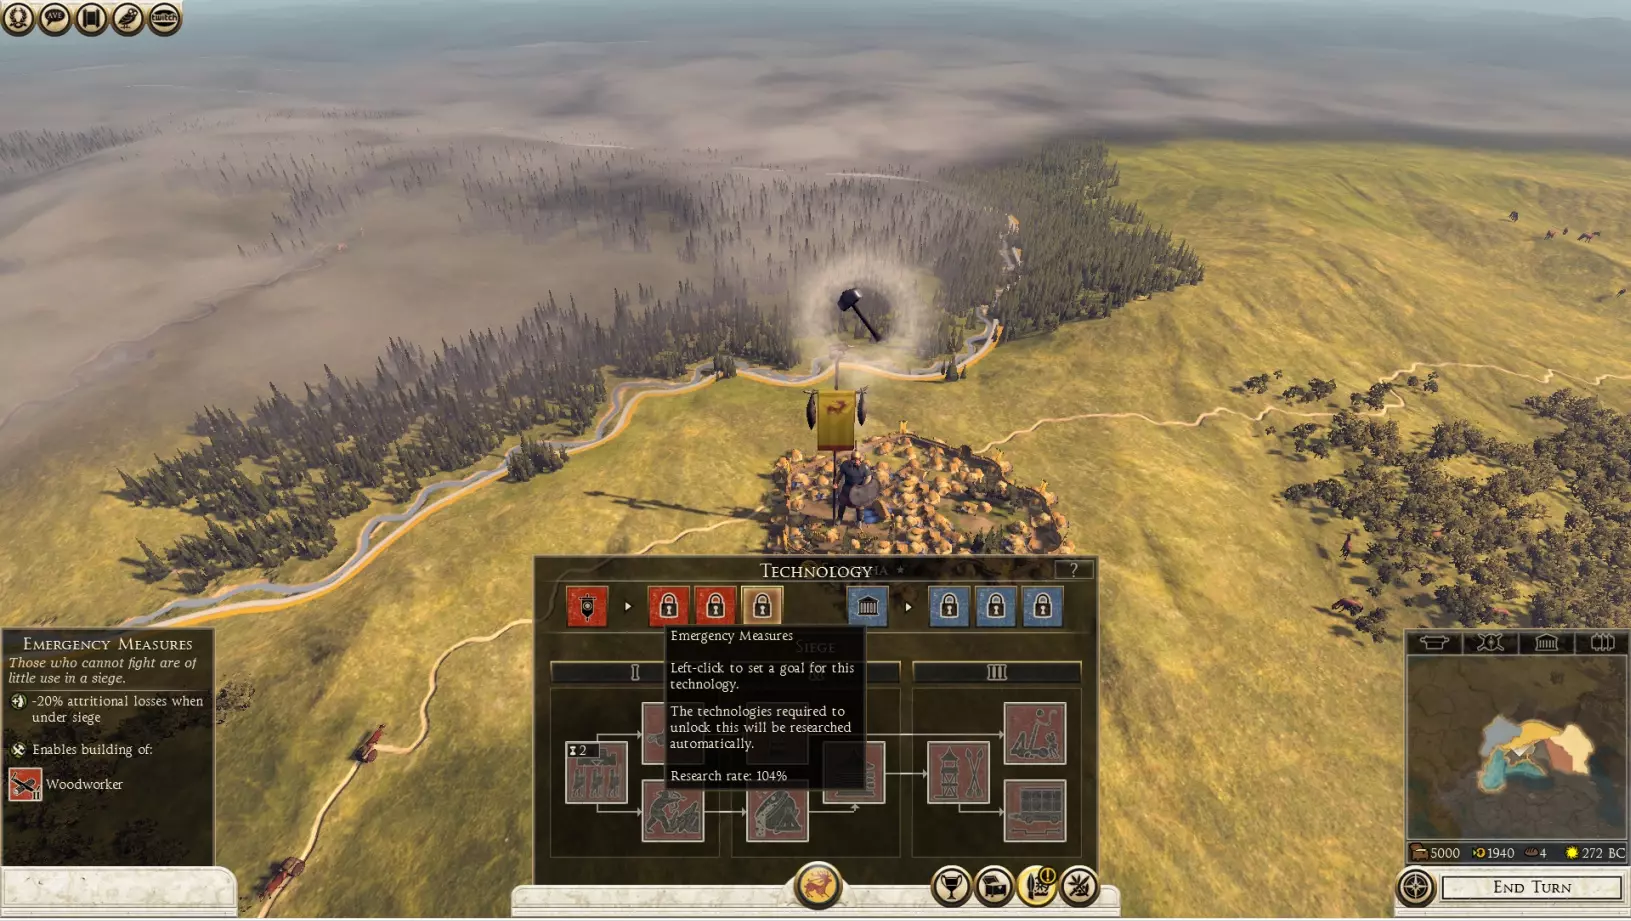
The 100% shown when you mouse over each tech at the start of the campaign is your default research rate. This will increase over 100% (require less time to research) if you construct libraries and other buildings that increase research rate. So a rate of 200% should take half the number of turns to complete research for the selected tech compared to 100%. Recruitment Only an army led by a general can recruit new units. The number that appears on the unit card of units being recruited is the number of turns needed for the unit to be ready. What type of units you can recruit depends on what kind of military buildings you have in the province where they are being recruited. As long as you have a barracks/other military building built in a settlement, you can recruit the units unlocked by that facility even if your general is in another settlement within the same province. But you cannot recruit units from a military facility located in another province. If you're Rome for example, building a Field of Mars unlocks 2 separate building chains. One for specializing in recruitment of frontline melee troops (legionaries aka swordsmen) and the other for recruiting support (missile/cavalry) troops. There are variations for different factions where for example you need to build stables/horse trainers (under agriculture building chain) instead to recruit cavalry. It's good to consult the game's encyclopedia to see exactly what and how units are unlocked for your specific faction. More advanced units can only be unlocked and recruited after you research the appropriate tech and then upgrade your military facility. Without the relevant tech, you cannot upgrade the facility and the slot for upgrading will be greyed out until the tech is researched. This also applies to civil buildings. However, not all upgraded buildings need to be researched. Grouping, Unit Deployment & Battle Mechanics Grouping Before battle starts, you can group your units according to their roles like all infantry in 1 group, all cavalry in another and so on. This allows you to easily order all of the same unit type to move into tactically advantageous positions befitting their role on the battlefield. You may also group different unit types together according to task, eg. 1 group to distract the enemy from the front, another group to flank them from behind. Unit Deployment Before battle starts, you will be allowed to deploy your units anywhere within the yellow boundary (unless your army is ambushed). The enemy is deployed within the red boundary. Some players like to deploy missile/skirmish/javelin troops in front of melee units because they can take full advantage of their superior range before the enemy can engage in melee, then pull back behind melee troops at the last moment for protection. My preference is to put all missile troops behind melee infantry during deployment and keep it that way as this keeps them safe from cavalry charges. But it's just your preference. Battle Mechanics How well a unit type can fight other unit types depends on many factors like the general's traits and morale. But the biggest factor is the rock, paper, scissors system. In general, melee sword/axe infantry easily beat spearmen (except elite and heavily armored spearmen with decent weapon stats), but are less effective against cavalry and too slow to catch missile troops (especially if they are weighed down by heavy armor). Spearmen have a huge combat bonus against cavalry if they manage to catch them in melee but are too slow to catch them if they are running away. They are particularly useful when flanking cavalry already engaged in melee with other units. Missile troops including archers, javelinmen and slingers cause decent damage against all unit types at a distance. But they are very weak in a melee fight and cause less damage to heavily armored units. Cavalry have a huge bonus against missile troops and are the only other unit type fast enough to catch them. All professional troops have an advantage over levy/militia units, which suffer from poor morale and poor stats. Siege Battles Siege battles take place whenever you attack any settlement. Walled settlements (aka provincial capitals) are more well defended than other non-walled settlements within the province. More developed walled settlements also have artillery defenses like ballistas, catapults and scorpions, which make a walled assault very costly. All settlements (both walled and non-walled) are defended by a garrison in addition to any field armies stationed within them. These and any other armies within reinforcement range will support one another if the settlement is attacked. The garrison will also be stronger if there are any military buildings in the settlement. So make sure you bring along adequate troops of the right quality for a siege attack. There are 2 ways to take a walled settlement. Either starve the defenders into submission (which usually forces them to sally out to fight you in open battle without the protection of their walls), or recruit siege weapons like ballistas and onagers to level those walls to create breaches. The 1st option may be time consuming as more developed provincial capitals can hold out sieges for many turns. For the attacking army, there's the risk that enemy reinforcements will arrive to relieve the defenders before the garrison is forced to surrender. You can build siege ladders and rams to attack the garrison sooner rather than wait for them to sally, but your men will likely take many losses from bastion defenses as they approach the walls. The 2nd option tends to reduce your losses because any defenders still on the wall when it is destroyed will go down with it, which softens up enemy resistance. Later patches have made the AI smart enough not to stay too long on walls that are about to be destroyed. But they do end up too slow sometimes especially when bombarded by multiple siege weapons at the same time. By creating multiple breaches with your siege weapons, your men will be able to attack the defenders from more than one direction to flank them or divide their forces. However, siege weapons have limited ammo and once used, they serve no further role for the rest of the battle. Precious ammo is also often used to destroy enemy arrow towers. So getting the most you can out of your siege weapons requires smart use of ammo. Against hard-to-hit targets like arrow towers, use standard ammo. While they cause less damage than fire ammo, they are more accurate. Fire ammo are ideal for destroying easily hit targets like walls and scorpion towers as they cause more damage to such targets but have an accuracy penalty (not that it matters if the target is big enough). Explosive ammo are ideal against enemy units but also suffer from poor accuracy. They are most useful against bunched up enemy units. You can increase your ammo or siege weapon damage by researching the right techs. Ballistas are your first level siege weapons and can be recruited early in the game. Just click on the third branch of the military tech tree and select the very first tech as shown below. The names may be different for different factions, but they are essentially the same. Heavy onagers (not available for some barbarian factions) can be accessed further down the same tech tree and are the ultimate wall destroyers. But ballistas are still useful late game against enemy units.
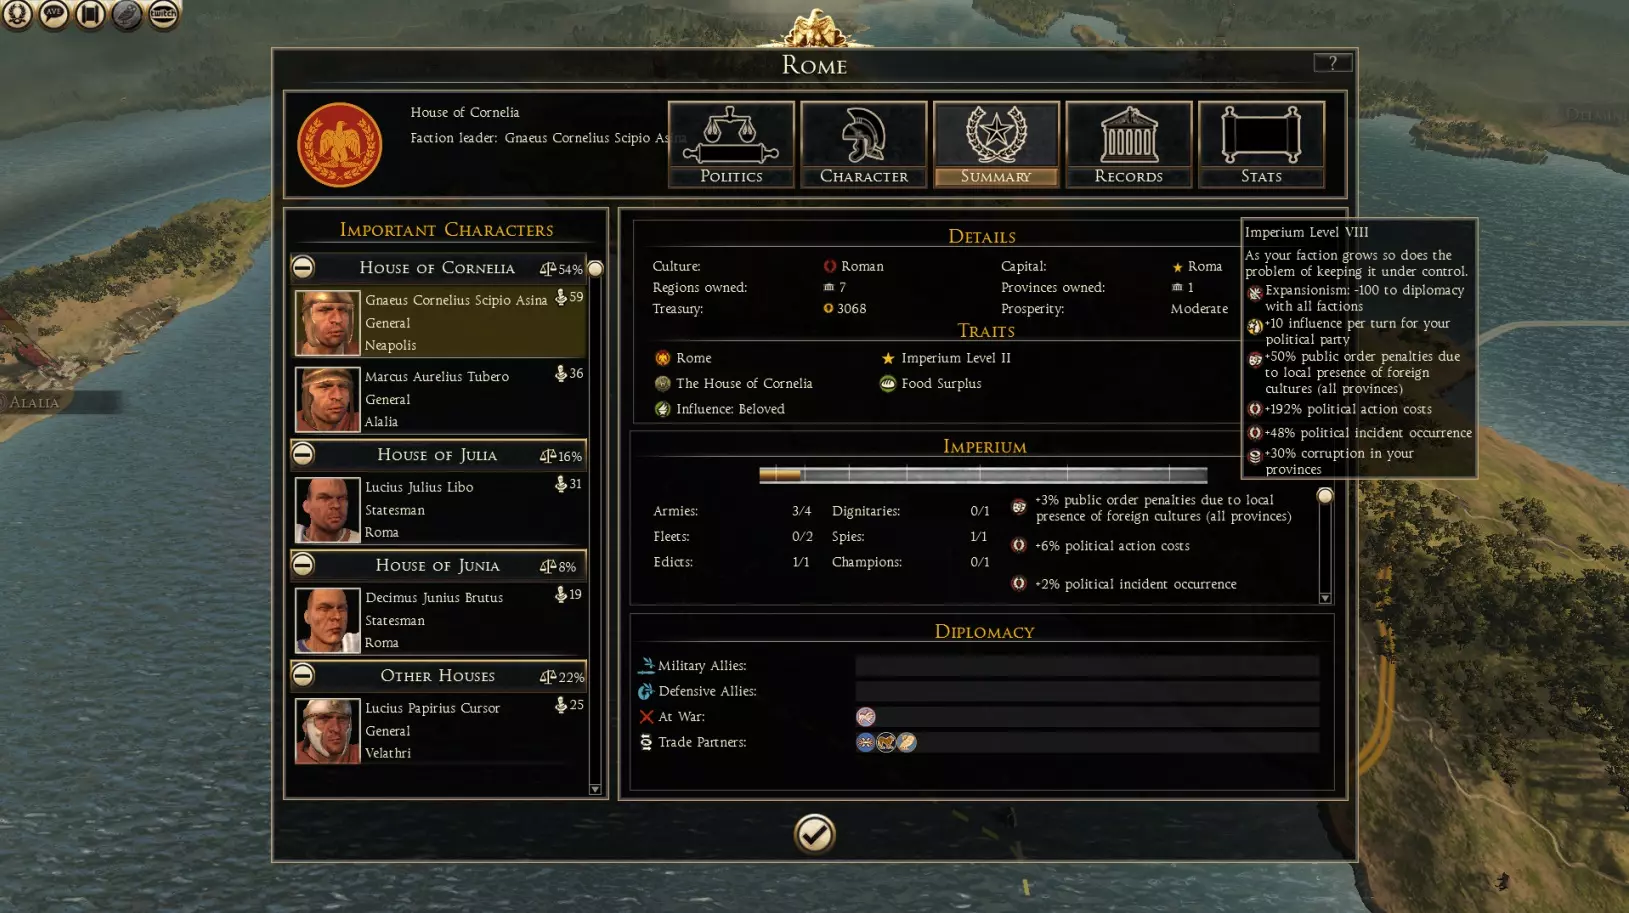
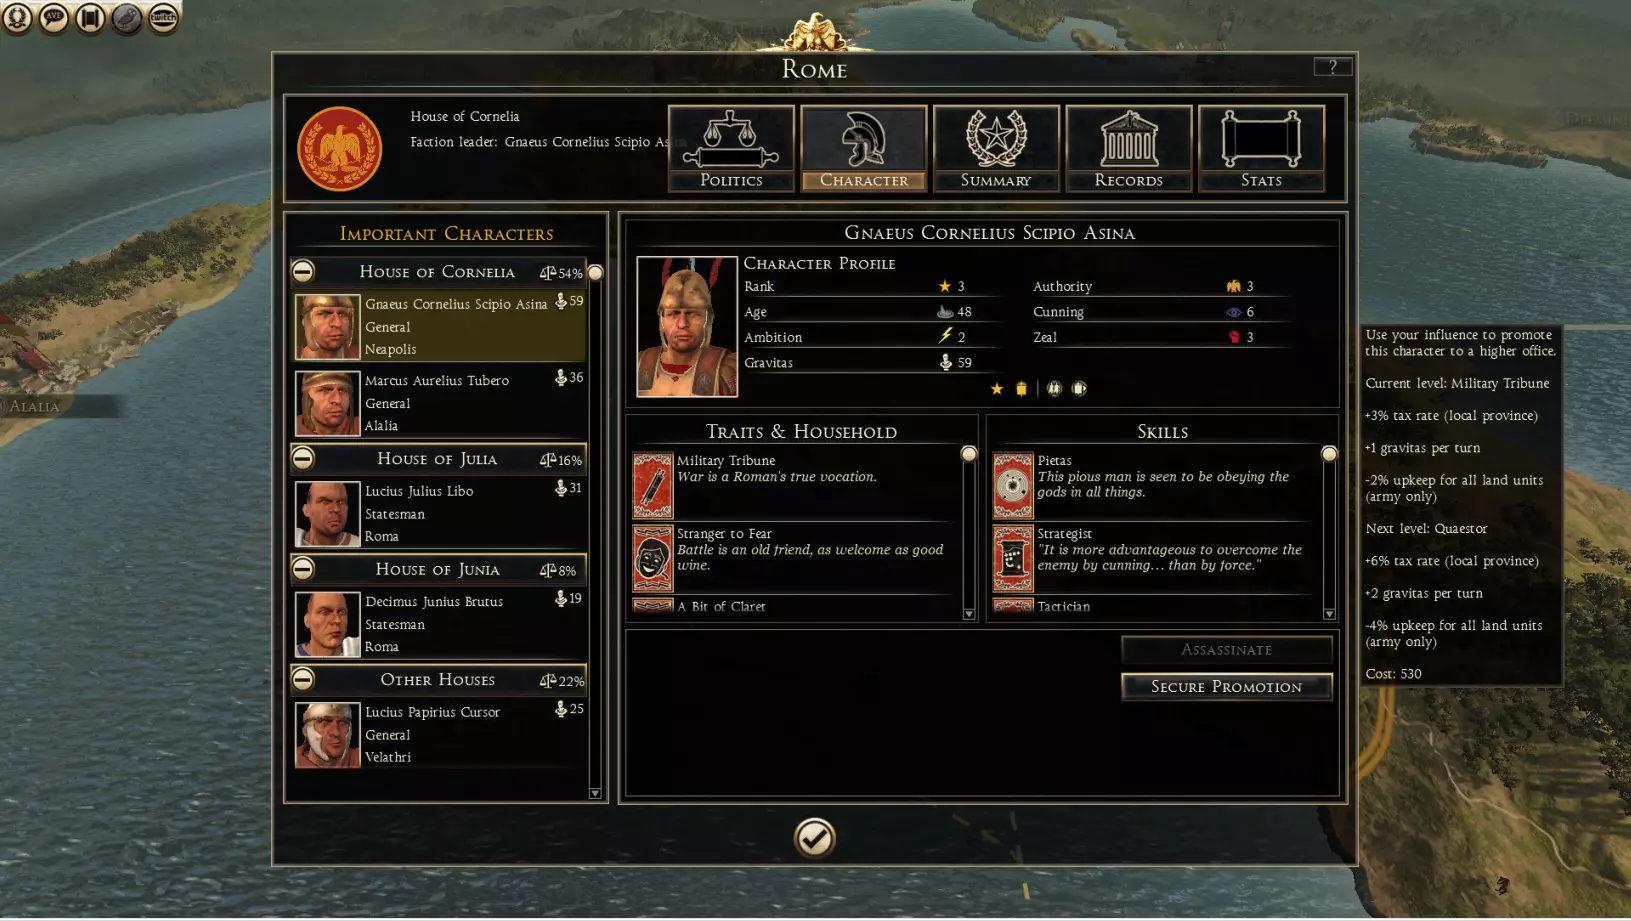
政治系统 在我看来,《罗马2:全面战争》中的政治系统意义不大,但为了内容完整,我还是在此进行说明。每个派系都有多个家族或政治团体争夺权力。对于罗马派系,元老院中有包括你自己家族在内的4个政治团体共享权力。其他派系则只有2个团体,即你自己的家族和部落议会。但除此之外,政治系统的运作方式是相同的。 你看到的百分比数字是你的家族在元老院中相对于其他政治团体的影响力等级。通过点击政治界面顶部的政治按钮,你可以查看因影响力等级而获得的研究、收入和公共秩序加成。游戏初期,保持较高的影响力等级(70%或以上)是非常理想的,因为这样你将获得比低影响力时更好的加成。但到了游戏后期,当你拥有庞大的帝国时,你需要将影响力控制在70%以下,以防止内战。在内战中,其他家族的将军及其军队会转而对抗你。这就引出了下一部分关于威望的内容。 威望指的是每个政治家/将军名字旁边的小雕像图标。可以通过战斗胜利和晋升将军来提升威望。只有你家族的将军可以被晋升,其他家族会自动晋升他们自己的将军。你的将军晋升等级越高,你将享受到的税收加成和维护费用节省就越多。只要家族的总声望超过其他政治团体,声望就会随着时间慢慢提升家族影响力。你的将领可能会因你做出的事件决策而失去声望。如果你试图暗杀或诋毁其他家族的将领,这些行为会消耗你的影响力。 你可以通过点击下方所示的晋升按钮来提拔将领。
随着你征服更多定居点,你的帝国等级将会提升,但管理更大帝国的惩罚也会随之增加,具体可参考下方的帝国等级条。当帝国等级低于5级时,你永远不会爆发内战。然而,当帝国等级达到5级及以上时,如果家族影响力超过70%,就有爆发内战的风险。这时,你可能需要考虑暗杀家族中影响力过高的将领。啊,这就是政治丑陋的一面。 在整个战役中,如果你在帝国等级达到5级后控制好影响力,是有可能完全避免内战的。但你也不会希望影响力过低,因为正如前面所提到的,这会削弱你的加成效果。