换一换
换一换 


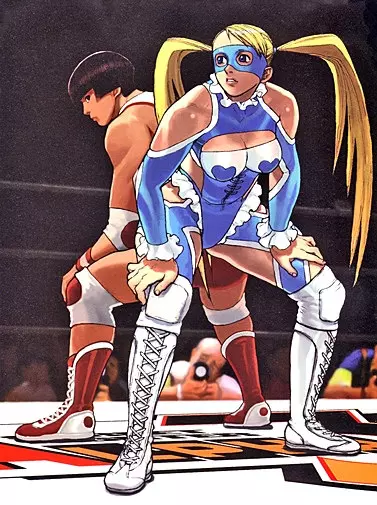
《街头霸王5》彩虹美华高效使用深度指南!肌肉之魂,展现自我!本指南将随着时间推移持续更新对战信息。 指南与作者介绍 ########################################################################### 【指南建设中——尚未反映第三季改动】 ########################################################################### 感谢查看我的彩虹美华指南! 我叫DrC,是一名《街头霸王》爱好者,喜欢教大家如何提升游戏水平。欢迎在游戏内卡普空格斗网络添加我,查看我的对战(CFN):DrChen 我个人不喜欢玩排位赛,更偏爱战斗大厅的较长局数对战。我真的觉得,了解某人的游戏风格并连续与他们对战(无论输赢)更有助于理解对局。可以看看我和一名1359级卡米的对战示例(这是五局三胜制比赛的一部分,我最终以4-5输掉了,感谢BacoVEVO允许我使用这段素材!)
本指南旨在帮助那些想要了解彩虹美华、她的特点以及如何充分发挥其能力的玩家。我多年来玩过很多《街头霸王》系列游戏,希望能教给大家一些东西。我会深入讲解她的招式以及哪些技能比较实用。同时还会为新手和中级玩家列出一些学习资源,因为很多玩家都需要提升自己的基本功。 如果你是《街头霸王》的资深玩家,请查看本指南末尾的简明指南部分。那里包含了你通常需要的所有基本信息。(目前【建设中】) 作者注:请查看本指南最底部的更新日志。由于部分内容仍在完善中,本指南目前为测试版发布。本指南部分内容仍在制作中,最终将完成。感谢您的理解。 彩虹美华角色概述 街头霸王角色档案
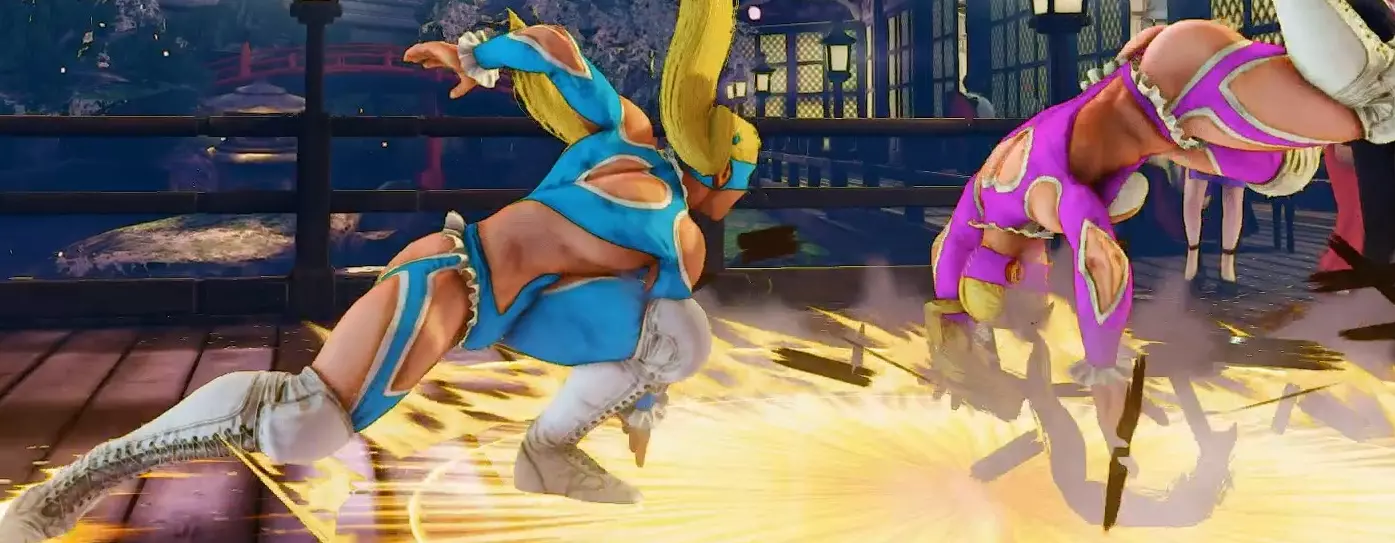
米卡游戏内角色概述 米卡是一名摔投系角色,主要依靠将对手逼至角落来造成狂风骤雨般的伤害,快速击晕并击败对手。她的立回(双方角色拉开距离时的普通攻击和技能)表现尚可,但有时将对手逼入角落会比较困难。若无法将对手逼至角落,米卡会失去很大一部分优势和战术,这可能会让她的对局变得相当棘手。 摔投系角色需要玩家具备扎实的基本功才能发挥作用。如果你的防守能力不佳,或者不擅长判断招式的距离,又或者无法稳定地打出连招,那么使用这个角色的效果将会参差不齐。有时候你会很幸运,把对手逼到角落然后猛揍他们。但其他时候,你可能根本无法发起任何进攻,只能在立回中慢慢被消耗至死。这种体验可谓是大起大落。 有些角色更容易上手,技能也更容错。如果你是《街头霸王》的纯新手,除非你准备好接受大量失败,否则很难推荐你使用米卡。这会是你的“学费”。玩投技型角色的另一个重要点是,你需要不断解读对手。你要寻找破绽,比如能否打断他们常用的特定攻击连招,或者他们在特定情况下总是喜欢跳起来?找到这些规律,然后想办法利用它们。米卡拥有让你在大多数情况下做到这一点的手段,但你需要观察对手的模式/习惯。 不幸的是,要观察这些模式,你需要具备格斗游戏经验。这不像隆那样,你可以扔很多波动拳,当对手跳进来时就用升龙拳。显然这是一个极度简化的解释,但这比实际尝试用米卡安全地接近对手要容易得多,而接近对手的方式会因你面对的角色不同而有很大差异。使用隆时,你通过发起进攻来迫使对手做出反应。对于米卡和投技角色来说,这种玩法更像是“主动博弈”,是一种需要思考的角色,我该如何应对对手的行动。一种风格像是在试探,比如你能否应对(隆释放波动拳),另一种则是应对的行动(米卡尝试接近并对隆的进攻做出反应)。当然,一旦对手被逼入角落,米卡就会开始主动试探,因为她的进攻已经展开,但要达到这一步,你需要突破隆的防御。 作为一名摔角手,猜测并感受比赛的节奏以及对手的动向也非常重要。使用米卡时,你可以让自己处于很多迫使对手猜测的局面中(有时在短时间内需要多次猜测)。你需要知道何时该主动进攻,何时该佯装进攻后撤退,引诱对手犯错(比如让隆因为你察觉到他变得急躁而空出一记重拳上勾拳)。这需要经验以及观察对手的习惯,但最大的缺点是有时你会判断失误,这会让人感到沮丧。这就是使用这类角色的特点。 如果你已经读到这里,并且明白要玩好米卡需要付出什么努力,仍然想继续的话,那就和我一起阅读指南的其余部分吧。 在角色综合排名中,我认为米卡最好的情况可能在中游水平,最差则在下游水平。在我看来,角色固有的【不稳定性】会让米卡很难赢得大型锦标赛,不过我仍然认为她是可行的。我和一些使用强势角色的高手交过手,米卡在接近对手方面存在一些问题。
Reasons why I think so (For more advanced players):In offline play, her charged drop kick can be easily reacted to and you'll either miss totally (low-profile Chun cr. mk) or get stuffed (Karin st. hp, Ryu Parry, Ryu shoryuken etc). You can try mixing it up in footsies but against good players, the move seems to have more limited use and should not be constantly abused like I see it used in online play. Cr. hk is great when you connect but it's absolutely horrible on block (-12), it's almost like gambling at least 1/4 of your life every time you do it, because the punish potential is high. Even at max range, it's punishable. None of the shooting peaches are safe on block (maybe if done meaty or at the very end of active) and really the only way in asides from that is walking forward or jumping. She does have some moves like cr. hp and f + mk to help her advance, but even they can be negative on block so you kind of have to wait for your opening (usually opponent making a mistake). Overall, it's an uphill battle and you will definitely need to be good at neutral in order to get anything going. Problem is, the higher level you go, the harder this is to do. Go participate in your local Street Fighter scene if you can, you will quickly see what you can and can't get away with and it will tighten up your gameplay significantly. I think you will also come to realize how honest you have to play against experienced players to get your offense going. That said, assuming you can get past this and somewhat reliably get your opponent in the corner, then you need to make a lot of good reads to keep the offense going. Thankfully, Mika does have good damage/stun so if your opponent makes a couple of bad guesses you can quickly end the round. She's very much a feast or famine character, thrives when she has the momentum and is very mixup driven once in the corner. Regardless of what I've said above, she's very fun to play and the fact she seems viable means I'll probably continue playing her. Overall Street Fighter Advice Street Fighter V is probably my favorite Street Fighter to date (after Super Turbo). It's also one of the most honest versions with emphasis on a lot of back-to-fundamentals stuff. Thanks to the March 2016 Update, there's now a 'Challenges' mode for all the characters. Going into 'Challenges' from the main Street Fighter V Menu has the following options: Trial This mode allows you to select a character and perform many basic combos. This includes Rainbow Mika of course but many of these combos are not optimized for damage/stun/pushing to the corner. Make sure to check out the combo section of this guide for that. A cool feature is that you're able to repeat a certain challenge over and over if you're struggling with it, but I typically prefer the flexibility of normal Training mode. This is a great mode for beginners. Demonstration Demonstration is a non-interactive mode that basically explains many system fundamentals of Street Fighter V, like what V-Trigger is and how to activate it. It's great to finally have an in-game mode to show people more advanced concepts. These are great resources for all players to understand the basics of Street Fighter V. Another method I like to use is if you want to quickly get used to a character, one of the first things to do is understand their normal attacks. Go into training mode and try out all the normal moves and try to imagine them in different scenarios. Is this move for tripping people? Maybe to hit someone out of the air? Perhaps a long range poke to harass? Get used to the ranges of various normal attacks, the timing of the button to hit someone out of the air, seeing the properties etc. Once you feel like you have a good handle in training mode, go to the Gauge Settings and set everything to normal. Then set the dummy to CPU Level 4 (default) and restart the battle. See if you can defeat the computer only using normal moves (no specials etc). CPU Level 4 should be pretty easy so feel free to start to crank it up. Ideally if you can beat CPU Level 8 with showing good defense and normals, you've probably gotten a good understanding of what normal to use in different situations. Try against different CPU characters to get a feel of what moves/offense/defense to expect. Chun-Li is a good one to try at CPU Level 8. Of course playing against people is still the best way to learn (especially by someone who can teach), but by playing this way against the CPU will help familiarize yourself with what a character is capable of. In my opinion it's a good enough primer to get most beginner/intermediate level players started.
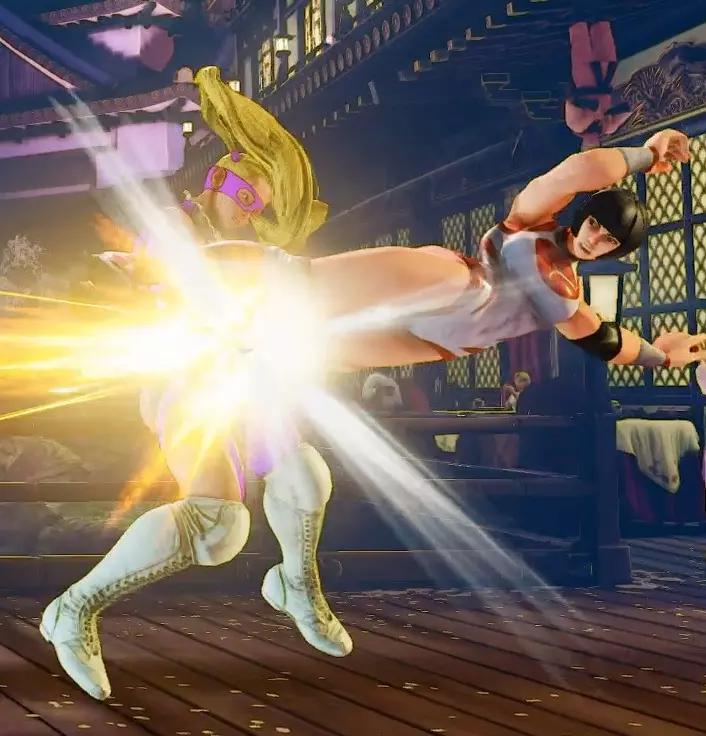
需要练习和理解的内容: 使用普通攻击 - 在训练模式中与CPU对战,将所有资源槽设置为正常,难度调至你能应对的最高等级。只使用普通攻击,并想象自己在与真人对战。尽可能专注于“防空”概念,即用招式击中空中的对手,以阻止他们对你的进攻。所以当对手跳入时,你需要用普通攻击进行应对。在米卡普通招式解析中,我会说明哪些按键用于防空。 正确防御 - 在与8级CPU对战时,仅通过格挡并使用普通攻击惩罚不安全招式,你能坚持多久? 理解机制 - 重要的一点是理解你所玩的游戏。如果不了解特定情况下的可用选项,你永远无法在更高水平上精通这款游戏。你知道如何积攒V槽吗?什么是V反击以及如何使出?普通受身和后受身有什么区别,又该如何操作?你的 Crush Counter 普通技有哪些?如果你不熟悉《街头霸王5》的机制,一定要去看看“挑战”->“演示”模式。 在本指南中,我将解释一些许多格斗游戏玩家都熟悉的特定概念。如果你不清楚我在说什么,建议先了解相关基础概念。以下是格斗游戏中常见的术语: 帧数数据、帧优势/帧劣势 确认命中 肉择 输入缓冲 挥空惩罚 Tick投、指令投 起身 择 花招/骗招 换血 扫腿 装甲 连段 优先级低位姿态 - 通常指攻击下段并使角色身体降低到一定程度的招式,此时针对上/中段的攻击通常会完全打空。达尔西姆的滑铲等角色常使用此类招式来躲到某些招式下方,或完全避开空中攻击。 当米卡使用蓄力站姿重脚时,这一点尤为重要,因为对手若操作得当,可通过低位姿态躲避,使飞踢完全打空。 指令符号说明 此处列出的指令均假设米卡朝右。若角色朝向相反方向,请反向操作。下方表格代表一个方向键或街机摇杆,其中列出了不同方向。
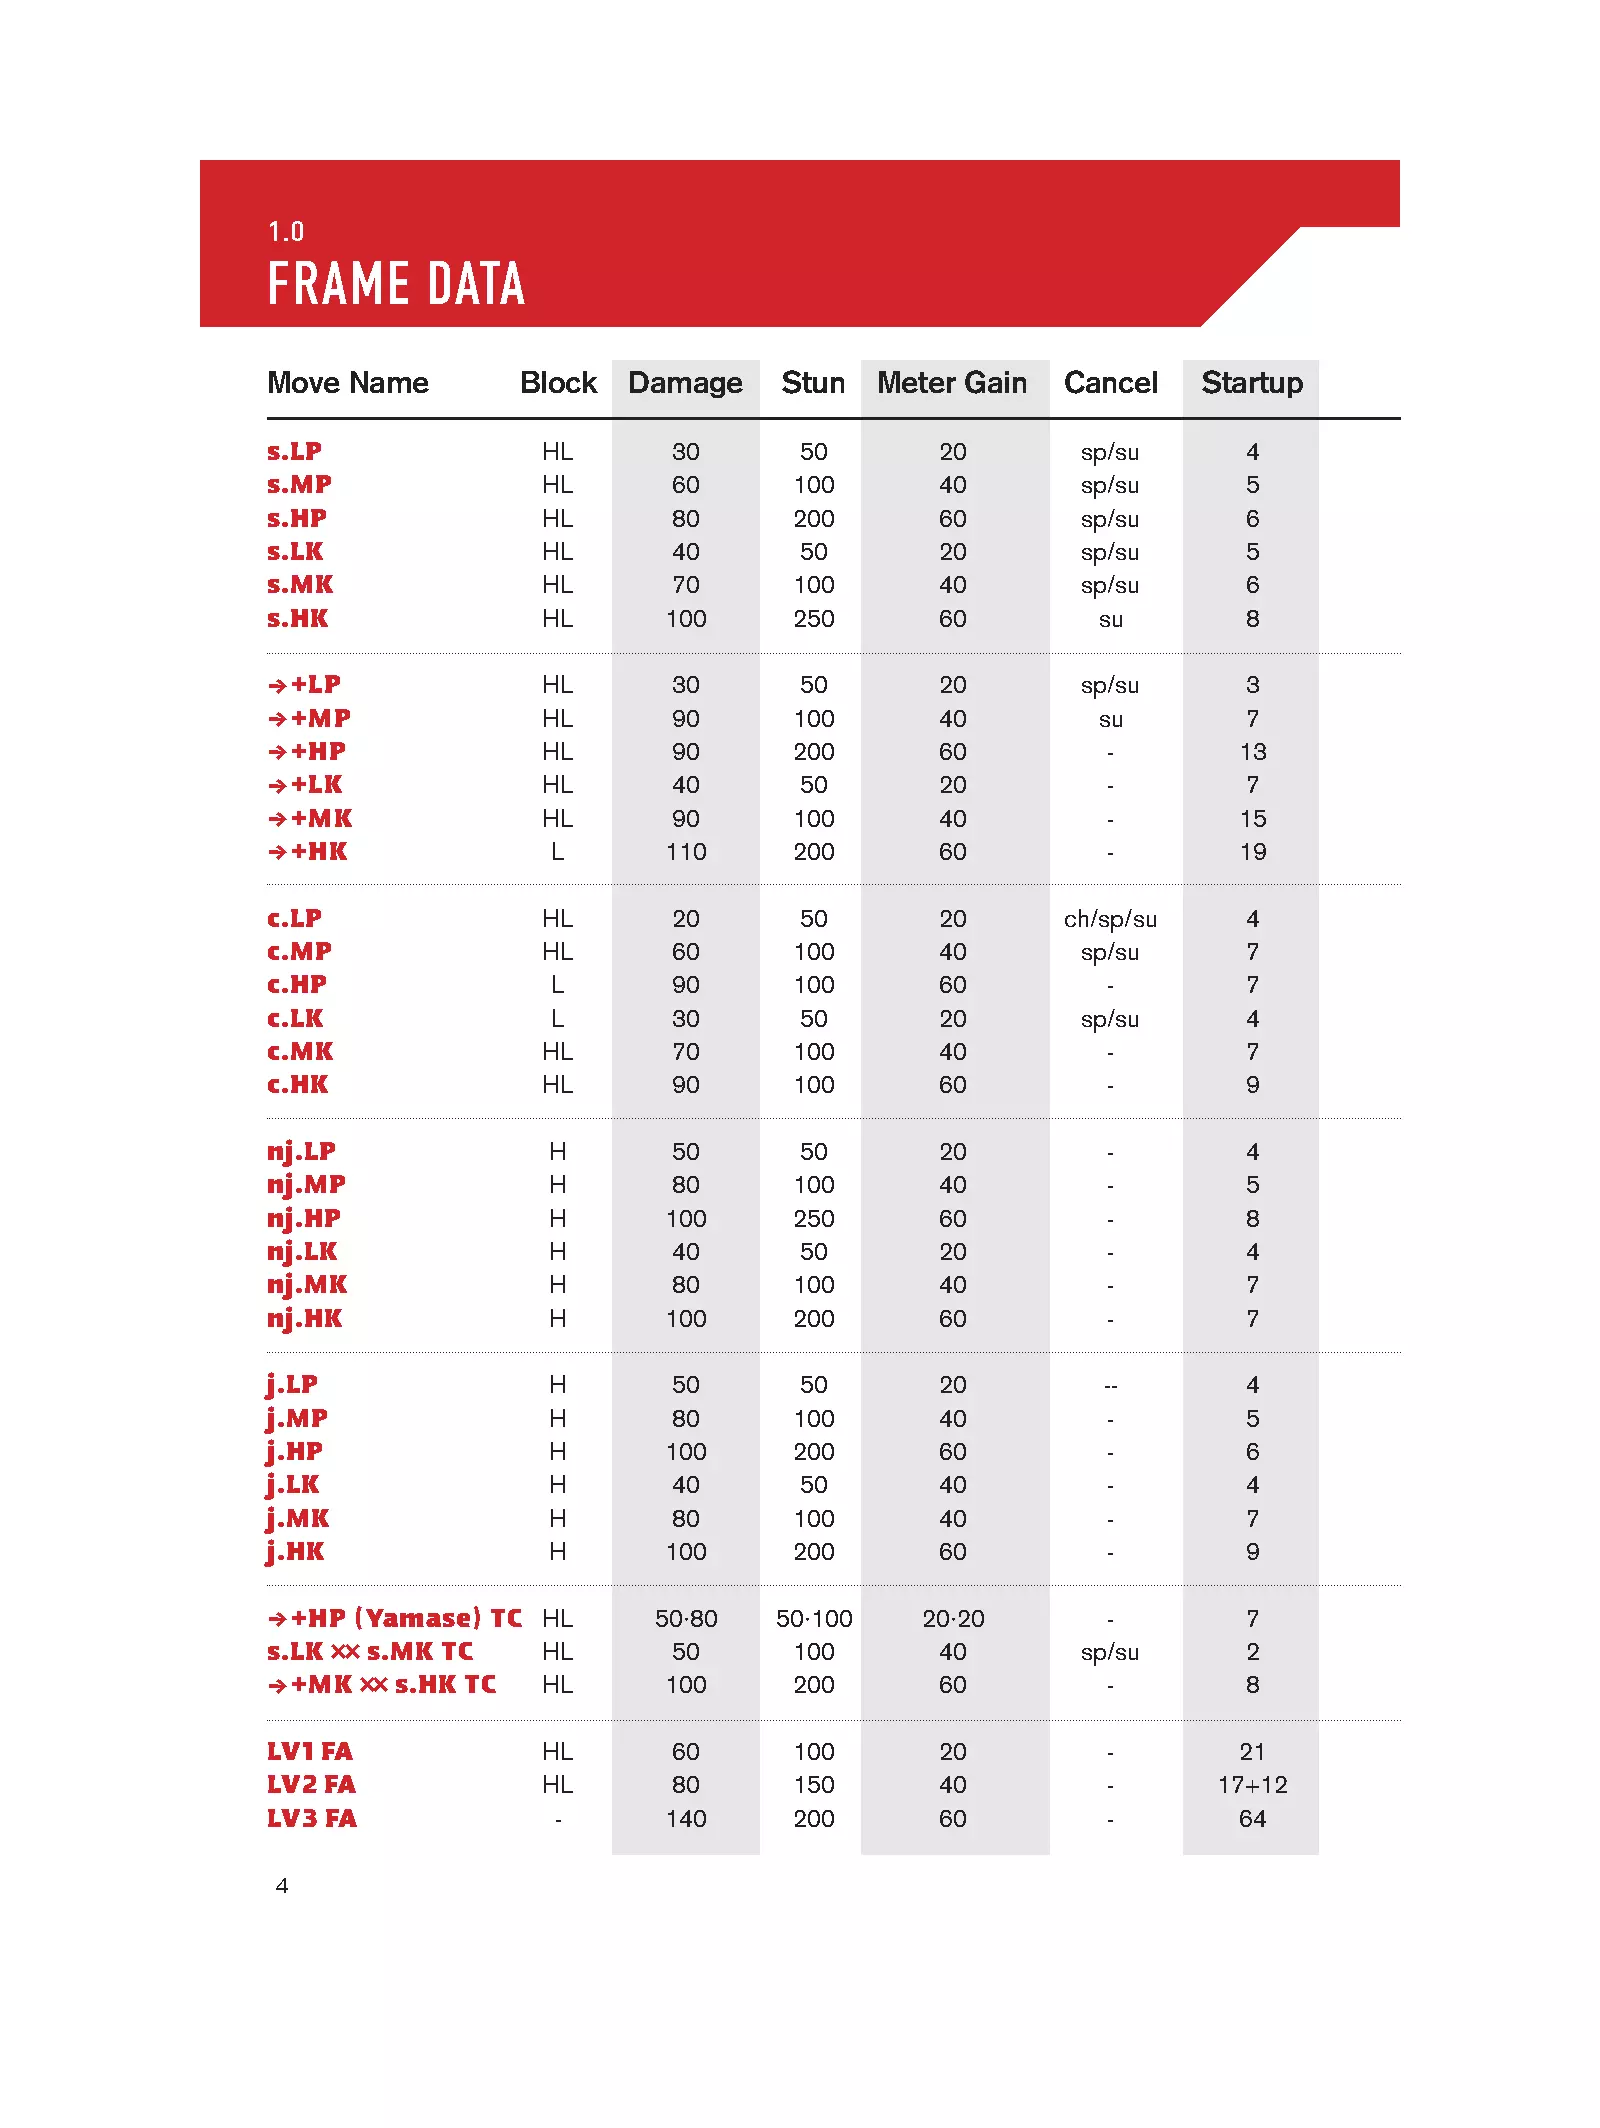
方向输入: 上后(ub) 上(u) 上前(uf) 后(b) 中立(n) 前(f) 下后(db) 下(d) 下前(df) 术语: st.:站立(中立状态下) cr.:蹲姿(按住下键时) jf. jb. nj.跳跃(向前跳、向后跳、原地跳) lp 轻拳(刺拳) lk 轻踢(短踢) mp 中拳(强拳) mk 中踢(前踢) hp 重拳(猛拳) hk 重踢(回旋踢) + 同时按下(例如:lp + lk) xx 取消【摇杆指令】 qcf:下、下前、前(四分之一圆前) qcb:下、下后、后(四分之一圆后) hcf:后、下后、下、下前、前(半圆前) hcb:前、下前、下、下后、后(半圆后) charge或hold:按住按钮约2秒 dash:前、前 或 后、后(前冲或后冲) CA:四分之一圆后、四分之一圆后+拳(超必杀技) 示例连招: 跳前重拳,站姿中拳,前+中拳,前+中拳,后冲,蓄力站姿重脚,四分之一圆前+双拳 详细说明: 向前跳跃重拳,接下来的指令是站姿中拳,这意味着你已从跳跃重拳落地。站姿中拳随后衔接同时按下前和中拳,即热情强击。下一个前重拳或中重拳是热情绳投,会将对手向前投掷。后闪身的指令是后、后。这会导致对手撞到屏幕的前边缘。蓄力站姿重踢(按住重踢片刻)会使出蓄力飞踢。从飞踢恢复后,接EX射击蜜桃,指令是前半圆加任意两个拳键。 普通技与特殊技(1) 普通技是你招式库中大多数最重要的工具。了解特殊技和超必杀技固然很好,但成功使出这些招式的方法是巧妙运用你的普通技。大多数普通攻击都有其特定用途和适用场景。尝试理解什么是【帧数据】,这样你就能解读下方的数值,这将帮助你在查看自己的回放时判断该做什么/不该做什么。如果在任何时候你不理解本指南中描述的某些术语,请参考指南的“基础知识与资源”部分。 站姿轻拳
Startup(启动) Active(生效)Recovery(恢复)On Hit(命中时)On Block(格挡时) 327+3+2 这是一个出色的戳击技、防空技和确认技,拥有极佳的帧优势。它的判定范围相当不错,我经常用它来应对正前方的跳跃。这也可以作为一种低风险的立回工具,用来克制那些本不该被克制的招式,只因它的判定范围实在太优秀。 你还可以确认后接诸如EX或轻拳射击蜜桃(qcf + ppp或qcf + lp),甚至是临界艺术(qcb, qcb + p)。这是少数几个可以安全地进行tick投而不会被任何普通招式打断的普通技之一,因为它拥有大量的帧优势(但无敌反击技仍能打断)。 站姿轻踢
起始动作 主动恢复 命中 被格挡 438+2+1 这是一个不错的站立普通攻击,感觉明显比站立轻拳慢,主要用于确认接站立中拳(站立轻脚、站立中拳、米卡的目标连招)。虽然此招在被格挡时能提供+1帧的有利,但如果在被格挡的站立轻脚后尝试指令投,+1帧不足以让投技完全安全。如果对手有3帧的轻拳,他们能在你的指令投使出前打出这一拳。 这就是为什么米卡的站立轻拳是最安全的选择(被格挡时+2帧有利),但在更高水平的对局中,优秀的玩家会知道这一点,并且知道你更可能在站立轻拳后使用指令投。他们可能会更愿意使用无敌技/反击技来脱身,所以要记住这一点。总的来说,偶尔变换一下招式是不错的,【站姿轻脚】可以作为打投择的一个不错替代选择。【站姿中拳】
起始 主动恢复 击中 格挡 5310+7-2 这是一个出色的戳技,可衔接自身并接热情按压(前+中拳)。同时也是非常优秀的肉择攻击。在中立状态下也可用于挥空惩罚,记得取消出射击蜜桃(下前+中拳)以尝试打出快速连招和击倒。 我也喜欢将此招式用作预判挑战。如果春丽喜欢前走并使用下中脚,然后用站中脚进行骚扰,且在整局中多次出现这种情况,有时我会进行挑战。我会先等待格挡春丽的下中脚,但因为我知道她们想用站中脚(且尚未因此受到惩罚),我会用米卡的站中拳进行挑战并取消出中拳版射击蜜桃。通常情况下,这招能破解对手的牵制,为你制造伤害并击倒对手,让你可以上前压制。 如果对手总是机械操作(不思考,只是重复相同的招式),你可以经常使用这一战术。如果对手是有思考能力的玩家,这会迫使他们考虑是否还要再次使用特定的攻击连段。这种策略需要你理解节奏,并且了解对手喜欢在何时按键。如果需要,可以在训练模式中尝试匹配时机,以便能够打断对手的攻击连段。 站姿中踢/前冲中踢
启动 8 帧 击中恢复 4 帧 被防恢复 15 帧 伤害 +2-3 这是米卡(Mika)最常用的远程牵制技,尤其是前+中踢版本。此招式能在第8至17帧期间克制下段攻击。它拥有相当不错的判定范围,若春丽(Cammy)的俯冲踢落点恰好在你腿部伸展的位置,可直接破解这类招式。注意此招式被防御后会陷入负帧,且由于启动时间较长,我通常不会连续使用两次,因为曾多次因此被打断(尤其是在招式被防御的情况下;若第一次命中,再次使用通常会更安全)。 注:你也可以将此普通技作为肉择使用,并直接取消接EX流星冲击(EX Shooting Peach)。我知道有相关连段设置,若能打出 counter hit,操作会简单很多。 站姿重拳(st. hp)
Startup(启动) Active(持续) Recovery(恢复) On Hit(命中时) On Block(被防御时) 7 3 18 +2 -6 这是一个优秀的反击戳技,也是不错的对空技(需要适当拉开距离,否则容易发生互击)。此招也可以像上文描述的站姿中拳(st. mp)那样用于预判式的挥空惩罚。我通常会用站姿重拳(st. hp)接重拳流星冲击(qcf + hp,即下前+重拳),希望站姿重拳命中后,即使距离稍远,重拳流星冲击也能使出并形成连招。 这个招式的射程比你想象的要远,但如果靠得太近,就容易频繁发生互击。需要注意的是,此招会让你略微向前移动,所以你需要相应地调整距离。它的持续帧数也不多,因此你需要熟练掌握对对手挥空技的命中时机。训练模式对此很有帮助。 站姿重脚(st. hk)
启动 主动恢复 击中时 格挡时 17220+2-4 启动较慢,但在7-12帧期间判定为空中状态。此招还能越过大多数下段攻击,因此如果你能掌握对手的攻击节奏,可以通过预判使出站姿重脚来破解他们的下段攻击尝试。该招式可通过 Crush Counter(压溃反击)造成旋转击倒效果。此招也适用于佯攻蓄力站姿重脚(只需短暂蓄力后提前释放) 蓄力站姿重脚
起始 主动恢复 命中 格挡 35 22 0 +4 +2 起始动作非常慢,但如果干净命中则效果极佳(可轻松衔接站立轻脚、站立中拳,再衔接前下前+中拳),或在格挡时(为你提供+2帧有利的择)。此招赋予你极快拉近与对手距离的能力,但代价是动作前摇极大,因为她会先蹲下再向前突进。很多人喜欢用这招,但要记住,反应快的对手很容易对策这招,他们只需垂直起跳后落下即可惩罚你。使用时需格外小心,尤其是在离线对战中,对手有更多时间反应。 此飞踢也可穿过火球,但时机把握较难。她在23-38帧期间被判定为空中状态,并在26-39帧期间拥有下半身对飞行道具的无敌判定。普通与特殊招式(2) 蹲轻拳

起始动作 激活恢复 击中时 格挡时 326+3+1 这是少数格挡时能获得正帧数的普通攻击之一,非常适合进行快速的惩罚连段。同时它拥有出色的判定范围,能非常快地打断对手的招式。通常可以接自身连段,或者接站立轻拳,再连接轻拳版【射击桃子】(下前+轻拳) 蹲轻脚
起始动作 激活恢复 击中时 格挡时 428+3+1 这是一记出色的快速长距离轻踢。此招的实际移动距离比站姿中踢远,但不如前冲中踢。仍然令人印象深刻。这招可以确认击中后接站姿轻拳,从而形成潜在的惩罚连招。这是米卡唯一可接连招的下段攻击(可接站姿或蹲姿轻拳)。也可用于 Tick 投。蹲姿中拳
启动 主动受身 击中时 格挡时 7416+1-1 这是米卡最好的对空手段之一,可惜它只对正头顶上方的角度有效。稍微在头顶前方或后方都会打空对手。甚至可以干净利落地压制某些特殊技,比如维加的墙壁俯冲。 米卡在第9-11帧被判定为空中状态,而且由于这个招式是向上戳刺,实际上可能完全打不到蹲姿对手。这个招式另一个非常有趣的用法是可以破解投掷/指令投,但时机把握很 tricky。在高水平对局中,曾有人用它来化解投掷局面并打出 counter hit。之后可以接站姿轻拳或站姿中拳(难度更高)来打出更多伤害。另一个常见用法是在角落使用米卡女士的前+重踢(f + hp)后重置对手。这通常用于热情绳索投的择中。(前+中拳后接前+中拳) 此招式的一个潜在用途是佯攻接投技。例如,当你和对手都处于蹲姿且距离较近(大约扫腿范围)时,你可以使用蹲中踢(cr. mk)稍微拉近距离,然后直接使用指令投(后下后+拳或脚)甚至超必杀技(后下前,后下前+拳)
启动 主动恢复 击中时 格挡时 7315+2-2 这个招式虽然略带迷惑性,但却是我最喜欢的米卡招式之一,原因在于它的判定框和攻击范围。实际上它的出招有点慢,但一旦使出,我见过它能压制很多招式。除了在地面用这招进行压制外,我最喜欢的用法之一是防空,因为它似乎总能成功。即使像肯的中立跳重拳和重脚这样的招式,只要时机把握得当,也会被这招干净利落地破解。 这招的攻击范围是除了前中脚和蹲重脚这类招式外最长的普通招式之一,所以如果你想在V触发激活后进行连招,这是一个非常稳定的选择(不过在可能的情况下,你应该使用站重拳来造成更高伤害)。此招也可作为择肉使用,若命中,可轻松衔接跺脚斩(站姿轻脚、站姿中拳)。 此招最独特的用法之一是:若在较近的距离以 counter hit 命中,无需取消即可直接衔接超必杀技。只需等待招式结束,然后立即使出超必杀技,即可形成连招,效果非常华丽。 蹲姿重拳

启动技 主动受身 击中时 格挡时 11617-3-5 这是一个用途广泛的有趣招式。可用于拉近与对手的距离,据我所知,招式持续时间越长,判定范围越佳。在对阵方和达尔西姆等需要躲避飞行道具的对局中,此招使用频率较高。 此招还可作为择技使用,或通过适当的距离控制在格挡后获得+1的有利帧。虽非突破性的技巧,但仍是不错的起手方式。这一招式也有助于触发V触发,当你用蹲重拳击中对手后,按住后方向键发动V触发,之后你可以继续进行压制连招,或使用无翼飞机(下前+脚)来交叉压制对手,并有望让你的搭档抚子获得一次免费攻击机会。 记住,当使用蹲重...HP通常用于迫使对手防御,以便你取消招式并激活V触发。所有角色都可以使用V反击,有可能在你使用蹲HP后打断你的后续行动。如果遇到这样的精明对手,务必在激活V触发后立即使用指令投来应对他们的V反击。 此招式的另一个用途是佯攻,故意空招并在落地后立即使用指令投。 蹲HK
启动 主动受创恢复 被格挡时 12821 击倒-12 这是米卡唯一能造成击倒的普通招式,尤其在对手在立回中前后移动时,能让对手保持警惕。此招的恢复时间很长,如果被格挡,对手(只要他们留意)就能获得免费的惩罚机会。如果你想冒险获取击倒效果,可以使用V触发来让此招变得安全,但总体而言,使用时务必谨慎。 此外,由于此招的出招位置极低,能够躲过某些招式的攻击,完全不会被命中,包括躲过飞行道具。 一个不错的安全跳设置是:先打出压起身反击的蹲重脚,一旦招式恢复,立即使出站立轻脚、站立轻脚(均为空挥),然后垂直起跳。这种情况会导致你选择的任意攻击的自由跳跃特别容易被那些拥有缓慢或糟糕的【返技】角色格挡。 普通技和特殊技(3) 空中 轻拳
Startup(启动时间):Active(生效时间):35。空中基础刺拳,判定范围良好。j.lk(跳跃轻脚)
Startup(启动) Active(判定) 48 这是米卡唯一的交叉攻击,只要用这个招式跳到对手头部附近,基本就能根据你离哪一侧更近而确保命中。由于其 hitstun(受击硬直)较短,我通常看到米卡会接轻攻击或 Stomp Chop(踩踏斩)(站姿轻踢,站姿中拳)来衔接连招。 空中中拳
启动帧 65 且处于激活状态,其判定框直接朝上,面对地面对手时实际上有点难命中。我还没在空战情况下测试过,所以不确定优先级如何。这招可以用作假动作,从跳跃下落时可以故意提前使用,使其看起来有点像跳重拳,然后落地接指令投。 跳中脚
启动技 激活 65 这是另一个对空手段,其判定框朝上。你可以更可靠地将此招式用作对地面对手的极晚帧确反,并且能让你有少许时间前冲,用【踩踏斩】(站立轻脚、站立中拳)或指令投进行压制。 空中重拳
Startup(启动):Active(有效):85。对米卡下方造成威胁的出色空中攻击。这招很适合对抗达尔西姆的滑行等低身位招式,让对手难以轻易逃脱。通常在需要快速下落惩罚某些招式(比如投掷出的火球)时,这招比跳跃重脚(j. hk)更好用,后者拥有更佳的水平范围,但没有向下的攻击判定。
启动 77 帧 全程无敌的空中攻击,可用于空中远程骚扰。即使仅用招式顶端命中,通常也能直接衔接热情压制接热情绳投(前+中拳,前+中拳),因此这是个非常实用的技能,能在较远的距离威胁对手并打出连招。 由于其攻击范围,也常用于后跳或中立跳来阻挡对手的其他空中攻击。 普通及特殊招式(4) 跺脚斩(目标连击)站姿轻脚,站姿中拳 启动 4 帧 持续 2 帧 恢复 14 帧 命中 +1 格挡 -6 米卡的目标连击。恢复时间具有一定迷惑性,米卡的站姿中拳本身是-2 帧,但在此连击中变为-6 帧,实际上可用快速攻击进行确反。此字符串通常用于跳跃轻踢(lk)或蓄力站姿重踢(st. hk)之后。如果这个目标连击命中,通常还会接一个中段拳【射击桃】(下前+中拳)。 【跺脚斩】非常适合确认命中,例如,当对手起身时,你使用诸如蹲中踢(cr. mk)或站姿中拳(st. mp)等压制技,如果招式命中,直接衔接此【跺脚斩】,就能轻松打出连击。 【俯冲轰炸】前跳中(在前跳50%-75%期间)下+中拳(jf. d + mp)
启动 激活恢复 击中时 格挡时 16--击倒- 这是一个棘手的招式,如果谨慎使用绝对有效。只能从跳跃顶点到跳跃剩余过程约75%的阶段使用,这意味着无法在上升过程中使用,且如果离地面太近也无法使出。 此招式通常有三种用途: 1. 诱骗上勾拳(如波动拳)- 有预判地向前跳跃,并在对手上勾拳范围外使出俯冲轰炸。如果隆或肯上钩,他们就会起跳,而你此时已经落地,可以进行一套免费连击。 2. 交叉压制对手 - 在击倒对手后或近距离突然跳跃时,你可以制造左右格挡的局面,如果对手在你下落时猜错方向,你就能造成击倒和伤害。 3.投射物应对 - 米卡拥有蹲重脚、蓄力站重脚和俯冲轰炸来躲避和穿梭于火球之间。蹲重脚相当慢,如果对手太近,很难凭反应使出。站重脚的前摇也很明显,要让它穿过火球,需要对手在你已经开始蓄力时扔出火球(对火球做出反应再开始蓄力太慢了)。这使得俯冲轰炸成为一种不错的近身方式,尤其是在全屏距离时。但仍需小心,有些角色可以从远处惩罚你(纳什的 teleport、达尔西姆的 Teleport 等) 淑女米卡 + 重拳
启动 主动恢复 击中时 格挡时 10312 击倒+3 米卡施展一记颈部高度的上勾拳,适合对空、打出 Crush Counter(压起身反击),并且在 Passion Rope(热情绳索)投掷(前+中拳,前+中拳)后能很好地开启重置局面。格挡时提供出色的+3帧优势,因此是极佳的帧优压制技,尤其当你预计对手会格挡时。 若此招命中,会将对手击至可连招的浮空状态。 热情强击 前+中拳 或 后+中拳(再按一次前+中拳 或 后+中拳 可施展热情绳索投掷)
启动技 主动受身 击中时 格挡时 6413+2-2 这可能是米卡我最喜欢的招式之一。她会进行一次拍手攻击,可取消后接热情绳投(前+中拳或后+中拳)。假设热情按压命中,无论你向前还是向后取消,她都会将对手甩到屏幕的对应一侧。这是帮助米卡将对手逼入她想要位置(角落)的关键招式。即使你背靠角落,只要成功使出这招并将对手扔进角落,就能迅速扭转战局。 如果在屏幕中央使用此招,通常你需要后跳,这会让屏幕边缘向你靠近,对手实际上会弹到边缘并踉跄着向你冲来。在这种踉跄状态下,对手会被判定为浮空,此时你可以使用无翼飞机(qcf + k)作为终结技来造成高额伤害。你也可以接任何你想用的招式,连招上限很高! 如果此招式在角落使用,角色会立即在屏幕边缘弹起。你需要快速使用另一个招式进行后续连击,将对手保持在角落。这里可以使用女士 Mika(f + hp),然后接无翼飞机(qcf + k)。 此招式似乎拥有优秀的通用判定框,在角色前方有一个不错的矩形范围,能够压制远距离戳刺,甚至可以击中空中的对手。 【注意】:热情绳投有时也被格斗游戏社区(FGC)俗称为爱尔兰鞭打。特殊技与超必杀技(1) 射击桃:下前+拳
TypeStartup(启动类型) Active(生效) Recovery(恢复) On Hit(命中时) On Block(被格挡时) lp10625Knockdown-7(轻拳10625击倒-7) mp13825Knockdown-10(中拳13825击倒-10) hp201317Knockdown-12(重拳201317击倒-12) 通常用作连招终结技,若对手喜欢乱按按钮,也可在中立对局中使用,但需注意若被格挡,恢复时间会很差。 轻拳 - 空中判定帧8-24 中拳 - 空中判定帧12-28 重拳 - 空中判定帧15-35 EX Shooting Peach(EX射击蜜桃):下前+双拳

启动 主动受身 击中时 格挡时 5?21 击倒 -10 这是一个出色且快速的招式,可用于对抗那些可能用戳击对你进行猛烈压制的对手。由于其推送距离远且速度足够快,能接在站姿轻拳之后,因此在连击中表现出色。米卡在第3至9帧期间获得1次上半身吸收判定的霸体,因此可以化解戳击、空中攻击、波动拳等多种招式。实际上,这在中立对局中是相当不错的招式,能出其不意地击中毫无防备的对手。 遗憾的是,霸体在第3帧才生效,这使得该招式极易受到择中攻击和投技的克制。如果你试图用EX流星冲桃来对抗择中攻击,每次都会被打断。虽然它看起来像是一张神奇的免罪符,但绝对不能滥用。我已经因为它被打飞无数次了,所以在连招之外使用时一定要格外小心。 无翼飞机:下前+脚
类型Startup 主动受身On HitOn Block lk5543击倒- mk7840击倒- hk101137击倒- 米卡(Mika)会跃向空中并抓取毫无防备的对手。有时如果对手已在空中开始普通攻击,可能会破解此招,但由于该招式速度极快,我发现通常难以破解。此招式的所有版本造成的伤害相同,招式结束后双方会交换位置(如果你面朝右并用无翼(Wingless)抓住对手,之后你会面朝左)。 lk-空中第4帧起 mk-空中第6帧起 hk-空中第9帧起 我通常在以下情况使用无翼(Wingless): 1.如果我确定对手会跳跃。如果你注意到一种模式,当你一连串的攻击都被格挡后,对手通常会垂直跳起来。一旦你预判到这一点,就用【无翼】技能来牵制他们。突然被“预判”往往会让对手士气低落,但如果他们开始变得急躁,就要留意他们的无敌反击或上勾拳。 2. 在【热情压制·绳索投掷】之后,我有时会用【无翼】来打出最后一击。我认为这通常是在中距离使用【热情压制·绳索投掷】后,不消耗能量的情况下能打出的最高连招伤害。记住,在【绳索投掷】后,当对手撞到边缘后踉跄后退时,他们会被判定为浮空状态,所以你可以可靠地使用这个技能并抓住他们。 3. 摆脱角落困境。如果我在角落对对手有很好的预判并使用了无翼飞机,现在双方位置互换,我处于角落,如果想脱身,我会用hk无翼飞机然后跳出去。这并非对所有角色都绝对安全,所以要记住这一点(拥有快速超必杀技或瞬移能力的角色,如果你用这招太规律的话,他们可能会追击你)。 EX无翼飞机:下前+脚脚
启动 主动恢复 击中 格挡 51137 击倒 - 这是普通“无翼”的更快、更高伤害版本,由于其无敌帧,甚至可以击中正在攻击的对手。EX“无翼”在第4帧进入空中状态,并在第5-15帧期间无敌。EX“无翼”在连招中也特别好用,因为它能够击中被击飞的对手。 同样,与EX“射击蜜桃”(qcf + pp)一样,这并非真正的反击技,也容易被延迟攻击和投技破解。从帧数据中可以看到,她直到第4帧才离地,且在那之后才进入无敌状态。她倒地的这3帧时间里,会在极短时间内完全处于无防备状态,此时若对手已使出招式或准备抓取,你就只能任其摆布。 这是米卡的一大弱点,她需要具备坚如磐石的防御和耐心,因为很多时候你不得不应对对手的压制。学会正确格挡和拆投是近距离防御的重要部分。 特殊技与EX技(2) 彩虹台风:后下后+拳
启动 主动受身 击中时 格挡时 5252 击倒 击倒 这是一个非常出色的指令投,其范围比硫磺(hcb + k)更广。各版本的范围从弱到强排序,轻版范围最大但伤害最低,重版范围最小但伤害最高。彩虹台风的一个缺点是会将对手向后投掷。这与米卡将对手逼入角落的战术相悖,因为这会破坏你的站位。不过,你可以将此转化为优势,如果对手将你逼入角落,你可以使用彩虹台风抓住他们,从而扭转局势。对大多数人来说,这些投掷距离似乎不会造成太大影响,但在《街头霸王》中,游戏胜负往往取决于像素级的距离差异。因此,仅仅是稍微超出范围,就可能导致连招中断,或是投掷落空反遭惩罚。一定要在训练模式中多加练习,熟悉指令投的有效距离。 EX彩虹旋风:下后下前+双拳
启动 主动恢复 击中时 格挡时 5252 击倒 击倒 这是米卡除了超必杀技外最好的远程投掷技。比轻拳彩虹台风的射程更远,伤害和眩晕值也更高。但同样存在将对手扔向后方,需要重新接近的问题。非常适合用最终投掷来打晕对手。 硫磺 hcb + k
启动 主动恢复 击中时 格挡时 5252 击倒 击倒 硫磺是彩虹台风的合作变体。彩虹台风会将对手向后投掷,而硫磺则向前投掷,使你能保持极近的距离,有可能反复使用。这是一种常用于重置对手以保持进攻 momentum 的投掷技。 不过其范围明显更差,你很容易因出拳而脱离范围。即使是在近距离格挡一记站姿中拳,产生的击退距离也足以让你无法使用任何普通版硫磺(EX硫磺拥有足够的范围)。与彩虹台风相比,硫磺的伤害和眩晕值也更低,你需要留意这一点,当对手接近被眩晕状态时,应尽量使用彩虹台风。再次说明,在普通版硫磺技能中,轻踢拥有最长的攻击距离但伤害最低,重踢则是攻击距离最短但伤害最高。 EX硫磺:hcb + kk
启动 主动恢复 击中时 格挡时 5252 击倒 击倒 这是最有用的EX指令投,它能造成大量伤害和眩晕,同时向前推进并让你保持近距离。其投掷范围也是硫磺石系列中最远的。 V系统招式与临界艺术 热力麦克风表演(V技能)中拳+中脚
按住中拳+中脚,米卡会拿出麦克风开始独白。按住的时间越长,她所有投掷相关招式的强化效果就越强。在此期间,她还会获得V技能计量条,并且在施展此动作时拥有一次护甲效果。该护甲可以吸收一次攻击(但无法吸收多段攻击或投掷)。 刚开始施展这个动作时,她处于1级状态,这会为她所有投掷(普通投掷以及包括“无翼飞机”和她的超必杀技在内的所有指令投掷)提供小幅伤害和眩晕加成。米卡说话的时间越长,周围会周期性地冒出烟圈,表示等级提升。总共有5个等级,在最高的5级时,任何投掷都能一击必杀。一旦你松开MP+MK按键,米卡会立刻停止说话并将麦克风扔到地上,麦克风会在她面前轻微向前弹跳一下然后消失。这实际上被视为米卡唯一的投射物,并且确实会造成少量伤害(通过这种方式可以获得Mic kills)。 你可以用这个技能来抵消敌方投射物、设置一个延迟生效的麦克风投射物,或者潜在地引诱对手前来攻击,希望能为你创造一个施展强化投掷的机会。 遗憾的是,如果你在获得强化后受到任何攻击,或者投掷尝试失败(包括普通投掷),强化效果就会消失。 这是一个相当有趣的招式,因为你相当于在暗示自己接下来想要施展投掷,这可能会让对手在心理上有所准备。另一方面,美华的独白时间越长,你获得的V槽就越多,这有助于你更频繁地使用V触发和V反击。通常在实际对战中,尤其是在释放彩虹旋风(qcb + p)后,你最多能积攒到1级或2级V槽就需要停止独白。 抚子(V触发)hp + hk

米卡的V触发技非常独特,她会召唤出她的双打搭档抚子。V触发技的一大优势在于,你可以随时用它取消普通招式,这能让像下中脚或下重拳这类高风险招式变得完全安全。它还可以用来打断对手,甚至通过迫使对手应对干扰来增强米卡的防御。 假设米卡召唤抚子时面朝右方,共有3种召唤方式: b + hp + hk(左)
生命值+香港(中立)

F + 生命值 + 香港(右)
方向决定了抚子从屏幕的哪一侧出现。如果长按重拳+重脚来使用美华的V触发(无论任何方向),美华会举起两根手指,抚子会在一段明显的延迟后出现。这有助于进行连招设置,并能威慑对手,因为他们知道抚子即将出现。 美华V触发的后方向和前方向版本会将对手击倒并进入旋转状态,通常可以用无翼刃或EX无翼刃进行连续攻击。 抚子垂直落下的普通V触发主要用作连招延伸,也能击中地面上的对手。 我注意到一个问题,抚子有时会因为对手移动速度过快而 miss。如果美香面朝右并紧贴对手,此时若你用b+hp+hk召唤抚子,且在召唤后立即从中距离开始向前冲刺/推对手,抚子会攻击落空。要确保熟练掌握V触发,并清楚在何时使用哪个V触发。 桃子鳄梨(V反击)f+kkk
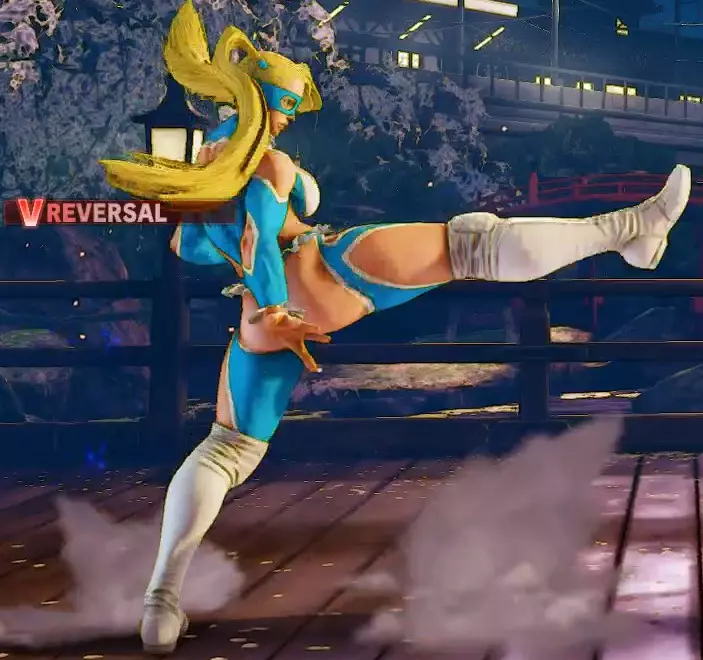
启动 15 帧 受击恢复 24 帧 格挡恢复 -2 帧 当米卡处于格挡硬直状态时,可以使用V反击,消耗一格V槽来打断对手。这对于阻止对手的进攻 momentum 非常有帮助,但只会造成白色伤害(即可恢复生命值,除非你成功命中)。记住,V反击并非不可阻挡,它会被某些特定的连招套路克制,例如快速轻攻击接投技。 示例: 米卡格挡了隆的近距离站立轻拳。 米卡使用V反击(启动时间为15帧)。 对手使用普通投技(轻拳+轻脚,通常启动时间为5帧)。 米卡被投中。 所以要记住,和《街头霸王》中的许多机制一样,V反击并非必定能命中。 蜜桃突袭(超必杀技):下后下后+拳

启动 主动恢复 击中时 格挡时 3251 击倒 - 米卡的超必杀技本质上是一个长距离指令投,出招速度相当快。它还可以带入连招,如果你有资源的话,可以打出非常高伤害的连招。这主要用于连招中或你确定能进行惩罚的情况。这不是一个0帧投技,如果对手只是站在那里,而你释放这个超必杀技,他们可以在你的动画演出期间按住上方向键,直接跳出来。 碰撞箱/受创箱数据 彩虹米卡的碰撞箱数据已公开,感谢Overheat76(来自Shoryuken)和eiSH(来自DeviantArt)!这是了解攻击在幕后样子的良好参考。归根结底,格斗游戏不过是各种判定框相互重叠并产生交互(例如造成伤害或击退等)的过程。观察一个招式的外观,能让你大致了解它可以克制哪些类型的招式。你也可以查看相关图片:彩虹·米卡判定框数据
快速连招/基础连招 这些连招主要用于快速确认命中,建议在攻防中使用,因为它们通常以快速攻击起手。这些是你可以经常打出的主力连招(希望如此)。如果不理解列出的术语(如qcf + p),请查阅“指令与符号说明”部分获取更多解释。 轻攻击确认 资源 伤害 眩晕 连招 0 111 253 蹲轻拳或蹲轻脚,站轻拳 xx 下前 + 轻拳(轻拳 射击蜜桃) 1 151 253 蹲轻拳或蹲轻脚,站轻拳 xx 下前 + 双拳(EX 射击蜜桃) 这是出色的防御性连招,可中断对手的攻击链并转入你的连招,为你造成伤害/击倒。EX射击桃也能快速将对手逼至角落,而米卡在角落作战很强。 计量条伤害 眩晕 连招 0 121 293 站姿轻拳,站姿轻拳接下前+轻拳(轻拳射击桃) 1 161 293 站姿轻拳,站姿轻拳接下前+双拳(EX射击桃) 用站姿轻拳骚扰时是不错的确认命中方式。在对手防御跳跃攻击后,你可以使用站姿轻拳试探是否命中,若命中就接这套连招;若未命中,则可以使用指令投。不过这两种选择都会被无敌的反击技克制,所以要知道何时退开。 踩踏斩连招 计量条伤害 眩晕 连招 0 147 280 站姿轻脚,站姿中拳接下前+中拳(中拳射击桃) 1 179 320 站姿轻脚,站姿中拳接下前+双拳(EX射击桃) 非常标准的确认连招,伤害也不错,适合交叉进攻。如果被格挡,你可以选择停在站姿中拳(此时仍为负6帧,可能会被快速攻击惩罚),或者取消接重脚无翼飞机(下前+重脚)来脱身(这也并非完全安全,但可能是一个出其不意的脱身手段)。 如果你真的很有胆量,当对手格挡了站姿轻脚、站姿中拳后,你完全可以接轻拳或中拳射击桃,尤其是在你已经让对手形成条件反射,以为格挡站姿中拳后可以惩罚你时。我只会对中级及以上水平的玩家使用这一招,尤其是当你的对手非常熟悉米卡的对局时。 轻量级临界艺术连招 能量 伤害 眩晕 连招 3335133 蹲轻拳或蹲轻脚,站姿轻拳取消 quarter-circle-back, quarter-circle-back + 拳(临界艺术) 3345133 站姿轻拳,站姿轻拳 xx quarter circle back(后半圆), quarter circle back + 拳(超必杀技)。如果能稳定打出这套连段,从轻拳或轻脚起手造成330以上伤害的压制力极强。虽然对新手来说有难度,但熟练掌握后会成为你极具威胁的武器。 伤害值 眩晕值 连段 336 316 0 站姿轻脚,站姿中拳 xx quarter circle back(后半圆), quarter circle back + 拳(超必杀技)。这是米卡的目标连段“Stomp Chop”的超必杀技转换连段。在蓄力站姿重脚飞踢或有效的站姿中拳、蹲姿中脚后,这是一套非常实用的连段。 完整连段 / 确反连段
Full / Punish Combos are when you get a major opportunity where you can really capitalize, either a whiffed uppercut or if you successfully blocked an attack with major recovery. I will typically omit jumping attacks as you can add these to most of the combos for more damage. Many of these combos will also involve standing medium punch into Passion Press to Passion Rope Throw (st. mp, f + mp, f or b + mp). Sometimes when the opponent is too far for the st. mp, feel free to omit it and just go straight for Passion Press to Passion Rope Throw. The entire Passion Press to Passion Rope Throw can be a finicky beast. The way it behaves heavily depends on how close you are to the corner. You will need to experiment with timings sometimes and you will not necessarily be able to use all the combos at any time. The combos below will assume you and your opponent are midscreen (the range that Training Mode starts you off in), unless stated otherwise, like "Corner or Near Corner Only". St. Mp Hp Combos MeterDamage StunCombo 0212355st. mp, st. hp xx qcf + hp (hp Shooting Peach) 1236395st. mp, st. hp xx qcf + pp (EX Shooting Peach) 3420235st. mp, st. hp xx qcb, qcb + p (Critical Art) Very standard punish string, from standing medium punch to standing hard punch. The Shooting Peach ender does a good job pushing towards the corner. Generally, these combos are inferior to the Passion Press combos listed below because they deal less damage and stun overall. These combos do have the advantage of working anywhere as well as the speed (time it takes to perform the whole combo). This can be helpful If the timer is running low and you need to quickly close the life gap between you and your opponent. Passion Press Combos MeterDamage StunCombo 0199295st. mp, f + mp, f + mp, back dash, charge st. hk, qcf + lp (whiff) (lp Shooting Peach) 0220330st. mp, f + mp, f + mp, back dash, qcf + lp (whiff), qcf + lk (lk Wingless Airplane) 1277415st. mp, f + mp, f + mp, back dash, charge st. hk, qcf + pp (EX Shooting Peach) 1295415st. mp, f + mp, f + mp, back dash, charge st. hk, qcf + kk (EX Wingless Airplane) The second combo is a great meterless punisher and is the heavily optimized version. Execution must be tight and there isn't much room for gaps. Basically perform it consecutively as quickly as you can. There's also an easier version to perform which is: st. mp, f + mp, f + mp, back dash, forward dash, qcf + k Instead of performing and whiffing a qcf + lp (lp Shooting Peach), just dash forward. The idea behind whiffing the lp Shooting Peach is to build a slight bit of meter before ending it in the Wingless Airplane. Regarding the back dash during this combo, you can technically walk backwards and the opponent will also hit the edge of the screen. The reason we back dash is to make the timing much more consistent rather than just walking backwards and judging it. Remember, all standard Wingless Airplanes deal the same damage when they land. The reason we use lk Wingless in this combo is because it's fastest to start up. A potential problem with this combo is that it does switch sides. If you don't want to switch sides, use the first combo which just uses the charge hk dropkick and gives you a nice knockdown situation. The whiff lp Shooting Peach is just to build meter and cannot be punished as you have enough time to recover. The whiff lp Shooting Peach can also be omitted if you want to play it safe. The third and fourth combo use meter to punish. The EX Shooting Peach pushes about 50-60% of an entire stage's length. The positioning can be quite valuable and worth the slight decrease in damage. Use EX Wingless Airplane for maximum damage. Charge Dropkick Combos MeterDamage StunCombo 0230398charge st. hk, st. lk, st. mp xx qcf + mp (mp Shooting Peach) 1258433charge st. hk, st. lk, st. mp xx qcf + pp (EX Shooting Peach) 3419293charge st. hk, st. lk, st. mp xx qcb, qcb + p (Critical Art) These are the standard punish combos after a successful charge st. hk dropkick. Nice damage on all of them. EX Shooting Peach ender is great for pushing to the corner while the Critical Art is great for finishing the opponent. Using the Stun bar (under the life bar) as a guide, approximate an extra 10-20% more on the Stun bar and you'll be in range to kill with the 3rd combo. Lady Mika Combos MeterDamage StunCombo 0207330f + hp, qcf + hk 1207330f + hp, qcf + pp 1234330f + hp, qcf + kk Landing a Lady Mika (f + hp) during normal play typically happens when using it as a meaty attack or as an anti air. Using a Normal or EX Wingless Airplane (qcf + hk or qcf + kk) is the most natural finisher. It's also possible to use EX Shooting Peach (qcf + pp) though it takes some timing as you need to use it at the correct level while the opponent is falling. Generally it seems more consistent if you perform the EX Shooting Peach when the opponent is quite low to the ground. Crush Counter Combos / Punish Combos Crush Counters are executed by basically getting a counter hit [en.wiktionary.org]while utilizing certain moves. In Mika's case, landing a f + hp, st. hk, or a charged st. hk as a counter hit will result in a Crush Counter. When crush countering an opponent, the opponent will usually be in a particularly vulnerable state (like spinning in the air or staggered on the ground) that gives you quite a bit of time to follow up on and deal more damage. To practice these combos in Training Mode, pause the game to open the Training menu. Go to 'Dummy Settings' then to 'Counter' and set it to 'On'. All moves you initially hit with will be considered a counter hit and will result in Crush Counters. Crush Counter Lady Mika Combos MeterDamage StunCombo 0198315f + hp, charge st. hk 1293475f + hp, forward dash, f + hp, qcf + pp 1302475f + hp, charge st. hk, qcf + pp 1317475f + hp, forward dash, f + hp, qcf + kk 1326475f + hp, charge st. hk, qcf + kk While these are the Crush Counter Lady Mika combos, remember that the normal Lady Mika combos listed above can still be used if you'd like. The first combo was the best meterless option without using any of the Wingless Airplanes. Using a charged dropkick (charge st. hk) isn't possible without the extra height that a Crush Counter Lady Mika provides. The second and third combo both utilize EX Shooting Peach (qcf + pp) to push to the corner. Less damage but it corner carries. The fourth and fifth combo use EX Wingless Airplane (qcf + kk) for more damage but positioning may not be optimal as it switches sides. Regarding the third and fifth combo, the timing for using charge st. hk right after the Crush Counter Lady Mika is quite strict, there isn't much room to delay and it's very possible to miss. If you prefer more reliability, use the second or fourth combo which use the forward dash to another Lady Mika (f + hp). Please note that damage for the second and fourth combo are less and actually come with their own caveats. One important thing to remember is to get into the habit of walking forward very, very slightly after the first forward dash but before hitting with the second Lady Mika (f + hp). This is to ensure the EX Shooting Peach doesn't miss as it's possible to be slightly out of range for the last hit. Make sure to perform any EX Wingless Airplane (qcf + kk) after a Lady Mika (f + hp) or charge st. hk as fast as possible. It's somewhat easy to miss if you're late. Crush Counter V-Trigger Lady Mika Combos MeterDamage StunCombo 0319475f + hp, forward dash, f + hp xx f + hp + hk, forward dash, (Nadeshiko Hits), charge st. hk 1384575f + hp, forward dash, f + hp xx f + hp + hk, forward dash, (Nadeshiko Hits), charge st. hk, qcf + pp 1399575f + hp, forward dash, f + hp xx f + hp + hk, forward dash, (Nadeshiko Hits), charge st. hk, qcf + kk These combos involve utilizing V-Trigger during a Crush Counter to maximize damage off a Lady Mika (f + hp). The first combo is meterless and leaves you close by. The second combo pushes to the corner and the third combo maximizes damage. In all three combos, the forward dash can be omitted but dashing forwards will push towards to corner so generally it's the optimal way to go. Crush Counter Dropkick Combos MeterDamage StunCombo 0162270st. hk, f + mk 1225360st. hk, qcf + pp 1273392st. hk, f + hp + hk, qcf + pp Landing a Crush Counter Dropkick usually involves a reading an opponent's low attack or sometimes just with luck. In most situations, the first two combos are the only consistent combos you can get following the spinning knockdown. Sometimes the f + mk can miss however especially if you hit with the very tip of st. hk. The third combo is the only viable V-Trigger follow up to a uncharged st. hk Crush Counter. Crush Counter Charge Dropkick CombosIf you're able to land a Crush Counter charge st. hk dropkick on a grounded opponent, they are knocked slightly back and spin around. There's quite a bit of time for you to work with and the most common thing to do after hitting is to dash forward. Right after dashing forward, you can execute any of the combos listed in the 'Full Combos / Punish Combos' or the 'V-Trigger Combos / Punish Combos' section of the guide for big damage. Generally, if you weren't expecting to get a Crush Counter off the charge st. hk, a safe way to get some damage is just to walk forward and press st. hp, then cancel into something (qcf + hp or qcf + pp or qcb, qcb + p etc) V-Trigger Combos / Punish Combos (1)
The following V-Trigger combos truly maximize the amount of damage Mika can deal off certain moves. These combos are great for getting yourself back into the game or dealing incredible amounts of damage for only one to two bars of meter with a V-Trigger activation. For all intents and purposes, these combos are still considered Full / Punish combos but significantly optimized for damage. St. Mp Hp V-Trigger Combos MeterDamage StunCombo 0298475st. mp, st. hp xx f + hp + hk, st. hp xx qcf + hp (hp Shooting Peach) 0313500st. mp, st. hp xx f + hp + hk, st. hp xx qcf + lk (lk Wingless Airplane) 1368590st. mp, st. hp xx f + hp + hk (hold), st. hp xx qcf + pp, (Nadeshiko Hits), qcf + lk 2380590st. mp, st. hp xx f + hp + hk (hold), st. hp xx qcf + pp, (Nadeshiko Hits), qcf + kk 3428400st. mp, st. hp xx hp + hk, st. hp, xx qcb, qcb + p The 1st and 2nd St. Mp Hp V-Trigger combos are what I've found to be maximum punishes without meter. The hp Shooting Peach pushes forward and the lk Wingless Airplane switches sides. The 3rd combo is the best I've found and that only uses 1 meter and doesn't need the corner. When Nadeshiko hits, the opponent will spin over you in a spinning state. Mika can then do a lk Wingless Airplane to deal damage and still keep the same direction she was when she started the combo. 4th combo is exactly the same except for using EX Wingless Airplane as the finisher. Only a marginal increase in damage and I'm not sure it's entirely worth it. Remember, the 3rd and 4th combo need to be performed as quickly as possible. Nadeshiko should be hitting your opponent pretty much exactly when you finish the last hit of EX Shooting Peach. Afterwards, it's important to get the Wingless Airplane timing down once your opponent spins over. If you are having problems with getting this to land, try using st. mp instead of st. hp, as this increases the consistency of this combo at the cost of a bit of damage. The last combo is maximum damage into a Critical Art without the corner. Damage/Stun jumps up to 486/500 with a jumping hp or hk attack. Passion Press V-Trigger Combos MeterDamage StunCombo 1348495st. mp, f + mp, f + mp, f + hp + hk (hold), back dash, charge st. hk, (Nadeshiko Hits), charge st. hk, qcf + pp 1360495st. mp, f + mp, f + mp, f + hp + hk (hold), back dash, charge st. hk, (Nadeshiko Hits), charge st. hk, qcf + kk These Passion Press combos involve using two charged st. hk dropkicks for a big boost in damage. Unfortunately, Passion Rope Throw isn't too cooperative with V-Trigger as it puts opponents in an airborne state, it's hard to keep juggling the opponent. Most of the stronger V-Trigger combos I've found involve keeping them grounded as long as possible before letting them get airborne. Definitely watch out for three specific moments in this combo, first, the V-Trigger (f + hp + hk) needs to be timed right after the f + mp. Then back dashing after this and doing the charge st. hk, then doing it against after Nadeshiko hits. All of these need to be performed together tightly, being slightly too late on any of them means you'll drop the combo. Corner V-Trigger Combos MeterDamage StunCombo 0331535st. mp, st. hp xx hp + hk, st. hp, (Nadeshiko Hits), st. mp, f + mp, f + mp, f + hp, cr. mp 1347520st. mp, st. hp xx b + hp + hk (hold), f + mp, f + mp, back dash, forward dash, (Nadeshiko Hits) charge st. hk, , qcf + pp 2385590st. mp, st. hp xx b + hp + hk (hold), qcf + pp, charge st. hk, (Nadeshiko Hits), qcf + pp 2397590st. mp, st. hp xx b + hp + hk (hold), qcf + pp, charge st. hk, (Nadeshiko Hits), qcf + kk 3480495st. mp, st. hp xx hp + hk, st. hp, (Nadeshiko Hits), st. hp xx qcb, qcb + p The fourth combo is typically the best you can do with 2 meters once you're near the corner. As long as the charge st. hk hits in the corner, the combo will work. This gives you a bit of leeway and as long as the last hit of EX Shooting Peach hits in the corner, this combo becomes viable. The last combo is the most damage I've found in the corner with V-Trigger with three reps of st. hp. With a heavy jump in attack, this combo is a staggering 536 damage 590 stun. V-Trigger Combos / Punish Combos (2) Cr. Hp V-Trigger Combos MeterDamage StunCombo 0250390cr. hp, f + hp + hk (hold), f + mp, f + mp, qcf + lp (whiff), charge st. hk 0250390cr. hp, f + hp + hk (hold), f + mp, f + mp, qcf + lp (whiff), qcf + hp 0268420cr. hp, f + hp + hk (hold), f + mp, f + mp, qcf + lp (whiff), qcf + hk 1315490cr. hp, f + hp + hk (hold), f + mp, f + mp, qcf + lp (whiff), qcf + pp 1360570cr. hp, f + hp + hk (hold), st. hp, qcf + pp, (Nadeshiko Hits), qcf + lk 2375570cr. hp, f + hp + hk (hold), st. hp, qcf + pp, (Nadeshiko Hits), qcf + kk 3430340cr. hp, hp + hk, st. hp, qcb, qcb + p Remember, all cr. hp combos assume you're hitting towards the end of the move, not right next to them. If you somehow land the cr. hp super deep (literally right next to them), you can add a st. mp in front of the f + mp for more damage. The first three combos are optimized and basically identical. They all whiff a lp Shooting Peach to gain a little bit of meter and have different finishers. The point of the charge st. hk finisher is so you are right next to the opponent. Finishing with hp Shooting Peach is to push to the corner (corner carry). Finally finishing with Wingless Airplane is for damage but Mika will switch sides. The fourth combo is for corner carrying and spends a meter for EX Shooting Peach. The fifth combo emphasizes damage and works very similarly to the 3rd combo in the V-Trigger combos section (Nadeshiko will hit the opponent over your head while you do a Wingless Airplane to finish). The sixth combo is maximizing the damage but is more expensive at 2 meters for only 15 more damage. Finally the last combo is a relatively easy way to land a Critical Art as you can see if you hit with the cr. hp or the V-Trigger before using it. Corner Cr. Hp V-Trigger Combos MeterDamage StunCombo 0300455cr. hp, hp + hk (hold), f + mp, f + mp, f + hp, (Nadeshiko Hits), nj. hp 0305455cr. hp, hp + hk (hold), f + mp, f + mp, f + hp, charge st. hk, (Nadeshiko Hits) 1357535cr. hp, hp + hk (hold), f + mp, f + mp, f + hp, charge st. hk, (Nadeshiko Hits), qcf + pp 1369545cr. hp, hp + hk (hold), f + mp, f + mp, f + hp, charge st. hk, (Nadeshiko Hits), qcf + kk 2394570cr. hp, b + hp + hk (hold), qcf + pp, (Nadeshiko Hits), charge st. hk, qcf + kk With these cr. hp combos, you have a lot of options available. The first combo is one variation I've found that also resets (Mika and the opponent will recover from the air, Mika lands first and can follow up with a command throw or a meaty attack). The second combo also resets and deals slightly more damage but is quite a bit harder to perform than the first, as the charge st. hk has a tendency to go past your opponent and miss entirely. The second combo is still worth learning however, as they build the base for the third and fourth combo. Third combo keeps the opponent in the corner with EX Shooting Peach while fourth finishes with EX Wingless Airplane which switches sides. Finally, if you're willing to maximize damage and spend two meters for it, the last combo is what you'd want to do. One of the best things about V-Trigger combos is the screen freeze during the V-Trigger as it gives you plenty of time to confirm if something hit or not. If your attempt was blocked you can still freestyle (command throw or continue attacking) and have Nadeshiko still be a threat. Pressuring / Understanding Offensive Options
To effectively pressure your opponents, you must understand the options available to you at any given time. In this section, we'll be primarily covering the wakeup/recovery situation and showing the decisions that you can potentially make. If at any point you don't understand certain terms described here, please refer to the 'Fundamental Knowledge and Resources' section of the guide. One of the most common situations for Mika is the decision that you make on your opponent's wakeup game or hitting someone out of the air into a recovery situation. Both situations are fairly similar in that you have the initiative and can act first while the opponent needs to make a guess. If you play the neutral game/footsies well, hopefully this can become a frequent opportunity for you to apply pressure and force your opponent to play a guessing game that's relatively in your favor. Below is a decision tree of how each situation typically plays out. We will be assuming that you've knocked your opponent down and are now right in front of them deciding on what move to make. We will also be assuming that attacks and throws will be performed meaty, which forces your opponent to wake up into your attack. Legend for Mika Big WinSmall WinNeutralSmall LoseBig Lose ++ +x--- The columns along the top indicate what moves your opponent makes assuming you did whatever move on the left (Meaty Attack, Meaty Throw, Block). Please note that the breakdown is not 100% accurate due to different character options, but is still relevant to the cast overall. Option Opponent Normal Atk Opponent Reversal Opponent Throw Opponent Jump Opponent Back Dash Opponent Block Mika Meaty Attack++--+++++++ Mika Meaty Throw++--xxx++ Mika Meaty Cmd Throw++--++----++ Mika Block-++-+-x Mika Meaty AttackLooking from left to right on the row 'Mika Meaty Attack', it's pretty obvious that doing a meaty attack (usually st. mp or f + hp) on an opponent is incredibly advantageous due to all the ++ and +. The only thing that could possibly beat you is a fast, invincible reversal move like Ryu's Shoryuken (Dragon Punch). Anything else they do, you'll basically catch them and are guaranteed a follow up. Only blocking is a safe universal response that all characters can do but still leaves you in a situation where you have the momentum and can potentially continue the pressure. Mika Meaty ThrowThe second option Mika can perform is to do a meaty normal throw (lp + lk) on the opponent's wakeup. This is the soft counter to someone who blocks too much and is a relatively safe option that ends up in quite a few neutral situations at worst. Opponents could tech your throw leaving both players at neutral or they can back dash, resetting the situation. If the opponent neutral jumps or forward jumps however, there's an opportunity to anti-air them (I recommend cr. mk). Even if they jump back, if you're really on the ball, you can catch them with an EX Wingless Airplane (difficult to react to, qcf + kk) or EX Shooting Peach (qcf + pp). EX Shooting Peach seems to be quite a bit easier to do but sometimes it misses the last hit depending on the height you hit at. Mika Meaty Command ThrowThen we have the heavy committal option, going for a meaty command throw (hcb + p/k). This is arguably the highest risk thing we can do and it blows up one of the safest option an opponent has, blocking. Unfortunately, now we start to see some real potential drawbacks. Jumping and back dashing now become hard counters and you're basically guaranteed to get punished as Mika's recovery for a missed command throw is almost one whole second (quite a long time in fighting game terms). The invincible reversal also still reigns supreme against the command throw option as well. Potentially, you'll be "gambling" with anywhere from 10-25% of your life depending on how your opponent guesses. It's possible to have the tables turned on you if you miss. That said, landing the command throw is awesome, generates momentum, deals damage/stun, and really forces your opponent to second guess themselves. Creating uncertainty in your foe is only in your favor and can create new opportunities for Mika as the opponent starts changing their behavior. Hopefully, your opponent starts making more unsafe decisions as they try to escape getting command thrown again. Mika BlockFinally, there's the lowly "Block" option. This is basically exercising patience and hopefully letting your opponent make a big mistake by letting them do their invincible reversal only to have you block it. This is also sometimes known as "doing nothing", even though you're really just suddenly playing passively/defensively and waiting for your opponent's response. Generally, blocking is the only hard counter to the an opponent's invincible reversal and if you manage to defend against it, during the opponent's recovery you can capitalize very hard, especially if you have V-Trigger and/or lots of meter to work with. By just blocking or waiting during an opponent's wakeup you're trading offensive pressure for safety and the chance to really punish. It's very safe for you to just stand back in almost all your opponent's wakeup situations and you're generally in control of the situation. You will also be able to deal with forward and neutral jumps by performing an anti air like cr. mk as well as the possibility of reacting to various options the opponent has. Understanding your Opponent (Offense)
Now that we've gone over all the pressuring options and the pros and cons, you can make a much more informed offensive decision and really start playing mind games with your opponent. Something very important to remember is to keep track of what your opponent did in certain situations. Imagine Mika vs Ryu. Perhaps you hit Ryu out of the air while he was jumping in and while Ryu was coming down, you went for a meaty st. mp, but he did a Shoryuken (his invincible reversal). You got hit this time, so remember that. Next time this situation occurs again, it's a good time to reevaluate the decision you initially made. Let's say Mika decides to block and sure enough Ryu goes for the Shoryuken again, but this time he doesn't connect. Now Mika can punish hard because you had V-Trigger and spent some meter (check out V-Trigger Combos / Punish Combos section). Assuming the Ryu player is a thinking person and is adaptable, you've punished them for this mistake and hopefully they will respect you more and NOT Shoryuken when this occurs again in the future. Now if this situation happens again, there's now a prime opportunity to go for a command throw because if the Ryu respects the fact you might block the Shoryuken and ends up just trying to block a meaty attack, instead you've gone and thrown them now. If you look at it simply, it's just a constant game of rock-paper-scissors. This is what mind games are and why it's important to get information from your opponent by keeping track of what they like to do in different circumstances. There are different types of players, good ones will try to adapt and change up their decisions, bad ones will typically follow the same patterns and do the same thing over and over again. That said, just remember, in rock-paper-scissors it's not impossible for someone to throw scissors three times in a row, it's just usually unlikely. Just like you could Brimstone (hcb + k command throw) your opponent over and over, it's possible the opponent won't expect such boldness but don't expect to win like this against all opponents. Other things can factor in such as how much meter they have or how much life left they have as well as their temperament/play style (are they super aggressive or very defensive? Use this against them). Ultimately there generally isn't a 100% "best" answer and you're just going to have to guess. Just do your best and go with your gut and the historical data you have. As you get more experience, you'll be a better judge in making decisions in these crucial moments. Patience / Understanding Defense Options Legend for Mika Big WinSmall WinNeutralSmall LoseBig Lose ++ +x--- This time, unlike the 'Pressuring' section above, the columns along the top indicate what moves your opponent makes against you during your recovery/wakeup. The options on the left show what you try to do during the recovery situation. Please note that the breakdown may not be 100% accurate due to different character options, but is still relevant overall. OptionOpponent Meaty AttackOpponent Meaty ThrowOpponent Meaty Cmd ThrowOpponent Block Mika Normal Atk------+ Mika Reversal-------- Mika Throw--x--+ Mika Jump--x or -++- Mika Back Dash--x++x Mika Block-----x Opponent Meaty AttackLook at the 'Opponent Meaty Attack' column and look downwards at all the options that Mika can do against a meaty attack. See how strong of an option it is for an opponent to meaty attack Mika's recovery? In literally all cases shows up as a - or --, meaning from Mika's perspective, doing almost anything leaves you in a disadvantageous situation. You'll have to exercise patience and be forced to guess correctly. This is not always easy to do and it's good to understand that this is probably Mika's greatest weakness; being put in defensive situations. As listed in the 'Special and EX Moves' section of the guide, EX Shooting Peach and EX Wingless Airplane both lose completely to a well-timed meaty attack, essentially making them not viable options at all. The only time to do them is if you're gambling that the opponent will mistime their meaty attack which will sometimes work but if someone has the meaty timing down, you need to be very careful. It's still a viable option to test your opponent and maybe try escaping with a EX Wingless every now and again but against strong opponents this becomes a potentially dangerous gamble. That said, you can probably get away with this "tactic" at intermediate and lower level play but don't get reliant on it, as it's not a solid strategy. When you play someone truly good, they won't let you get away with doing that. The only real way to beat a meaty attack with Mika is by burning all your meter and going for the Critical Art. This has enough invincibility frames to overpower an attempted attack but if the opponent does nothing and suddenly sees Mika start the Critical Art, they can just jump straight up and get a big punish. Opponent Meaty ThrowMeaty throwing Mika is a pretty solid option for your opponent as well and many options come out in their favor. Generally, you can only break even by breaking the throw (Mika Throw) or back dashing out to avoid the throw entirely. Back dashing is somewhat of a hard read though as you're guessing with confidence that your opponent is definitely going for a throw. Don't rely on back dashing too much as many attacks can catch you and you could get crush countered. Jumping out can work to let you escape, but it's probably safest to jump backwards. Jumping straight up or even forwards gives the opponent an opportunity to anti air you for free and puts you in a recovery situation (where they have advantage again). This is why the result is 'x or -', as you could escape and neutralize the situation, or get hit out of the air and put yourself in another situation. Once again, this isn't a good defensive situation for Mika but much like with the caveat with the Meaty Attack section, a mistimed Meaty Throw gives you an opportunity to use your 3-frame startup cr. lp (among the fastest normal attacks in the game). Assuming they mistime a throw, you could convert the cr. lp into a combo. Just remember that you can't get away with doing cr. lp all the time but it is an option if you don't think the opponent can perfectly time the throw. Opponent Meaty Command ThrowMeaty command throwing Mika is very similar to the Meaty throw situation except the opponent is "all-inning" and really gambling on their command throw to connect. In this situation, guessing right and neutral jumping straight up or back dashing become incredibly advantageous for you as it gives you a big opportunity to punish. Depending on the amount of meter and V-Trigger you have, you can at least deal maybe 300-400 damage pretty easily. There's also the option to try to throw out a cr. lp if you think they will mistime the command throw as you'll beat that out. Asides from that, assuming they time the Meaty Command Throw correctly and you guess wrong, you're going to be taking that damage. Try your best to get back to the neutral game! Opponent BlockGenerally an opponent doesn't really have a good reason to respect Mika's wakeup as she doesn't have anything truly invincible asides from her Critical Art. In the event your opponent plays passively and lets you get up for free, you should count yourself lucky. The only time I realistically see this happening is if you really like to abuse EX Shooting Peach on wakeup and they expect you to do it again. By blocking that, you're hanging yourself and it would be a good read from your opponent. Frame Traps / Meaty Attacks / Baiting Frame Traps and Meaties are a big part of what to do once you "get in" and it's important to understand what your tools look like. If at any point you don't understand certain terms described here, please refer to the 'Fundamental Knowledge and Resources' section of the guide. Whiff Punishing BuffersWhiff Punishing is important in neutral as you jockey for positioning and throw pokes out, it's good to buffer (prepare follow-up attacks in case they hit). Common attacks to buffer: st. mp to mp Shooting Peach (qcf + mp) st. hp to hp Shooting Peach (qcf + hp) St. mp and st. hp are common moves to throw out during footsies, especially st. mp. By buffering a Shooting Peach, if the st. mp catches and opponent's limb, you'll immediately go into the Shooting Peach move, hopefully for a follow up. st. hk to EX Shooting Peach (qcf + pp) Make sure to mentally prepare an EX Shooting Peach if you plan on using st. hk because if you see a Crush Counter, you can combo off and push to the opponent to the corner quite easily. St. hk can also be used to counter low attacks as well as throws if you time it well enough! Using Meaty Attacks on your opponent's wake up is a very standard way of applying pressure to your opponent and forcing them into a situation you initiate. Typically as an opponent gets up, the following are good to use on their wake up: Meaty Attacksst. lp - This move is at least +2 on block and allows for tick throwing opportunities. Strong options afterwards include attempting a throw, command throw or if you get a counter hit, stick out a st. lp into lp Shooting Peach or a Stomp Chop (st. lk, st. mp). st. mp or cr. mk or st. mk / f + mk - These moves are primarily fishing for counter hits, when you expect your opponent to do something other than block or invincible reversal. During counterhits, hit stun is increased and provides a lot of flexibility for comboing after visually confirming. Good followups include Stomp Chop (st. lk, st. mp) or Passion Press (f + mp) if it can combo. Getting any follow ups off a meaty can convert into EX Shooting Peach or even Critical Art quite easily. Lady Mika (f + hp) - This move provides the most amount of plus frames and gives you even more flexibility on follow ups if you expect them to block. You do need to be on the ball in case you do hit normally or via Crush Counter and get ready to combo them, most likely with a Wingless Airplane (qcf + k). Frame Trapsst. lp, st. mp, f + mp - This is a standard frame trap and you're generally shooting for an opponent to do something after the st. lp as the st. mp will pretty much catch anything they do. The Passion Press (f + mp) is to follow up if you do hit. st. lp, cr. lk, st. lp, EX Shooting Peach (qcf + pp) - There's 2 gaps here, between the st. lp and cr. lk and the cr. lk to st. lp. Both have chances to catch an opponent pressing buttons but you can only follow up with an EX Shooting Peach as they're quite far away after this string. cr. lk, st. lp, lp sp/ex charge st hk, cr. lp/st. lp/st. lk, st. mp charge st hk, st. mp, st hp, hp sp/ex/ca Baiting / Feintingst. mp -> CA Safer st. mp, V-Trigger, CA Safer st. mk -> CA st. mk, V-Trigger, CA light tick to ex sp cr. mp throw cr. hp throw Setup SituationsBrimstone, dash st. lk is meaty and can go into st. mp into sp or ex sp After EX SP in the corner, cr lp cr. lp, pp is meaty After PP -> charge st hk, cr mp sequence, cr. lp, pp is meaty, you can also lady mika for meaty situation Situational Baits cr hp whiff into cr lp -> bnb Most important setups Post Command Throw Setups EX SP in corner Post SP Setups PP Corner Setups Tick Throw Utilization and Throw Loops Mika's arsenal of command throws can be very intimidating to the opponent if you're near them but it's even more important to understand the approximate ranges of throws at your disposal. The command throw range order is from longest to shortest range: Command Throw EX Rainbow Typhoon lp Rainbow Typhoon mp Rainbow Typhoon hp Rainbow Typhoon EX Brimstone lk Brimstone mk Brimstone hk Brimstone Overall EX Rainbow Typhoon has great range and has lots of potential to be thrown in after blocked attacks. However, remember the Rainbow Typhoons throws your opponent quite far backwards and could ruin positioning. It'd be a bad idea to let a teleporting Nash out of the corner when it was so difficult to get him there in the first place. Peach Assault (Critical Art) is technically the longest range command throw you have but does not work in tick-throw scenarios as the startup of the Critical Art is very obvious and people can hold up to dodge it. While command throws can be used straight up when you're in range, a common usage is to do a tick-throw. This means you get your opponent to block an attack (typically a fast move that doesn't push them too far away), then immediately go into a command throw as they are ready to block another attack. The following is a list of common tick-to-command-throw scenarios. These scenarios all assume you get your opponent to block the initial attack at point blank range/right next to them (usually when the opponent is getting up or recovering from the air), then follow up with a command throw. st. mp -> EX Brimstone up st. lp -> All command throws cr. lp -> All command throws cr. lk -> All command throws cr. mk -> All command throws st. lk -> All command throws cr lk, cr. lp -> lp Rainbow Typhoon charge st. hk -> Depends on range and where the opponent blocks st. lp allows true meaty command throw, everything else can technically be potentially be interrupted by a very fast 3-frame startup normal unless done meaty (to get more frame advantage). Definitely experiment with this in Training mode to perform your setups with a Recordable Dummy. Then, switch to the other side and try to escape from them with attacks or reversals. This will give you a good understanding of how far you can go offense-wise. Explain 5 frame startup and consequences of not Brimstone looping Example tick throws lp lp charge st. hk Regular throws are still useful, especially jumpy opponents. Practice wakeup option randomization. Important while throws are awesome to land, opponents are prone to panicking, adapt as necessary Throw loops against quick rise after throw in the corner Brimstone, forward dash, throw Crouching throw, walk forward, throw Throw loops if your opponent does NOT quick rise after a throw Brimstone, forward dash, throw whiff, cr. mk, throw Throw mixup from a sweep crush counter Forward dash, Forward dash, Forward dash, st. lp (whiff), throw https://docs.google.com/document/d/1xfSUuGMihN36FWE84OfMIMlyMilK-60Bw-E-1S0k0w0/pub Passion Rope Throw Reset Fundamentals f mp, f mp, f hp, cr. mp reset command throw st. mp meaty -> Follow ups f hp meaty -> Follow ups Vtrigger shenanigans Touch Of Death Sequences Shooting for 1000 Stun Try to end on a command throw if possible for less scaling. Explaining 2-3 mistake concept. Knowing Matchup stun. Cammy has low stun for example. Setup Example jf. hp, st. mp, f + mp, f + mp, back dash, jf. hp (Reset) (Near the corner) jf. lk (cross up), st. mp, b + mp, b + mp, f + hp, cr. mp (Reset) EX Brimstone (Dizzy) jf. hp , st. mp, f + mp, f + mp, f + hp, Wingless Airplane Corner - Over 1000 life jf. hp, st. mp, f + mp, f + mp, f + hp, cr. mp (Reset) xx V-Trigger, forward dash st. mp, b + mp, b + mp, st. hp (Reset) Ex Rainbow Typhoon (Dizzy), forward dash, forward dash jf. hp , st. mp, f + mp, f + mp, back dash, charge st. hk, EX Wingless Dizzy Corner - Over 1000 stun jf. hp, st. mp, f + mp, f + mp, jb. lk (Reset) st. mp (Meaty), st. lk, st. mp, qcf + mp (Knockdown) (Opponent Normal Recovery) jf. lk (Crossup), cr. lk, cr. lp, qcf + lp (Dizzy) Unblockable Setups https://www.evernote.com/shard/s306/sh/eaa667f8-464f-4b0e-94aa-3ed75c613f10/f73c8cc5cf42136a6e843d457606ba7a V-Trigger Utilization and Tactics Screen Freeze Canceling common used normal to cancel Defensive uses Anti air creating temporary distraction Offensive use Pitfalls Vreversal Useful Technology ***UNDER CONSTRUCTION*** throw extending Option select back dash catching Passion Press Option Select Strategies and Direction Tactics and Responses Dealing with Projectiles (Fireballs etc) Dealing with Frame Traps (Attack Pressure from Opponents) Dealing with Throws / Command Throws Dealing with Jump-Ins / Cross-Ups Dealing with V-Reversals Dealing with Throw Baits (Shimmy/Shimmies) Dealing with Predictable Dealing with Low Attacks st. hk Dealing with Overhead Attacks Dealing with Baits Playstyles and Approach Covering different playstyles and approaches Neutral Game Approach Hyper aggressive

Reset Focused Damage Focused Effective Practicing ***UNDER CONSTRUCTION*** Hit confirming (emphasis) execution Practice Meaty Attacks Timing Meaty Throw Timing Meaty Command Throw Timing Setup Execution Combo Execution Situation Practice (Whiff throw in corner), random recovery action Defensive practice against CPU setups anti airing footsies Mika Matchups The matchup sections will be updated as I do more research/gain experience with these matchups. Under Construction! Vs. Alex Raw Shooting Peaches (qcf + p) can be used to get in during footsies. Vs. Balrog (Boxer) Vs. Birdie Shooting peach over bananas and can (Birdie V-Skill) during footsies EX SP through bananas and can Shooting peach to puruse after blocked chain st. lp to fmp frame trap? st. mp to st. lp Vs. Cammy st. mk / f + mk beats normal divekicks clean if she lands on the leg you're kicking with. Cammy has good walkspeed but can get too confident moving forwards. Use f + mp to keep her honest and try to convert into f + mp again on hit if she likes to walk up in your face. Beating EX Cannon Strike: Cr. mp (Getting the correct angle is difficult though) EX Wingless Airplane (more reliable but expensive over time) Neutral jumping is a decent tactic to bait out her forward moving offense (Cammy V-Skill, Spiral Arrow). Don't get too abusive as they can Cannon Spike if you get too predictable. Vs. Chun-Li Be careful of range on Kikoken, some chun lis will dash up after kikoken and light kick to catch neutral jumps. Vs. Dhalsim Cr. hp saves the day for getting in and trading in your favor with a heavy attack button. Remember, cr. hp's hitbox grows the longer the move is out so if you can time it correctly with Dhalsim's button pushes, you can cleanly beat out limbs. It's worth seeing how limbs interact in training mode. Watch the patterns, use hk Wingless Airplane to punish dhalsims that get too auto-pilot with the float. Even just throw it out there can be good if the Dhalsim isn't going to punish. You must master meaties. Personally, my timings were off and Dhalsim slipped out of favorable positions for Mika too many times. Do not let Dhalsim escape, it's much easier to clobber him in the corner and keep him when you want. Make sure to put as much pressure as possible if you can manage to get close and start your offense. It may be your only shot. J. hp blows up slide if you can manage to land on him. Need to be strong defensively, lots of left/right teleport mixups with the fireballs. V-Reversal any of Dhalsim's block to V-Trigger. This is typically a "free" setup for him but by V-Reversaling, you nullify most of the effect and can get out. Try to always have 1 bar of V-Gauge ready for this situation. if you see Dhalsim's teleport, st lp or st hp (if you can time it), typically follow up with meaty when Dhalsim lands as most like to jump or teleport out. If you can condition dhalsim to start blocking when he lands from this, start command throws. Alternatively if you can react to it, you can also use Lady Mika (f + hp) and combo into EX Shooting Peach or EX Wingless Airplane. Dhalsim slide in some ways sort of beats st. mk/f + mk because of how many active frames it has. even anticipating a slide, st. mk only beats lows for X frames, when Dhalsim has more active frames than that (X). I've been caught a few times from this so just be aware. Punish missed jump back air attacks with Wingless. Need to test after being hit, using Wingless. Lots of Dhalsims like to use this as a finishing move, be aware of this and get ready to block high if you're low on health. Landing an EX Wingless and a good read on Dhalsim's wakeup could win you the round. Another tactic is when you're knocked down, back recover then forward dash into offense. This can catch Dhalsims off guard but don't abuse it too much. Vs. F.A.N.G Vs. Guile Vs. Ibuki Vs. Juri Vs. Karin Guren Ken (Karin's Rekka) First, remember this: if you block a rekka just mash low jab. It will punish the rekka if she doesn't do any followup, beat the elbow (down+P) and the throw (up+K) will whiff and land behind you. Karin can only backdash (K followup) to make herself safe, or use the palm (P) or slide (down+K) to beat the jab. If she has a full gauge, she can do palm xx super as an elegant strategy to beat the jab, so you might want to focus on blocking if she has the meter. Mika's option after blocking rekka cr. lp EX Shooting Peach (whiffs if up + K) Countering Moves Karin's cr. hk: EX Shooting Peach cr. lp xx EX Shooting Peach (depends on range) f + mp, f + mp (depends on range) Karin's st. hk: st. lp xx EX Shooting Peach (depends on range) Karin's cr. mk: st. lk, st. mp xx mp Shooting Peach (depends on range) Karin's f + mk (overhead): st. lp xx lp Shooting Peach Karin's lk Mujinkyaku: Blocked 1st hit: f + mp Blocked both hits: st. mp xx mp Shooting Peach Karin's Orochi (shoulder check): Blocked: Go for tick throw situation You can also go for a neutral jump especially if Karin has no meter. Karin's hp Ressenha (overhead palm): Blocked: Go for tick throw situation You can also go for a neutral jump especially if Karin has no meter. st. lp xx lp Shooting Peach? cr. mk to catch Karin's cr. mp. You can buffer a forward V-Trigger after the cr. mk in case you do catch it, then go into EX Shooting Peach into Wingless Airplane Vs. Ken Vs. Laura Cr. hk is easy to land against Laura's projectile. I've seen people charge this up from mid-screen and it's basically getting free knockdown. Even if she releases the projectile when you're getting close, the slide will go under regardless and hit Laura's recovery. Vs. M. Bison (Dictator) cr. mk devils reverse Vs. Nash Stand at the range where Mika can Slide under or range where jf.hk hits. Be heavily offensive. Keep walking/dashing forward. His buttons aren’t very good. That said, be wary of Nash's dash, it's deceptively fast and it's good to throw out some fast buttons during footsies especially if Nash has no meter. Once Nash has 3 bars and CA ready to go, he becomes a lot more dangerous and must exercise more caution during neutral. He has no wake-up options other than V-Reversal. He's free to Mika's mixups after a knockdown. Be relentless here as this is one of the only opportunities you'll get to play Mika's game. Most important thing is keep track of his V-Gauge. If it's full and has (or close to) full meter, it's a safe bet they will try to teleport behind you and do combo into CA. Anticipate the teleport and punish it with a neutral jump j.hk, combo. Or just jf or jb if you’re not sure where he teleports to. Notable Nash moves: m.Scythe-8 Moonsault slashes are all + on block. It's a good opportunity to V-Reversal here and not Nash gain plus frames on Mika. Nash's cr. hp is +3 on block, must be careful of the situation afterwards as you may get frame trapped. Nash's f + lk (Knee Bazooka) is -5 on block, -1 on hit Nash's f + mk (Jumping Sobat) is -3 on block, +2 on hit Nash's f + mp (Chopping Assault) is -6 on block, +1 on hit Nash's f + hk (Step Kick) is -2 on block, +2 on hit Vs. Necalli Vs. R. Mika Cr. mk can be used to defensively to cleanly beat the other Mika's charge st. hk. EX Shooting Peach can also be used on reaction if you're close enough. Liberal use of V-Reversal to get out of "Blender"/Heavy Mixup situation. This can be baited/defeated by a lp or lk into a throw/command throw however. Vs. Rashid beware neutral jumps on rashid when he has full meter (Rashid CA) Must master the lp to lp sp to stop mixer strings Dealing with Dash Eagle Spike After blocking, forward dash, st. lp xx EX Shooting Peach Hard to deal with this move as Mika https://docs.google.com/document/d/1xWW888u3SuV0oI8xWLqKg5CyDY--cbJZcrO7NSBTpd0/pub Whirlwind Shot The first thing to keep in mind is that there is no reason to block HK Whirlwind Shot. The best answer is to interrupt it. Rashid will most likely Whirlwind Shot from st.MP, f.MP (1), st.HP or cr.HP (1). st.MP or f.MP (1) xx HK/EX Whirlwind Shot has at least a 5f gap so you can jump or even interrupt it. [That sounds off, f.MP xx EX Whirlwind seems like it has a 3f gap so you can't jump, needs further testing]. cr.HP / st.HP xx EX Whirlwind is more dangerous. It's not a true blockstring but you can not jump and can not interrupt it without an invincible move. To sum it up: st.MP / f.MP xx HK Whirlwind : Can jump or interrupt easily. Don't block it. st.MP / f.MP xx EX Whirlwind : 5f gap so you can jump on reaction [Again, need further testing on f.MP] cr.HP xx HK Whirlwind : Press a button on the timing where you would have blocked an EX cr.HP xx EX Whirlwind : 4f gap so it's hard to interrupt. If you try to jump out you'll get hit airborne, the correct answer is to block. st.HP xx HK Whirlwind : Can interrupt st.HP xx EX Whirlwind : Has the smallest gap at 3f. You jump you die. If you see the flash, block and maybe V-Reversal. So there's 2 things to keep in mind After blocking st.MP or f.MP, if you see a HK Whirlwind press a sweep or another button, and if it's an EX jump out. After blocking cr.HP or st.HP, press a button on the timing where you would have blocked the EX Whirlwind. https://docs.google.com/document/d/1h6Elvj9ZLyga3IUvCcFRuxKNlQQmmHBbpj9goyT63kY/edit?pref=2&pli=1 attack constantly bait out his 1-meter invi reversal RashidOBACTIVEMika d.mp+mk > k-54Max: EX.Peach Far: mp xx m.Peach qcb+k-20~walk fw > Clap EX.qcb+k-9~Clap mp+mk > k-24?~walk fw > Clap dj > qcb+k~~walk fw > Clap f.dash > f+k~~walk fw > Clap qcf+lp (3 hits)Unpunishable qcf+lp (5 hits)mp > Clap qcf+lp (7 hits)Clap Vs. Ryu Ryu CA breaks guard, if they set you up in the corner, you'll be eating a lot of damage guaranteed. If not, it's still safe (example: shoryuken, cancel to CA). Be very careful when Ryu has full meter. Ryu VTrigger fully charged normal hadoken also breaks guard. Many Ryus follow up with the Solar Plexus Punch (f + hp) for big damage. Block a lot. His strings are tight. Use charge.hk if you think he doesn’t kow how to deal with it Get in by: walk > block dash in > lp > mp dash in > mp / c.mk dash in > c.lk > mk dash in > c.lk > slight walk > c.lk dash in > C.Throw whiffing c.hp to bait meaty c.hp whiffing Dive Bomb to bait DP dj.hp dj.hk dj.lk (crossup) Meaty Peach EX.Peach through FBs Notable Ryu movesstartOHOB lp342 mp561 lk4-1-2 c.mp542 j.lk4crossup PunishesRyuMikaDifficulty Blockedc.hk (-11)(max) EX.Peach (closer) ClapMedium Blockedf.mp (-4)(max) CA (closer) lp xx EX.PeachHard BlockedNormal Tatsu (-10)mp > Clap …Medium Intercepted mid-wayNormal Tatsul/EX.PlaneEasy BlockedEX.Tatsu (-19)ClapHard Fireball(close) EX.PeachEasy Vs. Urien Vs. Vega (Claw) Beating EX Barcelona cr. mp cr. hk to make EX Barcelona whiff, then follow up with st. mp, f/b + mp, f/b + mp You can also try jumping with hk to catch him out of the air (very dependent on where he is) Vs. Zangief f + mp his v-skill and charge st. hp. Depending on how much they like to spam stand ch. hk is good when you can land, force a 50/50, either lp Rainbow Typhoon or EX, or st. lk, st. mp Keep distance, his normals are further than yours. Zangief putting pressure on Mika while she's waking up is very bad news (bad reversals) do your best guessing, this is make or break. Keep Zangief on his toes, dash in and command throw once in a while. Certain tactics like this can put mentally weaker opponents on tilt. Some try to "get you back" for doing that by trying their own forward dash to SPD. Try to understand your opponents state of mind. Matchup is very temperamental, are they a defensive zangief or offensive. current exp is with offensive zangief, I could play against him ranged (stand around where f + mk barely hits, harass with it) You must watch for patterns, what buttons until SPD? cr. lp, cr. lp SPD? remember it. Next time you get hit, jump up. lots of free easy damage this way. What setups did they like to use? I played a Zangief that like to use cr. mp as anti air, and when I landed went for the SPD 2 times. 3rd time, I jumped into full critical art punish combo. Videos and Resources CFN: ebiumino1 – Ebi (JP) hameko – Hameko (JP) hashibiron – Fuudo (JP) shimolen – Shimolen (JP) 200won – 200won (KR) BIGDANMUL – BIGDANMUL (KR) MarnHQ[www.twitch.tv] – Marn (VN) BS_Dang – Dang (US) ElChakotay – El Chakotay (US) Kelvinshouse – Kelvin Jeon (US) Pavocado – Pavocado (US) RainbowImpact – Native Impact (US) Mignon_Luffy – Luffy (FR) GentlemanThief – Gentleman Thief (US) OmGiTzRMika[www.twitch.tv] – OmgitzAndre (US) RainbowImpact [www.twitch.tv] – Native Impact (US) OlafRedland[www.twitch.tv] – OlafRedland (US) https://dafeetlee.wordpress.com/cfn-strong-player-list/ Recommended Tools / Apps FAT V-Frames http://watissf.dantarion.com/sf5/boxdox/ http://www.sirlin.net/ptw http://sonichurricane.com/?page_id=1702 https://en.wiktionary.org/wiki/Appendix:Glossary_of_fighting_games https://www.reddit.com/r/streetFighter/ http://forums.shoryuken.com/categories/r-mika-sfv https://discord.gg/0pfEeEnmg0ere9lk https://dafeetlee.wordpress.com/cfn-strong-player-list/ http://forums.shoryuken.com/categories/domination-101 http://wiki.shoryuken.com/Street_Fighter_V TL;DR Concise Guide Shoutouts and Credits Thanks everyone for reading, feel free to contact me if you have any questions or want to provide feedback for this guide. Unfortunately, I've gone home and become a family man now, so while I am busy, I'll definitely get back to you as soon as I can. Suggestions are always appreciated as the game matures things will need to be updated/changed. I also plan to continually update this guide as a personal reference especially for the matchup sections.
贡献者: Aria - 对局笔记,非常感谢你提供的宝贵对局知识! 特别鸣谢: ChesterCharm - 第一位主要的《街头霸王》训练伙伴,谢谢你,我的朋友。 长滩《街头霸王5》本地玩家们 - Theo、Darien、Z、Abe、Evan、Porkchop以及其他所有人,感谢大家的参与和切磋。 Capcom - 感谢带来这么棒的游戏,虽然开局有些波折,但游戏本身依然很出色。很喜欢对基本功的重视。 Shoryuken论坛 - 最初的交流平台,这里有大量知识,谢谢大家。 Mika Discord聊天群 OlafRedland - 教了我很多关于彩虹美华的知识,让我明白哪些有效、哪些无效。 NativeImpact - 很棒的频道,顶尖的彩虹美华玩家,人也很好。Vonsock——在《终极街霸4》里把我虐惨了,还很爽快地加了我好友(使用角色:阿贝尔、邪恶隆) Gorillacat——在《街霸5》里把我打爆了,我想再来几局!(使用角色:隆、春丽) BacoVEVO——超棒的嘉米玩家,人也很酷 VersacePython——谢谢你分享你的格斗游戏社区故事,希望有一天能和你在低延迟环境下对战! 施工中! 视频链接至作者 图片来源 其他贡献者 更新日志 版本0.9(2016-09-01) 在对战心得部分添加了Aria的 matchup 笔记。 版本0.9(2016-07-30) 连招部分已完成,完成了米卡的进攻和防守选项部分。考虑删除某些部分以避免内容过于臃肿。如果有人对此有任何反馈,请告诉我。需要完成Frame Traps/Setups部分。不确定应该详细到什么程度,因为有很多内容要涵盖,还有很多不同的设置。版本0.9(2016-04-09) 【连招系统】已基本完成,仅需完善V触发状态下的米卡连招。同时正在完成压制与防御选项部分,全面梳理并深入理解米卡可用的各项选项将很有帮助。接下来将重点关注重置/特殊技巧,并巩固相关知识。目标是完成除角色对战之外的所有内容,以此作为1.0版本发布。 版本0.85(2016-03-25) 仍在完善内容。需要完成所有惩罚连招的V触发化并实现最大伤害(需进行更多测试和数据记录)。持续扩充对战部分内容,并对连招之前的所有章节进行整理和说明优化。 版本0.8(2016-03-14) 初始测试版发布 - 完成本指南所花费的时间远超预期。我本想上周发布这份指南,但随着深入撰写,在测试所有内容并确保表述清晰的过程中,我对现有内容的详尽程度和质量并不满意。虽然仍有更多测试工作要做,但考虑到【3月更新】即将到来,我认为有必要让大家先看到这份指南。我郑重承诺,会将其完善到“1.0正式版”水准,并持续更新。 PP后使用蹲轻脚,蹲重拳重置 蹲重拳,VT状态下蹲轻脚,跳跃取消腹部攻击