换一换
换一换 


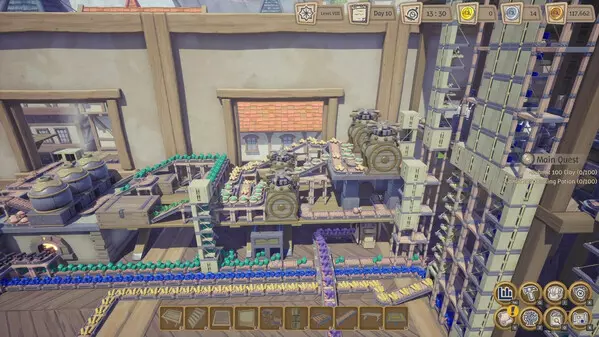
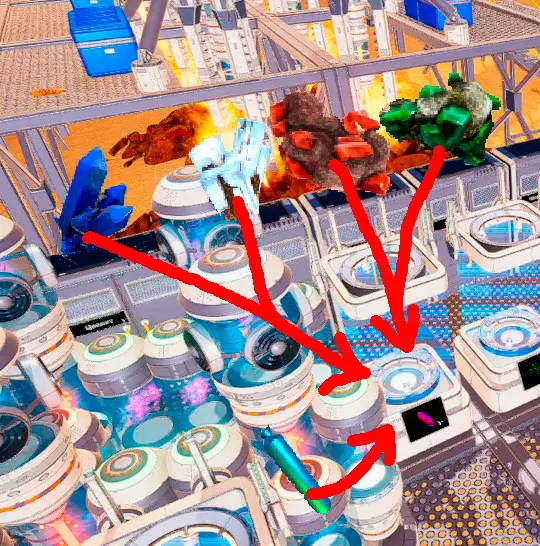
If, after buying the game, you find yourself asking questions like: What should I do? How can I reduce the amount of running back and forth to the store? How do I grow this flax automatically? Then check out this guide, written after 20 hours of gameplay :) The Basics, Or What you need to know First of all, before asking any questions, you should read the in-game guide; it's quite informative, animated, and can be extremely useful. It opens with the hotkey "O" and updates when additional mechanics are unlocked. (It also highlights if there is an article that hasn't been read yet) Short answers to "beginner" questions This section contains the simplest questions that beginners might have, it contains a few spoilers, but all for the best. - "Is that all? Such a small shop?" Of course not, among the first tasks in the game are goals to buy a new plot of land where you can place your cars, and later, after saving up some money (not recommended immediately), you can buy additional plots. - "I meant the shop itself, why is it so small and inconvenient?" Later in the game, you'll unlock upgrades for your equipment: backpack, construction tools, gloves, and belt. Upgrading your construction tools will allow you to demolish/build floors/walls, and you can build your dream shop. - "I'm so tired of putting everything on the shelves!" Almost immediately, a catapult is unlocked that allows you to fill the shop shelves automatically; more details about it are in the in-game guide. - "Yay, the shelves fill themselves, but I'm tired of running every minute to the cars and then to the customers." Be patient, at the 4th "tier" you can buy an automatic cash register that will do this for you. - "What about buying logs?" Around the same time, construction of trading portals begins. When you supply them with coins, they will buy resources for you. At this point, part of the production process can be fully automated: you sell at the automated kiosk - the coins are delivered to the portal - it buys logs/stones - the machines process them - the catapults load them onto the shelves - and they are sold again. - "I'm so tired of running around with seeds!" For full automation, at tier 4, fertilizers and a nursery are unlocked. However, in my opinion, the basic fertilizers are extremely unproductive (even with the recent update). Therefore, I personally choose to run around with seeds and regular garden beds until tier 5, where advanced fertilizers are unlocked, which allow for proper optimization. Non-obvious features The most valuable thing I would put here is that most machines, furniture, etc. have additional options, switchable with the hotkey "T" - "Change shape" Interesting things: - inclined conveyors change direction - platforms have different heights - non-symmetrical machines (for example, the assembler) can be mirrored - chests can change their configuration, for example, the initial chest can be turned into a "pass-through buffer" or placed vertically - dividers and filters can be placed on their side and so on, check the "shapes" for everything that exists, maybe you'll discover something else interesting About the main thing, about money First of all, money in the game is not an abstract account on a card, it's a very real physical object (the amount in the left corner is the amount you have in your pocket). Initially, you can ignore this, but later you will have to work with it, and here are a couple of tips. But first, about how to earn money, I found only 3 options: - Direct sales in the store - Completing tasks, both story-related and "daily" ones - Selling through the portal Selling in the store is simple, although a couple of things are worth mentioning separately: 1 - Customers don't buy everything indiscriminately, as far as I can tell, they always have their own "shopping list" (which may seem crazy, but the customer pays). 2 - Reputation, there is more detailed information about it in the in-game guide, but in short, the higher it is, the more customers come, and the more customers come, the more they buy from you. 3 - Limited shelf space: depending on the product, a different number of items fit on a shelf. Also, each product is bought differently, and this should be taken into account. Here are a couple of examples: - Mortars only fit 6 pieces per shelf, while customers may buy more, so it's worth having at least 2 shelves with mortars in the store. - Small wooden gears, on the other hand... A lot of these items fit on the shelf, but they are also bought in large quantities, and one catapult often can't keep up. There's no point in having two shelves of gears, but having two catapults to fill one shelf is perfect. The next source of income is quests. We won't consider linear/story quests, you can't skip them. But there's something to discuss regarding additional quests. First of all, selling goods through quests is more profitable than selling them in the store. Depending on the order, you receive 130, 160, or 200% of the market price of the goods. Therefore, if you want to develop more dynamically, you shouldn't neglect them. It makes sense to keep some goods in reserve in case of orders. In my shop, I do it like this: 1 - a chest from which I can take goods for orders 2 - a buffer for the catapult so that it can quickly replenish the shelves Also, regarding orders, it's important not to unlock new items if you are not ready to immediately set up their production. Any unlocked item can be in an order, which means that if you don't produce it, you might miss out on a profitable order with 200% profit, and it only lasts for a day, which might not be enough time to set up production and accumulate the goods for the order. And the last option for earning money is the trading portal. Some goods can be sold through the portal, receiving less than their market value. At first glance, this seems unprofitable, but considering that even with maximum reputation leveling, the flow of customers to the store is still limited, you won't be able to sell more goods to customers than they want to buy. But you can send large batches of goods through the portal (though not just any goods), which can nicely finance your development. p.s. Yes, there are also loans, I haven't even taken them out and I don't know exactly how they work, but you'll clearly have to pay back more than you can borrow, so the benefit is questionable. With a leisurely pace of the game, while you're building your "factory," currency will continue to accumulate, so a shortage shouldn't be a big problem. Now, some tips on distributing money as a physical object: - Bank portals They can exchange currency for the denomination you need. This is roughly the scheme I'm using now: 1 - A buffer of coins after the cash register. The cash register's capacity is limited, so it's best to unload it as quickly as possible, otherwise customers won't be able to buy anything and will leave. 2 - Exchangers for 1 silver coin. There are two of them because the cash register has two exits (and buffers). 3 - Then the silver (and later the scheme can be changed to gold) accumulates in the next buffer. If there's a surplus, you can take it from there to buy research, portal stones, etc., in general, for personal needs. 4 - Another exchanger for 1 silver coin. The point is that coins on the conveyor belt can stack up to 50 pieces. And on a long conveyor belt, a lot of money can accumulate idly, so it makes sense to put stacks of the size you need on the conveyor belt (in my case, 1 silver coin). 5 - Exchangers for 50 copper coins. For the early game, moving silver coins on the conveyor belt is quite wasteful, therefore, we exchange the previously accumulated silver coins for copper and send them to be distributed throughout the factory. In my case, there are currently three flows: one with silver coins of 1 coin each, and two with copper coins of 50 each. They all distribute the coins to the places in the "factory" where and in what denomination they are needed. Fuel or a greeting from the league of crazy calculations In the game, many things can act as fuel, and each of them has its own efficiency, profitability, and expediency. A few calculations and examples: T - calorific value, M - copper coins, T/M heat per coin 1 log - 200 M - 2000 T - 10 T/M boards - 200 from one log for 200 M - 20 T per piece - 4000 T per stack from 1 log - 20 T/M charcoal - 1:1 from boards - 40T per piece, but the production of 1 charcoal also consumes heat for 4 seconds in the crucible, which is 20T spent, it turns out that the heat profit is 20T (even a little less, the furnace also consumes heat when heating) we get again ~ 20 T/M charcoal powder - 1:1 from charcoal, 48T per piece - 20T for charcoal production - total 28 T/M It seems that charcoal powder is the best fuel, but the difference is not that big, and the production of powder takes up space, which is often more important. In total, until you get charcoal, it's better to burn just boards. Next, coal 1 coal ore - 4800M - 30000T - 6.25 T/M coal - 120 from one coal ore - 540T per piece - 64800 per stack from 1 ore - 13.5 T/M Further, there is also soot and soot powder, but their T is not much higher than coal, and their production again consumes heat and space, which makes their use as fuel impractical. And it turns out that boards are still the most profitable fuel based on T/M calculations but then the blast furnace will open The furnace, what a beauty - a blast furnace! You can install 4 hearths or a bunch of crucibles on it, and accordingly, its heat consumption is much higher, so it's more profitable to burn coal, because the planks simply won't have time to get into the furnace even with a full conveyor belt. Then there's the explosive potion, but I haven't tried it yet. I think it should be the best in terms of fuel efficiency, but you need to produce it somewhere in sufficient quantities, right? So each fuel has its own appropriate application. Blueprints Blueprints are very convenient, although not perfect. You can create a blueprint by selecting objects (hotkey "B") and then either confirm the selection for copying ("F") or "cut" the selected area ("T"), after which you will have a blueprint ghost selected, which you can save ("H"). Yes, there's not much point in saving something small, and something large is usually difficult to insert into a new place due to limited space. But something in between is quite suitable for saving as a blueprint, for example, a blueprint of soap. It is used in various further production chains and can itself fit into a compact blueprint. Multi-story construction Even after buying neighboring plots, space will still become scarce over time. Yes, there are plots further away, but they are much more expensive, and even those won't be enough for all your desires. And then you realize that it's time to build a second floor, fortunately it's quite simple, there are both stairs and vertical conveyors. I currently have 3 floors and it's time to move to the fourth. Relics or obtaining new upgrade points The upgrade tree is large, the upgrades are very useful, but there are so few points! Fortunately, there's an option to earn extra money. At level 5, the relic generator unlocks, and the first relic is Jupiter. There's also the Altar of Knowledge for converting relics into points. Each relic has its own "experience" points, which are converted into upgrade points at the altar, but each new point requires more and more experience. However, the process of creating relics is long and expensive; they require large amounts of resources, and therein lies a crucial catch. Before this, you always bought, made, and sold things, always getting even more money in return (of course, unless you just threw away resources). In the case of relics, you spend resources (i.e., money), but you don't get the money back! And relics, I repeat, are expensive! But relics are also a commodity that can and should be sold. Otherwise, after deducting the cost of the resources spent on the relic, you may be left without enough working capital, which can significantly slow down your progress. Therefore, it is necessary to maintain a balance between selling and studying relics. Currently, I have it set up so that every fourth relic is studied, not sold. In extreme cases, you can initially manually move them where needed, for sale or for study. They take a long time to make, so it won't be too tedious. Conclusion Of course, this is not everything that can be said about the game, but it's everything that came to mind immediately. I remind you that as new interesting things are discovered or questions arise in the comments, the guide may be supplemented. Thank you all for reading! :) This guide was originally created by Grey and this is only an English translation. For images and credit please visit the original guide. Grey's Guide
游戏常见问题解答及实用技巧(由Grey编写,译自俄语)

导读
这是一篇译自俄语的游戏新手向攻略,涵盖基础操作、常见问题解答、实用技巧等内容,核心围绕游戏内商店经营、自动化生产、货币管理及燃料选择等,还介绍了蓝图、多层建造、 relic获取等进阶玩法,助力玩家高效推进游戏进程。

评论
共0条评论

《星球工匠》-如何快速获取“泰拉代币”:利用脉动石英
大家好! 今天我将以自己的经验为例,简要说明如何在脉冲石英上快速赚取【Terra代币】。 这也有助于更快解锁部分成就。 《星球工匠》指南
2026-02-15 22:000赞 · 0评论
开始获取科学包/第四级科技包
开启“科学IV”的过程中存在一些不太明显的难点。本迷你攻略将为你详细介绍这一阶段的流程。 ### 为“科学IV”的生产做好准备 如果你希望在不借助攻略的情况下解…
2026-02-14 04:000赞 · 0评论

《传奇商店》游戏指南
欢迎来到《传奇商店》的世界,在这里你将成为一名店主,开启自己在贸易和手工艺领域的成功之路。本指南包含能帮助你打造繁荣商店并成为贸易行业领导者的建议与策略: "《…
2026-04-07 16:000赞 · 0评论
石器战争 宝石战争资源怎么获取-资源获取途径
想知道宝石战争资源怎么获取吗?核心玩法在于每日任务、王国探索、进贡及宝箱。新手应优先推主线和做日常以快速积累。以下是详细的宝石战争资源获取途径,助你高效变强。 …
2026-04-30 02:400赞 · 0评论
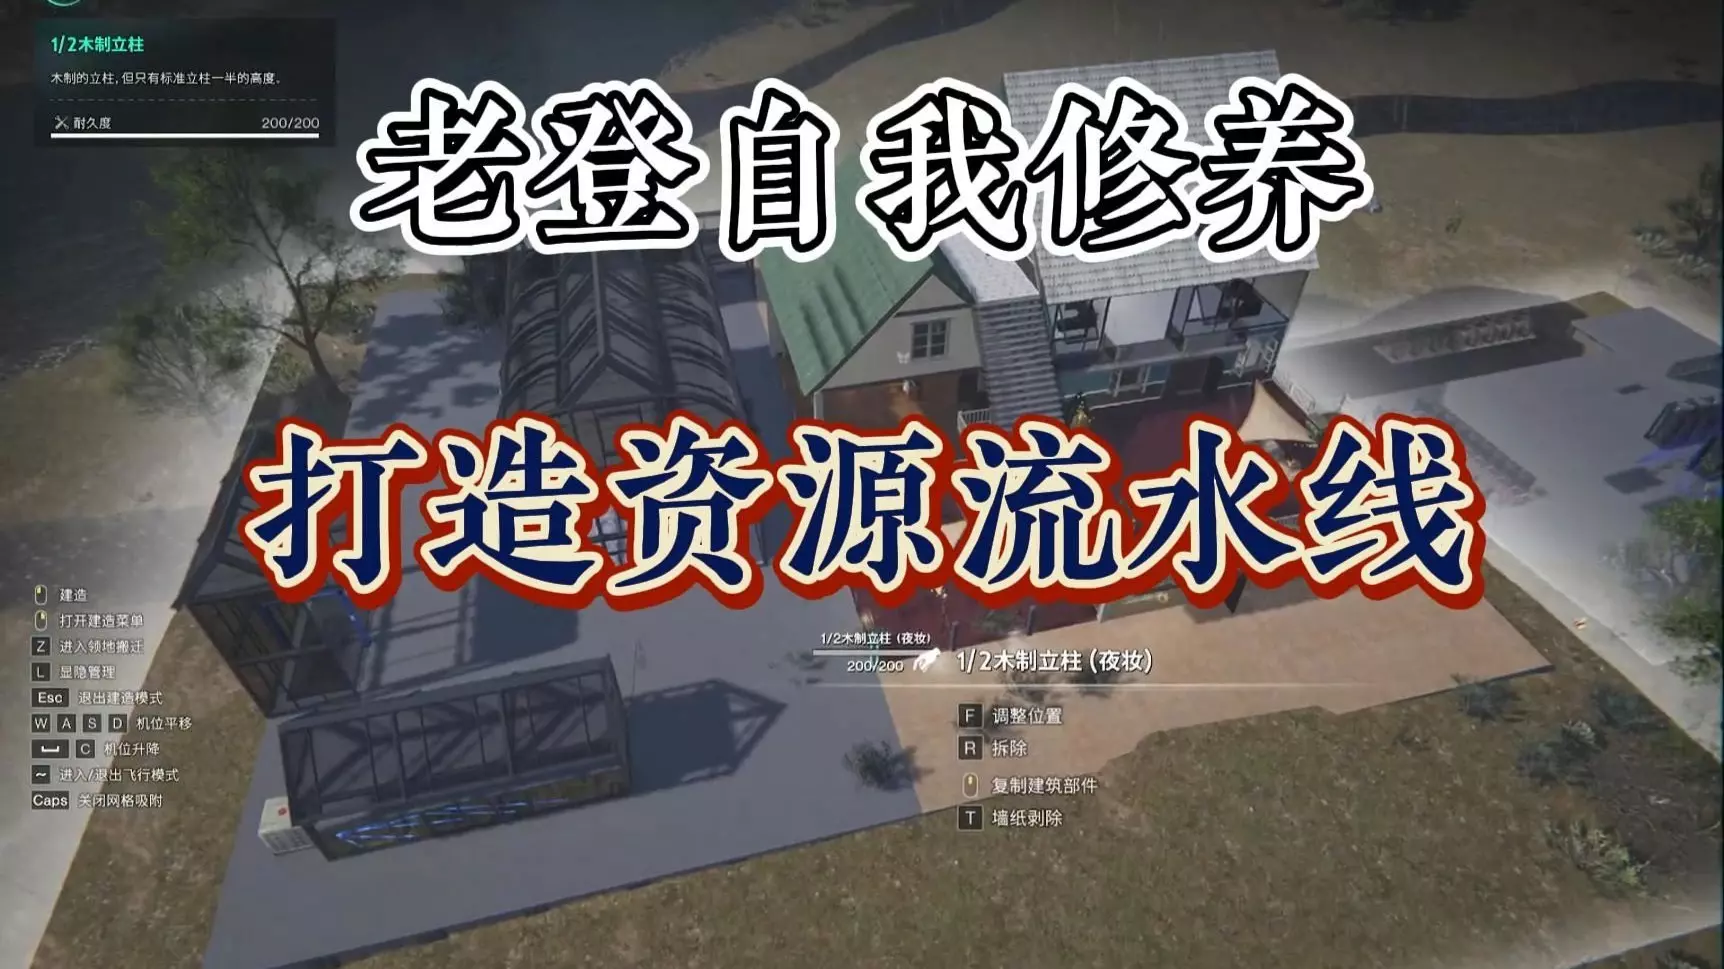
生存游戏 【七日世界】:老登的自我修养,打造资源全自动流水线!
2025-11-13 15:340赞 · 0评论
传奇商店货架作用 传奇商店经营与打造升级职业道具 传奇商店经营与打造职业道具玩法机制
传奇商店经营与打造升级职业道具是每位新手店长在奇幻世界中立足的关键。作为一款融合模拟经营与角色扮演的手游,玩家将化身中世纪商铺老板,通过制作武器装备、招募英雄冒…
2025-07-06 16:450赞 · 0评论

《我的世界》自动化烧炼教程
宝子们,🧭超详细的自动化烧炼教程来了! ✨这些技巧让你烧炼速度翻倍! 🌿学会了这些,你就是MC大陆最靓的崽! 📌你还知道哪些小技巧?快来评论区分享吧! #…
2025-11-17 09:110赞 · 0评论

残酷生存于每颗星球
学习如何在残酷开局下生存甚至发展壮大。 生存的关键:优先级 残酷开局的生存过程分为不同阶段,每个阶段由你的优先级决定。生存的五个阶段如下: 1. 糟了,糟了,糟…
2026-04-03 07:000赞 · 0评论

生活记录 走进魔域文化工厂
-
2025-11-18 20:590赞 · 0评论
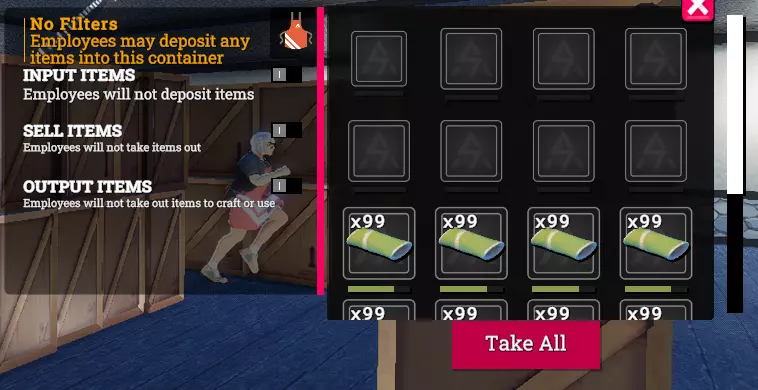
商店经营与存储
基础商店经营指南及如何利用存储功能更好地优化员工 指南 商店经营与存储指南 那么,你的商店已经开业,你希望开始让员工承担所有工作了。很好!不过,我们首先需要了解…
2026-03-17 19:000赞 · 0评论
暂无更多
最新更新
- 热修复补丁 v0.4.4.4316 — 修复了可能导致多人游戏断开连接的问题。
- 热修复补丁 v0.4.4.4306 — 《炼金工厂》更新内容 1. 新增多人游戏断开连接时的错误日志提交功能。 2. 修复了悬挂式吊桥在特定条件下仍会消耗物品的问题。 3. 修复了复制悬挂式吊桥时预览…
- 热修复补丁 v0.4.4.4299 — 修复了顾客可能在结账台卡住的问题。 修复了每日利润计算可能溢出的问题。 修复了垃圾桶模型无法更新的问题。 修复了删除转化器后物品无法退还的问题。
- 《炼金工厂》v0.4.4.4298版本更新内容现已上线! — 《炼金工厂》v0.4.4.4298更新内容 1.本次版本新增了部分全新内容,并修复及优化了大量问题,详细内容请查看下方更新日志。 2.由于中国公众假期的原因,本…
- 《炼金工厂》春季特卖与四月更新预告现已公布! — 各位炼金术士们,《炼金工厂》正在参与Steam春季特卖活动,从现在起到3月26日,购买可享受10%的折扣。此外,通过购买捆绑包还能额外获得5%至10%的折扣。
- 炼金工厂-视频介绍
- 游戏常见问题解答及实用技巧(由Grey编写,译自俄语) — If, after buying the game, you find yourself asking questions like: What should …
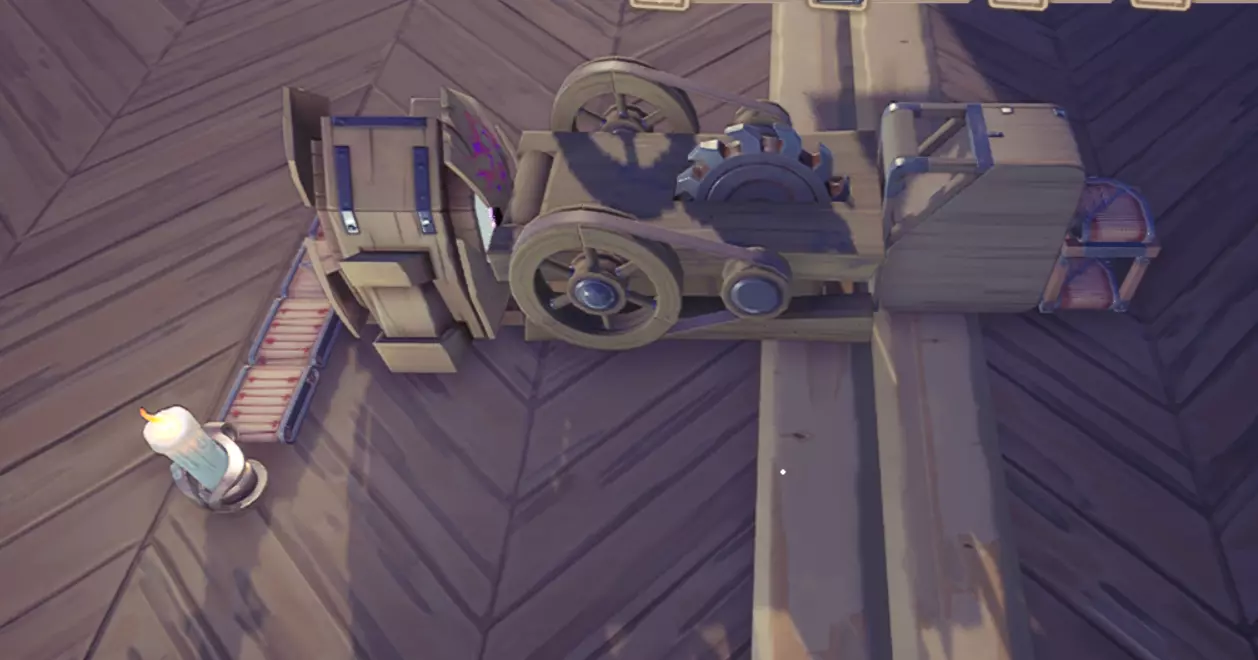
- 建造垂直蘑菇电梯 — 如何为大型垂直建筑建造完美的蘑菇堆叠式垂直电梯。 蘑菇电梯建造指南 跳跃蘑菇之间的距离是关键。你需要将它们间隔适当的距离,以确保你能平稳向上弹射,速度刚好能看清…
- 【指南】腐烂原木的自动化处理 — 这是一份关于如何在不浪费大量金币的情况下提高腐木使用效率的指南 前提条件 本指南中会用到一些必要物品,但部分物品(已标记)为提高产量的可选物品。此外,大部分物品…
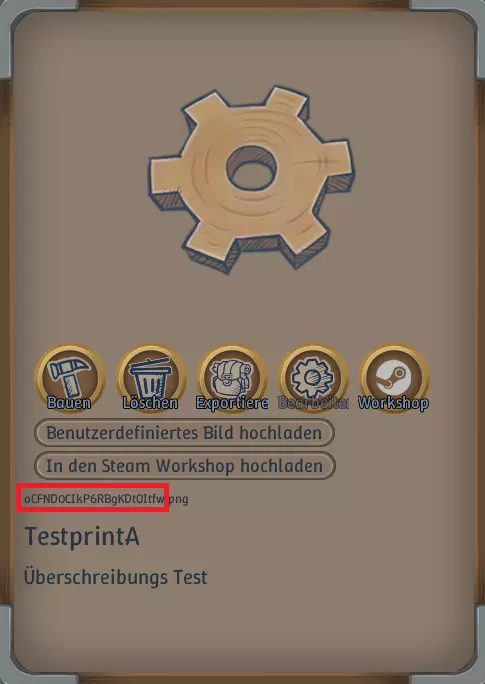
- 工坊中现有蓝图的覆盖(解决方法) — 在本指南中,我将展示一个小技巧,用于替换创意工坊中蓝图的内容,例如当你忘记某些东西时。 要求 你需要满足哪些前提条件? - 一个现有的创意工坊内容。 - 正确的…