


《空洞骑士:丝绸之歌》全 Boss 攻略 | 完整 Boss 指南与策略
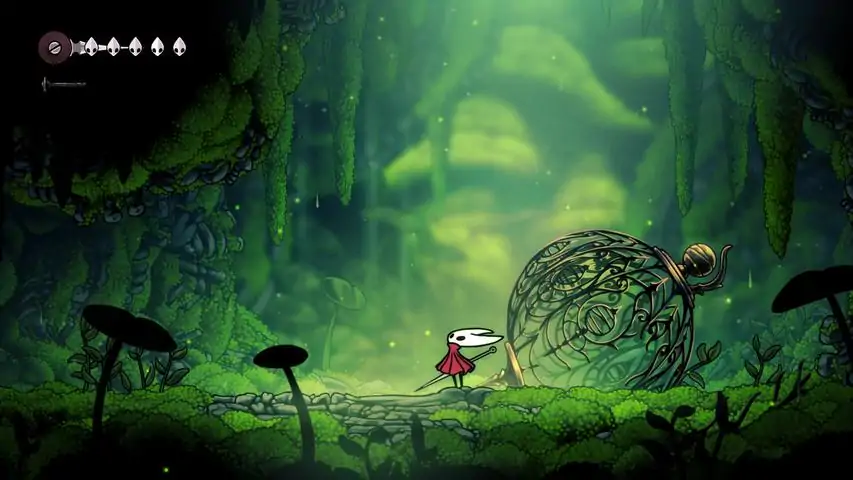
本指南将帮助你击败《空洞骑士:丝绸之歌》中的所有 Boss,从初次遭遇一直到达成真结局。每个部分都包含对 Boss 招式的简要说明、安全的反击时机,以及展示完整招式解析和无伤(无受击)通关的视频。 本指南适用于各类玩家,无论你是刚开始游玩想要顺利通关,还是准备挑战完美无伤战斗! 第一幕 Boss 1. 苔藓母亲 没太多需要说明的,它只是一个教程 Boss。
2. Bell Beast There's not much to explain, it's only a tutorial boss. 3. Lace (Deep Docks) Tools: Straight Pin Ability: Silkspear Lace boss fight feels a lot like the first time we fought Hornet in Hollow Knight — fast, stylish, and tricky. In this video, I’ll break down each of her moves, including The Lunge, Double Slash, Balestra, and Whirlwind, as well as how to deal with her parry and riposte. 4. Fourth Chorus Tools: Straight Pin | Magma Bell Ability: Silkspear The Fourth Chorus has a moveset that looks simple but punishes every mistake. In this guide I explain how to beat Fourth Chorus step by step, covering his attack patterns including the Hand Slam, Arm Sweep, and Rain of Rocks, along with the safest dodges and strategies to finish the fight. The video ends with a full fight showcase with No Damage so you can see the approach in action. 5. Savage Beastfly Tools: Shard Sting Ability: Silkspear The Savage Beastfly ican feel like your first truly annoying boss encounter, since his large body can deal damage with even the slightest movement and he sometimes summons two powerful minions to overwhelm you. In this guide I break down his attack patterns including the Soaring Charge, Triple Ground Smash, and Minion Summon, along with the safest dodges, tools, and strategies to handle the fight effectively. The video ends with a full fight showcase with No Damage so you can see the approach in action. 6. Moorwing Tools: Shard Sting & Flint Slate Ability: Threadstorm/Silkspear Moorwing is a formidable airborne boss with a challenging moveset, dealing double damage on all attacks and unleashing a second phase that introduces a new move while upgrading his existing ones. In this guide I explain his moveset including his Charge Attack, Slash Attack, and Projectile Attack in phase one, followed by his Inverted Throw, enhanced Charge, and upgraded Projectile in phase two. The video ends with a full fight showcase with No Damage so you can see the approach in action. 7. Sister Splinter Tools: Shard Sting & Flint Slate Ability: Silkspear Sister Splinter is a dangerous Shellwood boss that uses hand slams, thorn-covered vine attacks, and summoning Splinterbark minions that can easily overwhelm you. In this guide I explain her Triple Hand Slam, Vines Attack, Splinterbark Summon, stagger mechanics, and her final Vines Barrage, along with strategies for spacing, Silkspear usage, and effective minion control to make the fight manageable. The video ends with a full fight showcase with No Damage so you can see the approach in action. 8. Widow Tools: Flint Slate Ability: Silkspear Widow is one of the most intense boss fights, using deadly Bell Pulls, aerial lunges, slashes, and debris attacks that escalate into powerful Bell Rain patterns and faster combos in phase 2. This guide explains all of her moves step by step — including the Bell Pull, Aerial Lunge, Debris Pull, Diagonal Bell Rain, Vertical Bell Rain, and Running Slash — while showing you how to dodge effectively, find safe openings, and apply the best strategy for both phases of the fight. The video ends with a full fight showcase with No Damage so you can see the approach in action. 9. Skull Tyrant Tools: Flea Brew & Threefold Pin Ability: Thread Storm Skull Tyrant is a quest boss found in The Marrow after accepting a task from the Wish Board in Bone Bottom. While the fight may look straightforward, every attack he uses deals two damage, making pattern recognition crucial. This guide covers all of his moves — the Charge Attack, Jump Attack, and Ground Slam — and explains how to dodge safely while finding the best openings to punish. The video ends with a full fight showcase with No Damage so you can see the approach in action. 10. Phantom Tools: Tacks & Flint Slate | Pollip Pouch Ability: Silkspear Phantom is one of the hidden secret bosses in Silksong, locked behind two secret areas, and she delivers one of the most memorable and fast-paced fights in the game. This guide covers my recommended setup with Silkspear and the Pollip Pouce + Tacks combo for consistent ranged damage, along with strategies for dealing with all of her moves including Pin Rush, Pin Flurry, Counter Stance (parry), and Lightfall. The video ends with a full fight showcase with No Damage so you can see the approach in action. 11. The Great Conchflies Tools: Sting Shards & Flint Slate | Pollip Pouch Ability: Thread Storm The Great Conchflies are a paired boss you encounter in the Blasted Steps, and their fight revolves around just two but very punishing attacks. Their drilling move sends them burrowing into the walls to reappear and strike for two damage, often out of sync to catch you off guard, while the Conch Spit attack fires a ricocheting projectile that can bounce up to three times and punish careless positioning. The video ends with a full fight showcase with No Damage so you can see the approach in action. 12. Last Judge Tools: Tacks & Long Pin | Pollip Pouch & Magma Bell Ability: Silkspear Last Judge is one of the tougher bosses in Act 1, appearing after you and the Pilgrims attempt to open the Grand Gate. I’ll cover the build I used with Silkspear and Long Pin for safe ranged damage, Pollip Pouch + Tacks for poison, and Magma Bell for fire resistance. In phase 1 she relies on Jump, Slam, Censer Throw, and Censer Spin, each with small punish windows, while phase 2 ignites her censer to add fire damage to every move and introduces new threats like Fire Rings, Exploding Censer, Fire Slam, and the deadly Charge Attack. The video ends with a full fight showcase with No Damage so you can see the approach in action. Act 2 Bosses 13. Cogwork Dancers Tools: Tacks & Cogwork Wheel | Pollip Pouch Ability: Sharpdart Cogwork Dancers are one of the most unique bosses in the game. The battle is all about rhythm — you’re effectively the third dancer, and staying on their timing makes the fight much safer, while going too fast or too slow often leads to punishment. The fight spans four phases, with speed increasing each time until only one dancer remains. Phase 2 is especially dangerous since both cover huge space, while phase 3 offsets their attacks for tricky timing. I’ll also show the setup I used — Sharpdart for mobility and hitting both dancers, Cogwork Wheel as the MVP tool, and Pollip Pouch + Tacks for consistent poison damage — along with strategies for punishing, healing opportunities, and keeping pace. The video ends with a full fight showcase with No Damage so you can see the approach in action. 14. Trobbio Tools: Straight Pin & Cogwork Wheel | Pollip Pouch & Spool Extender Ability: Silkspear Trobbio is one of the tougher Citadel bosses, featuring a fast, fiery, and evasive fight reminiscent of Nightmare King Grimm from Hollow Knight. He deals heavy damage with Whirlwind charges, Firework explosions, and Smoke Bombs that fill the arena with danger, while constantly vanishing into the air or underground. In phase two, he swaps Smoke Bombs for Pyrotechnics, summoning fire pillars before striking again. Because of his unpredictable movement, ranged tools like Silkspear, Straight Pin, and Cogwork Wheel are best for safely dealing damage. Stay patient, keep your distance, and time your attacks carefully to survive his relentless aggression. The video ends with a full fight showcase with No Damage so you can see the approach in action. 15. Raging Conchfly Tools: Shard Sting & Cogwork Wheel | Pollip Pouch Ability: Thread Storm Raging Conchfly is a faster, stronger version of his previous fight, now appearing in the Sands of Karak with new moves and higher damage. His attacks deal 2 damage each, and phase two adds chaotic minion-summoning abilities through Drill Hoard and Drill Barrage. The biggest danger is his Greater Conch Spit — a bouncing projectile best countered with Thread Storm, which both destroys it and damages him. Using Shard Sting for traps, Cogwork Wheel for minion control, and Pollip Pouch for passive damage helps maintain control. With patience, smart spacing, and careful timing, you can handle his speed and projectiles to secure the win. The video ends with a full fight showcase with No Damage so you can see the approach in action. 16. Disgraced Chef Lugoli Tools: Shard Sting & Conchcutter | Pollip Pouch & Spool Extender Ability: Thread Storm Disgraced Chef Lugoli is a quest-related boss found in Sinner’s Road. Luckily, she’s one of the easier fights in the game. Her attacks include a Slam that scatters muckmaggot lumps, a quick Leap, a Slap that sends two lumps forward, and a Dive attack that combines underground movement with more projectiles. Most of these moves are easy to dodge, but the lumps can bounce unpredictably in the small arena, so spacing is important. For this fight, I recommend using Conchcutter to take advantage of the small arena, and Shard Sting as your usual airborne trap. Lugoli recovers quickly after most of her attacks, so patience and safe punish windows are key. The video ends with a full fight showcase with No Damage so you can see the approach in action. 17. First Sinner Tools: Tacks & Conchcutter | Pollip Pouch & Spool Extender Ability: Sharpdart First Sinner is a fast, chaotic, and stylish boss fight featuring four main attacks — Needle Weaving, Frenzied Charge, Aerial Lunge, and Bind — plus a healing move. In phase two, she becomes much faster and unleashes Rune Rage, filling the arena with explosive runes. Sharpdart is essential for safely attacking through her projectiles, while Conchcutter, Tacks, and Pollip Pouch provide steady trap and poison damage. Keep her in view to avoid surprise attacks, use silks wisely, and focus on maintaining control rather than matching her speed. Patience and well-timed punishes are key to overcoming her relentless aggression. The video ends with a full fight showcase with No Damage so you can see the approach in action. 18. Broodmother Tools: Tacks & Conchcutter | Pollip Pouch & Spool Extender Ability: Sharpdart Broodmother is a quest-related boss found in The Slab after completing the First Sinner questline in Songclave. While not the toughest, she’s notoriously annoying due to the cramped arena and constant pressure from her disruptive attacks. She uses Broodspawn to summon explosive freshflies, Muck Spit to immobilize you, Grabbing Leap to punish trapped players, and Wild Slam in phase two where she bounces violently around. All attacks deal 2 damage, including contact. Sharpdart is crucial for safe dashes and escapes, while Conchcutter handles freshfly spawns and Tacks provide steady ground damage. Managing space and punishing safely after her leaps are key to surviving this chaotic fight. The video ends with a full fight showcase with No Damage so you can see the approach in action. 19. Forebrothers Signis & Gron Tools: Cogfly & Cogwork Wheel | Pollip Pouch & Magma Bell Ability: Rune Rage Forebrothers Signis & Gron is a brutal multi-boss fight in the lower Deep Docks, surrounded by lava, durable minions, and no pogo damage opportunities. Signis attacks with combo slashes, boomerang throws, and summons, while Gron joins later with deadly spear throws and dive attacks. Using Rune Rage, Cogwork Wheel, Cogfly, and Pollip Pouch provides balanced offense and control, while Magma Bell helps mitigate fire damage. The key to victory is managing the chaos — use Rune Rage and Cogflies to handle minions efficiently, maintain spacing, and punish both brothers during their brief recovery windows. The video ends with a full fight showcase with No Damage so you can see the approach in action. 20. Voltvyrm Tools: Cogfly | Pollip Pouch, Long Claw, Spool Extender Ability: Thread Storm Voltvyrm is a hidden boss in the Sands of Karak and one of the simplest fights in the game. It stays on the ceiling, making pogo attacks impossible, and only uses two moves — Electric Spark, which expands into circular shockwaves, and Electric Pillars, which strike vertically. Both deal 2 damage but are easy to dodge once you learn the patterns. Hunter’s Crest boosts your damage output, while Cogflies provide steady hits since Voltvyrm stays out of reach. Summon four Cogflies before entering, dodge calmly, and the fight will be over almost instantly. The video ends with a full fight showcase with No Damage so you can see the approach in action. Act 2 Bosses (Continuation) 21. Father of the Flame Tools: Delver Drill | Egg of Flealia, Magma Bell, Spool Extender Ability: Thread Storm Father of the Flame is a hidden boss in Wisp Thicket that mixes fun pogo mechanics with frustrating fire wisp chaos. Since you can’t gain Silk from hitting the boss, healing and spell use are limited, making resource management crucial. Delver’s Drill is ideal because Cogflies can’t reach him, while Egg of Flealia and Spool Extender help conserve Silk, and Magma Bell reduces fire damage. In phase one, destroy his four arms while dodging increasingly frequent wisps; in phase two, attack his flame cage body while avoiding fireball rings. With precise pogo timing, careful Silk usage, and patience, you can burn through both phases safely. The video ends with a full fight showcase with No Damage so you can see the approach in action. 22. Lace (The Cradle) Tools: Cogfly & Tacks | Pollip Pouch, Volt Filament, Long Claw Ability: Sharpdart Lace’s second battle in The Cradle is one of Silksong’s most intense rematches, featuring three fast, punishing phases where every hit deals 2 damage. Her upgraded moveset includes chained Lunges, extended slash combos, and a Phase 2 Balestra dive that leaves circular slashes. She parries and ripostes more often, now with a new teleporting counter, and in Phase 3 performs double Moulinets. Sharpdart is crucial for safe dodging and repositioning, while Volt Filament, Long Claw, Pollip Pouch, Tacks, and Cogflies provide strong support and steady damage. Focus on pogo timing, tool usage, and patient counterattacks to survive her relentless pressure. The video ends with a full fight showcase with No Damage so you can see the approach in action. 23. Groal the Great Tools: Voltvessels & Pimpillo | Pollip Pouch, Volt Filament, Wreath of Purity Ability: Sharpdart Groal the Great is one of Silksong’s most frustrating bosses, featuring a long run-back, multiple pre-fight waves, and mid-battle summons that make the encounter chaotic and punishing. His attacks include tracking Acid Spit, the Great Inhale (countered with Pimpillo), arena traps that spawn minions, and a Vengeful Spirit attack unlocked at 60% health. Using Thread Storm for area control, Volt Filament for boosted skill damage, Wreath of Purity for water movement, and Pollip Pouch for poison damage provides strong balance and safety. Stay near the arena’s edge, bait his attacks, and strike during brief openings — with patience and precision, even this nightmare can fall. The video ends with a full fight showcase with No Damage so you can see the approach in action. 24. Shakra Tools: Cogfly & Tacks| Pollip Pouch, Volt Filament, Long Claw Ability: Sharpdart Shakra is a friendly duel found in Greymoor after completing her questline -- a fast-paced, teleport-heavy fight meant purely for practice and mastery. She uses three main attacks: Ring Throw, where she teleports mid-air to toss 1–2 bouncing rings; Ring Punch, a ground dash followed by a ring throw; and Ring Burst, a dive attack that creates a 2-damage shockwave. Sharpdart excels against her mobility, supported by Volt Filament and Long Claw for a skill-based setup. Remember to dash away when she teleports high, pogo or jump when she’s low, and focus on learning her rhythm rather than brute-forcing the duel. The video ends with a full fight showcase with No Damage so you can see the approach in action. 25. The Unravelled Tools: Cogfly & Tacks| Pollip Pouch, Volt Filament, Long Claw Ability: Sharpdart The Unravelled is a secret boss hidden in Whiteward, he's fast, aggressive, and far deadlier than his bulky form suggests. He opens with rapid Charges, fires corpse projectiles through Cadaver Spit, and in Phase 2 adds Scalpel Storm and Scalpel Summon to flood the arena with blades. At low HP, he chains these attacks relentlessly, creating chaotic pressure. A setup with Tacks and Pollip Pouch for floor control, Cogflies for chip damage, and Sharpdart for safe dodges works best, supported by Volt Filament and Long Claw. Stay centered, react to his emergence, and punish between attacks — with patience and precise timing, you can outlast his frenzy. The video ends with a full fight showcase with No Damage so you can see the approach in action. 26. Second Sentinel Tools: Cogfly & Tacks| Pollip Pouch, Volt Filament, Long Claw Ability: Sharpdart Second Sentinel is an optional boss from the Songclave Wishboard, a fast-paced and stylish duel that tests your reflexes more than endurance. She’s quick, elegant, and aggressive, with fluid combos that make the short fight feel cinematic. Because of the tight arena and her wide-reaching attacks, Sharpdart is the safest skill, while Cross Stitch offers a parry-focused alternative. Tacks and Cogfly let you focus on movement and reading her attacks, supported by Pollip Pouch, Volt Filament, and Long Claw for extra damage and range. Her moveset includes Gilded Combo chains, Aerial Lunges, Power Blades, the heavy Scissor Strike, Gilded Whirl spins, and parry counters. The key is to stay composed, dodge intelligently, and punish only when it’s safe. The video ends with a full fight showcase with No Damage so you can see the approach in action. 27. Grand Mother Silk Tools: Cogfly & Voltvessels| Pollip Pouch, Volt Filament, Long Claw Ability: Sharpdart Grand Mother Silk is a climactic late-game boss in Silksong, combining elegant needle barrages with deadly silk traps. She floats above the arena with no contact damage, but her attacks, including Needle Flurry, Needle Rain, and sweeping Claw Swipes, quickly fill the screen. Silk Web is her most dangerous move, creating glowing snares that explode for 3 damage, though Sharpdart’s i-frames can safely bypass them. At 60% HP, she transitions into Phase 2 with Rock Falls and later adds Spike Pull to summon falling debris and spikes. The best setup uses Hunter’s Crest for strong needle DPS, Sharpdart for safety, and Volt Filament, Long Claw, and Pollip Pouch for consistent passive boosts, supported by Cogflies and Volt Vessel. Stay beneath her to keep track of patterns, use Sharpdart to dodge through chaos, and punish between barrages. With patience and precision, she’s far more manageable than Radiance.The video ends with a full fight showcase with No Damage so you can see the approach in action. Act 3 Bosses 28. Bell Eater Tools: Cogfly & Voltvessels | Pollip Pouch, Volt Filament, Long Claw Ability: Thread Storm Bell Eater is the first boss of Act 3 in Hollow Knight: Silksong — a massive centipede that looks menacing but is far easier than Bell Beast once you know the rhythm. He alternates between head and tail attacks: Spit sprays projectiles you can erase with Thread Storm, while Flail punishes players who stay too close. From the tail, he uses Bombardment, launching bouncing red bombs that explode on contact. In Phase 2, he combines both ends for nonstop pressure, but Thread Storm effortlessly cuts through it while dealing heavy damage. His final move, Bell Bulldoze, sends him dashing across the arena as bells drop from above, so stay airborne and pogo to avoid harm. With a setup of Thread Storm, Volt Filament, Volt Vessel, and Cogflies, plus good positioning and patience, you can shred Bell Eater quickly and safely. The video ends with a full fight showcase with No Damage so you can see the approach in action. 29. Skarrsinger Karmelita Tools: Cogfly & Tacks| Pollip Pouch, Volt Filament, Long Claw Ability: Silkspear Skarrsinger Karmelita is one of Silksong’s peak fights -- a lightning-fast, precision-heavy duel often compared to Malenia for her relentless aggression and elegance. She mixes rapid melee combos with deadly dives and bone eruptions, forcing perfect timing and focus. The best setup uses Tacks and Cogfly for nonstop pressure, Silkspear for safe counterattacks, and passives like Volt Filament, Long Claw, and Pollip Pouch for balanced offense. Stay centered for movement control, pogo carefully without overcommitting, and punish right after her curvesickle throws. With sharp reads, steady rhythm, and full concentration, you can outlast her speed and claim one of the most satisfying wins in Silksong. The video ends with a full fight showcase with No Damage so you can see the approach in action. 30. Gurr the Outcast Tools: Cogfly & Voltvessels| Pollip Pouch, Volt Filament, Long Claw Ability: Thread Storm Gurr the Outcast is a quest-related boss in Far Fields. He's a chaotic but short fight thanks to his low HP. His main attacks include Charge, Trap Throw, and Floor Spikes, with the devastating Trap Flurry as his ultimate move. The best setup uses Thread Storm and Volt Vessel for burst damage, supported by Volt Filament, Pollip Pouch, and Cogflies for constant offense. Stay mobile to dodge his charges, destroy traps quickly, and punish during his long recovery windows. With this strategy, you can defeat Gurr in under a minute. The video ends with a full fight showcase with No Damage so you can see the approach in action. 31. Crawfather Tools: Cogfly & Curvesickles| Pollip Pouch, Volt Filament, Long Claw Ability: Thread Storm Crawfather is a boss that you can find in Act 3. You can find him inside Craw Lake building in Greymoor after you received their invitation. He's known for his aggressive mix of dive attacks and endless flying minions. His moveset includes Triple Peck, Dive Peck, and Chain Punishment — all of which can overwhelm you if you lose control of the arena. The best setup uses Thread Storm and Curvesickles for heavy damage and instant minion clears, supported by Cogfly, Volt Filament, Long Claw, and Pollip Pouch for consistent offense. Stay centered, use Thread Storm to wipe adds and punish his recovery frames, and unleash full combos during his Chain Punishment to bring Crawfather down hitless and fast. The video ends with a full fight showcase with No Damage so you can see the approach in action. 32. Lost Garmond Tools: Cogfly & Voltvessels| Pollip Pouch, Volt Filament, Long Claw Ability: Silkspear Lost Garmond is the saddest boss fight in this game. This fight combines simple mechanics with relentless aggression. His attacks -- Void Projectile, Triple Lunge, Wild Swing, and Void Dive covers a lot of space, making safe spacing essential. Using Silkspear, Voltvessels in grenade form, and Cogflies for passive damage provides steady offense while keeping distance. Supported by Volt Filament, Long Claw, and Pollip Pouch, this setup balances reach and efficiency, letting you defeat Garmond safely and peacefully freeing his soul to rest in peace. The video ends with a full fight showcase with No Damage so you can see the approach in action. 33. Prinstress Tools: Cogfly & Threefold Knives | Pollip Pouch, Volt Filament, Long Claw Ability: Cross Stitch Pinstress is a stylish, high-speed duel that tests precision and timing. She's found through quest from Bellhart’s Wishboard in Act 3. She uses swift, graceful attacks like Triple Pin, Golden Dash, Aerial Lunge, and the powerful True Needle Strike. Cross Stitch shines in this fight for its perfect parry timing and counter potential, supported by ranged tools like Threefold Knives and Cogflies. With Volt Filament, Pollip Pouch, and Long Claw as passives, you’ll maximize reach and consistent damage. Stay patient, keep mid-range spacing, and use Cross Stitch to punish her finishers to win this duel in fashion. The video ends with a full fight showcase with No Damage so you can see the approach in action. 34. Plasmified Zango Tools: Cogfly & Cogwork Wheel | Pollip Pouch, Volt Filament, Long Claw Ability: Sharpdart Plasmified Zango is a regenerating boss that can make fights drag out despite having only two attacks: Plasmium Torrent, where he shoots blobs in all directions, and Dash Attack, a quick charge across the arena. To counter his healing, use Sharpdart or Silkspear for steady damage, with Cogfly and Cogwork Wheel providing extra hits and spacing control. Pollip Pouch is crucial to negate his regeneration, while Volt Filament and Long Claw boost overall damage. Keep your distance, use Sharpdart’s i-frames to stay safe, and maintain pressure so his healing can’t keep up. Fun fact: completing The Alchemist quest unlocks Needle Phial, which can instantly kill him in just 4-5 hits with the tool. The video ends with a full fight showcase with No Damage so you can see the approach in action. 35. Tormented Trobbio Tools: Cogfly & Flea Brew | Pollip Pouch, Volt Filament, Long Claw Ability: Sharpdart Tormented Trobbio is one of the most chaotic and punishing bosses in the entire game. Returning in Act 3 with faster attacks and new explosive patterns. His tornadoes, smoke bombs, and fireworks now include extra beams and trails that make dodging tougher than ever. The best setup for this fight is Sharpdart for mobility, Flea Brew for sustain, and Cogflies for passive poison damage. Key attacks include Woeful Tornado, Smoke Bomb Throw, Forlorn Fireworks, and his Phase 2 Pyrotechnic Pillars -- all demanding precise spacing and silk management. Stay calm, read his movements, and use Sharpdart’s i-frames to escape any overwhelming danger. The video ends with a full fight showcase with No Damage so you can see the approach in action. Act 3 Bosses (Continuation) 36. Watcher at the Edge Tools: Cogfly & Tacks | Pollip Pouch, Volt Filament, Long Claw Ability: Sharpdart Watcher at the Edge is a secret optional boss in Sands of Karak. He's known for his simplicity and tanky health pool. Found after waking him with your Needolin, he only uses three main attacks -- Triple Swing, Crashing Sands, and Leaping Downslash, plus a Block & Retaliate counter. Each attack deals 2 damage, with body contact doing 1 damage. There’s no complex strategy here, just stay patient, avoid his telegraphed strikes, and chip away steadily for a clean, no-damage victory. The video ends with a full fight showcase with No Damage so you can see the approach in action. 37. Crust King Khann Tools: Cogfly & Tacks | Pollip Pouch, Volt Filament, Long Claw Ability: Thread Storm Crust King Khann, the infamous Coral Tower boss is less punishing than the gauntlet leading up to him. His attacks revolve around summoning coral pillars in various patterns: vertical, horizontal, diagonal, and X-shaped which all dealing 2 damage, with predictable gaps for punishes. At 75% HP, he adds Coral Overgrowth, and Phase 2 increases attack speed with Spike Rain and enhanced Coral Cross patterns. The best setup includes Thread Storm for consistent damage and crowd control for the gauntlet, Pollip Pouch, Volt Filament, and Long Claw for offense, while Warding Bell, Multibinder, for survivability choice that you can use. Success relies on patience and awareness. The video ends with a full fight showcase with No Damage so you can see the approach in action. 38. Palestag Tools: Cogfly & Tacks | Pollip Pouch, Volt Filament, Long Claw Ability: Sharpdart Palestag is one of the simpler bosses in Lost Verdania, relying on teleportation and Leaf Vortex projectiles to pressure players from a distance. Sharpdart is ideal for safely dodging her attacks, while Cogflies provide consistent chip damage, and traps like Tacks or Shard Sting punish her common reappearance points. Her Leaf Vortexes appear in pairs, moving horizontally across the arena and passing through platforms, with three pairs spawning once her HP drops below 40%. Contact deals 1 damage and her attacks deal 2, making this a straightforward fight focused on positioning, dodging, and using tools to chip her down efficiently. The video ends with a full fight showcase with No Damage so you can see the approach in action. 39. Clover Dancers Tools: Cogfly & Tacks | Pollip Pouch, Volt Filament, Long Claw Ability: Sharpdart Clover Dancers is a rhythm-based duel similar with Cogwork Dancers but only the Green Prince can be damagedthroughout the fight. Sharpdart is ideal for safely phasing through attacks, supported by Cogflies, Tacks, and Pollip Pouch for consistent damage, with Volt Filament and Long Claw boosting offense. All attacks, including body contact, deal 2 damage. His moveset include Clover Cadence -- dashes with light beams, Clover Configuration -- arena-wide patterns performed twice, and Clover Cyclone -- a rotating tornado covering the arena. Success relies on reading their rhythm, maintaining focus on the Green Prince, and using Sharpdart and tools to safely punish while staying in sync with their movements. The video ends with a full fight showcase with No Damage so you can see the approach in action. 40. Shrine Guardian Seth Tools: Cogfly & Tacks | Pollip Pouch, Volt Filament, Long Claw Ability: Sharpdart Shrine Guardian Seth is a fast and relentless boss, requiring precise timing and mobility to handle his six attack variations: Pin Combo, Pin Whirlwind, Shield Toss, Aerial Shield Toss, Shield Crash, and the Follow Through, with Phase 2 introducing Crash Combo at 40% HP. All pin attacks deal 2 damage, while shield moves and body contact deal 1. The optimal setup uses Sharpdart for safe escapes and counterattacks, Cogflies and Tacks with Pollip Pouch for passive chip damage, and Volt Filament plus Long Claw for offense and range. The key strategy is staying mobile, punishing recovery windows, tracking shield teleports, and using Sharpdart to bypass chained aerial finishers while tools chip away his HP passively. The video ends with a full fight showcase with No Damage so you can see the approach in action. 41. Nyleth Tools: Cogfly & Voltvessels | Pollip Pouch, Volt Filament, Long Claw Ability: Sharpdart Nyleth is a challenging wall-based boss where mobility and precise timing are key to avoid her attacks and finding safety in platform-less fight. Using Sharpdart allows safe phasing through her AoEs while staying aggressive, with Cogflies, Pollip Pouch, and Voltvessels providing consistent damage. Alternative skill to use is Cross Stitch which can be used to parry her AoE. Ascendant Grip can help you stick to the wall in place can help with your focus in this fight. Her fight has two phases, with platforms collapsing below 70% HP, and features attacks like Petal Blade, Pollen Barrage, Exploding Pollen, Thorn Balls, and Wall Leap. Success relies on hitting safely, retreating when needed, and mastering Clawline and Sharpdart timing to consistently land needle strikes while avoiding damage. The video ends with a full fight showcase with No Damage so you can see the approach in action. 42. Lost Lace Tools: Cogfly & Throwing Rings | Pollip Pouch, Volt Filament, Long Claw Ability: Sharpdart Lost Lace is the true ending final boss, renowned as the fastest and most unpredictable encounter in the game. Her relentless teleport chains and aggressive attacks make precise timing and mobility essential. Sharpdart is the safest tool to phase through danger, while Cogflies and Pollip Pouch provide consistent damage. Injector Band and Warding Bell add defensive options if needed. The fight spans three intense phases and chaotic patterns, with the total of attacks reaching 8 variation requiring patience, sharp reactions, and careful punishes to conquer this ultimate test of skill. The video ends with a full fight showcase with No Damage so you can see the approach in action. Bonus Video (No Tools & No Damage) These are videos that I made using Pantheon of Pharloom Mod to re-fight all bosses in the game: Closing That’s every boss fight in Hollow Knight: Silksong, broken down and explained as best as I can. If you found this guide helpful, please hit thumbs up to rate up this guide :D Feel free to check out my YouTube channel for more Silksong content as well! Thanks for the visit!
《空洞骑士:丝绸之歌》全 Boss 攻略 | 完整 Boss 指南与策略
2026-02-23 20:01:24 发布在 ![]() Hollow Knight: Silksong
Hollow Knight: Silksong


说点好听的...
收藏
0
0