


虚拟存在
虚拟存在

TA什么都没有写

 发帖达人Ⅰ
发帖达人Ⅰ虚拟存在
游戏档案
0
玩过游戏数量
0秒
总游戏时长
动态

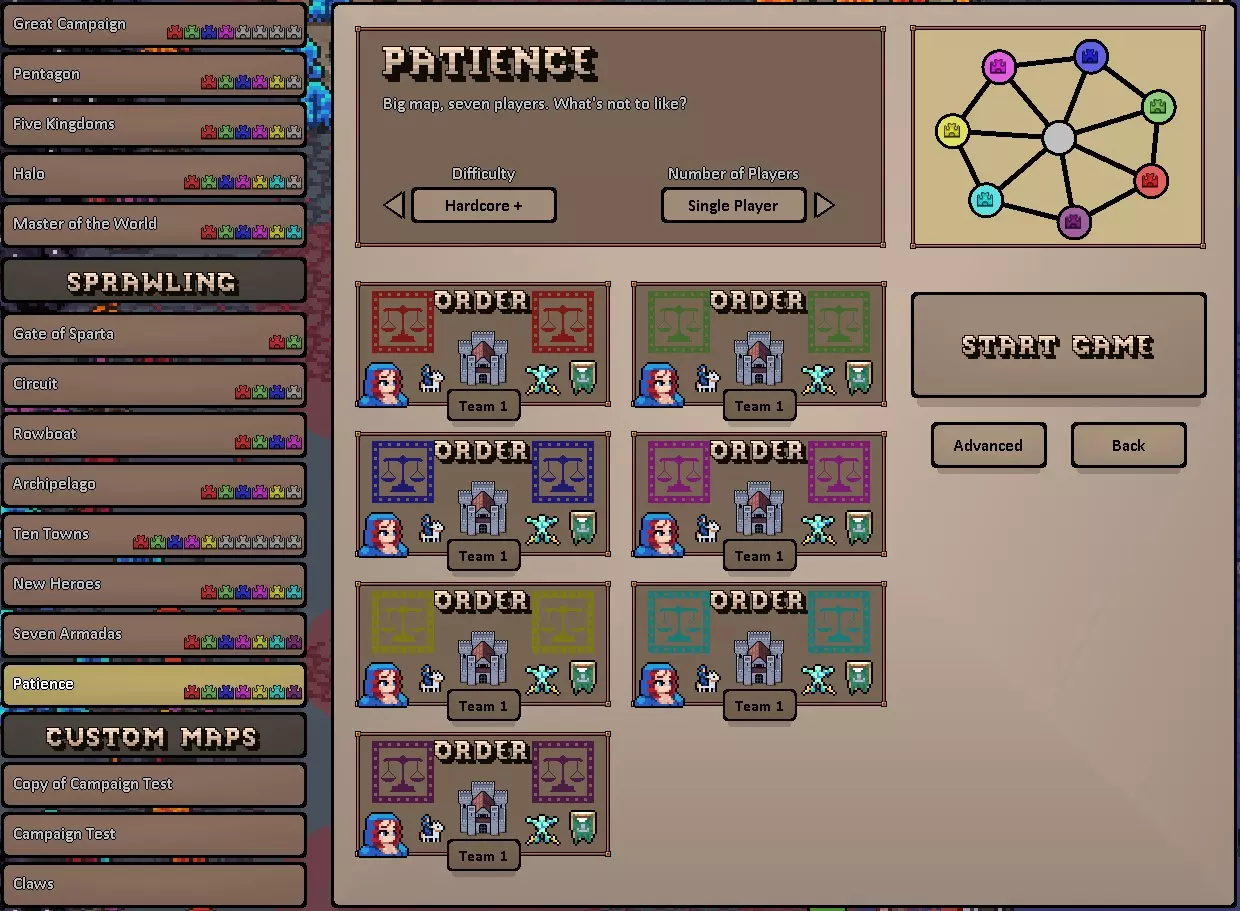
追求成就并无荣耀可言。我并非在与游戏对抗,而是在与游戏开发者较量;这就是取胜之道。让我来分享如何仅用95%的“操作”就能完成100%的成就(你还需要5%的“脑子”,这部分我就留给你了。祝你好运)。 什么是“操作”!?我该如何运用? 感谢Amphiprison教会我们如何运用“操作”。 另外,要在本指南中找到你缺失的成就,请按下Ctrl+F并输入成就的英文名称。你可以在主菜单左上角找到英语语言选项。不用谢。一键解锁15项成就 没时间浪费 速通玩家 任意%个人最佳 魔法恐惧症 我能独自完成 裸体跑 冠军 吃鸡 耐心 接受挑战 挑战完成 英雄时刻 首次胜利 解谜大师 以及你所玩阵营的成就……例如秩序 你可以一键获得这些成就。 请仔细查看你的设置,否则无法一键获得这些成就,好吗?这里是截图1
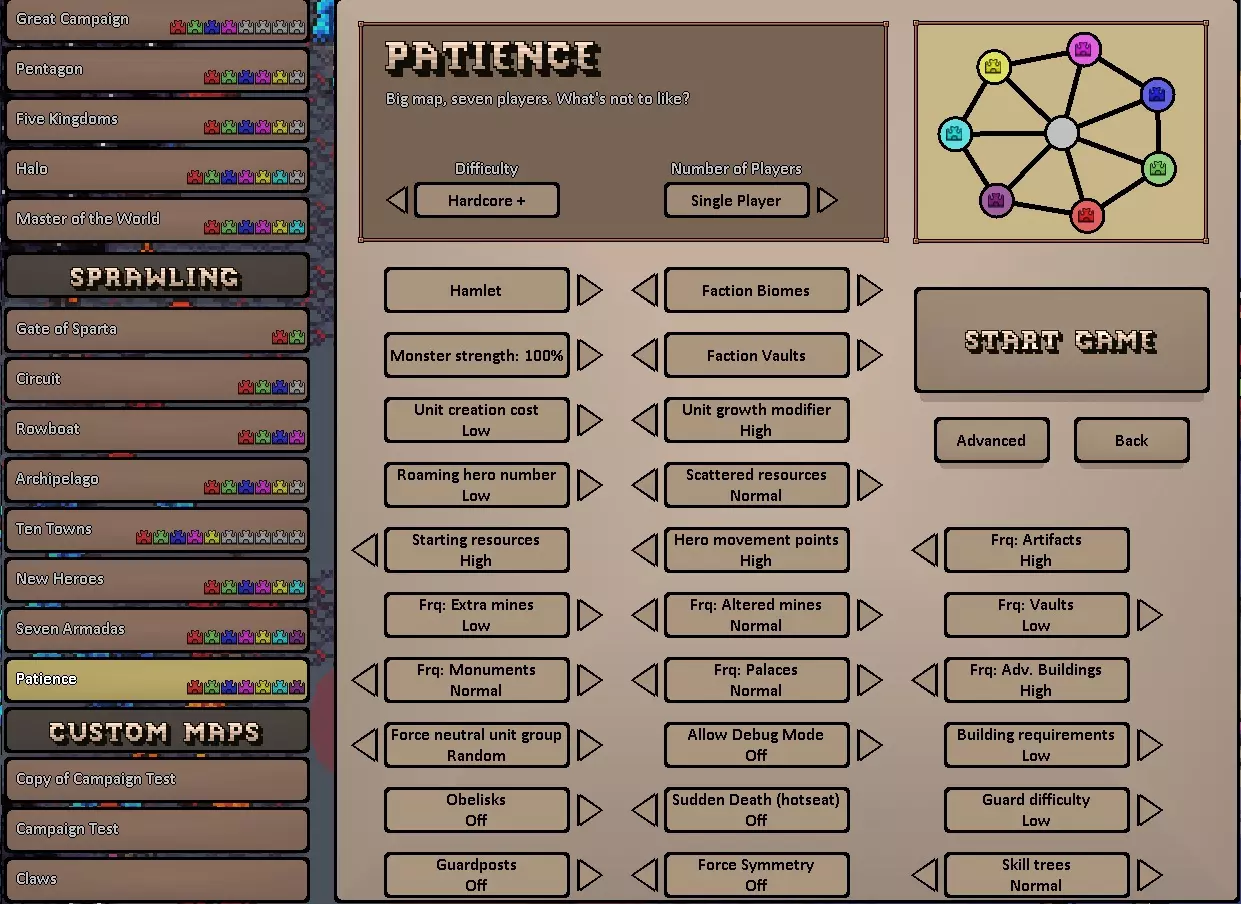
以下是截图2:
对6项成就的理解 恭喜你,你已一键成功解锁15项成就。请点击“继续游戏”领取你的奖杯,由于上一部分的设置,现在由AI为你进行游戏。但首先我想让你了解6项成就。 冒险者 要遭遇冒险建筑,你的队伍中任意成员都必须遇到该建筑。由于你的队伍中有6名专家级+盟友:他们非常乐意替你去遭遇这些建筑。(例如,查看你的冒险建筑日志,让AI进入一个冒险建筑后再次查看。) 拥抱死亡 一旦找到凄凉修道院,只需派遣你的英雄前往并牺牲他即可。你最终会找到一个,同时让AI为你遇到它们。 收藏家、弹药满载、远古之力、复苏传说 我花了20小时游戏时间尝试以正当方式获取所有 artifacts(神器),但这纯粹是浪费时间。你只需要一个【盔甲匠】和/或【黑市】冒险建筑。你会希望在所有游戏进程中至少遇到其中一个——包括本次——因为这些成就可以通过在这些冒险建筑购买获得。 所以从技术上讲,你让英雄移动到其中一个建筑旁,按【下一回合】直到新的一周开始,然后购买神器。只要运气好,你可以在同一次游戏进程中让AI完成这些工作,从而获得这6个成就。如果不行,就在下一次游戏进程中使用相同策略。同时始终将【神器生成率】设为“高”,找到的神器越多,就能越早解锁该成就。或者,你也可以收集它们,但这可能需要更多时间。 10个额外成就: Back in Order Going Wild Magic over Wild Death's Door Hell on Earth Liberation Exclave A Final Lament Rising Tides Earthen Arise Pillar Reformed 使用与之前相同的起始条件,Adventurer成就应该能在过程中解锁。如果你已经获得了这些成就,直接退出那些游戏即可。当然,我们来这里就是为了这些成就。 23个需要漫长过程的成就: 正如你可能猜到的,这款游戏想要达成全成就并不容易,所以是时候给自己准备一杯好饮料,或许再来点小吃,然后进入一场非常、非常漫长的游戏了,因为在这一局中我们要解锁大量成就。非常重要,以下是起始条件(如果涉及到成就的话,我可能会告诉你“原因”)
我希望你先忽略方尖碑,完全专注于以下两个成就。 Desperado“击败一支近乎不可能的军队”实际上是指:“战胜一支不同颜色的近乎不可能的军队” Flawless“无伤赢得一场战斗”实际上是指:“战胜一支不同颜色的军队,且不损失任何实际的、真正的单位” 这就是你的英雄完成此次挑战后的样子:
我跟你说过要选莉扎。她能召唤元素生物,还能学习召唤法术。这些元素生物死亡时不算作伤亡。当柱之英雄拥有几乎无法战胜的军队时,想个好战术打败他,然后读档重来,在不造成任何伤亡的情况下再次击败他。有人说这很简单,一场战斗就能拿到两个成就。我可不行,也许你可以,也许不行,我才不在乎呢。动动你那5%的脑子,完成后就去挑战下一个成就,还有很多事要做。 占卜术“仅凭1个线索找到方尖碑宝藏” 现在你可以去拜访方尖碑,获取宝藏位置的第一条线索。你不能再获取其他任何线索。想办法弄清楚宝藏在哪里,然后在那片区域搜寻。与《英雄无敌3》不同,当你靠近地点时,铲子就可以使用了。一旦可用,只需挖掘即可获得成就。 大法师:在大法师审判庭学习一个冒险地图法术 建筑师:完全发展一座城镇 偶像崇拜:创建一个偶像 如果你还没完成,只需完成你的城镇并派英雄到那里,就能获得这两个成就。另外,记得创建一个偶像。 国王:让一名英雄达到20级 皇帝:让一名英雄达到30级 神:将一项英雄技能提升至5级 万法大师:遭遇95%的所有法术 这个很可能是最烦人的一个。你必须反复进行随机战斗,直到达到30级。当你查看拉齐的专长时,我强烈建议你尽快学习智慧和学识专长。因为学识专长能加快升级速度,而智慧专长则能让你每次升级时最多学会2个新法术,这会让你更接近【Magus of Magi】成就。不过这个话题我稍后再细说。 【Scrooge】:拥有100000金币。这个成就在游戏过程中自然就能解锁。 【Theresa】:在单局游戏中通过医务室和医院救治500个生物。如果你因为没解锁这个成就而看到这里,尽管按道理你应该已经解锁了,我懂你的感受!我曾在我认为的“单局游戏”中救治了超过500个单位,但实际上,我是在一场战斗中救治了500个生物后才解锁了这个成就!我获得了2000名【圣柱教派】的信徒单位,将战斗策略设置为“防御”,让敌方弓箭手杀死大约1500名信徒,为了稳妥起见,用剩下的500名单位击败了他。然后我就解锁了成就。 Greed is Good【获取一只元素宝藏】 Bestiary【遭遇95%的所有稀有生物】 这里所说的“稀有生物”,指的是所有不属于任何派系的生物。你可以召唤它们(如果还没解锁Greed is Good成就的话,在这个过程中也能解锁)。 以下是获取该成就的7个步骤: 1. 打开圣柱城镇 2. 建造【精华圣柱】 3. 打开稀有生物图鉴 4. 按下CTRL+F 5. 打开你的稀有生物词典 6.在指南的搜索栏中输入你尚未遇到的稀有生物名称 7. 按照指南说明创造缺失的稀有生物 现在你的支柱城镇中已充满稀有生物,将幼崽编入主力部队并投入战斗。根据我的经验,经过几场战斗后,你就能将其中一只幼崽血变为炽天使。 成就【All Grown Up】:将幼崽血变为炽天使 成就【Dragonspeaker】:通过外交获得一条龙 现在我们要开始招募其他英雄了。在我们采取极端行动之前,尝试招募一名拥有外交技能的英雄,派他去对抗任何包含龙的中立军队。最终你将能够通过外交手段获得其中一条龙。 魔法大师“遭遇95%的所有法术” 现在是招募英雄的时间了! 创建一个存档,然后在英雄招募上采取极端行动。到目前为止,你应该已经学会了所有非派系相关的法术。你招募的英雄将提供所有缺失的派系法术。在你狂点鼠标左键之后,最终将解锁该成就。文化转换【将一座城镇转换为非初始派系】 达成方法:从酒馆招募一名非初始派系的英雄,让该英雄成为城镇旁的唯一英雄,进入该城镇后,屏幕顶部会出现将城镇转换为该英雄派系的选项。 你需要以下派系的英雄:荒野、炼狱、哀恸 荒野【控制10座蔓生矿场】 钻石矿不计入该成就! 选择荒野派系开局,或把城镇转换为荒野派系,然后将矿场改造为蔓生矿场。【地狱之潮】:在一局游戏中招募666个炼狱单位。我本想告诉你在精华之柱中召唤它们,但我打赌你确实需要“招募”它们,所以为了保险起见:选择炼狱阵营开始游戏,或将城镇转化为炼狱阵营,然后招募666个炼狱单位。 【真正的邪恶】:在奴隶围栏中投入总力量值达到200的单位。选择哀恸阵营开始游戏,或将城镇转化为哀恸阵营,然后将你在精华之柱中创建的所有单位都投入到该城镇中。你最终会获得这个成就。 【暗影之力】:当你的英雄拥有50点或以上法术强度时施放暗影编织。你需要一名属于哀恸阵营且拥有暗影编织技能的英雄。方尖碑每周每施放一次法术就能为你提供+1法术强度。所以你要等到新的一周开始,把所有单位都从奴隶围栏里调回你的英雄身边,进入接下来的几场战斗,让你的军队处于防御状态,同时你施放4-5个魔法,直到你最终有超过50点法术强度的余量,然后施放暗影施法。 贪婪吞噬【Devour a Black Dragon】 人造神明【Man Made God】 英雄的攻击、防御、知识和法术强度总和超过100。 装备属性不计入该成就! 既然你已经在精华之柱中创造了许多稀有生物,那就抓一条黑龙,把它交给你必须招募的、拥有吞噬技能的英雄。让他吞噬黑龙和其他任何高等级单位,以获得真正永久的属性。如果你按照这个方法操作,最终你会得到一个所有属性总和超过100的英雄。 我都说了,没那么容易。但希望这能让事情变得简单些。至少对我来说确实如此。 元素之力 元素之力“仅使用元素生物在战斗中击败一个具有挑战性的敌人” 实际上的意思是:“仅让你的军队阵容中包含元素生物,击败一个不同颜色的具有挑战性(或更困难)的军队。” 如何轻松获得: 选择支柱英雄:拉林尼滕/泰拉尼罗开局 并与腐朽英雄:恐惧帽/空白眼战斗 开始条件:
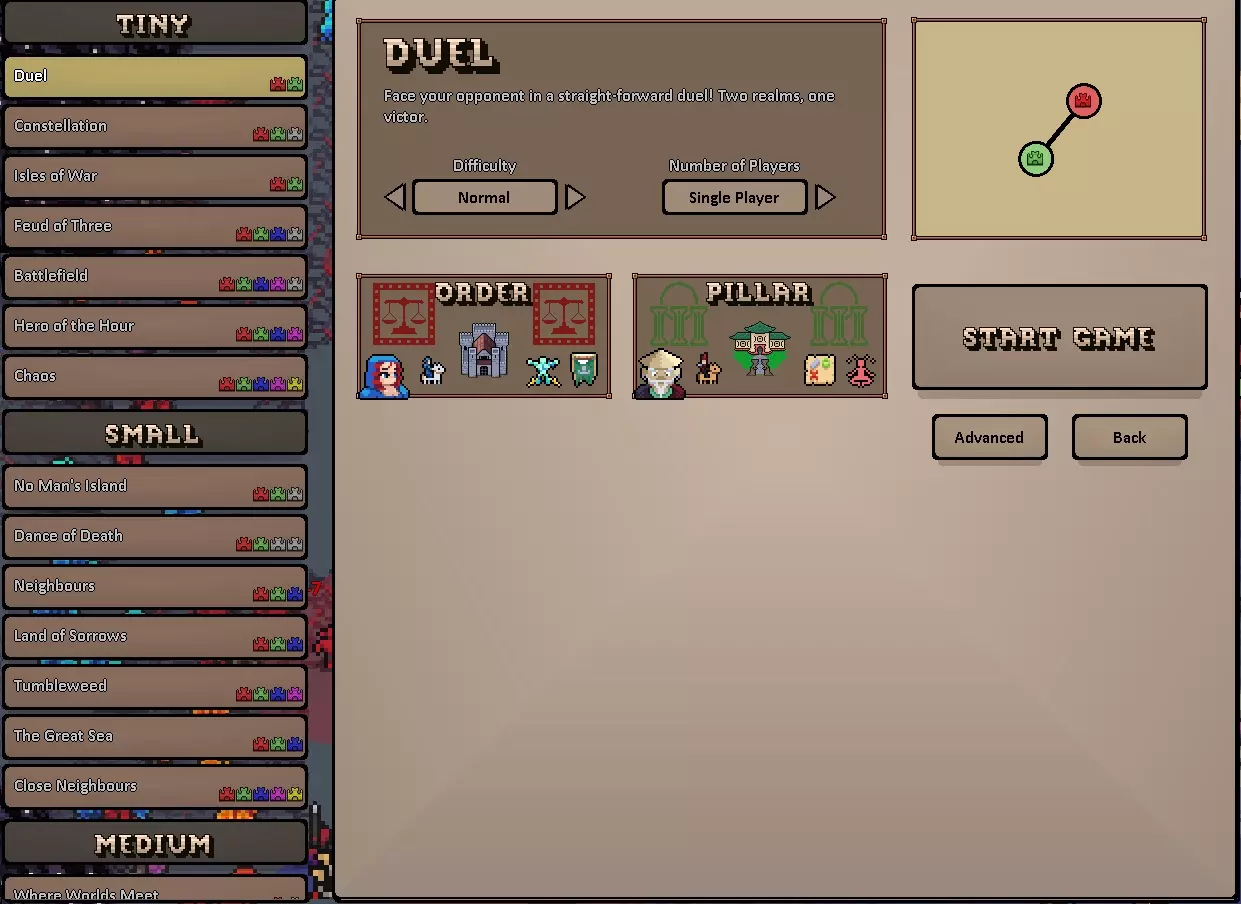
你想要在精华之柱召唤灵火。(请查看本指南的“怪物图鉴”部分。) 你需要尽快获取木材矿,并在其前方放置一个帐篷。单位增长修正值较低,因此敌人无法快速增加单位数量,但你可以,因为在精华之柱召唤单位不受单位增长修正值的影响。 尽快获取寡头政体。 与腐朽英雄进行一场具有挑战性的战斗。他的小兵生命值上限较低,但数量众多。 不过,由于飞行单位的能力过于强大,灵火可以轻松应对它们。获得成就后,立即放弃这局该死的游戏,直接开始下一局: Literacy 和 Showdown 以下是获取最后两个成就的方法: Literacy“让使用最强符文的英雄进入战斗” 实际上是指:“让使用死亡符文的英雄与异色军队进入战斗。” Showdown“与拥有至少2000战力军队的敌方玩家进入战斗” 实际上是指:“与异色军队进入战斗。敌方军队的战力必须至少达到2000。” 选择土系,英雄:冈沃尔/凯 敌人随意…… 初始条件:
清理决斗地图己方区域,并让英雄驻守在哨塔,阻止敌方英雄通过。为英雄装备死亡符文,即那个能在部队死亡时召唤骷髅的符文。 这些修正完全有利于部队量产。派遣尽可能多的部队前往哨塔,并将它们集中到主力英雄身上。大约在第9周左右,你可以派遣英雄前往敌方主力部队处,直接进入战斗即可获得这两个成就。 如果还未获得Showdown,重新加载游戏并再等一周。你最终会解锁它的。 一场遭遇战中的3个成就
《醉酒酒吧斗殴》指南 功能概述 重要事项 清理你的游戏空间以及周围所有区域的物品。 在这款游戏中,你不需要用力挥拳就能成功。 游戏开始前,请检查天花板上是否有灯具或风扇。如果它们在伸直手臂可及的范围内,不要在其附近游戏。 如果你靠近游戏区域边缘,不要出拳。你无需执行此实际步骤,可通过控制器进行移动。 1. 已知问题 1. 游戏无法加载,只能看到蓝天。 若SteamVR运行不正常或Steam未启动,会出现此问题。请确保Steam已启动且SteamVR未提示任何错误,以解决该问题。Toughz - 首次被击倒后站起来 Collateralz - 用投掷物品击中画廊里的人 Powerupz - 喝5瓶酒 Giantz - 喝10瓶酒 Buttz - 头槌 魔法酒精 绿色发光瓶子 - 巨大的体型和力量 红色发光瓶子 - 矮小的体型 蓝色发光瓶子 - 慢动作(敌人变慢) 黄色发光瓶子 - 强力拳头 显示在在PC显示器上,通过空格键可以将视角从第一人称切换为第三人称。一旦相机进入第三人称视角模式,按住鼠标右键即可改变相机位置,并使用上下左右箭头键进行调整。使用鼠标滚轮可以放大或缩小画面。 你知道吗? 和朋友一起玩这款游戏会有趣得多。你可以通过控制器上的方向键进行移动。目前移动需要使用方向键的内侧部分。 你可以通过点唱机上的圆形旋钮关闭音乐音量。 酒吧里的部分酒类是【魔法药水】,它们会发光以区分彼此。 你可以通过点击点唱机上的按钮切换音乐。你可以扔瓶子、椅子和木棍。 你可以格挡攻击。 不要和女性打架,就放松一下,喝几杯吧。 当对手向后退缩时,你可以抓住他们。 视频录制 对于那些对混合现实视频录制感兴趣的人,我们认为这份指南会有所帮助。如果你倾向于在录制游戏时不显示玩家角色(推荐),可以通过键盘上的【B】键来切换玩家角色的显示状态。 多人游戏 若要开始多人游戏,请按下Vive左手控制器上的菜单键(Oculus Rift的菜单键)以打开手机菜单。之后,你可以邀请好友或加入随机游戏。 点唱机 玩家可以自定义点唱机中显示的网络电台。找到名为【myradiostations】的文件。该文件可能位于【C: Users [你的用户名] AppData LocalLow KeithKurby Drunkn Bar Fight】路径下,具体位置取决于你的Steam安装方式。此文件会在游戏首次启动时生成。这是可通过点唱机使用的电台列表。如果将其中一个电台替换为另一个,新电台将取代其在点唱机中的位置。有关如何创建相应文件的更多信息,请参阅无线电指南5.1章节。 漏洞!! 如果遇到问题或错误,请向我们发送您的日志文件。 日志文件可在以下路径找到:C: Users [您的用户名] AppData LocalLow KeithKurby Drunkn Bar Fight如果问题未解决,请在下方列出的错误反馈渠道告知我们。 2. 视频卡顿、碰撞或打击效果异常 若开启了超级采样功能,可能会出现此问题。解决方法:关闭超级采样。若问题仍存在,请通过下方性能反馈渠道告知我们。1. 点唱机无法播放音乐 若首次启动游戏时创建【MyRadioStations】文件出现问题,会导致此情况。请将该文件复制到【C: Users [您的用户名] AppData LocalLow [用户名] Drunkn Bar Fight】目录下以修复错误。更多信息请查看下方关于电台的内容。 2. 无法移动或双腿卡在地面并扭曲我们的游戏支持Vive追踪器。如果您的腿部安装了Vive追踪器,可以在游戏中使用它们。部分第三方软件会创建虚拟追踪器。若SteamVR中连接了追踪器但未安装在腿部,可能会导致问题。解决此问题,请在SteamVR中取消追踪器配对。 模式 回合制 - 开启或关闭回合模式。回合结束时会有警察出现,如果你不想被执法人员打断,可以取消勾选此框。 【无敌武器】- 勾选此框后,可承受多次攻击的武器将不会损坏。 【魔法药水】- 勾选此框后,魔法药水将会出现。 【无敌模式】- 如果你不想被对手击倒,勾选此框。 【无尽关卡】- 如果你不希望对手被击倒后离开酒吧,勾选此框。 【触摸模式】- 如果你希望Vive控制器的移动方式为“触摸”而非“按压”,勾选此框。击倒模式 开启或关闭回合制。回合结束时会有警察出现,若不想让执法人员介入,请取消勾选此选项。 不可破坏的武器 - 勾选此选项后,武器在受到多次打击后也不会损坏。 魔法酒精 - 勾选此选项后,游戏中会出现魔法酒精。永生 - 勾选此选项后,敌人将无法将你击倒在地。 无限关卡 - 勾选此选项后,敌人在被你击倒后不会离开酒吧。 转向 - 勾选此选项可将控制器的转向设置为【敏锐】或【平滑】。连击 玩家可以通过多种方式在酒吧中获取分数和喝彩。Stitchz - 向AI角色头部投掷并打碎瓶子 Nutz - 击打AI角色的要害部位 Splinterz - 用椅子砸向AI角色使其断裂 Splinterz - 用椅子砸向AI角色使其断裂 Coconutz - 将两个AI角色的额头互撞 Ballz - 与4个或更多AI角色战斗 Bullzeye - 用飞镖射中AI角色的眼睛 Shardz - 打破窗户 Salutz - 展示嘲讽动作 Cheapz - 仅使用一把椅子通关游戏 Tunez - 切换广播电台 Comboz - 将AI角色抛向空中并击中
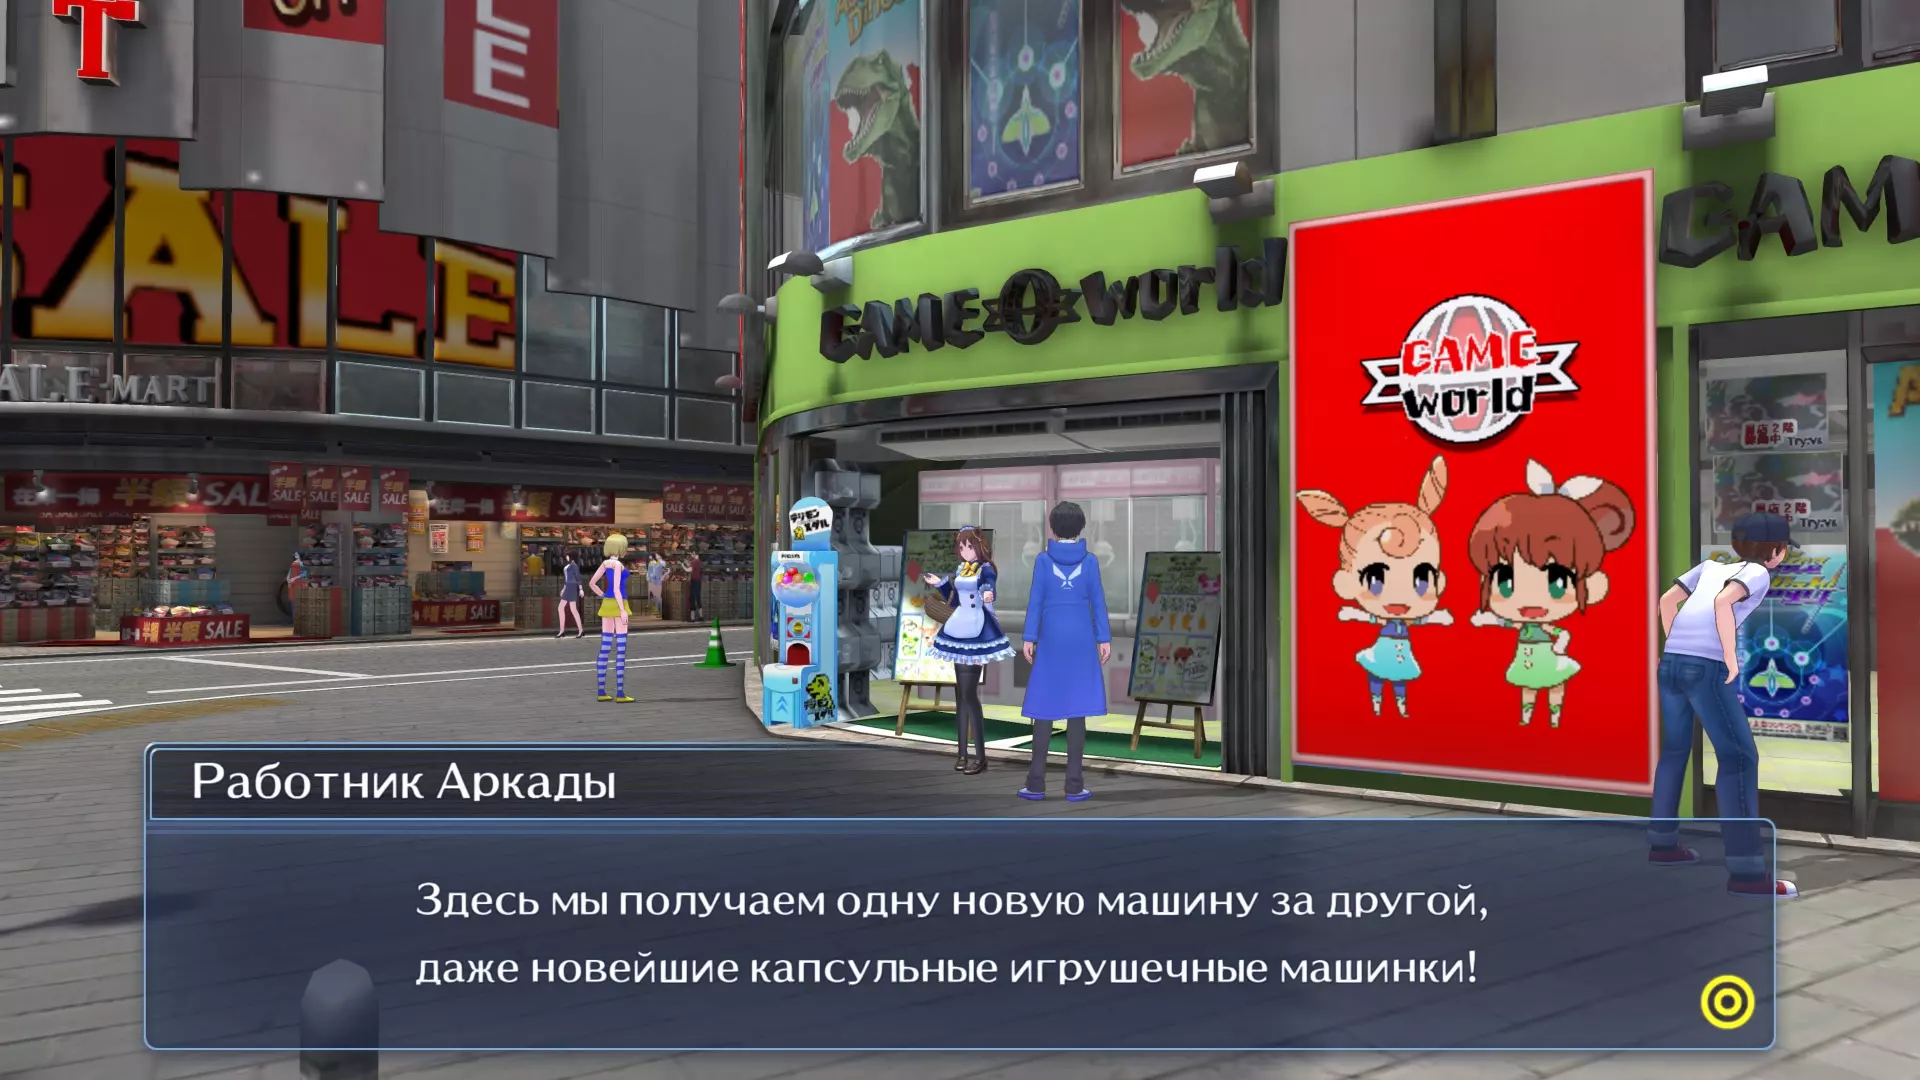
游戏俄文本地化补丁(测试版) 《数码宝贝物语》俄文本地化 大家好。 我制作了这个俄文本地化补丁,因为我喜欢数码宝贝系列。翻译部分为人工翻译,但大部分是通过谷歌翻译完成。总体而言,文本是可以阅读的,比如对我这种英语不太好的人来说,阅读这样的翻译要容易得多。 要人工翻译所有内容对一个人来说是不可能完成的任务——有2000个本地化文件,大小为16MB。文本通过程序以整行形式提交给谷歌翻译(而非浏览器翻译时的分段形式),这使得文本更具可读性。 除了三个因会导致游戏崩溃而被移除的文件外,其余所有文件均已翻译。或许人工翻译能解决这三个文件的问题,但已无力再做…… 部分图像已进行翻译。除解包工具外,本地化所需的工具均为自行编写。我会提供文件并说明如何处理,共同更新本地化内容。如果有需求,我也可能会亲自更新。作者Rzone:负责程序部分、机器翻译、图形。iSergey123:负责翻译改编、测试。安装文件共三个:DSDBS.steam.mvgl(翻译文件)以及M100.mvgl、M104.mvgl(字体文件) 打开游戏文件夹:...Steam\steamapps\common\Digimon Story Cyber Sleuth Complete Edition\resources\media 复制原始文件M100.mvgl和M104.mvgl(保存到其他位置) 将M100.mvgl替换为汉化补丁中的文件 打开文件夹:Steam\steamapps\common\Digimon Story Cyber Sleuth Complete Edition\resources 复制原始文件DSDBS.steam.mvgl(保存到其他位置) 替换DSDBS.steam.mvgl文件文件更新至v0.22,修复了部分崩溃问题。翻译已部分适配。DSDBS.steam.mvgl(放入resources文件夹)。M100.mvgl和M104.mvgl(放入resources media文件夹)。本地化尚处于测试版,因使用机器翻译,仅部分测试,可能存在漏洞或崩溃问题。若出现崩溃情况,请替换DSDBS.steam文件。请提供与《数码宝贝物语:赛博侦探 完全版》相关的游戏内容以便进行汉化处理。

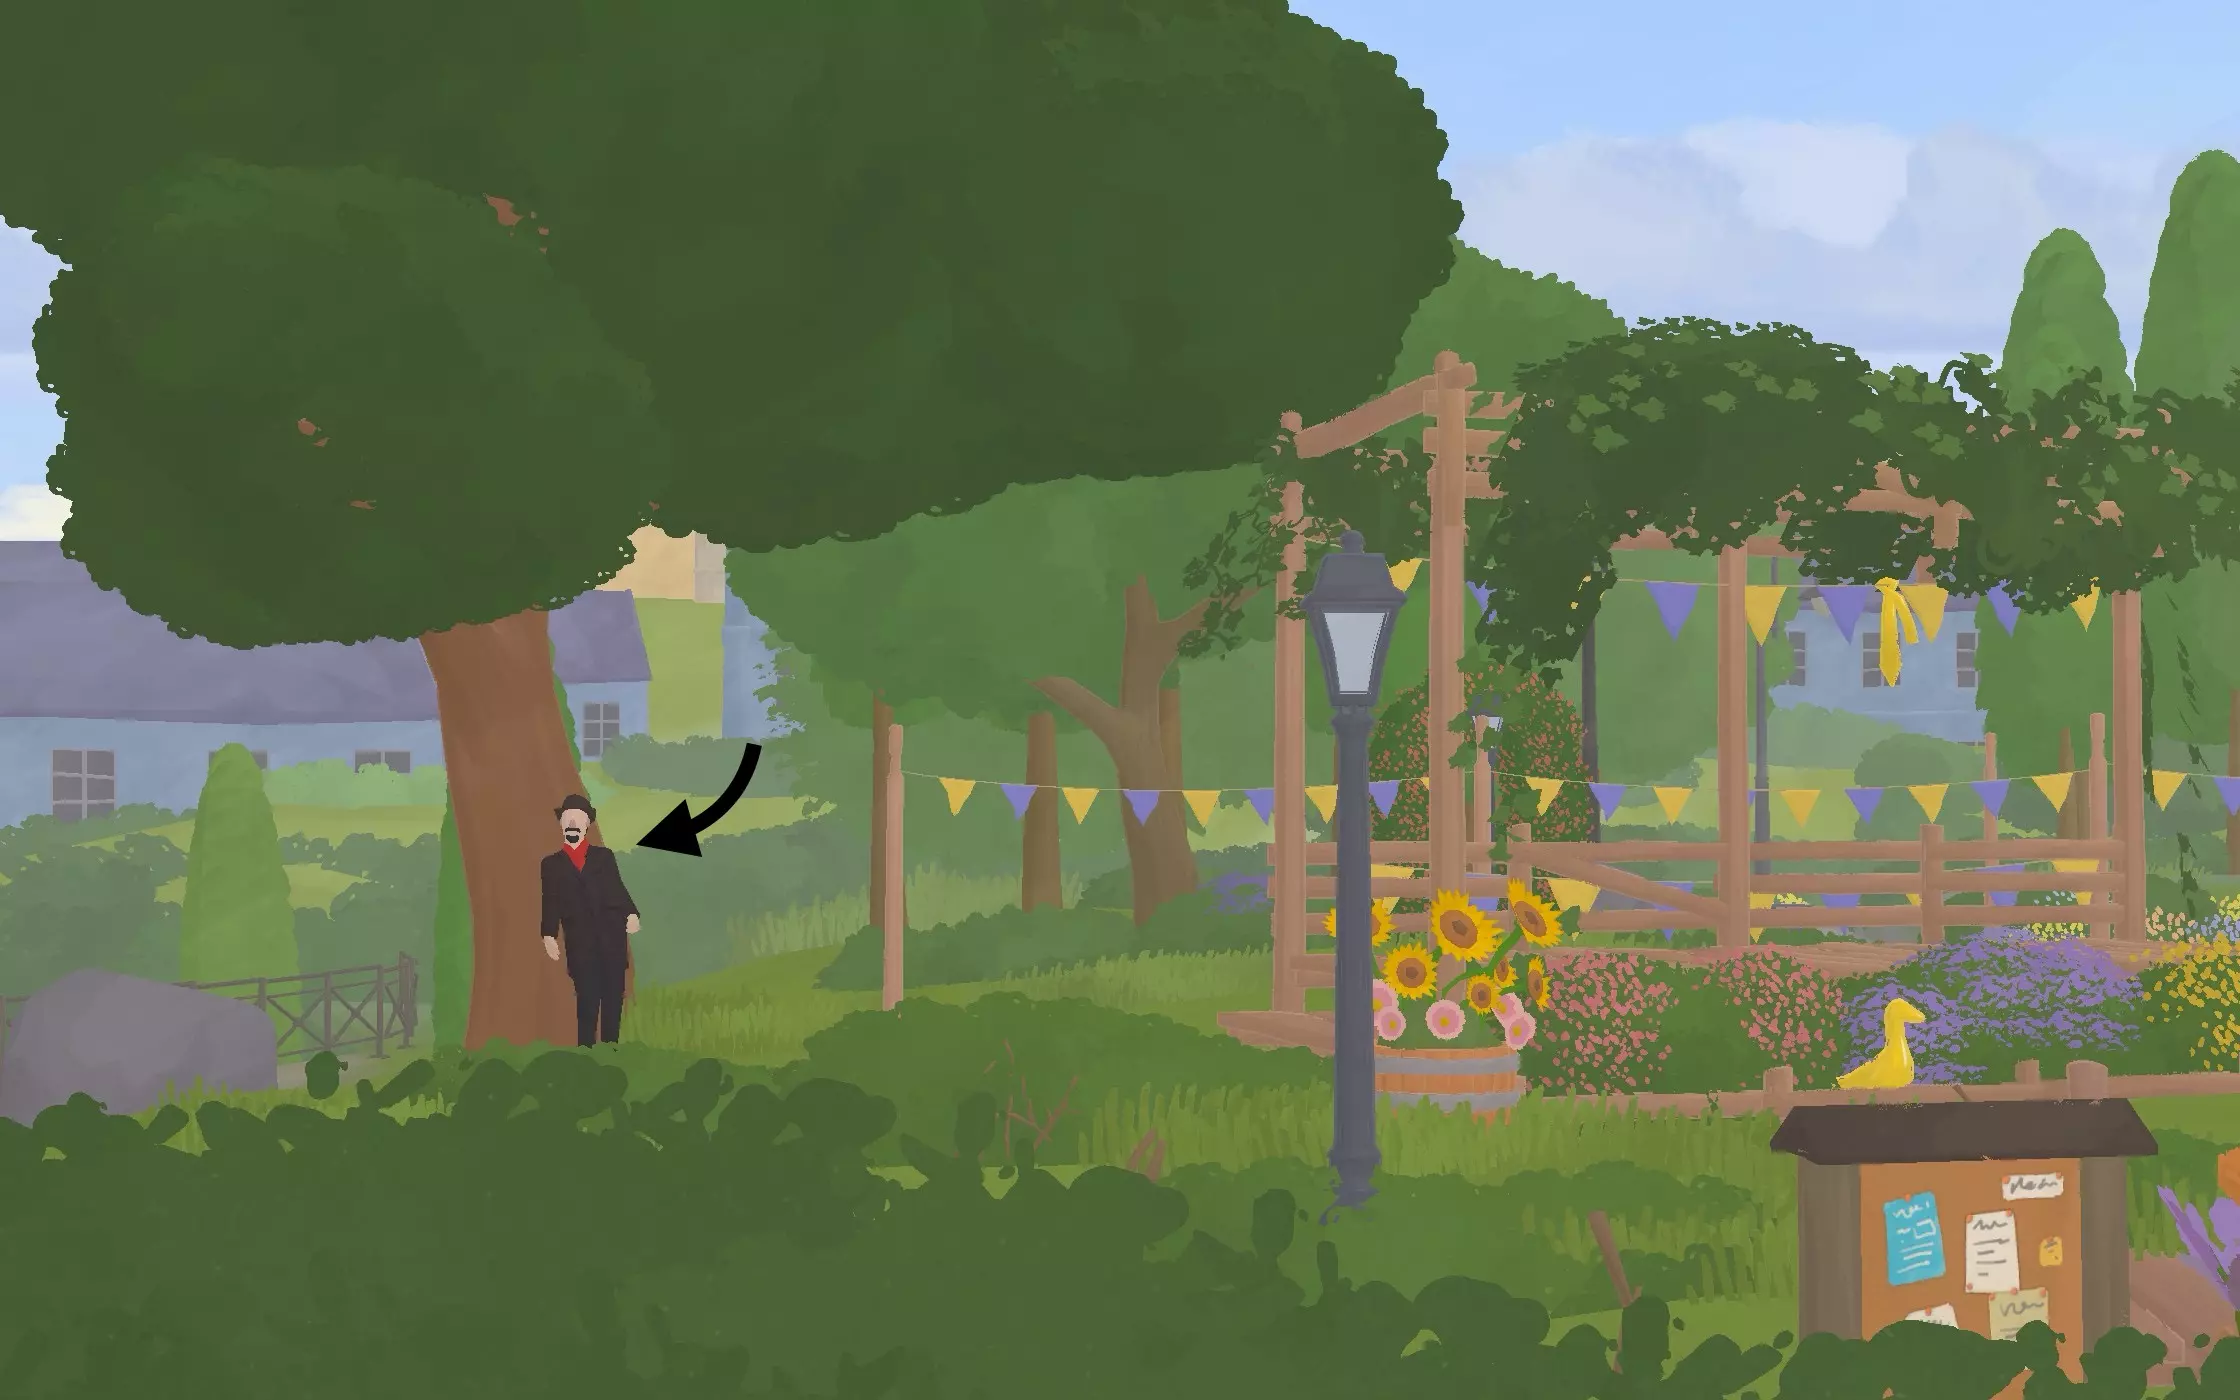
彩蛋 在春季的最后一天【花节】,将视角移动至最左侧会看到哥特商人。 对话后得知需要收集6个复活节彩蛋。
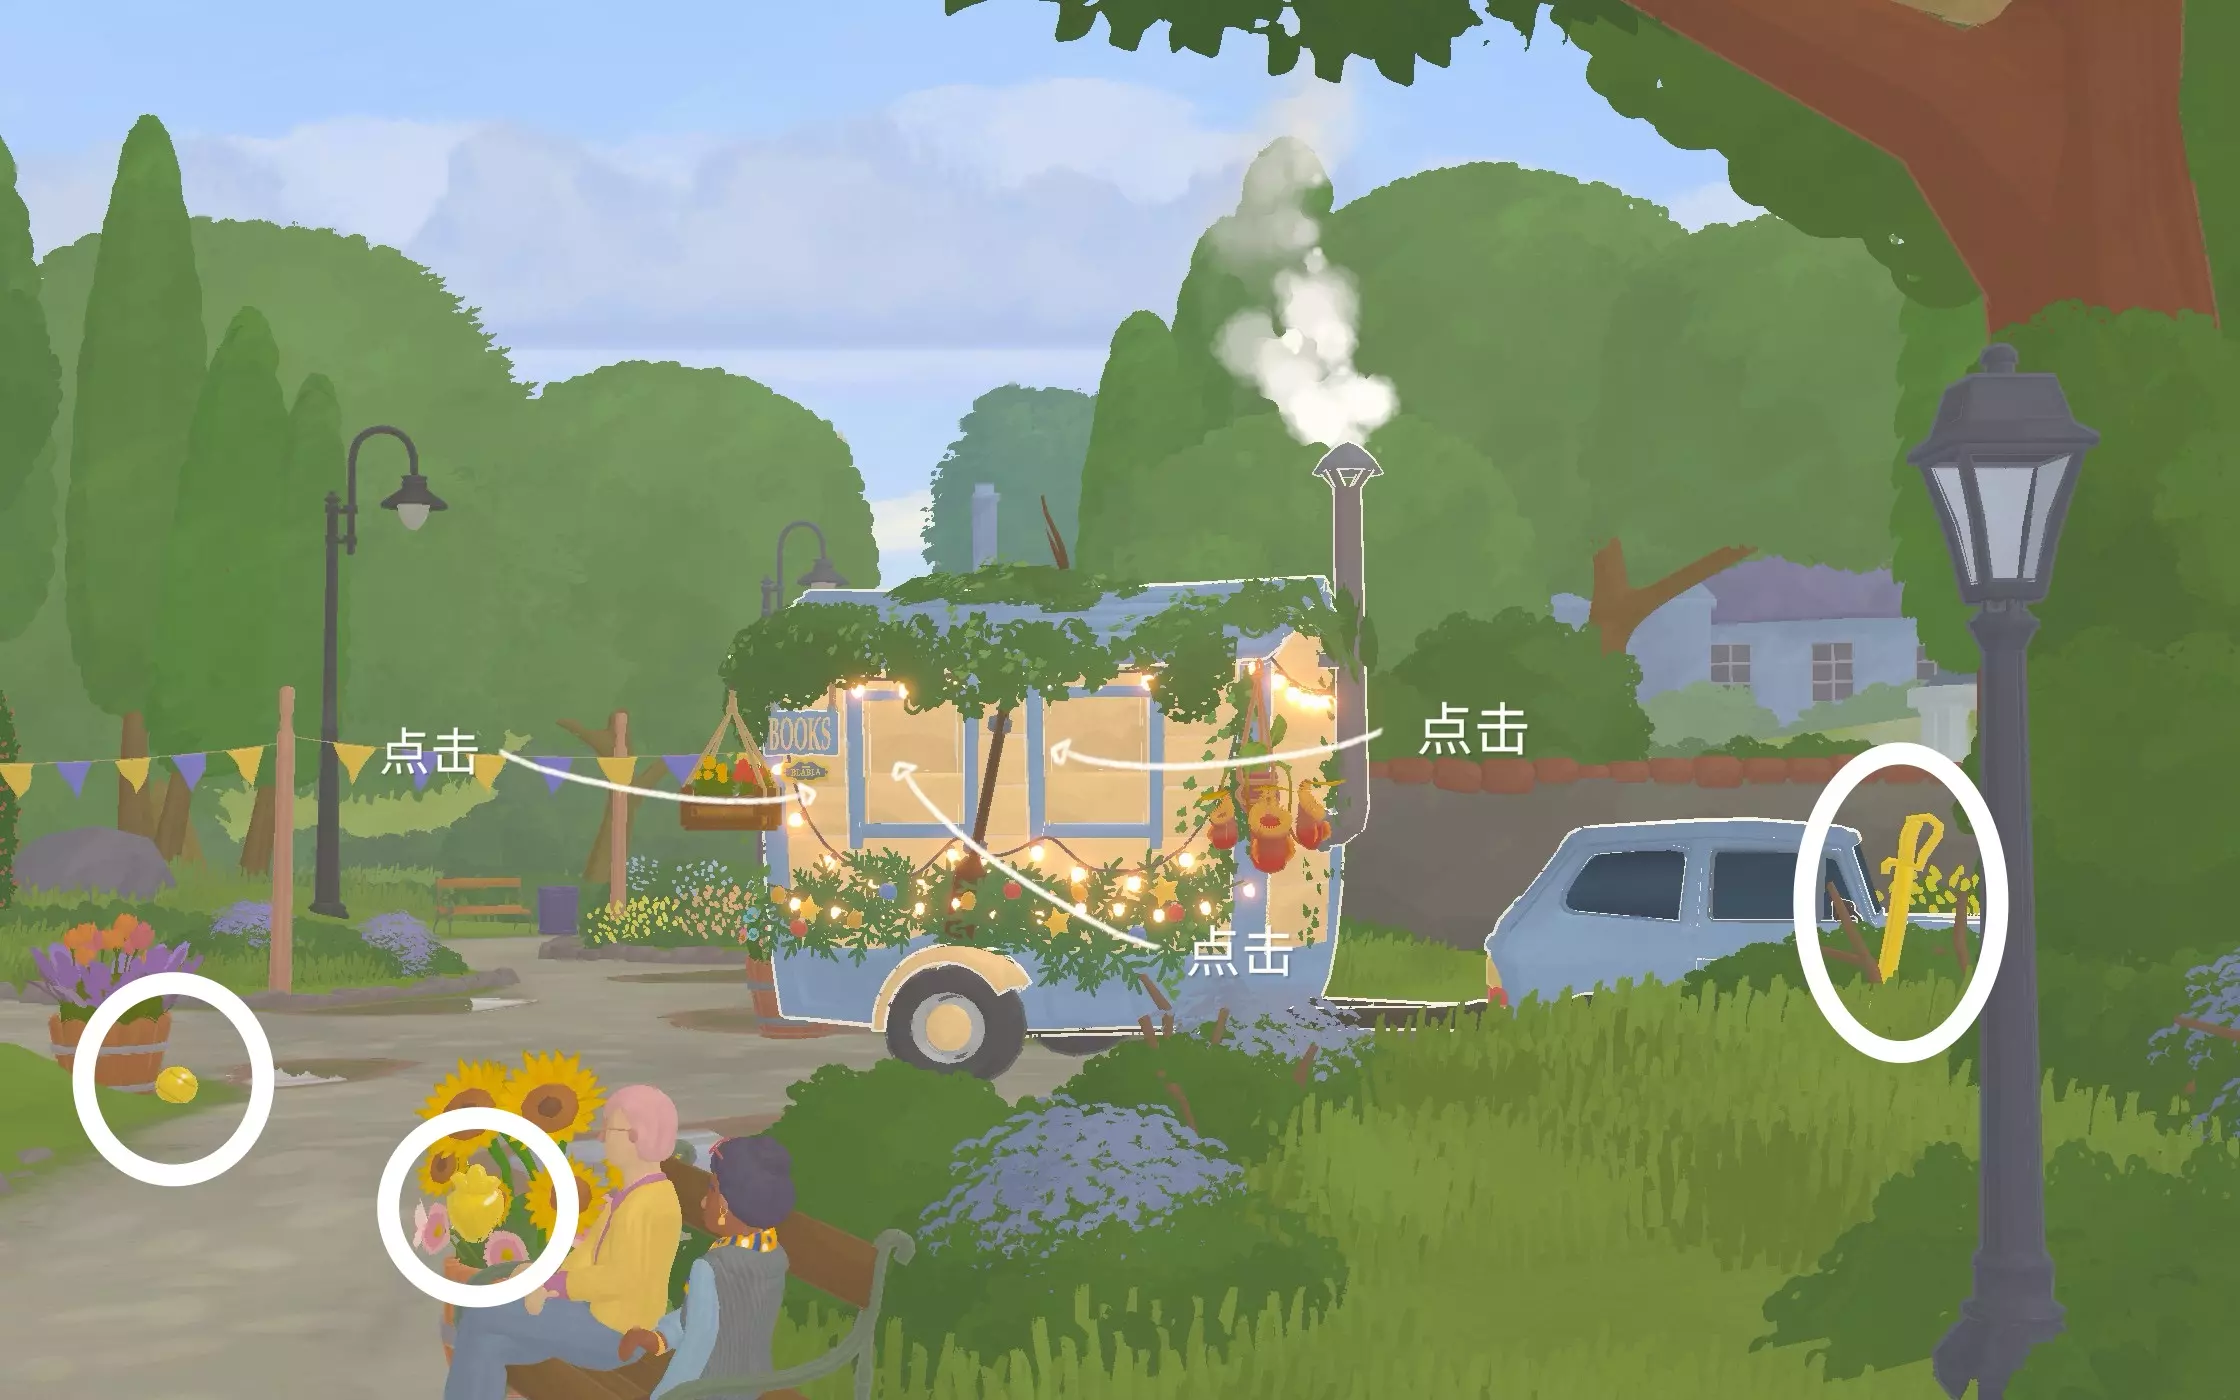
彩蛋位置如下(建议在开店前收集 画面清净且不占时间)
集齐后再与哥特商人对话会得到新物品【★】

本指南将为你展示如何在猎人模式中以三星评价通关所有关卡。此外,还包括从第6关开始的【市中心故事】关卡。 【市中心故事】第6-11关(三星评价)
市中心奖励关卡全关卡(3星) 建筑工地故事全关卡(3星) 建筑工地奖励关卡全关卡(3星) 科技园故事全关卡(3星) 科技园奖励关卡全关卡(3星)
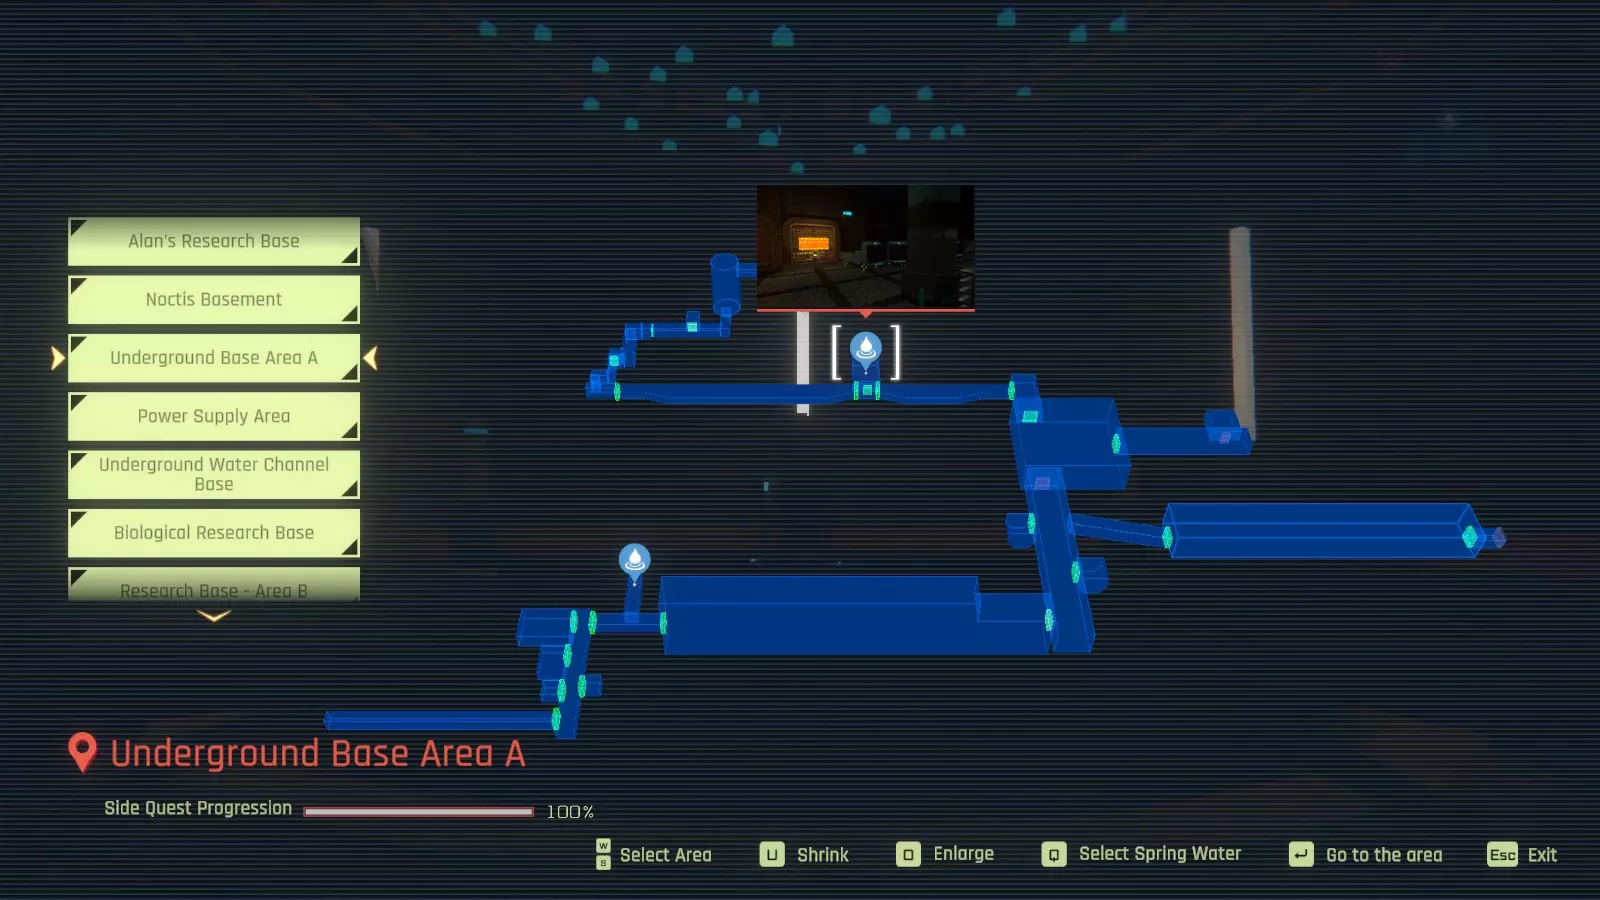
本指南主要针对游戏通关后仍难以获取该成就的玩家。 该成就的进度会保存至整个游戏,而非仅保存在存档文件中。因此,如果你有已解锁安能力的存档,只需加载该存档并使用她的能力击杀敌人即可。 但如果你没有这样的存档!
你需要前往地下基地A区,并在此保存或覆盖当前存档。然后向左门方向前进,你会发现螃蟹敌人,每当你进入左门或返回右门时,这些敌人就会重新刷新。
在区域中央,每当你重新加载存档、传送至其他地方再返回时,会刷新几只蟹类敌人。 在此处激活你的能力,消灭该区域内所有螃蟹。 然后重新加载存档。 重复上述步骤,直至解锁成就。 补充:经测试,重新加载存档不会重置能量条,但会刷新中央区域的螃蟹(包括那只红色螃蟹)。 补充2:装备较弱的武器可以更快地充能。
我制作了一个非常简单直接的视频,以避免产生混淆。

本指南包含游戏全流程及所有成就的视频: - 包含成就的游戏全流程视频(部分成就在游戏首发时存在bug) - 首发时无法正常解锁的成就视频 - 新区域及额外谜题视频(由开发者于2023年4月24日添加):护身符/望远镜谜题以及蓝色/橙色球体谜题。 游戏全流程+成就
《Escape First Alchemist》2023年04月24日更新内容 1. 开发者在关键区域新增了新区域和一些谜题。 2. 44:50处的卷轴已替换为护身符。你将在新区域中找到该护身符,需要拿起并完成它。 3. 在游戏结尾1:22:00处,你将遇到一个新谜题:蓝/橙色球。 4. 收藏品和成就保持不变。 成就: 0:42 Welcome : 你得帮帮我!10:30 双倍数量:成功炼制出暴击药水 1:00:55 1d4:变形立方体 1:01:58 Master Brewer:酿造所有药水 1:09:44 Archivist:阅读所有知识碎片 - 2:05 知识碎片1 - 8:13 知识碎片2 - 8:56 知识碎片3 - 27:04 知识碎片4 - 1:09:43 知识碎片5 1:14:38 Curious:找到并检查所有古董 - 2:12 铃铛 - 5:41 号角 - 9:03 书籍–魔法书 - 14:30 魔法球 - 15:37 仪式刀 - 26:42 护身符 - 45:00 安卡十字架 - 1:06:36 圣杯 - 1:14:34 骷髅头 1:10:04 Collector:收集全部15张卡牌 - 2:28 太阳牌12 - 3:27 愚人牌5 - 3:57 审判牌7 - 5:16 正义牌8 - 7:47 恋人牌9 - 8:05 星币皇后牌11 - 8:45 倒吊人牌6 - 11:52 皇帝牌3 - 15:40 塔牌15 - 26:54 皇后牌4 - 31:33魔术师卡牌10 - 38:56 月亮卡牌14 - 44:39 恶魔卡牌2 - 1:06:30 死神卡牌1 - 1:10:04 宝剑王牌卡牌13 - 1:22:44 结局1 - 1:25:30 结局2 你可以在此处查看其他成就Think Fast (Alone)、Iron Gut、I See U 其余成就 我游玩游戏时部分成就存在bug或我有所遗漏。 因此,这就是在你完成游戏后解锁它们的方法。 0:00 Think Fast:向朋友投掷一瓶药剂 2:23 Iron Gut:喝下所有药剂 9:52 I See U:揭示所有幻象 完整游戏视频 额外谜题+新区域 在2023年4月24日的更新中,开发者在关键区域添加了新区域和一些谜题。0:00 新增区域,包含护身符/望远镜谜题 此护身符替代了游戏旧版本中可获取的卷轴(可在本视频44:50处查看该卷轴) 16:17 新增谜题:蓝/橙球 你将在游戏结尾遇到这个新谜题。 祝你玩得开心!
本指南基于THE SHELL系列的翻译者John Hooper/GAce所编写的完整攻略。我希望制作一个无剧透版本,仅聚焦于必要的选择,避免透露可能破坏剧情的角色名称,避开坏结局,并且不包含可选的H场景。同时,考虑到这部视觉小说拥有大量选择,本指南也简化了文本跳过的方法。《壳之少女》在系列中因其数量众多的潜在选择和结局(包括普通结局和坏结局)而显得尤为突出,因此一个精简的真结局指南会特别有用。回顾整个三部曲,本指南优先选择能通向与《壳之少女2》相连的真结局的选项,同时强调那些在《壳之少女3》结局前始终重要的关系。 在调查场景中,一个好方法是点击每个显著物体两次。可能需要进行一些对话才能解锁结束调查的选项。 普通结局1(解锁真结局的必要条件) 三部曲的一个常见设定是,需要完成第一个普通结局(不是坏结局)才能进入真结局路线。《壳之少女》高清版结局,然后进入《壳之少女2 / THE SHELL Part 2 Purgatorio》。点击新游戏 这是一段简短的序章,在提示时你只需调查所有事物,当你以主角玲二的身份进行游戏时,以下日期和选择才会真正产生影响。 1月14日 新宿,月世界 2月29日 调查所有事物 3月5日 调查所有事物(确保检查挖开的泥土),受害者2:犯罪现场,受害者2:尸体,月世界,询问恭子 3月6日 唯或遥,受害者2:尸体 3月7日 调查环节(需要检查脸部、衣物和地板上的玻璃) 3月8日 你在画什么?,井之头公园,你感觉怎么样?月世界,井之头公园 3/9 假装,职员室,别管她,东京都,月世界,安慰她 3/10 忙碌,撒谎,高城诊所,想知道,大庭学园,询问此事 3/12 调查环节(需要获得纸片,在分别调查黑布、上半身、下半身各两次后,可在尸体口中找到),指定,由衣+朽木冬子+镜华,由衣,黑布,黑圣母,大庭学园,月世界,招待客人,神曲,蛆虫,3/13 【剧情强制H场景 注意】,新宿站,东京都 3/14 东京都,月世界,冬子 3/15 井之头公园,大庭学园 3/16 调查环节(需要获得纸片,在调查尸体后可在其口中找到)裙子和腿部各调查一次。如果出现“继续调查”选项,意味着你还没有找到重要线索,所以务必点击该选项直到找到线索。提示:调查完尸体上半身之后,再次调查裙子。调查环节(需要调查右上角的柜子两次),由井照片,由井,真,大庭学园,否,月世界,观察地点。3月17日[剧情强制H场景 注意],[此处存档1以便后续使用],不要睡觉(重要!)妮亚斯之卵,由衣,全体成员,戒指,织姬,妮亚斯之卵,日下,神秘碎片,家中的疑问,出租车,调查环节(需要调查书架中间平放的书),日下 3/29 东京都,井之头公园 3/30 任意,任意,井之头公园,新宿 3/31 井之头公园,月世界【H场景】4/1 冬子,东京都,新宿站 4/2 任意,月世界,东京都 4/4 离开,任意,月世界 4/5 东京都,大羽学园 4/6 访问全部(顺序无关)4/7 朽木病理研究所,月世界 4/8 新宿,高城诊所,井之头公园 4/10 没有线索, murder case victims, murder case bodies, corpse disposal methods,东京都,月世界 4/11 美术室,教室,校园 4/12 调查环节(需要通过两次调查大型书架找到杂志,然后调查桌上的小型书架,再调查大型书架),同一人,肢体,相加,真嗣,真照片,美术工作室,4月13日选择所有可用姓名,亚麻布,直树,宁宁,调查阶段1(需要调查所有物品两次),调查阶段2(需要调查大部分物品两次,但不要调查书桌右侧的书),结束调查,与八木沼合作 真结局(在普通结局1后解锁) 达成所需普通结局的几乎所有选择与达成真结局的选择相同。第二次游玩时只有少数不同选项和新选择,因此请务必留意。如果你按照我的要求在3月17日开始时保存了存档1,你可以从那里继续。否则,只需点击新游戏,并按照普通结局1的选择进行,直到3月17日。 3月17日【在此处加载存档1以方便游戏】,与【重要!】H场景警告,涅亚尼斯之卵,由衣,全体成员,戒指,织姬,涅亚尼斯之卵,日下,神秘碎片,家中的疑问,出租车,调查环节(需要调查书架中间平放的书),日下 3/26 任意选项(不妨选里面) 3/29 东京都,井之头公园 3/30 任意选项,任意选项,井之头公园,新宿 3/31 井之头公园,月世界【H场景】 4/1 冬子,东京都,新宿站 4/2 任意选项,月世界,东京都 4/4 离开,任意选项,月世界 4/5 东京都,大庭学园 4/6 访问所有地点(顺序无关) 4/7 朽木病理研究所,月世界 4/8 新宿,高城诊所,井之头公园 4/10 没有线索,谋杀案受害者,谋杀案尸体,尸体处理方法,东京都,月世界 4/11 美术室教室、校园 4/12 调查环节(需要通过两次调查大书柜找到杂志,然后调查桌上的小书架,再调查大书柜),同一人,肢体,合计,真嗣,真照片,美术工作室,4/13 选择所有可用姓名,亚麻布,直树,宁宁,调查环节#1(需要调查所有物品两次,注意脸部和颈部是分开的,且灯线+刀彼此非常接近),调查环节#2(需要调查大部分物品两次,但不要调查书桌右侧的书),结束调查,单独行动,仓敷 4/14 任意 4/15 真嗣 4/17 眼睛,有妹妹,选择所有选项,齐藤 4/18 不要拉动 结局:去看看 如果你能看到最后一个选项并选择了它,你现在已经看到了真正的
本指南旨在让你了解博斯独立步枪连(IR von Bose)的工作方式:包括其使用的命令以及如何执行这些命令。此外,还会穿插一些小贴士,告诉你在《Prime & Load : 1776》的线列战斗(Linebattles)中如何表现才能避免看起来像个完全的新手。本指南既适用于第8步兵团的新兵,也能帮助那些属于黑森旅团或希望加入该旅团参与历史性线列战斗的玩家。 引言 欢迎,尊贵的新兵们!本指南将让你了解黑森团在战斗中的运作方式。因此,请认真阅读并记住这里所说的内容!因为快速准确地执行此处列出的指令,可能会拯救你和战友的生命。
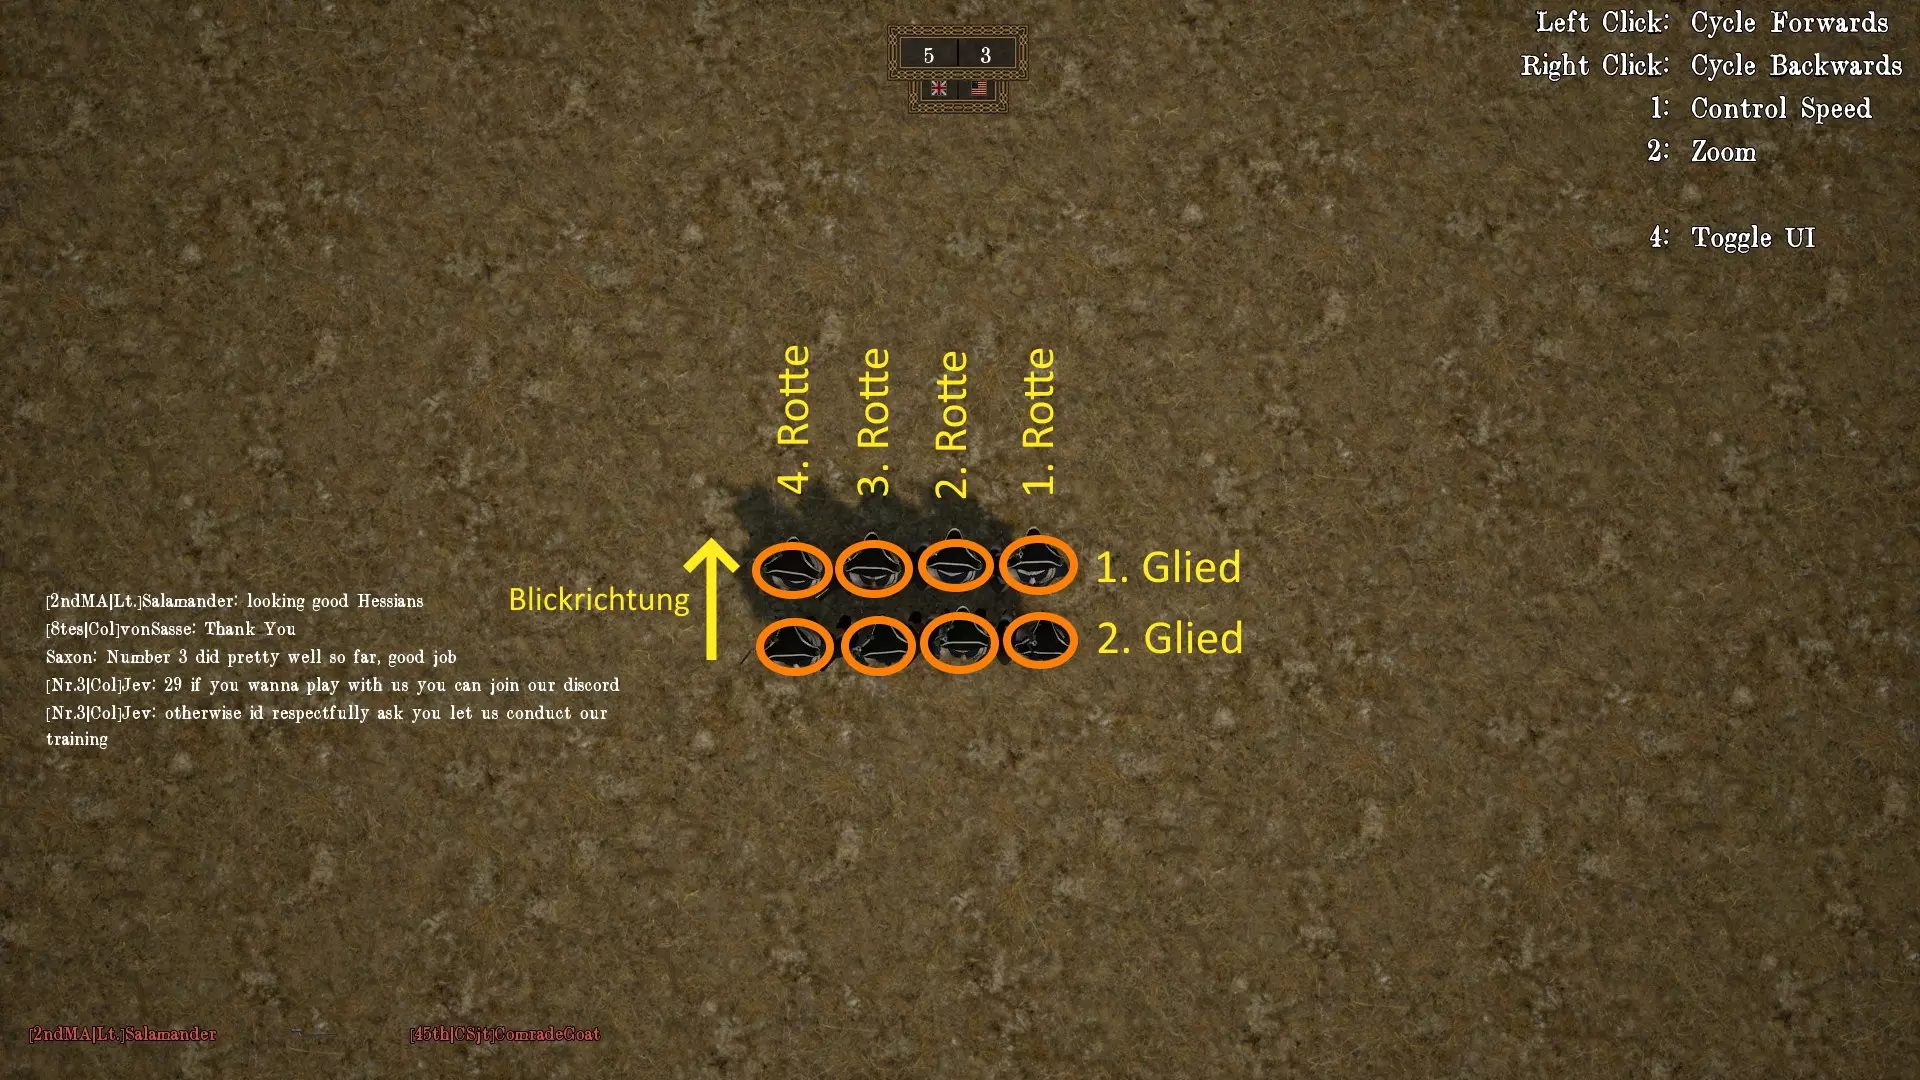
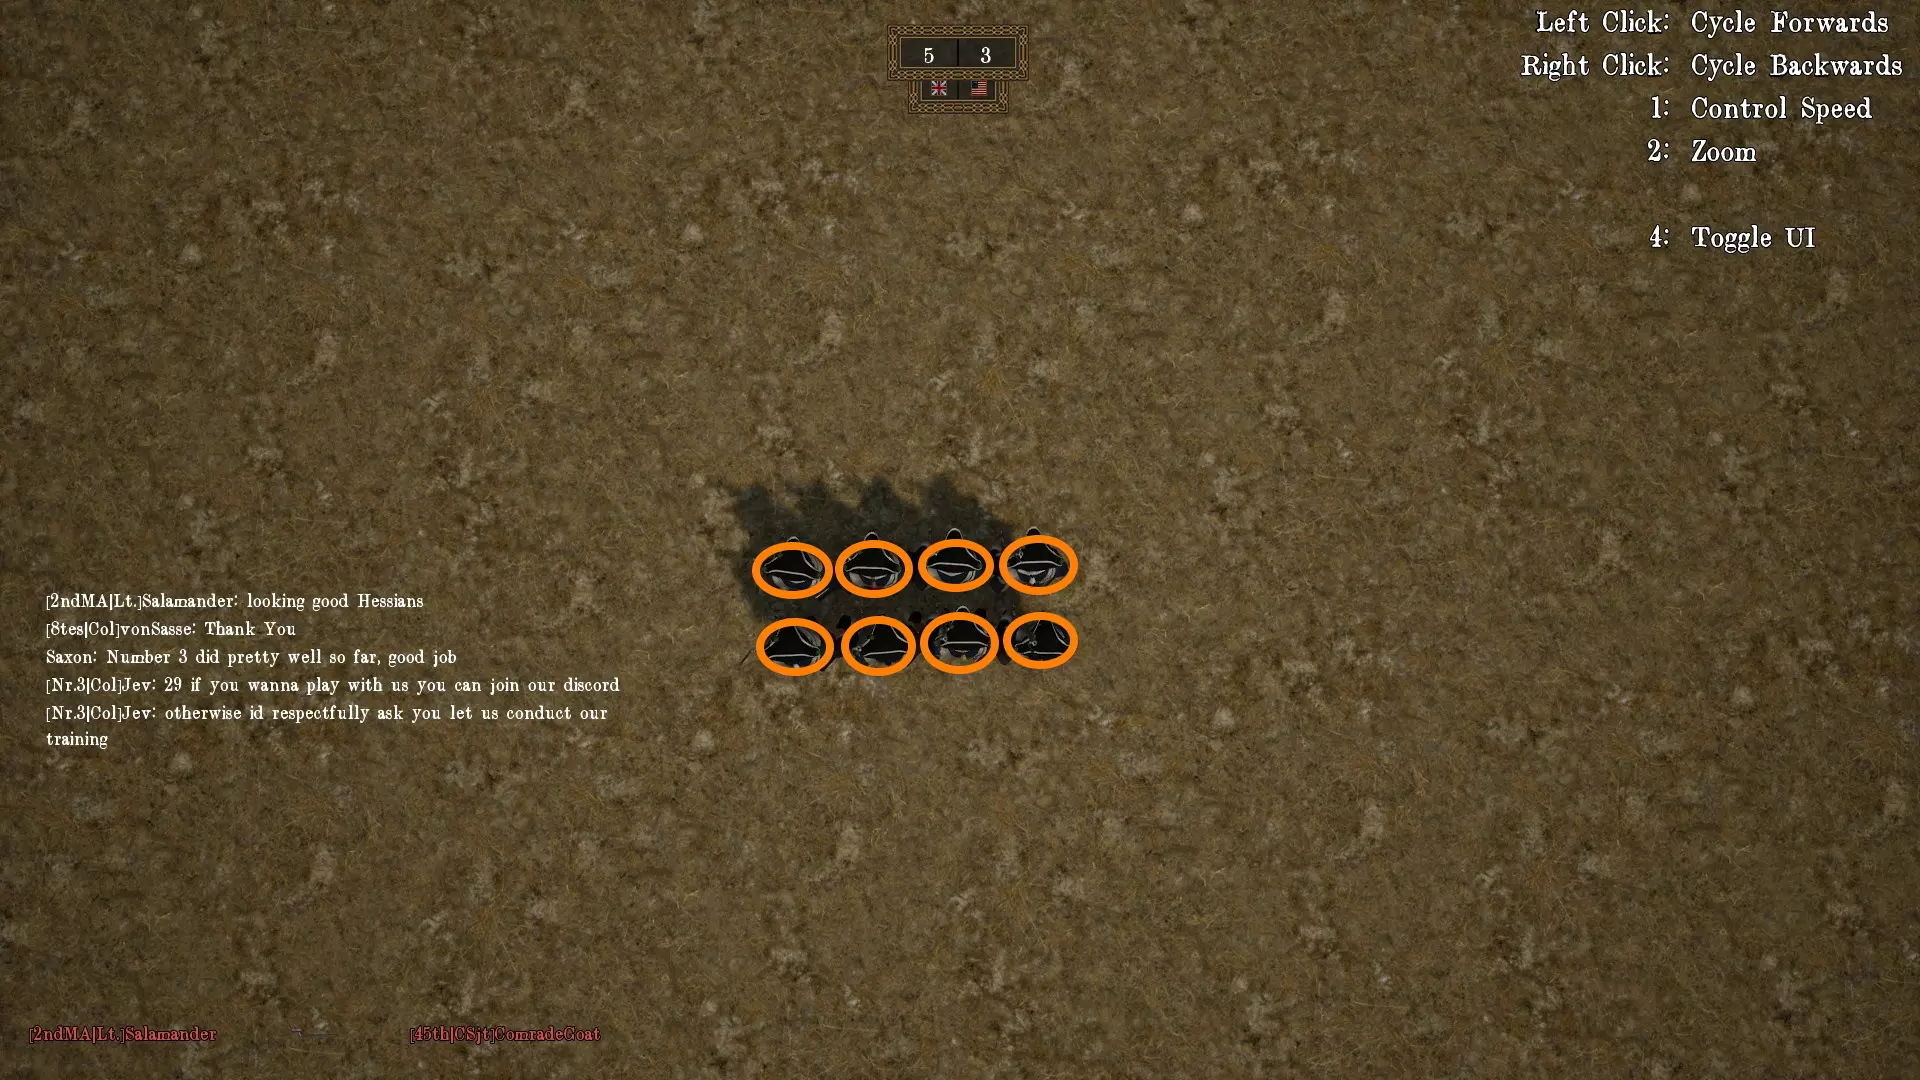
集合! 团内采用线列战术作战,并每周进行训练,确保所有成员无需过多思考具体指令含义就能迅速服从命令。指令执行得越快,线列作战的效率就越高,齐射火力也就越强。 基础编队指令 成一列集合!/成两列集合! 士兵们需排成一列或两列,即并排站在军官前方。第一名士兵站在军官正前方,其余士兵向左依次排列。前方的横队称为第一列,后方的称为第二列。前后排列的士兵组成纵队,从右开始计数。
并排站立的士兵称为【列】;前后排列的士兵称为【排】。第一列第一排的士兵在列队时站在军官前方。该士兵以及位于队列最左侧的士兵称为【侧翼士兵】。此位置通常由士官或军衔较高的士兵担任。 【向右/向左转——齐!】 整条/所有队列通过左/右肩旋转180度。(注意:现在站在前方、原本是第二列的队列,因位于前方而成为第一列。相应地,原本的第一列现在变为第二列。) 【向右/向左转!】 士兵向右转/左转90度。 【以常步走!】 士兵正常“行走”。在1776年背景下,可通过【Shift】键切换奔跑模式。快步前进! 士兵“跑步”。 前进! 士兵径直开始移动。 全排立定! 整列停止前进。此时以最右侧士兵为准看齐。 看齐! 若队列中出现空隙,士兵们向右靠拢并填补空隙。(当正在向左行进时,此规则有例外。此时需向左看齐。一旦右侧翼士兵到位,便再次向右看齐)。 在我右/左侧列队! 士兵们在军官的右/左侧组成新队列。 向我位置前进! 队列前进至下达命令的军官所在高度。 按士官右/左排成横队:右/左转弯与“向左右转!”命令相反:士兵们以横队阵型行进或站立。在静止状态下,除最右侧/最左侧的士兵(翼侧士兵)外,所有士兵都转向相应方向。随后下达“前进”命令时,未转向的士兵开始行进,其余士兵则成列跟随。此操作在行进中同样适用,但无需额外的“前进”命令,队列会直接形成。
当左翼士兵开始行进时,其余士兵可轻松跟上。原第二列士兵需追上翼侧士兵,以组成两列整齐的队伍。 向右转/向左转!士官:向右转/向左转! 行进过程中,士兵需向右/左呈弧形前进,直至与相应翼侧士兵保持齐平并形成一条直线,期间不停顿。当然,也可如图片所示在静止状态下执行此命令。此时,军官会下达“前进!”的指令,士兵们才会移动到新的位置。基准点和方向参照点为士兵转向一侧的翼侧士兵。
士兵们围绕着充当门轴的翼侧士兵进行旋转,就像门绕着合页转动一样。对于第二列的士兵来说,跟随前面的士兵是最简单的方式。 半右/左转! 士兵们在行进中向右转/左转45度,继续前进,直到听到“前进!”的命令。在此期间,他们应保持行进,不要调整队列。只有在听到“前进!”的命令后,才调整队列。
如图所示,士兵会朝着指定方向倾斜转身并前进,直到收到【直行!】命令。该命令主要用于在行进中简单绕过物体。 【直行!】 士兵会回转45度回到原来的位置。由于半右/半左时队列常常会有些散乱,此时会自动进行调整。 【保持方向!】 指挥官离开部队,但右翼士兵仍会继续沿原方向前进,直到新命令下达。 【跟我来!】 队列跟随指挥官行动。 【撤退!】 士兵转身180度并撤离。切换至近战模式可中断装弹。 【集合!】收到撤退命令后,士兵会在军官面前排成一列,面向敌人。士兵站定后,如果尚未进入近战模式,将自动切换至近战模式。士兵不会自动装填弹药,需等待装填命令。 射击命令/阵型 进攻! 上膛! 开火! 退膛! 自由射击! 由于《Prime & Load : 1776》设有瞄准系统,士兵会等待瞄准圈缩到最小后再射击。但注意不要等待过久,不建议进行补射。 听我命令,开火! 与“开火!”命令不同,此命令下士兵会立即射击,无论瞄准圈是否缩小或张开。 齐射!/自由开火!士兵可以自行选择目标,并自主决定何时射击。 装填! 当前枪膛内没有子弹的士兵,将装填他们的步枪。 停火! 停止射击,所有正在装填的士兵需完成装填。若士兵刚刚射击完毕,则不能立即装填,需等待“装填!”命令后才能进行。 ……分队卧倒! 指定分队卧倒。 ……分队起立! 指定分队起立。 冲锋! 第二分队的所有士兵向右迈出一步,以便能通过前排士兵的肩膀进行观察和射击。
在装填状态下,士兵们会处于“间隙”位置。这意味着他们会透过第一排士兵的肩膀之间进行观察。这样一来,就可以进行两排齐射,而不会出现“第一排蹲下”时各排之间的高度差问题。 由于在《Prime & Load : 1776》中士兵的 hitbox(碰撞箱)还不够完美,所以在游戏中装填时必须留出稍大一些的间隙,以避免误射前排士兵。大致情况如下:
由于《Prime & Load : 1776》中的 hitbox 还需要进一步优化,士兵们必须保持更大的间距。否则后排士兵不会击中敌人,反而会射杀前排的战友。 靠拢! “冲锋!”指令的取消:第二列士兵再次向左迈出一步,站到前排士兵身后。 近战 举枪向右攻击! 士兵切换至近战模式。 放下步枪! 若此前已下达疾跑指令,士兵会放下步枪准备下刺。在双列纵队中,仅第一列士兵发动攻击。在分排纵队中,仅第一排的第一列士兵发动攻击。 发起攻击! 士兵可以中断之前的攻击动作并进入近战状态。在此地一切行为皆被允许,直至新指令下达。 额外提示 上刺的攻击范围较小,但速度更快。与之相反,下刺的攻击范围更大,但施展所需时间更长。 士兵可按F键用枪托攻击敌人。 在《Prime & Load : 1776》中,要将冲锋的骑兵击落马下,可在近战模式下蹲下。士兵会将刺刀向前对准,立即击杀马匹。但马匹必须是正对着士兵冲锋,而非从其身旁经过!骑兵会被甩落马背,且需要时间起身。在此期间,你可用两次快速的刺刀刺击将其解决。黑森士兵战斗行为规范 线列战斗规则 线列战斗(LB)指的是多个军团相互对抗的活动。此类战斗可能有诸多规则或少量规则,且各有其独特之处,但以下几条规则几乎是所有线列战斗共有的: •禁止在队列外开火 •禁止在队列外蹲下 •队列出现缺口时必须尽快填补 •冲锋时禁止开火 请仔细阅读组织者制定的规则,如有疑问可向军官咨询。若违反规则,可能导致你的军团被取消线列战斗资格,因此务必遵守规则。博斯步兵团服役实录 团部行动纪实 您想亲眼目睹上述命令在战火中的执行情况吗?那就来观看【Prime & Load : 1776】历史事件首场阵线战的录制视频吧!在视频中,博斯团将与近卫军协同作战,对抗美国和法国军队。
如何加入博斯团? 如果你们中的任何人在阅读本指南并观看招募信息后,产生了执行这里所描述命令的强烈愿望,即使这些命令是对着你大喊的,那么你可以申请加入博斯步兵团(第8团): 加入 Teamspeak,IP 为 62.75.159.155:5555;或在 Steam 上联系 [8tes] Beuteltier。 所有命令的表格形式 在以下链接中,你可以找到黑森分遣队的规则表格。在这里你可以再次看到所有命令的列表。

虚拟存在
简介
TA什么都没有写
发帖达人Ⅰ