Forts


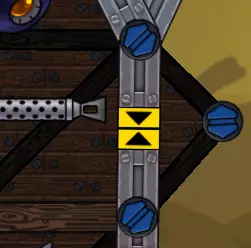
这不是一篇关于如何建造它们的指南,而是关于何时建造以及何时不该建造它们的指南。(其实称不上指南,更像是一些通用建议) 简介 你可能见过有些玩家为通常需要更大舱门的武器(例如加农炮或高射炮)建造小型舱门。甚至可以为狙击枪和转轮机枪建造这类舱门。但仅仅因为职业玩家经常使用它们,并不意味着你自己这么做就一定是个好主意。 首先,确保你能正确地为加农炮、火箭或高射炮等武器设置小型舱门。试着询问优秀玩家或观看回放,了解具体操作方法。有很多种方式,其中大多数需要你按G键来停用网格。第二点: 存在微型门并非合适选择的情况。原因如下。小型门的优缺点 主要优点: - 建造和维修所需的金属成本更低 - 更难被门狙(doorsnipe) - 由于成本较低,安装双门以防御穿甲狙击枪或加农炮射击的成本相当低廉 主要缺点: - 易受特定类型武器的攻击,例如核武器、榴弹炮、火焰光束或电锯若击中木质部分 - 武器的射击角度通常会部分受阻 - 需要操作频率(APM,即每分钟操作次数,简单来说:用鼠标绘制正确结构需要更多时间) 因此,何时使用或不使用小型门需根据地图和敌人情况来决定。并没有绝对正确的答案,因为某些观点可能支持小型门,而另一些观点则可能反对。 通常不适合使用小型门的情况: - 地图中需要射击处于不同高度的对手 - 敌人使用核弹,而你没有地图控制权/足够的防空武器来以极高的效率拦截它们(例如使用加农炮或激光对抗核弹,并用木头硬扛伤害) - 敌人拥有火焰光束,而你想建造更多火箭筒/霰弹枪……除非你能像高手一样放置沙袋,并且敌人目前无法部署迷你机枪 - 你的狙击手与需要射击的武器处于不同高度……狙击手需要射击角度,否则毫无用处在拥有大量经济的地图(如战列舰地图)中,不必费心使用小型舱门。 小型舱门通常适用的情况: -在狙击手与你通常想用该狙击手瞄准的武器处于大致相同高度时,为狙击手使用小型舱门。 原因:狙击手不易被舱门狙击,成本更低。 -为高射炮使用小型舱门:面对优秀玩家时,标准尺寸的舱门会使高射炮极易受到舱门狙击。但要确保这些高射炮的射角至少能覆盖来袭导弹路径的一部分。(否则高射炮将毫无作用) - 小型舱门在纯加农炮战斗中表现出色(维修成本低得多),但如果遭遇榴弹炮突袭可能会吃亏 - 火箭快攻搭配小型舱门通常效果不错,因为这样能更快更安全地对抗穿甲狙击炮(穿甲狙击炮是火箭快攻在游戏初期的最大克星,它可以一击摧毁霰弹炮或电磁脉冲武器)。当你用带小型舱门的火箭获得地图控制权后,如果能持续施加足够压力,就可以大量使用大型舱门火箭,甚至不带舱门的火箭。但要注意电锯和火焰光束武器。 - 在那些你没有足够经济来建造大量舱门的地图上


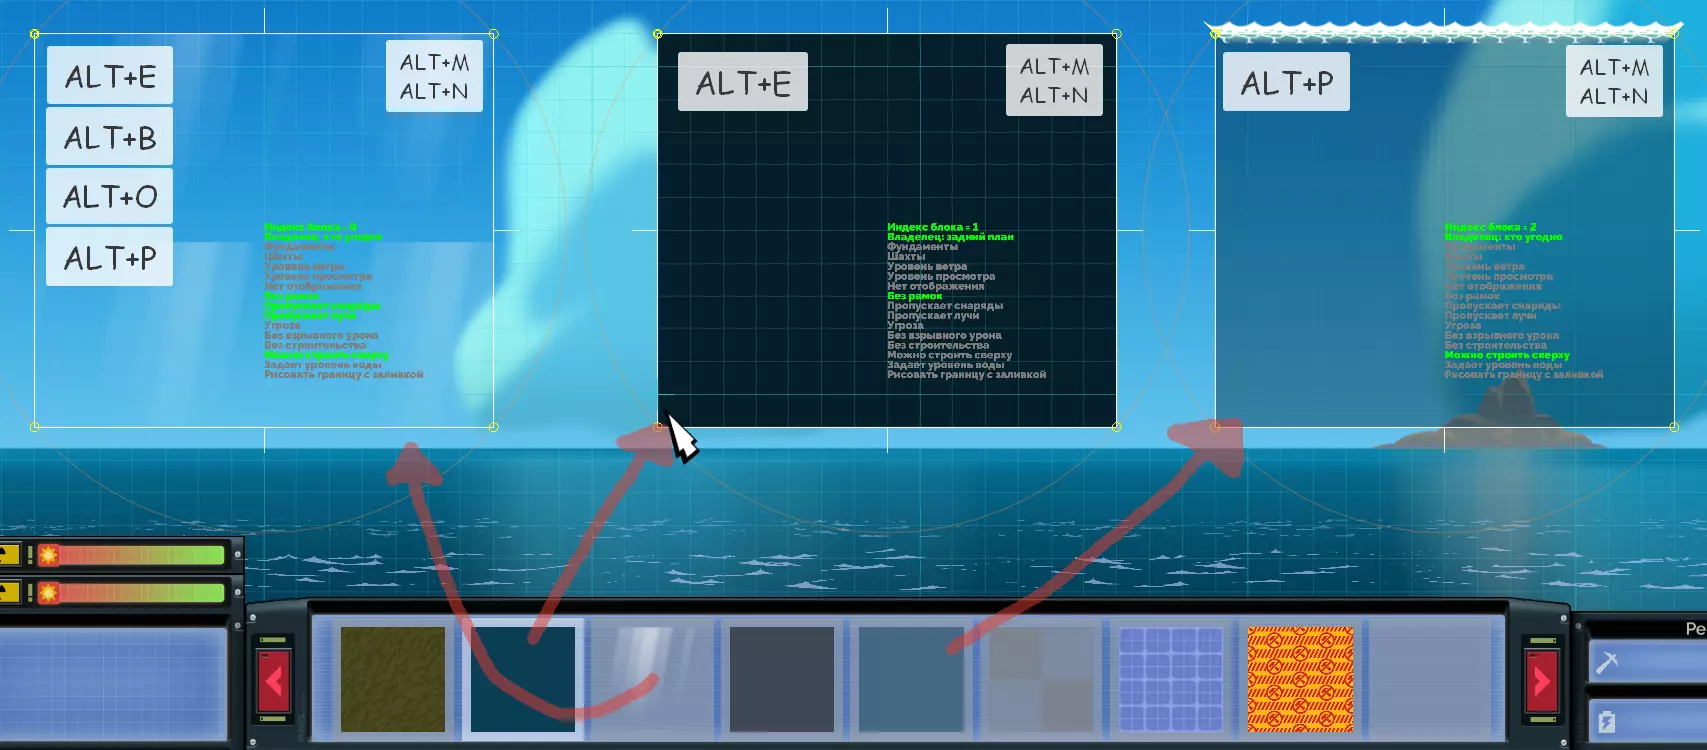
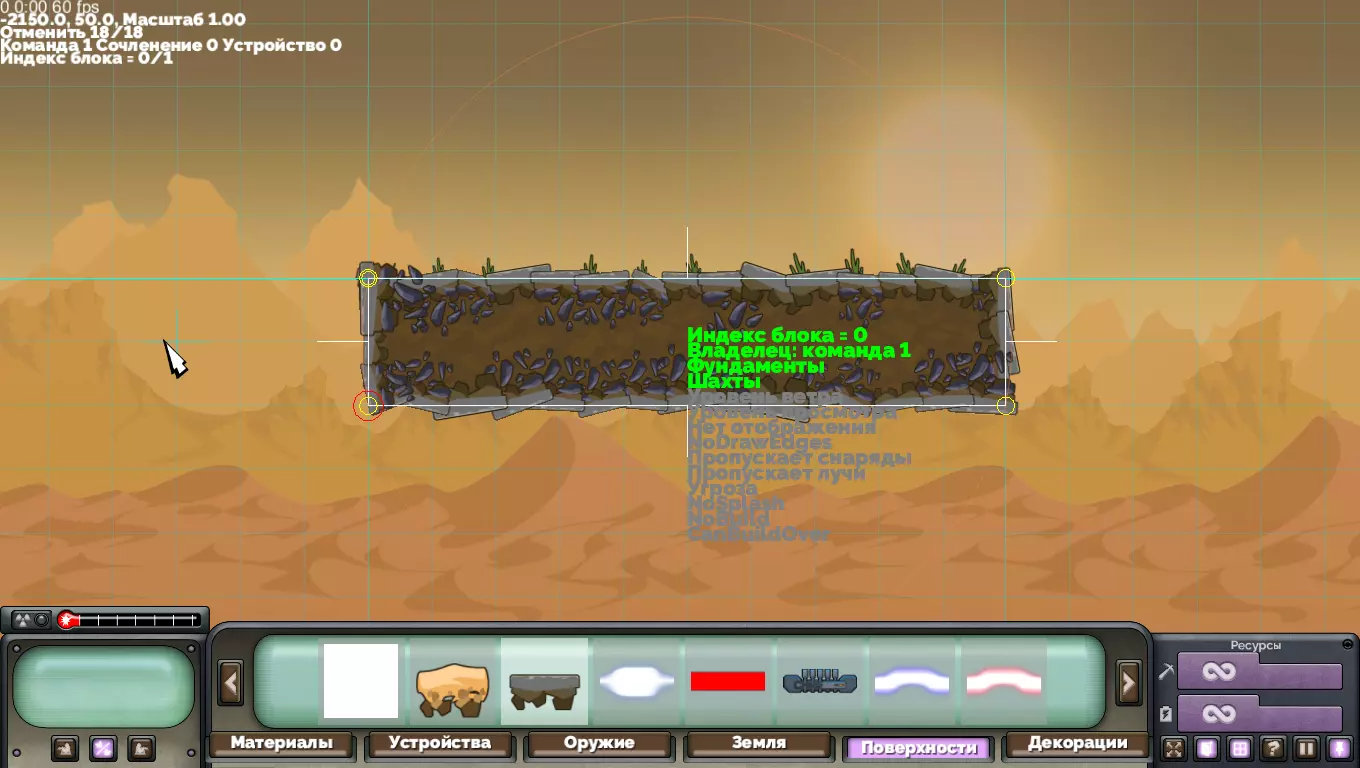
关于堡垒地形数据保存方式的简要说明 标题 所有数据均为小端字节序 16字节常量(?) 0x1400 0000 0000 0000 0040 7544 0000 0000 4×4字节浮点数世界边界(左、右、上、下) 4字节环境字符串长度 环境字符串 4字节方块数量 方块 4字节方块名称长度(可为0) 方块名称 4字节节点数量 4×4字节浮点数颜色(红、绿、蓝、透明度) 4字节地形名称数量 地形名称 4字节全局表面名称数量(可为0) 全局表面名称 常量(?) 0x0000 c03e 16字节零常量(?) 4字节队伍ID(1→1,2→2,无→0,任意→-1,背景→-2) 7字节(?)) 标志 - WindFloor = 1 << (8*0) - ViewFloor = 1 << (8*1) - NoDraw = 1 << (8*2) - Foundations = 1 << (8*3) - Mines = 1 << (8*4) - OilDrills = 1 << (8*5) - OilRigs = 1 << (8*6) + 0 - PassProjectiles = 1 << (8*6) + 1 - PassBeams = 1 << (8*6) + 2 - Hazard = 1 << (8*6) + 3 - NoSplash = 1 << (8*6) + 4 - NoBuild = 1 << (8*6) + 5 |3x4字节浮点数(x,y,z) |4字节零常量(?) |4字节表面名称长度(可为0) |表面名称 8字节0(若没有道具,文件终止) 道具 4字节#道具数量 |4字节道具名称长度 |道具名称 |可能包含位置、大小和旋转数据 示例用法: 打印所有1队或2队方块 editor = MapEditor("playermap1.fwe") for block in editor.blocks: if block.无法翻译的内容已删除

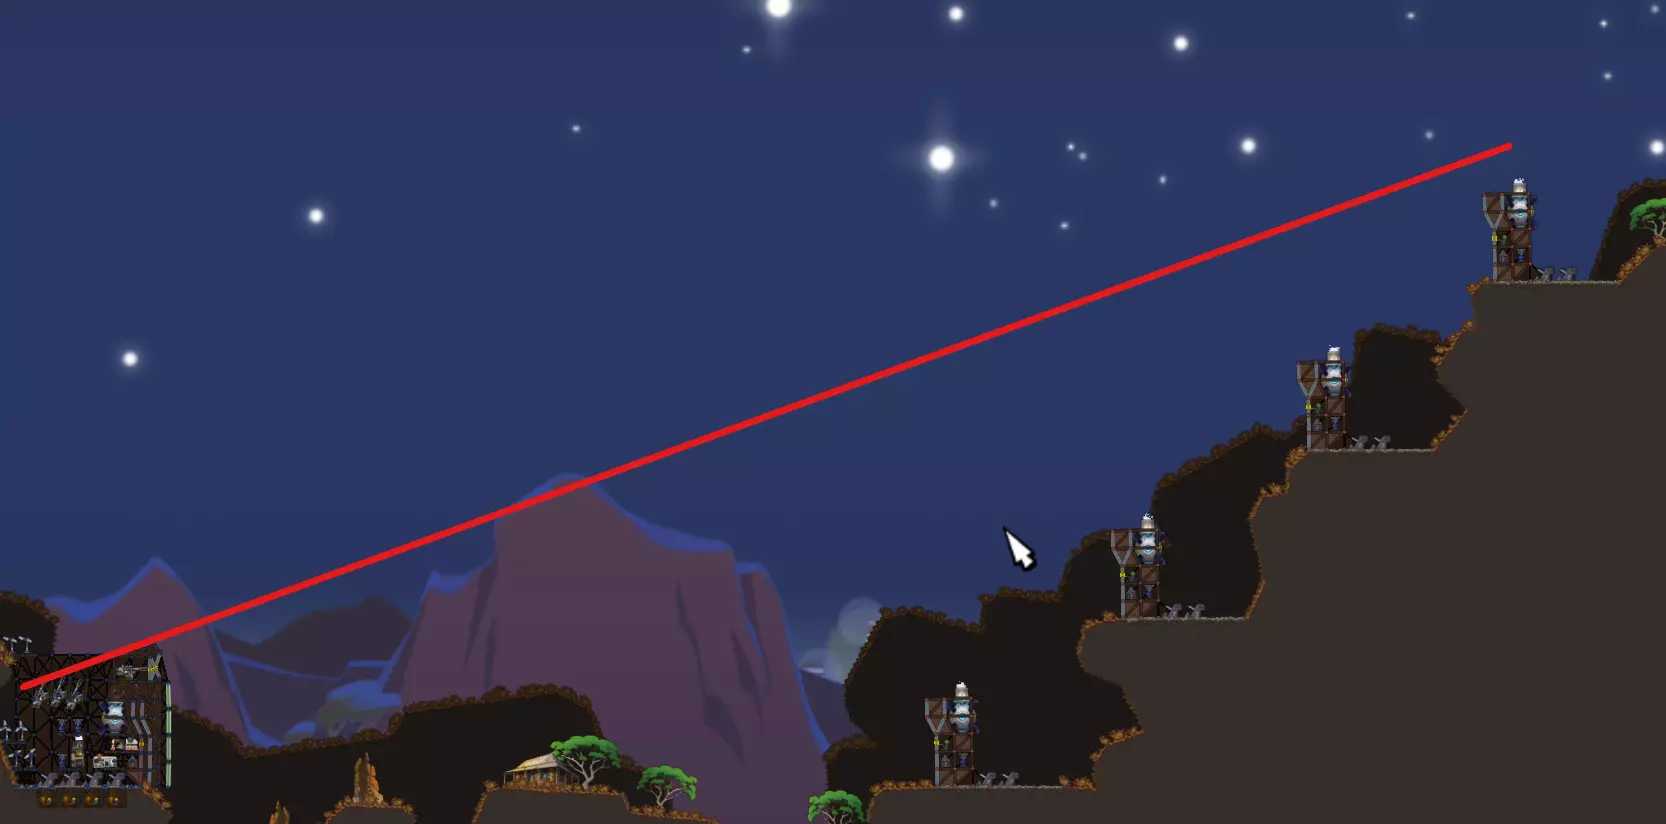
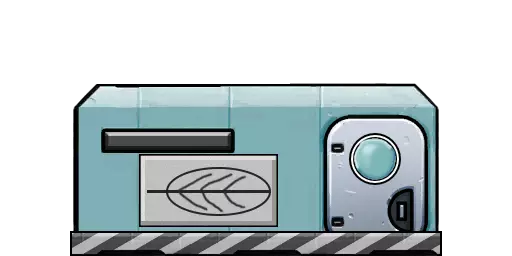
A quick reference guide to help new players defend against a weapons rush and survive the first 5 minutes of multiplayer games. Introduction Losing to a weapons rush is almost a rite of passage for new Forts players. What is a weapons rush exactly? It's a set build order that results in having specific weaponry in the shortest amount of time possible. The goal is to overwhelm an opponent before they have adequately prepared and it can be devastatingly effective. How can you defend against it? The key is timing, and that is what the majority of this guide will focus on. For those already familiar with Forts or RTS's in general, detailed listings of costs and building times are included in the Appendices. Weapon Timeline This timeline will represent the earliest possible time that a weapon can be produced under ideal circumstances. Ideal circumstances assumes placement is always immediate, resources are always available to begin construction, and no time is lost to bracing or device construction. Upgrade Centres are assumed to be built concurrently with other tech buildings, and no pre-existing tech buildings were included on the map. TimeStandardHurricaneOverdriveEagle EyeArmourdillo10 SecondsSniper18 SecondsMachine Gun Sniper20 SecondsMachine Gun SniperMachine Gun SniperMachine Gun SniperMachine Gun Sniper54 SecondsWorkshop Armoury Upgrade Centre60 SecondsWorkshop Armoury Upgrade CentreWorkshop Armoury Upgrade CentreWorkshop Armoury Upgrade CentreWorkshop Armoury Upgrade Centre70 SecondsMinigun72 SecondsMinigun72.5 SecondsAP Sniper76.5 SecondsAP Sniper Flak Smoke Bomb80 SecondsMinigunMinigunMinigun81 SecondsIncendiary Mortar EMP Rocket85 SecondsAP Sniper Flak Smoke BombFlak Smoke BombAP Sniper Flak Smoke BombAP Sniper Flak Smoke Bomb85.5 SecondsBuzzsaw90 SecondsIncendiary Mortar EMP RocketIncendiary Mortar EMP RocketIncendiary Mortar EMP RocketIncendiary Mortar EMP Rocket95 SecondsBuzzsawBuzzsawBuzzsawBuzzsaw97.5 SecondsShotgun99 SecondsHeavy Mortar Shotgun100 SecondsHeavy Mortar105 SecondsAP Minigun*110 SecondsHeavy Mortar ShotgunRocketsHeavy Mortar ShotgunHeavy Mortar Shotgun117 SecondsSwarm Missiles Rockets130 SecondsSwarm Missiles RocketsSwarm MissilesSwarm Missiles RocketsSwarm Missiles Rockets135 SecondsMunitions Plant Factory150 SecondsMunitions Plant FactoryMunitions Plant FactoryMunitions Plant FactoryMunitions Plant Factory162.5 SecondsWarhead175.5 SecondsWarhead195 SecondsWarheadWarheadWarhead198 Seconds20mm Cannon202.5 SecondsFirebeam Magnabeam220 Seconds20mm Cannon20mm Cannon20mm Cannon20mm Cannon225 SecondsFirebeam MagnabeamFirebeam MagnabeamFirebeam MagnabeamFirebeam Magnabeam234 SecondsCannon243 SecondsPlasma Laser Howitzer260 SecondsCannonCannonCannonCannon270 SecondsPlasma Laser HowitzerPlasma Laser HowitzerPlasma Laser HowitzerPlasma Laser Howitzer Moonshot DLC Weapons highlighted and underlined. *Armourdillo specific weapon. Build Orders The first thing to understand about a rush is the build order. A build order for a given map consists of 3 parts. Technology and Device Prerequisites: The buildings and devices necessary to build and fire the weapons. Resource Costs: The total amount of metal and energy necessary to build the prerequisites, the weapons, and to fire the weapons. May affect device requirements. Build Timings: The exact moments to begin building each component and the cumulative length of time before the weapon, or weapons, are ready. As an example, consider the prerequisites for a Plasma Laser. To access the Plasma Laser on the tech tree, you would first need a Workshop or Armoury, then a Factory, and a storage capacity of 1000 metal and 6000 energy. On most maps that would mean you would also need to build additional Metal Stores and Batteries. To simplify things, we'll ignore the resource costs for the moment and focus on time. Before you can start on your Factory, you must first complete your Workshop or Armoury. That will take 60 seconds to complete. Once it is complete, you can begin building your Factory, which will take an additional 90 seconds. Finally, you are able to begin construction of a Plasma Laser, which will take an additional 120 seconds. Adding all of that up, we get 60 seconds + 90 seconds + 120 seconds for a total of 270 seconds. Or 243 seconds when using the Hurricane commander. (See Appendices.) This represents the earliest you should expect to see a Plasma Laser in a standard game, barring the use of a commander's active ability and maps with pre-built technology buildings. How Does This Information Help? Once you understand a build order you can formulate strategies to defend against it. In the previous example under ideal circumstances an opponent could have a Plasma Laser ready within 243 seconds. By referring to the Weapon Timeline and Appendices, you can determine what counters you have the time and resources to afford. Let's say you decide to counter with a Shield. Since a Shield takes 15 or 7.5 seconds to build, you know that you would need to have begun construction by the 228st or 235th second. At the same time, you also know you don't really need the Shield (against a Plasma Laser at least) until that point. Many players who have fallen to a Laser Rush build a Shield near the very beginning of the game. This sets them back in quite a bit in terms of resources for their own tech and weapons. It's understandable, given the embarrassment of toppling or falling onto a teammate. By learning the timings involved, you can allay those fears and be prepared with your own defenses and weapons at the appropriate times. The Art of Survival This is a list of common defenses against the various weapons. Weapon TypesCountersBullet Weapons: Machine Gun, Minigun, Sniper, Flak, Shotgun, 20mm CannonSlanted Armour, Shields, Sandbags, ArmourMissile Weapons: Mortars, Swarm Missiles, Warheads, EMP, RocketsAnti-Air (AA) fire, manually fired weapons, Sandbags, sacrificial (ablative) bracing, Armour Special: Firing missile weapons to trigger opponents AA to shoot down their own weaponsPenetrating Weapons: AP Snipers, Lasers, Fire Beams, CannonMultiple layers of Armour, Shields, Sandbags, sacrificial bracingSpecial: Lasers, Fire Beam, Swarm Missiles, WarheadsShields reflect Lasers and Fire Beams Eliminating Snipers prevents the firing of Swarm Missiles and WarheadsAllEMP Rocket explosions temporarily disable everything within their area of effect Prevent an opponent from building up the resources to build and fire weapons by destroying Mines, Turbines, and causing damage that forces them to repairAttempts to Topple or Disconnect the Fort from its FoundationBackground bracing, cross bracing, additional ground connections, Rope supports, sacrificial bracing, armour, and removal of objects to prevent explosions that would damage background bracing Note: Sacrificial bracing is bracing that is deliberately built out from the Fort to be struck by incoming missile weapons in order to absorb their area-of-effect (AoE) damage. By causing explosive weapons to detonate further away, it reduces the amount of damage caused inside the base or on the core. Ideal vs Actual vs Just Have Fun Looking at the Timeline it would be easy to think a weapons rush was the only viable tactic. In reality, a failed weapons rush often spells the end. A player must commit the bulk of their resources to an attack that, if countered, leaves them with few options. The faster they achieve their weapons, the more they must neglect their income and their own defenses. Forts affords a variety of play styles, and finding ways to make your preferred builds work is all part of the fun. But too often players new to Forts fall victim to a rush and become angry, discouraged, and reluctant to continue playing. That benefits no one and was the inspiration for this guide. What is in the Moonshot DLC? The Moonshot DLC adds: A new single player campaign. Additional single and multiplayer achievements. Capture map game mode and a new device, capture point Derricks. The Combined Forces faction with three new commanders, Buster, Phantom and Moonshine. Five new themes including a dark nighttime theme. The Moonshot HUD. An in-game badge. New Moonshot in-game music. Four new weapons, Buzzsaw, Smoke Bomb, Howitzer, and Magnabeam. Two new materials, Blast doors and Portals.Moonshot content and Moonshot dependent mods can only be enabled by lobby hosts who own the Moonshot DLC. However, this also enables that content for all players within the lobby whether they have the DLC or not. Moonshot DLC content in this guide is highlighted and underlined. Appendices Note: All Appendix information is current as of June 30, 2021, and reflects the Tons of Guns Mod enabled. Moonshot DLC content highlighted and underlined. Appendix 1: Materials Building Times MaterialTime to Build(A) Time to BuildBracing5 Seconds2.5 SecondsBackground Bracing5 Seconds2.5 SecondsArmour8 Seconds4 SecondsArmoured Door10 Seconds5 SecondsShield15 Seconds7.5 SecondsRope0 Seconds0 SecondsPortal8 Seconds Activation 10 seconds4 Seconds Activation 10 seconds (A) Architect Commander Time to Build To activate portals click and drag from one portal to the next. Portal alignment can be modified by right-clicking to bring up a contextual menu. Note: Materials under construction will pass projectiles until completed with the exception of Buzzsaws. Appendix 2: Materials Conversion Times MaterialTime to Build(A) Time to BuildBracing to Background Bracing5 Seconds2.5 SecondsBracing to Armour8 Seconds4 SecondsBracing to Armoured Door10 Seconds5 SecondsBracing to Shield15 Seconds7.5 SecondsBracing to Portal*8 Seconds4 SecondsBackground Bracing to Bracing5 Seconds2.5 SecondsBackground Bracing to Armour8 Seconds4 SecondsBackground Bracing to Armoured Door10 Seconds5 SecondsBackground Bracing to Shield15 Seconds7.5 SecondsBackground Bracing to Portal*8 Seconds4 SecondsArmour to Bracing5 Seconds2.5 SecondsAmour to Background Bracing5 Seconds2.5 SecondsArmour to Armoured Door10 Seconds5 SecondsArmour to Shield15 Seconds7.5 SecondsArmour to Portal*8 Seconds4 SecondsArmoured Door to Bracing5 Seconds2.5 SecondsArmoured Door to Background Bracing5 Seconds2.5 SecondsArmoured Door to Armour8 Seconds4 SecondsArmoured Door to Shield15 Seconds7.5 SecondsArmoured Door to Portal*8 Seconds4 SecondsShield to Bracing5 Seconds2.5 SecondsShield to Background Bracing5 Seconds2.5 SecondsShield to Armour8 Seconds4 SecondsShield to Armoured Door10 Seconds5 SecondsShield to Portal*8 Seconds4 SecondsPortal* to Bracing5 Seconds2.5 SecondsPortal* to Background Bracing5 Seconds2.5 SecondsPortal* to Armour8 Seconds4 SecondsPortal* to Armoured Door10 Seconds5 SecondsPortal* to Shield15 Seconds7.5 Seconds (A) Architect Commander Time to Build Note: Materials in the process of conversion will react with projectiles using the properties of the original material while building. *Moonshot DLC Material highlighted and underlined. Appendix 3: Device Costs and Building Times DeviceMetal CostEnergy CostTime to Build(H) Time to Build(A) Time to BuildMine300200030 Seconds27 Seconds30 SecondsTurbine20080020 Seconds18 Seconds20 SecondsMetal Store20050016 Seconds14.4 Seconds13.33 SecondsBattery15062516 Seconds14.4 Seconds13.33 SecondsSandbags030030 Seconds27 Seconds30 SecondsRepair Station200150020 Seconds18 Seconds20 SecondsBarrel*150200015 Seconds** Note: Devices interact with projectiles normally while under construction. (H) Hurricane Commander Time to Build (A) Architect Commander Time to Build *Shockenaugh specific device. Appendix 4: Technology Costs and Building Times BuildingMetal CostEnergy CostTime to Build(H) Time to BuildWorkshop400200060 Seconds54 SecondsArmoury400200060 Seconds54 SecondsUpgrade Centre600300060 Seconds54 SecondsMunitions Plant800500090 Seconds81 SecondsFactory800500090 Seconds81 Seconds (H) Hurricane Commander Time to Build. Appendix 5: Weapon Costs and Building Times WeaponMetal CostEnergy CostTime to Build(E) Time to Build(H) Time to BuildMachine Gun7525020 Seconds20 Seconds18 SecondsSniper10030020 Seconds10 Seconds18 SecondsIncendiary Mortar150100030 Seconds30 Seconds27 SecondsBuzzsaw*200200035 Seconds35 Seconds31.5 SecondsSwarm Missiles500250070 Seconds70 Seconds63 SecondsSmoke Bomb3030035 Seconds35 Seconds31.5 SecondsFlak20080025 Seconds25 Seconds22.5 SecondsEMP Rocket200200030 Seconds30 Seconds27 Seconds20mm Cannon600400070 Seconds70 Seconds63 SecondsCannon9006000110 Seconds110 Seconds99 SecondsHowitzer10009000120 Seconds120 Seconds108 SecondsFirebeam400300075 Seconds75 Seconds67.5 SecondsMagnabeam600500075 Seconds75 Seconds67.5 SecondsPlasma Laser10006000120 Seconds120 Seconds108 Seconds *Scattershot Buzzsaws cost 275 metal but receive +2 projectiles when firing. (E) Eagle Eye Commander Time to Build (H) Hurricane Commander Time to Build Moonshot DLC Weapons highlighted and underlined. Appendix 6: Weapon Upgrade Costs and Building Times WeaponMetal CostEnergy CostTime to Build(H) Time to Build(O) Time to buildMachine Gun to Minigun12540020 Seconds18 Seconds10 SecondsMinigun to AP Minigun*12580025 Seconds**Sniper to Armour Piercing Sniper15040025 Seconds22.5 Seconds12.5 SecondsIncendiary Mortar to Heavy Mortar10080020 Seconds18 Seconds10 SecondsSwarm Missiles to Warhead200200065 Seconds58.5 Seconds32.5 SecondsFlak to Shotgun5040020 Seconds18 Seconds10 SecondsEMP Rocket to Rockets200200040 Seconds36 Seconds20 Seconds (H) Hurricane Commander Time to Upgrade (O) Overdrive Commander time to Upgrade *Armourdillo specific weapon. Appendix 7: Weapon Firing Costs WeaponMetal CostEnergy CostMachine Gun030Minigun20300AP Minigun*30500Sniper030Armour Piercing Sniper030Incendiary Mortar3150Buzzsaw01200Heavy Mortar15400Swarm Missiles401800Smoke Bomb30300Warhead504000Flak30300Shotgun30800EMP Rocket20800Rockets30120020mm Cannon402000Cannon753000Howitzer704000Firebeam02000Plasma Laser05000 Note: Fire Beam and Plasma Laser can be fired before reaching full energy, but will fire for a reduced duration. Moonshot Weapons highlighted and underlined. *Amourdillo specific weapon.


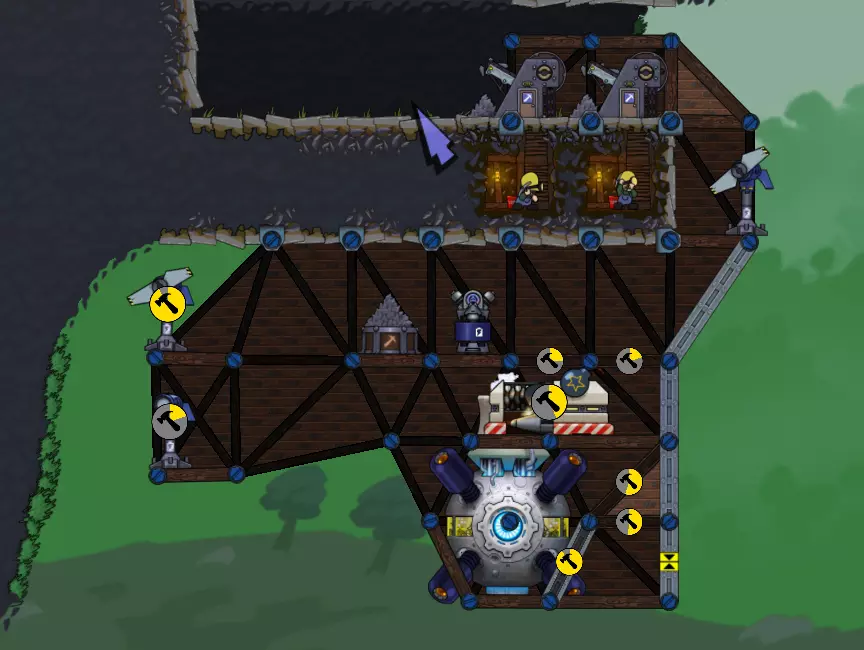


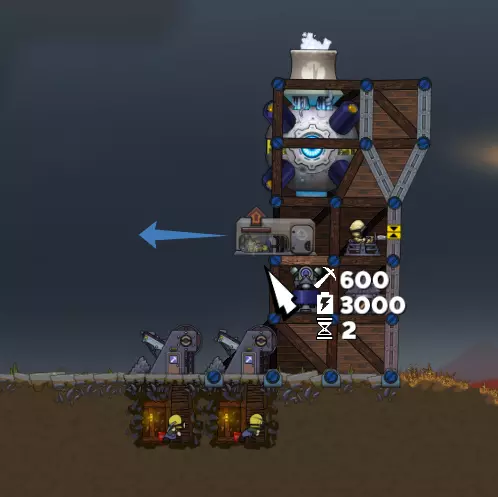
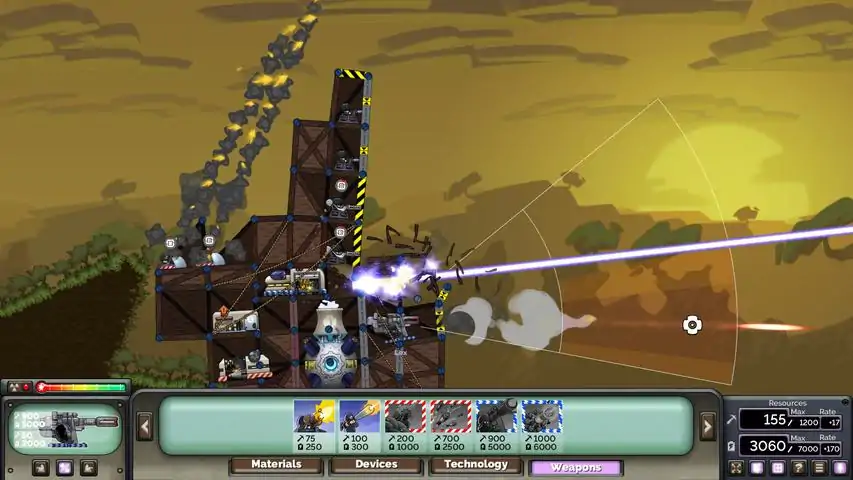
在本指南中,我将向你展示如何保护和武装你的堡垒,以及如何避免因重力而死亡。 首先要做的事情! 一开始,你需要移除堡垒的前端。这样做不仅能让我们获得资源,以便放置武器库和矿井,还能让堡垒保持平稳!之后,我们移除支撑物并将其拆分。这将为我们提供极高的支撑强度,并增加施加在支撑上的最大重量!得益于这种防护,堡垒不会晃动,能够承受多次攻击,并且无论你在上面安装多少门火炮,都不会因重量而倒塌。首先,我们需要拆除堡垒的突出部分。这样做不仅能获得资源,还能建造兵工厂和矿场,同时让堡垒保持平稳!之后,我们拆除支撑结构并进行拆分。这将大幅提升支撑强度,并增加支撑所能承受的最大重量!堡垒防御。1 需要将箱子再增加3层。1 还需要加固这些箱子(如图所示) 2 另外必须将重心后移,防止堡垒倒塌! 3 还可以为堡垒创建额外的支撑必须保护好风车5 得益于新的堡垒防御系统,可以安装占用空间小且资源消耗低的门。 1 你需要将箱子再扩展3层。此外,这些箱子需要加固(如图所示)。2 还需要将重心后移,这样堡垒才不会倒塌! 3 你也可以为堡垒创建额外的支撑4 务必保护好风力发电机 5 得益于堡垒的全新防护设计,你可以安装占用空间小且资源消耗低的门。结果:通过此次加固,堡垒将不会晃动,能够承受多次攻击,并且无论你在上面安装多少门火炮,都不会因重量而倒塌。