换一换
换一换 


🛈 About this guide 🛈 Guide is builded as a connected route, areas completed one at a time. It is not necessary to do it that way, it's just for consistency of the checklist. Checklist is intended for maximum possible completion (for example, guide skips Nepheli doll or Dung-eater doll to gain more reward, but mentions it). No unmissable items (like remembrances) included. No replenishable items (like non-ancient smithing stones or simple gloveworts) included. No sacrificial twigs included. Map-fragment locations, if they are shown on unexplored map, are not included. Dungeons and caves mentioned in the end of the area section, separate from route. Suggested quest progression and "wrap up" go in the end of the section, usually after the boss. Order doesn't really matter, it's a checklist, maybe only quests need attention. Checklist can lead you to 100% achievement completion (except different endings at the end). Checklist uses sites of grace and named locations for navigation and is meant for people who have beaten the game at least once, but can be used by anyone. Breaks in route chain (where you need to continue from a different location) are separated with linebreaks. ! Talking to characters suggests that every interaction and dialogue option are exhausted and in the end that character just repeats itself, unless specifically mentioned not to do so. Used and finetuned it myself on two characters. Arcane build (from level 1 to 80 at final boss) was used to LITERALLY go and test described route (even without quick picking golden seeds or valuable weapons ahead of route, or skipping hard enemies). Again, that is not required, it was done for "science". Don't know how many builds, besides blood, can comfortly handle Dragonbarrow early on, for example. Found mistakes, missed stuff and any advice highly appreciated. Hope this checklist could be useful to someone! 📖 Legend📖 - Item [Quest_step] {Merchant} * Invader ! Warning > Notes ☠ Enemy/Area could be hard on route (depending on character build and skill), maybe better to mark and return later # Area boss or miniboss [[Dungeon]] - dungeon items 🔗 Reference 🔗 Map, if got lost or couldn't find something[mapgenie.io] TXT file to download for yourself, print/edit and LITERALLY cross out progress[1drv.ms] Quests breakpoint chart[cdn.jpg.wtf] 👣 General route to understand checklist order 👣 Limgrave (west to east clockwise) Peninsula (down east -> center up -> down west) Stormveil Liurnia (east up -> center up -> west middle down -> west middle up) Academy Carian Manor Ansel River Siofra River Caelid (west down -> center counterclockwise -> dragonbarrow west and north and back south in a loop) Redmane Castle (normal/festival) Nokron Nokstella Lake of Rot Moon Altar Deeproot Depths Altus Plateau (north-ish -> around tree -> north-west -> clockwise east -> back south) Capital Outskirts (clockwise) Mt.Gelmir (west -> back and north -> counterclockwise) Shaded Castle Volcano Manor Capital Sewers Mountaintops of Giants West (north) Castle Sol Mountaintops of Giants East (south) Consecrated Snowfield (north to the river -> east -> from river center clockwise) Moghwyn Palace Haligtree Azula Ashen Capital 🌴SHADOW OF THE ERDTREE🌴 Gravesight plain (counterclockwise) Jagged Peak (straight to boss) Charo's Hidden Grave (from Dragon Altar towards north-west) Cerulean Coast (north to south with small pit stops) Belurat Castle Ensis Scadu Altus (clockwise with a stretch) Fort of Reprimand Fort of Fog Rauh Base (west ballpark) Bonny Village Finger Birthing Grounds (arc from village to cathedral) Finger Ruins of Rhia Shadow Keep (Church District -> Storehouse -> exterior towards proper entrance -> Dark Chamber) Watering Hole (south) Abyssal Woods (east, then west) Scaduview Hinterland Stone Coffin Fissure Ancient Ruins of Rauh Enir-Ilim 🌟 LET'S GO, TARNISHED! 🌟 - Tarnished Wizard finger - Gesture: Strength - Finger Severer + Tarnished's Furled Finger Limgrave (east) [Quest_Varre_1] Talk to Varre (First Step checkpoint) - Small Golden Effigy (First Step checkpoint) {Merchant_1} Kale (Church of Elleh, north of First Step checkpoint). Buy => Nomadic Warrior Cookbook[1],Nomadic Warrior Cookbook[2],Missionary Cookbook[1],Telescope,Torch,Crafting Kit,Cracked Pot x3, Chain Set, Large Leather shield - ☠ Golden Halberd (Tree Sentinel) - AOW: Stamp sweep (invisible bug on the western shore) {Merchant_2} On the western shore. Buy => Armorer Cookbook[2], broadsword, club, bow, shield [Quest_Ranni_1] Get Horse, after that AT NIGHT return to Church of Elleh checkpoint, talk to Ranni => Ashes: Lone Wolf + Spirit Bell - Lordsworn Greatsword (cart in Gatefront ruins) - Flail (another cart in Gatefront ruins) - AOW: Storm Stomp + Whetstone knife (cellar in Gatefront ruins) [Quest_Boc_1]: Talking bush near Agheel Lake North checkpoint - Armorer's Cookbook [1] (camp north west of Agheel Lake North checkpoint) * [Quest_Yura_2] + Reduvia (this step can be done skipping Step 1) Invader Nerijus (in a canyon, down Murkwater Coast checkpoint), Yura can be summoned. Talk to him nearby afterwards - Painting "Homing Instinct" (Artist's shack checkpoint) > droppoint south-west-west from Dragon-burnt ruins, near the cliff and tombstones - AOW: Determination (bug near bridge near Agheel Lake North checkpoint) - ☠ AOW: Repeating thrust (At Night: Night Cavalry on a bridge near Agheel Lake North checkpoint) [Quest_Sellen_1] Talk + Buy Spells + Gesture: Nod in thought (Waypoint Ruins) - Great Axe (convoy near Waypoint Ruins) - ☠ Larval Tear (Runebear hiding as basic guy, near Anghel Lake south checkpoint across the road) - Royal House Scroll (Ruins with garrison south east of Anghel Lake south checkpoint, on top, with wizard) - Great Epee (Ruins with garrison south east of Anghel Lake south checkpoint, in the chest) - Starlight shard (south east from ruins with garrison) [Quest_Blaidd_2] (Part 1 begins in east) Summon him for Forlorn Hound Evergaol fight, talk afterwards - ! Bloodhound's Fang (Forlorn Hound Evergaol) > Don't forget about Quest_Blaidd_1 and Quest_Blaidd_2 here, maybe return later when he's ready - AOW: Unsheathe (bug in the lake, guarded by big crabs) [Quest_Yura_1] Talk to ronin, under the ruins, if not fought invader with him before on Step 2 (Seaside Ruins checkpoint) - AOW: Gravitas (skinny guy on a southern shore, drop down on spiritspring) - >Incantation Scarab: droppoint for Homing Instinct painting, south-west-west from Dragon-burnt ruins, near the cliff and tombstones - Haligdrake Talisman (cave near skinny guy, leading to tutorial area) - Twinblade (Dragon burnt ruins cellar) - Stonesword key (Dragon burnt ruins) > Chest Teleport to Sellia Crystal tunnel (Caelid) - Dragon Heart (Dragon north of Dragon burnt ruins) >if return to Yura afterwards, he'll tell about Dragon Communion Church (optional) - Golden seed (path from Limgrave to Stormhill shack) - Starlight shard (South west from Stormgate, near sleeping giant) - Gesture: Crossed Legs (top of ruin near Starlight shard and sleeping giant) - ☠ Aspects of Crucible: Tail (Stormhill Evergaol, south of Stormgate) - Arrow Reach Talisman (towers south of Stormgate) - Ashes: Godrick soldiers (cemetery with lots of jellyfish, west of Stormgate) - AOW: Wild strikes (bug on the road to Stormveil castle) - Nomadic Warrior Cookbook [7] (broken bridge north, near crone) - AOW: Storm Wall (bug below broken north bridge near crone) - Stonesword key (Stormhill shack) [Quest_Roderika_1] Talk to Heartbroken Maiden (Stormhill shack) => Gesture: Sitting sideways + Ashes: Jellyfish [Quest_Manor_0] Talk to Bernahl near Warmaster Shack checkpoint. Buy => AOWs - ☠* Bone Peddler Bell Bearing (At Night: Bell bearing hunter in Warmaster shack) - Strength-knot crystal tear (north-west of Warmaster, near troll up the hill) - * Hammer Talisman (Invader Henricus, north of Warmaster, near colliseum) !missable after killing Margit or Erdtree Avatar in Peninsula apparently - Duelist Finger (near colliseum, north of Warmaster) - AOW: Golden Vow (north east from Warmaster, lone knight rider) - Beast Crest Hunter shield (camp west of Warmaster shack) - Lance (top of ruin in the camp west of Warmaster shack) - Lance Talisman (north east of Deathtouched Catacombs, under the bridge) - ☠ Blue Feathered BranchSword talisman (At Night: Deathbird, southeast from Warmaster shack, on big fallen ruin, near trolls) [Quest_Alexander_1] Help Alexander escape and talk to him (near Saintsbridge checkpoint) => Gesture: Triumphant delight - Golden Seed (return to Stormhill shack after Roderika moves to Hold: Quest_Roderika_2). To make her move, either rest at any checkpoint in Limgrave, or pick Chrysalids Memento in Stormveil Castle [Quest_Rogier_1] Summon him for the fight with Margit > optional - !# Talisman pouch (Margit. !Warning: finish all three invasions in Limgrave and Peninsula, boss could block it.) ☠[[Fringefork Hero's Grave: Require Stone Key]] - Erdtree favor - Erdtree greatbow (destroy charriot with hanging pots) - Stonesword key - Dragon Communion Seal - #Golden Seed + Ashes: Banished Knight Oleg [[StormFoot Catacombs]] - Voice "Hello" - Ashes: Wandering Noble - #Ahses: Noble Sorcerer [[GroveSide Cave]] - Cracked pot - #Flamedrake talisman [[Coastal Cave]] - [Quest_Boc_2] talk at checkpoint - #Tailoring tools + Sewing needle -> Exit to Church of Dragon communion - [Quest_Boc_3] return to entrance and give needle [[Deathtouched catacombs]] - Uchigatana - #Assassin Crimson Dagger talisman - Deathroot [[Highroad Cave]] - Shamshir - #Blue Dancer Charm talisman [[Murkwater Catacombs]] - #Ashes: Banished knight Engval [[Murkwater Cave]] - [Quest_Patches_1] Whoop his ass and talk !do not kill accidentally! => Gesture: Grovel for Mercy if start fight again and allow him to kill you => Gesture: Extreme Repentance - [Quest_Patches_2] On return open chest and be teleported to Misty Ruins to bears, return, talk to Patches => Gesture: Calm down - {Merchant_Patches} => Stonesword key, Parrying dagger, Horse Crest wooden shield, Margit's shackle, Missionary Cookbook [2], Sacrificial Twig, Gold Pickled Fowl foot, etc [[Limgrave Tunnels]] - #Roar medallion Limgrave (west) > continue from Alexander {Merchant_3} West of Saintsbridge => Nomadic Cookbook 3, Bandit mask, cracked pot > [Quest_D_0] Can talk to D on a cemetery near Summonwater Village outskirts, if not went to Roundtable before - # Ashes: Skeletal Militia + Deathroot (Summonwater Village) - Green Turtle talisman (Summonwater Village cellar) - Nomadic Cookbook 14 + Missionary Cookbook 3 (Smoldering church) - * Sacred scorpion talisman (Anastasia 1st invasion, Smouldering church) - AOW: Sacred blade (bug, north of 3rd church of Marika, near spiritspring) - Flask of Wonderous Physics + Crimson Crystal Tear (3rd church of Marika) >Teleport (3rd church of Marika) => Caelid, Bestial sanctum (can be hinted by D in Roundtable Hold) [Quest_Nepheli_1]: Talk to Kenneth on top of ruin, on a road from 3rd church back to Limgrave - Fevor's Cookbook [1] (coffins, south-east of Summonwater Village Outskirts checkpoint, east of Artist's shack, north of Kenneth) - Nomadic Warrior Cookbook[4] (near map fragment and scratching runebear) - Cracked Tear + Crystal Tear (near Siofra River lift) - AOW: Ground Slam (bug between Merchant_4 and Siofra River lift) {Merchant_4} (near Fort Height West checkpoint) => Nomadic Warrior Cookbook[5], Armorer Cookbook [3] - Axe Talisman (Mistwood Ruins cellar, under sleeping runebear) [Quest_Blaidd_1] Hear howling in Mistwood Ruins => go to Kale merchant (Merchant_1) => Gesture: Snap => Return to Mistwood Ruins => Gesture Snap => Talk to Blaidd - Golden Seed (Fort Height) - Nomadic Warrior Cookbook [6] (Fort Height) - AOW: Bloody Slash (Fort Height) - Dectus Medallion - left (Fort Height) - Large Club (south of Evergaol, near bridge of Sacrifice, around the plateau) - Stonesword Key (Bridge of Sacrifice) [Quest_Nepheli_2]: Talk to Kenneth after clearing Fort Height, pledge for service. Same place, on top of ruin => Erdsteel Dagger [Quest_Nepheli_3]: Return to Fort Height and talk to him Weeping Peninsula > starting at Bridge of Sacrifice [Quest_Irina_1] Talk to, near Bridge of Sacrifice, get letter - Morning Star (cart, road south from Bridge of Sacrifice) - AOW: Mighty Shot (bug, road south from Bridge of Sacrifice) {Merchant_5} Castle Mourne Rampart checkpoint => Crimson amber medallion, Stonesword key, pots, etc - ☠ Nightrider Flail + AOW: Barricade shield (At Night: Night Cavalry near Castle Mourne Rampart checkpoint) - Memory Stone (Oridy's Rise, kill three ghost turtles, one is invisible in the pond) - Starlight shard (East of Oridy's Rise) - Great Turtle Shell (tower south of Oridy's Rise, jump on top with spiritspring) - Golden Seed (West of map fragment) - ☠ Sacrificial Axe (At night: Deathbird, West of Golden Seed) - Poison Mist (Teleporting bug, east of map fragment) - Flame Crest Wooden shield (Ailing village) - Flame of Frenzy (Callu Baptismal church) - Sacred tear (Callu Baptismal church) - Hand Ballista (Forest lookout tower, top of the hill southwest of Bridge of Sacrifice) - Lightning Strike (Above Mourne Tunnel, zone with heavy lightning bombardment) - Shield of Guilty (Demi-human Forest Ruins cellar) - Demi-human Queen Staff + Crystal Burst (Demi-human Forest ruins, queen) - Faith-knot Crystal Tear (north of Demi-human Forest ruins) - Sacred tear (Church of Pilgrimage) > north of church is a droppoint for "Prophecy" painting - Gilded Iron Shield (Church of Pilgrimage) - Eclipse Crest Heater Shield (north-west of Erdtree, jump down on ledge and then on protruding stone) - Sacred Tear (fourth church of Marika) - Ambush Shard (Witchbane ruins) - ☠ Radagon Scarseal talisman (Weeping Evergaol) {Merchant_6} Isolated Merchant's shack => Buy Lantern, Stonesword keys 3, Zweihender, Lost ash of war, Twigs, etc > Teleporter to Leyndell, Royal Capital (top of Tower of Return) - !# Opaline Bubbletear + Crystalburst Crystal tear (Tree Avatar near minor Erdtree) !Warning: finish all three invasions in Limgrave and Peninsula, boss could block it. [[Earthbore Cave]] - #Spelldrake talisman [[Impaler's Catacombs]] - voice "Please, help" - #Ashes: Demi-human [[Mourne Tunnel]] - #Rusted Anchor [[Tombswart Catacombs]] - Nomadic Warrior Cookbook [9] (require Stonesword key) - Voice "Thank you" - #Ashes: Lhutel The Headless [[Tombswart Cave]] - Nomadic Warrior Cookbook [8] (require Stonesword key) - #Veridian Amber Medallion Roundtable Hold > accessible after resting at any checkpoint out of Limgrave or Weeping Peninsula [Quest_Corhyn_1] Talk to brother Corhyn [Quest_D_1]Talk to D, show him deathroot [Quest_Diallos_1] Talk to Diallos (probably optional) > Talk to Gideon [Quest_Fia_1] Hug Fia - Gesture: What do you want? (Talk to Ensha near Gideon's door) [Quest_Varre_2] Talk to Varre (same place, First Step checkpoint) - Crepus Blackkey Crossbow (cellar, need Stonesword key) - Assassin's prayerbook (cellar, need two more Stonesword keys) - !* Taunter's tongue (Invader, jump down from balcony, !WAIT for him to complete greetings gesture => Gesture: Reverential bow) - Cypher Pata (room near Invader) > Talk to Gideon on next return to Hold [Quest_Roderika_2] When she appears in the Hold, talk to her, then to Hewg, repeat process until she become spirit tuner (need to reload) [Quest_Fia_2] Next time in Hold, hug again and Talk in Secret [Quest_Diallos_4] Talk to Diallos after meeting in Liurnia > Go to Gurranq in Beastial Sanctum, if didn't before (Teleport near 3rd church of Marika). Continue giving him Deathroots whenever found. !After second one he'll attack on next visit, just hit him a little and he stops. [Quest_D_2] Talk after visiting Gurranq in Beastial Sanctum >>> Godrick defeated <<< - ! Gesture: Bravo (after beating Godrick go to First Step checkpoint to the place where Varre was) [Quest_Nepheli_6] Talk to Nepheli after killing Godrick => Arsenal Charm talisman - Gesture: Rapture (Touch Two Fingers after killing Godrick) > Talk to Gideon about every boss [Quest_Rogier_3] Talk after kill Godrick => Rogier Rapier [Quest_Fia_3] Talk about Rogier, she'll give a clue where to get Black Knifeprint (Black knife catacombs, see Lurina East) [Quest_Rogier_4] Give Black Knifeprint - * Clinging bone (Ensha invades after Quest_Nepheli_7, upon return from Albinaurics Village) - Royal Remains set (near Gideon's door, where Ensha was) [Quest_Nepheli_8] Talk to Nephelie downstairs [Quest_Nepheli_9] Talk to Gideon about Nepheli [Quest_D_3] Speak about Rogier [Quest_Fia_4] Speak about Rogier => Sacrificial Twig [Quest_Roderika_3] After leveling any ash to 4+, talk => Gesture: Curtsy >>> Rennala defeated <<< > !Talk to Enia => Talisman Pouch [Quest_Nepheli_11] Talk about Gideon, give Ashes: Stormhawk (after visiting Four Bellfries - Precipice of Anticipation), exhaust dialog >>>Altus Plateau visit<<< [Quest_Corhyn_2] Talk about leaving [Quest_Fia_5] Talk to her, she asks for a favor => Withered dagger [Quest_Fia_6][Quest_D_4] Give Withered Dagger to D [Quest_Fia_7][Quest_D_5] in new room talk to Fia. Pick up => D's bell bearing + Twinned Set [Quest_DungEater_2] Talk to Roderica about noises, talk to Dung-eater [Quest_Corhyn_3] Talk to him about leaving (probably after just access to Altus Plateau) >>> Fia completed <<< - Rogier's Bell bearing + Spellsword's Set + Rogier's Letter (Rogier's body) >>> Dung-eater check <<< [Quest_DungEater_5] talk to Dung-eater after acquiring Seedbed Curse => Sever-Gaol Key >>> Moghwyn Palace visit <<< - Fevor's Cookbook [3] (Talk to Gideon after visiting Moghwyn Palace) >>> Mohg defeated <<< - Law of Causality (Talk to Gideon) >>> Haligtree visit <<< - Black Flame Protection (Talk to Gideon) >>> Malenia defeated <<< - Lord's Divine Fortification (Talk to Gideon) Castle Morne > Recommended to clear Limgrave and Peninsula as much as needed, especially invasions. Push quests to maximum steps - Claymore (chest in the room near smouldering pile) - Steel-wired torch (top, where fighting going on) [Quest_Irina_2] Talk to Edgar (top of eastern tower) - Stonesword key (drop on ledge after Behind The Castle checkpoint) - Twinblade talisman (top of western tower) - Whip (Room with rats) - # Grafted Blade Greatsword [Quest_Irina_3_Final] Return to Bridge of Sacrifice, talk to Edgar > CAN BE KILLED WITHOUT CONSEQUENCES. Otherwise will invade in Western Liurnia later. Stormveil Castle ! Recommended clearing Limgrave and Peninsula, especially invasions. Rest at least once at any checkpoint outside of Limgrave and Peninsula (one of teleporters or traps helps). Push quests to maximum steps. > Talk to Gostoc. Will be {Merchant_Gostoc} later. - Marred Leather shield (stairs to wincellar with alert guard) - Hookclaws (Wine cellar) - Curved Sword talisman (chest in room where trapped with big knight) - Brick hammer (top of winecellar, access from outside) - Stonesword key (roof parkour, tower leges and drop down into tower) - Gesture: Dozing Cross-Legged (roof parkour, evil bird) - Claw Talisman (roof parkour, up the ladder with exiles) - Marred Wooden shield (from Rampart Tower checkpoint, drop down from castle wall where birds with barrels) - AOW: Storm assault (bug, continue from Marred Wooden shield) - Aspects of the Crucible: Horns (Crucible Knight) [Quest_Rogier_2] Talk to, buy spells (church, after birds with barrels) > Talk to Gostoc on roof above Rogier. - Highland Axe (room with grafted scion) - >Chrysalids' Memento (same corpse pile). Only if Roderika didn't move to Hold. - !Crimson Hood (corpse pile near grafted scion). Only if Roderika became Spirit Tuner, otherwise return here for Hood when she does. - Mimic Veil (discussion room with knight, above grafted scion) - Stonesword key (balcony above grafted scion) - Hawk Crest Wooden shield + Misericorde + Iron Whetblade (armory near grafted scion, north, REQUIRE stonesword key) - Pike (Main Plaza) - Wooden Greatshield (Main Plaza, side structure) - Godslayer's Seal, Godskin's Prayerbook (cellar, entrance from main plaza, REQUIRE Stonesword key) > possible access to main plaza right outside - drop down on ballista guys - Nomadic Warrior Cookbook [10] (continue up the ladder, past guards and another ladder. Also can be reached from roof parkour) - Arbalest (A litte back to the plank bridge exposed to ballistas, down from wall) - Commoner's Simple Garb (Gateside Chamber checkpoint) - Painting "Prophecy" (Small library, entrance from Main Plaza near smithing stone statue) > bring north of Church of Pilgrimage to the ledge => Ahses: Warhawk [Quest_Nepheli_4] Talk to Nepheli Loux (near troll) - Cracked Pot x2 (lift up from Liftside Chamber checkpoint, room with living jars) - AOW: Stormcaller (room with living jars) - Manor Towershield (room with slaves, jump on edge in liveing jar area and proceed) - Rancorcall (bug in the corridor with rats, south from Liftside Chamber checkpoint, just before miniboss) - Golden Seed, Stonesword key, Prince of Death Pustule (miniboss area) [Quest_Nepheli_5] summon Nepheli Loux for boss fight (probably optional) {Merchant_Gostoc} talk to him after boss fight in boss arena (he's kicking the head) - Shabriry Grape (proceed further from boss arena) - Boltdrake Talisman (from castle main gate (gateside chamber checkpoint) past angry cat, Limgrave tower bridge checkpoint) > Fix Rune past the weak giants > check Roundtable Hold "Godrick defeated" section Liurnia of the Lakes (east) [Quest_Boc_4] REST at Lake Facing Cliffs checkpoint, talk [Quest_Hyetta_1] Lake Facing Cliffs checkpoint, appear only after Quest_Irina_1, talk (give Shabriry Grape if have any, otherwise return here when you have) => Gesture: As you wish [Quest_Thops_1] Talk + Buy Spells (Church of Irith) - Sacred Tear (Church of Irith) - Academy Scroll (Cemetery near Church of Irith) - Glintstone Craftsman's cookbook [1] (Camp on the road up from Church of Irith) {Merchant_7} Liurnia Lake Shore checkpoint (Nomadic cookbook [11], Astrologer stuff, lantern, Kite shield, estoc, etc) - Glintstone Craftsman's cookbook [2] (Laskyar Ruins checkpoint) > Teleporter to Academy Gates (Laskiar Ruins) - Ritual Pot (Near teleporter) - Wraith Calling Bell (Laskiar Ruins cellar) - Firemonks Prayerbook, Gesture: Fire Spur Me (camp with firemonks neear Lakeside Crystal Cave) - Flame of the Fell God (Malefactor's Evergaol) [Quest_Latenna_1] Talk to Latenna Albinauric (exit to shack from Lakeside Crystal Cave) [Quest_Hyetta_2] Give second Grape (Purified Ruins) - Two Fingers Heilroom, Shabriry Grape (Purified Ruins cellar, east) - Treespear (cart on the broken bridge, south east of Liurnia Highway South checkpoint) - Glintstone Craftsman's Cookbook [3], Carian Glintblade staff (Lookout tower, north-north-west of Liurnia highway north checkpoint) - Starlight Shard (north of Liurnia highway north checkpoint, little to east up the hill, left side) - Ashes: Skeletal bandit, Deathroot (Mariner, a little north from Starlight shard) - Dragon Cult Prayerbook (lone knight near Artist's shack) - Painting: "Resurrection" (Artist's shack) => Bring to Caria Manor, after Loretta, cemetery near Royal Grave Evergaol - Ritual Pot, Cracked Pot x4 (Jarburg) [Quest_Diallos_2] Talk to little jar - Lucerne (North of Liurnia highway checkpoint towards the tunnel, near spirit army) - AOW: Frost Spear (At Night: Night Cavalry, Gatetown bridge checkpoint) [Quest_Hyetta_3] Give Shabriri grape (Gatetown bridge checkpoint) > got from Edgar. If not killed, take from Endgar invader in Liurnia West. [Quest_Hyetta_4] Talk, reload, Talk (until she decides to be Fingermaiden) - Ashes: Land Squirt (North of Gate Town Bridge checkpoint, down in the water with poison eggs, south of Eastern Liurnia Lake Shore checkpoint) - Flame, Cleanse Me (encampment north of Artist's shack, Eastern Tableland checkpoint) - Briars of Sin (lone cultist outside of encampment) - Gold Sewing Needle + Gold Tailoring Tools (church of vows) {Merchant Miriel} Church of vows (recommend to dump ALL books to him) - ☠* Meat Peddler Bell bearing (Church of vows at Night, bell bearing hunter) - Stonesword key (north of Ainsel River Well) - Spiral Horn Shield (near mausoleum and snipers, corpse hanging from edge, north-west-west from Ruined Labyrinth checkpoint) - Stalwart Horn Charm (from Mausoleum Compound, up the hill north, then immediately southwest, around the rock, inside rock window) - AOW: Giant Hunt + Night Rider Glaive (At Night: Night Cavalry, East Raya Lucaria Gate checkpoint) [Quest_Boc_5] Talk (East Raya Lucaria Gate) - Sacred Tear (Bellum Church) {Merchant_9} North of Bellum Church => Nomadic Cookbook [13], Rift Shield, Bewitching Branch x5, etc - Great Mace (Camp with ballistas down the road from Grand Lift) - Howl of Shabriri (Frenzy-Flaming Tower) - Frenzied Cookbook [1] (Frenzy village) - Shabriri's woe (Frenzy village) - Note: To Lord of Frenzied Flame (Frenzy village) - Frenzied Burst (bug up north from Frenzied village) - Stonesword key (on western wall of village) - * Fingerprint Grape + Vyke's War Spear (invader Vyke, before Church of Inhibition) - Sacred Tear, Finger Maiden set (Church of Inhibition) [Quest_Hyetta_5] Church of bellum, give her Fingerprint grape - # Magic/Light/Holy shrouding crystal tears (Tree Avatar) !Mind finish invader before, unknown if could be blocked [[Stillwater Cave]] - Sage set - #Winged Sword Insignia [[Lakeside Crystal Cave]] - Spear Talisman - #Cerulean Amber Medallion [[Cliffbottom catacombs]] - Nox Mirrorhelm (require Stonesword key) - Voice "Wonderful" - Ashes: Paige - #Ashes: Kyden Sellsword [[Black Knife catacombs]] - Rosus Axe (Require Stonesword key) - #Assassin's Cerulean Dagger + Black knifeprint (hidden boss behind hidden wall) > can progress Quest_Rogier_4 - #Ashes: Twinsage Sorcerer - Deathroot [[Ruya Lucaria Crystal Tunnel]] - Crystal Knife - Shatter Earth - #Smithing Stone Miner's Bell Bearing [1] [[Carian Study Hall]] - Carian Glintstone staff (Carian Study Hall, during Preceptor Miriam chase) - Magic Downpour (Preceptor Miriam) - Cerulean Seed Talisman (Study Hall rafters) [[Carian Study Hall Upside Down: Requre Quest_Ranni_9]] - Mask of Confidence (niche before Preceptor) - Lucidity (Preceptor) - Godskin Noble Set (godskin on the way to Divine Tower of Liurnia) - [Quest_Ranni_11][Quest_Fia_7] Stargazer Heilroom + Cursemark of Death Liurnia of the Lakes (central) > starting at Laskyar Ruins checkpoint [Quest_Rya_1] Agree to help her find medallion (She is in small tower near telescope, north-west of Laskyar Ruins checkpoint) [Quest_Diallos_3] Talk to him, Academy Gate Town, on a roof on sunken house, griefing (north, not far from Academy Gate Town checkpoint) - Glintstone Craftsman's Cookbook [4] (one of the sunken tower with Albinaurics) - Golden Seed (Middle of sunken Academy Gate Town) - AOW: Charge Forth (bug hanging under bridge with finger reader crone, west of Golden Seed) - Stonesword key (one of the sunken tower, west of South Raya Lucaria Gate; need Torrent to get) > Teleporter to Northern Liurnia Shore checkpoint + Map Liurnia West (Little tower east of Academy) - Ancient Death Rancor (At Night: Death Rite Bird, Between Academy and Teleporter) [Quest_Patches_3] Talk (Scenic Isle checkpoint, west of telescope) - Red Feathered BranchSword (At Night: Deathbird, ruin north of Scenic Isle checkpoint) - Dexterity-Knot Crystal Tear (north west from Scenic Isle checkpoint, isle with albinaurics) [Quest_Rya_2][Quest_DungEater_1] Buy-out medallion, then talk, buy shrimps (Boilprawn shack checkpoint, north-north-west of Scenic Isle checkpoint) => Gesture: Spreadout [Quest_Rya_3] Hand over medallion => Volcano Manor Ivitation - Larval Tear (South of Fallen Ruins of the Lake checkpoint, north west from Scenic Isle checkpoint, small tower with three sleeping shrimps and one awake. Kill awake one, it will turn into Grafted Scion) - Nomadic Warrior Cookbook [12] (Rose church, west of Fallen Ruins of the Lake checkpoint) [Quest_Varre_3] (!!BEFORE TALKING, make sure you visited First Step checkpoint where he was before to obtain Gesture: Bravo) Talk (Rose church) [Quest_Varre_4] Invade 3 times (Alternatively: go to Writheblood Ruins in Altus Plateau, area where Bloody Helice located, find invasion sign for Magnus the Beast Claw) [Quest_Varre_5] Talk => Lord of Blood's Favor. Go to Church of Inhibition, soak blood of dead maiden (Alternatively => Four Bellfries: Precipice of Anticipation, there's also corpse of a maiden) [Quest_Varre_6] Give soaked Lord's of Blood Favor => Bloody Finger + Pureblood Knight's Medal - Bloodflame blade (bug north-west of Rose Church) - Icerind Hatchet (Temple Quarter chest) - Dragon's Heart (Glintstone Dragon Smarag, west of Academy) - Glintstone Academy Key (corpse where Smarag slept) - AOW: Shield bash (teleporting bug near East Gate Bridge Trestle checkpoint, under the bridge) - Memory Stone (Testu's Rise, 3 turtles, one a little north of entrance, another on the tree, last one below southeastern side) - Blue-white wooden shield (west side towards South Raya Lucaria Gate checkpoint) [[Academy Crystal Cave: Require Stonesword key]] - Stonesword key - Crystal Staff (behind hidden wall) - #Crystal Release - Terra Magika (lift after bosses) Liurnia of the Lakes (west) > Starting at Northern Liurnia Lake Shore checkpoint - Carian Knight Sword (Caravan, south of Northern Liurnia Lake Shore checkpoint) - Imbued Sword Key (Up the hill after the camp, Four Bellfries checkpoint) => Teleport zones marked as dungeons, see below. Access next upon obtaining another Imbued Sword Key - Jellyfish shield (West of Four Bellfries, broken cart with four red jellyfish) - Greatblade Phalanx (Cookoo Evergaol, south of Four Bellfries) - * Shabriri Grape + Banished Knight Halberd (south from Four Bellfries, Revenger Shack, if you didn't kill him on Bridge of Sacrifice at Quest_Irina_3_Final) > Go to point of Quest_Hyetta_4 if didn't do it before - AOW: Sworddance (path towards Road's End Catacombs) - !# Cerulean Crystal Tear + Raptured Crystal Tear (Tree Avatar) !Can spoil invasions, be sure to finish Edgar if needed - AOW: Vow of the Indominable (bug in crab area, south from Folly of the Lake checkpoint) [Quest_Nepheli_7] Talk to Nepheli Loux (up to Albinauric Village from poison swamp) - Larval Tear (Albinaurics Village, at the beginning) - Crystal Sword (Albinaurics Village checkpoint, wooden bridge to the north, corpse on ledge) [Quest_Latenna_2] Talk to Albus until dead (Albinaurics Village checkpoint, east up past perfumer, he hides as jar) => Secret Talisman - Ivory Sickle (Behind coffin, right next to Albus) - !# Crucible Knot Talisman (Omenkiller in Albinaurics Village) !unknown if spoil invasions of the area [Quest_Latenna_3] Return to Latenna at Slumbering Wolf's shack, talk until receive Ashes: Latenna > check Roundtable Hold after completing village - Frozen Needle (Kingsrealm ruins cellar, north of Northern Liurnia Lake Shore checkpoint) [Quest_Blaidd_3][Quest_Ranni_2] Talk to Iji (Road to Manor checkpoint) - Intelligence-Knot Crystal Tear (Valley right of road from Iji to Manor, hands guarding it) - AOW: Hoarfrost stomp (Invisible bug, Lake southeast of Carian Manor) - Golden Seed (Up the canyon from Bellum Church/Merchant_9) - AOW: Barbaric Roar (top end of canyon, way to Ruin-strewn precipice) [[Four Bellfries: Precipice of Anticipation]] - #Ornamental Straight Sword + Golden Beast Crest Shield (Grafted Scion) - [Quest_Nepheli_10] The Stormhawk King - Ashes: Stormhawk Deenh [[Four Bellfries: Night sky unceasing] - Mottled Necklace [[Four Bellfries: Crumbling Lands]] - Pearldrake Talisman [[Road's End Catacombs (full of hidden walls)]] - Watchdog's staff (hidden wall) - Ashes: Raya Lucaria Soldiers - #Ashes: Glintstone Sorcerer [[Ruin-strewn precipice]] - Serpent-God's Curved sword (mama octopus and kids) - ! Gesture: Casual Greeting (!summon Great Horned Tragoth before boss) - #Magma Wyrm Scalesword > Going out activate Mt.Gelmir and Radahn festival Raya Lucaria Academy > starting from south gate {Merchant_10} East from Main Academy Gate checkpoint => Lost Ash of War, Ashes: Fanged Imp, Stonesword key x3, Blue set, Fevor's cookbook [2], etc - Celestial Dew (dead end near Merchant_10, guarded by bloodhound) - Golden Seed (North from Main Academy Gate checkpoint, end of bridge) [Quest_Yura_3] South of Main Academy Gate checkpoint, red sign, right between golden seed and checkpoint => AOW: Raptor of the mists [Quest_Yura_4] Talk to him near summon sign - Ashes: Marionette Soldier (after Church of Cuckoo checkpoint, before wooden bridge, jump down to the ledge to the right and proceed) - Carian Set (after the bridge, down to the right where 3 zombies praying) - AOW: Spectral Lance (before entrance to building, down to the left, bug) - Gravity Well (skinny guy near monument, past observation wheel) - Longtail cat talisman (down on observation wheel, behind Abductor) - Lost Ash of War (past the Abductor, jump on the ledge, near crypt) > being killed INSIDE Abductor cat transport you to Mt. Gelmir to Subterranian Inquisition chamber - Conspectus Scroll, Glintstone Craftsman's cookbook [5] (Schoolhouse classroom checkpoint, corridor to the left from mages) - Olivinus Glintstone Crown (hidden wall in room with Conspectus Scroll, jump down left from balcony) - Ritual Pot (room with wizards and jar) - Comet, Stonesword key (hidden path to the left, before ginger wolf boss) - Graven School talisman (explore hidden room further, near little jars) - Memory Stone (ginger boss) - Radagon Icon (immediately to the right out of Debate Parlor checkpoint, up the ladder) - Stonesword key (out of Debate Parlor checkpoint, fountain on plaza) - Golden seed (same plaza) - Karolos Glintstone Crown (south-west of Golden seed, at the end crystal crab hide in bushes) - Cracked Pot (balcony above boss room) - Glintstone whetblade (western part of plaza, in a small room) - Fullmoon Crossbow (crazy jump from roof after bridge with wizard and robots, and continued parkour this time south along robots, then up the ladder) - Lazuli Glintstone Crown (crazy jump from roof after bridge with wizard and robots, and continued parkour north, jump down broken floor in tower, crystal crab on one of MIDDLE floors) - Imbued Stonesword key (continue parkour on roofs, before jump on chapel roof; OR if dropped from Crown above, climb up the ladder and go east before jumping on chapel roof) - Academy Glintstone Key (after Imbued Sword key, continue to chapel roof, from rafters down on chandelier) - Shattering Crystal (second floor of this chapel) - Azur's Glintstone staff (from second floor corridor to east with firearrow paige) - Twinsage Glintstone Crown (same side, next corridor, crystal crab behind scaffolding) > Teleporter to Church of Vows (room past rolling ball) - Carian Knight Shield (Moongrum guard, past the rolling ball) - Glintstone Scarab (south from Moongrum to area with two shortcuts, jump over the ledge to the east, up the ladder, room with Pumpkinhead) ! # Finish all invasions in Liurnia if they not. And pump quests to maximim, just in case. > check Roundtable Hold "Renalla defeated" section > Gesture: Balled Up (after any rebirth) [Quest_Thops_2] Give him Academy Glintstone key => Gesture: Erudition [Quest_Thops_3_Final] Back frorm Schoolhouse classroom checkpoint, around the wall => Thops bell bearing + Academy Glintstone Staff + AOW: Thops's barrier (bug, back in Church of Irith where Thops was) > Open Converted tower (Rise, near Minor Erdtree, Liurnia west), use Erudition gesture => Memory Stone > Open Converted Fringe tower (Rise, near Minor Erdtree, Liurnia north-east), use Erudition gesture + any Glintstone Crown => Cannon of Haima, Gavel of Haima Caria Manor - Glintstone Craftsman's cookbook [6] (east of entrance, in a room) - Carian Piercer (bug, right side of entrance, around the structure) - Sword of Night and Flame (from Manor Lower Level checkpoint, past ghosts, left path, jump down the bridge, and down the ladder) - Urumi (Before Upper Manor Level checkpoint, jump over bridge eastern side, then south way) - Golden Seed (past Upper Manor Level checkpoint) - Troll knight's sword (Troll, hard to miss) - Cracked pot (Before boss door, to the left, down the edge, down the scaffolding) - AOW: Carian Grandeur (even more down) - # Loretta's Greatbow, AOW: Loretta's Slash - Frozen Armament (bug on the road, from Royal Moongazing Grounds checkpoint, to the left, and east) - Ashes: Albinauric (cemetery, south from Behind Carian Manor checkpoint) - >Juvenile Schooler set + Larval Tear (droppoint for "Resurrection" painting, right next to Albinauric Ashes) - Meteorite (Royal Grave Evergaol) - AOW: Chilling Mist (from Royal Moongazing Grounds checkpoint, to the right, ruins) {Merchant_Pidia} South from Chilling Mist, down, then down the ladder => Larval Tear, AOW: Carian Retaliation, Celestial Dew, Ritual Pot, Black Leather shield, Ripple Blade, Glintstone Craftsman's cookbook [7], etc > Talking to Ranni will start Radahn Festival !> Progress Rogier's quest to Quest_Rogier_5 before talking to Ranni [Quest_Ranni_3] Talk to Ranni until she says to piss off for poking your nose around [Quest_Ranni_4][Quest_Rogier_6] Talk to Rogier at Hold (he suggests entering Ranni's service) [Quest_Ranni_5] Talk to Ranni (pledge to her) [Quest_Ranni_6][Quest_Blaidd_4][Quest_Seluvis_1] Talk to Blaidd, Iji and Seluvis [Quest_Ranni_7] Talk to Ranni (she is goint to sleep) [Quest_Seluvis_2] Talk to Seluvis, accept task and receive potion - Memory Stone (top of Seluvis Rise) - Black Wolf Mask (on the wall around Seluvis Rise) [Quest_Seluvis_3] Give potion to Gideon at Hold (other options to make puppets from Nepheli or Dung-eater not worth it and blocks their respective quests) [Quest_Blaidd_5] Talk to Blaidd at Siofra River, south-east from Siofra River Bank checkpoint, near spiritspring [Quest_Seluvis_4] Talk to Seluvis, buy ALL available puppets/spells, receive introduction to Sellen [Quest_Sellen_3] Talk to Sellen (she tells about Radahn) [Quest_Seluvis_5] Ask for another puppet, buy the last one (require starlight shards) [Quest_Seluvis_6] Ask him about scheme against Ranni. Agree to procure Starlight Shard (Altus Plateau) > after Altus plateau [Quest_Seluvis_8] Give Seluvis Amber Starlight => Magic Scorpion Charm [Quest_Seluvis_9] Talk to Seluvis, receive Amber Draught [Quest_Seluvis_10] Administer Amber Draught to Ranni [Quest_Seluvis_11_Final] Return to Seluvis body => Preceptor's Set + Seluvis's Bell Bearing > at this point if you reach Quest_Seluvis_10, Ranni will be pissed at you => Church of Vows + Celestial Dew = Absolution > after finding Fingerslayer blade in Nokron (check Quest_Ranni_8) ! before giving Fingerslayer Blade to Ranni, it's recommended to finish Quest_Seluvis_11_Final or it will be blocked! [Quest_Ranni_9] Give Ranni Fingerslayer Blade => Carian Inverted Statue - Snow Witch Set (Renna's Rise) > Teleporter to Ainsel River Main [Quest_Ranni_10][Quest_Blaidd_9] Talk to Iji at Road to the Manor checkpoint about Ranni's voyage and Blaidd's imprisonment. Buy => Carian Filigreed Crest talisman > at this point don't forget to go to Carian Study Hall to progress Quest_Ranni Ainsel River - Celestial Dew (down the tunnel, left path from carrion, past nest with queen, jump on a bar) > return back up the lift for checkpoint > after lift, from room with dozens of clayman, take inconspicuos tunnel to the left of main way, then up the fallen column, to get to moth. - Map (below moth) {Merchant_11} Below moth, map => Lost ash of War, Celestial Dew, Perfumer's cookbook [4], Nomadic Warrior's cookbook [16], Prisoner's set, some gravity stones - Immunising Horn Charm (From Ainsel River Downstream checkpoint, cave with carrion and ants) - # Frozen Lightning Spear - Great Ghost Glovewort Siofra River - Oracle Bubbles (bug on a pillar, can be shot or accessed by jumping on ruins wall) - Armorer's cookbook [6] (Siofra River Bank checkpoint, north and immediately left and back, where two tribesman gather berries) >Teleporter1 -> to Teleporter3 (before boss stairs) - Map (near boss stairs) - Horn Bow (below boss stairs) - Inverted Hawk Heater Shield (from boss stairs, south-west, up the hill) {Merchant_12} North, up the scaffolding => Larval Tear, Stonesword key x3, Nomadic Warrior's cookbook [17][18], Shotel, etc - Stonesword key (from checkpoint to the east, left of boss stairs, spiritspring, proceed to the dead end) >Teleporter2 -> to secret area (up ruins, where snipers camp) >Teleporter3 -> to Teleporter1 (north of Worshipers Woods checkpoint) - AOW: Square Off (bug on the edge, north-west from Worshipers Woods checkpoint) - Clarifying Horn Charm (up from Below The Well checkpoint) > activate lift (requre 2 Stonesword Keys) and Deep Siofra Well checkpoint above for later > next two items can be obtained upon return from secret area - Golden Seed (path between Worshipers Woods checkpoint and Below the Well checkpoint, to the west) - Stonesword Key (south from Golden Seed, second bridge support pillar, around) - Great Oracle bubble (bug in secret area, south-west to archway with dozens of clayman) - # Dragon Halberd (secret area) - Marika's Scarseal (near waterfall past boss) - #Ashes: Ansestral Follower Caelid (west) > starting from rotview balcony - !# Green-burst Crystal Tear + Fire-shrouding cracked tear (Erdtree Avatar, north) !.. - Cracked Pot (branch north of Erdtree Avatar) - Whirl, O Flame (bug, from balcony, east, near dogs eating caravan) - Greatsword (caravan truck) - Visage Shield (Caelem Ruins cellar) - St. Trina Sword (Forsaken Ruins cellar, west of Caelem Ruins, below balcony) > Require Stonesword key - AOW: Flame of the Redmanes (invisible bug, south of Forsaken Ruins, fort Gael North checkpoint) - Flame Grant Me Strength (behind Fort Gael) - Starscourge Hailroom (top of Fort Gael) - AOW: Lion's claw (Lion in Fort Gael) - Katar (room in Fort Gael) >Teleporter -> Impassable Bridge - AOW: Lifesteal Fist (bug near Astray from Calid Highway North checkpoint, south of Smouldering Wall checkpoint (which is near telescope), down the road) {Merchant_13} East of Astray from Calid Highway North => Consumables - Meteoric Ore Blade (Caelid Waypoint Ruins cellar, south-west of Astray from Calid Highway North checkpoint) [[Gael Tunnel]] - [Quest_Alexander_2] Talk to Alexander - Cross-Naginata - #Moonveil + Dragonheart [[Minor Erdtree Catacombs]] - Imp Head (Wolf) - #Ashes: Mad Pumpkinhead [[Abandoned Cave]] - Serpent Bow - Venomous Fang - #Gold Scarab [[Gaol Cave: Require 2 Stonesword keys]] - Pillory Shield - Wakizashi - Stonesword key - #Ashes: Putrid corpse - Regalia of Eochaid Caelid (center) > continuing from Caelid Waypoint Ruins down the road - Starlight Shard (south-west from Caelid Highway South checkpoint) - Larval Tear (one swordweilding zombie near tombs turns into troll, south of Caelid Highway South checkpoint) - Ancient Dragon Apostle Cookbook [1] (Cathedral of Dragon Communion, south-east from Caelid Highway South checkpoint) - Dragon Heart (Dragon, north of Cathedral) {Merchant_8} Near map fragment => Stonesword key, Pot, Champion set, Nomadic Warrior Cookbook [15] - Golden Seed (road to the south from Merchant_8) - AOW: Poison Moth Flight (At Night: Night Cavalry, south of map fragment, close to Golden Seed) - Death Poker (At Night: Death Rite Bird, east of Southern Aeonia Swamp Bank checkpoint, across the road) - Windy Crystal Tear (north-east of Sacred Seed, south of Southern Aeonia Swamp Bank checkpoint, in a deepening) - Arrow's Sting talisman (siege tower near Impassable Bridge) - AOW: Crag blade (bug on a hill, west of siege tower, near history swords) [Quest_Millicent_1] Talk to Gowry (shack south of Sellia Town) - Stonesword key (Sellia Town, on top of the arch) - AOW: Double Slash (bug on top of big branch of Sellia Town) - Cerulean Tear Scarab (on the roof of the house) - Spelldrake Talisman +1 (behind forcefield door) - Imbued Sword Key (behind another forcefield door) - Night Comet (behind third forcefield door) - "Redmane" Painting (main street, under balcony of a house) => bring to a shore after tricky jump down near Erdtree in Dragonbarrow - Golden Seed (near second gate) - Staff of Loss (on a balcony of one house, hanging corpse) - Sacred Tear (Church of the Plague, up up the hill from Sellia Backstreets checkpoint) [Quest_Millicent_2] Talk to Millicent - Starlight shard (east of Church of the Plague) > hidden path to Sellia Hideaway (up the hill, behind battlemage) - Stonesword key (north of battlemage, spiritspring) - Eternal Darkness (from Church of the Plague, south, across Sellia Gatewau, in the tower near bloodhound) - # Nox Flowing Sword (boss near Sellia Backstreets checkpoint) - Lusat's Glintstone Staff (chest behind bosses) - Ashes: Rotten Stray (north of Sellia Understair checkpoint, near castle wall) - Poison Armament (invisible bug near Sellia Crystal tunnel) - Rock Sling (Street of Sages ruins cellar) - Traveller's set + Perfume bottle (Street of Sages ruins) - Meteorite Staff ((Street of Sages ruins) - AOW: Poisonous mist (teleporting bug, center of the swamp) * Invader Millicent (center of the swamp, drops nothing) - Commander's Standard + Unalloyed Golden Needle (Commander O'Neil at Heart of Aeonia checkpoint) - AOW: Sacred Ring of Light (exploding bug, East of Heart of Aeonia checkpoint) [Quest_Millicent_3] Give Gowry unalloyed needle [Quest_Millicent_4] Return to Gowry for repaired needle [Quest_Millicent_5] Pin Millicent in Church of Plague [Quest_Millicent_6] Talk to Gowry in his shack, buy spells [Quest_Millicent_7] Talk to Millicent (she must be woke up) in Church of Plague => Prosthesis-wearer Heilroom [Quest_Millicent_8] Talk to Millicent in Gowry's Shack [[Caelid Catacombs]] - Ashes: Miranda Sprout - #Ashes: Kindred of Rot [[Sellia Crystal tunnel]] - Rock Blaster - Faithful's canvas talisman - #Somberstone Miner's bell bearing [[Sellia Hideaway]] > recommended to do as part of Sellen quest, not to go 2nd time - Stars of Ruin (part of Quest_Sellen_6 quest, require Quest_Sellen_5) - Lost Ashes of War (revenant) - Crystal Spear (behind hidden wall, cave with lots of huge crystal minerals) - Ashes: Crystalian (room with 3 mages, access from mineral cave above) - #Crystal Torrent Caelid (north aka dragonbarrow) > starting from Caelem Ruins checkpoint, towards Grayol's Dragonbarrow area {Merchant_14} Isolated Merchant's shack checkpoint (north from Dragonbarrow checkpoint, then west) => Beast Repellent torch, Lost Ashes of War x2, Ritual Pot, Spiked Caestus, Samurai Set, etc - AOW: Sky Shot (bug near Merchant_14) - ☠* Gravity Stone Peddler's bell bearing (At Night: Bell bearing hunter near Merchant_14) - Ashes: Battlemage Hugues (Sellia Evergaol, far south from Dragonbarrow West checkpoint, at the end of smouldering wall) - Memory Stone (Lenne's Rise, jump on a balcony from torrent) - AOW: Bloodhound step (At Night: Night Cavalry, Lenne's Rise checkpoint, bridge) - Golden Seed (near Beastial Sanctum) - Starlight shard (South East from Beastial Sanctum) > Give Deathroots to Gurranq - Cinquedea (west of Beastial Sanctum, tricky jump down on a branch, then down structure 3 stories, end of northeastern side) - Dragoncrest Shield talisman (same level where Cinquedea is) - ☠# Gargoyle's Blackblade + Gargoyle Black Halbert (Black Blade Kindred gargoyle) - Dragon Heart (Dragon on the bridge, Farum Greatbridge checkpoint) - Beastial Constitution (bug, below bridge with dragon, west side) - # Stonebarb Cracked Tear + Opaline Hardtear (Erdtree Avatar) - AOW: Rain of Arrows => "Redmane" painting droppoint (directly south from Erdtree, behind the pot, tricky jump down on a branch, where mage giant sleeps) - Dragon Heart x5 (wounded mama dragon near Fort Faroth) - Dectus Medallion - right (Fort Faroth) - Radagon Soreseal (Fort Faroth, down inside from roof, after rats) >access from Siofra River - Stonesword Key (near bear, Siofra River Well checkpoint) - Spiked Paliside Shield (under first giant archer) - Great Jar's Arsenal talisman (after defeating 3 duelists in a row) [[Divine Tower of Caelid]] - Stonesword key (Divine Tower of Caelid ledge, right ladder, south-south-eastern side) - ☠ #Godskin Apostle Set (Divine Tower boss) - Godslayer's Greatsword (chest behind boss) [[☠ Dragonbarrow Cave]] - Bull-goat's talisman - #Flamedrake talisman +2 Redmane Castle (normal) - AOW: Flaming Strike (cemetery near backdoor) - Armorer's cookbook [5] (room where you open backdoor shortcut) - Armorer's cookbook [4] (room to the left of gate, at plaza with two lions) - Flamberge (top level with pumpkinhead, access from room before firecannon blockade, up the ladder) - Red-hot whetblade (2nd level, room right side of gate) - #Ruins Greatsword [Quest_Sellen_2] Talk to Jerren Redmane Castle (festival) - Gesture: Polite Bow (Talk to Fingermaiden) [Quest_Blaidd_6] Talk to Blaidd [Quest_Alexander_3] Talk to Alexander - Gesture: Heartening Cry (Talk to Jerren) #!Summon at least Blaidd and Alexander [Quest_Blaidd_7] Talk to Blaidd [Quest_Alexander_4] Talk to Alexander [Quest_Blaidd_8] Save Blaidd from Forlorn Hound Evergaol [Quest_Alexander_5] Help Alexander in Jarburg (need oil pot, can be crafted with Nomadic Warrior's cookbook [17]) !if alredy visited Mt. Gelmir, this step is skipped to Quest_Alexander_6 [Quest_Diallos_5][Quest_Alexander_6] Talk to little jar to the point "I want to be like Alexander". Reload area if necessary. > check Roundtable Hold "Radahn defeated" section [[☠ War-dead catacombs]] - Collapsing Stars (scarlet rot basement) - Ashes: Radahn Soldier (room with rotten knight) - #Ashes: Redmane Knight Ogha Nokron Eternal City > accessible after defeating Radahn - Ghostflame Torch (at the begining, tricky jump from thin ramp, you can see item on the roof) - Ghost Glovewort Picker's Bell bearing [1] (gazebo, center of plaza) - Larval Tear (structure south of center plaza, with zig-heist aliens on the roof) - Ashes: Greatshield Soldiers (south-east from center) - Larval Tear (next area, gazebo with ambush slimes under ceiling) - # Larval Tear + Silver Tear Mask - Clarifying Horn Charm+1, Celestial Dew (folowing north path from Mimic boss, drop down and continue, above Merchant_12 as a landmark) - Celestial Dew (south parkour on Ancestral Woods checkpoint, on the ledge of western building, BEFORE encounter with naked mimics) - Black Whetblade (cathedral following the roof path) - Ashes: Mimic Tear (cathedral following the roof path, require Stonesword Key) - Nox Flowing Hammer (In the corridor to Mimic Tear jump into south window, jump across and up to broken window) - Larval Tear (first floor of that cathedral, kill steel ball) - Celestial Dew (area with lots of mimics, near Night's Sacred Ground checkpoint) ![Quest_Ranni_8] Fingerslayer Blade + Great Grave Glovewort (chest north from Night's Sacred Ground checkpoint) > Teleporter to Ansestral Woods checkpoint - Shining Horned Headband (north-east of Ancestral Woods checkpoint, singing shaman at the crowded center near dead deer) - AOW: Enchanted shot (bug, directly north from Ancestral Woods checkpoint, where two shamans and lot's of rats listening to song) - Ancestral Infant's head (West from Enchanted Shot AOW, in the chest behind shaman) - Mottled Necklace (north-east from Ancestral Woods checkpoint, path through jellyfish, on top of ruins) #>Regal Ancestor - Crucible Hornshield (Crucible Knight, down from Aqueduct Facing Cliff checkpoint) - Missionary's cookbook [5] (behind Crucible Knight) - Order Healing (bug in gazebo, behind Spear Crucible Knight) - Gesture: Inner Order (talk to depressed D's brother in aqueducts) [Quest_D_6] Give him D's Twinned armor > D can be summoned for boss fight if alive - #Gargoyle Greatsword + Gargoyle Twinblade Nokstella > This part accessible only through Quest_Ranni_9 - Miniature Ranni (at the start, right before Ainsel River Main checkpoint) [Quest_Ranni_12] Talk to Miniature Ranni few times sitting at Ainsel River Main checkpoint - Stonesword key (south from main area, near crazy flower) - Ashes: Claymen (further south, near waterfall, hidden in bushes) - Wing of Astel (after descending down the stream, go into cave with 2 ants and one heavy ant, continue path to the chest on top of archway) - Ant Skull Plate (west from Nokstella Eternal City checkpoint, up the stairs and left, chest in the room) - Ashes: Archer (further up the stairs, around building to the left) - Ghost Glovewort Picker's Bell Bearing [2] (inside chest in that building, guarded by shielded blobs) - Ashes: Nightmaiden & Swordstress puppets (further up the stairs, before bridge, around the building, inside, in a chest. Require Stonesword Key) - Larval Tear (metal ball on the bridge) - Larval Tear (abross the bridge, building to the right, sneaky metal ball under the ceiling) - Great Ghost Glovewort (chest inside building with sneaky metal ball) - Larval Tear (another sneaky ball under ceiling, further up the stairs, chapel with lots of unstable blobs) - Moon of Nokstella (continue to the top of the stairs to great chapel with priest and two mimics) - Golden Seed (from great chapel take the lift down next, right after exit) - Stonesword Key (north of lift, drop down on the ledge) - Celestial Dew (west gazebo from lift to Nokstella Waterfall Basin checkpoint) - Celestial Dew (middle of the river, north-north-east from Nokstella Eternal City checkpoint, near wall, guarded by 3 snails) [Quest_Ranni_13] Discarded Palace Key (Baleful Shadow, after Nokstella Waterfall Basin) [Quest_Ranni_14] Go to Raya Lucaria Grand Library checkpoint in Academy and use key on locked-before chest => Darkmoon ring Lake of Rot > it's recommended to fetch Mushroom Set (Seethewater Cave dungeon at Mt. Gelmir, north from Seethewater River checkpoint, which is near Abductor Virgin checkpoint in Subterranian Inquisition Chamber, accessed from Raya Lucaria Academy being eaten by Abductor), Spiral Horn Shield and craft Preserving Boluses (or use "Flame, Cleanse Me" and "Two Fingers Heilroom" if needed) - Map (just near checkpoint) - Immunising Horn Charm+1 (south from checkpoint, horned guy) > advised to wear immediately - Mushroom Crown (south-east part, on top of ruins with basiliscs) > advised to wear immediately also - Alabaster Lord's sword (on top of ruins, risen by activation of two obelisks in south-central part that rises southern part of ruins) - Nomadic Warrior's cookbook [22] (most south-western part of the lake from checkpoint, in the chest) - #Dragonscale Blade (in the center) - Golden Seed (Putrid Tree Spirit, right below Grand Cloister checkpoint) - Scorpion Stinger (room guarded by centipeds) #[Quest_Ranni_15] Go up the lift behind Astel using Darkmoon ring Moonlight altar > accessible only after Quest_Ranni_15 - Adula's Moonblade + Dragon Heart (Dragon Adula north-east from Moonlight Altar checkpoint) - Starlight shards x10 (Cathedral of Manus Celes) [Quest_Ranni_16_Final] Drop down the hole in Cathedral of Manus Celes and put ring on Ranni, talk => Darkmoon Greatsword - Dragon Heart x3 (3 dragons west of Cathedral and Moonfolk ruins) - Ashes: Black Knife Tiche (Ringleader's Evergaol, far north-west cliff from Moonlight Altar checkpoint) - Ranni's Dark Moon (Chelona's Rise. Kill three ghost turtles to enter, one on a western cliff, second one on a cliff far to the east, south-south-east of cathedral, third on is up spiritspring near evergaol north-west of Moonlight Altar checkpoint) [Quest_Blaidd_10_Final] Meet Blaidd near Ranni's Rise => Royal Greatsword + Blaidd's set - Pidia's Bell bearing + Ashes: Dolores the Sleeping Arrow Puppet (Go to Merchant_Pidia after Quest_Ranni_16_Final) - Iji's Bell bearing + Iji's Mirrorhelm (after Quest_Blaidd_10_Final, talk to Iji at Road to the Manor checkpoint, then reload) Deeproot Depths - Staff of the Avatar (Erdtree) - AOW: Golden Land (bug with two heavy ants, behind Erdtree) - Elden Stars (cave with tons of ants, north-west of checkpoint, up the branches) - Map Fragment (gazebo behind sitting gargoyle, past Deeproot Depths checkpoint) - Prince of Death's cyst (bear in a cave behind waterfall, eastern wall, can be also accessed from hole on top) - AOW: Vacuum Slice (north-east from map fragment, chapel, behind gargoyle) - Stonesword Key (tower right in front of Crucible Knight, accessed by spiritspring) - Siluria's Tree (Crucible Knight, west) - Crucible Knight's set (chest behind Crucible Knight) - Ashes: Mausoleum Soldier ashes (north from mausoleum, on the edge) - Prince of Death's staff (northern tower of the group, past sitting gargoyle, north-east of The Nameless Eternal City checkpoint, access by branches) - #Fia's Mist (Fia's champions, Across the Roots checkpoint) > Teleporter to Capital (East Capital Rampart checkpoint) ![Quest_Fia_8] Talk to Fia, !say you just want to hug!, give Cursemark, talk until she wishes you become Elden Lord [Quest_Fia_9] reload/return, talk (she says 'goodbuy') #[Quest_Fia_10] reload/return, touch Fia, enter dream [Quest_Fia_11] Pick up Mendin Rune of Death Prince (check Roundtable Hold "Fia completed" section) [Quest_D_7][Quest_Fia_12_Final] Reload, talk to D, pick up => Fia's set [Quest_D_8_Final] Reload, pick => Inseparable Sword, Twinned Set (back) Altus Plateau > Any checkpoint triggers Radahn festival > check "Altus Plateau visit" block in Roundtable Hold [Quest_Rya_4/a] Talk after exiting the lift (she is on the left side of stairs) > she'll teleport you to Volcano Manor, useful to activate checkpoint for later and grab map nearby !if she's not there, see Quest_Rya_4/b - Stonesword Key (little camp west of lift, near the road to the right) - AOW: Shared Order (at night, Night Cavalry near Altus Highway Junction checkpoint) - AOW: Earthshaker (hidden bug, crawling underground, directly south from Altus Highway Junction checkpoint, can be seen by raising dust) [Quest_Boc_6] Near Altus Highway Junction checkpoint, talk, give Golden Needle, allow him to call you Lord => Gesture: My lord - Godfrey Icon (Golden Lineage Evergaol, east of Lift, but below, in the valley; Require Stonesword key) - Troll's Golden Sword (in a cart, camp with arbalests, west of Altus Highway Junction) - Greatshield Talisman (another cart in camp) - Golden Seed (north of Altus Highway Junction checkpoint) - Perfume Bottle (near Golden Seed, north-west from Altus Highway Junction checkpoint, north-west from camp) >area is highly connected to Mt. Gelmir, so mind the intersections if you wander west - AOW: Blood Blade (bug in a pond, north of the camp) [Quest_Seluvis_7] Amber Starlight (dark valley north-east of Altus Highway Junction checkpoint, entrance from south, at the begining of the main stairs) [Quest_Corhyn_4] Talk to him about Golden Mask near map fragment {Merchant_15} Forest-Spanning Greatbridge => Ancient Dragon Apostle's Cookbook [2], Stonesword key x3, Red Crest Heater Shield, Scorpion Kite Shield, Crossed-Tree Tower Shield, Tree Surcoat, etc > teleporter to Village - Sacred Tear (Second Church of Marika, north-west from map fragment, in a depression) *[Quest_Yura_5] Nagakiba + Purifying Crystal Tear + Eleonora's Poleblade (Second Church of Marika) - Unseen Blade + Unseen Form (Mirage Rise, touch 3 phantoms: first phantom near book, second phantom south-west of this book closer to Second Church of Marika, third phantom is hidden as out-of-place rock between Bower of Bounty checkpoint and Forest-Spanning Greatbridge checkpoint) - Wrath of Gold (Woodfolk ruins cellar, east from Forest-Spanning Greatbridge checkpoint) - Icon Shield (ruins north of Woodfolk ruins) - AOW: Golden Slam (bug in ruins near tree, north of the tree) - Nomadic Warrior's cookbook [19] (same ruins as above) - Golden Seed (north-north-east of the tree) - #Crimsonspill Crystal Tear + Speckled Hardtear (Giant Wormface near tree) - Bloody Helice (Writheblood Ruins cellar, north-west of Mirage Rise, north-east of Bower of Bounty checkpoint, up the cliff, not in depression) - Great Stars (caravan near Writheblood Ruins) - Radiant Gold Mask (southern end of the southern part of the northern broken bridge, south from Road of Iniquity Side Path checkpoint and Corhyn with Goldmask, accessible from western cliff) - Protection of the Erdtree (bug on a platform near north part of bridge ruins, east of Road of Iniquity Side Path checkpoint) [Quest_Corhyn_5] "Talk" to Goldmask (edge of bridge, Road of Iniquity Side Path checkpoint) [Quest_Corhyn_6] Tell Corhyn about Goldmask, he is still at map fragment [Quest_Corhyn_7] Return to Goldmask and ask Corhyn about him - Haima Glintstone Crown + Battlemage's Set (battlemage on a cliff, looking at East Windmill Pasture, just north of Road of Iniquity Side Path checkpoint) - Ashes: Giant rat (western cliff, in a barn with rats, West Windmill Pasture, west of Road of Iniquity Side Path checkpoint) - Twinned Knight Sword + Navy Hood + Noble's set (campfire at East Windmill Pasture, north of Road of Iniquity Side Path checkpoint) - Celebrant's Skull (northern (left) path around cliff, from Windmill Village checkpoint) - #Godskin Peeler + Scouring Black Flame (northern cliff of Dominula, Windmill Village) - >Fire's Deadly Sin (droppoint for Flightless Bird painting, Windmill Heights checkpoint, at the edge to the south) - Golden Seed (road from village to artillery and north-western gate) - AOW: Lightning Slash (bug in artillery camp, near north-western gate) - Greatbow (top of Highway Lookout Tower, north-west from camp above, south-east of Windmill Village checkpoint) - Larval Tear (scared noble turning into lion, ruins by road to south-south-east from Windmill Village checkpoint) - Lansseax's Glaive (Lansseax, south from Rampartside Path checkpoint, on a hill) - >Harp bow (droppoint for Champion's Song painting, just a little south-west of Rampartside Path checkpoint, on a ledge where dragon was) - Stonesword Key (platform, south-west from Rampartside Path checkpoint and south from artillery camp, down the road from Larval Tear above) - AOW: Lightning Ram (bug near history spot, south-west from Rampartside Path checkpoint) - Black Knife (assassin, continue road from Stonesword Key to the west, entrance to Sainted Hero's Grave) - Sacred Tear, Dragonbolt Blessing (Stormcaller Church, south of Sainted Hero's Grave) [[Altus Tunnel]] - Arsenal Charm +1 - #Somberstone Miner's Bell Bearing [2] [[Sainted Hero's Grave]] - Crimson Seed Talisman (require Stonesword Key) - Ashes: Leyndell Soldier - Dragoncrest Shield Talisman +1 (require Stonesword Key) - Voice: Let's get to it - #Ashes: Ancient Dragon Knight Kristoff [[Perfumer's Grotto]] - Perfume bottle - #Great Omenkiller Cleaver Capital Outskirts > starting at Altus Highway Junction checkpoint and to the east - Erdtree Greatshield (two Treee Sentinels at the gate) - Golden Seed x2 (Outer Wall Phantom Tree checkpoint) - Golden Seed, Giant Crusher (camp, south of Outer Wall Phantom Tree checkpoint) - Missionary Cookbook [4], Golden Order Seal (Minor Erdtree Church, south-east of Outer Wall Phantom Tree checkpoint) - AOW: Prayerful Strike (invisible bug in a pond below, east of Outer Wall Phantom Tree checkpoint) - Gargoyle's Great Axe (road north-west from Outer Wall Phantom Tree checkpoint) - Golden Seed (square, north of Gargoyle, south of Margit) - Lost Ashes of War (closed gate, south-west from Golden Seed above) - AOW: Golden Parry (bug on a ramp, near Golden Seed above) - Viridian Amber Medallion +1 (Margit, on the way north from Golden Seed above, south of Outer Wall Battleground checkpoint) {Merchant_16} Hermit Merchant Shack checkpoint => Sentry's Torch, Perfume Bottle, Prophet's Set, Consort's Trousers, Upper-Class Robe, Distinguishedd Greatshield, - * Medicine Peddler's Bell Bearing (at night, Hermit Merchant Shack checkpoint, Bell Bearing Hunter) - Twinbird Kite Shield (at night, deathbird, west of Hermit Merchant Shack checkpoint, up the hill) - Winged Crystal Tear (where deathbird is) - Twiggy Cracked Tear + Crimson Crystal Tear (Erdtree) [Quest_DungEater_3] Talk to blackguard about Dung-eater (south-east of Hermit Merchant Shack checkpoint, down in the pond with crabs) - Dragon Greatclaw + Dragonclaw Shield (Draconic Tree Sentinel near north-eastern entrance to the Capital, Millicent can help) [[Sealed Tunnel]] - Smithing Stone Miner's Bell Bearing [2] - Stonesword Key - #Onyx Lord's Greatsword > prepare checkpoint past boss for later [[Auriza Side Tomb]] - Perfumer's Cookbook [3] - Cracked Pot x2 - Ritual Pot - Cracked Pot x2 - Ritual Pot - #Ashes: Soldjars of Fortune [[Auriza Hero's Grave]] - Golden Epitaph (require Stonesword Key) - Stonesword Key - Ashes: Vulgar Militia - Crucible Feather Talisman (behind omen) - AOW: Holy Ground + Tree Sentinel Set (after destroying chariots) - #Ordovis's Greatsword + Crucible Axe Set (crucible duo) Mt. Gelmir > Any checkpoint triggers Radahn festival > starting at Magma Wyrm Makar checkpoint, in Ruin-strewn precipice - Ruler's Set (cart near Stake of Marika, north-east of Abandoned Coffin checkpoint) - AOW: Sacred Order (bug on the road, north-west from Abandoned Coffin checkpoint) - Omenkiller's Set (omenkiller in Perfumer's Ruins, far north-west-west from Abandoned Coffin checkpoint) - Perfume Bottle (Perfumer's Ruins) - Perfumer's cookbook [1] (Perfumer's Ruins, chest) - Perfume Bottle (Perfumer's Ruins) - Perfumer's Talisman (Perfumer's Ruins cellar) [Quest_Millicent_9] Talk to her, near Erdtree Gazing Hill checkpoint, north-west of Abandoned Coffin checkpoint - Golden Seed (Erdtree Gazing Hill checkpoint) [Quest_Rya_4/b] Talk near Lux Ruins (just near Erdtree Gazing hill checkpoint) > she'll teleport you to Volcano Manor, useful to activate checkpoint for later and grab map nearby !if she's not there, see Quest_Rya_4/a - Ritual Sword Talisman (Lux Ruins, part that above Raya) - AOW: Shield Crash (teleporting bug in Lux Ruins) - DeathRoot + Ashes: Tibia Summons (Mariner at Wyndham Ruins, north from Erdtree Gazing Hill checkpoint, up the hill) - Perldrake Talisman +1 (Wyndham Ruins cellar, require Stonesword Key) - AOW: Barrage (bug near Seethewater River checkpoint) - Golden Seed (north of Seethewater River checkpoint) - Stonesword Key (north-west from Seethewater Terminus checkpoint, near jellyfish) - Prelate's Inferno Crozier + Fire Prellate Armor (Fort Laiedd, west of Seethewater Terminus checkpoint) - Armorer's cookbook [7] (Fort Laiedd) - Fire Scorpion Charm (Fort Laiedd, top, over the wall, near spirit) - #Dragon Heart (magma wyrm, south of Fort Laiedd) [Quest_Alexander_7] Talk, near magma wyrm, south of castle - Roilling Magma (south of magma wyrm, Hermit's Shack) - Pulley Crossbow (east of Hermit's shack, Craftsman's Shack checkpoint) - Errant Sorcerer's Set (Hermit village, north-east of Craftsman shack checkpoint) - Starlight Shard (Hermit Village) - Hierodas Glintstone Crown (Hermit Village) - Voice: You're beautiful (Hermit Village) - Memory Stone (queen Maggie, past Hermit Village, north) [Quest_Sellen_4] "Talk" to Azure => Comet Azure - Pulley Bow (mobile siege tower, past Gelmir Hero's Grave, north-east of Primeval Sorcerer Azur checkpoint, west of First Mt. Gelmir Campsite checkpoint) - Scavenger's Curved sword (north-west of mobile siege tower, across the gap, with grafted scion) {Merchant_17} Up the ladders from grafted scion => Nomadic Warrior's cookbook [20], Stonesword Key, Guilty Hood, Confessor's Set, Explosives Greatbolts, etc. - Fallingstar Beast Jaw (up the mountain from Ninth Mt. Gelmir Campsite checkpoint) - Starlight Shard (same bull fight arena) - AOW: Through and Through (invisible bug, west from bull fight arena, north-west of Vocanic Manor) - Golden Seed (north-west of Volcano Manor, west from bull fight arena) - Larval Tear (Wormface, north-west of Road of Iniquity checkpoint and map fragment) - #Leaden Hardtear + Cerulean Hidden Tear (Ulcerated Tree Spirit near tree, west of Road of Iniquity checkpoint, past Wormface) - Stone Sword Key (lower part of collapsed bridge, near Corpse-Stench Shack, down the broken bridge with corpses, east of tree) - Golden Vow (Corpse-Stench Shack) - * Sacred Butchering Knife (Anastasia, Corpse-Stench Shack, east from tree, west from Bridge of Iniquity checkpoint) [Quest_Sellen_5] Talk to Sellen at Waypoint Ruins Cellar checkpoint, accept Path, ask about Lusat's whereabouts => Sellian Sealbreaker [Quest_Sellen_6] go to Sellia Hideaway, down to a pit with a mage, open magic barrier, "speak" with Lusat => Stars or Ruin [Quest_Sellen_7] Talk to Sellen at Waypoint Ruins Cellar checkpoint => Starlight Shard [Quest_Sellen_8] Talk to Sellen at Witchbane Ruins cellar at Weeping Peninsula => Sellen's Primal Glintstone [Quest_Sellen_9] Talk to Jerren in Redmane Castle about festival results, if you didn't before (Redmane Castle Plaza checkpoint) [Quest_Sellen_10] Talk to Jerren at Witchbane Ruins cellar near Sellen's corpse about how she may return [Quest_Sellen_11] Talk to Sellen (ruins north-east of Ranni's Rise) [Quest_Sellen_12_Final] Before Renalla's boss room, choose. Red sign => Witch's Glintstone Crown, Sellen's Bell Bearing, Ancient Dragon Smithing Stone, Eccentric Set (only if kill Jerren) ; gold sign (recommended) => Eccentric Set, Glintstone Kris, Witch's Glintstone Crown, Shard Spiral, Azure's Glintstone Set, Lusat's set > if 'helped' Sellen, return to respective locations to Lusat (down in the second pit of Sellen Hideaway) and Azure (Primeval Sorcerer Azure checkpoint) to obtain Lusat's set and Azure's set [[Sage's Cave]] > higly recommended to bring Sentry's Torch (Merchant_16) for assassin fight - Lost Ashes of War - Black hood - Candletree Wooden Shield - Stonesword key - Raptor Talons - Skeletal Mask - Raptor's Black Feathers - #Family Heads (necromancer) - #Concealing Veil (assassin) [[Unsightly Catacombs: require 2 Stonesword keys]] - Ashes: Winged Misbegotten - Voice: Apologies - #Ashes: Perfumer Tricia [[Wyndham Catacombs]] - Lightning Scorpion Charm (require Stonesword Key) - Ancient Dragon Apostle's cookbook [1] - #Glovewort Picker's Bell Bearing [1] [[Subterranian Inquisition Chamber]] > Accessed from Raya Lucaria Academy's Abductor. If went outside to manor or Altus Plateau, will trigger Radahn festival, if was not before. #Inquisitor's Girandole [[Seethewater Cave]] - Mushroom set (near flower and flower-lovers) - #Kindred of Rot's Exultation [[Old Altus Tunnel: Require Stonesword key x2]] - Boltdrake Talisman +1 - Troll's Hammer - #Great Club [[Gelmir Hero's Grave]] - Stonesword key - Mantis Blade - Bloodhound Set - Gelmir's Set - Ringed Finger (down the lava) - #Ashes: Bloodhound Knight Floh - Deathroot [[Volcano Cave]] - #Jar Cannon Shaded Castle - Starlight shard (outside of castle, around clockwise, north) - Marais Set + Antspur Rapier (invader, outside of castle, west) - "Champion's Song" Painting (follow wall to the north, past two perfumer's, down in a poison puddle with a slugs and zombies, in a shack) => Droppoint south-west of Rampartside Path checkpoint, on a ledge with Lansseax [Quest_Millicent_10] Valkyrie's Prosthesis (after climbing ladder to inner wall, follow north, chest behind rot knight) - Perfume Bottle (from Shaded Castle Inner Gate checkpoint go to the ladder on eastern wall, and to the right, near perfumer) - Stonesword Key (from near Perfume Bottle, jump on rocks off south-eastern part of the wall, then continue carefully on other side of rocks) - Perfumer's cookbook [2] (continue north from Shaded Castle Inner Gate checkpoint, climb up the ladder in the dark room with paige and mage) - #Marais Executioner's Sword + Briar Greatshield [Quest_Millicent_11] Give Millicent prosthesis arm (near Erdtree Gazing Hill checkpoint) [Quest_Millicent_12] Talk to Gowry => Gesture: Desperate Prayer (also he has Pest Threads now for sell) [Quest_Millicent_13] Talk at Windmill Heights checkpoint where battle with Godskin was Volcano Manor [Quest_Manor_1] Talk to Tanith, Join Volcano Manor => Drawing Room Key - * Ghiza's Wheel (inquisitor up the stairs above Tanith) - Perfume Bottle (west corridor, first door to the right, with illusory wall) [Quest_Manor_2] Talk to depressed kneeled spirit (west corridor from Tanith) [Quest_Rya_5] Talk (west corridor from Tanith, 2nd door to the left) [Quest_Manor_3] Talk to Bernahl on a chair near Rya [Quest_Diallos_6] Talk to Diallos near warmaster [Quest_Manor_4] Pick assignment letter on the table - Recusant Finger (on the same table) [Quest_Manor_5] Invade Old Knight Istvan (Limgrave, north of Warmaster Shack checkpoint, red sign near colliseum) => Scaled set [Quest_Patches_4] Talk (north corridor from Tanith) [Quest_Manor_6] Turn in first contract => Magma Shot [Quest_Rya_6] Talk about strange noises [Quest_Manor_7] Talk to Bernahl [Quest_Manor_8] Pick second contract from the table [Quest_Manor_9] Rileigh (Red sign in a valley towards Shaded Castle, under Bridge of Iniquity) => Crepus's Vial [Quest_Manor_10] Turn in second contract to Tanith => Serpentbone Blade [Quest_Patches_5] Take Patches's contract from Patches [Quest_Patches_6] Tragoth (Red sign, Magma Wyrm Makar checkpoint) => Bull-goat set [Quest_Patches_7] "Turn in" contract to Patches, reload and ask him again about reward => Magma Whip Candlestick [Quest_Manor_11] Take Bernahl's contract [Quest_Manor_12] Take Red letter from the table [Quest_Diallos_7] Talk > Talk to Bernahl, he has AOW: Eruption and AOW: Assassin's Gambit [Quest_Rya_7] Talk to Zorayas in the room across - Nomadic Warrior's cookbook [21] (corridor, behind illusory wall) - Ashes: Depraved Perfumer Carmaan (another illusory wall at the end of corridor with snails) - Bloodhound Claws (bloodhound, cellar in corridor) - Great Omenkiller Cleaver (past Prison Church checkpoint, omenkiller in small square with burning victim on stake, down in the streets below) - Erdtree Seal (in a jail room, behind omenkiller) - Stonesword Key (from plaza with Omenkiller go into east alley to the edge, turn right and walk wooden stairs along the wall, then do a very long jump; alternatively from Prison Church checkpoint jump on first house near snake, continue west till last house with another snake, carefully drop down south on a small ledge) - Smouldering Shield (continue from Stonesword Key above to cemetery with jars) - Crimson Amber Medallion +1 (require Stonesword Key, hard to miss, stonesword key hall with Abductor) - Albinauric Staff + Albinauric Mask (continue past Stonesword Key gate and snek, climb up the ladder on the roof, then carefully jump down south on a ledge, dark prison with omenkiller) - #Dragon Heart (wyrm down below, after Guest Hall checkpoint) - #Godskin Stitcher + AOW: Noble Presence (Godskin) - Serpent's Amnion (Temple of Eiglay checkpoint) [Quest_Rya_8] Talk to Tanith about Zorayas [Quest_Rya_9] Give her Serpent's Amnion - Missionary's Cookbook [6] (proceed normally after Temple of Eiglay, after an abductor when enter very dark tower through a window, go down the ladder) [Quest_Rya_10] Talk to Raya (after activating shortcut to Temple of Eiglay checkpoint, go into west window down the ladder, in the path where poison zombies and snek with magma blade walks) [Quest_Rya_11_Final] Option 1: Kill her; Option 2 : Talk to Tanith, get Tonic of Forgetfulness and give to Rya, return after killing Rykard; Option 3: talk to her after killing Rykard and reload area. (all three options => Daedicar's Woe) - Stonesword Key (next tower from Raya jump into open window; alternatively can be accessed by shortcut lift, jump in window middle of lift well) - Commoner's Headband (walkway with magma blade snek and magma whip candlestick snek, east, on the stone snake head above lava with poison zombie) - Ashes: Manserpent (continue to a hall with zombies, sneks and big head mage snek) - !> Teleporter to Rykard. Activate checkpoint, but don't go yet until all Quest_Manor is done. - Dagger Talisman (from hall above, 2nd level, west, requre 2 Stonesword Keys, but BEFORE jumping down on cages, carefully jump down to the right on the ledge, continue past snek with whip) [Quest_DungEater_4] Seedbed Curse (jump down the cages to the bottom) > check Roundtable Hold for "Dung-eater check" section - AOW: Royal Knight's Resolve (same area with Seedbed Curse, on a way out) - >! before doing Rykard, make sure Quest_Manor_17, Quest_Rya_11 and Quest_Patches_6 are complete, Tanith will teleport you to boss area by herself - #Serpent Hunter (at the start of boss fight arena) - Eye Surcoat (boss fight arena) [Quest_Manor_18] Talk to Tanith [Quest_Patches_7] (talk to Patches) [Quest_Manor_19] Talk to Tanith at Rykard,Lord of Blasphemy checkpoint - Gesture: My thanks (east corridor from Volcano Manor checkpoint, where ghost was) [Quest_Patches_8] (Shaded Castle, Castellan's Hall checkpoint, corridor to boss) => Dancer's Castanets [Quest_Manor_20] Give Tanith castanets, though nothing happens ![Quest_Patches_9] Beat him ALMOST to the death in Murkwater Cave => Gesture: Patches' Crouch; attack him 3 times and let him almost kill you and use gesture Grovel For Mercy (or let him kill you) => Gesture: Extreme Repentance Leyndell, Royal Capital [Quest_Boc_7_Final] Talk. Three options: give him Larval Tear / Say "You're beautiful" / Do nothing - Stonesword Key (from East Capital Rampart jump on golden roof from west wall with three evoys, continue parkour past imps ) - Perfume Bottle (from East Capital Rampart, building after lift, chest in room up the ladder) - Seedbed Curse (room above Perfume Bottle) - Imp Head - Corpse (east end of main street, then turn south in the cul-de-sac with guards at very end) - Stonesword Key (west end of main street, on gazebo roof, access from upstairs, under huge golden spear) - Black Bow (from shortcut and fountain near middle of main street go west down the lift to the street with zombies, jump on roof to the right and continue parkour) - Stonesword Key (from lift, down the zombie street, to the left, graves with two skeleton guards) - Stonesword Key (end of this zombie street, chest in wine cellar) - Golden Seed (middle of zombie street, turn north-west, vacant lot with putrid tree spirit) - Cracked Pot (from vacant lot go south-west in the door with sleeping knight) - Omensmirk Mask (omenkiller, Lower Capital Church) - Lionell's set, Deathbed Dress (Lower Capital Church checkpoint, past room above) - Guilty Hood (from Lower Capital Church go down to the sewers by ladder and stairs, go right (north-east)) - Lost Ashes of War (from sewer stairs, go left and left, tunnel with hands, guarded by large hand) - Erdsteel Dagger (from sewer stairs, go left and then right, past crippled gargoyle; also can be accessed by ladder at the end of street from Avenue Balcony checkpoint) - AOW: Thunderbolt (bug, from Avenue Balcony checkpoint go down the street, in the middle, jump down the dark ruined area to the left; alternatively climb up after picking Erdsteel Dagger) > jump in the well in this dark area to access sewers - Cane Sword (go south down the stairs from West Capital Rampart checkpoint, around the corner) - Gargoyle's Halberd (gargoyle near West Capital Rampart checkpoint) - Golden Seed (near gargoyle) - Gravel Stone Seal (from Golden Seed down the stairs to sandy area, knight with spear) - Stonesword Key (in sandy area, from dragon toenail jump on a barn and inside wooden shed) - Alberich's Set (Fortified Manor main hall, enter from sandy area) [Quest_Manor_13] Invade Vargram (Fortified Manor red sign in the main hall) => Raging Wolf's Set - Two Fingers' Prayerbook (fireplace in Fortified Manor) - Painting "Flightless Bird" (Fortified Manor First Floor checkpoint), droppoint at Windmill Heights checkpoint on the edge to the south - Stormhawk Axe (Fortified Manor main hall, north shut door to the garden, in the garden) - Blessed Dew Talisman (lift up from garden, near golem; also accessed by teleporter from Tower of Return) - Sanctified Whetblade, Hammer (Fortified Manor, access from wooden shed roof near huge tree branch in sandy area) - Gesture: By My Sword (near Sanctified Whetblade, Fia's room) - Coded Sword (near Sanctified Whetblade, Two Fingers and Enia's room) - Seedbed Curse (near Sanctified Whetblade, Dung-eater's room) - Ritual Shield Talisman (behind duelist near colliseum) [Quest_Corhyn_8] Talk (from West Capital Rampart checkpoint continue south to colliseum hill, they look at Erdtree) - Star Fist (in the colliseum near Corhyn and Goldmask) - #Talisman Pouch (Erdtree Sanctuary) - Erdtree bow (up the branch, at the begining of walkway to Queen Bedchamber, jump left and into open window) - Celestial Dew (near Erdtree Bow and shortcut ladder) - Golden Order Principia (cradle up the branch from shortcut ladder) [Quest_Corhyn_9] Cast Law of Regression incantation in front of Radagon statue (from Erdtree Sanctuary west, down the lift; require 37 intelligence, prepare incantation (it's in Golden Order Principia) and stats beforehand) - Barrier of Gold (invisible bug near crucible knight, west of Erdtree Sanctuary) - Bolt of Gransax (near crucible knight jump over the ledge on a huge spear below) [Quest_Corhyn_10] Return to them and tell Goldmask about statue discovery => Gesture: Golden Order Totality [Quest_Corhyn_11] Talk to Corhyn - Blessing of the Erdtree (Queen Bedchamber checkpoint) [Quest_Manor_14] Talk to Bernahl after Quest_Manor_13 => Gelmir's Fury [Quest_Manor_15] Talk to Diallos at Jarburg (if not there, talk to little pot and reload) >on a way to forbidden lands after Morgott - Perfume Bottle (door to sand-covered area, east end of main street, continue lower level southern part to misbegotten warrior) - Flamedrake Talisman +1 (near Morgott's seal) - #Ashes: Omenkiller Rollo (before using lift to Forbidden Lands, path south-east to divine tower) [Quest_Nepheli_12_Final] After not giving Seluvis's potion to her, go to Godrick the Grafted checkpoint and talk to all of them (rest a few times at checkpoint if they didn't spawn) => Ancient Dragon Smithing Stone (and another one can be bought from Merchant_Gostoc now) Subterranian Shunning-Grounds - Bloood-Soaked Set (Main corridor with Omens, Underground Roadside checkpoint) - Shadowbait (from Underground Roadside checkpoint, down the ladder, continue past pipes until reach shortcut to main corridor) - Mohg Shackle (again from Underground Roadside checkpoint drop down from pipes to shrimps below) - Lost Ashes of War (from Underground Roadside checkpoint, down the hatch, past rats and flowers, big hand) [Quest_DungEater_6] Open cell, talk (same area as above) [Quest_DungEater_7] Read his message in the Roundtable Hold [Quest_DungEater_8] Talk to Blackguard (in a lake, north-west-west from Capital Rampart checkpoint, east from Outer Wall Battleground checkpoint) *[Quest_DungEater_9] Return to Blackguard and talk => Seedbed Curse, Blackguard's Bell Bearing, Iron Ball, Blackguard's Iron Mask, Sword of Milos [Quest_DungEater_10] Talk to Dung-eater in Roundtable Hold [Quest_DungEater_11] Talk to Dung-eater in his cell in the sewers - Stonesword Key (while traversing inside pipes, drop into first hole) - Ashes: Nomad (after exiting from pipes to a shortcut to starting corridor and opening doors to continue further, drop down to big flowers and basiliscs) - Omen Bairn (return back from flower and continue to omen with cleaver) - Ritual Pot (room with jars) - #Bloodflame Talons - Erdtree Favor +1 (chest in boss room) > hit the wall behind chest to continue - Nomadic Merchant Set (inside first tent past wooden plank; require "help" of crazy merchant) - Frenzied Cookbook [2] (on the last plank below) - Inescapable Frenzy (on a protruding coffin down the pit close to the bottom) - Fingerprint Stoneshield (same floor as Inescapable Frenzy, near crazy merchant) > Note: Miquella's Needle (inside tent on a floor with Fingerprint Stoneshield) [Quest_Hyetta_6] Talk ![Quest_Hyetta_7_Final] Talk after joining 3 fingers !> it will lock all other endings, but Quest_Millicent_18_Final can revert it. [[Leyndell Catacombs]] (from Underground Roadside checkpoint, down the pipes, past the shrimps) - Haligdrake Talisman +1 (summoner snail behind hidden wall) - Crucible Scale Talisman - #Lord of Blood's Exultation Mountaintops of the Giants (west) ! Progress all quest lines to maximum point, especially Quest_Latenna - Official Attire (huge lift to Forbidden Lands, jump in corridor midway) - Blade of Calling (room behind Official Attire) - AOW: Phantom Slash (at night, Night Cavalry, hundred meters up the road from Forbidden Lands checkpoint) - Golden Seed (on the road up north-east) - #Gargoyle's Black Blades + Gargoyle's Black Axe (gargoyle before Grand Lift of Rold) [Quest_Yura_6_Final] Talk to Shabriri near Zamor Ruins checkpoint (can be killed?) - Zamor Ice Storm (Zamor Ruins) - Smithing Stone Miner's Bell Bearing [3] (Zamor Ruins cellar) - Briars of Punishment (before long bridge with firemonks, up west hill) - Lost Ashes of war (bridge from fire prelate, corpse on a chair) [Quest_Millicent_14] Talk near Ancient Snow Valley Ruins - Golden Seed (on frozen river proceed east and turn south, guarded by giant golem) - Travelling Maiden Set (west end of frozen river, Shack of the Lofty) [Quest_Manor_16] Invade Hoslow near Shack of the Lofty => Hoslow's Petal Whip, Hoslow's Set, Gesture: Hoslow's Oath (probably needed to let him finish it) {Merchant_18} From Shack of the Lofty south, spiritspring, around the mountain => Missionary's cookbook [7], Stonesword Key x3, Vagabond Knight Set, Lightning Greatbolts, etc. - Gesture: Fancy Spin, Primal Glintstone Blade (From Shack of the Lofty south, spiritspring, Stargazer Ruins, require to summon ashes: Jellyfish near longing jellyfish) [Quest_Corhyn_12] Talk on bridge south of Stargazer Ruins (can give tonic of forgetfullness if have one, but it doesn't matter a lot) - Cerulean Crystal Tear + Crimson Bubbletear (Erdtree Avatar near Minor Erdtree) - Helphen's Steeple + Deathroot (Mariner, west of Snow Valley Ruins Overlook checkpoint, hiding behind northern ledge) - Death Ritual Spear (Death Rite Bird west of Mariner) - Starlight Shard (near Death Rite Bird) - Founding Rain of Start (top of Heretical Rise, access by invisible bridge from ruined bridge with skeleton arbalests, east of Snow Valley Ruins Overlook checkpoint) [Quest_Manor_17] Turn in task to Tanith => Taker's Cameo (can safely kill Rykard now in Volcano Manor, check 'Volcanic Manor' section) [[Giants' Mountain Top Catacombs]] - Ashes: Firemonk (lower part of catacombs, descend by first lift second time) - Ritual Pot - #Golden Seed + Glovewort Picker's Bell Bearing [2] - Deathroot Castle Sol - Painting "Sorcerer" (past the arbalests) => droppoint at the bridge above Shack of the Lofty - Stormhawk Axe (from Painting, return up the ladder, jump over eastern wall on the ledge with hawk) - Stonesword Key (from Church of Eclipse checkpoint, northern exit, up the ladder, past halberd knight) - Eclipse Shotel (Church of Eclipse) - Cerulean Amber Medallion +1 (church east exit, turn left, continue up the ladder, near double sword knight) - #Veteran's Prosthesis - Haligtree Secret Medallion Left (lift past boss) Mountaintops of the Giants (east) - AOW: Sepukku (invisible bug, west of Freezing Lake checkpoint) - Dragon Heart (dragon in a middle of the lake, south-east-est of Freezing Lake checkpoint) - Somberstone Miner's Bell Bearing [3] (First Church of Marika) - Sacred Tear (First Church of Marika) - Vyke's Dragonbolt + Fingerprint Set (Lord Contender's Evergaol, west of First Church of Marika, up the spiritspring; or down the path from Heretical Rise) - Stonesword Key (in front of Guardians' Garrison, guarded by prelate) - AOW: Prelate's Charge (bug on a tree, in front of Guardians' Garrison) - One-Eyed Shield (cheif guardian in Guardians' Garrison) - Giant's Prayerbook (Guardians' Garrison, chest on top) - * Rivers of Blood + Okina Mask (Church of Repose) - Sacred Tear (Church of Repose) - Golden Seed (under huge dead troll, north-east from Foot of the Forge checkpoint) - Starlight Shard (north-east of golden seed) - Crimsonwhorl Bubbletear (north-east of Foot of the Forge checkpoint, from dead trolls and pot-throwing trolls circle counterclockwise around mountain through lots of hands) !!!> POINT OF NO RETURN: before giving matches to Melina at Forge of the Giants checkpoint, checklist: - finish all quests with characters in the Hold (everyone except shopkeepers will move out from Hold) - recommended to complete Consecrated Snowfield and Moghwyn Palace before commiting arson [[Spirit-caller Cave: Require 2 Stonesword Keys]] - White Reed Set - #Godskin Swaddling Cloth + Black Flame Ritual [[Giant Conquering Hero's Grave]] - Flame Protect Me (Require Stonesword Key) - Cranial Vessel Candlestick (Require another Stonesword Key) - Great Grave Glovewort (near fire prelate) - Giant's Seal (near fire prelate) - #Zamor Curved Sword + Zamor's Set Consecrated Snowfield - Nomadic Warrior's cookbook [23] (corpse, just lying in the snow, north-north-east from Consecrated Snowfield checkpoint) - Rotten Battle Hammer + Rotten Duelist Helm (rotten duelist near coffins, west of Consecrated Snowfield checkpoint) - St. Trina's Torch (caravan on the road from Consecrated Snowfield checkpoint) - Larval Tear (guy stuck in the snow, south-east of Inner Consecrated Snowfield checkpoint) - Graven Mass Talisman (Albinauric Rise, north-east from stuck in the snow guy; arrange imp fightclub with lone imp walking around, don't forget to upgrade your Imp Ashes beforehand) - Flowing Curved Sword (caravan going north, south-west from Inner Consecrated Snowfield checkpoint) - Night's Cavalry Set + Ancient Dragon Smithing Stone (at night, Night Cavalry x2, guarding caravan above) - #Dragon Heart (wyrm, east end of frozen river) - Ancient Dragon Smithing Stone (ledge above wyrm) - Albinauric Bow (kill albinauric girl near tree, the one that not in saddle) - AOW: White Shadow's Lure (invisible bug across the river, north-west from Inner Consecrated Snowfield checkpoint, pack of wolfs chasing it) - * Somber Ancient Dragon Smithing Stone (Anastasia 3rd encounter, on the river near invisible bug) - Stonesword Key (south-west of bug, across the river, on a cliff) - Stalwart Horn Charm +1 (south-west from Inner Consecrated Snowfield checkpoint, shaman behind tree trunks) - Unendurable Frenzy (Yelough Anix Ruins cellar, horse jump into western section) - Stonesword Key (Yelough Anix Ruins, small north-western tower with rats) - * Sanguine Noble Set (north-west of Yelough Ruins) > Teleporter to Mohgwyn Palace (near invasion and protruding stone, far west of Inner Consecrated Snowfield checkpoint) - Silver Mirrorshield (Apostate Derelict checkpoint) [Quest_Latenna_4_Final] Summon Latenna at Apostate Derelict checkpoint (white message on the ground) => Somber Ancient Dragon Smithing Stone - Explosive Ghostflame (at night, Death Rite Bird, north-west end of frozen river) - Golden Seed (south-west of Ordina) - Rotten Duelist Greaves + Rotten Greataxe (rotten duelist, west of Ordina, on the cliff) - Black Knife Set (Ordina, under walkway to Haligtree teleporter, in normal world) > Teleporter to Haligtree (Ordina, after completing light 4 statues in gaol) !#Thorny Cracked Tear + Raptured Crystal Tear (Erdtree Avatar) > saved for last in case it spoils invasions [[Hidden Path to Haligtree]] - Silver Scarab (Grand Lift of Rold entrance, turn west, before octopus and vulgar militia, jump down on invisible path from platform, south, chest behind invisible wall) - Spelldrake Talisman +2 - #Ashes: Blackflame Monk Amon - Deathroot (chest) [[Consecrated Snowfield Catacombs]] (north-east from Consecrated Snowfield checkpoint, hug eastern wall, somewhere in the middle of the ridge) - Imp Head (Elder) - #Great Grave Glovewort + Rotten Gravekeeper Cloak [[Cave of the Forlorn: Require two stonesword keys]] - #Golden Order Greatsword [[Yelough Anix Tunnel]] - Ancient Dragon Smithing Stone - #Meteorite of Astel Moghwyn Palace > check Roundtable Hold for "Moghwyn Palace visit" section - Blood Tax (bug, down to blood lake, first cave to the east) - Swarm of Flies (second cave to the east in blood lake with albinaurics) - Golden Seed (center of the blood lake with rotten birds and dogs) - War Surgeon Set + White Mask (kill all three invaders in blood lake with birds) - Stonesword Key (western part of the bird blood lake, under the ambushing from above bird) - Haligdrake Talisman +2 (western edge of the bird blood lake, near tombstones) - Stonesword Key (on a way past blood zombies, after big blood blob, turn into northern path) {Merchant_19} Inside temple, in a tunnel, near first two Sanguine Nobles => Stonesword Key x5, Lost Ashes of War, etc. - Great Ghost Glovewort (inside temple, very big cave, north-eastern part with zombies) [Quest_Varre_6_Final] Invade using red sign (right before Dynasty Mausoleum Midpoint checkpoint), talk to him afterwards => Varre's Bouquet + Festering Bloody Finger - Somber Ancient Dragon Smithing Stone (chest on altar, past Dynasty Mausoleum Midpoint checkpoint) # > check Roundtable Hold for "Mogh defeated" section Haligtree > check Roundtable Hold for "Haligtree visit" section - Envoy Crown (from Canopy checkpoint, southern branch past 3 ants, with big fat envoy) - Stonesword Key (one of the branches south-east) - Voice "My Beloved" (one of southern branches, near middle-sized envoy, on a mushroom) - Lost Ashes of War (on a way to Haligtree Town checkpoint, near big envoy, bombarding from above) - Ashes: Oracle Envoy (from big envoy above, up the branches to group of big and small envoys) - Pearldrake Talisman +2 (north from Haligtree Town checkpoint, up the ladder, misbegotten warrior) - Ancient Dragon Smithing Stone (on a way to Haligtree Plaza checkpoint, guarded by misbegotten warrior) - Veridian Amber Medallion +2 (chest in building below summoner snails) - # Loretta's Mastery + Loretta's War Sickle - Ancient Dragon Smithing Stone (after Haligtree Promenade checkpoint, before going down on lift go around tower up to the chest) [Quest_Millicent_15] Talk at Prayer Room checkpoint - Tripple Rings of Light (chest right below Prayer Room checkpoint, require Stonesword Key) - Miquellan Knight's Sword (belltower, accessed by jumping on branch from a balcony) - Ashes: Cleanrot Knight Finlay (gazebo in the middle with a healing bug, chest guarded by a cleanrot knight) - Somber Ancient Dragon Smithing Stone (from gazebo jump on support to the west and walk up to room with chest) - Seedbed Curse (from stone above continue to the end of the balcony) - Seedbed Curse (there's room with two cleanrot knights below gazebo, jump on a beam south of this room and then on a ledge, continue to cellar above three crystalians) - Rotten Staff (Erdtree Avatar walkin on eastern outer wall) - Somber Ancient Dragon Smithing Stone (south end of walkway with Erdtree Avatar) - Marika's Sourseal (alley along eastern wall with Revenants, southern end, require Stonesword Key) - Ashes: Haligtree Soldiers (northern point of outer wall, with arbalests, near big chalice) - Haligtree Knight Helm (ladder up from Elphael Inner Wall checkpoint) - Rotten Crystal Sword (chest with three crystalians) - Golden Seed (rotten tree spirit in the scarlet rot area) - Great Ghost Glovewort (in the bassin with rotten tree spirit) [Quest_Millicent_16] Assist/attack Millicent (in the bassin with rotten tree spirit) => Rotten Winged Sword Insignia / Millicent's Prosthesis [Quest_Millicent_17] If assisted, talk to her, return/reload => Unalloyed Gold Needle - Dragoncrest Greatshield Talisman (top level of church with insects, access through roof via branches) - Ghost Glovewort Picker's Bell Bearing [3] (from church above turn north throuth cemetery with insects till the edge) - Traveler's Set (south door from Haligtree Roots checkpoint) #[Quest_Millicent_18_Final] Miquella's Needle + Somber Ancient Dragon Smithing Stone (dip Millicent's Needle into scarlet flower in Malenia's arena) > Pest Threads (can be bought from Gowry after Quest_Millicent_18_Final) > check Roundtable Hold for "Malenia defeated" section [Quest_DungEater_12_Final] Bring seadbed curses to him in the sewers => Mending Rune of the Fell Curse, Omen Set (after returning/reloading) Crumbling Farum Azula - Ancient Dragon Smithing Stone (dragon, unmissable) - Grave Ghost Glovewort (from Crumbling Beast Grave Depths, upper level of the church, near shaman) - Ancient Dragon Prayerbook (same church, in the middle) - Somberstone Miner's Bell Bearing [4] (Tempest-Facing Balcony checkpoint) - Glovewort Picker's Bell Bearing [3] (south-east exit of church near Crumbling Beast Grave Depths, down the lift to a lake with huge wormface) - Great Grave Glovewort (from Dragon Temple checkpoint jump west down on stairs and continue past skeletons) - Ashes: Azula Beastman (from stairs above, jump down east, room with two knights) - Stonesword Key (Dragon Temple, upper level, near knight with two swords) - # Smithing Stone Miner's Bell Bearing [4] + AOW: Black Flame Tornado - Ancient Dragon Smithing Stone (past Dragon Temple checkpoint, going up winding stairs and to the south, jump on floating column, near beastman with cleaver and his dog) - Golden Seed (up winding stairs, Dragon Temple Lift checkpoint, go up the lift, south-east, skeleton army) > Require 2 Stonesword keys - Golden Lightning Fortification (bug close to Golden Seed) [Quest_Alexander_8_Final] From Golden Seed jump over ruins to the west => Shard of Alexander + Alexander's Innards - Ancient Dragon Apostle's Cookbook [4] (continue up south from encounter with Alexander, in a tower) - Dragoncrest Shield Talisman +2 (continue story path to another tower by floating platforms below winding stairs, it's on the small inconspicuos platform) - Drake Knight Set (from Dragon Temple Rooftop checkpoint, jump down to lightning bombardment area with birds, but immediately turn back to ladder, but jump down to the right and go around the tower) - Ancient Dragon Smithing Stone (wounded dragon that bombarding with lightning) - Somber Ancient Dragon Smithing Stone (in gazebo behind wounded dragon) - Golden Seed (from wounded dragon go north-east up the hill) - Dragon Tower Shield (from wounded dragon, jump down left of the gazebo, proceed up the ladder, chest with two knights) - Boltdrake Talisman +2 (continue from Dragon Tower Shield past Crucible Knight) - Somberstone Miner's Bell Bearing [5] (continue from wounded dragon, story path, altar with beastmen) - #> Plaucidax. Back from Beside the Great Bridge checkpoint and church with bell bearing above, carefully jump down from west edge * [Quest_Manor_21_Final] Blasphemous Claw + Devourer's Scepter + Beast Champion Set (from Beside the Great Bridge checkpoint go to highway to the boss, but go north, continue path down the ladder) - Old Lord's Talisman (chest behind invader above) - Malformed Dragon Set (draconic sentinel before final boss) !!!#> POINT OF NO RETURN: before boss, checklist: - Give all Deathroots to Gurranq - Finish all quests - Talk to Gideon and receive all rewards [Quest_Diallos_8_Final] Go to Jarburg, talk to Diallos, return/reload, talk to pot, return/reload, give Alexander's innards to pot => Companion Jar Talisman, Hoslow Petal Whip (from Diallos' corpse) Lyndell Ashen City - Erdtree Favor +2 (jump down to 3 rotten tree spirits - NEED to come from "Forbidden lands" checkpoint) [Quest_Corhyn_13] Corhyn's Robe + Flail + Corhyn's Bell Bearing (middle of Ashen City, reload after exhausting dialog) (! if you gave him tonic of forgetfullness before, check bridge they were before, in Mountaintops of Giants, above "Ancient Snow Valley Ruins" checkpoint) - Crimson Medallion +2 (south-south-west from Capital of Ash checkpoint, the only "survived" street, jump down to sewers through manhole, on a beam) - Somber Dragon Smithing Stone (near gargoyle) [Quest_Corhyn_14_Final] Mending Rune of Perfect Order + Goldmask's Set (east of city colliseum, below where they were standing before, accessed by going south-west from spear and sewers hole, between buildings !> reload/return after picking rune) - # Scepter of All-knowing + All-knowing set - Erdtree Heal (Queen's Bedchamber checkpoint) #>Marika & Co. ᐅ Optional cleanup of loose ends ᐊ > unknown yet if this won't affect future DLCs - Flock's Canvas Talisman + Gowry's Bell Bearing (you can kill Gowry in his shack) - Consort's Set (after Quest_Manor_20 you can kill Tanith while she is having a dinner) - Aspect of the Crucible: Breath (if you kill Tanith, Crucible Knight will spawn to explain you were wrong) - Ronin's Set (after Quest_Yura_6_Final kill Shabriri near Zamor Ruins checkpoint. If already got hugs from Three Fingers, Shabriri will be gone and his set will be on this spot) 🌴SHADOW OF THE ERDTREE🌴 - Gesture: Ring of Miquella (did you preorder DLC, Tarnished?) Gravesight plain - *Beast Claw (Logur naked guy, basically mob, west of Gravesight Plain checkpoint, deep in the woods) - Scadutree fragment (down the road from Logur, church of Consolation) - Black Steel Greathammer (black knight, near church of Consolation) - Blessing of Marika (near church of Consolation, cave near waterfall) - Larval Tear (AT NIGHT, west of Gravesight Plain checkpoint) - Revered Spirit Ash (west of Scorched Ruins) - Hefty cracked pot (Scorched Ruins) - Greater Potentate's cookbook [1] (Scorched Ruins) - Blade of Mercy (Scorched Ruins, door on the top) - Scadutree fragment (east of Scorched Ruins checkpoint, guy with glittering pot) - Painting "Sacred Tower" (northeast of Scorched Ruins checkpoint) > droppoint at Rauh Base, south-west of Northern Nameless Masoleum - Backhand Blade (north-north-east of Scorched Ruins checkpoint) - Greatsword of Solitude + Solitude Set (Western Nameless Masoleum) - Deflecting Hardtear (furnace-golem north of Scorched Ruins) - Scadutree fragment (Three-Path cross checkpoint) > Miquella Cross (Three-Path cross checkpoint) [Quest_Leda_1] Talk (Three-Path cross checkpoint) [Quest_Hornsent_1] Talk, he gives Cross map (Three-Path cross checkpoint) - Scadutree fragment (past the bridge, near Castle Front checkpoint) - Lost Ashes of War (on the bridge, dispose of ballista operator first) - Fire Knight cookbook [2] (south-west of Castle Front checkpoint, tent east of big bonfire) - Spelldrake Talisman +3 (north-west from Castle Front checkpoint, turn right and go down along the cliff, fort cellars) - Firespark Perfume bottle (south of Castle Front checkpoint, chest in parfumer's section) - Spread crossbow (taking eastern road, turn south to messmerites camp and around the hill even more left) - Swift Spear (south-east of Castle Front checkpoint, down the east road) - Scadutree fragment (Pillar Path Cross checkpoint) > Miquella Cross (Pillar Path Cross checkpoint) [Quest_Thiollier_1] {Thiollier} Talk + buy Deadly Poison Perfume bottle (Pillar Path Cross checkpoint) [Quest_Igon_1] Talk to Igon (Pillar Path Waypoint checkpoint) - Gravebird bracelets (south of Pillar Path Waypoint checkpoint, under birds on pillars) - Larval Tear (at night, south-east of Pillar Path Waypoint checkpoint, near the edge of the cliff) - Ancient Dragon Smithing stone (more south, past birds, top of Suppressing pillar) *Ancient Dragon Man (from Pillar Path Waypoint down the lower south-west road) - Herbalist's Bell Bearing (pot, hanging on the western cliff, near invader, above broken statue) - Greater Potentate's Cookbook [7] (from Castle Front checkpoint either south past orgres to swamp and then counterclockwise, or east through messmerites camp and down the cliff with bats, crab and vulgar militia, it's behind miranda flower. It is seen to the east below from Pillar Path Cross checkpoint where Thiollier sitting) - Talisman of the Dread (Elder's Hovel, south-east from cookbook up the hill) > with spirit jumps, access Behind the Fort of Reprimand bonfire for the future - Revered Spirit Ash (Ellac River Cave checkpoint > from Elder Hovel go down north past vulgar militia to the pond with crab and miranda flower, cave behind miranda flower; alternatively, from Castle Front checkpoint go western road past soldiers all the way west to the cliff, then jump down and proceed past bats to the pond with crab and flower mentioned above) - Greater Potentate's cookbook [12] (from Ellac River Cave checkpoint, down the river, mario-jump on stone pillars from first waterfall) > at the bottom of waterfall cascade is Ellac River Downstream checkpoint and access to Cerulean Coast and not so far from map fragment for the whole south region - Horned Bairn (from Ellac River Cave checkpoint, up the river, tree spirit, can't miss) - Two-headed Turtle talisman (further up river, mini-cave right of Rivermouth Cave, behind waterfall with astonished spectral worms) - Mushroom-seller's Bell Bearing [1] (left of Rivermouth Cave, near the precipice, shoot pot hanging on the wall) - Greater Potentate's Cookbook [2] (north of Three-Path Cross checkpoint, south-east of Greatbridge North checkpoint, Run-Down Traveler's Rest, under bridge) - Larval Tear (AT NIGHT, north of Greatbridge North checkpoint, left of entrance to Abandoned Ailing Village) - Revered Spirit Ash (north of Greatbridge North checkpoint, right of Abandoned Ailing Village, altar with flies) - Ailment Talisman (north of Abandoned Ailing Village) - Greater Potentate's Cookbook [10] (left of Abandoned Ailing Village, burned shack under the hill with crying fly) - Gravebird Armor (west by the precipice to the end, grave with four birds on pillars) - Great Katana (west of Greatbridge North checkpoint, east of Belurat Gaol, big pond, in front of "dead" ghostflame dragon) - #Dragon Heart + Somber Ancient Dragon Smithing Stone (Ghostflame dragon that now awake) > Serpent Crest Shield: droppoint of "Incursion" painting, south-east-east of Belurat's Gaol, south-west from dragon's pond, on a small hill - AOW: Savage Lion's Claw (south-south-west from Greatbridge North checkpoint, small camp near stone wall) - Scadutree fragment (Main Gate Cross checkpoint, west of Three-Path Cross checkpoint) > Miquella Cross (Main Gate Cross checkpoint) [Quest_Leda_2] Talk to Ansbach (Main Gate Cross checkpoint) [Quest_Thiollier_2][Quest_Moore_1] {Moore} Talk until he gives Black Syrup (Main Gate Cross checkpoint) - Scadutree fragment (south-west from Cliffroad Terminus checkpoint, cemetery with ghosts, guy with glittering pot) - String-Seller's Bell Bearing (under Prospect town, dead-end to the west, pot hanging on the stone wall) - Bloodfiend Arm (bloodfiends praying group in Prospect Town, guaranteed drop) - Outer God Heilroom (top of Prospect Town) - Larval Tear (AT NIGHT, east of Prospect town) - Forager Brood Cookbook [2] (talk to sad pest east of prospect town, don't kill accidentally) - Revered Spirit Ash (north-east of Prospect Town, altar) - Greater Potentate's Cookbook [5] (south-east from Prospect Town, near lightning rams) - Incursion Painting (Artist Shack, on top of the hill, past forest with lightning rams) > Droppoint south-east-east of Belurat's Gaol, south-west from dragon's pond, on a small hill) - Blessed Blue Dew Talisman (Church of Benediction, underneath Artist Shack) - Pata + Oathseeker Knight Set (in front of Church of Benediction, on hanging corpse) [Quest_Thiollier_3] Give Syrup to Thiollier (Pillar Path Cross checkpoint) > Thiollier's Concoction [[Fog Rift Catacomb]] - Ancient Dragon Knight's cookbook [1] - Great Ghost Glovewort - Ashes: Black Knight Commander Andreas (jump on trap while in a room with messmerites and black knight) - Electrocharge - AOW: Blinkbolt (in a room with double spiked-traps, from podium with mage and four imps, jump into recess inside spiked trap) - Stone-Sheathed Sword (traverse on top of double spiked-traps) - #Death Knight's Twin Axes + Crimson Amber Medallion +3 [[Ruined Forge Lava Intake]] - Greater Potentate's cookbook [13] - Smithscript dagger - Anvil hammer + Ancient Dragon Smithing stone [[Dragon's Pit]] - Dragon Heart + Ancient Smithing stone - #Dragon-hunter's Great Katana >access to Jagged Peak [[Rivermouth Cave]] - #Ashes: Bloodfiend Hexer [[Belurat Gaol]] - Hefty Cracked pot (when descenting down by hanging pots, drop on balcony) - Lost Ashes of War - Hefty Cracked pot (storage room) - Greater Potentate's cookbook [11] (storage room) - Hefty Cracked pot (storage room) - Greatjar (secret pot elevator to the west, in mini-arena with 5 pot-meat-boys after pot storage room) - #Ashes: Demi-human Swordsman Yosh Jagged Peak - #Dragon Heart + Dragonscale flesh (Jagged Peak Drake) - Igon's Cookbook [1] (from JP Drake, south-east canyon, broken tower at the end, close to Grand Altar of Dragon Communion) [Quest_Igon_2] Talk to priestess at Grand Altar of Dragon Communion and devour draconic essence > Ancient Dragon's Blessing (replenishable) ![Quest_Igon_2a] > If you want incantation reward, at night drug the snoozing dragon-girl with Thiollier's Concoction, then speak to her after couple of days. If you want mace and dragon form, do nothing. - Greater Potentate's cookbook [6] (from the first Jagged Peak Drake arena, take the eastern path through arch, before first spiritspring turn north to some skeletons) - #Dragon Heart + Dragonscale flesh (continue by spiritspring, two Jagged Peak Drakes) [Quest_Igon_3] Talk to Igon and take finger (he'll appear on two drakes arena and will be very loud) - Scadutree Fragment (continue through canyon with rolling stones) - #Ancient Dragon Smithing Stone + Somber Ancient Dragon Smithing Stone (Sennesax) - Igon's cookbook [2] (Jagged Peak Mountainside checkpoint, head east past blobs) - >Rock Heart (droppoint for Domain of Dragons painting, at stormy edge after first spiritspring on the way to second fall down on a ledge below and follow back, it's close to first spiritspring) - Ancient Somber Dragon Smithing Stone (past the stormy edge, after second spiritspring, drop a little to western cliff and continue forward) - Ancient Dragon Smithing Stone (after second spiritspring, in a cave leading up, small dead-end to the south with few blobs, hard to miss) [Quest_Igon_4o] Summon Igon for Bayle (summon sign on arena at the entrance) - #Bayle Heart [Quest_Igon_5_Final] Collect Igon's set + Igon's Greatbow + Igon's Bell Bearing at his last spot with two drakes (shown on your map). Go to dragon priestess and get you reward (Dragonbolt of Florissax + Ancient Dragon Florissax Spirit Ash if you drugged poor girl, or Priestess Heart + Flowerstone Gavel if you didn't) Charo's Hidden Grave > starting at Jagged Peak's Grand Altar checkpoint, where dragon priestess is/was - Gravekeeper's cookbook [2] (south-west from Grand Altar, into the red-blooming area, behind small rock at river mouth) - Tibia's Cookbook (Tibia Mariner on the river) - Call of Tibia (from the river headwater go to the very top of the hill keeping right side, small cemetery) - Rings of Spectral Light (above river headwater, altar with big bird statue and several small birds) - #AOW: Ghostflame Call (from river headwater and Charo's Hidden Grave checkpoint, north to next water area, 24/7 Deathbird) - Spirit Glave (from Deathbird take to the left and go north to the tombstone at the end) - Greater Potentate's Cookbook [14] (south-west from Deathbird, behind Miranda flower) - Scadutree fragment (jump above Miranda flower to the hill, pond with a hippo) - Glovewort Crystal Tear (furnace-golem north from hippo) > armored legs, prepare lots of pots or run away, refill and return back - Ashes: Gravebird (hill above furnace-golem) [[Lamenter's Gaol]] - voice "Lametation" - Chilling Perfume Bottle - Clarifying Horn Charm +2 - Call of Tibia - Hefty Cracked Pot - Lamenting Visage - #Lametner's Mask Cerulean Coast > starting at Cerulean Coast West checkpoint by going down by protruding gravestones from the south-western edge where Charo's furnace-golem was - Starlight Shard (from Cerulean Coast West into the canyon to the east, demi-human swordmaster) - Spirit Sword (from huge gravestone where swordmaster was, take eastern path) - Scadutree fragment (now take western path, cave in left wall with demi-human chief) - #Star-lined Sword (continue to the beach, Queen Marigga) - Great Grave Glovewort (on top of sunken warhammer-style stone coffin-ship near Marigga) - Gravekeeper's cookbook [1] (south-east from Cerulean Coast West checkpoint, under tree with shade) - Lost Ashes of War (a little to the west from previous tree, in the water with wisps) - Great Grave Glovewort (jump down behind the tree with shade and venture into cave, take eastern path to the end) - Perfumed Oil of Ranah (now take western cave path past shrimp and climb on the isle hill outside) - #Dancing Blade of Ranah + Dancer's Set (souther part of that isle, Southern Nameless Masoleum) > continue down the beach from Cerulean Coast West checkpoint) - #Viridian Hidden Tear (north-east arch path from Cerulean Coast checkpoint, south from Ellac River Downstream checkpoint, furnace-golem) - Lightning Perfume Bottle (furnace-golem clearing, on a corpse in the small puddle in the middle with lightning strikes and lightning rams) - Forager Brood Cookbook [3] (talk to pest in the most eastern part of that clearing) - Mushroom-seller's Bell Bearing [2] (north towards Ellac River Downstream checkpoint climb on a huge lopsided rock bridge, shood down a pot hanging on north rock wall in front of first waterfall) - Dragon Heart + Somber Ancient Dragon Smithing Stone (south of Cerulean Coast checkpoint, ghostflame dragon) - Map fragment (south of ghostflame dragon) - Scadutree fragment (Cerulean Coast Cross checkpoint, south-east from map fragment) > Miquella Cross (Cerulean Coast Cross checkpoint) - Hefty Cracked Pot (south-west from Cerulean Coast Cross, road to peninsula) - St. Trina Disciple's Cookbook [2] (eastern cliff of peninsula) > activate The Fissure checkpoint for later - Great Grave Glovewort (from Cerulean Coast Cross checkpoint, closest coffin-ship to the south, then jump east on another stone coffin-ship on the shore) - Great Grave Glovewort (from previous glovewort, jump onto shore with hands, go a little north and turn left, on another stone coffin-ship) - St. Trina Disciple's Cookbook [1] (from coffin-ship with glovewort, jump on south plateau with lonely shade) > good idea would be go down on the finger beach and getting to the very eastern end onto coffin-ship to activate checkpoint for Belurat - Revered Spirit Ash (in the entrance hall with camel-spiders) [Quest_Queelign_1] * from Small Private Altar checkpoint go up the stairs, take right path to big tree in the middle of the square, where he will appear > Crusade Insignia - AOW: Shriek of Sorrow (under mentioned big tree in the square) - Storeroom Key (from Small Private Altar checkpoint go up the stairs, then take left path and turn into north alley, continue forward until you get to the top level with ladder) - Well Depth Key (from Storeroom Key go outside, take sharp left, then jump left on that building's awning and then on a bridge) - Bone Bow(from Storeroom Key go outside, take right, then take left (north) path to the room with two huge camel-spiders) - Immunising Horn Charm +2 (from room with two spiders and Bone Bow go out, turn right downstairs to elevator, activate shortcut to Belurat: Tower Settlement checkpoint, from checkpoint continue east again, take right turn, then right again and go down into the well, outside go south, until tree spirit) - Poisoned Hand (from the point where you entered Miyazaki swamp, go north now) > guaranteed one time drop of Horned Warrior's Sword from horned warrior nearby - Scadutree fragment (from Belurat: Tower Settlement checkpoint take north elevator back to Bone Bow and double-spider room, in front of that room, jump onto rubble (north-west) and proceed into room with flies) > Miquella Cross (same Scadutree fragment) - Dried Bouquet (south door from Cross and Fragment) - Revered Spirit Ash (drop to gutter with flies and proceed until you get back on top, proceed until split path to bridge and dead tree, go to tree with praying ghosts) - Revered Spirit Ash (on a mentioned split path, pot guy on a bridge where horned warrior patrolling) [Quest_Leda_3o] Freyja summon sign near Stage Front checkpoint - #Divine Beast Head - Revered Spirit Ash (from theater arena, go up the elevator) [Quest_Leda_4o] Tower of Shadow Message (further up) - Watchful Spirit (Small private altar, west door and sharp left towards south, open storage room, WEAR Beast Head, talk to Hornsent Grandam) [Quest_Hornsent_2o] (rest/teleport and talk to Grandam again) > Scorpion Stew [Quest_Hornsent_3o] Give Hornsent stew from grandma (he's either still at Three-Path Cross checkpoint, or moved to Highroad Cross checkpoint in northern region) [Quest_Leda_5] Talk to Freyja at Three-Path Cross checkpoint Castle Ensis - Milady (past giant, tower wall to the left, chest on top) - Loyal Knight's cookbook (when you see black knight, before going up the hill to fight, go to east gate, right below checkpoint) - Scadutree fragment + Castle Cross Message (Castle Ensis Checkpoint) > Miquella Cross (Castle Ensis Checkpoint) - Starlight Shard (after drop to cave with three dogs, out and to the right by the wall, on the roof) - Moonrithyll's Knight Sword (dropped from Moonrithyll Carian Knight) - Wolf Crest Shield (on Moonrithyll's arena, instead of going inside, go down the wall to the right) - Rellana's Cameo (altar after Moonrithyll) - Glintblade Trio (after opening the gate, drop down to the left, follow up on rooftops and jump down, it's close to Wolf Crest Shield) - Imbued Sword Key (chest in tower on the wall, near next black knight) - AOW: Wing Stance (Castle-Lord's Chamber checkpoint, go to the east balcony and jump behind the wall, then climb to the top of lookout tower) [Quest_Leda_6o] Leda can be summoned for Rellana !> Before venturing to the next region, highly advised to push all questlines to their limit (especially Quest_Leda_5, Quest_Hornsent_3, Quest_Thiollier_3) Scadu Altus !!> Do not go close to Shadow Keep entrance (behind messmerites camp and golem to the north) before getting to Quest_Leda_7, Quest_Thiollier_3, Quest_Hornsent_4, and it's better to give Moore the Forager Brood Cookbook [4]. Check "Somewhere a great rune is broken" section below for more info. - Scadutree fragment + Monk's Missive + Gesture: May the best win (Highroad Cross checkpoint) [Quest_Leda_7] Talk to Leda [Quest_Hornsent_4] Talk to Hornsent > New Cross Map - Verdigris Discus (from Highroad Cross checkpoint drop down to river with phantom troll, proceed south-west to the altar, require 2 imbued stonesword keys, teleported to Ancient Ruins of Rauh) > you can get to it later after battle with another Dancing Lion in that region - Carian Socrery Sword (west branch of phantom troll river, jump onto Castle Ensis building, in a chest) - Starlight Shard (after taking sword, jump from west wall to a roof) [Quest_Queelign_2] norht-west on the hill from Highroad Cross checkpoint, Church of Crusade > AOW: Flame Skewer + Prayer Room Key - Scadutree fragment (Church of Crusade) - Larval Tear (at night, south of Church of Crusade) - Forager Brood Cookbook [4] (wounded pest to the north of Church of Crusade, use warming/sunwarmth stone and reload/pass time at bonfire and return) >[Quest_Moore_2] Forager Brood Cookbook [7] (Talk to Moore at Main Gate Cross checkpoint while having Forager Brood Cookbook [4]) - #Crimsonburst Dried Tear (furnace-golem in camp) - Scadutree fragment (on a eastern fence of camp main road) > can be destroyed by golem, reload if it happened - Battlefield Priest's cookbook [3] (in northern tent on west side of the road) - AOW: Rolling Flames (hill east of the camp, with wandering parfumers, scarab flying above) - !Furnace Keeper's note (tent near broken furnace golem at Keeps wall to the right of gates) > this will definetely trigger "Rune broken" event (see corresponding section) - Blacksteel Twinblade (black knight on top of the western hill) - Larval Tear (at night, east side of the camp, unde south side of the hill, bears wander around) - Highland Set + Leather Crown (near pond, east of map fragment, south-east from larval tear, just lying on the ground) - #Pelt of Ralva (middle of the pond) - Scadutree fragment (south-east, under the pond with Ralva, another pond with worms, entrance to a cave) - Heal from afar (inside the cave, under golden tree with parfumers) - Gravebird Ankles (from golden tree take northern exit to poison swamp with birds, altar in the center) - Forager Brood Cookbook [5] (pest east from altar with birds and ankles) > further up is Rauh Base and Ancient Ruin Base checkpoint - Scadutree fragment (messmerites camp east of Highroad Cross checkpoint, below, statue of Marika) - Fire Knight's cookbook [1] (inside tent behind Marika's statue) - Scadutree fragment (Moorth Ruins checkpoint, east of messmerites camp) > Miquella Cross (Moorth Ruins checkpoint) *Dryleaf Arts + Dane's Hat (use "May the best win" gesture on silent monk at Moorth Ruins checkpoint, you must have Monk's Missive already) - Revered Spirit Ash (altar east of Moorth Ruins near edge) - Scadutree Fragment (pot-ghost south east of Moorth Ruins hole, guarded by curseblade) - Shattered Stone Talisman (in the hole on a ledge) - Golden Arcs (north-east part of Moorth Ruins, near north side of tall lopsided tower, jump down, walk through cave and jump down to chapel below) > also access to Bonny Village - #Dragon Heart + Somber Ancient Dragon Smithing Stone (road south from Moorth Ruins checkpoint, follow noise) - Repeating Crossbow (under ghostflame dragon) - Scadutree fragment (from dragon arena take spiritspring on the eastern side of the road (open switch is around east cliff with bats), go to the most south-east point, Scaduview Cross checkpoint) > Miquella Cross (Scaduview Cross checkpoint) - AOW: Piercing Throw (from dragon go west, bug behind few misbegotten) - Forager Brood Cookbook [1] (north-west from misbegotten ruins, south east from pond with two shrimps, around the hill, talk to pest near cliff) - Blessing of Marika (from ghostflame dragon arena follow the road, Moorth Highway South checkpoint, go around fort clockwise past two abductors) [[Ruined Forge of Starfall Past]] - Smithscript Spear - Smithing Talisman - Smithscript Cirque - Ancient Meteoric Ore Sword + Ancient Dragon Smithing Stone Fort of Reprimand - Flamedrake Talisman +3 (in a corridor with four pike guards and piled cages, jump on cages in the corner) - #AOW: Aspects of the Crucible: Wings (Black Knight Edreed) - Battlefield Priest's Cookbook [2] (very top of the fort) - Iris of Occultation (drop down into manhole at north wall, omenkiller down ther) - Marika's Rune (same area, on top of the pile of corpses) - Ashes: Messmer Soldier (tombstone when you get outside from disposal area) Fog Rift Fort > accessed by dropping down from north edge from Scadu Altus West checkpoint - Greater Potentate's cookbook [3] (west wall, wooden bridge across canyon) - #Blacksteel Greatshield - Arrow's Soaring Sting Talisman (on the very top of the fort, accessed by going clockwise around tower with Garrew) - Serpent Flail (chest below, guarded by flamethrowers) Rauh Base - AOW: Scattershot Throw (north from Ancient Ruin Base checkpoint, bug on a stone column above hacking misbegotten) - Bloodfiend Sacred Spear (west from forge, pond with relaxing bloodfiends) - Pearl Shield Talisman (west from Ancient Ruin Base checkpoint, chest behind small messmerites camp) - Larval Tear (AT NIGHT, east of map fragment, above Fog Rift Catacombs checkpoint) - Iron Rivet Set + Red Bear's Claw (use locked spirit spring south-east of map fragment, Northern Nameless Masoleum) - Spiraltree Seal > droppoint for Sacred Tower painting, south-west from Northern Nameless Masoleum near edge, require getting to Enir-Ilim for the first time - Revered Spirit Ashes (altar on south cliff from Temple Town Ruins) - Scadutree fragment (inside Temple Town Ruins, can be accessed through small hole in southern wall, item is seen on the bridge above) - Two-handed Sword Talisman (at the top of ruins once inside) - Ashes: Divine Bird Warrior Onis (north-east of Temple Town Ruins checkpoint, access tower by spiritspring, then jump on the wall, traverse and jump onto a cliff to the east, proceed to hidden crypt) - Antiquity Scholar's cookbook [1] (proceed north past red pests, north cave with pot-ghost) - Gravebird Blackquill Armor (west from cave across river, altar with alley of birds on pillars) - AOW: The Poison Flower Blooms Twice (bug underneath alley of birds) - Larval Tear (from Ravine North checkpoint continue following the river, on west bank, visible at night) - Greter Potentate's cookbook [8] (near Larval tear a little more south-west on a ♥♥♥♥ pile) - #Roar of Rugalea (north-west from Larval Tear, in the woods) - Leather Set (on the ledge directly south from two sleeping bears and north-east from Rugalea) [[Taylew's Ruined Forge]] - Smithscript Axe - Smithscript Greathammer - Ancient Dragon Smithing Stone - Smithscript Shield - Ashes: Taylew the Golem Smith + Ancient Dragon Smithing Stone [[Scorpion River Catacombs]] - Ashes: Black Knight Captain Huw - Imp Head (Lion) (room with two ceiling traps and eyes, after crossing watched bridge with two statues at the end, before lift, turn left and jump on the ledge behind statue and get to the eyes, then jump on spiked trap) - Knight's Lightning Spear (get back to the eyes and proceed behind them) - Great Ghost Glovewort (pit with basilisks, under mage) - Ancient Dragon cookbook [2] (drop down on bridge next room from mage, where eyes patrolling) - #Death Knight Longshaft Axe + Cerulean Amber Talisman +3 ⚠️ Somewhere a great rune is broken... ⚠️ > this section not particulary in route and is more general and "parallel". !> This event happens when you get close to Shadow Keep entrance or cross bridge north-east of Bony Village (getting past Bridge Leading to the Village checkpoint), and it progresses quests of majority of NPCs. Progress to Quest_Leda_7, Quest_Thiollier_3, Quest_Hornsent_4 and give Moore the Forager Brood Cookbook [4] beforehand.
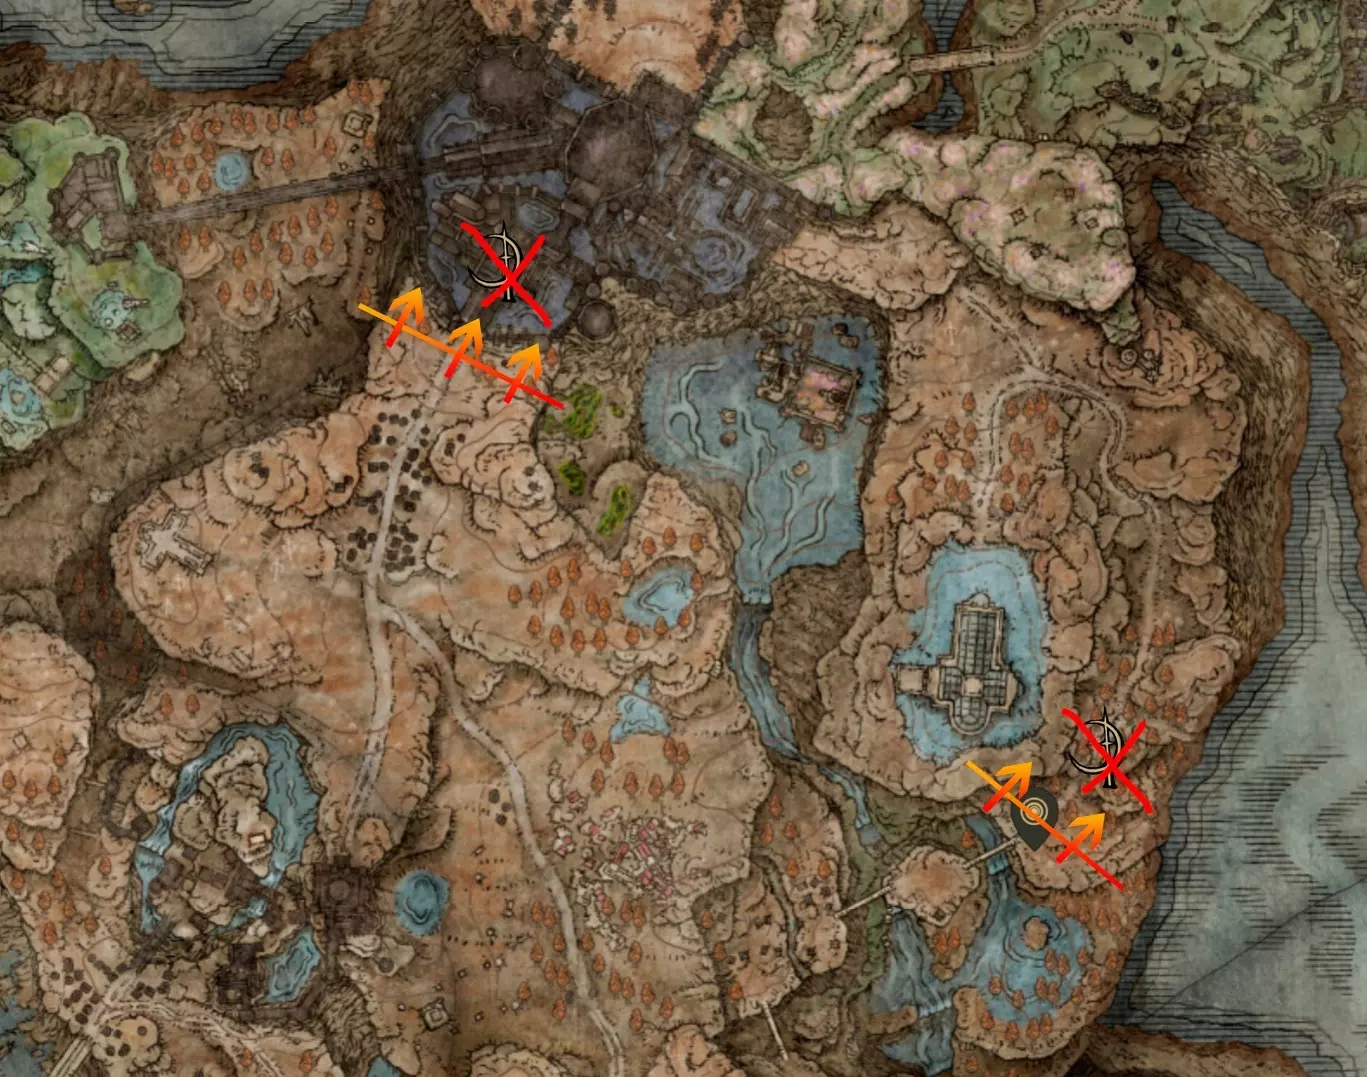
当触发以下条件时: 【任务_Leda_8】与安斯巴赫交谈 !> 与摩尔交谈。如果尚未获得全部六本觅食者巢穴食谱,请选择“我不知道”,以便为后续保留选项;否则害虫和摩尔将会消失。【任务_Moore_3_最终_A】(推荐)获取所有“觅食者巢穴”食谱后,选择“永远沉浸悲伤”,他会死亡,尸体出现在“觅食者食谱[4]”的位置,可获得“铜绿套装”+“Moore的铃珠”(若此前错过事件,此途径还会提供“觅食者食谱[7]”) 【任务_Moore_3_最终_B】获取所有“觅食者巢穴”食谱后,选择“将其抛诸脑后”,他会在“Enir - Ilim”的“米凯拉信徒对决”中成为敌人,击败后可获得“铜绿套装”+“Moore的铃珠” 【任务_Leda_9】与Freyja交谈 【任务_Leda_10】与Leda交谈,选择任意选项,最终选择“Hornsent” 【任务_Leda_10】与Hornsent交谈 之后Ansbach、Freyja和Hornsent必须消失 【任务_Thiollier_4】与Thiollier交谈,休息或传送后再次交谈,直到他提及前往南方旅行护符+3(在转身后来到被钉十字架的雕像头部下方,可从三楼进入)- 决斗盾牌(三楼东南翼,一具尸体上)- 受尊敬的灵体骨灰(底层,在一个填充的橡木山羊状物体上)- 战技:火花之墙(仓库一楼 checkpoint 乘坐西侧电梯下到陶罐地下室,在一个阳台上)- 战场祭司的制作笔记[4](经过阳台后进入军械库,走左侧看似死路的路径,在幻影墙后面)- 恩惠滴露+沉重龟裂壶(下到陶罐堆,在冒着沸腾雾气的肉块怪后面)> 可前往西城墙 checkpoint 以及通往劳赫古代遗迹的桥梁[任务_莉达_11] 仓库一楼 checkpoint,从橡木山羊状物体往东北方向,有巨大鱼骨架的房间,与安斯巴赫对话[任务_莉达_12] 与芙蕾雅对话仓库七楼【任务_Leda_13】与安斯巴赫谈论芙蕾雅的决定,直到他说或许他们的顾虑是相同的。 【任务_Leda_14】秘密仪式卷轴>从四楼 checkpoint 出去,经过燃烧的船只和频繁施法的火焰法师,走第一段下楼的楼梯,在书架后面。 如果尚未完成任务_Leda_15,且想选择任务_Leda_20的(B)或(C)路线,请在此处停止,不要将秘密仪式卷轴交给安斯巴赫。完成任务_Leda_16_B后再回到此步骤。 【任务_Leda_17】若准备继续任务,将秘密仪式卷轴交给安斯巴赫并与其交谈。【任务_Leda_17】前往/重新加载区域,与安斯巴赫交谈>获得给芙蕾雅的信 【任务_Leda_18】与芙蕾雅交谈>获得黄金狮子盾牌 【任务_Leda_19】与安斯巴赫交谈,传达芙蕾雅的消息 【任务_Leda_20_B】在安斯巴赫的房间有两个召唤印记。选择帮助莉达>获得安斯巴赫套装+安斯巴赫弓 【任务_Leda_21_B】在大路十字路口 checkpoint 与莉达交谈>获得反击十字树护符 【任务_Leda_20_C】选择帮助安斯巴赫>获得莉达的卢恩+安斯巴赫弓 【任务_Leda_20】忽略>下一步是任务_Leda_Final 暗影堡垒外部 【任务_Leda_15_A】【任务_Hornsent_5_A】从仓库一层 checkpoint 出发,向西南方向走,乘坐巨大电梯下楼,到达外部的燃烧船只处,那里会有两个召唤印记。选择帮助霍恩森特(金色)>获得战技:迅斩+莉达的卢恩该选择会锁定Quest_Leda_*_B阶段 [Quest_Leda_15_B][Quest_Hornsent_5_B_Final] 选择支持莉达 > 获得巨镰+霍恩森特套装- 画作【巨龙领域】(在有燃烧船只的区域,前往东侧,从北侧不显眼的梯子爬下,进入下水道)> 掉落点在【锯齿峰山腰】赐福点,继续向上,在前往第二个灵泉的途中,经过第一个灵泉后,在风暴边缘处向下跳到下方的 ledge 上,然后往回走,靠近第一个灵泉 > 通过在画作所在房间西南墙上开启幻影门,进入【水洼洞】 - 【主手短剑】(在有两名黑骑士的餐厅之后,走下有士兵的楼梯,第一个左转进入房间,里面有一个看着窗户的 pikeman、一个打盹的士兵和另一个与黑骑士交谈的士兵) - 【君王赐福护符】(庭院中的黄金树,跳出窗户) - #Aspect of the crucible: Thorns + Scadutree碎片 x2(若死亡,不知为何无法再次穿过雾墙,因此需通过正门并激活【暗影要塞正门】 checkpoint)【Quest_Leda_16_B】在【公路十字路口】 checkpoint 与莉达交谈>【撕裂的十字树】。持续交谈/返回,直至她表示不信任他人。 【暗影要塞,黑暗密室】 >从【仓库七楼】 checkpoint 进入,下一层有旋转展品的拉杆,跳上附近新出现的横梁,向上经过填充山羊继续前进 - 有翼蛇头盔 + 战技:火焰 spear(黑暗密室入口 checkpoint 前的火焰骑士) - 斯卡杜树碎片(黑暗密室入口 checkpoint)在处理Boss【梅瑟莫的火种】前推进【蕾妲的任务线20】 若已完成【尤弥尔的任务线4】,可在Boss战场地召唤【约兰】;若选择了【蕾妲的任务线19A】分支,可在Boss战场地召唤【霍恩森特】(战斗后与他对话),若未选择该分支,他会在最终NPC对决【水洞】中对你抱有敌意并与之战斗 【水洞】可从挂有“巨龙领域”画作的房间进入 -【浸油泪滴】(位于【水洞城】 checkpoint 南侧的熔炉魔像处) -【尊荣灵 ashes】(【温特遗迹】东南侧的祭坛上) -【失落战灰】(【温特遗迹】北墙处) -【吸血裂泪滴】(激活阻挡【温特遗迹】入口的未启动熔炉魔像,方法是从西侧建筑向熔炉内投掷一个【重型熔炉壶】,即带有【熔炉面容】的那种)- 【巨型金色弧光】(安特废墟内的宝箱):废墟内部,右侧祭坛附近。石鞘剑可转化为暗之剑。 - 【铸模者铃珠】:从安特废墟向南走,经过隐士河上游赐福点,靠近隐士河下游赐福点,在东北侧墙壁上,稍后下到河边时拾取。 - 【尊荣灵 ashes】:从隐士河下游赐福点向南走,位于飞蝇村的祭坛处。 - 【骨灰:人蝇】:在布满飞蝇、陶罐和施放群攻法术幽灵的小山上,祭坛东侧。 - 【枯叶圣印记】:从隐士河下游赐福点沿着东北侧边缘前进,绕到有鸟类和发光十字架的地方,跳下南侧边缘。 - 【鳞树碎片】:进一步下落到瀑布的顶层平台。继续向前前往大瀑布,就在隐士河上游赐福点的正下方)- 枯叶套装(从第二个瀑布跳下,靠近枯叶封印处)- 罗刹大曲刀+罗刹套装(无名东方陵墓,从枯叶套装所在的瀑布向西走)- 鳞木碎片x2(利用突出的墓碑,爬到瀑布下层,向西走到空地,那里有两只河马)【暗光地下墓地】- 绿琥珀护符+3(在有灯光开关的大房间顶层,跳到边缘上)- 死亡骑士套装(在有第二个灯光开关的第二个大房间里,楼梯下方非常小的边缘上)- 大幽灵紫花(巨大的小恶魔加农炮处)- 骨灰:巨口小恶魔(有巨大小恶魔加农炮的第三个大房间)- 带刺长柄矛 > 通往深渊森林深渊森林 - 疯狂之手(林地小径 checkpoint 南侧,道路上的疯狂之手)- 鳞树碎片 + 癫火香水瓶(东侧废弃教堂)- 老者的狂喜(从林地小径 checkpoint 向南走的癫狂老者,只有第一个有护符,就是靠近三条关于躲在灌木丛里不敢战斗的留言的那个!)邦尼村 - 沉重龟裂壶(村庄东部区域) - 大卢恩(村庄东部区域) - 邦尼屠刀(村庄东部区域) - 尊荣灵体骨灰(村庄沟渠北端) - 大卢恩(村庄西部区域) - 大卢恩(村庄西部区域) - 沉重龟裂壶(村庄西部区域) - 动作:哦,母亲(村庄北部) - 牙鞭(村庄西边的哭泣小屋)需要格挡一次才能受到伤害 - 斯卡杜树碎片(深渊森林 checkpoint 西北方) - 疯狂工匠的制作笔记[2](最南端的悬崖,深渊森林 checkpoint 西南方,以长老小屋正南方为经度参考) - 疯狂工匠的制作笔记[1](最东方,瀑布下方的岩架) - 撕裂的日记页(米德拉宅邸,穿过画作后,左侧第一个房间(北方)) - 疯狂工匠的制作笔记[3](打开架子后面的路径后,有老鼠的房间) - 七夜的火把(穿过近路附近的第二幅画作后,启动杠杆并继续跳上架子) - 受人尊敬的灵 ashes(七夜的火把下方的胖祭司) - 受人尊敬的灵 ashes(二楼房间 checkpoint,向北跳上吊灯) 斯卡杜景观 - 精准射击护符(斯卡杜维 checkpoint 东北方的阿尔比娜uric小屋)- 盖乌斯的护胫(附近狼背上的阿尔比娜uric掉落)- 斯卡杜树碎片x5(更北边,斯卡杜树圣杯附近) 腹地 > 影之要塞后门 checkpoint 西侧,在雕像前使用【哦,母亲】姿势,可进入腹地(斯卡杜维西侧) - 斯卡杜树碎片(影之要塞后门 checkpoint 东侧,玛莉卡雕像处) - 玛莉卡的祝福x2(两只树哨兵处) 迪奥手指遗迹 - 重力弹(指石山丘 checkpoint 西北方的落星牛掉落) - 姿势:双指(牛所在陨石坑西侧,较低的高地上,在巨大断裂手指旁祈祷的尸体处)> 姿势西侧的追忆复制器 - 骨灰:指痕怪(复制器南侧的洞穴,里面有一群婴儿手,物品由【】守护)【巨大之手】 [任务_Ymir_5] 在手指区域中央吹响号角 > 蓝泪石种子护符+1 [任务_Ymir_6] 与伯爵交谈 > 废墟地图3 [任务_Ymir_7] 休息/重新加载,与约兰交谈 [任务_Ymir_8] 激活约尔米伯爵的王座 [任务_Ymir_9] 爬下去继续前进 > 夜之爪 - 手指编织者的制作笔记[2](与安娜战斗后,查看下一座桥的左侧) [任务_Ymir_10] 吹响熟悉的号角,交易完成后返回大教堂 [任务_Ymir_11] 杀死约兰,杀死约尔米 > 约尔米的铃珠 + 母亲法杖 + 高阶祭司套装 [任务_Ymir_12] 向西走到外面的墓地 > 珍爱手指 [任务_Ymir_13_Final_A] 与约兰交谈,给她隐匿之鸢尾 > 夜之剑 [任务_Ymir_13_B] 与约兰交谈,给她恩典之鸢尾 > 骨灰:夜之剑约兰。萨满村-小型黄金树(从 Hinterland checkpoint 出发,向西南方向上山至萨满村,村庄前方有小金树的光亮区域)-黄金发辫(在村庄上方,顶部的巨大枯树下)[Quest_Ymir_14_Final_B]从萨满村向西南方向越过边缘,小心向下移动并跳至 Rabbath's Rise 塔的小阳台上,找到安娜的傀儡>骨灰:约兰与安娜-咒术师铃珠(无论是否已获取 Quest_Ymir_13_Final_B,均在安娜傀儡所在位置的下一层)石棺裂隙>从 Shadow Realm 南部半岛的 The Fissure checkpoint 出发- Scadutree 碎片+莉达的留言(Fissure Cross checkpoint)>米凯拉十字(Fissure Cross checkpoint)-丝绒圣特里娜之剑(从裂隙十字 checkpoint 跳下,在一个有 blob 的小洞穴中) - 腐败团块(从裂隙 Waypoint checkpoint 向北爬下悬崖) - 多层光环(幽灵混种) 【任务_西奥利耶_5】击败 Boss 后,如果西奥利耶不在圣特里娜附近,重新加载区域。如果他仍不在,在支柱路径十字路口 checkpoint 与他对话,直到他移动到洞穴。与他交谈。 【任务_西奥利耶_6】饮用花蜜直到特里娜与你谈及处理米凯拉(至少 4 次) 【任务_西奥利耶_7】与西奥利耶交谈并传达特里娜的话两次,直到西奥利耶变得非常生气。 【任务_西奥利耶_8】再饮用一次加了料的花蜜酒,然后战斗 > 圣特莉娜的微笑 【任务_蒂奥列_9】与说谎的蒂奥列交谈,并至少再喝一次酒(直到特莉娜提到米凯拉的“处置”),此时蒂奥列只会说“啊啊啊……” - 圣特莉娜信徒的 cookbook(在圣特莉娜附近)特里娜) 暗影要塞,西城墙 - 萨尔扎的兜帽 + 火焰雨(桥尽头的法师)> 通往劳赫古代遗迹的路径 劳赫古代遗迹 - 斯卡杜树碎片(小高架桥塔 checkpoint 南侧,下层的河马怪处,使用电梯) - 受人尊敬的灵 ashes(进入地牢部分后,持有闪光罐子的人) - 联结石 + 古代学者的烹饪书【2】(打开门下楼后,三只蜘蛛附近东北方向的幻影墙;或可从小高架桥塔 checkpoint 向西北方向一直走,跳下进入神殿) - 斯卡杜树碎片(进入有柱子和诅咒之刃的大厅,同一西北墙上的第二个入口,持有闪光罐子的人) - Ashes: 蜘蛛蝎子(从大厅探索东北方向的地牢部分,巨大蜘蛛)(悬挂在天花板的蛛网上)- 优良调香瓶羽护符(从灵泉向下进入有飞虫的区域,东北方向,有巨大树根的房间)- 狄沃尼亚之锤+调香瓶战锤头盔(劳赫古遗迹东赐福点附近的调香瓶半人马骑士)- 鳞木碎片+古遗迹十字留言(劳赫古遗迹东赐福点)- 战技:枯叶旋风(从劳赫古遗迹东赐福点向东北方向,靠近有小瀑布的墙壁处)- 噬血裂痕泪滴(劳赫古遗迹东赐福点西南方的熔炉魔像)- 鳞木碎片(从魔像所在的竞技场向南经过劳赫古遗迹西赐福点,有咒刃和弹跳球幽灵的大厅)> 西侧路径有通往上层的升降机 - 尊荣灵 ashes(从大厅向北走到室外,有石头的池塘)有雕像和两名带角战士的凉亭(位于【神鸟羽毛】下方)-【大君主的 cookbook [9]】(再往北,害虫区域,穿过电梯后走西北走廊,右转进入有害虫的房间,绕过有雕像的祭坛)> 从 cookbook 往东北方向的隐形桥通向塔楼,在那里可以用【石鞘剑】打造【光剑】-【害虫丝线矛】(返回该层害虫区域起点,使用西墙的电梯,然后绕楼梯走)【Quest_Hornsent_6_A_Final】霍恩森特会在楼梯处入侵>【钩刀】+【霍恩森特套装】> 到达楼梯顶部后激活【萌芽教堂正门】赐福点,以备后续使用 -【神鸟羽毛】(从楼梯脚下往南走,靠近石头凉亭和鸟战士的池塘,位于【Revered】上方)在完成任务“莉达的探索7”“西奥利耶的委托3”“霍恩森特的使命4”并将【觅食者巢穴食谱4】交给摩尔之前,不要通过“通往村庄的桥梁” checkpoint北侧的桥梁。【邦尼监狱】区域可获取:沉重龟裂壶(第一个区域,跳到罐子上);坚定号角护符+2(老鼠洞穴区域后,东北方向);失色战灰(有罐子的废弃区域);夜之套装(抬起罐子,上一层);夜之盾。【骨灰】:咒刃米菈·指痕诞生地。【战技】:狂怒野兽(从“通往村庄的桥梁” checkpoint向东北方向,道路东侧发光的虫子处)。蓝耗削减龟裂泪滴(更北侧的熔炉傀儡处)。油商的铃珠(傀儡后面道路西侧石墙上悬挂的罐子,爬上有一群狼的悬崖)。(双角战士灵体骨灰)- 斑纹项链+2(在神鸟羽毛北边,悬崖上有一个灵泉开启装置,使用灵泉前往东侧对面的高地,上楼后,宝箱内)- 熔炉百相:绽放(利用东北方的塔状建筑向下爬至下方的米兰达花朵处;也可在熔炉傀儡竞技场前向北转,骑乘托雷特跳过缺口到达此处)- 尊荣灵体骨灰(从塔状建筑向西,乘坐石制升降梯上去,有个拿着闪光壶的人)- 熔炉百相护符(回到灵泉开启装置所在的上层区域,从鸟战士和神鸟羽毛处向南走,到电梯右侧,跳上石梁,沿着石梁移动,直到找到东侧的电梯,先不要上去(或返回)激活【远古遗迹大阶梯】 checkpoint后向南前进,进入管道可找到宝箱。【神圣野兽龙卷风】:从【远古遗迹大阶梯】 checkpoint出发,沿东北方向的路径前进,在尽头跳至东南方向的平台,会遇到另一只【舞动雄狮】。若你在【摩尔遗迹】与【戴恩】战斗过,可召唤他协助挑战女 boss,召唤印记在雾墙前方。【无法回头点】:遭遇【巨型蜈蚣】后,与【枯萎黑树】互动会推进几乎所有 NPC 的任务线。确保到目前为止你已完成任务:Quest_Thiollier_9、Quest_Leda_21/Quest_Leda_19_A、Quest_Moore_3_Final,并从僧侣德莱夫·戴恩·埃尼尔-伊林处获得奖励——【尊崇灵灰】(从第一升降机 checkpoint 向南上楼梯,肥胖审判官教徒处);【尊崇灵灰】(竞技场西北方,下层,有膜拜苍蝇的祭坛处);【斯皮拉】(上行途中,在元素角战士之前,跳上东侧大树的树枝,向上到达有祈祷审判官教徒的平台);【鳞树碎片】(螺旋升降机 checkpoint)>【米凯拉十字】>螺旋升降机 checkpoint;【骨灰:审判官】(返回之前那个释放圣言弹幕的审判官所在平台,从北侧(左侧)楼梯向下走);【鳞树碎片】(从骨灰所在房间向东南方跳跃)在楼梯下方有一处破损的 ledge,前往南侧,小心跳到下方的 ledge 上,继续沿着墙壁向下攀爬 ledge,然后进一步向南绕着墙壁走,跳到下方的塔楼 ledge 上,接着跳到通往该塔楼的楼梯上,从那个楼梯跳进南侧建筑中敞开的窗户,来到外面有带顶的玛丽卡雕像和一只蜘蛛的广场——【Euporia】(从那个广场向南乘坐巨大的电梯下去,经过审判官和有角战士,前往桥上的大门)——【Revered Spirit Ash】(从螺旋上升 checkpoint 继续前进,经过有鸟的屋顶后,有一座由另一只鸟守卫的小礼拜堂)——【Scadutree fragment】(在冰霜有角战士之前的另一座小礼拜堂再往上走)——骨灰:有角战士(在有冰霜有角战士的屋顶上,向南跳到一个小阳台上并攀爬)下梯子)- 墓鸟头盔(回到螺旋塔的楼梯后,往下走并跳到有发光物品的平台上)- 失色古龙岩锻造石(拿到头盔后,跳到有电梯的楼层,但继续往外走会遭遇咒刃敌人)- 角斗士巨剑(沿主路继续前进,有狂暴角斗士)- 斯凯杜树碎片(净化仪式前厅赐福点)【任务_莉达_最终】在净化仪式前厅赐福点后与莉达对话,触发与整个团伙的最终对决。阵营取决于你之前的选择。四处走动可拾取所有参与者的武器和套装。如果你未选择任务_莉达_21_B,安斯巴赫可在 boss 战中召唤(在上去的路上与他对话),战后会掉落他的物品。蒂奥利耶也可被召唤。# 《艾尔登法环》DLC黄金树之影补充内容 - 姿势:携手同行(在第二阶段被米凯拉抓取两次,出现【心被偷走】提示即表示成功;或在 boss 被击败时,该姿势会呈现倒地状态) - 黄金树之影未完成内容清理 - 现在可获取【圣塔画作】奖励 - 【任务_Thiollier_Final_part_1】:在拉达恩竞技场的尸体处可获得【Thiollier套装】+【Thiollier的隐藏针】 - 【任务_Leda_Final_A】【任务_Leda_Final_C】:可获得【Ansbach套装】+【黑曜石薄片】+【Ansbach的狂怒之刃】 - 【任务_Thiollier_Final_part_2】:前往【圣树】可获得【圣树之花】拉巴斯的大炮(拉巴斯的崛起顶部,教堂区大路 checkpoint 西侧,二楼幻影墙后的灵泉开启器)- 觅食者巢穴 cookbook [6](教堂区大路 checkpoint 西北方向,上山,暗影堡垒东墙,徽章下方仰卧的害虫身上)> 此时你应该已获得全部7本 cookbook,可以根据需要完成 Quest_Moore_3_Final - 幼虫泪滴(夜晚,教堂区大路 checkpoint 西侧)- 战技:卡利亚主权(大教堂西南下方,绕平台走,天花板有虫子的洞穴)- 大君 cookbook [4](大教堂东侧,岸边)- 星光碎片(大教堂东南方向,悬崖上)> 追忆复制炉(大教堂西南方向的水中)[Quest_Ymir_1] 与……交谈count,购买法术>废墟地图+布满孔洞的项链 莉娅手指废墟>从同名 checkpoint 出发,通过蔚蓝海岸手指海滩,在最东端登上棺材船>追忆复制者(沿着左墙向上走)- 织指者的 cookbook [1](主手指广场西南方向,沿着森林小路向上,织指者的小屋)[Quest_Ymir_2] 在中间吹响号角>猩红种子护符+1 [Quest_Ymir_3] 返回玛努斯·梅蒂尔大教堂,与 count 交谈,购买新的法术>挚爱星尘+废墟地图 2 [Quest_Ymir_4] 与影子要塞附近的约兰交谈,教堂区 - 大型墓地手套草(教堂区入口 checkpoint 东南方向,石圈处)[Quest_Queelign_3_Final_A] 大教堂二楼,使用祈祷钥匙开启上锁的门,将隐匿之眼交给奎利恩>奎利恩的巨剑[任务_奎利恩_3_最终_B] 将恩典之眼交给奎利恩>骨灰:火焰骑士奎利恩 - 斯卡杜树碎片(在玛莉卡雕像手中) - 火焰骑士之印(在玛莉卡雕像下方,需先排水) - 死亡面具头盔(大厅内,玛莉卡雕像附近,有带着自杀式炸弹手的火焰法师) - 战场祭司的 cookbook [1](从大厅向东北方向的路径)> 食谱下方的门可通过树之信仰通道进入斯卡杜树基地 - 荆棘披风(外面的黄金树化身,石圈附近) - 隐匿之眼(教堂区入口 checkpoint 以西的第二个黄金树化身)[[斯卡杜树基地]] - 恩典之眼 - #米凯拉的大卢恩 暗影堡垒,仓库>从仓库后方进入区域检查点,但如果你选择从前方走,就反向跟随大部分区域!> 如果你在Quest_Leda_17之前拿到了【秘仪卷轴】,在与芙蕾雅交谈前不要把它交给安斯巴赫,和安斯巴赫对话时先忽略这个选项,直到完成Quest_Leda_13。 > 另外,如果你还没完成Quest_Leda_15且想走B或C路线,不要把【秘仪卷轴】交给安斯巴赫。最终你会到达【黑暗房间入口】 checkpoint,在完成Quest_Leda_19-Quest_Leda_20之前不要继续前进。 - 【雷电龙徽护符+3】:从【仓库后段】 checkpoint往东,跳下去;或者从【仓库一层】 checkpoint往右(东)走,从一堆石板之间挤过去。 - 【卡利亚突刺盾】:从【仓库后段】 checkpoint往西走,由火焰法师守护。 - 【火焰蛇】:爬上梯子,走上火焰法师巡逻的楼梯,在尽头的北边阳台上。 - 【遥距怒火】:从【仓库阁楼】 checkpoint上到横梁区域,上到第二层并跳到东南边的一个大齿轮上。 - 【火焰骑士希尔德】:在横梁附近的升降梯处,有一个非常烦人的火焰法师,物品就在离墙最近的上方。抬起并启动另一个装置,然后跳到最近的屋顶上)> 北门和外面的两个小型升降机通向【暗影要塞后门】 checkpoint,【斯卡杜维尤】和【 Hinterland - Impenetrable Thorns】(当经过麋鹿雕像后转向,和/或到达有【玛莉卡楔石】的房间走向黑暗密室时,从外面的边缘跳下去)-【斯卡杜树碎片】(【仓库四楼】 checkpoint)>【米凯拉十字】+【仓库十字留言】(【仓库四楼】 checkpoint)-【尊荣灵 ashes】(从【仓库七楼】 checkpoint 向东跳上填充山羊)> 从【仓库七楼】 checkpoint 下一层即可进入黑暗密室,那里有一个旋转展品的杠杆,跳到新出现的横梁上,向上经过填充山羊继续前进 -【珍珠龙鳞】