


GOAT Sorter - 库存管理器指南
This is the Guide for the GOAT Sorter - Inventory Manager If you need further assistance, or want to report bugs, join our Discord Server[discord.gg] First time Setup First things first: THIS IS NOT A MOD, its a Script! Scripts are loaded inside a Programmable Block that you place In-Game!!! DO NOT, UNDER ANY CIRCUMSTANCES INSTALL IT SERVER SIDE, your game will throw errors! now to the actual installation part: Make sure that you enabled In-Game Scripts inside the world settings! Place down a Programmable Block In-Game Open the Control Panel of the PB and Click the Edit Button. if the Edit Button is greyed out, that means you dont have In-Game Scripts Enabled! Click on Browse Scripts and search for GOAT Sorter Double Click on the Script to install it Click Ok and the script will boot up the script will prompt you to build a LCD screen tagged with !StatusScreen, only normal LCD panels like the Text Panel, LCD Panel, Wide LCD Panel, Transparent etc work, perhaps in the future we will support mutli panel LCD screens for the Status Screen. Basic Sorting and Item Categories By Default, the Script Categorizes Items after the following Categories: (sorted by personal preference) Ores Ingots Components Tools Ammo Consumables Foods Ingredients Seeds MiscThese are the default Categories which are used for all Vanilla Items and will only be needed if the script sees an item that belongs into that category. the [StatusScreen] will show you if a category is missing a container. To sort these items into containers, add the Category to the name of your desired container. Example Cargo Container Names: Cargo Container Ores Ingots Container Components Storage Tools with Misc Foods, Ingredients and Seeds as long as the Category name is inside the cargo container name, the script will try to sort the items into that container. You can add or change Categories how ever you want, for that read part: The Custom Data any undefined Item (modded items that dont have a clear category) will be added to the Misc category, which you can then later change in the custom data of course. [Stock] Container The Stock Container allows you to define a desired amount of items to be stored in that Inventory. by adding [Stock] to the name of a Cargo Container, the script will populate the custom data of the container with a list of known items. Changing the number after the = sign will store the amount inside the container. There are also modifiers to alter the behaviour of the Item to be Stocked. Examples: SteelPlate=100This will keep 100 Steel Plates inside the Container, removing any excess that are above 100. SteelPlate=100MThis will always Add 100 Steel Plates, but it will never take out excess amounts of Steel Plates. SteelPlate=100LThis will never add Steel Plates automatically, but will only remove excess amounts of Steel Plates. SteelPlate=allThis puts all available Steel Plates inside untill the Container is Full, never removing any excess. SteelPlate=100PPins the Item to the Top of the Stock Container List, that way its easier to find the Adjusted values. Can be Combined with other Modifiers, you just need to add P after the other Modifers. Note: the custom data will show the defined Item names and Categories that are written in the Custom Data of the Programmable block, so if you changed a item name, the old name in the Stock container will be updated to the new one while also keeping the set amount. Editing the [Stock] tagyou can edit, or add tags for the [Stock] Container function inside the Script Settings. Example: private string[] StockContainerTags = { "[Stock]", "[Loadout]", "TurretStock" };make sure that you get the formatting right! [Locked] Ignore Cargo Containers By adding [Locked] to the name of a Cargo Container, the Script wont touch Items that are stored within this Container. Usefull if you want to keep Items stored without the Script touching those items. Note: Assemblers and other machines that have "Automatic Push/Pull" enabled are still able to take out items of that Container, nothing we can really do there :/ [Hidden] Hide Items from AutoCrafting Counter To hide items amounts inside a container from the current item amount of the Autocrafting Panel, add [Hidden] to the Container name Editing the [Hidden] tagyou can edit, or add tags for the [Hidden] function inside the Script Settings. Example: private string[] HiddenTags = { "[Hidden]", "Turret", "Cargo Terminal", "[DifferentTagHere]" };just make sure that you get the formatting right! [P:<number>] Priority System The Script allows you to define Priorities for Type Containers and Stock Containers. By adding [P:<number>] to the name of either a [Stock] or Type container, you can set its Priority. Default Priority for non Priority defined containers is 0, and higher numbers have higher Priority. Example: Cargo Container Ores [P:5] >>> will be filled first Other Container Ores [P:2] >>> will be filled once Ores [P:5] is full Ores Storage >>> has no Priority, will be filled last this also works for [Stock] Containers, same rules apply. higher Priority will be filled first (until quota is matched) Priority on Reactors, O2/H2 Generators and Irrigation SystemsSince Reactors, O2/H2 Generators and Irrigation Systems are Important for life sustain, they have a Priority of 100. so if you want to put Ice in a Cargo Container as backup for something else, make sure that you give it a Priority higher than 100. Docking Priority Docking Priority is a important feature for the sittuation, where a Ship that runs GSIM Docks to a Station that also runs GSIM. the script that has the higher priority set in the custom data of the Programmable Block that runs GSIM will take over and the one with the lower Priority will be paused untill it disconnects from the grid. these are the default values which will be assigned at the first start of the script: Large Grid Station=10 Large Grid Ship=5 Small Grid Ship=1 remember: higher number = higher priority! If the priority is the same on both sides, none of the Scripts will be Paused! Regarding [No GOAT], if 2 grids dock via a connector that has [No GOAT] in its name, none of the scripts will be paused! [No GOAT] Ignoring Connected Grids By Default, the script sorts and manages connected grids, meaning if a ship connects to a station running the Script, non tagged containers will be emptied out, stock containers will be filled, O2/H2 generators and Reactors will be filled as well. but if you dont want that you can add these tags to the name of either one of the connectors. [No Sorting]This will stop the Script from Sorting Containers but it will still fill [Stock] containers, O2/H2 Generators and Reactors. If the Connected grid has GSIM Installed, Docking Priority will decide which Script will Pause [No GOAT]This will completely Stop the Script from Interacting with the Connected grid. If the Connected grid has GSIM Installed, Both Scripts won't be Paused! Remember, you can add these tags to both sides of the Connector! You can also add or change these tags inside the Script Configuration part. The Custom Data The Custom Data is a big part of this Script. It stores all the Information about the Item Names, Item Categories, Crafting Blueprints, and some Internal things to be able to show them on LCD Screens like Oxygen, Hydrogen and Power levels. The First section of the custom data shows you how the Items are written / stored inside the custom data. ~Name~Category~TypeId~SubTypeId~Blueprint~all Items inside the Custom data are sorted after Categories first and then Alphabeticaly. so, steel plates are defined like this: ~SteelPlate~Components~MyObjectBuilder_Component~SteelPlate~MyObjectBuilder_BlueprintDefinition/SteelPlate~ You can edit the first 2 things, Name and Category. Changing the Name will change the referenced item on the Autocrafting Screen, Inventory Screen, Stock Container and other places where you would reference or see the item. meaning, if you change SteelPlate to Plate, it would show up as Plate on the Autocrafting Screen, Inventory Screen and even in the custom data of a [Stock] Container. this works retroactively for Stock Containers and Autocrafting Panel so you wont have to re-adjust those values. But for Inventory screens (not autocrafting) you would have to define the newly used name to display that item again. Changing the Item Category to either one that already exists, or a new one, will make it so that it gets sorted and listed under the new defined category. for example: Changing the category of Algae from Ingredients to Ores, would store and list them under Ores Internals SectionThe Script stores Internally Tracked things like Hydrogen and Oxygen here. you can add your own gasses if you want to display them on a Inventory LCD screen. Example: DeuteriumGas, from the Life'Tech-Powers (Multilingual) Mod ~DeuteriumGas~Gases~gas~deuterium~~once you added this to the Internals Section, you can show the amount of stored DeuteriumGas on Inventory Screens by just writing DeuteriumGas in the Inventory Screen. [AutoCrafting] based on Priority! Autocrafting allows you to automatically assemble or disassemble Items by a defined amount. to get started, place down a LCD screen and add [AutoCrafting] (case sensitive!) to the name of the LCD screen. only Single display LCD screens, that allow you to press F on them to open the Text section should be used. that way its easier to configure the LCD screen. (Text Panel, Wide LCD Panel, Corner LCD) those LCD screens can be rotated using the rotating function. (very usefull for a horizontally placed wide LCD screen). once the script cycled through a whole script cycle, the screen will show items that the script knows how to craft. you can change the wanted numbers, by pressing F on the LCD panel to get to the EDIT Text screen. here just change the number after the / to what you want the script to craft. If in any case you want to access the text section outside of the screen F interaction trigger, you can do this by looking in the control panel of the AutoCrafting screen and change its content from app to text and images, then you can press the Edit Text button and adjust your values. the script will switch back to App once it cycles through. WARNING: you can only have 1 [AutoCrafting] screen per GSIM instance, or else AutoCrafting WILL BREAK!!! Autocrafting ModifierAutocrafting modifier allow you to enable autodisassembling, define yield amounts per craft, A = Craft Items (this is default behaviour if no modifier is defined) D = Disassemble Items Y<number> = defines yield per craft. (example: 10Y5 because 1 craft yields 5 items) H = Hides item from the Autocrafting Display, but not from the Autocrafting settings. you can combine these modifiers in order to assemble and disassemble items. for that just add AD after the wanted number (without a space) Examples: BulletproofGlass~~~~2000/2000 >>> This would only craft items BulletproofGlass~~~~2000/2000D >>> This would only disassemble, not crafting new items BulletproofGlass~~~~2000/2000AD >>> This would both craft new, and disassemble excess ModdedItemThatYieldsMoreThanOneItemPerCraft~~~~128/128ADY8 >>> this item yields 8 items per craft, and we want to craft, disassemble it properly withouth the script getting confused that it yields more per craft. Auto DisassemblingIf you want items to be disassembled, you have to switch at least one Assembler to Disassemble in its Production tab

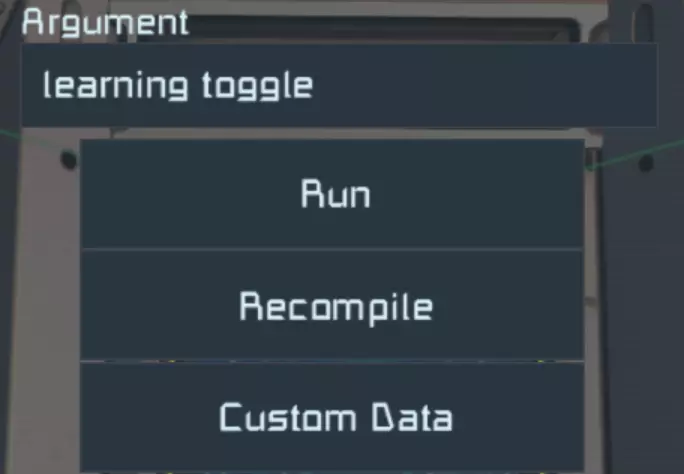
自动合成界面的可调设置 你可以在自动合成界面的自定义数据中调整以下几项设置: 1. **More=14** >>> 请勿修改此项,脚本会自动处理。 2. **ScrollingEnabled=true** >>> 允许界面滚动查看所有物品 3. **FontSize=1** >>> 字体大小,例如可设为0.5以在界面上显示更多物品。 4. **Margin=16** >>> 文本与屏幕边框之间的像素距离。MinScrollWait=8 >>> 滚动间隔秒数 ColoredIcons=false >>> 同时将颜色变化应用到图标(与文本处理方式相同) ### 扩展自动合成界面 可通过在次要LCD屏幕名称中添加“[AutoCraftingExtension:#]”来扩展自动合成主界面,其中#需替换为0-9之间的数字。 这样可以显示所有可合成物品,但次要LCD屏幕无法用于调整自动合成数值,**仅主面板可进行调整**。 ### 自动合成优先级机制 脚本会查看需要满足的配额,并根据当前数量与所需数量的差距,按优先级对所需物品进行排队。注意:我们会清理装配机队列并重新排队,以保持条理。因此,当需要物品时,每个脚本周期你可能会听到装配机发出“叮”的提示音,这属于正常现象。 物品学习/模组物品 该脚本具有学习模式,启用后会暂停正常脚本执行,专注于快速高效地进行物品学习,无需等待完整的脚本周期。 要将脚本切换到学习模式,只需在脚本参数栏中输入“learning toggle”,然后按下运行键即可。
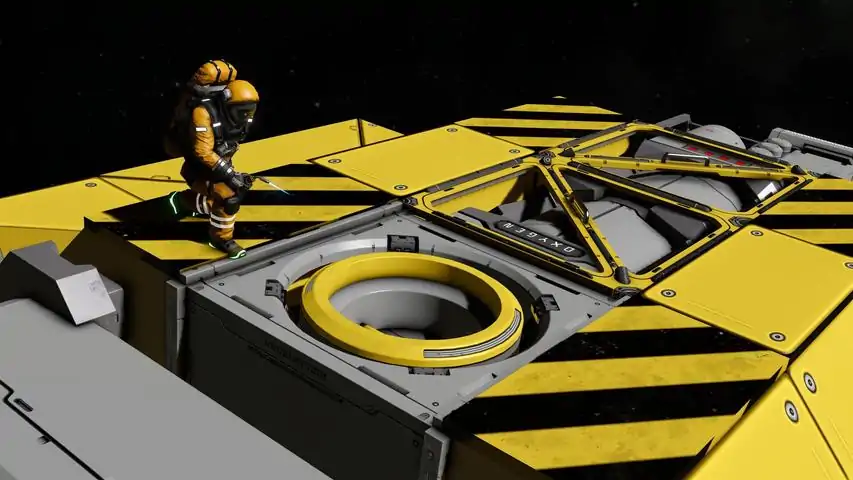
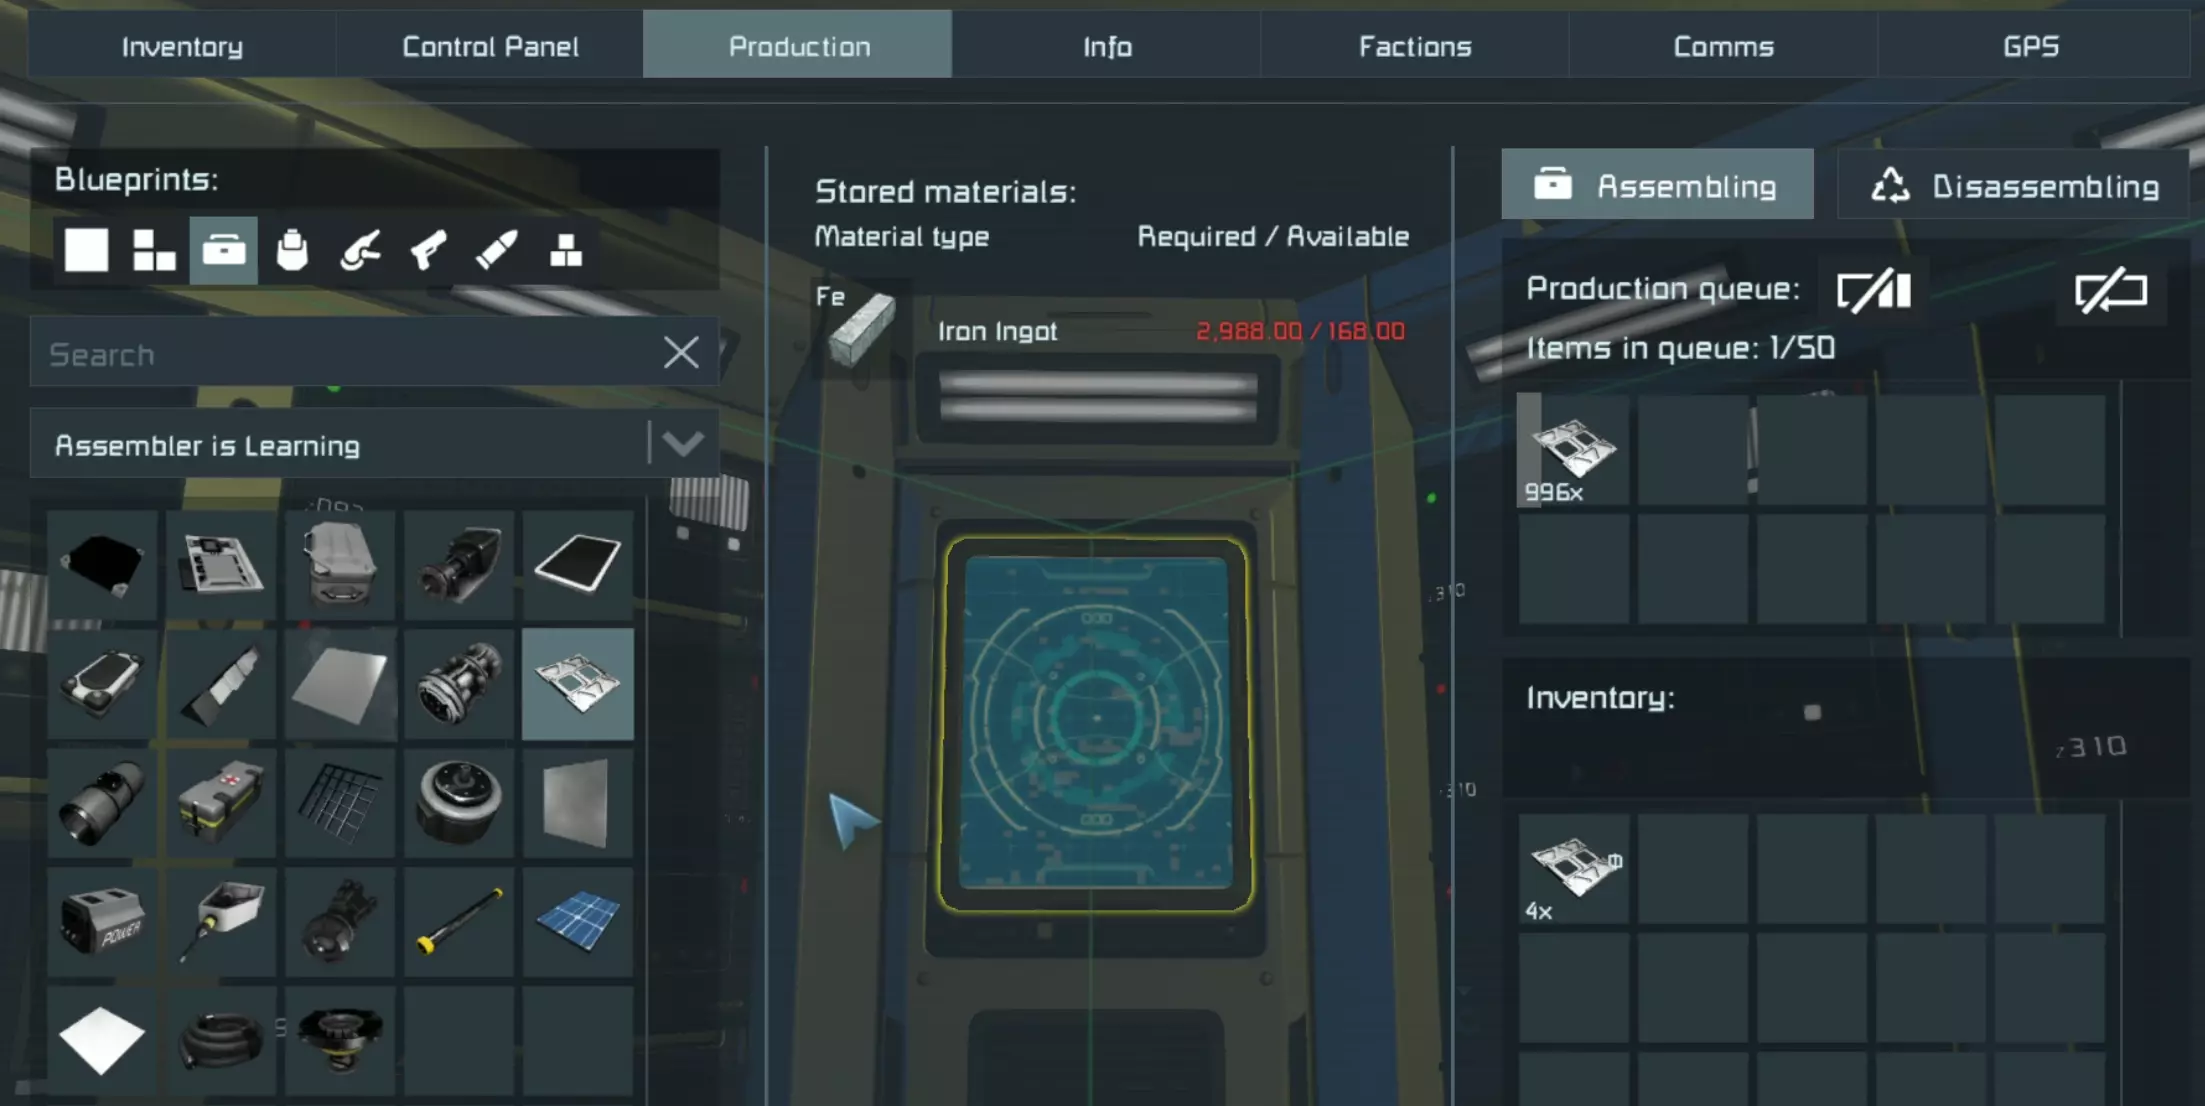
脚本将通过可编程方块的文本屏幕(非LCD屏幕)显示其处于学习模式。 装配器准备好学习物品后,会开启“显示在HUD上”功能,并且名称中会包含“is learning”。 进入学习模式后,你只需前往生产选项卡,选择名称中带有“is learning”的装配器,然后按住Ctrl+Shift并左键点击你想要学习的物品,以排队1000个该物品。 脚本成功学习物品后,会清空队列和产出物。之后你就可以开始学习新的物品了。
The Learning process works by the Script looking at the Queue of the Assembler, and what lies in the Output of that Assembler. In order to turn Off Item Learning, just run the same Script Argument again. learning toggle Alternatively, the script resumes normal execution after 300 seconds as a safety measure. IMPORTANT:Dont queue multiple item types at once, otherwise the learning wont work! Only learn one Item at a time in 1 Assembler. After the Script learned that item, it will empty out the queue and empty out the Output. Another very important thing is, that the OUTPUT of the assembler NEEDS TO BE EMPTY AFTER EVERY LEARNED ITEM!! or else you'll run into item blueprint mismatches, meaning the script will craft the wrong item for what you actually want. If the Output wont get emtpied by the script, you might not have the needed type container and or space left in the needed type containers. Vanilla ItemsThe Script features a Internal Item library where we added all Vanilla Items besides the Prototech Stuff. Meaning, if the Script sees a new Item, it will first go through that library and if it finds that Item inside the library, it will know how to craft it, so no need to teach the Script Vanilla Items! Modded Items however need to be Learned manually! Refinery AutoCrafting and Handling The Script has 2 Refining Modes. First one is Quota Refining, this will refine the required Ingots to fullfill the wanted quota on the AutoCrafting Screen. Quota Refining always comes before Automatic Refining as long as a quota of a Ingot is NOT fulfilled (and ore for that Ingot is available) The Second one is Automatic Refining. We Compare your Stored amount of Ingots with Each other and their corresponding yield factors and then decide what to refine. we recommend leaving Ingot quotas at 0 to let the Script refine everything depending on your needs! Changing a Ingot quota will make it so that the script prioritises this Ingot before the Automatic refining kicks in no matter how much of the other Ingots you have. Technical stuff starts herethe calculation works like this: <Amount of Stored Ingot> / Yield factor = Ingot coefficient 1000 Iron Ingot / 70 = 14,28571429 1000 Cobal Ingot / 30 = 33,33333333 1000 Platinum Ingot / 0,5 = 2000in this case, since Iron Ingot has a lower coefficient compared to Cobalt and Platinum, Iron ore will be refined first, and once its on paar with Cobalt, both will be refined, first a bit of iron till it overtakes cobalt, then a bit of cobalt and so on till it meets platinum. this also works with modded ores that yield more than one ingot, but important is that the script knows the yield rates of that ore. for that use the ore learning process. Note:we clear out refineries and re-fill them to keep things organised. so dont be surprised if you hear your refineries powering down and back up again, this is normal. Another thing is the fact that the script only Refines Ores that are stored inside either a [Stock] or a type container (like Ores), we had to do it this way otherwise the script would want to refine Ores and or Scrap that arent reachable. for example inside a ejector system that is locked behind a outgoing sorter. Scrap and StoneThe Script will prioritiese Scrap and Stone first so that your grids Inventory gets empty ASAP We also Support Scrap from the AwwScrap mod, meaning that this Scrap will be refined first before the general refining mode starts. Refinery Learning and Modded OresThe Refinery Handling works with Modded Ores! So in order to tell the script what it can get from refining modded Ores, you need to run it with learningOre toggle in the argument field. The Script will then switch to the Ore Learning mode which will Automatically add 100 of unknown Ore to a Eligable Refinery to let that Refinery process the Ore. Once the Refinery is done, the script will look at the output of the Refinery to see what came out of 100 Ore and that information will be added in the custom data of the PB running the Script. so its basically Fully Automatic! the refinery learning should stop itself once there is no ore left to learn. alternatively you can run learningOre toggle again to stop the ore learning. the learned values will only be added once the learning process has been stopped! dont recompile the script, otherwise the learned data will be lost! Reactor, O2/H2 Generator and Irrigation System Handling The Script fills Reactors and O2/H2 Generators with predefined amounts of Uranium and Ice. The default values can be adjusted inside the Script Configuration near the top, under the Machine Managing section. If you want to fill specific Reactors, O2/H2 Generators and or Irrigation Systems with Custom amounts, just add the [Stock] tag to these Machines and set your amounts inside the Custom Data. Note: The Script Deactivates "Automatic Push/Pull" for these Managed Machines. That way they wont pull and or steal too many Items from your grid. If you want to Exclude a Machine from Script Managing, and perhaps want to enable "Automatic Push/Pull" just add the [Manual] tag to the Machines name. Bottle RefillingThe Script Automatically Refills Hydrogen and Oxygen Bottles that are Stored in managed Containers (type and [Stock]) as long as a Hydrogen / Oxygen Tank is available filled with Gas. The Refilling happens so fast, that we can only explain it as "Magic" Just make sure that the conveyor path is available between the managed container and the gas tanks. Bottle Refilling happens once every Script Cycle. Priority on Reactors, O2/H2 Generators and Irrigation SystemsSince Reactors, O2/H2 Generators and Irrigation Systems are Important for life sustain, they have a Priority of 100. so if you want to put Ice in a Cargo Container as backup for something else, make sure that you give it a Priority higher than 100. [Manual] Exclude Managed Machines If you want to Exclude certain Machines, like Assemblers, Refineries, O2/H2 Generators, Reactors so that you can use them manually you just need to add [Manual] to the name of that block / Machine. that way the script wont use this machine for things like Autocrafting, Ore Refining or balanced fuel filling etc. It also allows you to enable "Automatic push / pull" again because usually the script turns it off so that these machines wont steal or overfill themselves with items. Container Level Screens By Tagging a (prefarably) Corner LCD Screen that is placed next to a Inventory with [ContainerLevel] You create a nice looking display that shows you your fill level of that Inventory. this works for all Storage Containers and Gas Tanks.
you can change the settings of those screens by walking to them and pressing F on them. there you can find things like which container it should show the level of and you can change the style for these screens. there are 6 styles in total, just change the style= number to a number between 1 and 6 Inventory Screens You can create custom Inventory Screens to display your desired items ona LCD Panel. you can set these up in 2 ways, The first way is to use a Interactable LCD screen where you can press F on when you stand in front of it, just add [Inventory] to the name of that LCD screen, then you can go into the edit text section by pressing of on the screen to set your things to show. the second way is to add the universal [GOAT] tag to a multi panel LCD screen and then adjust the things inside the custom data of that screen. for multi panel screens you have to start by defining your LCD screen and what exactly to show, this follows the same rule like Automatic LCDs 2 @0 GOAT-Inventory Header=Ingots Category=Ingots SteelPlate UraniumIngot Burrito Gravel the 0 indicates which screen this should be shown to. you configure both type of inventory screens the same way, meaning that if you write Header=Ingots Category=Ingots SteelPlate UraniumIngot Burrito Gravel into the text section of the interactable screen that is tagged with [Inventory] it will show the same things like the multi panel screen. Available ways to Configure Inventory Screens: Margin=16 >>> Changes margin of text, the gap to the screen. NEEDS TO BE FIRST IN LINE <ItemName> >>> shows item with icon and number Size=1.0 >>> Changes all text sizes after this line HideEmpty >>> Hides empty items in Category List after this line ShowEmpty >>> Shows empty items in Category List after this line Header=<Text> >>> Displays a Header with <Text> and an underline Category=<category> >>> Shows all items of a given category Category=<category>,Offset=<number> >>> Shows all items of a given <category> but skips the first <number> entries ShortItem=<ItemName> >>> displays the just the Icon and amount of the given item Space=<number> >>> Adds <number> of empty lines IconBar=<item> >>> Shows the icon of the item together with a bar that shows current items compared to quota IconBar=<item>,Target=<amount> >>> Shows the icon of the item together with a bar that shows current items compared given <amount> Text=<text> >>> Just Displays one line of <text> CategoryLevel=<category> >>> shows a bar with the storage capacity of all storage containers that are tagged <category> DeltaItems >>> Shows all items that left, entered, got created, got consumed on the grid since the last script cycle Stonks >>> same as DeltaItems Icon=<item,iconPath> >>> shows the icon of a given icon or the direct icon from path Push=<distance> >>> pushes the output of the next line <distance> * font size pixels to the right BG >>> displays a grid background BG=<sprite>,Repeat=<repeat>,Opacity=<opacity> >>> displays sprite <sprite> as background, repeated <repeat> times with an opacity of <opacity> you can use any of these images listed on this Sprite List[github.com] Command Arguments The Following Command Arguments can be used for the script. in order to use them, just write the argument in the argument field and press the run button. or place down a button panel, cockpit or timer and add the PB running the script to the hotbar with the run option and define the argument there. Command Argument Description learning toggle toggles the learning mode for assemblers learningOre toggle toggles the learning mode for refineries resetIndex resets all stored data of the PB (Custom Data) including ore Yields for modded Ores, Custom names and Custom / Changed Categories removeNotCraftableBlueprints Deletes all Stored Item Recipes that arent able to be crafted anymore. This is very Usefull if you removed a Mod where the Script learned Items from. That way you wont loose Items that can still be Crafted. WARNING, will include all Items if you dont have assemblers on your grid that are able to craft that Item. sub grid assemblers only count if you enabled the use of production blocks on sub grids. Frequently Asked Questions Q1: HELP, the Script keeps crafting X Item even though its quota is already fulfilled! A1: this is a Item recipe error, meaning, the script needs A, but thinks in order to get A it has to craft B. take a loot at your [AutoCrafting] screen and check which Item has a Construction Icon next to its Icon and check if the amount number goes up or not. if the number doesnt go up, you have to re-learn that item via the Learning method. Guide section > Learning Items / Modded Items. Q2: My Programmable Block Keeps Overheating / Damaged / uses too much Performance aka PB Limiters or "how to slow down script" A2: Turn on AutoThrottle and set the AutoThrottleTotalMs to the limit of the server, or keep it at 0.5 which is the default value for most PB Limiters. This will slow down the Script but will prevent it from getting Stopped by PB Limiters. Q3: How to Refine X in X Refinery and Y in Y Refinery A3: Either use Sorters and Prevent Ore from going to Refineries where you dont want your specific Resources to be refined in which will cause the [StatusScreen] to show a Warning but you can ignore it, Or use [Manual] with [Stock] on your Refineries and set the Ores that you want to refine in those Refineries to =10000 Q4: The Script cant Autocraft my Recipes that take too long because the queues get cleared constantly. A4: we currently remove all assembler queues to then re-queue them with the correct priority of items needed. sadly, this breaks recipes that take longer to craft. the only way to currently somehow fix this is to increase "MinWaitSecondsBetweenScriptCycles" but this doesnt help in every sittuation. we do want to rework autocrafting in the future to better support items that have a longer crafting time. one option could be to be able to disable the queue clearing and priority autocrafting but we will have to see what we can do. [LogScreen] Crashes and Issues If you have issues with the Script, you can place a LCD Screen and add [LogScreen] to the name of the LCD screen to display the Script logs. Script actions and crashes will show up there. If you have Issues, be sure to Join Our Discord Server[discord.gg]!
2026-02-13 11:30:41 发布在  Space Engineers


说点好听的...
收藏
0
0