


基地建造
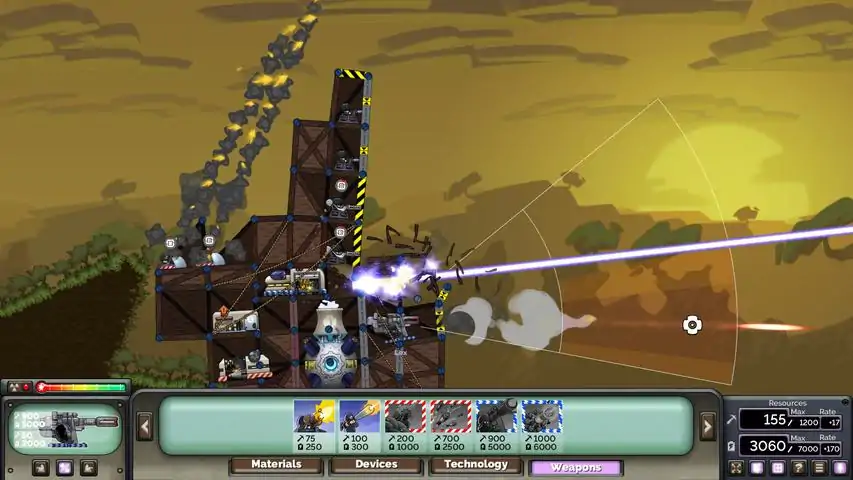
本指南将为你介绍《forts》中建造与防御的基础及进阶技巧。还在为建造坚固基地或频繁被摧毁而烦恼吗?快来看看吧! 章节: 第一部分:防御 第二部分:建造 第三部分:进阶信息 基地建造入门 在众多问题中,许多《forts》玩家似乎都在为建造坚固且防御得当的基地而发愁。不少在线玩家建造的堡垒,我称之为“针型堡垒”——这类堡垒几乎没有正面装甲,通常会向上或向下延伸很长一段。这样的堡垒注定会被摧毁。此外,还有一些玩家不使用拖拽建造功能,或者建造方式效率低下(例如需要维修大量装甲)。本指南将教你如何建造坚固的基地并进行防御,涵盖多种技巧,例如利用双层地基/双层基地、护甲、沙袋和支架等。同时还会展示不同类型的堡垒如何进行更有效的防御。 注意:本指南仍在制作中!如果存在图片缺失、文本未完成或其他不完整的情况,是因为这是一个持续进行的项目! 第一部分:防御 本节将介绍正确防御堡垒的常用方法以及可使用的材料。 防御部分的第一版视频已发布!快来观看吧:
装甲与舱门 抵御敌人火力的主要材料是装甲。装甲非常适合为基地提供防护,这一点从其名称中就可见一斑。装甲的使用方式多种多样,舱门也属于装甲的一种形式。 基础装甲 装甲的第一种使用方式是基础用法。装甲的生命值远高于支架,因此能够轻松阻止敌人摧毁你的防御工事或击穿堡垒。不过,使用装甲也存在缺点和取舍,这一点我将在后面重点说明。激光恰好只能穿透2.2块装甲,这进一步凸显了其阻止防御被摧毁或核心被狙击的能力。装甲本身可以被普通子弹击中,但倾斜装甲能轻松应对这一问题。 倾斜装甲 装甲的另一种使用方式是倾斜装甲。倾斜装甲的成本更高(因为斜向支柱更长),但能有效阻挡基础子弹。这包括高射炮、迷你炮、机枪以及狙击枪(非穿甲)子弹。有一个技巧可以让你在使用倾斜装甲时节省开支:从一个节点延伸出许多微小的斜向短支柱,然后再连接回节点,使其尽可能短小。这样的结构仍能起到倾斜装甲的作用,但比向外延伸后再在支撑盒内部构建要便宜得多。 舱门 舱门是《forts》玩家应该都使用过的功能。游戏甚至会自动建造舱门,除非你在放置武器时按住Control键。舱门的作用类似装甲,但可以通过开启和关闭来保护你的武器。门的单位成本略高,但生命值完全相同,且拥有独特的特殊能力。武器能够像击穿护甲一样轻松破坏单个门,因此许多玩家会采用一种名为“双重门”的技巧。这种技巧能让你正常使用门,但需要开启2到3扇门而非单扇。如果你拥有足够资源(通常情况下你确实如此),这种方法能为你的武器提供额外保护。 **支撑** 许多人认为护甲是防御基地的唯一方式。如果你也这么想,那就错了。前景支撑(FG)本身就是另一种极佳的基地防御方式,前提是使用得当。这其中包含一些复杂技巧,但只要运用熟练,你就能凭直觉操作。### 错误的加固堆叠方式 许多玩家在基地防御时,会在基地前方堆叠2-3格大小的前景方块,希望以此阻挡激光。但这种做法会导致防御工事因过度加固而自身倾倒。这不仅存在自行倒塌的风险,还会让敌人有机可乘——只要击中特定位置,就能利用结构应力使你的防御工事倒塌。 ### 正确的加固堆叠方式 有一种更优的加固堆叠方法:使用2-4段1格大小的前景方块。具体做法是,先延伸放置1格大小的前景方块,然后对其进行交叉加固,使其强度更高。这种结构不仅能有效阻挡大量溅射伤害,即便激光穿透,也能轻松修复。我曾在一场对局中,通过反复使用这个(技能/道具)来拖延一名核弹(Warhead)滥用者,同时组织了一波绕后突袭,消灭了他的狙击手和军械库(Armoury)武器。我成功拖延了他整整3分钟。
其他技巧 当然,这并非滥用支架的唯一方法。滥用支架的方式多种多样,即便只使用一层,也能阻挡大量攻击,尤其是在游戏前期。以下是Ximsa在基础站立堡垒中滥用支架的示例:
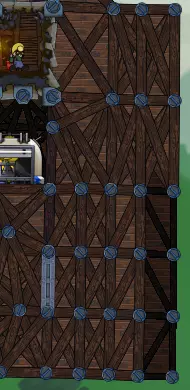
每种支撑堆叠方式都有其优缺点。这种堆叠方式的缺点是难以选择和修复连接点,但优点是支撑数量众多,足以抵挡前期武器的攻击。你可以多做尝试,找到适合自己的方法! 堡垒内的堡垒 你听说过“堡垒内堡垒”或“双重基座”技巧吗?如果没有,现在你知道了。许多玩家(包括我自己)会将横梁分割成更小的部分,这样就能在单个方块内堆叠2-3倍的支撑,而且成本几乎可以忽略不计。这是一种很棒的装甲强化方法。更妙的是,通过利用网格并点击微小的碰撞箱,你甚至可以在保留原始横梁的同时,对其进行更多支撑。这是游戏前期为自己提供防护的好方法,因为它能阻挡大量的溅射伤害和试图早期核心狙击的穿甲狙击手,尤其是在侧向堡垒上。你还可以在地基上构建“V”形结构,这能使你对倾倒的防御力翻倍,我们现在就来详细说明这一点。
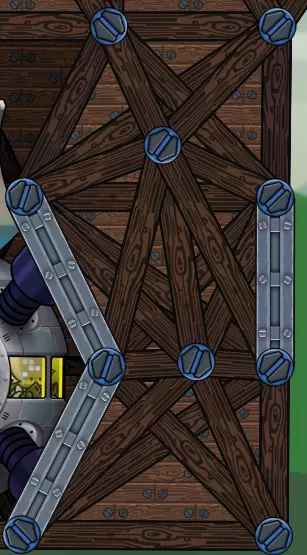
《Topplers》玩家注意 这里有一种利用网格的小技巧,不仅能进行交叉支撑,还能大量加固地基横梁。操作方法如下:利用网格制作一个可嵌入地基的小型BG部件(BG piece),然后在所有可能的位置对其进行支撑,并延伸该部件以重复此操作。对于3格高的地基,你可以在Y轴上镜像复制该结构,从而获得更高的稳定性。这样一来,即便有人攻击你顶部的地基,你的堡垒也不会移动分毫。此外,你原有的防护措施(无论是护甲还是前置支撑)依然有效。你也可以在标准(Vanilla)类型的堡垒中尝试这种技巧的变体,多多实验吧!
护盾 护盾是一种特殊材料。它并非直接防御,而是针对特定投射物进行防御。护盾能偏转所有斜装甲可偏转的子弹,最广为人知的是其对激光和光束的偏转能力。不过,很多人过度使用护盾,出现“护盾滥用”现象,即在基地的每个部件上都安装护盾。如果拥有足够的涡轮机,这种做法可能会有一定帮助,但通常会耗尽所有能源。我个人喜欢只给涡轮机安装护盾(风可以顺利穿过护盾),只有当敌人拥有激光且我资源充足时,才会给核心安装护盾。我通常不会给地基安装护盾,因为我的防御足以承受激光攻击而不被摧毁。不过,如果敌人配备了多门激光炮或重型武器,或者使用爆炸物来穿透你的装甲,那么(使用护盾)可能是个不错的主意。 使用护盾的另一个重要原因是应对“散射炮”,尤其是在近距离地图中。通常情况下,炮弹击中护盾后会爆炸,摧毁护盾并对周围造成溅射伤害。但在“散射炮”(Scattershot)的效果下,如果对手向你发射炮弹并击中护盾,炮弹会直接反弹回去,可能对他们自己造成伤害,而不是你。不过,这并不意味着“散射炮”是必选指挥官,因为他在远程地图上的作用并不突出,尤其是考虑到他的另一个被动技能——更大的弹道散布。 沙袋 另一种保卫基地的有效方法是使用沙袋。许多玩家不使用沙袋,或者在尚未拥有科技或武器时就大量堆砌沙袋来加固基地。沙袋确实很有用,但通常应适度使用,或与其他战术配合使用。 为何使用沙袋? 沙袋仅有250点生命值,但这意味着仅需3个沙袋再加上你的前景物堆叠,就能完全阻挡加农炮的攻击。它们还能有效拦截火焰光束。沙袋不应完全取代装甲或前景物堆叠,但在敌人拥有爆炸性武器或火焰光束的情况下,它们确实非常实用。
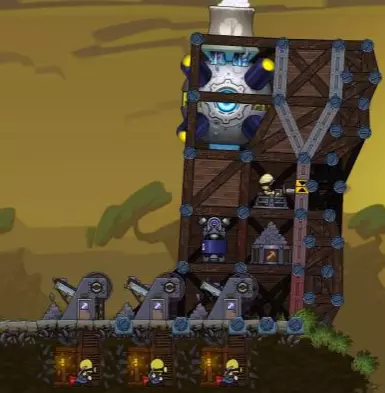
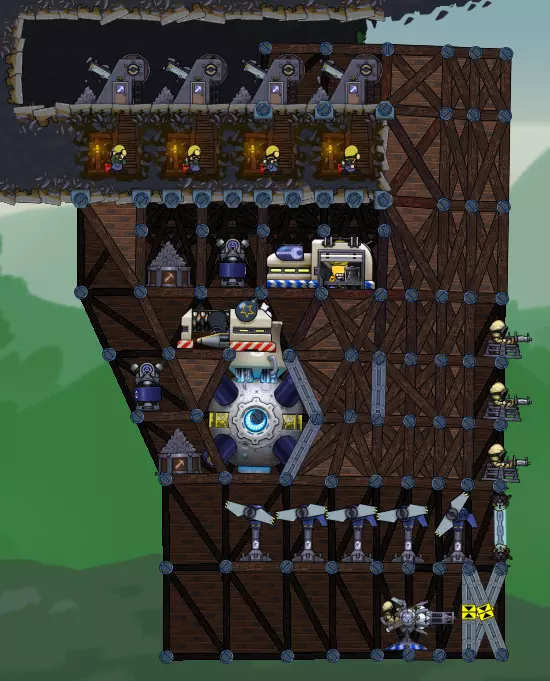
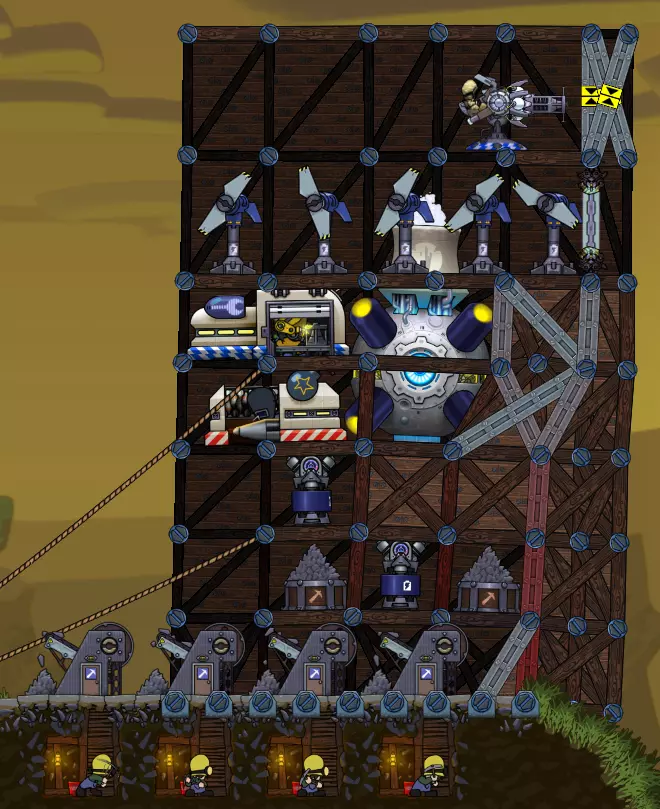
Turbines: Sandbags vs. Shields There are usually two common ways to defend turbines: either with sandbags or with shields. Shields are a great way of defending your turbines since wind passes through them. Although, one major tradeoff is that they are very fragile to some weapons. It only takes a single swarm silo to punch into your shield and kill a turbine or a single EMP to disable your shield. Then anyone can just kill your turbines as they wish. Sandbags are a solution to this. Both ways of defending your turbines have their pros and cons, specified in their own sections. There are a couple ways to use sandbags to protect your turbines. One major tradeoff with using sandbags is that they may cut down your efficiency by a little. You can limit the efficiency cut by reducing base-lean and being careful with placement. Sandbags are generally cheap, so you may even end up using both if you need to! Reactor Armor One thing you should definitely remember is to armor your reactor from all angles. Vertically armoring your reactor is crucial to survival in Forts. Most pre-made forts come with firing angles that allow an opponent to hit your reactor, especially with swarms or an AP sniper. Instead of having just one piece of bracing upwards or downwards on your fort (depending on the map), a lot of people will add at least a 1-grid high cross-braced FG box (see below) on the bottom or the top of your reactor that will stop the enemy from killing it immediately. Tradeoffs Of course, every single form of defense has its own upsides and downsides, which is why you must use them in variation. This section explains the tradeoffs, or major downsides, for every weapon. Armor Armor has many tradeoffs to using it, including: If armor takes damage, it costs a lot to repair. Armor costs a lot of resources, especially larger pieces of slanted armor. It can make some matches on premade maps unfair by selling a ton of premade foundation. Overall, armor is very good to use in Forts, but it has its tradeoffs, especially if you use a lot of it, or if you're on a premade map with a lot of it. Bracing Bracing also has its own major tradeoffs, including: If you bracing spam too much, it can become very hard to click and repair. Bracing isn't as compressively strong as armor, and can easily snap if you use too much on standing forts. Bracing can easily ruin your resources if it gets hit by a splash-heavy weapon, like a warhead. Bracing also limits the amount of weapons that you can put on your fort, as you need to allocate it for defense instead of putting weapons on it. Foreground Bracing is directly hit unlike Background Bracing, so if you rely on only FG for your defense, especially on hanging forts, you may be toppled because of it. Sandbags Sandbags also aren't the best in every scenario, and their tradeoffs include: They take up a lot of space compared to other methods of defending, as they are a device. They only have so much durability before they can't repair fast enough from an incoming weapon. One box of bracing that needs to be BG because of a sandbag is a lot of defense lost. Shields Shields are definitely something you have to use very strategically, and have their own tradeoffs: Shields take up a lot of energy to run, and shield-spamming can easily ruin your economy. Shields are very brittle, and they break easily if exposed to an explosive like a cannon.* There's always the possibility that a slanted shield on your fort can end up hurting a teammate, and it can actually happen quite commonly.* In some cases, this can actually be a good thing because a shield can tank a cannon hit so that your other defense doesn't have to. This is another great trick to use when you need it! Grid Tricks and Double-Basing Of course, grid tricks such as double-basing techniques and special core armor have their own special downsides: They take a lot of time and focus to make, and once they're gone, you can't do much in the middle of combat to bring them back. They also need their own space, and since they usually need to be foreground unless you're doing a foundation technique, that's even more space that you can't place a sandbag or another device. Overall, every single method of defense in Forts has its own tradeoffs. Make sure to use them wisely, and not to go overboard with one single technique. Use some variation, and use them as efficiently as possible. What Should I Use? With all of these options, they are many defensive measures that you can use. I recommend using a mixture of all of these, including the special techniques. You can quite cheaply make a Fort in a Fort technique at the start of the game, Foreground spam mid-game, and make more armor next to your core mid-late game. Sandbags you can either use as a backup, or just include them with the other techniques. It's all up to you, but it's best to use a mixture of all of these (or at least bracing and sandbags) for the best defensive stance in Forts. Strategy & Weapon Specific Defense Now that you know have an idea of how to defend in Forts, what defense should you use at what time? One of the most important aspects of mastering defense in Forts is that you need to know when to use it. This is already explained in Romerolagus and I's Surviving the Rush, but I decided to elaborate it here, as it matches this guide perfectly. Let's start by going over weapon and projectile types and their common counters. Bullet Projectiles Bullet projectiles include any projectiles that come from Machine Guns, Miniguns, Snipers, Flak, Shotguns, and 20mm Cannons. All of these weapons are stopped by a few commonly used defensive techniques. One is Slanted Armour, which was explained previously. Slanted Armour is a great defense to use against these types of weapons, especially against Shotguns and Miniguns. When you are using this against a Shotgun or Minigun rusher, it's usually best to preserve your resources and use it intelligently by making little diagonal nubs instead of large diagonal nubs of metal, especially against the more directly fatal weapons like those specified. Another great form of defense against these are shields, but it usually best to use them lightly. They are most commonly useful against 20mm cannons, since they were debuffed around the start of Tons of Guns to be reflected by them. Sandbags are also another great way to stop these, as they have enough HP to endure these types of weapons for quite a while, and soak up a lot of 20mm damage. Using straight armour is also a good idea, but slanted armour is generally used more because it doesn't take any direct damage, making straight armor much less effective. Explosive Projectiles Explosive projectiles include any projectiles that come from Mortars, Swarm Missiles, Warheads, EMP's, and Rockets. These weapons are all most commonly stopped by anti-air (AA). However, AA is not the only form of defense against these weapons that you should use. Manually fired non-AA weapons also have a chance at stopping these, such as miniguns, and manually-fired AA is usually much better if you can aim it properly and quickly. Sandbags are also a great form of defense against these, as their HP can absorb the splash damage, especially against nukes. Another thing is sacrificial, or ablative, bracing. Sacrificial bracing is a type of bracing spam that is deliberately built out from the fort to absorb the splash damage of weapons, such as Warheads, so that the rest of the fort is safe. You'll see people do this a lot to prevent splash damage victories from reactor or battery shots. One special technique that you can do to counter an explosive weapon is to fire one of your own explosive weapons to force your opponent's anti-air to shoot at their own projectiles, or to distract their anti-air for another weapon to go through, especially against flak. Penetrating Projectiles Penetrating projectiles include projectiles that come from AP Snipers, Cannons, and (partially) Lasers and Firebeams. Lasers and Firebeams classify as more of a special weapon (see below), but they still have high penetration, so they are included here. Penetrating weapons are most commonly stopped by multiple layers of armour, but making too much armour can increase your repair costs against Explosive projectiles. Sandbags are also an option here, as they act as a dead end for things like Firebeams and AP snipers to go through. Sacrificial bracing can be used here as well, as it acts as a barrier that these weapons have to go through, and the projectiles end up stopping in the middle of it. The final way to stop penetrating weapons is through the use of shields, as they can deflect Lasers and Firebeams (see Special), instantly stop the piercing of a Cannon (although the splash damage still takes effect), and take a lot of the damage from an AP sniper. Overall, penetrating weapons are unique compared to other weapons, and therefore sometimes need some unique counters. Special Projectiles Special projectiles are projectiles that come from weapons that have a partial spot in the other categories, but have their own special counters that need their own category. Their projectiles include those that come from Lasers, Firebeams, Swarm Missiles, and Warheads. For the beam weapons, you can use a shield to reflect Lasers and Firebeams, unlike any other weapon (except for when Scattershot is active, but that's not really a pure reflection). Make sure not to shield spam, though, as explained in the shield's dedicated section. Swarm Missiles and Warheads need a sniper to shoot, so they classify as a special weapon, since they have a weakspot that no other weapon has, a separate targeter. A lot of missile rushes that you'll see will use at least 2 snipers, as if one of them dies by an AP or doorsnipe, that's 10-20 seconds (depending on your commander) that you can't shoot your missiles. This makes shooting snipers a very good counter to the missile weapons. Toppling Attempts We've talked about toppling before in the Bracing section, but there's more to it than just making the grid-tricks. You can stop attempts to disconnect you from your foundation by using background bracing since it doesn't take direct damage, cross bracing to add more support to your foundation and overall fort, additional ground connections, or "double basing" to add even more support, ropes to stop your reactor or parts of your fort from falling, sacrificial bracing to absorb all of the damage in front of your foundation layer, some armour because of its high HP, and the removal and replacement of objects such as batteries to prevent explosions that can blow your foundations up are all the most common suitable defenses for defending against toppling. You don't have to use all of these, but it's usually best to at least double-base, cross-brace, remove batteries and other devices/weapons, and add more armour in front, whether it be an FG spam or other technique to counter these types of attacks. General Counters There are also a few specific counters which act as a counter to nearly every strategy or weapon/projectile type. These are to use EMP's to temporarily disable every single weapon and device within its area of effect, which are useful for stopping a lot of weapons unless they have adequate anti-air, and to prevent an opponent in any way from building up the economy to build and fire their weapons. You can do this by causing damage that forces them to repair (especially against an armour spam), and destroying things like mines, turbines, and resource storages. If the opponent can't build up 1,000 metal to make a laser, for example, then they are going to be very delayed and it can act as a useful counter to buy you some time in defense and offense. Overall, you should not only defend stagnantly and to a specifically set algorithm and build order, but also defend dynamically and adapt to what the opponent is shooting at you, whether it be by projectile type, special properties, or a general counter to stop them offensively. However, I won't go too much into offense in this guide, as this guide is mostly focused on building bases efficiently. A major element of Forts is to have at least a basic understanding of your opponent's fort, building your own fort, and defending against their offense in an efficient way, and this section should have provided a basic understanding of how to do just that. Part 2: Building This section of the guide will teach you all about the common ways to passively build in Forts. Best Building Material? We've gone over defense, but what's the best material to generically build out of? Overall, I would say Background Bracing. Foreground Bracing (FG) and Background Bracing (BG) both cost the same, but BG is unique in the way that anything can pass through it. I was once in a match where a friend of mine shot a ton of rockets at me, and by luck, 2/3 of them passed through my fort. It also makes your opponent wonder where to shoot if your entire fort is BG, due to the fact that everything is uncovered. You should still use Defensive techniques around your reactor, but I like to build primarily out of Background Bracing for everything else. Weapon & Device Placement Now that you've hopefully got defense and passive building down, let's go over some common problems with weapon and device placement. Battery Bombs Battery Bombs are a common term for when you place a battery or other explosive near your reactor, foundation, or other easily destructible device or weapon like an oil barrel or laser. All someone has to do is hit that battery and your reactor might take some damage and result in a splash damage loss. Or, if you have a lot on your foundation, maybe your foundation will blow up and make you fall. It could also blow up a weapon that the bomb was near. There is one simple solution to this, which is to build your storages and other heavy explosives in hidden places on your fort, preferably behind a point where anyone can shoot it. An example of this for both Stalactite forts and Vanilla forts is shown below. If you're making storages next to each other, also make sure to alternate them so that the batteries aren't so close together. Oil Barrels Ever made the perfect base and then had an oil barrel spawn on you? You're not the only one. This is actually another tradeoff that comes with foreground spamming, oil bombing. Let's say you make two 1-grid extensions of FG bracing that you're going to defend with. Your opponent has Shockenaugh, so your teammate ends up charging it for them with damage. You're in the middle of doing a mid-game tank, when suddenly an oil barrel spawns right above your mines or in front of your reactor and gets sniped. There are ways to fix this, such as using foundation techniques with no vertical struts and making sandbags. Shockenaugh does seem like a less common commander now, so it may not be as much of a problem as it used to be. What Could my Fort Look Like? This is not what your fort has to look like. You should experiment and see what works the best for you, and see what incorporates the best into your strategy! In summary, your fort could look like this: you have Background Bracing that is cross-braced on your foundation, with the Fort in a Fort trick made if you have time. The front of your reactor can have the same trick, but used it to defend your core. The primary bracing of the fort used to extend is most efficient when made out of Background Bracing. You should have a layer or 2 of armor (slanted or not) in front of your core, but you can also make tiny pieces of slanted armor in front to stop Minigun spammers. You can either extend bracing out in front to make 2-3 layers of sandbags (potentially with Machine Guns in front), or you can use Foreground spamming to do the same exact thing but with bracing instead of sandbags. Simplified, a late-game fort can look like these pictures and this video (tied with a Laser rush): Note that Hanging forts can hold a lot more without snapping.
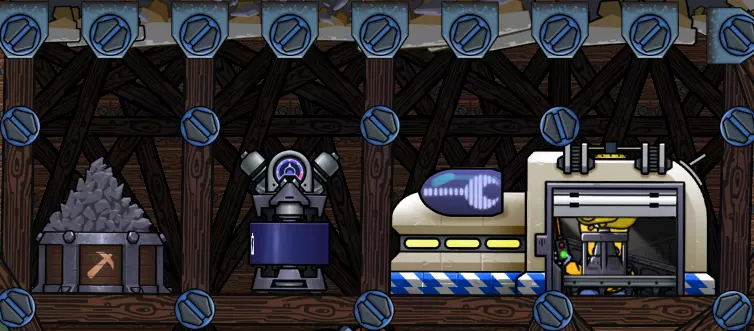
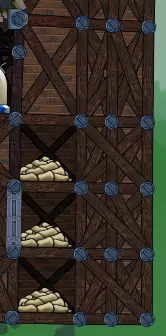
### 第三部分:进阶信息 本指南的最后一部分将为你介绍《forts》中的一些进阶机制,例如智能建造。 #### 建造与转换 指南的进阶部分将全面讲解游戏的高级信息。其中部分内容起初可能会有些复杂,但最终你应能熟练掌握这些知识。 #### 智能建造 许多《forts》玩家都不知道的一个进阶技巧是:按住Control键可启用智能建造模式。按住Control键时,建造的关键部分将被禁用,例如: - 武器在资源充足时自动在前方放置舱门 - 武器自动将前方的前景(FG)转换为背景(BG) - 支撑支柱与其他支撑节点的连接 - 以及更多其他功能。你可能想知道禁用智能建造有什么帮助,但它确实作用很大。比如说,你正在建造一台激光炮,并且希望放置时能将其隐蔽起来。你拥有足够的资源,于是决定在放置区域前方安装舱门前,先放置临时的前景支撑。问题在于,当你放置激光炮时,前景支撑会自动转换为背景支撑。此时,按住Control键再放置激光炮,你就能忽略这一特性,顺利完成放置,同时也能减少被敌人发现的几率。此外,这还能在你使用网格技巧时,防止支柱自动对齐。 建造与转换 这部分内容可能会让人有些困惑。关于转换时间、建造时间等内容的详细示例,我建议查阅指南《Surviving the Rush》。 此外,以下是关于建造和转换的一些关键信息: - 除非有其他支撑物固定背景镶板,否则你会看到“材料→门”的转换过程。这意味着,如果你放置双开门且未用任何物体固定后方镶板,敌人会清楚地看到它,并知道那里有武器。 - 很多人不知道,不同材料之间的转换是物理性的。这意味着,如果你在空中放置纯装甲,子弹可以穿透它;但如果你先放置背景支撑,再将其转换为装甲,子弹就无法穿透了。在为武器建造掩体时,这一点尤为重要,因为如果你直接建造而非转化,敌人可能会直接射穿掩体。直接建造有一个缺点,那就是它比转化稍快一些。不过,如果你要放置重型武器并为其建造掩体,由于建造和装弹时间较长,这点差异根本无关紧要。 结论 本指南到此结束!希望你能学到一些建造技巧,记住,你不必完全照搬这些建造方式。运用你新学到的技能,创造出属于自己的建造方式,并将其融入你的策略中!
2026-02-13 13:00:25 发布在  Forts
Forts


说点好听的...
收藏
0
0