


《英灵神殿》综合指南
本指南将“引导”你从头到尾了解这款游戏,以及其中的所有内容!本指南目前仍在制作中,并且只要游戏持续更新,它就永远不会真正完成;但我计划将《英灵神殿》中你需要知道的大部分内容都收录进来! 开发暂停 大家好!这里有一条简短的消息说明…… 我将暂停本指南的开发一段时间 ✧ | 简介 大家好。首先让我介绍一下我自己和本指南。我叫MadMan,17岁,这是我的第一份大型攻略。我想做这样的攻略已经有一段时间了,但一直没找到机会,所以今天我决定“是的,我要为《英灵神殿》写一份攻略”。 现在,你们大多数人可能都玩过某种类型的生存游戏。无论是《我的世界》《腐蚀》还是《方舟:生存进化》等游戏,它们的核心玩法都大同小异:收集材料、制作工具、建造基地,为自己寻找一个安全的立足之地。在《英灵神殿》中,玩法也基本类似。你需要收集资源、探索世界、制作物品和建造基地等等。 不过,《英灵神殿》与其他游戏也存在一些不同之处:**它没有许多游戏中常见的“夜晚会让敌人变得更强或更危险”的机制**。你无需匆忙行事,只需按照自己的节奏来,在准备好之后再安定下来即可。 需要说明的是,这份指南确实是公开的,因为我希望能让更多人看到它。但目前,它还远未完成。我不打算真正完成这份指南,只要开发者继续推进游戏的“进度系统”,就请将本指南加入收藏! ✧ | 信息 请注意,本指南可能包含部分剧透内容,敬请留意。 随着我在游戏中不断探索新内容,我会持续补充本指南(目前我仅游玩了约100小时,我的朋友们每人也只玩了约400小时)。如果您发现本指南缺少某些信息或存在错误,请在下方评论区告知我,我会立即进行修正。我们都在共同学习进步。 本指南包含“流程攻略”部分,供玩家跟随以通关游戏。如果您已通关过游戏,或正在尝试速通,那么这部分内容可能不适合您。任何标有✧的内容均为通用知识,建议所有玩家参考!如果你喜欢本指南,觉得它对你或他人有帮助,欢迎支持我。

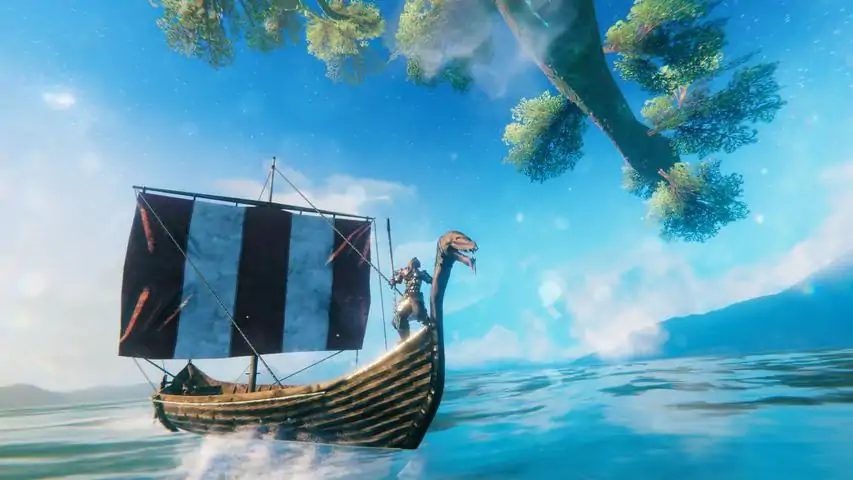
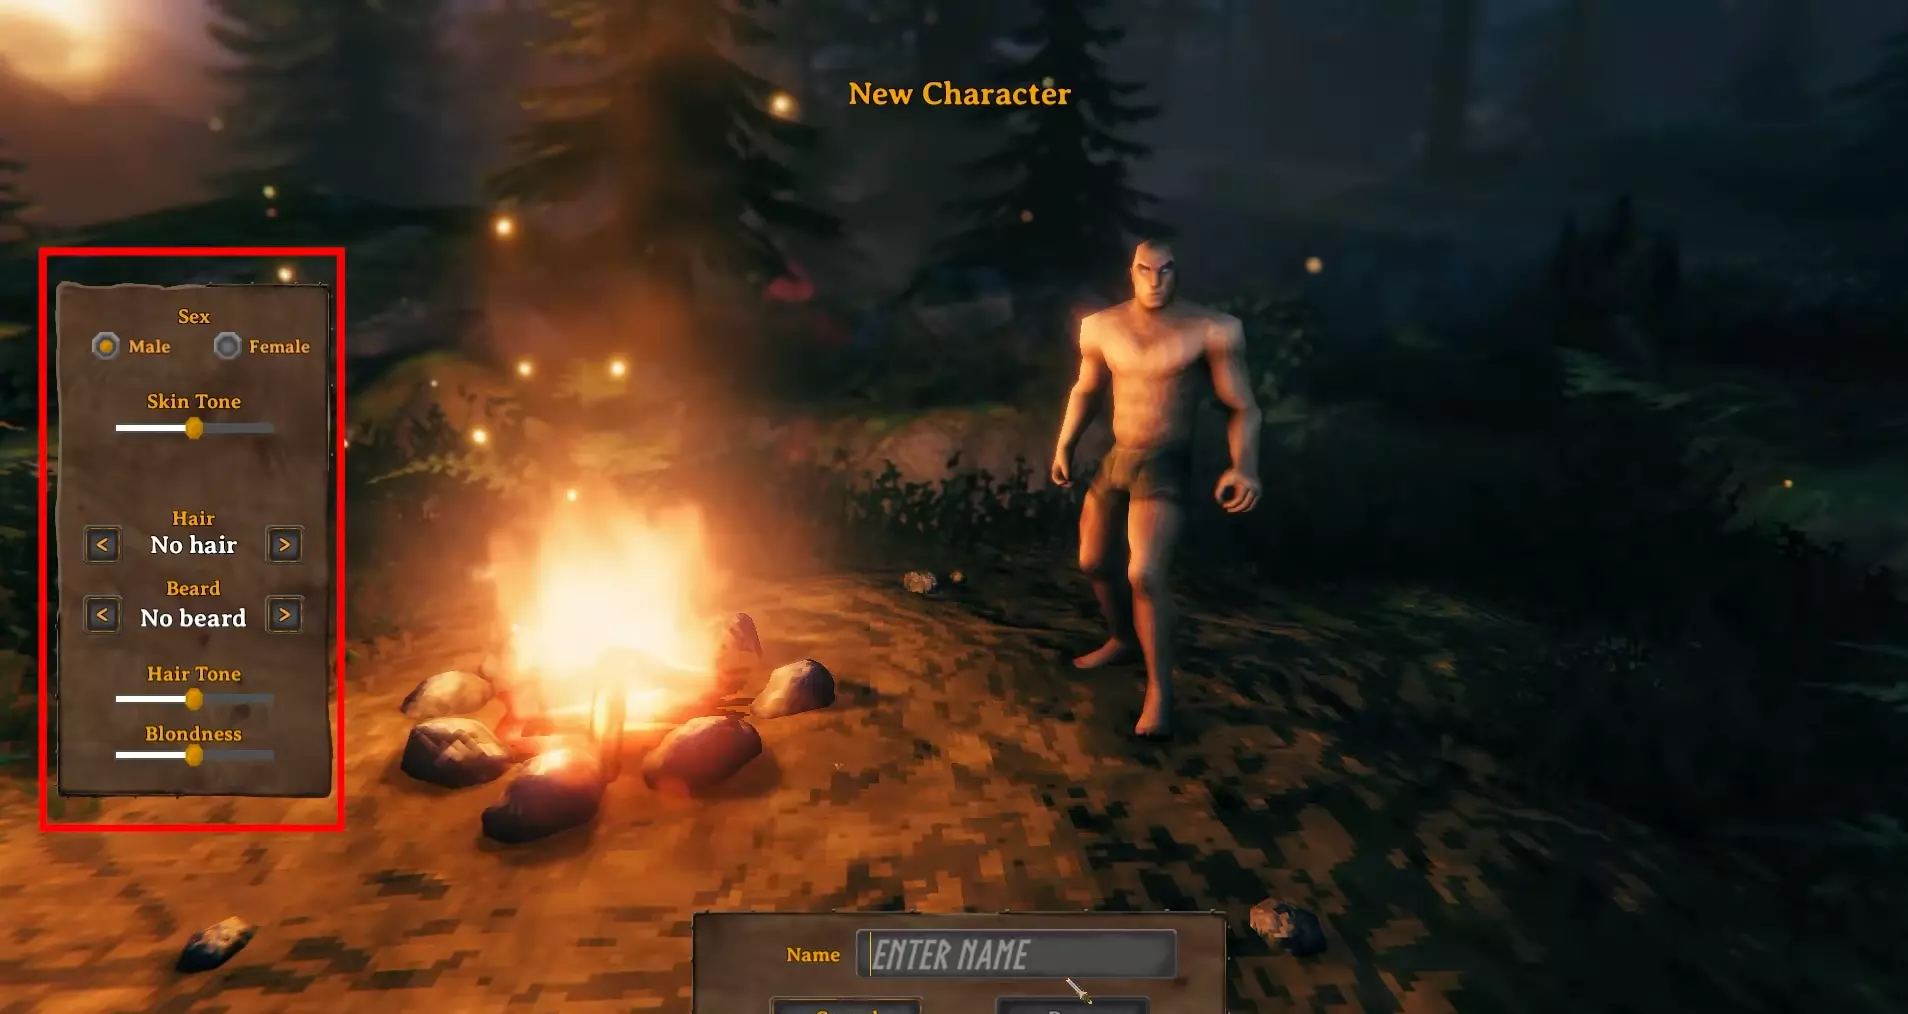
✧ | 英灵神殿 背景故事 主要背景故事 很久以前,万神之父奥丁统一了九界。他击败了敌人,将他们放逐到第十界,随后斩断了世界之树连接这所监狱的枝干,任其在虚空中漂泊,成为一处流放之地…… 数世纪以来,这个世界在不安中沉睡,却并未消亡……随着冰川时代更迭,王国兴衰交替,不为诸神所见。 当奥丁得知他的敌人力量再度壮大,便将目光投向米德加德,派遣女武神在战场上搜寻最伟大的战士。这些已离世的勇士,将在英灵神殿重生! 角色背景故事 为证明自身价值,你被送往北欧第十界——英灵神殿。唯有在充满众多神话怪物与野兽的严酷环境中生存并战斗,你才能向众神证明自己的价值。对于那些无法证明自身价值的人而言,他们唯一的归宿便是赫尔——冥界,在那里,他们的灵魂将遭受数世纪的折磨。或许你会成为一名强大的战士,证明自己的价值并赢得众神的青睐,那么你的归宿将是瓦尔哈拉——一座位于阿斯加德的宏伟巨殿,奥丁将与你并肩。 1 | 攻略 创建角色 首先,如果你尚未创建角色,那么你需要先创建一个。如所示,你可以使用左侧的滑块来调整角色的不同属性(性别、肤色、发型、胡须、发色以及金发程度)。
Now one thing to note.. these character attributes are fully personal preference, and they do not give you an Advantage nor a Disadvantage in game. NOTE: Your character is cross-server-progression based. Meaning, if you for instance have an Axe from your server you played on, and then join a friend's server; you'll have that axe still. This can be good and bad. Good; because you start with an advantage, but bad because if you lose it in one, you lose it in all. There is no limit to the number of characters you can make; however, they will always be sorted alphabetically, so be sure to remember that when making a new one. HuginOnce you've landed into your Valheim World, it's best to talk to Hugin First. Hugin is your game guide, your spiritual protector, your father- wait. No, not that one. He's a bird. Whenever you make progress in the game, that can be considered a "Landmark" or "Achievement" Hugin will appear and tell you all about it. Now, if you've either already played the game, or don't want him, you can look up a tutorial to turn him off, but to be honest, I don't know why you're reading a beginners guide, if you don't need Hugin's help. Just sayin.. Your First Steps Once InWell perfect; you loaded into a Server. You'll notice you're being carried by a Large Bird. Well one thing to note, if you press m, you can open your map, and notice that they are opening part of your map. This can come in handy by being able to now note if you're close to Water, Meadows, Black Forest, Swamp, etc etc. Once you've landed, you'll first want to talk to Hugin, as mentioned before; and then you'll want to head over to the Lit Up Stone and you'll want to Register the Vegvisir so that you'll know where the first boss Eikthyr is. Now do note, we're not going to explain how to kill all of the bosses until LATER in the guide, so if that's what you need, then skip ahead! Now, before leaving the starting area, you'll want to take a look behind the boss stones, to find some Food, Wood, or Rocks. It's free things, so I don't know why you wouldn't. Now on this note; we need to start collecting resources. The ones available right away are Wood and Stone. These will be vital, and will stay with you for the entire time you play the game. As you cannot chop trees yet without tools, you'll have to pick up wood from Branches on the Ground, or hitting SMALL trees. You can find rocks laying on the ground. Once you have the resources of 3 Wood and 2 Stone, I would make a Hammer First, as it means we can then build a campfire, workbench, and buildings. Now in my personal opinion, early game, Stone Axe is the best tool. Though some creatures (mentioned in another section) do damage differently according to Blunt, Sharp, etc; the Axe allows you to chop things down, and deal damage. The Stone Axe requires 5 Wood and 4 Stone. Once you’ve crafted your basic equipment and thrown together some shelter, your next priority should be your empty stomach. Food in Valheim is a little different from other survival games. While you can’t starve to death, food is still critical for survival. Each different item will either provide you mostly health, mostly stamina, or an even amount of both. For now, you won’t have access to Valheim’s delicacies, but you can get some nice meats and berries. Hunt some deer, boar, and necks in the meadows, and you’ll almost certainly stumble across some raspberry bushes along the way, and maybe some Blueberries if you accidentally touch the Black Forest. If you’re having trouble finding specific animals, I find a lot of necks near water, boars near hills, and deer in thick woods, hopefully you will too. Before moving to the next stage of Valheim, you’ll need to do a fair bit of hunting. For that, I’d recommend making a crude bow as soon as you can. This will make it easier to hunt deer and in general, plus level up your bow skill, which will be helpful later. Once you have some food, hunt deer and boar until you have your crafting bench upgrades and some leather armor. You don’t have to be excessive, but some basic defense will be helpful. Now, it’s time to gear up for the first boss fight. One thing to mention, don't be afraid of Greylings. They're so easy to kill, I'd be comfortable almost saying they're Passive. I've never died to one, and don't plan on ever doing so. 2 | Walkthrough Beating your First BossNow you have a base of operations, some decent food, and entry-level equipment. You’ve outgrown your starting area, so it’s time to look further afield. It's time to become a real man (unless you're a woman), and step up and beat your first boss. Eikthyr is the first boss you can summon in your starting biome, the Meadows. To summon Eikthyr, you'll need to place two deer trophies (from hunting deer) on Eikthyr's altar, which you've marked at the beginning of the game. You can check the "Bosses" Chapter of this Guide, to get information on how to beat Eikthyr! Now, after defeating Eikthyr, hang his trophy on the sacrificial stone at your starting point in the world, which will grant you the Eikthyr power, a buff to your stamina while running and jumping. This comes in handy throughout the game. Default, press f to activate it. A New AdventureWith the first boss defeated, you will have a basic idea of the mechanics and gameplay loop of Valheim. Essentially, you will move to a new biome, establish a base, harvest materials, then defeat what amounts to an area boss. You’ll likely have noticed that there are very few enemies in the meadows, none of which are especially threatening. The Black Forest is a bit of a step up. The enemies won’t cause you too many problems, but the Black Forest on the other hand; can be a bit of a step up. Prepare yourself. Once you get into the Black Forest you need to look for caves that have small entrances. I specify small because there are caves with big entrances, though I’d hesitate to go in them just yet if I were you. In them are a few enemies, skeletons usually, guarding a much-needed treasure – surtling cores. These cores are the most important item in the forest for now, as they are used to build charcoal kilns, smelters, and portals. The first two allow you to make use of the remaining treasures of the forest, namely tin and copper ore. Neither ore is terribly difficult to find, though you’ll have to look in certain areas. Tin usually can be found along rivers and the shoreline, looking like a glistening stone. Copper is typically deeper in the forest, found in large deposits that take a fair bit of mining to get a good haul. Once you have at least 10 cores, some tin, and as much copper as you can carry, it’s time to head back to base. Continuing your GameYou'll continue progressing through the game by following that Basic Mechanic of "Move to the Next Biome, Establish a New Base, Harvest Materials, make new Items, then Defeat the Boss, and move on". But now, once back home with your stations made, it’s time to start making bronze. To do so, smelt the ores you collected, build a forge, then use it to meld your metals together. Bronze ingots are two parts copper, one part tin, so you should try to prioritize copper when taking trips out to the Black Forest. Once you have your first bronze ingot, congratulations! You have now entered the bronze age, your reward being a variety of new recipes available at the forge. New weapons and armor can now be made, in addition to a few handy tools like the cultivator, which allows you to set up a farm. You can also make a cauldron with tin, which you need for advanced foods and mead bases. With the means to create bronze at your fingertips, you’ll need to set off to acquire a good chunk of the stuff. Bronze is needed for a lot of equipment, upgrades, and most importantly, your first boat. That said, it can be quite a pain ferrying your ores from forest to base so often. You may find yourself in this stage for days. Some people only defeat the first boss in two days, and some defeat the first boss in 50. It's your own pace, so don't rush. If this is your first time through, take time and enjoy it. Establishing an OutpostTransporting ores is one of the most frustrating parts of the game. By now, you’re probably sick of the journey to and fro your mining spots. You might have even noticed a particular attribute to ores and metals, namely the fact they can’t be teleported. While irritating, this is done to promote exploration and the creation of minor bases across the world of Valheim. So, it’s time for your first outpost. Where you choose to build your outpost is largely up to you. You could prioritize proximity to ores, or opt for a spot near the sea or on the forest’s outskirts for ease of material transport. I prefer areas near the sea, as I do most of my transportation by boat, and generally find such areas more defensible. Once you have your outpost built, it’s time to gather that ore. Your business in the Black Forest is not over yet, like I mentioned before; so get workin! Beating your Second BossYou’ve forged your bronze equipment, built your new structures, maybe even explored the new foods available to you. Well done. Now it’s time for your second boss fight. The Elder is Valheim's second boss. You can discover its location by interacting with rune stones in Burial Chambers found in the Black Forest. Summon The Elder by using three Ancient Seeds. These can be found in drops from Greydwarf brutes and Greydwarf shamans, and by destroying Greydwarf nests. Burning three Ancient Seeds on The Elder's altar in the Black Forest will summon it. Your fight against the first boss may have convinced you that Valheim’s bosses are no big deal, though such a misunderstanding will sting you, hard. Prepare well for this fight and craft a few fire arrows while you’re at it, they’re indispensable for the fight ahead. Now, after defeating The Elder, hang his trophy on the sacrificial stone at your starting point in the world, which will grant you the Eikthyr power, a power that increases your Wood Cutting Speed. This comes in handy throughout the game. Default, press f to activate it. Work in Progress. Will resume work 2023! (I have a life too you know) ✧ | Base Building Valheim has a rich build menu, of which can be used to create impressive structures to satisfy the needs of any discerning warrior. Not only can players build Houses, Outposts, and other Buildings, but they can also be seen making Massive Bridges, Works of Art, Defenses from the Creatures of Valheim, and custom Tools for looks. (Often seen in Public Servers). Credit to Letozeth for this Portion of the Guide. You can find the original Starter Home Guide here! Easy Starter Home:FoundationFirst thing first, you'll need to place a foundation for your house. This is done by placing a single 1m Wood Pole in the ground, then using the 2m Wood Beam to space it out on top to the next pole location. You'll want a pole in each corner for structural integrity. This will be the floor space of your house, if you want a larger one, then extend this beyond what I've done here.
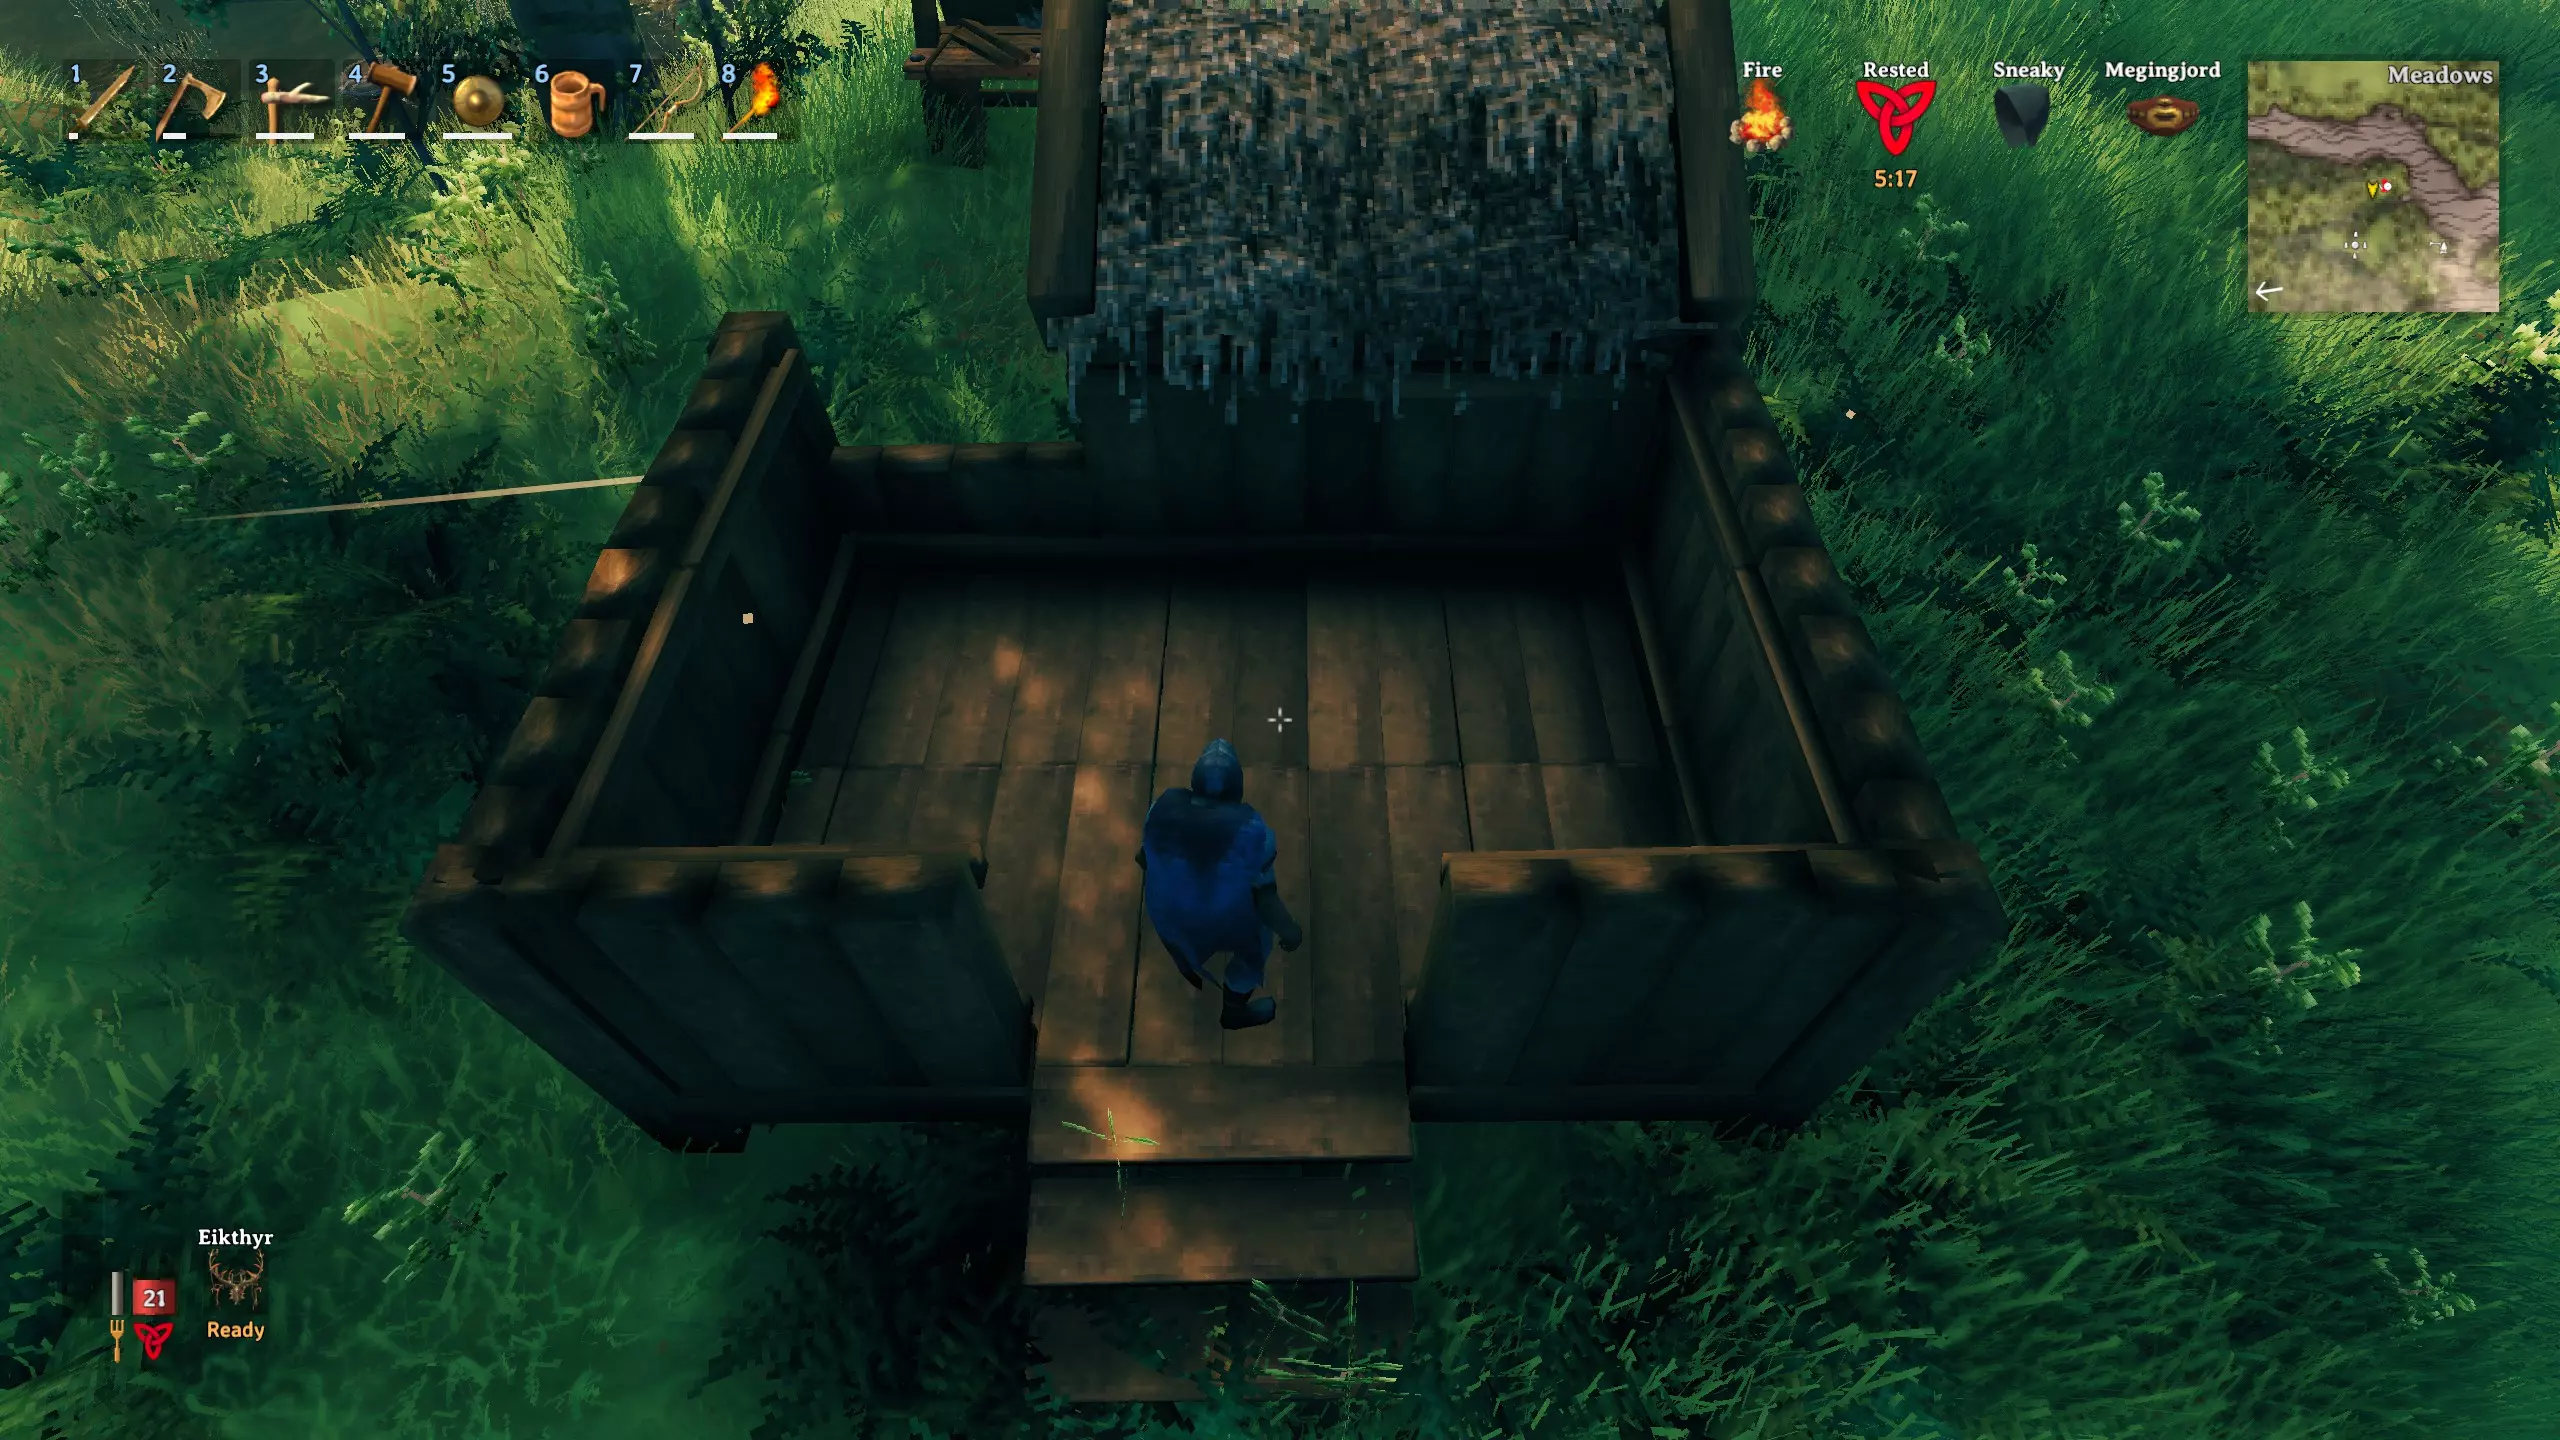
篝火与地面 篝火是获取“休息增益”的必要条件,该增益能大幅提升生命和耐力的恢复速度。 你的庇护所品质越好(舒适度等级越高),此增益的持续时间就越长。不过,你无需将篝火放置在房屋内部,如果你尝试过这么做,肯定会发现屋内很快就会充满烟雾,你也会开始受到伤害。 为避免这种情况,只需将篝火放置在室外,并在其上方搭建一个朝上而非朝下的屋顶,同时在篝火两侧各建一堵墙以抵御暴风雨天气。只要屋顶是朝上的,就能将烟雾导出建筑外。 基本上,只需为你的篝火搭建一个小棚屋即可。由于棚屋体积较小,它能为整个建筑提供保护。要建造一个棚屋,你需要搭建3面墙(左墙、右墙、后墙)和一个45度屋顶。后墙应使用你房屋的其中一面墙。同时,用2x2的木地板填充地基,总共需要6块。
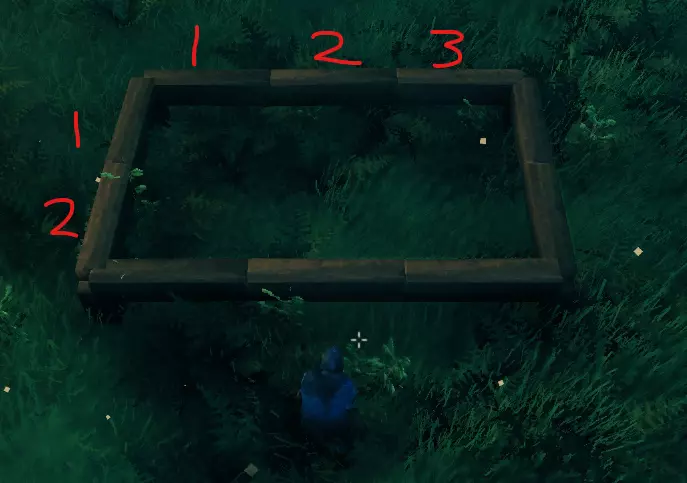
首先在地基顶部的每个角落添加一根2米木杆,然后用木墙填补空白区域。在你想要安装窗户的位置放置“半截木墙”。此外,由于建筑是建在离地的地基上,需在入口处放置一组木楼梯。
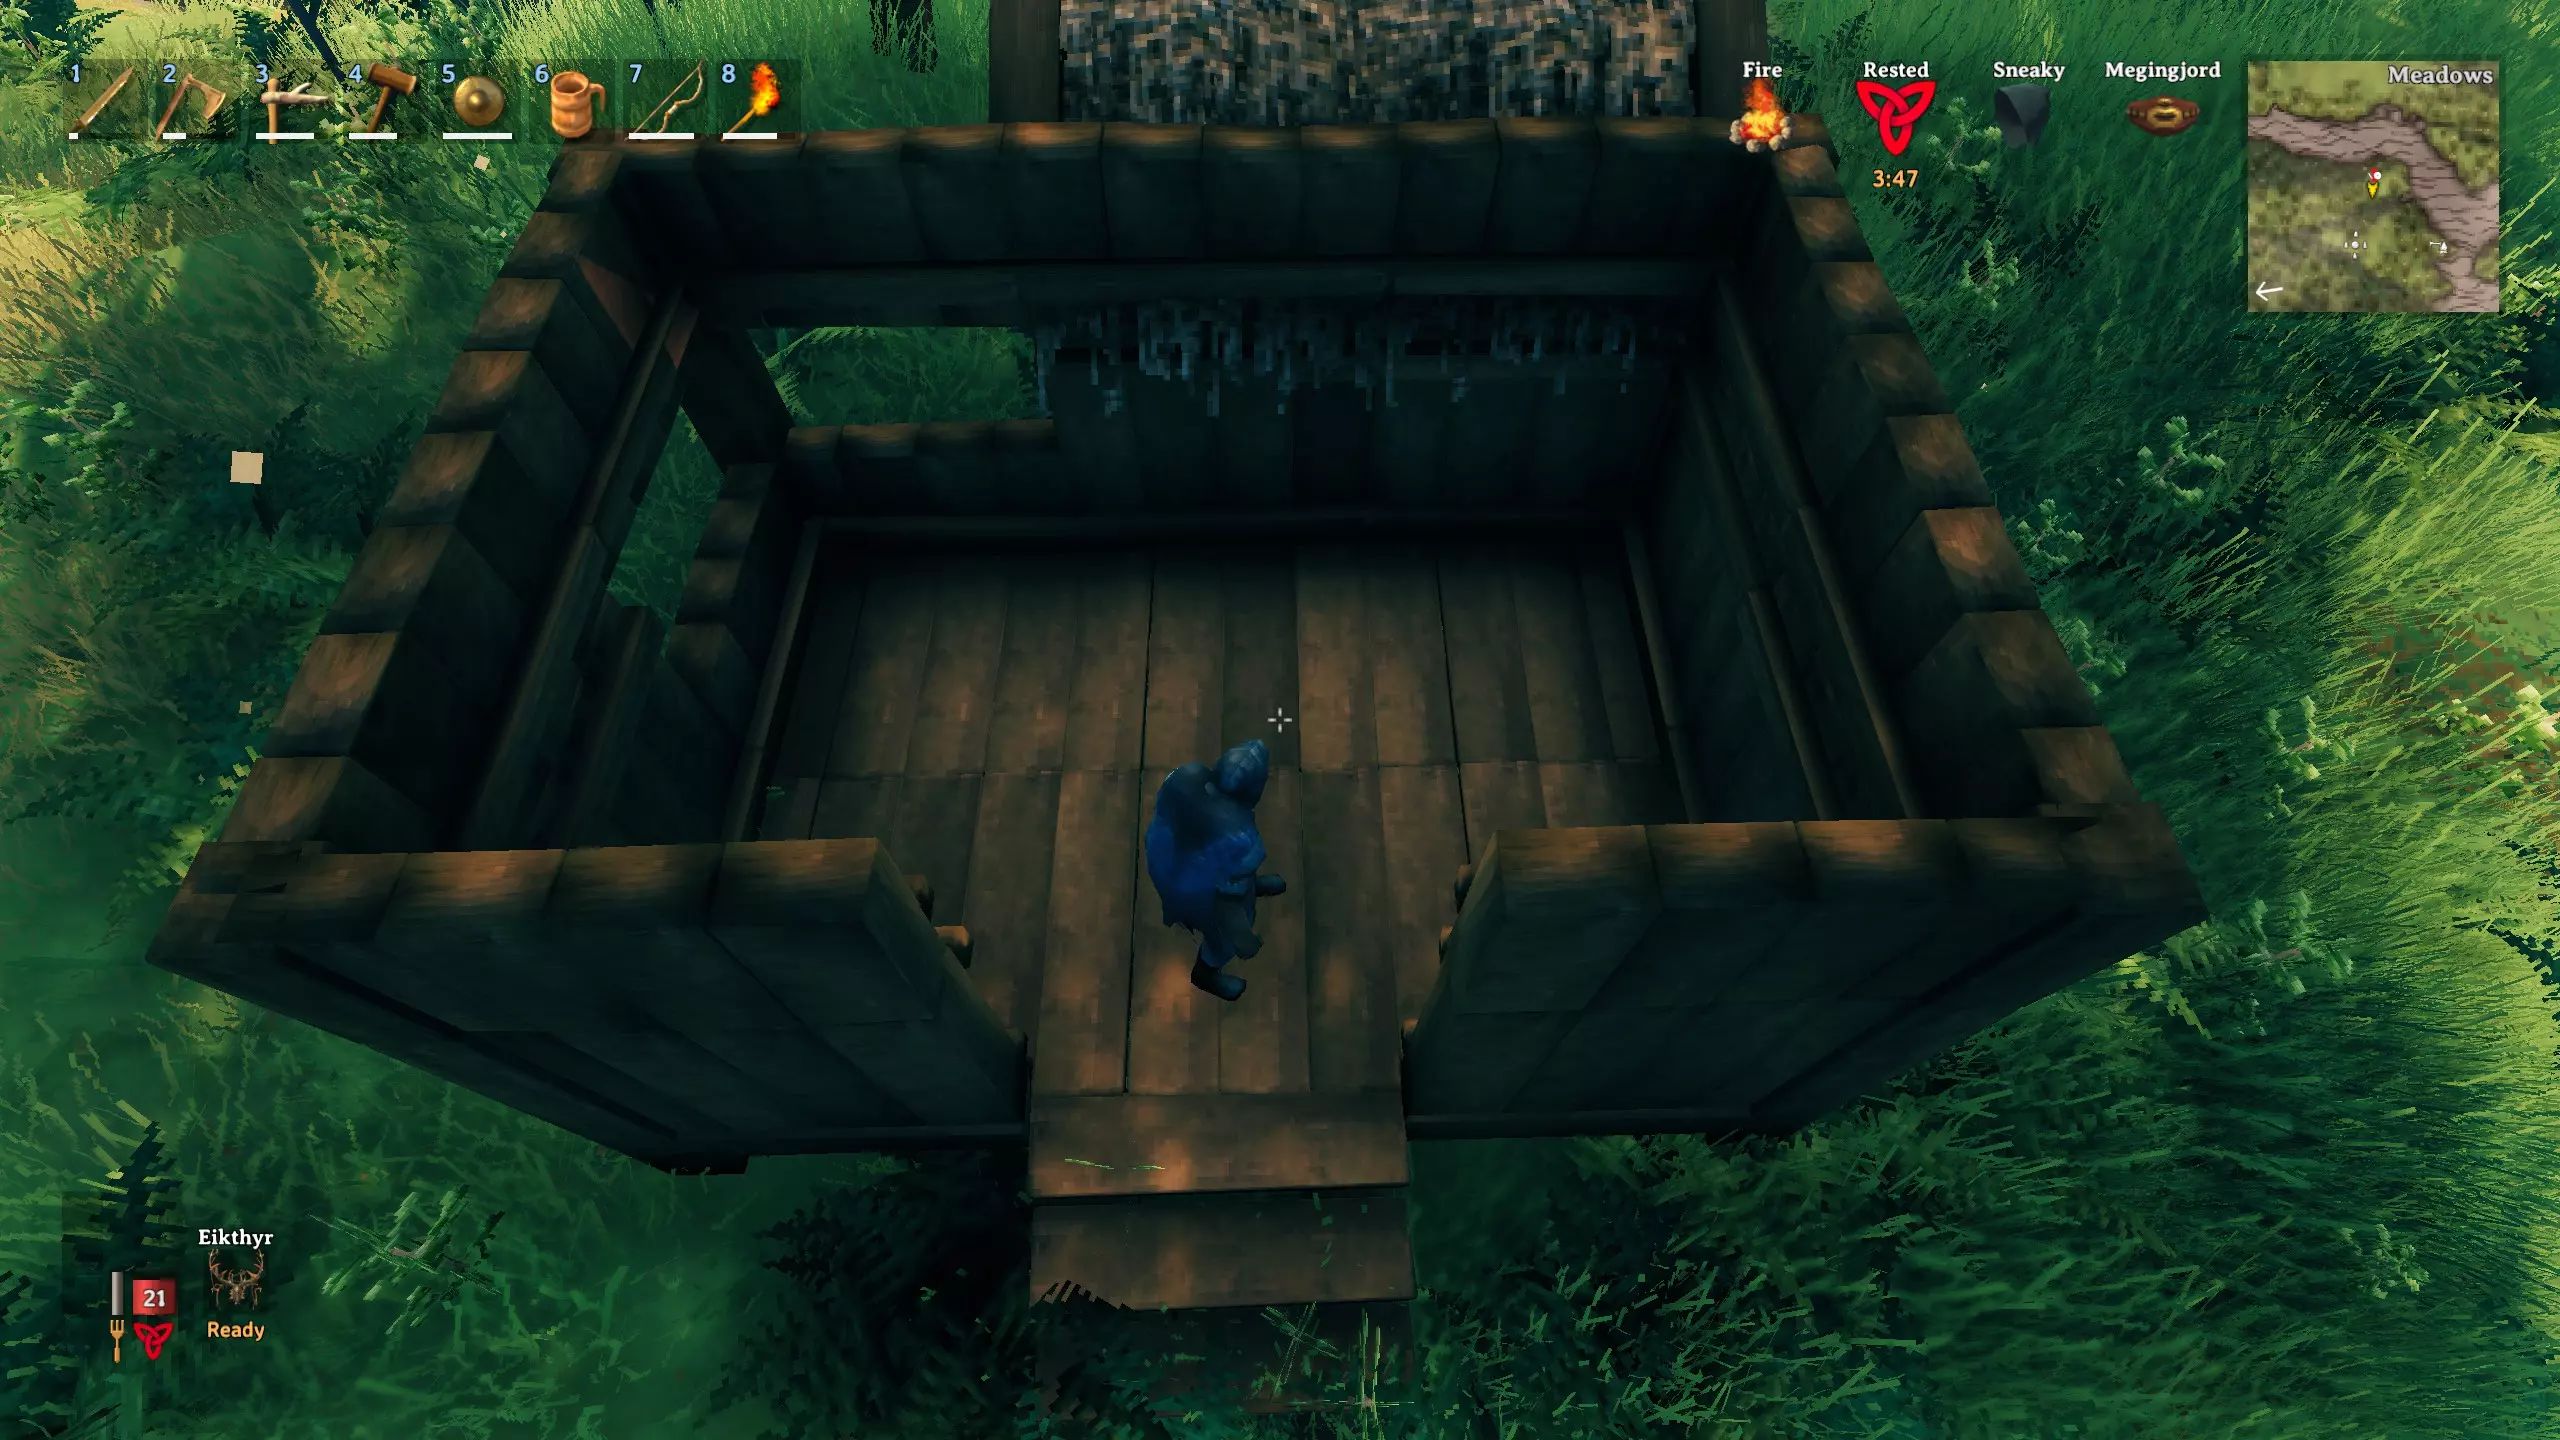
在墙壁顶部再添加一层“木质半墙”来完成墙体建造。 如果你想要更大的窗户,就不要在窗户上方放置任何东西;如果你想要更小的窗户,可以按照我的做法来操作。
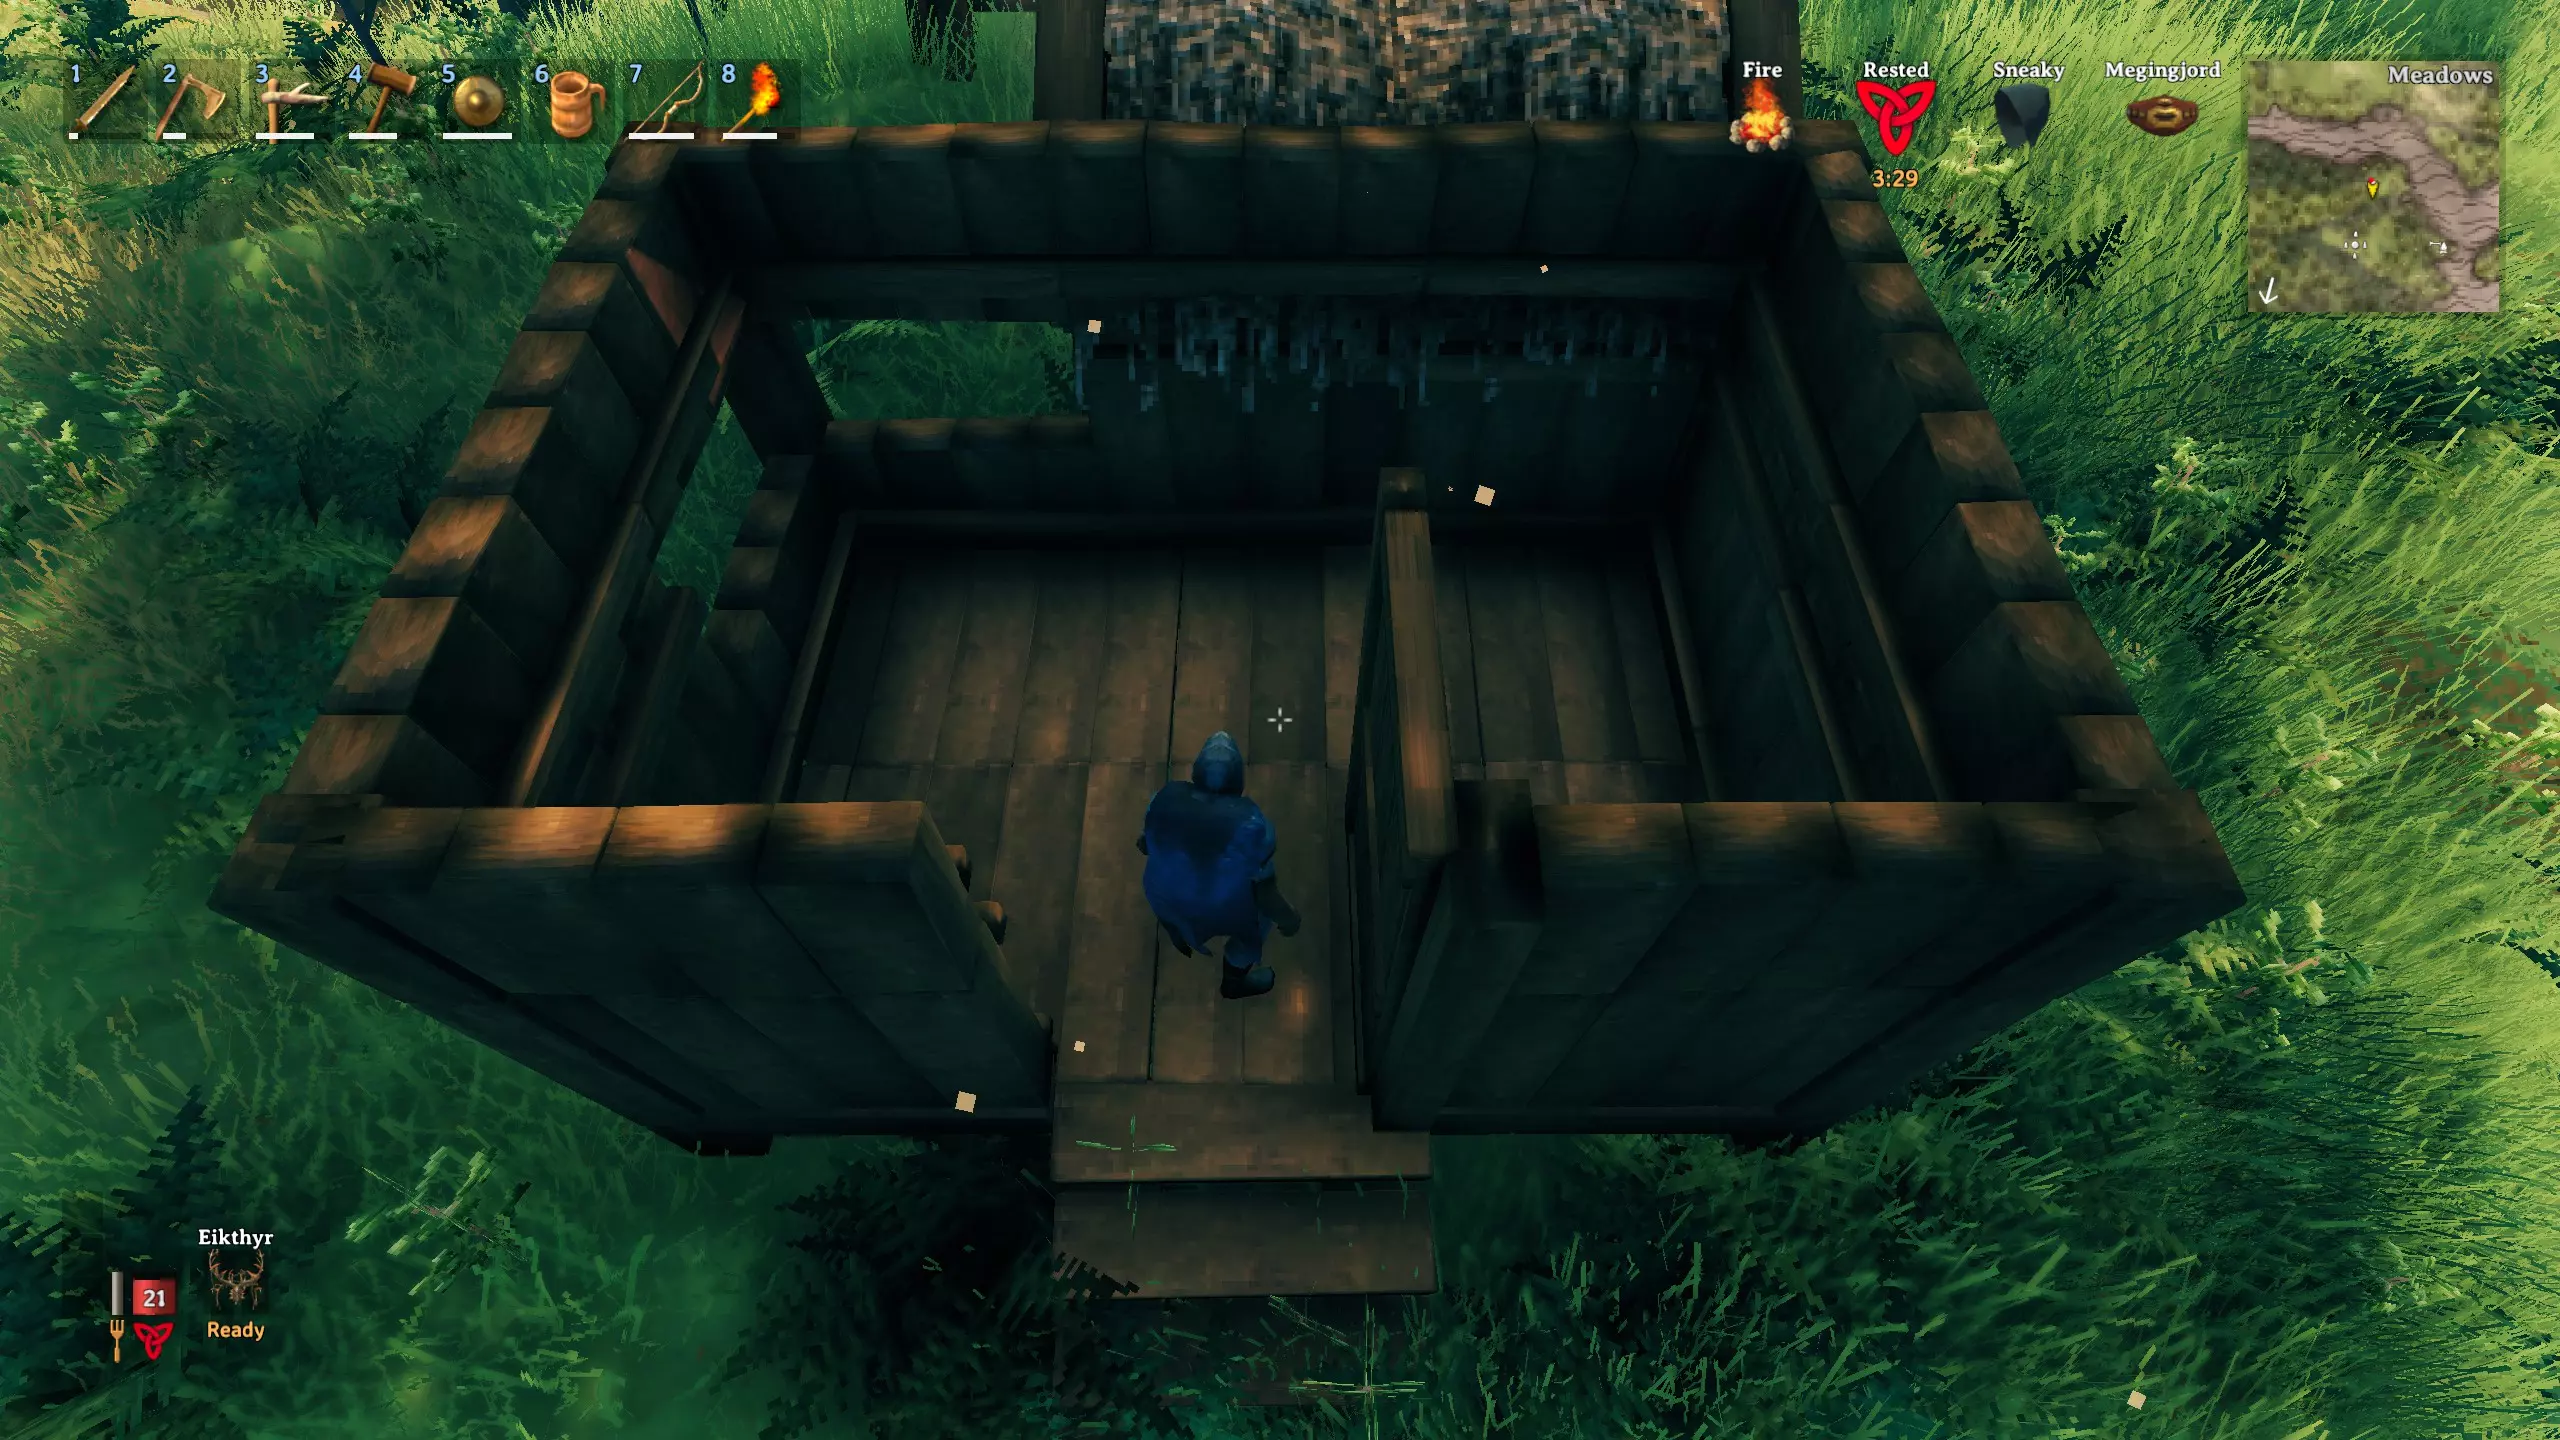
最后,不要建造木门,多花点钱建造稍贵一些的木栅栏门是非常值得的。它看起来更美观,进出房屋也更方便。 家具与屋顶: 首先把你的工作台搬进来。即使摧毁它也不会有任何变化。为自己建造一张床(作为死亡后的重生点),在床前放置一个箱子用于储物,再放一个火把来营造氛围照明。如果你东西实在太多,也可以选择在第一个箱子上方的架子上再放一个箱子,方法是使用两块1x1的木地板。
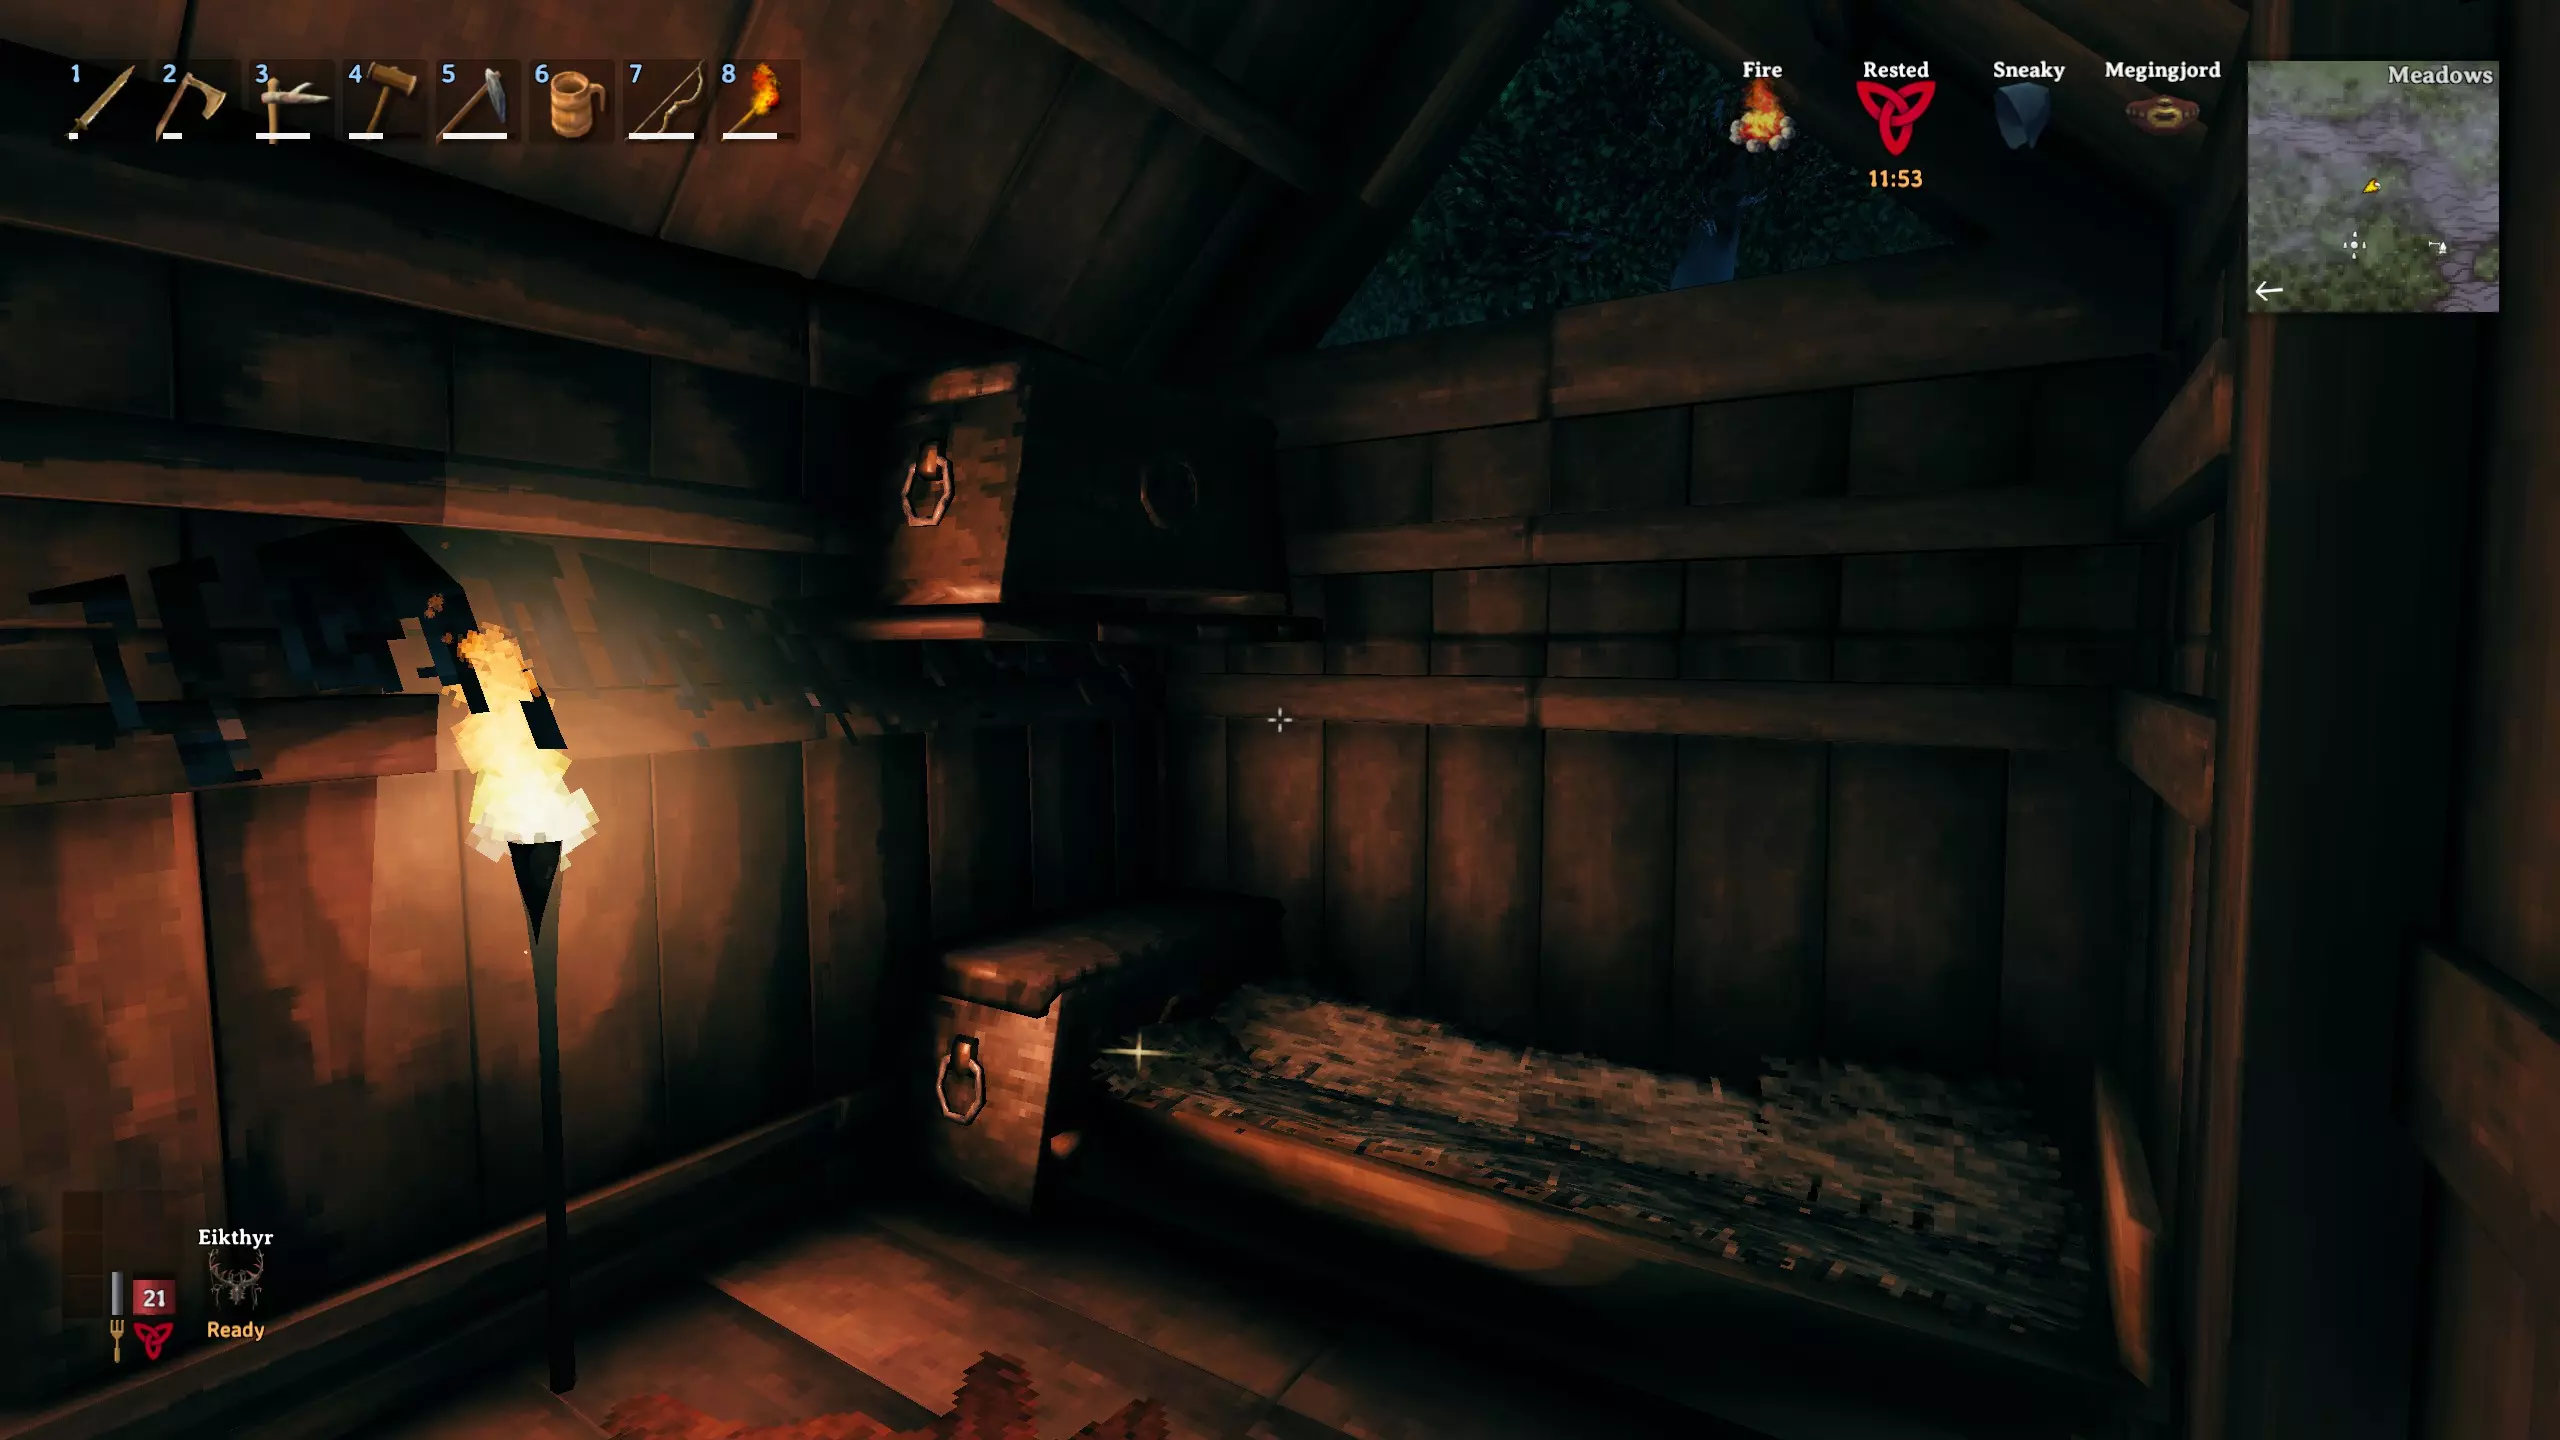
接下来是屋顶部分。屋顶是建筑的收尾部分,能将其转变为庇护所,从而获得强化的休息增益效果。工作台上方有屋顶覆盖,还能解锁额外的制作选项。 你可以选择使用26度茅草屋顶或45度茅草屋顶,这完全取决于你自己的需求。 我个人会选择45度屋顶,这样能获得更高的头部空间。如果是建造较宽的建筑,建议使用26度屋顶,以避免屋顶过高。 ✧ | 首领 以下所有首领图片均来自《英灵神殿》维基百科[valheim.fandom.com],感谢他们提供的素材! 古树长老
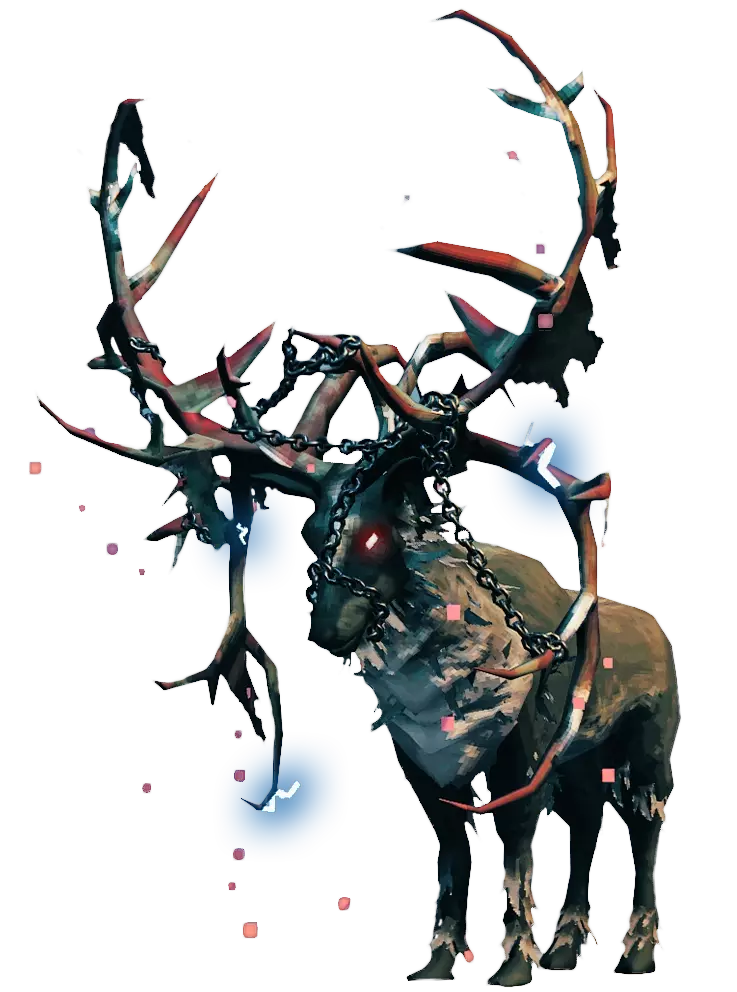
生物群系:草地 奖励: - 硬鹿角,用于制作镐 - 古树长老战利品 - 古树长老之力 古树长老是你在起始生物群系“草地”中可以召唤的第一个 Boss。它是一只巨大的雄鹿,鹿角上缠绕着锁链。要召唤古树长老,你需要将两个鹿战利品(通过猎杀鹿获得)放置在古树长老的祭坛上。 战斗策略: 尽管古树长老体型庞大,但你可以用小型木盾有效格挡它的攻击,所以一定要制作一个木盾。你也可以制作弓从远处射击,但重点是用盾牌格挡,并在它攻击间隙使用燧石矛或斧头等近战武器进行反击。无需追逐它,节省耐力,等它主动靠近你。 长者

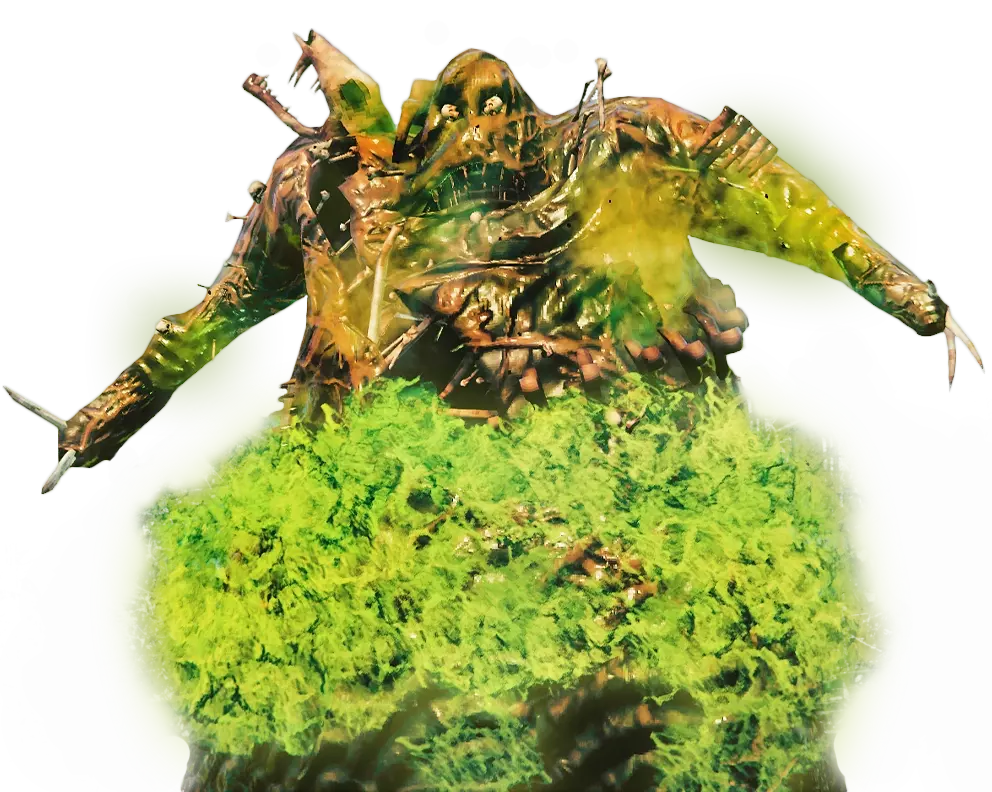
生物群系:黑森林 奖励: - 沼泽钥匙,用于开启沼泽生物群系中的地下城 - 古树战利品 - 古树之力 古树是《英灵神殿》的第二个 Boss。你可以通过与黑森林中发现的 Burial Chambers( burial chambers)内的符文石互动来确定它的位置。使用三枚古代种子即可召唤古树。古代种子可从灰矮人 brute(greydwarf brute)和灰矮人 shaman(greydwarf shaman)的掉落物中获得,也可通过摧毁灰矮人巢穴获得。在黑森林的古树祭坛上焚烧三枚古代种子即可召唤它。 战斗策略: 击败 Eikthyr(Eikthyr)后获得的镐子,在挑战古树前,你应该进行大量的采矿和冶炼。你需要准备好青铜盔甲、一把优质的弓、大量的火焰箭,以及已解锁的治疗药水。火焰伤害是击败“古树长老(The Elder)”的最佳方式,这需要大量的火箭,可能得上百支。 你也可以尝试在他的召唤区域放置营火,因为他在追逐你时可能会踩到营火,从而受到额外的燃烧伤害。一旦他被召唤出来,利用其召唤区域内的柱子阻挡飞来的藤蔓投射物,然后探身用箭攻击他。当他从地面召唤藤蔓时,立即转移位置,并远离藤蔓的攻击范围。尽量避免将他风筝到太远的树林里,因为这可能会引来附近更多的灰矮人或巨魔敌人。你不需要这种麻烦,所以战斗时要待在他的祭坛附近。 骨缚者(Bonemass)
生物群系:沼泽 奖励: - 许愿骨,用于寻找隐藏的宝箱和银矿 - 骨缚者战利品 - 骨缚者之力 骨缚者是《英灵神殿》的第三个 Boss,可在沼泽中找到。要确定其位置,需与沼泽地穴中的符文石互动,而进入地穴需要从“古树长老”处获得的沼泽钥匙。 沼泽地穴中还会有枯骨。你需要收集 10 根枯骨,才能在骨缚者的祭坛处召唤它。 战斗策略: 尽管它是五个 Boss 中的第三个,但实际上可能是游戏中最艰难的一场战斗。骨缚者对所有形式的伤害都有很高的抗性,只有近距离的钝器攻击和远程的冰霜箭能对其造成有效伤害(不过即使是这些也不是特别有效)。对付他时,你需要使用铁甲和钝器,比如钉头锤和锤子(例如雄鹿破坏者),保持足够近的距离以便命中,同时躲避他的攻击。骨缚者在战斗中还会治疗,所以你必须持续不断地进行攻击。即使霜箭造成的伤害不高,它们也能打断他的治疗。 由于毒性攻击的伤害很高,你需要携带大量的抗毒蜂蜜酒,因此在考虑挑战这个 boss 之前,你应该尽早解锁坩埚和发酵桶。霜箭需要前往山脉生物群系收集黑曜石和冰冻腺体,所以你还需要抗寒蜂蜜酒来抵御寒冷。击败波塞摩斯后,将其战利品放置在献祭石上,可获得提升物理伤害抗性的力量。 莫德:开发中 亚格鲁斯:开发中 ✧ | 生物 被动生物:被动生物是指被击杀/采集时会提供资源的生物。它们永远不会攻击玩家。 | 名称 | 主要生成区域 | 基础生命值 | 备注 | | --- | --- | --- | --- | | 乌鸦 | 黑森林 | 1 | 接近时会飞走 | | 鹿 | Meadows、黑森林 | 10 | 接近时会逃跑 | | 鱼 | 海洋 | 0 | 可在水面上拾取 | | 海鸥 | Meadows、黑森林、平原 | 1 | 接近时会飞走 | | 利维坦 | 海洋 | ??? | 每个深渊藤壶40生命值 | | 野兔 | 迷雾之地 | ??? | |靠近时会逃跑 鸡 蛋 ??? 仅通过孵化蛋生成 鸡 无 ??? 长大后会取代小鸡 <3 **敌对生物** 敌对生物是指在被惊动时会攻击玩家的生物。它们被击杀时也会掉落战利品。敌对生物可能有代表其等级的星星:一星生物拥有两倍生命值并造成150%伤害,二星生物拥有三倍生命值并造成两倍伤害。 生物列表即将制作完成!目前有超过40种不同的敌对生物,因此列表不会包含全部,而是收录最常见的种类。 **生物伤害加成** 《英灵神殿》中有三种伤害类型:钝击、穿刺和挥砍。此外还有火焰等元素伤害类型。但现在我们来谈谈近战武器。灰色伤害数值表示该伤害类型效果较低,即敌人对此类伤害有抗性。白色表示效果正常,而黄色则表示敌人对此类伤害存在弱点。
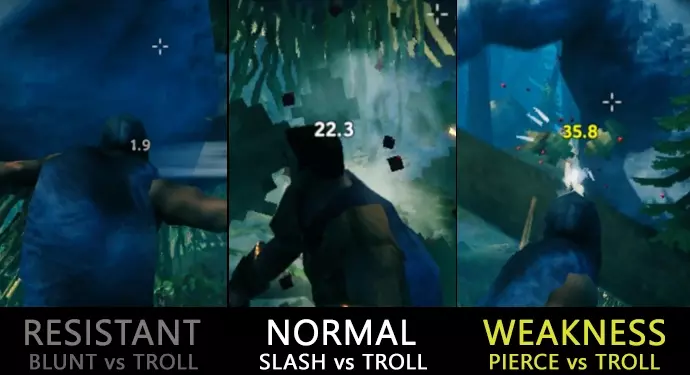
Image Credits[valheim.fandom.com] ✧ | Biomes Meadows Starting Area Full of Trees, Stone, Deer, Boars, and Raspberries Not very dangerous Black Forest Probably the Second Area you Explore Full of Pine Trees, Stones, Mushrooms, Greydwarfs, Trolls, and Mining Deposits Somewhat Dangerous Mountain Ranges Blizzards make you freeze and damage you over time You need to be close to a firepit, or you'll need to wear warm clothing Full of Wolves. They're not nice.. You can find small drakes, werewolves, and an ice giant You can find Dragon Eggs here You can find Iron, Obsidian, and Silver Swamps Full of Slimes, Skeletons, Draugrs, and more Dangerous You can get like poisoned here You can find Iron Here Ocean If you sail far away from the coast, you will move into it Sea "serpents" will come during Night and Storms Sea Turtles (Good to make Harpoon and Knife)Thanks to Airbags for some of the info about the Ocean! Plains Good Source of Find Wood Cloudberries found Here Fulings, Deathsquitos, Lox, Tar, Berserkers Fuling ShamansThanks to kickapuppy for the info about Plains! Mistlands Not enough Information. ✧ | Food Information As you may notice, certain foods have different colored Forks next to them. This symbol signifies whether they give you higher amounts of Health, or Stamina (or both). Yellow - Stamina White - Equal Red - Health Starvation is not possible, but food provides valuable buffs to both the maximum and regeneration rates for health and stamina. As a player can only three types of food active simultaneously, it is important to carefully select the three types of foods consumed based on the activities the player is planning to undertake. For example, consume foods with higher stamina buffs during exploration or resource gathering, and eat foods that give higher health and health regeneration for dungeons and boss fights. Ranked Foods | Per BiomeThis will show the top 3 ranked foods of each biome. Meadows Cooked Deer Meat Boar Meat Honey Black Forest Carrot Soup Cooked Fish/Deer Stew Minced Meat Sauce Swamp Serpent Stew & Cooked Serpent Meat Black Soup (If Serpent Meat isn't available, this should be your first pick!) Sausages Turnip Stew Mountain Serpent Stew & Cooked Serpent Meat Sausages (If Serpent Meat isn't available, this should be your first pick!) Eyescream Wolf Skewer Plains Serpent Stew Black Soup (If Serpent Meat isn't available, this should be your first pick!) Blood Pudding Lox Meat Pie Mistlands Not enough Information! Best CombosHealth Honey glazed chicken Meat Platter Serpent StewThis provides an initial bonus of 245 health and 80 stamina, decaying over 25 minutes. Stamina Fish n' Bread Mushroom Omelette SaladThis provides an initial bonus of 84 health and 255 stamina, decaying over 25 minutes. Balanced Misthare Supreme Honey Glazed Chicken/Meat Platter/Serpent Stew Fish n' BreadThis provides an initial bonus of 195 health and 144 stamina, decaying over 25 minutes. Effect DecayOver time the buffs applied by food will fade away, gradually at first, but rapidly speeding up just as the buff is about to end. In practice this means that when the food is 30% through its duration, its effects are only 90% what they were at the start, and by 60% through they are only 76% effective, finally by 90% of the way through the duration, the food is only giving 50% of its effects. Also, whilst deciding what you're going to eat; note that HP Regenerated Per Tick can differ. Information gathered about some food topics from Valheim Wiki[valheim.fandom.com] ✧ | Common Resources Needed Wood - Obtained by Chopping Trees in the Meadows, Black Forest, and Swamps Core Wood - Gotten by Chopping Pine Trees in the Black Forest Fine Wood - Obtained by Chopping Birch Trees in the Meadows Stone - Collected from The Ground, Stone Rocks, or dropped from Greydwarfs; everywhere Coal - Get it by Burning Food in the Cooking Station, or from the Charcoal Kiln Copper - Mining it from Copper Nodes in the Black Forest Feather - Killing Birds or getting from Chests in the Meadows and Black Forest Flint - Collect it from the ground near rivers or sea in the Meadows Hard Antler - Get it by Killing the First Boss (Eikthyr Boss) in the Meadows Deer Hide - Get it by Killing Deer in the Meadows or Black Forest Leather Scraps - Obtained by Killing Boars in the Meadows Wolf Pelt - Obtained by Killing Wolves in the Mountain Ranges Troll Hide - Obtained by Killing Trolls in the Black Forest Lox Pelt - Gotten by killing Loxs in the Plains Mushroom - Collected from the Ground in the Meadows and Black Forest Raw Meat - Collected by Killing Deer or Boars in the Meadows and Black Forest Resin - Gotten by killing Greydwarfs or breaking small trees in the Meadows, Black Forest, or Swamp ✧ | Guide Changelog Information about the Updates to the Guide. Updates: 1/2/23 + Added Bonemass Guide ( Happy New Years! ) 12/31/22 + Small Updates to Food Information Category 12/25/22 + Small Updates to Food Information Category 12/23/22 + Updated Food Guide (Completed) 12/22/22 + Made Starter Base Guide + Made Creature Damage Buffs + Made "Passive" Creatures + Made Boss Guide + Improved Guide's Depth 12/21/22 + Made Public / Comments Open + Created Guide To Do: - Finish Guide
2026-02-14 07:00:21 发布在  Valheim: 英灵神殿


说点好听的...
收藏
0
0