换一换
换一换 


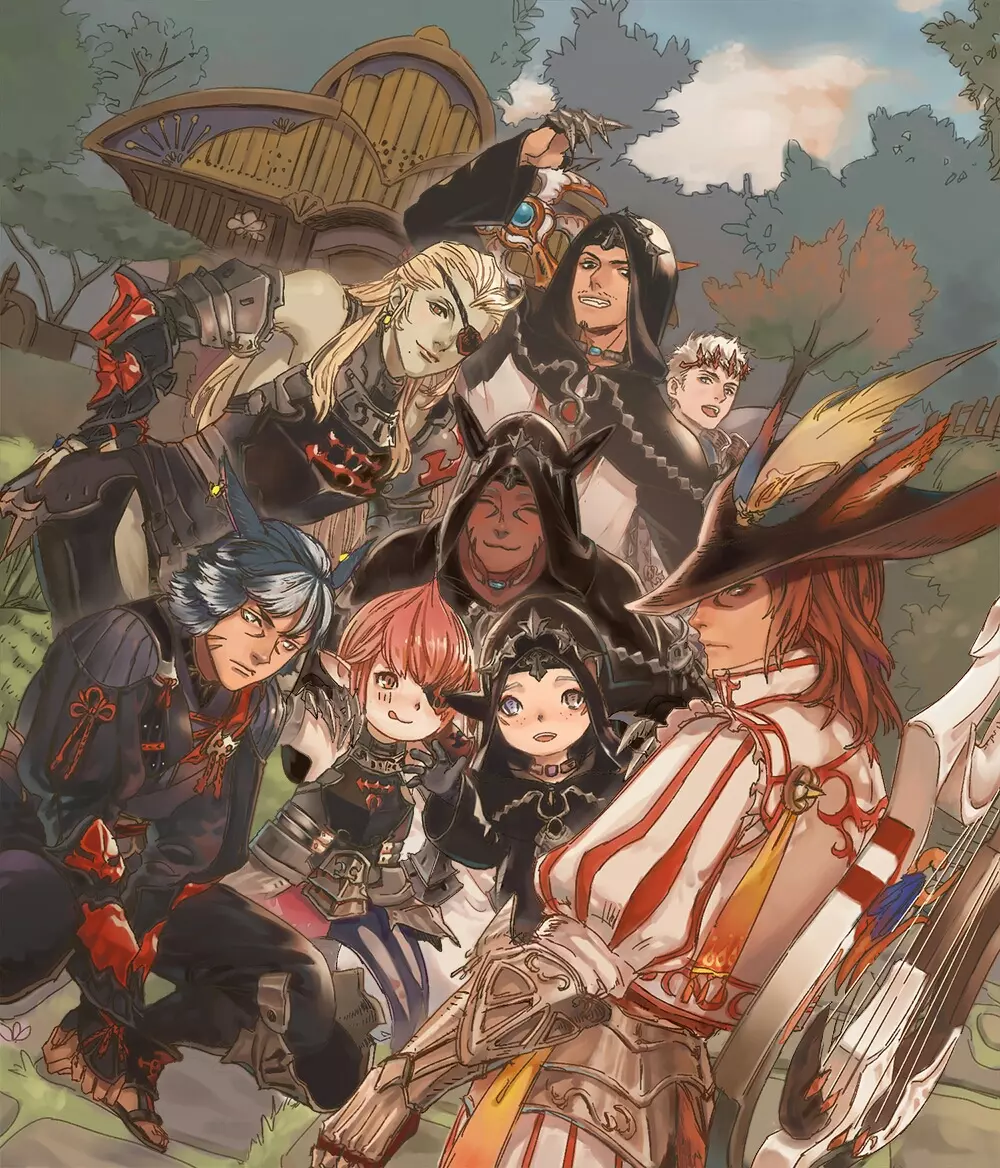
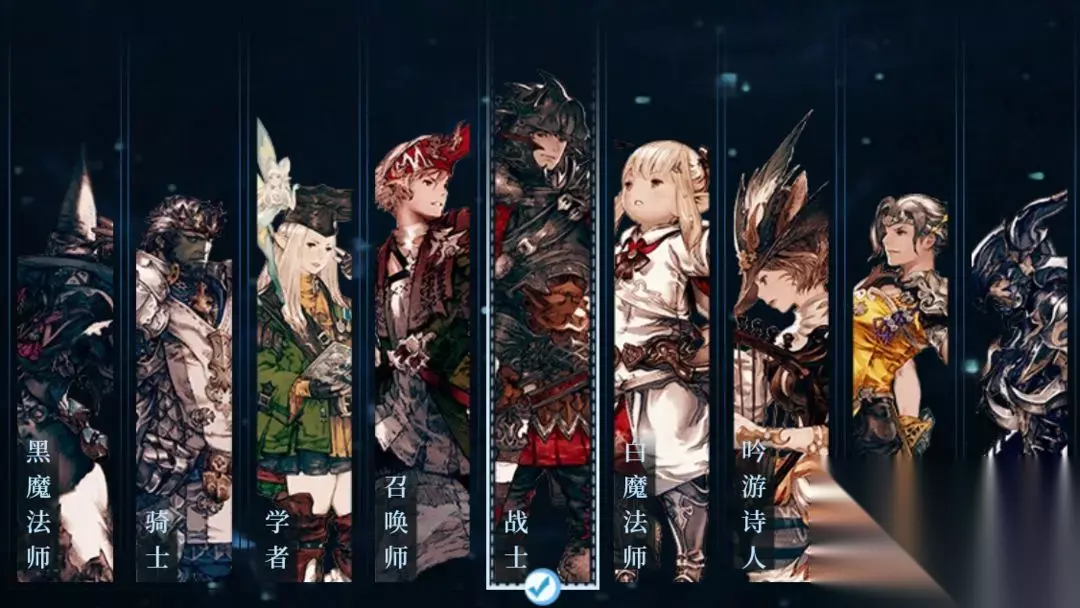
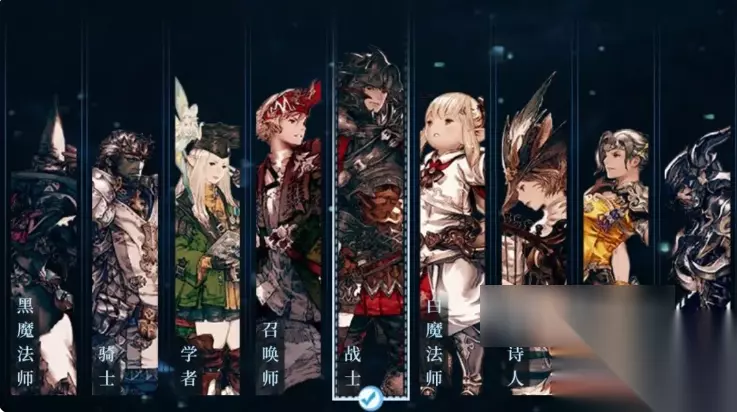
本指南旨在帮助你在《最终幻想14》的冒险旅程中,就选择何种职业做出明智的决定。 需要注意的是,游戏设计师会通过频繁且细微的调整来保持各职业的平衡,而不会大幅改变它们的玩法。我还想强调,游戏的职业系统允许一个角色体验所有职业,因此不必过分纠结于初始职业的选择。如果时间允许,建议你尝试多个职业,以便更好地理解它们之间的互动方式。请记住,本指南展示的是各职业在满级时的状态,大多数职业在达到满级前会感觉不够完善,节奏也较慢。本指南将根据不同的角色类型,把职业划分为5大类别,并全面介绍每个职业的玩法风格、优势、劣势以及任何值得注意的特点。 简介 “我该选什么职业?”——几乎每个人都问过这个问题。 大家好,欢迎阅读我们针对5.0版本更新的官方新手职业概览。本指南旨在帮助你在《最终幻想14》的冒险旅程中,就选择什么职业做出明智的决定。正如前面所说,本指南将根据不同的角色类型,把职业划分为5大类别,并全面介绍每个职业的玩法风格、优势、劣势以及任何值得注意的特点。如果你不喜欢阅读,Larryzaur 发布了一个有趣的视频,也涵盖了基础知识。 如果你是《最终幻想14》的新手,我强烈推荐阅读《新手大师指南》,以基本了解这款游戏的内容。
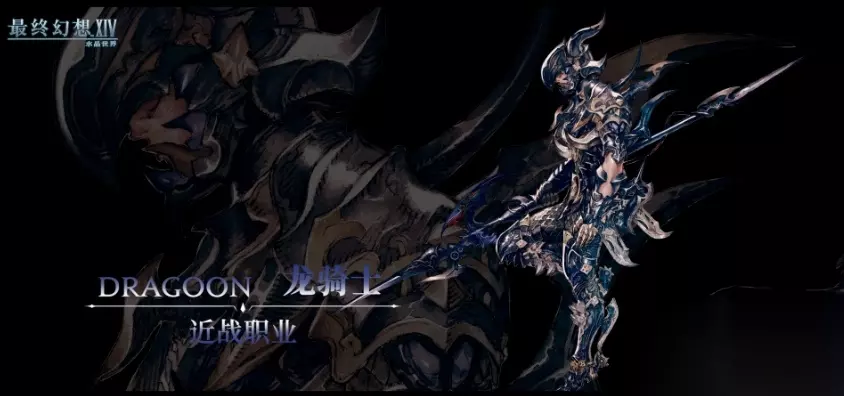
Welcome to the journey of a lifetime. o/ Abbreviations & Concepts Commonly Used Abbreviations & Concepts: 1.GCD - Global Cooldown: A default 2.5-second cooldown timer linked to most abilities to limit ability spam. When one ability tied to the GCD is used, every GCD abilities will be subjected to the cooldown as well. This can be reduced via character stats or job abilities. 2. oGCD - Off Global Cooldown: These instant abilities ignore the GCD restriction, and typically have a resource requirement and or recast timer to prevent spam. 3. Weaving - The act of using oGCDs in between GCDs. 4. DoT - Damage Over Time. 5. AoE - Area of Effect: Affects multiple targets. 6. Rotation - Sequencing of job abilities in order to maximize effectiveness. 7. DPS - Damage Per Second: can also refer to damage output or damage dealer. PDPS stands for personal damage, while RDPS means raid damage. 8. CPM - Casts Per Minute: A measurement of ability usage frequency. 9. Combos - Abilities designed to be used in a set sequence in order to gain bonus potency and effects. [Tanks] Donned in heavy plate armor and armed with an array of defensive cooldowns, the tank role is meant to take the brunt of incoming damage. They are also in charge of positioning enemies while holding their attention. All tanks have a defensive stance that increases survivability and threat generation, at the cost of damage output, as well as an offensive stance that enables higher damage potential. Note that tanking in FFXIV is more methodical than reactionary, as fight mechanics and tank busters are mostly scripted and predictable. Skilled tanks will minimize their use of the defensive stance in order to deal maximum damage, all while planning out their defensive cooldowns in order to safely survive incoming damage. Paladin (PLD) Available from the beginning as Gladiator - starting city is Ul'dah Overview: The classic sword and board tank. Excels at providing support to allies with holy magic, especially compared to the other two tank options. Pros: • Excellent party-wide mitigation/shielding with Passage of Arms[ffxiv.gamerescape.com] and Divine Veil[ffxiv.gamerescape.com] • Cover[ffxiv.gamerescape.com] and Intervention[ffxiv.gamerescape.com] are absolutely amazing single target mitigation support abilities that other tanks can't match • Access to a shield that passively blocks damage • Have access to a powerful single target emergency heal (Clemency)[ffxiv.gamerescape.com] Cons: • Weak snap-aggro generation, so a paladin cannot be the main initiator in combat without taking a heavy penalty in opener damage output • No gap closer • Low aoe damage output • Switching between the defensive & offensive stances is clunky, as they are tied to the GCD Special notes: • Paladins have potent defensive cooldowns but have generally lengthier recast timers • They can use Sheltron[ffxiv.gamerescape.com] to guarantee blocks with their shields frequently, making them excellent at mitigating large singular hits • Requires an above average amount of key binds to play their kit effectively due to having many situational abilities • The only tank with a powerful ranged attack, Holy Spirit[ffxiv.gamerescape.com], but the cast time of it can make it tricky to use while handling mechanics • Can become impervious to most damage with Hallowed Ground[ffxiv.gamerescape.com], and bypass certain mechanics that other immunities cannot Rotation & Playstyle: • Alternate between a physical and magical damage phase • Has a DoT that is naturally maintained through its rotations • The overall rotation is very rigid and straightforward, as complexity comes from effectively utilizing support/utility skills • Blocking enables shield swipes for extra damage, so a skilled paladin will time their blocking skills to maximize casts Warrior (WAR) Available from the beginning as Marauder - starting city is Limsa Lominsa Overview: The axe-wielding, offensive tank. Does comparatively more damage than its counterparts by roughly (4-5%), and the preferred pulling tank currently. Pros: • High average damage output for single & multi targets • Stances are oGCD, so switching stances mid-combat feels smooth and reliable • Unchained[ffxiv.gamerescape.com] negates the damage penalty attached to the defensive stance, which allows the warrior to generate a high amount of threat without giving up much damage • Ability to quickly close in on enemies with Onslaught[ffxiv.gamerescape.com] • Party shield (Shake it Off[ffxiv.gamerescape.com]) has a short 90 seconds cooldown Cons: • Otherwise powerful mitigation ability Inner Beast[ffxiv.gamerescape.com] can only be used while in tank stance. • Tank stance, (Defiance[ffxiv.gamerescape.com]), does not offer direct damage resistance, and the bonus healing only works for healing spells, not abilities. • No co-tank support utilities Special notes: • Holmgang[ffxiv.gamerescape.com] is an ability with a relatively short cooldown that can prevent the warrior from dropping below 1 health for a short duration. This allows the warrior to frequently survive otherwise lethal attacks with proper healing support • Relatively low amount of key binds required to play, due to skills having two forms depending on the warrior's stance Rotation & Playstyle: • Lower average CPM • 10-second burst windows every 90 seconds via Inner Release[ffxiv.gamerescape.com], which negates resource costs and guarantees critical direct hits for 10 seconds • One damage buff to maintain • Heavily punished for not properly executing or delaying the burst phases Dark Knight (DRK) Requires access to Ishgard in Heavensward expansion and start at level 30 Overview: Wielding the greatsword, the dark knight excels in fights with heavy magic damage, and empower strikes with dark magic. There is a heavy emphasis on mana management in order to maximize damage and survivability Pros: • The dark knight can use The Blackest Night[ffxiv.gamerescape.com] to create a powerful shield around the user or an ally very frequently, making it one of the best defensive abilities in the game • Dark Mind lets the user heavily mitigate magic damage on a short 1-minute timer • Can approach enemies quickly using Plunge[ffxiv.gamerescape.com] Cons: • No party-wide shield/mitigation • Dark Mind[ffxiv.gamerescape.com] does nothing for physical damage, so its strength is very encounter-specific Special Notes: • High CPM due to the amount of Dark Arts[ffxiv.gamerescape.com] spam • Double resource management with mana and blood • Absolutely stellar at tanking dungeon mobs with its aoe kit once max level • Dps stance and tank stance can be both enabled at the same time Rotation & Playstyle: • Primarily only uses a 3-hit combo while weaving in Dark Arts to empower various abilities for extra damage • Requires frequent weaving and double weaving due to the sheer amount of Dark Arts usage • Resource management is key in dealing damage and being able to activate key abilities in the right time [Healers] Keeps the party alive through healing and resurrection. Simpler damage abilities to compensate for the added healing responsibilities. Healers in FFXIV are not meant for sustained healing. They rely primarily on their oGCDs to counteract predictable incoming damage while maximizing their damage uptime, contrary to many other MMO titles. White Mage (WHM) Available from the beginning as Conjurer - Starting city is Gridania Overview: The most straight-forward, regen based healer. Has overall high potency damage and healing GCDs, but relatively low mobility. Pros: • Great mana management tools like Thin Air[ffxiv.gamerescape.com] which negates mana cost for a short while, and Assize[ffxiv.gamerescape.com] that recovers 10% mana per cast • Mana efficient GCD heals • Holy[ffxiv.gamerescape.com] is an excellent aoe that stuns and deal high damage to enemies around the user. Especially great for dungeons with packs of enemies • Benediction[ffxiv.gamerescape.com] can instantly restore an ally to full health Cons: • No party wide mitigation abilities • Very few instant-cast spells, so weaving and movement windows are more limited compared to the other two healing jobs • No party damage utility Special notes: • A very beginner friendly healing job due to having very straightforward abilities, and is the only one you can choose from the start. However, the limited oGCD options can sometimes make the job surprisingly difficult in high level content • Have a large variety of aoe healing tools, but in practice, are tricky to utilize, as most of them are tied to the GCD or have limited range • The developers have commented about reworking the current job gauge, lilies, as it is currently not a useful/reliable resource to aid with the job's performance Rotation & Playstyle: • Two dots to maintain • Throws some hard-hitting rocks • Limited mobility options, so smart positioning to maximize healing and damage potential is key Scholar (SCH) Available from the beginning as Arcanist in Limsa Lominsa, which is a dps role until obtaining the job change at level 30. Shares levels with the Summoner job Overview: Tactical healer with incredible flexibility, strong mitigation tools, and a powerful pet to aid with healing. An integral part of the SCH kit involves gathering Aether charges with Aetherflow[ffxiv.gamerescape.com] and using unique abilities that consume them. Pros: • Incredibly potent oGCDs options • Excellent mana management thanks to Aetherflow[ffxiv.gamerescape.com] and Energy Drain[ffxiv.gamerescape.com] • Pets provide very substantial healing, which allows the scholar to dedicate more time and resources to deal damage • Excellent mobility having two instant cast spells to use in place of the primary dps GCD, at the cost of a little damage potential. • Provides great offensive party support with Chain Stratagem[ffxiv.gamerescape.com] and Fey Wind[ffxiv.gamerescape.com] Cons: • Relatively expensive and inefficient GCD heals • Pet management controls can be clunky or unresponsive • Weak aoe sustained aoe healing, especially when out of Aether charges. Special notes: • Suffers more from button bloat than most other jobs in the game due to the combination of pet commands and numerous utility spells • The more powerful skills all cost an aetherflow stack to use. Smart usage of resources is needed to be effective Rotation and Playstyle: • Two dots to maintain • Has to position the pets properly in order to maximize their effectiveness • Uses an arsenal of aetherflow abilities to mitigate/heal/deal damage at a set pace. Over consuming aether stacks can leave the scholar out of options Astrologian (AST) Requires access to Ishgard in Heavensward expansion and start at level 30 Overview: Time-mage inspired, versatile healer. Astrologians can draw and manipulate cards from their divining deck in order to empower allies with powerful buffs. Has two healing stances to either provide heals over time or shields. Pros: • Have some of the best rdps increase buffs in the game • High mobility due to Light Speed[ffxiv.gamerescape.com] eliminating cast time for a short duration, and has a shorter primary damage GCD cast time (Malefic[ffxiv.gamerescape.com]) • Can provide damage mitigation with Collective Unconscious[ffxiv.gamerescape.com] and shields in Nocturnal Sect[ffxiv.gamerescape.com] Cons: • Semi-dependent on rng to draw the right cards • Tend to struggle more with mana due to limited mana management tools • Slightly weaker aoe damage options in dungeons Special Notes: • Can be both regen or shield based healer based on stances • A very powerful aoe ability, Earthly Star[ffxiv.gamerescape.com], requires a 10-second priming time to reach maximum potential, so planning and party cooperation is critical • Due to the limited aoe coverage of certain healing options, the overall healing output can be severely hindered in an uncoordinated environment Rotation & Playstyle: • Only one, high-duration dot to maintain (Combust[ffxiv.gamerescape.com]) • Card actions are woven constantly between dps spells, and the astrologian has to evaluate party status and available cards on the fly in order to maximize their effectiveness [Melee DPS] All jobs in this category excel at dishing out damage up close. They have combo attacks that have positional bonuses when used from the flank or rear. Melee dps roles are highly mobile, and mastering them requires being comfortable using that mobility to maintain uptime and proper rotation on targets. Dragoon (DRG) Available from the beginning as Lancer - starting city is Gridania Overview: Supportive spear wielding damage dealer. Specialized in flashy jump attacks and long combo chains. Offer great party damage utilities. Pros: • Critically, the only job in the game that can apply a piercing resistance down debuff for jobs with piercing damage (bards, machinists, and red mages) • Can massively boost party critical hit rate with Battle Litany[ffxiv.gamerescape.com] and increase a friendly player's personal damage with Dragon Sight[ffxiv.gamerescape.com] Cons: • Lower than average in potential pdps • Jumps (Jump[ffxiv.gamerescape.com] | Spineshatter Dive[ffxiv.gamerescape.com] | Dragonfire Dive[ffxiv.gamerescape.com]) have animation locks that prevent the character from moving for a short period Special Notes: • Blood for Blood[ffxiv.gamerescape.com] (Now Lance Charge) is a double-edged buff that can sometimes mean taking lethal damage from incoming damage • Blood of the Dragon[ffxiv.gamerescape.com] is an essential status maintained by performing combos, losing it will be detrimental to a dragoon’s dps Rotation & Playstyle: • A fixed, 11-GCD rotation with a fair dose of positional requirements • DRG has a self-buff, a resistance debuff, and a DoT that all need to be maintained full-time, but these are a natural part of your main single target rotation • Slowest GCD among all melee dps, but has numerous oGCDs for single & double weaving Ninja (NIN) Available after reaching level 10 on another job, and picking up the quest: My First Daggers[ffxiv.gamerescape.com] in Limsa Lominsa Overview: High utility, dagger-wielding dps. Has the ability to create a variety of elemental Ninjutsu[ffxiv.gamerescape.com] spells by weaving various combinations of hand-signs called Mudras. Pros: • Trick Attack[ffxiv.gamerescape.com] increase target’s damage taken by 10% for 10 seconds every 60 seconds, providing huge rdps increase when coordinated properly • Shade Walker[ffxiv.gamerescape.com] and Smoke Screen[ffxiv.gamerescape.com] are great tools to aid in aggro management, and even open up more damage centric openers on tanks • Provides slashing resistance down debuff Cons: • Ten Chi Jin[ffxiv.gamerescape.com] allows the ninja to cast 3 enhanced ninjutsu back to back, but requires the user to be stationary for an extended period of time • Lower pdps vs most other dps jobs in the game, so contribution will be hinged on proper utility usage Special Notes: • Failing the rear-positional requirement on Trick Attack or using it at a poor time is fairly detrimental to a ninjas rdps contribution. • Huton[ffxiv.gamerescape.com] increases attack speed by 15%, making ninja one of the faster-paced jobs available. Rotation & Playstyle: • Only three positional attacks • One simple tri-hit combo with 3 different finishers • High CPM job with heavy amount of weaving using oGCDs and mudras • One of the jobs most negatively affected by high latency/ping due to how rapidly mudras and oGCDs have to be executed Monk (MNK) Available from the beginning as Pugilist - starting city is Ul'dah Overview: High damage, positional oriented melee dps using fist weapons. Has very fast GCDs thanks to the maintenance of Greased Lightning[ffxiv.gamerescape.com]. Has a non-traditional combo system by having each weapon skill shift the form the monk is in, opening up different weapons skills in the process. Pros: • High average dps • Minor physical damage party buff via Brotherhood[ffxiv.gamerescape.com] • Offer bonus party healing with Mantra[ffxiv.gamerescape.com] Cons: • On the lower end for utility • Failing to manage the Greased Lightning buff correctly during an encounter is detrimental to damage output • No ranged attacks • No disengage tool Special Notes: • One of the busiest jobs during downtime due to Meditation[ffxiv.gamerescape.com] and Form Shift[ffxiv.gamerescape.com] to help manage resources and Greased Lightning • Can be one of the hardest jobs to optimize at the highest level, due to the potential complexity to use Tornado Kick[ffxiv.gamerescape.com] properly • Enmity reduction skill aside from the role action is costly to use Rotation & Playstyle: • Constantly dancing between the flank and rear position to maximize positional bonuses, and unleashing a flurry of punches and kicks to deal high damage • Has a slower phase with Riddle of Fire[ffxiv.gamerescape.com] • Dot, debuff, and damage buff is maintained fairly naturally through executing weapon skills Samurai (SAM) Available in Ul'dah once level 50 on another job, and own the Stormblood expansion - The Way of the Samurai[ffxiv.gamerescape.com] Overview: The katana-wielding, “selfish” dps. Provides next no utility but has the highest damage potential vs other melee roles. Heavy emphasis on resource planning and usage. Pros: • Amazing personal damage output • Good mobility • Only two weapon skills with positional requirements • Powerful aoe options Cons: • Only utility is the ability to put up slashing debuff, which two other jobs have access to • TP dependent for sustaining aoe damage, especially at lower levels Special Notes: • Only melee that has a skill with a cast time, Iaijutsu[ffxiv.gamerescape.com] Rotation & Playstyle: • Has multiple opener combinations based on skill speed stats and encounter timings • Has to maintain a pair of damage and speed buff with a relatively long duration • Generates Sen & Kenki by executing three different weapon skill combos • Iaijutsu, the combo finisher, has three different effects based on the number of Sen consumed • Kenki is primarily used to fuel oGCD attacks woven between GCDs [Physical Ranged DPS] Specializes in dealing damage from afar, while being some of the most mobile jobs in the game. Both available jobs provide powerful utility tools for the party, such as Palisade[ffxiv.gamerescape.com] to reduce incoming physical damage, and restore mana through Refresh[ffxiv.gamerescape.com]. Usually tasked with handling more mechanics compared to other jobs due to having superior mobility and ranged attacks. Bard (BRD) Available from the beginning as Archer - starting city is Gridania Overview: A bard deals damage from afar with a bow, and has access to an extensive arsenal of supportive tools. It is primarily a DoT centric job with a multitude of proc based offensive skills that offer a very dynamic and fast paced combat style. Pros: • Being ranged and having only one skill with a cast time, bards can basically move about the battlefield without restrictions • Offensive utilities include increasing party crit rate through songs, direct hit rate with Battle Voice[ffxiv.gamerescape.com], and enemy damage taken with Foe Requiem[ffxiv.gamerescape.com] • Defensively, they can increase the effective HP of the party via Troubadour[ffxiv.gamerescape.com], dispel selective debuffs with Warden's Paean[ffxiv.gamerescape.com], and increase target's healing taken by spells through Nature's Minne[ffxiv.gamerescape.com] Cons: • The only source of piercing debuff is locked behind a DRG's Disembowel[ffxiv.gamerescape.com], which plays a critical role in a bard's personal damage output Special Notes: • Personal damage output is also more heavily hinged on party composition and gear than average due to the job's heavy synergy with offensive utilities and critical hit rate Rotation & Playstyle: • A loose rotation structured around three distinct song phases • Dynamic gameplay due to the high numbers of proc-based abilities the player have to micromanage • Highest average CPM of any job when played at a higher level Machinist (MCH) Requires access to Ishgard in Heavensward expansion and start at level 30 Overview: Burst damage style ranged dps using firearms. Can summon a turret that deals sustained single target or aoe damage. Has a reloadable ammo resource and a unique heat meter that empowers various ballistic attacks. Pros: • Super mobile, having only one ability with that needs to be channeled • Dismantle[ffxiv.gamerescape.com] is a powerful mitigation tool that reduces enemy damage for a short duration • Hypercharge[ffxiv.gamerescape.com] on your turrets[ffxiv.gamerescape.com] give a vulnerability debuff on targets hit Cons: • Punished quite harshly for messing up its strict 1-minute rotation cycles, and making mistakes can quickly snowball into heavy loss in damage output • Ping and raid composition dependent to do optimal rotation/damage Special Notes: • The rotation changes completely once max level via the use of Flamethrower[ffxiv.gamerescape.com] to enter overheat window • Developers have spoken about reworking the job significantly in the next expansion Rotation & Playstyle: • One of the most rigid and strict rotations of any job • The rotation revolves around the skill Wildfire[ffxiv.gamerescape.com] that amplifies all damage dealt by the user during its 10-second duration, so the player is tasked to fit in as much damage as possible during that window for a huge burst of damage every minute • The other resources, ammo and heat, are all used to support the wildfire window to maximize its damage • Execution is heavily affected by latency due to strict weaving requirements in the burst window [Caster DPS] High damage magic attackers. All three caster jobs have a varying amount of cast time to limit their mobility, and have ways to reduce incoming magic damage through the use of Addle[ffxiv.gamerescape.com] and Apocatastasis[ffxiv.gamerescape.com]. They can also transfer their mana to an ally with Manashift[ffxiv.gamerescape.com]. Summoners and Red Mages are also capable of reviving downed players during battle. Red Mage (RDM) Available in Ul'dah once level 50 on another job, and own the Stormblood expansion - Taking the Red[ffxiv.gamerescape.com] Overview: The ranged & melee caster hybrid. The red mage uses black & white magic to build up mana in order to unleash a powerful melee combo with a rapier against foes. Every other spell that has a cast time normally will be instant, thanks to its unique mechanic, Dualcast[ffxiv.gamerescape.com]. Pros: • Grants bonus party damage through Embolden[ffxiv.gamerescape.com] • Can heal players with Vercure[ffxiv.gamerescape.com] and revive them with Verraise[ffxiv.gamerescape.com] • Decent mobility through the help of Dualcast, as well as being able to revive players more rapidly than any other job in the game Cons: • Lowest pdps among the three available caster roles • Displacement[ffxiv.gamerescape.com] requires a large safe space to execute and has a lengthy animation lock, so using it incorrectly can lead to positioning problems or death Special Notes: • Only mana recovery tool is through the role action Lucid Dreaming(LD)[ffxiv.gamerescape.com], so overspending mana on expensive spells like Verraise or being revived without LD available can lead to awkward situations • Generally considered the easiest dps job in the game, as there is no buffs/debuffs to upkeep, and recover from death well due to its simplicity. Rotation & Playstyle: • Elemental magic are used to build up mana, while oGCDs are woven behind Dualcast windows • The rotation is dynamic and priority-based due to certain spells locked behind procs • Mana is consumed to fire off flashy, enchanted melee combo attacks that lead up to a powerful magic finisher based on black & white mana balance (Verholy[ffxiv.gamerescape.com] | Verflare[ffxiv.gamerescape.com]) Summoner (SMN) Available from the beginning as Arcanist, and shares levels with the SCH job - starting city is Limsa Lominsa Overview: Dot based caster with burst phases and pets. The goal is to build resources and Summon Bahamut[ffxiv.gamerescape.com] by using a similar resource system as SCH, Aetherflow[ffxiv.gamerescape.com]. Pros: • Highly mobile for a caster by having a wide variety of instant-cast spells • Relatively high single target damage, and exceptional sustained aoe damage • Ability to revive downed players • Provides small dps and healing boost through Devotion[ffxiv.gamerescape.com] • Pets can boost magic or physical damage through Contagion[ffxiv.gamerescape.com] or Radiant Shield[ffxiv.gamerescape.com], respectively Cons: • Incredibly punished by death, due to possibly resetting multiple layers of resources that take a long time to gather, on top of having to resummon the pet Special Notes: • Requires a long setup before engaging in combat to set up a proper opener Rotation & Playstyle: • 2-minute loops • Spend 3 aether stacks to enter Dreadwyrm Trance[ffxiv.gamerescape.com] to deal minor burst damage • Enter Dreadwyrm trance twice in order to Summon Bahamut[ffxiv.gamerescape.com] and deal devastating burst damage Black Mage (BLM) Available from the beginning as Thaumaturge - starting city is Ul'dah Overview: Turret-style, staff-wielding mage specialized in black magic (Fire, Ice, Lightning). A "selfish" job with the highest damage potential in the game, at the cost of having no utility and relatively restricted mobility. Pros: • Highest potential dps job in the game • Recovers mana quickly via Umbral Ice[ffxiv.gamerescape.com] so death is not as punishing • Great burst aoe damage Cons: • No party utility aside from role actions • No ability to revive downed teammates • Longer than average cast times on most abilities, so when movement tools are exhausted, damage potential will drop significantly during movement heavy mechanics Special Notes: • Manaward[ffxiv.gamerescape.com] is a powerful shield that sometimes allows black mages to ignore otherwise fatal mechanics • Cannot recover mana via most means in Astral Fire[ffxiv.gamerescape.com] • Being effective in combat will typically require extensive fight knowledge and planning, so it is generally more challenging to bring this job to the progression stage of high-end content. This is further exacerbated by having no combat resurrection Rotation & Playstyle: • Wants to minimize movement in order to maximize time spent casting • Maintains dot damage with various varieties of Thunder[ffxiv.gamerescape.com] • Fire III[ffxiv.gamerescape.com] & Blizzard III[ffxiv.gamerescape.com] (or Transpose[ffxiv.gamerescape.com]) to switch between fire & ice • Deal massive damage during the fire phase while quickly recovering mana with Umbral Ice • Have to adapt rotation on the fly due to having traits that have a chance of eliminating the cost and cast time of certain spells Conclusion Thank you for reading! Keep in mind that everything you've read thus far is rudimentary, so if you want to go more in-depth, please add me or Jeff and we'd be more than happy to give you personal advice or answer any questions to the best of our ability. I will be personally updating this guide to Shadowbringers sometime in the first quarter of 2020, but if you need an up to date gunbreaker guide right now just reference the top of this guide for a link to one I highly recommend.