换一换
换一换 


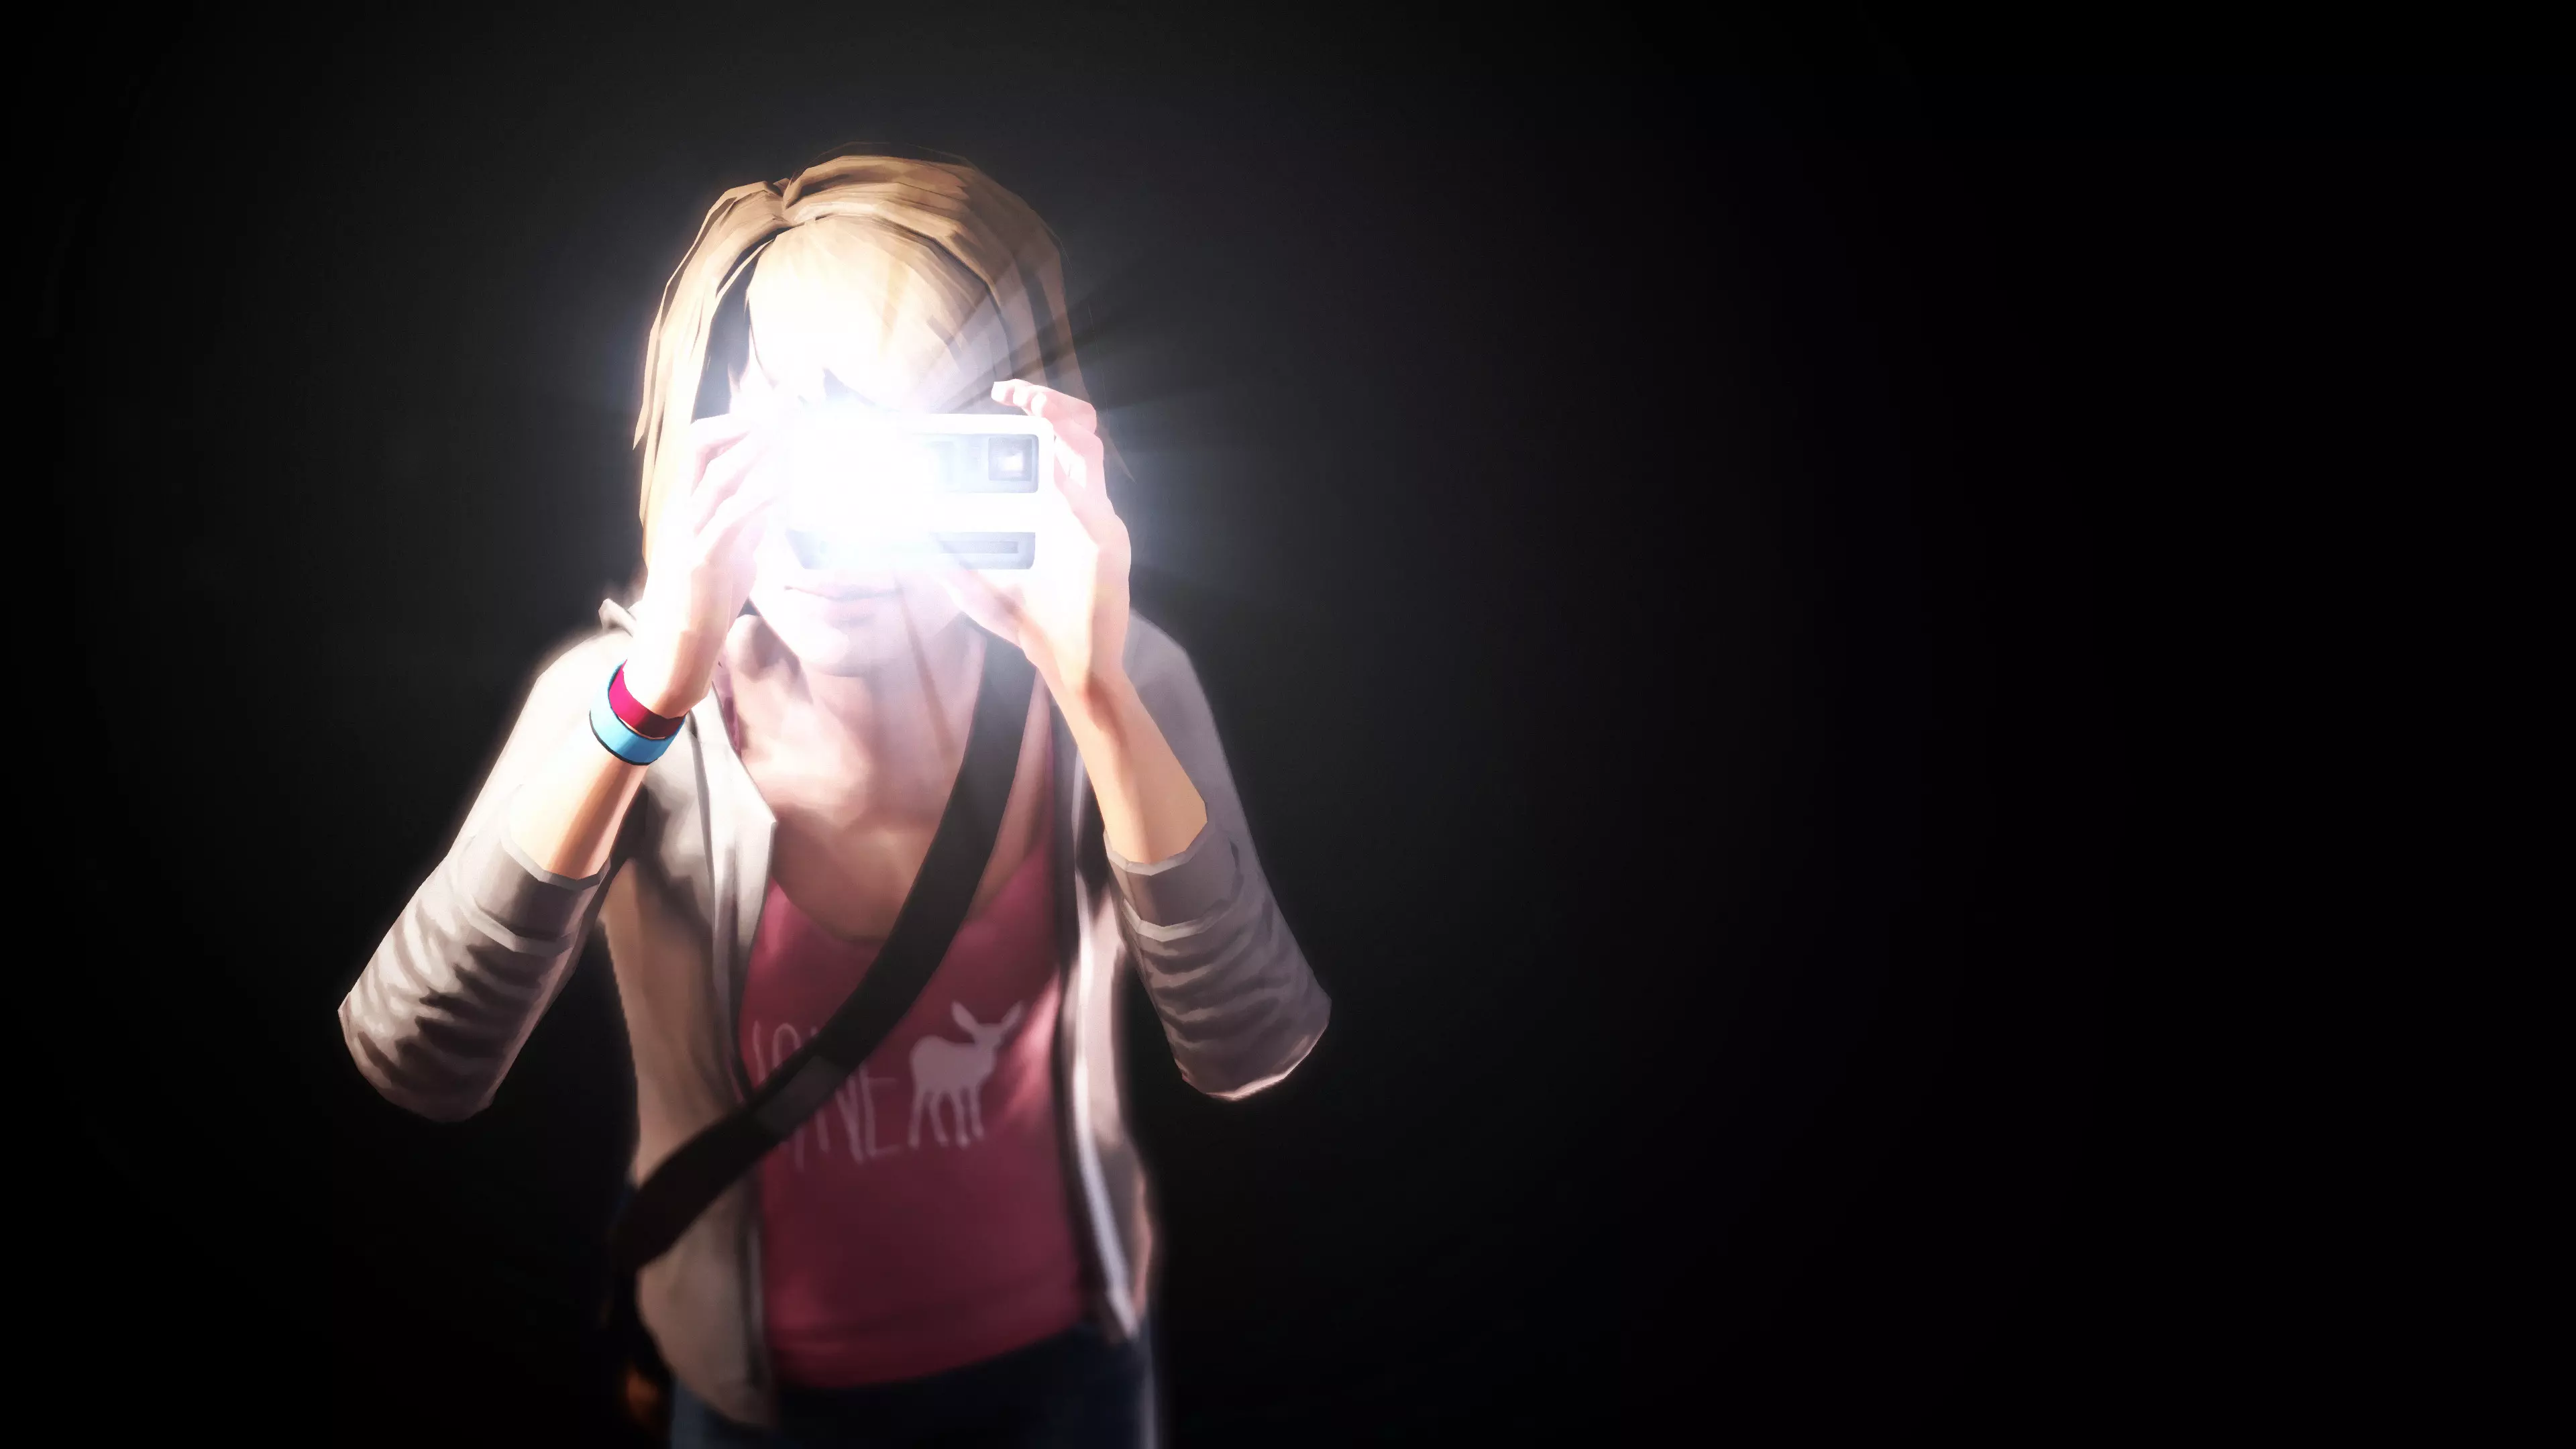
使用这款截图工具,像专业人士一样拍摄阿卡迪亚湾。包含:相机控制、景深、色调映射、HUD 切换、时间速度调节等功能。 开始使用 此模组需要【Cheat Engine】。它用于修改内存中存储的值。换句话说就是作弊,但在本案例中,我用它来移动相机并更改游戏的一些视觉属性。 注意:切勿在多人/在线游戏中使用此程序。如果你是多人游戏玩家,可能会面临 Steam 的 VAC 封禁。在本指南所述用途下使用【Cheat Engine】是安全的,但为保险起见,截图完成后请关闭它。 所需文件 【Cheat Engine】 【奇异人生:摄影师模组 v1.3】
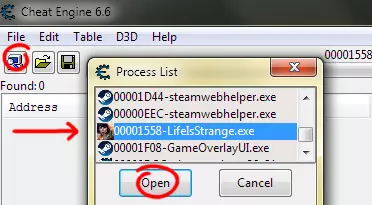
获取所有文件后,请按照以下步骤操作: 启动《奇异人生》 启动CE修改器 点击CE修改器中高亮的电脑图标(或通过“文件>打开进程”),选择“LifeIsStrange.exe”,将CE修改器附加到《奇异人生》进程 在CE修改器中加载下载的文件“LIS_PhotoMod1.3.ct” 按文件中指示的F2键激活相机脚本 按PageDown键解锁自由视角,使用小键盘按键移动 为获得最流畅的相机体验,请在CE修改器的“热键”设置中将“按键轮询间隔”和“延迟”设为0(见下图)

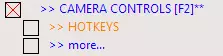
如果“>> 相机控制”旁边没有红色“X”,说明脚本未激活且出现了问题。这可能是因为未遵循所有步骤、我这边出了差错,或者有补丁导致其失效。如果是这样,我很抱歉,并且可能正在努力修复。否则,请继续阅读。 相机控制 当相机控制处于激活状态且相机已解锁时,你可以使用小键盘按键进行移动。按键很多,因此为节省篇幅,有2个修改键可改变小键盘按键的功能。你必须同时按下修改键和小键盘按键。基本上,不使用修改键时,你可以调整自身位置。PLUS键可让你像使用三脚架上的相机一样平移或瞄准目标,ENTER键则能让你像使用轨道车一样移动。你可以围绕目标旋转或环绕,并执行好莱坞式的轨道变焦。热键 PageDown:自由视角开关 C、F、T(按住时):慢速移动、快速移动、极快移动(【按键】+ALT可切换) 下方为小键盘按键(无修饰键) 8、5、4、6、9、7:向前飞行、向后飞行、向左飞行、向右飞行、向上飞行、向下飞行 3、1:仅镜头向上、仅镜头向下 2:切换高度锁定 (修饰键:PLUS) 8、5、4、6:向上瞄准、向下瞄准、向左瞄准、向右瞄准 9、7:放大、缩小 1、3、2:向左倾斜、向右倾斜、【重置倾斜】 (修饰键:ENTER) 5、8、6、4:向上旋转、向下旋转、向左旋转、向右旋转 9、7:靠近/远离目标 3、1、2:推拉变焦放大、推拉变焦缩小、【重置变焦】 需要了解的是,镜头始终指向一个隐形目标。移动是通过移动镜头或目标中的一个,或两者协同完成。你可以通过使用旋转键来判断目标的位置。当你首次解锁相机时,目标会位于玩家所在的位置。提示:将相机移至拍摄对象附近,然后使用【拉远】而非【向后飞行】,并使用旋转键调整拍摄角度。这样可以保持目标静止。 此模组还能记住九种相机设置,帮助你拍出完美照片。如果你需要在游戏中进行其他操作后回到之前的位置,这一功能可以帮你保存当前位置。热键如下: 热键 下方为标准数字键 ALT+【数字1至9】:保存相机设置 【数字1至9】:加载已保存的相机设置 0(零):撤销(加载上一次设置) 这些设置仅在Cheat Engine开启时保存到内存中,不会保存到文件。因此,下次打开时这些设置将不会保留。不过,如果游戏崩溃且你未关闭修改器,仍可使用这些设置。重启游戏,在修改器中重新打开游戏进程。接下来会出现两个提示,依次点击“是”:“保留当前地址列表/代码列表?”和“存在一个或多个自动汇编条目或已启用的代码更改...” 玩家控制 启用【相机控制】后,若麦克斯挡住你的镜头,可按H键隐藏(或取消隐藏)她。你也可以使用ALT+E(向右转)和ALT+Q(向左转)精确调整她的位置。如果你想要特定姿势,在【玩家设置】中有一个名为“闲置姿势倒计时”的选项。将其锁定为零(设置值为0并勾选方框),麦克斯就会保持姿势。她选择的姿势是随机的,你需要耐心尝试才能获得想要的姿势。快捷键 隐藏或显示麦克斯:ALT+Q、ALT+E 向左、向右转动麦克斯 如果需要让麦克斯绕过无形墙体且不使用“幽灵模式”(高级玩家会理解),可以使用“跳跃”键(激活【其他】>【重力(跳跃)】)。按住空格键会反转重力,以此“跳过”墙体。松开空格键即可下落。只要下方有坚实地面,麦克斯可以从任意高度下落而不受伤害。若遇到非坚实地面,按空格键停止下落。回到坚实地面后,按G键(零重力)。之后再次经过同一区域时就不会下落了。 快捷键 空格键:向上漂浮(释放后下落) G:切换重力开关 景深
Depth of Field (DOF) is used in Life Is Strange during cutscenes to focus attention on something or someone. I've made DOF settings available during normal play. I, J, K, L will edit the foreground settings. Adding ALT will change the background. Focus with J and L. Notice L with the hard edge focuses and J with no edge blurs. I and K are used to move the focus area forward and backward. With COLOR AND EFFECTS active, the DOF hotkeys are: HOTKEYOToggle DOF on/offPLoad DOF preset (Max and foreground out of focus)C, FSlower, faster adjustmentsLForeground focus moreJForeground blur moreIPush foreground area forwardKPull foreground area backALT+LBackground focus moreALT+JBackground blur moreALT+IPush background area forwardALT+KPull background area backNFocus near and blur far (N for near)MFocus far and blur near (M for far as in "mountains") Cutscene settings can be changed while no-menu paused (see "Picture-Taking Tips" later in the guide for details). If you want your settings to persist, you should lock the values by ticking the boxes next to them. Cutscenes have their own preferred settings and may try to overwrite your settings. There will be brief moments where the two "fight it out." Tonemapping As with DOF, with COLOR AND EFFECTS active you can change the tonemapping in game. Just press PAGEUP to start color-editing mode (cancel freecam) and use the numpad keys to edit a specific color range. Like camera settings, there are 9 save slots for color which I have preloaded with settings. You can write over these if you choose. Color presets: HOTKEYPAGEUPColor-editing mode on/offBelow, standard numbers1Warm colors (red tint)2Cool colors (blue tint)3Vintage (washed out shadows and yellowed)4Autumn (enhanced reds, browns, yellows)5Black and white - Warm6Black and white - Cool7Sepia (yellowed black and white)8Noir (hard black and white)9Default colorsALT+[number 1 to 9]Overwrite slot with current color settings[number 1 to 9]Load preset or overwritten values0 (zero)Undo (load previous settings) Like the camera, there are modifiers which change the tonal range to edit and each has a special key. With no modifier you can edit highlights and desaturation. With PLUS you can edit midtones and gamma. With ENTER you can edit shadows and contrast. Finally with MINUS, you can edit overall tint (no special key). Color-editing hotkeys: HOTKEYPAGEUPColor-editing mode on/offC, FSlower, faster adjustmentsBelow, numpad numbers7, 4RED up, down8, 5GREEN up, down9, 6BLUE up, down3, 1*Special up, down(mod: none)RGB: highlights, *Special: saturation(mod: PLUS)RGB: midtones, *Special: gamma(mod: ENTER)RGB: shadows, *Special: contrast(mod: MINUS)RGB: tint (after saturation), *Special: none Shooting In Hi-Res You might be asking yourself how to create 4K (or larger) shots. Here's how: GeDoSaTo. It allows you to render the game at a higher resolution than your monitor. First, it renders at some crazy resolution you choose, say 3840x2160 (or 8000x2000 for example assuming your video card can handle it). Then, it shrinks the image down to fit on your sceen. This is called hotsampling or downsampling. Screenshots can be taken at the higher resolution. OPTIONAL FILE GeDoSaTo[blog.metaclassofnil.com] Here's a brief run-through of the steps needed to shoot in hi-res: Install and start GeDoSato (don't start the game yet) Add Life Is Strange to the whitelist Add resolutions you want to shoot Bind a screenshot button Edit your Life Is Strange .ini file (optional) Use my mod to unlock any aspect ratio (optional) First, GeDoSaTo has something called a whitelist which is a list of games you want to make GeDoSaTo available to. You don't always want it on because it will slow down your game. So, click on "Whitelist" (not the User one) and add Life Is Strange by adding this line: LifeIsStrange || Life Is Strange Next, you need to decide what resolutions you want to be able to shoot. 4K is 3840 by 2160 which is about 8 megapixels. Calculate the megapixel count by multiplying Length × Height and divide by 1,048,576 (2^20). You'll need to think about megapixels (MP) when shooting. Life Is Strange will begin to stutter beyond 10 MP. After 20 the stuttering gets almost unplayable. So, aim for 8-15 MP. Here are some standard sizes you can add when you click on "Edit Settings" (2, 3.5, 8, 14 MP): renderResolution 1920x1080@60 renderResolution 2560x1440@60 renderResolution 3840x2160@60 renderResolution 5120x2880@60 Now, you will need to bind a screenshot key. Delete the "#" in front of the line "#takeFullScreenshot VK_DIVIDE" and you will be able to use the "/" (divide) key to take a hi-res screenshot. If you want it to be a different key, you'll have to look up the VK codes[www.kbdedit.com] and change it. Screenshots by default are saved here: "C: GeDoSaTo screens [GAME]" Having done the above, you should be able to start Life Is Strange and see/select the new resolutions in display settings. Don't forget GeDoSaTo needs to be running before Life Is Strange each time and you need to press the special screenshot key. Not F12. These shots cannot (easily) be added to Steam. If you must upload to Steam, you'll have to copy over a shot (preserving the original name) that you've taken in Steam and delete the thumbnail. This may not be required for all users, but I had to set one thing to TRUE in "Edit Settings" due to not being able to use the menu properly. If you have the same problem, change this line to read: forceAlwaysDownsamplingRes true When you change resolutions, GeDoSaTo will flash a message on the screen. By default, this message can take a long time (10 seconds) to clear, so you might also want to set this: messageSeconds 1 The below is optional and for advanced users who want to shoot at non-standard aspect ratios and use hotkeys to quickly swap between them. If you want to quickly set a resolution, you can bind a key to the "setres" command in your .ini file "LifeIsStrangeInput.ini." You can find it here: "...[USER] Documents My Games Life Is Strange LifeIsStrangeGame Config." You'll need to add a line under "[Engine.PlayerInput]" and format it like this: "Bindings=(Name="[KEY]",Command="setres [X]")." KEY is a key like F10 and X is a resolution of the form LENGTHxHEIGHTf. Example: "Bindings=(Name="F10",Command="setres 3840x2160f")." The "f" is necessary and means fullscreen. You can also bind a key to the "talk" command to get to the dev console and type out other commands from there (after deleting "say"). To bind the same GeDoSaTo resolutions we made above you would add something similar to this: Bindings=(Name="F1",Command="setres 1920x1080f") Bindings=(Name="F2",Command="setres 2560x1440f") Bindings=(Name="F3",Command="setres 3840x2160f") Bindings=(Name="F4",Command="setres 5120x2880f") Life is Strange will letterbox and pillarbox the screen to preserve a 16:9 or 4:3 aspect ratio. Aspect ratio (AR) is length divided by height. The resolutions we've been using are 16:9 or 1.777 AR. My mod (the download at the top of the guide) will allow you to set any aspect ratio. Go to OTHER OPTIONS > GAME SETTINGS > MORE and you will see Letterbox AR and Pillarbox AR. This is like the minimum and maximum aspect ratio it will begin to add black boxes. To make sure there are none, set Letterbox AR to 0 and Pillarbox to something high like 10. Here are some example non-standard aspect ratios (but feel free to use anything reasonable): 5040 x 2160 (10 MP, ultrawide 21:9, 2.333 AR) 6480 x 2160 (13 MP, panorama 3:1, 3.0 AR) 5760 x 1440 (8 MP, panorama 4:1, 4.0 AR) 2880 x 3840 (11 MP, portrait 3:4, 0.75 AR) 2160 x 3840 (8 MP, vertical shot 9:16, 0.57 AR) Picture-Taking Tips To take "clean" screenshots (no text, icons, or anything that might cover up a shot), activate OTHER OPTION > GAME SETTINGS. Then, you can use these hotkeys: HOTKEYF2Toggle Chromatic Aberration (blurry edges)F3Toggle overlays (text, icons, option bubbles, pause menu)F4Toggle active outline A note about character outlines: you must be looking at one to turn it off. This is only temporary. To keep it off, lock the address (tick the box next to it), then the next outline you encounter will briefly pop in then out. Turning off Chromatic Aberration is recommended which makes the edges blurry. NO-MENU PAUSE ADVANCED: Edit your .ini file to bind a key to the command "pause." This freezes the action while still allowing the freecam to move. Locate the file "LifeIsStrangeInput.ini" under ".. Documents My Games Life Is Strange LifeIsStrangeGame Config." Open it in Notepad. Under "[Engine.PlayerInput]" add the following line: Bindings=(Name="F5",Command="pause") Save the file. F5 will now pause the game without the menu. If you really want to, you can bind a key to "ghost" which will allow you to noclip through the level. You can go up and down with E and Q in ghost form. Unfortunately this is not reversible and you will need to restart any chapter to undo it. Slow down the game if the action is moving too quickly or speed it up to breeze through it. Activate the game speed controls (OTHER > GAME SPEED), then the hotkeys are: HOTKEYF6The game runs VERY slow (0.001x)F7The game runs medium slow (0.2x)F8The game runs somewhat slow (0.5x)F9The game runs normal speed (1.0x)F10The game runs faster (2.0x)F11The game runs VERY fast (5.0x) I left the screenshot key F12 untouched. Experimenting
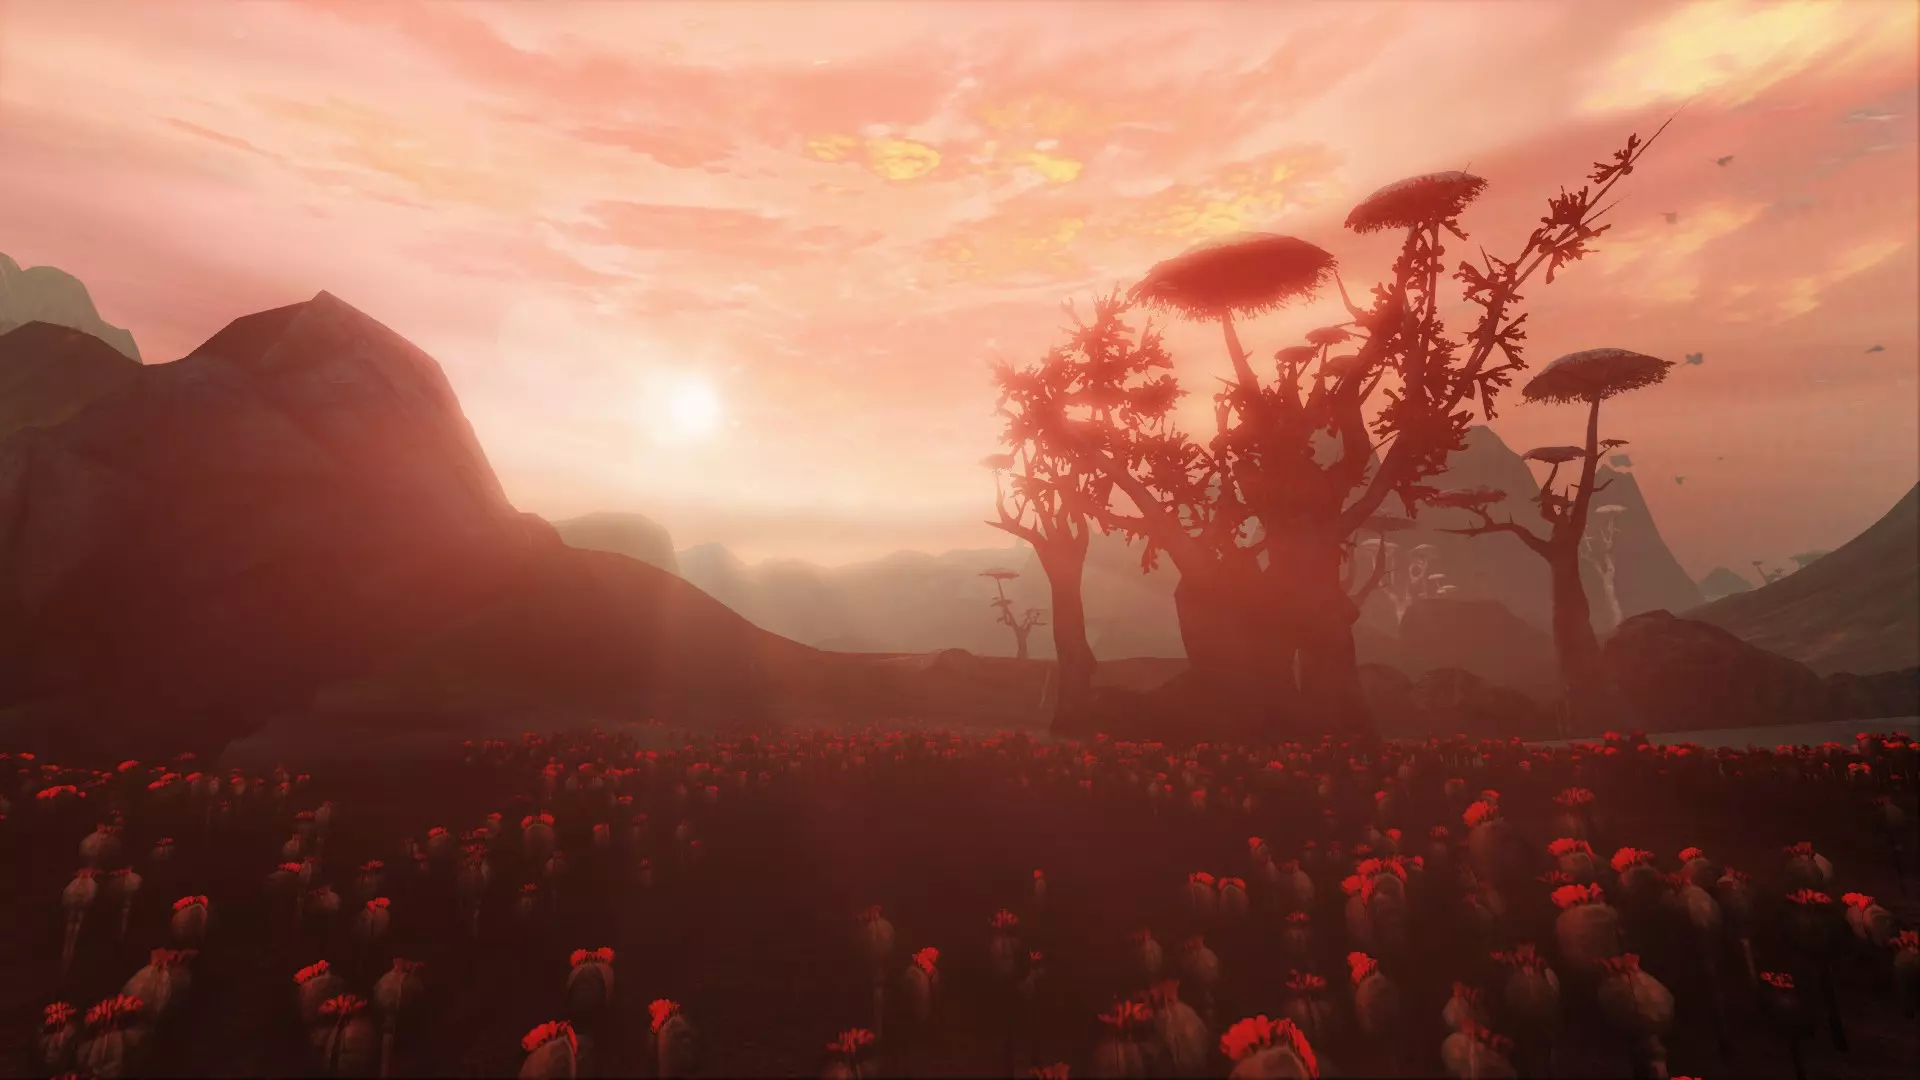
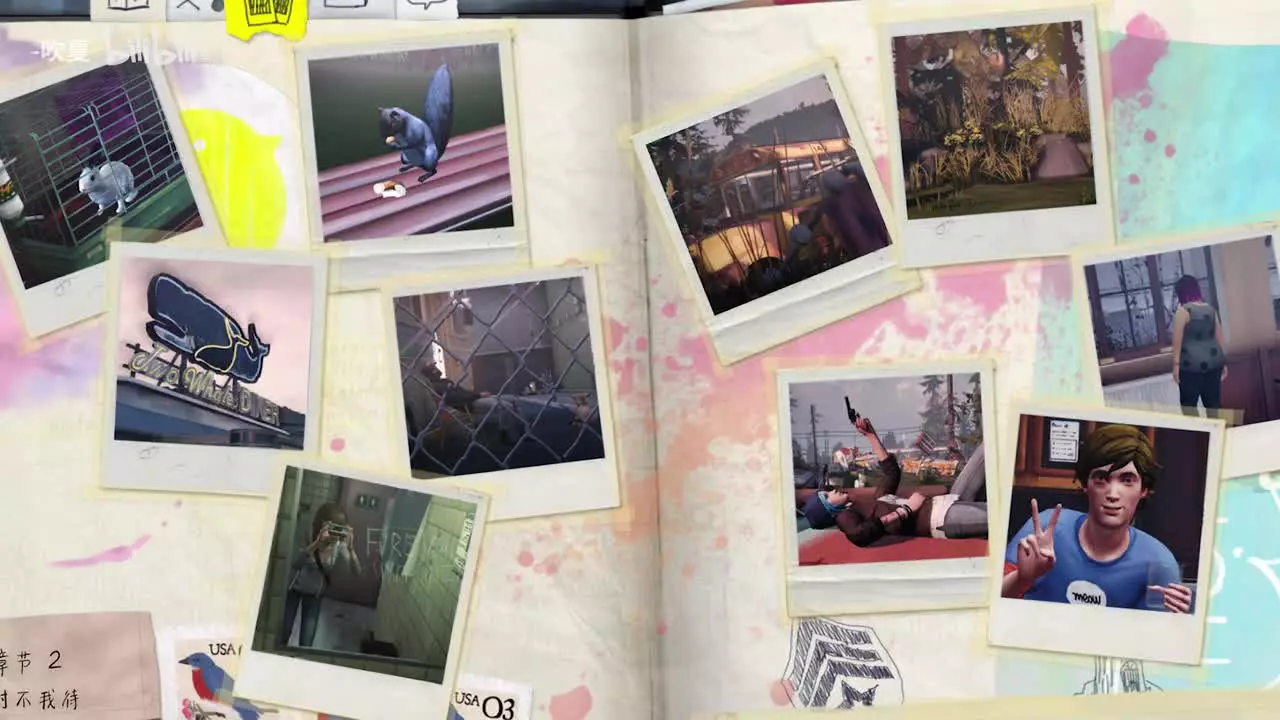
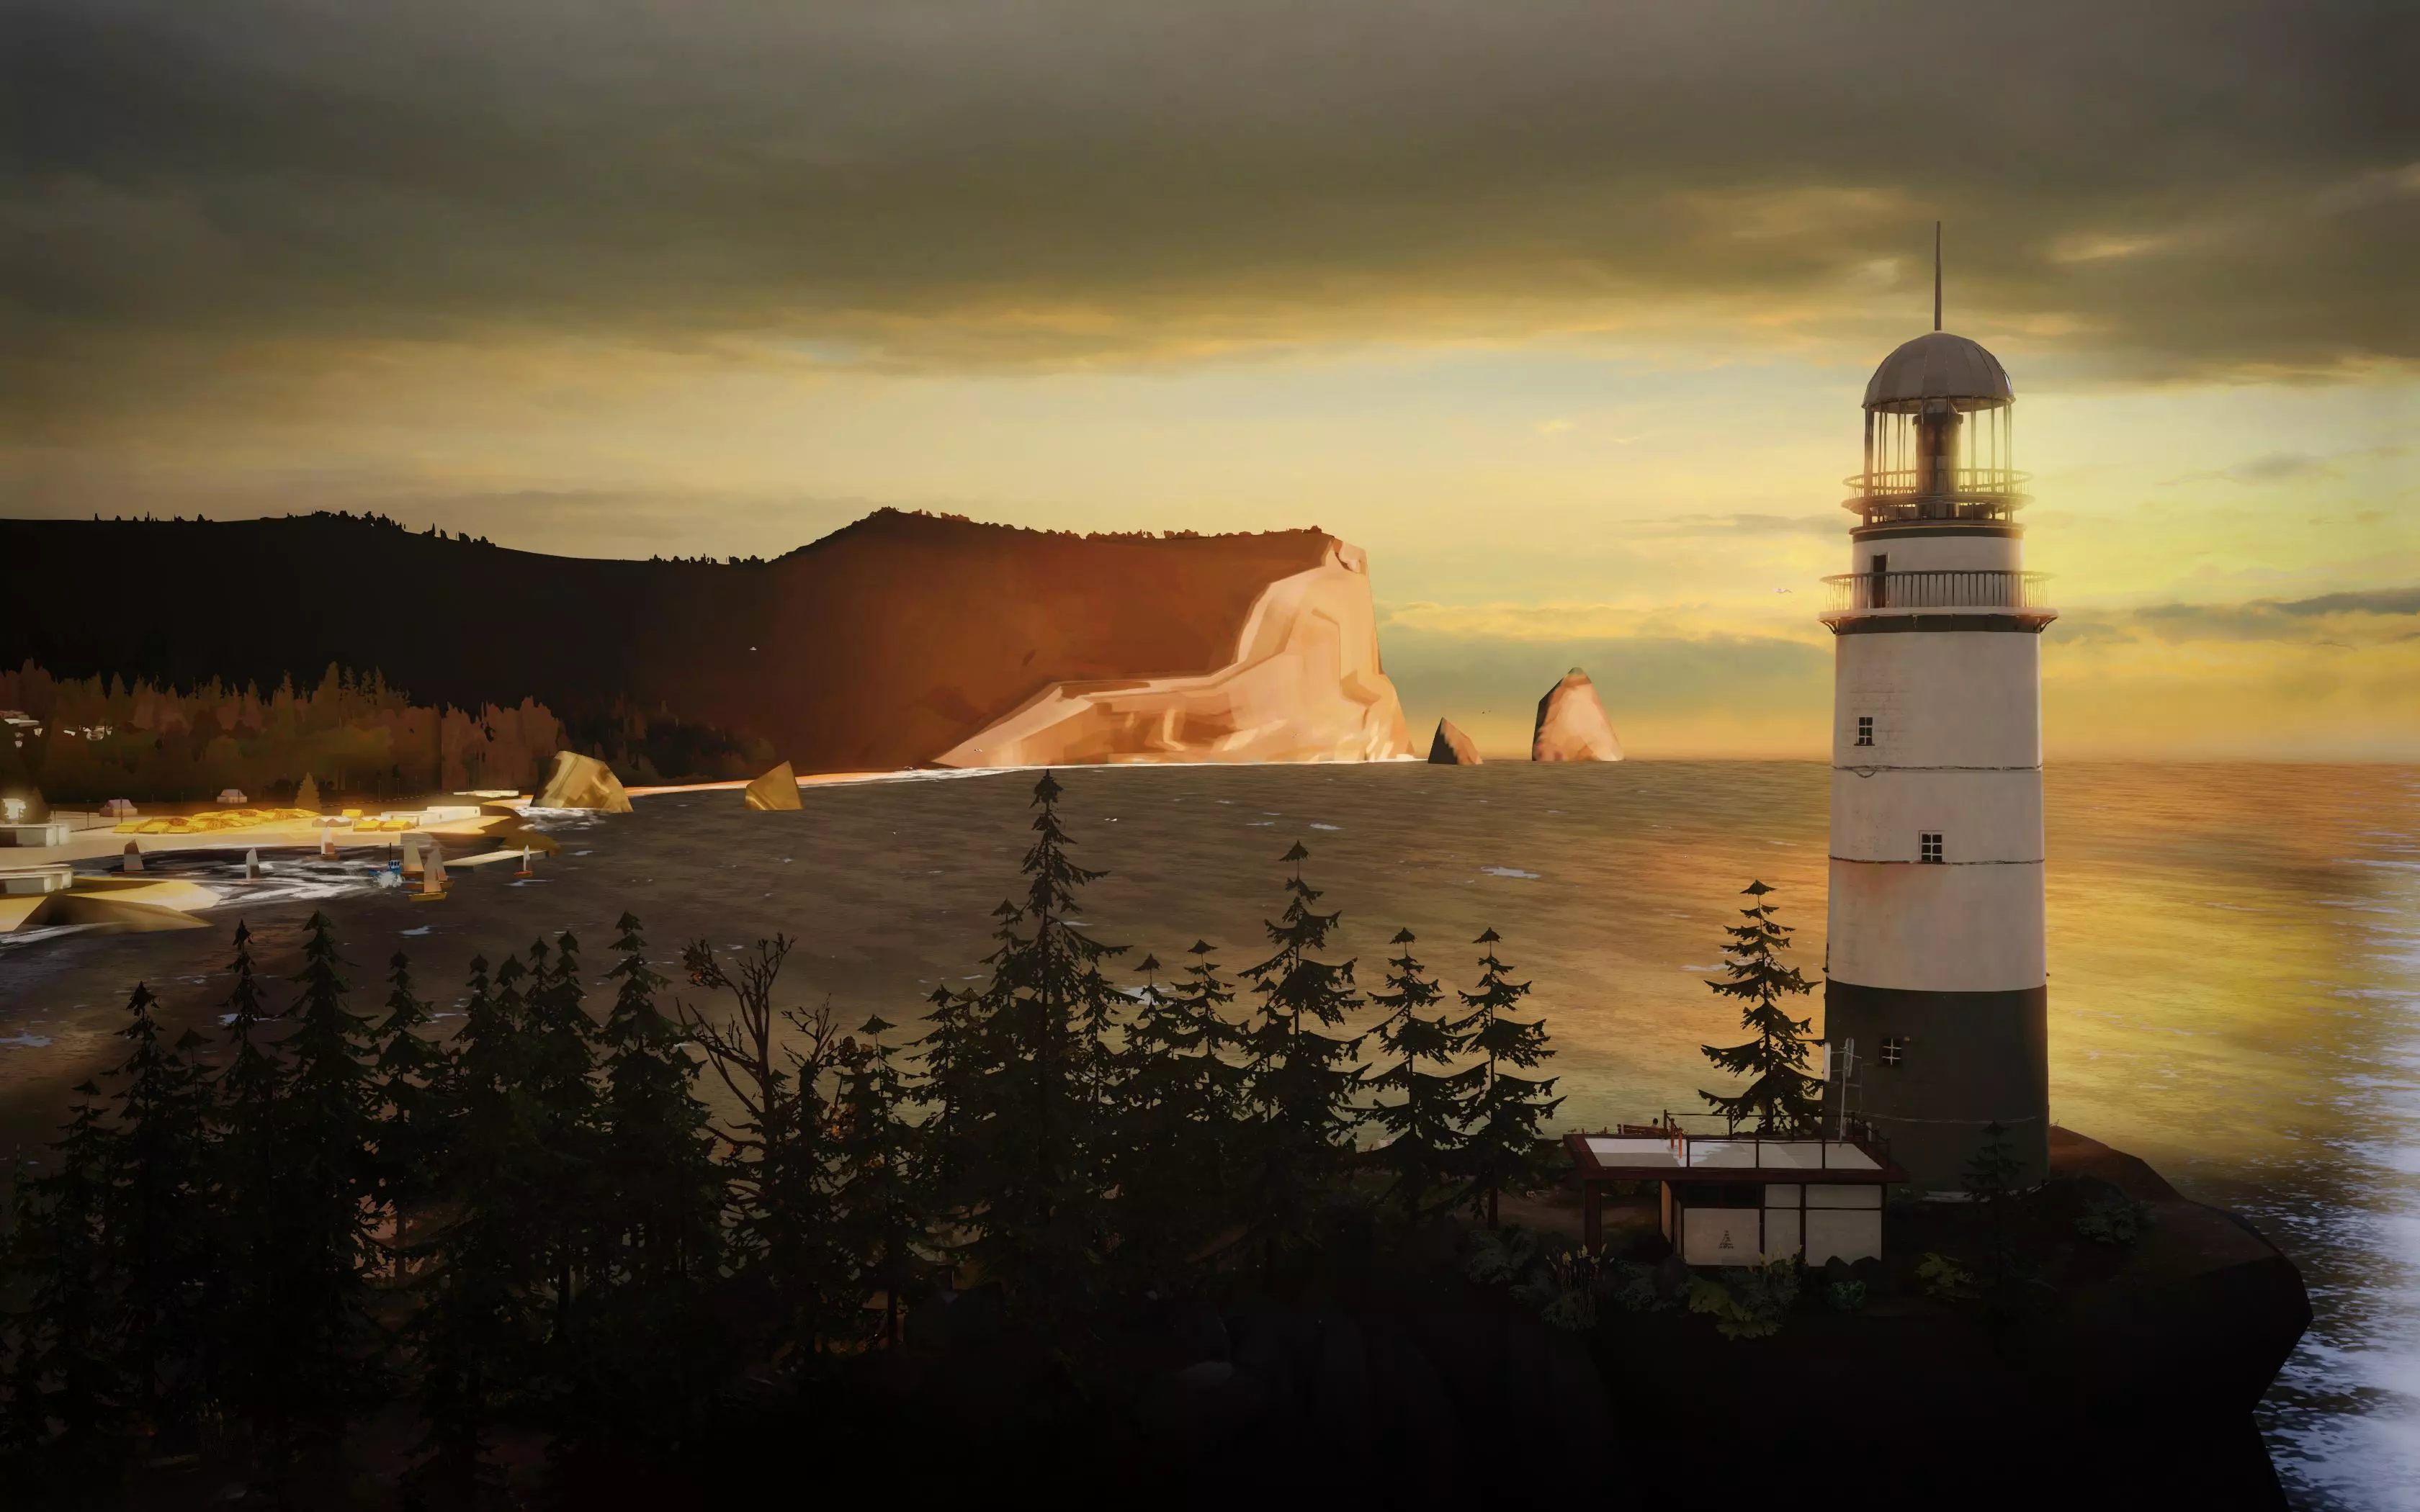
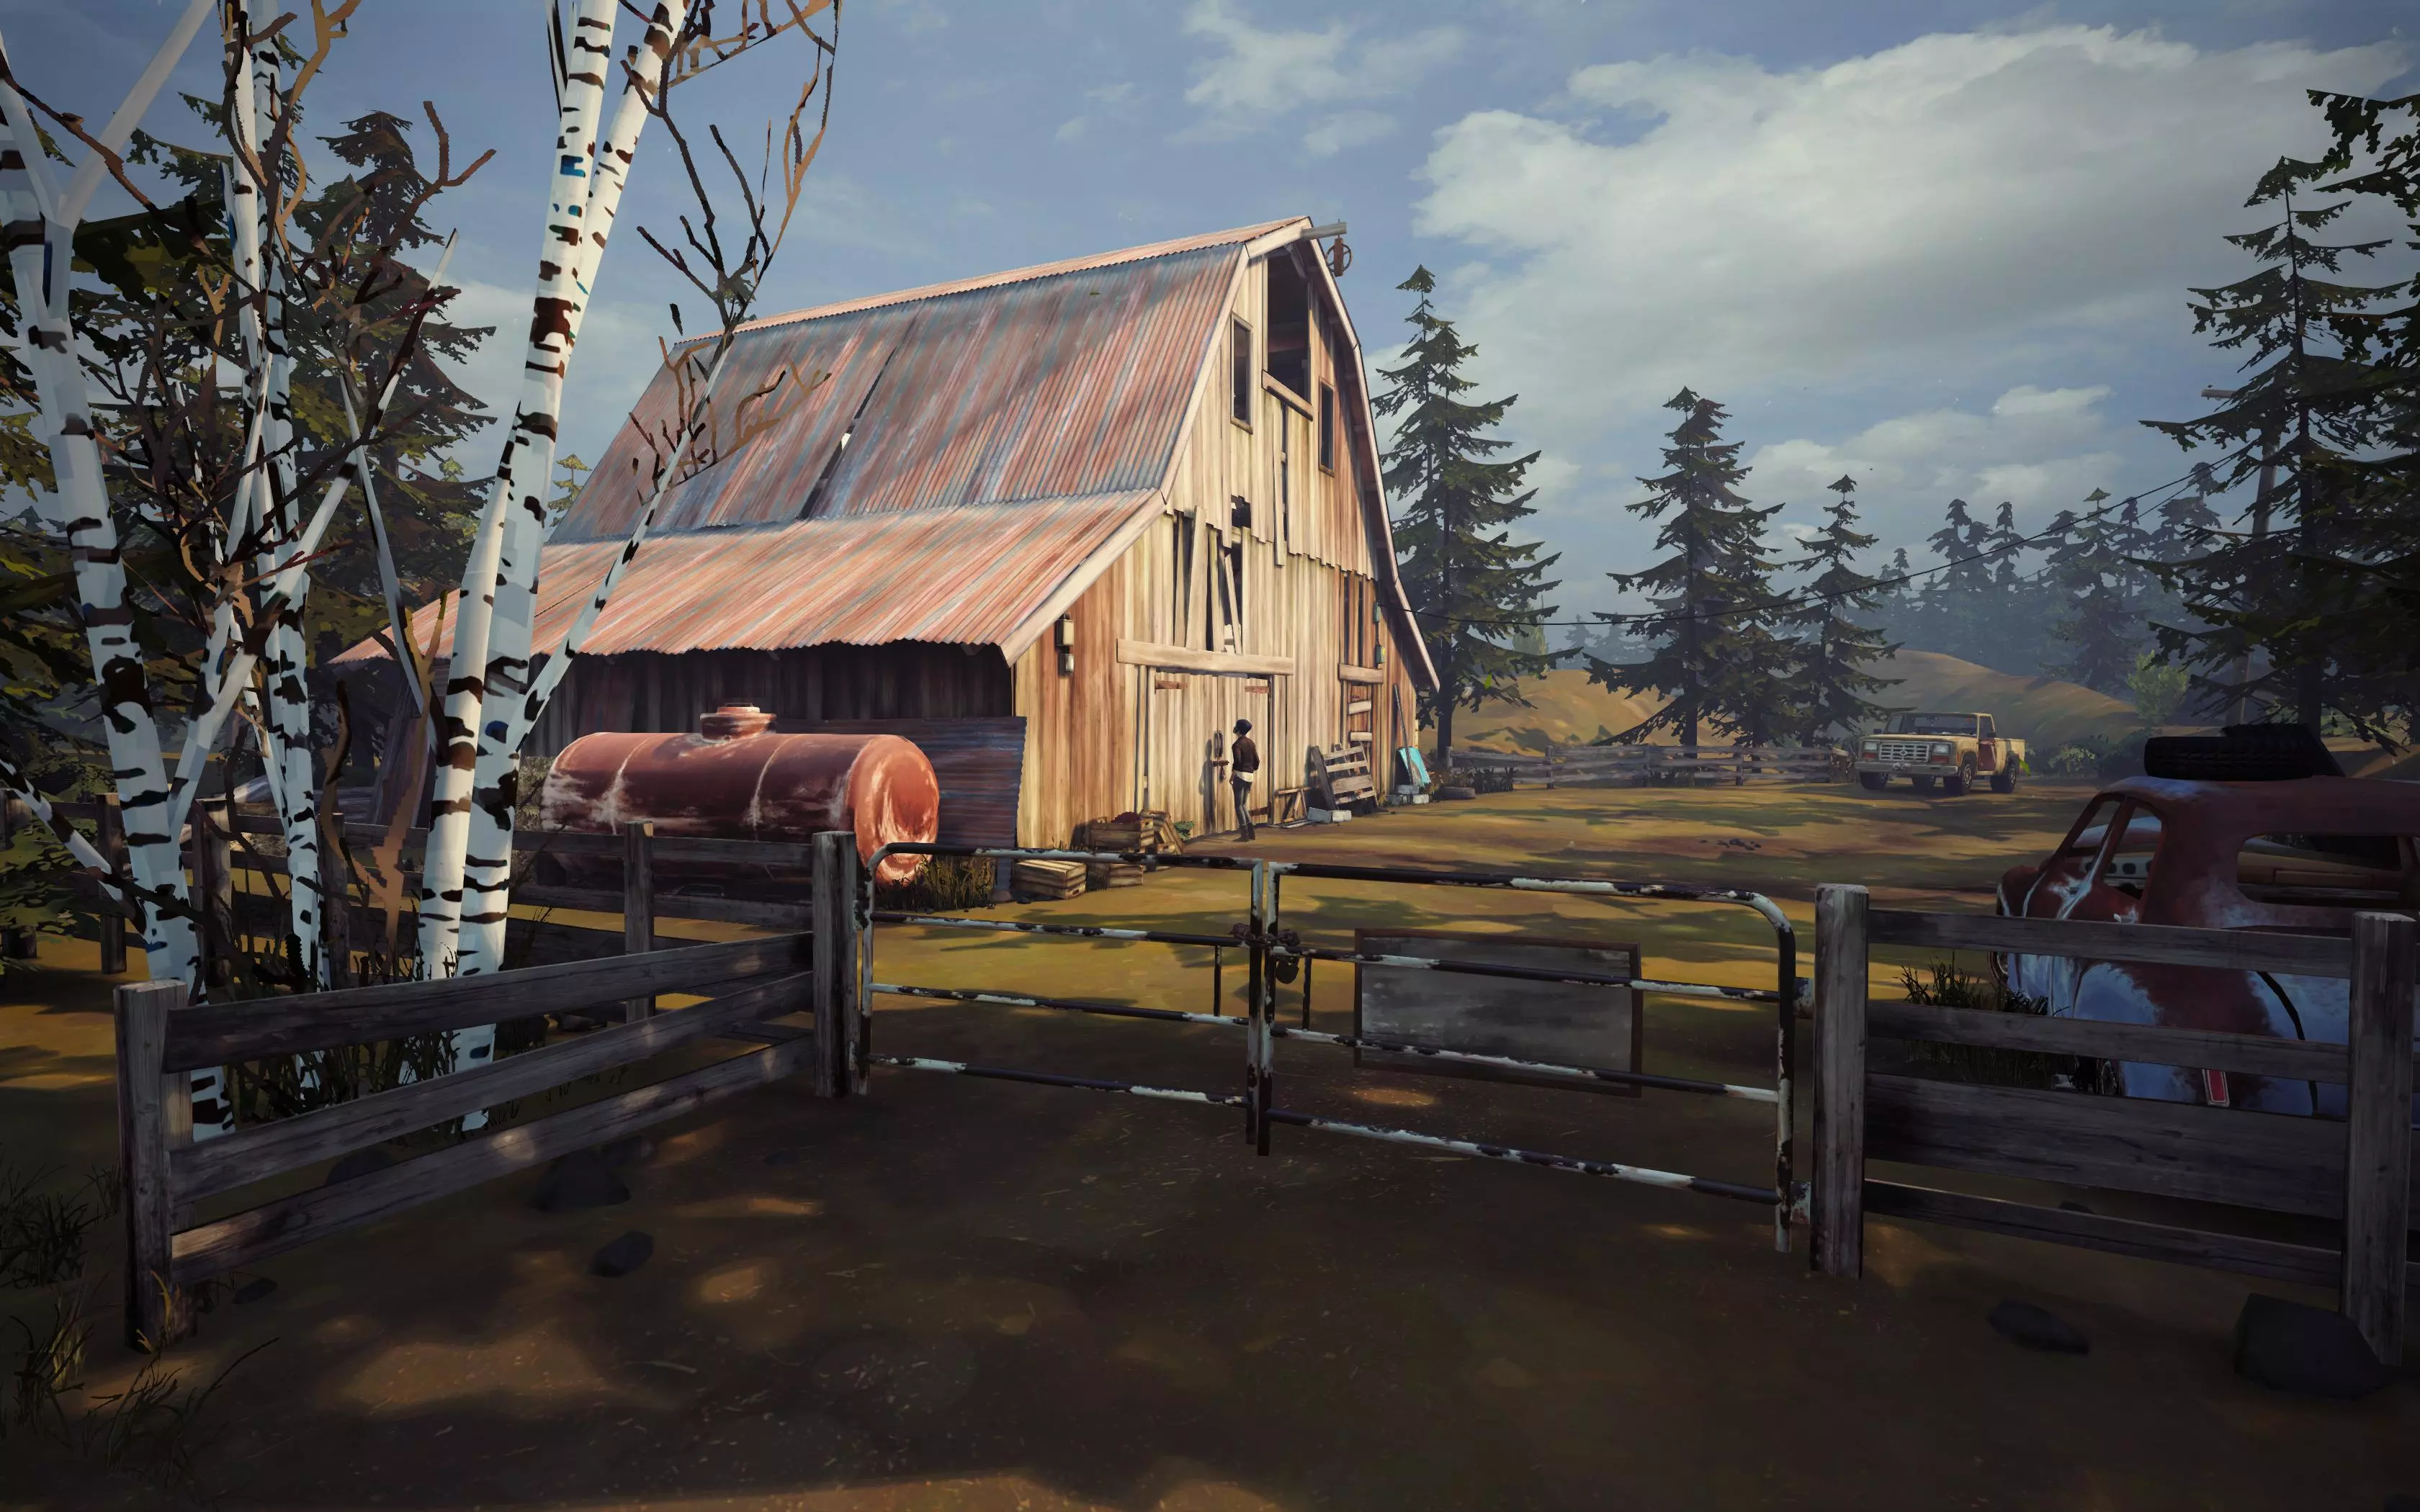
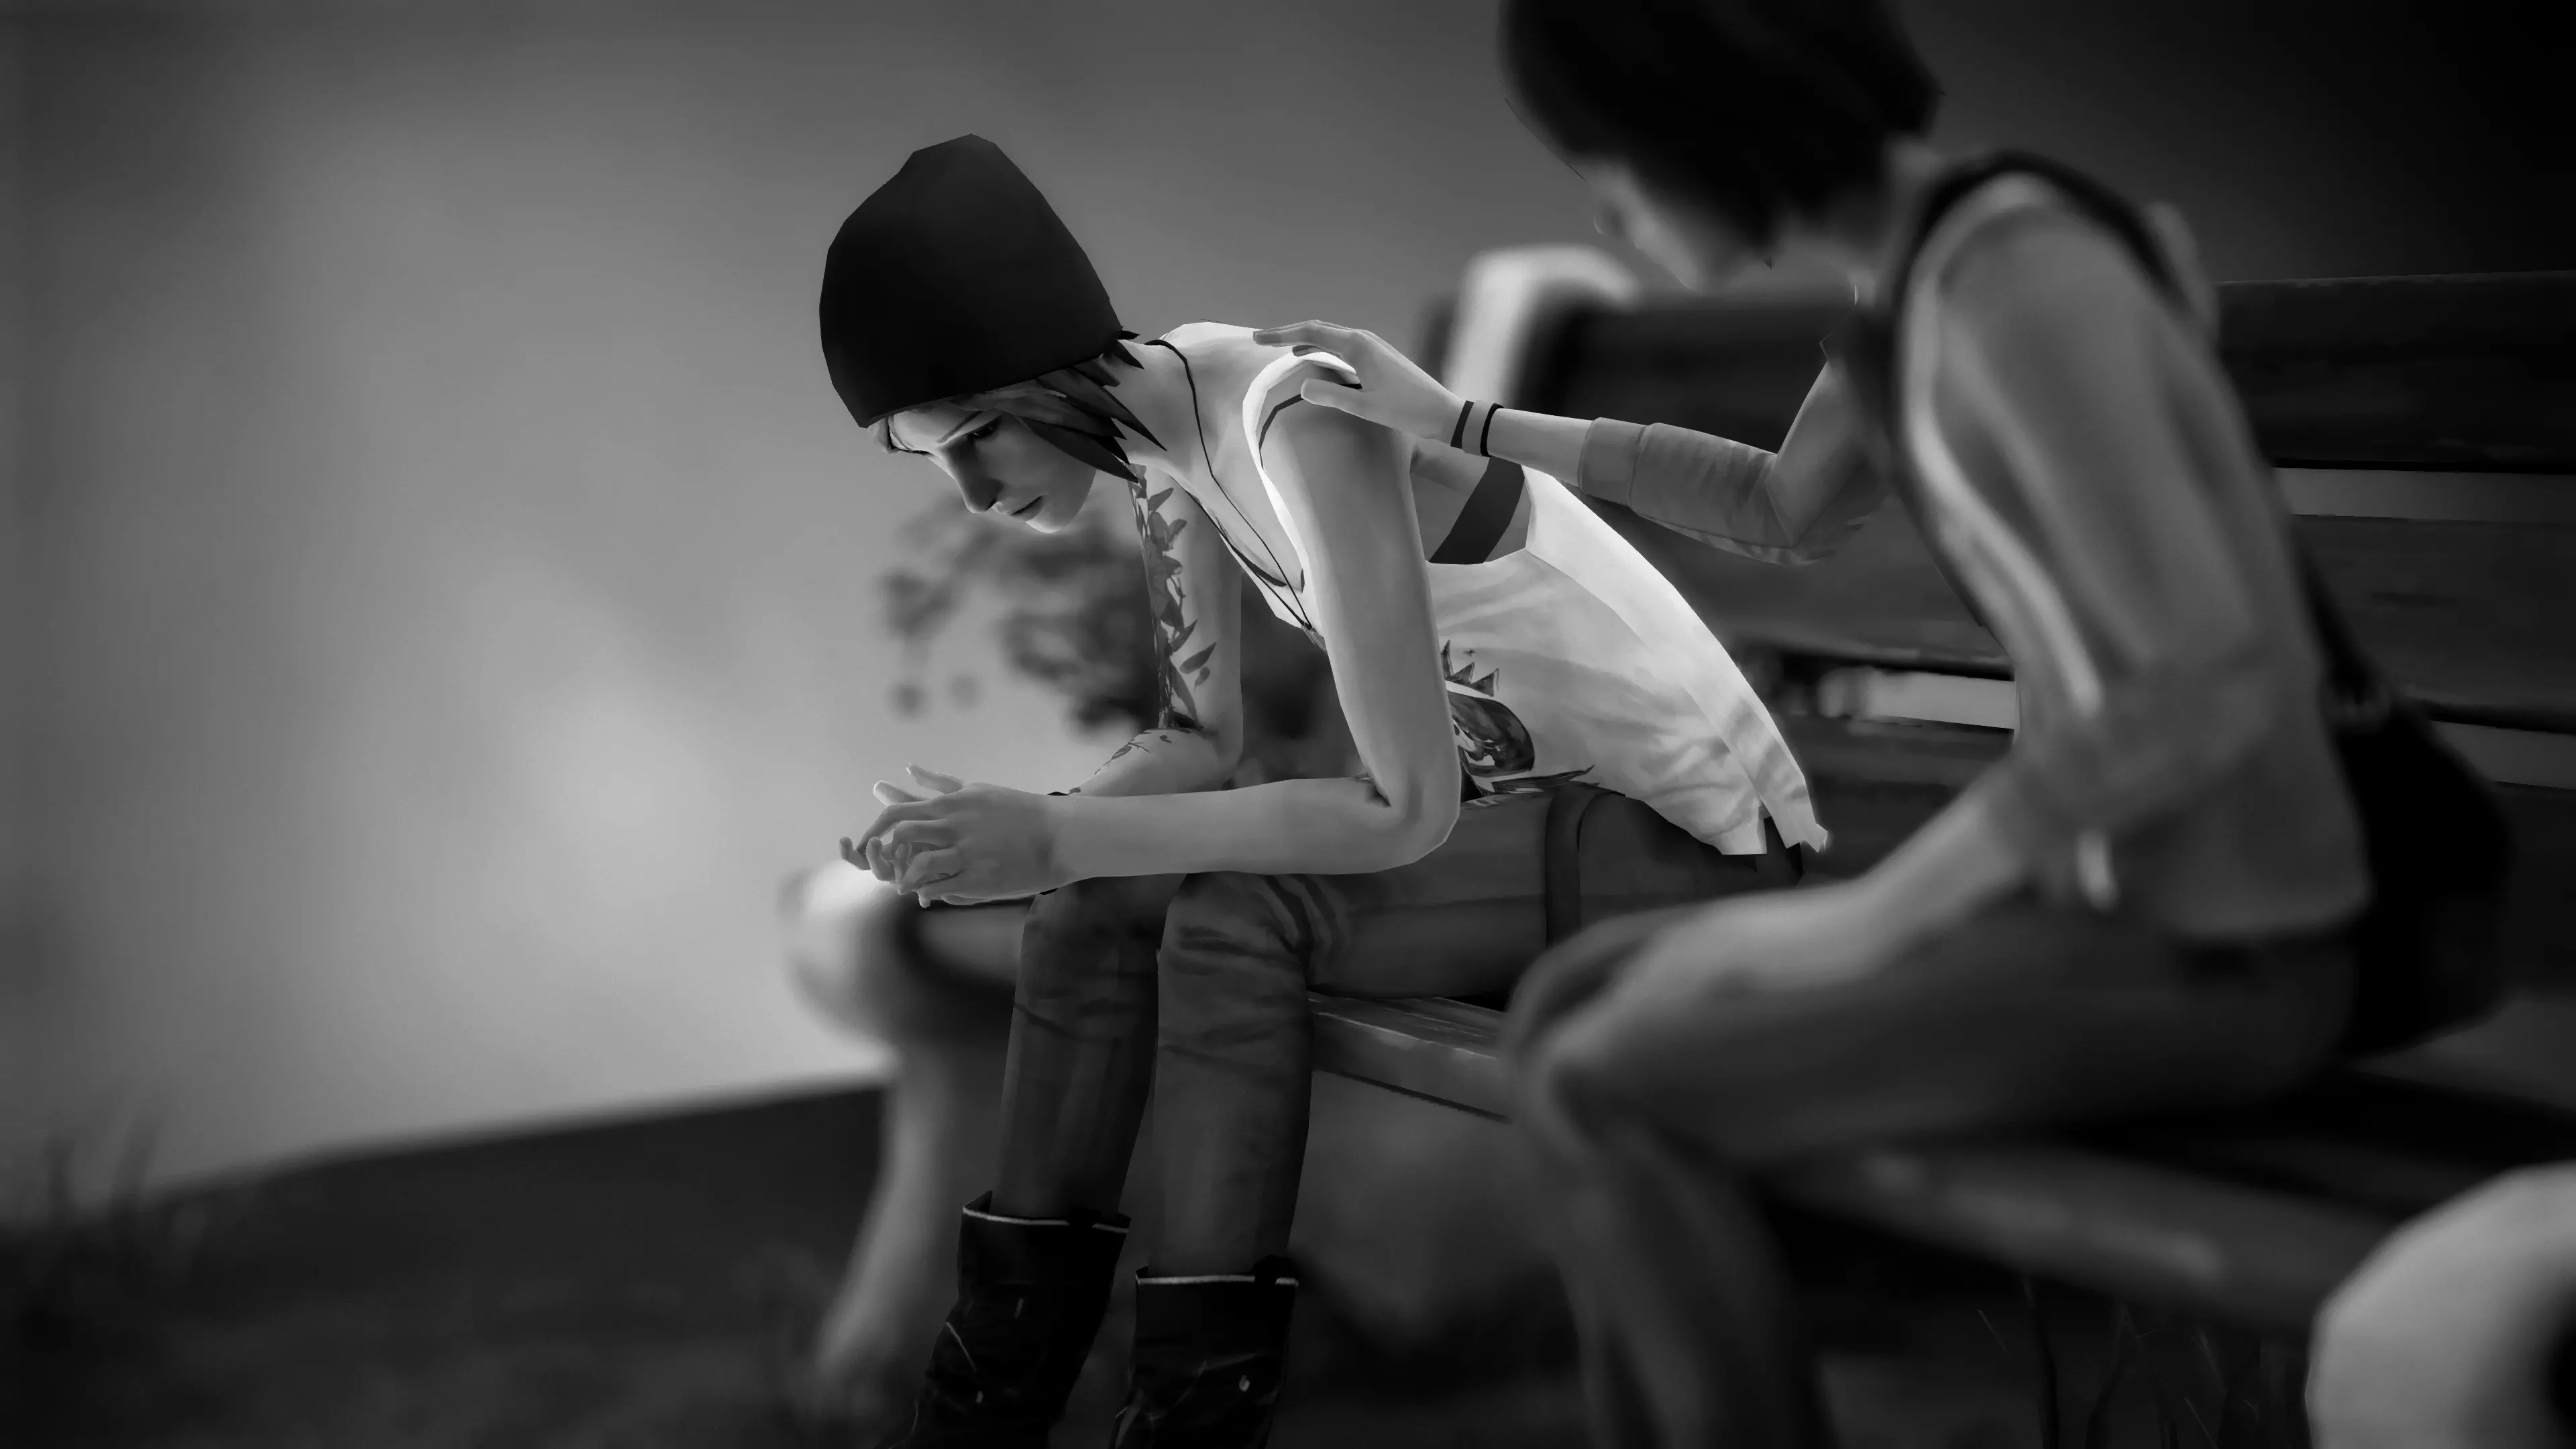
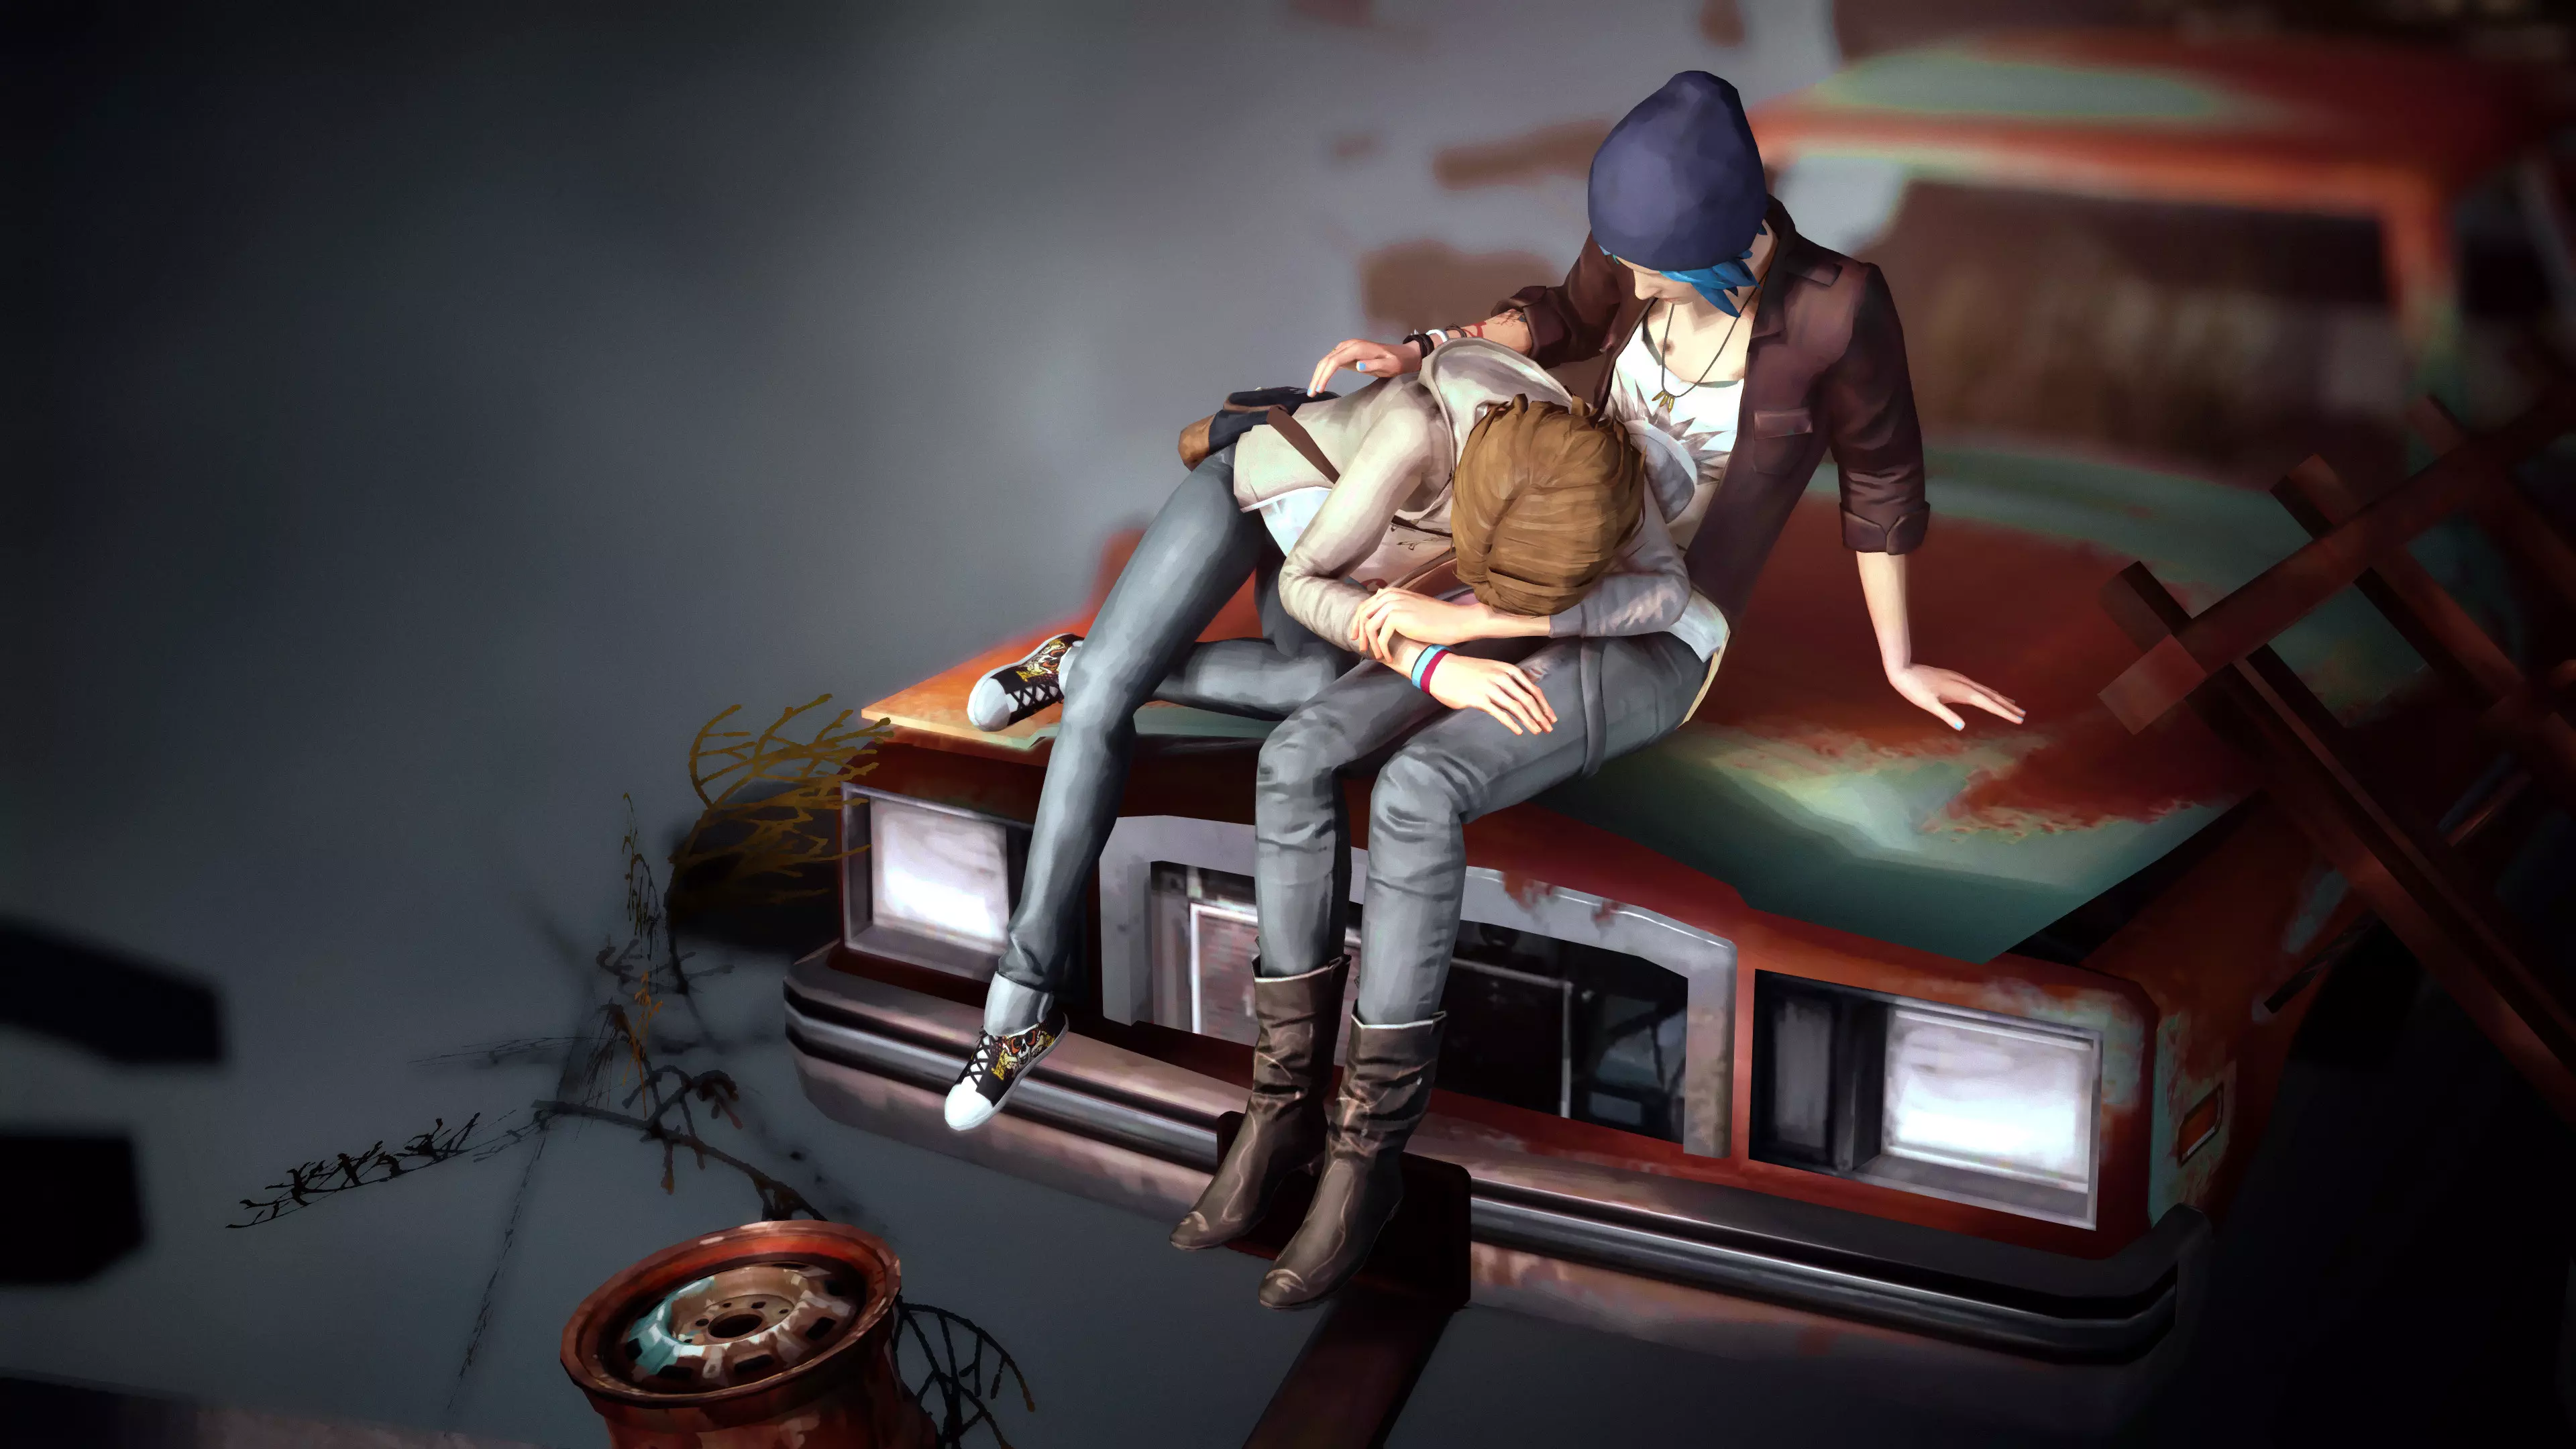
了解这款模组的最佳方式就是不断尝试。我甚至都不清楚它到底能实现多少功能。说不定有人会发现一些意想不到的玩法。比如,之前马克斯操控布鲁克的无人机时,我就有过意外发现。当时我试着操作相机控制,突然就获得了无人机的控制权(或者说,至少效果是持续的)。可惜的是,我一直没找到能随意调出这个功能的方法。 举例来说: 摄影是这款游戏的一大主题,所以我觉得制作这个模组很合适。而且游戏本身有着美丽独特的美学风格——就像可互动的概念艺术,但又带着一种超写实的感觉。用它能拍出一些非常漂亮的照片。 以下是我拍过的一些最喜欢的照片:
希望你喜欢这个模组,也觉得这份指南对你有帮助。愉快地拍摄吧! 特别感谢 感谢Dontnod Entertainment和Square Enix带来这款精彩的游戏! 感谢Cheat Engine Forums社区给予的积极且极具价值的支持(以及对我层出不穷的问题始终保持耐心)。 感谢Deadendthrills.com的精彩截图,它们启发了本模组的创作以及游戏作为艺术文化的理念。 其他项目 查看我的其他摄影相关项目。