换一换
换一换 


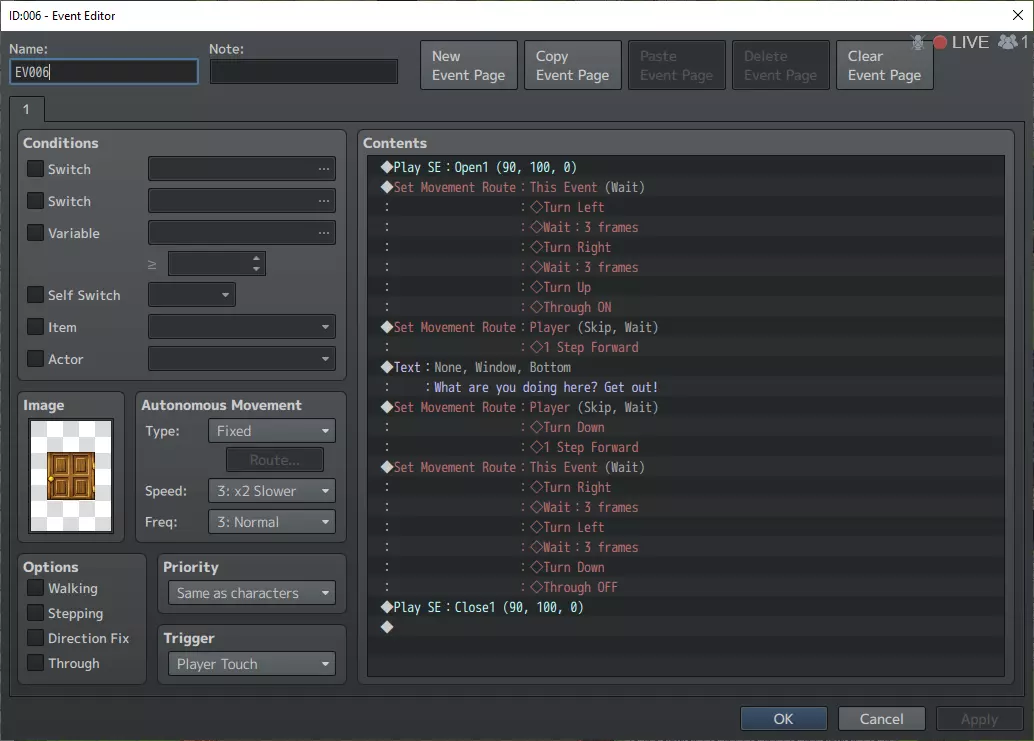
本指南将帮助你开始使用《RPG制作大师 MV》制作游戏。 它最初是为VX Ace编写的,后来经过了转换和重写。 第1部分包含早期章节。 7. 门2.0 通过编辑现有事件和开关来获得一些乐趣。 让我们添加一个脾气暴躁的角色——如果每天都有陌生的英雄闯进你家,你会是什么感觉?我肯定不会喜欢! 在你的城镇中找到一所房子并添加一扇门(快速事件创建->门)。 现在,我们将对其进行修改,不让玩家进入新区域,并让房主对你大喊一些文字,如下所示。* 复制动画(移动路径)并将其反转。 * 添加一个开关,用于指示玩家已尝试打开过一次门。 * 根据该开关添加条件,以显示暴躁角色对你大喊大叫的场景。 * 播放关门音效。 * 移除过渡效果。 结果: @> 播放音效:“Open1”,音量80,音调100 @> 设置移动路径:此事件(等待) :: $> 向左转 :: $> 等待:3帧 :: $> 向右转 :: $> 等待:3帧 :: $> 向上转 :: $> 穿透开启 @> 设置移动路径:玩家(跳过,等待) : 向前走1步 @> 条件分支:开关【0003:暴躁小镇1】 == 开启 @> 文本: -, -, 普通, 底部 :: 又回来了?!我告诉过你走开的! @> : 否则 @> 文本: -, -, 普通, 底部 :: 你在这里干什么?!走开!控制开关:【0003:暴躁小镇1】=开启 设置移动路径:玩家(跳过,等待) :向下转 :向前走1步 设置移动路径:此事件(等待) ::$>向右转 ::$>等待:3帧 ::$>向左转 ::$>等待:3帧 ::$>向下转 ::$>穿透关闭 播放音效:'Close1',音量80,音调100
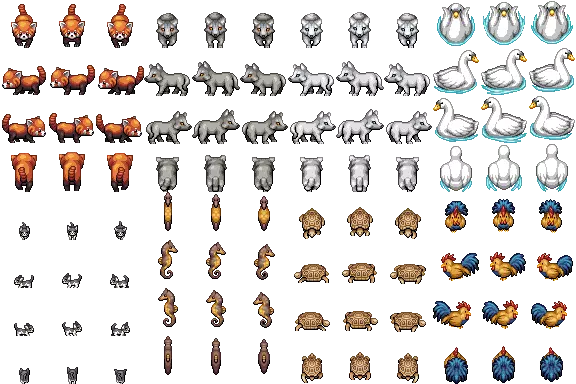
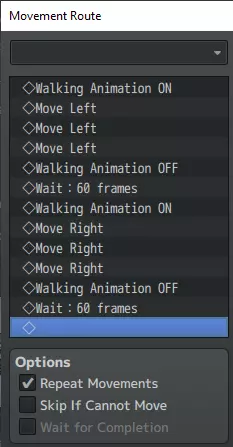
看看你能否为自己的城镇重现这一效果。 8. 移动NPC 所有人都像傻瓜一样站着会让城镇看起来有点“死气沉沉”,所以我们来添加一些移动的NPC。比如跑来跑去的狗、猫、信使,还有慢慢踱步的老人。 进入事件层(F6)并添加新事件。从“人物”图像中选择一个随机人物(或者怪物、角色,根据你的需要选择)。接下来,你需要查看两个部分:“自主移动”和“优先级”。将“类型”设置为“自定义”。这将解锁“路线...”按钮,点击它并添加一条简单路径。不要忘记启用/禁用行走动画,这样角色看起来像是在实际行走而不是滑行。例如: $>行走动画开启 $>向右移动 $>向右移动 $>等待:60帧 $>向左移动 $>向左移动 $>向上移动 $>向下移动 $>等待:60帧 这将使NPC以重复的L形模式移动,然后返回其原始位置。 或者,你可以让它们向左/向右移动——如截图中的示例所示。
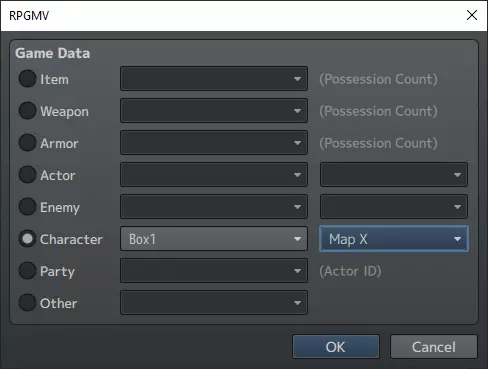
接下来是“优先级”部分。默认情况下,此选项设置为“与角色相同”。这意味着玩家会阻挡NPC移动,反之亦然。如果玩家阻挡了NPC的路径,NPC会暂停其循环。如果将NPC的优先级设置为高于或低于玩家,则NPC和玩家都不会阻挡彼此的移动。 如果你希望NPC看起来像是走进了房子,可以在它们走向房门时设置“透明开启/透明关闭”标志。 请注意,你也可以轻松让怪物使用此行为,并让它们通过“玩家接触”来触发战斗。 9. 双向桥梁 桥梁很酷,但制作起来有点棘手。如果你尝试创建一个峡谷,并在上面架设一座直桥,你会发现一些问题。如果桥梁边缘的地格是悬崖边缘地格,你可能无法“走上”桥梁。 如果没有使用悬崖边缘地格,你可能可以“走到”桥梁下方,并直接走到桥梁连接的悬崖表面。 如果你走到桥梁下方,你会走上桥梁! 不用担心,所有这些问题都可以解决,但最初设置确实需要一些工作。一旦设置完成并正常运行,你可以在整个角色扮演游戏中尽情复制这种技巧。 请以下方图片作为参考。
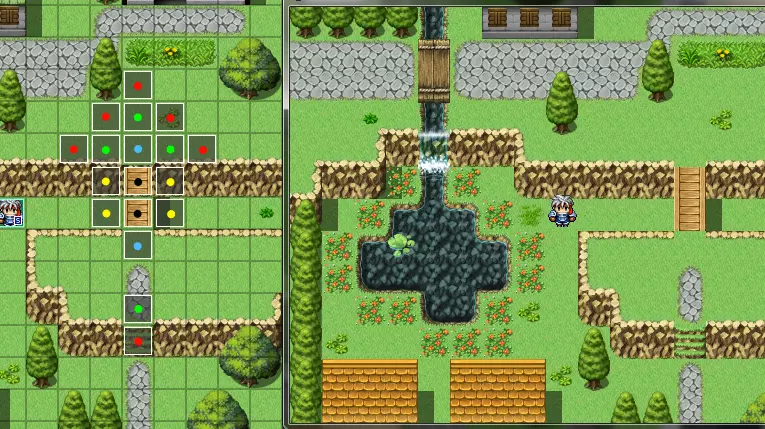
这些彩色圆点不会出现在RPG制作大师中,它们是用paint.net添加作为参考的。每种颜色代表一个事件,之后可以将事件复制粘贴到相同颜色的圆点上。我们从黑色、黄色和蓝色圆点开始。 * 黑色:创建一个新事件,并设置图像(列表底部的图块集B中有一些不错的桥梁元素)。将事件的优先级设置为【高于角色】。接下来是你可能之前没做过的操作。在事件编辑对话框的顶部,我们选择【新建事件页】按钮。这将创建一个新的事件页,我们可以对其进行修改并设置特殊条件。在这种情况下,我们需要添加一个【开关】。创建一个新开关,并将其命名为【0004:bridge】(如果该编号已被使用,可使用其他编号)。最后,在这个新事件页面上,将优先级设置为“角色下方”。就这样,复制此事件以创建基础桥梁。 * 黄色:为防止玩家从桥梁两侧掉落,需要在玩家位于桥上时阻挡两侧,当玩家想走到桥下时移除该障碍。创建一个新事件,并将优先级设置为“角色下方”。接下来添加一个新事件页面,并在该页面上设置优先级为“与角色相同”。在第二个页面上,我们还像黑色事件一样设置开关条件(0004:bridge) * 蓝色:为防止玩家从桥下走到悬崖上,我们将创建一个阻挡事件,其工作方式与桥梁两侧类似,但作用相反。创建一个新事件,并将其优先级设置为【与角色相同】,然后像黄色事件一样创建一个新事件页,添加【开关0004:桥梁】作为条件,并将优先级更改为【低于角色】。 这样就处理好了桥梁本身,现在只需确保当玩家靠近或远离桥梁时,开关会相应地开启和关闭。这就是绿色和红色事件的作用。 * 绿色事件:创建一个新事件,在其内容中添加一行【游戏进程->控制开关】,设置【桥梁=开启】。同样重要的是,将【触发条件】(位于优先级字段下方)设置为【玩家接触】。 * 红色事件:复制刚才创建的绿色事件(几乎所有内容都可以使用Ctrl+C、Ctrl+V复制)。将控制开关行编辑为“关闭”。作为额外操作,你可以在此事件上设置一个检查“0004:桥梁为开启”的开关条件,但这在某种程度上是多余的。
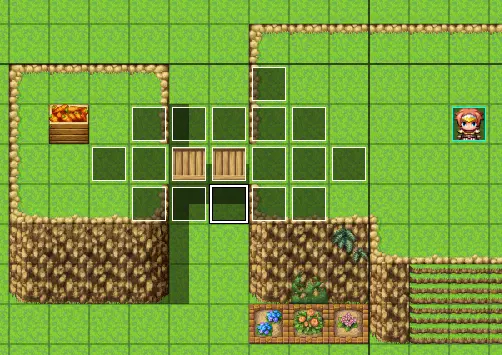
最后,将事件复制粘贴到正确位置,确保玩家总能踩到它们。然后测试你新创建的桥梁。 10. 压力板和可移动物体 如果你玩过《塞尔达传说》或《鲁菲亚2》(如果没玩过,读完本指南后就去玩吧),那么你肯定遇到过一些“可移动方块谜题”。为你自己的角色扮演游戏创建这样的谜题难道不是很有趣吗?这类谜题有很多玩法,它们为游戏增添了全新的维度,确保玩家能获得乐趣。可以说,这是从单纯的怪物击杀任务中解脱出来的一种休息。 有几种实现方法,但目前最简单的方法是使用“并行处理”。不过要记住,当玩家在该地图中时,这些内容会与游戏其他部分并行运行,在同一地图上创建大量此类内容可能会影响游戏性能。因此,请限量使用,或在小型地图上使用。 第一部分是创建可移动物体。在这个示例中,我将创建一个桶,之后我们可以把它推到开关上。 打开你的测试项目地图并创建一个新事件(通常按F6),然后设置一个图形。桶、方块、板条箱等任何物品都可以。 接下来,确保优先级设置为【与角色相同】,这样你就无法穿过该物体,而必须推动它。我建议将触发条件设置为【动作按钮】,这样玩家就不会意外推动不想推的物体,而是必须按空格键来强制移动。不过,你也可以根据需要设置“玩家接触”。另外,“速度”应设为“正常”(这样看起来效果更好)。 最后需要设置的是在事件内容中,添加一个新的插入项(标签2,为“此事件”设置移动路线),并选择“远离玩家”。同时设置以下选项: - 重复移动 - 关闭 - 无法移动时跳过 - 开启 - 等待完成 - 关闭 最后,给这个事件命名,暂时命名为“Box1”即可(在添加下方的压力板时你就会明白原因)。然后测试这个方块。你应该可以到处移动它,也可能会让它卡在角落里。通过这个功能,你已经可以创建一些解开门锁的谜题了,但我们想为冒险增加一个额外的维度——按钮,或者更准确地说,压力板。
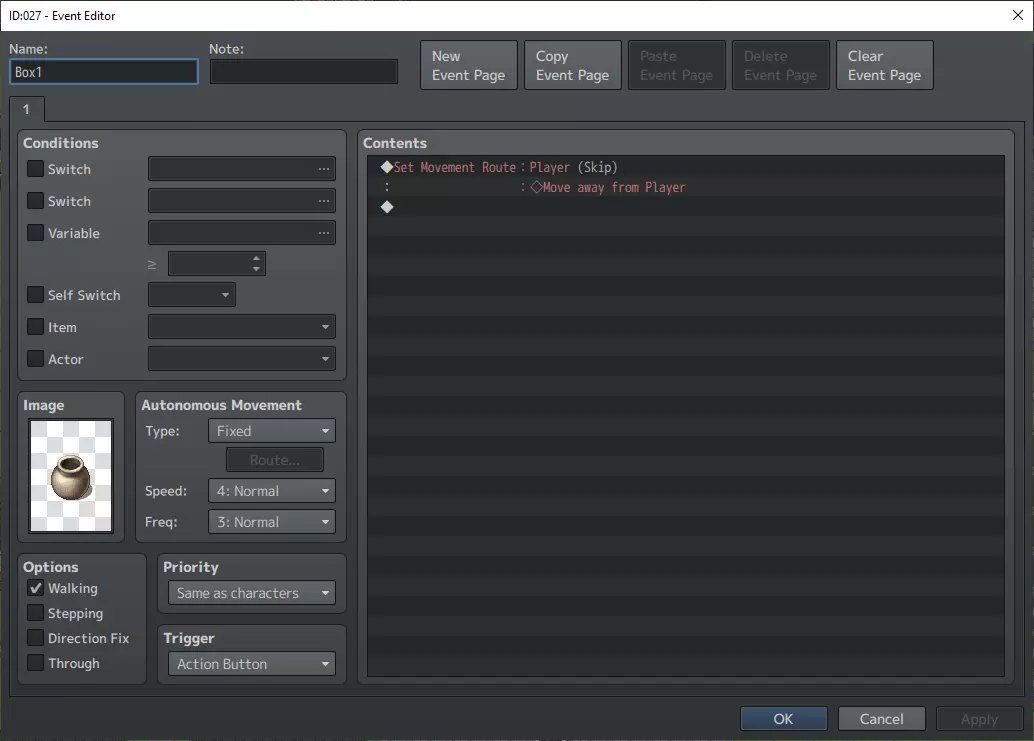
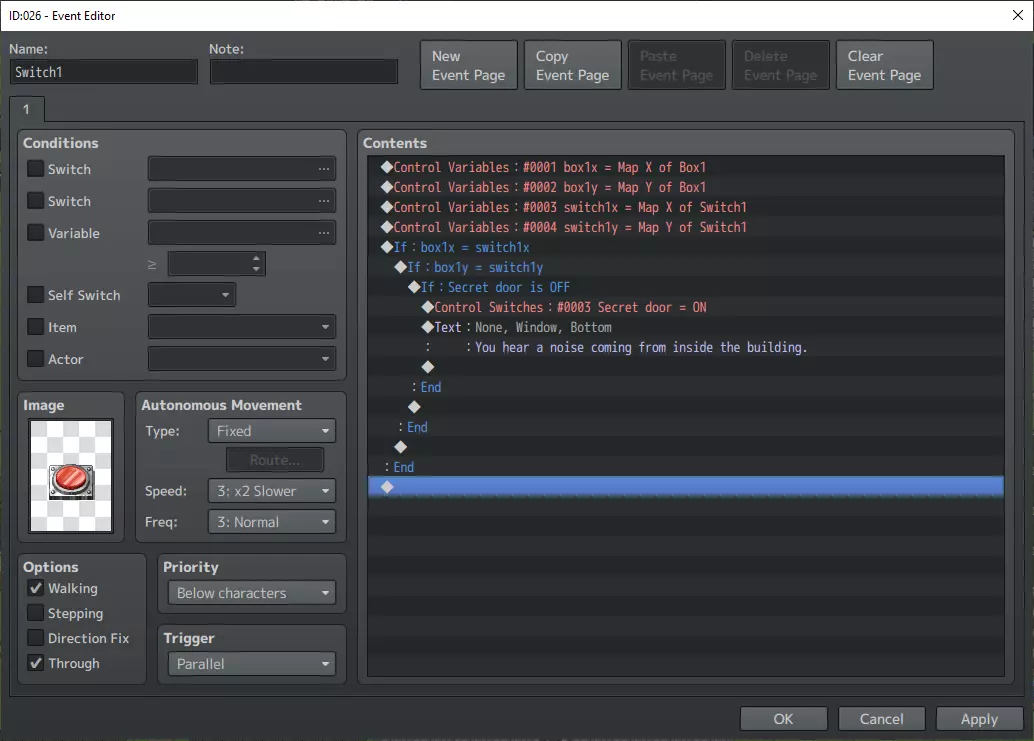
在我们刚刚创建的箱子附近添加一个新事件,并为其设置合适的图像。(我在此处添加了一个开关按钮) 将“穿透”选项设为开启。(例如,确保复选框处于勾选状态) 将优先级设置为“角色下方”,以确保可以从其上方走过。 将触发条件设为“并行处理”。 接下来是有趣的部分,最好通过展示我使用的实际代码内容来解释。注意下方的截图略有不同,是为了向你展示另一种方法。你可以使用固定坐标,或者从开关本身获取坐标(更好)。始终使用事件来设置开关,这样当罐子放在开关上时,它就不会持续触发了。控制变量:[0001:箱子1-X] = [箱子1]的地图X坐标 控制变量:[0002:箱子1-Y] = [箱子1]的地图Y坐标 条件分支:变量[0001:箱子1-X] == 21 条件分支:变量[0002:箱子1-Y] == 16 条件分支:开关[0006:开启秘密门] == 关闭 文本: -, -, 普通, 底部 :: 你听到建筑物内传来一声巨响。 控制开关:[0006:开启秘密门] = 开启 分支结束 否则 控制开关:[0006:开启秘密门] = 关闭 分支结束 否则 控制开关:[0006:开启秘密门] = 关闭 分支结束
如你所见,在此示例中,压力板仅会对【Box1】做出反应。 或者,你可以将其设置为对玩家做出反应。移除“OFF”部分后,按钮将保持激活状态。 通过添加第二个事件页,你可以更改压力板的颜色或“按压状态”(如果你愿意,也可以称之为按钮)。上一章已向你展示了具体操作方法。
* Control Variables: Can be found in tab 1. Event XY and the player XY can be found in the "Game Data" operand under character. Just scroll down from there. Tip: It's a good idea to also add a sound to both the box movement, and the switch being pressed or released. 11. Saving and not saving By default any new project you make in RPG Maker will allow the player to save anywhere by simply pressing the ESC button and selecting "Save" from the menu. How casual. Should you want to make your game more hardcore (or roguelike if you wish) then you can remove the save ability entirely. Or, like most RPGs you could move the save ability to specific areas or NPCs such as the Innkeeper. Let's start by removing the player's ability to save anywhere. In VX this used to be done in the script editor, but in MV you can simply go to the database -> system, and unselect "save" the player is now unable to save his game. If that is too hardcore for you, and you wish to add the ability to save at specific locations then you can make the save option available by the following means. Let's go back to the Innkeeper we added earlier (See chapter 3) and edit that event. Under the "Facein Screen" line, insert a new "Text" stating something along the lines of "Do you wish to save?", followed by a "show choices" (tab 1) giving the player the option to select yes and no. Next we insert a new command. See Tab 3 and select "Open Save Screen". Now the player will be able to save the game anytime he's used the innkeeper. Innkeepers are cool n all, but they cost money. If you wish to take it a step further, you could add "save points" at the front of dungeons, or even before big boss fights. Now, I feel it would be weird to have a full fledged inn suddenly spring up in the middle of a demon invested dungeon (right?), so instead of that, we could add a "circle or protection" to certain points in a dungeon. Let's make it a fancy one that restores all health, resurrects all dead players, and allows you to save. Create a new event somewhere in town (just as a test for now), and select a special floor tile (a green hexagram would do). Set the priority to "Below Characters" and the trigger to "Player Touch". Save and close the event by pressing OK. Now, go into the game database (F9) and select the "Common Events" tab. Insert a name for event 001. "Query Save Screen", then add (or copy from the Innkeeper above) the following lines: @>Text: -, -, Normal, Bottom :: Would you like to save? @> Show Choices: Yes, No : When [Yes] @> Open Save Screen @> : When [No] @> : Branch End @> Save and close the game database screen and go back to the hexagram event we just created. Insert the following two lines in the contents: @>Recover All: Entire Party @>Call Common Event: [Query Save Screen] Both of those can be found in tab 1. (Actor, and Flow Control) I recommend also adding a nice sound and perhaps a screen flash (tab 2). And last but not least having the event animate by setting a "Move Route: This event" (just like the door from chapter 2) 12. Shooting fireballs If you've played Lufia 2 (snes), then you will probably remember the player's ability to destroy bushes, or grappling hook. (we may get to those later) Let's look at a Zelda ability instead for now. Shooting fire or arrows, in order to solve puzzles. This ability is a bit buggy still so we'll have to edit this chapter with clarifications and improvements later. If you can figure out a solution to the issues listed, feel free to share them with the rest of us. Problems to note before continuing: * If you shoot and walk at the same time in different zones, you'll trigger a "transfer" - annoying bug. * If you shoot in different zones, the fireball / arrow movement speed is lower than the one you've set in the main area. Those issues aside, this is an interesting ability which will add a lot of fun puzzle abilities for your players. We will need to create 3 events, 2 common events, 2 switches, 2 variables. This chapter should be considered as intermediate difficulty. We'll create an event for the fireball itself (or arrow if you prefer). An event for learning/unlocking the ability. And an event to shoot at and do something. (so we can use it to solve puzzles) Start by creating 3 events on the map, not much script/contents yet, just create an event and give it a name. Put them somewhere in the topleft, where the player won't walk over them. * Shot: Priority below characters, Stepping animation, Through (disable the other 2 options), Frequency 5, Speed 2x faster. * Target Practice: Priority same as characters, Trigger on Parallel Process. * Learn Boulder(name doesn't matter though): Priority below characters, Trigger on player touch. Common EventsNext up, the common events (we'll get back to the other events soon), and we need two events to make this work. Common events can be found in the database section. * Name the first one "Use Check". This one is a bit complicated, but easy to understand in the end. Set it to trigger on a "parallel", and the conditional switch (create new) on "Ability Active". Feel free to rename it later. Create a conditional branch, then go to Tab 4 and set the check for "button cancel is pressed". As below: (Note you'll probably need to create the 2 switches 7 and 8 mentioned below) @> Conditional Branch: The X Button is Being Pressed @> Control Variables: [0003:Player-X] = Player's Map X @> Control Variables: [0004:Player-Y] = Player's Map Y @> Set Event Location: [Shot], Variable [0003][00004] @> Set Movement Route: [Shot] (Wait) : : Script : this._direction = $gamePlayer._direction @> Control Switches: [0007: Ability Active] = OFF @> Control Switches: [0008: Ability Used] = ON : Branch End @> This is also your very firs introduction to scripting. Just one line but still, more on that later. You "can" make this work without using a script, but a conditional branch with: if player is facing left, turn left, if right, do right, repeat for all directions. is a LOT of code for something that can be fixed with a single line of script. Conditional Branch can be found on tab 1. (Flow Control) Control Variables can be found on tab 1. (Game Progression) Set Event Location can be found on tab 2. (Movement) Set Movement Route can be found on tab 2. (Movement) Control Switches can be found on tab 1. (Game Progression) What we're basically doing here, is check whether the player has pressed a specific button. If so, get the player's current XY map coordinates and store those for later use. Then move the [Shot] starting position and rotation accordingly. After that we set the "used" switch on, so that another event can pick up from there. (In theory this could be done in a single event, but it's cleaner this way.) Save / Apply that common event and let's go on to the next one. We'll name the second event "Use Function". This event basically tells the game what needs to happen when the shot has been fired. Set the trigger to "autorun", and the condition switch to "Ability used" @> Set Movement Route: [Shot] (Skip, Wait) : : $> Graphic: '!Flame', 4 : : $> 1 Step Forward : : $> 1 Step Forward : : $> 1 Step Forward : : $> 1 Step Forward : : $> 1 Step Forward : : $> Graphic: (None) @> Set Event Location: [Shot], (000,000) @> Control Switches: [0008: Ability Used] = OFF @> Control Switches: [0007: Ability Active] = ON @> This event will tell the fireball to "appear" and move 5 steps forward from it's starting point, then disappear, return to a set location, and reactivate the default switches. Next up - making it all work together. Go to the "Learn Fireball" event, and add the following contents: @> Conditional Branch: Switch [0007: Ability Active] == OFF @> Text: -, -, Normal Bottom : : New ability learned! [Fireball] : : Press [PgDn] to shoot and activate torches. @> Control Switches: [007: Ability Active] = ON @> Control Switches: [008: Ability Used] = OFF @> : Branch End @> This will tell the player he's learned a new ability and how to use it, and set the "initial state" of the relevant switches so that the other events can begin monitoring the A key. You should already have set the other settings for this event above.
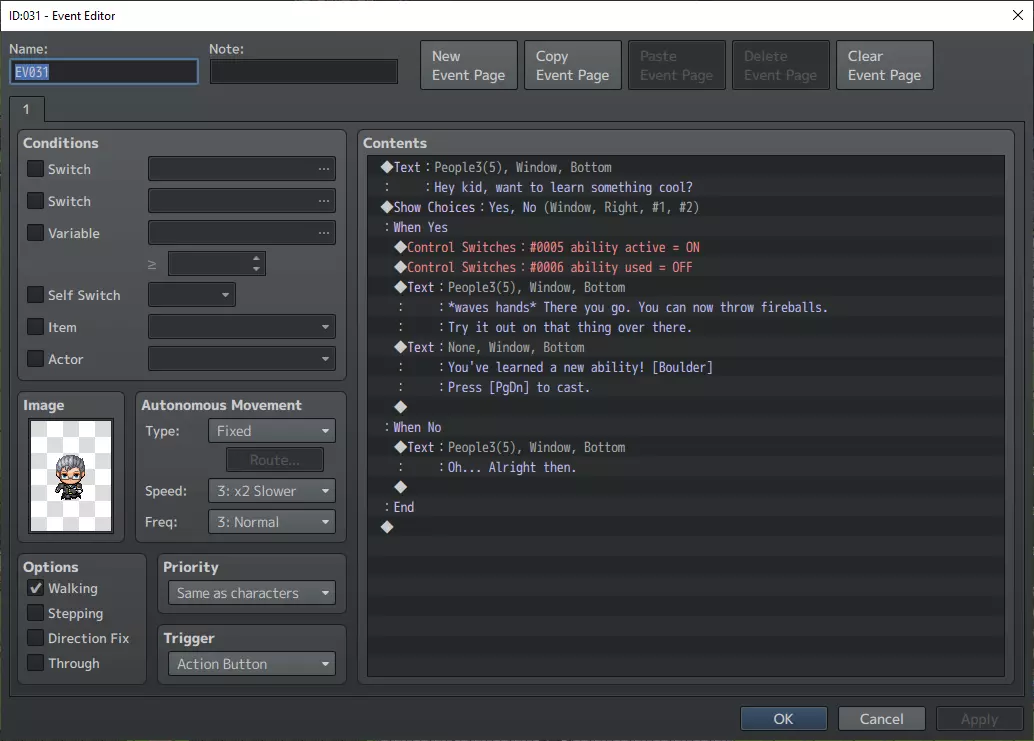
射击事件也无需进一步修改。 最后,我们要设置一个火炬(或基础营火)作为火球的射击目标。 打开“目标练习”事件并添加以下内容: > 控制变量:【005: 射击X坐标】 = 【射击】的地图X坐标 > 控制变量:【006: 射击Y坐标】 = 【射击】的地图Y坐标 > 条件分支:变量【0005: 射击X坐标】 == 31 > 条件分支:变量【0006: 射击Y坐标】 == 26 > 设置移动路线:【射击】(等待) > ::$> 图像:(无) > 设置事件位置:【射击】,(000,000) > 控制独立开关:A = 开启 > > 分支结束 > > 分支结束 应用这些更改,并为此事件创建一个新的事件页。将图像更改为“带火的营火”,并在条件中勾选“独立开关A为开启”。在选项中设置【步进动画】,并禁用其他3个选项。 触发器应设为【并行处理】,优先级设为【与角色相同】。 最后,我们只需在内容中再添加两行。注意这些是可选的,用于控制火焰自行熄灭,对基于时间的谜题很有用。 @> 等待:120帧 @> 控制独立开关:A=关闭 操作完成。 现在进行测试,你应该能在四处移动时发射火球了。 这是一个很棒的能力,可以在游戏后期赋予玩家,用于解锁河流对岸或栅栏后的开关。 注意,如前所述,本教程仍存在2个漏洞——如果你能提供帮助,请不吝赐教。
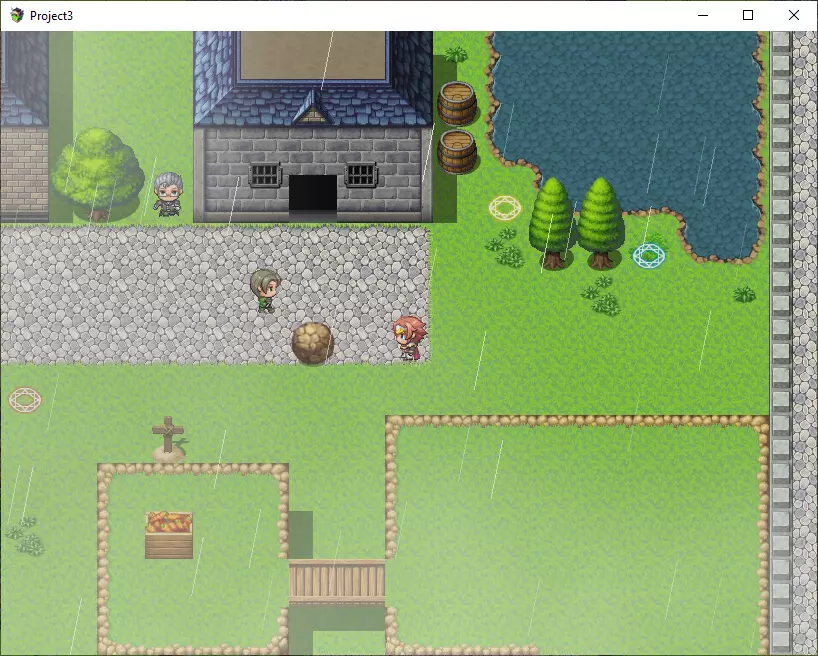
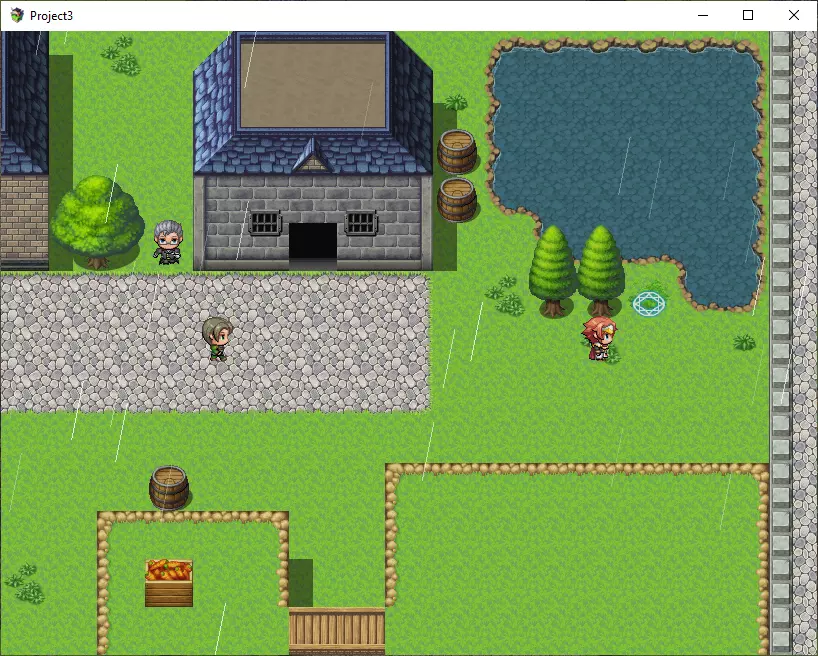
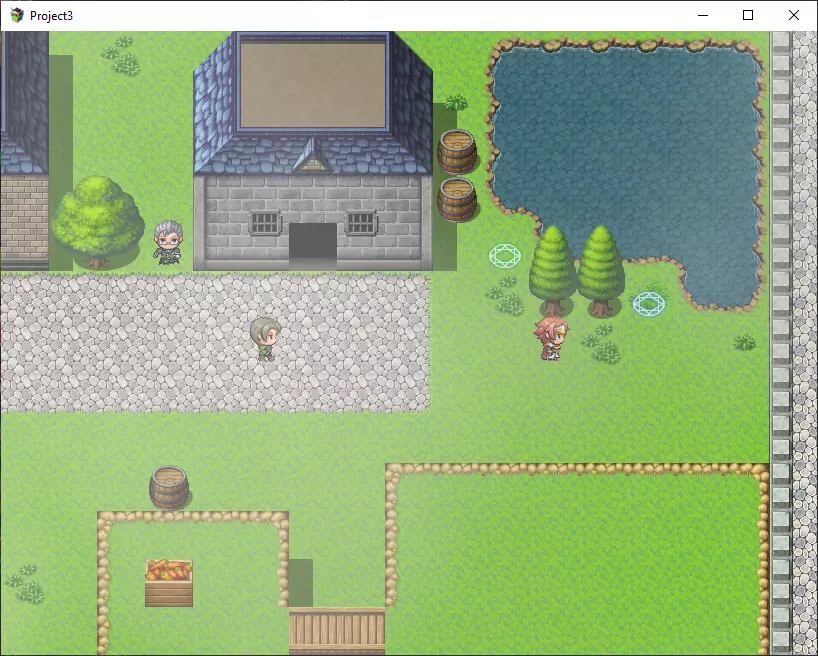
一些可能的用法: - 召唤巨石的法术来触发远程开关。 - 火球术点燃水面对面的远程火炬。 - 抓钩可拖动玩家跨越 gaps。 13. 天气效果和雾气 雨水、雪花、雾气、阴影和光线将为你的游戏增添氛围——这非常重要。 雨水和雪花的制作极其简单,因此我们将从这两种开始。 创建一个新事件,并确保其优先级设为【低于角色】,触发条件设为【玩家接触】。 接下来,从标签2中添加【设置天气效果】内容。 只需选择【雨】、【暴雨】或【雪】即可完成设置。 只需复制此事件一次,然后编辑它以获得其他天气类型。 不要忘记添加【无】类型,以便你之后也能再次禁用天气效果。 天气的简单部分到此结束。
雾的设置稍微复杂一些,但也不必担心。游戏默认安装时没有任何雾效资源,因此此时你需要打开谷歌并搜索“RPG Maker Fog”,从中下载一些图片(不过出于版权原因,之后不要在你的游戏中实际使用这些图片)。你会看到一些云雾模糊的图片,这些很适合用作普通雾效。此外,你还会看到一些阴影状的叶子图片,这些可以在森林场景中使用,用来模拟头顶树木的叶子效果。 下载完成后,点击工具 -> 资源管理器,然后选择“Img/Pictures”文件夹。你会发现该文件夹最初是空的。只需选中它,点击导入,然后选择你刚刚下载的雾效图片,将其添加到项目中。要启用雾气效果,我们只需创建一个事件(之后还需要一个“清除”雾气的事件,但我相信你现在已经能想到该怎么做了)。 创建另一个优先级低于角色的六边形事件,设置为玩家接触时触发。 在事件内容中添加以下指令: > 显示图片:1,'fog1',中心 (0,0),(500%,500%),110,普通 > 控制独立开关:A = ON 这意味着,显示编号为1、图形为“fog1”的图片。图片原点为中心,坐标(0,0),X轴和Y轴缩放至500%,不透明度为110(范围0-255),混合模式为普通。
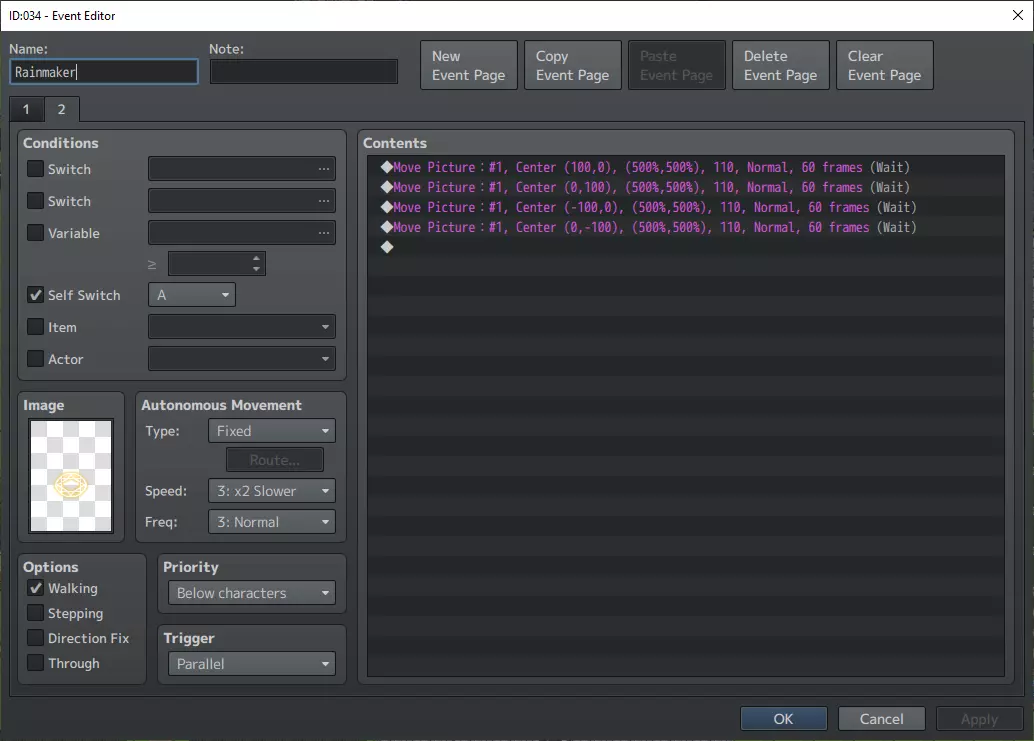
接下来,为此添加一个额外的事件页,并勾选“独立开关A为ON”。 禁用选项,并设置为并行处理触发。 然后添加4条“移动图片”指令,确保在雾效果激活时图像能持续轻微“移动”,避免雾看起来过于静止(从而显得单调)。具体操作为:向右移动、向下移动、向左移动、再向上移动,如此循环。在此示例中,我们将每次移动的速度设置为60帧,以便清晰观察移动效果,但在实际游戏中,你可能需要将其设置为600帧左右。移动图片:1,中心(100,0),(500%,500%),110,普通,@60,等待 移动图片:1,中心(0,100),(500%,500%),110,普通,@60,等待 移动图片:1,中心(-100,0),(500%,500%),110,普通,@60,等待 移动图片:1,中心(0,-100),(500%,500%),110,普通,@60,等待 就这样,踩在六芒星上进行测试,感受这诡异的氛围吧。
森林树叶、浓雾、薄雾、镜头光晕都可以用类似的方法制作。不过不要过度使用。