换一换
换一换 


觉得死太多次?资源不够用?坐下来放松一下,让佩妮来指导你如何生存下去,并希望能成功逃脱。来杯咖啡吧。 简介 作为佩妮的爱好者,我来帮你生存和逃脱。我会分享一些游戏前期/中期/后期的技巧,尽量不涉及剧透。我也更新了本指南,让特定信息更容易查找,既为那些只想快速了解无剧透的十大技巧的玩家提供便利,也为想要深入了解的玩家保留了详细解释。 欢迎在下方留言提供任何反馈或修正意见。 随着更多信息的公布和新发现的出现,我会定期更新本指南。 最后更新时间:2025年4月19日

10个快速提示 助你快速上手的小贴士;无剧透 1. 选择达芙妮和佩妮 达芙妮能额外制作食物和医疗包;佩妮的潜行能力更强,这让潜行处决和躲藏变得更容易。 2. 优先解锁区域内的望远镜 优先解锁新地点,以防你需要撤离当前区域。 3. 侦查、清理、运输 侦查 - 派遣你的佩妮或其他幸存者四处移动,尽可能探索,如有可能,消灭尽可能多的僵尸。 清理 - 对于较大的区域,你可能需要派遣第二名幸存者携带开锁器或断线钳来进入上锁区域,当潜行不足以进入房间时,也需要使用声音较大的武器。 运输 - 让背着大背包的幸存者去收集所有剩余的战利品。 4.尽快找到第二个避难所 僵尸攻击强度每隔一晚就会加剧,转移到新地点会将强度重置为1。不断移动可以节省用于 barricade( barricade)的木板。 5. 搜刮优先级 一旦开始拆解,拆解物品是最高优先级,因为它们的价值相当于多个 inventory space( inventory space),而自身只占用一个空间。咖啡、酒精和薯片能在游戏初期帮助幸存者保持状态,同时你还在升级各种设施。 6. 升级优先级 按需升级工作台 拆解台2级 烹饪区3级 公共区域1级(如果有5名或更多幸存者则升至2级) 便携床1级(如果有5名或更多幸存者则升至2级) barricade( barricade)1级(如果需要,但可以很容易地推迟到后期再升级) 武器工作台3级 医疗区3级 ……将其余设施升至最高级 7.幸存者数量:前期4人,以便在搜寻物资和制作物品之间保持平衡;后期5人,以便在每个阶段进行多次搜寻。 最佳前期幸存者: 乔——在Texway Gas Hart St找到:额外拆解奖励和+2背包空间。 弗兰克——在8号消防站找到:烹饪时获得额外食物,钝器伤害加成。 僵尸引开技巧:利用带门和隐藏点的相连房间,将未探索房间的僵尸引到已探索房间。你也可以使用瓶子或故意惊醒僵尸来引开它们,但要做好在它们回到巡逻模式前损失一两扇门的准备。这是前期节省武器的好方法。将生命值和医疗包作为资源管理 如果你的医疗包比较充足,可以主动使用声音较大的近战武器或拳头击倒僵尸,以节省潜行武器。把那些 Shiv( Shiv)和螺丝刀留到真正需要进行潜行击杀的时候再用。 【额外技巧】11. 使用瓶子 你可以将瓶子扔到僵尸身后,让它们转身背对你,这样你就能进行潜行击杀了。这在那些僵尸位于房间另一端、正对着你要进入的门的场景中非常有用。 10个技巧扩展 以下是每个技巧的详细说明: 1. 选择达芙妮和佩妮 如果你刚开始玩并且遇到困难,可以考虑使用达芙妮和佩妮,她们的技能会在整个游戏过程中为你提供帮助。达芙妮的【烹饪能手】技能能让你在游戏前期制作食物时获得更多产出,并且在后期依然有用。她的【急救训练】还能增加每次制作急救包的数量,在后期你需要与僵尸进行更多近身搏斗时非常有帮助。佩妮的【潜行】技能可以缩小她发出声音的范围,并且在使用隐蔽点时,巡逻僵尸发现她所需的时间更长。

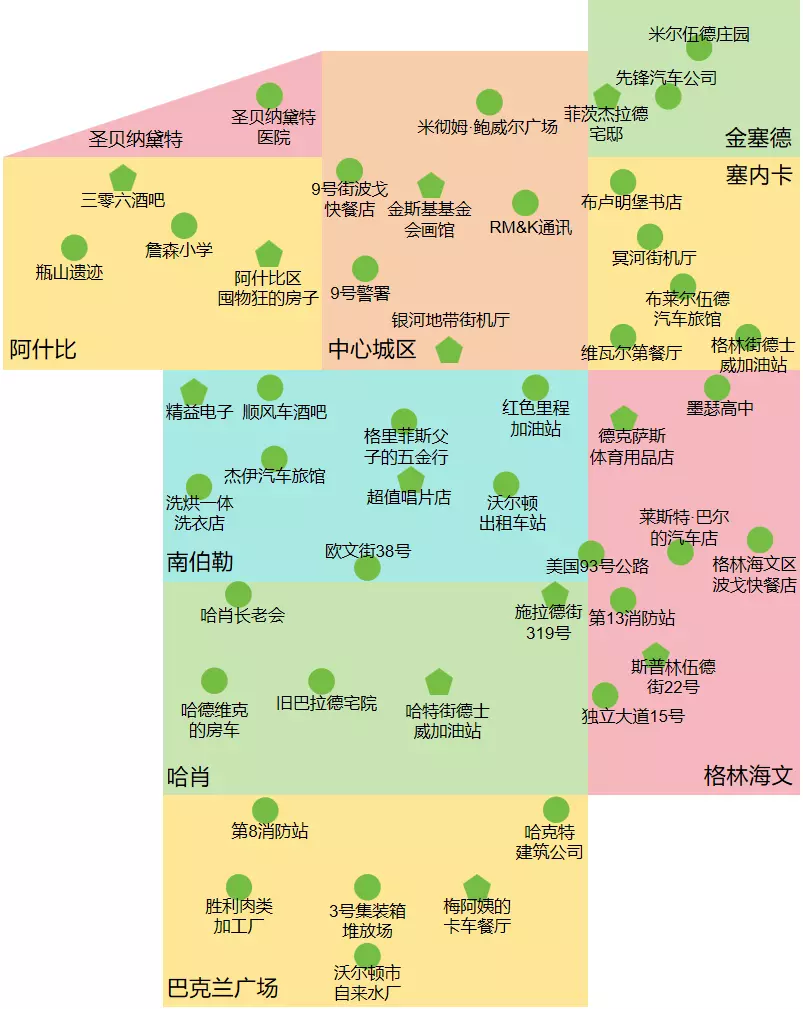
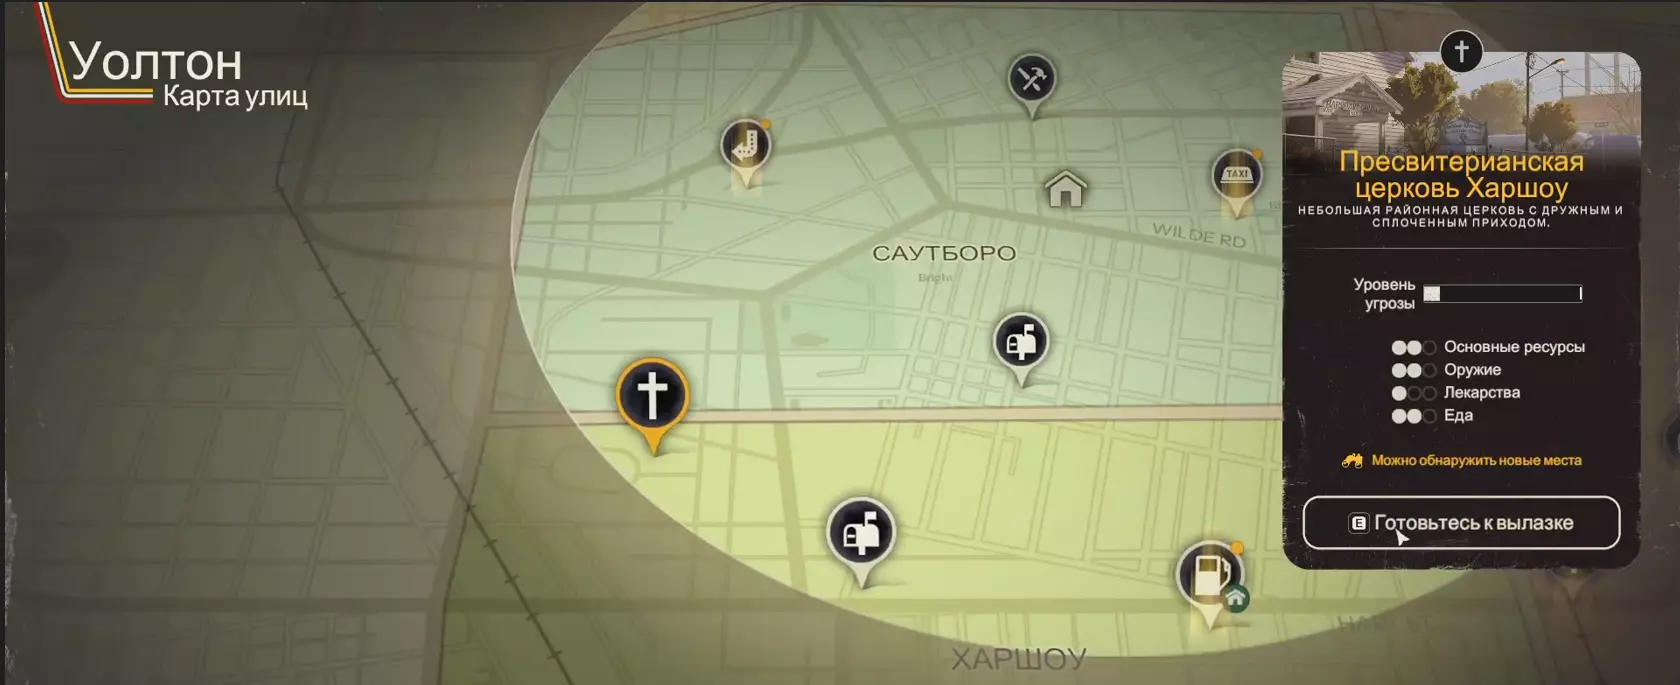
2. 优先前往区域内的望远镜处 进入一个区域时,优先爬上去并到达望远镜处,以解锁更多可探索的区域。这能扩大你可以搜刮的区域选择,并解锁新的、更好的避难所。最好尽早完成这些操作,以防你需要暂时撤离,并可能需要在之后准备更充分时返回。至少,你在搜刮时会有新的区域可供选择。

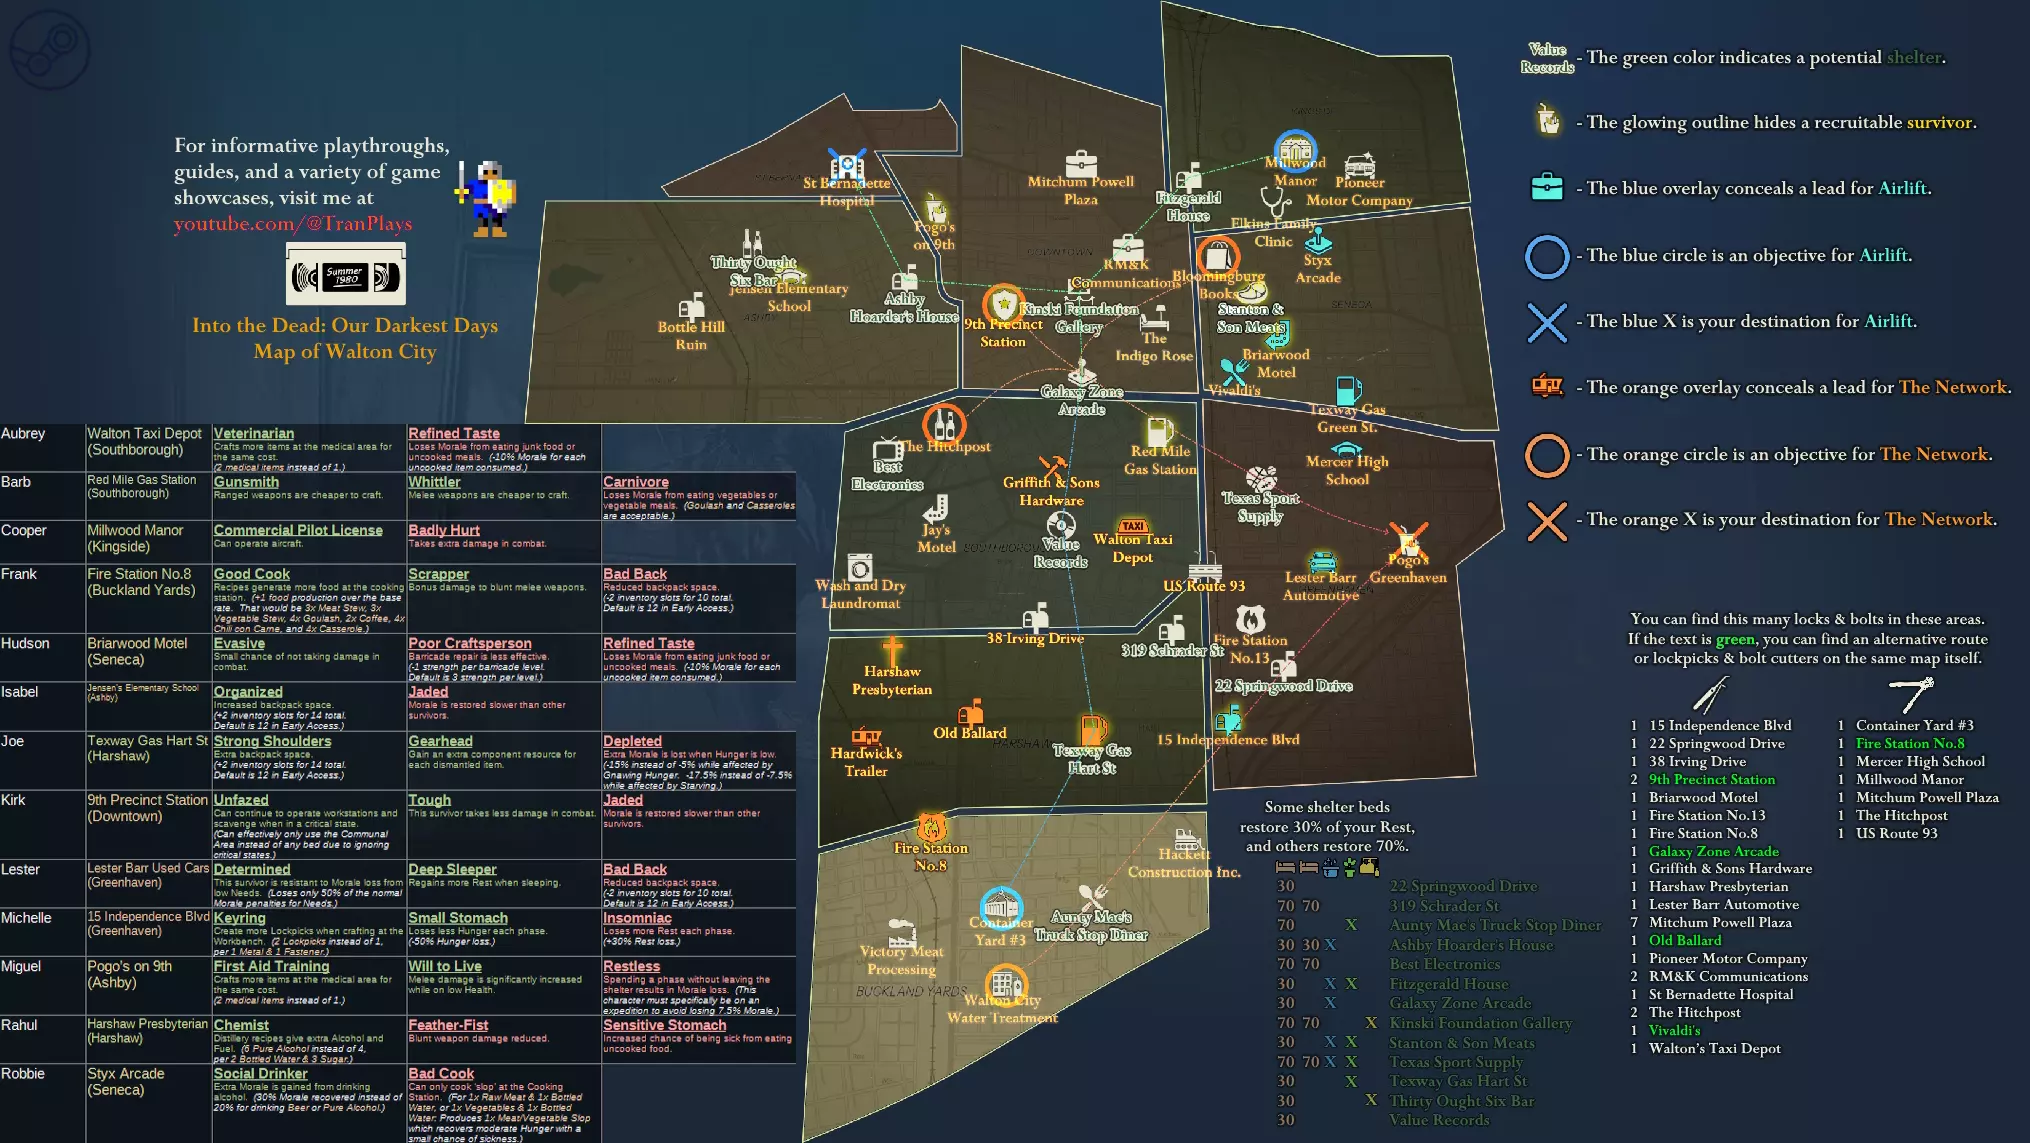
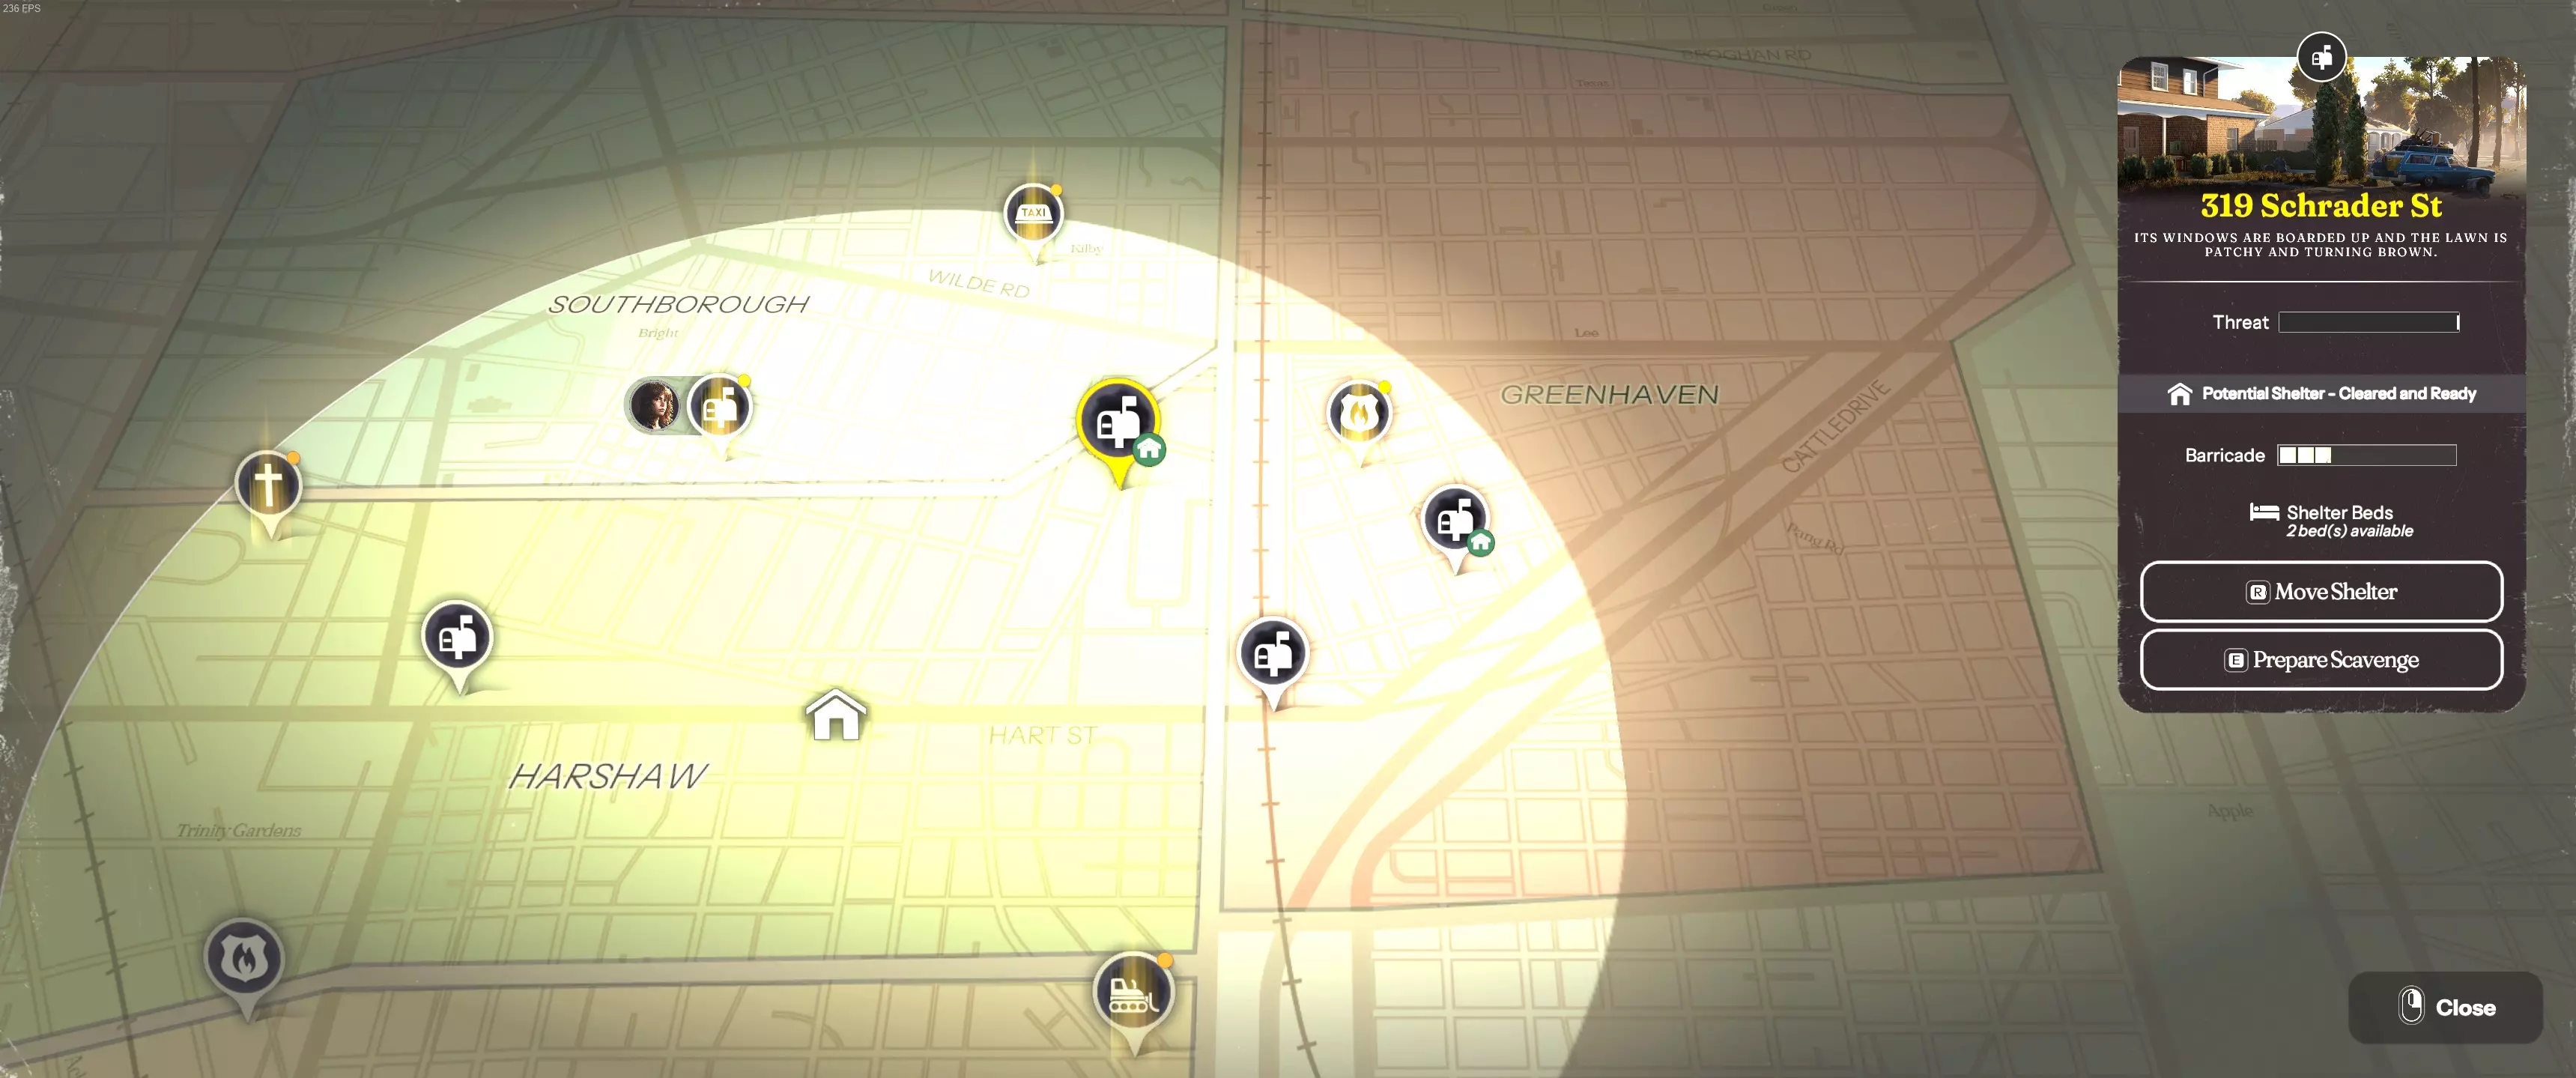
望远镜可以在地图上标有【新地点可发现】的位置找到。 3. 侦查、清理、运输 这是我处理每个地点的常用方法: 侦查:让专注于潜行的角色携带武器、开锁器和断线钳进入新区域,尽可能探索更多地方。打开所有需要开锁或断线钳的区域、捷径,并启动望远镜。悄悄消灭尽可能多的僵尸。优先带回武器和任何你缺少的材料。第二次行动时你会需要这些武器。 清理:下一次行动带上你的壮汉角色。游戏对此没有明确说明,但有些角色即使没有将其列为特性,也能比其他角色承受更多伤害(例如佩妮和乔,乔能承受更多攻击)。携带一些潜行武器和一些威力更大、耐用性更高的武器,专注于清理通往 loot 点的路径。如果可以的话,试着使用声音更大的近战武器,并节省潜行武器。 提示:如果你在一个封闭的房间里,且只有一只僵尸,切换到你的噪音武器,并确保在进行潜行击杀前关上门。无论如何,这都能一击杀死它们,这样你就可以把更安静的武器留到后面使用。这样做时要记住噪音范围机制,但大多数情况下你是安全的。 搬运:如果你有背包容量更大的角色,带他们到这里来,收集任何你可能遗漏的材料。如果你已经清除了该区域所有活跃的僵尸,那么你可以不带任何物品进入,以获得更多空间来带回材料。根据区域不同,你或许可以将此与清理任务结合进行。随着游戏的进行,你会更擅长估算这一点。 4. 尽快找到第二个避难所 你在避难所停留的时间越长,僵尸攻击对路障造成的伤害就会从1点逐渐增加到3点。切换到另一个避难所(新的或旧的)会将每次攻击的伤害重置回1点。根据需要重复此操作。记住,进入一个新清理过的避难所会自动将遗留的任何战利品添加到你的基地储备中。 注意事项: 离开避难所前,确保至少留下2个路障。这样,如果你在夜间返回,就能在僵尸攻击后还剩1个路障,从而有两个阶段来建造更多路障。如果你长时间不打理避难所,就需要重新清理它们。
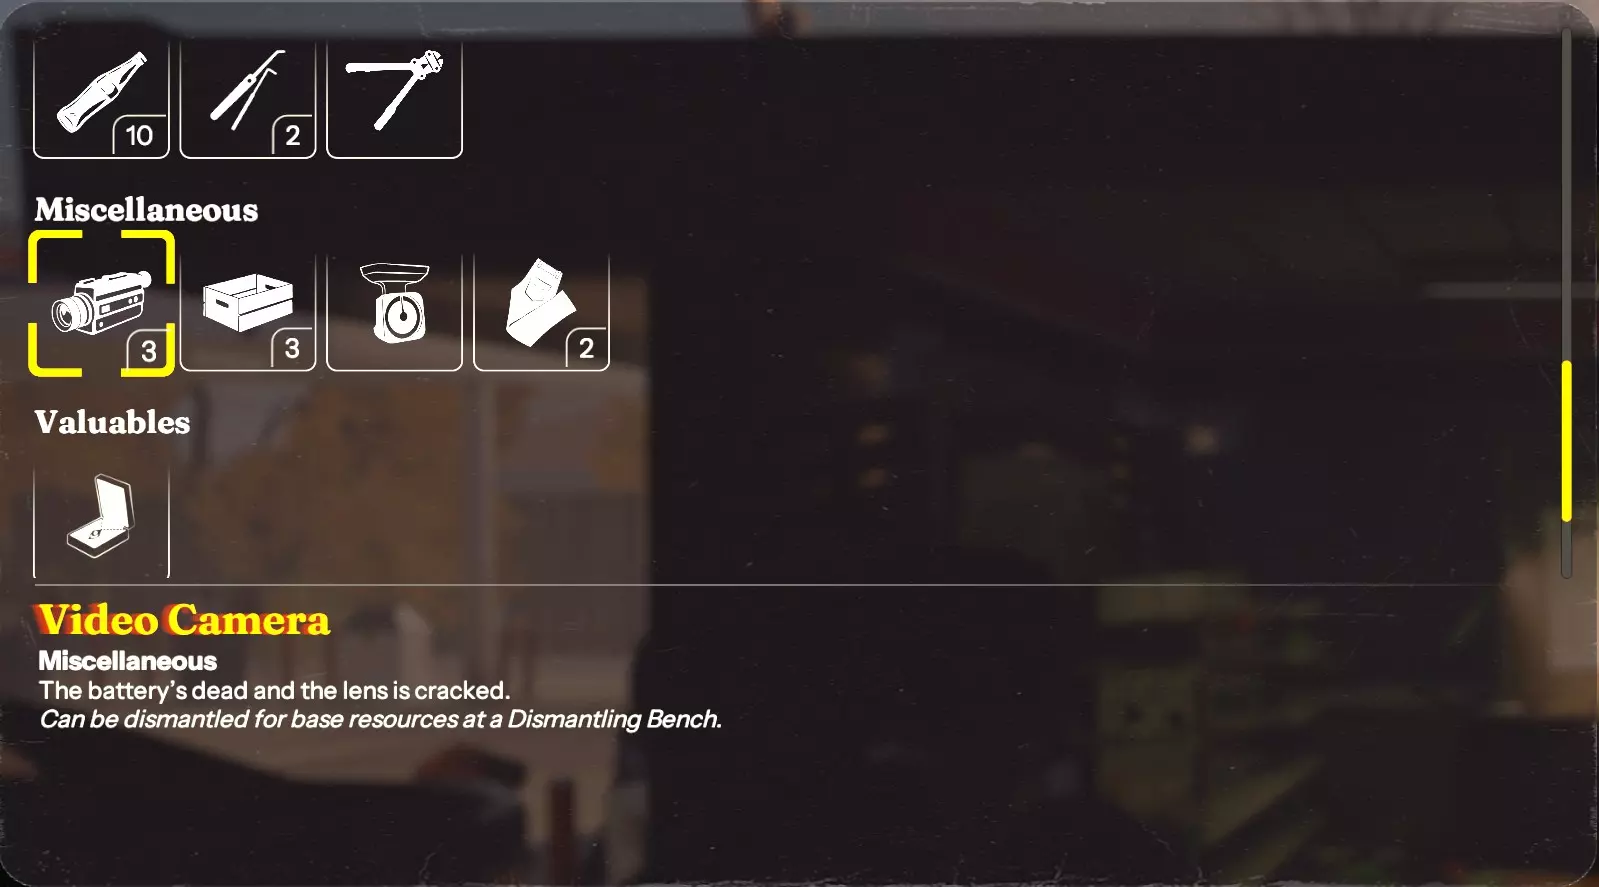
5. 战利品优先级 拆解物品 这些是最高优先级,因为它们通常能为单个占用槽位提供多个槽位的资源。如果这能帮助你在下次游戏中更好地清理区域,或者你还未解锁拆解站,你可以将其优先级降至武器之下,但一定要在某个时候回来处理这些物品。 潜行/中型武器 这些将帮助你清理更多区域,从而获得更多可获取的战利品,你永远不会嫌这些武器太多。拥有充足的这类武器意味着你可以为一些需要更隐秘潜入的房间节省时间和精力。尝试保留一些强力武器以及一把枪和弹药,以备那些需要与僵尸正面交锋的清理任务使用。咖啡/零食/酒类 这些是帮助你的幸存者度过游戏初期、同时让你逐步升级其他设施的好东西。不要舍不得用它们,因为一旦你的设施全部升到满级,这些东西就只会积灰了。尽可能在每个阶段都使用它们,让幸存者保持最佳状态,并在拥有3级升级时,从食材和各个阶段中获得更多收益。 金属 所有东西都需要金属,确保把找到的每一份金属都带回来。 水 游戏后期种植蔬菜和烹饪食物都需要水。尽可能多收集水,因为你需要用它来种植蔬菜和烹饪。一旦解锁带有水过滤功能的避难所,你的用水问题就解决了,所以在那之前要尽可能多地收集水。
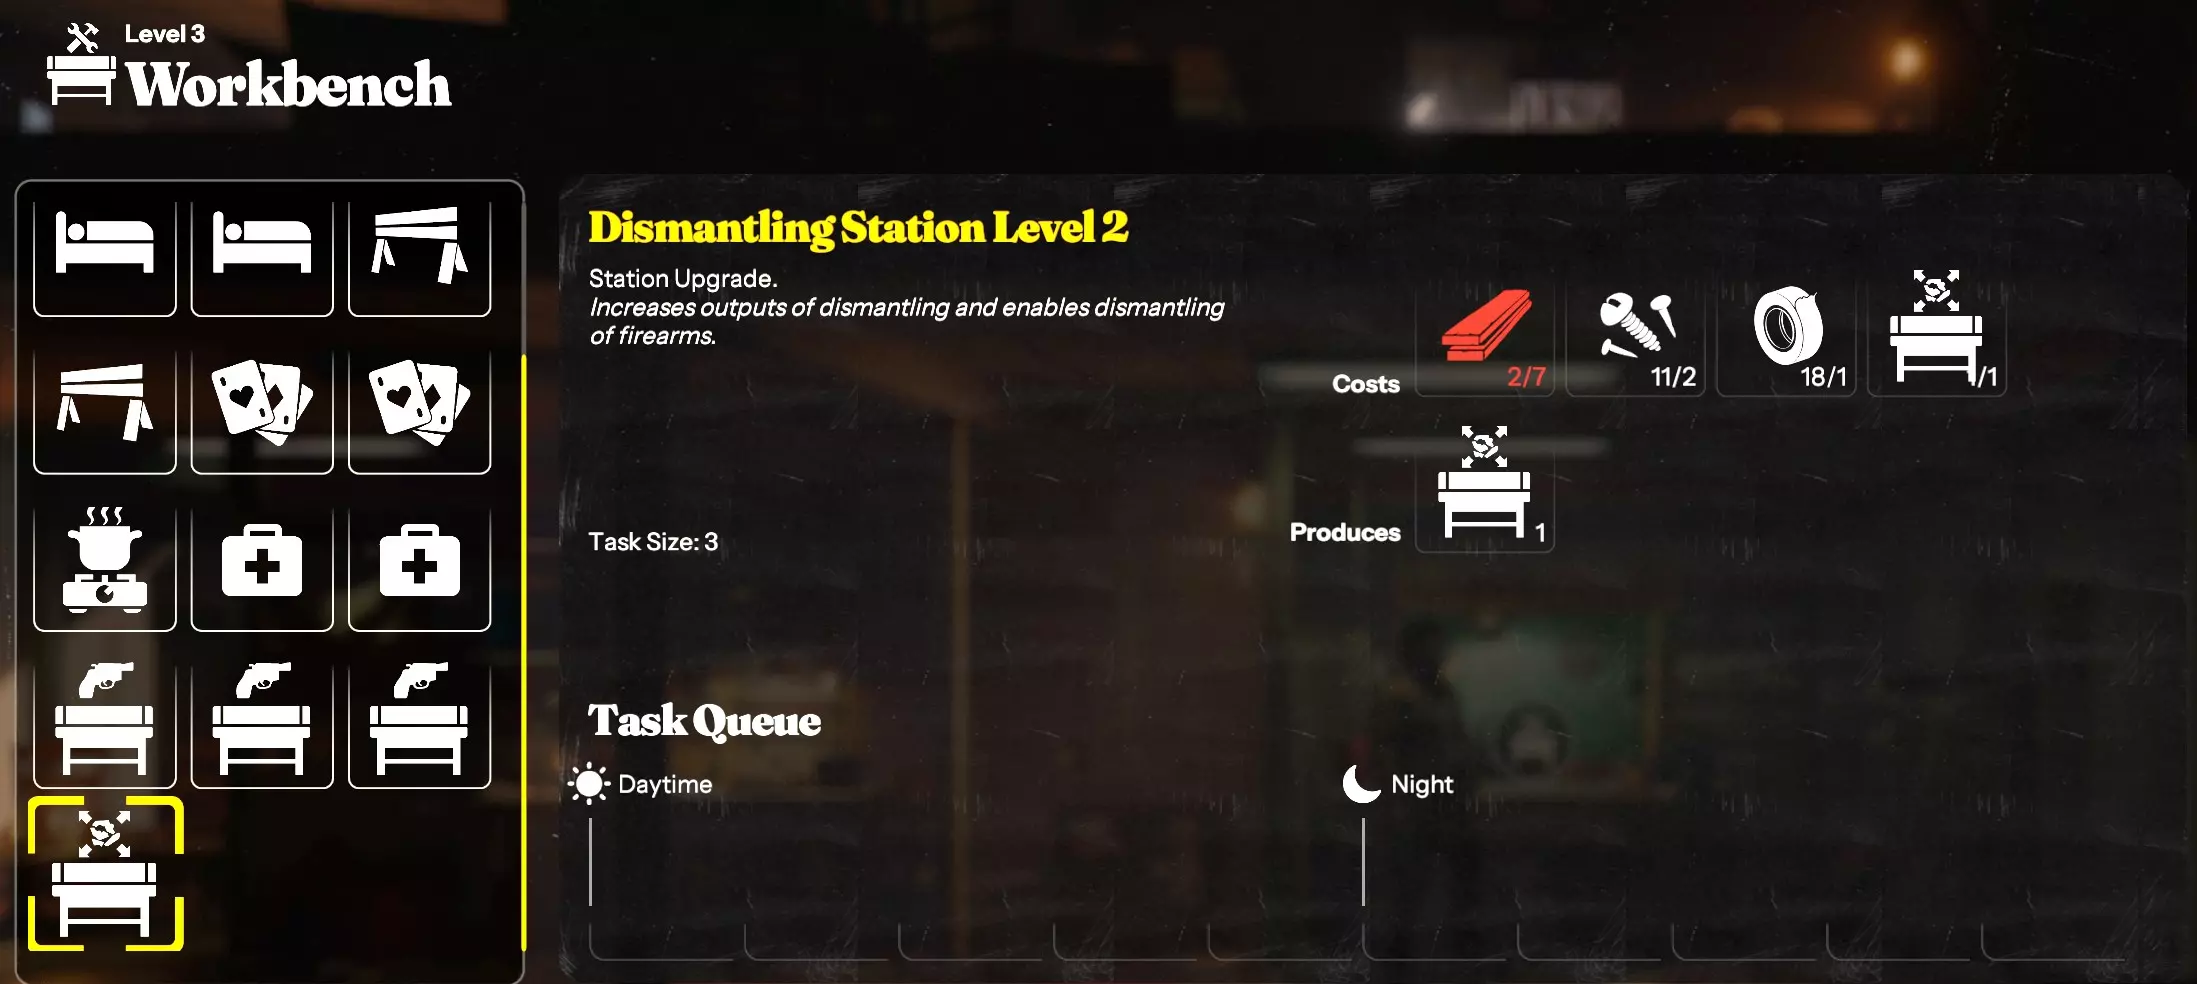
6. 升级优先级排序 按需升级工作台 拆解台2级 烹饪区3级 公共区域1级(若有5名或更多幸存者则升至2级) 便携床1级(若有5名或更多幸存者则升至2级) 路障1级(如需建造,但可轻松延后) 武器台3级 医疗区3级 ...将其余设施升至最高级 游戏初期需要大量升级工作台和进行搜刮。咖啡、啤酒/纯酒精是提升士气和控制疲劳度的好方法,这样可以让你的幸存者在每个阶段都能持续工作。 在能够制作中型/大型餐食前,尽量依靠薯片维持生存。开始招募更多幸存者后,建造第二个便携床和第二个公共区域。一旦稳定了食物供应,拆解站会为你提供大量材料,帮助你进行下一级别的工作站升级。理想情况下,在解锁3级武器工作台之前不要制作武器,因为低等级的武器性能不佳(偶尔制作的 Shiv 除外)。一旦开始需要制作医疗包,在升级完武器工作台后就将医疗区升至满级,3级医疗区会减少每个医疗包的制作材料消耗。
7. 幸存者数量 游戏全程建议保持4-5名幸存者。当你需要在每个阶段安排幸存者升级制作站时,你会觉得5人是必要的,但这种情况只会持续到所有制作站完全升级为止。如果有闲置的幸存者,每个阶段最多可以派遣3人去搜寻物资。如果你觉得需要养活的人太多,不必害怕让某个幸存者执行九死一生的任务。升级后的公共区域可以轻松一次性消除悲伤负面状态。这也是使用闲置的高噪音武器清理高威胁区域僵尸的好方法。当你拥有充足的物资后,可以考虑招募第五名幸存者,以便在每个阶段进行更多的搜寻活动,但这最终取决于你自己以及何时能找到他们。

8. 应该招募哪些幸存者? 优先招募能够提高制作效率的幸存者,比如增加制作产出或减少制作所需材料的。 乔非常出色,他拥有额外的背包格子,还能提供额外的拆解材料。 如果你没有达芙妮,弗兰克将是你的首选厨师,他拥有“优秀厨师”技能,同时使用钝器类近战武器时还能获得加成。 奥布里可以提高医疗包的制作效率,在后期战斗较多时非常有用。 能够简化武器制作的幸存者在游戏后期也很有价值。

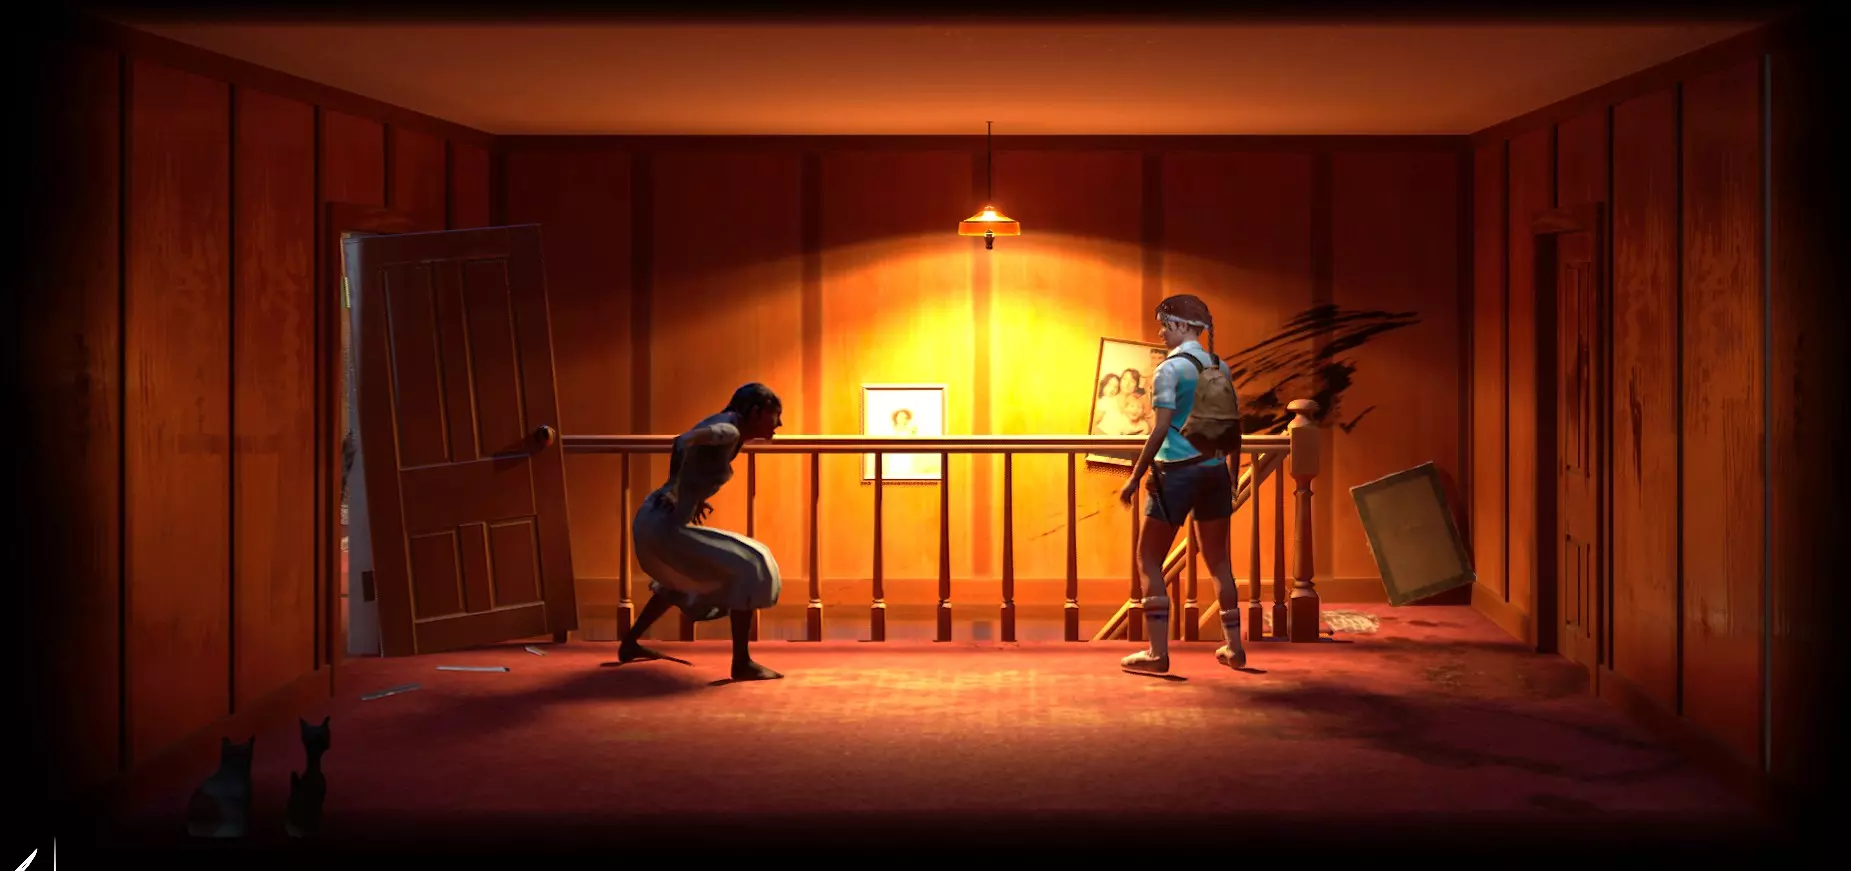
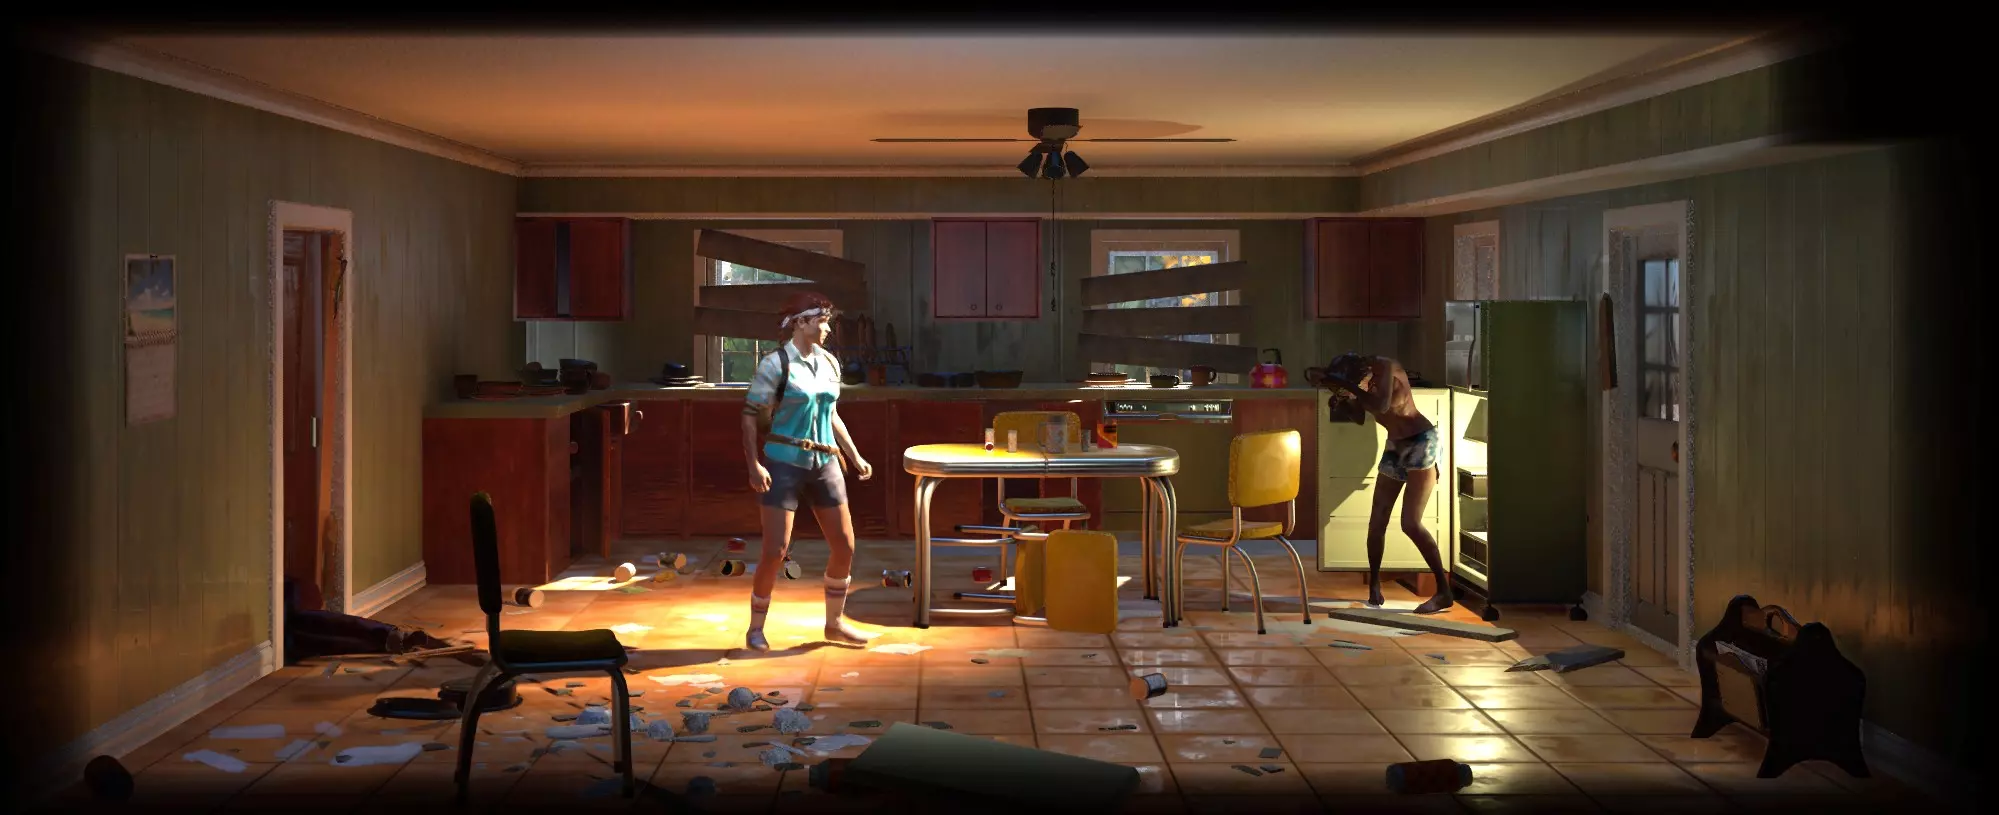
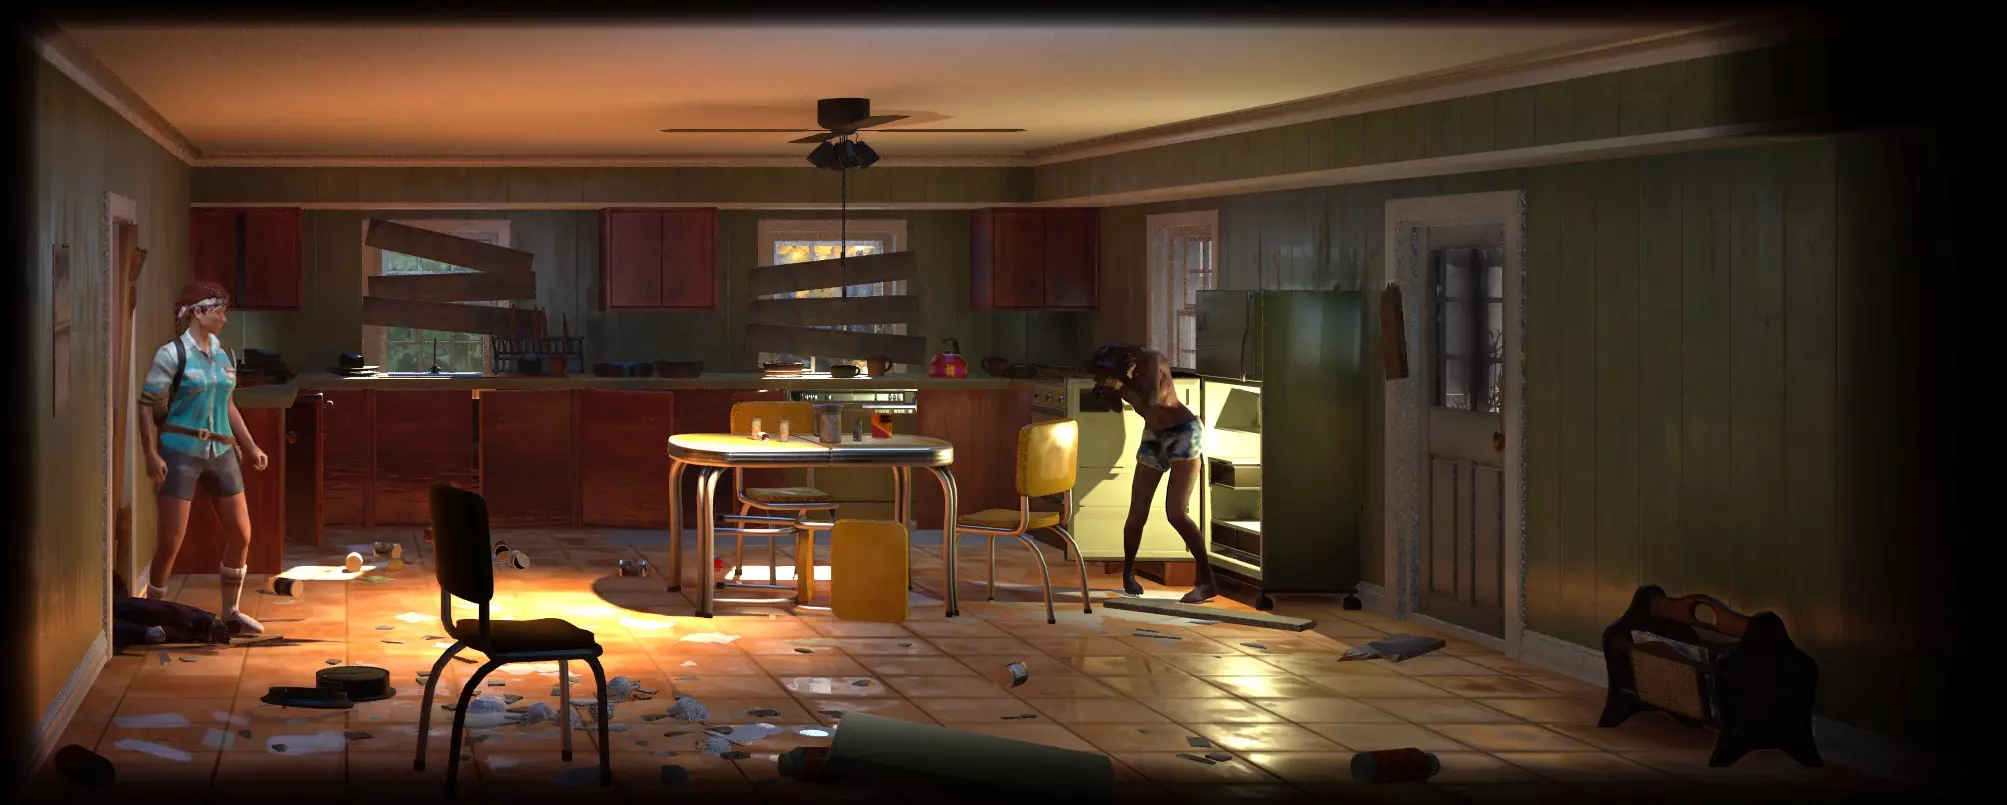
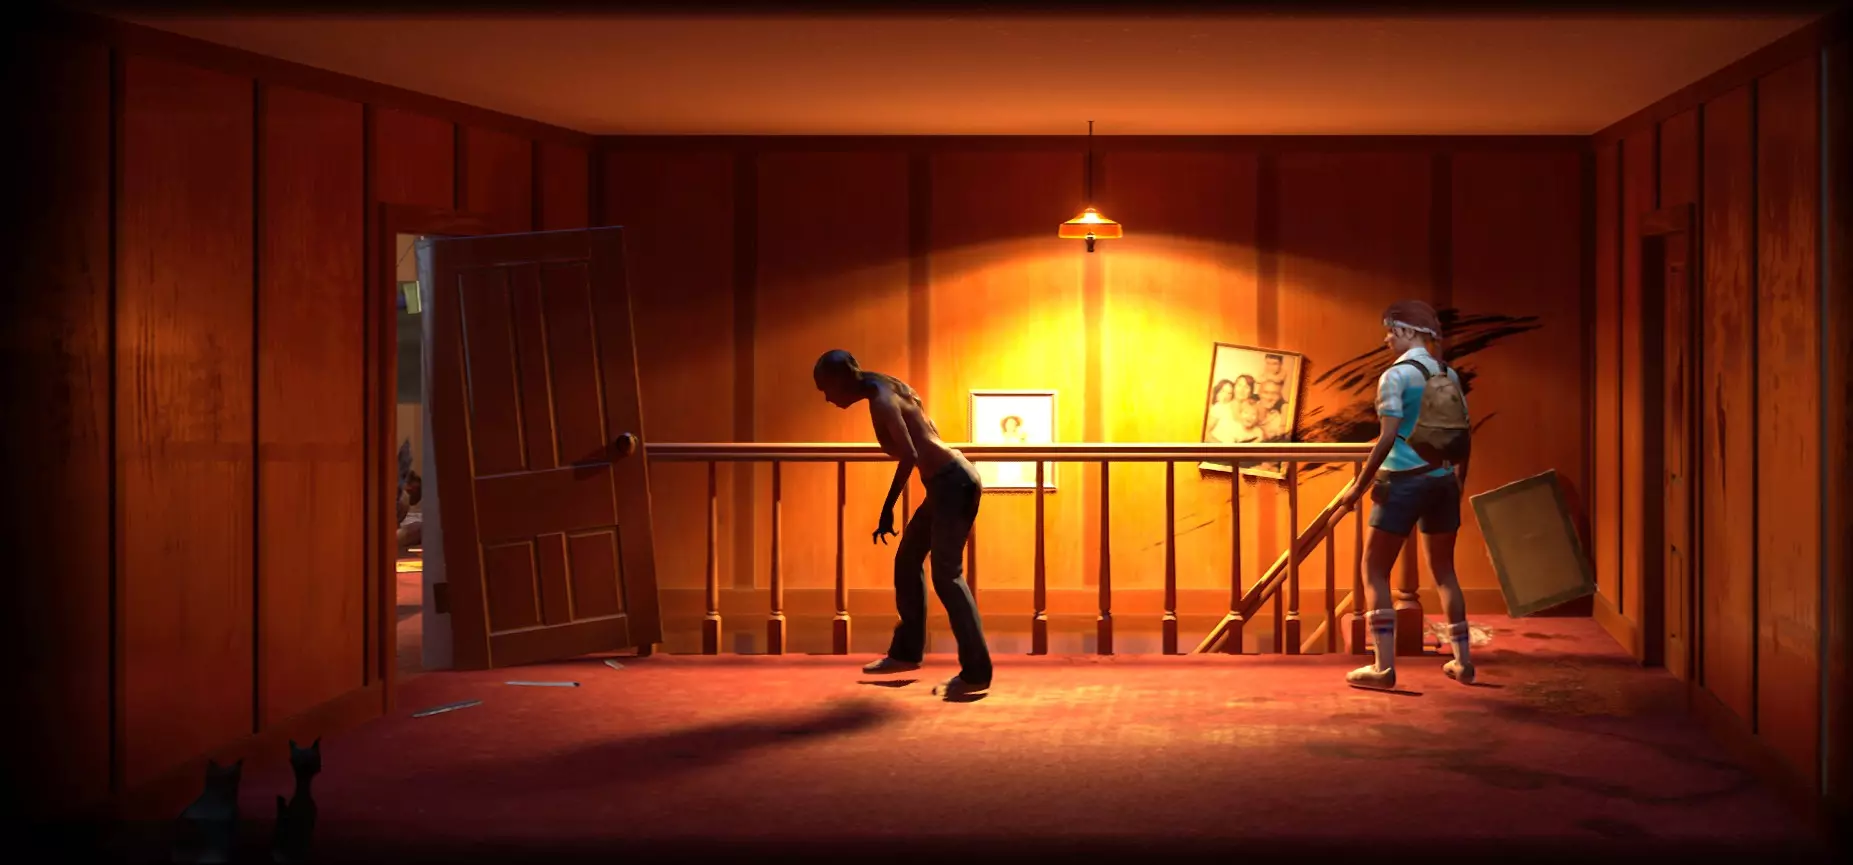
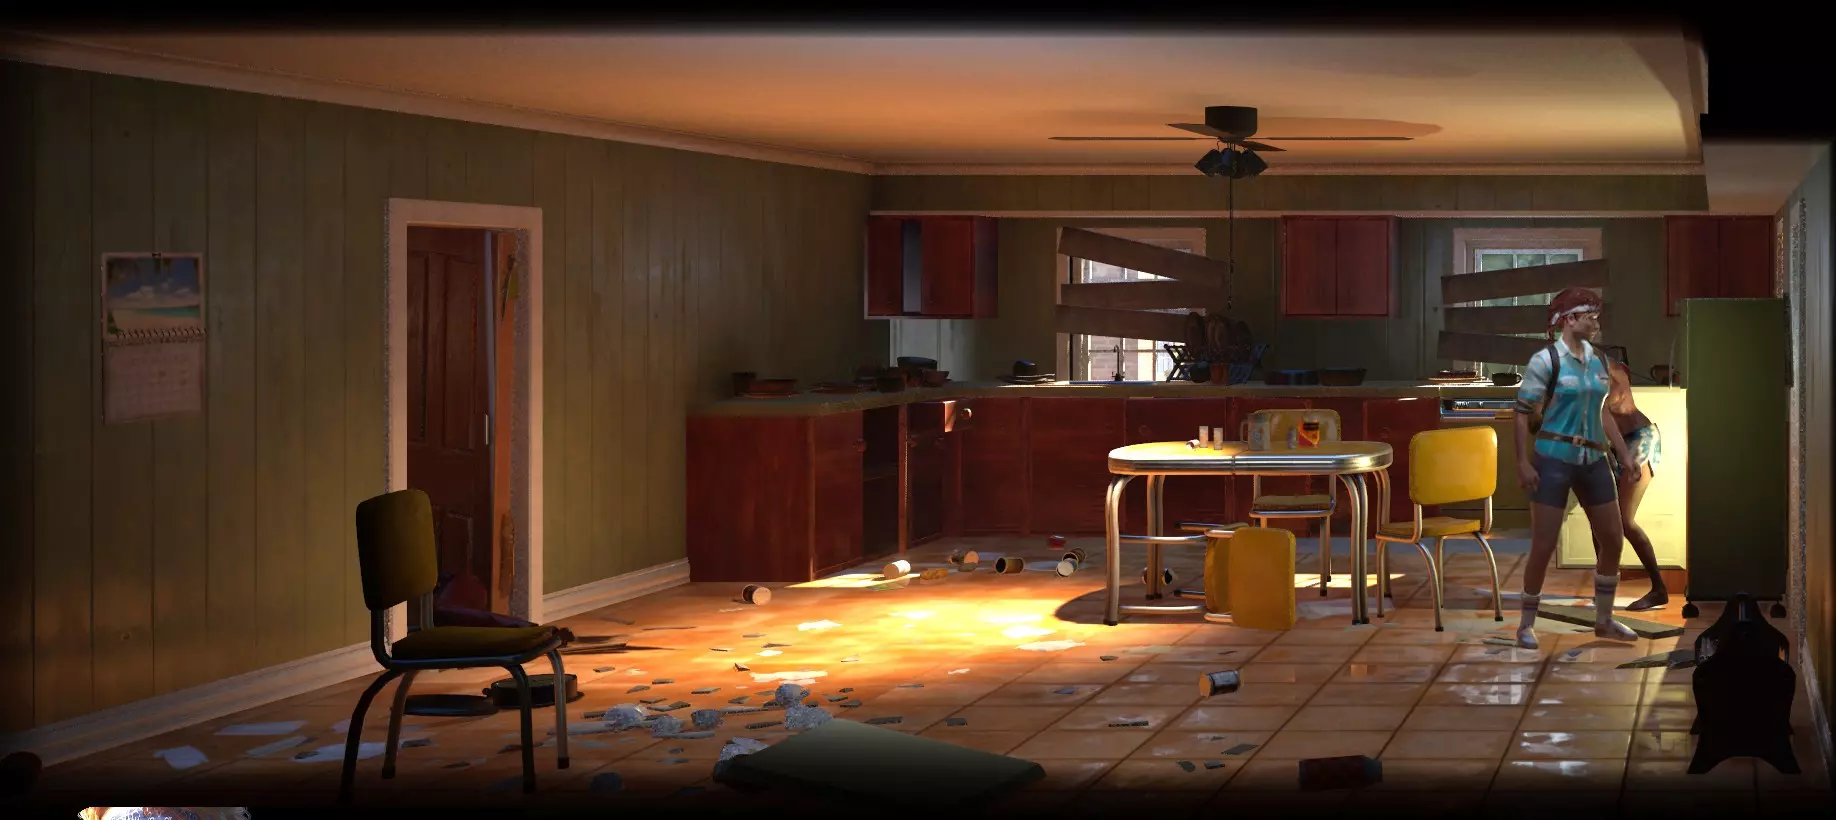
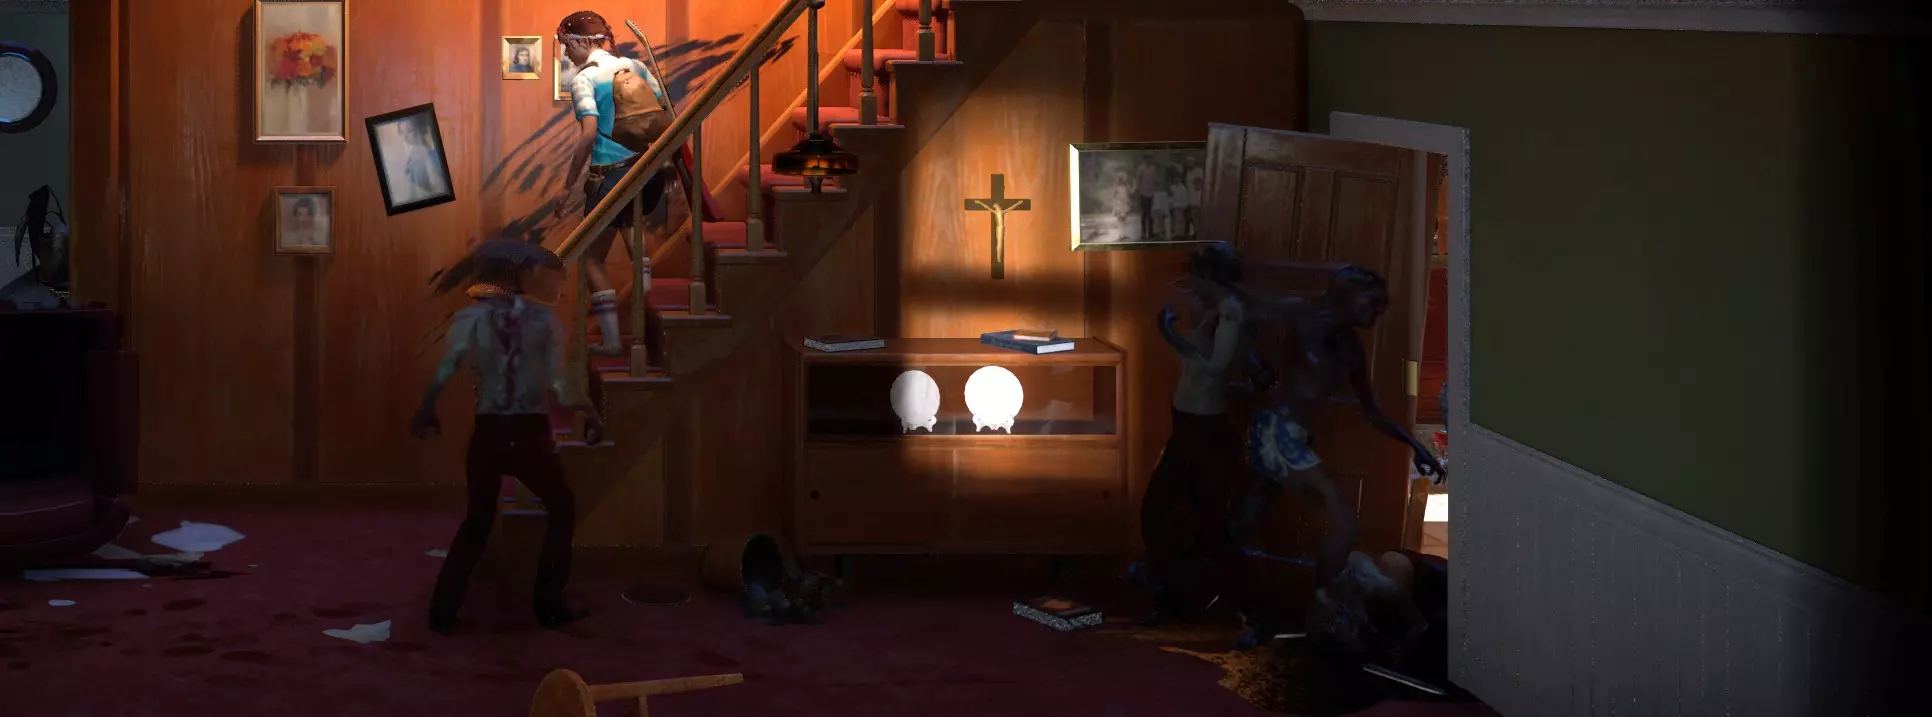
9. Zombie Shuffling Zombie shuffling utilizes zombie's patrol patterns to lead them to different rooms so you can safely scavenge loot spots, especially in smaller rooms. Zombie shuffling can be done when you have long stretch of connected rooms, separated by doors. By opening the door the zombie is originally patrolling, you can get them to leave that room, go past them and lock the door behind you, allowing you to safely scavenge. Once you're ready to go back, you repeat the same method and trap them in the original room they're in. This usually requires hiding spots but most rooms have these so it shouldn't be an issue. You can get creative with this by using loud sounds/running to attract zombies to different floors, and trapping them in dead-end rooms that you've already cleared out. Just keep in mind that using loud sounds may cause zombies to break a door between you and them so make sure you have enough doors as buffers in case. This is a good way to conserve on stealth weapons, or luring zombies in more secluded places so you can fight them with louder weapons. 10. Use HP and Medkits as a Resource If you have loud weapons sitting around: You can proactively use loud melee weapons, or your fists to take down zombies and conserve stealth weapons if you have excess medkits lying around. Save those shivs and screwdrivers for when you really need to go for a stealth kill. Alternatively, you can also use your plain fists to conserve on weapons. This is especially helpful early game when zombie density is still small. How to Fight a Zombie with Fists The rotation is: 3x Punch Dodge (Q with Keyboard) Walk back, wait for zombie running/shambling animation 3x Punch Dodge Walk back, wait for zombie running/shambling animation 2x Punch Execute After punching a zombie 3x, they usually become immune to stagger and will hit back immediately. We dodge back once to dodge the hit (wait for zombie to do it's attack animation), then walk back to create distance. The reason for the walk back is that survivors have a dodge meter and can only dodge twice in a row. It takes the duration of 3 punches for a meter to fill back. Normally this would be fine, but some zombies are more unpredictable, and they either need an extra set of punches, or they will attack immediately after 2x punches instead. By walking back after every dodge, this gives your dodge bar time to regenerate to full, allowing you to theoretically perform this combo infinitely. Note that some zombies behave even more erratically and just seem to tank the stagger from your punches and hit you constantly. I haven't found a way to consistently identify these zombies yet but in general, prepare to get hit 1-2 times per zombie whenever attempting to kill with fists. I haven't tried this with the beefier zombies, but the rotation should work all the same. Credits to JandaAmatir/Carla for their barehand guide that inspired me to look into this. Bonus Tip: Use Bottles Some rooms have zombies facing your way, making a stealth kill impossible. Use a bottle and throw it behind them to make them look behind, and swoop in for your stealth takedown. Don't overuse bottles as you will need them for Water later though. Terminologies Unofficial terminologies I'll be using throughout the guide just to ensure we're all in the same page: Active/Inactive ZombiesActive Zombies These are the ones that are in your way and will attack you on sight. Inactive Zombies These are the zombies in the foreground and background. You can walk past them and will not "activate" unless you create noise near them. Weapon NoiseWe classify weapons based on the noise they make as noise affects how zombies react around you. Stealth Weapons Weapons that have a noise level of around 30% or lower. They usually have low durability and break with one hit. Ex. Makeshift knife, Army knife, Scalpel, Broken Glass Bottle, etc. Medium Weapons Weapons that have a noise level of 30-50%. These tend to have higher durability than quiet weapons, and are used to do stealth kills as long as no active/inactive zombies nearby. Loud Weapons These are the heavy hitters, high durability weapons, and guns. They can alert active/inactive zombies, and the sound can go through doors (tested on 4/11/2025). Check the Sounds section under Game Mechanics for a deeper dive into this. Game Mechanics I've tested these myself, but feel free to do your own testing and let me know if you find something different. Penny's "Sneaky" SkillSneeky seems to reduce the range of which zombies can hear Penny's actions. Keep this in mind when looking at the reference images in this guide for sound distance, as you'll likely need more for other survivors. The screenshot below is a comparison of Penny and Daphne doing the same stealth kill, but Daphne triggers the zombie by the fridge. Looking closely, Penny is actually closer as she's covering one of the plates in the background, while Daphne is further back, but still triggers the zombie.
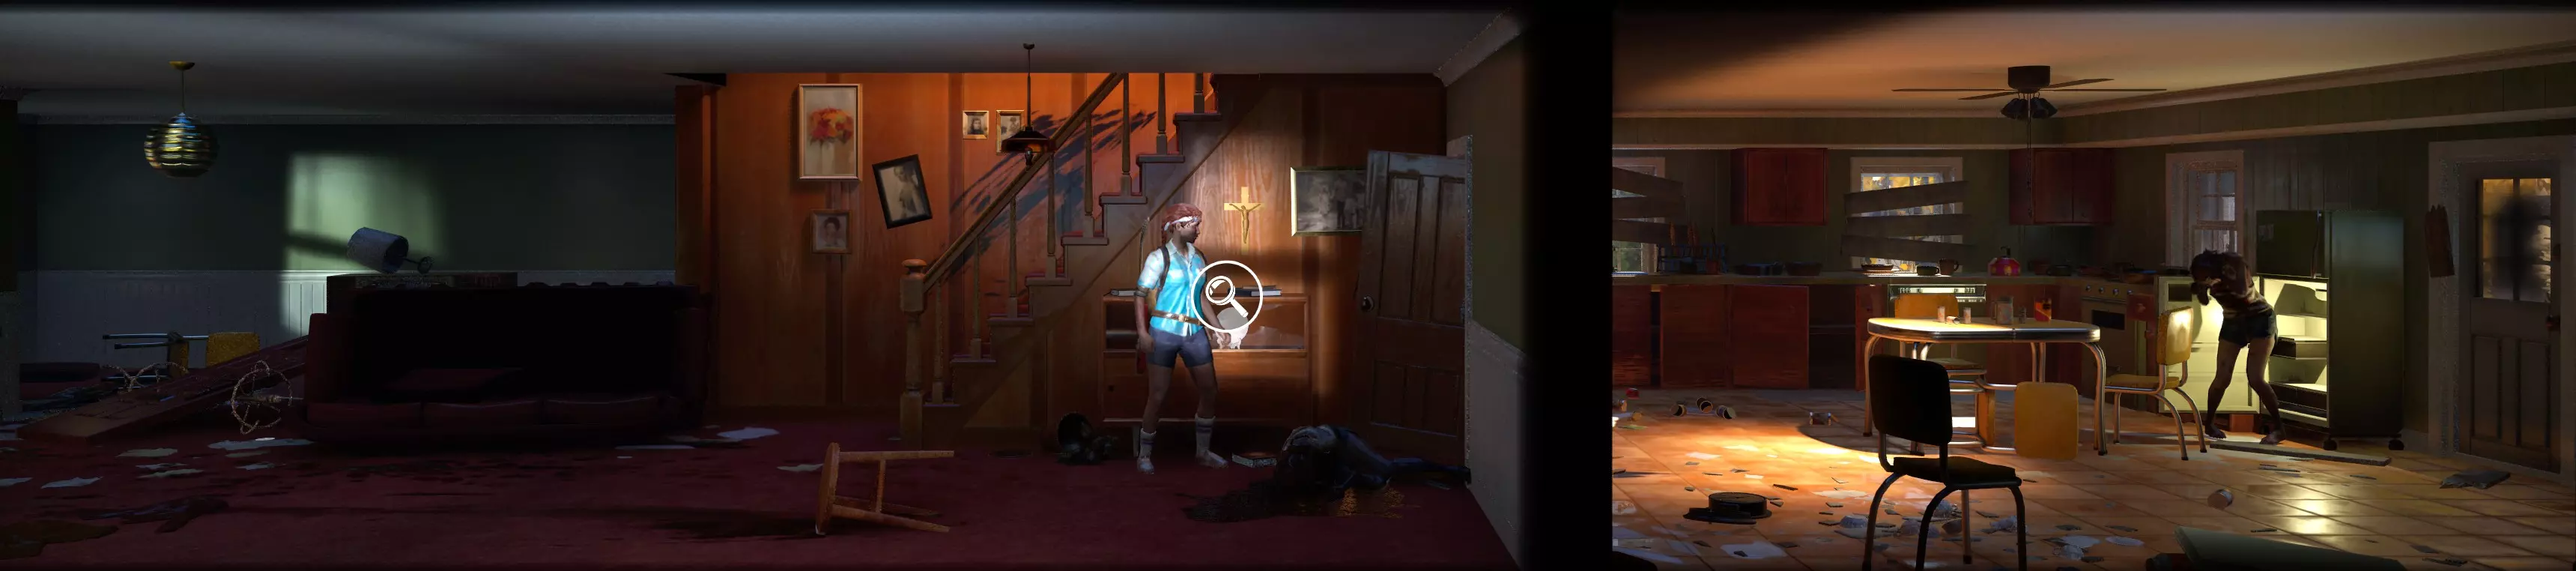
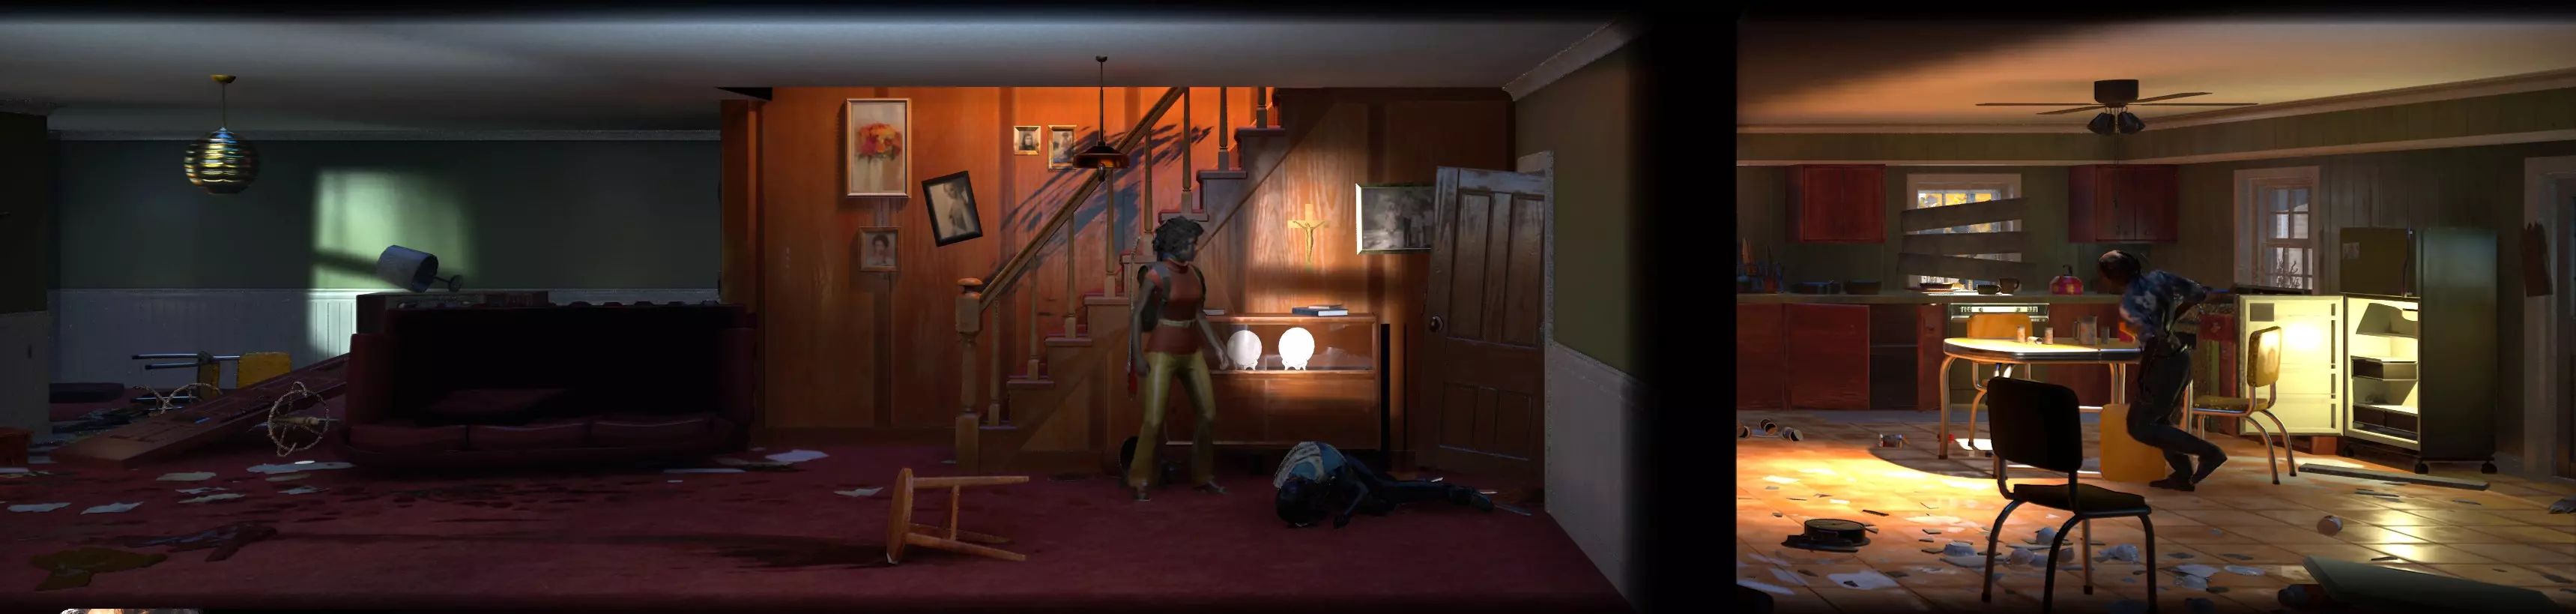
达芙妮再往后退,僵尸仍会醒来 声音说明:截至2025年4月16日热修复,潜行击杀的噪音已全面降低一半。这些内容需要更新,但你可以将其用作参考,并减半以获取当前正确的距离。 潜行声音 安静。你被发现的唯一途径是处于活动僵尸的视线范围内,或者在任何僵尸附近执行动作。 行走声音 行走声可以穿过门。僵尸必须在门的另一侧才能被触发,所以行走时要小心。
僵尸被触发行走所需的距离 跑步声音 跑步似乎会持续暴露你最后的已知位置。我通过以下方式测试:跑步经过一扇关着的门,触发门后的僵尸,然后躲在楼梯的隐蔽处。如果我一直跑到楼梯,僵尸似乎会跟到那里。如果在进入楼梯前停止跑步,潜行进入楼梯,它们似乎就不会跟进来。 潜行击倒 这里指的是使用潜行武器进行的潜行击倒。在未激活的僵尸面前直接进行潜行击倒会唤醒它。与未激活的僵尸保持一定距离进行潜行击倒则不会唤醒它。对已激活的僵尸也适用同样规则。使用会损坏的潜行武器进行了测试,武器损坏时会产生掉落噪音,需要测试在不活动的僵尸面前进行潜行击倒时,这是否是一个影响因素。
潜行击倒安全距离估算 中型击倒 若潜行击倒的有效范围为小型房间的一半距离,那么中型击倒则需要整个小型房间的长度,即从房间一端到另一端的距离才能保持安静。 *需要测试
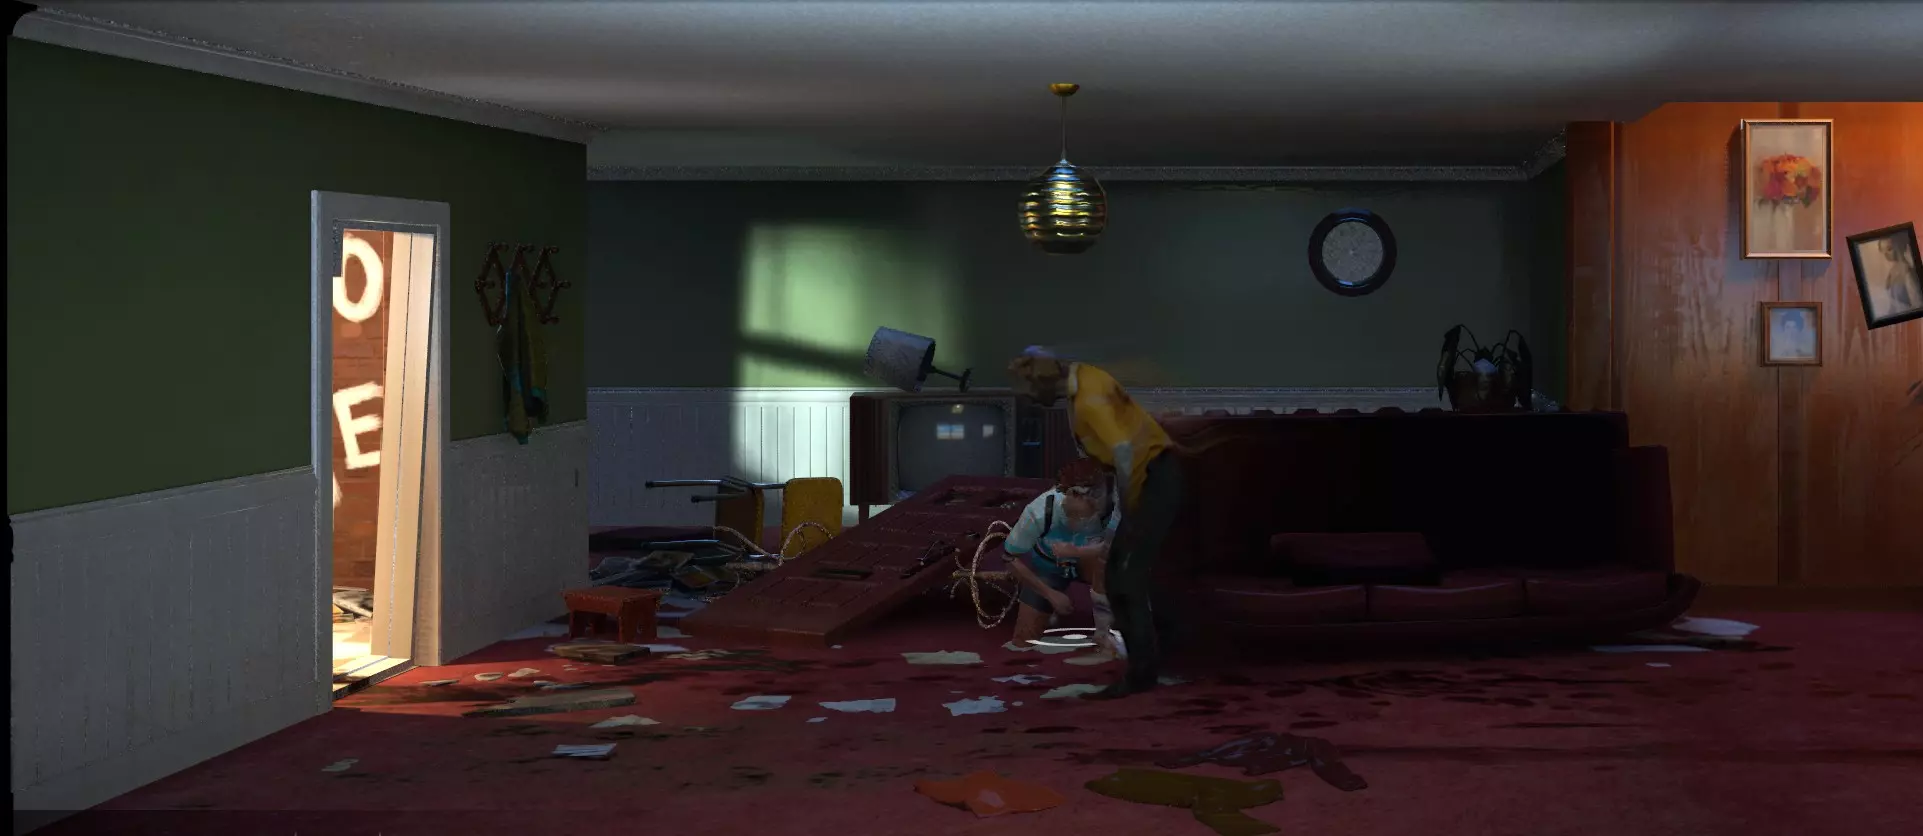
中型击倒的安全距离估计 响亮声音/击倒 声音似乎能传播全屏范围,可穿透门(可参考门部分的对比)。不会传播到其他楼层。活跃的僵尸似乎比不活跃的僵尸能从更远的地方听到你的声音(通过跑步测试)。佩妮也能减少响亮声音的传播范围,详见下方对比: 使用约80%噪音的吉他测试得出的响亮击倒安全距离估计
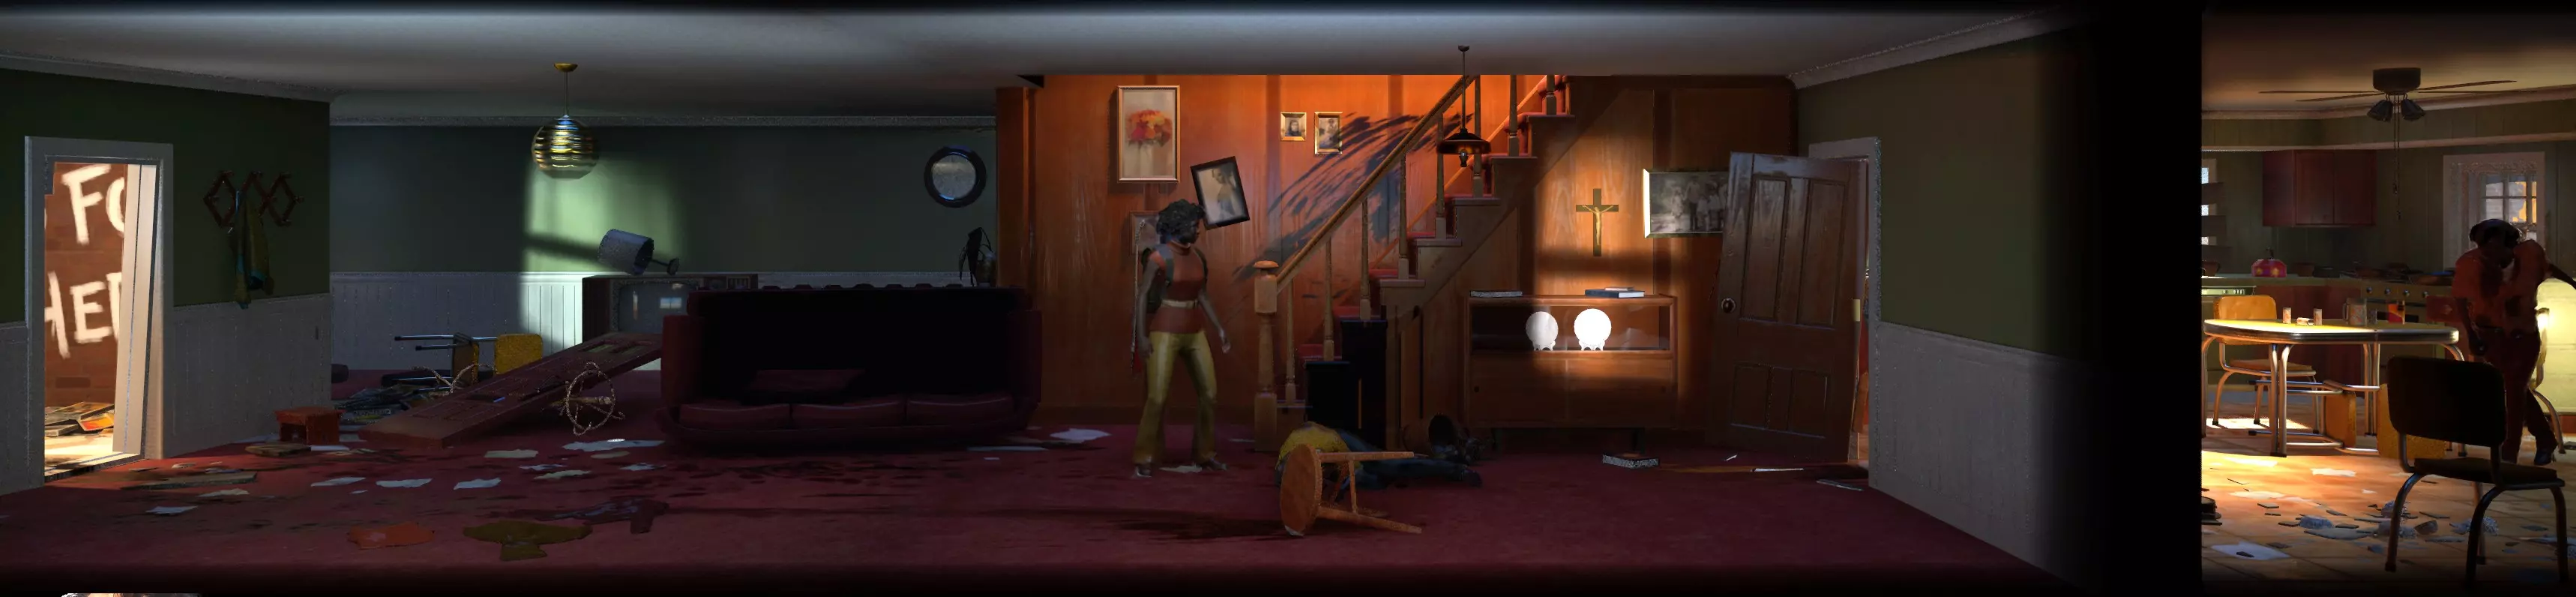
达芙妮在门开启状态下;僵尸未听见声音
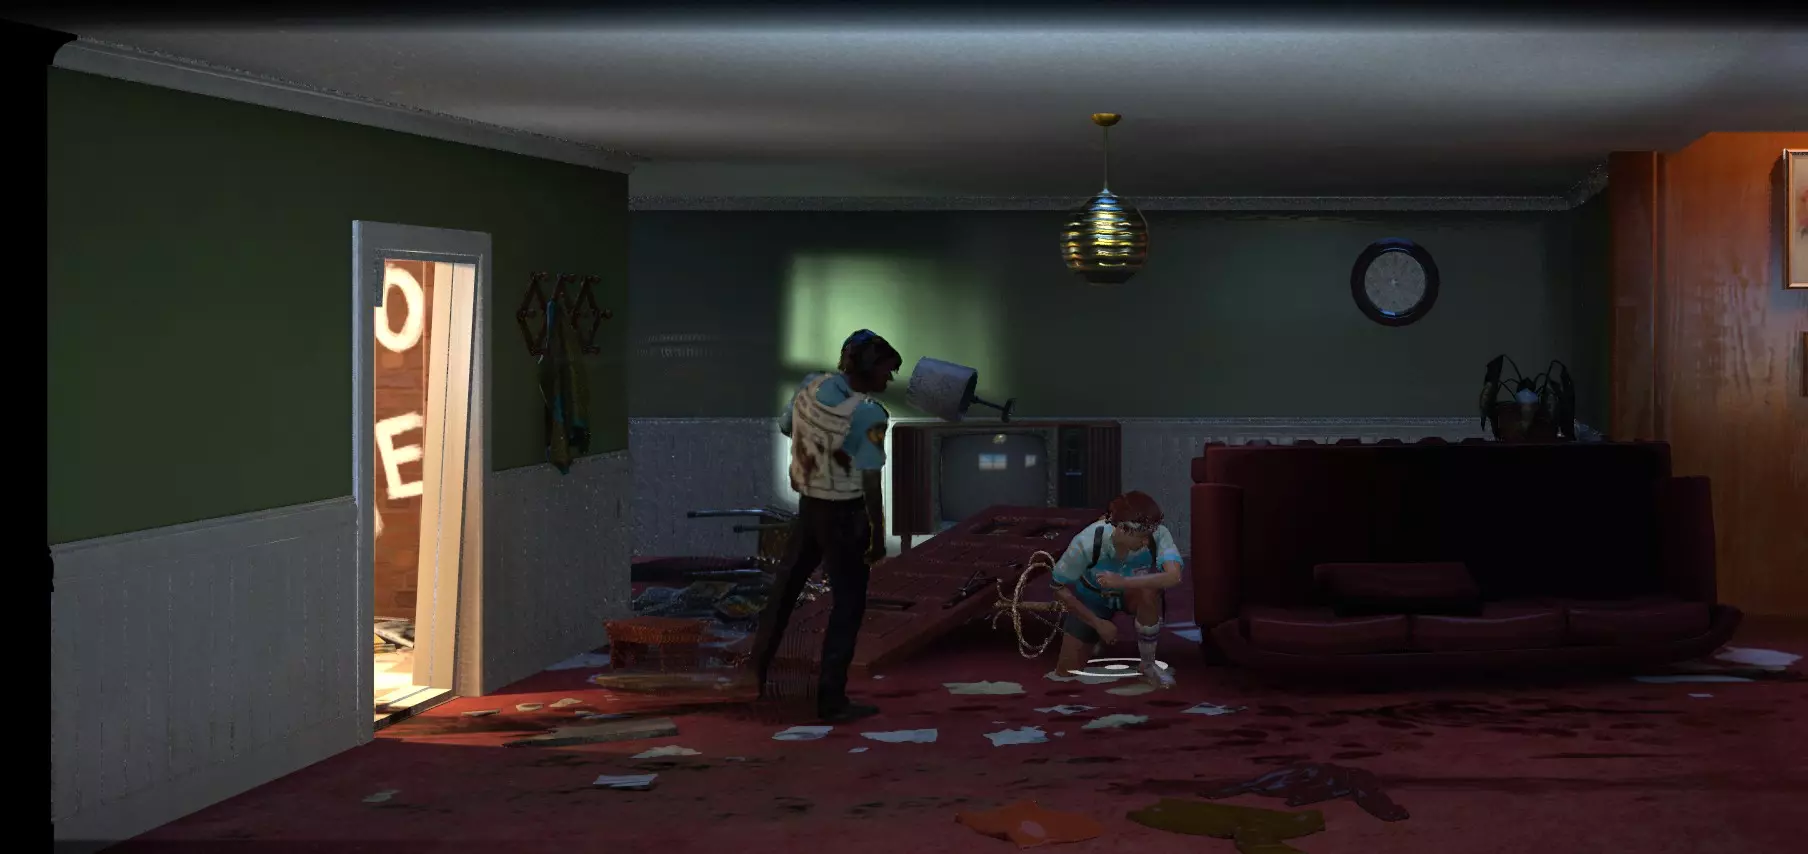
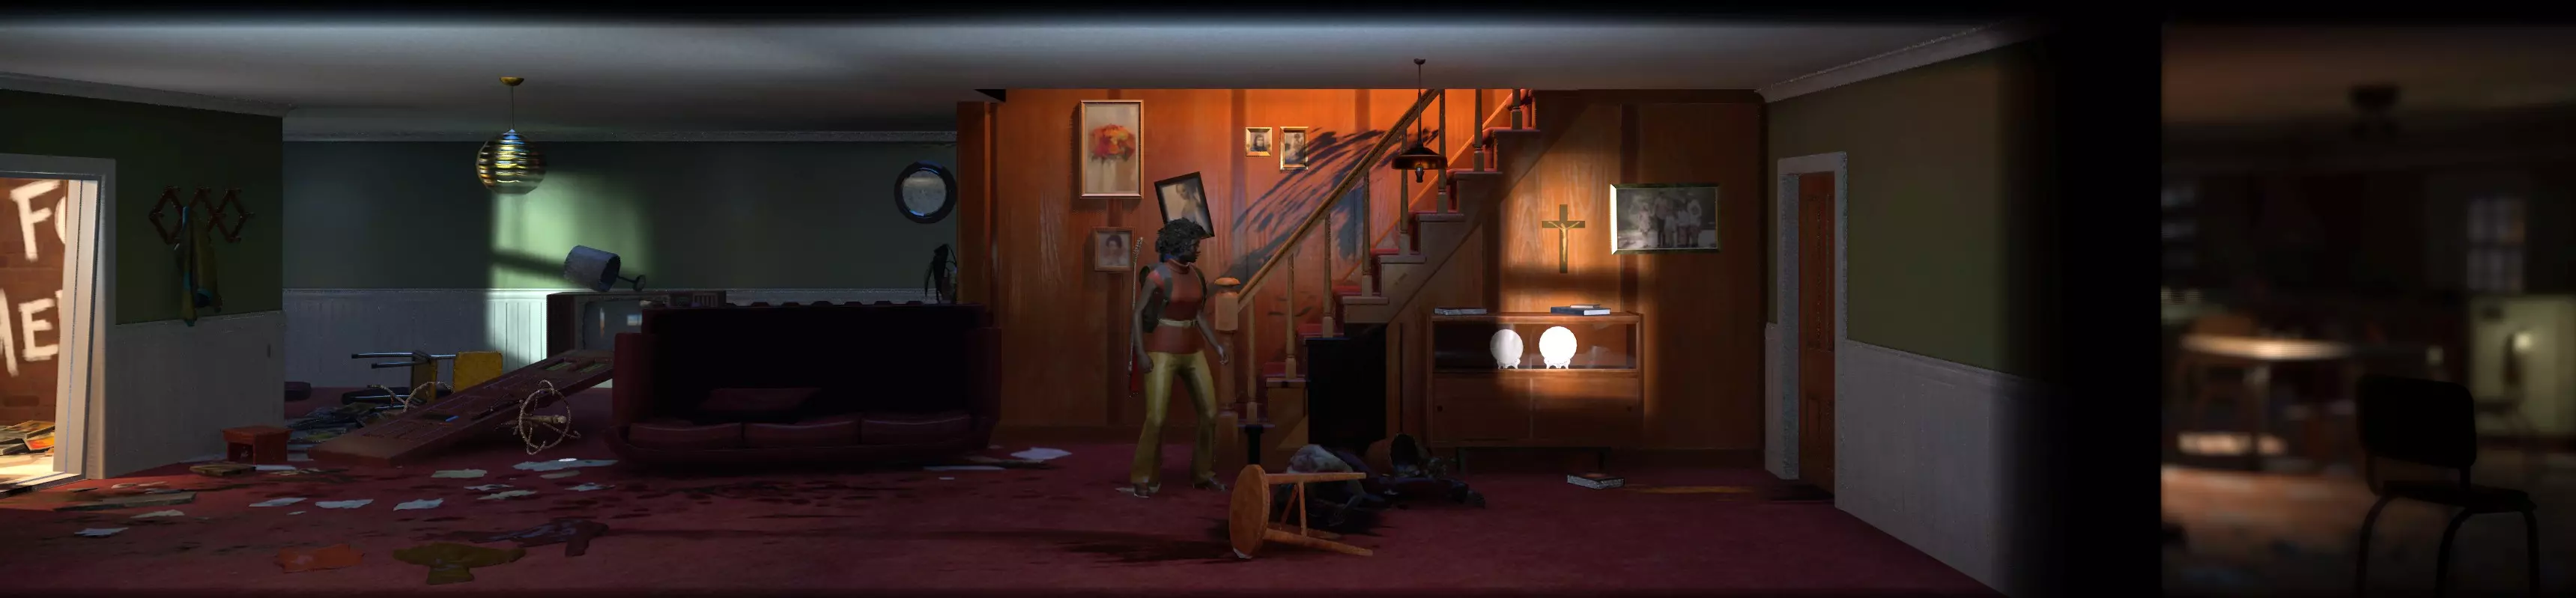
门开着的佩妮;僵尸听不见 僵尸状态 活跃僵尸 活跃僵尸是阻挡你去路的僵尸。与非活跃僵尸不同,你无法“穿过”它们。要悄悄将它们击倒,或利用藏身之处通过。
活跃僵尸 非活跃僵尸 非活跃僵尸是处于背景和前景中的僵尸。你可以悄悄“穿过”它们,除非被声音触发,否则它们不会被激活。激活或“唤醒”非活跃僵尸会使它们“生成”到相应位置。如果你离开地图后再返回,僵尸仍会保持生成状态,但此时处于巡逻状态。
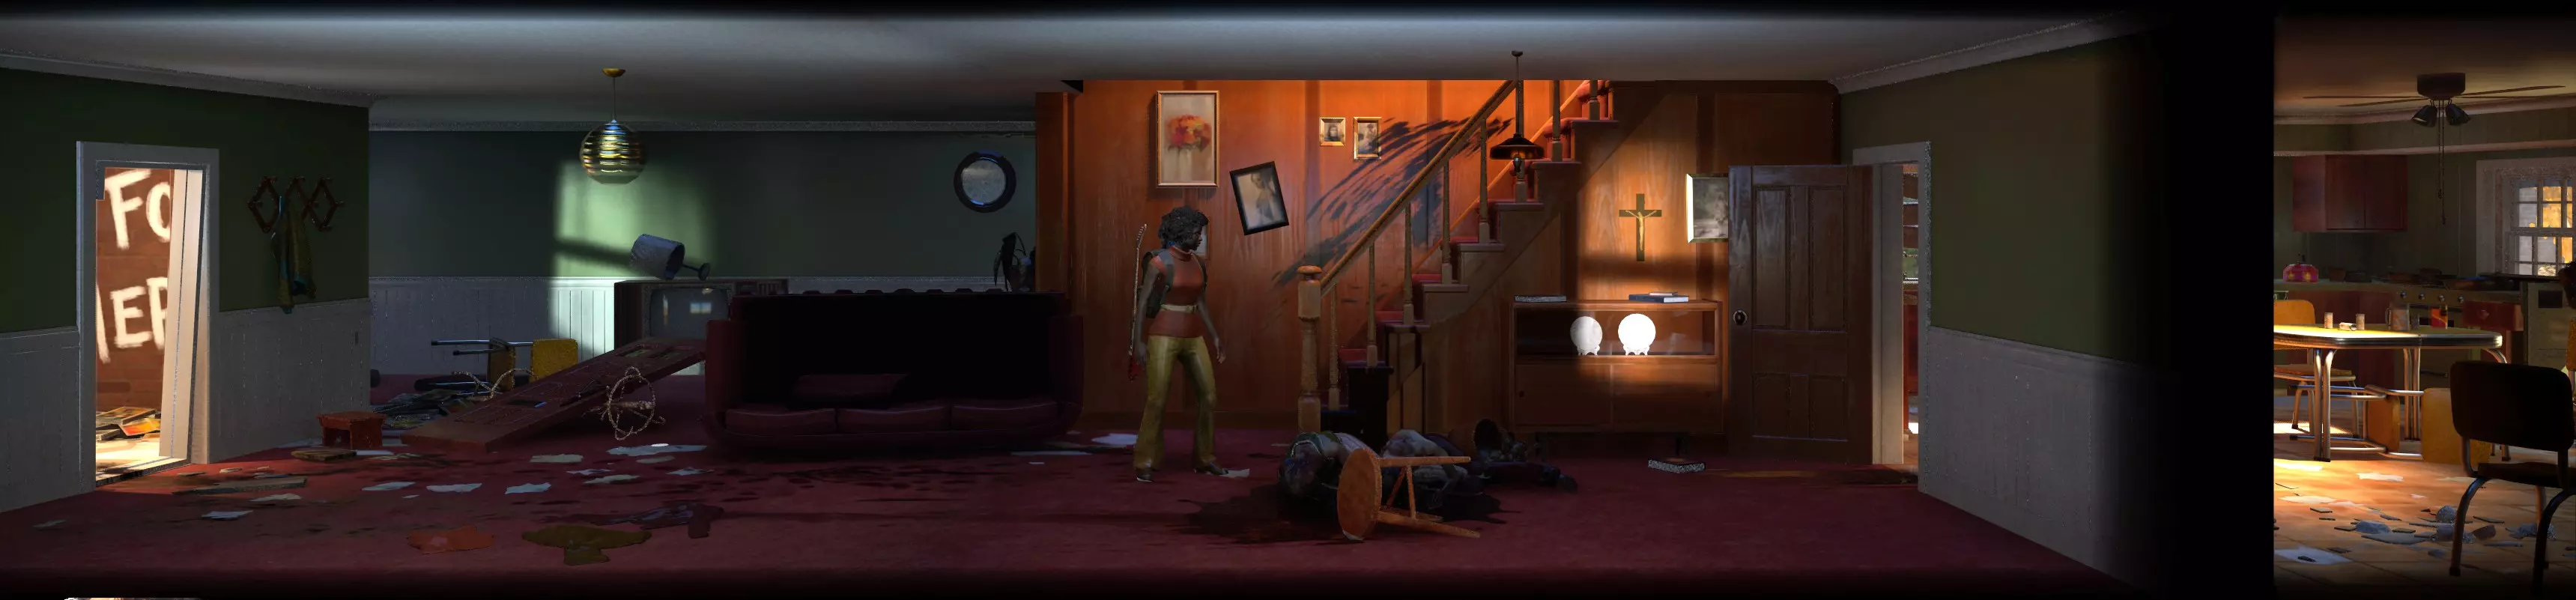
未激活的僵尸,幸存者可以穿过它们,在激活前无法与之互动。 楼梯:楼梯可作为藏身点。即使僵尸能目视到你,只要你不走出楼梯,它们就不会发现你。注意,在楼梯内仍需遵守声音规则,根据你处于楼梯的上层还是下层,声音可能会传播到楼下或楼上。

僵尸不会发现位于楼梯最顶端的幸存者,即使幸存者未处于潜行状态。 隐藏点/掩护物:隐藏点有一侧或两侧可以掩护你。对于单侧隐藏点/掩护物,如果僵尸朝你走来且掩护物面向它们,僵尸不会看到你。但如果它们返回,当僵尸经过时你和僵尸之间没有掩护物,它们就会发现你。有些隐藏点两侧都有掩护物,僵尸从任何一侧都无法看到你。
幸存者藏在面向僵尸的隐蔽处
僵尸与幸存者之间无遮挡;已发现 僵尸尖叫:经测试,当僵尸听到你发出的声音时,有几率触发此效果。僵尸可能会直接朝你跑来,也可能发出尖叫。尖叫会使你所在房间及相邻房间的僵尸都来追击你。如果附近没有其他僵尸,它们还可能从背景中“生成”新的僵尸(通过清理一小块区域内的所有僵尸后,观察到有僵尸从背景中生成来验证了这一点)。逃跑时要记住,你的撤退路径上可能会出现新的僵尸。如果附近有楼梯,可以使用跑向楼梯、潜行,然后进入的技巧来阻止僵尸跟随。如果你速度够快,可以在僵尸做出尖叫动画前跑到它身边并攻击,从而打断尖叫。
通过奔跑+潜行+楼梯的方法躲避因尖叫声激活的一群僵尸。 关门似乎能减小声音传播范围。下方对比展示了在门关闭和打开的情况下,达芙妮使用大声击倒技时触发僵尸的范围。可以看到,两者差异很小,但这可能只是个例而非普遍规律。在关闭的门后使用潜行和中等音量的击倒技可能仍然是安全的。 以下对比是使用80%噪音的吉他击倒技测试得出的。
达芙妮与敞开的门;僵尸听到了
达芙妮在门打开的情况下;僵尸没有听到声音
达芙妮关着门;僵尸听不见
Penny with open door; Zombie does not hear Threat LevelThreat level will slowly go up on the different areas you've previously cleared, including shelters. Early Game I will fine tune this section as I do more testing and collect data, screenshots, etc Prioritize FoodYou won't be very efficient with cooking early. Snacks are a great way to fill hunger without going through your meat/veggie supply. Use these as much as possible so that you have more ingredients left for when you unlock the higher level Cooking Area. Avoid Using Up Weapon Durability If PossibleSome rooms may have hiding spots that will let you walk past a patrolling zombie without needing to kill it. Use this to your advantage while zombie counts are still low, this will help you have a nice weapon stock for use as you get into the higher threat level areas. This guide also mentions zombie shuffling and fighting zombies with your fists as other ways to conserve weapon durability. Find a 2nd ShelterFind your second shelter as soon as possible and prep it for moving. Once zombie attacks start reaching 2 damage per attack, move to the new shelter. This will decrease your wood usage early, and if you move around enough, you might not need to craft any barricades until you reach mid game as shelters come with 3-4 barricades once available. Swap between shelters as attacks intensify to keep attacks at 1 damage. Find Your Escape Plan and Follow ItOnce you find your escape plan, plan your scavenges to try to hit the areas you need to progress. This way you can progress when you feel ready or when resources dry up. The later areas in your escape plan will have more zombies and are generally riskier, so it's good to tackle this when you have more supplies than when you're running dry. Focus on Workbench Upgrades That Increase EfficiencyCooking Area is top priority for upgrades. Unlocking the foods that satiate a medium amount of hunger will help keep your survivors easily fed, eventually moving to the large food upgrades. If you plan to run 5 or more survivors, definitely prioritize getting to the large and extra large food upgrades so you don't run out. Dismantling Station is next priority for the influx of materials you will get, which will help you get the necessary Workbench upgrades. Don't forget to use a survivor with bonus dismantle yield skill if you have one. Upgrade your Workbench when you can to gain access to higher tier stations. Upgrade your Portable Beds and Communcal Areas to at least 2 capacity each. This can carry you for a while with 4 survivors. Consider upgrading Portable Beds to 3 capacity or finding a base with 2 beds if you have 5 or more survivors. Upgrade your Communal Area before killing off any survivor if needed to speed up their recovery from the Grief debuff. Weapons Bench is next. The higher tier recipes have better weapons/materials used. Metal is a hot commodity when making weapons and you will need a lot of these late game, especially if you plan on using guns. Save for Lvl 3 weapons if you can. Mid Game I will fine tune this section as I do more testing and collect data, screenshots, etc At what point Mid Game is is subjective. For the purposes of this guide, consider mid game to be when you've had decent base upgrades, are in the middle of your escape plan progress, and have access to water and gardens for your food supplies. Stockpiling WeaponsStealth weapons are always in demand and you want to bring these back as much as possible. Louder weapons (such as spiked plank, baseball bats, etc) won't be used as much unless you plan on fighting head-on a lot. As always, bring home as much as you can, but consider bringing back that pair of scissors over the 4th baseball bat you find. I generally try to keep 2-4 loud weapons. The Fireaxe and Wrench are especially good if you're going toe to toe with groups. The Lvl 3 weapons you craft are also excellent, so you can always craft those later. Lvl 3 FoodGenerally, use the recipe that uses up less of the ingredients you have less of. Veggies can be farmed so you'll likely have more of this over meat, but hitting up Victory Meat Processing is a good way to get a bunch of meat for your stock (bottom left corner of map). MedkitsYou'll start needing to clear areas by swinging weapons on top of stealth kills. Keep an eye out on your Medkit supply and consider upgrading your Medical Area to 3 for less materials per craft. Always have a stock pile, and make sure you have some Splints, Medicine, and Bandages in stock. Stealthily Kill with Loud WeaponsAreas will be bigger, with more and bigger rooms to explore. You'll start coming out of runs with a deficit on your stealth weapons supply. Start looking into using medium and loud weapons to do stealth kills, or to kill 2-3 zombies at a time (with a trade-off of needing to heal after). Use your HP as a resource to conserve weapons. Start Bringing Lockpicks and BoltcuttersIf you haven't yet, start bringing at least 1 lockpick in your runs. Bigger areas typically have bolted doors as well, so consider bringing those. Don't Make Too Much WaterThe water filter station is a great way to get water. Pay attention to the material cost per water craft vs your water supply. It's easy to go through your mats leaving you with more water than you can use, and no materials to craft weapons and ammo. Late Game/Escape Plan I will fine tune this section as I do more testing and collect data, screenshots, etc Late Game will be basically you following your escape plan. Will consists of ways to prep for the harder areas and combat/stealth mechanics. Consider Replacing Your Survivors with Better OnesYou may have recruited some survivors with meh skills just to have extra hands in your shelter. Consider killing them off and recruiting other survivors, particularly those who have better combat skills. Your upgraded communal areas and alcohol supply should help keep your survivor's morale up. Start Using GunsSome of the bigger areas will have riskier rooms that will force you to fight. Start bringing heavy weapons or guns. I usually bring 1 loud weapon, 1 medium, and 1-2 stealth weapons. On some of the very high threat areas, I'll bring pistol as well. Guns can be surprisingly quiet if used in the right setup. You can potentially save some HP, weapon durability, and most importantly, your life for a couple of bullets. Pistol will be used for reference as the other weapons aren't available yet.* Pistol Sound Range It will be heard in: The whole room you're currently in Adjacent rooms if doors are open The side of adjacent rooms close to your room if door is closed (i.e. if a zombie is right by the closed door on the other side of the room you're in). If you're in a small room, and a door is open to an adjacent large room, it may not travel all the way. A rule of thumb I use for any loud weapon is: if the zombie is within your screen (whether behind a closed door or not), they will hear it. *Will need to test this Pistol section thoroughly first. In the meantime, go to the Sounds section under Game Mechanics for a more tested explanation of how sound works Waking Up a Horde =/= Leaving the AreaYou don't have to exit the whole area if you trigger a group of zombies. Use the run+sneak+enter stairs method to de-aggro (see Running Sounds under the Game Mechanic station for the strat for this). From here on, you may be able to resume scavenging and at times, in a better position to take the zombies out one by one stealthily. Activating Inactive ZombiesIf you trigger a group of zombies and exit an area running, or unnecessarily wake up inactive zombies as you exit, those activated zombies will then start patrolling the previously cleared areas. Pay attention to the threat meter. It will reflect the current amount of active zombies. Medkits and AmmoMake sure you have a good supply of Medkits, and consider crafting ammo for Pistol. Some areas will activate zombies on you, so it's good to have a way to deal with these, especially if you're running a less-combat oriented survivor. Notes Some things to note that don't particularly belong to the other sections