换一换
换一换 


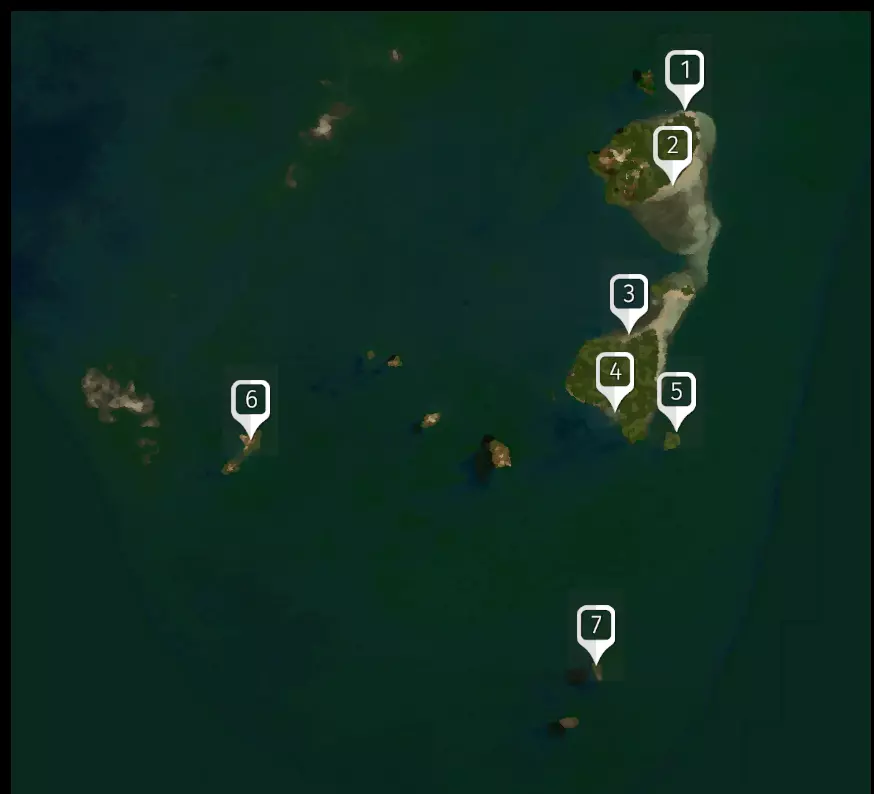
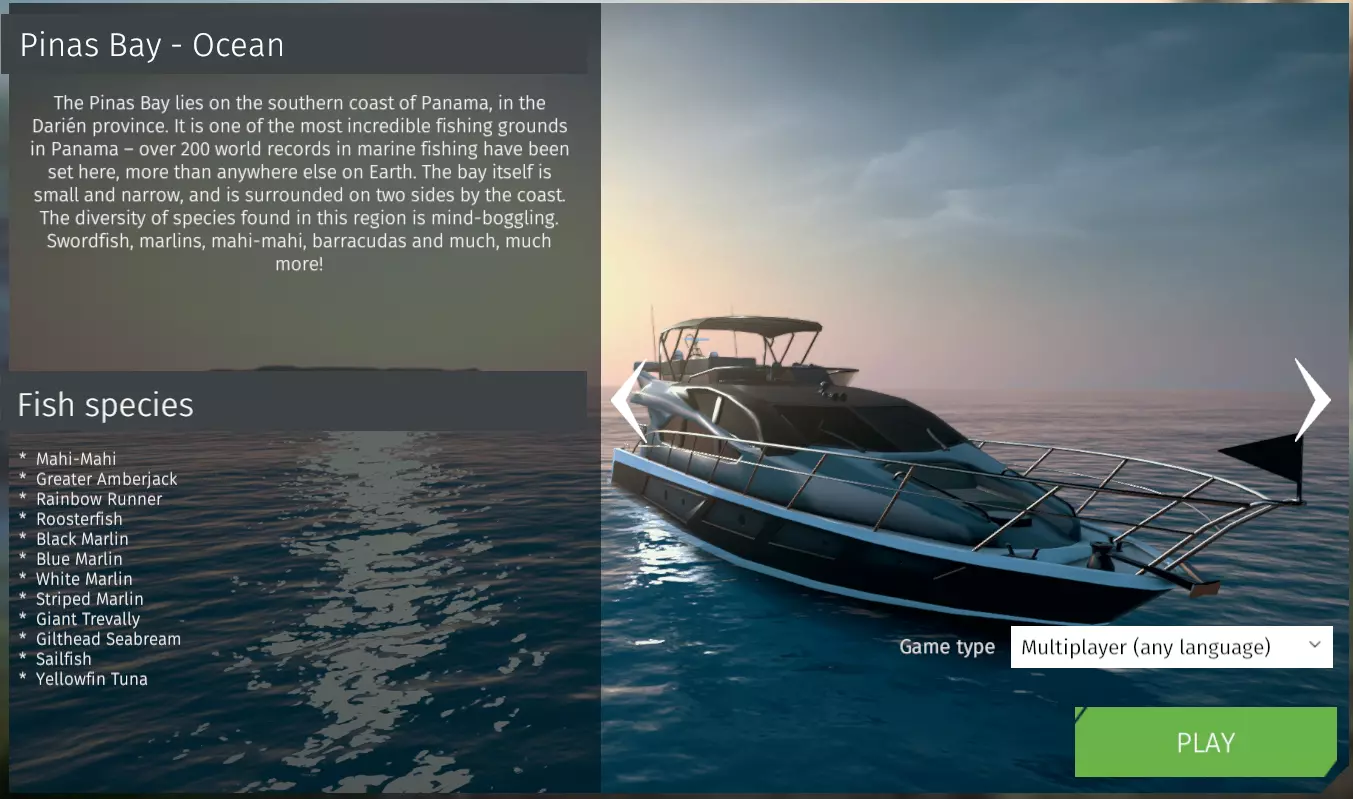
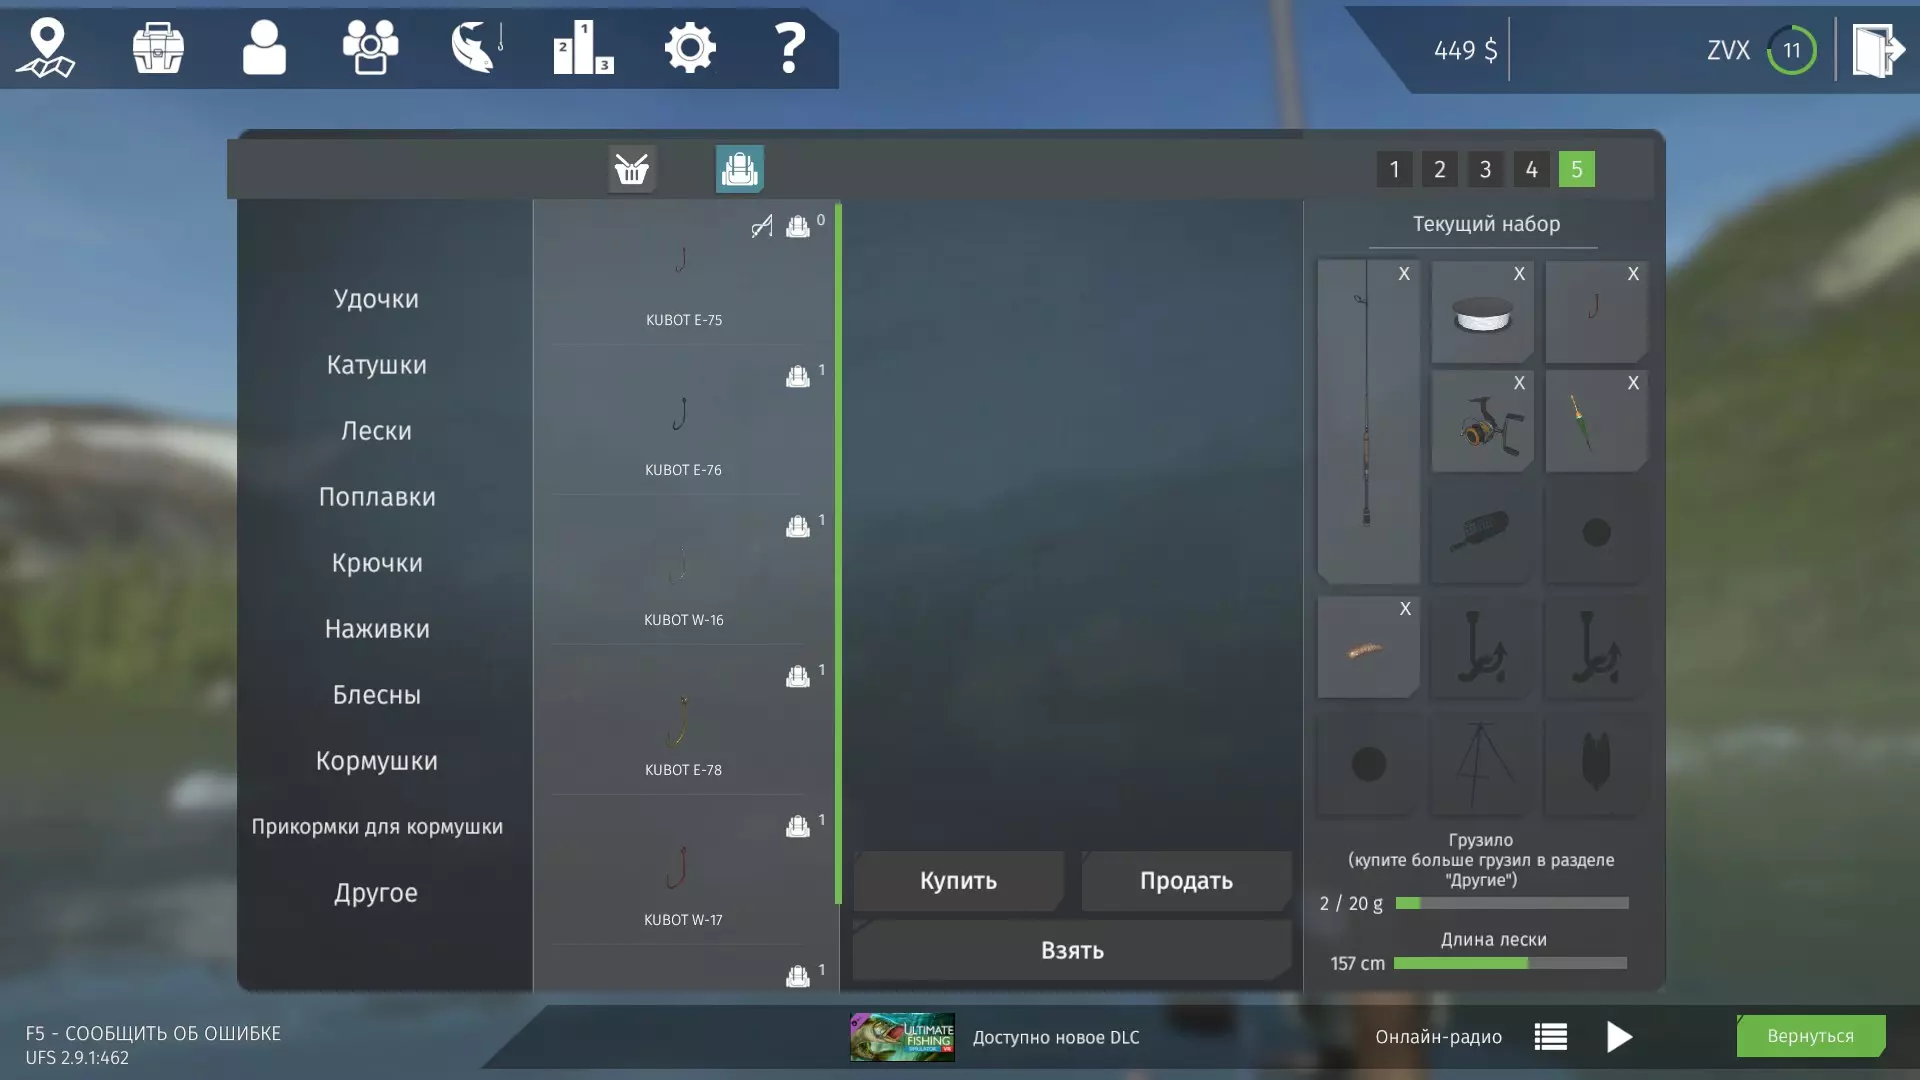
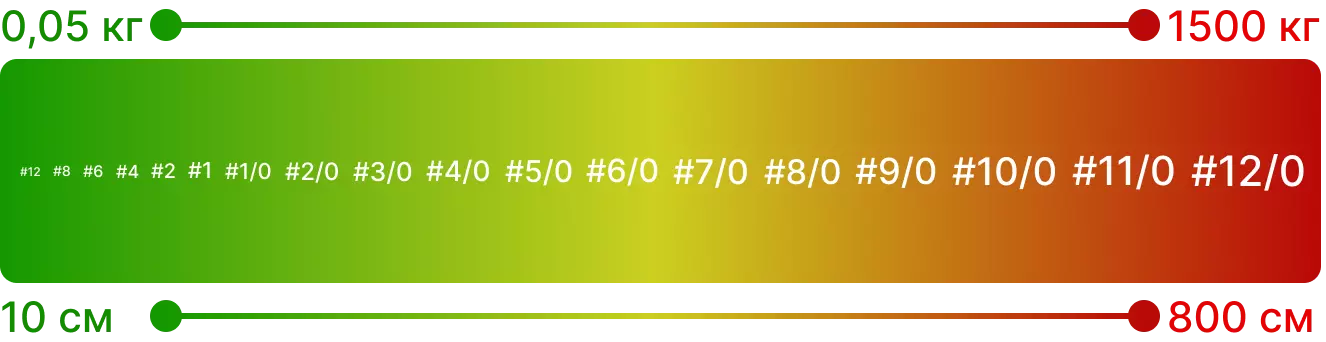
This is a very general guide mainly with information, that ought to be available to all UFS players at any time. It is meant to be sort of a lexical tool where you can quickly look up which hook or bait you are supposed to use to catch fish X and where to go to find it. It is also the place to find information about quirks in the software, that will be of interest to any player. Disclaimer Let me start by saying that I really enjoy this game. It is extremely beautiful and well-made. This is not a post complaining about a poor product! This is a post about how to manouver in an existing great product and possibly (and hopefully) how to make it better. I wouldn't have spent so much time compiling this if UFS wasn't a product I believe in and really enjoy playing. It is not yet completed, and there are species not yet added, but it can be used as is. This guide is for everyone interested in playing UFS; new or experienced. It is based on my personal testing which naturally suggests a rather small sample-size. Thus information about bait, hook-sizes etc. may be incorrect. It is also worth noting the date of this guide; flaws, quirks or similar mentioned in the guide, may be corrected or adjusted in coming versions of the software. Tom with contribution from Ace (video on spinning techniques) Quirks in UFS (This section can easily be skipped, unless you are specifically interested or new to the game). NOTE: All theses quirks may or may not be intentional on the part of the development team [for various reasons], but they are important to know about. Physical quirks: However impressive your gear is, even small fish may cause problems. A 20+ kg breaking strength braided line can easily snap by simply raising your pole on a striking 2 kg fish - even with your break set safely. Some species of fish seem to be extraordinarily strong comparative to whatever size they have. Fish like Brook Trout or Mahi Mahi for instance. A 7 kg Mahi Mahi will fight harder and longer than a 22 kg Rainbow Trout or a 30 kg Sturgeon, and the latter two gives a much higher rate of experience/money. Behavioural quirks: All species of fish move around at all times. All species of fish (even Carp, Catfish and similar) jump out of the water on occasion and none of them appear to favor certain depths of water. No species of fish appear to have a cycle that makes them favor a certain time of day. Though you may experience a decline in catches at some parts of the day from all species. No species of fish appear to favor certain types or colors of lures or types of bait. Weather seem to have no effect at all on your ability to catch fish. Nor wind on your ability to cast. Fish seem to be randomly magnetically drawn towards especially bait - you can have 10 fish around a hook all candidates for a strike, and then have another fish zoom in from 30 m away to take the bait. Spinning quirks: Some reels appear to have no set speed. Using for instance 2 bars of reel-speed will cause the lure to be drawn at different speeds depending on a couple of factors: If a fish is struggling, sideways or moving towards you. On the distance of the lure from the caster!!! (This really puzzles me)Both can be really really annoying [and potentionally disastrous] when spinning or reeling in fish. Reel-speed is automatically turned to 3 bars when a fish strikes (unless you're not using a lure, in which case this doesn't appear to happen). You will have to manually turn it back every time if you are using a diffirent spinning speed. Types of spinning is a confusing and very difficult area: There are 4 basic types of spinning techniques recognized by the software, and the objective is to get 3 bars of either type to make the lure move optimally: Straight (or Straight Slow if using only one bar of reeling speed) is very easy to use and it is simple and fast to get 3 bars. I often use it with a stop spin cycle every 1.5 second or so (which is what I would do IRL), but that is NOT a style of spinning that is recognized by the software, and every so often it resets the bars doing so. I still find it more effective and worthwhile doing. Lift and Drop can be used in a couple of ways. Spinning in while holding down the RMB and releasing it briefly once every 1.5 second or so or by spinning in while pressing the RMB briefly once every 1.5 second or so. You may also be able to use it with a stop spin cycle where the LMB is released simultaneously with the RMB being pressed but I am not dextrous enough to test that. Whichever of these techniques is used, it takes at least 10 m of your cast (and often more) to reach 3 bars and a single misclick resets it to zero bars, meaning that this technique is very difficult to use effectively in UFS. Also your fingers will become numb after 10 50+ m casts. Stop and Go is used by first letting the lure drop to the bottom. Then you drag it in in small sections after each letting it rest on the bottom until the "GROUND" signal appears. Stop and Go is extremely slow to use and if you start spinning before the lure has hit the bottom on an iteration or if you get a little bit out of sync, the bars will reset. I don't see any benefit of ever using this over the simple Straight; the fish you will catch don't seem to be bigger or different species and catching them will be significantly slower. Twitching is similar to Stop and Go, but only used for flies. No lure has any indication on what type of spinning technique, that gives the optimal ability to catch fish. This can be very confusing unless you're an experienced angler. No type of lure [of any color and using any spinning technique] seem to be favored by the fish as long as it's a type they can take.Short video on spinning techniques (by Ace): 引用自 Ace:https://www.youtube.com/watch?v=xqXGoV8vhrY&feature=youtu.be Combining all this, you may conclude that when spinning you should always chose the lure that has the simplest/easiest type. Color, size and type of lure is irrelevant; only hook size matters. It often isn't worth the time spent trying to get for instance a popper or a jig to work properly; even when/if you should get one to operate properly, you will catch fewer fish than you would using other types of lures or spinning techniques (unless ofc the only possible lure for that particular species of fish you're after is one of those types). Baited hook quirks: When changing the size of a baited hook be sure to remove all bait and the float every time. If you don't you will sometimes experience really small or really large bait. I am not entirely sure there is any difference when fishing, but maggots the size of the float or corn the size of a pinhead sure look odd. The only difference between using 1 and 3 pieces of bait appears to be the distance it will draw fish from. 3 pieces will draw fish from far away (~30 m) while 1 piece of bait works on close range only. The feeders seem to have little to no effect. Equipment quirks: Some pieces of equipment have a level requirement and/or hook-size that make them almost unusable. For instance the fly "PANIT Fly STREAM KI" has 9 target species of fish at a level requirement of 15. Neither of those targets will be especially interesting at level 15, and realistically at most one of the species is even able to take the fly given the extreme hook-sizes! Netting quirks: When on a boat a fish can go under it, in which case you may be able to net a fish through the boat without being able to see it. Or you may loose it by timing out. There is no real option for getting it out. When on a bridge or pier be sure to use a short distance between hook and float when float fishing. A long distance can cause all sorts of problems when netting. Generally you should never use > 1 m between hook and float whereever you may stand; deeper has no benefits as far as I can tell, only drawbacks. Area quirks: There is no correlation between the level of an area and the experience and money it may yield. In most cases you are better off staying at area 1 all the way to level 10 or so before possibly moving on to area 4 or 5. It is really confusing that area 2 and 3 yield smaller, less abundant and harder to catch fish than area 1. Area 7 is completely irrelevant, unless you're hunting specifically Spotted Bass, and the 2 ice areas are simply worse versions of the non-ice ones. This means that you are likely to spend the vast amount of your time fishing the same areas and the same fish over and over, while other areas are completely ignored. Level quirks: After level 13, the level progression is extremely slow, and the only bonus from gaining a level is a slight upgrade in gear. This makes the road from 13 to 20 really really long and arduous. Hopefully more content in the future will solve this. Notes on how the tables should be read The information here is based on my own statistics and testing. Given that the sample-size is very small, there are bound to be incorrect or imprecise information. Any information or corrections will be welcomed. Testing has been done by creating a small pond with 20 specimens of any one species of fish. NOTE: When spinning speed is mentioned in the tables, I am assuming basic spinning gear is used. If other types of gear is used, you are most likely better off using a slower speed. Some reels spin much faster than others, and you should only use my indications as a guideline - try faster or slower and see how either performs. Never just assume, I am right!!! As a general rule of thumb, you can use the following as a guide for hook-size in UFS: #8 to #1: Very small to small fish typically well under 1 kg. #1/0: Fish weighing under 1 kg. #2/0: Fish weighing under 2 kg. #3/0: Fish weighing under 3 kg. #4/0: Fish weighing under 4 kg. #5/0: Fish weighing 5 kg or more. #6/0: Fish weighing 10 kg or more. #7/0: Fish weighing 15 kg or more. #8/0: Fish weighing 20 kg or more. #9/0: Fish weighing 50 kg or more. #10/0: Fish well over 50 kg. It is far from exact but as a rule of thumb it is useful. You can catch 10+ kg fish on a #1/0 hook, but you will never catch a 1 kg fish on a #7/0 hook. Baikal Omul
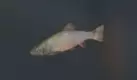
出没地点:贝加尔湖和贝加尔湖(冬季)。 最大鱼钩尺寸:#3/0。 最佳钓点:贝加尔湖 - 通常必须乘坐2号船。贝加尔白鲑分布较散 - 通常在较深水域。 最佳鱼饵:使用飞蝇饵、蛆虫或类似饵料的鱼钩。狗鱼、河鲈和白鲑也可能咬钩。 其他钓法:飞蝇钓。部分旋转亮片饵显示可用于钓贝加尔白鲑 - 此说法不实。 常见尺寸:不足1千克。超过1.5千克的贝加尔白鲑就算体型较大。 评价:游戏初期能提供少量经验/金钱。它们的挣扎力度不大。 难度:非常容易发现和捕获。容易钓获但回报较少。 贝加尔鲟鱼
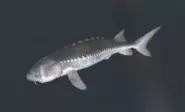
出没地点:贝加尔湖和贝加尔湖(冬季)。 最大鱼钩尺寸:#8/0。 最佳钓点:贝加尔湖 - 通常的策略是乘坐2号船,向右绕过悬崖后抛锚,这样可以向任何方向抛竿。 最佳钓饵:使用大饵块作为钓饵的鱼钩。使用较小的鱼钩还能钓到一些白斑狗鱼,较大的鱼钩则只能钓到鲟鱼。 其他钓饵:无。 常见重量:约20-40公斤。超过60公斤的贝加尔鲟鱼就算是大型个体了。 评价:中后期能提供不错的经验值和金钱。它们的挣扎力度不大,通常只会进行一次长时间的拖拽。 难度:非常容易发现和捕获,是中后期的理想目标。容易钓获且奖励丰厚。 【鲃鱼】
发现地点:乌瓦茨河。 最大钩号:#5/0。 最佳钓点:乌瓦茨河 - 7号位置的船似乎是个不错的起点。 最佳钓法:浮漂下60厘米处挂饵。蛆虫和玉米都是不错的饵料。没有特别限制的饵料。 其他钓法:飞蝇钓。 常见尺寸:3公斤以下。5公斤以上的丁鱥就算是大型个体了。 评价:当你能够到达乌瓦茨河时,从丁鱥身上获得的兴奋感、经验或金钱可能不会太多。 难度:很难针对性地钓丁鱥;容易上岸。一种难度中等但在游戏初期奖励较少的鱼类。 黑刺盖太阳鱼
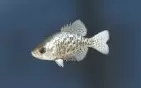
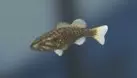
分布区域:鲍威尔湖和阿查法拉亚盆地。 最大鱼钩尺寸:#2/0。 最佳钓点:鲍威尔湖——码头与陆地连接处附近通常有一群黑刺盖太阳鱼和蓝鳃太阳鱼游动。 最佳钓法:浮漂下60厘米处挂饵。使用面包饵最具针对性,若不介意偶尔钓到 channel catfish,可使用棉花糖饵。 其他钓法:拟饵——勺型拟饵(匀速2档),但可能会钓到很多鲈鱼。 常见尺寸:通常不足1千克。超过1.5千克的黑刺盖太阳鱼就算大型个体。 评价:钓黑刺盖太阳鱼不会获得太多兴奋感、经验值或金钱。想体验乐趣的话,可以尝试使用初始装备。 难度:在鲍威尔湖较容易发现和钓到,在阿查法拉亚盆地则较困难。属于容易钓到但奖励很少的鱼类。 蓝鳃太阳鱼
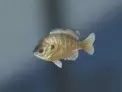
分布区域:鲍威尔湖和阿查法拉亚盆地。 最大钩号:1/0号。 最佳钓点:鲍威尔湖——通常在码头与陆地连接处附近有一群黑刺盖太阳鱼和蓝鳃太阳鱼游动。 最佳钓法:使用浮漂下60厘米的饵钩。使用面包饵最具针对性,若不介意偶尔钓到 channel catfish,也可使用棉花糖饵。 其他钓法:拟饵——勺型拟饵(直线速度2),但准备好同时钓到很多鲈鱼。 常见尺寸:通常不足1千克。超过1千克的蓝鳃太阳鱼就算大型个体。 评价:钓蓝鳃太阳鱼不会获得显著的兴奋感或经验/金钱。为了娱乐,可以尝试使用初始装备。 难度:在鲍威尔湖很容易发现和钓到,在阿查法拉亚盆地则相当困难。一种容易钓到但回报很少的鱼。 太阳鱼
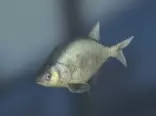
出没地点:圣泽诺湖。 最大鱼钩尺寸:#6/0。 最佳钓点:圣泽诺湖——通常最大的个体出现在最大的湖泊中。3号区域是不错的起点。 最佳钓法:浮漂下60厘米处挂饵。可使用多种饵料,如玉米、红虫、面包等。根据饵料不同,也可能钓到镜鲤、草鱼、 pike(狗鱼)或鲶鱼。 其他钓法:飞蝇钓。 常见尺寸:约6-8公斤。超过10公斤的欧鳊就算是大型个体了。 评价:低等级时通过钓欧鳊可以获得不错的经验和金钱。它们的挣扎力度不大。 难度:非常容易发现和捕获;是早期游戏中令人兴奋的鱼类。对低等级玩家来说奖励丰厚,对抗体验良好。 溪红点鲑
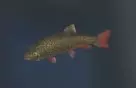
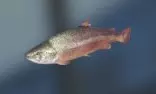
出没地点:贝蒂湖、冬季贝蒂湖和乌瓦茨河。 最大钩号:#6/0。 最佳钓点:贝蒂湖 - #6号位是不错的选择。 最佳钓法:勺型拟饵(匀速收线速度5)是最佳策略。你也会钓到大量其他鳟鱼。 其他钓法:飞蝇钓以及使用飞蝇饵、蛆虫或红虫的带饵鱼钩。 常见尺寸:3公斤以下。体型差异较大。6公斤以上即为大型溪红点鲑。 评价:早期游戏中的溪红点鲑可能会有点棘手;就其体型而言,它们异常有力。在游戏早期到中期,溪红点鲑能带来一些刺激感以及经验/金钱。 难度:容易上钩,但使用初始装备时难以遛鱼/搏鱼。在游戏早期到中期是一种有一定难度但有回报的鱼类。 棕鳟
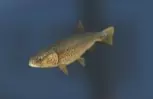
出没地点:贝蒂湖、冬季贝蒂湖和乌瓦茨河。 最大钩号:7/0号。 最佳钓点:贝蒂湖 - 6号位置是不错的选择。 最佳钓法:勺型拟饵(匀速5档)是最佳策略。你也会钓到大量其他鳟鱼。 其他钓法:飞蝇钓以及使用飞蝇、蛆虫或红虫作为饵的带饵鱼钩。 常见尺寸:10公斤以下。18公斤以上为大型褐鳟。 评价:褐鳟在游戏早期到中期能带来一定的乐趣和经验/金钱。搏斗体验尚可。 难度:容易钓获和上岸;在游戏早期到中期能提供不错的经验/金钱。 公牛鳟
出没地点:贝蒂湖和贝蒂湖冬季。 最大鱼钩尺寸:#7/0。 最佳钓点:贝蒂湖 - #6位置不错。 最佳钓法:勺子拟饵(匀速5)是最佳策略。你也会钓到大量其他鳟鱼。 其他钓法:飞蝇饵以及挂有飞蝇、蛆虫或红虫的饵钩。 常见尺寸:7公斤以下。14公斤以上为大型公牛鳟鱼。 评价:游戏前期至中期,公牛鳟鱼能带来一些乐趣和经验/金钱。挣扎力度不大——通常只有一次猛拉。 难度:容易钓获和上岸;游戏前期至中期能提供不错的经验/金钱。 【频道鲶鱼】
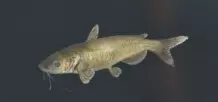
出没地点:鲍威尔湖、圣泽诺湖和阿查法拉亚盆地。 最大钩号:#7/0。 最佳钓点:鲍威尔湖 - 起点右侧(#1位置),通常能找到不少不错的斑点叉尾鮰。 最佳钓法:浮漂下60厘米处挂饵。3块棉花糖,大约一分钟就能钓到一条斑点叉尾鮰。 其他钓法:只能用其他类型的鱼饵挂钩。 常见重量:约4-5公斤。超过10公斤就算是大型斑点叉尾鮰了。 评价:经验/金钱收益不错,尤其在游戏初期。它们挣扎力度适中,但很快就会力竭。 难度:很容易发现和捕获;是游戏早中期的理想目标。容易钓获且回报丰厚。 鲦鱼
分布区域:圣泽诺湖和乌瓦茨河。 最大鱼钩尺寸:#4/0。 最佳钓点:圣泽诺湖。圣泽诺湖的【3号区域】和乌瓦茨河的【7号区域】是不错的起点。 最佳钓法:浮漂下60厘米处挂饵。玉米、蛆虫、苍蝇和红虫都是不错的选择,但也会吸引相当数量的其他鱼类。 其他钓法:飞蝇钓。 常见尺寸:约1公斤。超过2.5公斤的丁鱥就算是大型个体了。 评价:无论哪个等级,从丁鱥身上获得的经验/金钱都很少。它们的挣扎力度也不大。 难度:很容易发现和捕获。容易钓获但回报很少的鱼类。 普通丁鱥
发现地点:乌瓦茨河。 最大钩号:#2/0。 最佳钓点:乌瓦茨河 - 7号位置的船似乎是个不错的起点。 最佳钓法:浮漂下60厘米处挂饵。玉米和面包都是可能的选择,但这两种饵都会被鲃鱼咬钩,玉米还会被鲦鱼咬。 其他钓法:飞蝇钓。 常见尺寸:1公斤以下。超过1公斤的就是大个体的普通欧鳊了。 评价:当你能够前往乌瓦茨河时,普通欧鳊不太可能给你带来太多兴奋感或经验/金钱收益。 难度:尽管名字里有“普通”二字,但乌瓦茨河里的普通欧鳊数量并不多,而且很难针对性地钓到它们。这是一种难度高但回报很少的鱼。 鲫鱼
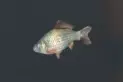
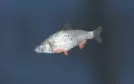
发现地点:圣泽诺湖。 最大鱼钩尺寸:#4/0。 最佳钓点:圣泽诺湖 - 通常最大的个体出现在最大的湖泊中。3号区域是不错的起点。 最佳钓法:浮漂下60厘米处挂饵。任何非掠食性鱼类的饵料均可,但无论选择哪种,过程中都可能钓到其他几种鱼类。 其他钓法:飞蝇钓。 常见尺寸:差异很大 - 有些可能非常小。超过2.5公斤的为大型欧鲫。 评价:无论等级如何,欧鲫能提供的经验/金钱都很少。它们的挣扎力度尚可。 难度:很容易发现和捕获。容易钓获但奖励较低的鱼类。 割喉鳟
出没地点:贝蒂湖和贝蒂湖冬季。 最大鱼钩尺寸:#6/0。 最佳钓点:贝蒂湖 - #6号位是不错的位置。 最佳钓法:勺型拟饵(匀速收线2档)是最佳策略。你也会钓到大量其他鳟鱼。 其他钓法:飞蝇饵以及挂有飞蝇、蛆虫或红虫的饵钩。 常见尺寸:4公斤以下。7公斤以上为大型割喉鳟。 评价:游戏前期至中期,割喉鳟能带来一些乐趣和经验/金钱。挣扎力度不大——通常只有一次猛拉。 难度:容易钓获和上岸;游戏前期至中期能提供不错的经验/金钱。 草鱼
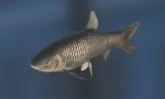
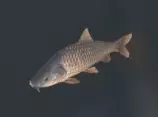
出没地点:圣泽诺湖和阿查法拉亚盆地。 最大钩号:6/0号。 最佳钓点:圣泽诺湖——通常最大个体的草鱼会出现在最大的湖泊中。3号湖是不错的起点。 最佳钓法:使用浮漂下60厘米的带饵鱼钩。唯一可用的饵料是玉米和豌豆——钓的过程中会钓到不少镜鲤。 其他钓法:无。 常见重量:约8-12千克。超过16千克的草鱼就算是大型个体了。 评价:在中低等级时,钓草鱼能获得相当不错的经验和金钱。它们的挣扎力度也很可观。 难度:比较容易发现和钓获;主要是前期游戏中令人兴奋的鱼类。奖励丰厚,搏斗体验良好。 哲罗鲑
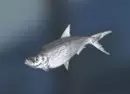
出没地点:乌瓦茨河。 最大鱼钩尺寸:#8/0。 最佳钓点:乌瓦茨河 - 7号位置的船只处是不错的起点。 最佳钓饵:勺型拟饵(匀速5档)是最佳策略。较小尺寸的拟饵也会吸引梭鲈和其他种类的鳟鱼。 其他钓饵:飞蝇饵和装有大段鱼饵的饵钩。 常见重量:约5-15公斤。超过30公斤的是大型多瑙哲罗鱼。 评价:中到后期能提供不错的经验/金钱。通常会有2次长时间的拉扯,战斗体验尚可。 难度:非常容易发现和捕获;是中后期的良好目标。容易钓获且奖励不错。 大口黑鲈
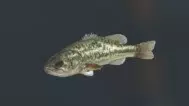
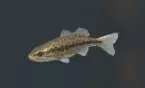
出没地点:鲍威尔湖和阿查法拉亚盆地。 最大钩号:#4/0。 最佳钓点:鲍威尔湖——通常在地图上标记为1号或2号的码头下方及周围区域最容易找到。大嘴鲈鱼似乎是第二常见的鲈鱼品种。 最佳诱饵:勺型拟饵(直线速度2)——钓获过程中可能会遇到不少条纹鲈和少量小口黑鲈。 其他诱饵:几乎所有诱饵都能钓到。 常见尺寸:约1-3千克。超过5千克的大嘴鲈鱼就算是大型个体了。 评价:在低等级时,钓大嘴鲈鱼能获得一些经验值和金钱。它们的挣扎力度与其他鲈鱼品种相当,表现不错。 难度:比较容易发现和钓获。是一种难度与奖励相匹配的容易钓的鱼。 镜鲤
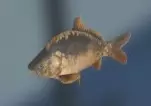
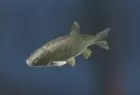
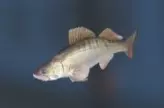
出没地点:圣泽诺湖和阿查法拉亚盆地。 最大鱼钩尺寸:#7/0。 最佳钓点:圣泽诺湖——通常最大的个体出现在最大的湖泊中。3号区域是不错的起点。 最佳钓法:浮漂下60厘米处挂饵。通常玉米或豌豆是最具针对性的饵料——主要会钓到镜鲤,偶尔也会有草鱼上钩。 其他钓法:飞蝇钓。 常见尺寸:约8-20公斤。超过30公斤的镜鲤就算是大型个体了。 评价:在低等级和中等等级时,钓镜鲤能获得大量经验和金钱。它们的挣扎力度适中,有时会让人手忙脚乱。 难度:非常容易发现和捕获;无论是在游戏初期、中期甚至后期都是一种令人兴奋的鱼类。在游戏的多个阶段都能带来高额奖励和精彩的搏鱼体验。 河鲈

出没地点:贝加尔湖、贝加尔湖(冬季)和圣泽诺湖。 最大钩号:4/0号。 最佳钓点:贝加尔湖 - 通常的策略是乘坐2号船,朝着船原来的位置抛竿。 最佳饵型:勺型拟饵(匀速收线速度2)是最佳选择。你也会钓到一些 pike。 其他饵型:几乎所有足够小的饵都能钓到。 常见重量:约1-2公斤。超过4公斤的就是大型河鲈了。 评价:早期游戏能提供少量经验/金钱。它们的挣扎力度不大。 难度:非常容易发现和捕获;非常适合游戏初期的目标。容易钓到但奖励很低。 pike
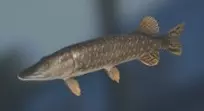
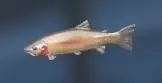
出没地点:贝加尔湖、贝加尔湖(冬季)和圣泽诺湖。 最大鱼钩尺寸:#7/0。 最佳垂钓地点:贝加尔湖——在贝加尔湖和圣泽诺湖,它们分布较散且体型较小。 最佳钓饵:勺型拟饵(直线速度2)是钓 pike(狗鱼)的好方法。 其他钓饵:装有3块切割饵的饵钩。 典型尺寸:约3-4公斤。超过8公斤的是大型 pike(狗鱼)。 评价:尤其是在游戏初期,能提供不错的经验值/金钱。它们会进行一定的挣扎,但很快就会疲惫。 难度:找到并钓到它们相当困难;是游戏初期的一个合理目标。容易钓到且奖励不错的鱼。 虹鳟鱼
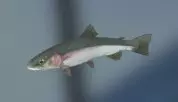
出没地点:贝蒂湖和贝蒂湖冬季。 最大鱼钩尺寸:#8/0。 最佳钓点:贝蒂湖 - #6位置不错。 最佳钓法:勺子拟饵(匀速5)是最佳策略。你也会钓到大量其他鳟鱼。 其他钓法:飞蝇饵以及搭配飞蝇、蛆虫或红虫的饵钩。 常见尺寸:10公斤以下。20公斤以上为大型虹鳟。 评价:虹鳟在游戏前期至中期能带来一定的乐趣和经验/金钱。搏斗体验尚可。 难度:容易钓获和上岸;在游戏前期至中期能提供不错的经验/金钱。 小口黑鲈
出没地点:鲍威尔湖和阿查法拉亚盆地。 最大鱼钩尺寸:#3/0。 最佳钓点:鲍威尔湖 - 通常在地图上1号或2号码头下方及周围最易发现。小嘴鲈鱼似乎是鲈鱼中最不常见的品种之一。 最佳鱼饵:勺型拟饵(直线速度2) - 钓获过程中可能会遇到不少条纹鲈和一些大嘴鲈鱼。 其他鱼饵:几乎所有鱼饵都能钓到。 常见尺寸:1公斤以下。超过1.5公斤的属于大型小嘴鲈鱼。 评价:低等级时从小嘴鲈鱼身上能获得少量经验/金钱。它们的挣扎力度与其他鲈鱼品种相当。 难度:较难发现和钓获。回报几乎没有。 【斑点鲈】
发现地点:阿查法拉亚盆地。 最大钩号:#4/0。 最佳钓点:阿查法拉亚盆地 - 通常在起始的桥附近最容易钓到。斑点鲈似乎是最稀有的鲈鱼品种之一。 最佳诱饵:勺型拟饵(直线速度2) - 钓的过程中会经常钓到条纹鲈、大嘴鲈和小嘴鲈。 其他诱饵:几乎所有诱饵都能钓到。 常见尺寸:1公斤以下。超过2公斤的斑点鲈就算是大型个体了。 评价:低等级时从斑点鲈身上能获得少量经验和金钱。它们的挣扎力度和其他鲈鱼品种相当。 难度:极难发现和钓到。当你能前往阿查法拉亚盆地时,它们几乎没有什么奖励价值。 条纹鲈
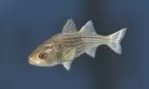
分布区域:鲍威尔湖和阿查法拉亚盆地。 最大钩号:#6/0。 最佳钓点:鲍威尔湖——通常在地图上1号或2号码头下方及周围最易找到。条纹鲈似乎是最常见的鲈鱼品种。 最佳诱饵:勺型拟饵(直线速度2)——钓获过程中可能会遇到一些大嘴鲈鱼和小嘴鲈鱼。 其他诱饵:几乎所有诱饵都能钓到。 常见重量:约2-12公斤。超过20公斤的条纹鲈就算是大型个体了。 评价:低等级时从条纹鲈身上能获得相当数量的经验和金钱。它们的挣扎力度与其他鲈鱼品种相似,表现不错。 难度:非常容易发现和钓获;是早期游戏中令人兴奋的鱼类。对低等级玩家来说是不错的奖励。 白鲑
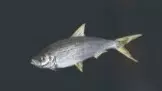
出没地点:贝加尔湖和贝加尔湖(冬季) 最大钩号:1/0号 最佳钓点:贝加尔湖 - 乘坐2号船并向海滩方向抛竿似乎是最佳策略。白鲑似乎主要在鲈鱼附近活动 最佳饵钩:使用飞蝇饵、蛆虫或类似饵料的鱼钩。要做好钓到许多鲈鱼以及偶尔钓到 pike 或贝加尔凹目白鲑的准备 其他钓法:飞蝇饵。一些旋转亮片显示可用于钓白鲑——这是错误的 常见尺寸:1公斤以下。超过1公斤的白鲑就算是大型个体了 评价:经验/金钱收益很少。它们的挣扎力度不大 难度:找到并钓到它们有点难。容易钓到但几乎没有回报 梭鲈
发现地点:乌瓦茨河。 最大鱼钩尺寸:#6/0。 最佳钓点:乌瓦茨河 - 7号位置的船似乎是个不错的起点。 最佳钓法:勺型拟饵(匀速2档)是最佳策略。你也会钓到一些多瑙哲罗鱼和鳟鱼。 其他钓法:飞蝇钓以及使用飞蝇饵、蛆虫、切块饵或红虫的饵钩。 常见尺寸:3公斤以下。4公斤以上就算是大型梭鲈了。 评价:当你能够前往乌瓦茨河时,从梭鲈身上获得的兴奋感或经验/金钱可能不会太多。 难度:选择性钓梭鲈较难;上岸容易。这是一种前期回报较少、难度中等的鱼类。