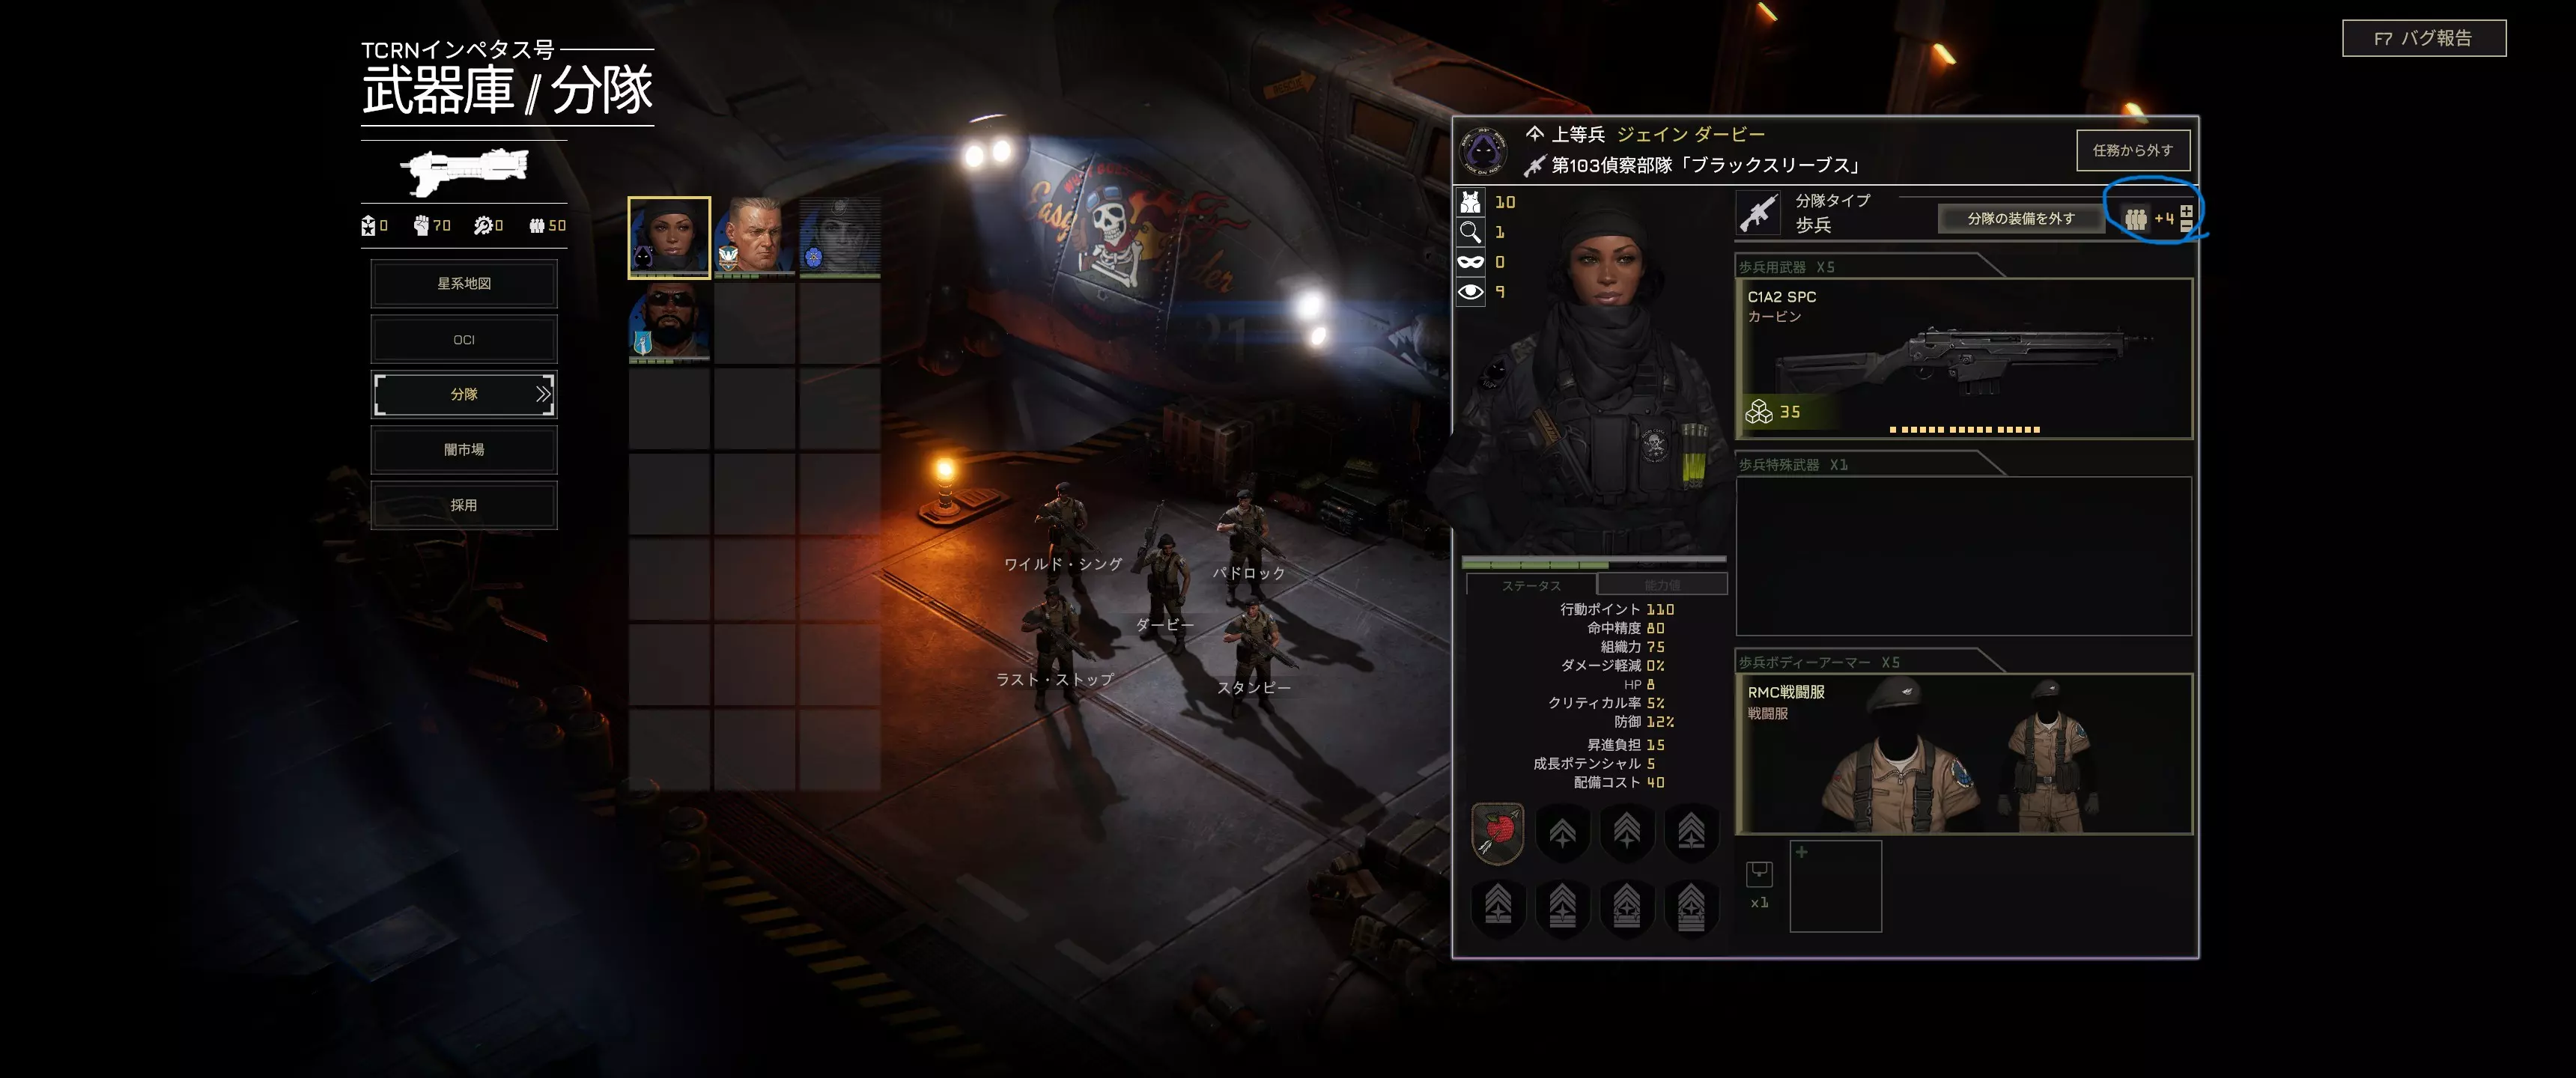
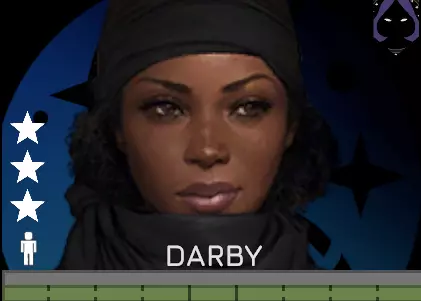
本指南汇编包含了资深“时空撕裂者”(Gate Rippers)提供的技巧、策略和信息,旨在帮助你在“归途”(Wayback)中生存下来。 前言 大家好,我是Hooded Horse的社区总监马特。 本指南是由MENACE测试玩家编写的社区指南精选汇编,旨在为新老玩家提供实用的入门参考。它并非单一的权威观点,而是汇集了玩家们在实际战役环境中通过反复试验、不断失败、调整适应后总结出的第一手经验,展现了游戏各系统之间的相互作用。 每个部分都聚焦于游戏早期或中期的特定决策领域,例如难度选择、小队领袖、武器、配件和潜行等,并标明了原作者。目标不是规定一种正确的玩法,而是呈现《MENACE》中持续重要的有用思维模式、权衡取舍和模式。 选择难度 作者:Balki(Gate Rippers) 在开始第一次部署前,选择一个符合你学习和战斗偏好的难度会有所帮助。《MENACE》的玩法会因你早期给自己施加的压力而有很大不同,从留有充足试错空间到紧张且不容失误的战斗。这份快速说明将解释每种难度的侧重点,以便你根据自身经验和风险承受能力选择合适的起始难度。 普通难度: 你会初始获得额外物品,让早期游戏更加顺畅,同时拥有更高的补给点上限,使你能部署更多单位和更好的装备。敌人解锁新单位和系统的速度更慢,且倾向于使用更简单的组合。 挑战难度: 你初始只有非常基础的装备,补给点也比普通难度少,这迫使你在携带什么以及携带谁的问题上做出更艰难的选择。敌人会更早引入新单位和装备,促使你快速适应。失去小队队长的情况随时可能发生。 专家:起始条件与挑战难度相同,但敌人数量更多、装备更好。此模式面向经验丰富的战术玩家,他们能从容应对高压下的多重威胁。 该从何开始?如果你是战术游戏新手或经验有限,普通难度是最佳选择,能让你在学习游戏系统的同时,不会因小错误而受到严厉惩罚。该类型游戏的老手可能更喜欢更高难度,以保持挑战的趣味性。 威胁:了解基础知识 来源:Prowler(Gate Rippers)
Image by: locasteius This is an interactive, in-universe reference guide aimed primarily at new players. It is structured around linked pages navigated through the function keys, with the first few pages focused on presentation and tone before getting into usable content. The main interface is meant to offer a fun, approachable way to pick up core information about MENACE without diving into deep meta analysis or overwhelming detail. It focuses on small, useful takeaways rather than exhaustive explanations. A large part of the project is the Anecdotes and Logs section, which pairs practical best practice tips with short in-setting journal entries from other units. These entries are meant to reinforce lessons through flavor and context, giving players a memorable reason why certain tactics work, rather than just stating them outright. Instructions: You can navigate this by clicking on the "F keys" at the bottom. They're all linked to other pages. The first couple pages are just flare. Note: Some pages have expanded additional views based on some F keys. Check out the Google Doc link here.[docs.google.com] Black Market Accessories Credit: Balki (Gate Rippers) Looking at the black market, you'll be looking at all these new shiny toys. And you'll be wanting to get some good weapons ASAP, and most likely you're thinking about getting some armors, some new vehicles, oh, and new SLs. It's easy to fall into thinking that accessories are too expensive and not worth it. And it would be a big mistake. Getting 2 to 3 guns ASAP is a good idea, also one or two SLs to start rotating, so you don't get hit by exhaustion. But then stop and look at accessories. Armors can wait. The pirate rags will see you through the early game, and soon you'll be swimming in class 2 and class 4 armors dropped by Rogue Army. Think of accessories as options. They can either plug a hole in your squad's weakness (do I take some AT as a backup or let someone else deal with AT?) or enhance their strengths (do I give my Scout even more vision?). Your choice of weapon and special weapon decides your squad's role, and the accessory builds further on it. This list will be non-exhaustive. Just because I don't mention one accessory does not mean it's bad. This guide is for talking about and showing you some good-to-get options in the early game. Smoke GrenadesThe king of all accessories and the one you'll never want to take, but will regret not bringing when you need it. They don't do damage, they don't help you deal more damage, but they're the single most important accessory to get. Full stop. Want to stop a Bombardier or Mortar from nuking your squaddies? Smoke up. Want to properly retreat? Smoke up. Want to save your downed SL without adding another one to the list? You guessed it. Smoke up. Smoke removes enemy vision, and they cannot fire into it unless targeting a marked unit. It will save your bacon many times, and if you don't end up needing it, it costs very little supply. Aim to get at least one before fighting the RA. BinocularsWhy do I want to see further when I can't shoot further? Vision and information are king. Knowing earlier where an enemy is allows you to react earlier. Great when combined with Scout. Helps against stealth units like Outcasts and Yaegers. The Target Designator is a similar option, letting you mark targets to maintain vision. Potentially saving a perk slot by using an accessory slot instead. Ammunition AccessoriesWe have several types worth picking up early: Hollow Point – A good reward, but skippable to buy. Helps against unarmored enemies, but only if it changes time-to-kill. Best on weapons with high Penetration. Match Grade – Increases accuracy and range. A solid general-purpose pick. Works well with Darby's +1 range perk. Armor Piercing – Great on both high-AP and low-AP weapons. Helps counter armor and reduces range falloff issues. Rend – The armor shredder. Extremely effective on SMGs or shotguns to melt armor fast. Disposable Rocket Launcher (DLAT)Seems expensive at 100 TV for a one-time use, but it's very cost-effective on assault squads. You don’t lose a rifle, and you can neutralize a vehicle once per mission. It won’t kill a heavy tank, mech, or [REDACTED], but it might disable or armor-break them. Low supply cost makes it easy to slot into your squad. Ammo PouchesYou start with 3. If you're going infantry-heavy, getting more ensures longer engagements without needing resupply. Ammo BagsYou'll likely loot a bunch from pirates. If not, buying 1 for your Special Weapons Team significantly improves sustained effectiveness. Vehicle AmmoOne of the most impactful accessories after Smoke Grenades. Allowing your vehicle to shoot more often turns it into a serious force multiplier. Camo KitIdeal for stealth builds or defensive base setups. Keeps your weapon team hidden until the enemy is close enough to be deleted. ScannerAn infantry-held radar. Less range than the vehicle version, but it doesn't take up a medium weapon slot. DronesGreat for scouting. The Kamikaze Drone lets your Scout deal with one vehicle on their own. New Player Guide to Starting Marines Squad Leaders Credit: Balki (Gate Rippers) New Game: Who Should You Pick? So you've pressed New Game, watched a nice cutscene, and are now greeted by a selection of characters to pick and choose from, and you have no idea who to take. You could just pick whichever looks coolest to you, but if you're interested in learning more about them, keep on reading. Squad Leaders Overview Squad Leaders (SLs) come in two flavors and three categories: Infantry and Pilot, and 1 to 3 Stars. Infantry SLs are your boots-on-the-ground leaders, commanding up to 8 soldiers into battle. Pilots, on the other hand, drive vehicles. From jeeps and troop carriers to mechs and heavy tanks. You should pick 3 Infantry and 1 Pilot for a balanced start. Picking 2 pilots is ill-advised, as it will take some time before you get a second vehicle. It's much easier to recruit a second pilot later once the need arises. Star Ratings The more stars an SL has, the stronger they generally are. But should you always pick the highest-star SLs? Yes... and no. This guide won't go too deep into stats, but there are two especially important ones:Supply Cost – How many points it costs to bring the SL into a mission (before gear). Promotion Tax – How much extra supply is added per promotion.For example, Darby has far better stats than Carda, but she costs 40 supply to deploy much more than Carda. And while a 3-star SL gets powerful fast, a 1-star SL can often receive three promotions for the same cost as one promotion on a 3-star. The game balances power against supply efficiency. You’ll start to shape your strategy around when to bring elite squads, and when to lean on cheaper options. Pilot Squad LeadersAchilleas (3★) Achilleas is an exceptional pilot SL. His stats are the best among all pilots, and his perks are incredibly potent. He works well in any vehicle but truly shines when piloting mechs, unlocking their full potential. His only real downside is his high supply cost and promotion tax. To bring Achilleas into a mission, you'll often need to make sacrifices elsewhere — but he’s worth it. Rewa (2★) Rewa is a ferocious and aggressive pilot with strong offensive perks. Her innate and perk kit reward aggressive play and chaining kills. She has a few defensive tools to help her stay on the field longer. Rewa has balanced stats, moderate cost, and performs well as your main offensive pilot if you don’t want to splurge on Achilleas. Bog (1★) Bog is a cheap and flexible pilot SL. His stats are poor, and his growth potential is low, but he has a diverse and unique perk set that allows him to fit into many roles. He comes with a very low supply cost and low promotion tax. One of his perks even reduces vehicle supply costs at the cost of some HP. That means you can free up points to invest elsewhere, but you’ll need to play carefully. Bog rewards tight, efficient play. Infantry Squad LeadersDarby (3★) Darby brings strong stats and deadly accuracy to the field. She excels with long-range weapons and has perks focused on scouting, concealment, and precision shooting. Her high ACC allows her to consistently output damage and support her team from the rear. However, Darby comes with a very high supply cost and promotion tax, so you’ll need to plan carefully to field her consistently. Lim (2★) Lim is a flexible and offensively focused marine. His perk kit allows him to be built into several roles: short-range assault, mid-range rifleman, or mobile infantry paired with a vehicle. He adapts well to changing battlefield needs. With a solid growth rate, Lim scales well into the mid-game and stays relevant as you promote him. Pike (2★) Pike is a support-focused SL who boosts the strength of other squads. He can grant action points, morale, accuracy, and suppression recovery, and also has the tools to serve as a rifleman if needed. He starts with strong base stats, but has low growth potential, meaning he won’t scale as well without support from growth perks. Still, his utility is unmatched, especially on defensive or static missions. Tech (2★) Tech is a frontline SL who brings heavy weapons and durability to your force. His signature perk allows him to use Infantry Special weapons on the move, bypassing deployment delays. He’s the tankiest infantry SL and has perks that support grenades, accessories, and utility roles. If you want raw firepower and a squad that can take hits, Tech is your go-to. Carda (1★) Carda starts with terrible stats, there’s no sugarcoating it but she has the highest growth potential in the game. Her innate perk boosts her stats over time during missions, and her growth scaling can eventually outpace even 2-star SLs. She’s extremely flexible. Carda can serve as mobile infantry or lead a Special Weapons team. Her very low supply cost lets you invest more into her squad, and if she survives long enough, she’ll become a 3-star in all but name. If you’re willing to nurture her, Carda becomes one of the most cost-efficient SLs in the game. Basic Weapons and You: A Guide to Early Game Squad weapons Credit: Mephansteras (Gate Rippers) This guide is a practical overview of the basic squad weapons you have access to in the early game, with a focus on what each gun is good at rather than raw numbers. It explains the intended role of each starting weapon, how they compare to one another on the battlefield, and why replacing carbines early makes such a difference. Stats are intentionally left out, since those may change, but the core strengths, weaknesses, and use cases of each weapon are unlikely to. C1A2-SPC CarbineYour basic starting rifle. Pretty much inferior to all other options. Cheap to field, with decent range and damage, but low rate of fire. Use it until you can afford anything else. R10A6 K-PAC Assault RifleHigher armor penetration, suppression, and rate of fire than the Carbine. This is the best all-rounder gun, and works well as a default if you don't have a specific role in mind for the squad. All other guns in the list will be compared to this one. R14A2 ARC Assault RifleHigher HP and armor damage, but lower range. This is a better option for taking on armored opponents and closer-range engagements, but the shorter range can hurt in some fights. A solid general-purpose rifle that can be used as a default instead of the K-PAC, depending on your playstyle. BR3A3 Kr-BaR "Crowbar" Battle RifleLonger range, higher damage, better armor penetration, and higher suppression make this weapon hit the hardest per bullet. However, it has a lower rate of fire than the assault rifles and poor accuracy at close range. Think of it as your squad-level marksman rifle. It really needs other units to cover close-quarters threats. MP3A9 PPP SMGMuch shorter range than the other rifles, but strong HP damage and very high rate of fire let this weapon shred nearly anything up close — unless it's heavily armored. It also has a "tap" mode for some limited long-range use, but that’s generally much less effective than other rifles. Stoneclad CS185 ShotgunThe shotgun is in a class of its own. Very short range with no long-range fallback, but devastating accuracy combined with strong HP and armor damage make it the best option for close-quarters combat out of the starting weapons. General Advice for the Early GameBuy new basic guns ASAP. You want every squad using something other than carbines if you can afford it. Weapons squads, those focused on the SL's Special Weapon, are the exception. But most rifle squads need good guns to be effective. A mix of rifles on the field can be a solid strategy: Crowbar excels at long range and can even damage light vehicles like pirate trucks. SMGs and Shotguns let you kill things that get in close. Assault Rifles give you control over the mid-range. Regardless of how you build your squads, you’ll need some way to handle all three ranges. Rate of fire makes a huge difference in actual damage output. The Crowbar may have great damage per shot on paper, but it can struggle to kill off large groups. Meanwhile, the SMG has no trouble turning a band of scavengers into mulch in a single burst. Full Auto is an option on most of the rifles (and default on SMGs). When using Full Auto it takes 80ap (40 on SMG) and does a spray of bullets onto the target. This is generally best for suppression, but also has a shorter range curve that can make it superior at close range. For the Crowbar, especially, this mode is critical for dealing with close-up threats. Just make sure you have the AP to use it! It also only takes one use of ammo, allowing you to conserve ammo if necessary. (Note: Specific stats are left out, as they may change but weapon roles are unlikely to shift much.) Stealth: A Guide for Staying Invisible Credit: sunlight5759 (Gate Rippers) This section explains how stealth works in MENACE, breaking down Vision, Concealment, and Detection, and how they interact in real missions. It covers practical ways to build and use stealth squads, common mistakes to avoid, and how to apply stealth effectively across different mission types rather than treating it as an all or nothing approach. BasicsEach unit has three relevant stats: Vision, Concealment, and Detection. The range at which you can spot an enemy unit is calculated as: Your Vision − (Enemy’s Concealment − Your Detection) The same rule applies in reverse. Your goal is to spot enemies before they spot you. Vision ModifiersWeather conditions usually decrease both your Vision and the enemy’s. Scout perk is great for stealth but not required. Accessories like Binoculars increase Vision. Time of day matters. Nighttime reduces Vision and can be countered with Night Vision Goggles. Towers increase the Vision of the stationed unit. Being pinned down dramatically decreases Vision. ConcealmentConcealment is the core stat for staying hidden. Chameleon perk increases Concealment. Deploying increases Concealment by +1. Accessories like Camouflage Kits increase Concealment. Gear can grant Concealment — early examples include: - Outcast Rags: +1 Concealment - Jaeger Outfits: +2 Concealment Standing in a bush grants +3 Concealment. Being in a tower decreases Concealment. DetectionDetection is usually gained alongside Vision. Scout perk provides +1 Detection. Weather conditions decrease Detection. Binoculars also increase Detection. Nighttime generally reduces Detection. Silenced Weapon MechanicsFiring an unsilenced weapon nullifies your Concealment for one turn. A typical stealth squad might be Darby with Chameleon, wearing a Jaeger outfit, and using a silenced K-PAC or Crowbar. Optional gear includes:Binoculars Camouflage Kit Night Vision Goggles (for nighttime missions) In general, aim for 3 to 4 Concealment for reliable stealth performance. Advanced TipsIn combat, press R with a squad selected to preview enemy detection ranges. Some enemies (like Jaegers and RA Officers) have higher Detection — plan accordingly. If a nearby enemy suddenly appears, do not immediately retreat. If you pin them down, they lose all Vision, allowing you to safely disengage. Check if your squad is spotted via their icon: - Crossed eye = Unspotted - No eye icon = Spotted SLs will whisper when unspotted and shout when seen. Advance one tile at a time and always leave AP to fall back. You can run a non-silenced stealth squad (e.g. snipers), but you’ll need Vision equal to your weapon range and higher than the enemy’s. Do not place stealth squads in towers. You’ll lose Concealment and become a priority target. Mission ApproachYou don’t need your entire force to rely on stealth. While other squads draw fire, your stealth team can flank and pick off exposed enemies. Even defense missions can benefit from stealth. A well-built stealth squad can stay hidden even while enemies advance. On RA difficulty, they’re essential for eliminating ATGM and mortar teams without triggering mass aggression. Close Combat: Trangle's Guide to Getting in There Credit: Trangles (Gate Ripper) This guide breaks down close quarters combat in MENACE, focusing on when it works, why it works, and how to survive getting in close. It draws on hands on beta experience to cover CQC fundamentals, the risks involved, and the tools, characters, and tactics that make aggressive play viable instead of suicidal. Close Combat: Trangle's Guide to Getting In There Why CQC? A lot of new players will want to stay at range, chip away at targets, and take wide angles to flank. Many are concerned about ammo shortages, secondary timers, and the difficulty of flushing out entrenched enemies. Coincidence? I think not. Close Quarters Combat (CQC) refers to any engagement at or under 4 tiles. It’s the domain of shotguns, SMGs, and personal defense weapons. These are brutal, short-ranged firefights where you have to be ready to hit and be hit. Fortunately, MENACE gives us plenty of tools to succeed. CQC gets you kills. You'll quickly shred light enemies and break armor on tougher ones. Shotguns can kill armored trucks. SMGs can melt bugs. Even the big threats [REDACTED] aren’t safe. Kills cost less ammo. No more drawn-out duels. Just knock 'em down and move on. Save logistics for fun stuff like combat drugs and utility gear. CQC moves you forward. Faster kills means you're physically pushing up the map. That pressure fractures enemy lines and creates openings for support units or grenadiers to exploit. Why Don’t More People Use CQC? Enemies are more accurate at short range. Pirate shotguns, bug claws, and sudden fog-of-war ambushes can ruin your day. But with the right planning and gear, you can control the risk. Equipment Tips Armor is good, but smoke is better. Smoke enables CQC. Use it to block enemy vision and push forward. The flow looks like this: 1. Throw smoke. 2. Enter smoke. 3. Next turn, burst out of smoke and wipe the floor. Your CQC troops need smoke support. Whether carried by them, dropped by mortars, or delivered via OCI, someone has to throw that grenade. Always leave AP for smoke grenades. Characters Suited for CQC Lim One of the best CQB SLs. His perks make him brutally effective: - Counterstrike: Return fire with your squad weapon when attacked. - Berserk: Get 30AP back after a kill. Often enough for a third shot. - Run & Gun: -10AP for firing after moving. - Synergizes well with SMGs and shotguns. - Blaze of Glory clears suppression if you overextend. Yaz A morale monster. He thrives when enemies are wounded, wavered, or fleeing]. - No Mercy: Big accuracy and damage against scared enemies. - Fearsome: Double morale damage. - Close & Personal: Accuracy boost at melee range. - Surprisingly durable with the right armor. Tech MENACE’s own walking warcrime. - Get ♥♥♥♥♥♥♥♥♥♥♥♥: Use special weapons without deployment. - Zig Zag + Die Hard: Tough to kill. - Long Bomb + Quick Hands + Frag: Make him a grenade god. - Extremely effective with support gear and CQB rifles. Pike Not a brawler himself, but amazing support. - Take Command: Transfer 40AP to another SL. - Buffs suppression, accuracy, and morale. - Keeps your frontline moving and your CQB killers killing. Final Thoughts This guide isn’t about proving that CQC is superior. Ranged play is valid. In fact, you should run both. But if you’ve only ever sat back volleying rifle fire and you’re struggling with ammo, timers, or momentum -- try getting in there. Set up your smoke. Charge the enemy. Watch their lines break. Then tell them Trangle sent you. Close Combat Continued: Additional CQC Tactics and Builds Credit: Finx (Gate Ripper) This section builds directly on the previous CQC guide. It focuses on specific Squad Leaders and abilities that support aggressive close-range play, with attention on keeping momentum, managing suppression, and adjusting CQC approaches when facing tougher enemy types. CharactersPikePike has been brought up thanks to his Command ability, which is great, but if you were to ask me, the icing on the cake has to be Rally. One of the main things that can shut down your push is that you get in there, but you somehow get suppressed and are now pinned down, or you use one of the other SLs I will bring up later. Anyway, thanks to Rally, you can keep the momentum of your push by "healing" your suppression. If you want to Rally, wait until every enemy within the pin down SL range has taken their turn; you don't want to Rally them just to be pinned down right after. KodyKody, I'm quite surprised he wasn't brought up, because his entire kit screams CQC alpha strike to me. One of the problems you will face when you start fighting the construct is that they don't suffer from morale status, so Yaz's entire gimmick is negated, unlike Kody's amazing Guerrilla ability, which grants improved accuracy and damage on any target that is at high HP. Combine that with Assassin, which increases damage on isolated targets, and you now have crazy damage, which solves the second problem you will face versus the menace: they are super tanky, so any damage perk is welcome against them. Kody is great at other things too, with Fortify and Zig-Zag, and he has the second-best DR and HP of infantry SL after Tech, as well as his Recover, which removes some suppression when he kills an element, which turns him into a very sustainable character. Last but not least, Vanguard, I said before that Kody is a CQC alpha striker. Thanks to this perk, if you feel ballsy, you can spawn on top of a high-priority target on mission start and just delete them on turn 1, which can really set up a mission for success. No matter if they are infantry or vehicle, Kody can take them out with the previously mentioned perk or Tankbuster if you give him a rocket. VamplewVamplew, I'm not the biggest fan of his Taunt, but I do recognize that some could enjoy his gimmick, so let me briefly touch on it. Vamplew, with his ability to gain AP after being shot at enough times, is a great candidate if you like brute-forcing into a position. If you give him a Boarding Commando suit for the jetpack and high armor, you can Leeroy Jenkins him into a suicidal position, have him take all the agro until Pike arrives, and rally him so he can start cleaning up. Like Kody, he gets Fortify, so even if he is pinned down, as long as you give him good armor and he's not flanked, he can tank forever. AchilleasAchilleas, of all the pilot he is the one who excel at close range. Early on, when you struggle with armor from enemies like the Warrior, his Lancer ability is a game-changer if you want him to be your anti-armor SL. Not only that, but he also has Shield Wall, so taking big hits is fine with him, so you are allowed more risky play, unlike a Rewa, who can go from 100 to 0 in a single turn if not careful. Heck, if he does take a big hit, he becomes stronger thanks to his starting perk, which grants him extra AP. DarbyDarby, not necessarily Darby herself, due to her stat disincentivizing direct combat, but her scouting capability, if used properly, allows your dedicated Assault squad to push forward knowing what is ahead. Give her Scout, Covert Ops, Vanguard, and a camo kit, and she will be a great wingman. OCISensorSensor, as they say, knowledge is power, and this OCI embodies that. I brought up a few times, Vanguard. Well, this OCI is very recommended, so that you know what the target is exactly when you plan your Vanguard strategy with Kody, Darby, or Achilleas. Being aggressive doesn't mean not being smart about it. Pirate Gear - TCRN hoists the black sails Many players will usually just sell all pirate equipment on the Black Market to buy new better toys from there. And while it's a valid approach, you can get some use out of pirate items early game, especially when you get unlucky on the first mission and dont loot enough to buy a Crowbar or KPac. Weapons:Pipegun - the worst and cheapest weapon in the game. I like keeping one around as it allows you to squeeze some more guns into the supply cap. As they are cheaper than carbines, you can save a bit of supply on weapons teams by equipping them instead. Especially nice on challenging and above to squeeze out one more squaddy or one more accessory on your assault team. Bad ROF, Bad accuracy combined with decent damage means it's not going to do much. But sometimes bringing 8 pipeguns is better than bringing 4 carbines. Not worth to keep past 4 OPs. Pirate Assault Rifle - It doesnt do much against the Player, cause we usually engage against pirates from outside the optimal range. So we think it's a bad weapon. And while each of the Basic ARs is better than the Pirate AR, the Pirate AR is an upgrade over the carbine. Especially in the hands of SLs with good aim (Darby, Pike, Lim,...) ROF 3 Brings more bullets, so more dead pirates and more suppression. It's a decent pick for your first 2-3 OPs until you can trick Out everyone with ARs/BRs from the black market. Light Chaingun - a sleeper hit and one of my favorite Special Weapons in the early game. 20 AP Shooting cost means it can shoot up to 5 times per turn or allowing you to walk farther before taking a shot. Can suppress/Pin up to 5 units per turn. Does good damage, also against bugs. It can Jam putting a wrench into your plans at the wrong time. Good backup option on an assault/MI Squad. Also can be used to squeeze some more activation triggers on Carda for growing stats. I tend to use one of These until the Rogue Army, when it stops doing enough damage and suppression Workshopped RPG - unless playing on normal this will be your First AT weapon. But even then it still has upsides compared to the MAAL Rocket Launcher. Does not need deployment (but benefits from it due to the mediocre accuracy) and can be fired twice per turn. Allowing you to cripple/disable Up to two vehicles per turn. Sometimes even kill 2. Keep one until you get the RA rpg2. Pirate PDW - rare drop from boarding commandos. An insanely deadly weapon in the hands of an MI Assault or Vanguard. High ROF ans high armor pen. It will completely shred anything early game throws at you except for a handful of high armor enemies. Can destroy pirate Vehicles in one tap from the side or back. Kody and Lim will be happy to have it. Can be used Well into the midgame until you get T2 SMGs - also very useful against bugs. Flamethrower - decent early game option to deal with enemies in cover. Shortish range limits it's usefulness and it means one less gun firing on the primary weapon. EMP Rifle - disables a vehicle for one turn. Useful if paired up with an AT User. One disables the vehicle other can now take it out without getting into danger. Doesnt do anything against bugs and Rogue Army brings less vehicles early in a campaign. I always keep one around, but I havent used it much. It's a very playstyle dependant weapon. Armors: Outcast Rags - your first armor giving some concealment. Keep one for Darby If you're building her for stealth. Offers very little protection, but enables her to be further out without getting detected. Otherwise sell them. Scavanger Armor - pirate class2 Armor. Offers the same protection as soft armor while being more expensive. Still useful in the beginning by saving TV for other items on the black market. I tend to use them into the RA and then start replacing it with their class2+/class4 armors. Boarding Commando Armor - your first taste of heavy armors and currently our only option for a jetpack. Worth to use on all content we have in EA right now. Very tanky and versatile, but the cost is prohibitive and on a Squad without buff it means they're much slower if not jetpacking. Note that the Jetpack is limited to 6 uses per mission. Pairs well with an Shotgun/SMG assault. Vehicles: Pirate Jeep - a cheaper ATV. A good option to bring an additional vehicle to a mission. Cheap to field and fast. Very squishy as you've by now noticed how easy it is to blow them up yourself. So should be used with care. Vehicle Chaingun - Same as the infantry option low AP cost allows firing many times until it jams. Decent damage and suppression and a good early game pick until getting an autocannon or heavy mg turret. Nice to pair with the pirate jeep for a cheap suppression platform. Heavy Flamethrower - 55AP makes it expensive to use and needs perk investment for a Pilot to be able to shoot it two times. Makes up for it with insane aoe damage, forcing the surviving enemies to move next turn to Not take fire damage. Any unit pinned by the flamethrower will take additional damage on their next turn as they cant move away. Rocket Organ - your first long range artillery weapon. And Most likely you've been on the receiving end before looting one yourself. Insane AOE suppression and can do some decent damage. Inaccurate and only a few Pilots with heavy perk investment will be able to use it once a Turn, but Achilleas is better suited to the front. Not a General purpose weapon, but great on missions where enemies are bunched up. Bog makes for a good rocket organ user, you can bring him with a pirate jeep or atv for very cheap into the mission and have him hang out in the back. Accessories: Ammo Bags - giving more ammo for your special weapon. A core and important accessory, but it costs 120 TV to buy. Hold off on buying one, because pirates like dropping these. Scrap Bomb - the pirate's grenade. Useful in the early game, deadly against lightly armored squads, which will be most of the opposition you'll face. Good when you need to flush out a unit out of cover. Can be phased out once frag grenades become available. Bundled AT Grenade - Limited usefulness, look at it as an option If you are lacking other AT options. Doesnt do much against infantry either. It's cheap to bring atleast and can help an assault squad deal with a closeby jeep in a pinch.


 换一换
换一换 


