换一换
换一换 


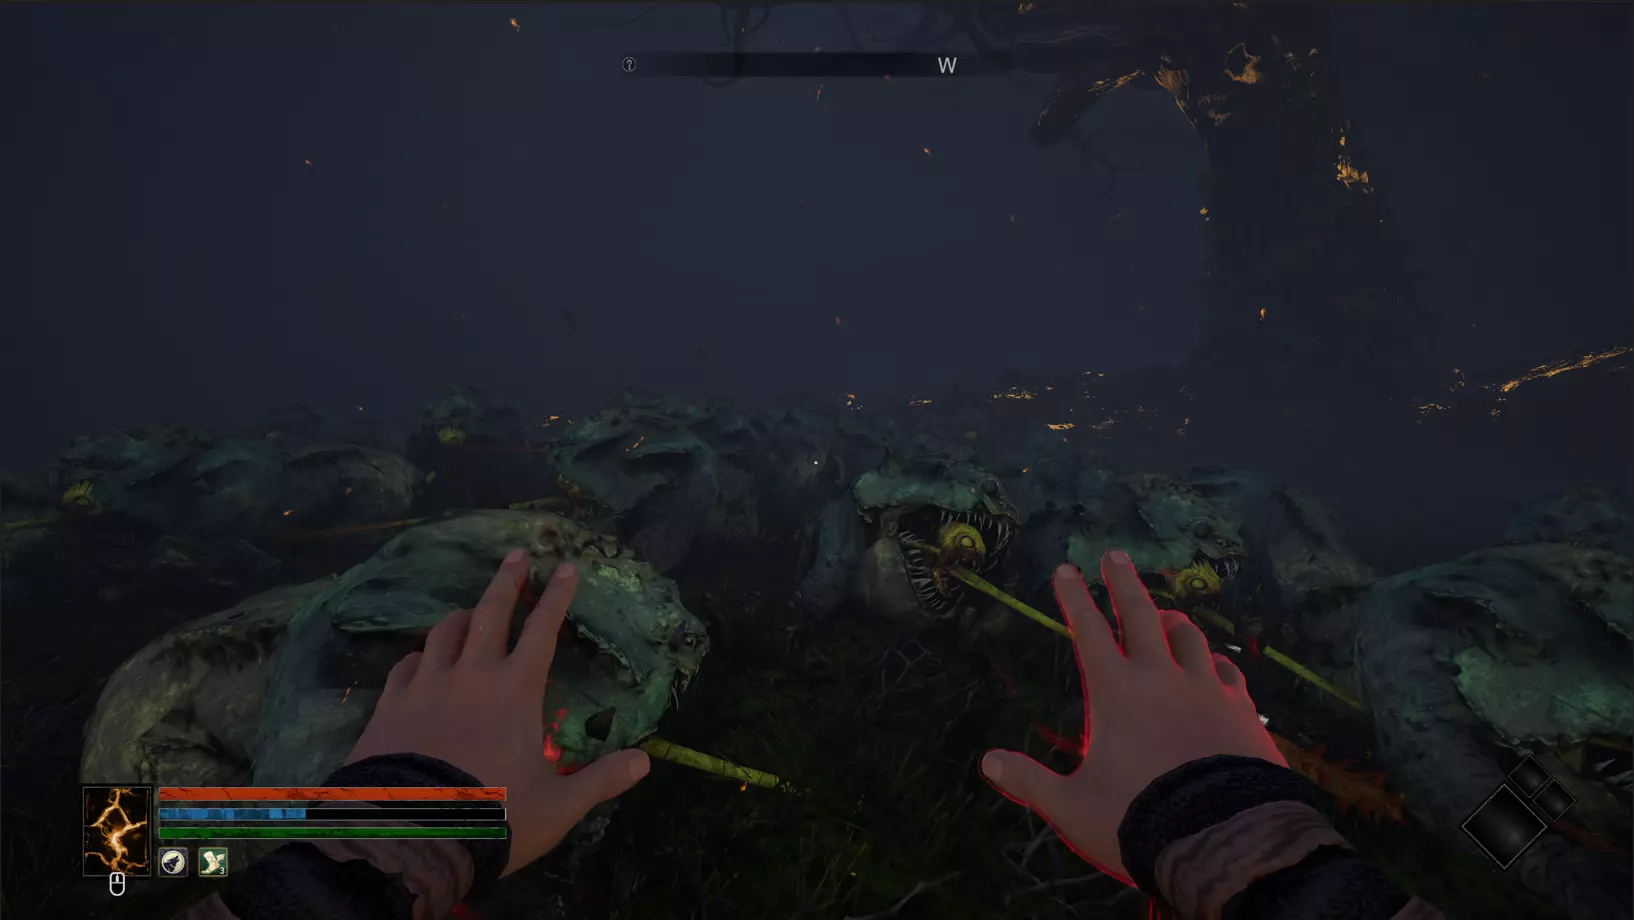
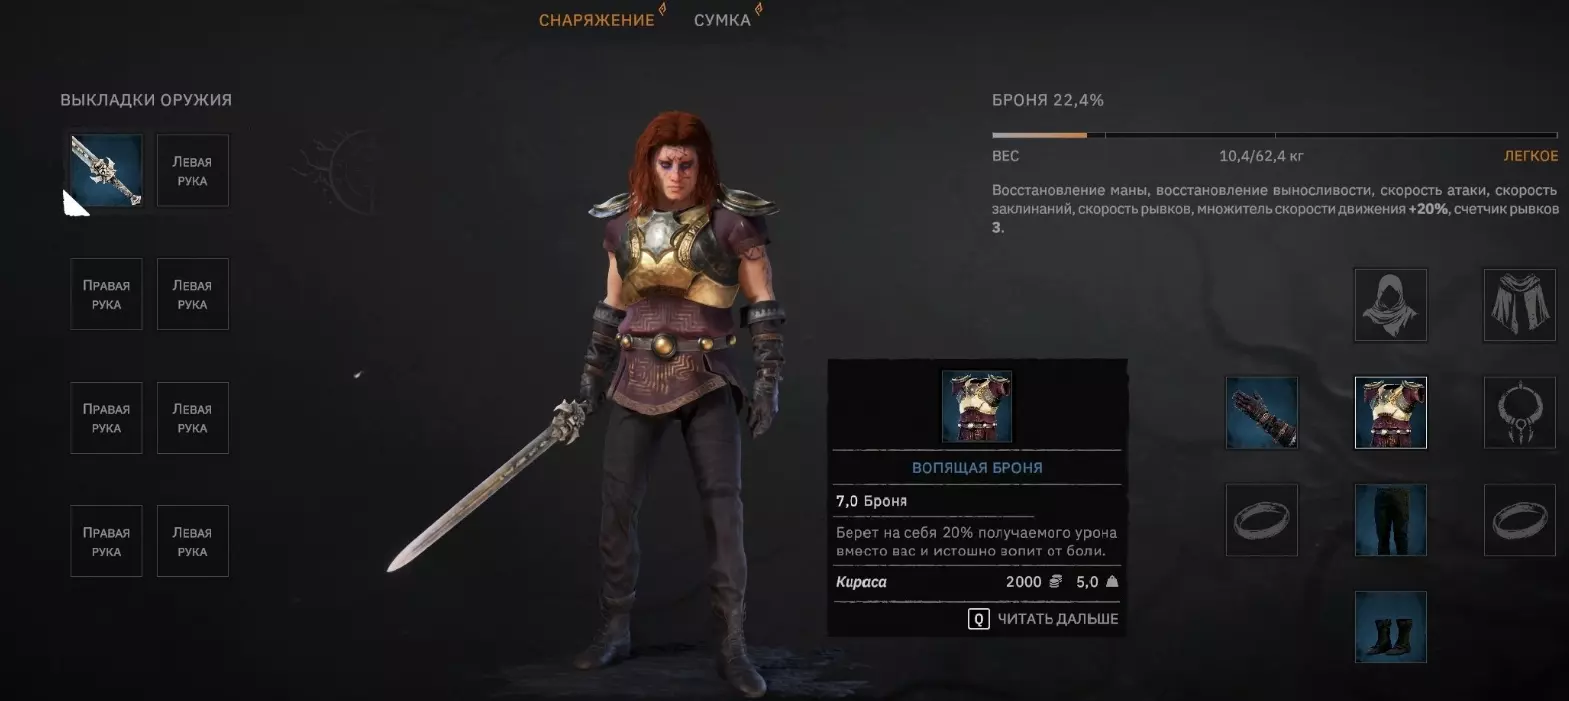
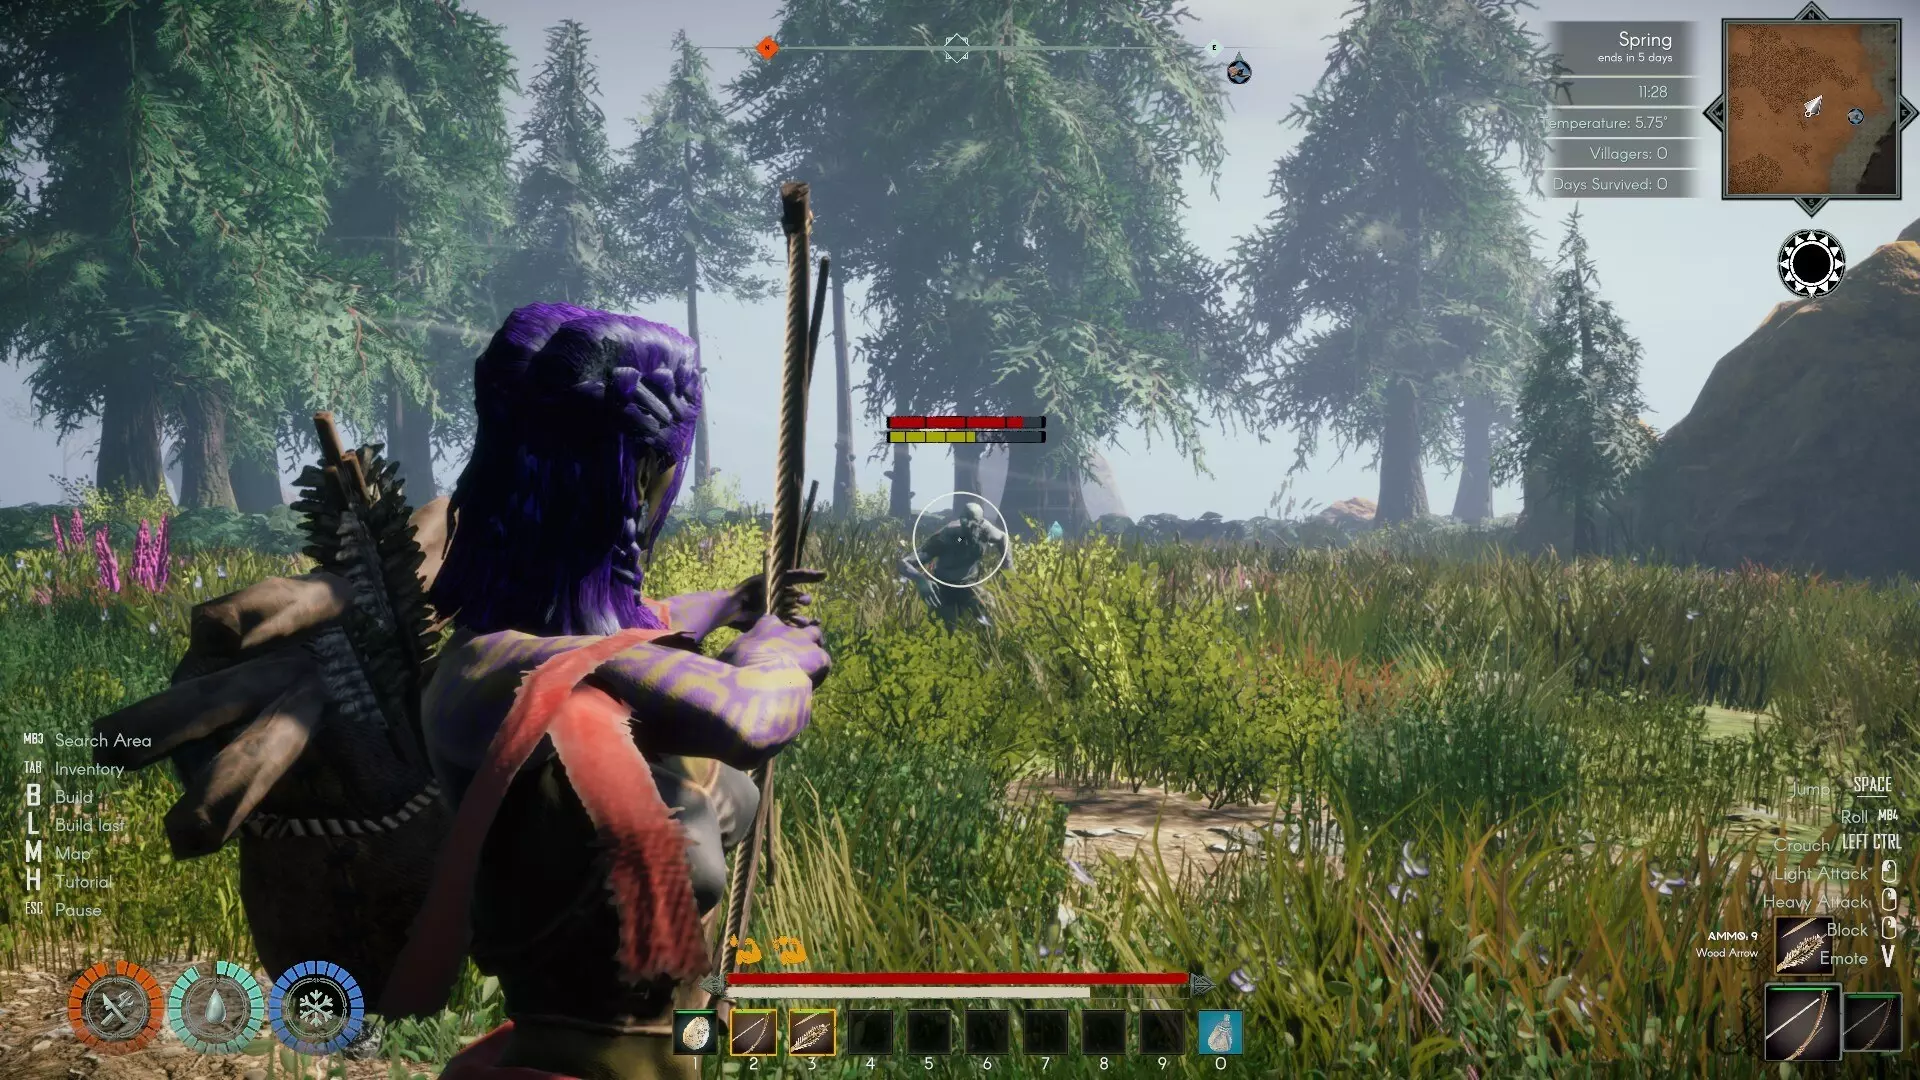
A list of Tips and Tricks to help make your journey through Tainted Grail just a little bit better. Intro This is a list of Tips and Tricks that should be helpful to both players just getting started and may even help players who have a few dozen hours under their belt. This guide is Spoiler-Free, so don't worry about getting spoiled by anything if this is your first playthrough. I will try to make additions and changes as I learn more about the game but please let me know if you have any questions or suggestions to improve the guide. I hope everyone finds this guide helpful. General IMPORTANT!!! - Save often and keep many saves! Don't lose hours of progress because you didn't save enough and had the save get corrupted, made a terrible decision, etc... Don't stress on your starting choices too much. While they can give a good boost at the start of the game, you can easily get caught up once you leave the Tutorial. Don't waste Origin Potions too often, as they are limited. Hoarding them makes them useless, so don't be afraid to use them at all, but wasting them early on to make slight adjustments will make you unable to change later. I've found about 10 Origin potions from the start until about halfway through Act 2, so you can use this to gauge how much you're using. Use your Stash. There is one by the Quartermaster the Main Quest sends you to. Crafting Materials can be used from the stash and you can sell unwanted items to shops from there as well. Items used for Altars, Quests, NPCs, etc... have to be in your inventory to use them though so you'll want to keep some things on you. The Practicality Attribute directly affects Sell Prices, but not Buy Prices. At 1 Practicality, you sell for only 10% of an item's value. At 20, you sell for 200% of an item's value. At 50, you sell for 500% of an item's value. Items have a variable cap on Max Sell Price. This is what I believe to be the variables from what I can tell, but there may be outliers. Ingredients and Purchased Items = 100% Cap Crafted Items and "Trash" items like common weapons and armor, plates, bowls, etc... = 200% Cap Found Blue Armor and Weapons = 400% Cap "Valuable Trash" items like jewelry, gold bars, and gemstones = 1000% Cap Ingredients cannot be sold for more than 100% price. Shops restock and Common Enemies and Resources like plants and ore respawn but Storages like crates, barrels and chests do not ever refill. Shops restock every 24 hours. Common Enemies respawn every 24 hours. Resources respawn every 72 hours. Resting in an actual bed gives you a 10% experience bonus for a few minutes. Nothing is time-gated so don't feel rushed and use the Rest mechanic as much as you want. Stolen Items can't be sold until Act 2. Read and collect every book you find. Many are used for quests, give Recipes, or even grant Permanent Bonuses. Read item effects. Some consumables give Permanent Bonuses, so be sure to consume them. Leveling Think carefully over your Attribute and Skill Choices, perhaps even waiting until after you've explored a bit to spend any of them. Respecs are limited by Origin Potions so making smart choices is important. I recommend not putting any points into anything for several levels and the making a save where you can test out different builds and see what feels good without having to waste any Origin Potion. Min-Maxing is often stronger than Jack-of-All-Trades builds, but don't let this limit you. It's okay to turn down the difficulty in order to use the build that you find the most fun. The reason that Min-Maxing tends to be stronger is that Equipment and Skills generally matters more than Attributes. As long as you hit the minimum requirements for the Equipment and pick the correct Skills, you can distribute the rest of your stats however you like without too much detriment. Skill Experience is based off of effectiveness and not repetition. This means higher damage dealt, higher damage received, better Recipes made, etc... so you'll naturally level at a steady pace for most of the game provided you keep advancing your character. Level Experience is based off of the enemy type, level of the skill, level of your character and other similar factors, so you'll need to keep pushing further to keep leveling at a steady pace. You get 50% more Experience at night, making it the best time to grind. Wyrd Spawn are a special type of enemy that scales with your level, including the Experience that they give. They appear at night in locations where you have killed enemies during the day, but you'll need to leave the area before night time for them to spawn. This means you can clear out groups of enemies during the day, leave and rest until nightfall, and then go back to grind Experience and Cobwebs from teh Wyrd Spawn. Exploration The map can be freely explored as soon as you leave the Tutorial and items don't scale with level. This means you can grab powerful and high level equipment right away, provided you can survive the journey and get the stats needed to equip them. You can Dash while sneaking to move more quickly while in stealth. Going into Sneak while Sprinting will cause you to Slide. If you set your Sprint to Toggle in the Controls Menu, instead of Hold, you can easily Slide repeatedly to travel quickly across the map and escape enemies. Careful jumping can be used to skip long walks, avoid enemies, and reach locations in "unintended" ways. Potions can be used to increase movement speed and jump height as well as decrease fall damage so keep some one hand. The Cheat Death Skill in the Perception > Stealth skill tree can be used to survive falls from a great height. WARNING!!! - This one is difficult to pull off, but if a fall is high enough to damage you but not high enough to kill you, you can Dash the moment you touch the ground to "evade" the damage. It's hard to judge and even harder to time but if you can master it, you can use it to explore more quickly without needing to heal. 100% Mana Shield converts ALL incoming Damage into Mana Damage. This allows it to be used to avoid Fall Damage and even drowning if you can manage to get it. Questing Talk to everyone. If you can talk to them then 99% of the time, it means they are used for something at some point. Quests, items, lore, etc.. Check back with NPCs from time to time, especially a day or 2 after completing a quest for them. New information can discovered or discussed, the next quest in a chain can be started, or new items can be obtained from them. Read before you click. Your decisions have actual consequences. Being rude can lock you out of quests or start a fight. Being nice can help you skip quests or avoid a fight altogether. Finding information that the quest doesn't expressly guide you to can lead to special dialogue and interactions during quests that can result in alternative endings. Orange options are the obvious "go to the next set of choices" option, but sometimes white options can do that too and take you a direction you don't want to go. Be careful. DECISIONS HAVE CONSEQUENCES!!! You can miss out on quests, items, lose access to NPCs, and a variety of other consequences ranging from mild to EXTREMELY severe. Save often and read choices or you can end up very unhappy with the consequences of your decisions. Crafting Crafting Materials can be used from the stash so keep the majority of your ingredients in it to save on weight. You learn most Recipes from recipe books, but once you have learned the Recipe you can safely sell the recipe book. Most Cooking Recipes can actually be learned manually without needing a recipe book by combining the correct ingredients. So almost every food can be cooked from the start of the game with the right ingredients. Some things can only be crafted by you and cannot be found naturally. While they don't technically have a skill level requirement, Handicraft items have a chance, sometimes a high chance, of failing if your skill level isn't high enough in Handicraft. On of the effects of the Practicality Attribute is that it acts as a modifier for crafting skills. This means you can use it to make up for low skill levels if necessary. You can make better versions of Potions, Food and other Consumables than can naturally be found in the game once the related skills are high enough. You can also make better versions of Weapons and Armor than can naturally be found, but you can also just upgrade them as that doesn't require any skill, just materials and money. Upgrade Weapons for increased Damage. Upgrade Shields for increased Damage and Block. Upgrade Wands for increased effects. Upgrade Armor for increased Damage Mitigation. Upgrade Capes for increased effects. In addition to upgrading equipment, you can reduce the Weight of equipment and add Relics to them to give a variety of new effects. Equipment How much your Armor weighs matters. Less than 20% Weight is Light Armor. 20-50% Weight is Medium Armor. 50-100% Weight is Heavy Armor Over 100% is Overloaded. You get different bonuses and debuffs for different Armor Weights. Armor Weight affects mana regeneration, stamina regeneration, attack speed, casting speed, dash speed, and movement speed multiplier by percentages and determines the number of Dashes you have. Light Armor gets a +20% bonus and 3 Dashes. Medium Armor gets no bonus and 2 Dashes. Heavy Armor gets a -10% debuff and 1 Dash. Overloaded gets a -50% debuff, -75% stamina regeneration debuff, and no dashes. The higher your Strength and Encumbrance, the more Armor you can wear before reaching heavier Armor stages. Build your skills and accessories around your choice of Armor and Weapon. Light Armor will either want more Health and Armor for those times you do get hit, or more and faster Dashes so you can dodge everything. If you can manage without either then you can focus on damage. Heavy Armor will want more Dashes to avoid the big hits when necessary but can otherwise focus on more Health and Armor to out-trade enemies. Don't forget that you can upgrade Armor to get higher Damage Mitigation and lower Weight without using skills. Upgrade Equipment at the Blacksmith. With minimal effort, you can make enough money to afford it. Light Armor may want to focus more on Cape upgrades Heavy Armor may want to focus more on Armor and Weapon upgrades. 1 Armor = 1% Damage Mitigation. It is possible to reach 100 Armor and make almost all damage outside of Status Effects and Fall Damage negated entirely. Combat No matter what method you are using for fighting, avoid using up all of your Stamina as it will leave you very vulnerable. Attacking Weak Spots increases damage, but Magic cannot trigger Weak Spot damage. Weak Spots are generally pretty obvious, like heads, big eyeballs, a magic core, etc... You can use the Journal > Bestiary to try to find out enemy Weak Points from enemy descriptions. Dashing avoids all damage at the cost of Stamina and a Dash charge. Running out of Dash Charges makes Dashing not take effect. Parrying deflects all damage, reduces enemy Stamina and knocks the enemy off balance when successful, but not everything can be parried and it's difficult to parry multiple attacks at once. When you can't Parry, Dash instead. Parrying has a very small time frame, something like ~0.5s give or take. You also can't Parry AoE attacks, like the attacks that Ogres use. Parrying can be done with a weapon as well as a shield and they have different Stamina costs as well. A shield will let you Parry 2 or 3 times before depleting the bar, while Daggers will let you Parry non-stop provided that you don't get hit. If you plan to Parry, you may want to go into the Dexterity > Parry skill tree to increase the Parry window by up to 0.3s. There are also a couple items that can double the Parry window. Use of these items can help if you're having trouble and can also allow you to Parry multiple enemies in a single Parry. With all the Parry window bonuses that I have found, it is possibly to Parry, finish the animation, wait a full second, and still Parry an attack. Using Dual-Wield with this makes you able to Parry infinitely and become unable to be hit without AoE or Magic. Blocking reduces damage, possibly negating it entirely, at the cost of Stamina. Sliding works very similarly to Dashing, but doesn't negate damage, only physically dodging it. Temporal Slip in the Dexterity > Movement skill tree slows down time 2 seconds every time you Slide and has no cooldown. Combining this with changing Sprint to a Toggle allows you to slow down combat for nearly 100% of the fight. Stealth The Dexterity Attribute reduces Noise and Visibility but neither can ever be lower than 10% regardless of any and all bonuses, including items that say they reduce chances of being Detected. 10% is the hard limit meaning you can ALWAYS be detected. Stealth is affected by a variety of factors. The main ones being Noise and Visibility. Armor Weight and how fast you are moving affects Noise, so going Light and Walking are the best ways to minimize Noise. Brightness and enemy line of sight affect Visibility. Stay out of enemy view and move through the shadows or at night to minimize Visibility. Just because the eye is open does not mean you are detected, it just means the enemy is alert to something being there. This means you can get multiple Sneak Attacks off before the enemy actually detects you. Using Summons can keep enemy attention off of you for longer. You can use Dashes while in Stealth to move more quickly, but be careful not to move too close to the enemy and get detected. Using the Temporal Slip skill to slow down time while Sliding can be used to help guarantee a melee Sneak attack on an unaware enemy. Conclusion I hope everyone enjoyed the guide, and as I said I'll try to improve it as I learn more about the game. Please let me know if you have any questions or suggestions to improve the guide, or any requests for further guides as I'll likely write a few more.
从新手到高手的技巧与窍门

2026-02-15 19:00:19
发布在污痕圣杯:阿瓦隆的陨落
转载

导读
这是一篇《Tainted Grail》的无剧透游戏技巧指南,覆盖通用、升级、探索、任务、制作、装备、战斗、潜行多维度,包含频繁存档、合理使用起源药水、活用储物箱、夜间刷经验等核心技巧,助力新老玩家提升游戏体验。

评论
共0条评论

你知道吗?!230+个列表
关于《阿斯卡》的一些你可能还不知道的有趣事实。这个列表每周都会更新。 10个新手提示,助你顺利开始第一次游戏: 以下是10个早期游戏提示——其中大部分是在召唤第…
2026-02-14 16:000赞 · 0评论
游戏大神是学霸 游戏大神之学霸之路攻略 新手快速通过指南
【233乐园攻略解读】
2026-05-12 09:400赞 · 0评论
模拟经营 星露谷物语新手指南
-
2026-05-07 17:320赞 · 0评论

新手入门指南:如何制作金属锭
在本指南中,我将教你关于“矿工”的基础知识。如果你对这张地图不感兴趣,也不打算制作至少30个背包,那么请随意。 前言 这里将包含一些关于“矿工”生存的基本规则,…
2026-02-27 20:010赞 · 0评论
《无限法则》新手指南——如何获胜、技巧与窍门
《无限法则》新手指南 《无限法则》新手指南将为你提供游戏中所有有助于你有效赢得比赛的事项和操作。 《无限法则》是一款大逃杀类游戏,这意味着每场比赛只有一名玩家能…
2026-02-16 19:000赞 · 0评论

《贪吃蛇大作战》怎么玩?贪吃蛇大作战技巧 贪吃蛇大作战操作教学 新手快速上手指南
-
2026-06-01 17:240赞 · 0评论

战棋游戏 铁血联盟3新手指南【完结】-最后的10个技巧
最终章了,一起聊聊最实用的10个游戏技巧吧!
2025-12-15 08:500赞 · 0评论

生存 如何开始学习Rust—新手指南、技巧和窍门
https://www.youtube.com/watch?v=ENMi9FVyowI
2025-11-28 04:410赞 · 0评论
我的世界 我的世界新手指南
-
2025-09-14 10:530赞 · 0评论
王者之剑攻略 《王者之剑》新手指南 打造王者之路的必备秘籍
本文目录一览 1、《王者之剑》新手必知攻略 作为一款广受欢迎的游戏,不少新手玩家在开始游戏时会遇到各种问题。本文将为大家提供《王者之剑》的新手指南,帮助大家了解…
2025-09-08 05:290赞 · 0评论
暂无更多
最新更新
- 《污痕圣杯:阿瓦隆的陨落》v1.23a热修复更新内容 — 《污痕圣杯:阿瓦隆的陨落》v1.23a 修复公告 1. 即使已解锁鱼类条目,拾取鱼类时也不会再每次都显示日志弹窗。 2. 任务可读物品现在可以再次存放。 3. …
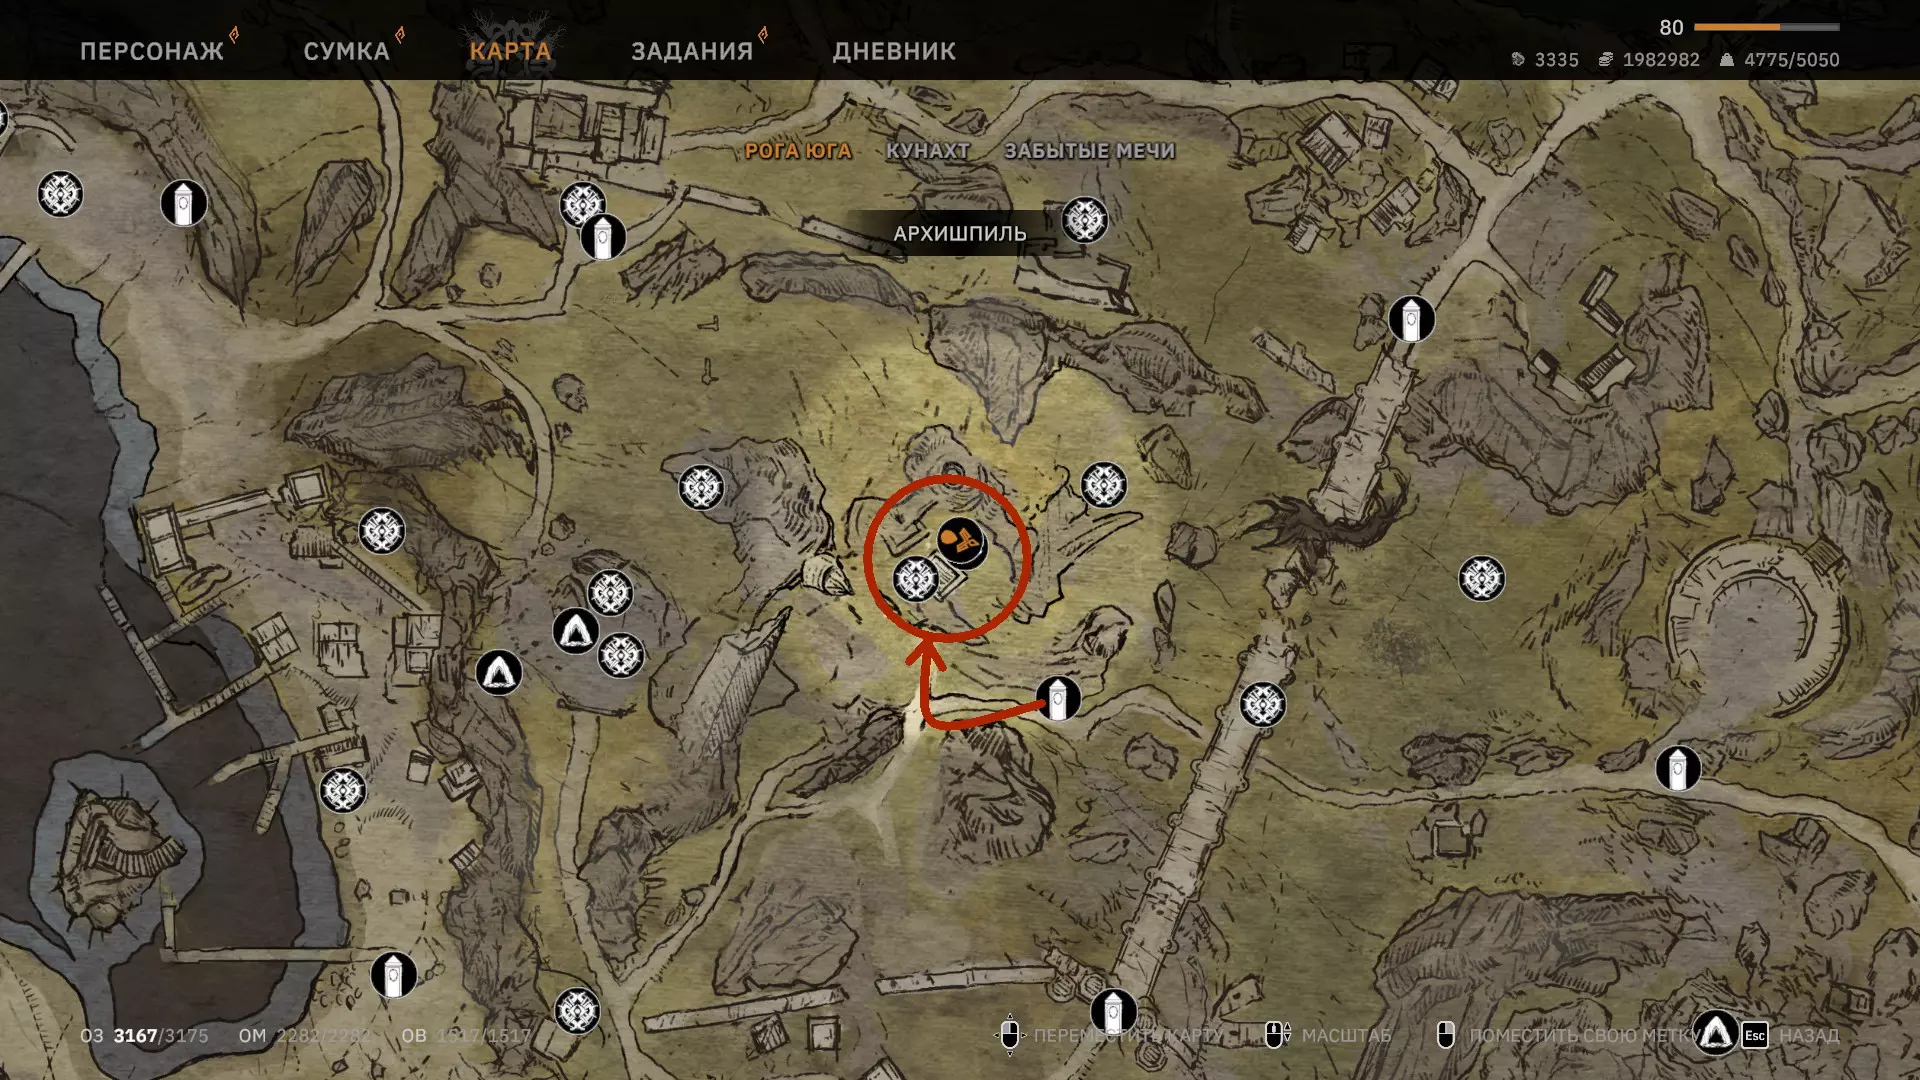
- “浪尖之上” 辛德里拉在哪里? — 在哪里找到辛德里拉? 1. 没能吓到希普恩奇卡? 没有足够的力量吓到希普恩奇卡来获取辛德里拉的位置信息?
- 关于美丽莉莉安的书籍 — 极乐居所中的美丽莉莉安娜
- 《污痕圣杯:阿瓦隆的陨落》免费DLC #3 - 梅林之墓 及 1.21版本更新 — 大家好! 大家最近怎么样?我们希望大家能抽出时间体验一下我们之前推出的DLC内容包,其中包含21种新武器,希望大家玩得开心!有没有开发出什么强力的新流派呢?:D…
- 轻松赚钱 污痕圣杯:阿瓦隆的陨落 — 你好,穷光蛋,我会帮你快速、合法且安全地为亚瑟积攒黄金。我在网上逛了逛,发现会有人建议你用镐子挖贵重矿石,这些矿石每24分钟刷新一次(你得整晚都卖矿石,才能赚点…
- 《污痕圣杯:阿瓦隆的陨落》免费DLC - 额外内容#2及其他消息 — 大家好! 希望大家一切都好! 还记得我们宣布在三月底推出的免费内容DLC吗?现在它将推迟到四月初发布……不过,为了不让大家空手而归,我们为三月准备了一些额外内容…
- 初始技能选择 - 更新 — These are the starting skill choices as of release Intro I noticed that the prev…
- 【面纱之下】成就/真结局指南 — 以下内容包含部分剧透,但主要是指引前往位置。 总体而言: 建议将此内容留到游戏即将结束前再进行,因为这需要主线故事中获得的部分遗物。感谢开发者指引我前往库阿纳赫…
- 控制台命令或任务修复方法 — 什么是控制台命令以及如何准备使用它们 准备工作 1. 启动控制台不再需要模组。开发者的Discord上提供了启动控制台的说明:按下键盘上的Home键,然后输入c…
- 如何开启俄语 — 俄语! 后续步骤 右键点击游戏->属性,然后按照截图所示进行选择