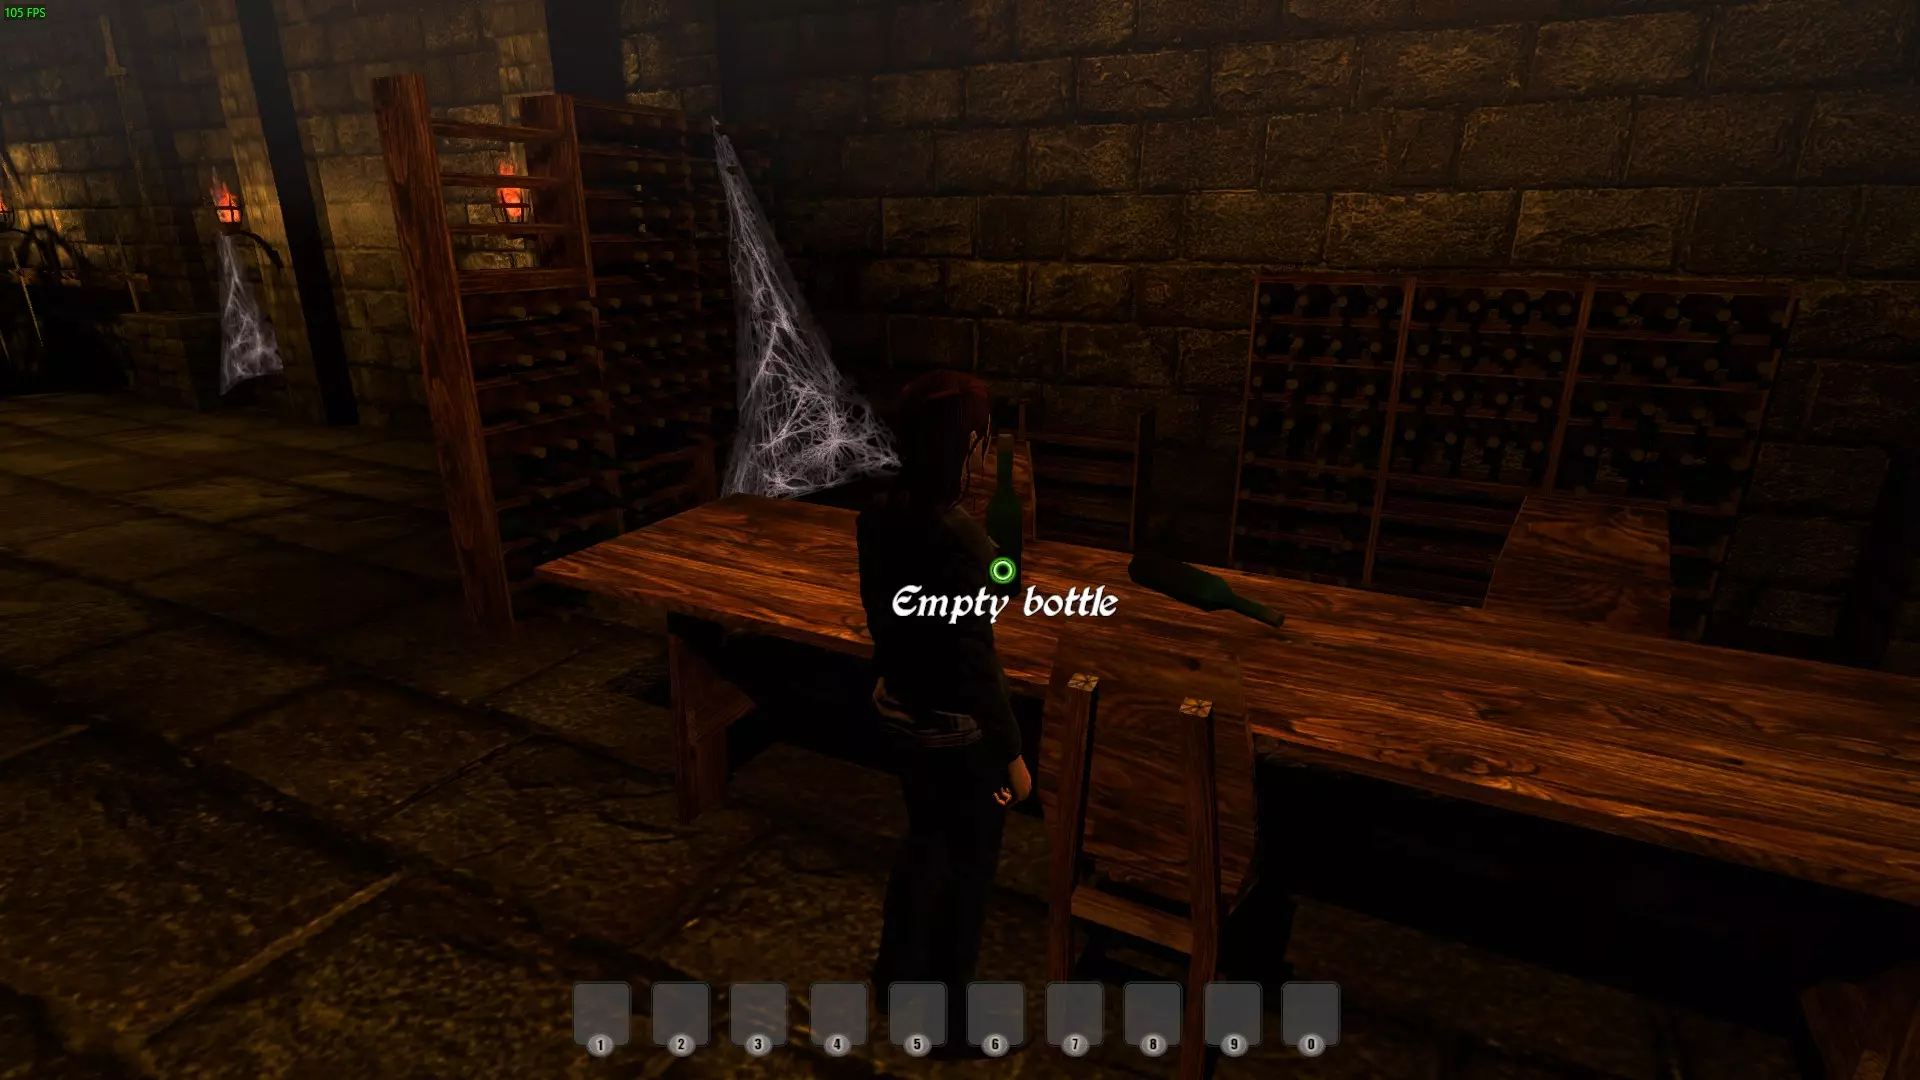
换一换
换一换 


This is an Achievement Guide for the Base Game of Final Fantasy 7 Remake! IMPORTANT I am not the original author of this guide. This guide has been copied from this PSN Profiles (https://psnprofiles.com/guide/9997-final-fantasy-vii-remake-trophy-guide) to Steam for the convenience of players playing FF7R on Steam to access this guide while playing. All credit goes to that amazing guide author! Also this is a guide for the achievements within the FF7R portion of the game. Another guide will probably be made for INTERmission. Stage 1: Play Through the Story on any Difficulty For the first stage of the guide, you can play the game on either Classic, Easy, or Normal difficulties. Hard difficulty will unlock after playing through whatever difficulty you're playing on. However, starting on normal difficulty is recommended so the difficulty of the Hard playthrough doesn't ramp up too much by comparison. Here you will earn the 18 story-related achievements as well as the possibility of earning some chapter-specific achievements: Chapter 3: Heavenly Dart Player Chapter 4: Biker Boy Chapter 6: Cleanup Crew Chapter 7: In Lockstep Chapter 8: Crate Annihilator Chapter 8: Say it with Flowers Chapter 9: Returning Champion Chapter 9: Sultan of Squat Chapter 9: Dancing Queen Chapter 14: Whack-a-Box Wunderkind Chapter 14: Peeress of Pullups Chapter 14: Divine Gratitude It's also recommended to work on collecting the Music Discs for the Disc Jokey achievement, and it's also recommended to keep an eye on the requirements for Dressed to the Nines to avoid unnecessary extra playthroughs. Other than that, most other achievements will unlock along the way. So just sit back and enjoy a wonderful dive back into the world of Final Fantasy VII. Most achievements and collectibles in this guide include the chapter they are obtainable in, so they're easier to navigate through with CTRL + F. Stage 2: Hard Playthrough & Achievement Cleanup with Chapter Select After finishing the game for the first time, there will be two things left: a Hard mode playthrough along with replaying Chapters 3, 8, and 9 to obtain the three remaining dresses. Keep an eye on Dressed to the Nines to avoid a fourth replay of those chapters and you're good to go. If you haven't already, you can hand the last finished quests to Chadley on any Chapter you meet him Intelligence Agent Through chapter select it will be far easier to go back to any missing Music Disc (Disc Jockey) and missing weapons (Weapons Expert). At any point after obtaining all weapons and abilities, you can go for the 300% stagger achievement (Staggering Feat). Just progress through the story chapter by chapter again on hard difficulty, and you will be able to do the remaining two quests from Chapter 9 and obtain the Best in the Business achievement. On Chapter 17, a new Shinra VR system will be in Hojo's lab to tackle new challenges and obtain three achievements: That's the Smell, Master of Mimicry and Ultimate Weapon. Take a look at this last achievement since it rewards a very powerful accessory. After that, only the 18th and last chapter is left, another encounter with Sephiroth and obtain Hardened Veteran. Note About Chapter Select: When using chapter select, you can freely jump from one chapter to another and it will retain all of your game progress (battle intel, materia, equipment, stats, etc). However, if you are trying to get Dressed to the Nines or Hardened Veteran, you will have to finish the chapter for dress data and hard mode chapter clear data to be counted. Tips & Strategies The first and most important thing you'll want to do is play this game once watching all of the cinematics. It's gorgeous, and it's worth it. General Tips And now for real, here's a list of tips that might help you beating the game or making things easier: Keep the Assess Materia equipped throughout the game and use Assess on all enemies to determine their weaknesses. Through the Battle Settings menu, change the quick shortcut for the different party members. Obtain the Level 2 Limit Breaks from Colosseum Challenges (Chapter 9) and equip them as soon as possible through the aforementioned Battle Settings menu. Abuse overpowered skills like Cloud's Triple Slash and Counterstance to defeat multiple enemies at once or to counterattack stronger foes. Keep an eye for Weapons Expert as every new weapon will yield you a new ability to use in battle. After being able to learn enemy skills (Master of Mimicy) use Algid Aura often. It is a very easy way to damage the enemies over time in a wide area. During your Hard playthrough, do NOT play two Chapters simultaneously. Progress is carried from one to another only after the episode has been finished. Have patience during your playthough of the chapters on Hard difficulty. Some fights will prove to be hard, especially when you are going for the Ultimate Weapon achievement. Analyze enemy weaknesses and your strengths. Balance the odds in your favor. The Importance of Materia Due to items being disabled in your second playthrough on Hard difficulty, you'll want to make sure that you start focusing on leveling up Materia on your first playthrough. Materia is like magic, and it simply provides a way to heal yourself, revive others, attack enemies with elemental attacks, and help greatly increase your statistics without having to use items. Almost all pieces of materia can be leveled up simply by equipping them to your weapons and armor, and you'll get AP by fighting enemies which go towards leveling them up. Here is the materia you will want to focus on leveling up: Pedometer - While initially seeming useless as it just counts your steps, this materia transforms into AP Up Materia once you've walked 5,000 steps with it equipped. This will help you level up another piece of materia you link it to at double the speed. You'll find this materia in Chapter 14 in the garden at Aerith's house. Healing Materia - You'll want this one equipped with you on any difficulty as it will you allow you to cast Cure to heal yourself. After leveling up this materia enough, you can cast Curaga which heals a significant amount of health. Once you level up your healing materia, you can by highlight 'Cure' in the spells area on your Commands menu and press the Right arrow to select a more powerful cure magic. Revival Materia - This materia will allow you to revive your party members if they go down. Leveling it up will allow you to revive a party member and fully restore their health. MP Up Materia - It's important to level up this materia to max for hard difficulty due to it being more difficult to restore MP on that difficulty. Starting a chapter with more MP can help you significantly as it gives you more opportunities to heal yourself and cast magic. HP Up Materia - This will raise the total amount of health (HP) that you have when this materia is equipped. Prayer Materia - This materia provides a way to restore a chunk of HP without the need to use MP, which will become highly useful on your Hard difficulty playthrough. Magnify Materia - Attaching this materia to healing materia will allow you to heal your entire party when you cast it on yourself, which will be extremely beneficial on Hard difficulty. You could also attach other things like fire materia to it to attach groups of enemies all at once with a magic/elemental attack. You will find this materia in Chapter 9 in the tunnel in the third robotic arm puzzle. Master of Fate

获得《最终幻想7 重制版》的所有成就。这包括基础游戏和INTERmission DLC中的所有成就。一次性 gigs

完成第一章。 通过魔晄反应堆并使用炸弹将其炸毁。击败蝎子哨兵并及时逃离主反应堆区域后,即可获得此成就。 Escape Artist

完成第二章。 逃离隧道并穿过城市到达火车。击败猎人后观看克劳德跳上火车的过场动画,即可解锁此成就。 Mercenary Endeavors

完成第三章。 与雪崩组织相遇!在本章中,你将穿梭于第七区贫民窟,结识团队成员,同时完成一些支线任务并进行探索。击败几名来自 Wall Market 的混混(流氓帮)后,在公寓外与杰西交谈,即可解锁该成就。你还将获得伊弗利特召唤魔晶石。 在本章中途,在酒吧等待蒂法时,你可以在飞镖盘处尝试解锁 Heavenly Dart Player 成就。 夜之城

完成第四章。 别急!雪崩组织最终可能需要你,但首先你得击败一个神秘的新敌人:幽魂(Spectres)。当你前往火车站并登上火车时,将解锁此成就。 在本章开始时,你还可以尝试获取Biker Boy成就。 计划E

完成第五章。 在Stamp的帮助下穿过火车轨道,抵达魔晄反应堆5号。击败螃蟹守卫并登上前往魔晄反应堆5号的平台后,你将获得此成就。 Lights Out

完成第六章。 把灯调暗!在本章中,你将穿过魔晄炉5号外部的迷宫,关闭太阳灯并切断其能源。完成太阳板谜题并与比格斯会合进入魔晄炉后,此成就将解锁。 在本章中,你还可以尝试通过找到陆行鸟与莫古力魔晶石来获取【Cleanup Crew】成就。 像下水道的老鼠一样被困住

完成第七章。 本章在导航体验上很像魔晄炉1号,虽然初期会感觉更简单,但随后情况会变得复杂。这一切都是个陷阱!在不同区域间导航时,摧毁空中霸者的哪些部件并不重要。击败本章的 Boss【空中霸者】后,即可解锁此成就。 在本章后期,你会遇到可以打开一扇门的杠杆。此时你也可以尝试完成【In Lockstep】成就。 【Reunited】

完成第8章。 结识新伙伴爱丽丝!在本章中,你将了解另一个区域的贫民窟,并进行一些探索和支线任务。本章有两个 boss:雷诺和路德。当你偷偷溜出爱丽丝的房子(或者更像是被赶出来,对吧?)前往第6区后,将解锁该成就。 Never the Bride

完成第九章。 啊,你不会这么轻易摆脱爱丽丝的,对吧?但这次,蒂法遇到麻烦了!在“围墙市场”章节中穿行,再次进行探索和支线任务。做好持久战的准备,这一章无疑是游戏中最长的章节之一,并且包含了最难对付的 bosses 之一——地狱屋!从唐·柯尼欧的宅邸被冲进下水道后,此成就将解锁。 Sewer Survivor

完成第十章。 遇见阿布祖!可爱的小猴子,不是吗?击败他并穿过下水道。解开最后一个杠杆谜题并走出下水道后,此成就将解锁。 Paranormal Investigator

完成第11章。 恐怖时刻。穿越火车墓地并离开那里。这里会有两个 boss:食尸鬼和埃利戈。成功离开火车墓地后,你将获得此成就。 The Collapse

完成第12章。神罗不可能那么坏,对吧?你还有很长的路要走。击败雷诺和路德并逃离第五区支柱后,此成就将解锁。Broken Dreams

完成第13章。神罗干的好事。了解圆盘坠落的后果,穿过新的地下实验室去救韦奇。这里的新 boss 是失败实验体。击败它,继续前进找到韦奇后,成就【Picking Up the Pieces】就会解锁。

完成第14章。 再次前往沃尔市场。在进行更多探索和支线任务后(这是游戏中最具【开放世界】特色的章节),莱斯利会为你指路并去营救爱丽丝。穿过下水道,第二次与阿普苏战斗。在爬上城市开发区那面有雪崩组织涂鸦的墙后,即可解锁此成就。 The Pizza in the Sky

完成第15章。 哦,这开始感觉像是一场特殊行动。使用抓钩枪穿过倒塌的建筑,前往神罗总部。击败本章的头目【瓦尔基里】后,将解锁此成就。 No Appointment Needed

完成第16章。 咚咚咚,是小队成员,我们要把爱丽丝救回来!穿越神罗总部并抵达宝条的实验室,你将迎来雪崩组织的剧情转折。击败样本H0512并救出爱丽丝后,将解锁此成就。 Emerging from Chaos

完成第17章。你就快到了。穿过宝条的地下实验室并到达屋顶。在你与神罗总裁之子鲁弗斯相遇(你需要与克劳德一起击败他)并与队伍的另一部分击败兵器后,你将获得此成就。Destiny's Crossroads

完成第18章。 这是旅程的终点。通过本章,反复击败一些怪异的幻影,然后就是它了。【最终幻想7 重制版 第一章】的最终Boss:萨菲罗斯。击败他,你就能获得最后一个与剧情相关的成就! Warming Up

赢得一场战斗。 这是一个入门成就,在序章开始部分,从火车上下来与几名神罗士兵战斗后即可获得。 Weakened Resolve

利用敌人的弱点。 这是一个引导性成就,当你首次使用敌人弱点属性攻击敌人时解锁。 游戏中共有四种元素,分为两组对立关系: 冰克制火,火克制冰 风克制雷,雷克制冰。 通常,不同类型的敌人也会有特定的弱点属性: 人类敌人弱火。 机械敌人弱雷。 飞行敌人弱风。 怪物弱冰。 Bonds of Friendship

解救被束缚的盟友。 这是一个引导性成就,当你首次解救被敌人束缚的盟友时即可获得。你的盟友身上会出现红色警报信息【被束缚】,你可以通过攻击敌人来解救他们。 Staggering Start

使敌人进入 stagger 状态。 这是一个引导性成就,首次让敌人进入 stagger 阶段(将 stagger 条完全填满)即可解锁。在 stagger 阶段,你对敌人造成的伤害至少提升 160%。 每个敌人都有特定的方式可以更快地填满其 stagger 条:使用【评估魔晶石】可以发现其确切弱点! Music Collector

收集3张音乐唱片。音乐唱片是游戏中随处可见的收藏品。有关更多信息,请参见成就【Disc Jockey】。总得有个开始

完成一个任务。 任务是游戏中随处可见的支线任务。有关更多信息,请参见【Best in the Business】。 我的第一个能力

将武器熟练度提升至满级。 武器熟练度与其专属能力相关联。要达到最高武器熟练度——从而解锁该技能并能在其他任何武器上使用,熟练度条必须达到100%。此熟练度条可在武器菜单中查看。 提升武器熟练度的方法很简单,只需在战斗中使用该武器的专属能力。具体操作是,先查看你所持武器的特定能力,然后在战斗中按A键>能力>使用该特定能力。 每种能力的“升级”方式不同,但每次使用至少能提升10%熟练度。在同一场战斗中多次使用某一能力来提高其熟练度等级是可行的。 更多信息请参见【武器专家】。 【新手魔晶石指南】

升级一个魔晶石。这是一个入门成就,会在魔晶石首次升级时解锁。在查德利向你介绍魔晶石后,在第七区废品场击败怪物即可达成。魔晶石是蕴含元素和各种加成效果的宝珠,装备并激活在武器或防具上后,其效果会应用到角色身上。My First Summon

召唤召唤兽。 在游戏中,召唤魔晶石仅在长时间战斗场景中可用,例如迷你首领战或首领战。此时,队伍界面顶部会出现一个带有进度条的紫色矩形框,为召唤槽充能。当充能完成后,按A键并选择相应选项即可召唤魔晶石。 你将在第三章首次获得召唤魔晶石。章节末尾,杰西会交给你伊弗利特召唤魔晶石。 机车男孩

在摩托车小游戏结束时获得杰西的称赞。 第四章开始时会有一个摩托车小游戏。要获得杰西的称赞,需要在完成小游戏时剩余约75%的生命值。是否进行大量坡道跳跃并不重要。 在简单难度下很容易获得此成就,因为敌人几乎不会造成伤害。如果你的首次通关是在普通难度且没有获得该成就,不用担心,之后可以通过章节选择功能来完成。 Heavenly Dart Player

登上第七天堂飞镖排行榜榜首。 在第三章等待雪崩重逢结束的空闲时间里,你将解锁飞镖小游戏。 此前的最高分(由魏吉保持)是用8支飞镖达成的,因此你必须用7支以内的飞镖完成飞镖小游戏,实际上用5支就能做到。瞄准三倍区20分以获得最高分数(靶心仅50分),并等待外部蓝色准星缩到最小再精准投掷。当你还剩1支飞镖就能结束游戏时,镖盘上可射击以完成得分的区域会亮起黄色。 在第四章结束时,如果你在排行榜上击败魏吉,他会给你【 Luck Up Materia 】。 Cleanup Crew

获取陆行鸟与莫古力魔晶石。 在第六章关闭3个太阳灯并准备跳上平台进入魔晄炉5号前,打开地图会看到目标点西侧有一个未探索区域。你会发现一台贩卖歌曲【Electric the Chocobo】的自动售货机,穿过门后会触发一段1分钟的流程,需要在时限内击败敌人并到达房间另一侧的发电机以停止计时器。穿过那扇门,你将找到红色的陆行鸟与莫古力召唤魔晶石。 如果在首次游玩时错过也不用担心,在首次通关后通过章节选择功能可以再次获取。此外,在困难难度下,通风管的另一侧会有一份手稿【拳之道VI】,可为蒂法增加10点SP。同步模式

在魔晄反应堆5中绕过德尔塔级安全锁。 在第7章,处理完魔晄反应堆5中机器的几个不同部件后,你会遇到一个杠杆谜题来打开一扇门。在返回并继续主线任务之前,打开通往处理室的第二扇门(会出现一个探索任务)。你需要通过协调左右操纵杆来完成四次杠杆谜题(阿尔法、贝塔、伽马和德尔塔)。当门打开时,此成就将解锁。要知道何时操作杠杆,你可以跟随音频提示(推荐)或视觉提示(箭头会变为橙色,但难度较大)。 Crate Annihilator

完成所有普通难度的打地鼠挑战。打地鼠小游戏将在第8章支线任务【认证英雄】后解锁,详情见【行业翘楚】。要获得此成就,需完成专家挑战。目标是专注获取额外时间盒(+10秒),以便轻松完成挑战。建议使用默认绑定L1+X的技能【勇气】,该技能能对阻挡道路的1500分盒子造成更多伤害。

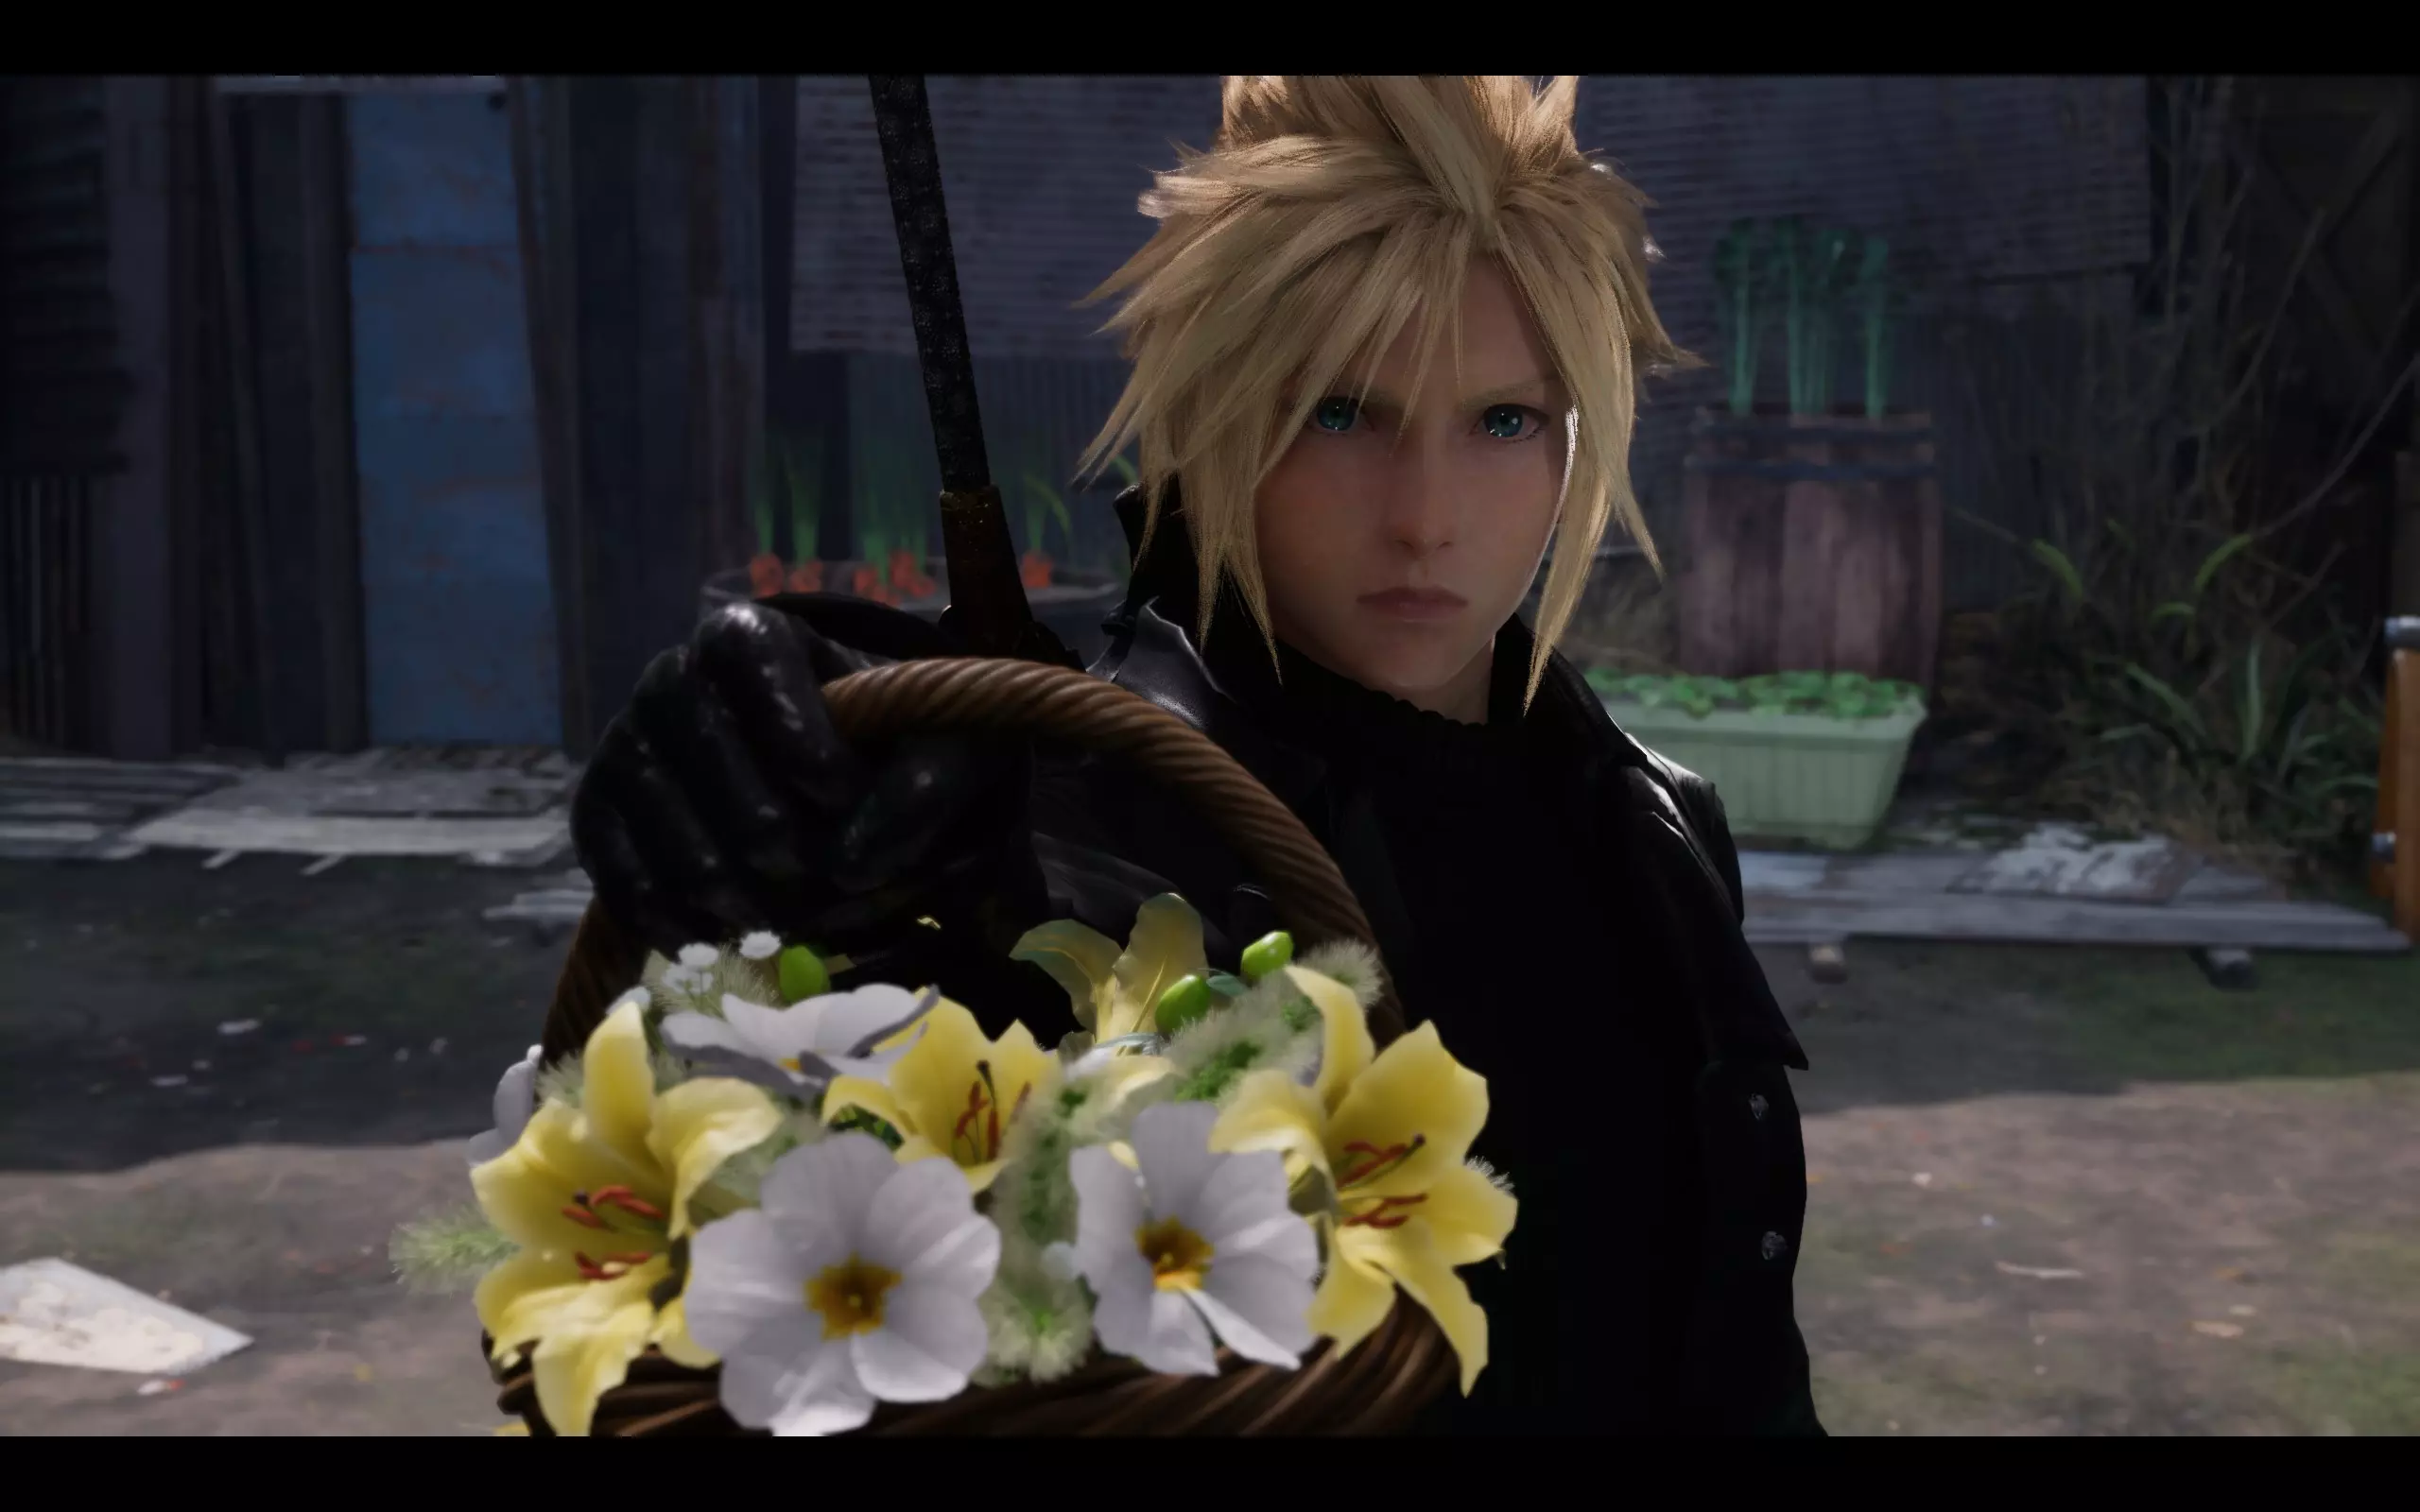
用花艺装饰叶之屋。 该成就是在第八章自然解锁的。作为主线任务的一部分,你会和爱丽丝一起在她的花园里采摘花朵,并将它们带到叶之屋。之后,当你作为主线任务的一部分返回爱丽丝的家时(或者在四处探索时走到叶之屋附近),会有一位女性告诉你她们已经完成了花艺布置并展示给你看,此时成就解锁。 Summon Slayer

在战斗中击败一个召唤兽。 最早可在第8章完成。要在战斗中击败召唤兽,你需要通过查德利的VR任务与它们战斗。 第一个召唤兽战斗是希瓦,在你为查德利完成前4份情报报告后解锁,游戏中共有四个召唤兽。击败每个召唤兽后,你将获得它们的召唤魔晶石作为奖励。 更多信息见【Intelligence Agent】。 Sultan of Squat

完成所有深蹲挑战。 深蹲小游戏将在第9章支线任务【燃烧的大腿】后解锁,具体可参考【业界标杆】。 要获得此成就,需完成专家级挑战。目标是按照Y、B、A、X的顺序按键,并随着克劳德的节奏加快速度。 Dancing Queen

从安德里亚那里收到了一份礼物,因为你是舞蹈巨星。 在第九章的最后阶段,你将在蜜蜂之馆展示你的舞蹈技巧!进入蜜蜂之馆前可以先存档以防万一,不过为了【Dressed to the Nines】成就,你至少需要完成这个流程3次。此外,教程会让你练习“舞蹈”机制的操作方法,并不复杂。只需在六边形到达最低点时准备好点击A、B、X、Y键即可。 虽然具体的判定阈值未知,但你最低达到23次“完美”和5次“良好”就能成功。 【Returning Champion】

在角斗场的 sparring session 中获胜。 在第9章击败地狱屋(剧情相关)并离开角斗场后,角斗场的工作人员会告诉你可以随时回去与更多敌人战斗。此时返回角斗场,完成任意可用挑战即可获得该成就。如果在第9章错过了,可以在第14章回来获取,或者在完成主线故事后通过章节选择功能重新挑战。 另外,击败地狱屋后是唯一可以使用艾瑞丝完成她的挑战的时机,建议此时完成。这对后续获取终极武器是必要的。 Snappy Dresser

获得三套新娘候选人服装。 当你即将完成第九章时,会自然解锁此成就。为提高效率(减少章节选择重玩次数),可参考【Dressed to the Nines】了解完成该成就的最佳方法。

Obtain all nine bridal candidate outfits. The bridal outfits are tied to the choices on different chapters, specifically Chapter 3, Chapter 8, and Chapter 9. In your first playthrough based on your choices, you will have Tifa, Aerith, and Cloud wear a specific outfit in Chapter 9 based on the choices you've made in Chapter 3, 8, & 9. Then you'll have to go back after completing the game and replay part of the game again at least 2 more times to make different choices to obtain the remaining six outfits. At the end of the achievement description, you will find a recommendation on how to most efficiently tackle this achievement. Outfit Requirements Below is each character and the bridal candidate outfits tied to each: Tifa (Chapter 3) -Choices are tied to the Discovery Quest "Alone at last", available after completing all side-quests in Chapter 3 Blue Dress. Obtained by: 1) not doing all the side-quests or 2) choosing the option "Mature" when Tifa asks what to wear. Chinese Dress. Obtained by choosing the option "Sporty" when Tifa asks what to wear. Kimono. Obtained by choosing the option "Exotic" when Tifa asks what to wear.Aerith (Chapter 8) -Choices are tied to the amount of side-quests completed during Chapter 8. Simple Pink Dress. Complete between 0 and 2 side-quests during Chapter 8. Pink Dress. Complete between 3 and 5 side-quests during Chapter 8. Red Dress. Complete all 6 side-quests during Chapter 8.Cloud (Chapter 9) -Choices are tied to the side-quests completed during Chapter 9 Black dress with white ribbons. Complete 0 side-quests during Chapter 9. White/black dress with tiara. Complete Set 2 of side-quests (Burning Thighs, The Price of Thievery, Shears' Counterattack) Blue/black dress with black ribbon. Complete Set 1 of side-quests (Burning Thighs, The Party Never Stops, A Dynamite Body) Important: How Dress Progress is Saved It's important to note that the game saves your choices after you complete the chapter and ONLY IF you have completed the chapter, so you can skip from chapter 3 to 8 to 9 when replaying them. To be clear, you must start on Chapter 3 and make choices there, make choices in Chapter 8, and then make a set of choices in Chapter 9. This means the game will not log a bridal outfit as "obtained" until you actually see the outfit in chapter 9, based on the decisions you've made in Chapters 3, 8, & 9. Thankfully, after completing Chapter 3, you can skip ahead to Chapter 8 using chapter select, you don't need to play through chapters 4 - 7 for this achievement. You must then play on from chapter 8 until you see the character wearing the outfit in Chapter 9 and it logs that dress progress in the pause menu under "System" and "Play Log". Another important note is that you don't have to play all the way through Chapter 9 to get your progress logged, for example when you see Tifa for the first time in Chapter 9 in the carriage, the game will actually log her dress in the pause menu under "System" and "Play Log" at that moment, and it will be the same when you see Aerith and Clouds dresses for the first time later in the chapter. After those are logged, you're welcome to jump back to Chapter 3 and work on the remaining dresses without having to finish Chapter 9. The Most Efficient Path Below is the most efficient way to do this (in just 3 playthroughs), you will need to do the following: Playthrough 1 (Watching all cinematics): Complete all side-quests in Chapter 3 and choose "Sporty" or "Exotic". Complete all side-quests in Chapter 8 and unlock that beautiful red dress for Aerith... just like the trailer! Complete a set of side-quests in Chapter 9.Playthrough 2 (Hard mode playthrough): Complete all side-quests in Chapter 3 and choose the other option from "Sporty" or "Exotic". Complete 3 side-quests in Chapter 8 (or 5 if you're doing a Hard playthrough to obtain more manuscripts - "A Verified Hero" doesn't reward any manuscript upon completion, so don't hand that one in). Complete the other set of side-quests in Chapter 9.Playthrough 3 (Quick play-through) Complete no side-quests in Chapter 3. Complete no side-quests in Chapter 8. Complete no side-quests in Chapter 9.To obtain all the manuscripts while playing hard mode from Chapter 8 & 9 without "doing" all sidequests, simply complete them and don't hand them in. It won't count towards the side-quest completion count, while the manuscript will be awarded by defeating the sidequest bosses. Whack-a-Box Wunderkind

完成所有困难难度的打地鼠箱挑战。 打地鼠箱专家挑战(最难的打地鼠箱挑战)将在第14章返回儿童藏身处后解锁。此成就与【Crate Annihilator】没有太大区别,只是难度稍高一些。游玩专家挑战不需要在困难难度下进行。 要获得此成就,需击败专家挑战。你的目标是专注于获取额外时间箱(可增加10秒),以便轻松完成挑战。这个困难难度挑战的棘手之处在于,几乎所有额外时间箱都是按时完成挑战所必需的,而且在你开始时,有两个隐藏在你身后!默认使用绑定在LB + X上的技能【勇气】,可以更轻松地破坏1500分的箱子。 Peeress of Pull-Ups

完成所有引体向上挑战。 引体向上小游戏将在完成第14章支线任务【Wavering Heart】后解锁。有关该支线任务的更多信息,请参考【Best in the Business】。 要获得此成就,需完成专家级挑战。目标是按照Y A B X的节奏(会变化)进行操作,并随着蒂法的节奏加快速度。由于每个挑战的模式都会变化,将序列记为“上、下、左、右”等方向可能比记为“Y、A、X、B”更有用,这样你可以直接记住要按哪个按钮,而不必额外记住符号的位置。 Divine Gratitude

获得成就【Receive a letter from an angel】。 目前,该成就的达成条件尚不能完全确定。如果你在一周目完成了所有支线任务(26个中的24个),那么在第14章结束时,这封信100%会出现在都市开发特区的陆行鸟快速旅行点前。当你穿过下水道并返回围墙市场区域,且任务目标变为【翻越围墙】时,就表示你已处于第14章的结尾部分。信应该就在前方的地面上。 也有可能仅完成第14章的支线任务,或完成某个特定支线任务——很可能是那个让你发现【贫民窟的天使】身份的任务——就能触发信件(或者不需要完成任何支线,谁知道呢!)。不过为了保险起见,在你的第一次游玩中完成所有支线任务。你将获得一个元素魔晶石作为奖励,它在对抗 Boss 时非常有用。在完成第 14 章之前获得这个成就,因为这是一个无法返回的节点(你会收到提示)。The Johnny Experience

见证所有与强尼相关的事件。 啊,强尼小子!在你的旅途中,你会遇到一个名叫强尼的角色,并且可以选择在他的各种冒险中帮助他。完成故事中的所有四个事件就能获得这个成就。 要解锁此成就,需按描述完成所有与强尼故事相关的事件,具体如下: 1. 事件一:在第三章的主线任务中自然触发。强尼,你不会出卖雪崩组织的,对吧? 2. 事件二:在第九章首次前往神罗大厦时,强尼会从你身边跑过,此时会解锁一个新的探索任务。完成该任务,并在适当的时候对他说“好啊”。 3. 事件三:第九章的支线任务【派对永不停止】。跟随强尼并帮那个醉汉找回灵感来源——一张蜜蜂之馆的贵宾卡。谁会不想要呢?——根据你的选择,这个任务可能会也可能不会在你的第一次游玩中出现。要了解如何让它出现,请查看【Best in the Business】获取更多详情。 事件#4:第14章支线任务【假小子劫匪】。有人的钱包被偷了……强尼,你真是一团糟。完成后续的凯里支线任务找回钱包,并在火车站附近还给他。之后应该会解锁成就。

Complete all quests. You will be introduced to Quests in Chapter 3. They will be indicated by a Green (!) mark on the map. There's only side-quests in few episodes for a total of 26 side-quests and only 24 are doable in the first playthrough, so you will need to obtain the rest of the side-quests needed for this achievement through chapter select after completing the game for the first time. Below is a list of all quests and their requirements. Chapter 3 Chadley's Report - Use Assess on 2 enemy types (this can be done on the scrap mobs near Chadley). You'll need to equip the Assess Materia to one of your pieces of equipment and then use the Assess ability during combat by pressing A then choosing abilities. Lost Friends - Help Betty find her 3 friend cats. The first cat is found after going through a mini-tunnel in front of Cloud's apartment (you will see a woman with a green (!) on her head), the second is at Seventh Heaven, and the last one is on the way to the train station. Rat Problem - Head to the dead-end through the mini-tunnel and defeat some basic Wererats. The Doomrats will appear shortly after (you can do another side-quest in the meantime or go back and talk to the shop owner). On The Prowl (Rat Problem required) - Wymer heard wonders about you! Defeat the Shinra-mutated dog found in the scrapyard. Nuisance in the Factory - Head to the old factory (previously inaccessible) and slay two batches of lesser drakes inside. Just flew in from the Graveyard (Nuisance in the Factory required) - Head back to the old factory and defeat a Cerulean Drake. The key will be on the Shinra boxes next to the location inside the Factory where you can find a vending machine, a bench, and a materia orb. Chapter 8 The Mysterious Moogle Merchant - Use a Moogle medal to buy the Moogle Emporium Membership card. Weapons on a Rampage - Navigate through the scrapyard and slay two batches of Mark II Monodrives (when they have a shield, hit them with magic to remove it) Paying Respects (Weapons on a Rampage required) - Buy the key to the graveyard from the Moogle Emporium (if you haven't yet) and defeat the monsters in there. Kids on Patrol - Find the kids with wooden Cloud swords on their back. Talk to Ms. Folia and she'll tell you where the kids are. First is outside of the community center, second on some pipes (what can be called mini-tunnels), third is in front of the weapon shop, and fourth and fifth are on the opposite ways out of town. A Verified Hero (Kids on Patrol required) - Complete the Whack-a-Box minigame. Complete the Pro challenge afterwards to also unlock Crate Annihilator. The Angel of the Slums (A Verified Hero required) - Follow the reporter's instructions and complete the dialogues. Then head out to the location and defeat an enemy to complete the quest. Chapter 9 Here we have two sets of quests, pay attention to which ones you have done for the Chapter Select cleanup. Burning Thighs - Complete the Squat minigame which can be started by visiting the gym in Mall Market. Complete the Pro challenge afterwards to also unlock Sultan of Squat. The Party that Never Stops (Set 1 of quests) - Find the inspiration of the drunkard. Just go up and down completing the delivery-guy requirements. A Dynamite Body (Set 1 of quests - The Party that Never Stops required) - After completing 'The Party that Never Stops' and 'Burning Thighs', talk to Sam at the Chocobo station right outside of the Wall Market front gates. Then head to the colosseum and fight the special match. The Price of Thievery (Set 2 of quests) - Head to the tunnel and defeat the bandits. Shears' Counterattack (Set 2 of quests - The Price of Thievery required) - Head to the colosseum and fight the special match.To do one set of quests or another, the game uses a hidden point-per-answer system (-1, +0, +1) depending on what you reply, and the final count is tied to a side quest path or the other). Set 1 of Quests (Party That Never Stops & Dynamite Body Set 2 of Quests (The Price of Thievery & Shears' Counterattack) Describe Tifa as "She's in great shape" Describe Tifa as "She's great handling the books" Complete Johnny's Discovery Event. Select "Yeah" on the dialogue Ignore Johnny's Discovery Event During the main story when playing heads or tails select "Heads" When playing heads or tails, select "No deal" Talk to the guy in front of Wall Market's Hotel, say "No thanks" Talk to the guy in front of Wall Market's Hotel, ask "How much?" At Madame M's parlor, select "Poor Man's Course: 100 G" or leave At Madame M's parlor, select "Luxury Course: 3,000 G" When asked about Aerith's outfit, say "It's alright" When asked about Aerith's outfit, say "It matter what I think?" Taste the mystery drink on the table in the Colosseum Don't drink or ignore the mystery drink in the Colosseum Chapter 14 The Power of Music - You'll find Betty in the alleyway next to the hotel near the Wall Market entrance. She will ask you to collect three Music Discs to cheer people up. 'Good Night, Until Tomorrow' is found by talking to a person in the hotel lobby next door, ‘Stand Up’ is found next to the Honeybee Inn, and 'Fight On!’ is found in the Colosseum. Once you find them, you'll need to interact with the jukebox next to Betty and play them. You can find more information on the locations in Disc Jockey. Malicious Goons - To start this quest, talk to Madam M outside of her massage parlor in Wall Market. After talking to her, head to Aerith's house and defeat Tonberry. If you're having trouble, know that the A.I. will most of the time dodge Chef's Knife. Wavering Heart - Complete the pull-ups mini-game which can be started at the gym in Wall Market. Complete the Pro challenge afterwards to also unlock the Peerees of Pull-Ups achievement. Chocobo Search - Find the chocobos to unlock more fast-travel waypoints. After finding all 3, travelling will be free. Chocobo locations are marked on the map, but talking to the stableguy will give you a location too. Missing Children - Similar to Chapter 8's. However, this time there is only one kid located in the Cemetery. Defeat the enemies and all kids will show up! Tomboy Bandit - Head to the church and meet Kyrie, the thief and liar! Head to the colosseum, finish the battle and head back to the Church to get Corneo's Stash Key and Johnny's Wallet (necessary for The Johnny Experience) Secret Medicine - Talk to the doctor south of the Leaf House orphanage. He will ask you to obtain the three ingredients: Moogle's Mortar (bought in Moogle Emporium), Medicinal Flowers (found in the Church) and Behemoth Horn (obtained during Subterranean Menace quest). Subterranean Menace Corneo's Secret StashIf you do all possible quests in a single playthrough (24 of 26), there will be a letter on the ground at the end of chapter 14, where at that point you have the mission objective "Over the Wall". Picking up the letter will get you the Divine Gratitude Achievement. Disc Jockey

Collect all music discs. You will be introduced to Music Discs in Chapter 3. You will see an icon top left of the map with a music disc icon and ???? indicating that there's an unobtained song nearby. Music Discs are either obtained from a Jukebox, bought from a Shop or Vending Machine (which have Music included in the logo) or given by an NPC. If you miss any music discs at any time you can go back through Chapter Select. It will be indicated which amount of Music Discs you're missing for each chapter. Here is the list of all the discs and where you can find them, by either number or chapter (scroll down): Ordered by Number The Prelude - Can be purchased from the Item Shop vendor in Chapter 3. Bombing Mission - Purchased from the vending machine during Chapter 7, after the lever mechanic. Tifa's Theme - It will be the introductory Music Disc during Chapter 3. Found in the Seventh Heaven's Jukebox Barret's Theme - Head to the Sector 7 train station during Chapter 3, it will be sold in a food stall for 50 gil. Lurking in the Darkness - Chapter 15 along the path. Vending machine. Let the Battles Begin! - Chapter 11 Train Graveyard. When you're about to reach the generator room, there's a vending machine. Turk's Theme - Located next to a pond north of Wall Market during Chapter 14. Will be given by an NPC. Under The Rotting Pizza - Wall Market alley behind the hotel. There's a Jukebox with the music disc in there. The Oppressed - From a Music Vending Machine a few steps away from defeating Abzu in Chapter 10. Honeybee Inn - Chapter 9. Wall Market Item Shop Vendor. Don of the Slums - Chapter 9. After you wake up from the sleeping gas in the Don's Vending Machine. Fight On! - Can be purchased from the Wall Market Colosseum souvenir shop in the lobby. Necessary for Betty quest in Chapter 14. The Chase - During Chapter 14, looking for Corneo's Hideout from a Vending Machine Main Theme of FFVIII - Chapter 13 Vending Machine. At the end of the Underground Test Site. On Our Way - Chapter 13 Item Store Vendor on the Playground, after meeting Wymer. Good Night, Until Tomorrow - Inside the Wall Market Hotel from a guy with a moustache. Necessary for Betty Quest in Chapter 14. Farm Boy - Chapter 9 Wall Market. From where Chadley is, head north and go upstairs. There will be few girls dressing as cowgirls. Talk to the "main" one. Electric de Chocobo - After you have turned off the 3 Sun Lamps in Chapter 6 and are about to hop on the platform to enter Mako Reactor 5, if you open the map you will see an unexplored area west of the objective. You will find a vending machine selling the song, and if you go further ahead you can also do Cleanup Crew. Costa del Sol - Sector 5 Materia Vendor Shop. Chapter 8. Gold Saucer - From the Moogle Emporium in Sector 5 Slums. Available when secondary quests are available after progressing through main story quest. Chapter 8. Cait Sith's Theme - Sector 5 Slums after meeting Aerith when you reach the station in Chapter 8. At the end of it in a vending machine. Cosmo Canyon - Chapter 9. After the second robot arm mechanic puzzle, go straight ahead and buy this from a vending machine. Descendant of Shinobi - Sector 5 Train Station. Nearby where the Turk came out from at the beginning of the chapter. Accessible on Chapter 8 free roam. Wutai - Worker in urban advancement district (next to corneo mansion) Chapter 14. Tango of Tears - Sector 5 Slums community center in the Jukebox. Next to the Leaf House. Chapter 8. Let the Battles Begin! - REMAKE - Chapter 9. Get 10x great on the practice dance in the Honeybee Inn (you can repeat it as many times as you need). Hip Hop de Chocobo - Behind the Seventh Heaven bar from a DJ. You will pass through here when you follow Johnny in the main story. Stamp - After you defeat the 2 Flamethower soldiers and the 2 Sentry Guns in Chapter 5, there will be a room a not much further away with a vending machine with this Music CD on sale. The Midgard Blues - Chapter 9 Secondary Quests - When you go look for the drunkard with the help of Johnny, go into the bar. Talk to the guy singing karaoke. If you don't have this side quest, it's in the bar just right across the Gym. Stand Up - In an alleyway area to the left of the Honeybee Inn entrance in Wall Market. Necessary for Betty Quest in Chapter 14. Scarlet's Theme - Chapter 16 Jukebox next to Shinra's VR facility. Building Character

使用一个角色达到50级。 在进行困难模式游戏时,此成就会较早解锁,因为困难模式下获得的经验值翻倍,AP值三倍。不过,如果你想加快进程,可以在第16章完成神罗VR模拟器战斗挑战,获取经验值提升魔晶石。 注意:50级是《最终幻想7 重制版》第一部分的等级上限。 Staggering Feat

对处于 stagger 状态的敌人造成 300% 的伤害。 如果你在通关后查看这个成就,可能会想……等等,我在第 18 章对处于 stagger 状态的敌人造成了超过 600% 的伤害,这个成就是有 bug 吗?不,它没有。你只需要用“正当”的方式来完成它。 要做到这一点,最简单的 boss 是 Chadley 的 VR 任务中的胖陆行鸟,难度选择普通/困难,这样它才有足够的生命值存活(说真的,不要尝试简单难度,否则它会被你打死)。要提高敌人的 stagger 百分比,你可以:1) 使用蒂法的 Y 技能;2) 使用蒂法的真·打击技能(查看武器专家成就了解如何获得)和爱丽丝的审判光线(同样查看武器专家成就了解如何获得)。你将在第16章获得蒂法所需的武器,因此在那之后的任何时间,你都可以与查德利对话并开始挑战。 在敌人被击晕之前,1) 使用两次“不羁之力”来充能蒂法的“Y终极冲击”,然后使用“升天坠落”为敌人进入击晕模式做准备,并充能2条ATB槽;2) 准备艾莉丝的“审判之光”,因此需要2条ATB槽。 只需让胖陆行鸟进入击晕模式,使用“升天坠落”(+30%击晕伤害),使用伙伴指令L2/R2让艾莉丝使用“审判之光”(+20%击晕伤害),并持续用蒂法的X攻击打击胖陆行鸟以充能ATB槽,然后使用3次“真·打击”(+30%击晕伤害)。 Intelligence Agent

Complete all battle intel reports. Chadley will be found on all the "city stops" throughout the game: Chapter 3 (Sector 7 Slums), Chapter 8 (Sector 5 Slums), Chapter 9 (Wall Market), Chapter 14 (Sector 5 Slums), Chapter 16 (in front of Shinra VR Simulator) and when you replay Chapter 17 (Hojo's Lab). There's a total of 20 battle intel reports. Combat Simulations are affected by difficulty, thus playing them on Easy will lower the difficulty significantly. Below is a list of all battle intel reports and how to get them: Monster Bio Pt. 1 Assess 2 enemy types. You will obtain Assess materia, equip it and use it (A > Abilities > Assess with 1 ATB bar) on 2 enemies to find out their weakness. Magic Elements Pt. 1 Hit enemies vulnerable to the 3 magic elements: fire, ice, and lightning (1 time per element). You will need to obtain each element materia, equip it and use it on enemies vulnerable to that element (use Assess to know). The Stagger Effect Pt. 1 Use unique abilities (Y abilities) on staggered enemies and charge ATB gauge 10 times. When an enemy is staggered, use Y skills to charge the ATB gauge bar (Cloud's Operator Mode, Tifa's Whirling Uppercut or Barrett's Overcharge). The Stagger Effect Pt. 2 Stagger 15 enemy types. You will complete this naturally as you progress. Combat Simulation: Shiva Defeat Shiva to obtain the Shiva Summon Materia. Monster Bio Pt. 2 Assess 10 enemy types, same as Monster Bio Pt. 1 Magic Elements Pt. 2 Exploit the weaknesses of 15 enemy types. This is the same as 'Magic Elements Pt. 1' but it's not restricted to 1 time per element, but rather 1 time per enemy type. Help yourself with Assess to know the weakness to elements. The Manipulation Technique Defeat 2 or more enemies with a single attack. Will complete naturally as you progress. Monster Variants Pt. 1 Defeat monsters of 3 unique varieties. Will complete naturally as you progress. Combat Simulation: Fat Chocobo Defeat Fat Chocobo to obtain the Fat Chocobo Summon Materia. To unlock Fat Chocobo, you'll need to complete battle intel reports 1 - 9. You will be coming back to this to do the stagger achievement/intel report. Monster Bio Pt. 3 Assess 20 enemy types, same as Monster Bio Pt. 1 & Pt. 2 The Stagger Effect Pt. 3 Increase stagger damage bonus to 200%. See Staggering Feat for more information. If you're earlier in to the game and already want to complete this, simply load up the Fat Chocobo again and once staggered hit it with Tifa's Y skill. Refocus Analysis Refocus is a limit break equipped by Aerith by default. Simply charge the Limit Break bar and use it twice. The Stagger Effect Pt. 4 Stagger 40 enemy types. Will complete naturally as you progress. Combat Simulation: Leviathan Defeat Leviathan to obtain Leviathan Summon Materia. To unlock Leviathan, you'll need to complete battle intel reports 1 - 14. If you're struggling with Tidal Wave (it's one-shotting you), know that you can use Manaward (level 2 of Barrier Materia) to survive it. Monster Bio Pt. 4 Assess 30 enemy types, same as Monster Bio Pt. 1 & Pt. 2 & Pt 3. Simply assess everything you come across. If you're having trouble finding enemy types, you can participate in some of the optional fights at the Corneo Colosseum in Chapter 14 and Assess all of the different enemies you fight. After completing this, you can visit Chadley and start working on the Master of Mimicry achievement. Weapon Abilities Acquire all 16 weapon abilities. Well, 16 weapon abilities aren't all of them (there's a total of 24), but it will be enough to complete this intel report. Simply bring the proficiency of the weapons up to 100% to unlock their skills (see Weapons Expert for more information). MP Consumption Master all 12 types of magic materia. Level up to the maximum the magic materia (help yourself linking it to AP Up Materia if necessary), although by the end of the game you will have most leveled up to the max, and with the Hard playthrough it should be enough. The optional fights at the Corneo Colosseum in Chapter 14 is a great place to level these up. This are the 12 materias: Healing Materia Cleansing Materia Revival Materia Fire Materia Ice Materia Lightning Materia Wind Materia Poison Materia Barrier Materia Binding Materia Subversion Materia Time Materia Monster Variants Pt. 2 Defeat monsters of 10 unique varieties. This should be completed naturally as you progress. Combat Simulation: Bahamut Defeat Bahamut to obtain Bahamut Summon Materia. You'll unlock Bahamut after completing battle intel reports 1 - 19. This boss can be quite hard, so if you're struggling it's recommended to attempt this fight on easy difficulty. Weapons Expert

Learn all weapon abilities. To learn a weapon ability, a weapon's proficiency must reach 100% weapon's exclusive ability. This bar can bee seen on the weapon menu. To increase weapon proficiency, simply use the weapon-specific ability in combat. To do so, check which ability in particular the weapon you're carrying has, and once in combat press A > Abilities > and use the specific ability. Each ability "levels up" differently, but it is at least 10% per ability usage. Using an ability multiple times in the same combat to increase its proficiency rank is possible. Below is a list of all the weapons available in the game and how to find them. Cloud Buster Sword – Focused Thrust Default weapon Iron Blade – Triple Slash Will be obtained in Chapter 3 as part of the story Nail Bat – Disorder It is obtainable in Chapter 8 as a reward of the side-quest "Kids on Patrol" Hardedge – Infinity’s End Purchasable in Chapter 9 from the Weapon Shop Vendor (Wall Market Mythril Saber – Blade Burst Purchasable in Chapter 14 from the Weapon Shop Vendor (Wall Market) Twin Stinger – Counterstance It is obtainable from a purple chest in Chapter 17, after Red XIII helping you cross some pods and defeating some enemies. It is next to a staircase and in plain sight, hard to miss. Tifa Leather Gloves – Divekick Default weapon Metal Knuckles – Overpower Will be obtained in Chapter 5 as part of the story. Sonic Strikers – Focused Strike It is obtainable from a purple chest in Chapter 7 in simple sight (Mako Reactor 5 - B5 Connecting Passageway) Feathered Gloves – Starshower It is obtainable from a purple chest in Chapter 10 from the area where water has been drained (Aqueduct 1) Mythril Claws – Chi Trap Will be obtained in Chapter 13 as part of the story. Purple Pain – True Strike This is one tricky weapon to get. In Chapter 16, you will play as Tifa and try to reach reception in the lobby of Shinra Tower. At some point you will fall. To get back up you'll need to climb on top of a car then proceed up a ladder. However, DO NOT climb the ladder, instead head for the bars to the right and you will reach a purple chest containing the weapon Barret Gatling Gun – Focused Shot Default weapon Light Machine Gun – Lifesaver Will be obtained in Chapter 6 as part of the story. Big Bertha – Maximum Fury Purchasable in Chapter 13 from the Weapon Shop Vendor (Evergreen Park, the playground southeast of Wall Market). You can also purchase this from the same shop in Chapter 14. Steel Pincers – Charging Uppercut Purchasable in Chapter 14 from the Moogle Emporium. Wrecking Ball – Smackdown It is obtainable in Chapter 14 as a reward from the side-quest "Subterranean Menace" EKG Cannon – Point Blank It is obtainable in Chapter 16. After talking to the Mayor, head back outside and talk to "Hart". He will ask for 10,000 gil and give this weapon as a reward. Aerith Guard Stick – Arcane Ward Default weapon Silver Staff – Sorcerous Storm Purchasable in Chapter 8 from the Moogle Emporium. You can purchase it in later chapters as well (such as Chapter 14) Arcane Scepter – Fleeting Familiar It is obtainable in Chapter 9 as a reward from the side-quests "A Dynamite Body" or "Shears' Counterattack" - depending on if you do Set 1 or Set 2 of quests. Mythril Rod – Ray of Judgment It is obtainable from a purple chest in Chapter 11 not much ahead from the starting point. Right at the start there's a bench and vending machine, the chest is on the other side of the fence. Backtrack all corners and you will see it, it's on the room on the other side of where the starting bench & vending machines are. Bladed Staff – Lustrous Shield Easily the trickiest weapon to obtain in the game. You must use "Steal" on Chapter's 11 boss Eligor to obtain this weapon. You will fail several times to steal the item, but keep trying. You must equip the Steal Materia before the combat - but don't worry, at any time you can exit the Eligor combat and you will be sent back to few steps before the combat starts, giving you time to change your equipment. You can only use the steal ability by having the Steal Materia attached, which you can buy from Chadley after finishing Battle Intel Report 7. You can always go back via chapter select and get this after finishing the game. Reinforced Staff – ATB Ward This is obtainable from a purple chest in Chapter 17. It is at the very beginning and in plain sight, it will be hard to miss. Master of Mimicry

学习所有敌人技能。 要学习敌人技能,你必须完成情报报告16(详情请咨询情报特工)并获得敌人技能魔晶石。装备该魔晶石后,当敌人用特定技能攻击你时,你就会习得该技能,并且只要装备着敌人技能魔晶石就能使用它。在战斗中按A键并选择【能力】,可以查看克劳德已习得的敌人技能,所有通过该魔晶石习得的敌人技能都会列在该栏目中。 共有四个敌人技能需要学习,以下是获取它们的地点和方法建议: 精神虹吸 从幻影使用【精华汲取】时习得。可在第14章找到。【支线任务“失踪儿童”】:在墓地会与一群此类敌人战斗,很容易获取 第16章和第17章:神罗大厦VR模拟。在四星挑战“克劳德/蒂法/巴雷特/爱丽丝 vs 神罗战士学员”中可找到 【自爆】 通过瓦尔基多利斯或原始特里帕波利斯(由特里帕波利斯召唤)使用细胞凋亡时习得。可在以下地点找到: 第14章:坍塌高速公路的随机遇敌 第16章和第17章:神罗大厦VR模拟。在四星挑战“三人小队 vs 杂牌小队”中可找到 通过炸弹使用细胞凋亡时习得。可在以下地点找到: 第9章和第14章:斗技场“双人小队 vs 复仇小队”挑战 第17章困难模式:宝条实验室将新增一组神罗VR模拟。在“三人小队 vs”中可找到传说怪物挑战。 从使用自爆技能的烟雾怪处习得。出现地点: 第8章和第14章,5区贫民窟废料场的随机遇敌。 第16章和第17章,神罗塔VR模拟战,四星挑战“三人小队VS杂牌小队”。 极寒冰环 从使用寒冰光环技能的苍蓝龙处习得。出现地点: 第3章,支线任务“刚从墓地飞来”。 第11章,击败幻影Boss后,列车墓地的主线任务路径。 第9章和第14章,斗技场“双人小队VS复仇小队”挑战。 坏 breath 从使用坏 breath技能的魔晄花处习得。出现地点: 第17章,宝条实验室新增神罗VR模拟战,“三人小队VS传说怪物”挑战。这就是那股味道

击败一只莫古力(Malboro)。 通关游戏后,在第17章的宝条实验室会解锁新的神罗VR模拟战斗。你可以随时加载该章节并前往VR模拟战斗。要进入神罗VR挑战,需开始第17章,乘坐电梯前往宝条实验室主楼层,途中会与一些未知实体战斗,之后队友会移开障碍物。随后会遇到查德利,他会告诉你需要你协助测试他在实验室主楼层新重建的战斗模拟器。 莫古力(Malboro)可在【三人小队 vs. 传说怪物】挑战中找到。即使你以简单或普通难度加载章节,挑战中的敌人仍会以困难难度出现(因此无法使用道具)。 你需要确保队伍中的每个人都装备复活魔晶石和治疗魔晶石,同时建议克劳德将范围魔晶石与治疗魔晶石连接,这样当克劳德治疗自己时,队伍其他成员也能获得治疗。 你将按以下顺序面对敌人: 炸弹怪 这场战斗应该不会太麻烦,它很快就会进入 stagger 状态。 Tonberry 与第14章支线任务中遇到的 Tonberry 类似。AI 几乎总能躲开厨师刀。避免与其正面相对,这样它就不会一击杀死你,尽量从背后攻击它。贝希摩斯 与你在第14章支线任务中对抗零式贝希摩斯时类似。通过集中攻击它身体的中下部使其瘫痪,当它被击晕时全力攻击。不要用魔法攻击它,因为1)魔法攻击无效,2)这会使它进入短时间的“狂暴”状态,极难存活。 炸弹怪+莫古利 与单独战斗没有太大区别。但要优先集中攻击炸弹怪并尽快将其消灭,因为如果你忽视它,它会迅速变大并通过自爆团灭你的队伍。 玛尔博 这可能是模拟战斗中最简单的一场。它唯一危险的攻击是“坏 breath”。装备【敌人技能魔晶石】并被其攻击一次,即可习得【坏 breath】技能(更多信息参见【Master of Mimicry】),之后需躲避该技能。当它施放此技能时,会瞄准你并短暂跟随你移动。当你能够自由移动且它不再跟随你的动作时,只需悄悄绕到它身后,从背部安全地攻击它。

击败【骄傲与喜悦】原型机。 【骄傲与喜悦】原型机是神罗VR挑战“三人小队VS最高机密”中的一个必须击败的 Boss。要解锁此挑战,你需要完成所有斗技场挑战和所有之前的神罗VR战斗挑战。斗技场挑战可能比较棘手,因为你只能在第九章击败地狱屋之后才能进行艾莉丝的斗技场挑战,之后无论是第九章剩余部分还是第十四章,她都无法再使用了。如果你还没有在困难难度下完成这些,请在重玩游戏时注意这一点。要前往神罗VR挑战,需从第17章开始,乘坐电梯前往霍ojo实验室主楼层。途中会与一些未知生命体战斗,之后队友会移开障碍物。接着会遇到查德利,他会告知需要你协助他新重建的战斗模拟器,该模拟器也位于实验室主楼层。 此前完成的困难难度章节越多越好,因为你将拥有更多魔晶石手稿、已解锁的核心,从而获得更强大的武器。此战斗挑战仅提供困难难度选项,即使你当前章节是以较低难度进行的。以下是此挑战的推荐配置: 克劳德 武器(双刺枪):治愈、魔力提升、生命值提升 防具(至尊护腕):冰元素、复活 饰品:冠军腰带 蒂法 武器(秘银爪):生命值提升、魔力提升、治愈、屏障、复活 防具(齿轮手环):冰元素、抗性 饰品:冠军腰带 爱丽丝 武器(守护之杖):时间、屏障、魔力提升、魔法提升、生命值提升 防具(符文臂环):治愈扩大、复活(治愈扩大可让治愈技能影响并治疗队伍中的所有3名成员) 饰品:治愈项链 在“三人小队VS顶级机密”VR挑战中,你将面对以下敌人: 希瓦 防具上的冰元素链接会让你免疫冰系攻击,因此这将易如反掌。胖陆行鸟 这里最简单的 Boss,和 VR 模拟战没什么区别,只是生命值更高。 利维坦 如果它使用潮汐之浪,而你无法及时将其击晕,就使用魔法屏障。 巴哈姆特 游戏中最难的战斗。当倒计时归一时,巴哈姆特会释放超级新星,对队伍全体3名成员造成9999点魔法伤害。你只能通过以下方式存活:及时将其击晕(难度极大,但第二次超级新星时相对容易应对)、及时使用魔法屏障或魔法壁障(屏障魔晶石),或者装备6级武器上的不屈效果(受到致命法术或攻击时,保留1点生命值存活),这也是选择这些武器的原因。当伊弗利特出现时,保留极限技(升天和海豚连打)以尽快将其击败。骄傲与喜悦原型 惊喜的是!它实际上并不是游戏中最难的 boss……是不是很意外?这场战斗和魔晄花类似,要尽可能骑到它背上,从它身后的安全位置击败它。 击败骄傲与喜悦原型后,你将获得【诸神黄昏】,这是一个饰品,装备它的队员在进入战斗时极限技计量条会处于满值状态。这在困难模式流程中非常有用。 Hardened Veteran

Complete all chapters on Hard difficulty. You will have access to the Hard difficulty after completing the game on any difficulty: Classic, Easy, or Normal. It is not a regular second playthrough on a harder difficulty, but rather can be either played linearly from start to finish or by hand-picking chapters. It is pretty much the same story-wise as the normal playthrough, so cutscenes are totally skippable if you wish to finish this playthrough quicker. From the pause menu, you can select "System" and then choose "Chapter Selection" and play levels on hard difficulty at any time in any order at your leisure after finishing the game for the first time. If you select "System", then "Play Log" from the pause menu, it will keep track of how many chapters you've completed on hard difficulty, but won't tell you exactly which chapters. General Tips In Hard difficulty, you cannot use items, MP is not restored by sitting on benches, and enemies are stronger. Completing main objectives and bosses will automatically award manuscripts on hard difficulty, but so will side quests on specific chapters (side quest manuscripts to look out for are detailed below). These are character-tied and award 10 SP each to upgrade weapon cores. Make sure everyone in the party has Revival Materia, and stock up on HP Up and MP Up materias too. They can be bought from several places, but for example the Materia Vendor in Wall Market has them. When fighting melee bosses (Turks - Reno, Rude - Rufus Shinra & Sephiroth among others) abuse the Counterstance ability. It will make your life easier. Since sitting on benches will not restore your MP in hard difficulty, you will want to use your MP sparingly - don't waste it! There are a few ways to restore MP. Destroying Shinra Boxes are the most popular way to recover MP, and you can also save your game and reload the save after destroying a Shinra Box to respawn it and gain more MP. Aerith's Soul Drain skill can also draw MP from enemies in battle. It's also recommended to equip Prayer Materia to all party members to heal the party without consuming MP. Use Magnify Materia on Healing Materia, so you can heal your whole party with a single heal for the cases you do have to use MP to heal. If you want to reset your weapon upgrades and assigned weapon SP, perhaps to reconfigure the weapon to have materia slots than you currently have over other skills, you can always speak to Chadley in Chapter 3, 8, 9, or 14 (along with any other chapters you run into him like the end of Chapter 4) and have him reset those skills. Chapter-Specific Tips Chapter 3 - Completing the "Rat Problem" side quest will give Cloud the 'The Art of Swordplay Vol. V' manuscript which allows him to upgrade his weapon further. Tifa can get a manuscript by completing the "On the Prowl" side quest as well. Chapter 4's Bike Mini-Game can be skipped (and you be thankful that it can). Roche doesn't give any Manuscripts for being defeated in this scene (though he will for defeating him later on in the chapter), so you are missing nothing! Chapter 8 - It's possible to get four manuscripts for Aerith in this chapter by completing the "Weapons on a Rampage", "Kids on Patrol", "The Angel of the Slums", and the "Paying Respects" side quests, though completing them are entirely your choice depending on if you want to upgrade her weapons more. Cloud has no manuscripts that can be earned in this chapter. Chapter 8 - When fighting Rude towards the end of the chapter, you will want to immediately switch characters when he focuses his attacks on you. If you remain fighting as a character he focuses attacks on, he will defeat both Cloud and Aerith quickly. Switching to the character he's not attacking and getting a few hits in will disorient Rude and keep him running back and forth. Chapter 9 - Completing the side quests "The Price of Thievery", "Shears’ Counterattack", and "A Dynamite Body" will all award Cloud manuscripts which allows him to upgrade his weapon further. You can't do all three of these side quests in one playthrough though as they are available depending on specific choices you make in the chapter. Because of this, it's recommended that you go for 'set 2' of quests detailed in Best in the Business as that will allow you to get 2 manuscripts instead of 1. Chapter 9's Hell House is a boss you may struggle the most with. You may run out of mana if you use the medium or high-level version of the elemental spells, so it is important that you always use the lowest one (4 MP consumption) as it is already enough, don't use magic in Chapter 9 much up until that point, and have MP Up Materia equipped as well. When it puts its shields up, start hitting its arms (it may be easier to switch to Aerith and do ranged attacks on its arms) in order to break the shield, then when the shield breaks, immediately hit it with the right elemental spell. If it tosses Tornberry's onto the battlefield, either hit them with a medium-to-high level magic spell, an ability that targets multiple enemies, or Clouds limit break and get rid of them quickly. On the third and final phase of the battle, make sure Aerith has 'Planet's Protection' tied to her limit break and use it when the sweeper and cutter spawn to make you immune to most attacks and let you focus on defeating sweeper and cutter quickly to refocus on Hell House. And just a reminder: When it glows red, hit it with ice When it glows white, hit it with fire When it glows green, hit it with lightning When it glows yellow, hit it with windChapter 11's second boss, Eligor, may prove difficult in Hard mode. If you're stuck, try these tips: Eligor is weak to Ice, so equip Elemental+Ice materia on Cloud. Eligor will become weak to wind on its 2nd phase, so equip Elemental+Wind materia on Aerith. On its 2nd phase, it will cast "Reflect" on your party members. It won't allow for characters to heal other characters with regular spells (abilities like Pray still work) but the effects of Reflect is lost upon death. Therefore, you can make your characters die once and revive them to make the fight easier. It's a bit contradictory, but it might help.Chapter 14 - Completing the "Tomboy Bandit" side quest will award Cloud a manuscript which will allow him to upgrade his weapon further. In addition, completing the "Corneo’s Secret Stash" and "Missing Children" side quests on hard difficulty will award you manuscripts for Tifa and completing "Malicious Goons", "Chocobo Search", and "Subterranean Menace" side quests will award Barret manuscripts, though completing them are entirely your choice depending on if you want to upgrade their weapons further. Chapter 17's Hojo Lab VR Simulations have good rewards, but are hard. You will be able to obtain some manuscripts to increase the weapon stats and completing Ultimate Weapon will award you the Götterdämmerung, an accessory that allows you to enter all combats with the Limit Break bar at its fullest. The fight is the most complicated in the game, but the accessory will make the Hard mode playthrough way easier. Chapter 18's Bike Mini-Game can be skipped again (and you be thankful that it can) - the mech boss doesn't give any Manuscripts for being defeated, so you are missing NOTHING.