换一换
换一换 


《100%鲜橙汁》模组使用、安装与创建指南 欢迎!

欢迎阅读这份全新指南,它将引导你完成《100%鲜橙汁》各类模组的安装与创建流程。 若你在任何时候有疑问,可参考工坊论坛或本指南的评论区。 你可以从“首次准备与提示”部分开始。 法律声明 本指南中描述的游戏资源仅可提取并在游戏外部使用,且仅限用于为《100%鲜橙汁》制作自定义图形模组。这些资源不得用于任何其他目的,也不得以任何方式贬低游戏或角色,或损害版权持有人的权利。所有模组创作者都有责任遵守当地法律并尊重商标。Fruitbat Factory, Ltd. 可能会通过在Twitter、Discord、Steam或其他公开平台发布公告并加密所列图形档案,进一步限制这些游戏资源的使用方式,或随意撤销使用这些资源创建模组的权利。在公开任何模组之前,创作者有责任参考本文件的最新版本,以确保其模组符合当前的模组指南和使用限制。限制条件 目前可修改单位和卡牌的纹理,以及背景音乐、语音和音效。 纹理位于单位、阿尔法蒙版、帽子、头发和卡牌的游戏包中。(注:可使用任何压缩软件(7-Zip、WinRAR、WinZIP等)打开这些文件。) 重要提示:仅允许修改未加密压缩包中提供的文件用于模组制作。特别是语音文件可替换为自定义配音,但不得对现有语音文件进行任何形式的修改或再利用。 修改结果可在主菜单中设置按钮旁的模组菜单中查看。
系统版本

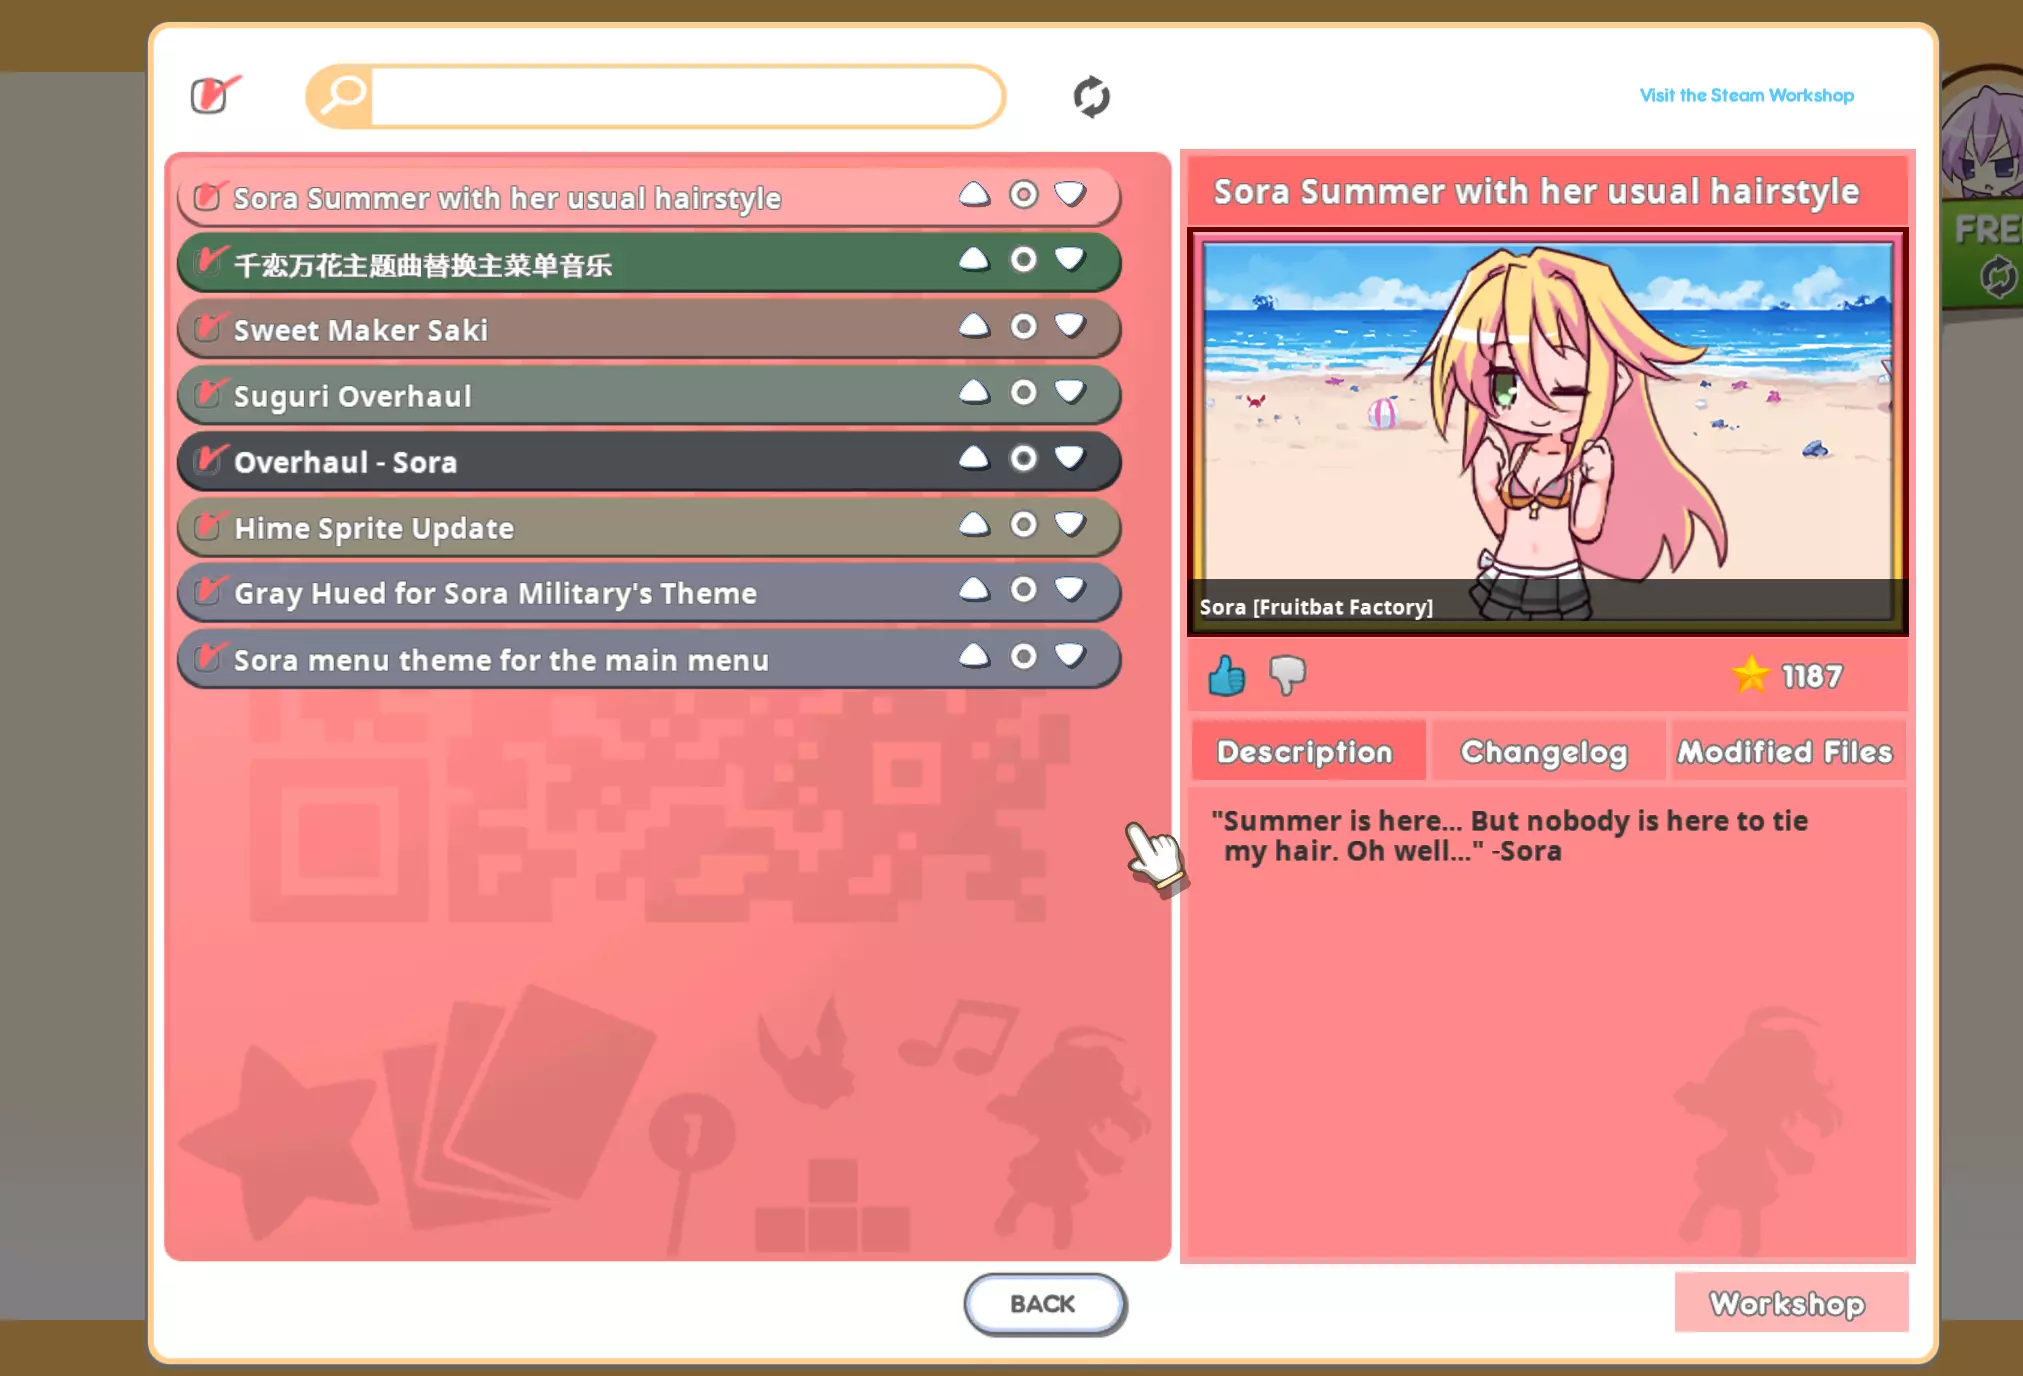
Guide Updates Here you can see the changes to the guide. DateChange15.02.2026 Added missing music events.18.12.2025 Added newest unit ID, accessory ID, and costume ID.01.04.2025 Added newest unit IDs, accessory IDs, and alphamask IDs.15.09.2024 Added a missing music event.27.07.2024 Deprecated "contest" mod definition. Added "mod_version".29.05.2024 Added newest unit IDs, accessory IDs, and alphamask IDs.17.05.2024 Added information about card back & dice modding.23.11.2023 Added missing field_circus music event.19.10.2023 Added new unit IDs & accessory IDs.04.07.2023 Added new & missing unit IDs.22.04.2023 Added newest IDs for alphamasks, accessories, and units.01.10.2022 Added new music event (Pudding Pop DLC).18.08.2022 Added new costume IDs.30.07.2022 Added section for hat IDs.16.06.2022 Added missing IDs for alphamasks, units, character voice files, and costumes.20.12.2021 Added missing unit IDs, and added clarification on .DAT files.30.09.2021 Added the Pets module.03.09.2021 Added one new music event.06.07.2021 Added 2 missing sound effect IDs.05.07.2021 Added Lone Rider and Merchant. One new music event added.04.05.2021 Added Cook and Halena.24.03.2021 Added important notice in the Limitations tab.26.02.2021 Added new unit IDs.23.02.2021 Added sections for panels, homestops, and custom languages.23.02.2021 Added a notice for Kiriko Miko costume modding.23.02.2021 Updated music section with new events.23.02.2021 Updated music section with a new parameter: volume.25.12.2020 Added Chris and Kyupita.08.11.2020 Added a new music event for the "Final Stage" music played in Tomomo's Hell (campaign).23.10.2020 Added Arnelle and Maynie, as well as a new music event.06.10.2020 Updated "System voice filenames" section.03.10.2020 Guide Updates section added.02.10.2020 Small typo fixes. =============================== First time preparations & Tips Before jumping into making your mods, there is a few things you need to know. The mods folderA "mods" folder at the location of 100% Orange Juice’s executable is where you will put all your locally saved mods. You can find it by going in your Steam Library > Right clicking 100% Orange Juice > Properties > Local Files > Browse Local Files, then by moving to the "mods" folder. To begin, create a new folder in "mods". Give it any name. This is where you will place your assets. Extract the game filesThe modding system is all about replacements. You can extract our game packages that contains textures by navigating to the "data" folder in the game directory. From there you can open the following PAK files with any software capable to open archives: alphamasks cards hats hairs units You can extract their content somewhere on your computer to make it easier for you to search and browse through our assets. As your mod need to point to a path that the game expects it, you must have a proper structure for your mod. StructureYour mod should be having this structure, if you want to replace the textures for Suguri for example: 100 Orange Juice | mods | your mod directory | units | suguri_00_00.png | suguri_00_01.png | suguri_00_02.png | suguri_00_03.png | suguri_00_04.png | suguri_00_05.png | preview.png | mod.json Since the update 3.9, textures are now using the DDS format. Your mod files can be either PNG or DDS, just make sure your modded files are using the .png extension in any case. Unencrypted game archives containing textures have ".dat" files, which are renamed DDS textures. Simply replace the extension to be able to open them. Make up your mod definition The mod definition file is how you will tell the game about what your mod should do and replace. To begin, go to your mod folder, and create a new file named "mod". Make sure that the file extension is JSON. Here's below an example you can use. { "ModDefinition": { "name": "Cuties Ft. Sora Alone", "description": "loved mod", "author": "Sora [Fruitbat Factory]", "system_version": 2, "changelog": "Initial release." }, "ModReplacements": { "textures": [ "units/cuties_00", "units/cuties_01", "units/cuties_02" ], "music": [ { "unit_id": "sorasp", "file": "music/grayhued", "loop_point": 796411 } ] } } You can also checkout hexundev's mod generator: https://hexundev.github.io/100oj-modgen/ To see the legacy way of making mod definitions, please refer to its dedicated section. But keep in mind it is recommended to stick with the new format! The following guide sections will cover the explanation of the different modules you can use. Mod Definition Section This section is not compatible with the legacy version. Parameter Data type Effect Required name string The name of your mod, used for display purposes in the mod list. This will also define the title for your Workshop item. ✓ description string The description of your mod, used for display purposes in the mod list. This will also define the description for your Workshop item. ✓ author string Who made this mod, used for display purposes in the mod list. ✓ system_version int This always need to be defined and updated to the current supported version. If at any point the mod definition process changes drastically, you will need to update your definition in order to load the mod. Refer to the System Version section to know the current version. ✓ mod_version string The mod version. This will be displayed under the Changelog tab. ✘ changelog string The latest changelog of your mod. It will appear as the change note when you update or submit your item to the Workshop. ✘ color string Requires a hexadecimal color. This will modify the color of your mod box in the list. Not defining it will default to a orange color. ✘ Mod Replacements Section Note: Each replacements now have their own subsection. You will need a different array of data for textures and sounds for example. You can combine multiple subsections in a single mod. The following sections in this guide will bring more details about them. Textures The texture replacement array only require strings to the replaced paths. This currently include: alphamasks hats hairs units cards field cardsystem/backs system Textures must be using the PNG format and have the same dimensions as the original texture. To replace a texture in the game, you must place your file in your mod where it originally appear in the game files. For example, the texture for the neutral pose of Nico is located in units/nico_00_00.png. You must place your replacement in your mod at the same path in your mod folder, like this: 100 Orange Juice/mods/my mod for nico/units/nico_00_00.png. Unit related texture size : 256x256 Card artwork texture sizes: 256x256 & 128x128 (need two versions.) Homestop texture size: 256x256 Panel texture size: 128x128 Dice texture size: 512x512 Card back texture sizes: 128x128, 256x256, 512x512 (need three versions.) The game will now handle simple paths as a complete set. This means you do not need to add paths for all poses in a specific color, accessory, hair, ect. in your mod definition file. Example: "textures": [ "units/cuties_00", "units/cuties_01", "cards/cuties", ] For the game, all poses of Cuties default color & color 1 has been included in only 2 lines instead of 12. Panel textures are an exception, since they are not part of a set. You can still use this method for them though. For cards, it will also include automatically the 128 & 256 texture variant. Only the ID is necessary here. If you wish to add a custom name and flavor text, see advanced textures below. (Note: For cards, you only need to define it once, even if it is an advanced texture. It's not the case for unit related textures.) For card backs, the same apply. Only the ID is necessary, and all texture sizes will be imported. If you need to only include single files, and not enjoy the pleasure of auto-filling, you can rely on advanced textures with a special parameter. See below. Advanced TexturesAdvanced textures can have special parameters, such as Face Coordinates for units, or Custom Names & Flavor text for cards. Face coordinates will change how a texture is centered when taking up the face of a unit. The most obvious example would be the in-game HUD. Parameter Data type Effect Required path string Path to your texture. ✓ face_x int X coordinate, from 0 to 256. ✘ face_y int Y coordinate, from 0 to 256. ✘ costume_id int The ID of a eventual costume. Not defining this parameter will default to no costume. ✘ custom_name string Enforce a custom card name. Only works for card paths. ✘ custom_flavor string Enforce a custom card flavor text. Only works for card paths. ✘ single_file bool If this texture is a single unit-related file that shouldn't automatically add all poses. Can be "true" or "false". Default is false. ✘ Face coordinates must be a position X & Y on the center of your unit's face.
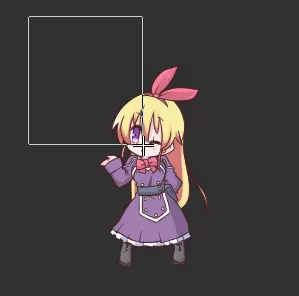
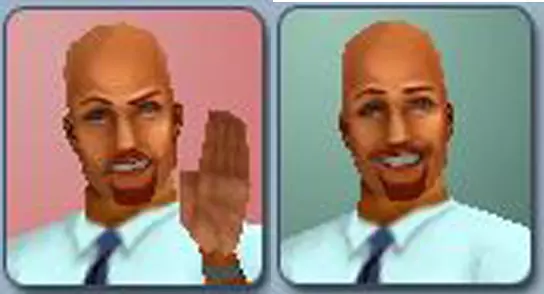
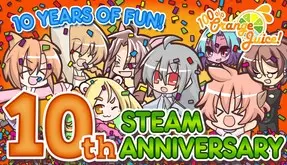
On the example above, my coordinates would be X116, Y129. In our JSON file, it would look like this: "textures": [ { "path": "units/alicianrone_00_05", "face_x": 116, "face_y": 129 } ] Costumes have their own coordinates. You can define a costume by their number identifier. See the section about costumes to know which one is which. "textures": [ { "path": "units/suguri_02_00_00", "face_x": 116, "face_y": 129, "costume_id": 2 } ] This will add the coordinates X116 Y129 to Suguri Summer's costume idle pose. Advanced textures can be used alongside regular textures in one go just fine. So don't hesitate to mix them as you need. Only unit textures and card textures can be treated as Advanced textures. Hairs, accessories ect do not need it. You can simply define them for the default color, and set regular path for the unit color options. Example: "textures": [ { "path": "units/sora_00_00", "face_x": 125, "face_y": 140 }, { "path": "units/sora_00_01", "face_x": 123, "face_y": 138 }, { "path": "units/sora_00_02", "face_x": 122, "face_y": 145 }, { "path": "units/sora_00_03", "face_x": 126, "face_y": 141 }, { "path": "units/sora_00_04", "face_x": 124, "face_y": 170 }, { "path": "units/sora_00_05", "face_x": 125, "face_y": 137 }, "units/sora_01", "units/sora_02", "units/sora_03", "units/sora_04", "units/sora_05", "hairs/sora_b00", "hairs/sora_h00", "hairs/sora_m00", "hairs/sora_s00", "hats/sora_00", "hats/sora_01", "hats/sora_02", "hats/sora_03", "field/homemark_00", "field/mass_bonus0", "system/dice_00", "cardsystem/backs/back_0", { "path": "cards/cookie", "custom_name": "Sora's cookie", "custom_flavor": "You're not the only one who enjoy cookies... ―Sora" } ] Note about Kiriko Miko costume As the naming it uses is unique, you can only rely on using advanced textures with the "single_file" parameter. Pets (Part 1) Caution: Unlike other graphics, pet textures cannot be replaced by usual ways. It must be done under the 'pets' module described below. Pets module base Parameter Data type Description Required id string The pet ID which will have its graphics modified. ✓ floating bool Is the pet a flying pet? Defaults to false. ✘ face_x int Working the same as face coordinates for units, though used here for the UI icon. Requires the middle point of the pet texture. Defaults to 128. ✘ face_y int Same as face_x, but on the Y axis. Defaults to 128. ✘ draw_offset_x int Offset the texture by the amount specified in the X axis. Defaults to 0. ✘ draw_offset_y int Offset the texture by the amount specified in the Y axis. Defaults to 0. ✘ textures Array An array of textures. Each texture need additional data. ✓ Pets module - Texture array Parameter Data type Description Required layer string The layer of the texture. See the section Pet Layers below for more info. ✓ path string The path to your texture. It should be the full path, like how advanced textures works. ✓ Pets module - Layers array Parameter Data type Description Required variant int Which variant this layer is for. Can be from 0 to 5. ✓ layer string Which layer type it is. ✓ color string The color of the layer. ✓ multiply bool Apply the blending mode Multiply to this layer. Defaults to false. ✘ Pets (Part 2) Pet Layers Pets are made of multiple layers, each of them capable of having a specific color. There is 3 different layers: "Base" LayerCodenamed "base", they are the whole pet graphic, minus the shadow elements and lineart. "Shadow" LayerCodenamed "shadow", they define the shadow parts of the pet. "Lineart" LayerCodenamed "lineart", they are the contour lines of the pet. Each of these layer types can have up to 9 sublayers. (9 base layers, 9 shadow layers, and 9 lineart layers), and will be drawn in the same order they are declared in the JSON file for each variant type. Non-code colored pets can be done by not filling color parameters in the "layers" array. However, you cannot use any variants that way. Full module example: { "ModDefinition": { "name": "Pet mod", "description": "", "author": "Sora [Fruitbat Factory]", "system_version": 2, "changelog": "", "color": "#adb5e0" }, "ModReplacements": { "pets": [ { "id": "roboball", "floating": true, "face_x": 128, "face_y": 128, "textures": [ { "layer": "base", "path": "textures/mypet_b00_00" }, { "layer": "base", "path": "textures/mypet_b00_01" }, { "layer": "base", "path": "textures/mypet_b00_02" }, { "layer": "base", "path": "textures/mypet_b00_03" }, { "layer": "base", "path": "textures/mypet_b00_04" }, { "layer": "base", "path": "textures/mypet_b00_05" }, { "layer": "base", "path": "textures/mypet_b01_00" }, { "layer": "base", "path": "textures/mypet_b01_01" }, { "layer": "base", "path": "textures/mypet_b01_02" }, { "layer": "base", "path": "textures/mypet_b01_03" }, { "layer": "base", "path": "textures/mypet_b01_04" }, { "layer": "base", "path": "textures/mypet_b01_05" }, { "layer": "shadow", "path": "textures/mypet_s00_00" }, { "layer": "shadow", "path": "textures/mypet_s00_01" }, { "layer": "shadow", "path": "textures/mypet_s00_02" }, { "layer": "shadow", "path": "textures/mypet_s00_03" }, { "layer": "shadow", "path": "textures/mypet_s00_04" }, { "layer": "shadow", "path": "textures/mypet_s00_05" }, { "layer": "lineart", "path": "textures/mypet_l00_00" }, { "layer": "lineart", "path": "textures/mypet_l00_01" }, { "layer": "lineart", "path": "textures/mypet_l00_02" }, { "layer": "lineart", "path": "textures/mypet_l00_03" }, { "layer": "lineart", "path": "textures/mypet_l00_04" }, { "layer": "lineart", "path": "textures/mypet_l00_05" } ], "layers": [ { "variant": 0, "layer": "base", "color": "#d18202" }, { "variant": 0, "layer": "base", "color": "#c7d102" }, { "variant": 0, "layer": "shadow", "color": "#dddddd", "multiply": true }, { "variant": 0, "layer": "lineart" }, { "variant": 1, "layer": "base", "color": "#02ced1" }, { "variant": 1, "layer": "base", "color": "#025cd1" }, { "variant": 1, "layer": "shadow", "color": "#dddddd", "multiply": true }, { "variant": 1, "layer": "lineart" }, { "variant": 2, "layer": "base", "color": "#34eb7d" }, { "variant": 2, "layer": "base", "color": "#2c98e6" }, { "variant": 2, "layer": "shadow", "color": "#dddddd", "multiply": true }, { "variant": 2, "layer": "lineart" }, { "variant": 3, "layer": "base", "color": "#e6e02c" }, { "variant": 3, "layer": "base", "color": "#e62c2c" }, { "variant": 3, "layer": "shadow", "color": "#dddddd", "multiply": true }, { "variant": 3, "layer": "lineart" }, { "variant": 4, "layer": "base", "color": "#b04fa6" }, { "variant": 4, "layer": "base", "color": "#eed4ff" }, { "variant": 4, "layer": "shadow", "color": "#dddddd", "multiply": true }, { "variant": 4, "layer": "lineart" }, { "variant": 5, "layer": "base", "color": "#ff0000" }, { "variant": 5, "layer": "base", "color": "#00ff00" }, { "variant": 5, "layer": "shadow", "color": "#dddddd", "multiply": true }, { "variant": 5, "layer": "lineart" } ] } ] } } The naming of textures should follow the same as we do, meaning for example: b00 = base layer 1 textures b01 = base layer 2 textures s00 = shadow layer 1 textures l00 = lineart layer textures Then, the declaration in the "layers" array is determining the order of layers. In the previous example, base 0, base 1, shadow 0, and finally lineart. Music The music replacement array require a few parameters described below. Music must use the OGG format. Parameter Data type Effect Required unit_id string The unit ID which will have its theme modified. ✓ event string Define a specific event to trigger this music on. See below for more details. ✓ file string Path to your music file. It can be in any directory. Do not include the extension. ✓ loop_point int If you wish, you can set a loop point, by the number of samples. It will play the whole music once, then rewind to the loop point. To get the amount of sample you need, you can use Audacity for example. If this is not defined, it will always read your music from start to end. ✘ volume int / double / float An additional volume gain or reduction will be applied. Numbers you seek would be around -20 to 20. ✘ Example: "music": [ { "unit_id": "sorasp", "file": "music/grayhued", "loop_point": 796411 } ] EventsEvents can be defined to affect a music to a specific place. You cannot have both a event and a unit_id defined in a single entry, however. If a unit_id is specified with an event, the unit_id parameter will be prioritized. The list of events can be found below. Event identifier Where is it played? main_menu The main menu music. standby The music played when waiting in a multiplayer lobby, or on the campaign screen. dialog1 A music played in dialogs, often when a campaign or event starts. dialog2 A music played in dialogs. dialog3 A music played in dialogs, battle themed. conclusion A music played in dialogs, often when you reach the end of a campaign or event. ending1 A music played in the credits roll. dialog4 A music played in dialogs, in the campaign of Arthur and Nico. final2 A music played in dialogs, in the campaign of Arthur and Nico. ending2 A music played in the credits, actually only used when you finish Arthur and Nico's campaign. idol_duet A music played when Cuties use their hyper. idol_instrumental A music played when a unit that is not Cuties or Poppo use the Special Stage hyper. idol_poppo A music played when Poppo use the Special Stage hyper. dialog5 A music played in Mio's campaign. It's the default dialog song. dialog6 A music played in Mio's campaign. It's Kai's appearance song. ending3 A music played in Mio's campaign. It's the credits song. tomomo_sweeteater A music played when Tomomo (Casual) plays her hyper. maynie_ragingmode A music played when the Raging Madness hyper is active. finalstage Tomomo's Hell music, played in the campaign. field_wintertown Beginner Town (Winter) Intro Music field_desert Lonely Railway Intro Music field_pool Whirlpool Intro Music field_circus Circus Intro Music idol_qpudding A music played when QP use the Special Stage hyper. idol_starbaker A music played when Star Breaker use the Special Stage hyper. field_void Void Intro Music field_schoolyard Schoolyard Intro Music Example: "music": [ { "event": "standby", "file": "music/menu", "loop_point": 614400 } ] The lobby music will be replaced that way. Voices Voice replacement mods require either of these 2 parameters, depending on which types of voices you want replaced: character: Array of paths that files to replace character voices will be attempted to be loaded from. system: Array of paths that files to replace announcer voices will be attempted to be loaded from. Before loading the sound files from the .pak, the game will try to find files in the paths listed here and attempt to load those instead. Format example: "voices" : { "character": [ "voice_cha_qp", "voice_cha_suguri", "voice_cha_kai" ], "system" : [ "voice_sys_suguri", "voice_sys_kai" ] }} If you want to only replace Kai's system voices, it'd look like this: "voices" : { "system" : [ "voice_sys_kai" ] }} That's cool, but what do I place in these folders?The files that are meant to be in this folder also have to match with what the game's expecting. The "Dice roll 1" voice line file is named "0_0.wav" (required filenames listed below), so the sound you want to replace the voice line with must be named the same and be located in the character folder you want to replace the voice of. The same also applies to system voices. For best results, make sure your sound files have a 44100Hz sampling rate. Here's a folder structure example of a mod replacing QP's Dice roll 1 and 4 voice lines, along with her "100% Orange Juice" and "Warp" announcer voices: cute qp mod (Folder name) |__ voice_cha_qp |____ 0_0.wav |____ 0_3.wav |__ voice_sys_qp |____ title.wav |____ warp.wav |__ mod.json For information on how to name the files, check out the Character voice filenames section. Character Hair Color The character hair color replacement array will only accept arrays of data. You have several techniques of hair coloring to choose from: texture : Rely on a external texture to draw the hair. singlecolor : Define a base, shadow, and additional color to draw the hair. gradient : Define a base, secondary, shadow, and additional color to draw the hair. The module only read the following parameters: ParameterData typeDescriptionRequiredunit_idstringThe unit ID that will have its hair data changed. See the Unit ID section of this guide to know about them.✓hair_colorintThe hair color number to change. It can be from 1 to 12.✓techniquestringThe technique of hair drawing to use. See above for a list.✓base_colorstringAn hexadecimal color value. If not defined, it will default to white.✘secondary_colorstringAn hexadecimal color value. If not defined, it will default to white. It's only used with the gradient technique.✘shadow_colorstringAn hexadecimal color value. If not defined, it will default to RGB: 128, 50, 50.✘add_colorstringAn hexadecimal color value. If not defined, this color won't be added.✘ You can also specify an alpha value for your color: #ff000000 : ARGB (255, 0, 0, 0) #000000 : XRGB (0, 0, 0) (the alpha is always 255.) Texture Textures do not need any specific parameter. You'll need to include your texture in the dedicated module (see the earlier section Textures) by following our naming: Example: hairs/sora_00_00 : It will change the hair color 1 of Sora's idle pose. hairs/sora_02_00_00 : It will change the hair color 1 of Sora's Summer costume idle pose. Note: Even if the hair color file is not present in the official files, you can still define yours to be read by the game. As long the name of the file is the same as what the game is expecting, you're all set. JSON example: "hair_color": [ { "unit_id": "sora", "hair_color": 3, "technique": "texture" } ] Single Color The single color technique depends on the base color you'll define to draw the hair. JSON example: "hair_color": [ { "unit_id": "sora", "hair_color": 1, "technique": "singlecolor", "base_color": "#000000", "shadow_color": "#ff0000" } ] Gradient Color The gradient color technique depends on the white & black hair textures to draw the hair. The base color being the black part, and the secondary color being the white part. JSON example: "hair_color": [ { "unit_id": "sora", "hair_color": 2, "technique": "gradient", "base_color": "#000000", "secondary_color": "#ffffff", "shadow_color": "#ff0000" }, ] The hair textures used when using gradients or single colors are the following: For Alicianrone (applies to all units) hairs/alicianrone_b00_00 (base color) hairs/alicianrone_h00_00 (hair highlight) hairs/alicianrone_m00_00 (gradient) hairs/alicianrone_s00_00 (shadow) Sound Effects To add a custom sound simply create an entry in ModReplacements with the name sound_effects. This is a list of the sound effects your mod is replacing. These sounds must be in a folder named sound in your mod's root directory. For best results, make sure your sound files have a 44100Hz sampling rate. Below is an example definition in your mod.json file: "ModReplacements": { "sound_effects" : [ "cancel.wav", "cardget.wav", "decision.wav" ] } This suggests that your mod folder structure should be something like this: poppo mod (Folder name) |__ sound |____cancel.wav |____cardget.wav |____decision.wav |__ mod.json What will this do? This will replace the "Player selects something", "Player cancels a selection" and "Card get" sound effects with whatever these files are. A list of all the sound effects used is located at the end of the guide, so you can use that for reference whenever you need it. Custom Languages The Custom Language array only take one member called "directories". { "ModDefinition": { "name": "French Jus d'Orange", "description": "This mod add the french localization.", "author": "Sora", "system_version": 2 }, "CustomLanguages": { "directories": [ "french" ] } } Your mod structure should look like this: French Jus d'Orange (Folder name) |__ french |_____<define, font files, etc> |__ mod.json You need to put the directory name with all the define files inside your mod folder, and set the name under directories. You can include multiple languages, and you can mix this module with other ones (textures, music replacements...) This will add the "french" custom language along all the included font files. For existing translations, it will only be a matter of moving your folder to a dedicated mod folder and copy pasting the JSON code above. For new translations, you can refer to the file located here: 100 Orange Juice language CustomLanguages.txt to get started. =============================== Customized Preview You can include a customized preview with your mod. This is a requirement if you wish to publish your mod to the workshop. Create it at the root of your mod's directory, named preview.png. The preview should preferably be following a 16:9 aspect ratio, and use the PNG format. It will automatically be read if the game detects the file, so there is no need to do anything else! The preview must be less than 1 MB in size to be uploaded to the Workshop. Submit your mod to the Workshop In order to send your mod to the Steam Workshop, you must ensure the following conditions are fulfilled: Your mod definition file must use the JSON format. Your mod must have a valid preview. Jump to the Customized Preview section of this guide for more information. Once the conditions are met, you can then jump in-game and click the Publish button.

If any error during the upload occurs, a message will show up giving more details. Once the mod is done uploading, you'll be redirected to the page of your workshop item, ready to be used for everyone. Note that all submitted items have their visibility set on public by default. Contest Participation In order to participate in our official contests, you'll need to declare the flag "contest": true in the mod definition, alongside the other required parameters. Doing so, you will have to ship all the assets required in your mod folder. Once your folder is ready, hop in-game and publish, like any mod. Note: When no contest are available, or if time ran out, you won't be able to send or update any item. Tip: As it is considered a mod, you can treat your entry as it was one and have users subscribe to it so they can have a direct preview of your entry in their game. Placeholder cards will be added in the in-game binder when a contest is up and running. Please make sure to include full resolution artworks in the submission folder, even if the mod won't read them. =============================== (Legacy) Mod definition This method is discontinued! To make your first mod, you need to create a new folder in “mods”, which will be your mod’s name. Inside this folder, you will need a mod definition file, called mod.txt. The content should follow this format: < MOD_NAME > The Cuties, but Sora is alone < MOD_DESCRIPTION > This mod made Sham quite upset. < MOD_AUTHOR > Sora [Fruitbat Factory] < MOD_AUTHOR_CONTACT > https://steamcommunity.com/id/SoraTheGuardian < MOD_REPLACEMENTS > units/cuties_00_00 units/cuties_00_01 units/cuties_00_02 units/cuties_00_03 units/cuties_00_04 units/cuties_00_05 This syntax is the same as a localization define file. Make sure the encoding of this file is UTF-8. Here’s a quick recap of what those values means: < MOD_NAME >*The name of your mod. It can be different from the folder’s name, and is only used for display purposes.< MOD_DESCRIPTION >The description of your mod.< MOD_AUTHOR >Your name!< MOD_AUTHOR_CONTACT > (Facultative)A way to contact you, steam profile link, e-mail...< MOD_REPLACEMENTS >*These should be all file paths that you want to replace with your own texture (omitting file extension.) *Those values must be added in your mod.txt. If they are missing or having bad data, your mod might not be loaded by the game. Only textures can be modded with this method. =============================== Avoid JSON errors! In order to be loaded, you must make sure your JSON file can be fully parsed. If there is any error, the game will not load your mod. You can use the following website to check your data: https://jsonformatter.curiousconcept.com/ It will as well highlight the potential issues if there is any. Alphamask Helper In order to make the modding process more easy for you, here below are a few helpers to figure out for example what file is what, due to our naming using identifiers. # Alphamask 00 Pumpkin head, no xmas outfit, applied to body + hair 01 Pumpkin head, with xmas outfit, applied to body + hair (only hair if default color) 02 Pumpkin head, with xmas outfit, applied to the actual pumpkin head (used for Krila due to her doll) 03 Xmas outfit, non default hair color applied to the hair 04 Crowns: body + hair 05 Xmas hats: body + hair 06 Halloween costume: body + hair 07 Halloween costume 2017: body + hair 08 Xmas 2017 (Rein Kigurumi): body + hair 09 School Crashers: hair 10 Halloween 2018 costumes (Leo Kigurumi): body + hair 11 Halloween 2018 costumes (Trick & Treat): body + hair 12 Santa scramble costumes 13 Pigformation 14 RPG Costumes 15 Miusaki volleyball - Festa Junina - Summer Games costumes (QPD, Ceoreparque, Lone Rider, Merchant) 16 Halloween 2019 costumes (Operation Halloween) 17 Summer 2020 (Yukata costumes) 18 Mushroom Poppo 19 Cow Kigurumi 20 Summer 2021 (Mio swimsuit) 21 Halloween 2021 costumes (Tricked Out) 22 Tiger Kigurumi 23 Halloween 2022 costumes (Operation Halloween Rerun) 24 Xmas 2022 (Sweet God baking outfits) 25 Valentines 2023 (Sweet God casual outfits) 26 Bunny Ears 27 Valentines 2023 (Aru/Nico/Arthur Lunar New Year) 28 Halloween 2023 costumes (Trick & Treat Rerun) 29 Restaurant costumes (Extracurricular Crisis) 30 Bounty Poppo Accessory IDs Keep in mind that a cosmetic's hat ID will usually not be the same as its alphamask ID. In addition, there are many accessories which share an ID number with other accessories. # Alphamask 00 Xmas hats 01 Brown Antlers 02 Red Antlers 03 Red Crown 04 Purple Crown 05 Pumpkin head 06 Halloween 2016 costumes 07 Eyeglasses 08 Sunglasses 09 Poppo Mask 10 Halloween 2017 costumes 11 Xmas 2017 (Rein Kigurumi) 12 Valentines 2018 (QP White Chef Outfit) - NoName whistle - Summer 2018 (Beach Party) - Xmas 2017 (Present) - Santa scramble costumes - Summer 2020 (Yukata costumes) - Restaurant costumes (Extracurricular Crisis) 13 Valentines 2018 (QP Yellow Chef Outfit) - Xmas 2017 (Tomato & Mimyuu) - Summer 2020 (Syura/Kai) 14 Valentines 2018 (QP Sweet God wings) 15 Valentines 2018 (QP Lunar New Year) - Valentines 2023 (Aru/Nico/Arthur Lunar New Year) 16 Halloween 2018 costumes (Leo Kigurumi) 17 Halloween 2018 costumes (Trick & Treat) 18 Pigformation 19 RPG Costumes 20 Miusaki volleyball - Festa Junina - Summer Games costumes (QPD, Ceoreparque, Lone Rider, Merchant) 21 Halloween 2019 costumes (Operation Halloween) 22 Flower Hairpin 23 Mushrooms 24 Earmuffs 25 Cow Kigurumi 26 Summer 2021 (Mio swimsuit) 27 Idol Poppo 28 Halloween 2021 costumes (Tricked Out) 29 Tiger Kigurumi 30 Halloween 2022 costumes (Operation Halloween Rerun) 31 Xmas 2022 (Sweet God baking outfits) 32 Valentines 2023 (Sweet God casual outfits) 33 Bunny Ears 34 Dark Hairpin - Flower Crown (Treasure Tails) 35 Halloween 2023 costumes (Trick & Treat Rerun) 36 Hyper Ellie's Bells - Hero Kai's Goggles (Memory Menders) 37 Bounty Poppo 38 Mufflers (Clubroom Challengers) Unit IDs You can find below our internal names for units. Name Unit IDAlicianronealicianroneAltealteArnellearnelleArthurarthurAruaruAru (Scramble)arusRobo BallballBalloon Jerk (Co-op Minion)balloonjerkM10 Robot (Co-op Boss)bballBig the Haruo (Co-op Boss)bchickenTurnislime (Bounty Hunt)blobBourbonbourbonBig Poppo (Boss)bpoppoSummer Beast (Co-op Boss)bqpShifu RobotbroboFlying CastlecastleCeoreparqueceorChefchefChickenchickenChrischrisChuuchuuCookcookCutiescutiesCuties (Sora, different due to separate hair color options)cuties_soraHaunted Doll (Bounty Hunt)dollEllieellieHyper EllieelliehyperThe Harbinger (Bounty Hunt)evilguardianDark Chocolate Mousse (Bounty Hunt)evilmousseAurora (Bounty Hunt)faeFernetfernetFernet (Noble)fernetnobleWolly (Bounty Hunt)fluffGöst (Bounty Hunt)ghostGoalpost (Co-op Minion)goalpostMoss Golem (Bounty Hunt)golemStar Devourer (Co-op Boss)gpoppoGraingrainGuardian (Bounty Hunt)guardianHalenahalenaHarukaharukaHeliseed (Bounty Hunt)heliseedHimehimeHime (Moonlight)himemHalloween 2019 Pumpkinhw2019pumpkinIruiruIslayislayKaekaeKaikaiKai (Hero)kaiheroKanatakanataKirikokirikoKrilalariskrilaKrilalaris (Pajamas)krilapKyousukeksukeKyokokyokoKyupitakyupitaBunnizard (Bounty Hunt)lizarditLone RiderloneriderLulululuDark LulululudarkGlobbu (Bounty Hunt)magmaMaltmaltMarcmarcMarc (Pilot)marcpilotManagermasterMayniemaynieMeimeiMerchantmerchantMescalmescalMimyuumimyuuMimyuu (Jailbird)mimyuujMiomioMio (Festive)miofMiramiraMiusakimiusakiEmerangler (Bounty Hunt)moleMousse (Bounty Hunt)mpoppoNanakonanakoNathnathNatsuminatsumiNiconicoNoNamenonMarie Poppo (Mixed)npoppoPeatpeatPomeraniuspomeraniusMari PopomipopomiMarie PoppopoppoMother PoppopoppomamaPoyopoyoQPqpQP (Dangerous)qpdHoshino ReikareikaRoPoChi (Co-op Boss)ropochiSakisakiSeagullseagullBig the Jonathan (Co-op Boss)seagullbossShamshamSherrysherryShifushifuRuffshroom (Bounty Hunt)shroomTerrawyrmer (Bounty Hunt)snekSorasoraSora (Military)soraspStar BreakerstarbSugurisuguriSuguri (46 Billion Years)suguri46Suguri (Ver.2)suguribSumikasumikaSweet BreakersweetbNatsumi (Sweet Blogger)sweetbloggerSweet CreatorsweetcreatorSaki (Sweet Maker)sweetmakerSwimming Coach (Co-op Boss)swimmingcoachSwimming Ringer (Co-op Minion)swimmingringerSyurasyuraTeotorattateotorattaPirate Crew Memberteq_minionTequilatequilaTomomo (Casual & Sweet Eater)tmswTomatotomatoTomomotomomoTrollite (Bounty Hunt)trollTsihtsihWattywattyYukiyukiYuki (Dangerous)yukidYuukiyuuki Card IDs You can lookout for the great guide written by Zomoroko: https://steamcommunity.com/sharedfiles/filedetails/?id=2234774298 Character voice filenames This list is to help with naming sound files for replacing character voices. Use the prefix with an underscore and then the variation of the line (starting the count from 0) to name the file, you can use the in-game Gallery section for help. For example: Replacing Warp 3 would need a file named 10_2.wav and replacing Drop panels 4 would need a file named 21_3.wav It's important to note that entries marked with * only have one variation, and replacing subsequent lines require changing the prefix. For example: The sound replacement for Special Line 3 needs to be named 52_0.wav. PrefixUsage0Rolling dice1Use card2Trap card3Battle card4Hyper card5Revived6Revive failed7Attack8Effect Damage9Healing10Warp11KO12Challenging enemy13Being challenged14Attack in battle15Damage16Major damage17Evasion18Winning a battle19Losing a battle20Bonus panels21Drop panels22Stepping on a trap23Encountering a boss24Star Norma25Win Norma26Selecting character27Game starts28Winning games29Obtaining new stuff30Unused31 to 45 *Generic Line 1-1546Enemy Hyper47Alternative Version Hyper Card48Generic Line 1650 and onwards *Special Line System voice filenames Below is the list of system/announcer voice sound files that can be replaced. Just name the sound file you want to use accordingly. FilenameUsage1.wavUnused2.wavUnused3.wavUnused4.wavUnused5.wavUnused6.wavUnusedbattle.wavBattle start if no character voice was playedbonus.wavBonus rollcheck.wavNorma checkconnected.wavConnected to lobbyconnectfailed.wavFailed connecting to lobby: Generic errorconnecting.wavChose a lobby to connect todraw.wavCard draw, Playground! Draw 2 rewarddrop.wavDrop roll, Playground! Drop penaltyfruitbatfactory.wavUnusedko.wavUnusedlobbyfull.wavFailed connecting to lobby: Lobby is fullmove.wavMove panelnewitem.wavUnusednorma1.wavLevel 1 Norma clearnorma2.wavLevel 2 Norma clearnorma3.wavLevel 3 Norma clearnorma4.wavLevel 4 Norma clearnorma5.wavUnusednorma6.wavFinal Norma clearojandfbf.wavOrange Juice & Fruitbat Factory splash screenorangejuice.wavUnusedplayer1.wavPlayer 1 turn startplayer2.wavPlayer 2 turn startplayer3.wavPlayer 3 turn startplayer4.wavPlayer 4 turn startplayerjoin.wavA player has joined the lobbyplayerleft.wavA player has left the lobbyrevive.wavUnusedshindenken.wavShindenken splash screenskip.wavPlayer's turn was skippedstart.wavUnusedstop.wavPlayer actives Immovable Object's effecttitle.wavTitle screentrap.wavTrap card activatedwarp.wavWarp panel, Playground! Warp rewardwarpmove.wavWarp-move panelwin.wavBattle win if no character voice was played Costumes IDs You can find below the costumes identifiers. # Costume 0 No costume. 1 Suguri & Hime Winter costume 2 Summer 2018 Swimsuits costume (Suguri - Sora - Hime) 3 Pig chibi costume 4 Summer 2019 Swimsuits costume (Marc - Fernet - QP) 5 Star Devourer Poppo costume 6 Kiriko Miko 7 Kiriko Miko (Original) 8 Mousse costume 9 Tan QP costume 10 Summer 2020 Swimsuits costume (Saki - Kae - Nath) 11 Summer 2021 Swimsuits costume (Yuki - Tomomo - Kai) 12 Summer 2022 Swimsuits costume (Ellie - Lulu) 13 Summer 2025 Swimsuits costume (Star Breaker - Tomato - Mimyuu) Dice IDs You can lookout for the great guide written by Zomoroko: https://steamcommunity.com/sharedfiles/filedetails/?id=3248072013 Sound effect filenames Below are the sound filenames the game attempts to load along with a brief description of where they're used in-game. Just add one to your mod's sound folder under any of the filenames of the sound you want to replace. FilenameUsagedecision.wavPlayer selects somethingcancel.wavPlayer cancels selection, going back in a menupage1.wavScrolling through pages (Forward)page2.wavScrolling through pages (Backward)trapset.wavTrap card setcardget.wavCard obtainedcarduse.wavUsing a cardtraptrigger.wavTrap card has been activatedpowerup.wavBattle boosts, fireworks, dialoguehealing.wavRecovering HPko.wavUnit has been KO'dthrow.wavThrowing dicenormaclear.wavNorma has been clearednormamiss.wavNorma clear conditions weren't metchapterstart.wavChapter startstar.wavObtaining a starhit.wavBattle light hitwarp.wavWarpturnstart.wavPlayer turn start, countdownsrebound.wavDice bounceencounter.wavBattle startmiracle.wavMiraclemiracle2.wavRevival of Stars, Lulu's Lucky Egg, Arcade animationsdiscard.wavCard discardstockeffect.wavStock effect appliedwin.wavWin a gamealert.wavBoss appears on the fieldbattlewin.wavEither side wins or flees from a battlecriticalhit.wavBattle strong hitevasion.wavBattle evasioncannon.wavExplosions, Marc's rocketsblaze.wavBlazing!, bomb explosions, hand discardsstatus1.wavBattle status effectstatus2.wavBattle status effectchain.wavBinding Chainsairraid.wavAir Raid field eventshield.wavBattle star-guard, several card effectselectricity.wavTurbo Charged, Delta Fieldsugurihyper.wavHyper sound from SUGURI serieslockon.wavBomb ticking, Extended Photon Rifle's and Rocket Cannon's animationqps_damage.wavSummer Beast KO, Workshop Mod downvotesynth-sweep2.wavMelting Memories' animationsynthsweep_wind.wavCutscenepropeller.wavCutscene, Rival's and Rocket Cannon's animationwind.wavCutsceneqps_hyper.wavMelting Memories' animation, cutscenes, Arcadesynthsweep_new.wavExtension, Lulu's Lucky Eggitem_get.wavGetting chocolate or snow from panelscardflip1.wavPlayground! minigames, flipping a piece in Build-A-Castlecardflip2.wavPlayground! minigamescrash.wavCutscenecrash2.wavCutscenedestruction.wavCutsceneschoolchime.wavCutscenese_quake.wavCutscene, Unforgiving Avengerse_sea_waves.wavCutscenewind2.wavWhite Christsmasher's animationsfood_crunch.wavCutscenegulp_once.wavCutscenegulp_3times.wavCutscenephone.wavCutscenesms.wavCutscenejingle01_full.wavCutscene logojingle01_short.wavUnusedthrow01.wavSnowball throwingthrow02.wavSnowball throwingthrow03.wavSnowball throwingsnowball_ground01.wavSnowball landsnowball_ground02.wavSnowball landsnowball_ground03.wavSnowball landlighter.wavCutscenelaser.wavExtended Photon Rifle's animationclang.wavMetallic Monocoque's effectlaunch.wavIndiscriminate Fire Support's and Rocket Cannon's animationmissilehit.wavIndiscriminate Fire Support's animationplace_cup.wavCutscenesip.wavCutscenepour_water.wavCutsceneexplosion.wavCutscene, Bounty Hunt smoke bombags_weaponattack.wavFull Speed Alicianrone's animationags_weaponswing_1.wavFull Speed Alicianrone's animationags_weaponswing_2.wavFull Speed Alicianrone's animationags_weaponswing_3.wavFull Speed Alicianrone's animationags_weaponswing_4.wavFull Speed Alicianrone's animationags_whoosh.wavFull Speed Alicianrone's animationfishsplash.wavSplash from Fish-a-Fish minigamese_fire.wavCutscenecicada_short.wavCutscenemudblup.wavStep on a Goo paneltrainpass.wavUnused.motorcycle.wavLone Rider Hyper