换一换
换一换 


还在为选择加点流派而烦恼吗?别再犹豫了。通过本指南,我们将介绍每一项属性及其相关的技能,以及它们对应的武器装备、游戏风格和实用性。纳维甘等着你! 重要提示 - 1.0版本 各位幸存者们,大家好! 《七日杀》1.0版本已经发布了!这确实是个令人兴奋的消息,但我稍后再详细说这个。毕竟,本节的重点是本指南。 说实话,我当初制作这份指南,只是因为当时对这个主题突然产生了兴趣。在《七日杀》的游玩过程中,我花了几周时间,不知疲倦地测试并完善了我思考已久的内容。话虽如此,随着1.0及后续版本的发布,我不能保证未来一定会更新这份指南。如果我最终有很多空闲时间,或许会抽时间更新那些需要更新的部分,但我不会做出任何承诺。不过,我仍然非常感谢大家的支持,希望这份指南能继续为那些需要相关信息的人提供帮助。 简单来说:目前,本指南尚未更新至1.0版本。我也没有更新计划。 祝好, Memjahmin M. Mutante 简介 自A17版本起,《七日杀》更新了全新的技能树和 perk 系统。游戏中有五种属性:感知、力量、坚韧、敏捷和智力。每棵技能树都有其独特的 perk 组合,以及独特的游戏风格和武器配置。多棵技能树可以搭配使用,以打造更强大、更多样化的角色build。本指南可能会随着新更新的发布而发生变化。 技能树计算器【当前已过时】 需要帮助规划你的角色build吗?可以使用下方的技能树计算器来可视化《七日杀》的技能系统。该计算器会显示游戏中的所有技能、技能需求,以及解锁所有所选技能(包括通过教程任务获得的四个技能)所需的玩家等级。 最新更新:A19 免责声明:此技能树计算器并非由我创建。该网站的所有权归其相应创建者所有。 感知技能树

一击多杀。感知技能树专注于精准度和高伤害射击,同时与敌人保持安全距离。感知流派能快速消灭单个目标,同时利用爆炸物和穿透射击清除大量敌人。战斗之外,感知技能树有助于避开陷阱、回收物资、追踪动物以及获取最佳战利品。 感知从1级开始。随着感知树等级提升,步枪、爆炸物和长矛的爆头伤害与肢解几率会增加。爆头伤害初始为+100%(双倍伤害),每级提升+10%(9级和10级提升+15%),在10级时达到最高+200%(三倍伤害)。感知 - 战斗专长 肢解几率初始为+5%,每提升1级增加5%,最高在10级时达到50%。 随着感知等级的提升,所需技能点也会增加。2-5级需1点技能点,6-8级需2点,9-10级需3点。稀有服装【墨镜】可使感知等级免费提升1级。 等级 爆头伤害 肢解几率 所需技能点 1 +100% +5% 0 2 +110% +10% 1 3 +120% +15% 1 4 +130% +20% 1 5 +140% +25% 1 6 +150% +30% 2 7 +160% +35% 2 8 +175% +40% 2 9 +190% +45% 3 10 +200% +50% 3

鹰眼 - 精准爆头。提升步枪的整体效能。每级增加伤害、装填速度、武器操控性,降低瞄准状态下的耐力消耗,并解锁独特技能:连杀奖励。此外,每级会调整你的战利品,提高你找到步枪、7.62毫米弹药和步枪制作技能杂志的几率! 等级 实体/格挡伤害 装填速度 操控性 耐力消耗 特殊能力 战利品概率 感知等级要求 1 +10% +10% +10% 无 无 +200% 1 2 +20% +15% +20% 无 无 +400% 3 3 +30% +20% +32% -10% 连杀奖励 - 最高+30%伤害 +600% 5 4 +40% +25% +45% -20% 连杀奖励 - 最高+40%伤害 +800% 7 5 +50% +30% +60% -30% 连杀奖励 - 最高+50%伤害 +1000% 10 连杀奖励技能 - 精准即力量!使用步枪达成首次击杀可获得10%/20%/30%的伤害加成,后续每次击杀额外增加10%伤害加成,最高可叠加3层。该加成持续5秒,每次新击杀会重置持续时间。 【战利品概率】- 对于“鹰眼”特长:提高找到步枪及步枪零件、7.62毫米弹药、特长杂志“狙击手”(若尚未全部阅读)以及狙击枪制作杂志(若制作技能尚未满级)的几率。 【操控性】- 提高瞄准和射击后准度稳定(达到最高值)的速度。

爆破专家 - 爆炸!提升所有投掷物(燃烧瓶、管状炸弹、手榴弹等)和火箭筒的战斗潜力。每级提升伤害、装填速度、操控性、击晕几率、肢解几率以及在战利品中发现爆炸物的几率。等级 实体/方块 伤害 装填速度 操控性 击晕几率 致残几率 肢解几率 战利品概率 感知等级要求 1 +10% +15% +10% +50% 无 +5% +200% 1 2 +20% +20% +20% 100% 无 +10% +400% 3 3 +30% +25% +30% 100% +33% +20% +600% 5 4 +40% +30% +40% 100% +66% +30% +800% 7 5 +50% +35% +50% 100%且击晕时间更长 +66% +45% +1000% 10 战利品概率 - 对于【爆破专家】 perk:提高你找到火箭筒及火箭筒零件、管状炸弹、燃烧瓶、手榴弹、定时炸药、 dynamite、开锁器(原因不明)以及爆炸物制作杂志(如果你的制作技能尚未满级)的几率。 击晕几率 - 提高使敌人踉跄的几率,降低其50%攻击速度和80%移动速度。眩晕效果会随时间逐渐消退,效果结束后敌人将获得3秒的眩晕抗性。 致残几率 - 提高致残敌人的几率,使其移动速度降低30%,持续5分钟。较强大的敌人拥有致残抗性。 肢解几率 - 提高切断敌人肢体的几率。斩首为即时击杀。无臂僵尸的攻击强度和范围会降低。无腿僵尸会减速至爬行状态。较强大的敌人拥有肢解抗性。感知属性本身提供的肢解几率与爆破专家 perk 的肢解几率可叠加,对普通僵尸的最大肢解几率总计可达95%。 操控性 - 提高瞄准和射击后准度稳定(达到最高值)的速度。

标枪大师 - 锋利的棍棒与金属尖刺。提升长矛伤害,降低每次挥舞的耐力消耗,增加每次命中的致残几率,并提高发现长矛相关战利品的几率。更高等级将在每次击杀时恢复耐力!等级/属性 格挡伤害 普通攻击耐力消耗 强力攻击耐力消耗 击杀耐力恢复 致残几率 战利品概率 感知等级要求 1 +10% -8% -15% 无 +20% +200% 1 2 +20% -15% -30% 无 +40% +400% 3 3 +30% -20% -40% +10 +60% +600% 5 4 +40% -25% -50% +20 +80% +800% 7 5 +50% -25% -50% +30 +100% +1000% 10 战利品概率 - 对于【标枪大师】 perk:提高你找到长矛和长矛部件、perk杂志【长矛猎人】(如果你尚未全部阅读)以及长矛制作杂志(如果你的制作技能尚未满级)的几率。 致残几率 - 提高致残敌人的几率,使他们的移动速度降低30%,持续5分钟。更强大的敌人拥有致残抗性。

敏捷敏锐 - 如女武神般迅捷!提升所有长矛的挥舞速度。 等级 攻击速度 感知等级要求 1 +10% 4 2 +17% 7 3 +25% 10 感知 - 战斗专长(续)

穿刺者 - 从细端取出。对所有远程武器和长矛应用装甲穿透效果。为所有穿甲弹药提供额外穿透加成。还能使7.62毫米穿甲弹药获得更多穿透次数。 等级 枪械/弓箭装甲穿透 穿甲弹额外装甲穿透 长矛装甲穿透 最大穿透次数 感知等级要求 1 +10% +10% +20% 1 1 2 +15% +15% +30% 2 4 3 +20% +20% +40% 3 6 4 +20% +30% +50% 4 8 目标穿透 - 默认情况下,穿甲弹最多可穿透一个目标。每个敌人算作一个目标,掩体每拥有250点最大生命值算作一个目标(例如,500生命值的掩体算作2个目标)。穿透目标后,子弹将继续沿原弹道飞行,在整个飞行过程中造成相同伤害。升级【穿透者】将增加可穿透的目标数量。有关更多信息,请参阅【属性机制】(续)下的【目标穿透】。 【装甲穿透】——游戏中的部分敌人拥有【护甲等级】,这意味着它们可以抵抗 incoming 伤害。【装甲穿透】会按百分比抵消此【护甲等级】。有关更多信息,请参阅【属性机制】(续)下的【装甲穿透】。 注意: 【穿甲弹】默认拥有+50%的【装甲穿透】。当【穿透者】升至满级时,有可能达到+100%的【装甲穿透】,这意味着你将无视目标的所有护甲。 【钢矛】同样拥有+50%的【装甲穿透】,因此也能达成上述效果。【钢箭】和【钢螺栓】被视为【穿甲弹药】,这意味着它们可享受【穿甲弹】的额外穿透加成。感知 - 掠夺/追踪专长

渗透者 - 对于希望全身而退的不法之徒来说,这是个可靠的选择。减少受到地雷的伤害,并增加陷阱的引爆延迟。在兴趣点和布置自己的陷阱时非常有用。 等级 地雷伤害 触发延迟 特殊能力 感知等级要求 1 -20% +0.5秒 无 1 2 -35% +1.0秒 无 4 3 -50% +2.0秒 拾取地雷 7 地雷归我 - 你可以拾取自己放置的地雷,或者兴趣点生成的地雷。如果你打算布置陷阱,这非常有用。

动物追踪者 - 追踪猎物。赋予追踪动物的能力。蹲下三秒后,该特长激活20秒,20米内所有动物将显示在罗盘上。再次蹲下可刷新计时器。每提升一级都将保留前一级的效果。同时提高发现【猎人日志】特长杂志的几率。 等级|猎物|掠食者| loot概率|感知等级要求 1|兔子和鸡|蛇|+200%|1 2|鹿和野猪|狼和郊狼|+600%|4 3|无|熊和美洲狮|+1000%|7 loot概率 - 针对【动物追踪者】特长:提高发现【猎人日志】特长杂志的几率(前提是你尚未全部阅读)。

幸运掠夺者 - 闪光的不全是金子,但能提升掠夺的品质和速度。战利品加成会影响你打开的所有容器的游戏阶段战利品。你将更容易找到更高等级和更高品质的物品。每提升一级,你找到幸运掠夺者技能杂志的几率就会增加。 等级 战利品加成 掠夺速度 战利品概率 感知等级要求 1 +5% +10% +200% 1 2 +10% +20% +400% 2 3 +15% +40% +600% 3 4 +20% +60% +800% 5 5 +25% +80% +1000% 7 战利品加成 - 提高你打开的所有容器的战利品游戏阶段。这意味着你能找到比正常情况下更高等级的战利品。 战利品概率 - 对于幸运掠夺者技能:提高你找到幸运掠夺者技能杂志的几率(如果你还没有全部阅读的话)。

寻宝猎人 - 那个该死的宝箱到底在哪儿?提升寻找宝箱的能力,并增加宝箱内的战利品数量。 等级 挖掘方块数 战利品数量 所需感知等级 1 7 +10% 1 2 5 +20% 4 3 3 +30% 7 挖挖挖 - 默认情况下,当玩家在宝箱周围挖掘10个方块后,宝箱的探测半径会减少1米。这有助于确定宝箱的精确位置。寻宝猎人 perk 会减少减少半径所需挖掘的方块数量。 注:战利品数量与战利品加成是分开的。数量增加物品的数量,而加成提供更高稀有度/等级的物品。

打捞作业 - 修复了“害羞的汽车”问题。再次提升了使用扳手、棘轮扳手和冲击起子进行打捞的效率和资源获取量。解锁打捞工具的制作,并随等级提升其品质。 等级 实体/方块伤害 攻击速度 资源获取量 耐力消耗(普通攻击) 耐力消耗(强力攻击) 战利品概率 所需感知等级 1 +20% +20% +20% -8% -15% +200% 1 2 +40% +40% +40% -15% -30% +400% 2 3 +60% +60% +60% -20% -40% +600% 3 4 +80% +80% +80% -25% -50% +800% 5 5 +100% +100% +100% -50% -50% +1000% 7 打捞基础 - 机械和电子设备,如汽车、灯具、面板、机器零件和显示器,可使用扳手、棘轮扳手或冲击起子进行打捞。当一个物体可被打捞时,你会通过独特的工具动画得知(仅普通攻击时)。根据你回收的物品不同,你可以找到机械零件、电子零件、锻铁和钢材、发动机、电池等等。 战利品概率 - 对于“回收行动” perk:提高你找到回收工具和回收工具零件、perk杂志《废土宝藏》(如果你尚未全部阅读)以及回收工具制作杂志(如果你的制作技能尚未满级)的几率。 感知 - 制作 制作技能杂志是Alpha 21中引入的新机制。你的制作进度最终由杂志控制,而非通过perk或随机在战利品中找到的图纸来获取制作配方。 当你提升某个perk的等级时,你更有可能找到与该perk相关的杂志!阅读制作技能杂志可提升对应类别的制作技能。 随着制作技能的提升,你能制作出更高品质的相关物品,并解锁新的制作配方。当某类制作技能达到满级后,你将不再获得该类别的制作技能杂志。 感知 - 武器(步枪) 步枪 - 感知型角色的主要武器是大口径、远程狙击步枪。步枪使用7.62毫米弹药,能造成游戏中单次射击的最高伤害之一。瞄准状态下的步枪精度很高,但腰射时操控性较差。 所有步枪默认均为半自动。按住扳机只会发射一发子弹。
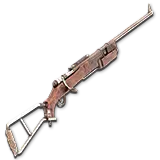
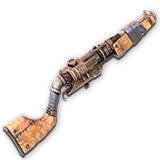
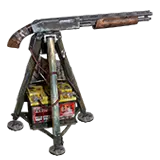
管道步枪 - 解锁方式:初始解锁 - 品质:原始 - 属性:伤害44.0-66.0,弹夹容量1发,射速120发/分钟(快速),有效射程50米,最大射程150米,腰射精度极低,瞄准精度极高,耐久度100-200, reload时间3.5秒 - 尽管构造简陋,手工制作的管道步枪仍可作为早期游戏中的狙击武器使用。其精度和伤害足以在普通难度下杀死大多数弱小僵尸。但请注意,该武器每次只能发射一发子弹,且 reload 时间较长。
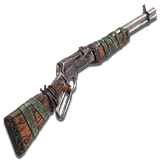
猎枪 - 解锁条件:鹰眼等级1或蓝图 - 等级1 - 属性:伤害46.8-85.3,弹夹容量1,射速114-126发/分钟(快),有效射程56-84米,最大射程150米,腰射精度低,瞄准精度极高,耐久度136-348, reload时间2.8秒 - 曾用于猎杀动物——如今用于猎杀僵尸。猎枪可在游戏早期阶段的战利品中找到,其玩法与管道步枪类似,但伤害更高, reload速度更快。
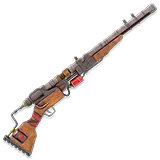
杠杆式步枪 - 解锁方式:仅蓝图 - 等级:2级 - 属性:伤害50.2-91.5,弹夹容量4-6,射速78-86发/分钟(平均),有效射程48-72米,最大射程150米,腰射精度极低,瞄准精度极高,耐久度160-432, reload时间3.0秒 - 杠杆式步枪前身为“神射手步枪”,是一款经过改进的优秀枪械,采用独特的装填机制。虽然射速慢于同类武器,但杠杆式步枪凭借更高的伤害和大于1发的弹夹容量弥补了这一不足。

狙击步枪 - 解锁方式:仅蓝图 - 等级:3级 - 属性:伤害54.4-99.2,弹匣容量11-13,射速133-147发/分钟(快速),有效射程56-84米,最大射程150米,腰射精度极低,瞄准精度极高,耐久度200-540, reload时间3.4秒 - 狙击步枪是游戏中威力最强的步枪,拥有最高的伤害、弹匣容量和有效射程。建议搭配8倍瞄准镜以发挥最大狙击效果。让敌人人头滚滚! 感知-武器(爆炸物) 爆炸物危险、不稳定且能带来满足感。爆炸物可将敌人炸成碎片,或许也能用于采矿和地形破坏。无论你的目的是什么,请务必做好安全防护措施——退后,保持冷静,爆炸发生时慢慢走开,不要直视(太阳镜可选)。 投掷类爆炸物可按M2点燃,按M1投掷。按住M1的时间越长,爆炸物扔得越远。部分爆炸物若握持过久可能会引爆! 爆炸伤害以溅射伤害形式生效,即会在一定半径内造成伤害。敌人距离爆炸中心越远,受到的爆炸伤害就越低,燃烧瓶除外。

燃烧瓶 - 解锁方式:初始解锁 - 属性:250点火焰伤害,16秒燃烧时间,3米半径 - 无政府主义者的经典之作。虽然不完全算是爆炸物,但投掷出的燃烧瓶会点燃小范围内的敌人。如果你有幸找到一些汽油和机油,可以考虑制作一两个燃烧瓶。

管道炸弹 - 解锁条件:爆破专家等级1或蓝图 - 属性:230点爆炸伤害,5点格挡伤害,4米半径,4秒引信时间 - 价格低廉、高效的爆炸物。管道炸弹在大多数情况下都能发挥作用,但与其他爆炸物相比,它的伤害并不是最高的。不要点燃管道炸弹后一直握在手中,你会被炸死。

炸药 - 解锁条件:爆破专家等级2或蓝图 - 属性:500点爆炸伤害,3000点方块伤害,6米半径,4秒引信时间 - 在所有投掷爆炸物中,炸药的伤害最高,爆炸半径更大,引信时间适中。虽然它在炸毁敌人方面很有效,但在破坏地形方面效果更佳!如果你打算使用炸药,请确保在你不介意被炸成碎片的地方使用。和 Pipe Bomb 一样,如果你握太久不扔就会爆炸。
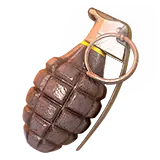
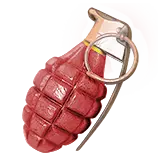
手榴弹 - 解锁条件:爆破专家等级3或蓝图 - 属性:310点爆炸伤害,10点格挡伤害,5米半径,3秒引信时间 - 作为最常见的爆炸物之一,手榴弹能在较大半径内造成高额伤害。与管状炸弹不同,你可以拔下手榴弹的保险销,在投掷出去之前它永远不会爆炸。
接触式手雷 - 解锁条件:爆破专家等级5或蓝图 - 属性:310点爆炸伤害,10点格挡伤害,5米半径,无引信时间 - 尽管接触式手雷与普通手雷属性相同,但它有一个独特特性。当接触到敌人或地面时,它会立即爆炸,因此在快速清理大量敌人时更为出色。
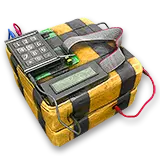
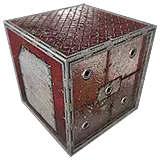
定时炸药 - 解锁条件:爆破专家等级5级或完成“大劫案:第三章” - 属性:727点爆炸伤害,3000点破坏伤害,1米半径,4秒引信时间 - 虽然不完全适用于战斗,但定时炸药是一种用于炸开保险箱、金库和上锁箱子的爆炸装置。投掷后,它会附着在表面并激活,4秒后引爆,对放置的方块或物体造成大量伤害。
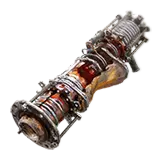
火箭发射器 - 解锁方式:仅蓝图 - 等级:3级 - 属性:爆炸伤害357-651,弹夹容量1,有效射程56-84米,最大射程100米, projectile speed 46-54米/秒,腰射精度极低,瞄准精度高,耐久度64-163, reload 2.5秒 - 火箭发射器是一款强大的武器,发射毁灭性的火箭弹,能摧毁路径上的一切。它是一款精准打击或群体控制武器,可用于清理尸潮或消灭危险敌人。对敌人和障碍物均造成巨额爆炸伤害,但每次只能装填一发弹药。
地雷 - 解锁条件:仅限爆破专家 - 有多种形状和尺寸。更多信息见感知-陷阱。 感知-武器(长矛) 感知者使用长矛作为近战武器。长矛比其他近战武器射程更远,可通过强力攻击键(M2)投掷。按住该键时间越长,长矛飞行距离越远,造成的伤害也越高。长矛还具有天然的装甲穿透能力,让你能更轻松地消灭体型较大的威胁。 按住M2可投掷长矛。按住M2的时间越长,长矛飞行距离越远。点击换弹键可取消投掷。
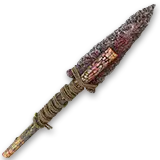
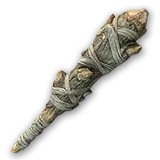
石矛 - 解锁方式:初始解锁 - 类型:原始武器 - 属性:10.3-15.5伤害,39.7-44.8强力攻击伤害,55次/分钟攻击速度(平均),长射程,18.5耐力/次攻击,36.9耐力/次强力攻击,60-88耐久度,+30%护甲穿透 - 石器时代的经典武器。石矛并非最出色的武器,但制作成本低廉,可大量制造,让你能快速连续投掷多支。石矛能造成可观伤害,且可穿透护甲。
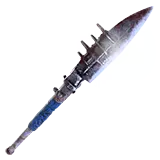
铁矛 - 解锁条件:标枪大师等级1或蓝图 - 等级:2级 - 属性:10.5-19.2伤害,45.9-54.6强力攻击伤害,55次/分钟攻击速度(平均),长射程,20.3耐力/攻击,40.6耐力/强力攻击,212-423耐久度,+40%破甲 - 更为精良的武器。铁矛优于石矛,拥有更高的伤害和破甲能力,但更难获取且制作成本更高。
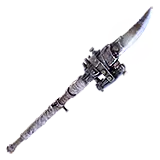
钢矛 - 解锁条件:长矛猎人第二卷 - 等级:3级 - 属性:15.8-28.8伤害,68.8-81.8强力攻击伤害,55次/分钟攻击速度(平均),长距离,22.4耐力/攻击,44.8耐力/强力攻击,317-592耐久度,+50%破甲 - 一把致命且极具威力的利刃。钢矛是游戏中最好的长矛,拥有最高的伤害和破甲能力。 感知-陷阱 作为感知系技能组合的一部分,感知系build可以制作被称为地雷的爆炸陷阱。通过提升【爆破专家】 perk等级可以制作地雷,这是获取地雷最高效的方式。或者,将【渗透者】perk提升至3级,可让你拾取在兴趣点发现的地雷。地雷在战利品和商人库存中极为罕见。注意事项: - 地雷伤害以 splash damage(范围伤害)形式生效。距离地雷中心越远,受到的伤害越低。超出爆炸半径(例如糖果罐地雷为4米)则不会受到伤害。 - 默认情况下,地雷无法被拾取。需要将【渗透者】perk(特长)升至3级才能拾取。【渗透者】还会降低地雷伤害,最高可减少50%。 - 地雷可以对方块造成伤害,但伤害极低,可忽略不计。地雷对木头或泥土方块无伤害。石头和金属方块仅在爆炸半径一半范围内时会受到1点方块伤害。 - 射击或击打地雷会将其摧毁并随后引爆。被其他爆炸摧毁的地雷有33%的几率发生爆炸。
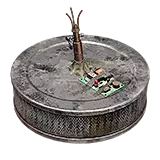
糖果罐地雷 - 默认解锁 - 属性:251点伤害,4米半径,0.5秒触发延迟 - 一个可爱的小型地雷,能将任何踩到它的东西炸成一堆碎肉。糖果罐地雷可以轻松大量制作,但在环境中非常显眼。最适合在狭窄走廊中对付僵尸,或者埋在你的基地里等着朋友踩上去。
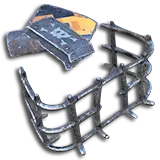
废铁板地雷 - 解锁条件:爆破专家等级1 - 属性:251点伤害,3米半径,0.5秒触发延迟 - 虽然它们看起来与糖果罐地雷相同,只是射程较短,但这些铁板地雷更难被敌人避开。它们能覆盖整个街区,甚至可以涂色以融入环境。如果你想要理想的地雷来捕捉毫无防备的猎物,就选铁板地雷!
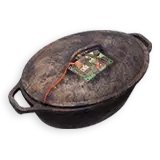
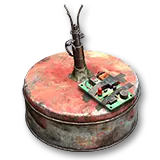
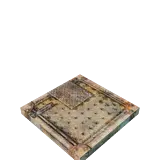
烹饪锅地雷 - 解锁条件:爆破专家等级1 - 属性:272点伤害,3米半径,0.5秒触发延迟 - 你闻到正在烹饪的东西了吗?它可能不太健康。这些烹饪锅地雷比之前的版本造成的伤害更高。由于体积更大,僵尸踩到它们的几率更高,但玩家也更容易发现它们。你可以随意使用它们,不过我打算用它们来加热我的 chili。

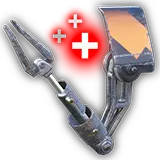
轮毂盖地雷 - 解锁条件:爆破专家等级2 - 属性:409点伤害,5米半径,0.5秒触发延迟 - 车辆的主人可能不再需要这些了。轮毂盖地雷相比之前的地雷拥有显著的伤害加成,以及更大的半径。它们还很扁平,不太显眼。
Air Filter Mines - Unlocked: Demolitions Expert Rank 5 - Stats: 627 Damage, 5m Radius, 0.5s Trigger Delay - By far the deadliest trap in the game, Air Filter Mines deal incredible amounts of damage, and are very hard to escape. Even if you start running when you hear the heart-stopping tick of the mine setting off, you'll still take an immense blast, due to the large damage and radius of this mine. Watch your step! Perception - Playstyle Overall OpinionDifficulty: Intermediate Combat Viability: Great (A) Survival Viability: Good (B) Perk Synergy: Agility (see Skilltree Synergy below) Strategy Pick off high-health targets with sniper rifles Clear hordes with explosives Use spears for close-range targets Track and hunt animals for food Lockpick containers and get better loot Salvage devices for resources General Playstyle Perception builds are sighted for medium to long-range combat, picking off enemies at a distance. When in close range, snipers are more difficult to use, especially if equipped with scopes. Instead, spears should be used in close quarters. Explosives should be used at a careful distance, or used with good timing to allow yourself to escape the blast radius. Grenades can also be used to clear out a small room. For example, if you want to make a tactical entrance, open the door to a room and toss in a grenade. After the explosion, make an entrance and take out any surviving enemies. Often, Perception builds rely on a strategic approach. For example, when entering a Point of Interest, it's best to first find a vantage point: a high-ground where you can see enemies ahead, while staying out of attack range. While on a vantage point, you can utilize stealth by staying crouched, granting you bonus damage and a lower detection chance. On occasion, zombies will be hidden behind cover, or sleeping out of view. Often, you are able to maneuver around your vantage point to get your sights on them. You can also shoot down breakaway doors to reveal zombies. In the event that zombies are drawn to your vantage point, you can still use this to your advantage! They will often flock directly below you, giving you the critical moment where you can drop a grenade on them. Optimizing Weapon Usage Sniper Rifles - Use in mid to long range situations. Rifles are harder to use in very close ranges, due to their low hipfire accuracy, high aim accuracy, and slow fire rate. If you want to clear out enemies from afar without them noticing, spec yourself for stealth. Equip a silencer, unequip armor, and hide in the shadows. If zombies can't see or hear you, you gain the advantage to pick them off one by one. Alternatively, you can use a rifle for closer range if you use iron sights or a dot sight. It overall depends on your experience with FPS games. You can also watch doorways and chokepoints, especially if you have The Penetrator ranked up, and are using AP rounds. Explosives - Using grenades and explosives to your advantage can help soften up or completely blow away a crowd of zombies. Utilize chokepoints such as doors and hallways, where zombies bunch together tightly, making explosives more viable. You can also throw inactive grenades or bombs on the ground as traps, where enemies will tread. Active explosions will trigger inactive grenades, dealing potent area damage. Rocket Launchers are more dangerous to use indoors. I suggest that if you plan on using one, you keep a safe distance. You can lure enemies behind doors, where you can blast them on the other side with a well-placed rocket shot. Of course, always be careful while using any explosive. They can seriously injure you if too close, and can cause buildings to collapse. Spears - When all else fails, your trusty spear will do the trick! Spears can still keep enemies at bay with their long attack range, while dealing good damage, even against armored targets. Only throw your spear if you have a good angle, or very good aim. Tossing your only melee weapon away can screw you over, especially outdoors. Hitting a zombie's legs or torso can stun them, giving you a chance to get some breathing room. Surviving The perk Animal Tracker helps greatly in finding animals to hunt. Once ranking it up, crouch for a few seconds to reveal the locations of all animals in a radius. Apart from that, Perception builds rely on looting and scavenging for food/water. With perks such as Lucky Looter and Lock Picking, you're likely to find what you're looking for, without much trouble getting inside. Obtaining resources is best done through the perk Salvage Operations. Traverse the area, looking for salvagable devices, to help find core materials such as brass, lead, and iron. Many items you salvage, such as radiators, batteries, and engines, can readily be scrapped or incinerated for its respective raw material. Blood Moons Early game, you're likely starting out with just a pipe or hunting rifle, and perhaps a few molotovs or pipe bombs. Because early hordes aren't the biggest threat, you shouldn't have any significant problems. Use your rifle; go for headshots. When enemies stack up, toss in a pipe bomb or two. Use spears sparingly. When late game comes, and hordes are more intense, you have a wider selection of options to choose from. Use your sniper rifle to pick off as many enemies as you can. If you have Dead Eye ranked up, go for weak enemies first to build up a quick killstreak, and then target higher health enemies. Try your best to take out high-priority targets. Typically, Demolition zombies and Fat Cops should be taken out as soon as possible, as they have the most potential to ruin your base. When enemies bunch up, obliterate them with explosives. Later game, you have better choice weaponry for explosives, such as contact grenades. If you want to stack extra explosive damage, throw inactive grenades and trigger them with an active one. This easily wipes out hordes of enemies, but the toughest may survive. Do not use explosives against the Demolitionist zombie! It will immediately trigger their C4. Place landmine traps. As you level up Demolitions Expert, you will unlock recipes for several explosive traps. Craft and plant some around your base to clear out early groups. Rocket launchers can be used for high-priority targets. Rocket Launchers do insane amounts of damage, especially upon direct hits. When in dire need to kill a dangerous enemy, use your RL to quickly take them out. Rockets launchers can also be used to clear hordes if not too close. Skilltree Synergies What perks mix best with Perception? Because of how Perception builds play, Agility is one of the best skilltrees to mix with Perception, if you plan on going full combat. Previously, I mentioned vantage points and their usage for taking out enemies. Because the stealth mechanic is valuable for this, as it allows you to remain undetected, Hidden Strike and From the Shadows are excellent perks to pick up, as they improve your stealth damage and decrease detection risk. Stacking stealth damage upon the already massive damage of rifles results in one-shotting just about anything that moves. Parkour can also help reaching new vantage points, as it increases jump height. When it comes to the best armor type for Perception builds, I recommend light armor. For the exact same reason, its a good idea to pick up Light Armor in the Agility tree. Alternatively, if you have completed the Sniper series, you can craft Ghillie Suits. If you enjoy staying hidden and sniping threats from afar, Ghillie Suits will become your best friend. They decrease noise and visibility. Combined with stealth perks from Agility, it is possible to become completely invisible. As for every build, I recommend picking up Mother Lode, Sexual Tyrannosaurus and Miner 69'er from the Strength tree. These perks are extremely good for early game progression, and will help you immensely in gathering the main resources you need. The Strength Skilltree

撕裂并粉碎,直至完成任务。力量技能树专为近距离战斗和群体控制设计,配备霰弹枪、棍棒和大锤等重型武器。为了抵御强大的进攻,力量属性专注于坦克能力和重型护甲,并辅以不屈的耐力。在战斗之外,力量技能树还能提升携带战利品的数量、烹饪更优质食物的能力、工具造成的伤害以及资源产量。 力量初始等级为1级。随着力量技能树的升级,霰弹枪、棍棒和大锤的爆头伤害和肢解几率会增加。爆头伤害初始为+100%(双倍伤害),每级提升+10%(第9级和第10级提升+15%),在10级时达到最高+200%(三倍伤害)。力量 - 战斗专长 肢解几率初始为+5%,每提升1级增加+5%,在10级时达到最高+50%。 随着力量等级的提升,所需技能点也会增加。2-5级需要1点技能点,6-8级需要2点,9-10级需要3点。稀有服装道具【雪茄】可免费提升1级力量。 等级 爆头伤害 肢解几率 所需技能点 1 +100% +5% 0 2 +110% +10% 1 3 +120% +15% 1 4 +130% +20% 1 5 +140% +25% 1 6 +150% +30% 2 7 +160% +35% 2 8 +175% +40% 2 9 +190% +45% 3 10 +200% +50% 3

霰弹枪专精 - 咔嚓-咔嚓!提升霰弹枪的战斗潜力,包括增加伤害、射速和 reload 速度。每提升一级都会增加特殊的 debuff 效果,用于致残和削弱敌人。所有已解锁的增益效果在升级后仍会保留。 等级 实体伤害 格挡伤害 射速 reload 速度 霰弹枪增益 制作解锁 制作品质 力量等级要求 1 +10% +20% +10% +10% 眩晕延长+2秒(总计6秒) 双管霰弹枪 2 1 2 +20% +40% +20% +15% 无 无 3 3 3 +30% +60% +30% +20% 眩晕延长+2秒(总计8秒) 无 4 5 4 +40% +80% +40% +25% 无 无 5 7 5 +50% +100% +50% +30% 腿部射击致残敌人 无 5 10 眩晕 - 眩晕会使敌人移动速度降低80%,攻击速度降低50%。随着眩晕效果消退,敌人会逐渐恢复正常的移动和攻击速度。眩晕效果完全消失后,敌人将获得3秒的眩晕抗性。 致残腿部射击 - 用任何霰弹枪射击敌人腿部必定造成致残效果,无论僵尸强度如何。致残敌人会使其移动速度降低30%,持续5分钟;该减益效果在持续时间结束前无法刷新。 肢解几率 - 提高切断敌人肢体的几率。斩首为即时击杀。无臂僵尸的攻击强度和范围降低。无腿僵尸的移动速度会减慢至爬行状态。更强大的敌人拥有肢解抗性。力量属性提供的肢解几率与霰弹枪技能叠加。

击打皮特 - 准备就绪。提升挥舞球棒和棍棒的强度与击晕潜力,同时提高其制作品质。每级提升伤害、增加击倒伤害倍率、提高击倒几率,并解锁独特能力:连锁攻击。 等级 实体伤害 格挡伤害 击倒伤害加成 击倒几率 特殊能力 制作解锁 制作品质 力量等级要求 1 +10% +20% +40% 60% 无 棒球棍 2 1 2 +20% +40% +80% 70% 无 无 3 3 3 +30% +60% +120% 80% 连锁打击 - 5次攻击 无 4 5 4 +40% +80% +160% 90% 连锁打击 - 4次攻击 无 5 7 5 +50% +100% +200% 100% 连锁打击 - 3次攻击 无 5 10 击倒伤害加成 - 当敌人被击倒时,使用强力攻击造成额外伤害。击退倒地几率 - 击倒或击晕敌人后,在敌人试图起身恢复期间,强力攻击有几率将其再次击退倒地。 连击 - 在短时间内连续命中5/4/3次,最终一击将获得100%额外伤害加成。

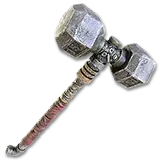
颅骨粉碎者 - 最重型的金属。提升大锤的伤害和制作品质,同时小幅增强击倒能力。解锁独特技能:范围击倒。 等级 实体伤害 格挡伤害 击倒几率 范围击倒几率 制作解锁 制作品质 力量等级要求 1 +10% +20% 15% N/A 铁制大锤 2 1 2 +20% +40% 30% N/A N/A 3 3 3 +30% +60% 45% 20% N/A 4 5 4 +40% +80% 60% 35% N/A 5 7 5 +50% +100% 75% 50% N/A 5 10 击倒几率 - 使锤子的强力攻击拥有更高的敌人击倒几率。 范围击倒几率 - 用强力攻击击中敌人时有20%/35%/50%的几率击倒1.3米/1.3米/1.4米范围内的所有敌人。非常适合牵制一群敌人并趁机脱身。

【性暴龙】 - 与我一样。减少攻击造成的耐力消耗,击杀敌人后恢复耐力。 等级 攻击耐力消耗 强力攻击耐力消耗 击杀耐力恢复 力量等级要求 1 -8% -15% 无 1 2 -15% -30% +10 3 3 -20% -40% +20 5 4 -25% -50% +30 7

重型护甲 - 力量之塔:提升重型护甲的耐久度,降低其对耐力和速度的惩罚。同时提高重型护甲的制作品质。 等级 耐力和移动速度惩罚 耐久度 制作解锁 制作品质 力量等级要求 1 -5% +50% 铁护甲 2 12 2 -10% +100% 无 3 33 3 -17% +150% 无 4 54 4 -25% +200% 无 5 7 力量 - 烹饪/建造专长

驮包客 - 囤积者的选择。增加玩家在负重前可携带的物品数量。 等级 开放槽位 力量等级要求 1 +3(总计30) 1 2 +3(总计33) 2 3 +4(总计37) 3 4 +4(总计41) 4 5 +4(总计45) 5 负重 - 默认情况下,玩家在负重前可在背包中持有27件物品(不包括快捷栏)。每点负重会使移动速度降低3%。 注意 - 虽然驮包客在游戏初期很有用,但最终会被服装/护甲模组和载具超越。

【主厨】 - 祝你好胃口!解锁多个新的烹饪制作配方,同时提升烹饪速度和效率。更高级的食物能恢复更多耐力,施加独特增益效果,并提供临时的最大耐力加成。等级食物配方解锁饮料配方解锁烹饪速度力量等级要求1培根、烤土豆、烤肉、煮肉、烤玉米和玉米面包茶和咖啡+10%12肉炖菜、蔬菜炖菜、南瓜派、南瓜芝士蛋糕、南瓜面包、牛排土豆餐和蓝莓派无+20%33 Sham杂烩、辣味热狗、鱼肉塔可饼和流浪汉炖菜啤酒和丝兰果汁冰沙+30%54秋葵汤、牧羊人派、意大利面和金枪鱼肉汁吐司无+40%且配方中主要食材用量减少20%75无爷爷的月光酒、爷爷的秘制酱料、爷爷的学习药剂+50%且配方中主要食材用量减少20%10 爷爷的强力食谱 - 爷爷的饮料能提供非常独特的增益效果,在多种不同情况下都有极大帮助。爷爷的私酿酒 - 持续45秒,获得+400%近战伤害、+50%伤害抗性、+100%眩晕抗性、+60%耐力恢复速度,以及每秒20点生命恢复,最大恢复量为900点生命。简而言之,你会成为一台不可阻挡的杀戮机器。在你濒死的紧急情况下非常有用,尤其是在尸潮期间。 爷爷的秘制酱料 - 持续2分钟内提升20%交易能力(所有商人购买成本降低20%,所有出售价格提高20%)。当你想赚取大量杜克币时非常有用。 爷爷的学习灵药 - 持续4分钟内获得20%经验值加成。非常适合在尸潮夜、挖矿和建造时获取大量经验值! 注意 - 所有配方都可以通过战利品中找到的蓝图学习。

矿工69级 - 分解一切!提升除打捞工具外所有工具的实体/方块伤害和制作品质。 等级 实体伤害 方块伤害 制作解锁 制作品质 力量等级要求 1 +10% +30% 铁质工具(镐子、斧头、铲子、羊角锤) 2 1 2 +20% +60% 无 3 2 3 +30% +90% 无 4 3 4 +40% +120% 无 5 5 5 +50% +150% 无 5 7

【富矿】 - 这足够了吗?提高所有资源的产量,例如木材、石头、矿石、黏土等(不影响打捞或狩猎)。适用于所有工具。 等级 资源增益 力量等级要求 1 +20% 1 2 +40% 2 3 +60% 3 4 +80% 5 5 +100% 7 【力量 - 武器(霰弹枪)】 霰弹枪 - 它们在射程上的不足,用威力来弥补。霰弹枪非常适合近距离战斗,能够撕碎任何血肉之躯。标准鹿弹发射10颗弹丸,这使霰弹枪有更大机会击中多个敌人。 所有霰弹枪对被击中的敌人始终施加4秒的眩晕减益效果 所有霰弹枪默认是半自动的。按住扳机只会发射一发子弹
管道霰弹枪 - 解锁方式:初始解锁 - 品质:原始 - 属性:每发弹丸7.9-11.8伤害,弹夹容量1发,射速120发/分钟(快),有效射程4米,最大射程10米,腰射精度低,瞄准精度低,耐久度100-200, reload时间5.6秒 - 一把手工制作的撅把式霰弹枪。管道霰弹枪是你能制作的最早的霰弹枪,使用起来相当随意, reload时间很长。不过,它在游戏初期可能会救你一命。谨以此纪念老式滑膛枪

双管霰弹枪 - 解锁条件:霰弹枪等级1或蓝图 - 等级1 - 属性:每发弹丸伤害8.6-15.7,弹夹容量2,射速950-1050发/分钟(极高),有效射程4米,最大射程10米,腰射精度低,瞄准精度低,耐久度120-324, reload时间3.0秒 - 比管道霰弹枪好很多,但仍不是同类中最出色的。双管霰弹枪是一把不错的战斗武器,能在近距离轻松消灭大多数早期敌人。由于其基础射速极高,实际射击速度几乎能达到你扣动扳机的速度。
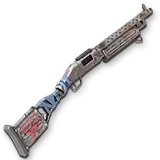
泵动式霰弹枪 - 解锁方式:仅蓝图 - 等级:2级 - 属性:每发弹丸伤害8.6-15.7,弹夹容量7-9,射速57-63发/分钟(慢),有效射程4米,最大射程10米,腰射精度低,瞄准精度低, reload时间2.6秒,耐久度128-374 - 作为游戏中最全面的枪械之一,泵动式霰弹枪能应对多种情况。它拥有较大的弹夹容量、良好的改装潜力和不错的换弹时间,是一把出色的武器!不过,它仍会被更高等级的武器超越。
自动霰弹枪 - 解锁方式:仅通过蓝图 - 等级:3级 - 属性:每发弹丸伤害8.6-15.7,弹匣容量14-19,射速66-73发/分钟(平均),有效射程4米,最大射程10米,腰射精度低,瞄准精度低,耐久度128-518, reload时间3.0秒 - 自动霰弹枪在Alpha 19版本中加入,是我目前最喜欢的新增武器。它拥有较大的弹匣容量和出色的射速,不过其关键特性在于:可以装配弹鼓枪管和自动开火扳机模组,这能使其弹匣容量翻倍并实现全自动射击。绝对是霰弹枪大师的专属武器。 【武器强度(棍棒类)】 棍棒类 - 全面的近战武器,各项属性均衡。无论是伤害、攻击范围还是挥舞速度,都表现良好。球棒也拥有独特的改装潜力:为你的球棒装备尖刺以降低敌人的护甲等级,或装备链条以提高击倒几率。
木槌 - 解锁方式:初始解锁 - 类型:原始武器 - 属性:伤害13.8-20.7,强力攻击伤害27.6-34.5,攻击速度55次/分钟(平均),平均攻击范围,普通攻击消耗耐力17.4,强力攻击消耗耐力26.1,耐久度60-110 - 在早期Alpha版本中,这是每个人都必须使用的近战武器。木槌的制作和使用都极为简单,因此它的性能也非常低下。对于渴望成为强者的玩家而言,你只能先凑合使用它。

棒球棍 - 解锁条件:拳击手皮特等级1或蓝图 - 等级1 - 属性:14.8-27.0伤害,32.2-44.4强力攻击伤害,52次/分钟攻击速度(平均),平均攻击范围,20.9耐力/次攻击,35.6耐力/次强力攻击,200-500耐久度 - 过去,这些曾被用于大型竞技场中的角斗。棒球棍比木棍好得多,整体属性和实用性都更出色。额外效果:使用强力攻击击杀敌人会触发夸张的布娃娃物理效果。准备击球!

糖果手杖棍 - 解锁条件:仅在圣诞节期间通过搜刮获得 - 等级1 - 属性:16.3-29.8伤害,35.5-49.0强力攻击伤害,52次/分钟攻击速度(平均),平均攻击范围,20.9耐力/次攻击,35.6耐力/次强力攻击,200-500耐久度 - 这是棒球棍的节日限定版!奇怪的是,糖果手杖棍的伤害实际上还要高一点。这一定是圣诞奇迹!太棒了!

钢棍 - 解锁条件:Batter Up Volume 6 - 等级:3级 - 属性:22.3-40.6伤害,48.5-66.8强力攻击伤害,52次/分钟攻击速度(平均),平均攻击范围,23.7耐力/挥击,40.3耐力/强力挥击,300-700耐久度 - 最高等级的棍棒类武器,是一把重击武器;钢棍拥有巨大的伤害潜力和出色的耐久度。 力量 - 武器(大锤) 大锤 - 适合击碎头骨的巨型锤具。锤类武器是游戏中造成伤害最高的近战武器,但挥动速度也是最慢的,且耐力消耗巨大。 所有大锤的所有攻击都有+10%的肢解几率,强力攻击额外增加+30%的肢解几率。 所有大锤无法从潜行中获益;它们不能造成额外的潜行伤害。
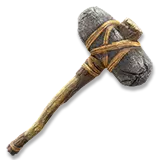
石制大锤 - 解锁方式:初始解锁 - 类型:原始武器 - 属性:17.5-26.3伤害,39.4-48.1强力攻击伤害,50次攻击/分钟(平均),良好攻击范围,22.3耐力/次挥击,44.7耐力/次强力挥击,55-112耐久度 - 可在游戏初期轻松制作,也常见于战利品中。石制大锤是一款不错的武器,但相比其他武器消耗的耐力更多,这在游戏初期可能会带来不少麻烦。
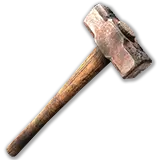
铁制大锤 - 解锁条件:粉碎者等级1或蓝图 - 等级1 - 属性:26.2-47.7伤害,64.7-86.2强力攻击伤害,34次/分钟攻击速度(慢),良好攻击范围,36.7耐力/次挥击,73.4耐力/次强力挥击,133-363耐久度 - 威力更强,但需求也更高。铁制大锤能造成更高伤害,但攻击速度较慢且消耗更多耐力。
钢锤 - 解锁方式:仅蓝图 - 等级:3级 - 属性:伤害39.3-71.6,蓄力攻击伤害97.0-129.4,攻击速度34次/分钟(缓慢),良好攻击范围,普通攻击消耗耐力40.5,蓄力攻击消耗耐力81.0,耐久度207-581 - 实际上就是一根木棍上绑着50公斤的重物。钢锤是所有物品中近战伤害最高的,但每次挥动消耗的耐力也最大。 力量-重型护甲 正如力量-战斗专长中所提到的,力量技能树专注于重型护甲,可提升其耐久度,并减少耐力消耗和移动速度惩罚。重型护甲拥有更高的护甲值和效果抗性,但会带来更大的耐力消耗、移动速度降低和噪音惩罚。总的来说,重甲非常适合那些希望承受伤害进行坦克作战,且不太追求快速移动或隐秘潜入的玩家。护甲属性机制说明: 护甲值指的是你的直接伤害抗性。例如,50点护甲值意味着你受到的攻击伤害减少50%(最高上限为90%)。 爆炸抗性的机制相同,但仅适用于爆炸伤害和溅射伤害(同样最高上限为90%)。 暴击抗性会提高你抵抗暴击的几率,例如在与僵尸战斗时抵抗擦伤和扭伤。 耐力/秒(恢复)指的是不跑步时耐力恢复减少的量。 耐力/秒(消耗)指的是跑步时耐力额外消耗的量。 机动性指的是护甲穿透对移动速度的降低程度。 噪音指的是执行动作时产生的额外噪音量。这是潜行玩法的重要属性。 耐久度指护甲在损坏前能承受的攻击次数。一旦护甲损坏,其属性将降为0,直至修复。 每套护甲包含五个部件,所有部件的属性相同。以下属性为单个护甲部件的数值。
废弃护甲 - 默认解锁 - 等级1 - 属性:护甲值7.5-10.7,爆炸抗性7.5-10.7,暴击抗性+5.4%,耐久度175-350,耐力恢复-4.5%/秒,耐力消耗+9.0%/秒,机动性-6.0%,噪音+20% - 废弃护甲默认解锁,制作成本相对较低,是游戏初期的良好防护装备。在战利品中也很常见。虽然它能多次帮你保住一些生命值,但你不能长期过度依赖它。

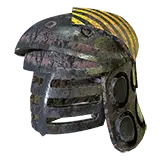
铁制装甲 - 解锁条件:重型装甲等级1或蓝图 - 等级:2级 - 属性:7.3-14.0点装甲值,7.3-14.0点爆炸抗性,+5.5-6.8%暴击抗性,200-400点耐久度,-4.5%耐力/秒(恢复),+9.0%耐力/秒(消耗),-6.0%移动速度,+20%噪音 - 生锈的钢铁和遮面头盔让你看起来像个真正的废土居民。铁制装甲可在游戏中期阶段被搜刮到,且相当常见。更强的力量,更强大的实力。

钢铁护甲 - 解锁条件:仅蓝图 - 等级:3级 - 属性:护甲值8.2-16.0,爆炸抗性8.2-16.0,暴击抗性+6.1-7.6%,耐久度250-500,耐力恢复-4.5%/秒,耐力消耗+9.0%/秒,移动速度-6.0%,噪音+20% - 由钢铁打造的无面骑士护甲。钢铁护甲是游戏中最具坦克能力的套装,其属性潜力可提供极高的抗性。

消防头盔 - 解锁条件:消防员年鉴第7卷 - 等级:2级 - 属性:护甲值7.3-14.0,爆炸抗性7.3-14.0,暴击抗性+5.5-6.8%,耐久度200-400,耐力恢复-4.5%/秒,耐力消耗+9.0%/秒,移动速度-6.0%,噪音+20%,隔热+15,(装备消防员年鉴第7卷时)生命值损失-5% - 在游戏中,消防头盔是染成红色的矿工头盔。除了与铁头盔属性完全相同外,这件装备还拥有+15的隔热加成,对于前期游戏来说是个不错的额外属性。如果搭配消防员年鉴第7卷的加成,它能减少5%的伤害造成的生命值损失,相当于额外增加了5点护甲值。

Swat Helmet - Unlocked: Looting Only - Tier 3 - Stats: 8.2-16.0 Armor Rating, 8.2-16.0 Explosion Resist, +6.1-7.6% Crit Resist, 250-500 Durability, -4.5% Stamina/s (Regen), +9.0% Stamina/s (Drain), -6.0% Mobility, +20% Noise - The Swat Helmet is a miscellaneous armor piece, only coming with this helmet. While you may find a Swat Helmet better than your Steel Helmet, the stat ranges are identical. Its cosmetic appearance may give it an appeal to some players. Strength - Playstyle Overall OpinionDifficulty: Easy Combat Viability: Great (A) Survival Viability: Decent (C) Perk Synergy: Fortitude (see Skilltree Synergy below) Strategy Decimate crowds with shotguns Disable tight hordes with sledgehammers Take out single threats with clubs Chain melee kills to retain stamina Mine ore and destroy blocks for resources General Playstyle Strength builds are best suited for players who want close-quarters, aggressive combat, while not giving a damn about taking damage. Shotguns can annihilate crowds in close ranges, while sledgehammers can knockout entire groups, as long as Skull Crusher is ranked up. Clubs are best used to take out single targets, or chaining melee kills between multiple, spread-out zombies. While using Strength builds, there is no need for a strategic approach. As long as there's zombies falling before you, you're doing your job right. In addition, heavy armor helps you tank through damage and resist critical hits. Healing might be a problem later, but combat won't be a problem for you. Though Strength builds are powerful up-close, they are lacking heavily in range. Shotguns have an effective range of only 4m with buckshot, and a range of 9m if using slugs. Though zombies out of range are often no significant problem, special infected like policemen can be problematic, as they have a ranged attack. In addition, due to heavy armor, strength builds are often slow. All heavy armor will decrease movement speed, increase stamina drain, and make you louder (the louder part being arguably beneficial for your playstyle). However, this can be counter-acted with the perk Heavy Armor and armor modifications, such as custom fittings and muffled connectors. Optimizing Weapon Usage Shotguns - Use for close ranges while using buckshot. Shotguns are devastating when used correctly, and can clear small hordes in only a few shots. To deal more damage against armored targets, or gain a bit of range, utilize slugs. See Ammunition for more. Shotguns also have the added benefit of being able to shred through wooden blocks. You can use this to your advantage: "wall-bang" your enemies by guessing where they stand behind walls, or tear your way through a house to get better positioning. Do be aware of where you're shooting, however; something you may want to keep intact could get blasted to pieces with just one misfire. Sledgehammers - Can be used in two different ways. The first option is to deal massive damage to a single target. Though this will often kill weak enemies in one hit, the sledgehammer family is slow to swing, and very costly to stamina. Alternatively, sledgehammers may be used to disable crowds via power attacks. If Skull Crusher is leveled up to at least rank 3, all power attacks with sledges will have a chance to stun enemies in a radius. This can be incredibly useful for making breathing room to reload, or taking out tough enemies while they're vulnerable. It can also be very amusing to watch a group of enemies drop to the floor. Clubs - Akin to sledges, clubs can be used in two different ways. The first tactic is to simply use them to take out lone targets. This is more effective than sledgehammers, as clubs are more efficient to stamina and swing speed. It's also useful for conserving ammo. If Sexual Tyrannosaurus is leveled up to at least Rank 2, Clubs can be used to chain attacks between multiple zombies. Because you will gain stamina on each melee kill, clubs can be a great option to eliminate a spread group of zombies. Surviving Though the Strength skilltree grants new cooking recipes with the perk Master Chef, there is no Strength-related perk for finding food in the first place. For that reason, it's often harder to find food in a Strength build, compared to other skilltrees. However, Strength builds flourish in mining and resource gain. The perks Miner 69'er and Mother Lode increase resource yield and block damage, surging the player's ability to acquire raw materials such as wood, stone, iron, and more. This extra resource gain can help in crafting ammunition, base-building, and more. Blood Moons When in early game, you're likely suited with a pipe shotgun and some low-quality scrap armor. If you're lucky, you may have found a double-barrel. Your best option is to find/build a sturdy house, and pick off zombies with whatever you've got. You'll need to keep a somewhat close range if you want to deal damage. When late-gamestage arrives, you'll be better equipped, but limited to dealing ranged damage with your shotgun. Here's your routine: Go for collaterals. When enemies bunch up, use your shotgun spread to hit several enemies with one shot. This helps with crowd control and conserving ammo. Utilize ammunition types. Buckshots are best used for weak targets, or hitting multiple enemies. When bulkier, armored targets arrive, hold R to switch ammo types, and choose slugs. Slugs pierce straight through armor, and deal heftier damage per shot. You can keep multiple shotguns on you, making it even easier to switch between ammo types. BERSERK! Using Grandpa's Moonshine, which can be unlocked at Rank 5 Master Chef, you can attain Godlike melee strength and near immortality (but don't push it). If you find yourself at dangerously low health, Grandpa's Moonshine is especially useful for making a quick, emergency recovery. Skilltree Synergies What perks mix best with Strength? Because Strength builds spec into cooking recipes, Fortitude is one of the best options for surviving and obtaining food. The Fortitude perks Living off the Land and The Huntsman allow for improved farming and hunting. This helps you get the ingredients you need to make a hearty meal. In addition, you can extend the duration of consumable buffs with Iron Gut, which is especially nice on Grandpa's recipes. In addition, Fortitude unlocks perks that further improve your tanking potential. Pain Tolerance decreases damage taken, and Healing Factor improves healing overtime. If you never want to feel pain again, spec into a Strength + Fortitude build. The Fortitude Skilltree

适者生存。坚韧技能树专注于生存,同时支持多面手和自给自足的游戏风格。坚韧流派专长于徒手格斗和突击步枪,提供在任何距离击倒敌人的方法。战斗之外,坚韧流派有助于狩猎、耕种、抵御伤害以及提升玩家的生命值。 坚韧从1级开始。随着坚韧技能树的等级提升,拳套武器和突击步枪的爆头伤害与肢解几率会增加。爆头伤害初始为+100%(双倍伤害),每级提升+10%(9级和10级提升+15%),在10级时达到最高+200%(三倍伤害)。肢解几率初始为+5%,每级提升+5%,在10级时达到最高+50%。随着坚韧等级的提升,所需技能点也会增加。2-5级需要1点技能点,6-8级需要2点,9-10级需要3点。坚韧可以通过稀有服装【硬汉眼镜】免费提升1级。 等级 爆头伤害 肢解几率 所需技能点 1 +100% +5% 0 2 +110% +10% 1 3 +120% +15% 1 4 +130% +20% 1 5 +140% +25% 1 6 +150% +30% 2 7 +160% +35% 2 8 +175% +40% 2 9 +190% +45% 3 10 +200% +50% 3 坚韧 - 战斗专长

机枪手 - 锁定、上膛、准备开火!提升突击步枪的伤害、射速和 reload 速度,同时解锁新突击步枪的制作配方并提高其制作品质。此外,还能减少渐进式散布和后坐力。后续等级将解锁新技能【突击队员肾上腺素】。等级 实体伤害 格挡 火焰伤害 射速 换弹速度 最大后坐力及渐进散布 特殊能力 制作解锁 制作品质 坚韧等级要求 1 +10% +20% +5% +10% -3% 无 AK-47 2 12 +20% +40% +10% +15% -6% 无 无 3 33 +30% +60% +15% +20% -9% 使用突击步枪每成功命中一发回复2点耐力 无 4 54 +40% +80% +20% +25% -12% 使用突击步枪每成功命中一发回复4点耐力 无 5 75 +50% +100% +25% +30% -15% 使用突击步枪每成功命中一发回复6点耐力 无 5 10 最大后坐力:射击时可能产生的最大后坐力。降低此数值可减少后坐力,提升射击稳定性。 渐进散布:每射击一发逐渐损失的准确度。降低此数值可在持续射击时保持更久的稳定性。

格斗家 - 准备战斗。提升徒手或使用指虎时的伤害。同时解锁随等级提升而保留的特殊能力,并提高制作拳套武器的品质。 等级 实体伤害 格挡伤害 特殊能力 制作解锁 制作品质 坚韧等级要求 1 +10% +20% 头部猛击永久免疫僵尸/动物感染 铁指虎 2 1 2 +20% +40% 强力攻击有30%几率击晕 无 3 3 3 +30% +60% 强力攻击头部有20%几率击倒 无 4 5 4 +40% +80% 强力攻击头部有10%几率击倒(总计30%) 无 5 7 5 +50% +100% 对头部有20%肢解几率 无 5 10 击晕 - 敌人移动速度降低80%,攻击速度降低50%。效果持续4秒,随着减益效果计时器结束,敌人会逐渐恢复至原始属性。减益效果结束后,敌人获得3秒的眩晕抗性。 击倒 - 敌人被击倒在地,处于易伤状态且无法攻击。 肢解 - 敌人的肢体被移除,能力受到阻碍。斩首会立即杀死僵尸。

疼痛耐受 - 哈!我几乎没感觉到!减少受到攻击时损失的生命值,并降低被击晕的几率。 等级 生命值损失 击晕几率 坚韧等级要求 1 -5% -20% 1 2 -10% -40% 3 3 -15% -60% 5 4 -20% -80% 7 5 -25% -100% 10 击晕(玩家)- 受到攻击时偶尔会获得的一种减益效果。被击晕时,屏幕会变得模糊,移动和攻击速度会显著降低,使玩家在受到后续攻击时极易受到伤害。

自愈因子 - 优秀的死侍!只要你不挨饿或脱水,就能获得缓慢恢复生命值的能力,同时加快重伤的愈合速度。 等级 生命值恢复 伤势愈合速度 所需坚韧等级 1 每90秒+1点生命值 +20% 1 2 每45秒+1点生命值 +40% 3 3 每20秒+1点生命值 +60% 5 4 每10秒+1点生命值 +80% 7 5 每6秒+1点生命值 +100% 10 坚韧 - 生存/新陈代谢专长

猎人 - 物尽其用。提升剥取动物时的资源获取量。剥取可获得更多肉、脂肪、骨头、羽毛和皮革。 等级 资源获取加成 坚韧等级要求 1 +20% 1 2 +40% 3 3 +60% 5 4 +80% 7 5 +100% 10

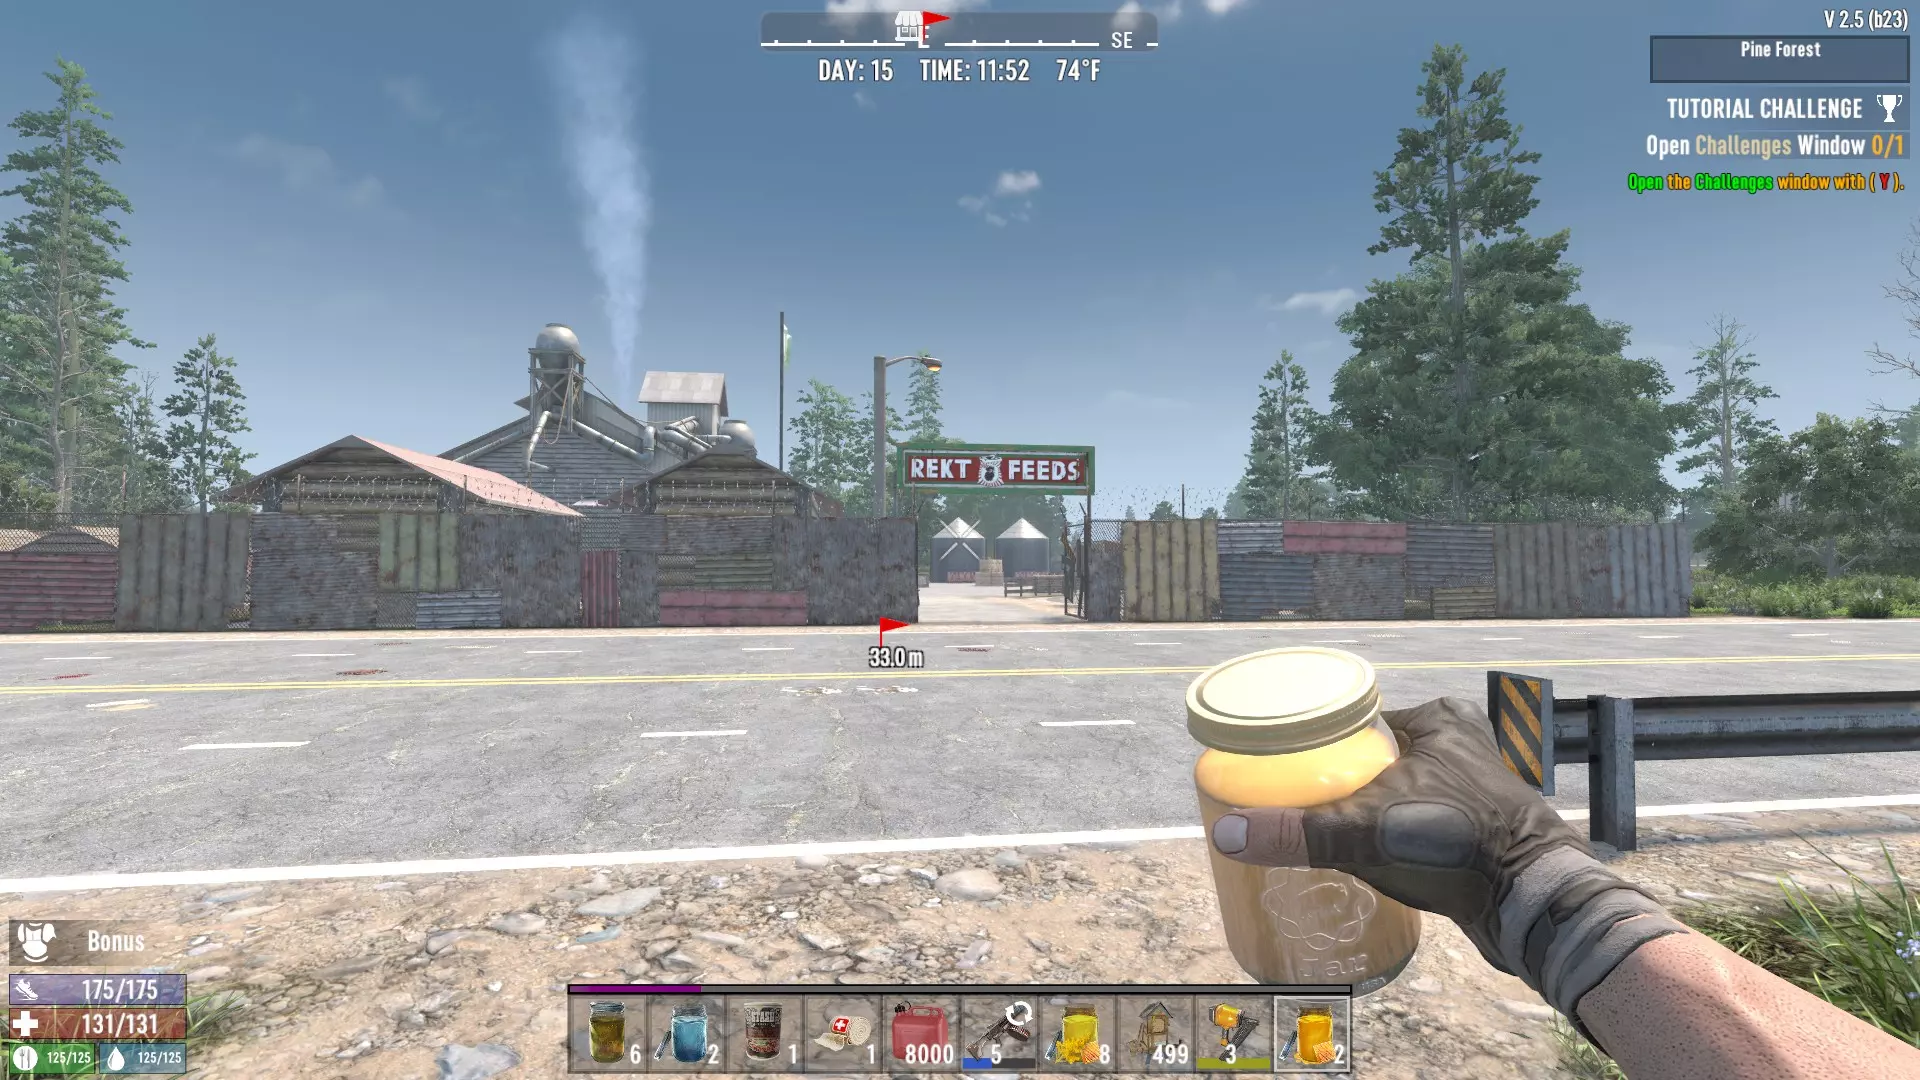
Well Insulated - 亚利桑那男人试图步行前往Shamway。提升你对恶劣天气的抵抗力,并且在冻伤/过热状态下减少食物/水分消耗! 等级 寒冷/炎热绝缘 天气下食物/水分流失 坚韧等级要求 1 +10 -15% 1 2 +20 -30% 4 3 +20且对极端天气(酷热/严寒)免疫 -30% 7 极端天气 - 寒冷时,你的食物条消耗更快。炎热时,你的水分条消耗更快。在极端天气(酷热/严寒)下,这些消耗速率会进一步增加。

靠山吃山 - 虽然收获不多,但这是份踏实的工作。种植更多作物,解锁新的种子配方,并降低制作农田的成本。 等级 作物产量 制作解锁 坚韧等级要求 1 +100% 解锁一枝黄花、菊花、芦荟和丝兰的种子。农田制作资源成本降低30%。 1 2 +100% + 额外收获1个作物(50%概率) 解锁蓝莓、玉米、棉花、蘑菇、啤酒花、土豆、南瓜、咖啡和超级玉米的种子。农田制作资源成本降低50%。 3 3 +200% + 额外收获1个作物(50%概率) 无 5

铁胃 - 吃了那份洋葱烂蒜沙拉后,我的胃一直翻江倒海。减少食物/水分随时间的流失,延长水下屏息时间,抵抗痢疾,并延长消耗品的增益效果! 等级 食物/水分流失 屏息时间 痢疾几率 增益持续时间 坚韧等级要求 1 -5% +24秒(总计84秒) -1% +10% 1 2 -10% +24秒(总计108秒) -2% +20% 3 3 -15% +24秒(总计132秒) -3% +30% 5 4 -20% +24秒(总计156秒) -4% +40% 7 5 -25% +24秒(总计180秒) -5% +50% 10

规则1:有氧耐力 - 为铁人三项做好准备。提升跑步(或骑自行车)时的耐力恢复速度。简单来说,你能跑得(和骑得)更久。 等级 跑步时耐力恢复 坚韧等级要求 1 +10% 1 2 +20% 4 3 +30% 7 坚韧 - 武器(突击步枪) 突击步枪 - 完美的多功能之选。突击步枪使用7.62毫米弹药,拥有高伤害、高射速、良好的精准度、大容量弹匣,以及从近距离到中远距离的有效射程。不过,与其他枪械相比,突击步枪的后坐力更高,且连射时精准度会随着每一发子弹逐渐下降,使其更难控制。尽管如此,突击步枪很少会让人失望。 所有突击步枪默认均为全自动,战术突击步枪除外。按住扳机将持续发射子弹 战术突击步枪默认是点射模式。轻触扳机将发射一发子弹。按住扳机将快速连续发射最多三发子弹
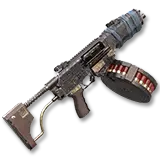
管道机枪 - 解锁方式:初始解锁 - 品质:原始 - 属性:伤害30.4-45.6,弹匣容量15,射速335发/分钟(极快),有效射程40米,最大射程90米,腰射精度中等,瞄准精度高,耐久度100-350,换弹时间3.0秒 - 这是“马盖先”式的杰作。管道机枪是一款前期的速射突击步枪,奇怪的是,尽管它看起来像一把冲锋手枪,却能装填7.62毫米弹药。它的属性远低于其他突击步枪,但对新手幸存者很有吸引力。
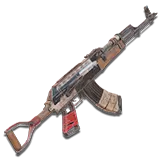
AK-47 - 解锁条件:机枪手等级1或蓝图 - 等级1 - 属性:伤害30.6-55.8,弹匣容量26-33,射速342-378发/分钟(极快),有效射程40-60米,最大射程90米,腰射精度中等,瞄准精度高,耐久度200-588,换弹时间2.85秒 - 在之前的Alpha测试版本中,该武器曾被视为备受珍视的武器。在当前版本中,AK-47依然是一把强力武器,相比管道机枪,它拥有更大的弹匣容量和更全面的通用性。
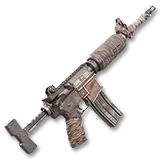
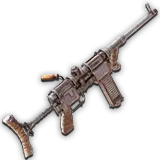
战术突击步枪 - 解锁方式:仅蓝图 - 等级:2级 - 属性:伤害34.0-62.0,弹匣容量26-33,射速385-425发/分钟(极快),有效射程40米-60米,最大射程90米,腰射精度中等,瞄准精度高,耐久度180-534,换弹时间2.55秒,自带三连发模式 - 作为突击步枪家族中的独特成员,战术突击步枪表现出色,属性优于AK-47。与其他武器不同,战术突击步枪内置三连发模式。按住扳机可快速连续发射三发子弹,松开并再次点击鼠标左键才能继续射击。点击鼠标左键一次则像普通武器一样发射单发子弹。
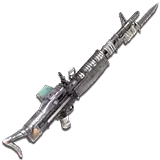
M60 - 解锁方式:自动武器手册第7卷或蓝图 - 等级:3级 - 属性:伤害37.4-68.2,弹匣容量52-67,射速418-462发/分钟(极快),有效射程40米-60米,最大射程90米,腰射精度中等,瞄准精度良好,耐久度240-696, reload时间5.0秒 - 这是另一款个人喜爱的武器,这款庞大的轻机枪拥有所有武器中最大的弹匣容量,并且拥有一些出色的属性。虽然它在战斗中持续时间很长,但M60的弱点在于较长的reload时间。可能会引发战争闪回。 坚韧-武器(拳击) 拳击-击倒!坚韧所使用的近战武器就是你自己的双拳。拳头挥动速度快且消耗 stamina少,但造成的伤害较低且攻击范围有限。所有拳类武器的伤害可通过饮用啤酒提升至三倍 断指 - 解锁条件:怀孕约八周后 - 初始物品 - 属性:5.0伤害,10.0强力攻击伤害,60次/分钟攻击速度(平均),短距离,10.5耐力/挥击,15.8耐力/强力挥击,无限耐久 - 嗯……聊胜于无,但严格来说它确实什么都不是。对于有抱负的格斗家而言,你的赤手空拳表现会很差,除非结合啤酒带来的醉意。大多数情况下,你会想要给拳头增加些东西。

指节套 - 解锁方式:初始解锁 - 品质:原始 - 属性:6.2-9.3伤害,12.4-15.5重击伤害,100次/分钟攻击速度(快速),短距离,9.1耐力/攻击,15.5耐力/重击,109-200耐久度 - 评价:还算不错但不算顶尖。指节套制作极其简单,仅需皮革和铁,在游戏初期很容易获取。它们的伤害比徒手攻击高得多,且挥砍速度比其他武器更快。

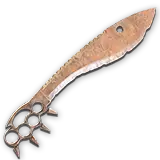
铁拳 - 解锁条件:格斗家等级1或蓝图 - 等级1 - 属性:7.7-14.1伤害,16.8-23.2强力攻击伤害,100次/分钟攻击速度(快速),短距离,9.6耐力/攻击,16.3耐力/强力攻击,385-961耐久度 - 你的贷款逾期了。铁拳是格斗武器中的中间选择,是游戏中期的不错武器。

Steel Knuckles - Unlocked: Schematic Only - Tier 3 - Stats: 11.6-21.1 Damage, 25.2-34.7 Power Attack Damage, 100 Attacks/min (Fast), Short Range, 10.2 Stamina/swing, 17.3 Stamina/P-swing, 577-1346 Durability, - Brutality reimagined. These knuckles have the best damage, almost on par with other melee weapons! Their blades are also useful for harvesting animals and breaking stuff, like wood and skulls (but mostly skulls). Fortitude - Playstyle Overall OpinionDifficulty: Intermediate Combat Viability: Great (A) Survival Viability: Excellent (S) Perk Synergy: Strength or Agility (see Skilltree Synergy below) Strategy Pick off targets from any range with your assault rifles Go berserk and brawl down enemies with your fists Hunt animals and grow crops for food Ignore pain and heal slowly overtime Worry less about food and water General Playstyle Fortitude builds are renowned for their versatility and survivability. Fortitude makes use of the AR family of weapons, which are effective at any and all ranges. They have great damage, fast fire rate, well-rounded accuracy, and excellent moddability. Depending on how you play, your combat may range from dynamic and focused to fast-paced and intense. One of the weaknesses of Fortitude builds, especially early game, is its primary melee weapon. Knuckles are short range and hard to use at first, thus encouraging risky combat. You can greatly improve your damage by drinking beer. As for surviving, Fortitude significantly improves player vitality and longevity. Perks such as Iron Gut and Pain Tolerance decrease the rate at which you starve, dehydrate, and perish, making each life last longer. Other perks, like The Huntsman and Living off the Land, greatly improve your hunting and farming, surplussing your food supply. Optimizing Weapon Usage Assault Rifles - ARs are accurate when aimed, inaccurate when hipfired. How you fire is very dependent on an enemy's distance. If they're far away, aim your shots and go for the head. If they're too close for comfort, don't feel the immediate need to aim down sights. Try not to spray and pray (unless you get jumpscared). 7.62 ammunition is more expensive to craft, and spraying an enemy down is often ineffective. Instead, shoot the enemy's torso once to stun them momentarily, giving you the chance to aim for a headshot. Always go for the head, whenever possible. Knuckles - Your fist weapons are best used to take out single, weaker targets, as to conserve ammo. If you REALLY feel like going berserk, however, your best option is to booze up. Drinking beer will triple your brawling damage, allowing you to punch hordes to death. It's risky combat, but it's a feeling that'll make you melt. Surviving As mentioned, the Fortitude skilltree is all about survival. You'll never be out of food or water again. With food still in mind, the perk Living off the Land improves your farming harvest and efficiency. You can craft farm plots cheaper and get much more yield from crops. The perk The Huntsman greatly increases the amount of meat, fat, and other resources you get from skinning animals. Perks like Iron Gut will decrease the rate at which you starve and dehydrate, while also giving you a lesser chance to contract to dysentery. Well Insulated gives built-in insulation points to both the heat and cold, which can help immensely depending on where you roam. Finally, the perk Healing Factor allows you to heal slowly overtime, so long as you aren't starving or dehydrated. It also speeds up the healing rate of critical injuries, like abrasions and concussions! Blood Moons Early game, you're very limited for options. Your best friend will likely be the Pipe Machine Gun, paired with a few mags worth of ammunition. Before you find out the hard way, let me tell you that your fists will not do much against a blood moon horde this early. That being said, you will be mostly reliant on your Assault Rifle of choice. Remember to use your ammo sparingly, especially early-game, and even when you can craft ammo in bulk. It's best to be stingy with your ammo; since your AR is your one ranged weapon, you're gonna wanna make sure you don't fry all your bullets before the horde is over. Try the following tactics: Keep those heads rolling! Try your best to go for only headshots (remember the aforementioned "shoot the torso" tactic). Mod your AR to have a red dot sight (or scope, if you prefer). If you're still early game, try to use as little ammo as possible. If you've reached late game, and can craft 7.62 ammo in bulk, don't be afraid to burst a little on tougher enemies. Utilize ammo types as well, such as hollowpoint, or better yet, armor piercing rounds. Your assault rifles will be your best and only friend when the horde comes, so put some trust in them! Forbidden Move. When all else fails, you're out of ammo, and you're ready to kiss your αss goodbye, there is only one option. Booze yourself up and do your best to beat the horde to death. I only recommend you try this when you have a good armor set and weapon, alongside plenty of first aid. Beer will also give you stun immunity, making it more effective when you take multiple hits. It's also good to stack other drugs or candies, like Skull Crushers or Health Bars, for those extra stat ups. Skilltree Synergy What perks mix best with Fortitude? Previously, Fortitude had the Heavy Armor perk, and Healing Factor granted even more insane healing, which made it arguably the best skilltree in the game. Though the Fortitude skilltree is still very strong, a great build needs reliable armor. Strength and Agility both have armor perks, as well as unique advantages over the other. The choice is based on your preference to playstyle. I mentioned this before, but Strength and Fortitude really compliment each other. Heavy Armor is great for creating a full-pledged tank build, with the bonus of having ARs. In addition, Master Chef has great synergy, as Fortitude's perks help considerably in acquiring raw food materials. The perks Miner 69'er, Sexual Tyrannosaurus, and Mother Lode are also extremely beneficial, improving your resource gain and melee combat. I highly recommend you pick them up, no matter what build you go for. If you enjoy fast-paced action, Agility is a great skilltree to mix with Fortitude. Though stealth sounds gimmicky with ARs, the perks Light Armor and Run and Gun can improve your fast-combat potential, allowing you to stay mobile and hipfire at will. Flurry of Blows also works great with brawling. Fortitude - Gameplay Montage https://youtu.be/RVGA97VyEhY Wanna see how a Fortitude build plays like, in glorious montage fashion? Check out this edit-heavy, combat-focused series of clips I've made, spiced with some music from MGR Revengeance! If you like my 7 Days video, consider subscribing and leaving a comment! The better feedback I get from this video, the more likely I'll do montages for every attribute (Strength, Agility, etc...)! The Agility Skilltree

无形的突袭,迅猛致命。敏捷技能树专注于潜行与机动性,能让玩家行动更流畅并避开敌人。当需要战斗时,敏捷系玩家精通弓箭、手枪和刀具,同时也会使用轻型护甲。作为正面战斗的替代选择,敏捷系专长于潜行,使玩家能在不惊动其他敌人的情况下造成更大伤害。 敏捷初始等级为1级。随着敏捷树的等级提升,弓箭、手枪和刀具的爆头伤害与肢解几率会增加。爆头伤害初始为+100%(双倍伤害),每级提升+10%(第9级和第10级提升+15%),在10级时达到最高+200%(三倍伤害)。敏捷 - 战斗专长 肢解几率初始为+5%,每提升1级增加+5%,在10级时达到最高+50%。 随着敏捷等级的提升,所需技能点也会增加。2-5级每级消耗1点技能点,6-8级每级消耗2点技能点,9-10级每级消耗3点技能点。装备稀有服装物品【滑雪护目镜】可免费提升1级敏捷。 等级 爆头伤害 肢解几率 所需技能点 1 +100% +5% 0 2 +110% +10% 1 3 +120% +15% 1 4 +130% +20% 1 5 +140% +25% 1 6 +150% +30% 2 7 +160% +35% 2 8 +175% +40% 2 9 +190% +45% 3 10 +200% +50% 3
弓箭 - 精准命中。提升所有弓和弩的伤害、操控性、装填及拉弓速度。解锁新的弓/弩制作配方,并提高其制作品质。 等级 实体伤害 格挡伤害 操控性 装填/拉弓速度 制作解锁 制作品质 敏捷等级要求 1 +10% +20% +10% +10% 木弓和铁弩 2 1 2 +20% +40% +20% +20% 无 3 3 3 +30% +60% +30% +30% 无 4 5 4 +40% +80% +40% +40% 无 5 7 5 +50% +100% +50% +50% 无 5 10 操控性 - 开火前后准星稳定(达到最高精度)的速度。

枪手 - 正午时分。精通手枪、左轮手枪和冲锋枪等 handgun 的使用。每提升一级都会增加伤害、射速、 reload speed,降低 spread,并解锁独特能力:暴击伤害。解锁新的 handgun 配方,并提高其制作品质。 等级 实体伤害 格挡伤害 射速 reload speed incremental spread 特殊能力 制作解锁 制作品质 敏捷等级要求 1 +10% +20% +5% +10% -5% 无 手枪 2 1 2 +20% +40% +10% +15% -10% 无 无 3 3 3 +30% +60% +15% +20% -15% 暴击伤害 - 5 发 无 4 5 4 +40% +80% +20% +25% -20% 暴击伤害 - 4 发 无 5 7 5 +50% +100% +25% +30% -25% 暴击伤害 - 3 发 无 5 10 暴击伤害 - 成功命中 5/4/3 发后,最后一发将造成 +100% 伤害。 incremental spread - 射击时和射击后损失的准确度。降低此数值有助于稳定命中率。

深层切割 - 血流不止。使用所有刀具和砍刀造成流血伤口,同时增加它们的伤害。每提升一级,流血伤口的最大叠加层数增加,并附加新的减益效果。 等级 实体/格挡伤害 最大流血层数 强力攻击流血层数 偏斜攻击流血几率 流血时的减益效果 制作解锁 制作品质 敏捷等级要求 1 +10% 3 2 无 -10%移动速度。每次攻击刷新流血持续时间。 猎刀 2 1 2 +20% 4 3 无 -10%移动速度 无 3 3 3 +30% 5 4 40% -15%移动速度 无 4 5 4 +40% 6 4 70% -15%移动速度 无 5 7 5 +50% 7 5 100% -20%移动速度 无 5 10 流血伤口 - 每个流血伤口会使敌人每秒失去1点生命值,持续20秒。默认情况下,普通攻击的匕首会造成1点伤害,强力攻击会造成2点伤害,最多叠加2层流血效果。每层流血效果会增加持续伤害(2层流血每秒造成2点伤害)。流血伤害无视护甲。 擦边攻击:当你击中并非瞄准的敌人时触发。击中恰好处于你攻击范围边缘(挥砍判定范围的末端)的敌人会造成擦边攻击。

轻甲 - 像蝴蝶一样轻盈……专精于轻甲,提升其耐久度,并大幅降低其耐力消耗和移动速度惩罚。解锁新的轻甲制作配方并提高其制作品质。 等级 移动速度惩罚 耐力消耗惩罚 耐久度 制作解锁 制作品质 敏捷等级要求 1 -15% -10% +50% 皮甲 2 1 2 -30% -20% +100% 无 3 3 3 -50% -35% +150% 无 4 5 4 -75% -50% +200% 无 5 7

奔跑与射击 - 火力压制:提升所有枪械的腰射精准度,并降低装填时的移动速度惩罚。 等级 腰射精准度 装填移动速度惩罚 敏捷等级要求 1 +10% -30% 1 1 +17% -60% 4 3 +25% -100% 7
疾风骤雨 - 眼冒金星。每级提升棍棒、徒手、小刀和电击棍的攻击速度。 等级 近战攻击速度 敏捷等级需求 1 +10% 1 2 +17% 4 3 +25%。额外效果:近战击杀时+30耐力 7 敏捷 - 运动/潜行专长

跑酷 - 跳跃!提升跳跃高度和安全坠落距离,同时降低跳跃的耐力消耗,高等级还能获得腿部免伤效果。 等级 安全坠落距离 跳跃高度 跳跃耐力消耗 特殊能力 敏捷等级要求 1 +1米(总计6米) 1米 -10% 无 1 2 +1米(总计7米) 2米 -20% 无 4 3 +2米(总计9米) 2米 -30% 坠落时不会腿部骨折 6 4 +2米(总计11米)3米 -40% 坠落时不会腿部扭伤或骨折 8 注:3级和4级仅能防止坠落导致的腿部扭伤或骨折。即使解锁了这些等级,仍可能在战斗中腿部扭伤或骨折。 安全坠落距离 - 默认情况下,玩家坠落6米不会受到任何伤害。在7米时,玩家开始受到伤害,并有25%的几率扭伤腿部。每增加1米,腿部扭伤的几率增加25%。在8米高度时,玩家有20%的几率摔断腿,超过8米后,每增加1米,断腿几率额外增加20%。腿部扭伤、疾跑或骨折会使所有跳跃距离减少2米。更多信息请参见坠落伤害机制。 跳跃 - 默认情况下,玩家可以跳1米,跳跃消耗20点耐力。

隐秘打击 - ...像蜜蜂一样蜇刺。大幅提升潜行攻击的伤害加成。 等级 潜行伤害 敏捷等级要求 1 +50%(总计+100%) 1 2 +50%(总计+150%) 3 3 +50%(总计+200%) 5 4 +50%(总计+250%) 7 5 +50%(总计+300%) 10 潜行伤害 - 当蹲下且没有敌人察觉你的存在时,攻击默认造成+50%伤害。

暗影潜伏 - 超级潜行。提升你的潜行能力。每级都会提高在黑暗中隐藏的效果,降低所有动作的噪音,增加蹲伏速度,并减少敌人的搜索时间。 等级 可见度 噪音 潜行移动速度 僵尸搜索时间 敏捷等级要求 1 -13% -10% +10% 50秒 1 2 -26% -20% +20% 40秒 3 3 -39% -30% +30% 30秒 5 4 -52% -40% +40% 25秒 7 5 -65% -50% +50% 20秒 10 潜行说明 - 蹲下时,耐力条上方会出现一个条。这通过你的可见度和噪音的组合来衡量你的总潜行值。该值越低,僵尸就越难发现你。 站立不动会提升潜行能力。 躲在黑暗中会极大提升潜行能力。环境中的明亮光线会降低你的潜行能力。你制造的所有噪音都会影响你的潜行效果。这包括脚步声、击打方块、枪声、换弹以及搜刮。不同枪械产生的噪音大小不同。踩在垃圾堆上会产生更大的噪音。 默认情况下,当敌人被惊动时,他们会搜索噪音来源长达60秒。如果他们无法确定噪音来源,就会随机游荡。保持安静,僵尸就不会警觉。如果它们开始游荡,保持隐藏并等待它们失去注意力。 更多详细信息请查看【敏捷-潜行】。 【敏捷-武器(手枪)】 手枪——神枪手的化身。在所有技能树中,敏捷系拥有最广泛的远程武器选择。手枪包括普通手枪、速射冲锋枪以及。44 手炮、麦格农左轮和沙漠秃鹫。 所有手枪默认均为半自动,SMG-5 除外。按住扳机只会发射一发子弹。 SMG-5 默认是全自动。按住扳机将持续发射子弹。
管道手枪 - 解锁方式:初始解锁 - 武器等级:初级 - 属性:伤害25.6-38.4,弹夹容量6发,射速126发/分钟(平均),有效射程12米,最大射程40米,腰射精度良好,瞄准精度高,耐久度75-135, reload时间5.5秒 - 一种简陋的左轮手枪,使用9mm弹药。管道手枪是敏捷流新玩家最早能获得的武器,但其性能欠佳,受限于较小的弹夹容量和较长的换弹时间。
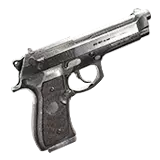
手枪 - 解锁条件:枪手等级1级或蓝图 - 等级1 - 属性:伤害25.5-46.5,弹匣容量13-16,射速171-189发/分钟(快),有效射程14-21米,最大射程50米,腰射精度良好,瞄准精度高,耐久度200-492,换弹时间2.0秒 - 手枪各项属性均衡,是早期战斗中可靠的武器。爆头可以消灭大多数弱小敌人。装备消音器后,它会成为一把有效的潜行武器。

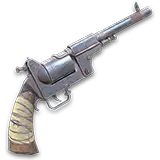
.44马格南 - 解锁方式:仅蓝图 - 等级:2级 - 属性:伤害59.5-108.5,弹夹容量6发,射速95-105发/分钟(平均),有效射程20-30米,最大射程70米,腰射精度良好,瞄准精度高,耐久度120-324, reload时间4.0秒 - 尽管只是一把2级武器,但马格南能造成所有枪械中最高的伤害之一,足以一枪爆头。此外,这把左轮手枪还拥有较高的精度和射程。不过,马格南的局限在于其6发的低弹夹容量和较长的reload时间。它的噪音也很大,消音器对其效果较差。
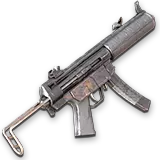
SMG-5 - 解锁方式:仅通过蓝图 - 等级:3级 - 属性:伤害28.1-51.2,弹匣容量26-33,射速456-504发/分钟(极快),有效射程24-36米,最大射程65米,腰射精度良好,瞄准精度高,耐久度280-756,换弹时间4.0秒 - 与其他手枪不同,这款冲锋枪拥有所有武器中最快的射速。其伤害和实用性使其成为敏捷流build的绝佳武器,尤其是与升级后的神枪手技能搭配使用时。
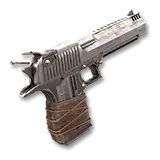
.44沙漠秃鹫 - 解锁方式:仅蓝图 - 等级:3级 - 属性:伤害57.8-105.4,弹匣容量8-9发,射速123-136发/分钟(快速),有效射程20-30米,最大射程50米,腰射精度良好,瞄准精度高,耐久度200-444, reload时间2.0秒 - 沙漠秃鹫可作为SMG-5的3级替代武器。其伤害可能略低于马格南,但 reload速度和弹匣容量更优。此外,它可使用消音器模组,但噪音仍然很大。无论是否潜行,这把小型手炮都能摧毁你瞄准的任何目标。 敏捷 - 武器(弓箭) 弓箭 - 弓可能只能单发,但却是所有远程武器中最安静的,同时能造成中等至良好的伤害。与其他武器常见的即时命中不同,箭矢是以抛射物形式射出的。此外,所有弓和弩获得额外的潜行伤害。所有弓和弩拥有+200%潜行伤害。所有弓和弩只能装填一支箭/弩箭。

原始弓 - 解锁方式:默认解锁 - 品质:原始 - 属性:伤害29.0-43.5, projectile velocity31.5米/秒,有效射程20米,最大射程100米,腰射精度普通,瞄准精度良好,耐久度60-150, reload0.9秒 - 这是玩家的第一把远程武器。原始弓制作极其简单,仅需木材和植物纤维。但它的性能也很差,伤害低且 projectile speed慢。

木弓 - 解锁条件:弓箭等级1级或蓝图 - 等级:1级 - 属性:伤害29.8-54.3, projectile velocity 41.4-48.6米/秒,有效射程16-24米,最大射程100米,腰射精度普通,瞄准精度良好,耐久度144-379, reload 0.9秒 - 这是一把更精良的弓,伤害更高, projectile velocity更快。如果你有幸找到一些弓/弩零件,制作起来也相对简单。

铁十字弩 - 解锁条件:弓箭等级1级或蓝图 - 等级1 - 属性:42.5-77.5伤害,55.4-66.2米/秒 projectile velocity,20-30米有效射程,100米最大射程,腰射精度低,瞄准精度高,80-216耐久度,2.8秒装填时间 - 作为木弓的替代品,这把铁十字弩是一种结构相似的武器。它造成的伤害更高,发射速度更快,但装填时间更长,不像弓那样可以快速拉弓。与其他弓不同,该武器有实际的机械瞄具,更容易瞄准。

复合弓 - 解锁方式:仅蓝图 - 等级:3级 - 属性:伤害37.5-68.4, projectile velocity 50.4-57.6米/秒,有效射程24-36米,最大射程100米,腰射精度中等,瞄准精度高,耐久度160-432, reload 0.9秒 - 这是一把非常强力的弓,具有高额伤害和较快的 projectile speeds。与其他弓相比,复合弓的独特之处在于拥有更大倍率的瞄准镜和机械瞄具。凭借这些特性,复合弓是远程作战的绝佳选择。

复合十字弩 - 解锁方式:仅蓝图 - 等级:3级 - 属性:伤害54.0-98.4, projectile velocity 62.1-72.9,有效射程20-30米,最大射程100米,腰射精度低,瞄准精度极高,耐久度96-269, reload 2.8秒 - 这是一件机械杰作,也是一把强大的武器。复合十字弩在所有弓类武器中伤害最高,但 reload 速度也最慢。其机械瞄准具和高精度使其成为非常有效的远程武器。 敏捷-武器( blades) 刀具和 blades-对于近战武器,敏捷系专长于锋利的 blades。匕首的伤害和攻击范围可能低于其他近战武器,但攻击速度更快,消耗的耐力更少,并且能对敌人造成可叠加的流血效果,使其随时间流失生命值(详见敏捷系-战斗专长中的【深度切割】专长)。 普通的刀刃攻击会使敌人叠加1层流血效果。强力攻击则会造成2层流血效果。 每层流血效果每秒造成1点伤害,持续20秒,且无视护甲。默认情况下,单个敌人最多可叠加2层流血效果。【深度切割】专长可以提升流血效果的叠加层数。 所有刀刃武器拥有+400%的潜行伤害加成。 刀刃是剥皮动物最快的工具。

骨刀 - 解锁方式:初始解锁 - 品质:原始 - 属性:5.1-7.7伤害,20.4-26.0强力攻击伤害,120次/分钟攻击速度(极快),短距离,7.3耐力/次攻击,10.9耐力/次强力攻击,120-220耐久度 - 作为直接战斗武器表现较差,但适合进行潜行攻击。骨刀可在游戏初期制作,前提是你能杀死动物。建议尽快寻找更高级的武器进行替换。

猎刀 - 解锁条件:深度切割等级1或蓝图 - 等级1 - 属性:5.2-9.5伤害,22.4-30.9强力攻击伤害,120次/分钟攻击速度(极快),短距离,8.2耐力/攻击,12.3耐力/强力攻击,462-1154耐久度 - 这把猎刀的伤害比骨刀更高,是更好的潜行攻击武器。在直接战斗中也是一个合理的选择,但不要指望它能在每次潜行失败时都救你。

糖果手杖刀 - 解锁方式:仅圣诞节期间通过搜刮获得 - 等级:1级 - 属性:5.6-10.2伤害,24.6-33.9强力攻击伤害,120次/分钟攻击速度(极快),短距离,8.2耐力/攻击,12.3耐力/强力攻击,460-1200耐久度 - 有人帮你把这根糖果手杖磨成了锋利的刀刃!哇哦!糖果手杖刀是狩猎刀的略微改进版;用它来庆祝圣诞节,切碎你的敌人吧!
砍刀 - 解锁方式:仅蓝图 - 等级:3级 - 属性:伤害16.8-30.7,强力攻击伤害36.6-50.5,攻击速度55次/分钟(平均),平均攻击范围,普通攻击消耗耐力19.2,强力攻击消耗耐力32.7,耐久度288-673 - 砍刀的各项属性明显优于普通刀具,是近战武器中的恐怖存在。它在更远的距离能造成更高伤害,但耐力消耗更大且挥舞速度较慢。无论是潜行还是正面战斗都表现出色。 敏捷系-轻甲 正如敏捷系-战斗专长中所提到的,敏捷技能树专注于轻甲,提升其耐久度并降低耐力消耗和移动速度惩罚。轻甲的护甲值低于重甲,但耐力消耗和移动速度惩罚更低,同时也更加安静。对于立志成为潜行玩家的人来说,轻甲可以在你被发现时提供保护。护甲属性机制说明: 护甲值指的是你的直接伤害抗性。例如,50点护甲值意味着你受到的攻击伤害减少50%(最高上限为90%)。 爆炸抗性的机制相同,但仅适用于爆炸伤害和溅射伤害(同样最高上限为90%)。 暴击抗性会增加你抵抗暴击的几率,例如在与僵尸战斗时抵抗擦伤和扭伤。 耐力/秒(恢复)指的是不跑步时耐力恢复减少的量。 耐力/秒(消耗)指的是跑步时耐力额外消耗的量。 机动性指的是护甲穿透对移动速度的降低程度。 噪音指的是执行动作时产生的额外噪音量。这是潜行玩法的一项重要属性。 耐久度指的是护甲在损坏前能承受的攻击次数。一旦护甲损坏,其所有属性将变为0,直至修复。 每套护甲包含五个部件,所有部件的属性相同。以下属性为单个护甲部件的数值。

布甲 - 解锁方式:初始解锁 - 等级:1级 - 属性:护甲值5.1-7.3,爆炸抗性5.1-7.3,暴击抗性+4.1%,耐久度75-150,无移动速度、耐力或噪音惩罚 - 由布料制作而成,这套护甲能提供中等水平的攻击防护。它在潜行时特别有用,因为这是唯一没有噪音惩罚的护甲套装。尽管护甲值较低,但你能获得大幅提升的潜行能力作为回报。

皮甲 - 解锁条件:轻甲等级1或蓝图 - 等级:2级 - 属性:护甲值5.3-10.2,爆炸抗性5.3-10.2,暴击抗性+4.3-5.3%,耐久度110-225,耐力恢复-2.81%/秒,耐力消耗+5.62%/秒,机动性-4%,噪音+10% - 尽管皮甲的属性相较于衬垫护甲有所提升,但和其他所有护甲套装一样,皮甲也存在耐力、机动性和噪音方面的惩罚。不过与重甲相比,这些惩罚要小得多,这使得皮甲成为兼顾潜行和抗性的理想选择。

军用护甲 - 解锁方式:仅蓝图 - 等级:3级 - 属性:护甲值6.2-12.2,爆炸抗性6.2-12.2,暴击抗性+5.0-6.1%,耐久度200-400,耐力每秒恢复-2.81%,耐力每秒消耗+5.62%,机动性-4%,噪音+10% - 标准配发的弹道护甲,供士兵使用。军用护甲拥有所有轻型护甲中最高的护甲值,是潜行与防护之间的最佳平衡。
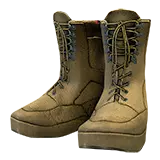
军用潜行靴 - 解锁途径:城市战斗第一卷 - 等级:3级 - 属性:护甲值6.2-12.2,爆炸抗性6.2-12.2,暴击抗性+5.0-6.1%,耐久度200-400,无耐力惩罚,机动性-4%,无噪音惩罚 - 该潜行靴的属性与普通军用护甲相当,但额外具备无噪音和无耐力惩罚的加成,使其成为保持隐蔽的理想选择。无法通过战利品获取,必须进行制作。

圣诞帽 - 解锁条件:仅在圣诞节期间通过搜刮获得 - 等级:2级 - 属性:护甲值5.3-10.2,爆炸抗性5.3-10.2,暴击抗性+4.3-5.3%,耐久度75-150,对移动速度、耐力或噪音无惩罚,寒冷绝缘+21.5-25.5 - 圣诞快乐!戴上这顶正宗的圣诞帽,展现你的节日喜悦吧!戴上它,所有烦恼都会抛到九霄云外!

美式橄榄球头盔 - 解锁方式:仅通过搜刮 - 等级:2级 - 属性:护甲值7.5-10.7,爆炸抗性7.5-10.7,暴击抗性+5.4%,耐久度110-225,耐力恢复速率-2.81%/秒,耐力消耗速率+5.62%/秒,移动速度-4%,噪音+10% - 美式橄榄球头盔是一种可搜刮的杂项装备,常见于学校和储物柜中。其属性略优于皮制兜帽。如果能在游戏初期找到它,那将是一件不错的前期护甲。加油,纳维甘!
采矿头盔 - 解锁条件:采矿的艺术第七卷 - 等级:2级 - 属性:7.5-10.7点护甲值,7.5-10.7点爆炸抗性,+5.4%暴击抗性,110-225点耐久度,-2.81%耐力/秒(恢复),+5.62%耐力/秒(消耗),-4%移动速度,+10%噪音,配备头盔灯 - 采矿头盔的属性与橄榄球头盔相似,但额外内置了头盔灯。头盔灯能提供适度照明,可按F键激活。请注意,该灯光会对您的能见度产生负面影响,降低潜行效果。 敏捷-潜行 敏捷系build比其他任何职业都更能利用潜行机制。潜行能让您不被发现,同时还能减弱所有行动产生的噪音。潜行可以对未察觉的敌人造成额外伤害,通常能一击击杀敌人,或者至少大幅削弱他们。 潜行计量条
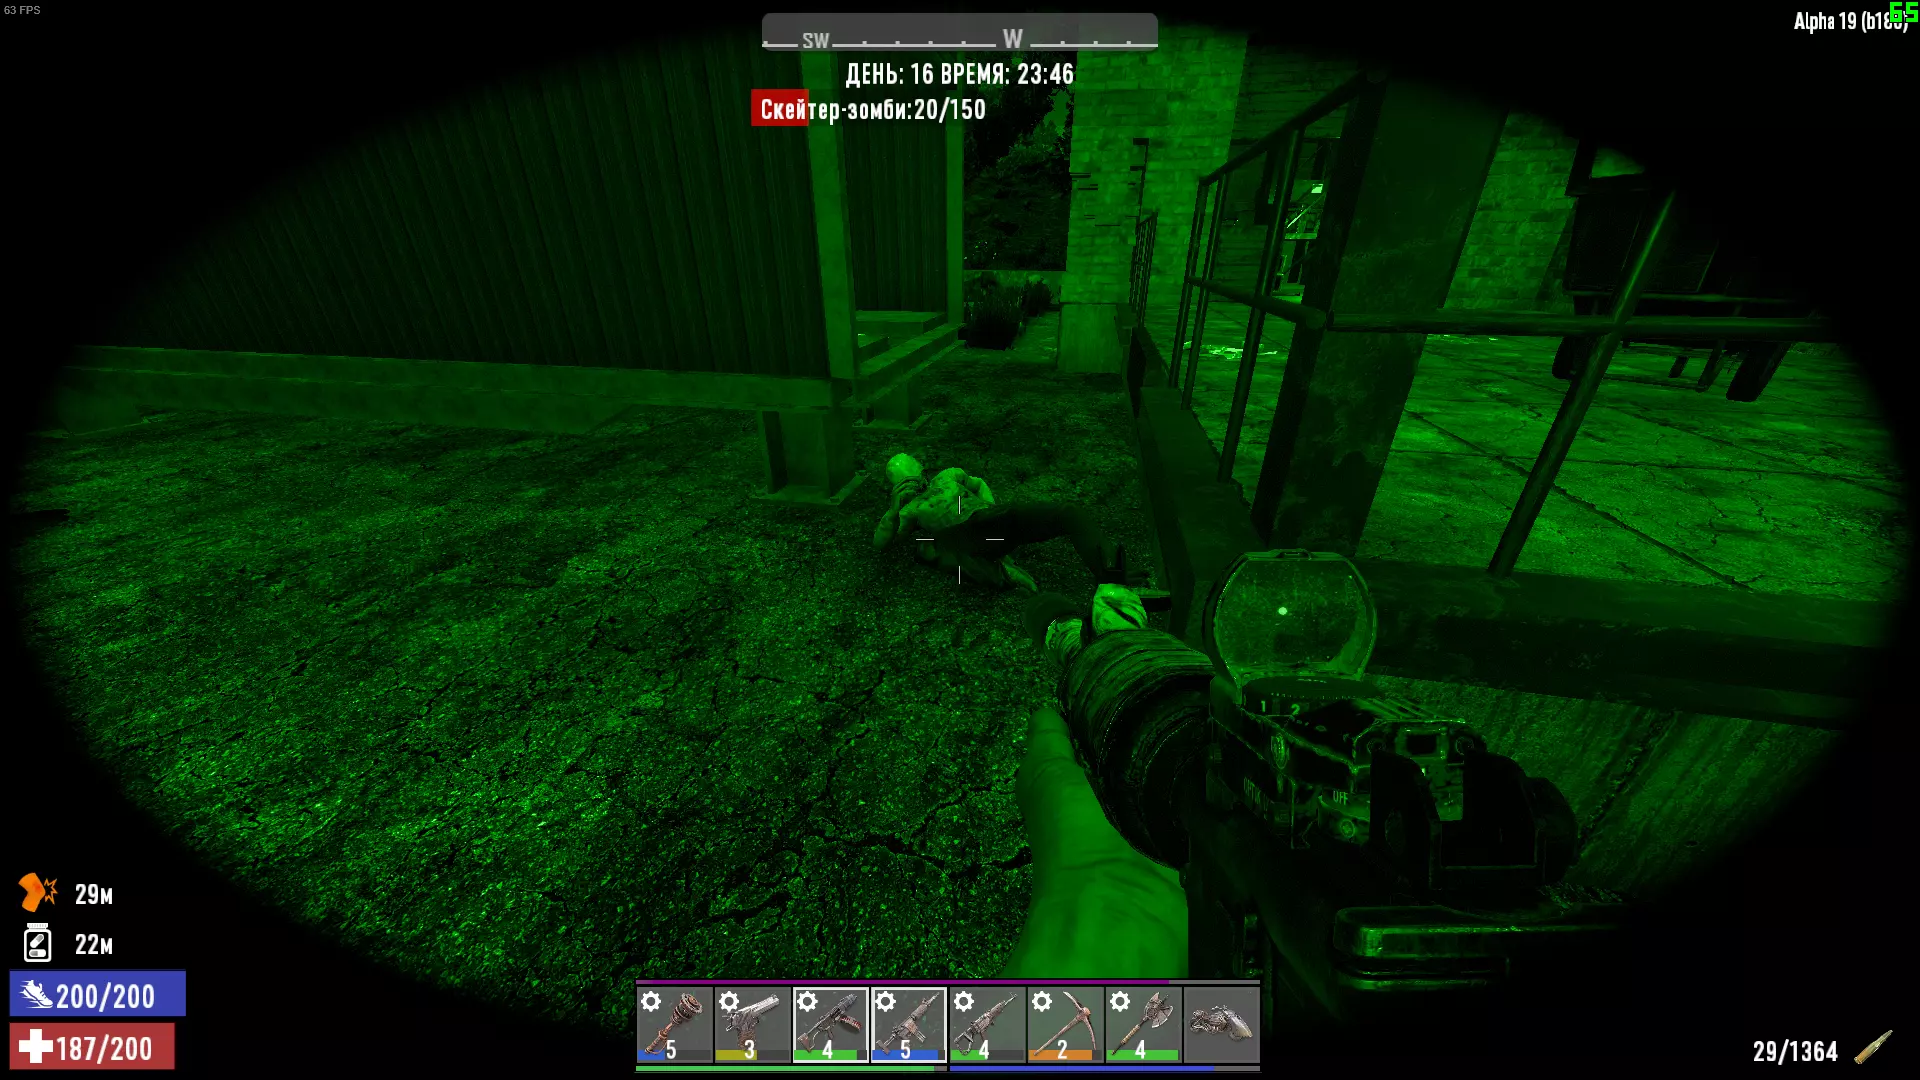
While crouched, stealth mode activates, and a new bar appears on your UI, above your health and stamina. This bar shows a hybrid measurement of your visibility and noise. The value directly converts into the distance at which enemies can detect you. The higher the value, the further zombies will find you. The smaller the value, the closer you have to be for them to detect you. At 0, you are completely undetectable (until you make noise). The environment affects your stealth greatly. Hiding in the darkness will dramatically decrease your visibility, while hiding in the light will increase your visibility. While stealthing, avoid lights and coming into contact with enemies. For riskier but more effective gameplay, enter points of interests at night. Tip: Points of interest will randomly generate active floodlights, light bulbs, and other sources of light. It is best to avoid these while stealthing, but they can be destroyed with a pickaxe or a silenced pistol (may take a few shots depending on block health. In addition, staying still for a few seconds will further decrease your visibility. Moving again will increase it. Other actions, like aiming down sights, can increase your visibility. You can also "sneak-sprint" by sprinting while crouched. You will move faster but make slightly more noise. How much noise you make also affects your stealth. Though noises are muffled while in stealth mode, your visibility will be increased by performing certain actions. These actions include making footsteps, aiming, shooting, reloading, looting, opening doors, and hitting tiles. Noise will not be increased by swinging weapons or power attacking. Tip: Points of interest will often have small, breakable piles of trash laying around (glass shards, trash piles, and paper shreds. Avoid stepping on these, as they will make more noise than regular footsteps. Try to maneuver around or break these hazards. Noise stacks with multiple actions. Actions such as walking too quickly causes multiple sounds from your footsteps to add up, lowering your stealth. It is imperative that you take your time to let each sound decay, allowing you to retain stealth. Try to "flutter step," by tapping W. Monitor your stealth while crouch walking in order to maintain maximum stealth. Sneak Damage While in stealth, enemies that are unaware of your presence will take bonus damage from all of your attacks. By default, this value is +50%, and can be increased with certain weapons, perks, and books. With a good weapon and modifiers, you can reach up to 8x (and higher) damage, which will often kill enemies in one shot. Weapons - Bows and Crossbows have +200% sneak damage. Knives and the Machete have +400%. Perks - Hidden Strike increases base sneak damage by up to +250%. Books - The Night Stalker is a set of volumes specializing in dealing extra sneak damage, especially at night. In the event that an enemy does not die in one hit to a stealth attack, they will momentarily search the area they last heard noise from. During this search period, your stealth attacks will be on cooldown for that specific enemy. The search period is 60s by default, but can be decreased to 20s with the perk From the Shadows. Improving Stealth Most armor sets (with the exception of Cloth Armor) will increase the amount of noise you make for all actions. To optimize your stealthing capabilities, unequip all armor. If the heat gets too high, put your armor back on and go loud. In opposition, some clothing items can increase your stealth. The Ghillie Suit, which can be crafted after completing the Sniper series, decreases your base visibility and muffles noise from all actions. Combined with the From the Shadows perk, you can reach a visibility of zero. Because light should be avoided, and you're going to be stealthing mostly at night, it can be hard to see enemies ahead. Your best choice to resolve this is by using Night Vision Goggles, which can be found most often in military loot and from traders. Night vision will give you full lighting, while not increasing your visibility. Stealth against Enemies When invading points of interest, zombies will always spawn as sleepers. Sleepers will not wake up until they are alerted by sufficient noise or light (or when you get too close). The most important thing you need to know is that sleeping zombies will make noises when close to waking up. If you hear a sleeper make a soft groan or snore, they are becoming alert and will soon wake up! Stop moving, and wait for them to calm down before approaching any further. When you've found a sleeper, make a decision on how to kill them. If they're alone and in an open spot, make a slow approach, and use your melee to quickly dispatch them. If they're among a crowd with multiple zombies, using melee is too risky. Instead, find a corner or dark spot to hide in, and snipe them out with your bow. Start with the weakest zombies, then make your way up to the toughest. If a zombie becomes alert, they will actively search the last spot they heard noise from. For example, if you shoot a zombie while stealthed, but don't kill them immediately, the zombie will search the area you were last in. Make a slow retreat and find a new spot to hide. It is vital you do this as to remain hidden. Alert zombies will also make specific sounds when they have detected you. Once you are detected, stealth damage no longer applies. Listen closely for zombie speech patterns, as to know when to fight. You do not always need to stand up when this happens. Standing up in a fight will greatly increase the chance of alerting the room. Occasionally, zombies will be hiding in closets and behind breakaway doors. You will have to open these, whether it be by breaking it or making sufficient noise. Rocks will not awake sleeping zombies. You can always break open these doors with an arrow, without alerting the zombie inside. Rocks and Stealth Rocks can be used as distractions on alert zombies. This can provide you with a massive advantage, especially in close corridors, where the odds of you bumping into an enemy are likely. When you alert a zombie, and they start chasing after you, try to get as much distance as possible. Close doors behind you, and find a hiding spot. Once your stealth is up, and the zombie does not have direct sights on you, toss out a rock to distract them. They will walk towards the spot the rock landed, and will become oblivious to your presence, as long as you stay hidden. Utilize this situation to either evade or kill the threat. A very important note to consider: Rocks only work on awake zombies. If you throw a rock at a sleeper, even if you hit them, they will not wake up. Sleepers and jumpscare zombies (ones behind closets) will only wake up through significant light or noise. Agility - Playstyle Overall OpinionDifficulty: Hard Combat Viability: Excellent (S) Survival Viability: Poor (D) Best Perk Synergy: Strength and Fortitude (see Skilltree Synergy below) Strategy Two modes of combat Stealth Combat Crouch and stay hidden to deal extra stealth damage Utilize knives and bows for their low noise and higher stealth damage multiplier Hide in dark places, locate escape points Unequip armor to further decrease noise, if necessary Loud Combat Break out louder weapons to take care of a crowd Utilize high-caliber handcannons or the fast-firing SMG-5 Equip Light Armor to stay mobile and protected Reload without movement penalty General Playstyle The Agility skilltree is the most mechanically complex of all the other attributes. With two ways to fight enemies, Agility builds are fully primed for combat. Stealth allows you to remain undetected and sneak by threats. While in Stealth, you deal greater damage and have a lesser chance of being hit by enemies. If you're caught sneaking, and need to go loud, you can break out powerful, high-caliber weapons that will send your enemies back to the grave. In combat, Agility builds are highly mobile and fluid, able to reload at full movement and jump incredible heights. Light Armor provides further protection without slowing you down as much. While Agility may seem like heaven's God-sent warrior, it has one major flaw. The Agility tree has no perks for survivability. While this may not be a problem to a veteran player, Agility builds alone miss out on bonus resource gain. To fully maximize your potential, you're best off investing into other skilltrees. Optimizing Weapon Usage Bows and Crossbows - These weapons are intended to be your ranged choice for stealth missions, though they still make great weapons for open combat. Bows are silent, and deal even greater bonus damage while sneaking. If you find a dark spot to hide, try picking off as many enemies as you can see with your bows. Pistol - If used with a silencer, pistols are a good option for stealth missions. In the event that you are caught by a single enemy, and you still don't want to alert the horde, a silenced pistol will do the job against one enemy, much better than a bow. Bows only hold one arrow/bolt, so a pistol with a full magazine can quickly dispatch a zombie. If unsilenced, pistols will still make a decent weapon against most targets. SMG-5 - Though it can be silenced, I recommend using the SMG for loud combat. Its fast fire rate gives it great synergy with the perk Gunslinger, which can trigger multiple critical hits in quick succession. The SMG's large clip size also allows it to take out large crowds with relative ease. .44 Magnum and Desert Vulture - Even when silenced, these weapons are still very loud, so I would recommend against using them for stealth. No, the Magnum and Desert Vulture are much more suitable for loud combat. These .44 handcannons deal extremely high amounts of damage, making them optimal against high-health targets. If used with AP rounds, and in tight chokepoints like corridors, you can kill multiple enemies with one shot. Blades - Lower tier knives like the Bone Knife and Hunting Knife are best used for stealth, but can be used in direct combat if need be. The Machete is the best option for both loud combat and stealth. While stealthed, use knives to deal massive sneak damage, often taking out enemies with one hit. When in loud combat, stab the hell out of your enemy, stacking as many bleeding wounds as possible. The perk Deep Cuts can increase bleeding stacks and blade combat potential. After inflicting 28 stab wounds, use your mobility to evade your enemy, and let them slowly bleed out. Think hit and run-type playstyle. Stealth See the previous section, Agility - Stealth for information on stealthing. Surviving Agility has no initial perks for surviving. Depending on how many hours you have in 7 Days to Die, most of your surviving in an Agility build will rely on your own gamesense. The least I can say, other than basically telling you to get good, is that Agility builds can rely on looting for resources. By stealthing through points of interest, engaging in combat or not, you can open containers and find some goodies to help you thrive. Blood Moons First thing's first. Stealth will not help you on horde night! Zombies automatically have your scent and will track you down, no matter your visibility. You have to rely on loud combat only. Early game, you're likely to have found a pipe pistol with a few rounds. Be resourceful with your ammo, and try going for headshots to quickly eliminate zombies. If you run out of ammo, you'll be able to fall back on your bows. They may be single shot, but they'll help you last. When late game arrives, and you have a few more perks and guns, you'll be more set for fighting the horde. Follow these tactics and never feel fear again. Use your SMG-5 for crowds. The SMG is fast firing and deals excellent DPS. Easily drop a crowd by spraying them down. Even the tankier targets won't survive a barrage of 9mm from the SMG, especially with Gunslinger ranked up. Utilize ammo types for bows and crossbows. Explosive arrows are excellent at single-target elimination and crowd control, whereas flaming arrows are good for dealing a bit of extra damage to a single target. Use .44 weapons to blast high-priority targets. Fat cops and irradiated zombies can take a beating. Use your most powerful weapons to take down the most powerful zombies. And of course, always try for headshots. You want to deal the most damage, right? Ascend to Godhood. If you're feeling ballsy, the movement you can gain from the Agility skilltree can actually let you fight a horde without a base. I only recommend you try this if you have Run and Gun maxed out, and Urban Combat Vol 6 read (combat adrenaline). In addition, with Parkour maxed out, you can even jump over enemies. Though it is extremely risky, it's an incredible feeling, and a whole new way to take on the horde. Skilltree Synergy What perks mix best with Agility? Because of Agility's low base stats for survival, I recommend going with Fortitude. The Fortitude tree has a plethora of perks for acquiring food, water, and supplies. Agility is already specialized highly into combat, so there's no need to branch off into other trees specifically for combat. If you want to live up to the fullest extent of a stealth master, also consider grabbing Lucky Looter and Lockpicker from the Perception tree. Not only will your looting experience improve, but you can remain hidden while opening locked containers. As for every build, I recommend picking up Mother Lode, Sexual Tyrannosaurus and Miner 69'er from the Strength tree. These perks are extremely good for early game progression, and will help you immensely in gathering the main resources you need. The Intellect Skilltree

知识就是力量。与其他流派不同,智力技能树专为辅助流派设计,能提升你和队友的战斗能力与游戏进程。智力流派可解锁电击棍和自动机器人炮塔,其中电击棍能电击并瘫痪敌人。在战斗之外,智力技能树有助于与商人交易、获取更好的任务 loot、提升药物治疗效果以及加快制作速度。 智力初始等级为1级。随着智力树等级提升,电击棍和机器人炮塔的爆头伤害与肢解几率会增加。爆头伤害初始为+100%(双倍伤害),每级提升+10%(9级和10级提升+15%),10级时达到最高+200%(三倍伤害)。【智力 - 战斗专长】 肢解几率初始为+5%,每提升1级增加5%,在10级时达到最高+50%。 随着智力等级的提升,所需技能点也会增加。2-5级每级消耗1点技能点,6-8级每级消耗2点,9-10级每级消耗3点。稀有服装【书呆子眼镜】可使智力等级免费提升1级。 等级 爆头伤害 肢解几率 所需技能点 1 +100% +5% 0 2 +110% +10% 1 3 +120% +15% 1 4 +130% +20% 1 5 +140% +25% 1 6 +150% +30% 2 7 +160% +35% 2 8 +175% +40% 2 9 +190% +45% 3 10 +200% +50% 3

机器人发明家 - 火力强化:提升所有机械炮塔的战斗能力。每级都会增加炮塔的伤害、射速、弹匣容量和部署范围,同时提高所有炮塔的制作品质。 等级 实体/方块伤害 射速(机械冲击炮) 射速(炮塔) 弹匣容量 部署半径 制作解锁 制作品质 智力等级需求 1 +10% +12.5% +30% +10 +4米(总计14米) 机械冲击炮 2 3 2 +20% +25% +70% +20 +1米(总计15米) 无 3 5 3 +30% +37.5% +110% +30 +1米(总计16米) 无 4 6 4 +40% +50% +150% +40 +1米(总计17米) 无 5 8 5 +40% +50% +150% +50 +1米(总计18米) 【额外奖励:最多可部署两个激活状态的炮塔】 无 10 炮塔特性:默认情况下,玩家可部署一个炮塔,当你处于10米范围内时,炮塔将保持激活状态。炮塔也可以像枪械一样握持使用,但精准度会大幅下降,并且后坐力很大。

电击专家 - 滋滋作响。提升电击棍的伤害,延长对敌人的电击持续时间。提高电击棍的制作品质。 等级 伤害 格挡伤害 眩晕持续时间 制作解锁 制作品质 智力等级要求 1 +10% +20% +1秒(总计5秒) 电击棍 2 1 2 +20% +40% +1秒(总计6秒) 无 3 3 3 +30% +60% +1秒(总计7秒) 无 4 5 4 +40% +80% +1秒(总计8秒) 无 5 7 5 +50% +100% +1秒(总计9秒) 无 5 10 电击效果 - 电击棍通过攻击敌人积累充能。 普通攻击积累1点充能 强力攻击积累2点充能 积累到4点充能时,电击棍会发光并释放电流。击中敌人将消耗3点充能并对其造成电击效果。触电效果默认持续4秒,每秒造成6点伤害。触电的敌人无法攻击或移动。再次对敌人施加触电效果会重置持续时间。注意,攻击地面会使你失去所有充能。未命中攻击或切换武器不会消耗任何充能。智力 - 辅助/制作专长

更好的交易 - 叮!谢啦,伙计。提高出售商品获得的杜克币数量,同时降低购买商品的价格。更高等级将解锁所有商人更好的秘密 stash。 等级 交易 秘密 stash 智力等级要求 1 +5% 普通 1 2 +10% 普通 3 3 +15% 更好 5 4 +20% 更好 7 5 +25% 最佳 10 交易 - 按给定百分比提高出售商品的收益。同时按相同比例降低购买商品的价格。 秘密 stash - 在商人 inventory 的最后一个标签页,有秘密 stash 选项。默认情况下,它会显示稀有物品,包括 armor、武器、蓝图、杂志等。升级更好的交易可以提高秘密 stash 中 loot 的质量和数量,但不会影响游戏阶段值(例如第一天你找不到霰弹枪。

无畏冒险家 - 不再返回山姆威工厂。完成商人任务后,获得更多杜克币和奖励选项。 等级 杜克币增益 奖励选择 智力等级要求 1 +5% +1 1 2 +10% +2 4 3 +15% +3 6 4 +20% +3 【额外奖励:可选择2个奖励】 8 任务奖励 - 默认情况下,玩家可选择1个奖励,有2个奖励选项。杜克币数量由任务难度决定。

魅力天性 - 什么才会奏效?只要你与盟友及队友保持组队状态,就能为你和他们提供属性加成。当处于友方15米范围内时,增益效果激活,离开范围后可持续5分钟。随着该特长等级提升,各等级获得的所有增益效果将保留。此特长仅在多人游戏中生效。可通过玩家列表添加盟友和创建队伍。 等级 盟友增益 智力等级要求 1 +20最大生命值和耐力 1 2 +20%格挡和近战伤害 3 3 +10%伤害抗性、-50%流血伤害、-50%流血持续时间 5 4 所有属性+1 7

医师 - 别这么娇气。肋骨会长回来的!使用药物和急救时获得更多生命值和经验值。每提升一级都会解锁多个新的制作配方。 等级 生命值加成 经验值加成 制作解锁 化学站制作速度 智力等级要求 1 +25% +40% 化学站、急救绷带、石膏固定 正常 3 2 +40% +60% 无 +20% 6 3 +55% +80% 急救包、类固醇 +20% 8 4 +75% +100% 福特比茨、雷科格、抗生素 +40% 9 药物 - 医师职业解锁类固醇、雷科格和福特比茨等药物的制作配方。这些可能合法的物质会在中等持续时间内为你提供属性加成,但需要付出代价。使用药物会大幅增加口渴度,并有几率导致戒断反应。戒断反应会暂时降低你的属性,该效果只能随时间消退,或通过使用导致你成瘾的药物来缓解。 类固醇 - 移动速度提升10%,并移除负重影响。持续10分钟。 Recog - 所有远程伤害提升50%。持续5分钟。 Fortbites - 获得50%伤害抗性。持续2分钟。 注意:经验值加成仅适用于绷带、急救绷带、急救包、夹板和石膏。所有已学习的制作配方都可通过蓝图学习,但Recog、类固醇和Fortbites除外。

高级工程学 - 实用问题。解锁众多新配方,同时提升制作速度、降低成本,并从陷阱击杀中获得更多经验值。 等级制作解锁制作速度熔炉配方成本锻造钢/电子设备成本电子陷阱经验值智力等级要求1熔炉。胶水制作成本减少1个骨头/超级玉米。+20%(搭配熔炉) 普通 普通 0% 12 工作台和水泥搅拌机 +20%(搭配熔炉和水泥搅拌机) 普通 普通 0% 4 3 发电机组、化学站、采矿头盔、刀片陷阱、飞镖陷阱、电围栏柱、军用纤维、所有其他电子设备 +20%(搭配熔炉和水泥搅拌机) -10% -15% 20% 6 4 霰弹枪炮塔、射钉枪、电池组、所有电动门 +20%(搭配熔炉和水泥搅拌机) -15% -25% 35% 8 5 SMG炮塔和坩埚 +20%(搭配熔炉和水泥搅拌机) -20% -35% 50% 10 其他电子设备-基础灯泡、聚光灯、工业灯、工业灯泡、继电器、扬声器、运动传感器、绊线柱、所有触发板 陷阱经验值-默认情况下,玩家通过陷阱击杀敌人不会获得经验值。在更高等级时,该百分比是击杀敌人通常获得的经验值的一部分。 注意 - 所有已学习的制作配方都可以通过蓝图解锁。

机械师 - 载具更新现已推出!解锁载具零件的制作配方,同时降低其制作成本。更高等级将解锁新配方,例如汽油桶和汽车电池,此外还能提升铅酸汽车电池的制作品质。 等级|载具零件配方|额外制作解锁|电池制作品质|智力等级要求 ---|---|---|---|--- 1|自行车零件(便宜33%)|车轮|无|1 2|迷你摩托车零件(便宜33%)|汽油桶、铅酸汽车电池|2|4 3|摩托车零件(便宜33%)|机油|3|6 4|四驱卡车零件(便宜33%)|汽油桶堆叠|4|8 5|旋翼机零件(便宜33%)|无|5|10 载具 - 在五种可驾驶载具中,每一种都独具特色,各有优势。更高等级的载具制作成本更高。更多信息请参见智力 - 载具。注意 - 所有载具零件配方都可通过蓝图学习。汽油桶配方同样可通过蓝图学习。 智力 - 武器(炮塔) 炮塔 - 智力技能树可部署两种自动炮塔,两者均具有独特功能和攻击模式。炮塔也可装备到快捷栏中使用,但精准度极低且后坐力很大。如果你需要额外火力支援,放置一座炮塔,然后见证科技的力量吧。 两种炮塔均有-65%的损耗率。这意味着它们的 durability 实际上提升了+35%。
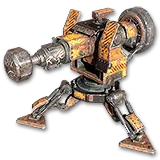
机械大锤 - 解锁条件:机器人专家1级或蓝图 - 等级:1级 - 属性:伤害9.8-17.8,攻击速度27-33次/分钟(慢),部署状态下为长射程,手持状态下为中等射程,耐久度200-636 - 大锤炮塔是一种花哨但偶尔有用的武器。作为近战武器,它的伤害很低,但部署时使敌人 stagger 和击晕的几率非常高。它还有一个独特效果,能将敌人向后推开,这对于获取喘息空间很有用。此外,似乎还可以用来推动友方单位并让他们飞出去。

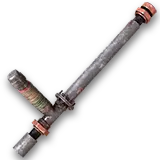
机械炮塔 - 解锁方式:仅蓝图 - 等级:2级 - 属性:伤害10.0-18.3,弹匣容量54-103,射速95.0-116.2发/分钟(快速),有效射程8-12米,最大射程15米,腰射精度极低,AI控制部署精度,耐久度200-636, reload时间3.5秒 - 虽然机械炮塔无法独自清剿整个房间,但它能提供出色的支援火力。它可以在等于其有效射程的范围内探测到僵尸,并且可以通过改装提升威力,即使在部署状态下也能进行改装。部署后,炮塔的射击必定命中,通常瞄准躯干中心,偶尔会命中头部。 智力-武器( Baton) Baton-目前包括钢管 Baton和电击 Baton。虽然管道警棍的作用与标准近战武器类似,但眩晕警棍拥有其他任何近战武器都不具备的独特功能:电击并使敌人失去行动能力。攻击敌人可积累充能,让你能暂时击晕攻击者。
【管道警棍-默认解锁】 - 原始品质 - 属性:13.8-20.7伤害,27.6-34.5强力攻击伤害,38次/分钟攻击速度(慢),中等攻击范围,14.8耐力/次攻击,23.0耐力/次强力攻击,60-110耐久度 - 由废金属和管道制成的警棍。管道警棍是电击警棍的前身,为智力型玩家提供了前期可用的近战武器。

眩晕 Baton - 解锁条件:电击者等级1或蓝图 - 等级2 - 属性:9.2-16.7伤害,20.0-27.5强力攻击伤害,70次/分钟攻击速度(平均),平均射程,15.5耐力/攻击,26.4耐力/强力攻击,269-673耐久度 - 与其他近战武器相比,眩晕 Baton 的伤害相对较低。但其真正的潜力在于电击敌人的能力。成功攻击会积累电荷,当积累足够电荷后,下一次攻击将暂时击晕敌人,让你或队友可以对其发起攻击。 电击效果 - 眩晕 Baton 通过攻击敌人积累电荷。 普通攻击积累1点电荷 强力攻击积累2点电荷 积累到4点电荷后,眩晕 Baton 会发光并释放电流。击中敌人会消耗3点充能并使其触电。触电状态下,敌人每秒受到6点伤害,默认持续4秒,且无法攻击或移动。再次使敌人触电会重置持续时间。注意,击中地面会使你失去所有充能。未命中攻击或切换武器不会消耗充能。【智力 - 无人机】
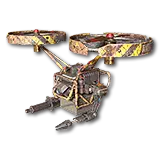
机械无人机 - 解锁方式:仅蓝图 - 等级:3级 - 属性:200-636点耐久度,16格物品栏 - 与其他炮塔截然不同,机械无人机不使用任何武器;它无法射击,也不会以任何方式攻击敌人。相反,无人机的用途是为玩家及其盟友提供全面支持。 无人机本身拥有中等大小的物品栏,让你在大量拾取战利品时能携带更多物品。无人机将跟随你到任何地方;穿越荒野、驾驶车辆时,甚至在室内!敌人不会对无人机产生仇恨,你的攻击也不会伤害到它。无人机仍会受到敌人炮火、僵尸攻击和爆炸的伤害。当生命值降至1点时,无人机将进入无敌状态,并会关机直至修复。无人机若未修复,将在一小时后消失。 即使拥有5级炮塔综合征,一次也只能部署一架无人机。 无人机特点: - 随时随地跟随你! - 操着一口模糊的英国口音说话! - 如果你不喜欢,可以开启安静模式! - 敌人靠近时会提醒你! - 拥有16个物品栏格子! - 安装货物模组后最多可达48个! - 会叫你主人! - 可以治疗你!(配备医疗模组时) - 提升耐力回复速度!(配备士气增强模组时) - 照亮黑暗!(配备头灯模组时) - 会吐槽商人珍! - 可能会产生被抛弃的情绪问题! 无人机有五种独特的改装模组,每种都有其特定功能。这些模组并非互斥,可以任意组合。所有模组在找到蓝图后都可以通过搜刮或制作获得。
货物模块 - 增加无人机库存容量8格。与大多数模块不同,此模块可在同一无人机上多次应用。

士气提振 - 无人机激活时,获得10%耐力恢复加成
装甲 plating - 提升无人机伤害抗性50%,降低无人机损耗50%

头灯 - 为你的无人机配备头灯,可照亮无人机朝向的任何地方。面向无人机时长按E键进入无人机界面,即可开关头灯。
医疗模块 - 当你或你的一名队友生命值低于或等于75%且当前未处于治疗状态时,只要无人机的库存中有急救绷带或急救包,无人机就会自动为你治疗。你也可以通过操作无人机手动为自己治疗。无人机治疗有15秒的冷却时间。 智力 - 陷阱 除了常规的电子设备外,选择智力专长的玩家可以建造独特的电子陷阱,包括电子围栏柱和全自动炮塔。只要这些陷阱连接电源,它们就会正常工作,提升你的基地防御能力,让亡灵保持死亡状态。 注意:默认情况下,电子设备击杀僵尸不会为玩家提供经验值。升级【高级工程学】特长将获得击杀经验值的百分比加成,在5级时最高可达50%。

电 fence 柱 - 解锁条件:高级工程学等级3或蓝图 - 属性:施加电击减益,5W电力需求,20格挡生命值,功能由生命值决定 电击减益会造成每秒6点伤害,持续4.5秒。同时降低90%移动速度。 - 连接两个或更多柱子可创建电 fence 链接。踏入链接的僵尸会被电击,持续受到伤害并被 immobilized。这些陷阱非常适合放置在基地周围!被电击的僵尸会进入动画锁定状态,便于进行爆头。功能信息如下。 每次电击事件会导致终端(末端)fence 柱失去0.5格生命值 当电子围栏柱的生命值降至50格(即承受300次电击)时,它将停止运作。 当围栏柱本应电击敌人却发出火花时,即表示其已停止运作。连接围栏柱的电线也会下垂。由于围栏柱较为脆弱,请用方块或金属板保护它们!
飞镖陷阱 - 解锁条件:高级工程学等级3或蓝图 - 属性:45点伤害,55米/秒 projectile speed,快速射速,10W电力需求,2500点方块生命值 - 必须装填铁飞镖才能使用。通电后,飞镖陷阱会持续每秒发射两枚飞镖。飞镖的碰撞箱非常精确,如果瞄准僵尸脚部可能无法命中。飞镖陷阱最适合放置在狭窄通道中,瞄准僵尸的重心。它不是最优秀的远程陷阱,但在合适的情况下能发挥作用。

刀片陷阱 - 解锁条件:高级工程学等级3或蓝图 - 属性:每次碰撞20点伤害,20W电力需求,2000点格挡生命值,功能由生命值决定 - 这些恐怖的刀片陷阱以毁灭性的速度旋转,足以将僵尸绞成红色肉酱。敌人离刀片陷阱中心越近,受到的碰撞次数越多,伤害也就越高。放置在基地附近时效果非常显著。不过,这些电力陷阱需要维护,因为它们在造成伤害的同时会逐渐失效。以下是该机制的详细说明。刀片陷阱每次与实体碰撞会受到4点格挡伤害。随着刀片陷阱的格挡生命值降低,其旋转速度会变慢(造成的每秒伤害减少)。刀片陷阱会根据自身生命值播放独特的循环音效,例如机械部件的刮擦声和变慢的旋转声。当刀片陷阱的格挡生命值降至500点(即经历375次碰撞)时,它会损坏并停止旋转。
霰弹炮塔 - 解锁条件:高级工程学等级4或蓝图 - 属性:每发弹丸9点伤害,8发弹丸,高射速(4发点射后,冷却2秒),15米侦测范围,15瓦电力需求 - 配备运动侦测技术,这款全自动炮塔会对其侦测范围内的僵尸进行扫射,并会尽力瞄准头部射击。当然,将其部署在僵尸近距离范围内时性能最佳,因此请务必制定好炮塔的部署策略。必须装填霰弹才能使用。炮塔通电时可设置摄像头。使用摄像头预览功能时,你可以手动瞄准并射击炮塔。

自动炮塔 - 解锁条件:高级工程学等级5或蓝图 - 属性:32点伤害,高射速(15发连射后,冷却2秒),30米侦测范围,15瓦电力需求 - 由你设计,由你建造……自动炮塔是游戏中最致命、最多功能的远程陷阱,只要数量足够,任何生物踏入你的领地都会被弹幕洗礼。与霰弹炮塔类似,它会优先瞄准头部。非常适合放置在基地周围,激活后可提供持续防御,尤其适合尸潮夜使用。必须装填9毫米弹药并锁定。炮塔通电时可设置摄像头。使用摄像头预览功能时,你可以手动瞄准并射击炮塔。智力-载具 正如“智力-支援/制作专长”中所述,智力技能树中有某个专长可以解锁载具制作。为方便起见,相关载具及其属性将在此处列出。 载具可通过两种控制方式驾驶。默认情况下,载具会朝着你面向的方向行驶。点击M1可将驾驶控制切换为WASD。按住Shift键可激活涡轮增压(速度更快但油耗更高),按F键可开启车头灯。所有载具均拥有90%的伤害抗性。你还可以通过按C键让大多数载具“跳跃”。自行车和迷你摩托车的跳跃效果最佳,摩托车略有效果,四轮驱动卡车则无法跳跃。 所有载具都能在水中行驶且不会受到伤害,但行驶时速度会减慢。当载具被摧毁后,它会停用且在修复前无法交互。在此期间,载具处于无敌状态,但如果一小时内未修复将会消失。不过载具的防御能力近乎无敌,所以不必过于担心这一点。 【km/Tank】这项属性指的是载具从满油到空油所能行驶的最大距离。如果你将【Base/Turbo speed】(基础/涡轮速度)转换为千米/秒(除以1000),然后用【km/Tank】除以该千米/秒数值,就能计算出在持续使用基础/涡轮速度的情况下,每箱油能持续行驶的秒数。(例如:摩托车的涡轮速度为14米/秒=0.014千米/秒,一箱油可行驶24千米。24千米 ÷ 0.014千米/秒 = 1714.29秒,即28.57分钟,这表示仅使用涡轮模式时的续航时间。)
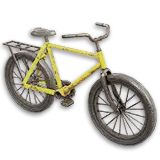
自行车 - 解锁条件:油脂猴等级1或蓝图 - 属性:1500生命值,5米/秒基础速度,10米/秒涡轮速度,1个座位,9个物品栏 - 这是前期游戏中的优秀载具,尤其适合经常负重或穿着重型护甲的情况。不过,自行车仍是五种载具中最不起眼的。处于涡轮速度时,自行车会消耗耐力(消耗速率略低于跑步)。减少跑步耐力消耗的 perk 和物品同样适用于自行车!
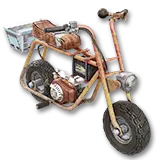
迷你摩托 - 解锁条件:油脂猴等级2或蓝图 - 属性:3000生命值,1000G油箱,基础速度7米/秒,涡轮速度10米/秒,每箱油行驶16千米,1个座位,27个物品栏位 - 让我回想起A16版本……迷你摩托比自行车好得多,尤其适合喜欢囤积战利品的玩家。它需要汽油才能运行,与其他载具相比油箱容量较小。
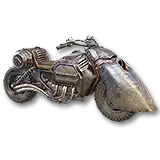
摩托车 - 解锁条件:油污技工等级3或蓝图 - 属性:6000生命值,3000G油箱容量,基础速度9米/秒,涡轮速度14米/秒,每箱油行驶24公里,1个座位,36个物品槽位 - 这是我个人最喜欢的载具,尤其是因为它的外观和越野能力。摩托车是一款全能的优秀载具,拥有适中的油箱容量和储物空间。它比迷你摩托车快得多,转弯速度也非常出色。此外,它小巧的尺寸使其非常适合越野行驶。
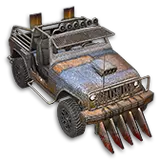
4x4卡车 - 解锁条件:油污技工等级4或蓝图 - 性能数据:7500生命值,10000G油箱容量,基础速度9米/秒,涡轮增压速度14米/秒,每箱油行驶40公里,2个座位,72个物品槽位 - 如果你要出门跑腿,最好开这种车。4x4卡车功能强大,最多可容纳72个物品,油箱容量巨大,同时行驶速度与摩托车相同。此外,如果你玩合作模式,这将是你的首选,因为它可以搭载两名玩家!不过,由于其体型较大,它在越野(在崎岖地形行驶)方面表现不是最好。
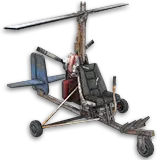
Gyrocopter - Unlocked: Grease Monkey Rank 5 or Schematic - Stats: 3000HP, 2000G Tank, 9m/s Base Speed, 15m/s Turbo Speed, 12km/Tank, 1 Seat, 45 Item Slots - Though it has a smaller health pool and gas tank, the Gyrocopter is the fastest of all the vehicles, and has the added ability of flying. By default, holding SPACE raises the Gyrocopter's height, while holding C decreases it. If you ever need to get to Point A to Point B as fast and safely as possible, the Gyro is your prime pick. The inventory room is nice, too. However, its smaller gas tank means that you will need to stop more frequently to refill, compared to other vehicles. Intellect - Playstyle Overall OpinionDifficulty: Intermediate Combat Viability: Poor (D) Survival Viability: Decent (C) Best Perk Synergy: Any (see Skilltree Synergy below) Strategy Use your stun baton to disable and mark enemies Place turrets for additional fire support Support your teammates by healing, applying buffs, and crafting Speed up gameplay progression by learning new recipes Significantly improve trader bartering and quest loot General Playstyle The Intellect Skilltree, on its own, is very unequipped for combat. Your Stun Baton is very ineffective at killing enemies, and Turrets must be placed strategically before becoming usable. When held as a gun, Turrets are unwieldy, slow, and couldn't hit the broad side of a barn. In addition, you don't have many perks to help you survive. You may have new crafting recipes and workbenches, but no efficient way to gain the resources necessary to craft them. So why choose Intellect? Intellect is a very unique skilltree, not meant to be leveled on its own. The Intellect skilltree is intended to support; Intellect improves game progression, unlocks new workbenches faster, provides healing and stamina support, and has automatic turrets intended for supplementary firepower. Depending on how you play, and who you play with, Intellect can be played in two different ways. In Singleplayer, Intellect skilltree can be used as an auxiliary attribute, allowing you to accelerate the progression speed of your own game. Unlock crafting recipes faster, that would have otherwise been unlocked through looted schematics. Place turrets for more firepower when you need it. Get better results from trading and questing. Intellect doesn't have to be what you spec into first, but it can make all the difference in a build. In Multiplayer, you're more free to spec into Intellect, without the need to combine it with any other attribute. With that in mind, however, you are completely reliant on your team for resources, defense, and offense. If you're a good coordinator, you can support your team with turrets, drones, crafting, and trading, while they bring you the materials you need. If you love being a team player, and playing support, then make an Intellect build. Optimizing Weapon Usage Turrets - With the Sledge Turret, place in tight corridors where zombies bunch up. The Sledge can be wielded as well, and has a very high chance to stun enemies. With any ranged Turret, place in similar areas, with the premonition of approaching enemies. Make sure your turrets are placed with sights on the enemy. If possible, deploy your Turrets on a high ground. Drone - While not exactly a weapon, the Drone is incredibly useful still. It can help you carry more loot during quests, and can provide additional support with specific mods. Medic Mod lets the Drone automatically heal you, and the Morale Booster gives additional stamina regen (especially useful for Mining). Keep in mind, these boosts provide to your allies as well! Stun Baton - Though it isn't as effective at killing, the Stun Baton can be used for personal defense, allowing you to disable tougher enemies within uncomfortable distance. If in Multiplayer, make call-outs to your team, informing them about your stunned target. Consider it a mark for death. Traps - While inside your base, your traps can be very potent at keeping enemies at bay. In direct combat out of your home, however, it's incredibly clunky and inefficient to bring a portable electrical setup. Bringing a few spikes to barricade yourself from zombies isn't a terrible idea, however, it's best to leave the trapmaking at home. Other Weapons - If you've spec'd into a different skilltree, make sure you utilize its weapons as well! You can further enhance your personal combat viability by combining skilltrees. See the respective attribute's playstyle for more info on its weapon usage. Survival In Singleplayer, you are reliant on your main skilltree and its survival perks, if you've spec'd into another tree, as well as your own gamesense and knowledge. In Multiplayer, you are reliant on your team for resources and protection. A good team treats their support with care. Likewise, you are integral for your team's survival. Spec into healing and crafting perks, and be their Medic/Engineer. If you're a quest-junky like me, you can improve your survival by getting better quest loot through Intellect perks. In addition, as you unlock new crafting recipes and workbenches, you can further enhance your own and your teammates' survival, with the new recipes those workbenches bring you. Blood Moons As mentioned for Singleplayer, you can invest into other attributes and their skilltrees before starting a full Intellect build. Early game, it is much rarer to find turret and stun baton parts, so you're less likely to have Intellect weapons, even in Multiplayer. Utilize your current weapons, or rely on your team's offense. Once late game arrives, you're more likely to have Intellect upgraded, a good Turret or two, and a strong team composition. Turret placement is key. On Horde nights, enemies will typically approach from only one direction. Deploy your turrets facing the direction of the horde's approach. Be sure to reload them often. Stun straggler enemies. Sometimes, an enemy might get past the base defenses, and will come too close for comfort. Utilize your stun baton to disable the enemy, and make a quick takedown. If in Multiplayer, make call-outs whenever you're in danger. Eat Nerd Tats candy. Nerd Tats will give your stun batons area of effect! Not only does this disable a tight group of zombies, but it can deal impressive damage to them as well, softening the crowd for you or your teammates to take out! Play doctor. Injured? Teammate screaming for help? You can do something about it. Bring plenty of medical equipment before horde night, and use it on yourself and your friends. You can heal other players by using M2 on them, while holding a medical item. Set up electric traps and utility. With earlier access to new electric devices, Intellect builds can set up electricity in a base. You can place spotlights to light up the area, or make SMG and shotgun turrets that automatically shoot enemies in their cone of vision. Electric traps stun enemies that walk by them, and blade traps can chop enemies to bits! Craft or find a Wire Tool, and hook up devices to a battery or generator bank to power them. Design and engineer a clever base. Unsurprisingly, Intellect builds will also flourish in creating the materials needed for making a base. With the right design, and the best trap placement, it is possible to make an impenetrable base. Hell, you won't even have to shoot your own gun! Sit back and let your trusty machines do the work. Skilltree Synergy If you haven't figured it out already, Intellect will mix and match with any other skilltree. It's completely up to you on what perks and weapons you want. In Multiplayer, it doesn't have to be you who specs into different skilltrees. Form a plan with your friends, and decide on an effective composition that will benefit everyone. Somebody can make a Strength build to mine resources and be the team's offense, or somebody can use Perception to snipe out threats from a safe distance... The choice is up to your team. Tools and Ammunition Below are the stats for every tool and ammo type currently in the game. Both have a similarly-styled evolution to ranged and melee weapons, where the later versions of an item are typically stronger than the early ones. So load up some AP rounds, and fire up your auger. We're going for another ride! Tools This section will cover every tool in 7 Days to Die, from wrenches to pickaxes and axes to shovels. Every tool's crafting quality and power is governed by the perk Miner 69'er, with the exception of salvaging tools, which are governed by Salvage Operations. For the sake of keeping things short, only Block Damage will be shown, while Entity Damage will not. Repair Tool - If a tool is a Repair Tool, its M2 ability is replaced by a slower swing that repairs blocks on contact. To repair a block, you need to have the correct material (it will appear in the bottom right when you try to repair). The HP value is the amount of block health repaired with each M2 swing. Efficacy - Efficacy is a new section for each tool, detailing its damage against certain block types. If a Tool does 50 Block Damage, but is only 50% Effective against Metal, then that tool will deal only 25 Block Damage to any metal object. Primitive Tools - Tools that we all started out with. These Primitive tier tools can be crafted very simply (with the exception of Taza's Axe), with unrefined stone, wood, and plant fibers.
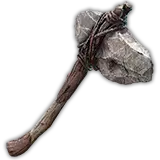
石斧 - 解锁方式:初始解锁 - 品质:原始 - 属性:格挡伤害21.5-32.3,攻击速度105次/分钟(快速),每次攻击消耗8.0耐力,耐久度112-300,修理工具(100生命值) - 效率:对木材100%,对泥土15%,对石头67%,对金属50% - 这是每个人的第一把也是“最喜爱”的工具。石斧是一种非常通用的工具,适合破坏任何材料,但不包括泥土和 gravel。通过一些搜刮,你最终可能会找到更好的工具。
塔扎的石斧 - 解锁方式:仅通过搜刮 - 等级:1级 - 属性:格挡伤害22.6-33.9,攻击速度99-110次/分钟(快速),每次攻击消耗耐力8.6-9.5,耐久度120-375,修理工具(100生命值) - 效率:对木材100%,对泥土15%,对石头67%,对金属50% - 这把阿帕奇族 artifact 是普通石斧的极其稀有变种。塔扎的石斧只能在阿帕奇宝箱中找到,这些宝箱隐藏在隐蔽的兴趣点内,例如印第安人墓地。它更适合收藏而非实际使用,除非你在游戏早期就找到它。可能带有诅咒。
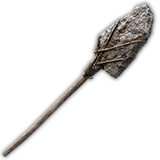
石铲 - 解锁方式:默认解锁 - 品质:原始 - 属性:38.4-57.6 格挡伤害,86.4-105.6 强力攻击格挡伤害,50 次/分钟 攻击速度(平均),16.2 耐力/次挥击,32.5 耐力/次强力挥击,75-200 耐久度 - 效果:对木材 30%,对泥土 100%,对石头 20%,对金属 20% - 虽然不是最好的铲子,但在需要进行寻宝任务时可以随时制作。 维修工具 - 这些维修工具用于修理、维护和升级基地。M2 键不再是强力攻击,而是替换为维修功能。瞄准你想要维修的方块,如果你拥有合适的材料即可进行维修。它们的格挡伤害较低,因此不太适合破坏作业。

羊角锤 - 解锁条件:矿工69级1级或蓝图 - 等级1 - 属性:18.7-34.1格挡伤害,66-73次/分钟攻击速度(平均),16.2-18.0耐力/次挥击,238-955耐久度,修理工具(400生命值) - 效果:对木材50%,对泥土25%,对石头100%,对金属100% - 与石斧相比,是更优秀的基地修理工具。羊角锤在工人木箱中很常见,也能勉强用于破坏方块。
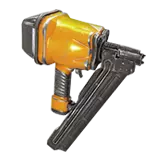
钉枪 - 解锁条件:高级工程学等级4或蓝图 - 等级3 - 属性:1000点耐久度,维修工具(1000点生命值) - 钉枪是顶级的维修工具。只需点击几下就能完全修复方块,其修复速度通常能超过僵尸群造成的伤害。钉枪也能像枪械一样使用,但我们不打算讨论这方面。它的战斗属性极差,可装填10发钉子射击敌人,但精准度和伤害都低得可怜。如果你已达到能找到钉枪的游戏阶段,肯定已经拥有更好的武器了,对吧? 镐子 - 镐子是对付石头和金属的主要工具,无论是拆房子还是挖矿都能派上用场。所有镐子对 gravel 都有额外80%的效率加成。
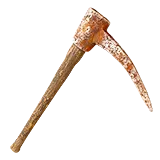
铁镐 - 解锁条件:矿工69级1阶或蓝图 - 等级1 - 属性:30.2-55.0 方块伤害,65.7-90.5 强力攻击方块伤害,61-68 攻击/分钟(平均),17.5-19.3 耐力/攻击,31.3 耐力/强力攻击,221-886 耐久度 - 效率:对木材20%,对泥土20%,对石头100%,对金属100% - 由早期锻造的铁制成,这把简单的手镐可以应对大多数方块和矿石。它的挥舞速度略高于其他镐子,但伤害要低得多。

钢镐 - 解锁方式:仅蓝图 - 等级:2级 - 属性:53.4-97.3 格挡伤害,131.9-175.8 强力攻击格挡伤害,52-57 次/分钟 攻击速度(平均),25.1-27.7 耐力/攻击,52.7 耐力/强力攻击,297-1287 耐久度 - 效果:对木材 20%,对泥土 20%,对石头 100%,对金属 100% - 这是油田工人用来采煤的同款工具。这把沉重的钢镐对石头和金属造成巨额格挡伤害,非常适合开采矿石和破坏建筑。
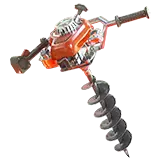
螺旋钻 - 已解锁:仅蓝图 - 等级3 - 属性:17.6-32.1格挡伤害,263-336G燃料容量,285-315次/分钟攻击速度(快速),1120-4368耐久度,3.5秒装填时间 - 效果:对木材20%,对泥土100%,对石头100%,对金属100% - 让电动工具充满力量!这款汽油驱动的螺旋钻可能格挡伤害较低,但它的高射速弥补了这一点。此外,它有一定的后坐力,因此需要进行一些后坐力控制。总的来说,螺旋钻是终极采矿工具,是快速破坏任何材料的顶级工具。 工具(续) 斧头 - 从重型消防斧到笨重的链锯,这些斧头专为砍树和突破木制障碍物而设计。它们看起来锋利到可以用来猎取头颅,但遗憾的是,它们并非为战斗而设计。记得随身携带一把,以便随时进行现场切割。
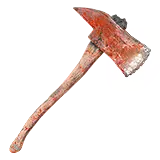
铁制消防斧 - 解锁条件:矿工69级1级或蓝图 - 等级1 - 属性:40-72.9格挡伤害,98.7-131.6强力攻击格挡伤害,57-63次/分钟攻击速度(平均),18.9-20.9耐力/攻击,39.9耐力/强力攻击,159-641耐久度 - 效果:对木材100%,对泥土20%,对石头25%,对金属25% - 一把传统的消防斧,用于破门和劈砍地板。在游戏初期对收集木材有显著帮助,远优于石斧。
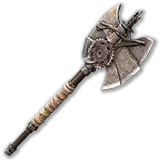
钢斧 - 解锁方式:仅蓝图 - 等级:2级 - 属性:格挡伤害73.3-133.6,强力攻击格挡伤害181.0-241.4,攻击速度44-49次/分钟(慢),每次攻击消耗耐力29.4-32.4,强力攻击消耗耐力61.7,耐久度255-1100 - 效果:对木材100%,对泥土20%,对石头25%,对金属25% - 这是一把双刃的废土居民斧头,由锋利的废金属和机械零件打造而成。每次挥砍都能对树木和木质方块造成大量伤害,强力攻击的伤害更高。
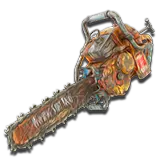
链锯 - 解锁方式:仅蓝图 - 等级:3级 - 属性:格挡伤害20.7-37.7,油箱容量263-336G,攻击速度285-315次/分钟(快速),耐久度1120-4368, reload时间3.5秒 - 效果:对木材100%伤害,对泥土15%伤害,对石头15%伤害,对金属15%伤害 - 和它的电动工具兄弟【电钻】类似,这把邪恶的链锯由恐惧(和化石燃料)驱动。当你拿出这台链刃机器时,树木会颤抖着倒下,使其成为收集木材的最佳选择。用它杀死敌人不会掉落额外弹药。 铲子 - 用于挖洞和挖沟的铁锹。虽然你可能不会在每个任务中都需要挖掘,但它们在收集粘土和沙子以及执行埋藏宝藏任务时非常有用。
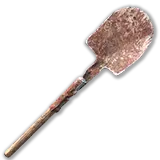
铁铲 - 解锁条件:69级矿工等级1或蓝图 - 等级1 - 属性:43.4-79.1格挡伤害,107.1-142.8强力攻击格挡伤害,47-52次/分钟攻击速度(平均),19.3-21.3耐力/攻击,40.6耐力/强力攻击,187-750耐久度 - 效果:对木材30%,对泥土100%,对石头20%,对金属20% - 一把简单的双手铲,对泥土、沙子和黏土有很高的格挡伤害。
钢铲 - 解锁方式:仅蓝图 - 等级:2级 - 属性:58.7-107.0格挡伤害,144.9-193.2强力攻击格挡伤害,47-52次/分钟攻击速度(平均),23.5-25.9耐力/攻击,49.3耐力/强力攻击,255-1100耐久度 - 效果:对木材-30%,对泥土100%,对石头20%,对金属20% - 这把钢铲是铁铲的直接升级版,非常适合挖掘壕沟和破坏地面。遗憾的是,它目前还没有专属模型。在游戏中,其图标是铁铲图标的浅蓝色版本。 回收工具 - 用于机械和电器设备(如汽车)时,这些回收工具会拆解设备以获取资源,例如铁、管道、散热器、电池、发电机等。瞄准你想要回收的设备即可使用。你可以通过独特的工具动画来判断其是否可回收。
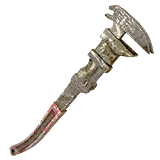
扳手 - 解锁条件: salvage operations 等级1或蓝图 - 等级1 - 属性:32.7-59.7格挡伤害,71.2-98.2强力攻击格挡伤害,50次/分钟攻击速度(平均),18.3耐力/次攻击,31.1耐力/次强力攻击,180-640耐久度 - 效果:对木材50%,对泥土25%,对石头50%,对金属100% - 曾经是一种修理工具,也曾是唯一的打捞工具。随着Alpha 19中新打捞工具的推出,扳手不再是唯一的选择。相应地,它成为了最低等级的打捞工具,但扳手仍然是一件可靠的装备!
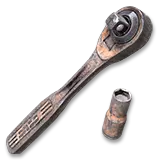
棘轮 - 解锁状态:仅蓝图 - 等级:2级 - 属性:格挡伤害41.2-75.2,强力攻击格挡伤害89.7-123.7,攻击速度50次/分钟(平均),普通攻击耐力消耗21.8,强力攻击耐力消耗37.0,耐久度300-900 - 效果:对木材50%,对泥土25%,对石头50%,对金属100% - 这把锻造铁制棘轮能拧开一些插槽。它比扳手的伤害高得多,能让你更快拆卸装置。
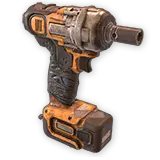
冲击钻 - 解锁方式:仅蓝图 - 等级:3级 - 属性:普通攻击格挡伤害49.3-89.9,强力攻击格挡伤害107.3-147.9,攻击速度50次/分钟(平均),普通攻击耐力消耗24.7,强力攻击耐力消耗41.9,耐久度500-1100 - 效果:对木材50%,对泥土25%,对石头50%,对金属100% - 所有回收工具中的佼佼者。这款3级冲击钻能将汽车和电器拆成碎片,供你进行家庭项目使用。 其他工具 - 包括画笔、光源、电线工具等。这些工具无法归类到其他列表中,且具有非常特定的用途。

火把 - 解锁方式:初始解锁(且初始持有一个) - 属性:10.2点伤害,50次攻击/分钟(平均),21.8点耐力/攻击,30%点燃几率,手持时+7寒冷抗性,中等亮度 - 一把摇曳的火把,可帮助你在黑暗中照亮道路。作为武器(或工具),它的伤害相当低,但有一定几率点燃敌人,使其在几秒内被火焰吞噬。手持时,它还能提供一定的寒冷抗性。愿光芒指引我们走向胜利。
手电筒 - 解锁方式:初始解锁(可在工作台使用) - 属性:7.2点伤害,65次/分钟攻击速度(平均水平),11.4点耐力消耗/次攻击 - 英国人也把这玩意儿叫做“torch”。手电筒也能当作近战武器使用,但伤害相当拉胯。按F键可切换开关,照明范围还不错。

画笔 - 解锁方式:初始解锁 - 用途:为方块绘制不同纹理。使用方法:首先按住R键选择绘画模式和纹理。只要拥有颜料,按下鼠标右键即可为方块涂上所选纹理。按下鼠标左键可清除已绘制方块的纹理,使其恢复正常外观。
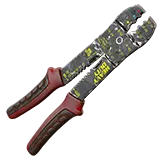
电线工具 - 解锁方式:默认解锁(通过工作台) - 用途:用于连接两个由你放置的电子设备。右键点击可连接输入/输出电线,左键点击可取消放置。电线的射程有限,记得使用中继器! 弹药 以下是游戏中所有弹药类型的完整介绍和概述。在游戏后期,弹药的选择会带来巨大差异,能帮助你击败那些通常难以对付的敌人。 注意事项: 所有枪械的伤害范围均基于其标准弹药。 更换弹药类型会根据所使用的弹药增加或减少武器的伤害。默认情况下,所有弹药(霰弹枪弹、箭矢、弩箭和炮塔弹药除外)对木制方块造成+200%的格挡伤害,但对地形仅造成20%的格挡伤害。 7.62毫米弹药 - 适用武器:管道步枪、猎枪、精准步枪、狙击步枪、管道机枪、AK-47、战术突击步枪、M60
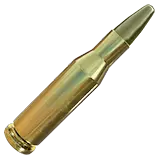
标准7.62 - 已解锁:默认可用 - 数据:远程伤害47,格挡伤害8,正常磨损 - 标准7.62弹药。能有效对付任何目标。

HiPower 7.62-已解锁:狙击卷7 - 数据:52远程伤害(步枪),50.5远程伤害(突击步枪),9格挡伤害 - HiPower子弹威力更大,但消耗资源也更多。在突击步枪中造成的伤害略低于在步枪中造成的伤害。
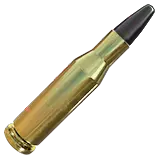
穿甲7.62 - 已解锁:狙击卷6 - 属性:57远程伤害(步枪),54远程伤害(突击步枪),10格挡伤害,+50%装甲穿透,1目标穿透 - 适用于重型目标和造成穿透伤害,这些穿甲弹可同时穿透装甲和敌人。每发穿甲弹可穿透一名生命值最高250的敌人,继续沿弹道飞行并对后方敌人造成相同伤害。此穿透效果可通过感知专长【穿透者】得到提升。 火箭弹 - 使用者:火箭发射器
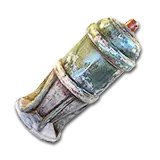
高爆火箭弹 - 解锁条件:爆破专家等级4或对应蓝图 - 属性:420点爆炸伤害,2500点方块伤害,50米/秒弹丸速度,5米爆炸半径 - 发射器使用的标准火箭弹,这种大型炮弹对地形造成的伤害比对敌人更高。如果你想进行爆破采矿,它们会很有用。但如果你想保护自然环境,最好使用破片火箭弹。
破片火箭弹 - 解锁条件:爆破专家等级4或对应蓝图 - 属性:700点爆炸伤害,20点方块伤害,50米/秒弹丸速度,6米爆炸半径 - 该火箭弹拥有更高的伤害和爆炸半径,在战斗中表现更为出色,尤其适合在己方区域作战。其对地形方块的破坏极小,能在保持地面完整的同时,将敌人炸得粉碎。 炮弹 - 适用武器:管道霰弹枪、双管霰弹枪、泵动式霰弹枪、自动霰弹枪

标准鹿弹 - 默认解锁 - 数据:每颗弹丸10.1远程伤害,每颗弹丸5.4格挡伤害(对木材+20每颗弹丸格挡伤害),10颗弹丸,2目标穿透(51格挡穿透) - 在近距离最为有效,这些弹药会释放10颗鹿弹的爆发,消灭敌人并摧毁较弱的方块。此外,每颗鹿弹都具有穿透特性,让你能够穿透墙壁和其他敌人击中目标!

穿甲弹-解锁条件:霰弹枪弥赛亚第四卷 - 属性:每发弹丸102远程伤害,每发弹丸80格挡伤害(对木材+200格挡伤害/弹丸),1发弹丸,+50%穿甲,2目标穿透,+5米有效射程,+8米最大射程,提升霰弹枪精准度 - 这些子弹能让你的霰弹枪造成游戏中最高的伤害之一,同时还能提高霰弹枪的精准度和有效射程。子弹最适合对付装甲目标和远程威胁。与典型的穿甲弹药不同,子弹最多可穿透两个目标。
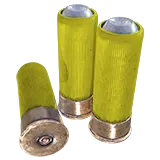
破障弹-已解锁:霰弹枪弥赛亚第二卷 - 数据:每发弹丸96点伤害,每发弹丸80点格挡伤害(对木材和门时每发弹丸+1000点格挡伤害),1发弹丸,有效射程-2米,最大射程-6米,提升霰弹枪精准度 - 虽然非常不适合战斗,但这些实用弹丸能让闯入保险箱、金库和房屋变得轻而易举。一发可破开桌式保险箱,两发可破开枪型保险箱,四发可破开加固箱。如果需要紧急破锁,就用这些弹丸。 9毫米弹药-适用武器:管道手枪、手枪、SMG-5、SMG自动炮塔

标准9毫米手枪-默认解锁 - 数据:32点远程伤害,6点格挡伤害 - 小型枪械和手枪的常用弹药。极易大量制作。

HiPower 9mm已解锁:Pistol Pete Vol 5 - 属性:远程伤害35,格挡伤害7 - 高威力弹药会造成略高的伤害,但消耗更多资源。

穿甲9毫米弹 - 解锁条件:Pistol Pete Vol 6 - 属性:38远程伤害,8格挡伤害,+50%穿甲,1目标穿透 - 最有效的9毫米弹药类型;穿甲弹造成最高伤害,可穿透护甲,并能穿透最多一个目标。 .44子弹 - 适用武器:马格南,沙漠秃鹫

标准.44弹药 - 解锁方式:初始解锁 - 属性:远程伤害70,格挡伤害12 - 该弹药适用于大威力马格南左轮和沙漠秃鹫手枪。对任何目标都具有致命威力,是单发伤害最高的弹药类型之一。
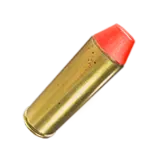
HiPower .44 - 解锁条件:Magnum Enforcer Vol 6 - 属性:远程伤害77,格挡伤害13 - 同一种子弹,如今更加强大。这些HP子弹将造成比普通子弹更高的伤害。
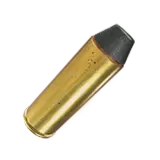
穿甲.44 - 解锁条件:麦格农执行者第五卷 - 属性:84远程伤害,14格挡伤害,+50%穿甲,1目标穿透 - 这些穿甲子弹能同时撕碎护甲和敌人。非常适合对付更强大的僵尸和造成穿透伤害。每发穿甲弹可穿透一名生命值最高250的敌人,继续沿弹道飞行并对后方敌人造成同等伤害。 弹药(续) 箭矢- 适用武器:原始弓、木弓、复合弓
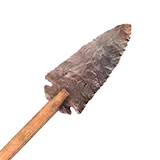
石箭-默认解锁 - 属性:35点远程伤害,1点格挡伤害,45米/秒 projectile velocity - 原始但极易制作。随着等级提升并获得熔炉后,你可以制作更好、更精制的箭头。这是所有弓的标准弹药。

铁箭-默认解锁 - 属性:38远程伤害,3格挡伤害,+20%护甲穿透,50米/秒 projectile velocity - 比石箭稍好,伤害略高且飞行速度更快。铁箭可以穿透护甲,这是石箭所不具备的特性。
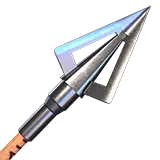
【钢铁箭矢 - 已解锁:游侠弓箭指南第四卷】 - 属性:远程伤害42,格挡伤害5,+50%破甲, projectile velocity 55米/秒 - 其刃锋利,专为撕裂血肉而设计。钢铁箭矢飞行速度最快,冲击力最强,且能够穿透护甲。

【燃烧箭矢】- 已解锁:游侠弓箭指南第五卷 - 属性:远程伤害25,格挡伤害6,火焰伤害120,燃烧时间14秒, projectile velocity 40米/秒 - 作为钢铁箭矢的衍生种类,燃烧箭矢命中敌人后会使其着火,造成持续火焰伤害。由于重量原因,其飞行速度较慢,且命中后无法回收。

爆炸箭 - 已解锁:游侠弓箭指南第五卷 - 属性:180点爆炸伤害,2点格挡伤害,4米爆炸半径,40米/秒 projectile velocity - 虽然看似不常规,但爆炸箭能轻松消灭聚集的僵尸群。其爆炸特性导致飞行速度较慢,且落地后无法回收。 弩箭 - 适用武器:铁十字弩、复合十字弩

石制弩箭-默认解锁 - 属性:50点远程伤害,1点格挡伤害,67.5米/秒 projectile velocity - 与箭矢相比,这些弩箭更强更快。石制弩箭是所有弩的标准弹药。

铁螺栓-默认解锁 - 属性:59远程伤害,6格挡伤害,+20%护甲穿透,75米/秒 projectile velocity - 比石螺栓快得多,伤害略高,并且能穿透部分护甲。
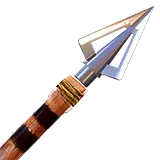
【钢铁螺栓】已解锁:游侠射箭指南第四卷 - 属性:远程伤害63,格挡伤害6,穿甲+50%, projectile velocity 82.5米/秒 - 与同类箭矢一样,这些钢铁螺栓具有穿甲能力,对更强大的目标更有效。

火焰箭 - 已解锁:游侠弓箭指南第五卷 - 属性:38远程伤害,6格挡伤害,120火焰伤害,14秒燃烧时间,50米/秒 projectile velocity - 火焰箭在命中敌人时会将其点燃,造成大量持续伤害。不过,其飞行速度比钢箭慢很多。

爆炸螺栓 - 已解锁:游侠射箭指南第五卷 - 属性:250点爆炸伤害,2点格挡伤害,4米爆炸半径,45米/秒 projectile velocity - 作为单发伤害最高的箭矢,爆炸螺栓能对小范围内的敌人造成爆炸伤害,非常适合清理小型敌群。 炮塔弹药 - 使用者:机械炮塔
标准炮塔弹药 - 默认解锁 - 属性:11.8远程伤害,3格挡伤害 - 虽然不是最强弹药,但炮塔弹药制作极其简单,仅需生铁。炮塔弹匣容量大,因此若计划使用机器人,需制作大量弹药。
炮塔炮弹-已解锁:科技达人卷4 - 属性:每发弹丸2.1远程伤害,无格挡伤害,8发弹丸,1目标穿透,有效射程-4米,最大射程-5米,射速-30%,增加炮塔散布 - 这些炮弹射程较短,但能将你的炮塔变成短程霰弹枪!非常适合在狭窄的 choke points 放置机械单位。不过使用它们会降低炮塔的射速和精度。
Turret AP Rounds- Unlocked: Tech Junkie Vol 4 - Stats: 14.1 Ranged Damage, 1 Block Damage, +50% Armor Piercing, 1 Target Penetration, +1m Effective/Max Range, Decreases Turret Spread - AP Rounds allow for your turret to pierce through armor and enemies, as well as boosting effective range and accuracy. Extras Want to know more about how the world works in 7 Days? Or maybe you didn't understand a word, and need to check the Glossary? Whatever your curious heart desires, I probably wrote about it somewhere below. The next few sections are miscellaneous, but can still provide substantial information to your process of survival! Prioritizing Your Perks (The "Meta") Disclaimer: This section will only really apply to Singleplayer. If you're in multiplayer, I recommend everyone sticks to their own personal attribute skilltree, and goes by their recommended playstyles: Perception players scout the area and loot Strength players cook, mine, and gather resources Fortitude players gather food Agility players can... uh... shoot stuff... Intellect players craft, build, trade, and heal When making your build, it is usually a bad idea to go full-out into just one attribute. Even in early game, it is optimal for you to branch off into other skilltrees; some perks are so good they can't be ignored, no matter what build you're going for. Below is a heavily opinionated priority list for what perks you should use to supplement your main attribute with. Important Note: Use clothing items, such as the Cigar or Nerdy Glasses, to increase your main attribute level without spending skill points! Other Important Note: Even if a perk is not that high of a priority, but it's still a part of your main attribute's skilltree, don't be afraid to pick up the perk! Lower priority does not mean a perk is bad. One Last Important Note: To reset your skillpoints, you can purchase Grandpa's Fergettin' Elixir, only found in traders' secret stashes (for a hefty price). Top Priority Sexual Tyrannosaurus (Strength) Stamina is extremely important, especially during early game. Picking up just one or two ranks into Sexual Tyrannosaurus can greatly decrease the amount of stamina used when swinging, which assists in gathering resources and, most importantly, melee combat, which you'll probably be doing a lot of during your first few days of survival. Advanced Engineering (Intellect) Only if you have not found schematics for forges, workbenches, cement mixers, or crucibles (or have not physically found any of the crafting stations). Otherwise, drop to High priority To begin any kind of real gameplay, such as weapon building and base construction, one must begin with the basic crafting stations. Forges are required to smelt metals, workbenches to craft better items, cement mixers for base building, and crucibles for forged steel. Even if you have found the schematics, Advanced Engineering provides very significant bonuses to crafting speed and resource efficiency. High Priority Miner 69'er (Strength) Simply put, dealing more block damage saves you a lot of time. Beyond that, being able to craft iron tools, or just higher quality tools, is a massive step from primitive tools, like the stone axe. Mother Lode (Strength) Gaining more resources from chopping wood and mining ore is another excellent way to improve your progression. The Daring Adventurer (Intellect) Getting more options and dukes out of questing is especially useful. For gaining skill points, doing trader quests is a must, so having a perk that improves your payday makes life all the better. Better Barter (Intellect) Being able to buy for less and sell for more, while it is great, isn't the only highlight of this perk. The Secret Stash section of a trader's inventory shows higher and higher tier loot in ranks 3, 4, and 5 of Better Barter, which can help you find rare items in a pinch. Physician (Intellect) Only if you have not found schematics for chemistry stations (or found one physically). Otherwise, drop to Medium Priority Chemistry stations are more of a luxury for crafting important resources, such as gunpowder and glue, as opposed to using a campfire. But it's a damn-well needed luxury! All you need is one rank to craft chemistry stations. Even without this perk, medications and first aids typically heal enough to fix most boo-boos. Still, even if you already know how to craft chem stations, ranking Physician can allow you to improve and craft medicine. It also provides large bonuses to chem station crafting speeds, which is especially useful for bulking up on gunpowder. Medium Priority Light Armor or Heavy Armor (Agility or Strength) Only if you don't already own an armor-related perk. Do not buy both (please) Having a lowered stamina/movement-speed cost to armor is excellent, for any combat situation. Extending the lifetime of your armor before repair is likewise very useful. However, it is not required to use an armor perk with its respective armor type. Grease Monkey (Intellect) Only if you have not found a vehicle through trading yet, or have not found schematics for vehicle parts. Unless you are strictly making an Intellect build, you are most likely to find your first vehicle through trading (often from the trader's Secret Stash) or to craft one yourself by finding the parts. However, if you have not found a vehicle or its part schematics yet, and have the resources, picking up some ranks from Grease Monkey is useful to give yourself a boost. Vehicles make looting and resource gathering much easier. Even if you already have a vehicle, you may not have the schematics to make gas from oil shale. Rank 2 will allow you to make gas, and rank 4 will allow you to make gas efficiently (-20% resources used), which is excellent for late-game gas hoarding. Pack Mule (Strength) Only if you do not own physically or do not have schematics for armor/clothing pocket mods. Otherwise, do not buy. While encumbrance is annoying early game, it isn't going to last for very long. Pocket mods are easy to come by (and can completely negate the need for Pack Mule, and vehicles allow you to carry more in the first place. Lucky Looter (Perception) Looting extra fast is nice. Getting more loot is also nice. Low Priority Pretty much everything else that isn't mentioned in the next category You're free to do whatever you'd like with your perks! Everything in this category is your own choosing; perhaps you would like to pick locks faster with Lock Picker, or run and reload quicker with Run and Gun. "Do Not" PriorityAKA the perks I don't recommend picking up, or what you SHOULDN'T do with your skill points. Rule 1 - Cardio (Fortitude) This perk allows you to run longer. As you level up, you naturally gain more stamina, allowing you to run longer anyways. Also, seldom will you ever have to run distances so long you need to catch your breath (except in early game). Mixing Weapon Perks Except anything with Intellect combat perks For example, trying to be the Shotgun Sniper with both Boomstick and Dead Eye. Even if the combo is appealing, mixing weapon perks is usually unnecessary; every attribute was built to have its own pros and cons. Of course, if you are already spec'ing into two different skilltrees, or are extremely late-game that you have too many free points, it isn't a terrible idea. Stealth Shotguns WE TRIED. IT DIDN'T WORK. IT JUST DOESN'T WORK OKAY? The "Meta" cont. For Perks: Grandpa's Fergit'n Elixir is a rare, expensive item found only in Trader's Secret Stashes (you will never find it in loot!) It automatically unspecs all spent skill points, meaning that you lose all unlocked perks, but regain all your original points. They are very useful for redesigning builds! You can use your points to pick up skills you only need temporarily (ex. Workbench recipe), and use the Elixir to gain your points back Alternatively, it gives you a chance to spec into perks that are better for early-game, but less good for late-game, like Pack Mule. Equipment Meta: Best Accessories: Cigar, Nerdy Glasses, College Jacket, BDU Top/Bottom Cigars provide an easy strength bonus plus a bit of bartering, which is very useful for picking up perks like Miner 69'er. The only other "mask" accessories are Bandanas and Piercings, both of which Cigars beat out by a longshot. Nerdy Glasses are among the four other "attribute glasses," the others being Goggles (Agility), Sunglasses (Perception), and Tough Guy Sunglasses (Fortitude). Overall, Nerdy Glasses are the best because, not only do they increase intelligence, they increase crafting speed universally and provide an XP bonus, both of which are some seriously game-changing bonuses The College Jacket, while not technically an accessory, is still an incredibly useful clothing item. It increases sprint speed by +10%, while providing reasonable insulation against cold and heat. If you aren't too worried about freezing/overheating (where a Leather Duster would be more appropriate), then equip the College Jacket for that extra run speed. BDU Clothing typically provides the best all-around bonuses to heat/cold insulation; they are good for just about any environment. However, if you find yourself travelling in fewer weather-extreme areas, spec your clothing to your heart's desire. Glossary Want more context on a certain game mechanic? Don't know what something means? IS MY VOCABULARY TOO DIFFICULT FOR YOU TO COMPREHEND? This alphabetically-sorted list will explain terms I used throughout the guide, with additional descriptions. Accuracy (Aim) - The spread of a firearm while aiming down sights (holding M2). A higher accuracy indicates a closer spread. Accuracy (Hipfire) - The spread of a firearm while not aiming down sights. A higher accuracy indicates a closer spread. Armor Piercing - Some weapons and ammo groups have Armor Piercing, which reduce the Armor Rating of players and zombies alike by a certain percentage. Armor Rating (Player) - The amount of armor a player is equipped with. Armor Rating is directly converted into damage resistance (50 Armor Rating = 50% damage resist). The maximum Armor Rating is 90. This Armor Rating does not affect explosive damage. Armor Rating (Zombie) - Certain zombies, such as Hardhats, Soldiers, Bikers, and Demolitionists, have their own Armor Rating. Likewise, this value grants them damage resistance against all attacks, except explosive damage. Zombie Armor Rating can be reduced through ammunition and weapons with Armor Piercing. Biker, Football, Hardhat - 20 Armor Rating Soldier - 50 Armor Rating Demolitionist - 60 Armor Rating Attribute - A skilltree's main perk (ex. Fortitude). Bleed - Status effect: Zombie takes 1 Damage per second, for 20 seconds. All knives will inflict one bleeding wound on regular attack, and two on power attacks. Bleeding wounds can stack, dealing more damage overtime (2 Stacks = 2 DPS). Bleed damage ignores armor. See the perk Deep Cuts under Agility - Combat Perks for more info on bleeding stacks. Cripple - Some attacks and perks can allow weapons to Cripple enemies. Crippled enemies have -30% movement speed for 5 minutes. Additional cripples do not refresh the debuff's duration; the cripple must completely wear off before the enemy can be crippled again. Critical Hit (Player) - Status effects applied by zombie attacks. Critical Hits will decrease your maximum health, and inflict various debuffs. All Critical Hits heal slowly overtime, and can be cured or healed faster with specific treatments. When receiving a Critical Hit, inspect the debuff through the Player Menu to learn more about its details. Crit Resistance - Have a decreased chance to receive Critical Hits. Critical Resistance is increased by wearing armor. Damage - The amount of health damage a weapon will deal. Every weapon has a damage range, showing the minimum and maximum value it can deal. Minimum values are only seen in very low quality crafting. Maximum values can only be achieved through high quality crafting (see Stat Mechanics.) Damage (Block) - Damage dealt to blocks, props, and furniture. Essentially any non-entity. If the damage is applied in a radius (explosion), then damage decreases as distance from the center increases. Damage (Explosive) - Damage dealt by explosions, applied in a radius. An explosion will do less damage as distance from the center increases. Damage (Fire) - Damage dealt by fire weapons. Fire Damage causes slow health loss overtime, and gradually does more damage the longer an target is on fire. Damage (Impact) - Damage exclusive to the Rocket Launcher. Impact Damage is caused by a direct hit with a rocket. Damage (Melee) - Damage dealt by any melee weapon. Does a set amount of damage, specific to the weapon used. Damage (Ranged) - Damage caused by any firearm (except the Rocket Launcher). Ranged Damage is determined by the weapon's base damage and the loaded ammunition, as well as the target range. Damage (Stealth) - A damage multiplier applied while crouching and undetected. You will see a message popup when dealing Stealth Damage, stating your damage multiplier.Degradation - The rate at which an item decays as it is used. For tools and melee weapons, a use is considered any successful hit (block or enemy). For firearms, a use is one shot. For armor, a use is one hit taken. Dismember - A zombie has a limb removed, limiting their abilities. Dismembering a leg will drop them to a crawl. Dismembering an arm will decrease their attack range and strength. Decapitations are instant kills, and are more likely the stronger the attack. Tougher enemies (irradiated and armored) have higher dismember resistance. Durability - The total number of uses an item has. The value given is the number of uses before the item will require repairs. Durability scales with item quality, and can be increased with mods. Effective Range - The range at which a firearm will deal its normal damage. At distances past a weapon's Effective Range, the weapon will deal a fraction of its normal damage, until it reaches zero at the Maximum Range. Explosion Resist - Damage reduction aimed towards explosions, increased by wearing armor. Explosion Resist is directly converted into damage resistance (ex. 50 Explosion Resist = 50% Explosion Damage Reduction). The maximum Explosion Resist is 90. Gamestage - An in-game scaling mechanic that affects enemy spawns, loot tier, and overall game difficulty. Gamestage increases as your player level and total days survived increases. Low Gamestages will see Primitive/Tier 1 items, Mid Gamestages will see Tier 2 items, and Late Gamestages will see Tier 3 items. As Gamestage increases, tougher zombies spawn more frequently (ex. feral and irradiated types). Handling - The rate at which your accuracy stabilizes (you will gain accuracy faster overtime). Because of this, you also lose less accuracy while rapid firing. Health (Block) - The amount of hitpoints a block has. Can be increased by repairing and upgrading the block. Health (Player) - Your health is the red bar in the bottom left of your UI. It increases as your player level increases. Lose it all, and you're dead. Health Loss - A buff that reduces health loss upon taking damage. This is applied separate from Armor Rating. Knockdown - Powerful attacks can knock zombies down, either ragdolling or putting them in a "falldown" animation. Knockdowned zombies are vulnerable and unable to attack for a short duration. Power Attack - While pressing M2 with any melee weapon/tool, you will perform a power attack. Power attacks deal additional damage, but are 30% slower than normal attacks, and cost more stamina. Some specific tools do not have power attacks (ex. Repair Tools). Schematic - Allows you to unlock the crafting recipes for items, that would have otherwise been unlocked by perks, or only found in loot. Can be found in almost any kind of container. Stamina - Your stamina is the blue bar below your health. It increases as your player level increases. It drains overtime while sprinting and aiming down sights, and drains instantly when melee attacking. When running out of stamina, your sprint is put on cooldown, and you cannot melee attack. While walking or consuming certain drinks/foods, you slowly regain stamina. Glossary (cont.) Stun (Player) - The player's movement speed is slowed significantly, and has their vision blurred, for 5 seconds. Can be received in combat with Zombies. Stun (Zombie) - Status debuff. When stunned, enemies have their movement speed lowered by -80% and their attack speed by -50% for a short duration. As the stun wears off, the enemy will gradually return to their original movement and attack speed. Additional stuns refresh stun duration. Enemies that were stunned receive stun resistance for 3s. Tier - Refers to an item's overall ranking among other weapons in its group. Primitive (Tier 0) items are craftable by default, and have the lowest combat efficacy. Tier 3 weapons are the best of their kind, and can only be found in late Gamestage. Stat Mechanics These last few sections will be an in-depth explanation of how various mechanics work in 7 Days to Die. For those who aren't very math-savvy, this will probably get confusing. The information below is predicted based on patterns with in-game items, as well as coding for weapon stats in the files. Quality TL;DR - Looting gives you more consistent item stats. Crafting items can give you higher damage and durability, but at random. For all items in the game, Quality is an important factor in determining an item's stats, especially entity/block damage. Quality is internally regarded as a positive integer, with a range from 1 to 600. In game, the displayed level of an item is single-digit and rounded to the nearest whole value (ex. An item with Quality 574 will be shown as Level 6). The higher item Quality is, the higher stats such as Damage (entity and block) and Durability will be. For weapons and tools, Quality applies a damage multiplier (see table below). Damage multipliers are set to a weapon's base damage. An item with a Quality of exactly 600 will receive the maximum damage bonus of +50%. An item with a Quality of between two levels will have a damage bonus proportionally between the two multipliers (ex. If an item has a Quality of 324, it's damage bonus is +22.4%). For ranged weapons, the base damage is a set value PLUS the damage of the loaded ammunition. The set value varies for each weapon. For example, the Hunting Rifle has a base damage of 8. 7.62 Ammo has a base damage of 47. When added together, the new damage of the Hunting Rifle becomes 55. QualityColorItem LevelDamage BonusMod SlotsFaultyGray1+0%1PoorOrange2+10%1FineYellow3+20%2GoodGreen4+30%2GreatGray5+40%3FlawlessMagenta6+50%4 This table demonstrates the relationship between Quality and Damage Multiplier. The function is linear, with the expression f(x) = 0.1x - 10, f(x) being the Damage Multiplier, for all f(x) ≥ 0, and x being the Quality, where 1 ≤ x ≤ 600. To find the multiplier of a certain Quality value, plug in Quality for x. Crafting vs. Looting Weapons, tools, and armor can be obtained through either crafting or looting. Looted items will tend to have more concentrated values, whereas crafted items are affected by additional multipliers, which can be negative or positive. Looted items have a randomly chosen Quality value (ex. 547, 239, etc...). You will find higher Quality items as your gamestage increases. Items found in loot are only affected by the Quality Bonus multiplier. They are not affected by any random factor. Crafted items have a fixed Quality value. By default, all items are crafted with a Quality of 100, and can be raised to a maximum of 500, through their respective perks. Alongside the Quality Bonus multiplier, crafted items are affected by an additional factor. For almost all weapons, this factor range is from -15% to +15% damage. This gives crafted items more inconsistent stats, but the potential for greater damage than a looted, perfect Quality 6 item. Primitive tier items are unaffected by this random factor. So, here's an example: Hunting Rifle - Base Damage of 55 If you manage to loot a perfect Hunting Rifle, it would have a Quality of 600. This would give it a damage multiplier of +50%. Thus, its total damage will be 82.5. If you rank up Dead Eye (ignoring the damage bonuses the perk gives) to craft a Hunting Rifle with Quality 500 (maximum quality from crafting), it will have a damage multiplier of +40%. IN ADDITION, it has the random damage multiplier from -15% to +15%. The total value is additional, not multiplicative (the percentages are added together, then applied). So if you were to get lucky, you can craft a Quality 500 Hunting Rifle with a damage multiplier of +55%, giving a total damage of 85.3! However, the odds of this occurring are somewhat low (about 1 in 30 chance). On the other side of the Crafting Factor, you may receive a negative multiplier, which goes as low as -15%. This would mean your Hunting Rifle has a damage bonus of only +25%, and a damage of 68.8. If the Rifle were of Quality 100 (no bonus multiplier), it would have a damage multiplier of -15%, and damage of 46.8, the absolute minimum damage a Hunting Rifle can have. If you've understood anything of what I've said so far, you'll realize that crafting can give you higher damage than items from loot. Items of lower crafted quality are less likely to have higher damage than a looted item of equal quality. Something to keep in mind - Level 6 weapons have one extra mod slot than Level 5 weapons. Every mod added to a weapon increases its damage by +10%. You will still get the most damage from of a Level 6 weapon if you fully mod it, but a crafted Level 5 weapon can have a higher damage than a Level 6 without mods. Durability Durability is scaled linearly with an item's quality. The higher the Quality, the higher the base durability. All weapons, tools, and armor, have unique minimum and maximum durability. Typically, items of higher tier will have more durability than the previous tier (ex. a Steel Spear has greater durability than an Iron Spear). Items from loot will have a durability chosen directly from its respective scale. Perfect items (Quality 600) will have the highest durability value. Crafted items will have a random factor for durability, similar to damage. This only affects non-primitive tier ranged weapons and tools. The range is from -20% to +20% for all ranged weapons and power tools, and -15% to +15% for all non-power tools. Armor Rating This section will cover Armor Rating. Explosion resist is measured in the same way. Armor Rating is given a base value range, which is chosen at random, and an additional quality bonus range. For example, Military Armor has a base armor rating (and explosion resist) value. This value ranges from 6.23 to 8.93, and is chosen at random. In addition, Military Armor gets an additional quality bonus. This bonus ranges from 0 to +3.27, and is governed by the armor's quality. Quality 600 would receive the maximum bonus of +3.27, whereas Quality 1 would receive no bonus. Qualities in-between receive a proportional bonus (ex. Quality 540 receives +2.94 armor rating). So for Military Armor, the maximum armor rating possible is 12.2. This, however, is extremely unlikely. Hitting the highest random armor rating is roughly a 1 in 270 chance, and hitting a perfect 600 quality armor piece scales with gamestage, but is still very rare. Stacking Stat Bonuses Stat bonuses, like damage from perks, mods, and magazines, are all additional. This means the percentages are added together, and then applied to a weapon's base damage. Below is an example, using the previous Hunting Rifle stats. Hunting Rifle has 55 Base Damage. Let's say we find a perfect one, 600 Quality; +50% Damage Bonus. This totals to 82.5 Entity Damage. If we have the perk Dead Eye at Rank 5, that's an additional +50% Damage Bonus. In unison, this makes a +100% Damage Bonus, which totals to 110 Entity Damage. All stat bonuses apply this way, be it degradation/durability, fire rate, etc... Stat Mechanics (cont.) Quality/Durability (Primitive Items Only) I mentioned in the previous section that Primitive tier items (e.g. Pipe Rifle, Stone Sledgehammer) do not receive stats the same way that other items do. Below are the rules for Primitive tier items. Primitive tier items do not receive "in-between" quality bonuses This means that every primitive item, crafted or looted, always has a quality of multiple 100 (e.g. 100, 200, 300...). This means that primitive tier items will only receive the respective flat damage upgrades (+0% for 100, +10% for 200, +20% for 300, up to +50% for 600), and similarly for durability. Remember, these quality values are displayed as single-digit item levels (1, 2, 3...). A more simple way of explaining: Every primitive item of the same name and item level will have exactly the same stats. Primitive tier item do not receive randomized stats from crafting This goes for durability and damage. All other stats are constant. Armor Piercing Some ammunition and weapons have a stat bonus known in-game as "Target Armor," which details how much less effective enemy armor is when using the aforementioned weapon/ammo type, usually by a percentage. For the sake of consistency, we are going to refer to the inverse of Target Armor: Armor Pierce. Armor Pierce represents the same stat, but with positive values instead. With that out of the way, let's explain: Armor piercing is a multiplier applied to armor rating, rather than being a subtracted percentage. For example, this means that a +20% armor piercing will reduce armor rating by 20% (80% of its original value). Let's say an enemy has 50 Armor Rating. This means they resist 50% of damage. A weapon which does 100 Damage will instead do 50 Damage to this enemy. We have some AP Rounds which have 20% Armor Piercing. This reduces the target's armor rating by 20%, down to 80% of its original value. 50 Armor Rating * .8 = 40 Armor Rating (40% Damage Resistance, or receives 60% of all Damage) Now, our weapon that deals 100 Damage deals 60 Damage to this enemy. Target Penetration A unique feature of AP Rounds is that they can penetrate through enemies and blocks, continuing to deal damage after already hitting a target. The effectiveness of this penetration can be increased through the perk The Penetrator, up to a maximum of 4 penetrations. This means that, if you max out the perk and are a good shot, you can hit 5 enemies with one bullet! The logic behind penetration, however, is somewhat complicated. Let's focus on normal AP Rounds for now, without any ranks from The Penetrator. These bullets can penetrate one target, with a maximum health of 250 HP. As of now, this maximum health only refers to blocks. Actual entities, like zombies and animals, can have any maximum health. I'm gonna use a few diagrams beautifully crafted in ms paint to explain block penetration, just to make things easier. The Penetrator Rank: 0

这是任何AP弹(穿甲弹)的标准穿透力,不受任何阻碍。两名敌人被击中(在穿透第一个敌人后),最后3名敌人未受伤害。穿透等级:0

当涉及方块时,单个方块本身会成为一个目标。方块每拥有250点最大生命值,就会额外算作一个目标。这意味着生命值越高的方块会“算作”更多的目标。 最大生命值=0(空气/无物)→ 不算作目标 0<方块最大生命值<251 → 方块算作1个目标 251<方块最大生命值<501 → 方块算作2个目标 501<方块最大生命值<751 → 方块算作3个目标 751<方块最大生命值<1000 → 方块算作4个目标 方块最大生命值>1000 → 方块无法被穿透 注意:如果射击穿过带有缝隙/孔洞的方块(如栅栏),将不算作穿透。要计算射击穿透障碍物后能击中的敌人数量,需用最大可击中目标数减去障碍物的目标等效值。对于生命值较高的障碍物,普通穿甲弹无法穿透,需要更高等级的【穿透者】技能。以下表格将进一步说明。

注意:穿透加成从【穿透者】等级2开始生效。 此表格展示了方块如何根据最大格挡生命值的变化来吸收穿透目标。同样,这只是重申:方块每拥有250点最大生命值,就算作一个目标。 不过,关于方块穿透还有一些我注意到的额外规则,如果你想最大化你的 collateral game,了解这些规则会很有帮助。 【穿透者】等级:0

只有一行中的第一个方块会被计算。方块的数量或它们的最大生命值无关紧要;第一个方块会被视为唯一目标。实际上,此规则将一直生效,直到两个原始方块之间有两个或更多空格。这意味着:穿透等级:0

两个方块之间间隔一个空格;第一个方块仍然是唯一计入的方块。
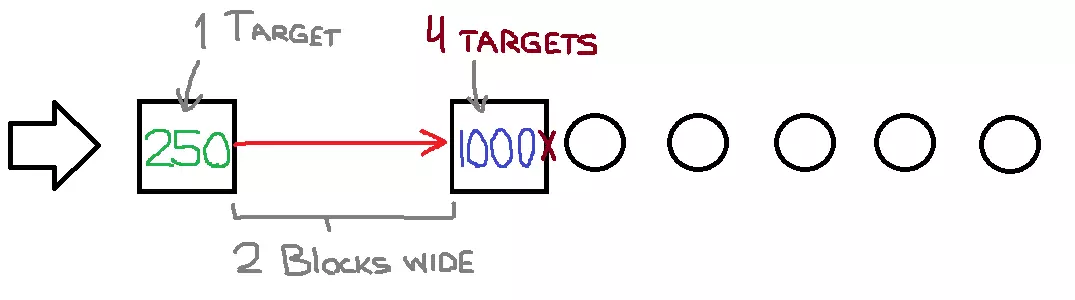
当方块之间间隔两个方块时,它们会开始作为独立目标。第一个方块会被穿透,如红色箭头所示,但子弹无法穿透第二个方块。 你会遇到各种各样的目标情况。这些图片仅解释了目标穿透的最简单示例。如果你想更好地理解更具体的情况,需要自行计算。 属性机制(续2) 价值(杜克币) 简单来说,物品等级越高,其经济价值就越高。物品随着耐久度的降低而贬值。模组会增加物品价值。 受品质影响的物品在商人处的售价会有所不同。价值会随品质成比例变化。其他因素也会影响物品的价值高低,例如模组和交易技能(交易技能是独立的,但仍会影响物品价值,它能按给定百分比提升所有物品的售价)。 对于不受品质影响的物品,如基础资源,其价值会随数量变化。 所有物品都有基础经济价值(详见基础经济价值列表)。 每件物品每添加一个模组,其基础经济价值就增加300杜克。 这是处理不需要的模组和物品的好方法!商人出售商品的价格始终是物品经济价值的10倍。例如,一件通常价值300杜克的物品,商人会以3000杜克的价格出售。交易属性将按百分比提高所有已售商品的价格,并按相同百分比降低商人商品的售价(与基础经济价值分开计算)。 物品的实际经济价值由其等级决定。物品等级指显示的数值1-6,由品质决定(见上文品质部分)。等级之间没有中间值;杜克币的变化是离散的而非连续的(例如,经济价值不会介于2级和3级之间)。 物品的经济价值(非基础经济价值)会随耐久度成比例变化。物品在100%耐久度时拥有100%的经济价值(正常价格)。剩余耐久度的百分比直接影响经济价值。假设一件价值1000杜克的物品拥有500点最大耐久度,当你使用5次(减少5点耐久度)后,其新的经济价值为(500-5)/500*1000=990杜克。 物品等级 基础经济价值百分比 1 8% 2 38.4% 3 68.8% 4 99.2% 5 129.6% 6 160% 此表格展示了物品等级与基础经济价值百分比之间的线性关系。该百分比指的是你所获得物品基础经济价值的比例,可能高于100%(增加)或低于100%(减少)。 举个例子,链锯的基础经济价值为1500杜克。1级链锯的售价为其基础经济价值的8%,即120杜克。6级时,基础经济价值为正常值的160%,因此其经济价值为2400杜克。 不过,假设你已经使用过这把链锯一段时间。电锯的耐久度为5040,你已使用1020次。因此,其剩余耐久度为4020/5040,经济价值将乘以该分数。当前经济价值为2400杜克币×4020/5040≈1914杜克币。 玩家等级 这一点其实很简单,但我就喜欢把事情复杂化,因为微积分很有趣。 玩家等级上限为300级。达到300级后,你将不再获得经验值或技能点。 这意味着,通过将玩家等级升至满级并完成教程任务(4点技能点),你最多可获得303点技能点。 计算两个等级之间经验值间隔的公式为:f(x)=9999.5(1.05)^x,其中x为玩家等级(适用于所有1<x≤300),f(x)为总经验值间隔。该方程为指数方程,因此玩家等级越高,升级所需的经验值间隔就越大。此公式用于计算从一个等级升级到下一个等级(x)所需的经验值。例如,在5级时,升级到6级需要13400经验值,可表示为f(6)=13400。 若要计算【达到特定等级所需的总经验值】(这是大多数人想了解的),请使用以下新方程对公式进行求和:

You can plug this into Desmos Graphing Calculator[www.desmos.com] if you wanna try it Set n as the level you wish to reach (upper limit) x = 1 sets the interval as 1 (cannot be a perfect integral, since the XP milestones are discrete and non-continuous, i.e. there is no level 1.1, 1.2, etc...) -10499.475 is technically the amount of XP required to reach Level 1. Since it does not really exist, we subtract it from the equation. Keep in mind, this always finds the Total XP Requirement from level one. If you want to find the XP Requirement between two levels, with the lower level being higher than 1, instead take the difference of the two XP Requirements. Example: It takes 47,517 XP to reach Level 5 (from Level 1). It takes 121,562 XP to reach Level 10 (likewise, from Level 1). To Reach Level 10 from Level 5, it takes 121,562 - 47,517 = 74,045 XP. Here are some pre-calculated answers for you: To reach Level 10, it takes a total of 121,562 XP (121.6 Thousand). To reach Level 50, it takes a total of 2,187,545 XP (2.187 Million). To reach Level 100, it takes a total of 27,393,394 XP (27.39 Million). To reach Level 200, it takes a total of 3,631,039,910 XP (3.631 Billion). To reach Level 300, it takes a total of 477,515,089,560 XP (477.5 Billion). Now as you can clearly see, it takes a pretty absurd amount of experience to reach the highest levels. You'll never really need that many skill points to optimize a build, even if you plan on going into other skilltrees for miscellaneous perks. Still, if you really insist on getting to Level 300, try playing around with the XP Multipliers. You can set them before loading into a world, under World Settings. Other Stats Some additional stats, such as fire rate and effective range, can have fixed multiplier ranges, that are applied to a base value for each stat. These multipliers are unaffected by crafting, looting, or weapon quality. Instead, they are chosen at complete random. For example, most guns have a variable fire rate. We'll use the Hunting Rifle again as an example. The Hunting Rifle has a base fire rate of 120 Rounds/min. The range of multipliers for fire rate start at -5% to +5%. The minimum fire rate for the Hunting Rifle is 114, and the maximum is 126. Once again, this value is completely random, not governed by how the loot was obtained. Hidden Stats Some stats are hard-coded into certain weapons, but cannot be viewed or otherwise reliably known in-game. The only stat I have come across that is 'hidden' is Weapon Handling in firearms. Almost every firearm (with the exception of the Primitive tier) possesses a ±8% Weapon Handling, meaning a range from -8% to +8% Weapon Handling. This modifier is unaffected by any modifiers; it is completely random. Fall Damage Mechanics After a bit of searching, I was able to uncover exactly how fall damage works. This section of the guide will give an in-depth detailing of falling in 7 Days to Die, including the safe fall distance, breaking/spraining legs, and mods and perks such as Parkour and Impact Bracing. Like the Stat Mechanics page, this part requires a basic understanding in algebra. So falling itself is not strictly determined by distance. Rather, the end value is regarded as a falling speed, which does scale based on distance, but is also affected by other factors, such as your current status effects, perks, and mods. The greater your fall speed, the higher damage you will take upon landing (and higher chance of receiving sprained/broken leg). There is no perfect formula for fall speed. The in-game XML files state that every meter adds a fall speed of .01414 (plus an initial constant), but this is not true. This value is more of an average fall speed per meter. Fall speed also caps at 1.0 (but this takes an absurdly massive height to fall). To keep things short, I just got the fall speed values directly via the debug window ingame. For reference, one block is one meter in-game. The falling speed is not actually your in-game velocity, otherwise it would be very slow. You still accelerate while falling, however. Fall damage scales linearly with fall speed, and has a definite expression. The formula for fall damage is f(x) = 300( x - .189), where f(x) refers to the total health damage, and x refers to fall speed, for all x ≥ .189. With these two factors, we are able to determine a full table to display a relationship with fall distance and damage. Before we do that, there are three last things to mention. By default, the safe fall distance (max height you can fall without damage) is 6m. At 7m (and every 1m above), the chance of spraining a leg increases by +25%. At 8m (and every 1m above), the chance of breaking a leg increases by +20%. Height (m)Fall SpeedFall DamageSprain ChanceBreak Chance6.188400%0%7.20404.525%0%8.21979.250%20%9.231512.875%40%10.247217.5100%60%11.25921100%80%12.270824.5100%100% This table displays a full chart for fall damage scaled with height, from the normal safe fall distance up until a 100% leg break chance. Breaking a leg will override spraining a leg. Note that damage always rounds up to the nearest whole health point (4.2 will appear as 5 Damage). The damage is also not resisted by armor. Increasing/Decreasing Safe Fall Distance There are also several other factors that can change fall speed, both negatively and positively. Such factors include the perk Parkour, blocks such as Hay Bales, certain perk books, having a sprained/broken leg, and even jumping vs. walking off edges. You can also lower fall damage altogether (which also lowers leg sprain/break chance). These factors will simply add or subtract a certain value from your end fall speed, thus reducing damage and increasing the safe fall distance. They can all be combined to make your safe fall distance ludicrously high. I'll show you the maximum height you can fall once I finish listing the different modifiers. Increase Safe Fall Distance Fully jumping (holding space) before landing effectively increases safe fall distance by 2m. This increases your total safe fall distance by 1m. Jump before you fall off! This scales with the perk Parkour. Jumping will always increase your safe fall distance. Hay Bales will halve your fall speed. This also lowers the fall speed cap to .5 rather than 1. The perk Parkour lowers fall speed by .0162/.0304/.0587/.0782 (Perk Rank 1/2/3/4). This raises safe fall distance by roughly 1.0m/1.9m/4.0m/5.6m. Impact Bracing lowers fall speed by .02121. This raises safe fall distance by roughly 1.4m. The perk book The Great Heist Vol 5 lowers fall speed by .114. This raises safe fall distance by roughly 8.7m. This effect only occurs when you are carrying 5000 or more Duke Coins. The candy Oh Sh!tz Drops makes you fully immune to fall damage. Decreasing Safe Fall Distance Having a Splinted, Sprained, or Broken Leg increases fall speed by .02828. This lowers safe fall distance by roughly 2.0m. Note that you can't have both a sprained and broken leg at the same time. So if you add up every possible factor, you can lower your fall speed by about .22755. This allows you to fall about 21.5m without taking damage! If you land on a Hay Bale, your fall speed is cut in half, allowing you to fall up to about 43m! Extended Chart To help with extreme heights and more calculations, refer to the chart below. Currently goes up to 30m. I'll extend it more if you ask nicely :) Height (m)Fall SpeedFall Damage13.282528.114.294331.615.306135.116.313937.517.325741.018.333543.419.345346.920.353249.321.361051.622.372855.123.380657.524.388559.925.396362.226.404264.627.412066.928.419969.329.428871.930.435674.0 List of Base Economic Values This section will list an extraneous stat for all items previously listed: Base Economic Value. This value (measured in Dukes/trader currency) is the base value of an item's worth. I'm listing this stat in a separate list, because I ran out of characters for the other, respective guide sections. Values will be listed in order of item appearance. Weapons and Armor with an item level will have a scaling Economic Value, their price being higher or lower than Base Econ Value depending on item level. Items with no item level are instead the same price per unit. See Value (Dukes) under Stat Mechanics (cont.) for more information on how Economic Value works. Perception - Weapons Pipe Rifle - 100 Dukes Hunting Rifle - 500 Dukes Lever Action Rifle - 1000 Dukes Sniper Rifle - 1500 Dukes Molotov - 8.16 Dukes per unit Pipe Bomb 8.16 Dukes per unit Dynamite - 20 Dukes per unit Grenade - 8.16 Dukes per unit Contact Grenade - 8.16 Dukes per unit Timed Charge - 8.16 Dukes per unit Rocket Launcher - 1000 Dukes Landmines Candy Tin - 19.4 Dukes per unit Plate - 23 Dukes per unit Cooking Pot - 24 Dukes per unit Hubcap - 29.2 Dukes per unit Air Filter - 36.4 Dukes per unit Stone Spear - Does not sell Iron Spear - 350 Dukes Steel Spear - 700 Dukes Strength - Weapons Pipe Shotgun - 100 Dukes Double Barrel Shotgun - 500 Dukes Pump Shotgun - 1000 Dukes Auto Shotgun - 1500 Dukes Wooden Club - Does not sell Baseball Bat - 350 Dukes Candy Cane Club - 350 Dukes Steel Club - 700 Dukes Stone Sledgehammer - Does not sell Iron Sledgehammer - 350 Dukes Steel Sledgehammer - 700 Dukes Heavy Armor Scrap Armor - 250 Dukes (each piece) Iron Armor - 500 Dukes (each piece) Steel Armor - 1000 Dukes (each piece) Fortitude - Weapons Pipe Machine Gun - 100 Dukes AK-47 - 500 Dukes Tactical Assault Rifle - 1000 Dukes M60 - 1500 Dukes Fists - Varies depending on which black market you go to Leather Knuckles - 45 Dukes Iron Knuckles - 350 Dukes Steel Knuckles - 350 Dukes Agility - Weapons Pipe Pistol - 100 Dukes Pistol - 500 Dukes .44 Magnum - 1000 Dukes SMG-5 - 1500 Dukes .44 Desert Vulture - 1500 Dukes Primitive Bow - Does not sell Wooden Bow - 500 Dukes Iron Crossbow - 500 Dukes Compound Bow - 1000 Dukes Compound Crossbow - 1000 Dukes Bone Knife - Does not sell Hunting Knife - 350 Dukes Candy Cane Knife - 350 Dukes Machete - 700 Dukes Light Armor Cloth Armor - 75 Dukes (each piece) Leather Armor - 250 Dukes (each piece) Military Armor - 500 Dukes (each piece) Intellect - Weapons Pipe Baton - 100 Dukes Stun Baton - 350 Dukes Junk Sledge - 700 Dukes Junk Turret - 500 Dukes Junk Drone - 700 Dukes Intellect - Vehicles Bicycle - Does not sell Minibike - Does not sell Motorcycle - Does not sell 4x4 Truck - Does not sell Gyrocopter - Does not sell Tools - Primitive Stone Axe - Does not sell Taza's Stone Axe - 1000 Dukes Stone Shovel - Does not sell Tools - Repair Claw Hammer - 500 Dukes Nail Gun - 1000 Dukes Tools - Pickaxes Iron Pickaxe - 350 Dukes Steel Pickaxe - 700 Dukes Auger - 1500 Dukes Tools - Axes Iron Fireaxe - 350 Dukes Steel Axe - 700 Dukes Chainsaw - 1500 Dukes Tools - Shovels Iron Shovel - 350 Dukes Steel Shovel - 1000 Dukes Tools - Salvage Wrench - 350 Dukes Ratchet - 700 Dukes Impact Driver - 1500 Dukes Tools - Miscellaneous Torch - 2 Dukes per unit Flashlight - 40 Dukes Paintbrush - 40 Dukes Wire Tool - 40 Dukes Conclusion Thank you for checking out my absurdly long guide. If you have any questions, or want to know more about 7 Days, let me know in the comments. I'll do my best to continue updating this guide as new updates are released. Coming Soon: Interpreting Weapon Statistics - A section which will describe what each value in a weapon statistic means (i.e. Entity vs. Block damage, accuracy, durability...) The Enemy Almanac - Another massive project, which will become a separate guide. The guide will discuss: Every mob (zombies/animals) in the game, their health, and their damage Optimal methods to fighting/countering enemies Difficulty scaling (Adventurer, Nomad, Warrior, etc...) Gamestage (May not be a numerical explanation, and more of a conceptual) Speculative Lore (Just for the hell of it) Change Log If I update anything to this guide, it'll be listed here, with a date and version (arbitrary number I chose, based on the magnitude of changes). This is the best place for you to keep in touch with this guide, incase I add anything new. Note: At the time of adding this changelog, the guide had already been out for around 5 months. Only until now I decided to add one, for quality of life sake. The five-month gap you'll see below is therefore probably normal. 1.0.0 - CreationJuly 20th, 2020 Guide finalized and published. Maybe I should add a change log... 1.1.0 - First (Recorded) UpdateNovember 8th, 2020 Added the Change Log section Displays new additions and updates to the guide Added Perception - Traps section Added Intellect - Traps section The goal of these sections is to detail the mechanics/stats of landmines (Perception) and electrical traps (Intellect) Added Player Level to Stat Mechanics (cont.) section Discloses the player level cap, as well as information on experience required to level up Updated information directories 1.1.1November 9th, 2020 Fixed: Perk Javelin Master does not affect thrown spear damage Thanks, Pekiti! Updated math examples to be 9.9% more accurate 1.2.0November 23rd, 2020 Added the Skilltree Calculator section Includes a link to a visualizer for the 7 Days to Die skill system Updated attribute descriptions 1.2.1March 12th, 2021 Removed two broken promises (Coming Soon in Conclusion) ...and replaced them with two new ones. 1.2.2March 25th, 2021 Updated Strength - Playstyle descriptions 1.2.3June 20th, 2021 Fixed Agility - Playstyle error with perk names Thanks, Taotiegames! 1.3.0July 20th, 2021 Added Notable Bugs/Discrepancies section Details all the currently non-functional features of the current alpha (what doesn't work). Removed all Bug footnotes from the other sections Revised Intellect - Playstyle Thanks, CHIPOLLINO! Messed around with more math-related stuff 1.3.1July 22nd, 2021 Added another DOOM reference Revised some information 1.3.2August 9th, 2021 Updated Notable Bugs/Discrepancies Thanks, Droante! 1.3.3October 7th, 2021 Added PSA: Alpha 20 Explains what will happen to the guide when A20 releases Added new promise (Coming Soon in Conclusions) 1.3.4November 24, 2021 Added tier-style ranking (SABCD) to all Attribute Playstyle viability sections 1.4.0November 26, 2021 Added Prioritizing Your Perks (The "Meta") A section to describe which perks I highly suggest any player picks up, no matter their build. Also details what not to do with skill points. Farted around with some numbers (again) 1.4.1November 28, 2021 Fixed: Perk Javelin Master does increase thrown spear damage Fixed: Armor piercing and target penetration are functional 1.5.0November 30, 2021 Added more to Stat Mechanics Explanations for Armor Piercing Needlessly-in-depth explanations for Target Penetration 1.5.1 - A20 Experimental ReleaseDecember 6, 2021 Updated PSA - Alpha 20 2.0.0 - Alpha 20 UpdateDecember 27, 2021 Friends and fellow survivors, I am happy to announce that the guide is now fully updated to the current installment of Alpha 20. Almost everything has been revisited, from new weapons to perk changes, to mechanics and readability. My other guides are next to be updated for A20. Below is a debriefing on the major additions to the guide Updated to Alpha 20 Added stats for all new weapons Pipe Rifle -- Primitive Tier rifle Pipe Shotgun, which replaced the Blunderbuss -- Primitive Tier shotgun Pipe Machine Gun -- Primitive Tier AR Pipe Pistol -- Primitive Tier handgun Pipe Baton -- Primitive Tier baton weapon Added a description of the new Robotic Drone and its mods Divided Weapon categories into more specific sections (i.e. Fortitude - Weapons was split up into Fortitude - Weapons (Assault Rifles) and Fortitude - Weapons (Pugilism) Miscellaneous changes Ammunition completely overhauled -- HP rounds are now HiPower rounds, and simply do more damage, and no longer have negative armor piercing. AP rounds have increased piercing power, and are a direct upgrade from HiPower rounds (in terms of raw damage, Standard < HiPower < AP). The Penetrator has been changed -- Now gives more armor piercing to all firearms and spears, and gives bonus armor piercing to any AP round. Living off the Land has been changed slightly -- Rank 2 grants a 50% chance to harvest a bonus crop. Super corn seeds are unlocked at Rank 2 instead of Rank 3. Updated all other item stats (too many to record) Damage values are now rounded to the nearest tenth of a decimal place Updated directories and added a few extras to make the guide easier to read and understand 2.0.1January 17th, 2022 Updated List of Base Economic Values i forgor 2.1.0January 20th, 2022 Added Quality/Durability (Primitive Items Only) to Stat Mechanics Repaired grammar 2.2.0March 14th, 2022 Added The "Meta" cont. Includes section about Grandpa's Fergit'n Elixir Thanks, Inspector Gadget! Includes section about the best accessories/equipment 2.3.0 - The "I-promise-I-still-care-about-this-guide" UpdateFebruary 16th, 2023 Added Fortitude - Gameplay Montage The first montage, perhaps of many? I promised in the "Coming Soon" section that I would do a montage featuring one of the five skilltrees in 7 Days, and after a few months, it finally released! Go check it out! Updated Playstyle sections Re-added all the pictures that Steam deleted Rant warning: This is by far the most frustrating thing I've ever had to deal with. It wasn't writing out the guide, or going through pages and pages of xml files. No, it was something as mundane as getting pictures. You can find all the item and perk icons in the 7 Days folder, so it's super easy. But for seemingly no reason, Steam corrupts and deletes images at random. AND THIS HAS BEEN A BUG FOR YEARS APPARENTLY. Once the image is corrupt, there's no bringing it back. You have to manually re-add it. BUT HERE'S THE KICKER: Even after you delete the image, Steam WON'T let you upload the same image if it has the SAME FILENAME. So you have to GO BACK and CHANGE THE FILENAMES so YOU CAN ACTUALLY UPLOAD IT. THEN you have to CHANGE THE FILENAMES BACK TO NORMAL so your 7 Days can run without issue. If you ever, EVER consider making a guide, please, for the love of all that is holy, KEEP a backup folder of all your images. It will save you unquantifiable amounts of pain. Change Log (cont.) 3.0.0 - Alpha 21 Update Coming soon! Currently updated: Perception Perks Additional Guides Still want more customization for your build? Check out my Mod Stats guide, which talks about the uses and exact statistics of every firearm, weapon, tool, and armor mod currently in the game. https://steamcommunity.com/sharedfiles/filedetails/?id=2186742344 Because you can never have too much customization! Check out my newest guide, Crack-A-Book -- The Guide to Magazines to read about 7 Days to Die's perk books, and how to incorporate their effects into your build. https://steamcommunity.com/sharedfiles/filedetails/?id=2206203609