换一换
换一换 


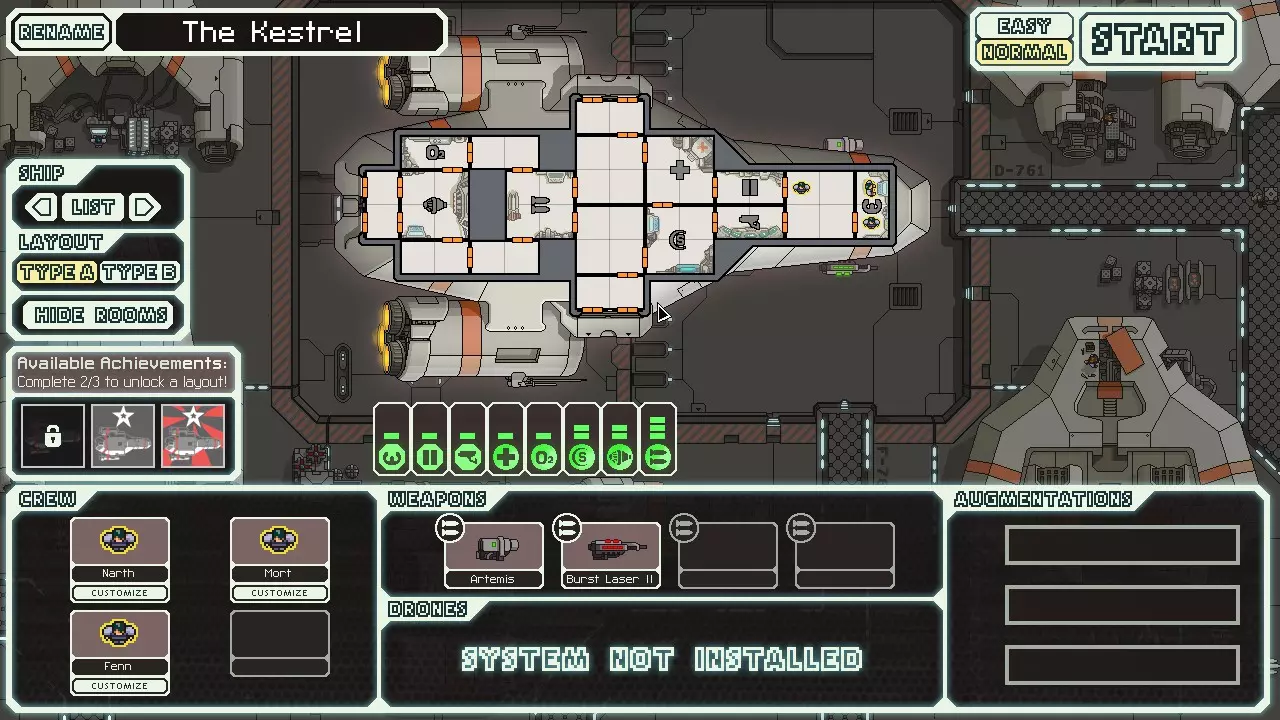
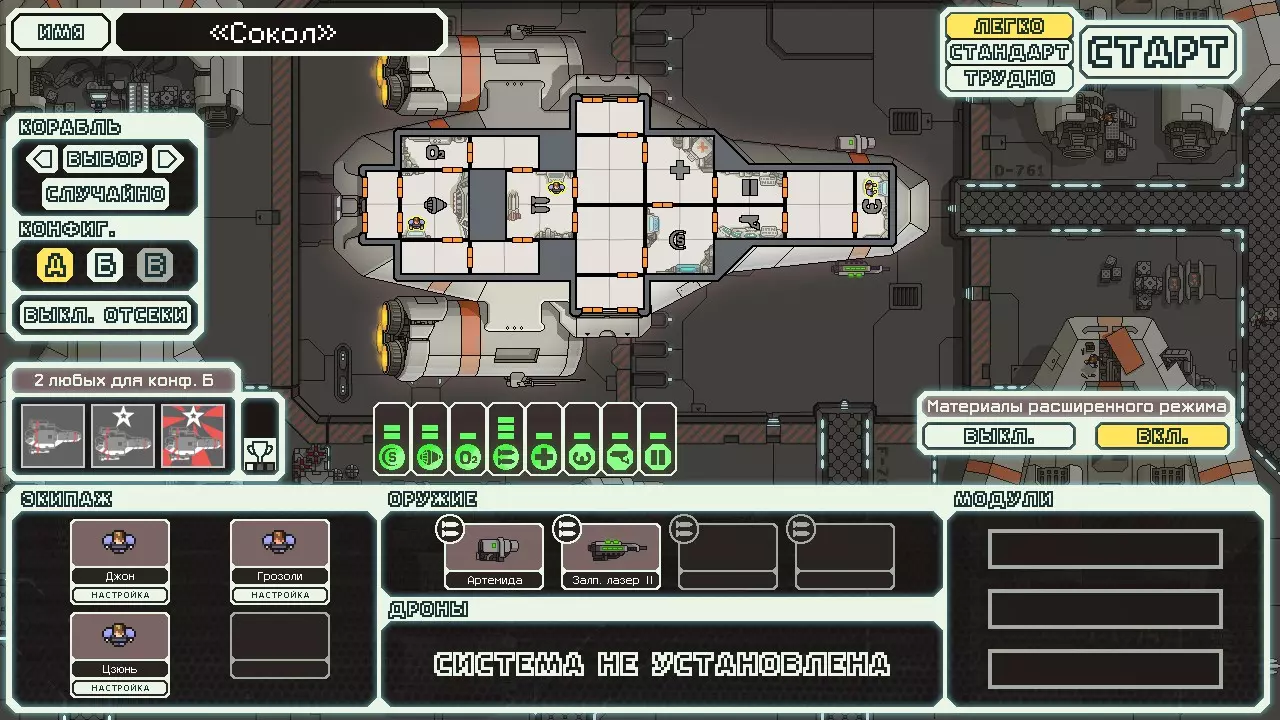
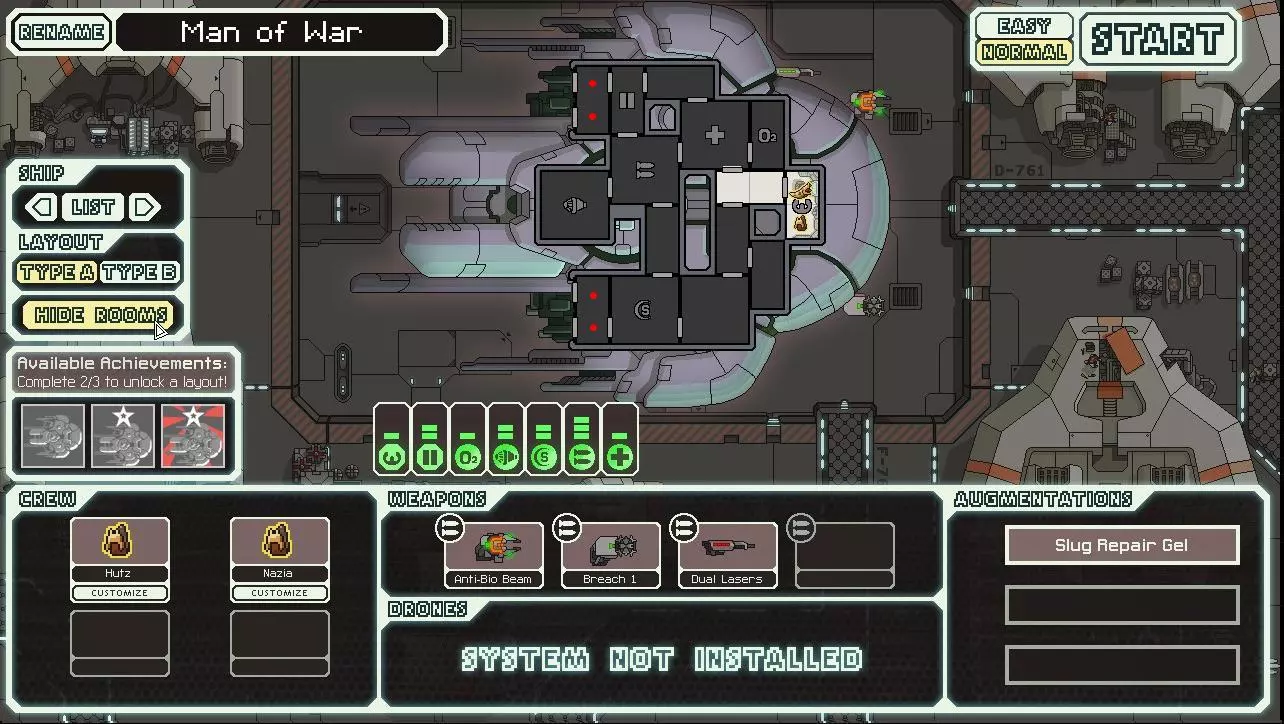
那么,你想成为一名太空英雄吗? 如果有人还记得《银河飞将》手册——《虎爪号》,这就是我为《超越光速》制作类似手册的尝试。 这是一本军事杂志形式的指南,包含社区创作的 artwork、游戏玩法提示与技巧,以及一些我原创的背景故事。我在《超越光速》上已经投入了超过 400 小时的游戏时间,如今凭借经验,我的胜率已经高了很多。我听到很多负面评价,说《超越光速》纯粹是一款靠运气的游戏。我强烈反对这种看法,因此决定将我的经验分享给那些可能需要的人。 对于感兴趣的玩家,我还花时间记录了使用我最喜欢的飞船——【猎鹰 B 型】进行的一场随机普通游戏中的每一次跳跃。我常常在想,如果把《超越光速》的游戏过程写成科幻故事,会是什么样子。于是我尝试写了这篇。如果你有负面或无建设性的评论,我恳请你不要说出来——毕竟我没有强迫你读它。 我再次声明,所有 artwork 都不是我创作的。如果有任何艺术家希望我删除图片,请联系我,我会立即删除。 更新内容! 启程 恭喜你首次担任舰长! 你凭借决心、智谋和勇气走到了今天——但这只是你作为联邦舰长将要面对的真正挑战的开始。 现在,你有权选择一艘合适的舰船。有些人的选择可能有限,有些人则可以从一整个舰队中挑选,但我们假设,和大多数舰长一样,你将从不起眼的“猎鹰”级巡洋舰开始。好好地、仔细地看看她。
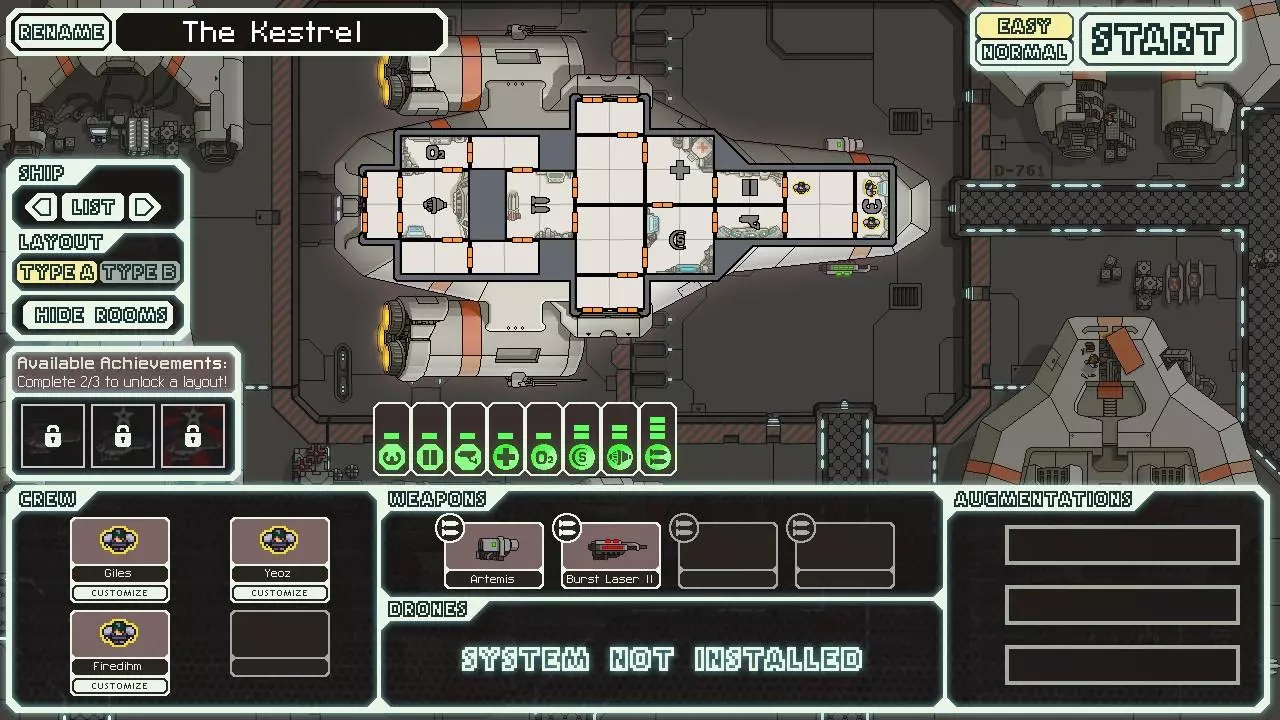
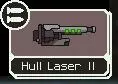
她很漂亮,不是吗?花点时间给她和她的船员们取个名字吧——建立起羁绊,他们不只是棋子,如果你想活下去,就需要好好照顾他们。 看看她的系统,注意到那可怕的【爆裂激光MKII】和快速可靠的【阿尔忒弥斯导弹】了吗?
猎鹰级巡洋舰初始仅配备基础系统,但最终可以加装从传送器到隐形装置在内的各种设备。该舰在系统和船员方面均无明显短板,是联邦舰队的优秀补充,也是理想的初始指挥舰。 现在你已了解自己舰船和船员的优势与劣势,接下来需要完成一项棘手的任务——分配职责。由于船员在岗位上工作时间越长,技能就越熟练,因此在任务的大部分时间里,最好让他们坚守最初的岗位。选择一名船员担任飞行员、武器协调员和工程师。无需担心护盾系统,在招募更多船员前,它们自动运行即可。现在把那个按钮设为“普通”模式——模拟训练的时间结束了,舰长! 第一星区 整个第一星区在你面前展开——那么多信标,时间却如此紧迫!如你所知,你的秘密任务让叛军对你紧追不舍——但你必须在抵达出口信标前尽可能探索更多太空区域。这片区域未经测绘,所以本手册能提供的帮助有限。仔细规划你的航线,否则他们会抓住你,而叛军舰队的每次遭遇都会让你追悔莫及!
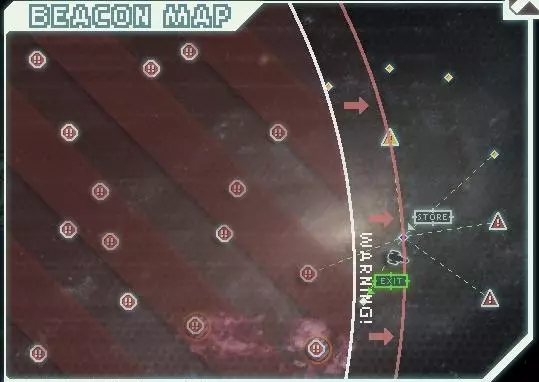
注意这里出口信标的位置——这位舰长将别无选择,只能与一艘精英反叛者巡洋舰正面交锋!为避免这种情况,请密切关注反叛者舰队的推进。在每个星区开始时,在他们进入传感器范围之前,你至少有几次跳跃机会,所以利用这些跳跃先探索最左侧的信标,你不会再有这样的机会了!在进行第一次跳跃之前,提前规划好接下来的三四次跳跃是很有优势的。
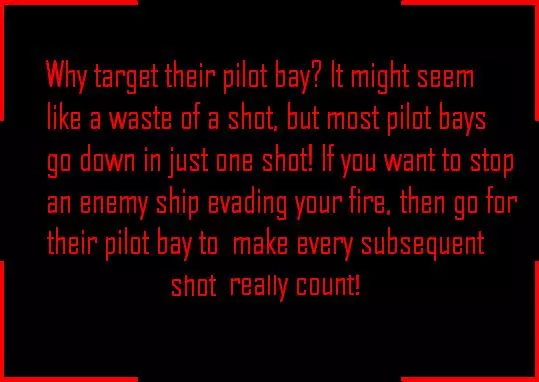
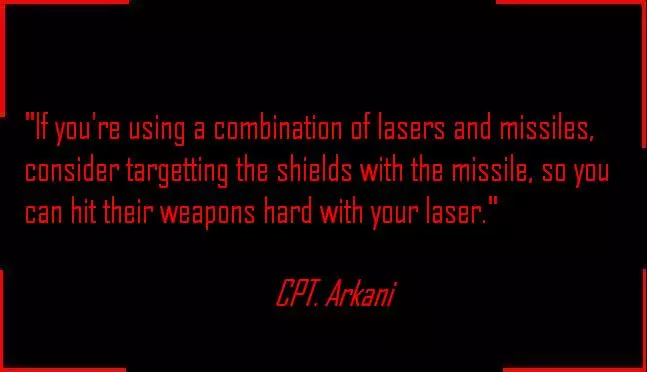
如果你想找商店,试着跳转到有很多连接节点的信标,这样能最大程度提高找到商店的几率。 记住,出口信标可能近在星区中部,也可能远在右上角或右下角,但只要仔细规划,你总能到达那里! 第一星区战斗:交战规则 很遗憾,你将不得不面对战斗,这是执行危险任务的一部分。但只要充分利用你所处的任何情况,你就能取得胜利,或者至少能活下来继续战斗! 幸运的是,猎鹰号拥有强大的武器,而第一星区的敌舰相对较弱——但永远、永远不要低估敌人!遵循以下简单规则,以最大化第一星区的战斗效率。规则一:如果你可以选择是否战斗,先仔细观察对方舰船。它的性能、优势、劣势是什么?它配备了何种武器?对你的舰船构成多大威胁?这些问题没有标准答案,但核心是,不要鲁莽行事!只有你,船长,了解自己舰船的性能,所以要清楚自己能应对什么,不能应对什么。 规则二:你不能参与每一场战斗。如果陷入无法取胜的战斗,就不要硬拼!撤退并不可耻,战败才更丢人!因此,在你的超光速引擎充能时,瞄准对方的武器,以最大限度减少 incoming 伤害,然后迅速撤离! 规则三:摧毁他们的火炮!一艘没有攻击能力的舰船无法对你造成伤害!联邦情报显示,第一区域的大多数敌人只需一轮齐射就能以此方式被消灭。所以不要吝啬使用阿尔忒弥斯导弹!一旦清除了眼前的威胁,就瞄准他们的驾驶舱和护盾,以最大化你的武器效率。如果敌方船只配备了攻击无人机且只有一门激光武器,应将攻击无人机视为更高威胁并优先摧毁。 规则四:击破他们的护盾!仔细把握射击时机,以穿透厚重的护盾。联邦情报提供了以下射击顺序以最大化护盾穿透效率: 1. 导弹/炸弹 2. 离子武器 3. 激光 4. 光束
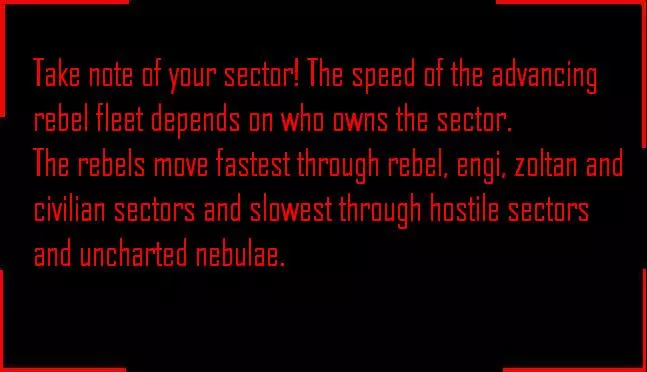
其他实用提示: 尽可能待在星云中。这种策略不仅能让叛军的推进速度变得极其缓慢,你可能面临的唯一环境危险就是等离子风暴。不过联邦情报也并非绝对可靠…… 留意那些怯懦的奴隶贩子。把他们的船体削弱到一定程度,他们总会给你一名新船员!如果你之后拥有了传送器,甚至可以在战斗开始前就获得额外的帮手! 有时,舰长会面临艰难的抉择——是帮助燃烧的空间站,还是从巨型外星蜘蛛手中拯救它?联邦学院会教你,责任意味着要做出这些艰难的决定。舰载电脑会始终以蓝色高亮显示最佳行动方案,如果没有推荐选项,切勿冒险行事,继续前进——你的任务至关重要!别怪我们没提醒你! 导弹是重大威胁,它们会使护盾失效,因此闪避是最佳防御手段。大多数导弹还可能造成舱室破裂和/或火灾。隐形装置或防御无人机能有效应对这些麻烦! 善用 asteroid fields,趁敌方护盾在受击后恢复时发动攻击。 不要急于升级舱门和传感器。需要时再派船员进入房间即可! 在第一星区结束时,出口信标在你面前发出耀眼光芒,但请花时间检查系统——舱门是否已升至二级?你是否至少升级过一次护盾(最好是两次)?你的闪避率是否达到25%或以上?如果其中任何一个问题你的答案是“否”,那么你接下来的旅程将需要运气——相信联邦最高指挥部的我们,“运气眷顾有准备的人”。 第二星区及更远区域
恭喜你,舰长!你已成功抵达第二星区。希望你一切顺利,船体完整性保持在75%或以上——如果是这样,请继续保持!从很多方面来说,你的任务挑战才刚刚开始。联邦情报显示,第二至第五星区间的大多数敌方舰船将至少拥有两个护盾条,并配备多个武器系统,以及传送器、医疗舱和无人机等烦人的系统。尽管之前给出的战斗建议仍然有效,但优秀的舰长懂得灵活应变,顺势而为,而非逆势而动。

此时舰长面临的主要危险是补给和船员不足。你显然希望尽可能探索更多信标,但这会导致燃料消耗速度快得惊人。留意商店或提供优惠的商人,将燃料量保持在10或以上。除非船体低于75%,否则不要购买维修服务;除非严重依赖导弹或无人机零件,否则不要购买这些资源。记住,敌对区域的商店数量远少于友好区域,因此如果可能,当你任何物资不足时,不要进入敌对区域。
到目前为止,你驾驶的【联邦信天翁级巡洋舰】上的初始武器应该表现不错,但如果你想在战斗中继续保持优势,最终还是需要补充武器。当你拥有2层护盾、2级传感器、2级舱门以及约30%闪避率后,就开始积攒一些废料吧(至少75个)。这些存下来的废料意味着,一旦你找到心仪的武器、系统或船员,至少有机会买得起它们。其他必需品包括传送系统。强烈推荐价格昂贵但价值极高的隐形装置和/或无人机舱,以应对那些讨厌的导弹。
成功的关键在于了解自己的风格,并据此规划舰船配置。卖掉所有不符合你计划的物品。记住,重要的不是武器数量,而是拥有适合你的武器。永远不要卖掉你的【爆裂激光MKII】或【阿尔忒弥斯导弹】,在相同能量消耗下,你找不到更好的激光或导弹系统替代品。
保持警惕,不要冒不必要的大风险,你就能抵达第八星区! 可怕的第八星区 干得漂亮,船长!能走到这一步,你现在肯定感觉自己像个真正的太空英雄了。不过等等,地平线上那是什么东西?! 有时候我们都会想,当初要是加入叛军就好了,对吧?错!现在是时候把你学到的一切都付诸实践了。 我们不知道你在第八星区会遇到什么,但我们知道怎么摧毁一两艘大型飞船。 让联邦最高指挥部为你讲解对抗巨型战舰的基础知识。 派遣登船队有助于摧毁武器舱。导弹始终是高威胁目标,因此建议你优先攻击它们。即使没有传送器,也要先摧毁那些火炮——这可是第一星区就该掌握的内容!

隐形装置在躲避齐射、无人机/光束攻击、登船无人机等各种情况时都极为宝贵——只需等待最佳时机使用即可。如果没有隐形装置,希望你已将废料用于升级引擎或配备防御无人机! 坚固的护盾可能很棘手,但别忘了离子武器,包括出色的离子炸弹,能迅速瓦解即使是最坚固的护盾。激光齐射或导弹也同样有效。如果没有导弹或炸弹,就同时发射所有武器以实现最大护盾穿透——这可能需要更长时间,但过去确实有效,对吧? 最重要的是,及时处理任何损伤——立即修复系统损坏,但要让飞行员始终坚守岗位! 保持冷静,为联邦争光!记住,如果你一开始没有成功——那就再接再厉!
联邦武器目录第一卷 各位枪械爱好者们!如果你们想一饱眼福,看看那些酷炫的枪械,那来对地方了! 火力知识可能决定一场战斗的成败——所以下次你想买或卖武器时,别再一头雾水了,阅读这份目录,让自己更有底气! 武器主要分为五大类:离子炮、光束炮、导弹、炸弹和激光炮。 每类武器都有其优缺点,在不同情况下可能会让你陷入险境,也可能助你大获全胜。如何使用它们以及如何组合搭配,都由你决定,但这份目录将帮助你找到最适合自己的选择。 激光炮 大多数飞船都配备激光炮,也都需要激光炮——激光炮操作简单但效果显著,依靠连续射击来摧毁护盾和系统。
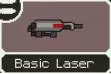
基础激光 - 所需能量1,射击次数1,每次射击伤害1,低点火几率。 你在任何地方都买不到这个玩意儿,但你为什么会想买呢?它的主要作用就是击破1点护盾。
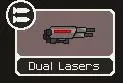
双激光 - 所需能量1,发射次数2,单发伤害1,低着火几率。 消耗1格能量发射2次 - 这才像样!充能速度比基础激光慢,但威力翻倍!该武器系统能与其他任何武器形成良好配合。
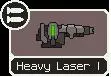
重型激光I - 所需能量1,射击次数1,每次射击伤害2,低起火率和击穿概率。虽然不是最强大的,但比基础激光更具威力。对佐尔坦护盾或无护盾船体仅造成2点伤害。是目前速度最快的激光武器。
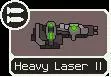
重型激光II - 所需能量3,射击次数2,每次射击伤害2,低点火及击穿概率。 其威力是前代的两倍,但能耗却是三倍!——不过朋友,要是你的武器槽位紧张的话,它还是值得考虑的!
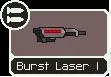
爆裂激光I - 所需电力2,射击次数2,单发伤害1,低着火几率。 和双联激光几乎没什么区别。不过要注意电力消耗!
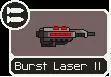
爆裂激光II - 所需能量2,射击次数3,单发伤害1,低着火几率。这是一把能量消耗与性能比极高的武器,建议购买,不要出售!
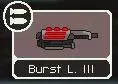
爆裂激光III - 所需电力4,射击次数5,单发伤害1,低着火几率。 哇塞!这是一把很棒的武器,一个武器槽能发射这么多发子弹——不过耗电且射速慢。比两个爆裂激光II还差劲……
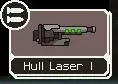
I级舰体激光 - 所需功率2,射击次数2,每次射击伤害1,低击穿概率。 该武器及其进阶型号对无系统房间造成2倍伤害,紧急情况下效果不错。
船体激光II型 - 所需功率3,发射次数3,单发伤害1,低击穿概率。 比MKI型更大、更强、更优秀……但谁会想攻击没有系统的房间呢? 离子武器 离子武器不会造成实际伤害,而是会使系统暂时失效,失效时间取决于离子伤害,可能会相当长。离子武器最适合对抗护盾,其失效时间明显长于护盾的通常充能速度。离子武器对那些烦人的佐尔坦护盾也能造成双倍伤害。
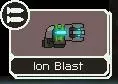
离子冲击 - 所需能量1,射击次数1,每次伤害1 它速度快、成本低,对电网的负担也不大。你还想要什么呢?
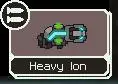
重离子炮 - 所需能量2,射击次数1,每次伤害2。几发这样的炮弹就足以摧毁即使是坚固的护盾,只是别忘了也要使用一些真正的武器!
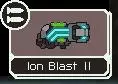
离子冲击II - 所需能量3,发射次数1,每次伤害1 工程师最爱的武器,其充能时间短到离谱!仅需4秒!如果你觉得值得消耗3格能量,那就尽管使用吧。 光束 光束武器威力巨大,但护盾是它们的主要克星。大多数光束武器充能时间较长,但其真正优势在于能够击中多个系统和房间。如果你能轻松穿透敌方护盾,不妨考虑配备光束武器来造成巨大伤害!值得注意的是,通过精心瞄准,大多数光束至少可以击中三个房间。要“击中”一个房间,只需光束的一小部分触碰到该房间即可。
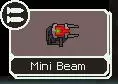
迷你光束炮 - 所需能量1,每舱室伤害1,低起火概率。它虽然不是最出色的,但却是基础隐形飞船的标准装备,基本上只有在这种飞船上才能见到它。
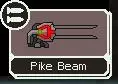
长枪光束 - 所需能量2,每舱室伤害1 最长且最常见的光束武器,长枪光束永远是不错的选择,但要注意单个护盾条就能阻挡它,且如果护盾重新开启,它可能会被中断。

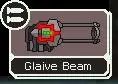
长戟光束 - 所需能量3,每舱室伤害2 这种强力武器可穿透1层护盾,但穿透时伤害减半。这种短而有力的光束是佐尔坦人的常用武器。
重力光矛 - 所需能量4,每舱室伤害3 传说中的重力光矛虽然充能缓慢且能耗高昂,但效果拔群。一旦启动,你绝不会后悔。它甚至能穿透两层护盾造成1点伤害,是一种可怕的武器。
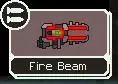
火焰光束 - 所需能量2,每舱室伤害0,高着火几率。 护盾会完全阻挡这种长光束,但其效果可能极具破坏性。有些舰长就喜欢看着舰船燃烧。与岩人登船部队配合时非常实用。
船体光束 - 所需能量2,每舱室伤害1 比长矛或戟更为稀有。与它的激光同类武器一样,船体光束对无系统舱室造成双倍伤害,这使其具备一定的护盾穿透能力。
反生物光束 - 所需能量2,对船员伤害4 蛞蝓人最爱的武器,这种阴险的武器只对敌方船只的船员造成伤害。虽然不是最快摧毁船只的方式,但确实很有效。 以上就是全部内容!敬请期待下周的战争武器特辑! 联邦军备目录第二卷 导弹/炸弹 由于这两种武器使用相同的弹药,我们将它们归为一类。它们种类多样,但没有什么比它们更能穿透护盾了。只是别耗尽弹药!
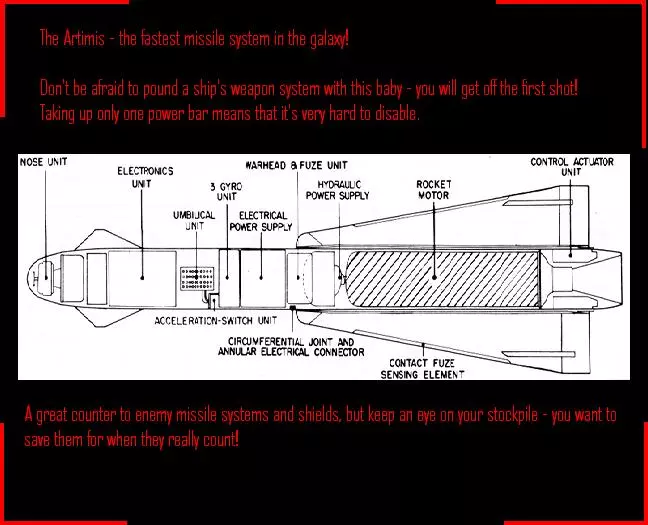
阿尔忒弥斯导弹 - 所需电力1,伤害2,低点火率和低击穿概率。装填速度快(尽管叛军拥有更快的版本),并且仅需1格电力,是目前最可靠的导弹。
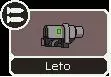
莱托 - 所需能量1,伤害1,低点火及击穿概率。比阿尔忒弥斯更快,但威力更弱,其他方面基本相同。
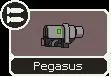
天马座 - 能量需求3,伤害2×2,低起火率和击穿概率。等待20秒后,你将获得两枚而非一枚导弹!非常适合突破防御无人机并节省弹药。
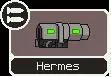
赫尔墨斯 - 所需能量3,伤害3,附加火焰及击穿概率。虽然射速较慢但效果显著,赫尔墨斯在紧急情况下是把不错的武器,但不要过度依赖它们。
突破弹 - 所需能量3,伤害4,附加火焰效果及高击穿概率 这是大众的最爱。正如其名,这种高威力导弹能给敌人带来意想不到的打击。看着他们在空气被抽干前拼命修补破洞,你尽可以放声大笑。

船体 - 所需电力2,伤害2,低起火和破损概率。在无系统房间中造成双倍伤害。这是岩人的最爱,如果你弹药不足,它会是个不错的选择。 炸弹 炸弹通过传送到目标房间,实际上可以绕过除闪避外的所有防御!真是够阴险的!唯一的问题是,它们不会造成船体伤害。炸弹用途特别广泛,因为你可以瞄准自己的飞船。炸弹会对人员和系统造成伤害(如果确实造成了伤害的话)。

小型炸弹 - 所需能量1,伤害2,低着火几率 这是螳螂族喜爱的多用途武器,非常适合摧毁烦人的系统。
破甲炸弹 - 所需能量1,伤害2,破甲概率100% 快速且高效,是任何舰船的绝佳武器。注意别让你的登船小队窒息!
离子炸弹 - 所需能量1,离子伤害4 啊,离子炸弹,或者叫I.Bomb。如果你确实需要瘫痪某个系统,那它就是不二之选。不过它的速度比较慢。
火焰炸弹 - 所需能量2,伤害2,必定触发火焰效果 这件武器很可怕,尤其是在石人手中。虽然不是最快摧毁飞船的方式,但绝对是最残忍的。
破甲炸弹II - 能量需求2,伤害3,破甲概率100%。这玩意儿比它的“小兄弟”更大、更强、更狠,专门在飞船上炸出窟窿。
治愈爆发 - 所需能量1。 这是另一种独特的蛞蝓武器,非常稀有。它会立即治疗其爆炸所在房间内的所有友方船员。对于登船作战或医疗舱较小的舰船来说很实用。 联邦军备目录 - 更新!

各位枪械爱好者们!想我了吗?我带着又一期能救命也能让你心碎的联邦武器目录回来了。让你掌握把那些叛军渣滓轰成渣的秘诀! 我们来看看联邦军火库的几款热门新装备,快来瞧瞧吧! 【高射炮Mk I】——你是不是很讨厌护盾?想让它们迅速消失,不费吹灰之力?朋友,你需要一门高射炮。朝它们发射一堆尖刺金属碎片,嘭!问题解决。Mk II更好,但射速更慢,耗能也更高。真得佩服那些拉尼乌斯人,居然能把那些废料变得这么有用! 【火神链式炮】——耐心是一种美德,舰长们,这头猛兽会为你的耐心给予回报。每一发炮弹都会越来越快,直到势不可挡!如果你驾驶的是一艘坦克般的舰船——赶紧把这家伙搞到手。这简直是你所需的一切! 链式激光——嘿,这让我想起了经典的脉冲激光MK I。它起初射速较慢,然后会变得越来越快!到那时你就能造成可观的伤害了! 充能激光(有2、3、4联装多种型号)——充能武器是我的个人最爱。需要快速单发?没问题;需要四发齐射?嘿,它也能满足你。充能后,先击破敌方护盾,再用快速单发击溃那些反叛者。它们还有两种类型:常规型和离子型。 眩晕炸弹——要登船作战?没有螳螂人船员?那就用眩晕炸弹为自己在战斗中取得优势。赌一把,在反叛者跑到医疗舱前解决他们。 锁定炸弹——受够了那些水晶族外星人用他们的锁定能力对你耀武扬威了吗?给自己也来几个吧。全新的锁定炸弹运作方式与那些古怪的水晶狂热者们的装置相同,非常适合登船作战或舰船安保。 眩晕离子炮——联邦研究部门的某个聪明人突发奇想:“要是你的离子炮MK I还能给船员来一下狠的电击会怎么样?”于是,这个好家伙就诞生了。它的用途十分广泛,被戏称为“和平卫士”或“警棍”,你会发现奴隶贩子和警察都在使用这种非致命武器。 蜂群导弹——真得佩服那些岩晶人(Rock)和他们的导弹。他们总能想出办法突破那些烦人的防御无人机,这次是用三枚导弹齐发,而不是一枚或两枚!不过,你也可以选择只发射一枚…… 好了,今天就到这里——希望你学到了些东西!多样性认知 没错,各位——联邦由各种不同体型和样貌的人组成,了解那些可能在自己麾下服役或不会服役的种族,是每位舰长的职责。
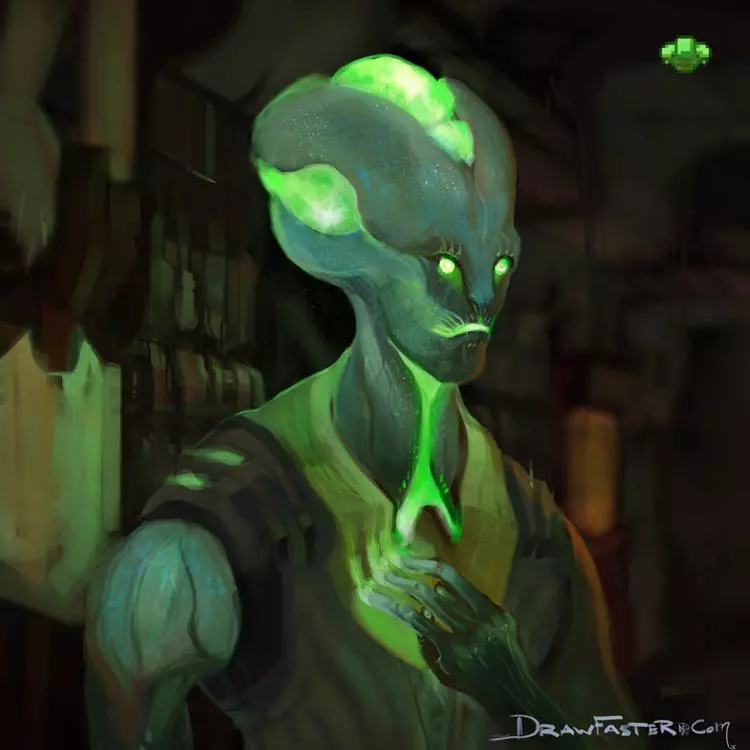
engi是一种半机械半有机的生命形式。他们逻辑性强且乐于助人,是优秀的工程师。 可悲的是,有些人认为engi是绝佳的奴隶。我们正盯着你呢,叛军渣滓! 他们与机器的密切联系意味着他们能快速进行维修。他们讨厌战斗,也并非为战斗而设计(一些研究engi的人认为,这背后可能有智能设计者的参与)。 无论engi是由谁或什么创造的,他们都是联邦的受欢迎成员。如果你的飞船上有engi,请给予他们应有的关爱和尊重。
螳螂族至少可以说是神秘的,尽管他们的名字难以发音,外表覆盖着几丁质外壳,但他们拥有勇猛的战士精神和永不放弃的态度,联邦在危难时刻已经开始依赖这种精神。 没有螳螂族我们会怎样?很大程度上会失去登船队。没错,这些小家伙在战斗中很有用,速度也很快。可惜那些带刺的肢体妨碍了他们的修理工作。如果你的船上有螳螂族船员,请给予他们应有的尊重,但爱意只会让他们感到困惑。

人类是一群混杂的家伙,联邦最高指挥部的我们认为他们其实都差不多。有些人头发不同,胸部有些肉团,但也就这样了。人类基本可以信任去管理任何岗位,只是别对他们要求太高。没有明显的优势或劣势,人类适应性强,但也就仅此而已。他们崇拜一个叫“猫王”的神,不过也有些人崇拜一个叫“上帝”的神。我们只知道,他们都挺疯狂的。 如果你船上有人类船员,能找到他们的话就拍拍他们的背,尽量别太同情他们。
佐尔坦是纯粹的能量生物,不过他们发现以物理形态显现会更方便。尽管身形脆弱,但这些高等生物能用自身能量为系统供能,因此是任何船员团队中都值得拥有的一员。他们严格遵守规则,正义对他们而言极为重要。 佐尔坦掌握着包括超级护盾在内的卓越科技。联邦欣然接受了他们的效忠。如果你的船员中有佐尔坦,试着对他们略带优越感的评论不以为意,庆幸他们站在我们这边就好!

蛞蝓族常被误解为狡猾、黏糊糊且不择手段。当然,它们确实黏糊糊的,但它们的心灵感应能力只用在正道上,偶尔也会用于邪道,但主要还是正道! 它们的天赋使它们成为出色的商人和飞行员,而它们明显弱点的缺乏让它们成为身边完美的船员。 蛞蝓族来自遥远的星云区域。如果你问起这件事,它们会矢口否认,然后用你的个人秘密来要挟你。 如果你的船员名单里有蛞蝓人,现在就把你所有的东西都给它们以节省时间,并且永远、永远不要再同意和它们玩牌了。
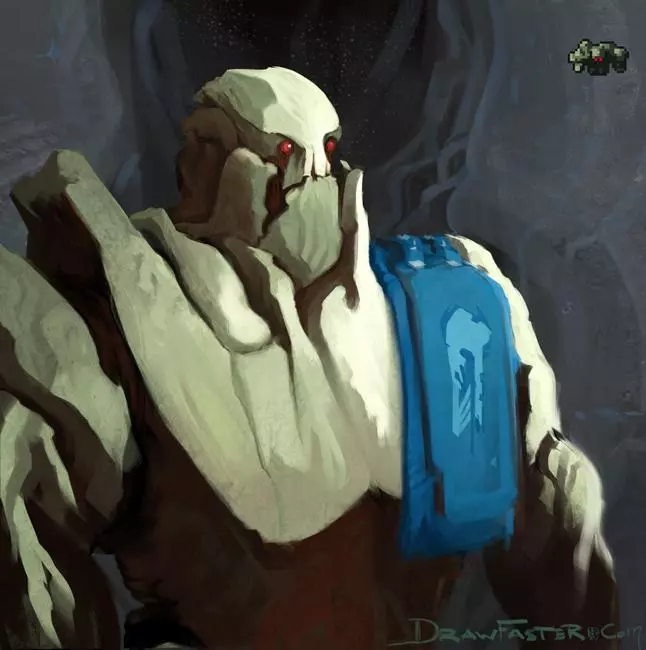
高贵而骄傲的岩人。这些强大的盟友并非一开始就属于联邦,但长年累月的战争改变了这一切。如今,他们好战的态度使得联邦军队一波又一波地投入战斗,希望能解决问题。值得称赞的是,岩人的这种战术有时确实奏效。 岩人身材高大,驾驶的舰船也十分庞大。他们行动迟缓且笨重,却对火焰伤害免疫,因此多年来一直是联邦船员中备受重视的成员。 他们强壮的体格也使他们能够协助螳螂族登船队,并在许多联邦舰船上负责安保工作。如果你的船员中有岩人,切记不要在他们身上刻自己的名字首字母,否则他们会拧下你的四肢,并用它们把你活活打死。
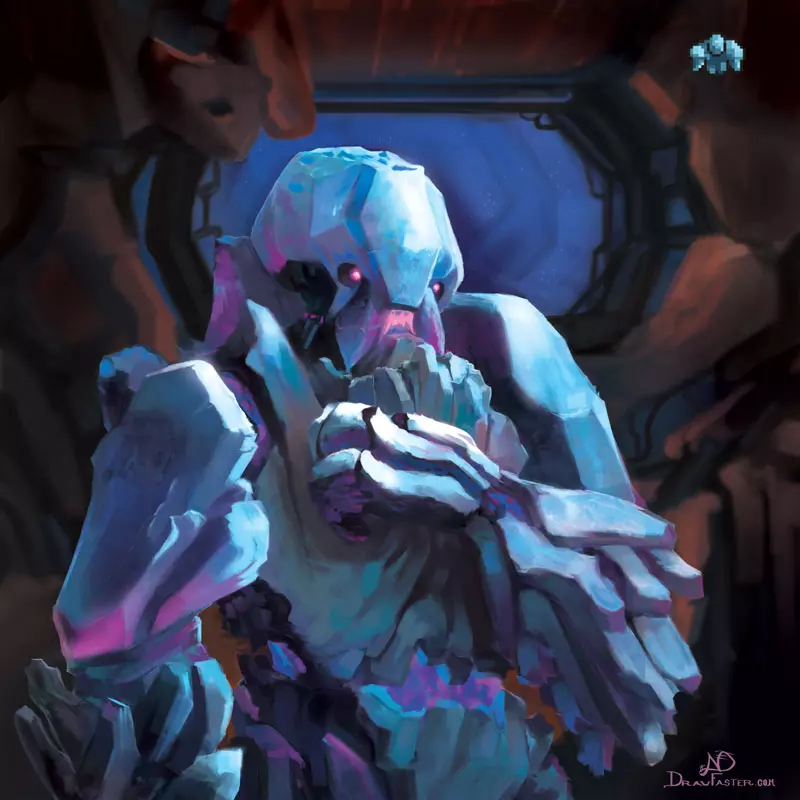
作为岩人的远古祖先,这些美丽而强大的生物在联邦中几乎一直是个传说。我们最近才开始收到关于它们的详细报告。它们似乎完全由一种名为水晶石的宝石状材料构成,而水晶石是已知宇宙中最珍贵的商品之一。它们都拥有一种特殊能力,即生长和操控水晶石的能力,这使得它们极难对付。如果你的飞船上有水晶实体——联邦最高指挥部警告,切勿为了出售而掰下它们的身体部位,否则你可能会得到一个水晶栓剂。
拉尼厄斯族是一群神秘的种族,来自银河系一个遥远且未经探索的星域。人们对他们知之甚少,但已知他们偶尔会与联邦合作。联邦最高指挥部能告诉你的是,他们热爱废料!他们甚至找到了将废料武器化的方法。他们可能难以理解,但尽量友善对待他们,你或许会因此获得回报。他们还会吸走周围空间的空气,所以如果争论持续太久,他们往往会胜出……如果你与一名拉尼厄斯族船员共事,给他们一些空间,他们不喜欢有人陪伴。无人机专题 联邦情报部门发现战斗中对自动化的依赖日益增加,联邦最高指挥部的官员们认为是时候给予这些小帮手应有的关注了。记住,知识就是力量,所以要了解无人机;这可能会决定战斗的成败。 联邦最高指挥部知道这方面的内容很多,所以请先轻松了解一下。此外,为了简化说明,本主题分为以下三类: 内部无人机、 外部防御无人机、 外部攻击无人机。 所有无人机都可以在开启和关闭电源的情况下正常使用且不会损坏,联邦情报部门强烈建议战略性地利用这一点,以充分发挥电网和无人机的效能!

外部防御: 所有外部防御无人机围绕你的飞船轨道运行,且更难防御大型飞船! 防御无人机(MK I 和 MK II): 顾名思义,这些无人机旨在击落来袭物体,例如小行星、导弹、黑客无人机,甚至登船无人机或高射炮弹块。大多数舰长都会考虑配备一个,它们构成了许多防御策略的核心。 遗憾的是,它们的人工智能容易混乱,同时出现两个或更多投射物时往往难以应对,通常只能击落其中一个。舰长们要记住,如果敌方飞船使用防御无人机,这是突破它们的一个好策略。这种策略对MK II防御无人机尤其有效,因为它们还会尝试击落你的激光齐射。护盾无人机: 这些无人机会环绕你的飞船飞行,大约每10秒生成1点索尔特超级护盾(最多可累积至5点)。非常适合辅助你的护盾系统,并能定期防御导弹、心灵控制、登船人员、登船无人机,甚至黑客无人机(不过战斗开始时黑客无人机通常会连续快速派出,所以不要依赖护盾无人机来防御黑客攻击)。护盾无人机相当耗电,但确实能提供很大帮助。尝试在获得一个护盾点后立即使用隐形,如果隐形时间足够长,离开隐形状态时你可能已经拥有两个护盾点了。 船体修复无人机: 这款价格不菲的无人机可能是防御无人机MK I之后最好的防御型无人机。它会在你的飞船周围快速移动,每使用一个无人机部件可修复3到5点船体值。它可以在战斗中或战斗外使用(但可能会被击落),能显著提升你的飞船在任何战斗中的续航能力,并大幅减少维修费用。如果你找到它,一定要留着! 反无人机无人机: 这个有趣的小型无人机将围绕你的飞船飞行,击晕并最终摧毁敌方战斗无人机。在某些情况下非常实用,在其他情况下则完全无用。值得一提的是,这是一种低功率无人机,不会对系统或电网造成负担。它不太可能瘫痪敌方登船无人机或黑客无人机。
外部战斗: 所有外部无人机都可被常规武器摧毁,在战斗中并不安全。 联邦军备目录的人员确实想这样做,但最高指挥部坚决反对,因为战斗无人机严格来说并非武器,它们只是无人机。战斗无人机将完全依靠自身人工智能行动,因此你无法选择它们的攻击目标。考虑使用它们时请牢记这一点。 战斗无人机(MK I 和 MK II): 任何指挥过Engi A型舰船的舰长都了解这些无人机。它们的攻击速度甚至比重型激光MK I还要快,但威力不大。有两个用途:一是持续压制敌方护盾的某个区域,二是协助摧毁无护盾的舰船。MK II无人机除射速更快外完全相同,这意味着它们通常能让敌人的护盾始终处于减少两点的状态。如果你难以穿透敌人护盾或对舰船造成伤害,可以考虑使用战斗无人机——但就所消耗的能量而言,几乎任何常规武器都更出色,至少常规武器还能让你选择目标。 光束无人机、重型光束无人机、火焰无人机。 这些无人机的运作方式与战斗无人机大致相同,只是它们无法穿透护盾。与离子武器配合使用时效果非常显著。重型光束无人机比标准光束无人机造成的伤害更高,但消耗的能量也更多。
内部无人机: 内部无人机存在于你的飞船或敌人的飞船中,可被船员攻击或摧毁。除非被摧毁,否则它们仅消耗一个无人机部件。 系统维修无人机: 这类无人机非常适合应对危险情况,例如无气房间和火灾。在启动状态下,它们会自动寻找损坏处并进行修复。如果你拥有小型或虚弱的船员,或者船员修理速度较慢,强烈建议配备一台系统维修无人机来减轻负担。 反人员无人机: 这对engi船员来说很实用。它的唯一用途是击退登船队伍。它非常坚固,能造成相当大的伤害。联邦情报部门还指出,它在对抗巨型外星蜘蛛时也被证明是有效的……登舰无人机: 在设计上,它与反人员无人机几乎完全相同,但有一个例外:它配备了复古推进器,使其能够飞向并突破敌方舰船。一旦进入舰内,它就会开始全力破坏舰上的系统和船员。对无人舰船非常有用,因为它不会遇到任何抵抗。你无法指定它的突破位置,但如果它突破到系统室,就会特别危险。请注意,登舰无人机可能会被防御无人机摧毁,并且无法穿过佐尔坦超级护盾。 离子入侵无人机: 它是登舰无人机的理想搭档,行为方式几乎相同。它会突破敌方舰船并寻找系统。但它不会攻击船员,也不会造成任何船体损伤。相反,它会尝试通过充能并释放EMP脉冲来瘫痪系统,这种脉冲甚至能击晕同一房间内的所有船员。攻击离子入侵无人机时,尽量只在它移动或充能时进行攻击,以避开EMP脉冲。 好了,目前就这些——希望这些能帮助你应对无人机! 舰船识别与战术 第一部分 联邦拥有许多可供使用的舰船,不仅仅是猎鹰号。联邦情报部门已将以下舰船归类为在有人居住的星系中常见的类型,联邦最高指挥部希望你了解如何应对它们。 没错——尽管舰长的直觉在任何情况下都有其价值,但对于某些舰船,你必须违背自己的风格,以弥补舰船的弱点或利用其优势。无论你使用哪艘舰船,都要花时间熟悉其布局,以便快速轻松地应对火灾和登船敌人。联邦情报部门列出了一些(但绝非全部)针对最常见联邦舰船的策略,希望能帮助你掌握不同的指挥风格。圆环号
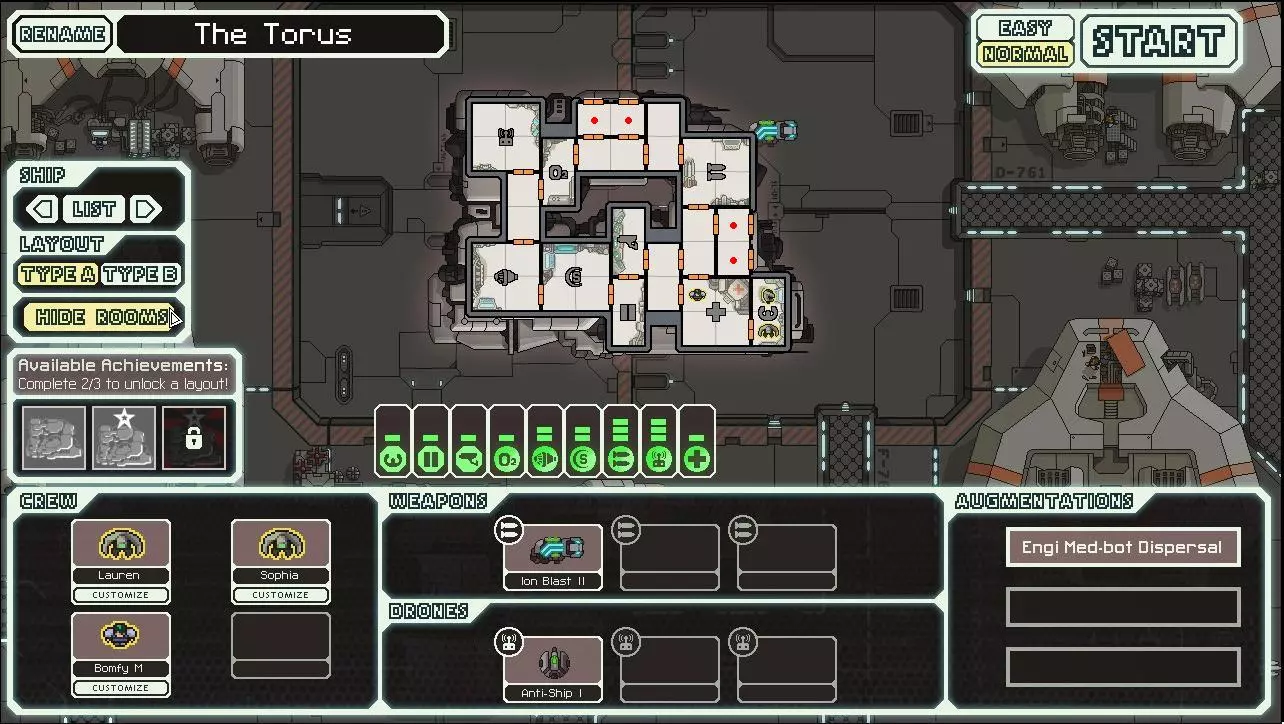
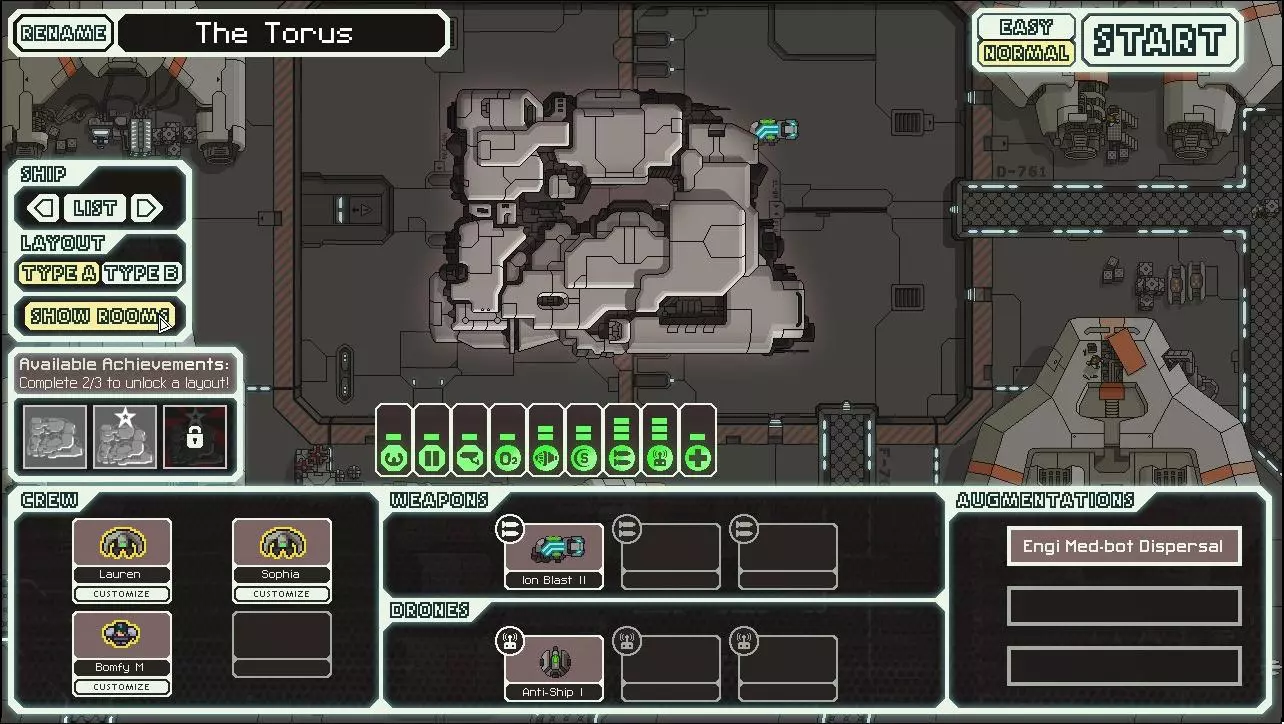
torus级战舰是engi种族的得意之作,它能够容纳任何系统。 engi对自动化的热爱在这艘船的设计中体现得淋漓尽致,你一眼就能看出无人机在这艘船的战术中扮演着重要角色。 在获得其他无人机和武器之前,你将依靠离子武器来瘫痪诸如护盾和武器之类的系统,同时由无人机造成实际伤害。值得一提的是,这种特定离子武器的充能时间使其能够同时瘫痪两个系统。 为了优化船员效率,该强化装置可以在船员无需前往医疗室的情况下为他们疗伤,因此他们只有在最紧急的情况下才需要离开自己的岗位!由于无人机不太可靠,且并非总能瞄准你需要攻击的系统,因此要专注于构建坚固的防御;尽快升级你的护盾和引擎,并获取【隐形装置】。 这艘船容易受到登船者的攻击,所以要充分利用【治疗强化】和【排气策略】。 【鱼鹰号】
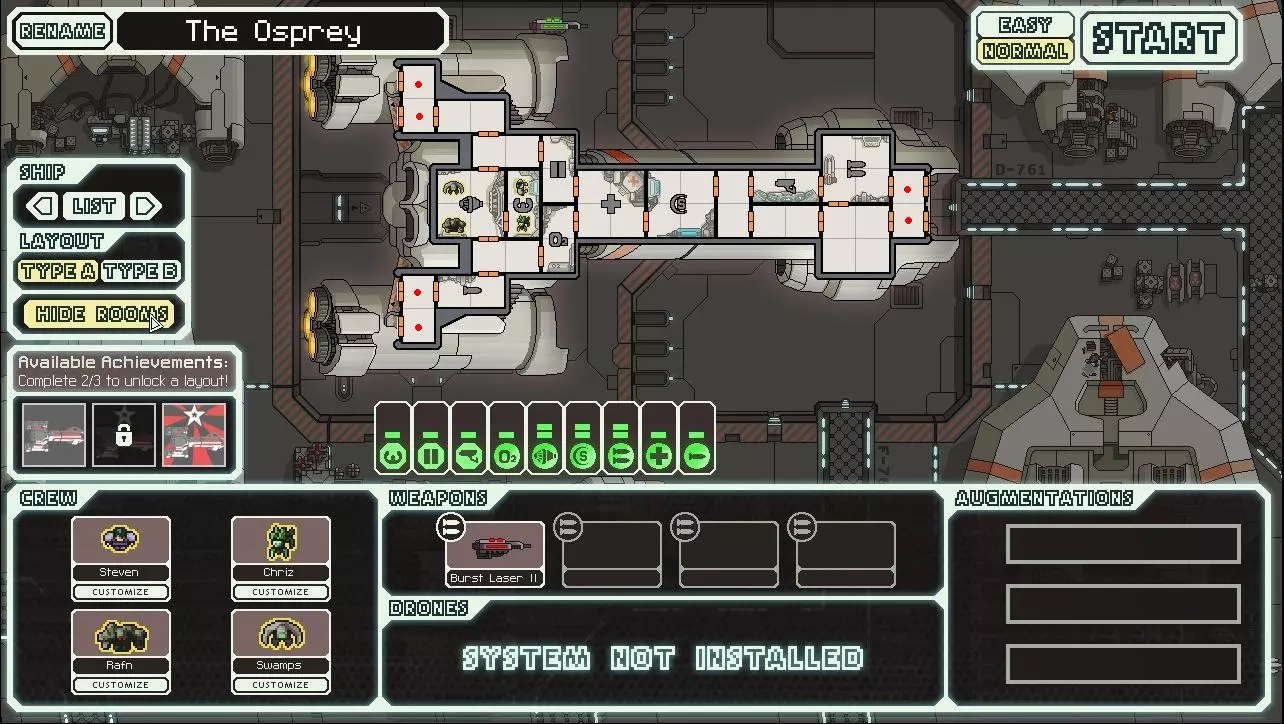
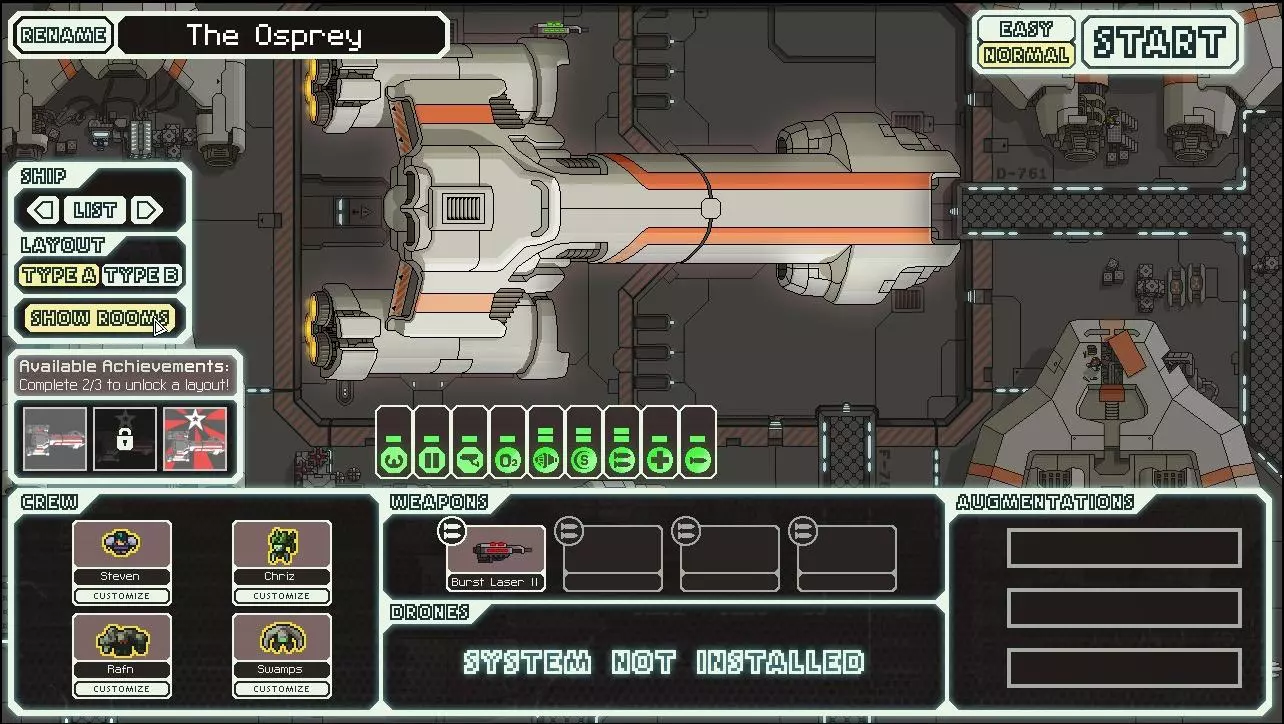
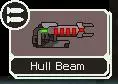
该舰船也被称为联邦巡洋舰,设计非常基础。其布局不太容易操作,且光束武器对该舰特别有效。 artillery beam是一种威力强大但射速缓慢的武器,可无视所有护盾。因此,尽早将其完全升级,你就能减少对武器系统的关注,转而专注于急需的防御。 鱼鹰级巡洋舰无法搭载隐形力场,因此最好尽早配备无人机舱以对抗导弹。 登船作战时务必关闭artillery beam,以防造成意外伤亡。 作为标志性的联邦舰船,鱼鹰级拥有最多元化的船员配置,这在任务中会非常有用。请仔细选择他们的位置,以充分发挥其优势并弥补其劣势。吉拉毒蜥
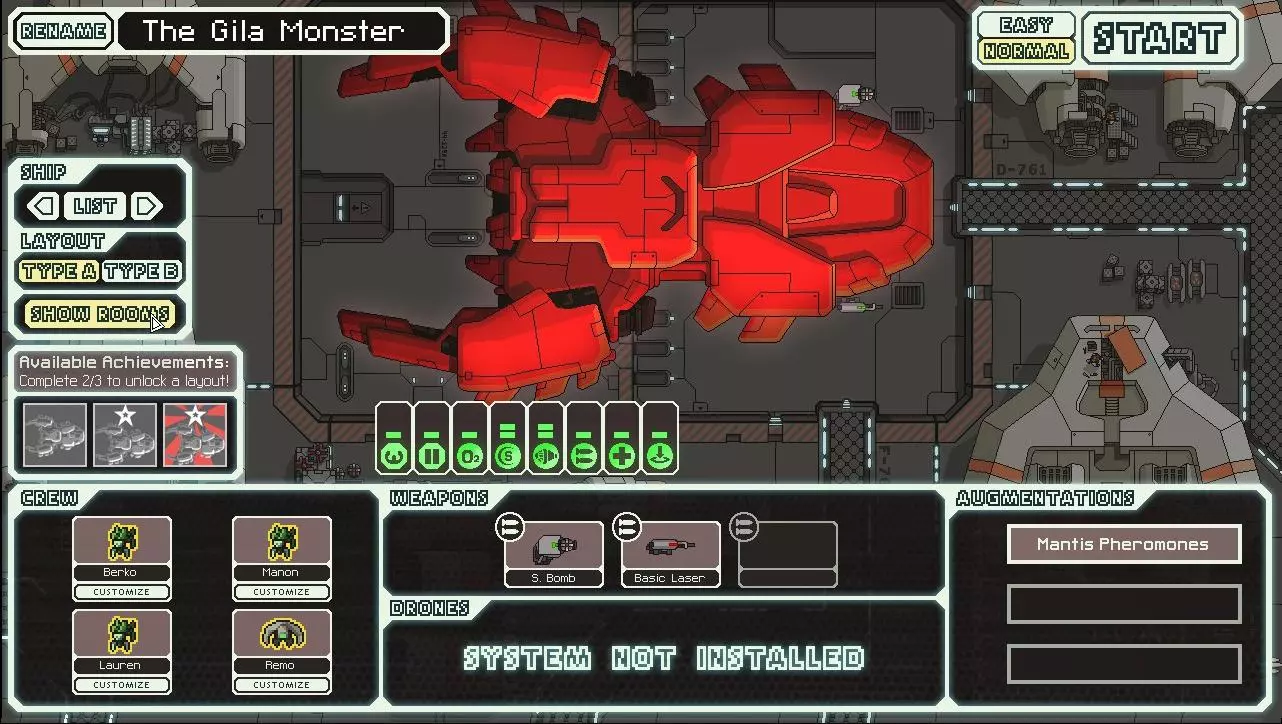
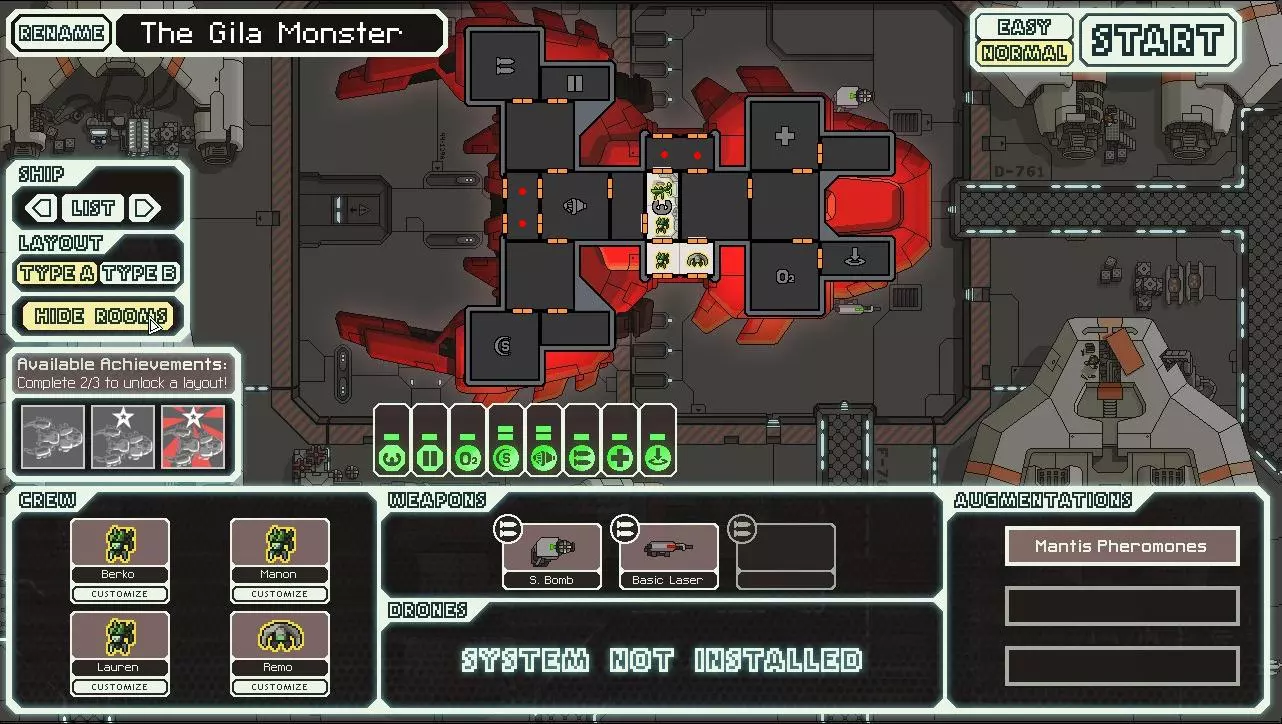
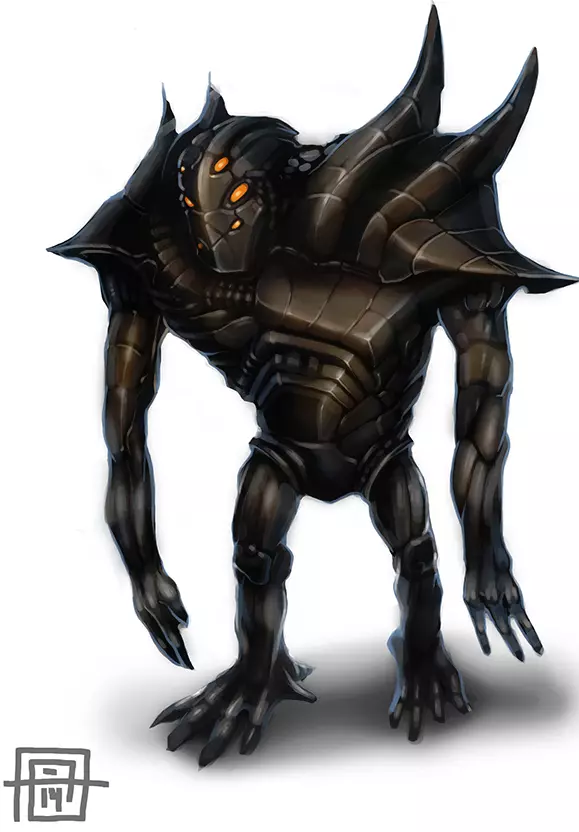
如果你喜欢登船作战,那么这艘螳螂族制造的巡洋舰肯定会吸引你的目光。不过,这艘船存在一些明显的弱点。虽然登船作战是每位舰长武器库中的强大手段,但它绝不是通往胜利的唯一途径。除非胜券在握,否则切勿尝试登船。这艘船能让你通过更高的总体奖励来弥补偶尔撤退的损失。 初始状态下,该舰的武器系统火力严重不足,但大多数舰长更倾向于依靠小型炸弹来摧毁医疗舱或其他阻碍登船行动的系统。重点加强防御并配备大量船员可以弥补舰船的弱点,但强烈建议升级武器系统,以对抗许多无法通过登船作战轻易摧毁的敌方舰船。同时,强烈建议将传送器升级到2级,以大幅提高登船行动的成功率。尤其要避免在早期与佐尔坦巡洋舰和自动化舰船交战。 涅萨西奥号
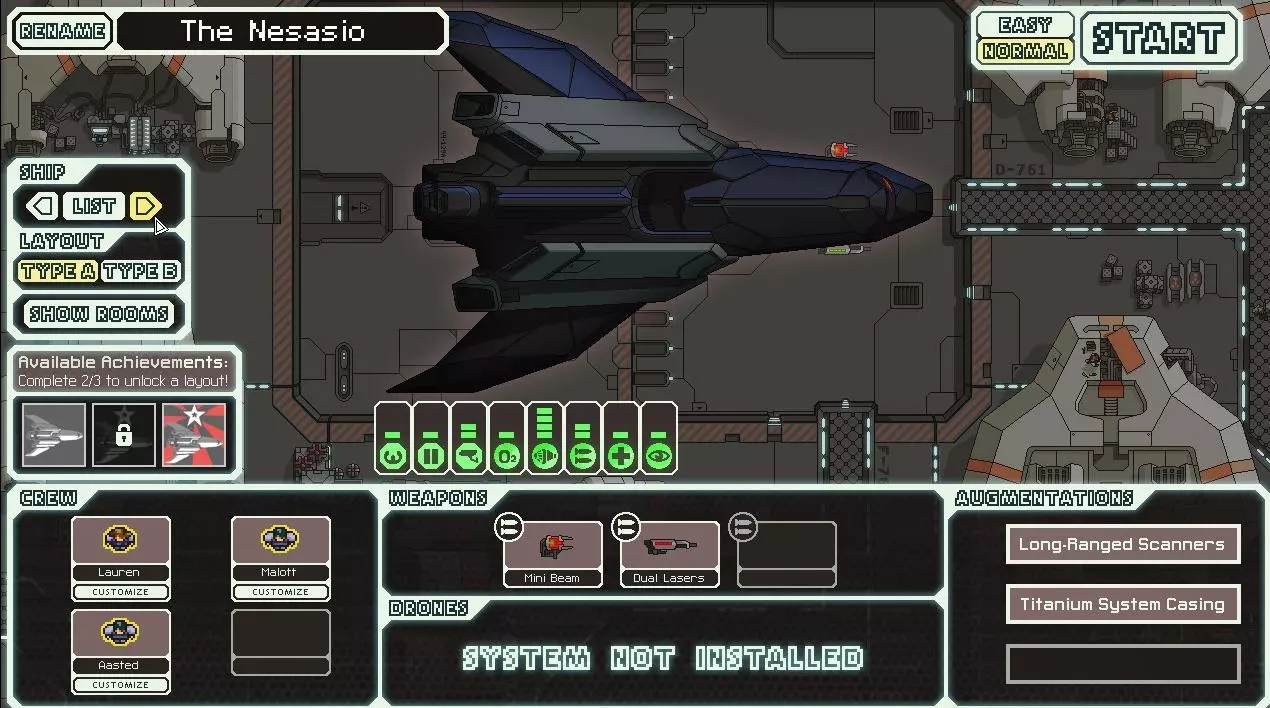
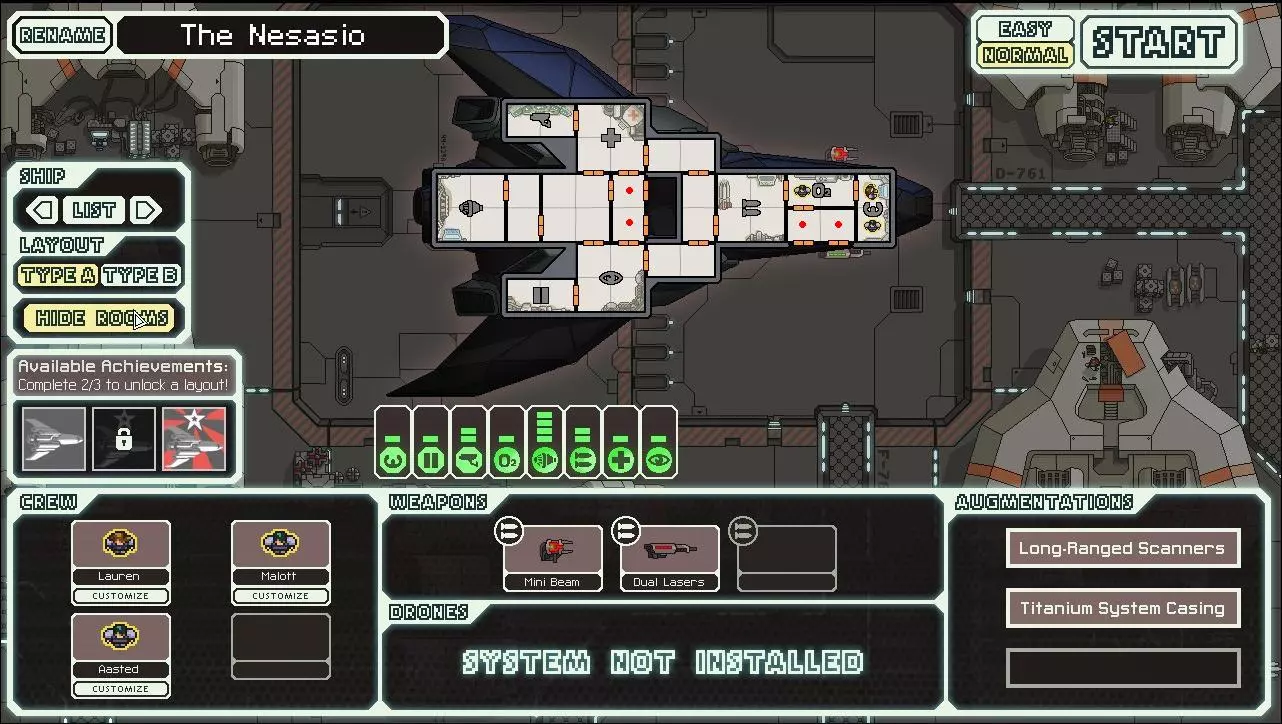
许多舰长将这艘舰船称为“隐形巡洋舰”,它初始就配备了传说中的隐形技术。但遗憾的是,它没有任何护盾。 驾驶这艘舰船成功的关键在于把握好隐形的时机。只在躲避大量齐射炮火或导弹时使用隐形,切勿在战斗开始时就激活。这意味着你需要判断哪些武器可能会击中你的舰船。 注意,开火会缩短隐形的持续时间。不必急于升级隐形驱动,应优先升级引擎,并为最终必需的昂贵武器和护盾存钱。 初始武器的威力非常弱小,所以要充分利用它们。联邦情报部门建议使用双激光瞄准敌方武器系统,待光束充能完毕后开火。当敌方护盾失效时,用微型光束尽可能摧毁其关键系统(优先攻击护盾和武器)。初期阶段,你应该能在大多数敌舰发动新一轮齐射前将其瘫痪,从而减少自身受到的伤害。应避免与佐尔坦族舰船以及具备无人机能力的舰船交战,因为你的舰船在将其击败前会承受巨额伤害。 壁垒号

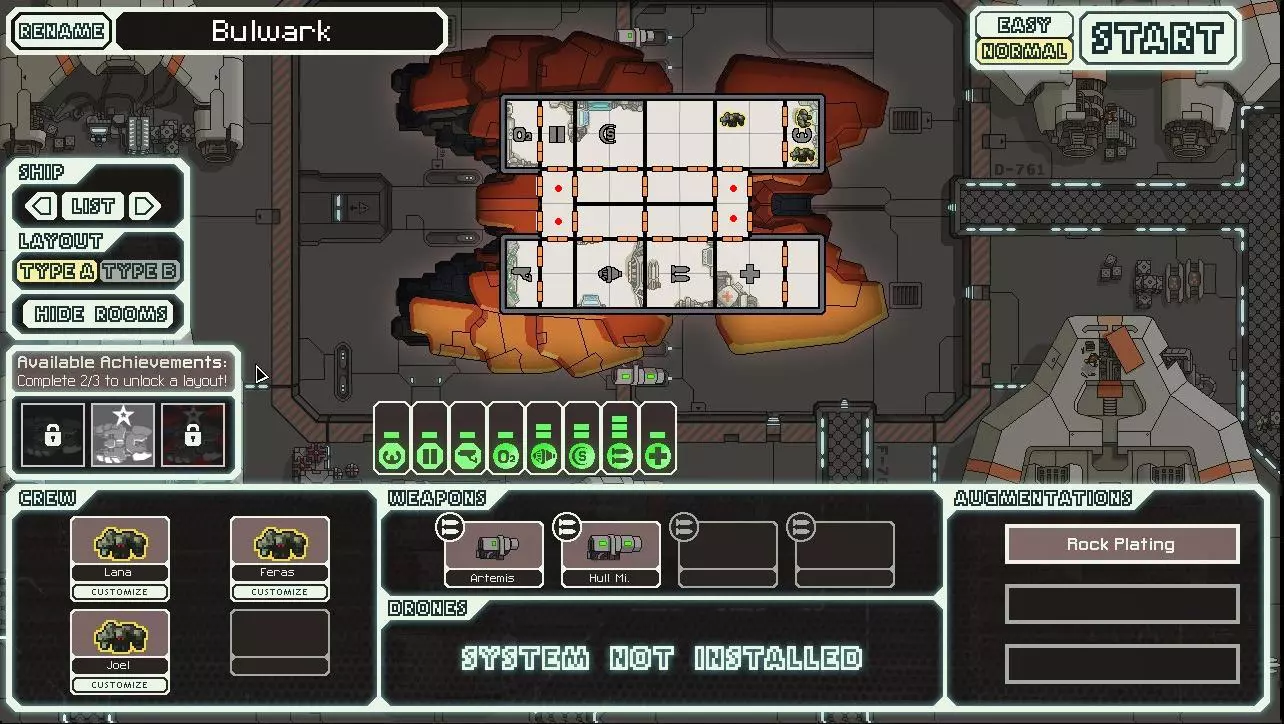
这艘岩石族飞船虽然坚固耐用,但完全依赖导弹作战。尽管该飞船可以配备其他武器系统和无人机,但在初期你需要仔细规划并节约弹药。联邦情报部门建议,使用小型快速导弹攻击武器系统和驾驶舱,用船体导弹打击无系统的房间,这样既能节省弹药,又能减少受到的伤害。 关于岩石装甲,这个强化部件有助于减少船体伤害,但绝不能依赖它来赢得战斗。在制定战斗策略时应将其排除在外,若某次攻击没有对你造成船体伤害,那它就是额外的惊喜。优秀的舰长总会努力在战斗中避免受到船体伤害,所以可以将这个强化部件视为降低维修成本的手段,而非帮助获胜的关键。尽早获取新武器,必要时甚至可以卖掉船体导弹。你不想完全依赖导弹/炸弹,因为你迟早会用完它们。 船员实力很强,但行动缓慢。务必仔细规划,要考虑到岩人的移动速度减半这一因素。 舰船识别与战术 第二部分 主力舰
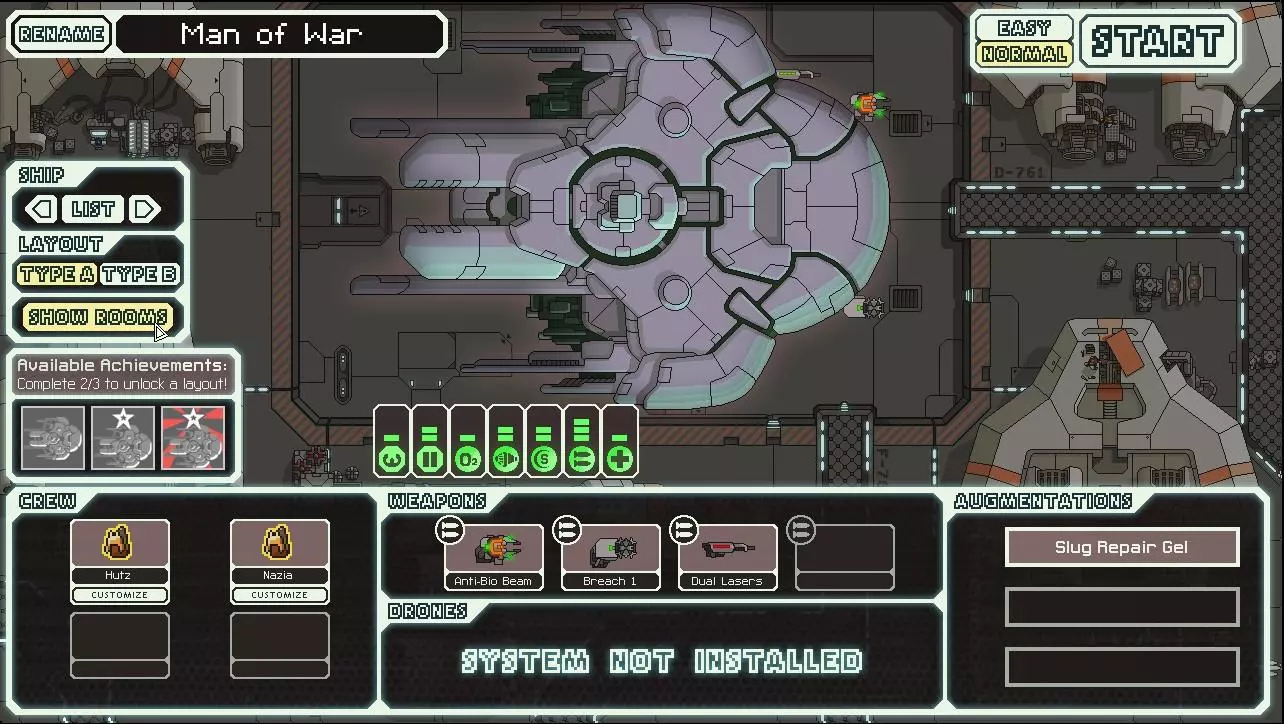
各位舰长,这艘船可不好驾驭。船员人数少,武器也没什么亮点。 联邦情报部门建议,要抵制使用反生物光束追求胜利的诱惑,应尽早将其出售。没错,消灭敌方船员能获得更多奖励,但这种方式所需的时间和精力往往会让你承受相当大的损伤。如果你执意要用反生物光束,那也只对那些无法伤害你的船只,以及没有医疗舱且护盾薄弱的船只使用。 当你船员较少时,蛞蝓修复凝胶是个有用的强化道具,但如果你得到了一名engi(工程师),可以考虑卖掉它。你可能只需要安排人员(或蛞蝓)操控引擎室和驾驶舱,除了医疗舱和氧气装置外,其他所有房间都可以排空氧气。这样操作可以减少匆忙应对登船者和火灾的需求。善用破甲炸弹,它对螳螂船员尤其有效。先用破甲炸弹攻击他们的护盾,然后用激光摧毁他们的武器系统。 裁决者
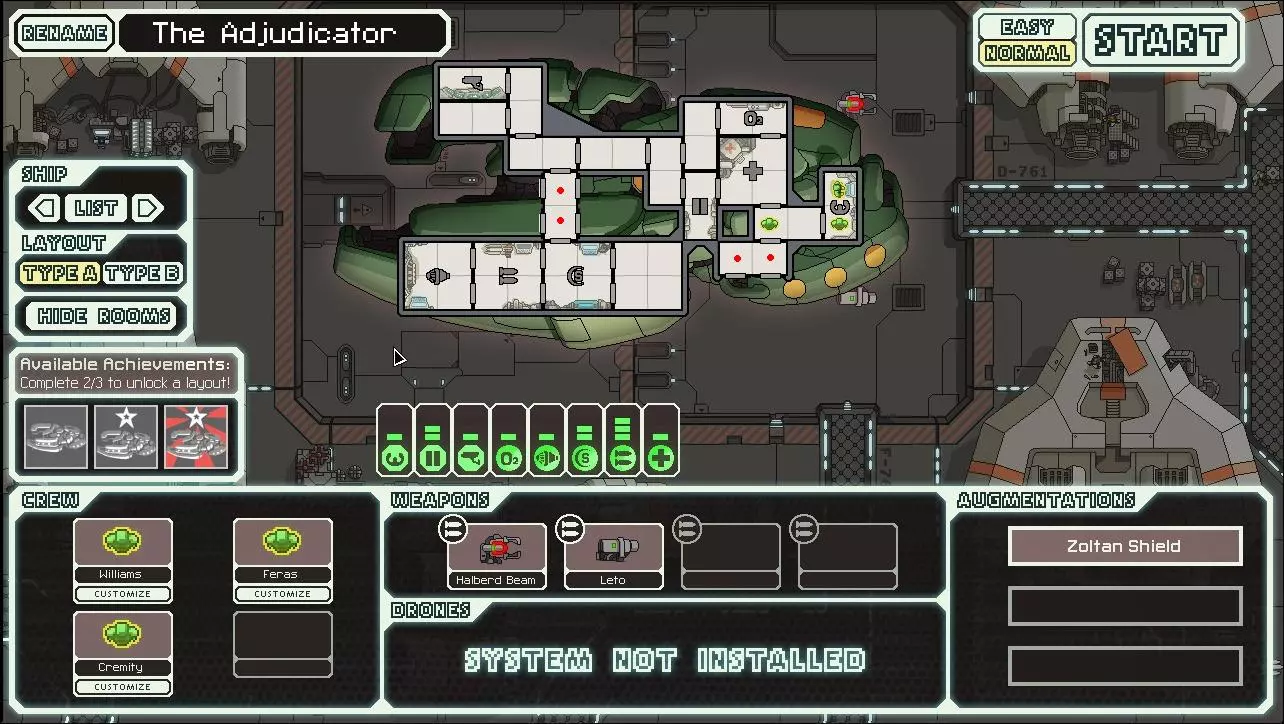
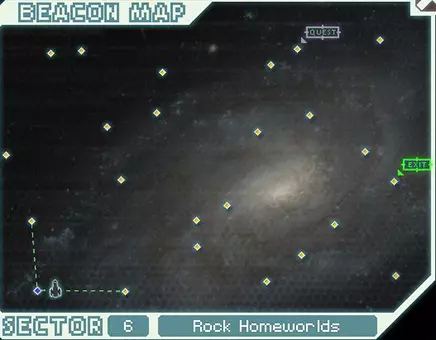
Impressive Zoltan technology might trick you into thinking that this ship is an easy command, but don't be fooled. The Zoltan crew are weak and boarders, fires and breaches all pose a significant threat. However, incoming hull damage will be severely reduced, and missiles pose less of a threat, at least while the shield holds. Use your weapons effectively. When targetting the beam, make sure that the beam starts with the shields and goes from there to maximise damage. Target shields or weapons with the missile depending on the adversary. Aim to stop their guns before your shield is down in every conflict. Upgrade your engine early. The more shots you evade, the longer you keep the Zoltan shield. Prioritise on crew, engines and offence, although upgrading shields helps eventually. Avoid beam/ion weapons and drones as they will get rid of that precious shield very quickly. As Zoltans do not power subsystems, get a new pilot at the earliest opportunity. We at Federal High Command hope that the information has proved useful. We are aware that other ship designs do exist but they generally require a basic mastery of the tactics already given for each ship. Besides, we like to think of our captains as independant thinkers, capable of devising strategies of their own. There are legends of a ship made entirely of crystal, but Federal Intelligence has yet to encounter this ship. More information will be provided as and when it arises. Ships' Log - USF Bolt Sector 1. This is the first log entry for the USF Bolt - Red-Tail class Federation Cruiser. The crew is comprised of myself, the pilot, Jack Bale. The second and last human on board is the lovely Amie Rine who specialises on shield systems. The Mantis who we've nicknamed "Clicks" is on weapons duty and Zoran, the legendary Zoltan engineer is where you would expect him/her/it to be. 1 - Our mission; to get the vital data we carry to our base in sector 8 - If we survive that long. Our supplies are limited and the rebels, aware of our mission, are hot on our heels. We power and double check all systems before making our first jump as the crew of the USF Bolt. Our destination, a nebula which should hide us from the rebel fleet. 2 - The beacon is in a particularly beautiful area; a tourist spot. Not free from traders, however although 4 missiles for 1 fuel is a deal we are happy to turn down. We jump deeper into the nebula. 3 - We have been partly disabled by a plasma storm. To make matters worse, a rebel scout has been waiting for us. To think we thought we had given them the slip! We have to power down the shields and O2 bay just to power our weapons, but we get them before they can escape to warn the fleet of our presence. We use their scrap to upgrade our door systems and then head deeper into the nebula. 4 - An unshielded auto-scout awaits us at this beacon. We take out it's weapons before it can fire a shot. Victory. We use it's scrap to upgrade our engines, then head deeper into the clouds. The space clouds. 5 - Another plasma storm. Multiple incapacitated ships loom in the shadows, briefly illuminated by lightning. We take a risk to search the ships for survivors and equipment. Most of the hulks aren't even worth scrapping, but we find an Ion Blast MKII. We don't equip it just yet. We jump deeper into the nebula. 6 - Nothing at this beacon but a lovely view. We power up our systems after the storm and jump out of the safety of the nebula. 7 - A slave trader in a small rock ship offers us a slave. We attack the scum in the hopes of liberating their cargo. The ship proves a threat and despite diverting power from our O2 unit to the engines, we take a hit to the shield bay. Amie works frantically on the repairs trying to get the shields back online while our lasers pound the ship. They surrender soon enough and we take a slave in exchange for letting them live. A human male named "Ohm" is welcomed on board. Traumatised by his experiences with the slaver, he joins me in my piloting duties. We jump on in search of the exit beacon. 8 - We've been jumped by a well equipped rebel scout. No way to avoid this fight. We target their guns while their attack drone gives us grief. In the first exchange we take out their guns, but our weapons bay was breached! Ohm rushes to help Clicks repair the hole before it's too late. Their drones help to repair faster than us and before our weapons are back online, they get off another volley, this time taking out our O2 unit. Ohm rushes to fix this while we cripple the fleeing ship and destroy it. A victory but the ship's hull was damaged and Clicks and Ohm damn near asphyxiated. All systems returned to normal we upgrade the reactor and jump away. 9 - Into an asteroid field! To make things worse, a rebel auto scout is waiting for us here. Luckily for us it's unshielded and we destroy it quickly. This is no place to work on the ship, we gather the scrap and jump away. 10 - We've strayed too close to a red giant star! This could get ugly as an another auto scout has found us here and it's airless ship has no fear of flames! We target it's weapons and vent all unoccupied rooms. In the first exchange it starts a fire in our weapons' bay. It won't fire again, we got it's weapons good. We vent the weapons bay to quickly put out the fire, and destroy the ship. we harvest it's scrap but this isn't a good place to stop. We move on. 11 - A pirate in a Zoltan ship has hacked our engines, with evasion at next-to-nothing, this could prove fatal! With only 3/4 guns operational and a zoltan shield to take down we have no choice but to take some punishment before we can stop their guns. We're at 75% hull integrity by the time we defeat the pirate. Ohm has proven to be a great ship's hand - running around repairing things, allowing us to stay at our posts. We spot a store one jump ahead and decide to check it out. 12 - Not much of any use here! After a long debate we sell the Ion Blast MKII for 40 scrap and use it to upgrade our shields for the sector to come. 13 - At the exit beacon we are offered a trade, we pass up the terrible deal and leave the sector for the rebels. Ships' Log - USF Bolt, Sector 2. 1 - We move into another Civilian sector ahead of the rebels. We aim for a distant nebula. It should take 3 jumps to get there. 2 - An asteroid field! We explore it despite the risk, we need the fuel. We find an abandoned mining site that yields 25 scrap and a drone part. Worth the risk. We upgrade our reactor and continue. 3 - We ignored a distress beacon but have run into a civillian being persued by a pirate. We move in to help. The pirates guns are no match for our new shields so they send some boarders our way. We vent the appropriate rooms and Ohm and Myself finish off the gasping soldiers. We finish off the pirate and as a thank-you the civillian victim patches some of our hull damage. We jump away. 4 - A store. We buy some much needed fuel but save most of our scrap for upgrades. 5 - We get to the nebula at last, straight into a plasma storm and the clutches of a waiting rebel scout! We make short work of the scout and gratefully power down our weapons and power up the O2 unit. We head deeper into the nebula... 6 - We've been boarded from a derelict. Ohm and Clicks fight to save our sensor room and with the help of some careful venting, all four boarders are killed. We jump away. 7 - We attack a ship hiding in the nebula like us, a possible smuggler. It's a feeble ship and we easily overpower it. The smuggler had military equippment, a MKI attack drone. We continue into the nebula. 8 - Another plasma storm, another rebel scout! This one has a cloak. Despite it bombing our pilot bay, we destroy it. We are now rich in scrap but with no stores around, we have nothing to spend it on. We need some new weapons. We jump deeper into the nebula. 9 - Another unmanned craft. It's worrying that the rebels have penetrated so far into uncharted space. We have no choice but to fight. This ship can cloak too, but we easily defeat it. We're running very low on fuel now, but we head on into the nebula anyway. 10 - Another auto-scout. This one guards a rebel station. We attack the weak ship to get to the station but it was a waste of time, the station was abandoned. We spot a store one jump away and head off. 11 - We sell the attack drone and a basic laser and replace it with a small bomb. That should tide us over in the hard fights to come. Especially against shielded ships. We also recruit a second mantis nicknamed "Gumpo" and restock our fuel, although it's still too low for our liking. We spend our remaining scrap on an engine and reactor upgrade and make our way to the exit beacon. 12 - Another trader, offering repairs. We decline as we are at 75% hull and leave the sector for the rebels. Ships' Log - USF Bolt, Sector 3. 1 - We decide to visit Zoran's home-system. The Zoltan homeworlds. We spot few nebula in this sector so we decide to make a near straight dash for the exit. 2 - Our first jump lands us at the claws of a well-equipped mantis ship which attacks without provocation. We kill the small crew with bombs. A significant haul from this encounter. We jump to a nearby distress beacon. 3 - A single life form on the surface of a planet. We go down to investigate and discover a lone man in a questionable mental state. We bring him back aboard the USF Bolt with hopes of finding help for him, but it all proves too much. He detonates an improvised explosive, killing himself and damaging our hull. So much for being the nice guys. We jump away. 4 - A mantis outcast mistakes us for a zoltan ship and attacks with the help of extra boarders. We defeat the invaders with the help of Clicks and Gumpo and then destroy the ship. We get lots of scrap but are running dangerously low on fuel. We jump away. 5 - A Zoltan emissary gives us some co-ordinates before jumping away. Bemused we jump straight to them. 6 - A rebel trap! We should have known. We talk to the rebel and manage to convince him over to our way of thinking and change their ways. Zoran proved invaluable here, he has a way with words! The would-be opponent gives us a weapon and alot of scrap to aid us. All well and good, but we have only enough fuel for ONE more jump! 7 - We arrive at an empty beacon. With no apparent way to get to the exit and no fuel to do so, is this how our mission ends? We have no choice but to broadcast a distress signal and hope help finds us before the rebel fleet catches up. 8 - A rebel scout answers our message. Not quite the help we wanted! As soon as they realise they're outmatched they try to run and warn the fleet, but we destroy them. We get 3 fuel from the wreckage, we're back in business! We jump into the sectors only small nebula to escape the rebel fleet. 9 - An unshielded automated ship - easy prey. We gather 3 more fuel from it's wreck along with an anti-ship drone MKI. Still no way to get to the exit, there HAS to be one... we continue to explore the nebula. 10 - A rock fighter craft attacks us deep in the nebula, it's well equipped but we put it down quickly, we're shocked by their offer to surrender and destroy them anyway. I thought Rockmen had more courage. Our fuel crisis is now officially over, we have a substantial amount of scrap saved and with a connection to the exit beacon finally in our sights, things are looking up! 11 - This beacon is merely a sightseeing stop, we take the time to double check the ship's systems before moving to a nearby store. 12 - We buy a crew teleporter at last. Clicks and Gumpo volunteer for the boarding party and Ohm takes over on weapons. Clicks was a master weapons controller, but his mantis blood screamed for "real" combat. We move on to the exit beacon after upgrading our shields and reactor. with 3 shield bars and a mantis boarding crew, the USF Bolt is getting serious! 13 - At the exit beacon a trader offers us scrap for our useless drone parts, we gladly accept and use the scrap to upgrade our reactor once more before leaving the sector for the rebel scum. Ships' Log - USF Bolt, Sector 4. We move into the Engi homeworlds. Although the mantis threaten Engi space they are usually willing to help the Federation. 1 - We are still quite low on fuel so we make a long jump into the sector. It turns out to be a refuelling station - we get all the cheap fuel we can before jumping to a nearby distress beacon. 2 - Giant alien spiders are the cause of the distress. While giant alien spiders are no joke, we can't risk the mission defending every backwater station we come across, we make our apologies and leave the station to it's grisly fate. 3 - A well equipped rebel scout guards this beacon. Time to test the new boarding crew! Clicks and Gumpo were happy as spring chickens, disembowling the rebels with accustomed ease. You've never seen a mantis so happy. We strip the fallen ship and jump away. 4 - A small fleet of Engi ships seem to be holding a conference. We listen in. It sounds like they are frantically debating some problem. We offer to help, which shocks them somewhat. They decline, explaining that this is "a private matter". We shrug our collective shoulders and move on. 5 - We stumble into a pirate in hot pursuit of an unidentified ship, time to play "hero". Despite the fearsome weaponry, Gumpo and Clicks kill the tiny crew before they can so much as fire a missile. The unidentified ship was a transport and offers us store facilities as thanks. The weapons on offer aren't what we're looking for but we gladly buy his fuel and patch up some hull damage. We spend the remaining scrap upgrading our teleporter and pilot bay before jumping. 6 - A nearby planet sends us an encrypted Federation signal. We send an away party to investigate. They tell us the co-ordinates of a secret base that could help our cause a mere two jumps away. We thank them and move on. 7 - A distress beacon coming from a dense asteroid field. We investigate despite the danger and find a strange, crystalline ship. We take a weapon from it and leave the ominous stasis pod. It's only a MK I heavy laser, but we immediately swap it for one of our basic lasers. 8 - We arrive at the co-ordinates given to us, but they must have been wrong - there's nothing here! What a waste of time. We jump to a distress signal. 9 - It's an Engi ship, we move in to assist. It was a fiendish mantis trap - using an Engi ship as bait! Ohm takes out the gasping mantis boarders while our own boarding crew kills the imposters. We strip the ship and move on. 10 - Another exit beacon trader, another dubious offer refused. We prepare to leave the sector for good by upgrading our reactor. We hope the Engi give the rebel fleet some hell for us. Ships' Log - USF Bolt, Sector 5. Sector 5 belongs to the Zoltan race. Without further ado we set course for a nebula and jump. 1 - An asteroid field stands in the way of the nebula. The zoltan guard turn up before we can jump away, blaming us for tresspassing on vital mineral reserves. They attack before we can explain. Looks like we have to settle this the old fashioned way. As soon as their shield was down Clicks and Gumpo tore through the zoltans with ease. A shame the ship took some flak before then, but nothing serious. We jump away before more Zoltans show up. 2 - A Shy zoltan jumps away before we can communicate, at least we have the time to patch up the system damage before jumping into the nebula. 3 - Inside the nebula we detect a rogue planet, drifting through space. An ancient Zoltan hails us and says "Through luck or intent, you have discovered the great eye. Look into it's depths to recieve your just dessert" Sounds ominous. We pull the ship in closer, what's the worst that could happen? The great eye reads our minds and sees our exploits, as commiseration to the pain we have suffered thus far he grants us a strange healing bomb. I can't help but feel that we dodged a bullet as we set off on our mission once more. 4 - We leave the saftey of the nebula to visit a store. We patch some hull damage and get some fuel. We also sell the healing burst and a spare basic laser before retreating back into the cloudy arms of the nebula once more. 5 - More like into the loving arms of a plasma storm! Two other ships seem to be suffering too however, both pirate vessels. One carrying fuel, the other ammo. Mindful of our recent fuel debacle, we power up our engines and chase the fuel transporter. It's a delicate situation - we have to leave the ship intact if we have a chance of gaining the fuel. A job for Clicks and Gumpo! The mantis ship, not to be taken lightly had a large crew. Clicks has been killed, while recovering in our medbay, a bomb teleported in. There was no time to save him. Gumpo was spared, thankfully. Ohm helps to repair the damaged medbay then joins Gumpo in finishing off the enemy crew. Poor Clicks... He was avenged. 6 - An uninhabited beacon, we press on. 7 - We discover a ship in critical danger, before it fades into the nebula we lock onto a solitary lifeform and beam it aboard with our teleporter. A zoltan by the name of Yevon Si decides to join our crew as thanks for saving their life. Yevon Si takes Ohm's position in the weapons bay and Ohm, an accomplished fighter, takes Click's place on the boarding team. We leave the nebula. 8 - We encounter a mantis bomber that offers us to participate in a scientific survey. We accept but realise too late that its a trap! A substantial boarding party engages our crew while the poor USF Bolt gets pounded by bombs and missles. After a long and terrible fight we defeat the ship. We were nearly destroyed but we now have plenty of scrap for repairs. Luckily, despite the heavy ship damage no more crew were killed and the scientists used as bait reward us with a MKII defence drone. We repair the ship as best we can and jump to a store. 9 - We sell the drone and repair the damage - repair bill 80 scrap! Ouch! We buy a second Heavy Laser MKI for 55 scrap and spend the rest of our scrap hoard on reactor, engine and medbay upgrades. We move towards the exit beacon. 10 - An auto scout waits for us at this beacon. It can cloak but has no shield. Despite it's formidable weapons, we make short work of it and jump on. 11 - We come across a primitive planet being harrassed by a zealous rebel captain. We decide to help the aliens and protect their way of life. We defeat the rebels with ease and glean substantial rewards from the wreck. We repair the damaged systems and move on, secure in the knowledge that at least one planet is free from the tyranny of the rebel scum. 12 - A sight-seeing beacon, we move to the exit. 13 - Nothing here but the gateway to Sector 6, the tension is mounting on board the ship things are not going so smoothly anymore and the road ahead looks rocky. Ships' Log - USF Bolt, Sector 6. We enter a mantis sector. It's poorly charted and with little chance of help we just hope that we have enough fuel to make it through. 1 - A small rebel transport is nearby. We demand the surrender of their goods. They don't want to fight and try to escape while setting drones on us. We easily destroy their crew and liberate a Federation agent named "Will". The human joins our crew as thanks. We jump away. 2 - With 210 scrap saved we go to a store to stock up. We hire a mantis named Noemi and a cloaking system for the ship. We sell a looted hull smasher laser to pay for a reactor upgrade. The cloak is a welcome system on board the USF Bolt. Noemi and Gumpo perform some sort of mantis bonding ritual. Are they together or something now? Who knows, but nothing is laying any eggs in MY cockpit! Regardless of the intricacies of their relationship, the two mantises have formed a new boarding party. 3 - With the crew at full capacity we head for the distant exit. We stumble too close to a red-giant star where a mantis captain seems to have been waiting. "I love a challenge" he screeches before engaging our ship. We dispatch the mad captain and his crew easily and leave the danger of the star. 4 - A civillian ship seems to be in danger from a pirate ship. We move in to help. Although we dispatched the pirate crew quickly, the Civillian thought it best not to hang around. Playing hero doesn't always reap rewards... 5 - We decline another dubious deal from a dodgy dealer and jump to a distress signal. 6 - A human mining colony is suffering from a dangerous disease. Luckily our advanced medical unit can synthysise a cure, preventing a riot that seemed inevitable. The colony gives us some scrap as a thank-you. We leave feeling all warm inside. 7 - A mantis bomber attacks without warning. They seemed to be worthy foes, yet we defeat them without incident. 8 - A welcome sight, a store. we patch some damage and upgrade our shields to maximum capacity. 9 - This beacon is empty, yet the tension is almost palpable. We check the systems and make a jump to the exit beacon. 10 - Another trader, trying to buy our much needed missles. We tell him where to shove his "deal" and leave the whole cursed system for the rebels. Ships' Log - USF Bolt, Sector 7. Sector 7 is a civillian sector, but with the rebels hot on our tail we move off in search of the exit. 1 - This beacon lies in a nebula and it contains a hiding smuggler. We engage the ship, but it is surprisingly well equipped. Noemi dies from her wounds, despite being inches from the medbay - she will be missed, and avenged! Ohm and Gumpo finish off the remaining crew and the rewards almost make up for the loss, almost. We travel deeper into the nebula... 2 - We engage another smuggler and through what can only be called an error of timing, Ohm was killed during a boarding action. The scrap from the defeated ship is little consolation for the loss of a fine crewman. We did glean vital data about the sector from the ship however. Will joins Gumpo on the teleporter pad. 3 - Our next jump lands us in an ion storm, but we slip away from the hostile vessel lurking in wait with our cloaking field. We push deeper into the clouds. 4 - We encounter a heavily damaged Federation ship hiding in the nebula. Before we can make contact it begins to fade into the distance. Thinking fast, we teleport the crew on board. One of them offers to join us, the rest want to be dropped at the next station. The new crewmate is a mantis named, approximately, Eckman. We also salvage the ship for 41 scrap. 5 - Eckman has joined Gumpo on the away team, will joins me in the cockpit. We continue into the nebula where the smugglers data detects a possible ship. The data wasn't wrong - a black market weapons dealer spins a tale of the dangers of the nebula before pushing his wares. We decide to attack after analysing the dealers' ship. His prices were too high and it could have been a scam anyway. Our judgement proved correct, the ship fell easily and we strip the ship for useful materials. 6 - This beacon houses a small trading station. We sell some looted weapons before buying a shield charge booster, some fuel and repairs. With another store close by we decide to save the remaining 202 scrap and jump to another detected ship. 7 - A slug light cruiser demands a toll of 24 scrap. It may be cheaper to fight them, so we do. I hope the slug is wrong about us regretting the decision...The fight proved long and hard and we lost a fair amount of hull and ammo but the day was won, and to the victor, the spoils! We jump to the store. 8 - We hire another mantis, Monsvik to act as ship security. The merchant patches up our ship to 75% hull again. We decide to answer a distress call but experience has taught us to upgrade some systems first so we spend some scrap on the reactor, O2 unit cloak and engine. The rest we spend on missles. Grand total now 6 missles. 9 - The distress beacon was coming from an illegal pirate miner, crushed between two asteroids. We could have risked some hull blasting him free, but without a beam weapon we think it safer just to destroy the ship and loot the remains...What? They're just pirates. 10 - A connection beacon, nothing more. We move on. 11 - A storage cache guarded by a terrifying auto-assault ship. We attempt to cloak past it to get to the cache, but it spots us - no choice but to fight now! Normally a responsible captain shouldn't send a boarding crew into an airless space, but with a level two teleporter, nerves of steel and good timing, it's just possible to do some system damage and pull them back before they gasp out. With this tactic the heavily armed, heavily shielded automated ship didn't even manage to graze our hull. The station and the drone provided good rewards, including a Hermes missile system. We move to another detected ship. 12 - A heavily armed and shielded Zoltan ship lets it be known that we could buy some slaves. We don't want to fight so we opt out. Yeah, right! Even though we have maximum crew, we teleport a slave into our ship and prepare for battle! The Engi, Maxim leaps into action while will takes a backseat. We took some damage from the fight, but we won in the end. Will agrees to be dropped at the next station and we head to the exit with the rebels dangerously close. 13 - At the exit is an abandoned station with some scrap and a system repair drone. Very nice! We leave the sector to the rebels, we made it. Sector 8! Ships' Log - USF Bolt, Sector 8. We finally made it to our base. Admiral Tully takes our data and transmits it to the Federation captial ships' war room computer. We explain our mission. It's met with murmers of cynisism and disbelief. General Turzil of the Engi brigade speaks up "Intel suggests potential counter to rebel technology - Risk all or save none" We know the weakness of the rebel fleet, the flagship. Tully responds with a new mission. We are to defeat the rebel flagship. In the humble USF Bolt! They give us fuel and patch up some of the damage and send us on our way. It's all up to us now. 1 - We start to make our way to the flagship, but a rebel rigger picks a fight. With no missles to take out their medbay defeating them seems hopeless, we jump away. 2 - A resupply station, finally some missles! 3 - We jump straight to another supply station, we will need lots of missles to defeat the flagship. 4 - After some hairy exchanges with an auto assault ship we jump away and live to fight another day. We have bigger fish to fry. 5 - After tangling with another Auto Assault ship, we jump to a store 6 - Luck is with us! We find a coveted I.Bomb, we immediately replace our small bomb with it. 7 - We engage the flagship, it's all or nothing now! It truly is a monstrosity. The boarding team get to work on the weapons pods while we dodge as much fire as the flagship can dish out. After it's weapons are down, the I.Bomb gets to work on disabling the shields. The cloak proves annoying, but now that it's guns have stopped, the fight is ours. Eventually it's shields fail and we succeed in breaking off a large chunk. The flagship jumps away, we follow close behind. 8 - Our sensors warn us that it's power has been diverted to it's drone systems. We make good use of our boarding team as before and cloak whenever the drones swarm en masse. It's not long before the flagship, badly damaged, limps away once more. We persue with 100% hull. 9 - Regardless of the result of this last stand of last stands, the crew has done the Federation proud to get this far. Only a badly damaged flagship stands between us and victory, glory and above all, survival. The dastards have engaged some sort of hyped-up Zoltan shield. We cloak past the missles before we take it down. We send in boarders to disable their guns and the faithful I.Bomb and lasers do the rest. We breathe a sigh of relief as we watch the flagship crumble before us. We have saved the day. The rebels are defeated thanks to the valiant efforts of the crew of the USF Bolt. We are truly Space Heroes.

你想了解更多吗?
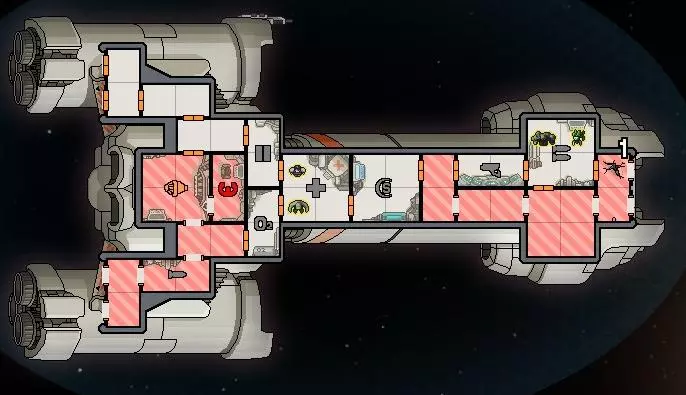
即便是最重型的升级舰船,也会在两种情况下遭遇致命危险:登船人员和火灾。幸运的是,有一种简单的方法可以同时应对这两个问题。无论是火灾还是登船人员,都无法在没有空气的环境中存活。联邦战术部门希望向新舰长们提供应对这些情况的最佳建议。
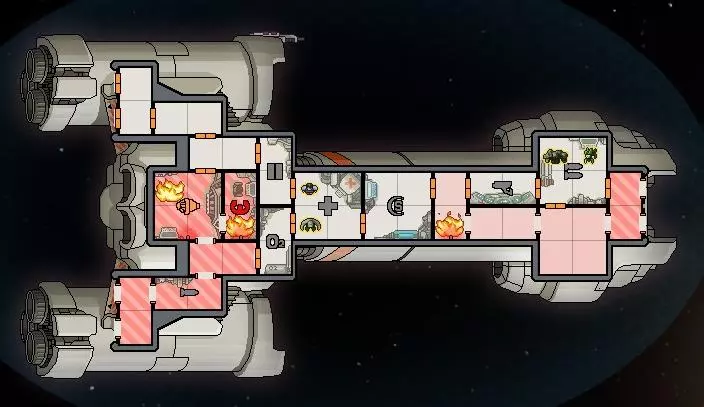
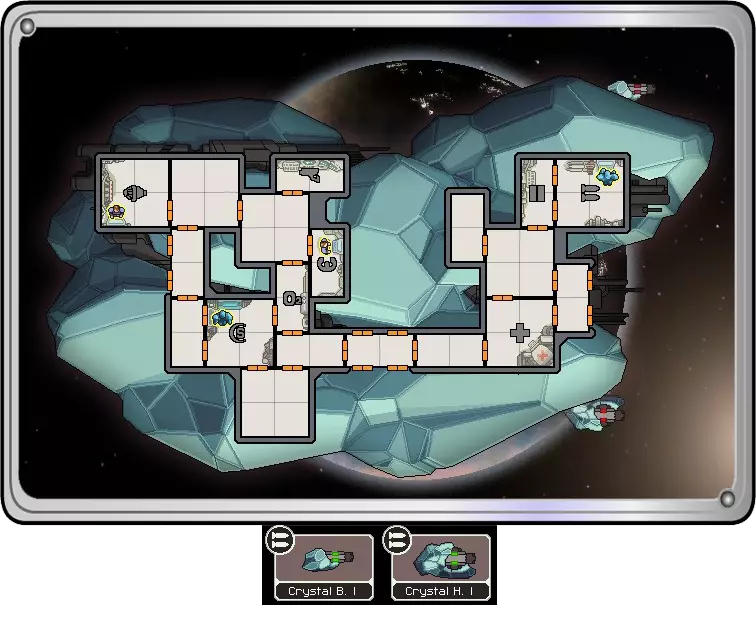
在这张图片中,我们可以看到联邦巡洋舰上多处发生了火灾。虽然可以让船员灭火,但打开一些舱门来灭火会更快更安全。需要注意的是,如果火灾发生在没有系统的房间,且你的舱门等级达到2级或以上,更安全的做法是让火自行熄灭。
现在火焰已经熄灭,这位舰长要做的就是关闭舱门,等待空气恢复,然后处理受损的系统。 登船敌人可能会更棘手,但解决方法是一样的。首先,确定登船敌人的位置。如果传感器正常工作,这很容易,但正如你在这里看到的,由于星云的影响,飞船的传感器失灵了。在这种情况下,寻找系统上方的红色拳头图标或闪烁的红色安全门。即使传感器失灵,这也能告诉你登船敌人的位置。
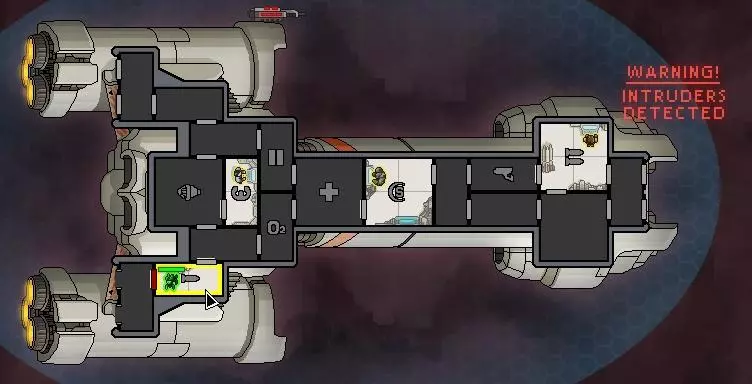
接下来你要做的就是抽空他们所在房间的空气。如果他们距离气闸很远,或者处于防御薄弱的系统房间,你可以派船员去骚扰他们,以减缓他们的行动进度。此战术【仅能通过二级门实现】,且在使用三级门时效果尤为显著。
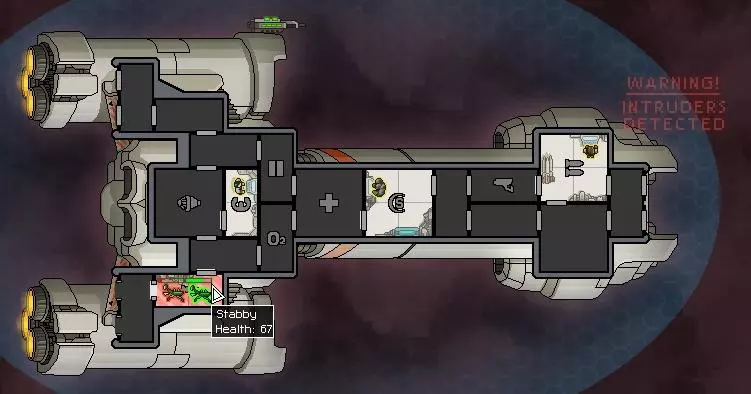
当敌方登船人员呼吸困难时,让你的船员解决他们,这样船员可以获得宝贵的战斗经验。对于某些舰船,最好提前清空登船人员将要闯入的房间,但有些舰船设计使得这种策略不可行。 关于空气管理的说明:只有当房间出现红色和粉色条纹时,才属于危险的减压状态。一旦房间变为粉色,无论何种深浅,船员都可以安全返回。打开通往相邻白色房间的门,能更快稳定气压。 有些舰船,例如【Engi B】,设计为可在几乎无空气的环境中运行。如果你的船员数量较少,除了有船员的房间外,将整艘船的空气抽空是对抗太阳耀斑和敌方登船人员的有效战术。最新报告 前线的新报告源源不断,每位舰长都知道新情报对任务成功至关重要,千万别被蒙在鼓里!所以所有未来的舰长们,别忘了关注一下! 克隆舱与医疗舱——激烈争论 暂且不论克隆的伦理问题,联邦情报部门成员之间仍在激烈争论这一话题是有切实原因的。有人认为克隆舱更优,因为它能让舰长派遣船员执行自杀式任务,比如登船行动、对抗巨型外星蜘蛛之类的任务,而不会损失宝贵的船员(尽管船员们通常对此并不太乐意!)。然而,一些人认为医疗舱更为有用,因为它可以让船员存活更长时间并治愈危险的瘟疫。最终,联邦最高指挥部认为没有“正确”答案,并下令每位舰长应根据个人判断来处理这个问题。不过,所有“C”型舰船变体都配备了克隆舱,而医疗舱在所有“A”型和“B”型舰船中仍占主导地位。请注意,克隆过程中会丢失一些技能,因此如果你不断失去一名船员,他们在岗位上的表现会越来越差。 【特别报道】 联邦情报部门报告称,网络犯罪正在增加,随之而来的是最新的威胁:系统被黑客入侵。黑客无人机最初由engi研发,如今已在已知宇宙中广泛普及。 成功入侵的效果会因目标系统或子系统的不同而有所差异。一般来说,被入侵的系统会做出与原本功能相反的行为。例如:被入侵的医疗舱会造成伤害而非治疗,被入侵的传送器会立即将登船人员传送回平台。 无论哪个系统被入侵,被入侵房间的门都会被锁死,迫使船员强行攻入。这对于减缓船员在飞船内的行动速度非常有用,例如在协助登船作战时。 通过防御无人机击落来袭的黑客无人机,可以完全应对这种威胁。####来自engi星域的讯息#### 01111000 – 01001 - 0100 – 10101010111 联邦的各位成员们,你们好。佐尔坦人最近发布了备用电池系统,深受预算有限的舰长们欢迎。如果你的反应堆提供的能量不足,或者缺乏足够的废料来完全升级反应堆,那么可以考虑配备一个备用电池,以便在需要时为关键系统供电。 0110011 – 011001 – 00011111 ######广告结束######## 增强它!

要是没有查理·托珀这位新人,舰长手册会变成什么样呢?可以肯定的是,读者数量会少很多!本周,他撰写的关于强化插件的专栏将让你全面了解这些神秘的救命装置! 各位舰长们注意啦!强化插件的使用其实很简单,关键在于协同作用:弥补自身弱点,强化已有优势。选择那些价格合理且能直接提升你装备性能的强化插件,就绝对不会出错! 举个例子:我的一个朋友最近被调派到一艘兰尼乌斯巡洋舰上——真是倒霉,那些混蛋会消耗氧气!我送了他一个应急呼吸器作为告别礼物,多亏了这个,那家伙现在还好好的,能给我寄信呢。 我还有另一个朋友,她是个出色的战士,最后登上了一艘蛞蝓B型巡洋舰——那些疯子居然连医疗舱都没有。如果你不喜欢自杀式登船任务,那这可能不太适合你。关键在于,他们有一种重构传送强化装置,每次传送后都能修复船员……这就是协同效应,朋友们。 我在“悖论”鼻涕虫酒吧和一位船长聊过——他很幸运,曾在一艘B型隐形巡洋舰上工作。他们的 glaive 光束炮配备了武器预点火器,那玩意儿能在敌人反应过来之前就把对方的船打穿!这就是协同效应,朋友们,协同效应。 好吧,我可以继续说下去,但大家都很忙。所以只要记住——要么找到适合你飞船的强化装置,要么就把你的废料花在别的地方! 精神战胜物质: 有一件事肯定会让任何船长感到恐惧,那就是船员叛变。有报告称出现了一种源自蛞蝓人的阴险装置,它会将你忠诚的船员变成狂暴的精神病患者。不过无需担心,以下技巧将帮助你应对这一新威胁。 1. 若有船员被精神控制,让其他船员干扰他们,防止其破坏系统。如果他们攻击的系统能承受一定损伤,可以让他们折腾到自己恢复正常。 2. 用精神控制对抗精神控制!如果你拥有精神控制系统,当船员遭受心理攻击时,你可以对他们使用该系统。 3. 蛞蝓人对此免疫——他们潜在的精神力量是抵御这种攻击的有效防御。4. 如果你拥有精神控制装置,在开火齐射前对敌方飞行员使用它,能让你射出的每一发炮弹都命中目标。 5. 如果你拥有精神控制装置,你可以给敌方登船小队一个“惊喜”!对登船小队使用它,能引发他们内讧。 公共板块 联邦最高指挥部深知,有许多经验丰富的舰长渴望通过分享自己来之不易的智慧,来帮助那些经验不足的舰长拯救生命。 公共板块就是这些舰长发声的平台。所以,舰长们:只需在“评论”区发布简短精炼的技巧,并附上你的名字。如果联邦最高指挥部认为该技巧值得一提,它就会被收录到这里。作者注:我想补充一点,《超越光速》拥有一个活跃的模组社区,而我目前遇到的最佳模组是“captains' edition”和“FTL infinity”——这两个模组都非常有趣,为我带来了全新的《超越光速》体验,所以任何想尝试《超越光速》模组的玩家都应该优先考虑它们。话虽如此,我最终还是回到了《超越光速》的原版游戏,因为它的平衡做得确实非常出色。 记住,各位舰长:安全飞行,为联邦争光!